Archive for the ‘Home & Organization’ Category

Cleaning & Stocking Your Refrigerator for the New Year

Tuesday, January 3rd, 2012


The New Year is now upon us and for me that brings with it a time of renewal for cleaning and organizing our year.

I will admit that the refrigerator is one area that could use some concentration in our house.

I would imagine after all of the holiday festivities and leftovers, it might be a spot to tackle in your home  as well.

Today I wanted to share with you some ideas for cleaning out the refrigerator and some great items to refill your refrigerator with.

Here are some easy tips for cleaning out your refrigerator:

back from vacation and back to work

Gather Your Cleaning Supplies

Break out two dishwashing tubs and a cookie sheet .

Fill one of these tubs with two tablespoons of baking soda and one quart of warm water for wiping down the interior of your refrigerator.

Then use your cookie sheet and other dishwashing tub to put all of the condiments on and empty your drawers into for removing items quickly and easily so you can wipe down the interior without a hassle.

Let the Drawers Clean Themselves

Before cleaning the interior of the fridge, fill each drawer with the same amount of baking soda solution in each one and let the baking soda solution do the dirty work of cleaning them  while you are wiping out the inside of the fridge.

Wipe Down the Interior

Using a rag or microfiber cloth, dampen the cloth with the baking soda solution.

Gently wipe the interior of the refrigerator and  all of the surfaces.

If the washing solution begins to look murky, be sure to dump it and get another tub full to for cleaning.

Tips for Stubborn Spots

For stuck on interior stains, you can sprinkle a little baking soda directly on the spot and add just a little water to it to make a paste.

Allow the paste to work on the set in stain and then scrub gently  to remove the gunk.

Put It Back Together Again

Go back to your drawers and empty them and wipe the interiors of these.

Now place these back into the fridge and then take your dishwashing tub of solution and empty it into the sink.

Refill the tub with just warm water and add a dash of lemon juice to the water.

Use your rag to do a final swipe using just this water & lemon juice solution.

This will remove any grit that might be left in the fridge and the lemon juice will give it a nice fresh scent throughout.

Dry thoroughly with a terry towel.

Take your cookie sheet of condiments and make sure to give each of these a quick swipe with the rag before returning them.

Half the battle is not having clean items in your fridge and this is a good way to start fresh.

Return all of the items in the other tub to their proper homes.

Tidy the Exterior

The exterior of your fridge can often be overlooked, but it needs attention too.

As a mother of two little ones, fingerprints and smudges are all over my fridge on any given day.

To remove these, I spray my homemade all purpose cleaner on my fridge.

You can use a microfiber cloth to clean the outside of your refrigerator, as it is  gentle  but also abrasive enough to remove any marks.

Any scuffs still left?

Break out your Mr. Clean Eraser (a mom’s best friend!)

You can find a generic equivalent of one of these at your local dollar store.

If you have a stainless steel appliance, dip your microfiber cloth into a little vinegar and give the outside of the fridge a good swiping with the vinegar.

Then give the appliance another swipe with just plain water and dry thoroughly with a terry towel.

Restock Your Fridge

Now that your refrigerator is nice and clean it is time to restock it for the New Year.

Here are ten essential items to have on-hand when restocking your refrigerator.

Ten Fridge Essentials

  1. Milk
  2. Coffee Creamer
  3. Butter
  4. Jelly
  5. Cheese- Slices & Shredded
  6. Minute Maid Pure Squeezed orange juice
  7. Carrots
  8. Lettuce/Romaine Hearts
  9. Lunch Meat
  10. Condiments (check your expiration dates on your condiments & toss any expired items)

Minute Maid has graciously offered to give one of our lucky readers a year’s supply of Minute Maid Pure Squeezed orange juice to get your New Year started out right. (**Sorry this giveaway is now closed**)

Just imagine that you don’t have to pay for this great fridge essential for an entire year.

I am so excited for you!

Sorry! This giveaway is now closed! We would  like to congratulate Sandy N. (Comment #4) on winning this great prize! What a wonderful way for her to start her new year!

Today we are offering one lucky reader a year’s supply of Minute Maid Pure Squeezed orange juice. Leave one comment for each  entry you wish to complete:

  • First Entry: Leave a comment and let us know which variety of Minute Maid Pure Squeezed orange juice you are interested in trying for your family- No Pulp 100% Orange Juice, No Pulp 100% Orange Juice with Calcium and Vitamin D, Some Pulp 100% Orange Juice, or Light Orange Juice Beverage with Calcium and Vitamin D with 50 calories per 8 fl. oz. serving.
  • Additional Entry: Let us know you are a fan of Minute Maid and join the Minute Maid Facebook Page.
  • Additional Entry: Follow me on Twitter and get an early scoop on what I am up to!

One winner, chosen at random, will receive a year’s supply of Minute Maid Pure Squeezed Orange Juice (52 coupons). Please submit your entries by Tuesday (01/10) at 8PM EST.  Our winner will be drawn at random. Good luck, everyone!

Sorry! This giveaway is now closed! We would  like to congratulate Sandy N. (Comment #4) on winning this great prize! What a wonderful way for her to start her new year!

I am a spokesperson for Minute Maid Pure Squeezed orange juice and have a relationship with the company. Want to know more about how things are handled here at MomAdvice? Be sure to read our Disclaimer which clearly states how things work and know that we will always offer only the best reviews to our readers. In full disclosure, the email addresses that are collected for this giveaway will only be used for the purpose of contacting the winner(s), and will never be sold or given to anyone. This giveaway is only open to residents of the United States who are 18 years of age or older. Entries that do not follow the above criterion will automatically be disqualified. This giveaway will close Tuesday, January 10th at 8PM (EST). I’ll announce the first name of the winner(s) that will be added to the top of this current giveaway post and contact the winner(s) by email. I will draw the names of the winner(s) by using the random number generator at Random.org from the eligible entries received. If a winner does not contact me within 72 hours by email, I will draw a new winner. The winner(s) will receive their prize from the PR agency responsible for this giveaway. 

Sorry! This giveaway is now closed! We would  like to congratulate Sandy N. (Comment #4) on winning this great prize! What a wonderful way for her to start her new year!


Photo credits: katisworld Michelle Wutkon


Don’t miss these other great ideas from MomAdvice.com:
 

Green Spring Cleaning Craft: Knitted Dishcloths
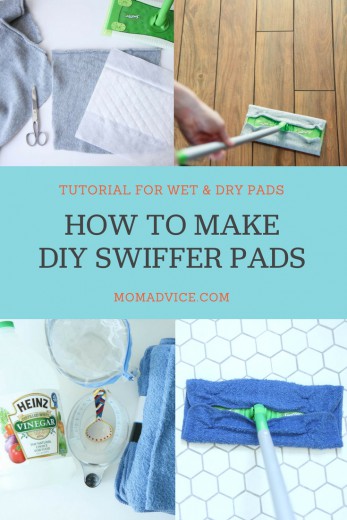


DIY Swiffer Pads



Organize Your Spice Rack
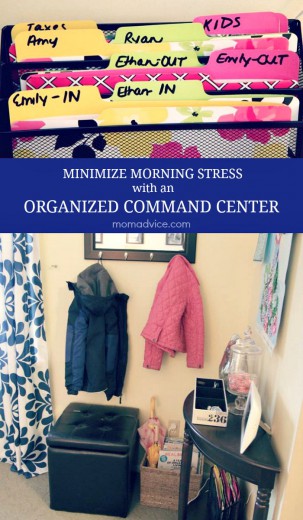


Minimize morning stress with an organized command center

Organized Command Center


Sign up for the MomAdvice newsletter

Anthropologie DIY Ruffled Lamp

Tuesday, November 15th, 2011

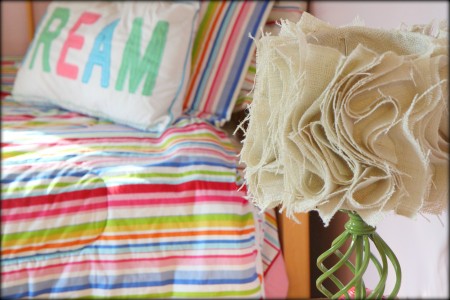
We have come to the final project in my daughter’s big girl room makeover. I am so proud of all of the little detai this room.  Many of the items in my daughter’s room had great bones, but seemed a little young for her.  The lamp in her room looked like it belonged in a nursery so I was excited to update this for her.  Instead of getting rid of a perfectly good lamp though, I wanted to figure out a way that I could do a stylish budget-friendly update to it. I happened upon this Ruffled Burlap Lamp tutorial on mama says sew and knew that this would be the perfect way to update her lamp and add a little big girl style to her nightstand.


As you can tell from the picture above, I was planning to just spray paint the original base and save myself a few dollars. Unfortunately, it rained that night and I had a spray paint fail with the paint never hardening and creating a big giant mess. I ended up buying a new lamp base for $12 at Walmart and then spray painted that to match her room. It goes to show that I can screw up even some of the simplest craft projects around here.

I bought one can of spray paint and two yards of burlap which worked out to be eight dollars in supplies (if you don’t count my big spray paint screw-up).

You will first want to cover the entire base of your lamp with a layer of burlap. Any of the metal around my lamp shade base, I just snipped a tiny slit to work the burlap around it. I used my hot glue to cover around it and secured the glue along the edge of the interior of the base.

If you have never worked with burlap before, this material is a MESS to work with. I had burlap pieces and strings everywhere. You definitely want to cut this on newspaper that you can toss out when you are done.

I got out this clothes-presser-thingie (can’t remember what this contraption is called) and pressed strips of burlap that were 1 1/2 times the length of my shade. These were 2″ strips that were then folded in half.

Just attach the pieces in a roughly manner all around the lamp. I went around it once and then filled in any empty spots with a ruffle in the middle where any holes were.

Keep going around and around until the shade is full. It is so pretty and I absolutely love how this turned out. I want to make one for our bedroom now since it is such a fun way to dress up a lamp.


This is definitely one of my favorite projects in my daughter’s big girl room and I would highly recommend making a lamp for a room in your house too. Thanks to mama says sew for the inspiration. Please visit her blog for the full details on measurements and a tutorial on how to make a ruffled lamp for a corner in your room.

What craft projects have you been working on?  Feel free to share any links to what you are working on! Access all of our craft fun on MomAdvice by visiting our Craft Section. Happy crafting, friends!

How to Reupholster A Chair

Tuesday, September 20th, 2011

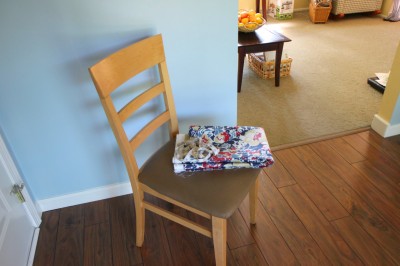
We have been hard at work on completely redoing our old dining set. My kitchen chairs were in solid condition and didn’t require any painting, but I was tired of the faux leather fabric that I had purchased for the chairs when my kids were little. Today I wanted to share with you just how easy it is to reupholster those chairs and add a little pizzazz to a tired dining set for very little money.

Supplies Needed For This Project

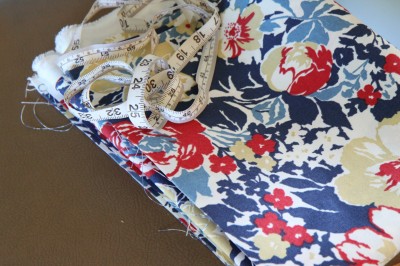
New Fabric (I am using outdoor fabric to help prevent staining from spills. You could also choose a faux leather fabric or any type of fabric and then treat it with Scotch Guard to prevent staining). This fabric should be measured to the width of your chair and then add 4 inches  to each measurement so you have enough fabric to reach around the cushion.  My chair seat was 20×20 so I needed 24×24 for each seat. For all six seats it required 2 yards of fabric total.

Upholstery Staple Gun (available at fabric stores)

Upholstery Staples (heavy-duty)

Needle-nose pliers

Screwdriver

Pinking Shears (or regular sewing scissors)


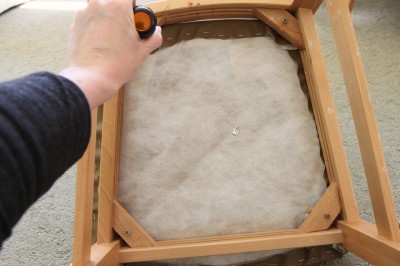
Invert your chair and use your screwdriver to remove the four screws on the bottom that are securing your cushion to the chair.

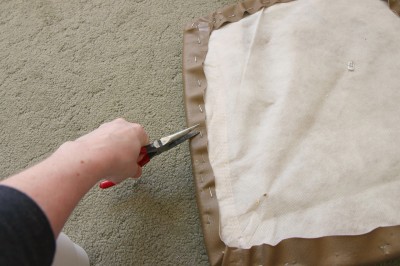
If the cushion has fabric stapled on it already, use your needle-nose pliers to remove the old staples and fabric from the cushion. If you only have one layer of fabric, it should be okay, but this chair had two so I had to remove my last round of reupholstering to get back to the base of the chair.

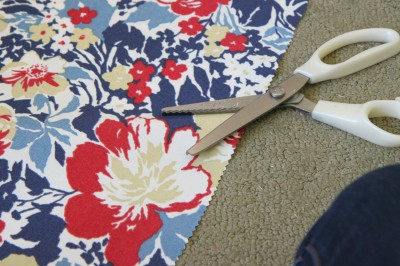
Now it is time to cut your new fabric to replace the old fabric that was on your chair.  This fabric should be measured to the width of your chair and then add 4 inches  to each measurement so you have enough fabric to reach around the cushion.  My chair seat was 20×20 so I needed 24×24 for each seat. For all six seats it required 2 yards of fabric total.

I prefer to cut my fabric with a pair of pinking shears instead of regular scissors because the fabric does not fray with these and I don’t have to mess with trimming and pulling strings on fabric. If you don’t have a pair of these though, you can always use regular shears.

When buying your fabric, be sure to ask if they offer any specials or discounts to customers. I got this fabric at Jo-Ann Fabrics and signed up for their email list while I was at the register. They gave me a coupon that took $16 off of my total fabric purchase so I was able to get fabric for six chairs for $25!

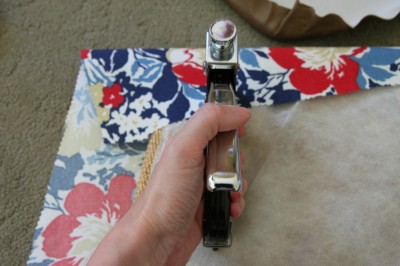
Once you have your fabric cut, it is time to staple. Center your cushion upside down and make sure there is approximately the same amount of fabric on all four sides and then pull the fabric tightly over your cushion and staple it. You are going to want to put your whole body into this one, friends.  Staple all the fabric down along the cushion securely.

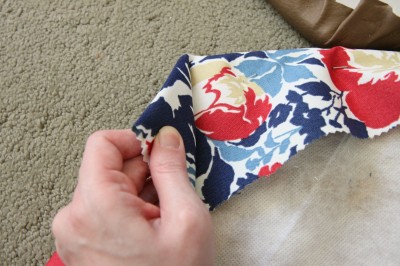
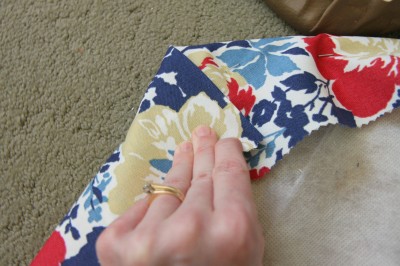
Corners can be a tricky terrain, but they don’t have to be. I like to bring the top part down and then fold in the other side of the fabric on top. You can do your corners on your cushion however you like. I think the trick with this one is just to play with it, flip it over and take a peek, and then play with the fabric again until you find a corner you like. Once you figure out how you like your corners, replicate it with the three other corners and then again on your next chair. Trim the excess corner fabric.

Center your cushion back on your chair and make sure all of the fabric is tucked nicely underneath and on top. Secure your cushion back on with the four screws again.

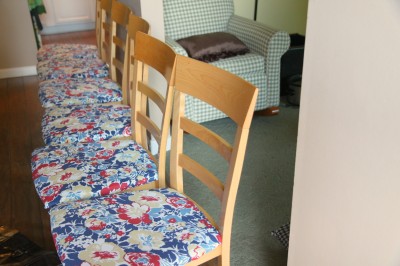
Now just repeat the same process over and over and over again until all of your chairs are done. I was able to get six chairs reupholstered in one afternoon. It isn’t hard to do and is a great job to tackle while watching your favorite shows.

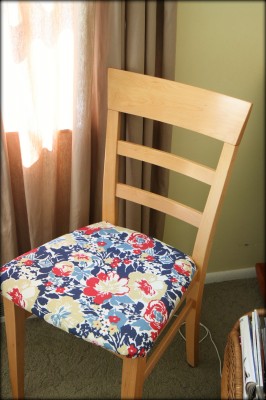
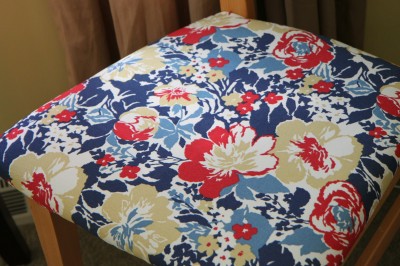
I am madly in love with this fabric that I chose and can’t believe how much more I love these chairs. They look like brand new and I only spent $25 to shine them up.

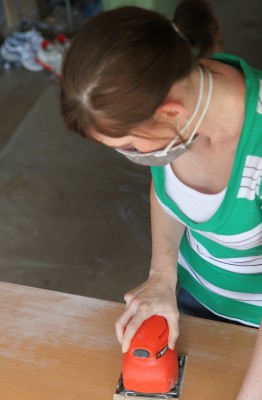
Of course, what are new chairs without a new-to-me table? Looking forward to revealing what I have been up to this past week and sharing with you our new kitchen tabletop!

This tabletop has needed attention for eight years now and I am finally doing it.

Procrastination is the name of the game.

I hope I am not the only one with an eight year project that has been bugging her.

What is one home improvement project you have been vowing to do, but just haven’t made time to tackle yet?

Revealed: 30 Day Cut the Clutter Challenge Results

Tuesday, April 19th, 2011

Last month I decided to challenge myself to cut the clutter in our home over the course of thirty days. My house and my life has been feeling chaotic these days and I knew that a thirty day challenge is just what I needed to get back to the roots of the organization in my home. If you have been a long time reader, you may remember the results from my clutter challenge last year. I am finding by making this clutter challenge a yearly one that it helps bring me back to center again in my home.

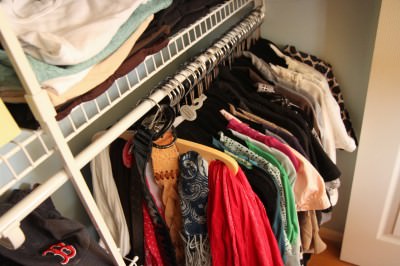
The closet, pictured above, is representative of what my home has been looking like. The bones of organization are there, but they are hiding amidst the overflowing drawers, shelves, and cupboards of endless amounts of unnecessary items. I planned to get rid of four car loads of items from my home and challenged myself to a weekly stop at Goodwill.

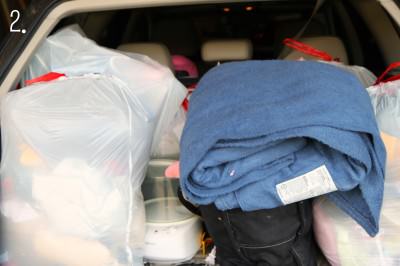
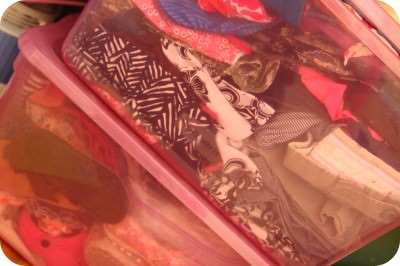
Pictured here are my first three drops to Goodwill. I have another round of items leftover from our home renovation to take over to the ReStore that are currently sitting in my garage. Once our weather finally warms up, my husband & I have a Saturday date planned with our cluttered garage.  All in all, I removed FIFTEEN garbage bags and three totes of random uselessness from our home. In these bags you would find books that we will never read, toys that the children have outgrown, clothing that is too small, a bazillion plastic containers that I do not need, bedding & blankets that are never used, shoes, & items from household projects that have been abandoned.

Can I say,  I was not sad to see any of these items leave our home?

Maybe when you see some of the corners of my home now, you will know why!

There is still much more clutter to be conquered in our home, but these corners that I have worked on really have me reassured that having our home organized is an attainable goal. If I was going to offer any advice on tackling the clutter in  your home, I would say this:

Start Small…Really Small- When I would survey my house as a whole, I could immediately become defeated. There is so much to do and my to-do list on any given day is enormous. Adding on trying to organize my house to the list and it just did not even seem like a feasible goal. Instead, start with one small spot in your home that has been bothering you. It could be as small as the kid’s bath toys, a junk drawer that could give under its weight of uselessness, or simply a single shelf in your home office.  I found that once I began a junk drawer, for example, I would then start moving into the drawer below it, and then I would move to the next drawer. Most of the time it is just getting the momentum to climb that cluttered hill that holds us back from achieving a little organization that is the hardest part.

You Don’t Need Another Basket, But You Might Need Another Donation Bag- I remember when I first began organizing my home, I considered home organization to be about buying organizers, storage containers, and pretty baskets to house everything. All of a sudden my home was filled with a dozen baskets of items I didn’t need or never used. Instead of thinking of how to make the items you have more attractive, consider if you really need the items themselves. If you don’t really and truly love or use them, get rid of them!

Sentimentality & “This Was So Expensive” Has To Be Set Aside– Two things get in the way of me letting the items go in my home. The first is the sentimental feelings that I have about things in our house. Usually it is a gift, an item that was special to my children when they were small, or something that was special to me that I would like to push my children into also loving. The other thing that gets in the way is my, “This Was So Expensive,” feeling about items that we spent too much money on, but no longer have love for.  If I could get rid of these two feelings about things, I could almost gather another car load of items. Instead, I have dedicated one tote in our basement that is specifically for sentimental mementos and we are working on passing on the gadgets in our life that we don’t use on to others that can use them.

Your feelings about items might be different than mine and it may take some time to figure out what holds you back from letting things go in your life. When you feel an attachment to an item, try to address where that attachment is coming from and if there is a way that you can manage those attachments to achieve the space you desire.

Embrace Your Power to Live Small- The more I cut the clutter in my home, the more I find that I have just the amount of space that I need in my home. When my closets began to feel too small, when the cupboards are bursting at the seams, when the basement is overflowing…those are the times when I think how nice it would be to move to a bigger home. Each time I cut the clutter in those spaces, I rediscover how perfect our home is for us. Basically, I save myself from a heftier mortgage payment AND I find a renewed sense of commitment to stay right where we are.

Our story of giving things away didn’t end there though, in fact, this is a story about the coolest thing that I have ever gotten to give away.  My husband had his ’99 Ford Focus for almost eight years and it was very good to us over the years. For the last five years though, he had been price researching his dream car and dreaming of the day that he could own a Lexus.  At the end of this month, his dream car dropped below the price of my Subaru wagon and with some serious negotiating and a couple of hours in the hot seat at the dealership, he drove that car home.

We talked a lot about what we wanted to do with our Ford Focus. While we could have gotten a little money to trade it in, we knew we could make my brother’s whole year if we gave him our old car. That very day we bought our new car, his car began to leak gas and he had no idea how he was going to get around. Later that afternoon I called to tell him that we had a birthday present for him.

I felt a little like Oprah handing over those keys.

He told me he felt like he won the lottery.

We both couldn’t stop grinning.

I don’t say this to brag, but to showcase how wonderful it can be to pass on the things we have in our lives to others. No matter how much or how little you have, you can always give with your whole heart. Look for creative ways to give back to your community, pass the items on that you no longer use to someone in need, use your talents to bless someone else in your life, and live a life of great thankfulness for all that you have.

If you have taken the clutter challenge, feel free to link up below and share some of the spots in your home that have been transformed or what you plan to work on this month. I can’t wait to see your projects and hear what you have learned from this experience!

30 Day Cut the Clutter Challenge

Tuesday, March 8th, 2011

I know it is spring when I feel the urge to purge our home of unwanted clutter.  The spring cleaning for me is more of a year-round activity and will probably continue that way until both of my children are in school full-time. At this point in my life, who has an entire week to just deep clean their house?

March though is a true time of devotion of ridding our home of extra things to dust and care for, with a refocused spirit on loving what we already have.  I find this time of year is focused on restoring the order in the drawers, learning to part with clothing that is never worn or doesn’t fit, and finding a new way to love the space we have have the privilege of owning.

You may remember my clutter challenge from last year and what I learned from it. This clutter challenge will be repeated again this month with another round of clutter that I would like to remove from our home. This month I will be tackling one room a week and getting rid of the clutter in that room so I can make cleaning and maintaining our space easier. My goal is to take one trunk of useless items out of our home each week.

30 day challenges are still my favorite way of reaching and achieving the goals in my life. It was, in fact, a thirty day goal that has brought exercising and a commitment to healthy living back into my life. It was also a goal of mine to read more and honor my body with an appropriate amount of sleep.  Those commitments, I am proud to say, are still a very important part of my life.

Consider a 30 Day Challenge for yourself. What is missing in your life right now? What would make your life easier? I wanted to share with you the steps I took towards choosing my challenges:

Focusing my goals: The first step for me was making a focused and small goal that could be built upon. I think the challenge for me was making a small goal instead of a big one. I am what is commonly referred to as an “overachiever.” I think that is why I fail so miserably at New Year’s resolutions and the previous goals for myself. I also wanted this very focused and small goal to add an element of enrichment that would be beneficial in certain aspects of my life.

For me, the enrichment needs to happen in three sections of my life.

Enriching myself.

Examples- Exercise challenges, challenging myself to one hour of quiet time to myself, reading the Bible, writing in a journal, reading literary classics, drinking more water, eating more fruits and vegetables, watching classic movies, learning/mastering a new craft, cooking challenges, giving up television, taking courses that enrich myself/my business, traveling, photography challenges.

Enriching my family.

Examples- Dating my spouse again, taking steps to improve our family finances, making alone time for each child, sitting on the floor and playing with my children each day, volunteering with my family, teaching my children a new craft/hobby, finding free things to do each day together, cooking with my children, making outdoor living a priority, limiting computer/television time, no spend challenges, trying to bless someone else each day, starting a gratitude journal together.

Enriching my home life.

Examples- Getting rid of clutter each day, organizing the paper flow in the house, organizing problem areas in our home, cleaning out a junk drawer each day, cooking every night, starting a garden, getting my children more involved with chores, taking inventory of pantry and closet clutter, green living challenges/making the home more energy efficient.

Balancing My Goals- I then decided that to make these challenges work for me, I would add something to my life one month and take something away the next month. For example, I add 20 minutes of exercise to each day of my life this month, but the next month I reduce clutter so I have less cleaning to do for the following month. That natural give and take is what will help me fit these challenges into my day and make them work with my busy schedule.

Reward Myself- At the end, I wanted to give myself a reward for completing the challenge. Maybe it could be a night out on the town after taking a no spend challenge or maybe it is catching on a television series after giving up television for a month.

It’s time to get out the trash bags and start chucking the clutter from my life. The problem zones in my house right now are the endless junk drawers, the kid’s toys that they no longer play with, the medicine cabinet, and the plastic container monster that seems to take over my kitchen.

On the horizon? Empty space. I can’t wait!

This month, I am cutting the clutter in our house and I can’t wait to share with you the results from this challenge! Want to take a 30 Day Clutter Busting challenge with me? I would love for you to join me! Let me know in the comments below what you plan to do to rid clutter from your life today!

New Year’s Goals: Banishing the Paper Clutter From Your Home

Thursday, January 13th, 2011


As I shared with you last week, I am working on getting happier this year through the help of, “The Happiness Project,” by Gretchen Rubin.

The first month of her book focuses on boosting energy and has several ways that you can do that.

I have been working on four specific goals for this month.

1. Going to bed on time.
2. Dealing with the nagging list of things to do.
3. Kicking clutter to the curb.
4. Returning to a good exercise routine.

Last week I shared with you my closet transformation. That little transformation helped me see the possibilities that our space could hold if I could let the clutter go. This past week I have taken not one, not two, not even three…No, I have taken SIX car trunks full of clutter to Goodwill to reclaim my home.

As each batch of clutter leaves my home, I am discovering  the potential of my home and the potential for my space to be exactly as I want it. It might not be a space that resembles the pages of Real Simple Magazine, but it brings me one step closer to the home I desire.

Ironically, I asked my husband if he had noticed the house potential peeking through the clutter after my sixth trip to the Goodwill drop-off box.  “Do you even know what is missing?” I asked. He looked around and said, “I guess I will figure it out when I try to find something.” Yes, we don’t even know what is missing which goes to show how little those items had meant to us.

Now that we had begun to see our house through the rubble, it was time to get a few organizing systems into place to get rid of the paper trail that makes its way into my home.

Finding a system that makes sense in your home and that you can maintain is the most important step towards transforming your paper clutter. What works for me might not work for you. Admittedly, I have tried more systems than I can count.

I have realized two things about myself and my paper clutter:

1) My system needs to be convenient- I would love to banish all papers down to to our home office. Walking down to the office though is not convenient though and that is why the clutter continues to build on my kitchen counters.

2) Everything must have a home- Half of the problem for me is not having a home for the papers in my life. I needed something that could house the chaos, yet I could find the papers at a moments notice.

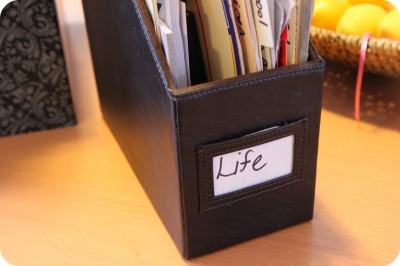
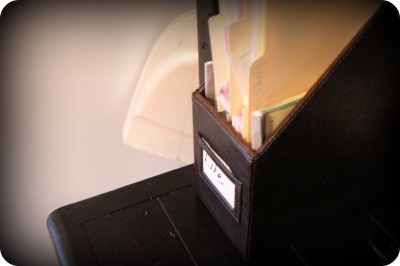
I decided to use a magazine organizer that I had bought years ago that had housed dusty magazines. I bought a set of decorative file folders in the $1 section of Michael’s and created a folder for those troublesome papers.

The file folders you create might be different than mine, but this is what was needed to organize our family papers.

1.  Coupons– This coupon folder holds the newspaper coupons and coupons for places that we might like to dine out. I also tucked any gift cards that we might have in there so that I can grab them when we go out.

2. Emily & Ethan’s School– Each child has a folder where I can put the month’s current newsletter and school calendar.

3. Tax Information– As tax information comes through, I can add it to this folder along with any receipts that I need to keep on hand for tax deductions.

4. Amy’s Work– Check stubs from jobs I have done and reports from my ad network go in here.

5. Recipes/Crafts– I always find things in magazines or recipes that I want to try and end up losing them. Now I have a folder where I can keep these on hand for dinner or crafty inspiration.

6. Receipts– I try to tuck receipts for important items somewhere. What ends up happening though is that they immediately become misplaced. Now I know exactly where they are!

I decided to implement the same system down in my office where my cluttered desk resides.  As a work-at-home mom, I needed organization to do my job well. Again, I had another dusty organizer in my office that needed to be put to good use.

In my work file folders were these categories:

1. Current Projects– Anything that I am currently working on goes into this folder for easy grabbing.

2. Inspiration– I try to keep an inspiration folder on hand. It could be something I see in a magazine that would make the perfect article for our site, a recipe that I would like to try, or ideas from other bloggers that I want to keep in mind.

3. Product Reviews– If I request a product to review for The MotherLoot, the company usually sends a product sheet. Now it is all neatly tucked in a folder and the papers can be easily recycled once I am done with the review.

4. Contracts– This folder contains the contracts that I am under with different companies and can be referenced when needed.

The papers are still all there, but I have reclaimed my counters. What a beautiful thing! I couldn’t be more pleased or feel more organized now that everything has its home.

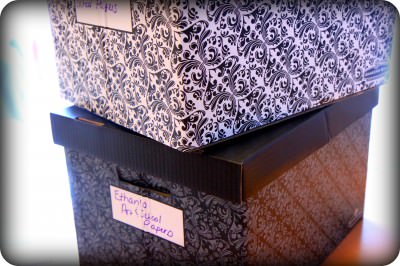
The next thing I needed to do was organize the kid’s art and special papers that I wanted to keep. I went to Walmart and got a two decorative banker boxes for a total of $6.88.

Each of the kids now have their own box to put their treasures in. These will go in their closets so they can save what they really love and then we will do an editing of the box in the summer for the next school year. It is just a big open box of possibility for them and will keep these papers from being strewn all over the house.

What systems have you found work for your family when it comes to organizing life’s papers? Please share or share links to your organizing systems. I would love some additional inspiration!

Transforming Your Mount Everest… One Hour At a Time

Tuesday, June 22nd, 2010

We have so been enjoying our “new-to-us home” and all of the renovations that we did to make our small spaces more livable. On this side of the basement, it has been all rainbows and sunshine. I have been spending lots of time in my favorite chairs, working hard in my little home office, and sipping coffee while snuggling under quilts in the evening with a big stack of books.

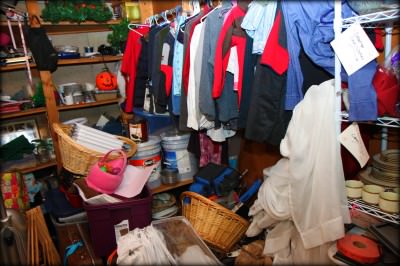
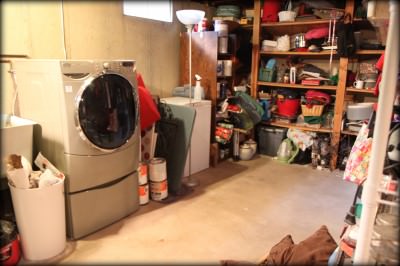
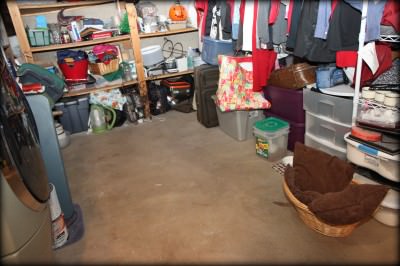
On the other side of the rainbows and sunshine was a space that I would like to call the Mount Everest of Clutter. It was where everything that did not fit into our “new to us home” went to live.  It was that room that would make my heart beat really fast if anyone wanted to see what was on the other side of the office. It was the room that I prayed that nothing would ever malfunction in because I would have been so embarrassed for anyone to see it.It was that room that made my laundry routines difficult, that made me spend money on repeat items we already had… it was that room that made me feel ashamed.

Perhaps you have a room like this? Your Mount Everest could be a craft room gone awry, a junk drawer that seems to multiply, it could be that pile of papers that you swear you will deal with next week, it could be the closet that harbors clothes of years past that will never be worn. If you don’t have a single spot in your home like this, please write a blog or book and I will buy it and read it. For me, I have many places in my life that need a little remodeling…this is just the big one for me.

I decided that I would set a timer and I would try to organize this space for one hour with no interruptions. I would avoid the rainbows and sunshine sides of my home and I would brave the rugged terrain of hideous clutter to show myself what could be done in one hour.  I would spend zero dollars.  I would commit to only what could be accomplished in an hour. I would be brave.

One hour later with zero dollars spent, my space has shaped up quite a bit. It is organized enough that I now can see my floors and I can find items that I need much easier than I could before. With only that hour, I have made my Everest into a small hill. There is still work to do, but it is manageable work that doesn’t seem half as daunting.

What happens when you tackle a Mount Everest? Well, sometimes a ripple effect seems to happen. When you organize a space, you find an unused item that could help organize another hill of clutter in your home.

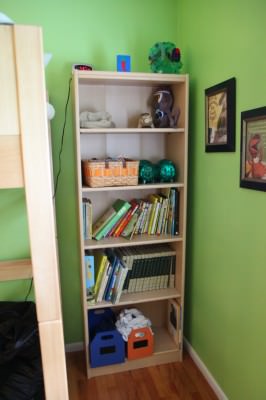
This little bookcase happened to be in that pile of clutter in our basement. After a good dusting, it found a new home in my son’s room. He had oodles of books that were taking over his desk and drawers. This bookcase matched perfectly with his room and is a useful storage tool for all of his reading materials.

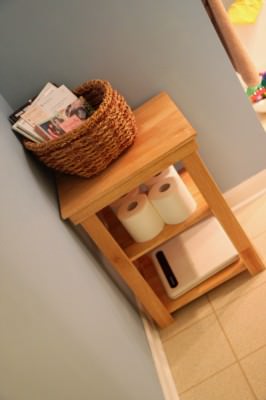
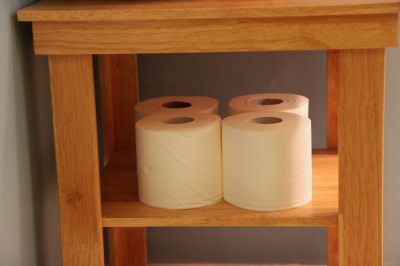
This little nightstand in his room was no longer needed and was moved into a tiny corner in my bathroom for bathroom storage and to make finding the important things that might be needed by our guests (*ahem*)  easily accessible.

In that hour, I feel a little bit of those rainbows and sunshine pulling through in cringe-worthy spaces from before. It is just a start, but it does feel like a good one!

Want to tackle a Mount Everest of Clutter in your home? Here are a few easy tips for tackling your project today:

Set Your Timer- Give yourself a set amount of time to tackle whatever project has been bothering you the most. Remember that you can always do another round later, but see what you can accomplish if you devote just one hour to that project.

Try To Reduce Your Items Not Spend More- It can be tempting to buy tons of shiny new containers and organizing tools to tackle your clutter project. See what frugal organizing solutions you already have and try to use those instead of heading to the big superstore for the latest and greatest in organizers. You might be surprised how little you actually need.

Schedule a Regular Clutter Date- Make one day a week your day for tackling one thing you have been meaning to do, but have never gotten around to it. I try to aim for Wednesday because I usually have very little going on during the midweek, but you can make it whatever day works with your own schedule. Devote that one hour each week to a task that should be done, but just never seems to get checked off the list.

Reward Yourself- After I was done with this project, I sat in the beautiful sunshine, in my favorite chair, with my favorite coffee drink, and read a mindless summer novel. It was the perfect reward for the hour I devoted towards tackling this project. Make sure that you reward your efforts whether it be with a trip to the library, renting a movie just for you, an at-home pedicure or bubble bath, or a favorite drink. After all of that work, you will have earned every minute of that reward.

What corner of your home do you want to transform? Do you have any tips for a problem space that you have resolved? Please share!

Mistreating My Windows the Type-A Way

Wednesday, March 17th, 2010

Decorating is not my thing and window treatments are really not my thing.  I think this is why I am really excited to showcase an idea for home decorating that anyone can do… especially people who don’t sew and love to wing it! I don’t sew, but am very Type-A so this project was a bit of a challenge for me. Regardless,  I am so pleased with the results and it was worth every little minute of my type-a-ness to complete this project!

Now that we have completed our home renovations,  I needed to do some focusing on the details of pulling my two rooms together to create one room. Pictured above is an example of a detail that needed to be addressed… the window treatments. The office had bamboo shades while the family room had faux wood blinds. Now that this room was one large room, I needed to match the window treatments up and make it look like a uniformed space.

We had curtains before, but trying to find curtains and hardware that matched exactly would have been impossible to do. I don’t sew, although I have tried, and I didn’t want to spend a ton of money on new curtains for five windows. I decided to do a little window mistreating courtesy of The Nester that had been featured in the notebook a long time ago.  She said it can be done in ten minutes per window so I was completely on board!

I also had this piece that I wanted to dress up and pull into the rest of the room. It originally was a buffet in our kitchen that held our glass stemware. It is now the place where we house all of the kid’s coloring books and crayons. Life has certainly changed, hasn’t it?  I wanted to try to dress this up inexpensively on top and keep the chaos inside (unlike how it is pictured here)

Two trips to Hobby Lobby, sweating in the fabric aisle, hardcore number crunching to figure out the perfect amount of fabric, $25 in materials to make the curtains and I was ready to roll. I kicked off my super awesome shoes and I was ready to get to work.

This is where I do everything wrong. I measure every curtain to make sure they have exactly the same amount of fabric, I carefully pin the corners of each piece, fold everything in and make sure nothing is showing, line them all up on top of each other and pin them again, practice hanging them, make my husband hold them up and then stand back, go down the steps and look at him holding them to make sure I still like them, pin them again, tack them, then re-tack them into the wall, practice different poofing techniques (not a word according to spell check), etc…. This is why Type-A personalities do not do well with projects where you just wing it.

It is now about ten at night before I finally finish with my measuring and obsessing. I then try to hang them, but because I am a girl of small stature, I realize that there is no way I can even reach that high. My poor husband has to do the hanging with my constant barking. He gets out a glass of wine to soften the blows of my barking and then we end up having a great time.

Here are my perfectly imperfect window mistreatments. I had my husband practically tack them to the ceiling so that the walls looked taller since this is our basement and the windows are so squat. I think the chocolate brown was a good choice of color since the walls were light beige and we had chocolate throw pillows on the couch. I also love that these can be switched out easily and fairly inexpensively when we need a breath of fresh air in the room.

Did I save money doing these? Absolutely! The curtains at Target ran about $20 per panel and the hardware was around $10-12 per window. Including the upholstery tacks, I only spent $26 on four windows.

The fifth window will remain without curtains due to the fact that it is right at the top of a lower wall and doesn’t need window treatments. We did have to buy more faux wood shades, but now everything will match in this room and we still did it inexpensively with these DIY window mistreatments.

I decorated my little corner of this side of the room with black-and-white photos of my children that I took of them (zero cost for photographer). I printed them on my little photo printer (no purchases made) and then got inexpensive frames at Hobby Lobby for $5 each. The glass container ($14.99 at Target) was filled with some fillers in green and brown to tie in the rest of the room. I look forward to switching the items inside with the seasons and switching the photos to keep this corner fresh!
Thanks to The Nester for inspiring me to mistreat those windows and visit  Nesting Place for more great ideas on budget-friendly home decor!
What are some ways that you have saved your family on home decor? Any DIY projects that have kept your budget low? Please share!

Welcome to Our “New To Us” Home

Tuesday, March 2nd, 2010

Small space living has never defined who I am or stopped me from being the best hostess I can be in my house. While some might shy away from space challenges, I have opened our home until it practically screamed for mercy to every friend and family member I possibly could.

Of course, small space is all relative, isn’t it? Our home is 1,500 square feet. While that may sound like a lot or a little, the space is made smaller and more challenging with a tri-level floor plan. If it was spread on one or two levels, it would feel much larger. I think it is the floor plan that is more of a challenge than the square footage of our home.

Despite the challenges as they existed, I can cram an entire Bunco group of 17 in my little house, I have hosted large birthday parties for my kids, an entire Redbook photo shoot in my home, a news crew out monthly so I could share frugal tips, and  Thanksgiving dinner was made and people shoved into the crevices of  two rooms for a delicious family feast. Small spaces should never stop you from sharing your home with others… although it might take a little furniture rearranging to make it happen!

That being said, I knew that there were ways that we could make the most of the spaces we already had. It started with the knocking out of a wall to create more open space in our kitchen. We felt like we had an addition to the space we already owned. What other possibilities could happen within our existing walls?

In the middle of the night, one January evening, I sat up in bed and had a vision for what we could do to make it work. I cornered my husband in the wee hours of the morning and explained my vision for the space. He looked at me like I grew another head and said I could get estimates, but the ball was in my court.

The estimates rolled in, the numbers crunched, the contractor for the job chosen, and just three weeks later, we have a brand new home.

All this said without the agony and woe that I experienced over the difficulties of living without flooring, a film of dust on everything I own, the close quarters that we endured, the challenges of keeping two children out of the way, the demise of our marriage, the demise of my parenting abilities, the irritation of losing my privacy, the crap food we ate, the budget we completely blew on eating out/entertainment, the cluttered and disgusting home I have had to live in, the short fuse that I never knew I possessed, the copious amounts of coffee I drank through the project, the glass of wine I drank to unwind in my dusty tub every night,  the day I cried in the garage in my bathrobe in front of one of the workers because I couldn’t find a specific paint color…Yeah, all of that is shamefully shoved under my welcome mat to never be spoken of again.


Pictured above is my family room before. This is where our family spends the majority of our time. Our two couches were crammed and people had to scoot their legs through a narrow opening to get behind the coffee table. One rocker in the corner couldn’t rock because the space was too narrow and had to be shoved against the wall. The room was long, but narrow, making it a difficult space to navigate. My furniture was bulky, but bought for a house in Massachusetts that we owned that fit that space perfectly.

The television was placed into an empty closet and framed with curtains. This definitely helped us free up some space since the entire television unit was out of the way, but the space was still small.


Next to our family room was the office/home gym equipment. The main challenges with this space…well, there were a lot of challenges with this space. It was in the heart of the activity of the home so I could hear the television through the walls when I was trying to work, the closet couldn’t be shut because of the length of our desk so I had to look at my clutter all of the time and if the treadmill was used in the mornings, it woke everyone up in the house.

Below that level of the home, was this half of the basement that was not being used for anything except to hold a bunch of junk in our house. As I was partying it up at BlissDom, my hubby was clearing this room for a major transformation to happen. It was a underutilized space that could potentially be awesome.


The kitchen had some storage challenges that I wanted to address. My pantry was so small and lacked the storage space that I needed for our food. I had to keep our food in the basement and go down two sets of stairs to get to the food storage at the bottom of the steps.

The console table in the kitchen made it difficult to maneuver around the kitchen table. We liked having the computer in the kitchen, but we needed to create a space for it that wouldn’t conflict with our eating space or make it difficult for our guests to dine at our house.  We knew that when the computer is phased out, we would likely put a television in that spot for our fun family nights.

Our entryway was fine, it just needed a spot for wet boots. We would love a new front door, but it wasn’t in the budget for now.

The kitchen floors were not my first choice for flooring, but I was okay with them…until the flooring started falling apart. The floor had not been installed properly and we had potential problems on our hand. For example, no flooring had been installed behind the dishwasher which makes it difficult to spot leaking if it occurs. Around the stove, the pieces were shifting. When the contractor agreed to give us the floors at builder’s cost and not charge for the install and give us a new entryway (in exchange for my husband’s web design services), we were on board!


The entire project took three weeks of them working on our home from 8-5 every weekday and two of the three weekends we had drywall and electric being done. That being said, the changes in that short time are jaw dropping. I still can’t believe that this much can be done in such a short time span.

Welcome to my new-to-me home! Pictured here is the new entryway that has been tiled for all of those muddy boots and then transitions into our new laminate flooring. We chose this plank-style laminate flooring because it had a beautiful faux grain to it and looked like hardwood without going the hardwood route. The tile was leftover from another job that the contractor had done and I loved the beautiful earth tones this porcelain tiling had in it.

This is the new kitchen wall with the cubbyhole built in for our computer. We added an extra shelf above for decoration or to hide the DVD’s and CD’s that we pick up from the library. I love that the kids can pull a chair into this spot to work on the computer and that we can watch family movies together in this room. They added a light above it to light this little area in our home.

All of the doors were updated with new six panel doors and new door hardware. This was one of the twelve doors that was replaced and painted white. Just these details alone made our home feel so much more modern!

The pantry shelves actually extended further than the door and I requested that they make them as big as we could fit into the space that we had. They are heavy-duty shelves that were painted white.

To me, this is truly one of the most exciting things in the house. I have always wanted a pantry in my kitchen and this space is going to be put to good use. I am in heaven and was so excited to organize and fill this space with our food.  Grocery day just got a whole heck of a lot easier!

I have plenty of space on bottom so I put our potatoes, extra soda, and my reusable grocery bags there. It is so nice to have all of this extra room!

Heading down the stairs is our brand new family room. You can see how it is one room now instead of two. A supporting beam was put in and the wall was taken out to create one room instead of the two smaller rooms that we had before.

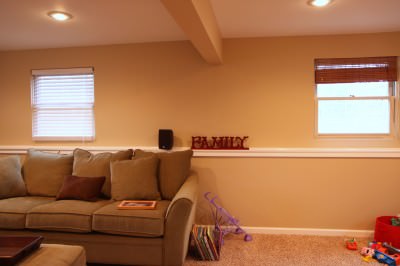
I am so proud of how the family room turned out and amazed at how much more spacious this room is. The kids are nuts about their new space, in fact, they have been running themselves silly around the room with all of this extra space. The updated trim, canned lighting, and textured ceiling really made this space so much more updated!

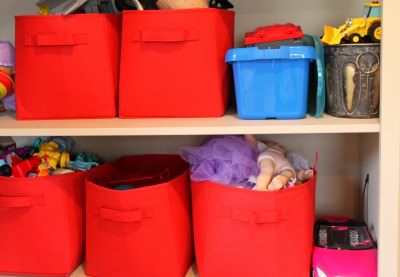
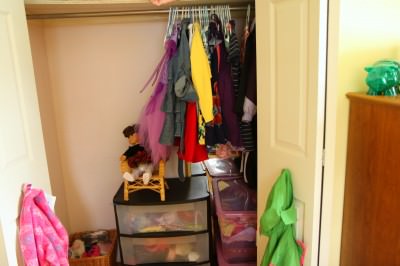
The disorganized home office closet has now become a functional space for our kid’s toys and family games. The doors can keep the chaos away and the kids love that they each have their own shelf in the closet for their toys.  A special spot for my vacuum was also carved out so I don’t have to figure out where to put it anymore!

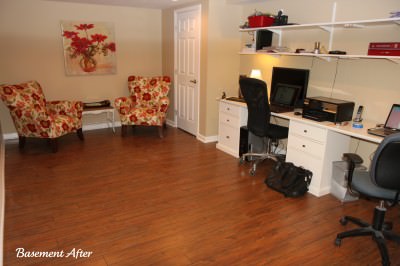
Down below our basement is the subbasement where we decided to put our new home office. I can keep the door open and have coffee downstairs while the kids play or I can lock the door and keep the chaos away or just leave the door slightly closed so I can get a little quiet time to work.

This is our new home office! The flooring matches the kitchen flooring that was installed and we brought our double desk downstairs where it would have more room to fit. Two shelves, the length of the desk, were installed for office storage.

We saw these chairs at Value City Furniture and just had to have them. The painting was one that we had already owned from Target and the bench that rests between them was a recovered Goodwill purchase years ago.

We would like to thank J. Wilson Construction for completing our renovation on time and within our budget. We could not be happier with our new space and highly recommend them if you live in the Michiana area. I am happy to be your referral too!

I hope you enjoyed the tour and thank you for your patience as we get ourselves organized and situated back into our home!

I just want to say that I am so thankful for your support and am so proud that we did this the way we wanted to- by saving and paying cash for this moment. It makes everything about this whole experience so much sweeter and that much more gratifying!

Boosting Energy by Tackling Life’s Nagging To-Do List

Tuesday, January 26th, 2010

We all have one.  It is a nagging list of items that you intend to do, but never get done. There is always a great reason why you don’t have time to do one more thing with such a full schedule, but deep down, you know that many of the items on the list would only take a few minutes. Some of the things on your list might be routine appointments for yourself, home ownership projects that never get done, paying bills, or an errand that has been looming. How about a really embarrassing to-do? How about the fact that my daughter is four and I still haven’t ordered her birth certificate!? Oh yes, I have a nagging to-do list and it can be a total energy drainer.

I sat down and jotted down my running list of things I need to do. It is the list of things to do that swims in my brain right before bed and causes me not to sleep as well. I did a brain dump on a sheet of paper and decided that this month I would tackle all of the things that have been bugging me.

Some of the items proved to be easier to tackle than I thought. My contacts could have walked away and stood to attention by themselves because I was in desperate need of an eye exam. I called Sam’s Club to schedule an exam and they had an opening in an hour. Within one hour, I got my eyes examined, got new contacts, and took my daughter to go get her ballet shoes (another nagging thing that needed to be done). It was almost too easy.

Other things on the list took much more time. I spent an afternoon ripping out the old caulk on our tub and caulking it with fresh caulk, we repainted our bedroom to a bright and cheery color,  and I spent a great deal of time researching flight prices and getting my schedule together for the upcoming BlissDom conference.

Two thing still remains to be done…getting a birth certificate and sending out thoughtful notes to the grandparents for the holiday gifts. I promise to tackle those this week.

Let me give you an example of how much better tackling something on your nagging list of things to do could be with an afternoon of time invested.

Our bedroom really was in need of a new update. We have lived in our home for six years now and this was one of the first rooms in our house that we had painted.  This room does not get a lot of natural light into it, the art lacked the personality that I want our home to have, and it was cluttered. After tackling our closet, I was ready to make this space our own by updating the paint and decor.

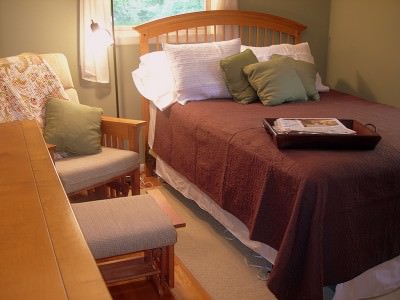
We had an extra gallon of paint leftover from painting our front room and we used this same Honey Bear color in our bedroom. I already owned the bedding and just bought two throw pillows ($12.99 each) from Target to add a new accent color to the room. One shade had not been hung because we couldn’t find the hardware. After decluttering our space, I found the hardware and we hung them in the room. We took down the dated curtains and decided not to hang any at all.

My husband asked for this print of Boston as a holiday gift and I bought a poster frame ($17.99) to frame the art. We miss Massachusetts a lot and this was a way to remember our first married years together and the home and friends that we love there.  This spoke so much more of us and what we love than a picture of fruit in a basket, don’t you think? Again, this pulled in our new accent color without costing us a lot of money.

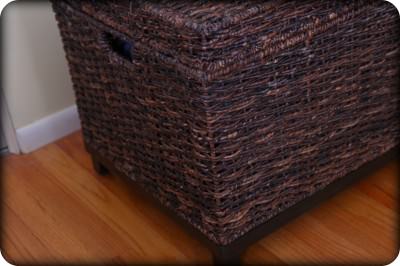
This little storage crate was one splurge purchase that we desperately needed for putting away bed linens. I have had linens in a basket underneath a side table for years. This made for much more attractive storage and keeps the linens fresh, put away, and dust-free instead of the spot they were in. I put off-season blankets in this and spare sheets for the children. I got it for $79.99 at Target, but they have it on sale this week for $59.99. (Note to self- add a price adjustment to my nagging list of things to do)

The true transformation though didn’t cost a dime. It was the absence of clutter… the wall clutter, the knick knack clutter, the useless objects clutter, the items-that-gathered-dust-but-were-never-useful clutter.

One of my favorite wedding gifts was the bowl that was pictured above. You would have never known it because it was filled with useless items. Emptied and dusted, it makes me so much happier.

The nightstand is empty and waiting for my library books to dive into, the little china saucer my best friend gave me is the perfect place to stick a glass of milk with my late night snack.

There is just so much peace in this space now and I can finally relax. One day spent tackling something that had been nagging me for months should give me many, many days of enjoyment.

(I am continuing to work on getting happier this year through the help of, “The Happiness Project,” by Gretchen Rubin I recommend you read it too!)

What has been on your nagging to-do list?  Anything half as embarassing as getting a birth certificate for your child? Please make me feel better!