Archive for January, 2012

How To Be a Pinterest Superstar

Tuesday, January 31st, 2012

It seems that everyone I know is crazy for Pinterest. In fact, my friends who may have never read a blog a day in their lives are now pinning fools.  From a business perspective, Pinterest is one of the best things that has ever happened to our website. Since starting to use it in April, we have had a steady growth of traffic averaging around 100,000 page views each month.  What is the secret to the traffic growth through Pinterest? I think it is a combination of many things that I have been working on and refining since I started using this tool for my site.

I wanted to share with you a few ideas for growing your web traffic using Pinterest and how to help your own site or blog grow. Anyone can be a Pinterest superstar, but you may need to make small changes in the way you blog to truly gain the traffic you desire.


Get Visual- For those that aren’t familiar with Pinterest, it is a basically a visual way to bookmark and categorize great things that you see on the web. Instead of a list of text bookmarks, it provides a bulletin board where you can visually see all the great projects, recipes, tips, and techniques all in one pretty space.

Since the bookmarks are visual, pictures are what get people pinning. If you have a wall of text and no pictures, no one will ever pin your content because they will have no images to grab. Of course, the prettier the picture, the more likely you will have pins and repins to your blog.  The best advice I can give you is to focus on developing your camera skills so that you can capture images that will capture the hearts of Pinterest users.

Next month I want to share with you some more photography tips, but feel free to browse our other photography tutorials that we offer on here for now.


Make Pinning Simple– Although I am not a huge fan of text on my photos, adding text into your pictures will make pinning from your site easier.

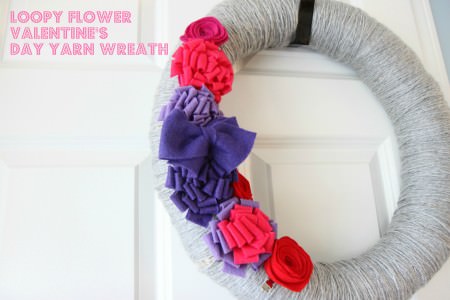
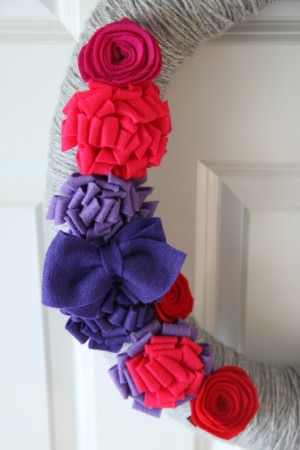
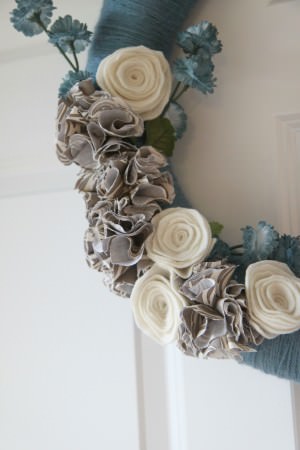
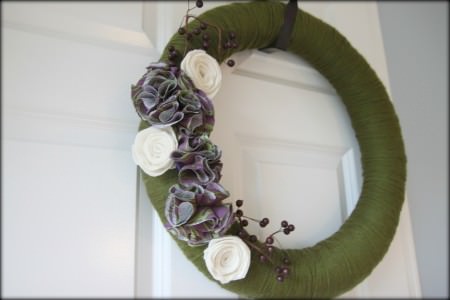
When a user grabs images from your site, they can add a few words describing why they are pinning that image. More often than not, people skip this step and just pin the image of the item. By adding text right into your pictures that describes the item and it helps that image to go a little bit further.  Perhaps this wreath picture would be fine on it’s own, but the Loopy Flower Valentine’s Day Yarn Wreath really lets the reader know that they are going to learn how to make it for the holidays.

Let me illustrate why text in pictures can be so important…


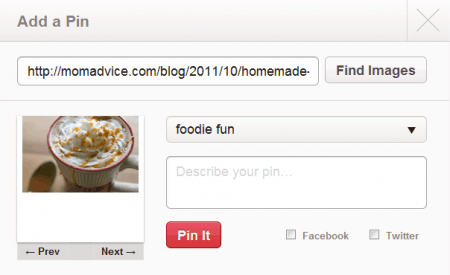
A picture of this Salted Caramel Mocha does not move me to repin this if the original pinner does not have a description. What is this? Why would I want to repin it?


A picture that clearly states that this is a Salted Caramel Mocha coffee drink? Heck ya! Let me repin that for you.


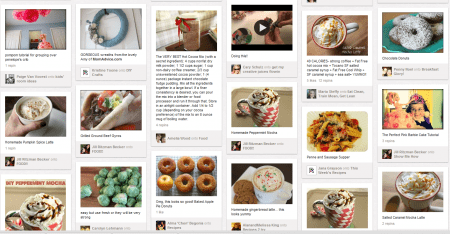
Source Yourself– Not sure what is being pinned on Pinterest from your site?  It is simple to see what your users are pinning on Pinterest.  I just go to http://pinterest.com/source/momadvice.com/ to see the pins from my site. You can do the same thing by simply replacing the last part of that URL with your own web address.

What happens when you source yourself? You can see exactly what people love on your site and it helps to guide the content on your site in a direction that can help with your traffic grow. It was through seeing the pins from my own site that I could see what people wanted more of. When I witnessed a wall of coffee pins, for example, I knew that I should create more fun coffee drink creations. As I created more of the content our readers loved, I created more pins and, in turn, created more readers.

Make Archives Accessible & Visual– It always surprises and makes me happy when an old post starts gaining traction on Pinterest. I understand that my readers don’t have time to sift through eight years of content to find the gems. I don’t have time like that to devote to my own site so that is why it is important that you make those archives accessible and visual for your readers.

Try adding a plugin like Link Within or Outbrain that will create pictures with links at the end of your post guiding readers to dig deeper into the site. This will get people clicking and pinning into your site without the necessity of creating even more content. Make sure that you are checking Pinterest so that you can see what old posts are being dusted off and pinned.

My photography was terrible when I started the site and so I do cringe often when I see old pictures going up on Pinterest. If you have the time to switch the pictures to freshen them up, I encourage you to do that to attract more pins. Once again, getting familiar with your camera and your camera manual is one of the best things you can do for your blog and will pay you back over and over again if you invest the time in it.


Jump on What is Trending- I like to visit the Popular link on Pinterest to see what the most popular pins are on Pinterest and to help me brainstorm content for the site. Jot down the ideas and themes that you see are popular and try to create your own unique spin on popular topics.

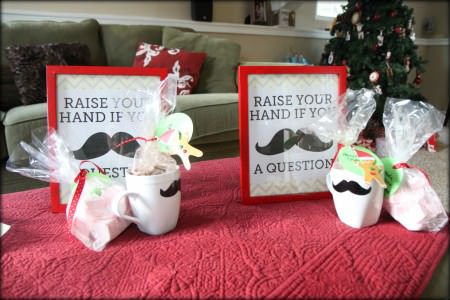
When I saw Mustaches were trending on the Popular section, we developed Mustache printables & Mustache Mug Templates that our readers could use. Mustaches weren’t necessarily a topic that I had planned to explore, but it worked out for us when the mustache fun hit Pinterest and attracted new readers to the site.

I do think that Pinterest has impacted our content in a positive way. Niche blogs benefit greatly from Pinterest, but any blogger can find ways to weave in content that can attract Pinterest users while sticking to the core content themes of their blog. Don’t be afraid to get creative or step out of your usual content box.

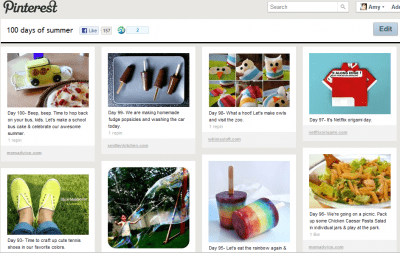
Create a Unique Pinterest Board to Engage Readers- Our readers may remember our 100 Days of Summer Pinterest board that I created at the beginning of last summer. I wanted to create an activity board of 100 activities you could do with your kids to keep them busy over the summer. Instead of sitting at my computer all summer, I switched my posting schedule and used Instagram to document the activities we completed off of the list.

Creating a unique Pinterest Board that could attract new readers is a fun way to interact with your community and bring more traffic to your site. If you run a blog on organizing, for example, you could create a 30 day organizational challenge and pin ideas from other bloggers and weave in a few pins from your own site on how readers could take on a challenge like this.

Install a Pinterest Plugin To Your Site– If you want to make pinning even easier for your readers, consider adding a Pinterest plugin to your blog. We recently added the Pin It On Pinterest plugin to inspire you to pin from our site. With this plugin, I am able to select the pictures that I would like people to pin from the post and even fill in a description of the pin so our readers can simply click and have the pin ready for them, making it easier to spread your content quickly.

Pin Yourself– You can absolutely pin yourself on Pinterest and I encourage you to do that! I like to treat Pinterest just like I treat all of my other social media outlets I belong to.  I try to pin lots of other great bloggers and pin myself every ten pins or so. I don’t want people to think I am only about self-promotion so I concentrate on the things that I think those that follow my boards would really like from our site.

Pin Wisely– Just as I have shared about other aspects of my career, I treat Pinterest with the same professional manner I treat my Twitter stream and Facebook stream. While I may find certain things funny on Pinterest, I have to remember what my readers may think is funny might not be the same as my idea of funny. More importantly, working for other brands also keeps me conscious that I am pinning things that reflect well for my job with them. Hopefully one day Pinterest will have private boards where I can muck it up a bit, but for now I try to keep my pins family-friendly and brand-friendly.

Just Get Pinning- It’s time to get pinning and build your presence. Don’t be afraid to set up your own network of bloggers to help promote each other on Pinterest. Just like all things in blogging, the beauty is in the community that you surround yourself with and sharing the traffic love!

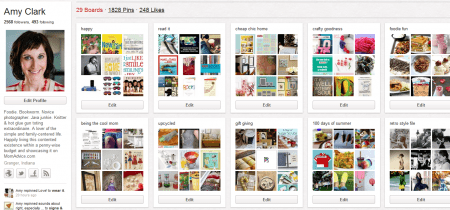
I hope you will follow me on Pinterest because I  love new friends.

I really, really do.

Let’s talk about using Pinterest for your business! What has helped you build your presence on Pinterest? What tips do you have for other bloggers? Do you have any questions for me about how I use Pinterest? Have any Pinterest tutorials you would like to share? Feel free to link them up below!

Pin It

An Apron Full of Giveaways 01.31.12

Tuesday, January 31st, 2012

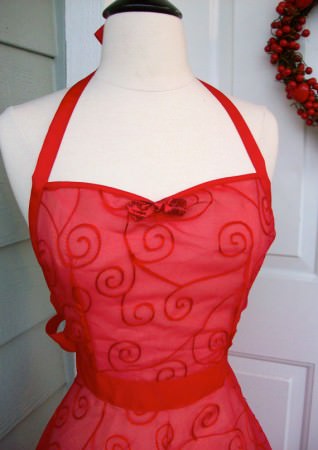
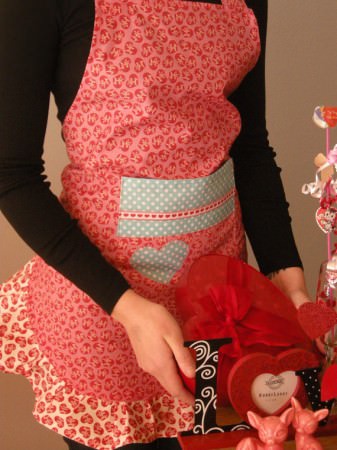
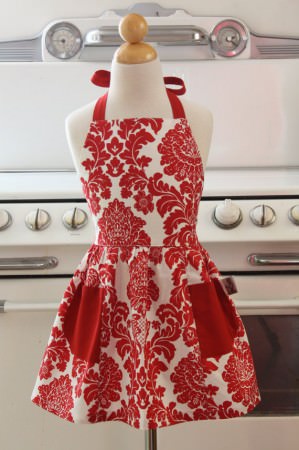
Drapes of Wrath, $40

Welcome to our Apron Full of Giveaways! I hope everyone is having a great week this week! As we do each week, here is our round-up of giveaways for our readers. We hope that this is beneficial to you and your family! Please let us know if you guys win anything- I love to hear the success stories!

Below are the contest links-if you are hosting a contest please link it up below. Sorry, we aren’t giving away the aprons just showcasing them! Please put your site name and then what type of contest you are hosting. For example, “MomAdvice (Kid’s Movies).”

Please let me know if you have any questions and good luck to each of you!

Pin It

Red Velvet Cake With Cream Cheese Frosting

Monday, January 30th, 2012

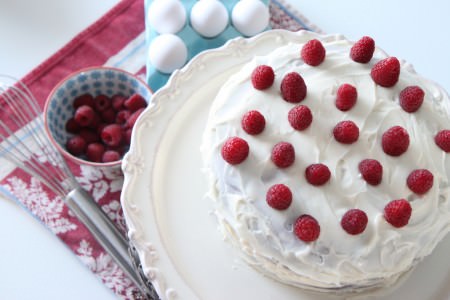
Red velvet cake is a decadent little treat perfect to share for Valentine’s Day with someone you love.  I was excited to make my first red velvet cake this weekend.  We threw a party for a few of my husband’s co-workers and it gave me the perfect excuse to whip up something to share that we wouldn’t normally get the pleasure of eating.

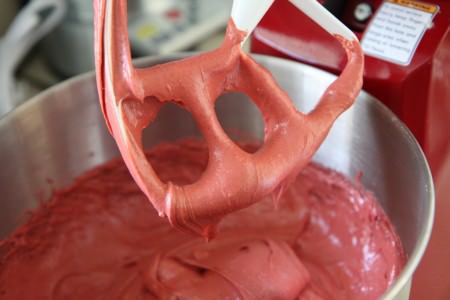
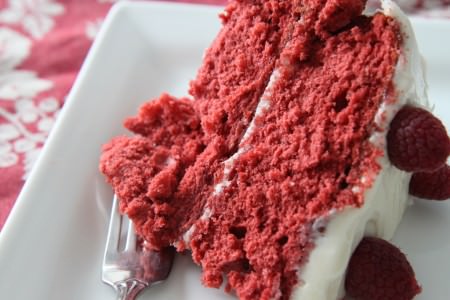
This red velvet cake is made using a simple white cake mix, cocoa powder,  and the signature bottle of red food coloring that makes this cake this vibrant hue. It is rich, but moist and full of cocoa flavor. The tang of the cream cheese frosting helps to cut the heaviness of this cake and adds the perfect balance.

After watching a million Cupcake Wars with my kids, it seems every great baker has a signature red velvet cake. I have to say, that my signature comes with a little baking shortcut, but yields just as tasty of results without a lot of the work.


Red Velvet Cake With Cream Cheese Frosting

Recipe:


Cake:

1 package (18.25 ounces) white cake mix

1 cup buttermilk

8 tablespoons (1 stick) margarine, melted

3 tablespooons unsweetened cocoa powder

3 large eggs

1 bottle (standard bottle of red food coloring gel) red food coloring

1 teaspoon pure vanilla extract

Fresh raspberries (optional)


Directions:


Preheat oven to 350 degrees. Generously grease two 9-inch round cake pans with shortening, then dust with flour. Shake out the excess flour and set the pans aside.

Place the cake mix, buttermilk, melted margarine, cocoa powder, eggs, red food coloring, and vanilla in a large mixing bowl. Blend with an electric mixer on low speed for 1 minute. Stop the machine and scrape down the sides of the bowl with a rubber spatula. Increase the mixer speed to medium and beat 2 minutes more, scraping down the sides again if needed. The batter should look well combined. Divide the batter evenly between the prepared pans, smoothing it out with your rubber spatula. Place the pans in the oven side by side.

Bake the cakes until they spring back when lightly pressed with your finger, 28-30 minutes (mine took 25 minutes). Remove the pans from the oven and place on a wire rack to cool for ten minutes. Run a dinner knife around the edge of the each layer and invert each into a rack then invert again on another rack so that the cakes are right side up. Allow to cool completely, 30 minutes or more.

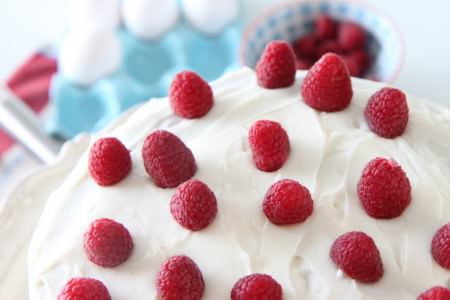
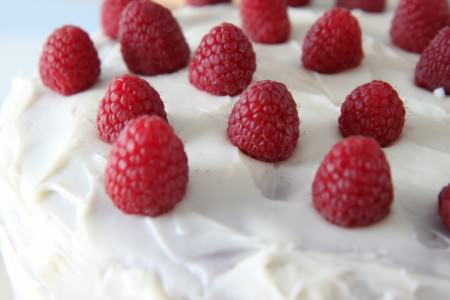
Meanwhile, prepare the Cream Cheese Frosting (recipe below). Ice your cake and then decorate with fresh raspberries on top.

Cream Cheese Frosting

1 package (8 ounces) cream cheese, at room temperature (I used the reduced fat cream cheese)

8 tablespoons (1 stick) butter, at room temperature

3 3/4 cups confectioners’ sugar, sifted, plus additional if needed

2 teaspoons pure vanilla extract


Directions:

Place the cream cheese and butter in a large mixing bowl. Blend with an electric mixer on low speed until combined, 30 seconds. Add the confectioners’ sugar, a little at a time, blending with the mixer on low speed until the sugar is well incorporated, 1 minute. Add more sugar as needed to make the frosting spreadable. Add the vanilla, then increase the mixer speed to medium and blend until the frosting is fluffy, 1 minute more.


Prep Time: 20 minutes

Total Time: 50 minutes

Serving Size: 16

Source: Adapted from Chocolate from the Cake Mix Doctor


Of course, if Red Velvet Cake isn’t your cup of tea, may I recommend this Orange Chiffon Cake or our favorite Darn Good Chocolate Cake for celebrating the holiday with? Those are just a couple of cake options our family loves and also are prepared using simple cake mixes, likely already in your pantry.

As we touch on celebrations, our family happens to be celebrating a big moment this month.  MomAdvice.com celebrated her 8th birthday this month!  I wanted to personally thank you for your wonderful support over the years.  I am so thankful to get to do this every day and could not do it without you.

Thank you, friends! I hope you can enjoy a slice of this decadent cake for a fun treat with your family!

Linking up to Mouthwatering Mondays at A Southern Fairytale!


Pin It

Amy’s Notebook 01.25.12

Wednesday, January 25th, 2012

These DIY arrow Valentine’s would be a cute Valentine’s Day project to do with your kids (@ Two Shades of Pink)

These snowball cupcakes are the cutest idea for winter celebrating (@ Hungry Happenings)

I want to make these hot chocolate sticks (@ 30 Pounds of Apples)

This side gathered shirt refashioned from a man’s t-shirt is so cute & a clever transformation (@ Sugar Bee Crafts)

This painted heart bag would make an adorable library bag (@ V & Co.)

Fat Elvis ice cream? Yes, please! (The Type A Housewife)

I love these printable Valentine’s Day coupons for a cute gift to give your sweetie (@ Love vs. Design)

Beef Pot Roast Marsala? Yum. (@ The Gourmand Mom)

These homemade peppermint patties would make a fun Valentine’s treat (@ smells like home)

I want to make some of these Anthropologie-inspired letters for our kitchen (@ Life as a Thrifter)

These blueberry yogurt multigrain pancakes look so yummy (@ Annie’s Eats)

This wood wax seal made from a dowel is such an elegant way to seal an envelope (@ RageHaus)

These homemade corn dog bites look like fun kid food (@ Gluesticks)

This personalized canvas art inspired by Red Envelope is a fun way to personalize your home (@ Decorating the Dorchester Way)

This teddy bear crocheted hat makes me want to learn how to crochet (@ Jennyandteddy Creation)

Oh my! Tiramisu brownies sound heavenly! (@ Bake. Eat. Repeat.)

This tunnel of love printable would be a cute way to decorate for Valentine’s Day. (@ Flamingo Toes)

Why have I never thought to try a gyro salad before- so smart! (@ The Gourmand Mom)

I want to dive into a bowl of this spaghetti with real deal bolognese sauce (@ Dinner: A Love Story)

Valentine’s Day Yarn Wreath

Tuesday, January 24th, 2012

Since Valentine’s Day is just around the corner, I thought it would be fun to decorate my little yarn wreath for one of my favorite holidays. Today I wanted to share with you another fun way to decorate that wreath of yours and some fun creations you can make with a simple piece or two of felt.

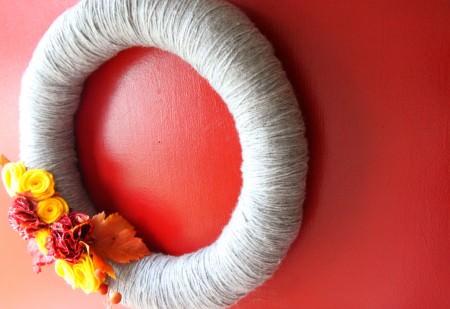
You may recognize this yarn wreath that I made this Fall to decorate our front door. This wreath was created because of the limited amount of storage in our house. I created this wreath to transition with the seasons and figured out a way to create accessories that could easily be removed and switched out with the holidays. Say goodbye to this old Fall look and let’s brighten things up with some Valentine’s Day fun today!


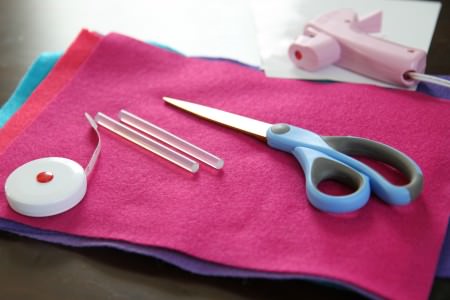
For this wreath, I wanted to create some loopy flowers in pinks and purples for my wreath.  I found a multi-pack of fun felt colors at Walmart over by the craft supplies with my Valentine’s Day colors in it.  You will also need a hot glue gun, glue sticks, scissors, a tape measure, and your choice of a clip (like I have shown here) or a jewelry pin (you can find those in the jewelry-making supplies).

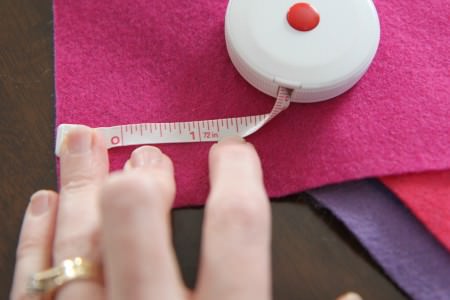
Taking your felt square (which is roughly the size of a sheet of paper), measure 1 1/2 inches width. You will cut a strip 1 1/2 inches wide along the long edge of your piece of felt. Repeat one more time so that you have two of these strips for your loopy flower.

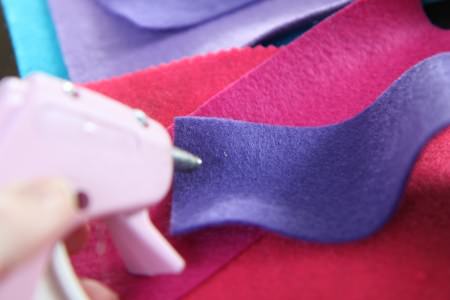
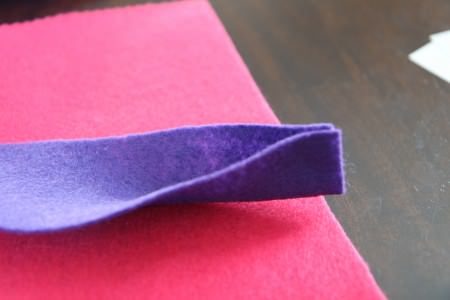
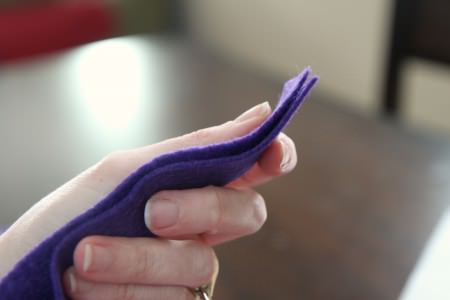
Dab a little hot glue on each end of the piece of felt and fold in half. I also like to make sure it is a little secure in the middle with one more dab of glue, but you can judge for yourself how secure you like it.

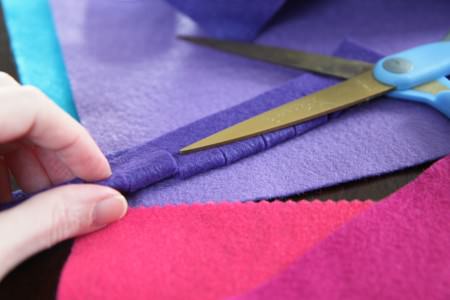
Cut slits down the side that is not glued.  You can make them fat or thin depending on what type of look you are going for. You can cut them straight or cut them on an angle. Basically, anything goes with the cutting!

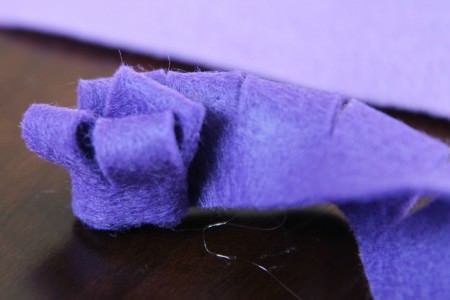
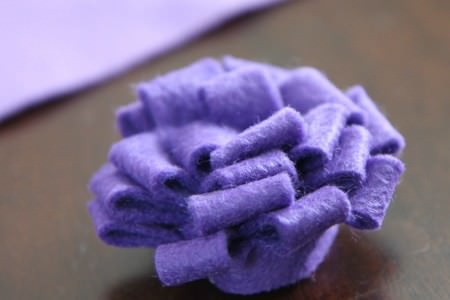
Now start rolling your little loopy flower up and add a dab of hot glue here and there to make sure it all holds secure.

So pretty! You can leave it like this for a small loopy flower or you can use that other strip of felt you cut and start cutting it up just like the last one.

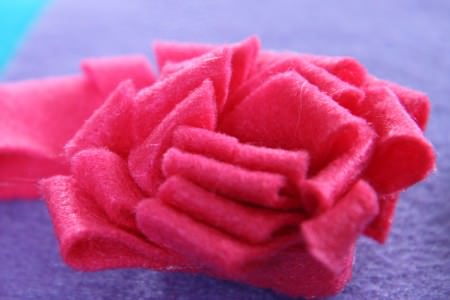
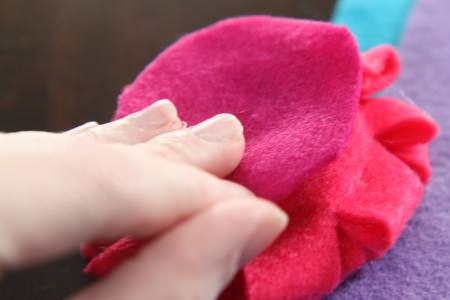
Once you have that second piece of felt cut, you can start wrapping it around the outside of your loopy flower you started, picking up where you left off with the last piece of felt. You can do two different colors of felt or keep it sweet and simple with the same color. Apologies for switching colors on you, my pictures from the first flower didn’t turn out as good.

Hot glue a small circle of felt to the back of your loopy flower to hold it all together. Add your pin or clip to attach the flowers to your wreath.

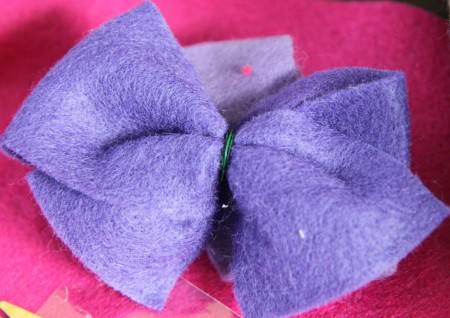
If you have any stray strips of felt, you can transform them into bows. I just fashioned this one into a bow shape and then secured it with a little floral wire in the center. Cover your wire with another little scrap of felt and you have another fun element to your wreath.

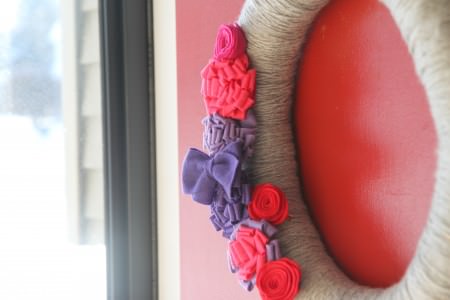
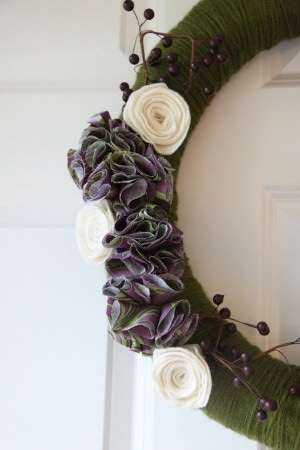
Here are all of my fun Valentine’s Day accessories on my wreath. I made these felt roses, several of these loopy flowers, and a bow in the middle clipped to the top. You could also add some cute fabric flowers, if you like, in other fun Valentine’s Day shades.

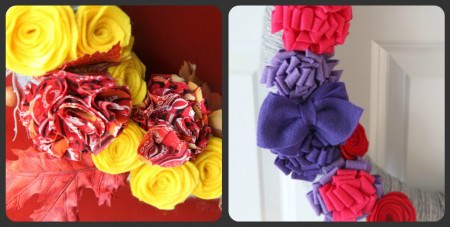
Same exact wreath.

Totally different look.

I saved all of my accessories (that my daughter did not run away to accessorize her room) and I can just reapply those fall accessories next year.

It is much easier to store a box of accessories than a million wreaths in my basement.

What special traditions have you created for your family for Valentine’s Day in your house? Do you have any special crafts you do together or any special food traditions? I would love to hear your ideas!

Pin It

An Apron Full of Giveaways 01.24.12

Tuesday, January 24th, 2012
Adrienne Honeycombs, $25

Welcome to our Apron Full of Giveaways! I hope everyone is having a great week this week! As we do each week, here is our round-up of giveaways for our readers. We hope that this is beneficial to you and your family! Please let us know if you guys win anything- I love to hear the success stories!

Below are the contest links-if you are hosting a contest please link it up below. Sorry, we aren’t giving away the aprons just showcasing them! Please put your site name and then what type of contest you are hosting. For example, “MomAdvice (Kid’s Movies).”

Please let me know if you have any questions and good luck to each of you!

Roasted Brussels Sprouts

Monday, January 23rd, 2012

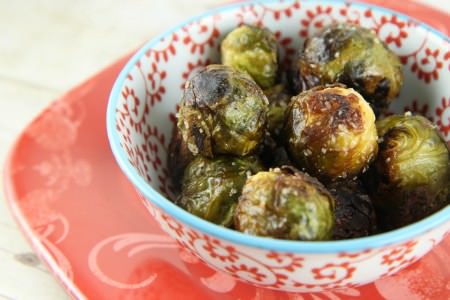
Has it been a few years since you have eaten brussels sprouts? Maybe you remember something that barely tasted edible from your youth or being forced to sit at the table to eat your brussels sprouts before your parents would excuse you from the torture. Have no fear because roasted brussels sprouts are nothing like those hard, steamed, barely edible things you may have eaten before.

As with all vegetables in our house, our family prefers our veggies roasted. It is a simple technique, requires zero cooking skills, and yields a tasty side dish that your whole family can enjoy. Whether we are roasting up a big batch of lemon roasted green beans or indulging in Parmesan-dusted roasted asparagus, chances are that if the vegetable is roasted, it will be a hit in our house.

Brussels sprouts had never touched my kid’s lips before.  It wasn’t a vegetable that was even on my radar when doing my grocery shopping. When I saw they were on sale in the store, I remembered Ina Garten’s claims that roasted brussels sprouts were so delicious and just as addictive as french fries.  I thought it would be fun to give these a try and see what our family thought.

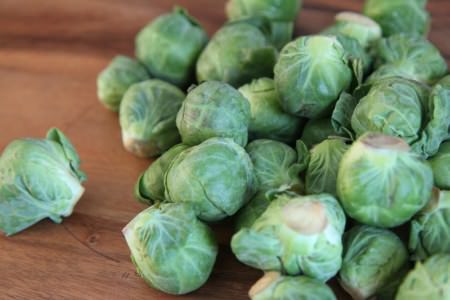
Preparing brussels sprouts for roasting is as easy as 1-2-3.  Simply cut off the brown ends, remove any loose leaves, and toss them with olive oil and seasoning. How is that for easy?

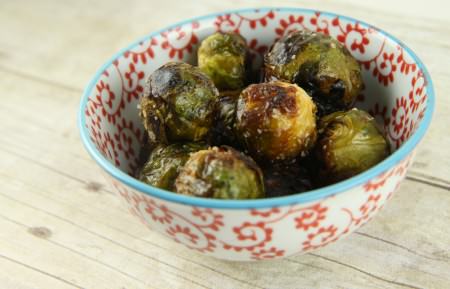
The taste compared to other methods just can’t be beat. These get a depth of flavor from the roasting and become more tender as they cook. The browned bits on them were my favorite part and the sprinkle of kosher salt make these taste like a treat to eat rather than a chore.  The method is a simple one, the dish is inexpensive to prepare, and it made a brussels sprout lover out of every single person in our family.

That was a first.

For all of us.

Recipe:

Roasted Brussels Sprouts

Ingredients:

1 1/2 pounds Brussels sprouts
3 tablespoons good olive oil
3/4 teaspoon kosher salt
1/2 teaspoon freshly ground black pepper

Directions:

Preheat oven to 400 degrees F.

Cut off the brown ends of the Brussels sprouts and pull off any yellow outer leaves. Mix them in a bowl with the olive oil, salt and pepper. Pour them on a sheet pan and roast for 35 to 40 minutes, until crisp on the outside and tender on the inside. If you have smaller brussels sprouts, you can adjust the time to 20-25 minutes. Shake the pan from time to time to brown the sprouts evenly. Sprinkle with more kosher salt and serve immediately.

Prep Time: 10 minutes

Total Time: 45 minutes

Serving Size: 6

Source: Food Network

Have you ever tried a vegetable you hated as a kid and found that you love it as an adult?

Amy’s Notebook 01.18.12

Wednesday, January 18th, 2012

Organizing the medicine cabinet by age group is so smart (@ ohdeedoh)

I love this idea for hiding your boot storage (@ I Heart Organizing)

These peanut butter chocolate chip cookies look so delicious (@ The Idea Room)

I want to try this lightened up version version of Chicken Alfredo (@ Recipe Girl)

This New England clam chowder must be made in my house this month (@ brown eyed baker)

I am madly in love with this personalized eye chart for Valentine’s Day (@ The Cheese Thief)

This pasta with shrimp, lemon, herbs, & feta looks like another great shrimp dish to try in our house (@ The Perfect Pantry)

I love these printables for organizing your takeout menus (@ Skip to My Lou)

This idea for repairing your TOMS shoes is genius (@ I Love to Create)

This giant picture would be such a fun way to dress up a blank wall (@ Sugar Bee Crafts)

I love these tips for making homemade vegetable stock (@ Simply Recipes)

This brushetta recipe sounds heavenly (@ The Pioneer Woman Cooks)

Amy’s Handmade Holiday Craft Factory 2011

Tuesday, January 17th, 2012

Handmade gifts are my favorite kinds of gifts to give. Unfortunately, since the recepients read my blog, I had to hold off and show off my holiday crafts until now. I hope that you can bookmark these for future gift-giving though since all of these gifts were so well received and fun to create!

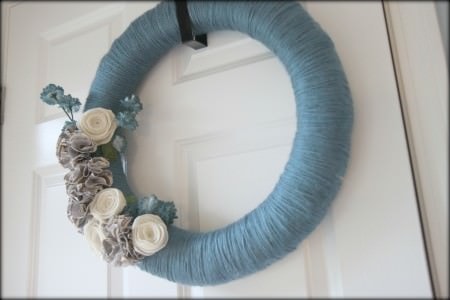
I ended up making two yarn wreaths this year for holiday gifts- one for my best friend and one for my mother-in-law. I did five fabric flowers on each, three rosettes, and one spray of berries/flowers.  The most time intensive part of this is definitely covering the wreath with yarn, but it is a great craft to do while catching up on your favorite shows.  To find out how to make a wreath of your own, visit this tutorial on creating a yarn wreath!


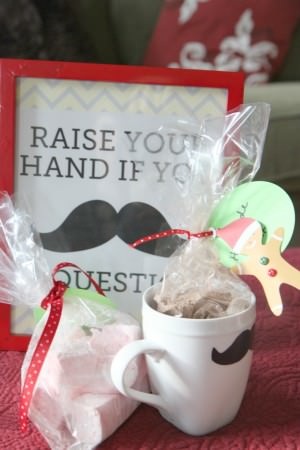
Our teachers loved our, “Raise Your Hand if You Mustache a question mugs and printables we created for them. I filled the mugs with my homemade cocoa mix and paired it with marshmallows for a fun gift this year. I spray painted the frames red to give them a little pop of color.  According to my son the teachers really got a chuckle out of these and we had fun making them.

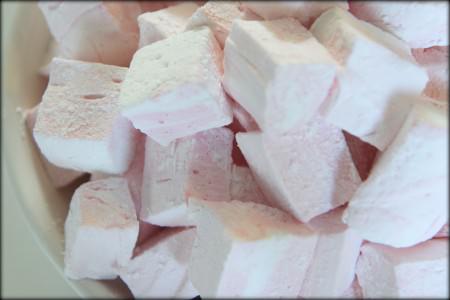
The Peppermint Marshmallows were bagged up for gift giving for all of  the  special people who make our lives so much better.  After making them as party favors to take home for my daughter’s birthday party, making them for all of the teachers, making a batch for the helpers in our lives, and giving out some to our family members, I ended up giving 27 dozen of these away!  They were so easy to make and so yummy to eat that it was one of my favorite gifts that I got to give this year. These would be so cute cut into hearts for Valentine’s Day too for February cocoa topping.  I am now a believer that homemade marshmallows are the best kind of marshmallows to eat and to share.

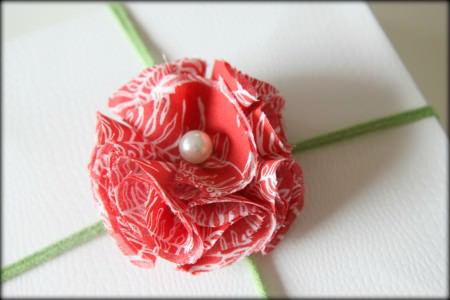
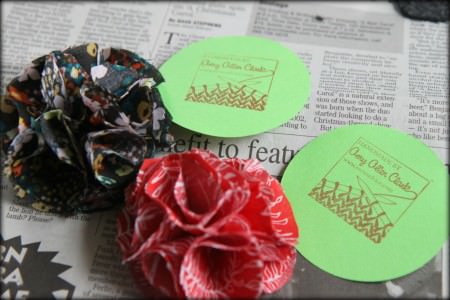
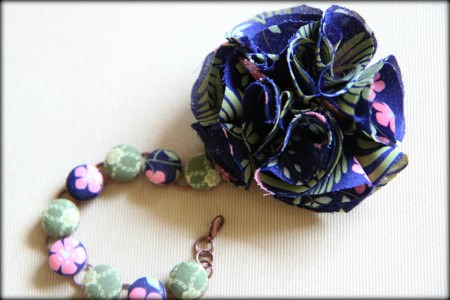
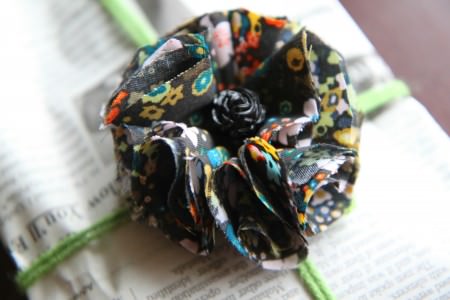
Fabric flowers adorned everything I gave this year. I made about fifteen of these pins to top gifts and packaged them up sweetly with our teacher gifts.  I bought two bracelets on clearance before the holidays and realized why they were on clearance when the elastic on both of them snapped after I slipped them on. The beads scattered everywhere and I gathered them up and threw them in my craft box for a future use. I ended up using those little pearls and broken bits to adorn the centers of the flowers. I still haven’t made a pin for myself yet… hopefully one of these days I will make a few of these for myself!

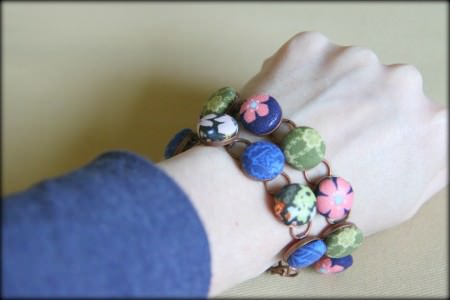
To match these pins, I found this tutorial for creating fabric covered button bracelets on The Mother Huddle.  I discovered one thing through this process… making buttons is not easy. My fingers were breaking and each button seemed to take forever.  I had planned to make four of these and ended up only making two. They are so pretty and worth every minute of effort, but it is hard to find a way to share just how special these are. I wanted to write a note with each of them that said, “Handmade. Like Really Handmade. Like I Made Buttons. Like Broke My Fingers For You. Because I Love You That Much Hard.”  I think I might try and do some fun stuff with my extra materials though after my fingers heal from this last round of button making. Who knew a girl could make buttons herself?
 

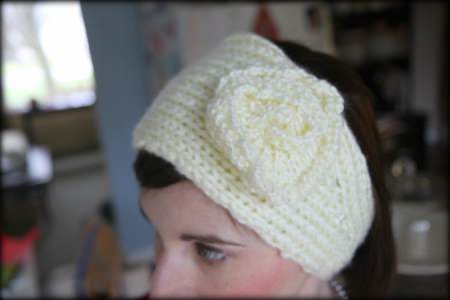
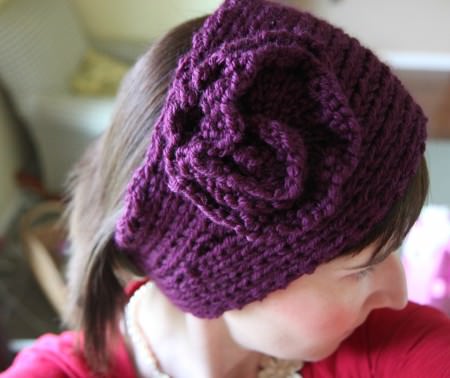
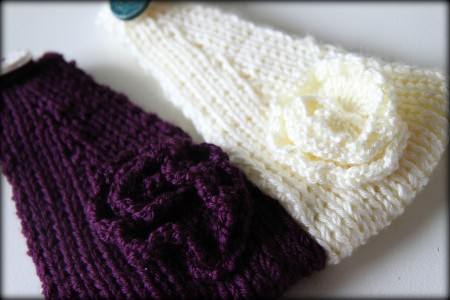
I kept visiting boutiques and shops and seeing these cute knitted ear warmers with flowers on them. I just knew these would make fantastic gifts for my sister and best friend for the holidays. These knitted up so quickly and easily and I had fun personalizing them with unique buttons to finish them off.

Cozy Ear Warmers

Pattern: Strictly Knit Flower Headband Ear Warmer (available for purchase for $5 on Ravelry)

Needle Size: US  9

Yarn: Caron Simply Soft (in Ivory) & Red Heart Soft Yarn (in Plum)

Notes:  The trick with making this ear warmer super soft and warm is that you knit with two balls of yarn to create a thicker ear warmer than you would with a single ball of yarn. This pattern is easy and straightforward. I had a blast making these two headbands and can’t wait to make one for myself soon!


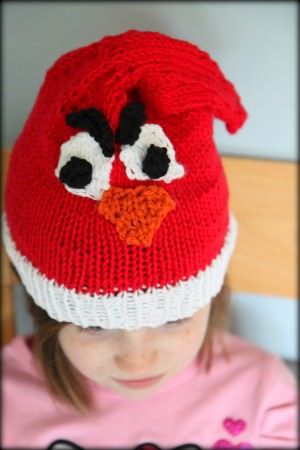
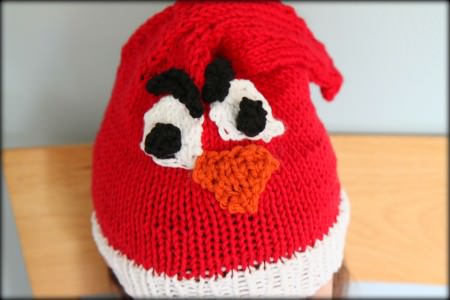
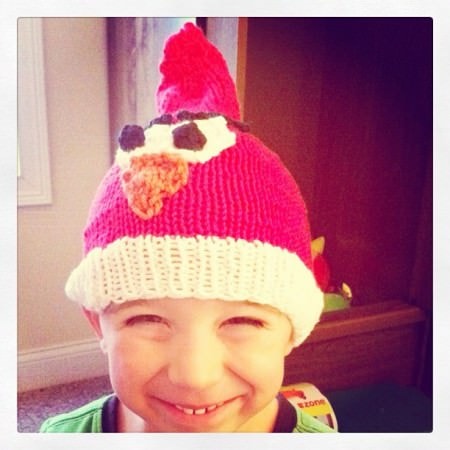
My nephew is a nut for anything Angry Birds so I was dying to make something for him that incorporated his favorite game! I decided to knit him an Angry Birds hat and I will admit, I never thought I could do it.  TWO eyes, TWO eyebrows, TWO eyeballs, and a nose?  I can’t do that. I was really worried about this hat, but mostly about appliqueing all of the details to the front.  I was shocked this turned out and I am pretty proud of my handiwork on this one.

Angry Birds Hat

Pattern: Red Bird With an Attitude (available for purchase for$3.99)

Needle Size: US  8 (16″ circulars)

Yarn: Hobby Lobby I Love This Cotton! (in Red, White, Black) &  scraps of orange from my yarn stash

Notes: This pattern is fairly straightforward. I would recommend sizing down (at least) one needle size because the 1×1 ribbing on the edge is very loose and will not fit on the head snugly.

I love how this bird turned out. You could definitely make the tail a little longer to make it wave and stitch in the back or you can tie it in a loop if it doesn’t set comfortably on your child’s head.

I opted to knit my eyeballs on this one because I didn’t want to have to mess with felt or buttons.

Knitted eyeballs:

CO 1 stitch Loosely (leaving a 4” tail)
Row 1: Knit in front and back of this stitch five times (5 stitches should be on your needle)
Row 2: Knit all stitches
Row 3: Purl all stitches
Row 4: Knit all stitches but do not turn. Pass 2nd, 3rd, 4th, & 5th stitch over the 1st stitch. One stitch will be left on the needle. Cut the yarn (leaving a 3” tail.
Ball up the yarn from the cast on tail and stuff it inside the eyeball. Stitch the eyeball closed and then secure it to the white part of the eye. Repeat for the other side.


Here is the adorable recipient in his little hat.  He kept pulling people aside and saying, “See this hat? It’s special. My Aunt Amy made it just for me. Just for me.”

Yup, you are special and  you are loved.

Handmade gifts say you are loved in BIG ways.

Did you tackle any holiday crafts? What is your proudest craft you created or received for the holidays? Please share here!


An Apron Full of Giveaways: 01.17.12

Tuesday, January 17th, 2012

Boojiboo, $16.75

Welcome to our Apron Full of Giveaways! I hope everyone is having a great week this week! As we do each week, here is our round-up of giveaways for our readers. We hope that this is beneficial to you and your family! Please let us know if you guys win anything- I love to hear the success stories!

Below are the contest links-if you are hosting a contest please link it up below. Sorry, we aren’t giving away the aprons just showcasing them! Please put your site name and then what type of contest you are hosting. For example, “MomAdvice (Kid’s Movies).”

Please let me know if you have any questions and good luck to each of you!