Archive for January, 2020

The Grace Year Book Club: Interview With Kim Liggett

Friday, January 31st, 2020

The Grace Year Book Club Interview With Kim Liggett

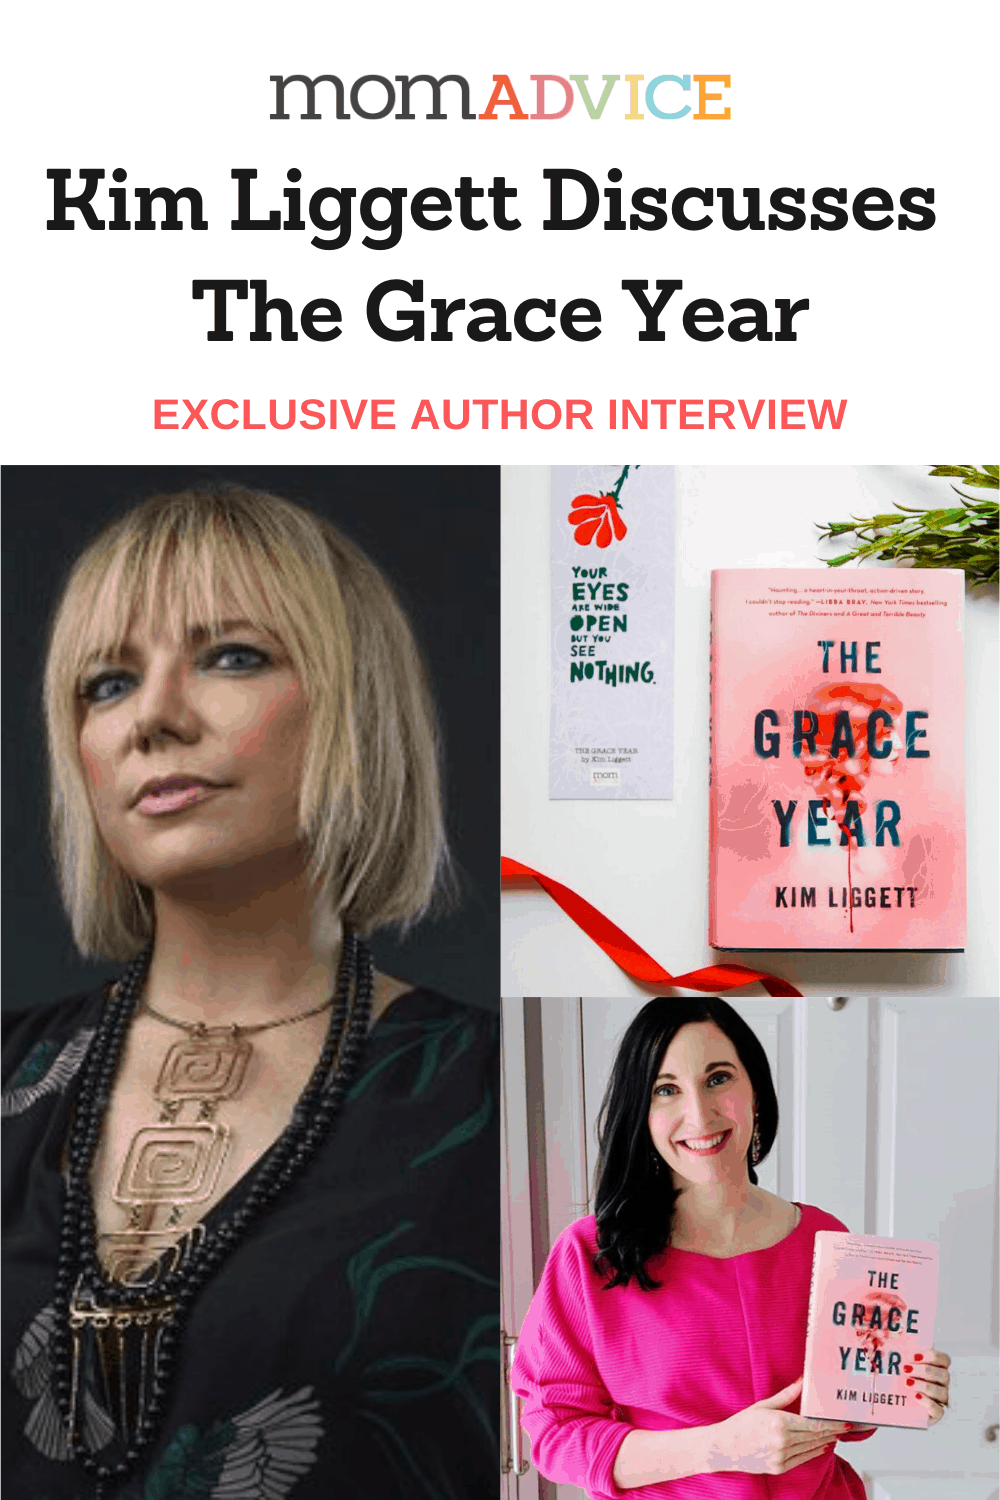
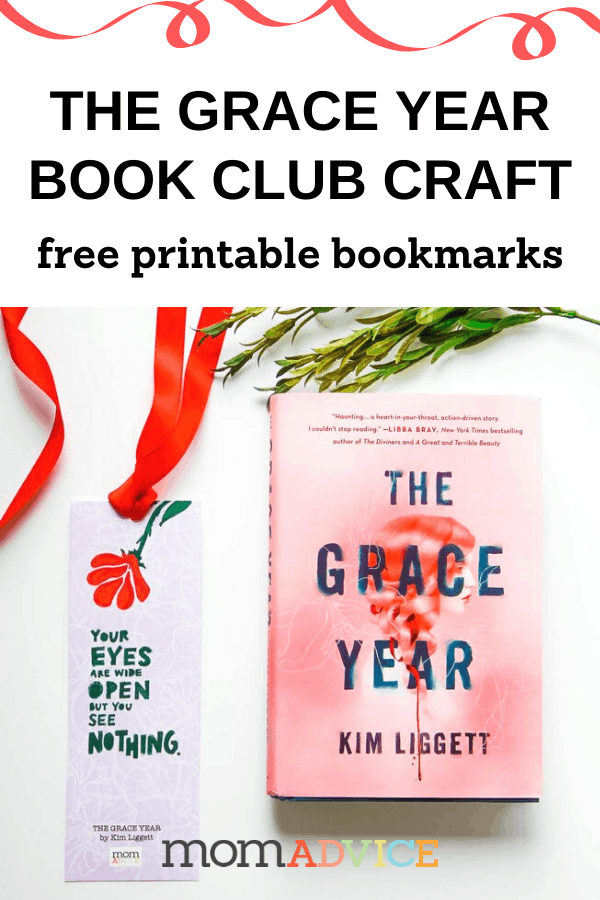
Check out this exclusive interview with Kim Liggett as we discuss, The Grace Year. This YA dystopian thriller is the incredible fast page-turner that every book club needs. Join us for our MomAdvice Book Club as we dig into this thriller that is the perfect blend of The Hunger Games, Lord of the Flies, and The Handmaid’s Tale. Read the book before you catch The Grace Year movie!

It has been such a joy to discuss my new favorite dystopian thriller, The Grace Year, with you all.  This year, the MomAdvice Book Club started out with a bang with a record number of you reading and participating in this month’s chat. This fast page-turner was a welcome reprieve from the busy holiday season and I loved hearing how many lost sleep because they had to read, JUST ONE MORE PAGE.

I want to supply book clubs all over with all the materials they need for a fun and interactive book chat together.

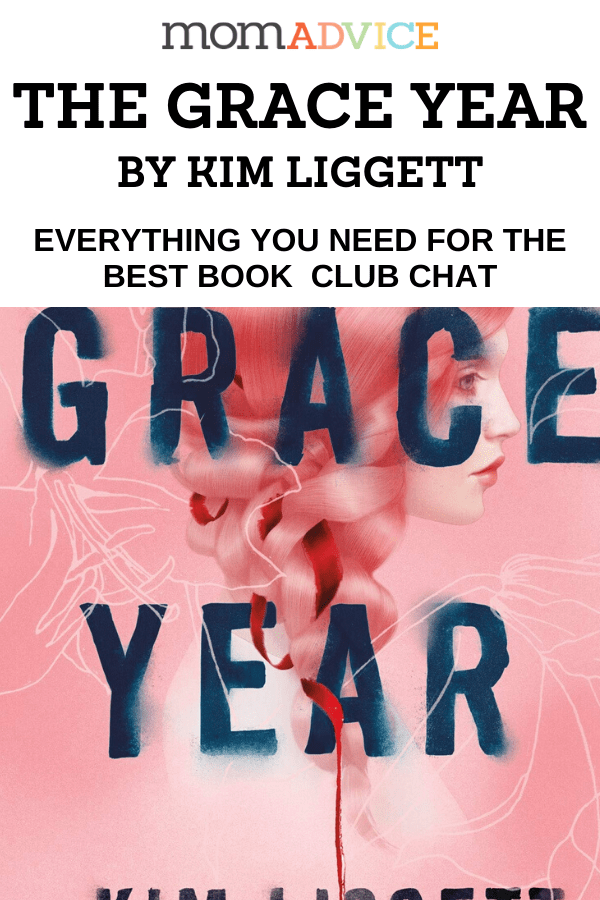
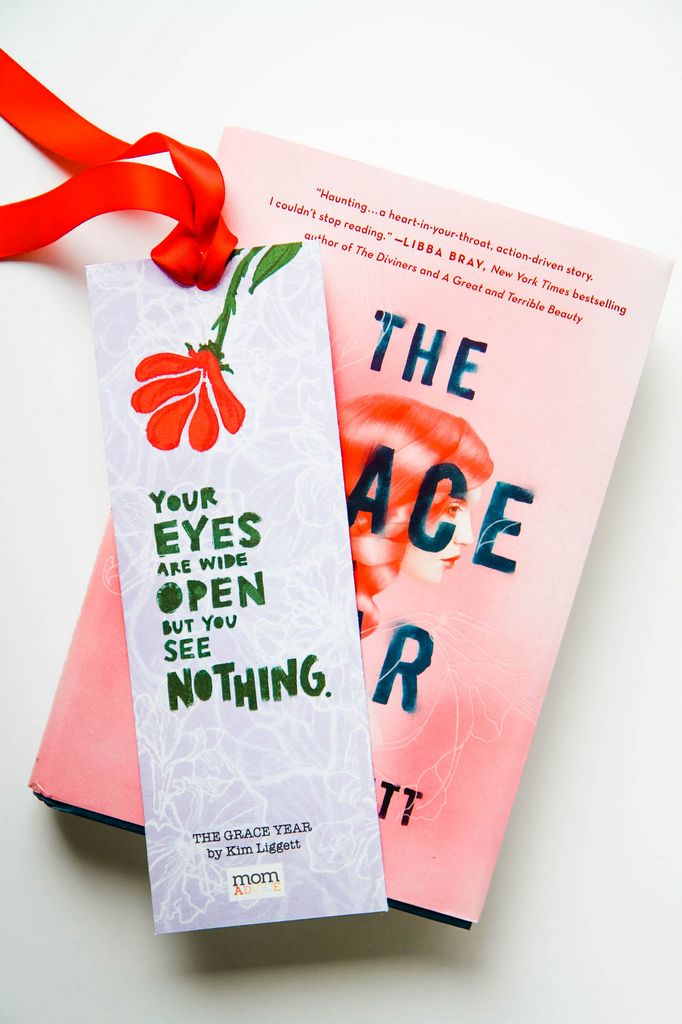
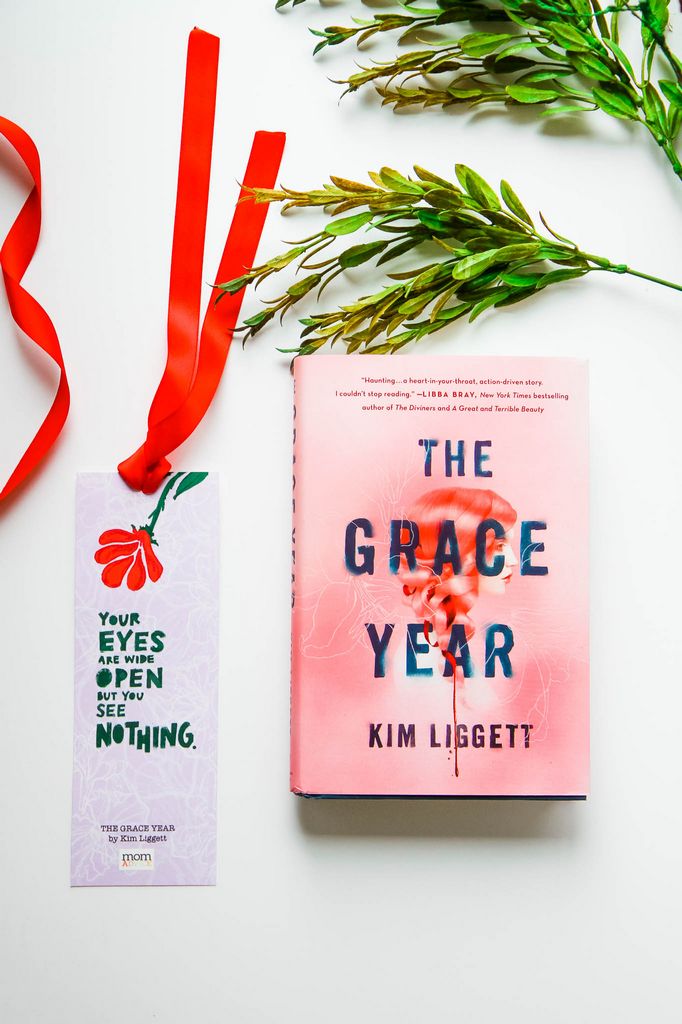
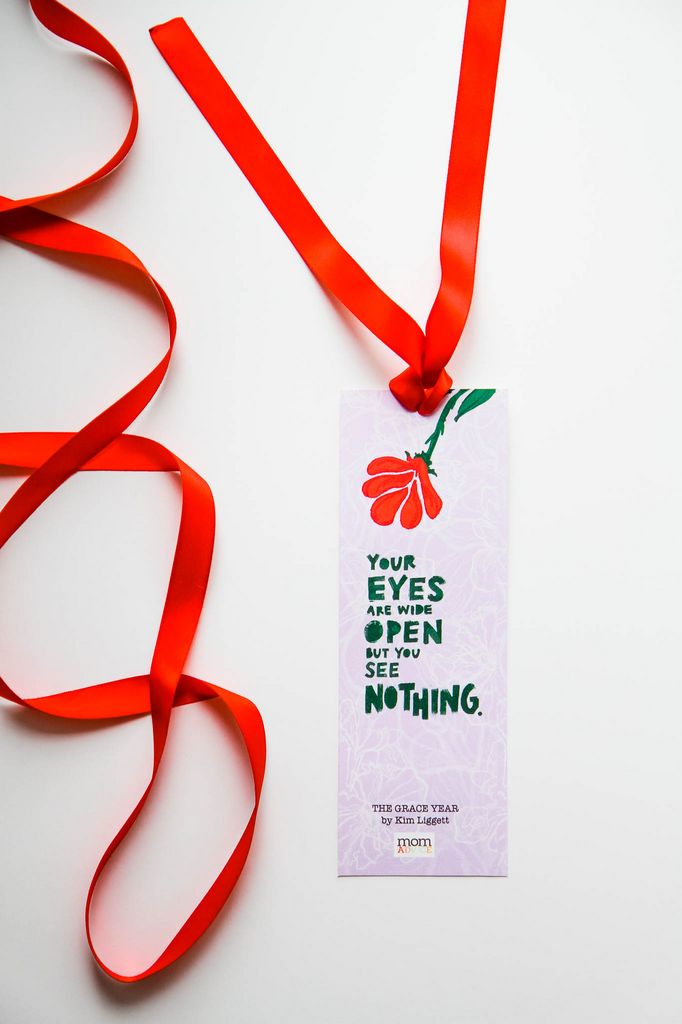
This post explains why I think this is a great book for any book club, you can find printable bookmarks to print out for your book club attendees, this interview will be a great supplement to your reading guide, and you will also find great book club questions for discussing this month’s book. 

Kim Liggett Picture

For those of you not familiar with Kim, you are in for a treat. Kim Liggett, originally from the rural midwest, moved to New York City to pursue a career in the arts.

She’s the author of Blood and Salt, Heart of Ash, The Last Harvest (Bram Stoker Award Winner), The Unfortunates, and The Grace Year.

Kim spends her free time studying tarot and scouring Manhattan for rare vials of perfume and the perfect egg white cocktail. 

If you are wondering if Kim is planning to write a sequel, I am thrilled to point you to her GoodReads answer that said The Grace Year sequel (book 2) is on the table

PHEW! 

I don’t want to be done with this one! 

Today it is an honor to share my interview with Kim Liggett. 

The Grace Year Book Club: Interview With Kim Liggett

Thank you so much for joining me in an interview about your phenomenal book. I had the pleasure of listening to your novel on audio book and loved the bonus interview at the end.

In it, you shared that the idea for your book came from an encounter on the train.

Can you share with us why this encounter moved you so much that it brought you tears…and then brought you to the plot of your book?

I still can’t tell that story without bursting into tears!

I think what really gets to me is how much I wanted to spare her of the ugly truth.

Whether she was ready for it or not, her world was about to change.

So much of The Grace Year is about intergenerational silence—the things we never say in the name of protection.

I think there’s an element of denial at play—why plant that rotten seed if there’s a chance it might not happen to them or there might even be a hidden sliver of resentment—they’ll have to learn the hard way, just like I did.

For whatever reason, we’re not talking enough about the issues that girls and women have to deal with. Essentially, we’re sending them into the wilderness unprepared.

I feel like any piece of feminist literature is now compared to, The Handmaid’s Tale.

I’m a big fan of that book, but I don’t always think these comparisons are worthy.

With your book, I really feel like you captured some of that Atwood magic though by building out Garner County and the customs of the Grace Year.

What inspired this dystopian environment and how hard was this element in the creation of your story?

The most difficult task by far was deciding what should be left unsaid.

Because it’s such an immense and fascinating world, the temptation is to fill in all the gaps, leave no stone unturned, but I didn’t want the origin story of the county to overshadow Tierney’s.

I always saw THE GRACE YEAR as the middle of the tale—and there’s rarely any glory in the middle of anything—but Tierney deserved her own book.

For me, the question of ‘how did we get here?’ was a lot less interesting than, ‘we’re here now, so what are we going to do about it?’

This is the county’s 47th grace year.

Tierney has never known a time before it.

All she knows is now.

In order to capture that immediacy I decided to plop the reader right into the center of it all. Sink or swim, so to speak. I

t’s a lot to ask of the reader, it requires a fair amount of trust, and I’m honored every single time someone decides to go along for the ride.

While this story focuses a lot on how women are treated by men in this society, I thought one of the bigger themes was how the girls competed against each other and didn’t band together.

Why was this theme important to your story and how do we encourage our girls to not do the same thing?

We’ve been conditioned to compete with one another—it’s everywhere we look—and the only beneficiary is the patriarchy.

I think the key to lowering our armor, embracing one another, is through compassion and empathy.

Like Tierney, I was always so quick to judge other women, but this book really changed me.

Nowadays, I try to meet women where they are, not where I want them to be. It’s amazing how much my world opened up when I made that tiny shift.

All I had to do was simply soften my gaze.

You started writing at 40 which is just amazing.

At 42, I feel like it is too late to make a career switch so I felt really encouraged reading that.

What do you think you brought to your stories at 40 that you might not have been able to in your 20’s?

Honestly, I was a train wreck at 20.

There’s no way I would’ve had the focus—the stillness—to write a book like this, but the real difference is sheer life experience.

I’ve been the maiden; I’ve been the mother, and now that I’m settling into my crone phase, I feel like I’m finally coming into my full power.

It took me a long time to find my voice, but it’s never too late.

Elizabeth Banks Directing The Grace Year

I understand that your novel will be coming to the big screen, thanks to Universal and Elizabeth Banks (directing & producing).

Just as amazing as that, I read that the film will be made entirely by women. How involved will you be in adapting this book and what was it like to know that so many wanted to purchase the movie rights to your novel?

It’s wild!

When I agreed to sell the rights, I really didn’t expect that much involvement, but they’ve included me every step of the way.

Readers will be happy to hear that they are being extremely faithful to the book.

There will be a bit of condensing, because we can’t make a four hour movie, but the integrity of Tierney’s story will remain intact.

And it’s true—everyone from the executives to the screenwriters are women. I’m extremely proud of that.

They say that writing can be therapeutic and much of this story was born from your own fear and frustrations with where we are at in the world.

Did you feel better after you wrote this and do you see this story as activism for young adults?

This book was so deeply personal for me. I didn’t know if anyone would care or get what I was trying to say, but I had to write it.

It almost felt like a purging.

Having the attention of foreign publishers and the film industry was exciting, but it wasn’t until I started hearing from early readers that it really started to sink in.

I wasn’t alone, and I felt so much hope.

If people take anything from this book, I hope it’s this—we are stronger together.

This might seem like a radical idea, but instead of focusing all of our energy on taking down the patriarchy, what if we threw some of that strength into building each other up?

We would be absolutely unstoppable.

I always like to ask authors, what are the best ways we can support writers and their books?

With so many social media avenues and review spaces, I love to hear what helps your book sales the most?

Pass it on.

The greatest marketing tool of all is word of mouth.

Publishers can’t manufacture it; no one can predict it.

If you love a book, if it makes you think, talk about it. You have more power than you think.

If we loved your book, what else would you recommend we read, that explores similar themes?

The Power by Naomi Alderman, Women Talking by Miriam Toews, Three Women by Lisa Taddeo & My Dark Vanessa by Kate Elizabeth Russell.


As an Amazon Associate I earn from qualifying purchases

Love this post? Here are a few others you might love!

MomAdvice 2020 Book Club Selections find out how to join our FREE MomAdvice Book Club (and see what we are reading next!)

January Book Club Pick: The Grace Year by Kim Liggett

get the scoop on the grace year and the upcoming movie

The Grace Year Bookmark Printable

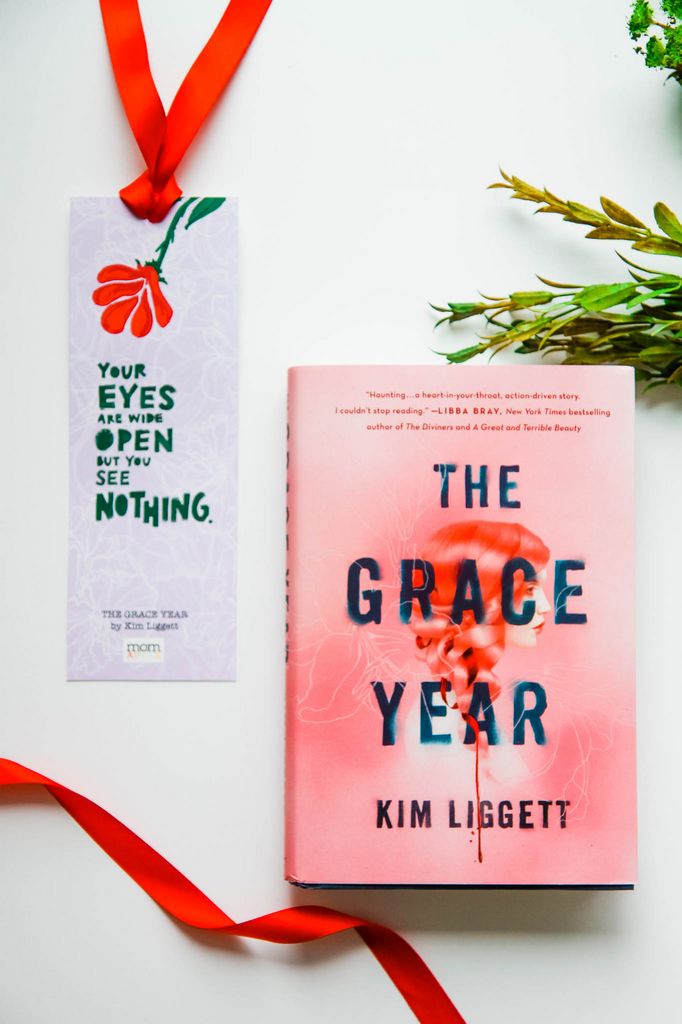
download your free printable bookmark

Looking for book ideas? Check out our entire Book section of the site! Don’t forget to friend me on GoodReads

The Grace Year Book Club Interview With Kim Liggett


Amy’s Notebook 01.30.20

Thursday, January 30th, 2020

source

How amazing are these dip dyed storage baskets? I love this colorful project!

I couldn’t love this idea more.

A beautiful piece on how to raise a gracious kid.

I needed to read this one today. I have a hard time filtering a lot of headline news.

The heartbreaking effects of being only partly committed to most things– guilty.

This turned out better than expected.

rosemary hot oil hair treatment source

What a great idea to diy your hot oil hair treatments. I can’t wait to try this!

How do I make plans without getting a drink? Such great suggestions!

I’ve been curled up with this wild ride of a book this week.

So much pantry eye candy in this post. I am feeling inspired!

I always love peeking at people’s top ten reads of the year. This gal never disappoints!

3 ways to meal prep chicken source

I can’t wait to try these recipes for 3 different ways to meal prep chicken for your week.

What a fun painting project update to a home! I don’t have the bravery, but I’m inspired!

I need to work on this- how to treat your texts like your inbox

9 books to read before they hit the big screen this year.


Sign up for my newsletter to get more great reads!

I hope you enjoyed our notebook, a collection of gathered links to DIY crafts, food projects, thrifty ways to spruce up your home, and thoughtful reads. Nothing brings me more joy than to highlight other fabulous bloggers. Follow me on Pinterest for daily inspiration!

Please note, there are affiliate links in this post- thank you! xoxo


Small-Budget Crushes 01.29.20

Wednesday, January 29th, 2020

small budget crushes

Don’t forget to download the Rakuten app before making any purchases on today’s list. You can find all the current coupons AND get cash back on all your purchases! Learn more about it over here!

click on the pictures to shop today’s picks!

clever fox budget planner clever fox budget planner

bibliophile book puzzle bibliophile book puzzle

the words you speak print the words you speak print (powerful!!)

library of congress card catalog library of congress card catalog

rbg paint by numbers rbg paint by numbers set

textured button front coat textured button front coat

the good place stemless wine glass the good place stemless wine glass (why does my favorite show have to end??)

happy sweater happy sweater

heart earrings heart earrings

felt purse organizer felt purse organizer (comes in several colors)

illustrated state print illustrated state print (choose your own!)

three bulb bud vase three bulb bud vase

catlationship mug catlationship mug

unique cutlery organizer unique cutlery organizer

ya basic mug (one more cheer for the good place!)

golf equipment organizer


Keep on window shopping by visiting all of my Small-Budget Crushes. This post contains affiliate links!

DIY Burlap Pom-Pom Wreath

Tuesday, January 28th, 2020

DIY Burlap Pom Pom Wreath Header

A painted wreath form becomes the base to this modern wreath. Burlap ribbon and wired ribbon are gathered into ruffled pom-pom flowers for the festive accents. Throw in an ostrich feather and you have everything you need for this inside out burlap wreath.

The self-proclaimed queen of wreath making is back and I can’t wait to share another wreath tutorial for a modern wire wreath for your front door.

This slimmed down wreath is particularly awesome if you have a glass door and your wreaths get smashed between the two doors.

While I have adorned this for wreath for Valentine’s Day, the metal base can be used over and over again with fresh floral picks, different colors of burlap, or different ribbons.

The possibilities are endless.

The best part about this wreath?

The accessories take just five minutes and don’t require any special pom pom maker to pull of this diy project.

DIY Burlap Pom-Pom Wreath

(don’t forget to download the Rakuten app to save on craft supplies- read all about it or just sign up here and get $10 of your first purchase)

DIY Burlap Pom Pom Wreath Supplies List

DIY Burlap Pom Pom Wreath Supplies List

DIY Burlap Pom Pom Wreath Supplies

Supplies Needed:

18″ Wire Wreath Frame

Metallic Acrylic Paint– pick your favorite shade or use my exact match

Foam Brush

Paper Plate or disposable cup for paint

Ostrich Feather

2 ⅜” Wide Burlap Ribbon (this is linked to exactly what I bought or search for your own favorite colors) NOTE: you will need 9 yards of burlap ribbon to replicate this project

2 ½” Wired Buffalo Plaid Ribbon (this is linked to exactly what I bought or search for your own favorite pattern) NOTE: you will need 8 yards of ribbon to replicate this project

Tape Measure

Cotton Twine (embroidery thread is pictured here, but I found it too fragile)

Embroidery Needle

Hot Glue Gun

Glue Sticks

Vintage Buttons or Vintage Jewelry for Flower Centers

Scissors

Floral Wire (this is the kind I love)

Directions:

Painting a Floral Wreath Frame

Paint your metal wreath with metallic acrylic paint.

You can just brush it on or you can try to create a bit of texture by sponging and then lifting your foam brush to give it a little more texture.

Set aside to allow plenty of dry time for your wreath base. It should take approximately an hour.

Burlap Pom Poms & Ribbon Pom Poms

While your wreath is drying, make 3 burlap pom poms and two ribbon pom poms for your accessories. You will find this step-by-step 5 minute craft tutorial over here.

After your wreath has dried, add another coat (if necessary) or touch up the paint as needed.

Allow to fully dry before proceeding to the next step.

Attaching the Ostrich Feather to Wreath

Once the wreath is dry, we can begin assembling everything for the wreath. 

My wreath form was still drying, but this picture should show you exactly how to do it.

Add your ostrich feather to hug around the wreath and secure it, about 3/4’s of the way down, and then at the base of the feather.

Mapping Out Placement of Burlap Pom Pom Flowers

Once you have your burlap pom poms and ribbon pom poms done, lay them out to figure out the perfect placement.

Remember, odd numbers of accessories are pleasing to the eye.

This wreath has 5 flowers, but you could add 7 or even 9, depending on how large you want the accessories to be.

Using the ends of the twine, on the back of the pom poms, tie your accessories to the wreath form. If necessary, add a dab of hot glue to secure it in place for your wreath.

DIY Burlap Pom Pom Wreath

Painted Wreath Form

DIY Burlap Pom Pom Wreath

DIY Burlap Pom Pom Wreath

That’s it! It is super easy to hang since the wreath form is exposed!

I can’t wait to see your wreaths and I hope this inspires you to create a special wreath for your front door this year!

As an Amazon Associate I earn from qualifying purchases.

As a RewardStyle affiliate I earn from affiliate links.

Looking for more wreath ideas for every season? Check out my favorites below.

fabric floral wreath make a floral fabric wreath out of scrap fabrics

fabric rag wreath make a fabric rag wreath out of scrap fabrics

diy peep wreath turn peeps into a wreath with toothpicks (this lasted FOR YEARS- not kidding!)

How to Make a Yarn Pom Pom Wreath from MomAdvice.com  diy yarn pom pom wreath

(don’t feel like neutral? try this craft with colored pom poms. The multi colored would be so fun for your home and you can use different size pom poms)

burlap wreath tutorial make a burlap wreath for your front door

Happy crafting, friends!

DIY Burlap Pom Pom Wreath


5 Minute Craft: Burlap Pom Pom Tutorial

Monday, January 27th, 2020

5 Minute Craft: Burlap Pom Pom Tutorial Header


This fast burlap craft couldn’t be easier. With just five minutes, you can make these pom pom flowers for wreaths, gifts, or to make into a burlap pom pom garland. Use this tutorial to make your own with burlap or your favorite wired ribbon. This is a perfect kids craft idea or for the beginner crafter in you!

This is that weird time of year, after Christmas, when I’m looking for craft ideas to fill those empty spots in our home.  I decided that it would be wonderful to have a little nod to Valentine’s Day with a new wreath for our front door.

I wanted to create something unique this year so I went to my button jar to see if I had anything to incorporate into a piece for our home.

Vintage Jewelry for Burlap Pom Poms

Vintage Jewelry for Burlap Pom Pom Flowers

Years ago, my grandmother had shared some of my great-grandma’s costume jewelry with me because she thought I might enjoy crafting with it.

In that stash, were numerous gorgeous clip-on earrings that would make the perfect centers for flowers.

Crafting is so much more special with a little history blended in, isn’t it?

Today I’m showing off this easy 5 minute craft to make burlap and ribbon pom pom flowers to adorn a wreath in your house.

I’ll share my full burlap wreath tutorial for you tomorrow, but to get started, you will need to whip up a few of these easy burlap flowers.

5 Minute Craft: Burlap Pom Poms Tutorial

(don’t forget to download the Rakuten app to save on craft supplies- read all about it or just sign up here and get $10 of your first purchase)

Supplies Needed:

2 ⅜” Wide Burlap Ribbon (this is linked to exactly what I bought or search for your own favorite colors)

2 ½” Wired Buffalo Plaid Ribbon (this is linked to exactly what I bought or search for your own favorite pattern)

Tape Measure

Cotton Twine

Embroidery Needle

Hot Glue Gun

Glue Sticks

Vintage Buttons or Vintage Jewelry for Flower Centers

Scissors

Directions for Burlap Pom Poms (or Ribbon Pom Poms):

Cutting Burlap for Pom Pom

Measure 3 feet of burlap ribbon and cut with your scissors.

Cotton Twine for Burlap Pom Pom Flower

Cut a foot of cotton twine. Knot one end, leaving a generous tail, and thread your embroidery needle on the other end of the twine.

Starting the Twine for Burlap Pom Pom Flower

Threading the Twine for Burlap Pom Pom Flower

Fold the rough edge down and then start your running stitch just a little past the tail of the burlap. The reason we are doing this is because it has a tendency to fray and we want to start with a clean line.

Stitching a Burlap Pom Pom Flower

Now we will be doing stitches down the length of the edge.

Gathering Stitches for Burlap Pom Pom Flower

You can feed these individually, or make it quicker by threading back-and-forth and grabbing multiple stitches at a time.

Once you get to the end, remove your embroidery needle.

Threading Twine Through Burlap Pom Pom

Bunching Up Stitches for Burlap Pom Pom

Bunching Up Stitches for Burlap Pom Pom

Now comes the fun part.

Grab the end of the twine (that once held your embroidery needle) and start pulling so the burlap bunches up and starts creating the pom-pom look we are after.

I also like to pull the opposite end to really bring these two sides together into shape.

5 Minute Craft: Burlap Pom Pom Tutorial

5 Minute Craft: Burlap Pom Pom Tutorial

Finishing Burlap Pom Pom With Vintage Jewelry

Now you can see exactly where your center will go to your burlap flower.

Apply your button or jewelry piece to the center of the burlap with a little hot glue.

Finished Back of Burlap Pom Pom

Finish by cleaning up the tails on the back of your pom pom.

For tomorrow’s wreath, we will leave these tails so we can secure these to our wreath.

If you are tying these to something, for example, you’ll just want to leave these tails on.

Prefer to make a pom pom flower out of ribbon? This same technique works with your favorite ribbon.

Starting a Ribbon Pom Pom

For this one, I used 4 feet of ribbon instead.

You can play around with the lengths too. There is no wrong way to do this fun craft.

I picked this buffalo plaid and found the pattern also helped me with spacing out those stitches evenly.

Ribbon Pom Pom Flower

You will do everything the exact same way, but it yields two different texture textures for your pieces.

I will say that I do prefer a wired ribbon because it gives you the ability to fan it out and allow it to really hold its shape.

Finished Ribbon Pom Pom

5 Minute Craft: Burlap Pom Pom Finished

How fun are these?

I hope you love this tutorial as much as me!

Tomorrow I will share how I used these beauties in my wreath for Valentine’s Day!

As an Amazon Associate I earn from qualifying purchases.

As a RewardStyle affiliate I earn from qualifying purchases.

Looking for more burlap or pom-pom crafts? I’ve got you covered!

how to make an autumn burlap wreath from momadvice.com learn to make a ruffled burlap wreath

The Easiest Burlap Wreath You Will Ever Make from MomAdvice.com learn how to make a burlap wreath that you can switch out for the seasons

pom pom flower bouquets learn how to make a yarn pom pom with this pom pom bouquet tutorial

How to Make a Yarn Pom Pom Wreath from MomAdvice.com craft up pom poms for this viral anthropologie inspired pom pom wreath

Happy crafting, friends!

5 Minute Craft: Burlap Pom Pom Tutorial Header


The Grace Year Book Club: Free Printable Bookmark

Friday, January 24th, 2020

The Grace Year Book Club Free Printable Bookmark

Join us for our MomAdvice Book Club as we dig into, The Grace Year by Kim Liggett. Download your free printable bookmark and tie it off with a little red ribbon. This dystopian young adult thriller explores the topic of girls on the edge of womanhood with themes that hit all the right Handmaid’s Tale notes.

The MomAdvice Book Club has started with a bang and the 2020 Book Club announcement yielded over three hundred additional members who have joined the free club.

Our January selection is, “The Grace Year,” by Kim Liggett and I have heard from so many of you how much you have enjoyed this month’s pick. 

For many, I have heard that it has been a long time until a book kept you up until way past your bedtime.  The conversations of exhausted women, who just couldn’t stop flipping those pages, has been just the kind of exhausting story that this bookworm loves hearing about.

The Grace Year Book Club Free Printable Bookmark

Here are some of my favorite comments that were posted in our book club group this month! 

“This book took me back to my early childhood experiences with reading; it took me back to the magic of why I fell in love with books; it completely swept me away, had me staying up to read just one more chapter—just one more chapter; it had me sitting outside of Starbucks flipping page after page, because I just couldn’t wait to see what would happen next. It was an amazing experience, powerful, dark, thought-provoking, and I loved every minute of it! So much ‘meat’ to pull off the bone with this one. I am really looking forward to the January 31st book talk. Thank you for making this the January read.”

“I’m normally in bed by 10, but Oh. My. Goodness. The Grace Year had me up till 3:30! The best book I’ve read since The Nightingale ❤❤. Can’t wait till our discussion!”

“I have read several good and some really good books recently but none that kept me up past bedtime or had me grabbing my Kindle on the way out the door just in case I had any waiting time where I could be reading. Besides that this was a page turner, I loved so many of the messages and things that got me thinking. A real plus when an entertaining story has substance too and isn’t just a fun read for the sake of fun! Thanks, Amy, for this pick!”

“I just finished The Grace Year last night and highly recommend for anyone who loved The Hunger Games!”

“I was up until 2am! Which is not me at all…but I just couldn’t stop reading!”

This is just a snippet of the commentary that was happening around this book. 

Was it everyone’s cup of tea?

Of course not! 

We all have such different tastes in books and that is why I picked so many different genres and books with very different pacing. Some are more character driven, some more plot driven, some slow burns, some fast page-turners…honestly, there is something for everyone this year.

Coming fresh off the holidays, I wanted something that you could devour quickly and that I thought would spur a delicious conversation.

Also in record numbers are the RSVP’s to this month’s book discussion.

137, to be exact, and still counting! 

I am thrilled to see that so many of you have connected with this month’s book and I can’t wait to talk with you about it.

On top of our book club discussion, I will be revealing the responses from a Q&A with Kim Liggett about her book and why she wanted to bring this story to life.

Following the conversation, her answers will be posted here and the Q&A that I’ve developed so you can replicate this one in your own local book clubs.

The Grace Year Book Club Free Printable Bookmark

What is The Grace Year About?

In case you didn’t catch my announcement about our January pick, I’ll give you a quick synopsis (with no spoilers). 

No one actually speaks of the grace year, but this is a rite of passage for all the girls in Garner County.

In this dystopian environment, the men believe that women are able to drive them mad with jealousy because of a powerful aphrodisiac that is emitted from their skin.

Their power to lure grown men,  is why they must be sent to the forest to release their magic into the wild.

To save the men of the county, teenage girls are sent to the forest, to release this, so they can return to their town purified and ready for marriage.

When does their skin emit a powerful aphrodisiac with this potent essence?

Well, unfortunately their sixteenth year releases it and they then must become the grace year girls.

Most girls are resigned to their fate, but there is one girl who thinks this ritual takes her away from a better life.

Sixteen-year-old Tierney James quickly realizes though that these girls aren’t just resigned to their coming-of-age duties…they are out to stop anyone who gets in their way.

The Grace Year Book Club Free Printable Bookmark

The Grace Year Book Club Free Printable Bookmark

As a gift to you, I wanted to share a printable bookmark that was designed just for you by a very talented designer (designer- M.J. from Pars Caeli).

We used the quote, “Your eyes are wide open, but you see nothing,” which was a sentence that stood out to me. Not only is it thoughtful for the plot of this book, but I believe it is  something that we are dealing with in the reality of these modern days.

Please print out this free download, cut it to your desired size, hole punch it, and loop some scarlet ribbon through it. 

I hope you love these freebie as much as I love sharing it.

My goal is to make the book club even more interactive this year and I hope this is just one way I can show my appreciation for your participation.

Click HERE to Download The Grace Year Bookmark 

Love this post? Here are a few others you might love!

January Book Club Pick: The Grace Year by Kim Liggett learn more about our january book club selection (and why you should read it)

MomAdvice 2020 Book Club Selections get the full list of titles for this year’s book club discussions

The Best Books of 2019 from MomAdvice.com not enough books? don’t miss my list of the 20 best books of 2019 for your stack!

Happy reading, friends!

The Grace Year Book Club Free Printable Bookmark


Pin It

Easy Cupcake Liner Holiday Trees

Tuesday, January 21st, 2020

Try this easy DIY with simple styrofoam floral cones and your favorite patterned cupcake liner for ruffles. While this craft is showcasing a Valentine’s Day tree, you can make these for ANY holiday!

Valentine’s Day is one of those tricky holidays that can quickly become awfully cheesy. Although we don’t do a lot of decorating, these cupcake liner trees have a way of making it into our decorating every year.

I thought it would be fun to share this craft with you today because it is such an affordable one that would be perfect to do with your family to celebrate the season.

If you have a mantle or coffee table that could use some festive décor, then you will love this easy and inexpensive project.

What I love about projects like this is that it is such an easy template to follow with so many other holidays. Decorate these foam tree trunks and turn them into Christmas trees, St. Patrick’s Day trees, Easter trees, birthday trees, or whatever else your heart desires.

Can I get a Mom’s Day Off tree to put out so I can get a break?

All you need are $10 in materials and you will have two festive trees in less than thirty minutes. Now that is a craft that I can get behind.

Best of all?

This one is SO EASY that it is a fun one to do with your kids each year. Whether you are on the hunt for Valentine’s Day or a Christmas craft, this one checks all the boxes.

Let’s get started!

Cupcake Liner Holiday Trees

Easy Cupcake Liner Holiday Trees Supplies


Supplies List:

2- 3-7/8 x 8-7/8 inch Styrofoam floral cones

2- 3-7/8 x 11-7/8 inch Styrofoam floral cones

Printed Cupcake Liners (holiday cupcake liners in one color or you can do layers of alternating colors and patterns)

Straight Pins

Scissors

Festive floral pick (I split one between two trees)

Directions for Holiday Cupcake Liner Trees:

Easy Cupcake Liner Holiday Trees Supplies

Cutting Edges Off Cupcake Liners

Cupcake Liner Edges Cut for Tree Remove one cupcake liner from your package and cut off the ruffled edge. For the small trees, you will need 12 ruffled edges and for the larger trees you will need 14-16 ruffled edges.

Attaching Cupcake Liners

Attaching Cupcake Liners Starting from the bottom of your tree, attach a ruffle and pin into place. For the base of the tree, you will be overlapping two ruffled edges to cover the base. Make sure that you secure the pins right at the top of the ruffle so they do not show.

Ruffling the Cupcake Liner Trees

cupcake liners to the top of tree

Repeat the ruffling until you have reached almost the top of the base, leaving just the tip of the base exposed.

attaching top cupcake liner to tree

finishing the top of a cupcake liner tree

scrunching cupcake liner down on tree

Now it is time to finish the top of your tree. Using a full cupcake liner, place it on top and press down to shape it on the top of the tree.

final ruffle on cupcake liner tree

Add an additional ruffle (with no top) around the outside and then pin into place with a pink or red pin.

valentine's day floral picks for top

Finish with a Valentine’s Day floral pick (or a holiday floral pick of your choosing to match your theme). You can now display these on your mantle or place on a cake stand or tray for a unique addition to a coffee table.

Easy Cupcake Liner Holiday Trees

Easy Cupcake Liner Holiday Trees

Easy Cupcake Liner Holiday Trees

I hope you can diy this easy craft and add a little Valentine’s Day festivity to your home. I plan to get these out every Valentine’s Day, they are just that cute!

As an Amazon Associate I earn from qualifying purchases.

Love these holiday cupcake liner trees? Here are a few other great craft projects we think you will like!

DIY String Art Pattern Free Heart Template Header diy string art with free heart template

The Easiest Burlap Wreath You Will Ever Make from MomAdvice.com the easiest burlap wreath you’ll ever make

7 Easy Scarves and Cowls to Knit from MomAdvice.com 7 scarves and cowls to knit (free patterns)

DIY Chunky Knit Blanket from MomAdvice.com diy an affordable chunky knit hygge blanket

Happy crafting, friends!

Easy Cupcake Liner Holiday Trees

Pin It

DIY String Art Pattern (FREE Heart Template)

Monday, January 20th, 2020

DIY String Art Pattern Free Heart Template Header


Looking for a fun craft project that is perfect for Valentine’s Day? With tiny nails, embroidery floss, and our free heart pattern, you have everything you need for your first string art project. Learn how to make your own heart shapes with this easy diy project for yourself (or for your kids).

From our contributor, Sarah Milne

I LOVE gallery walls.

We have a few areas of our home that are littered with frames filled with art and photos, kid art, faux taxidermy and monograms.

I enjoy crafting items to include on the wall to add texture and uniqueness.

We had a vacant angled wall on our landing that I’ve always wanted to do something with since we moved in.

As I collected items, frames, and art for the gallery, I also crafted a few small projects to display. 

On this gallery wall, I crafted the dream catcher (check out this dream catcher tutorial), chalkboard tag, and heart string art on wood.

DIY heart string nail art with free printable template

DIY heart string nail art with free printable template

This simple DIY heart string art on wood project is perfect for a crafternoon while baby sleeps, or an evening of indulging in creative me-time.

And, the end result is beautiful and gratifying, considering it’s quite an inexpensive project.

DIY String Art Pattern (Free Heart Template)

nailart-1

DIY heart string nail art with free printable template

DIY heart string nail art with free printable template

Supplies:

(don’t forget to use your Rakuten app to get cash back on your purchases!)


How To Make Your Heart String Art:

  1. Begin your project by printing this free printable heart template. The heart is already conveniently marked for the positioning of your nails.
  2. Place your heart template on your wood log slice. You can tape the template down for security. 
  3. On a solid surface, hammer the top and bottom nails in to keep your template from shifting. Hammer each nail into the log slice, about halfway, leaving enough space for you to wrap your thread.
  4. Hammer all of your nails along the heart’s border. Remove paper template.
  5. Tie a knot of your thread at the bottom nail head. Begin to randomly strand your tread to the nail heads, looping the thread around once. It’s important to keep tension on your thread the entire time to avoid the thread slipping or unraveling from your nails.
  6. Once you have your thread stranded over the entire heart, try to loop the end of your design at the same beginning point. Tie a knot to secure. Trim thread. I added a simple picture hanger to the back of my wood log slice for hanging.

download the free heart string art template 

DIY heart string nail art with free printable template

nailart4

nailart5

nailart6

nailart8

nailart9

DIY heart string nail art with free printable template

As an Amazon Associate I earn from qualifying purchases.

Love this string art tutorial? Here are a few other great craft projects we think you will like!

DIY Roll-Up Puzzle Mat from MomAdvice.com diy a roll-up puzzle mat to keep your tables clear

DIY Thumbtack Pumpkins from MomAdvice.com turn dollar store pumpkins into a decorative piece with thumbtacks

diy a chunky knit blanket with this free pattern

Happy crafting, friends!

Pin It

Homemade Pork Potstickers

Thursday, January 16th, 2020

From our food contributor, Shaina Olmanson.


Homemade Pork Potstickers MomAdvice.com


This simple DIY recipe for homemade potstickers can make for a kid-friendly dinner or an easy freezer snack. We love ours with a dipping sauce of soy sauce, sriracha, and green onions, but the kiddos like the straight from the pot.


Homemade Pork Potstickers Recipe Momadvice.com


One of my children’s favorite things to order when we go out for sushi is a plate of potstickers to enjoy while we watch the sushi chef in his tall paper hat roll out our rice and seaweed and tuck pink-fleshed fish inside.

They are second only to sushi itself in my children’s eyes.

While your kids may not be on the same sushi train as mine, pot stickers are rather universally delicious.

A dim sum, two-bite dumpling with a salty pork meatball tucked inside.

But why wait until you head out to enjoy them when they can easily be made at home?


Homemade Pork Potstickers Recipe MomAdvice.com


Once you get the hang of getting potstickers unstuck from the pot, there’s little stopping you from making your own all of the time.

We like to have a potsticker party, filling and crimping as many as possible, and then freezing them for use later as a quick and easy treat, nearly as easy as heading to our favorite restaurant.

Pulled from the freezer bag and cooked up on the spot, these meatball-filled dumplings make a wonderful lunch option when paired with a rainbow of fruits and vegetables.


Homemade Potstickers
 
Recipe Type: appetizer
Author: Shaina Olmanson
Prep time:
Cook time:
Total time:
Serves: 4-6
Ingredients
  • 1/2 pound ground pork
  • 1 cup finely shredded Napa cabbage
  • 1/4 cup shredded carrot
  • 2 green onions, diced
  • 1 clove garlic, minced
  • 1 tablespoon fresh minced ginger
  • 1 tablespoon soy sauce
  • 2 teaspoons toasted sesame oil
  • 1 egg, beaten
  • 1 teaspoon kosher salt
  • 1/4 teaspoon black pepper
  • 30 potsticker wrappers
  • 1/4 cup frying oil of choice
Instructions
  1. In a large mixing bowl, combine the pork, cabbage, carrot, onions, garlic, ginger, soy sauce, sesame oil, egg, salt and the black pepper.
  2. Place a small bowl of water near your work surface. Cover the potsticker wrappers with a damp cloth to prevent them drying out.
  3. Place a rounded teaspoon of the pork filling into the center of the wrapper. Lightly wet the edge of the wrapper, and then using your thumb and finger, fold pleats into the dumpling, starting at the center and going towards the cents to form a crescent shape.
  4. Set the filled dumplings on a baking sheet or cutting board, covered with a damp cloth. Continue until all the filling has been used.
  5. To cook, heat 2 teaspoons of oil in a 10″ non-stick skillet with a lid over medium heat. Add about 6 dumplings to the skillet. Cook for 3 minutes. Pour in 1/4 cup of water, cover, and allow the potstickers to steam for 5-6 minutes, until they are cooked through. and golden brown on the bottoms. Remove the lid and allow the steam to cook off, shaking the pan lightly to encourage the potstickers to dislodge themselves from the pan bottom. Serve warm.


Homemade Pork Potstickers Recipe MomAdvice.com


Homemade Pork Potstickers from MomAdvice.com


Sign up for the MomAdvice Newsletter!


We think you’ll love these ideas too!


Shrimp Fried Rice MomAdvice.com

Shrimp Fried Rice


Asian Turkey & Green Bean Saute MomAdvice.com

Asian Turkey & Green Bean Saute


Felt Fortune Cookie MomAdvice.com

Felt Fortune Cookie Dinner Hour Jar


Gluten-Free Orange Chicken MomAdvice.com

Gluten-Free Orange Chicken


Weeknight Chicken Lo Mein MomAdvice.com

Weeknight Chicken Lo Mein

Pin It

DIY Roll-Up Jigsaw Puzzle Mat (Video)

Wednesday, January 15th, 2020

DIY Roll-Up Puzzle Mat from MomAdvice.com


This no-sew felt puzzle mat is the perfect foundation to build your puzzles on, allowing you to relocate your puzzle when you need to. Check out this fun DIY in honor of National Puzzle Day! 

This post was created in partnership with Waverly Inspirations. Thank you for supporting the companies that support our site! 

What shows your love for someone more than something handmade by you?

Today I am sharing a tutorial for an easy no-sew DIY Roll-Up Jigsaw Puzzle Mat that I created for my family.

This mat makes it easy to relocate your puzzle projects when you need to use your table and it’s made with just a few inexpensive materials!

Are you addicted to jigsaw puzzles like us?

My kids are at a fun age right now where we are really enjoying playing board games and assembling puzzles together.

Right now we are tackling 1,000 piece puzzles which feels so ADULT. We haven’t had the courage to go beyond that size yet, but I’m sure we will get there.

Even after our kids have headed to bed, the hubby and I spend time together listening to podcasts or good music, while piecing together puzzles. I find it be quite therapeutic after sitting in front of a screen all day. It helps me decompress in the evening while giving my brain a break from my to-do lists.

To maximize our jigsaw puzzle collection, a couple friends and I trade puzzles after we finish them which has been great because we always have something to work on, while keeping it rather frugal in the process.

Trading puzzles has been a great way to keep our collection fresh and continue to keep our kids interested in putting these together with us.

My only gripe with puzzles is where to relocate them when we need to eat at the table.

We also happen to have a, “helper,” in our house who likes to flip puzzle pieces when her mother is ignoring her (we love you, Lulu the Cat!). I thought a mat might be a great way to discourage our helper and could be a quick way to clear the table for the dinner hour!

Let’s create this easy no-sew roll-up jigsaw puzzle mat!

DIY Puzzle Mat from MomAdvice.com

DIY Roll-Up Jigsaw Puzzle Mat Tutorial


DIY Roll-Up Jigsaw Puzzle Mat from MomAdvice.com

Supplies Needed (all of these supplies can be found at Walmart!)

1 yard of Waverly Inspirations Fabric  (check out the fresh new Valentine’s Day prints,  I picked a classic pink gingham!)

1 yard of felt fabric (any coordinating color)

1 package of Waverly Inspirations Ribbon (any coordinating color)

Cardboard tube (you can use a durable mailing tube, gift wrap roll, or even use plastic PVC pipe)

Razor blade (if cutting to size)

Hemming Tape or fabric glue

Scissors

Waverly Chalk Paint in a coordinating color  and paint brush (optional, but you can paint the cardboard roll to coordinate- I decided to leave mine in its natural state!)

PUZZLES!! (check out my suggestions below for a few of our faves!)


How to Make a DIY Jigsaw Puzzle Mat

DIY Roll-Up Jigsaw Puzzle Mat from MomAdvice.com

1. Much like our reversible seat cushion project, we are going to begin by lining up the two fabrics with the right-side of the fabric facing INSIDE towards each other. That means the wrong sides will be facing out!

Trim your fabric and felt to the same size.

Remember, this mat can be ANY size that you want.

If you want it be the size of your kitchen table, for example, measure that first and use this as your guide for creating your mat. I created a generous mat for our large puzzles!

DIY Roll-Up Jigsaw Puzzle Mat from MomAdvice.com

2. Once your fabric has been trimmed, use your fabric tape and line all the sides , making sure to leave an opening so that you can turn the mat out once you have sealed all the seams.

Using a very hot iron, carefully and slowly, begin ironing to seal the seam (you can see another example of what sealing this seam looks like over here!).

Typically doing this requires pinning, but I did find that the felt held the tape in place and made it an easy project to do without pinning.

Do this along all the sides (make sure you left that opening to turn it out!!) until the two pieces are fused together.

Carefully, turn the right sides out and then finish by sealing that last opening with fabric tape or a little fabric glue.

DIY Roll-Up Jigsaw Puzzle Mat from MomAdvice.com

3. Trim your cardboard tube to the length of your finished mat.

If you want to paint this, you can! I finished each end with a little tied ribbon that can be used to tie the entire mat up when we are storing it.

DIY Roll-Up Jigsaw Puzzle Mat from MomAdvice.com

DIY Roll-Up Jigsaw Puzzle Mat from MomAdvice.com

DIY Roll-Up Jigsaw Puzzle Mat from MomAdvice.com

DIY Roll-Up Jigsaw Puzzle Mat from MomAdvice.com DIY Roll-Up Jigsaw Puzzle Mat from MomAdvice.com

DIY Roll-Up Jigsaw Puzzle Mat from MomAdvice.com

As you can see, you can roll up those puzzles (take your time and roll carefully!) when not in use.

Please keep in mind, it is not recommended for  long-term storage since it can damage your puzzle pieces, but it is recommended for a quick relocation so you can use your table when you need it.

I am so excited to break this in and I’m guessing it is going to be a smart item to take when we rent our summer cottages too!

Looking for a few great jigsaw puzzles? Here are a few of my favorites!

I had one of those puzzle

great classic books puzzle

story time puzzle

nancy drew puzzle

harry potter puzzle

nevertheless she persisted puzzle

harry potter puzzle


video games collection puzzle

old bookstore puzzle

color me puzzle


PS- Seriously, start a puzzle exchange with your friends. You won’t regret it!

Looking for ways to store those jigsaw puzzles? This strategy works so well at our house!

Happy crafting!!

diy-jigsaw-puzzle-mat-9

Do you want more craft inspiration from Waverly? Try these!

DIY No-Sew Reversible Chair Cushions

Fabric Wreath & Matching Garland

Fabric Bulletin Board Tutorial

Painting Pumpkins With Acrylic Paints

DIY No-Sew Hand Warmers

DIY Ottoman Serving Tray

15-Minute Scrappy Fabric Trees

Kid Craft: Easy Technique for Painting Gift Wrap

DIY Phone Charging Station

This post was created in partnership with Waverly Inspirations. Thank you for supporting the companies that support our site! 

DIY Roll-up Puzzle Mat

Pin It