Archive for September, 2011

Amy’s Notebook 09.28.11

Wednesday, September 28th, 2011

I am in love with this dollar store illuminated pumpkin (@ Recaptured Charm)

I love these sweet little candy corn projects (@ Thrifty Decor Chick)

I want to try this recipe for cream of tomato soup (@ the kitchn)

These apple cider donuts look like a delicious little treat (@ peas and thank you)

Knitting up these coffee cosies would make a cute teacher gift as well as a great stash buster (@ Pickles)

This candy corn cheesecake mousse would be a fun Halloween dinner dessert (@ Glorious Treats)

These DIY fabric storage boxes would be a great way to organize a playroom or craft room (@ make it and love it)

I have to try this recipe for pumpkin snickerdoodles (@ Annie’s Eats)

These Halloween s’mores would be a fun treat to make for the holiday (@ eighteen25)

I love this idea for spray painting glass with words (@ {Love Stitched})

These pumpkin chocolate chip cookies look like a fun fall treat (@ How Does She?)

Be still my beating heart. Chocolate Covered Pumpkin Twinkies? Oh. Yes. (@ Inside BruCrew Life)

I need to try this short ribs with wine & cream– oh, my! (@ The Pioneer Woman)

These yarn wrapped gourds and pumpkins are absolutely beautiful (@ Two Shades of Pink)

This tilapia with tomato-herb pan sauce looks like a weeknight meal winner (@ gimmie some oven)

This DIY ruffly belt is adorable (@ 100 Layer Cake)

When my hair gets a little longer I want to try this sock bun (@ say YES! to hoboken)

These pumpkin cookies look like a fun fall treat (@ Little Miss Momma)

This roasted vegetable ratatouille looks positively divine (@ Picnics in the Park)

These webbed cakes in a jar are absolutely too cool for words (@ i am baker)

An Apron Full of Giveaways 09.27.11

Tuesday, September 27th, 2011
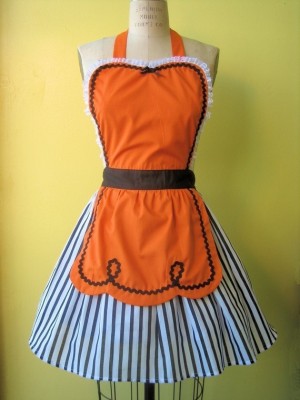
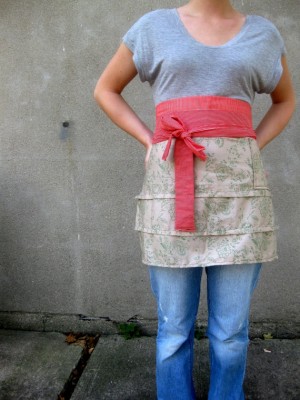
FoodPhyte, $23.95

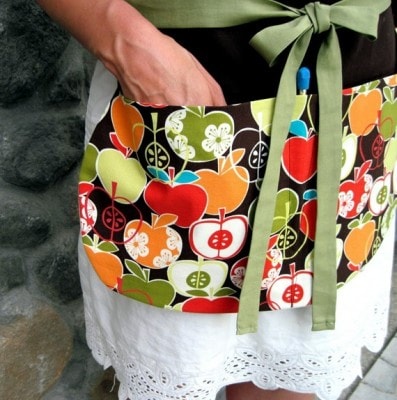
Welcome to our Apron Full of Giveaways! I hope everyone is having a great week this week! As we do each week,  here is our round-up of giveaways for our readers. We hope that this is beneficial to you and your family! Please let us know if you guys win anything- I love to hear the success stories!

Below are the contest links-if you are hosting a contest please link it up below. Sorry, we aren’t giving away the aprons just showcasing them! Please put your site name and then what type of contest you are hosting. For example, “MomAdvice (Kid’s Movies).”

Please let me know if you have any questions and good luck to each of you!

Baked Apple Pie Donuts

Monday, September 26th, 2011

Fall is in the air and with the beautiful sights and scents of Fall come all of the amazing fall foods. Anything apple happens to be on our fall cooking agenda, and baked apple pie donuts seemed the perfect way to bring my favorite fall flavors together.  Proving that anything can be made into a delicious baked donut, I wanted to share this easy recipe for an apple pie donut perfect for serving with your favorite mug of cocoa, hot chai, or latte when the weather gets chilly.

The dominate flavor in this one is definitely the apple followed by the earthy and nutty flavor of ground nutmeg that helps round out the flavor profile of these donuts.  Once these delicate donuts are done baking, they are brushed lightly with butter and then dipped into a cinnamon and sugar coating that helps bring all of those delicious fall flavors together and that little bit of gritty, yummy crunch that just so happens to be my favorite thing about donuts.

There is no need to visit the apple orchard for pricey donuts this year because I plan to make these right in the comforts of our home and in a price that is just right for our little family. These would be the perfect ending to any fall activity whether it is a round of jumping in the leaves, sitting cozy by the fire, picking apples together in the sweet sunshine, or just a lazy Sunday afternoon with nothing else on the agenda. It is also just a fantastic way to use up any apples you might have in your fruit basket this week.

It took all the willpower in me to photograph these and not eat all of them. It then took another great round of willpower to wait until my children came home from school to eat this fun snack. If you have been a reader here long, you will know that our donut pan is worth its weight in gold in our house and I would highly recommend snagging one or two for your kitchen too.    My donut pans were purchased with a few Swagbucks that I had set aside and credited  towards an Amazon gift certificate to purchase them for free this year. I use these Norpro 6-count Nonstock Donut Pans for $12.99 each for our donut baking in our house.

If you don’t have a donut pan, a mini-muffin tin will do the trick too for quick and easy donut holes. Watch the donuts after half the time listed in the recipe since they should cook up a little quicker.

Recipe:

Baked Apple Pie Donuts

1/4 cup of lightly packed brown sugar
1/4 cup of white sugar
1 1/2 cups of bite size chunks of apple, peeled and cored (approximately 2 apples)
1 1/2 cups of all-purpose flour
1 3/4 tsp baking powder
1/2 tsp kosher salt
1 tsp nutmeg
1/3 cup of cold butter, cut into small pieces
1 egg
1/4 cup of milk

For sugar & cinnamon topping:
1/4 cup of butter, melted
1/3 cup of sugar
1 tsp cinnamon powder

Directions:

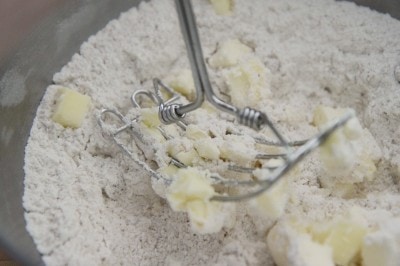
Preheat your oven to 350F. Whisk the flour, baking powder, sugars salt and and nutmeg in a bowl. Add the cold chopped butter, cut into tablespoons. Cut the butter with the flour mixture until the mixture resembles coarse crumbs with a pastry blender or fork.

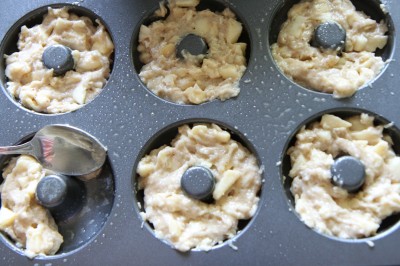
In a separate bowl, beat the egg. Mix in the milk and fold in the chopped apples. Add the egg mixture to the flour mixture. Stir using a spatula or spoon making sure not to overmix. Place two spoonfuls of batter into a greased donut mold pan.

Bake for 15-18 minutes or until the donuts are just golden. Allow to cool for five minutes. Unmold each donut gently and lightly brush each with the melted butter. Dunk in a bowl with the sugar and cinnamon mixed in. Shake off excess sugar and serve immediately.

Prep Time: 15 minutes

Total Time: 30 minutes

Recipe Adapted From: Cooks.com

Serving Size: 9 donuts


Pin It

Amy’s Notebook 09.22.11

Wednesday, September 21st, 2011

These candy corn waffles are an adorable breakfast treat for fall (@ Random Thoughts of a SuperMom)

These EEK blocks would be a cute addition to your Halloween decor (@ Tatertots & Jello)

I am loving this knitted chevron baby blanket (@ The Purl Bee)

Another ode to Missoni can be found in this crocheted chevron blanket (@ Vickie Howell)

I love this six cool coffee shop crafts for kids (@ what I made)

These pumpkin cupcakes with pumpkin spiced cream cheese frosting look divine (@ skinny taste)

These starburst paper flowers are beautiful (@ whip up)

I love this cute idea for a way to glam up your cell phone (@ Bless Our Nest)

I want to try this recipe for Cook’s Illustrated’s ultimate banana bread (@ The Way the Cookie Crumbles)

I love these ideas for how to organize your spices (@ A Cozy Kitchen)

How to Reupholster A Chair

Tuesday, September 20th, 2011

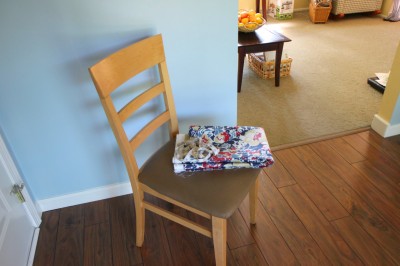
We have been hard at work on completely redoing our old dining set. My kitchen chairs were in solid condition and didn’t require any painting, but I was tired of the faux leather fabric that I had purchased for the chairs when my kids were little. Today I wanted to share with you just how easy it is to reupholster those chairs and add a little pizzazz to a tired dining set for very little money.

Supplies Needed For This Project

New Fabric (I am using outdoor fabric to help prevent staining from spills. You could also choose a faux leather fabric or any type of fabric and then treat it with Scotch Guard to prevent staining). This fabric should be measured to the width of your chair and then add 4 inches  to each measurement so you have enough fabric to reach around the cushion.  My chair seat was 20×20 so I needed 24×24 for each seat. For all six seats it required 2 yards of fabric total.

Upholstery Staple Gun (available at fabric stores)

Upholstery Staples (heavy-duty)

Needle-nose pliers

Screwdriver

Pinking Shears (or regular sewing scissors)


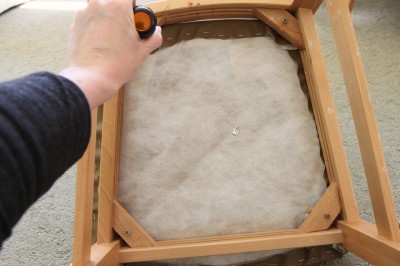
Invert your chair and use your screwdriver to remove the four screws on the bottom that are securing your cushion to the chair.

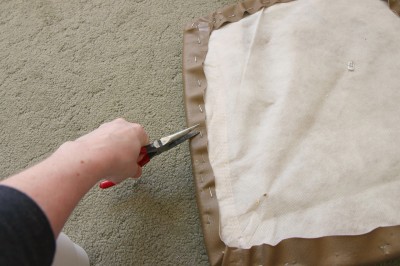
If the cushion has fabric stapled on it already, use your needle-nose pliers to remove the old staples and fabric from the cushion. If you only have one layer of fabric, it should be okay, but this chair had two so I had to remove my last round of reupholstering to get back to the base of the chair.

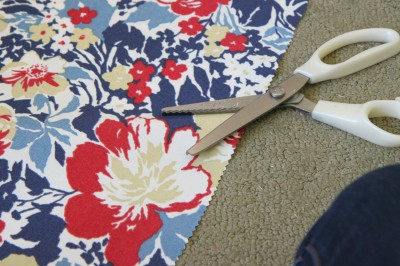
Now it is time to cut your new fabric to replace the old fabric that was on your chair.  This fabric should be measured to the width of your chair and then add 4 inches  to each measurement so you have enough fabric to reach around the cushion.  My chair seat was 20×20 so I needed 24×24 for each seat. For all six seats it required 2 yards of fabric total.

I prefer to cut my fabric with a pair of pinking shears instead of regular scissors because the fabric does not fray with these and I don’t have to mess with trimming and pulling strings on fabric. If you don’t have a pair of these though, you can always use regular shears.

When buying your fabric, be sure to ask if they offer any specials or discounts to customers. I got this fabric at Jo-Ann Fabrics and signed up for their email list while I was at the register. They gave me a coupon that took $16 off of my total fabric purchase so I was able to get fabric for six chairs for $25!

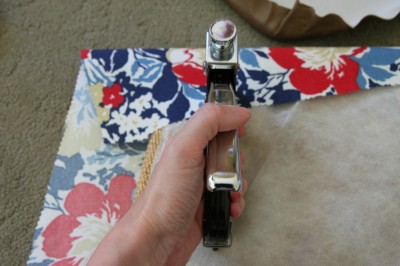
Once you have your fabric cut, it is time to staple. Center your cushion upside down and make sure there is approximately the same amount of fabric on all four sides and then pull the fabric tightly over your cushion and staple it. You are going to want to put your whole body into this one, friends.  Staple all the fabric down along the cushion securely.

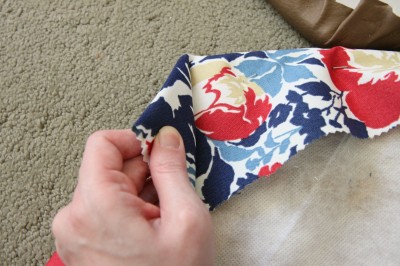
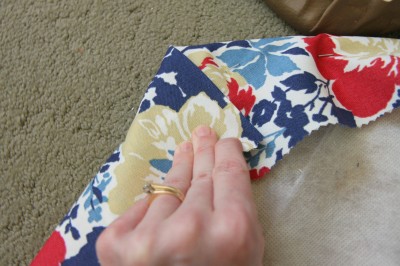
Corners can be a tricky terrain, but they don’t have to be. I like to bring the top part down and then fold in the other side of the fabric on top. You can do your corners on your cushion however you like. I think the trick with this one is just to play with it, flip it over and take a peek, and then play with the fabric again until you find a corner you like. Once you figure out how you like your corners, replicate it with the three other corners and then again on your next chair. Trim the excess corner fabric.

Center your cushion back on your chair and make sure all of the fabric is tucked nicely underneath and on top. Secure your cushion back on with the four screws again.

Now just repeat the same process over and over and over again until all of your chairs are done. I was able to get six chairs reupholstered in one afternoon. It isn’t hard to do and is a great job to tackle while watching your favorite shows.

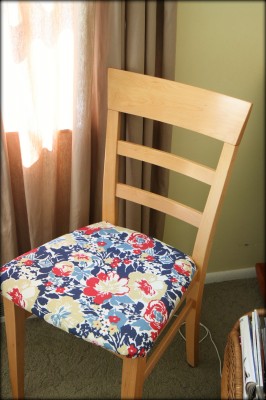
I am madly in love with this fabric that I chose and can’t believe how much more I love these chairs. They look like brand new and I only spent $25 to shine them up.

Of course, what are new chairs without a new-to-me table? Looking forward to revealing what I have been up to this past week and sharing with you our new kitchen tabletop!

This tabletop has needed attention for eight years now and I am finally doing it.

Procrastination is the name of the game.

I hope I am not the only one with an eight year project that has been bugging her.

What is one home improvement project you have been vowing to do, but just haven’t made time to tackle yet?

An Apron Full of Giveaways 09.20.11

Tuesday, September 20th, 2011

loverdovers clothing, $28.65

Welcome to our Apron Full of Giveaways! I hope everyone is having a great week this week! As we do each week,  here is our round-up of giveaways for our readers. We hope that this is beneficial to you and your family! Please let us know if you guys win anything- I love to hear the success stories!

Below are the contest links-if you are hosting a contest please link it up below. Sorry, we aren’t giving away the aprons just showcasing them! Please put your site name and then what type of contest you are hosting. For example, “MomAdvice (Kid’s Movies).”

Please let me know if you have any questions and good luck to each of you!

Satisfying Soup Suppers: 6 Easy Soup Recipes For Busy Families

Monday, September 19th, 2011

Is there is anything more satisfying than a  homemade soup on a chilly day? As soon as the weather turns cool, we do a weekly pot of homemade soup to satisfy all of our soup cravings.  I used to have a house full of people who did not enjoy soup. After dedicating a year of cooking to finding soups that they would eat, I am proud to say that every person in our house looks forward to soup night now.

Soup is a gift that keeps on giving throughout the week.  Each Saturday, I make a double batch of soup for the week. Our first night of after school activities happens on Monday so we enjoy a bowl on that night, instead of dining out.   There is less of a brown bag slump on Wednesday when I send a thermos of soup with my kids to switch up their usual pb & j routine. Surprise guests for lunch? No problem, homemade soup is always a winner!

Soup and homemade bread is an inexpensive endeavor for a weeknight meal. One lunch at that fancy bread & soup place in town  for our family of four can easily cost $25 for what I consider to be, “pauper’s food.”  When I can make a huge pot at home for less than $10 that can feed our family for entire week, I know that we are eating well and staying within our grocery budget.

I am looking forward to trying and sharing many more soup recipes with you this fall and winter. Today I want to share six of my favorite soups that I think you will love and a few ideas for the perfect sides to enjoy with them! You will absolutely love these soups, I just know it!

If you are looking for a soup with that tastes deliciously homemade, but can be prepared in about 30 minutes and happily feed your family for a week, then this is the soup for you. The trick with this soup is starting with a good well-seasoned base and then working from there with quicker cooking techniques and ingredients.

Soulful, satisfying, rich, delicious, comforting, and restaurant-worthy! This is the soup that my children now beg for whenever they feel under the weather. My daughter has deemed this, “mommy’s magic soup,” and it really is magical. This is definitely a lot cheaper than going out for soup and you can enjoy these leftovers all week long! Loved by all in our family, it is a recipe that I will be repeating again and again!

Easy Weeknight Chicken Noodle Soup

Serve This With: Artisan Bread in 5 Minutes

Sometimes all you are looking for a dish that is simple, satisfying, and easy on your wallet. This dish is all of that and more, and this soup happened to be the first time that I have attempted a lentil soup in the kitchen. The results were nothing short of fabulous and a batch of this soup yielded a week’s worth of delicious lunches just for me.

If you haven’t cooked with lentils before, you should really give them a try! Unlike dried beans, lentils do not require any pre-soaking overnight prior to being cooked. Instead, most cooks recommend that you first pick over these legumes, and remove any that look broken or damaged. A quick rinse after you have picked out the damaged lentils, and you are ready to go. The ease and minimal prep time for cooking these is why lentils are a wonderful and easy addition to any soup!

Lentil Soup

Serve This With: Homemade Whole Wheat Bread

Each family member has their own favorite soup and my husband  firmly states that this California Italian Wedding Soup is the most comforting and satisfying soup on our family’s soup agenda.  Satisfyingly hardy with meatballs blended with ground turkey & beef , but also surprisingly light with fresh basil, spinach, and hints of lemon in every bite… it truly is a delicious soup treat for the whole family.

You won’t believe how easy it is to make this soup and with a double batch of baked meatballs in the fridge, you will have a great soup to feed a small army with a minimal amount of effort!

California Italian Wedding Soup

Serve This With: Portuguese White Bread

Black bean soup is one of my own favorite lunches because it is rich and satisfying, while offering a delicious meat-free option for lunch. The addition of roasted red peppers in this soup makes it a clear winner because it balances out that heaviness that can exist with a basic black bean soup.

The spices are perfect in this, the roasted red pepper adds a beautiful color and flavor to the soup, the sour cream adds that perfect balance of creaminess, and the beans add that filling soup combination to help keep you full throughout the day, while the chicken broth makes this soup light enough that even black bean soup haters could learn to love it… well, most black bean soup haters.

Black Bean & Roasted Red Pepper Soup

Serve With: Pumpkin Cornbread Muffins


This soup… oh, this soup. Words seem indescribable to explain how it tastes like love, like comfort, and like coming home. If ever there was a soup that a girl could be proud of, this is my soup. It is rich and creamy tasting, but lightened with lemon. It is, in my humble opinion, the best pot of soup I have ever made.

If you are looking for a soup that is entertaining worthy, than this is the soup for you. Paired with my bread machine pitas, it is like going out to your favorite Greek restaurant, but enjoying every moment of that experience in the comfort of your own home.

Greek Lemon Chicken Soup

Serve With: Bread Machine Pitas

This tortellini soup brought together all of the flavors that my family loves, but is a versatile recipe that could be created with what is at your supermarket that day or what your family loves to eat. For our vegetarian readers, the chicken tortellini and chicken broth can easily be switched to a cheese-filled tortellini with vegetable broth instead. I used basil pesto in this, but you could also try a sun-dried tomato pesto or omit the pesto altogether if it is not a favorite of your family. Versatility is the beauty of a good soup recipe  and this recipe is quite versatile!

The broth for this is so rich and flavorful, thanks to the addition of the pesto, and the tortellini is tender and mixed with the brightness of the flavors from the diced tomatoes and spinach. It is delicious and satisfying.

Pesto Chicken Tortellini Soup

Serve With: Sinfully Sweet Cornbread
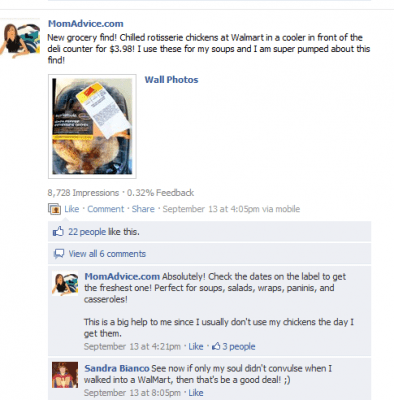

If you aren’t part of our Facebook community than you are missing out on some great information and discussions happening there. Last week I discovered that Walmart carries chilled rotisserie chickens for $3.98. It has shaved a couple of dollars off of my soup budget this week and I love to use these to start the base for my chicken soup recipes.  Feel free to join in on our discussions and share your latest grocery finds!

The soup pot is on! What is your family’s favorite soup? Feel free to share your favorite recipes or links to your favorite soup dishes!

Amy’s Notebook 09.14.11

Wednesday, September 14th, 2011

These Frankenstein Halloween treats would be adorable to create for a party (@ the idea room)

I love this monogrammed doormat for a fun way to dress up the front door(@ april’s craft nest)

This elegant half-up would be a fun new way to style my hair (@ It’s the Small Things)

These pie dough lattice cookies are stunning (@ not martha)

I love this DIY greeting card organizer idea (@ design sponge)

I am going to have to print out some of this Halloween subway art (@ eighteen25)

These DIY wood cutting boards are absolutely stunning (@ Centsational Girl)

I love this beautiful hair clip board (@ Prudent Baby)

I am going to be following this holiday craft along (@ A Southern Fairytale)

I love this superhero birthday banner made from comic books (@ Jolly Mom)

This little yo yo coin purse is adorable @ zakka life)

I am loving this fringed flower gift topper (@ Craft)

I want to make this Pottery Barn desk knock-off for a craft station in my house (@ Nashville Pug)

I am totally intrigued by this yellow cake made on a panini press (@ panini happy)

I bet my family would flip for this Italian Chicken Soup (@ The Pioneer Woman Cooks)

These snickerdoodle cupcakes with snickerdoodle cookies look so yummy (@ Hoosier Homemade)

This cinnamon pumpkin bread looks absolutely delicious (@ Cheeky Kitchen)

This easy macaroni and cheese would be perfect for the lunchboxes (@ Food for My Family)

I am dying to try this lemony orzo with chicken and roasted tomatoes (@ Confections of a Foodie Bride)

Round-Up of Knitted Pumpkin Hats

Tuesday, September 13th, 2011

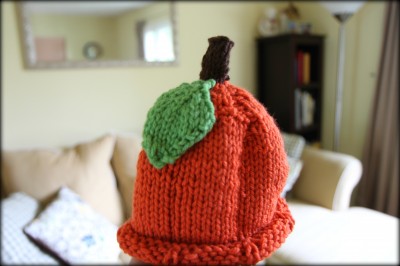
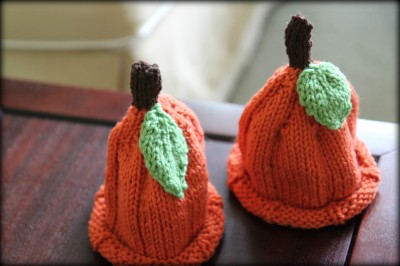
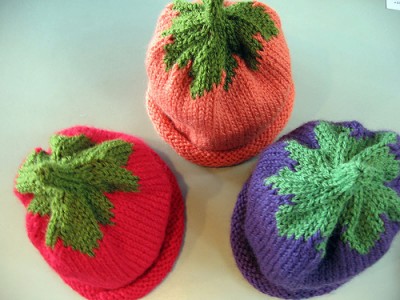
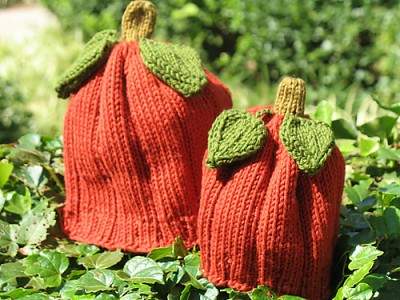
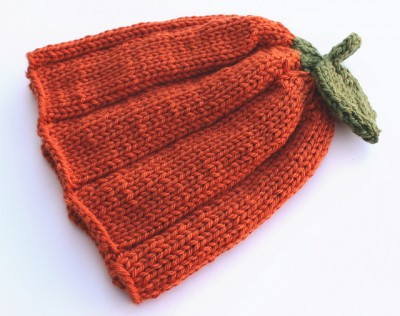
It is not only the time for pumpkin eating in our house, but it is also the perfect time for pumpkin knitting. I decided to whip up a few of these wee pumpkin hats for a few special newborns for the fall season. My pattern came from a book that I have in my knitting library, but I wanted to round up a few free pumpkin hat patterns you can use to create the same thing for free, if you don’t have my book.

Are you my friend on Ravelry? If not, I would love to be friends! My username is momadvice on there and I am always looking for new friends to knit with and share project ideas!

Wee Pumpkin Hats

Pattern: Little Pumpkin by Susan B. Anderson from Itty-Bitty Baby Hats

Needle Size: US 6 (for smaller hat), US & for slightly larger hat  (12″ circulars)

Yarn: Loops & Threads Impeccable Solids (in Pumpkin, Lush, & Chocolate)

Notes: This knitted up quickly, but also a bit bigger than I was expecting. I decided to do this with a needle size down (to a US 6) which helped alleviate the larger sizing issue.  The pattern is so easy to follow and I absolutely love the chocolate stem and sweet leaf on top. This would make a wonderful baby gift for an autumn baby!

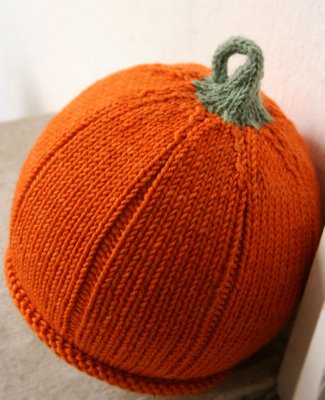
Here are a few free options that are available to you, if you would like a free pattern:

Kürbis* Baby Hat

Eat Your Veggies Baby Hat

Pumpkin Hats by Sarah Hood (free Ravelry download for members)


Punkin Head

**************************************

If you are just beginning the world of hats, these are the three things that really helped me have success getting comfortable with double-pointed needles and knitting in the round.

3 Things That Helped Me With Making Wee Baby Hats

1.Bamboo 12″ circulars– Here is the honest truth. If you are super coordinated with double pointed needles, you can skip buying these and knit the wee baby hats in the round. I have found that knitting baby hats in the round was more of a challenge than I expected, and my mother-in-law recommended purchasing 12″ circulars so the hats do not have to be started on the DPN’s. These were a lifesaver and I will always use these for starting my hats. They do require a bit of coordination since they are shorter & smaller than your normal circulars, but they are worth the effort.  I applied my Swagbucks towards Amazon gift cards to help reduce the cost on these.

2. Bamboo 9″ Double Pointed Needles– Again, these are an off-brand needle and they were extremely rough so they held my stitches really well. As a beginner on these, these rough double pointed needles were key for me to get the hang of it without dropping stitches. It was a lot cheaper to buy these as a set and I did apply my Swagbucks towards the Amazon gift cards so I didn’t have to dip in my pocket to pay for them. You could go with a different length on these, but I opted for these 9″ ones and they still work great for the baby hats as well as the adult hats I knit.

3. A Good Ring Marker- I was using the kind that you just slipped over the needles and was finding that I was losing my starting stitch marker for knitting in the round. Look for ones that will slip onto the yarn and put that at the beginning of my round. It will really help you not lose your pace and keep you on track with your knitting.

*******************

Disclosure: The links to books and supplies are affiliate links and are provided so you can locate what you need quickly and easily. Feel free to order a book, but we encourage utilizing the library system and buying me some yarn instead.  Wouldn’t that just be so much more lovely?

What craft projects have you been working on? Feel free to share any links to what you are working on and be sure to friend me on Ravelry if you happen to be a knitter too! Access all of our craft fun on MomAdvice by visiting our Craft Section. Happy crafting, friends!

An Apron Full of Giveaways 09.13.11

Tuesday, September 13th, 2011
Rupert’s Woolies, $25

Welcome to our Apron Full of Giveaways! I hope everyone is having a great week this week! As we do each week,  here is our round-up of giveaways for our readers. We hope that this is beneficial to you and your family! Please let us know if you guys win anything- I love to hear the success stories!

Below are the contest links-if you are hosting a contest please link it up below. Sorry, we aren’t giving away the aprons just showcasing them! Please put your site name and then what type of contest you are hosting. For example, “MomAdvice (Kid’s Movies).”

Please let me know if you have any questions and good luck to each of you!