Archive for February, 2011

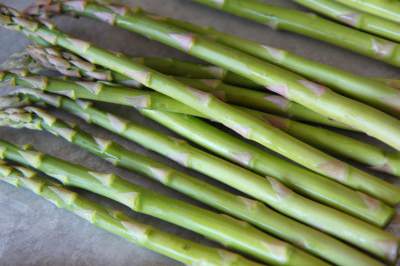
Simple Roasted Asparagus

Monday, February 28th, 2011

Side dishes can become rather boring in our house and I tend to rely on my easy standbys like brown rice and green beans to compliment our main dishes.  I forget how easy and lovely it is to add a little variation to our side dishes and the melancholy of those long winter days leaves my creativity drained when it comes to the dinner hour.

When I saw the beautiful shoots of asparagus on sale at our grocery store, I began to breathe a little sigh of relief as it has to mean that Spring is just around the corner. Asparagus is one of my favorite vegetables to create and enjoy. It is simple, low in calories, and packed with vitamins. It makes the perfect easy salty appetizer wrapped in a little prosciutto and roasting it brings out a nutty flavor with just a few simple ingredients you have already in your kitchen. Serve it as a finger-food to your children, like their favorite french fries and see if they don’t gobble it up.

Although I feel there is nothing really special about my technique for asparagus, I wanted to share with you how to roast it and enjoy it for your next weeknight meal.

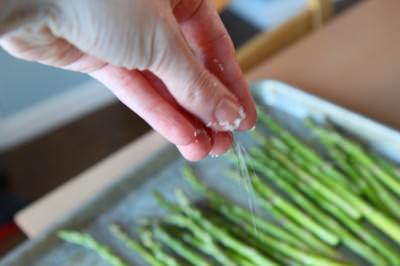
On a cookie sheet, fan your asparagus out on the baking sheet. Drizzle the asparagus with a little olive oil, salt, pepper, and a little minced garlic (bottled is fine). Give your asparagus a little rub to incorporate all those delicious seasonings into the vegetable. Pop it in the oven and bake them for twelve minutes at 425 degrees.

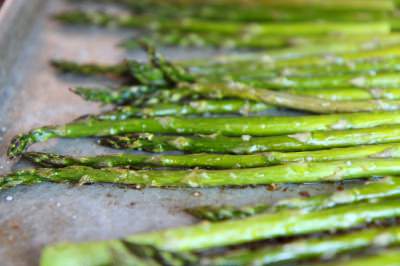
Pull your delicious asparagus out and try not to eat the whole platter before your family comes to the table. Notice that beautiful color and the roasted bits all over it. This stuff is a little bit of heaven.

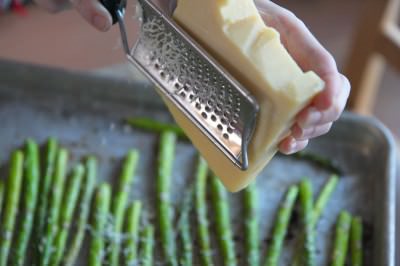
To make it even more delicious and appealing, grate a tiny bit of fresh Parmesan Cheese all over it.

Eat.

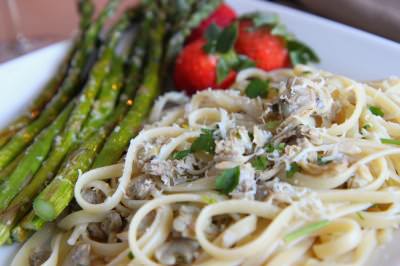
Enjoy that sometimes the simplest things are the best things in the world. Pair this with a favorite dish in your house- we love our asparagus with roasted chicken, linguine with white clam sauce, or make it a fun finger food night with panko crusted tilapia nuggets.

Simple Roasted Asparagus

1 bunch thin asparagus spears, trimmed
2 tablespoons olive oil
1 clove garlic, minced (optional)
1 teaspoon sea salt
1/2 teaspoon ground black pepper
Parmesan cheese (optional)
Preheat an oven to 425 degrees.  Place the asparagus on a cookie sheet and drizzle with the olive oil. Toss to coat the spears, then sprinkle with garlic, salt, and pepper. Rub the flavors into your asparagus with clean hands. Arrange the asparagus onto a baking sheet in a single layer. Bake in the preheated oven until just tender, 12 to 15 minutes depending on thickness. After you pull the asparagus out of the oven, give the hot vegetable a light dusting of Parmesan cheese.

What are your favorite vegetable side dishes? What Spring foods are you looking forward to this year?

Amy’s Notebook 02.23.11

Wednesday, February 23rd, 2011

I am madly in love with this random act of kindness party idea (@ The Lettered Cottage)

This ruffles t-shirt is so cute and frugal (@ Blue Cricket Designs)

This kitchen command station is a great way to tidy up the paperwork clutter in the house (@ tatertots and jello)

This Mardi Gras King Cake looks like a  fun way to celebrate Mardi Gras (@ Skip to My Lou)

Roasted edamame would be a fun side dish to try on my kids (@ the kitchn)

I love this faux wainscoting to update a room (@ the idea room)

These spinach and mushroom quesadillas look like a delicious lunch! (@ The Pioneer Woman)

This world wall map is a creative and inexpensive way to make some art for the wall (@ infarrantly creative)

These banana whoopie pies would be a great treat to use up overripe bananas (@ Baking Bites)

This stunt man kid’s t-shirt is too cute! (@ under the sycamore)

I like these practical tips on how to ice a cake (@ Whisk Kid)

This edamame hummus sounds like a delicious dip (@ Serious Eats)

This t-shirt scarf is so cute and a great way to repurpose those old t-shirts (@ Just Something I Made)

I love this botanical silhouette paper art (@ Design Sponge)

These baked skinny fries would be a fun weeknight side for the kids (@ Skinny Taste)

I am so inspired by this great round-up of DIY decorating ideas (@ tatertots and jello)

I love this backgammon game made from the wooden crates from Melissa & Doug (@ infrarrantly creative)

Giveaway & Returning to the Original Curly-Haired Amy

Tuesday, February 22nd, 2011

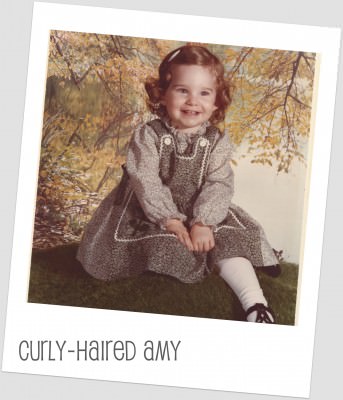
When I was a little girl, I was blessed with beautiful Shirley Temple ringlets that my mom could wrap around her finger, let go, and a perfect ringlet would stand to attention and hold it’s shape. My mom said that people would stop her on the streets and ask her how she got my hair to do that, and my mom would admit that she did nothing except wrap the curls around her fingers. My children, sadly, were not blessed with mommy’s curly-haired genes, but I always wish that I could do this to my own daughter’s hair.

Fast forward about thirty years and you will discover a girl who has beaten her curls into wild submission with product, blow dryers, metal brushes, and hair straighteners. I fight frizz and wave with pure aggression and as much heat as my hair can stand. If I try to do a day with wave in it, the waves will barely perk up, hanging limp and weighed down by forty products intended to curl boost.

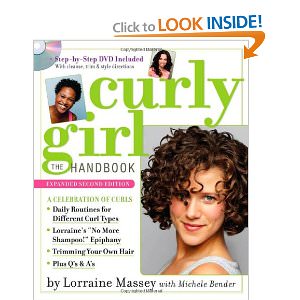
Years ago, I discovered a book at the library called Curly Girl that changed my life. I applied the Curly Girl philosophy to my hair for awhile with fabulous results, and then decided that I wanted a more polished look and headed back to the straightener. I admit that I feel less confident with my wild curls and wonder if people think I rolled out of bed instead of paying attention to my hair.

My hair is starting to show the strains of abuse though and I decided to head back to the Curly Girl way of life after witnessing my girlfriend who rediscovered her curls again after picking up the book. For a curly girl, the philosophy is curl-changing…a total game changer for girls who have relied on hair products to pull their curls together.

Want to return to your baby curls? The Curly Girl philosophy is frugal and easy to start!

1. Wash your hair with a non-sulfate clarifying shampoo to remove all of the gunk and product build-up from your hair.

2. Get your ends trimmed on your hair to give you a fresh start to your new curls.

3. Don’t ever use a brush on your hair. You will need a wide-toothed comb or you can use your fingers to comb through your curls in the shower and when your hair is wet.

4. Don’t use shampoo on your hair and only use conditioner on your hair. Shampoo has harsh chemicals in it that dry out and damage your curls.  Instead, use conditioner and give your scalp a nice massage and rub the conditioner into the scalp. Apply the conditioner to the rest of your hair and let it set in on your hair for four minutes and condition your curls. I comb my conditioner through with my hands and don’t even use a comb on my hair. Finish by rinsing your hair with a cool rinse.  Even if you are not washing with shampoo, there is no need to do this daily, some girls can even go once a week! I rinse mine with conditioner three days a week and that seems to work well with my hair.

5. Apply product to your hair while it is still wet (you can use an additional frizz cream and gel) and Scrunch your curls or wrap individual curls around your fingers to shape them.

6. Allow your curls to air dry or use a diffuser to dry them. Never use a towel on your curls because they can bruise and frizz your curls up. Instead, use a microfiber towel or even an old t-shirt to dry your hair. These instructions explain the drying process well.

7. Allow your hair two to six weeks to adjust to your new routine.  I found it takes me about two weeks for my hair to look good, but it depends on how much abuse your hair has suffered!

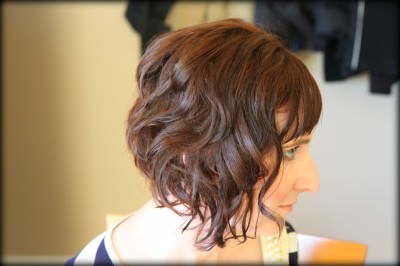
I am on week one again of letting my curls all hang out. Again, I feel unpolished and crazy, but here is where I am at right now:

This is actually the second day without washing my hair (in week one)  and all I had to do was use a little water to scrunch everything back up again.  I am working on being comfortable with my original look, but I definitely am getting used to these crazy old curls again. I can’t wait to see what my curls look like after six weeks of this treatment!

I had been planning to blog about this and they reissued the Curly Girl book and asked if I wanted to host a giveaway for my readers. Since it is something I am using in my own life, I am excited to share it with another girl fighting her natural beauty and curls! I am looking forward to getting my hands on my own copy of this book since I have worn the library book out to pieces!

Today I am giving away a copy of the new CURLY GIRL: The Handbook and a DevaCurl Travel Kit of products to care for your curls. Three additional winners will win a copy of the Curly Girl Book! That means four girls will be rocking their original curls this year thanks to MomAdvice!

To enter, leave a comment below letting me know why you need this book for yourself (or for someone  you love!) Please submit your entries by Tuesday (03/01) at 8PM EST.  Our winner will be drawn at random. Good luck, everyone!

MomAdvice Giveaway Guidelines: Want to know more about how things are handled here at MomAdvice? Be sure to read our Disclaimer which clearly states how things work and know that we will always offer only the best reviews and giveaways to our readers. In full disclosure, the email addresses that are collected for this giveaway will only be used for the purpose of contacting the winner(s), and will never be sold or given to anyone. This giveaway is only open to residents of the United States who are 18 years of age or older. Entries that do not follow the above criterion will automatically be disqualified. This giveaway will close Tuesday, March 1st at 8PM (EST). I’ll announce the first name of the winner(s) that will be added to the top of this current giveaway post and contact the winner(s) by email. I will draw the names of the winner(s) by using the random number generator at Random.org from the eligible entries received. If a winner does not contact me within 72 hours by email, I will draw a new winner. The winner(s) will receive their prize from the PR agency/company  responsible for this giveaway. The above link(s)  are an affiliate link and provided for reference for our readers.

An Apron Full of Giveaways 02.22.11

Tuesday, February 22nd, 2011

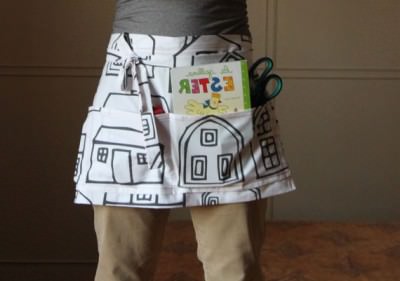
lover dovers clothing, $38

Welcome to our Apron Full of Giveaways! I hope everyone is having a great week this week! As we do each week,  here is our round-up of giveaways for our readers. We hope that this is beneficial to you and your family! Please let us know if you guys win anything- I love to hear the success stories!

This week on MomAdvice we are sharing a copy of the new Curly Girl book with fancy hair products and three additional copies of the book for three other readers. If you have waves or you have children with waves, you will want to enter to win today!

Below are the contest links-if you are hosting a contest please link it up below. Sorry, we aren’t giving away the aprons just showcasing them! Please put your site name and then what type of contest you are hosting. For example, “MomAdvice (Kid’s Movies).”

Please let me know if you have any questions and good luck to each of you!

Poor Man’s Date Night: Linguine With White Clam Sauce

Monday, February 21st, 2011

There was a time in our married life when even an inexpensive steak dinner was far from something we could afford. When the grandparents would offer to take the kids for us for a date night, we would run to the supermarket and buy ingredients for a date night at home. At the time, it wasn’t because I was such a great cook and because we loved to be home so much, but it was because we had no money to spend on a night on the town.

I really did try to do what I could to make our life feel special, no matter how much or how little money we had. Through that effort, we began a tradition of making Linguine With White Clam Sauce for our fancy dinner  together, and it became a tradition to make that every time we wanted a date night at home. We would indulge in a loaf of artisan bread and bakery cupcakes for dessert and then indulge all week long in the leftovers.

To be honest, I had never thought to serve it to the kids, but one night the pantry was bare except for a few ingredients for that dish. I decided to go ahead and make it for the kids and had a back-up plan of eggs and toast if it didn’t work out. To my amazement, my kids went nuts for mommy’s linguine and have been begging for it every day since.

It seems those kids are always teaching me a lesson about my own inhibitions towards foods when I was young, and this linguine is now not only a date night treat, but a fabulous treat for them too. Your kids might be different than mine, but it is always worth a shot!
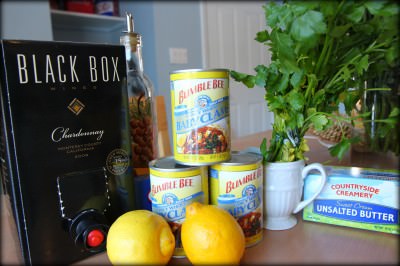
Gather all of the ingredients you will need to make your Linguine with Clam Sauce for your fun weeknight dinner (or poor man’s date night). You will need butter, olive oil, garlic (fresh or bottled minced), one or two lemons, white wine (I love boxed wine for this dish), two or three cans of whole baby clams, linguine noodles, and fresh parsley.
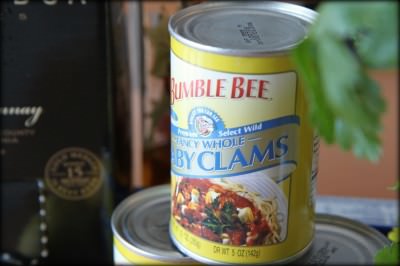
Now you can certainly subsitute with real baby clams, but I live in Indiana where it is harder to get the real deal anymore and they add a lot of expense to the dish here. They have a couple of varieties of clams on the shelf and you definitely want to go with the fancy whole baby clams over the minced clams that come in the smaller cans. Trust me, your dish will taste much better with the whole clams then those smaller clam pieces.
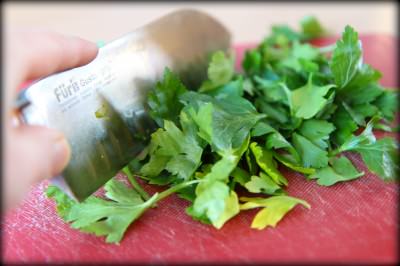
Heat a large pot of boiling water for your linguine noodles. Meanwhile, chop, chop, chop up a generous amount of fresh parsley to be mixed into the linguine and for garnish on top of your dish.
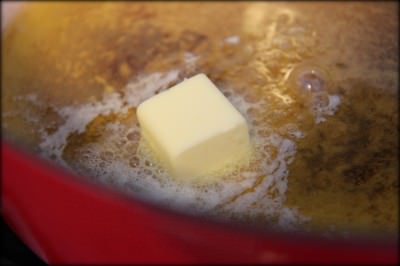
In the bottom of your pot, melt a couple of tablespoons of butter. You like how well-seasoned my dutch oven is? Yeah, should probably pay more attention to it, but I think it showcases how loved it is in our house.
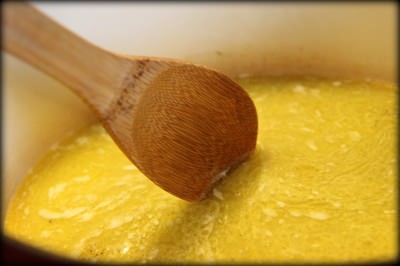
Add the olive oil and quickly saute your garlic. You want to make sure your pot isn’t too hot or your garlic will burn.  Next add your white wine, the juice from the canned clams, and the zest of one or two lemons. Allow this to cook for a few minutes to cook off the alcohol and season generously with a little salt and pepper.
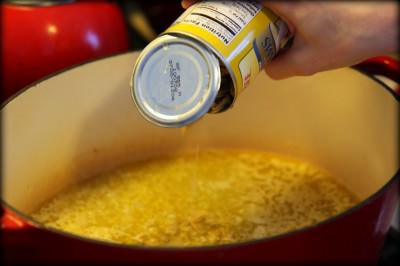
Once your noodles are about done, you will want to add the baby clams to your sauce.
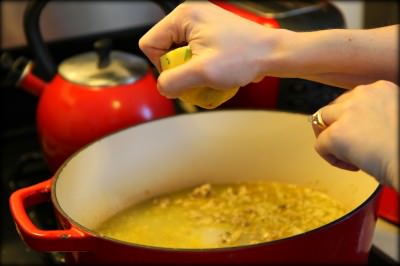
Squeeze in the juice of one or two lemons, depending on how much you love lemon flavor.
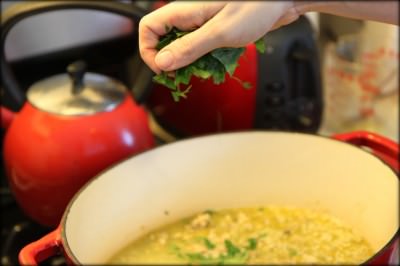
Finish with your generous handfuls of fresh parsley. Don’t skimp on the parsley since it adds so much fresh flavor to those canned ingredients.
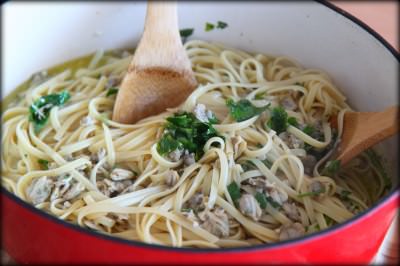
Add your drained linguine noodles and toss everything together, incorporating all of those delicious flavors. Add a little bit more salt and pepper, seasoning the dish to your own personal taste.
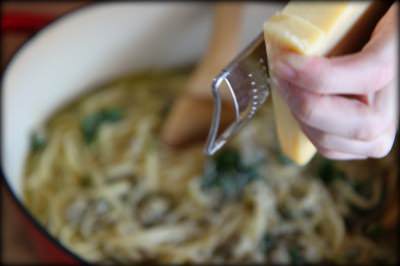
The final touch to bring everything together is a generous amount of freshly grated Parmesan Cheese. Don’t skimp on this, it really is what brings the sauce together and makes the sauce hug the noodles.

Finally, revel in being the cheapest date in town as you bask in the glory of the compliments from your significant other.

Sweet.


Linguine with White Clam Sauce

1 pound linguine
Salt
1/4 cup extra-virgin olive oil
2 tablespoons of butter
4 cloves garlic, chopped,
1/2 cup wine
Juice and zest from one or two lemons
2-3  (15-ounce) can whole baby clams, with their juice
Handful flat-leaf parsley, chopped.

Bring a large pot of water to a boil. Add salt and the linguine and cook as directed or until al dente. The linguine will continue to cook in sauce, later. To a large skillet heated over medium heat, add oil, butter, garlic. Cook together. Add wine, the juice from the clams to the pan, and the zest of one or two lemons. Finally, add the clams and the juice from one or two lemons. Drain pasta and add it to the clam sauce. Toss and coat the pasta in sauce with clams until the pasta absorbs the flavor and juices, 2 to 3 minutes. Remove from heat and season with salt, add parsley and serve with a loaf of crusty bread.

Do you attempt fancy date night dinners at home? What is your favorite frugal date with your significant other?
Amy’s Notebook 02.16.11

Wednesday, February 16th, 2011

I am inspired by this DIY freezer paper stenciled scarf (@ How About Orange?)

As an Angry Birds addict, I am in love with these Angry Birds cupcakes (@ Confessions of a Cookbook Queen)

This comparison of yellow cake recipes was amazing (@ The Way the Cookie Crumbles)

Homemade chocolate pop tarts? Heaven! (@ babble)

These brown sugar & cinnamon homemade pop tarts also look heavenly (@ rather be baking)

I love these creative magnet ideas for the fridge (@ infarrantly creative)

I want to try this recipe for buttermilk pancakes (@ brown-eyed baker)

These oatmeal chocolate chip sea salt cookies sound so good (@ Weelicious)

My daughter would flip for this unicorn and rainbow party (@ juicy bits)

These roasted brussels sprouts look delicious (@ Jolly Mom)

Who knew you could whip up a batch of chocolate truffles in the microwave? (@ Sugar Bee)

I am in love with this cute vintage shrinky dink jewelry (@ Just Something I Made)

I am bookmarking these tips for making the perfect soufflee (@ giver’s log)

I am keeping these Valentine’s Day photo card ideas in mind for next year (@ The Idea Room)

I am in love with this white swan scarf inspired by the Black Swan movie (@ knitting daily)

This vertical cake tutorial is jaw-dropping! (@ i am baker)

This post is inspiring me to pick up a few journals and start journaling again (@ salt & chocolate)

I want to knit this heart garland for my daughter’s room (@ Whip Up)

I am madly in love with this DIY silhouette headboard (@ desire to inspire)

Who also knew that you could make your own homemade cookie & cupcake sprinkles (@ the kitchn)

All Knitted Up: Knitted Headbands for the End-of-Winter Blues

Tuesday, February 15th, 2011

After my holiday knitting marathon, you would think that I would want to take a little break on the knitting. I can admit it though, I am addicted to my knitting needles, but I have been attempting smaller scale projects this month instead of my usual larger scaler ones. The best part about smaller scale projects is that they offer instant gratification and they offer an opportunity to tackle new skills that you might not think you have. It is much easier to give up on a smaller scale project if the going gets to tough, unlike those larger projects where you have a sense of commitment to them. This month has been a month of tons of little projects that I am looking forward to sharing with my knitting friends on MomAdvice.

I am hoping for the end of winter, but if you are feeling a little blue about winter’s never-ending days, these knitted headbands can add a fresh new look to your tired winter coat, and make the perfect accessory to keep your ears a little warm and your hair still looking cute!  I whipped these headbands up in an evening of sitcom-watching and they offered a great opportunity to do a little stash-busting in my yarn collection (also a horrible addiction of which I suffer).

If you are a knitter, I would love for you to be my friend on Ravelry. My username is momadvice and I try to keep my little notebook updated with the current projects.

Here are two fun headbands to try that will add a little sparkle to these end-of-winter days!

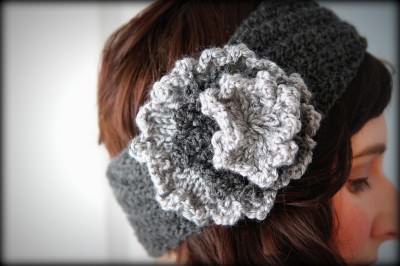
shades of gray headband

Pattern: Spiral Ribbed Headband by Allison Hogue (free Ravelry Download) with  Lydia Flowers (optional, for embellishment). These were all three sizes (Large, Medium, & Small) stacked in alternating colors. I am sorry, I understand that the pattern is down, let’s hope it will come back up soon!

Needle Size: US 7 (16″ circular needles– these are the ones I purchased. Don’t waste oodles of money on needles at the craft stores!)

Yarn: Naturally Caron Country (Charcoal) & flowers were created from Naturally Caron Country (Charcoal) & Caron Simply Soft in Heather Gray, alternately.

Notes: This spiral-ribbed head wrap is a beautiful pattern that can be done very easily while watching a little television. There are no tricky stitches in this pattern so it is a great one for a beginner and for knitters who are just getting familiar with knitting in the round.

I chose a merino wool blend for the yarn because it is light-weight while still being a little warm. It is the perfect yarn for the project and the bonus was that I got it on sale for $3.99 a ball (after the holidays) so it was a very thrifty knit too!

The flower is the Lydia Flower (large, medium, and small) stacked and used some of my Simply Soft in Heather Gray for the large and small flower from my yarn stash to add a little dimension to the headband.

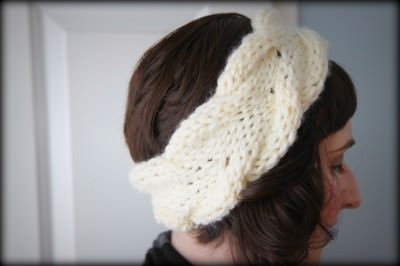
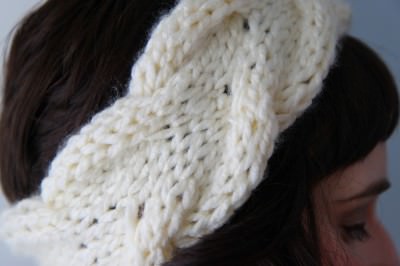
ivory cabled headband

Pattern: Vanessa Headband by Nancy Ricci (free pattern)

Needle Size: US 11 (straight needles)

Yarn: Premier Yarns Serenity Chunky Weight in Pristine (stash-busting)

Notes: Are you falling over right now? I am cabling!  I have never cabled before so this is my first project with cabling. This was a great introduction into cabling with very simple cables. Cabling sounds & looks much more difficult than it is. It is simply pulling stitches off your needles and pulling them into the front or the back of your work and then working them back into the pattern so they twist and vine around your project. If you can knit and purl, you definitely can cable!  If you have never cabled before like me

The pattern offers a wide band as well as a more narrow version of the same band. I chose the narrow version, but it is still plenty wide if you wanted to cover your ears with it thanks to the large needles and chunky yarn. If you use a thinner yarn, you may want to go for the wider pattern to achieve the same look.

Below is a  video on how to cable. I am telling you, it is so easy! I can’t wait to practice more cabled patterns! I will be back next month with a gazillion baby hat patterns that I have been working on…another instant gratification project that is great for practicing pattern!

***********************

Looking for more knitted projects to cure the winter doldrums? I recommend throwing a few of these projects on your needles for an instant pick-me-up in our Crafting section and Gifts section of the site!

What craft projects are you working on now that the holidays are over?

***********************

An Apron Full of Giveaways: 02.15.11

Tuesday, February 15th, 2011

mamma.190, $19.46

Welcome to our Apron Full of Giveaways! I hope everyone is having a great week this week! As we do each week,  here is our round-up of giveaways for our readers. We hope that this is beneficial to you and your family! Please let us know if you guys win anything- I love to hear the success stories!

Below are the contest links-if you are hosting a contest please link it up below. Sorry, we aren’t giving away the aprons just showcasing them! Please put your site name and then what type of contest you are hosting. For example, “MomAdvice (Kid’s Movies).”

Please let me know if you have any questions and good luck to each of you!

Bread Machine Puffy Calzone Hearts With Dipping Sauce

Monday, February 14th, 2011

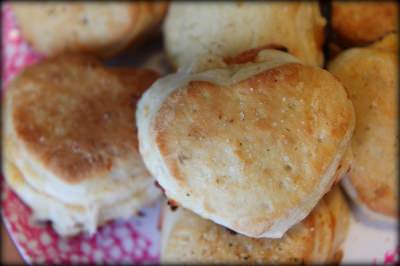
I was inspired by the notebook last week (specifically the entry by Craftzine) to whip up a batch of heart-shaped calzone hearts for my valentines. We used to make calzones more often around here, but I will happily admit that our pizza routine takes a little less time and my kids seem just as happy with it.  I knew that they would love this as a special Valentine’s Day surprise and I wanted to share with you my favorite calzone recipe that utilizes one of my favorite appliances… the bread machine.

This recipe is foolproof and makes a deliciously fluffy dough that has just the right balance of flavors. Fill these with whatever toppings you have on hand and then brush lightly with a little olive oil and a shake of a little garlic salt to add a little fun flavor to the top. We served these with a big bowl of dipping sauce and the kids were in amazement that their mom could make such a fun food for them.

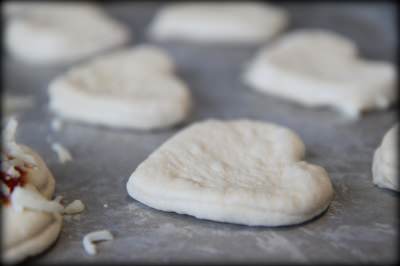
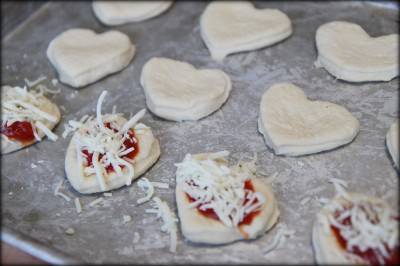
Of course, as I was making these, my camera battery stopped working so I hope the instructions and the few pictures that I do have will help explain how to make these cute little puffy calzone hearts for the special people in your life.

Bread Machine Puffy Calzone Hearts With Dipping Sauce

1 1/4 cups water

2 teaspoons active dry yeast

1 1/2 tablespoons white sugar

3 cups bread flour (can substitute with all-purpose flour, half white flour/half wheat flour, or whole wheat white flour)

1 teaspoon salt

1 teaspoon powdered milk

3/4 cup pizza sauce

1 1/4 cups shredded mozzarella cheese

your choice of fillings (pepperoni, sausage, extra cheese, etc.)

2 tablespoons olive oil

garlic salt for sprinkling

To Make Dough: Place water, yeast, sugar, flour, salt and powdered milk in the pan of the bread machine, in the order suggested by the manufacturer. Select Dough cycle. After cycle is completed, roll out dough on a lightly floured surface.

Roll out flat and then cut into hearts with a heart-shaped cookie cutter, cutting two hearts for each puffy heart. Transfer to a lightly greased cookie sheet, and spoon a small amount of sauce, cheese, and (optional) toppings on one heart. Top with the other heart-shaped cut-out and then crimp the edges with a fork to seal in the toppings (Side Note- Because these are puffy hearts, make sure you seal them well with the forks, but they will likely puff up and not hold the markings from your fork).  Brush the tops with olive oil and sprinkle with garlic salt on each heart. Bake at 400 degrees for 12-15 minutes. Serve with a bowl of dipping sauce and lots of hugs and kisses for your valentines.

Looking for another way to say, “I Love You,” today?  Be sure to check out our Be Mine Donuts that are guaranteed to capture hearts!  Planning to make a romantic dinner for your heart’s desire? Be sure to check out our elegant steak dinner and our favorite inexpensive wine selections! If you have a few more moments, swing by our podcast on choosing great wines!

Happy Valentine’s Day, everyone! Do you have any fun ways you will be celebrating today?

Amy’s Notebook 02.09.11

Wednesday, February 9th, 2011

My kids would flip for these fuzzy heart cookie pops (@ the decorated cookie)

I love this round-up of DIY camera strap covers (@ Tip Nut)

My son would think his mom was really cool if I did this invisible ink project (@ mini-eco)

How amazing are these heart cake tutorials and this beautiful rose cake tutorial? (@ i am baker)

This chicken florentine pizza looks like a weeknight winner (@ Eat at Home)

My children would love these little love notes in their pancakes (@ Random Thoughts of  a Supermom)

These silly simple Valentine’s are too cute (@ The Crafting Chicks)

We are going to have to make some of this snow ice cream for the kids (@ Sugar Bee)

These calzone hearts would make a fun Valentine’s Day dinner (@ Craftzine)

These love rocks would be a fun winter day activity (@ red bird crafts)

I love these vintage typewriter tin valentine’s (@ design sponge)

This shrimp scampi with sun-dried tomatoes & artichokes would be a great dish to make for my valentine (@ Craftzine)

I am in love with these rosa knitted hats (@ Soule Mama)

I want to try this recipe for pizza dough (@ The Wednesday Chef)