Archive for March, 2011

Green Spring Cleaning Craft: Knitted Dishcloths & Homemade Cleaning Recipes

Tuesday, March 29th, 2011

It is that time of year again, as we move into the beautiful season of Spring. Around this time of year, I usually start working on a batch of fresh new dishcloths to do the dishes with. If you could see how pitiful the rags I have been using are, you would understand why this is not only a hobby, but also a necessity!

As I mentioned last month, I get to share fun DIY projects as part of the Walmart Moms team, and when I was challenged with making something from the store for the spring cleaning season, I knew that I couldn’t wait to tackle some new dishcloth patterns made from the inexpensive Sugar ‘n Cream Yarn that you can pick up over in the craft section of the store. These balls of cotton yarn (in the knitting/crochet supplies) only run $1.57 per ball and you can usually get two generous sized washcloths out of them.

If you are new to knitting, dishcloths are the perfect project because they are like swatches of pattern rather than tackling a larger project piece. On top of that, it can make you feel braver doing patterns with more complexity and learning new knitting techniques. For the first few months after I learned how to knit, I knit a lot of dishcloths.

All of these patterns can be found on Ravelry, and you can find me there too! If you are a knitter, I would love for you to be my friend on Ravelry. My username is momadvice and I try to keep my little notebook updated with the current projects.

Here are four free fun new patterns to try to add an element of beauty and fun to your spring cleaning:

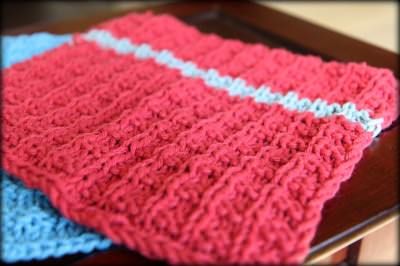
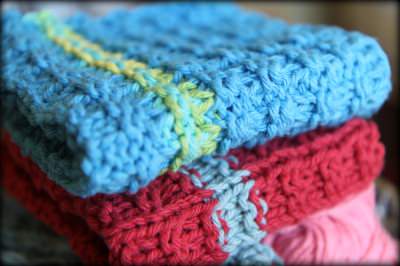
double bump dishcloths

Pattern: Double Bump Dishcloth Pattern by Missy Angus

Needle Size: US 7 Needles

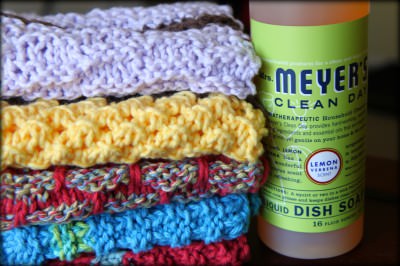
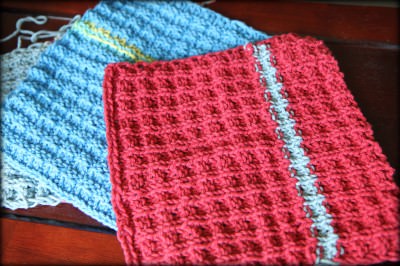
Yarn: Lily Sugar ‘n Cream Yarn- Pictured above is Country Red with Robin’s Egg Blue (accenting) &  Hot Blue with Summer Splash (accenting)

Notes: My girlfriend, Renee, alerted me to this pattern and I am so glad she did! This pattern makes the most perfect dishcloth and can be whipped up in an hour or so. If you know how to knit and you know how to purl, those are the only stitches that you need to know to create this.

While some patterns curl up on the edges or require a little blocking, this pattern knits up evenly without any curled corners, thanks to the slipping of the first stitch in each row.

These are highly addictive to make and I am already working on another one because it is an easy pattern to memorize and to knit while watching a few of your favorite television shows! I would highly recommend this pattern!

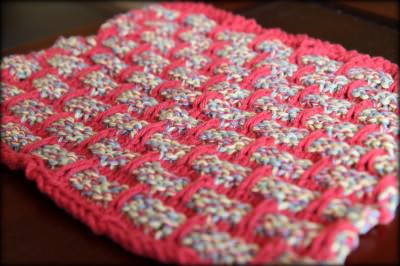
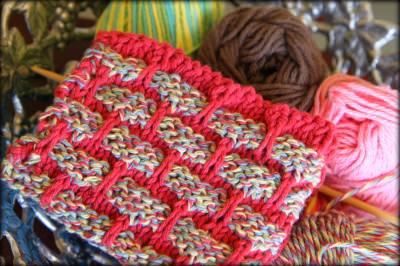
cottage ballband dishcloth

Pattern: Ballband Dishcloth by Pisgah Yarn & Dyeing

Needle Size: US 7 Needles

Yarn: Lily Sugar ‘n Cream Yarn- Pictured above is Country Red & Cottage Twists (Twists Chalet)

Notes: This is the free website link to the original pattern for Ballband Dishcloths, featured in the Mason Dixon Knitting Book by Kay Gardiner & Ann Shayne, the founders of MasonDixonKnitting.com

This pattern is beautiful worked in solids and variegated. Endless combinations of colors and variegated can be created using this pattern. Since you are using two different yarns for this cloth, it is a great one to use when stash-busting your yarn collection or for using different colors of yarn scraps you might have on hand that you can’t really make anything out of on their own.

When doing this pattern, I have found that knotting in the different yarns is the best way to go instead of just weaving in the new color because of the endless amount of abuse and washes that these dishcloths get in our house. I have lovingly weaved in many washcloths with no knots and the stitches have ended up falling out on these patterns. Live and learn!

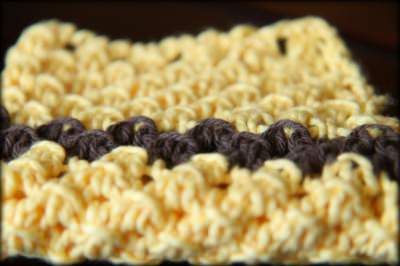
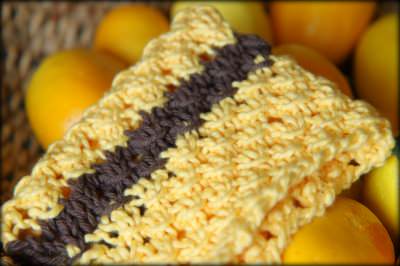
sunshine & stars dishcloth

Pattern: Open Star Dishcloth by Dishcloth Boutique

Needle Size: US 7 Needles

Yarn: Lily Sugar ‘n Cream Yarn in Sunshine & Warm Brown

Notes: I really loved this pattern because of how the simple yarn overs create a nubby pattern to this dishcloth and give it such a beautiful look and feel to the yarn. This pattern does not look as nicely when it is held open, but could be corrected if  it is blocked. The only time I would do that though is if it was a gift for someone.

This pattern is easy enough for a beginner and is a great beginning pattern for understanding yarn overs. I can’t wait to make more of these in other colors from my leftover yarn!

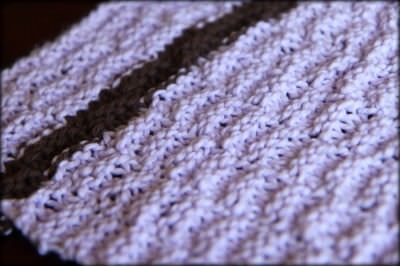
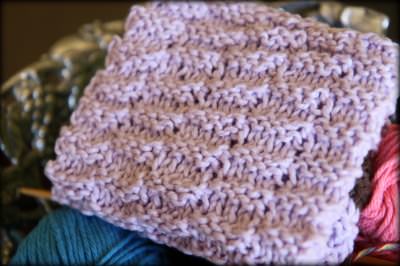
lavender squidge

Pattern: The Squidge Cloth by Sasha

Needle Size: US 7 Needles

Yarn: Lily Sugar ‘n Cream Yarn in Soft Violet & Warm Brown

Notes: The alternating rectangles of knit and purl give the ultimate squidge factor for a fabulously fondle-able cloth. The pattern is easy since you only need know how to knit and purl. It gives you a thickness to the pattern and would be perfect, not only for your dishes, but perfect as a face cloth too!

Not enough dishcloth patterns for you? Be sure to check out my Circle Cloth & Chinese Waves patterns or the Wedding Washcloth patterns that I have created in past entries!

Pair these with a few of these homemade cleaner recipes or a little of the fun Mrs. Meyers Cleaners (available at Walmart too) and you are ready to do a little spring cleaning of your own!

My Favorite Homemade Cleaner Recipes

All-Purpose Cleaner

Mix together two tablespoons of mild dishwashing soap and two cups of water in a spray bottle and give it a shake. Use these anywhere that you would use a commercial all-purpose spray. This cleaner is particularly great for countertops, bathroom surfaces, and high chairs.

Glass Cleaner

Mix together one part white vinegar to one part water in a spray bottle. Spray this solution on your mirrors and windows and dry your windows with newspaper.  The newspaper is great for lint-free drying and is a great way to repurpose some of those old papers you have laying around.

Homemade Oven Cleaner/ Deep Kitchen Cleaner

Mix a paste of three parts warm water to one part baking soda to clean away kitchen stains or to clean your oven.

Bathroom Cleaner

Mix dishwashing liquid with baking soda until you have a thick paste and use this throughout your bathroom.

Toilet Bowl Cleaner

No measuring is required with this recipe. Sprinkle a little baking soda into your toilet bowl and then pour a little vinegar in and watch it fizz it up. Give it a swish with your toilet brush and then flush.

Floor Cleaner

Add ½ cup of vinegar to a gallon of water.  The scent of the vinegar will fade in approximately an hour, but you can also add a couple of drops of essential oil to help with the scent. I like the smell of Tea Tree Oil, but you can buy any essential oil that smells best to you. Essential oils can be picked up at stores offering nutritional supplements or can be purchased online.

Furniture Polish

Mix ¼ cup olive oil with four tablespoons of vinegar and two teaspoons of lemon juice. Pour into a spray bottle and shake well before using.  If you do not use all of it in one cleaning session, store the remainder in the fridge, as the lemon juice can go sour. You can also substitute the lemon juice with twenty to thirty drops of lemon essential oil and then you won’t have to refrigerate it. Using the essential oils though will up the price a bit on your homemade product.

Silver Cleaner

Although I don’t polish silver very frequently, this is a great to have in your bag of tricks. This will clean all of those nooks and crannies that are hard to reach in more detailed pieces and is great if you have a big batch of silver that needs cleaning. In a large bowl (or you can use your kitchen sink) place strips of aluminum foil in and place the silver pieces on top. Cover the silver with boiling water and then add three tablespoons of baking soda and soak for ten minutes.

Do you have any fun green spring cleaning recipes or knitted patterns you are loving? Do you spring clean your home? Feel free to share those ideas here!

I am a part of the Walmart Moms program, and Walmart has provided me with compensation for these posts. My participation is voluntary and opinions are always my own.
Wafflepalooza: 6 Amazing Waffle Recipes & Tips to Get Your Waffle On

Monday, March 28th, 2011

In this family, we are all about traditions… especially food traditions.  One tradition that we started a few years ago was a waffle or pancake tradition each and every Sunday for brunch. It has become such a normal part of our week that you would think that it would lose some of its shine over the years, but it honestly has not. Thanks to a wide variety of fun waffle recipes and our fun tradition of jazz music with the Sunday paper, it is truly what Sunday afternoons have become all about for me and my family. Honestly, who could refuse a little Harry Connick Jr. and a little homemade waffle magic for a Sunday tradition? Not me!

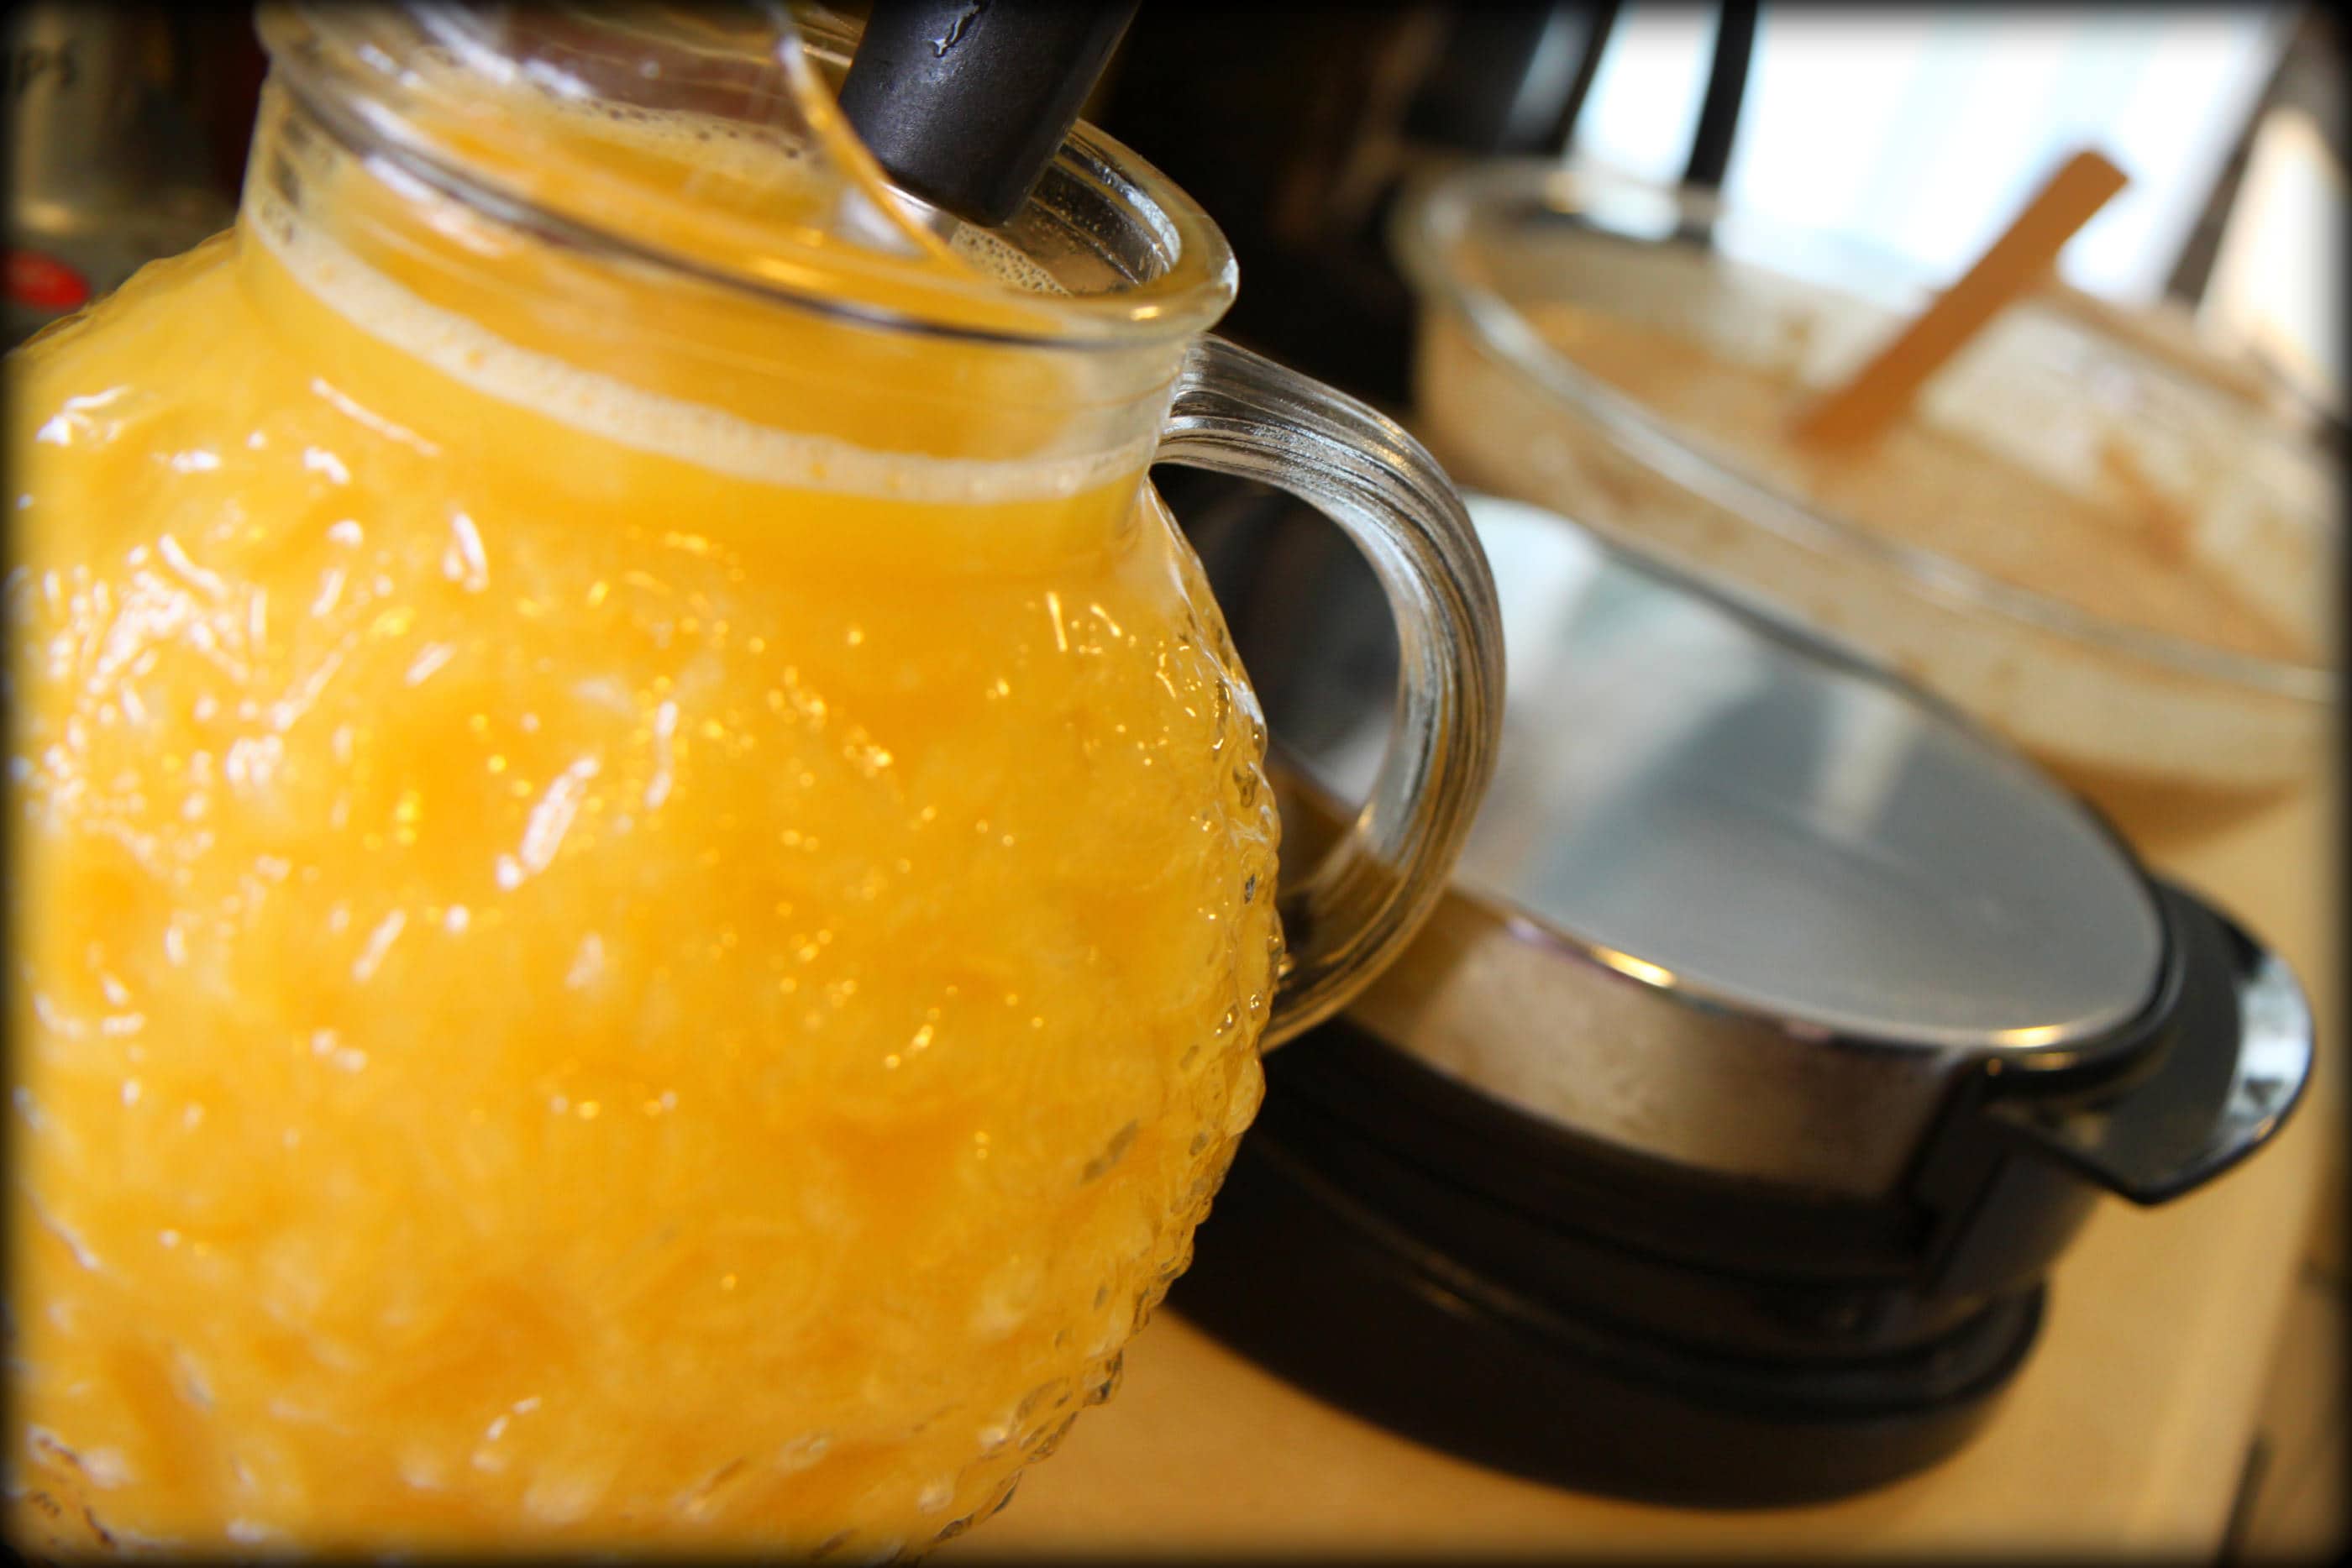
This tradition is the gift that keeps on giving because I always make a double batch of orange juice and a double batch of waffles that are frozen and are at the ready for a quick breakfast that costs a fraction of the price.  With my big breakfast eaters in the house, it has definitely helped save us a lot on the cereal budget.

Today I am throwing my own little wafflepalooza with all of the great waffle recipes that we have featured over the years a few fun ways to dress them up,  and a few quick tips for great waffle success.

This waffle is still our absolute favorite and it has been tweaked over the years and is now the most perfect and light wheat waffle that I have ever eaten. Give this one a try!

Whole Wheat Cinnamon Waffles

1 3/4 cup whole wheat white flour
1/4 cup toasted wheat germ or rolled oats
1/3 cup instant nonfat dry milk powder
1 tablespoon ground cinnamon
1 tablespoon baking powder
1/2 teaspoon baking soda
1/2 teaspoon salt
2 eggs (separate the egg whites from the egg yolks)
3 tablespoons canola oil
2 teaspoons vanilla extract
2 cups buttermilk (I used regular milk and then added 2 tablespoons of vinegar & let it stand for five minutes)

In a large bowl, combine the whole-wheat flour, unbleached flour, dry milk, cinnamon, baking powder, baking soda, wheat germ, and salt; mix well. Separate the egg yolks from the egg whites. In a medium bowl, mix the yolks, oil, buttermilk, and vanilla. Pour over the dry ingredients. In a small bowl beat egg whites until stiff peaks form (tips stand straight up). Gently fold egg whites into flour and egg yolk mixture, leaving a few fluffs of egg white, Do not overmix. Coat your waffle iron with vegetable cooking spray and preheat. Pour 1/2 cup of the batter into the center of the hot waffle iron and cook until the batter stops steaming, about 6 minutes. Cooking time varies according to the they type of waffle iron you have. Repeat with remainder of the dough, applying the cooking spray between waffles. Serve warm with your favorite syrup.

********************************

While this is definitely a waffle that might feel more appropriate in the fall season, if you have a can of pumpkin gathering dust in your pantry, I highly recommend freeing up your pantry space on this waffle recipe. These are my most requested waffles by my kids!

Deliciously Spiced Pumpkin Waffles

1 1/2 cups all-purpose flour
3 teaspoons baking powder
1/2 teaspoon baking soda
1 teaspoon cinnamon
1 teaspoon nutmeg
1 teaspoon ground ginger
1 pinch salt
2 eggs
1/4 cup firmly packed brown sugar
1 cup canned pumpkin puree
1 2/3 cups milk
4 tablespoons butter, melted and cooled

Mix together flour, baking powder, baking soda, cinnamon, nutmeg, ginger, and salt in large bowl. In a second bowl, add eggs, sugar, pumpkin, milk, and butter; beat well. Gently fold in the flour mixture. Spoon in about 3/4 cup of batter into the waffle iron. Cook each waffle for 4-5 minutes. This recipe makes approximately 5 waffles on my waffle iron.

Additional Notes- I double this recipe to make an extra batch to freeze or when entertaining. Make sure to spray your waffle iron well with nonstick spray or these will stick to the waffle iron and make a big mess. Also, be sure to leave these on at least four to five minutes. If you try to take them off sooner than that, they will not taste as good or set up as nicely.

********************************

Sometimes you just want a deliciously light waffle just like you would get at a great waffle house. This is my favorite waffle house type waffle and comes from the legendary Better Homes & Gardens cookbook. It is rave-worthy and perfect for your next Sunday brunch!

Best Waffles Ever (Courtesy of Better Homes & Gardens Cookbook)

1 3/4 cups all-purpose flour
1 teaspoon baking powder
1/4 teaspoon salt
2 egg yolks
1 3/4 cups milk
1/2 cup canola oil
2 egg whites

In a medium mixing bowl stir together flour, baking powder, and salt. Make a well in the center. In another bowl beat egg yolks slightly. Stir in milk and oil. Add egg yolk mixture all at once to the dry mixture. Stir just till moistened (should be lumpy). In a small bowl beat egg whites until stiff peaks form (tips stand straight up). Gently fold egg whites into flour and egg yolk mixture, leaving a few fluffs of egg white, Do not overmix. Spoon waffle batter into your waffle iron, making sure not to overfill it.

Note- I doubled this recipe for my family of four and we had enough for three extra Belgian waffles.

********************************

One of my oldest and most favorite waffles are these Oatmeal Cookie Waffles. They are deeply satisfying and are created using one of my favorite budget-friendly pantry ingredients!  This produces a giant batch of deliciousness with stick-to-your-ribs tastiness.

Oatmeal Cookie Waffles

4 cups quick oats (grind the oats in your food processor or blender until it is a fine powder)
1 cup all-purpose flour
2 teaspoons salt
3 cups milk (you can use prepared powdered milk)
2 tablespoons baking powder
2 beaten eggs
2 tablespoons molasses
4 tablespoons canola oil
2 teaspoons vanilla
2 teaspoons cinnamon
1/4 cup sugar

Mix all ingredients together until there are no lumps. Pour batter into well-greased waffle iron and allow each waffle to cook four minutes. Serve immediately.

Note: If you make the batter ahead of time, be sure to add milk to thin it out. My batter became too thick to even put in my waffle iron so add a little milk until you reach the desired consistency.

********************************

Looking for a waffle recipe that you can create the night before and then just wake up and heat up that waffle maker? Well, look no further than this delicious waffle that requires some time in your fridge overnight to rise. This recipe was gifted to me after enjoying a girl’s weekend with one of my dearest friends, passed on to her by her own mom. It is definitely great for after church service entertaining!

Overnight Yeast Waffles

1/4 cup warm water
1 package yeast or 2.25 teaspoons of yeast if bought in bulk(dissolve the yeast in the ¼ cup of water)
½ cup oil
1 egg
1 tablespoon sugar
¾ teaspoon salt
3 cups flour
2 cups warm milk

Mix all ingredients together, cover, and refrigerate overnight. Warm waffle iron and spray with non-stick spray. If batter is too thick, use milk to thin down.

Note: Keep water warm- if  it is too hot it will kill the yeast.

********************************

These waffles are our special Christmas morning treat and reserved for our Christmas Eve gift opening. These are so special and my kids know that they can look forward to this yearly tradition, reserved for this season of giving once a year. Bookmark this recipe for the holiday season!

Gingerbread Waffles (courtesy of 30 Minute Meals)

3 cups all-purpose flour
4 teaspoons baking powder
2 teaspoons ground cinnamon
2 teaspoons ground ginger
1/2 teaspoon freshly grated nutmeg, eyeball it
1/2 teaspoon salt
4 l
arge eggs
2/3 cup packed dark brown sugar
1 cup canned pumpkin puree
1 1/4 cups milk
1/2 cup molasses
1/2 cup (1 stick) melted butter, plus some to butter the iron
Syrup, whipped cream or fresh fruits for topping, to pass at table

Preheat waffles iron. In a large bowl combine flour, baking powder, cinnamon, ginger, nutmeg and salt. In a medium bowl, beat eggs and brown sugar until fluffy, then beat in pumpkin, milk, molasses and melted butter. Stir the wet into dry until just moist. Do not overstir the waffle batter. Brush the iron with a little melted butter and cook 4 waffles, 4 sections each. Serve with toppings of choice.

********************************

After years of trial and error in waffle-making, these are my simple tips for waffle success:

Get a Great Waffle Iron– The first tip to great waffle success is to find a great waffle maker.  Remember that a great waffle maker is not necessarily a bulk waffle maker. I made the mistake of asking for this Cuisinart 6 slice waffle maker that I thought would save me from standing over the waffle maker and enjoy some time with my family. Instead, we found the waffles that it created were teeny-tiny waffles and six of these teeny-tiny waffles barely fed one mouth and got cold before the syrup hit them. I am still a fan of a simple and inexpensive Belgain waffle maker.

Freeze the Leftovers– I try to always make a double batch of batter to insure that we can enjoy waffles all week long. As I make the extra waffles, I fan them out on my cooling racks until they are completely cool. Once they are cool, I slide them into a freezer bag, stacked on top of one another. If they are completely cool before freezing, they will just pop apart without the need for any wax paper to go in between.


Cut Those Waffles in Record Time– If you have several mouths to feed, cutting the waffles can be tedious work. My favorite and most overworked gadget in my kitchen drawer is the pizza cutter. Cut the waffles into waffle strips for dunking in the syrup on the side or cut into bite-sized pieces in record time.

Make the Toppings Fun– Waffle toppings don’t have to be boring and I love to add variety to my toppings. Try this recipe below for blueberry syrup in the summer or this apple cider syrup in the fall to spice up the waffles. Forget the syrup and serve with a little nutella, peanut butter, or just a little fresh fruit on top.  Don’t forget you can also ditch your dependence on store-bought syrups and make your own homemade pancake syrup at home.

Fresh Blueberry Pancake Syrup

1 pint (or two cups) fresh blueberries
1 cup sugar
1 teaspoon vanilla
1/4 cup water

Place all ingredients in a saucepan. Cook over medium heat and stir to dissolve the sugar. Allow it to cook for 12-15 minutes and give the berries a little smash with your wooden spoon to break them up into the syrup. This syrup can be served warm over The Best Waffles Ever or you can serve the syrup cooled.

Homemade Pancake Syrup

2 cups warm tap water
4 cups sugar
2 tablespoons molasses
1-1/2 teaspoons maple flavoring
1/4 teaspoon butter flavoring (optional)

In a three-quart saucepan combine the water, sugar and molasses. Put the pan on the stove over medium heat. Stir every now and then until the syrup comes to a rolling boil. Watch the syrup carefully because it has a tendency to foam and will boil over if your pan is too small. If this starts to happen, remove the pan from the heat and turn the heat down. After the syrup boils, cover the pot and simmer it for ten minutes over a low flame. Do not stir it for this ten minutes. Remove the pan from the heat. Take off the lid and let it cool on the counter for about 15 minutes. Stir in the maple flavoring (and butter flavoring if you’re using it). Store the syrup in a clean quart canning jar.

Have you tried a waffle recipe that has been featured on MomAdvice? We would love to hear your feedback! Feel free to share your own recipes (links or plug in those recipes below) and share your family’s favorite food traditions!

Amy’s Notebook 03.23.11

Wednesday, March 23rd, 2011

These personalized coffee mugs would make a great quick gift (@ The Crafting Chicks)

These DIY painted mason jars would be a fun decoration for the patio (@ tatertots & jello)

Homemade Hostesss Cupcake Cake Balls? Um, YES! (@ Sugar Derby)

I am dying to try this recipe for pop overs (@ Making This Home)

These fabric bows would be a cute way to use up scrap fabric (@ whip up)

I am adding this garlic pepper shrimp to our menu plan (@ Cheeky Kitchen)

As a reader and homemade brooch fan, I love this book brooch idea for a fun book club treat (@ Peppermint Plum)

Snickerdoodle popcorn with white chocolate drizzle looks like a fabulous little treat (@ Picky Palate)

I am so impressed with these adorable cardboard guitars (@ make it & love it)

This photo time capsule is a fun way to scrapbook your children (@ Maryjanes & Galoshes)

I am in love with this beautiful hydrangea cake (@ i am baker)

I have had German pancakes on my list of things to make for awhile- this is really inspiring me (@ two peas and their pod)

This shrimp & grits recipe looks heavenly (@ the kitchn)

These brown butter waffles look like a fun take on a waffle night at our house (@ shutterbean)

I am loving this reminder to fill your home with the unseen (@ Under the Sycamore)

This girly monster bash is amazing (@ kara’s party ideas)

These DIY watercolors would be a fun rainy day activity (@ oh my! handmade goodness)

These DIY chalkboard vases would be a cute way to personalize a bouquet of flowers (@ Centsational Girl)

My daughter would love to make these spring daffodils (@ alphamom)

There are few things I love more than homemade bread. I gave my bread machine a break and gave this homemade whole wheat sandwich bread recipe a try from Musings of a Housewife, that happened to be featured in our notebook (circa 01.27.10 ). There are no words to describe this deliciousness. The bread was filled with that whole wheat goodness, but not heavy like some whole wheat breads can be.  Topping it with a little melted butter really added to the decadence of enjoying a midday slice for a snack!  Definitely give this recipe a try- I promise you will be impressed with yourself and your family will be impressed too!

Have you tried anything from our featured notebook entries? We would love to hear what projects you tried and how they worked out for your family!

Great Reads for Moms: March ’11 Edition

Tuesday, March 22nd, 2011

Some of my reading months are better than others, and this month was filled with a few fantastic books that I can’t wait to share with you!  I read more out of my library pile than I have in a long time and really tried to tackle some of the books that have been in my to-be-read pile for a long time.  My goal is to read one book off of my to-be-read pile each month and then tackle the newer books that I happen upon when I am at the library.

If you are looking for a little inspiration this new year, be sure to check our MomAdvice fan page for a weekly check-in on what everyone is reading each week on our Facebook Fan Page. I hope you will swing by on Fridays and share about the books you are working on or request recommendations with one another. So far it is a huge success and I have gotten a few new ideas for my own stack!

Just as a reminder, I read many more  books than are just featured here, but try to feature the ones that are my absolute best picks of the month here. If you want to read more, please feel free to friend me on GoodReads! My username is momadvice and I am always happy to connect with people there too! There is nothing more motivating than seeing what other people are raving about and my to-be-read pile continues to grow with all of my new friends on there! In fact, many of the books featured are ones that I have found through my friends on GoodReads.

Don’t forget to make your own commitment towards a reading challenge this year! So far I have read 14 books out of my goal for 80 books read this year. We will see if I can really make it to 80!

Without further adieu, here are four wonderful books that I recommend for this month’s reading:

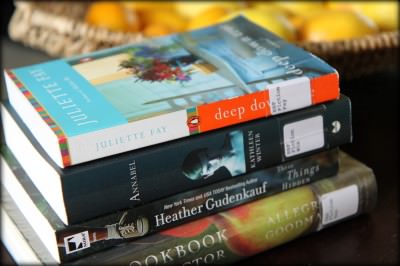
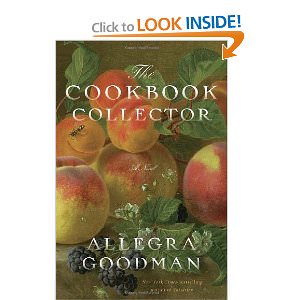
The Cookbook Collector by Allegra Goodman

I have heard many friends talk about this book and I have had it on my list for awhile as a book that I wanted to tackle.  The cover and the title made me think that I was diving into a book about a cookbook collector, but this book was so much more than I had expected and unlike anything I had expected.

The story follows two sisters who could not be more opposite if they tried. Emily is a CEO of an internet start-up company while Jessamine is  a free-spirited philosophy major and participating in environmental activism on the side. Jessamine falls in love with a true tree-hugger who lives a nomadic lifestyle fighting for the rights of trees while Emily finds the love of her life in another CEO of a dot com start up.

As Emily tries to make millions with her new start-up, Jessamine is happily working a used bookstore. When a customer comes in with an unusual collection of cookbooks that she would like to have appraised, it sets the stage for Jessamine to find a new passion and question her own identity of who she is and who she loves. Emily meanwhile grapples with how she can cultivate a long distance relationship and still be a success in her company. When she confesses a secret project that her company has been working on to her boyfriend (who also works in his own start-up), it sets the reader up for a suspenseful ride as Emily tries to figure out who she can trust and Jessamine figures out just who who she is.

As the two sisters are on two entirely different paths, the reader is taken on a ride along with them as the rise of the dot com happens, the fall of the stock market, the devastation of September 11th, and the realization that the sisters are more alike than they might think.

Readers may have difficulty keeping up with the sheer volume of characters in this book and the author does fail to tie up loose ends as neatly as you might hope, but you have to pride the author on the ambition of this book.

The true appeal of the book for me was how vividly Allegra was able to capture this time period and the significance of how big the dot com bomb rose and fell.  It really brought back so many memories of the start-ups that my husband & I both ventured into when we first were married.  Anyone who survived the dot com bomb will have a true appreciation for this read!

(MomAdvice Rating- 4 Stars out of 5 Stars)

Annabel by Kathleen Winter

I happened upon this book in an Oprah book list and couldn’t wait to pick this one up at our library.  Fans of Middlesex will really and truly love this debut novel by Kathleen Winter about the difficulties of gender identification and the beauty that can bring the genders together in this lovingly crafted finalist for the Scotiabank Giller Prize.

In 1968, in a remote seaside town in Eastern Canada,  a child is born in a typical home birth with a midwife present. When the midwife, Thomasina, presents the baby to the parents she notices that the child is neither fully formed as a boy or as a girl. Jacinta and Treadway are disturbed by the news and must make the difficult decision to decide if their child will be a boy or a girl. The mother wishes to identify the child as a girl or to not identify the child, letting the child choose his/her own gender. Despite Jacinta’s wishes, they live in a traditional home where the man is the one in charge and Treadway makes the decision that the child will be a boy. The surgery is performed and hormones are given to the child, whom they name Wayne, and Treadway makes every effort for Wayne to identify with the masculine side of himself.

Meanwhile, in secret, Jacinta is quietly nurturing the female side of Wayne and allowing him to indulge in the things that make him happy, as long as Treadway is not privy to what is happening. Wayne has never been told that he was born a hermaphrodite and does not understand why he cannot seem to identify with the masculine side of himself, but finds himself drawn more to the female side.

When the shocking secret is discovered after a terrible twist of events, Wayne finally comes to the realization of why he has always felt like two different people. Inspired by the postcards he receives  from Thomasina, the midwife who delivered him, from other countries, Wayne decides to leave his small town and see if he can figure out who he is on his own.

The story is beautifully woven together as the reader struggles with what they might do as parents and hoping that Wayne can find an identity and a world that will be accepting of him…or her.

This is a book that would make a fabulous book club book and would lend itself to really great discussion!

(MomAdvice Rating- 5 Stars out of 5 Stars)

These Things Hidden by Heather Gudenkauf

If you have not read The Weight of Silence, be sure to check out my review on Heather Gudenkauf’s first novel.  Gudenkauf is quickly becoming one of my favorite authors and her second novel is filled with suspense, fabulous plot twists, and a great storyline that I devoured in just two days!  Her books, to me, are like a really suspenseful movie and what I was so fond of in Jodi Picoult’s earlier books.

Allison Green was not the typical teenager, but a golden child who excelled at everything she ever did. Straight A’s, beautiful, and a strong soccer player, she seemed to have everything going for her. In a mistake that would forever alter her existence, and even cause her parents to disown her, Allison Green is accused of murder and spends five years serving a ten year sentence.  Her reputation is marred forever, but it isn’t the only reputation to be marred.

Allison’s sister, Brynn, was constantly in the shadow of her sister and never got any attention from her parents. Living in a small town and having your sister accused of murder is social suicide for Brynn, who has lost all of her friends because of her sister’s mistake. When Allison is released early for good behavior, she is the first to be called by Allison.  Brynn won’t take her calls and finds the new existence she has created at college once again is clouded by her sister’s past.

The two sister’s worlds are about to collide as the secret of one little boy threatens three families and the reader will be shocked at the twisted web that Gudenkauf  successfully spins, weaving an unlikely set of characters together and a suspenseful satisfying ending that will leave you begging for more!

(MomAdvice Rating- 5 Stars out of 5 Stars)

Deep Down True by Juliette Fay

Shelter Me,” was one of my favorite reads last year and was a book that I immediately became enchanted with.  I was hoping to be just as enchanted with Fay’s latest release, but it fell a little short.  That being said, I still love her writing and loved this book, just not as much as her first book.

Dana Stellgarten is newly divorced and has found herself dealing with issues that she never thought she would have to deal with- a bulimic daughter, a moody son, a Goth teenage niece who has come to live with them, and a very tight money situation thanks to her ex-husband’s lack of sales.

As Dana’s world seems to be crashing in on her from all angles, Dana must try to find out who she really is without her husband and learn to solve the families problems on her own.  The story builds as Dana finds a job to help support her family and then must learn to juggle the needs of her children with her own needs- for love, for friendship, and the money to keep their family afloat.

Dana’s most surprising discovery though is that it is just as hard to make true friends in your middle age as it is when you are a teenager. As her daughter’s eating disorder stems from wanting to fit in with the cool girls at school, Dana finds herself being reeled in by the town’s queen bee and compromising what feels good to her to make friends.  Both Dana & her daughter must learn what really will ultimately make them happy, and find that place within themselves.

Readers will be in for a bumpy ride as you go on the journey of Dana’s love life after divorce, but the message that we all have to find that “deep down true” place, no matter how old we get, will really resonate with readers. The takeaway message was a beautiful one, but the everyday minutiae to get there might be why the book wasn’t a knockout for me like, “Shelter Me.”

(MomAdvice Rating- 3  1/2 Stars out of 5 Stars)

**********************************************

Not enough great reads for you? Check out our Books section of our site for monthly recommendations and ideas for making reading a priority again in your busy mom life!

Disclosure: All of the links above are affiliate links and are provided so you can locate the books quickly and easily. Feel free to order a book, but we encourage utilizing the library system and buying me a latte instead.  Then we both would be really happy and we could have our own little book club together! Wouldn’t that just be so much more lovely? Happy Reading!

What has been in your book stack this month? Feel free to share your book recommendations or feedback on any of the books that have been mentioned above! I love getting new suggestions for my book pile!

An Apron Full of Giveaways 03.22.11

Tuesday, March 22nd, 2011

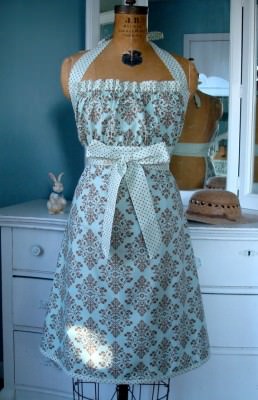
Handmaidens Cottage, $35

Welcome to our Apron Full of Giveaways! I hope everyone is having a great week this week! As we do each week,  here is our round-up of giveaways for our readers. We hope that this is beneficial to you and your family! Please let us know if you guys win anything- I love to hear the success stories!

Below are the contest links-if you are hosting a contest please link it up below. Sorry, we aren’t giving away the aprons just showcasing them! Please put your site name and then what type of contest you are hosting. For example, “MomAdvice (Kid’s Movies).”

Please let me know if you have any questions and good luck to each of you!

California Italian Wedding Soup

Monday, March 21st, 2011

Last week we celebrated my husband’s birthday and his birthday dinner request happened to be my Rotini With Turkey Meatballs. Since I was making meatballs already for our dinner, I decided to make a double batch and make a little California Italian Wedding Soup for our soup this week.

Each family member has their own favorite soup. My daughter loves my chicken & noodle soup and now begs for it every time she has a tiniest bit of ache or pain. She claims that this soup is the only thing that could make her feel better. My son flips for my Pesto Chicken Tortellini Soup and asks for this weekly. My Greek Lemon Chicken Soup is my new favorite thing… in fact, I can almost taste it! My husband though firmly states that this California Italian Wedding Soup is the most comforting and satisfying soup on our family’s soup agenda.  Satisfyingly hardy with meatballs blended with ground turkey & beef , but also surprisingly light with fresh basil, spinach, and hints of lemon in every bite… it truly is a delicious soup treat for the whole family.

You won’t believe how easy it is to make this soup and with a double batch of baked meatballs in the fridge, you will have a great soup to feed a small army with a minimal amount of effort!

Grab four carrots out of your crisper drawer and chop them in small even pieces for your soup. This is a great time to get rid of any carrots that have lost some of their crispness since we will be cooking them up!

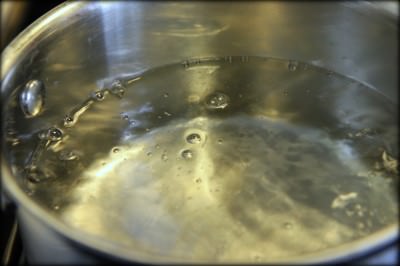
In a pot of salted & boiling water, add one cup of any small pasta that might be lurking in your pantry. I love to use small shells or orzo for this dish since those are two pastas we always have on hand. Cook as directed on the package.

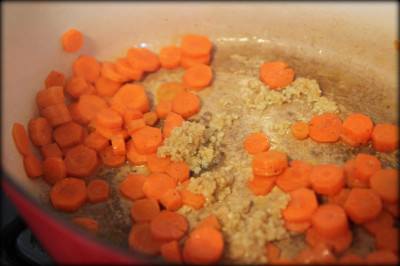
In another pot, add a couple of tablespoons to the bottom of the pot and then add carrots, salt, and pepper. Let them cook for five minutes. Add two cloves of minced garlic to the pot and let the garlic cook for one minute. Be careful and don’t have your heat up too high for this or the garlic will burn.

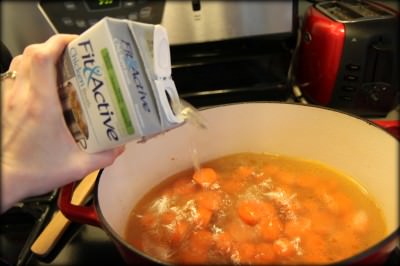
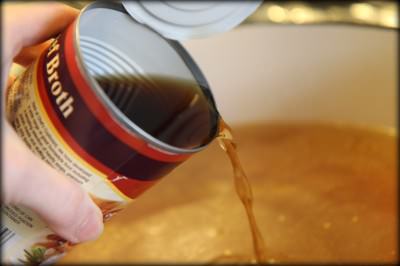
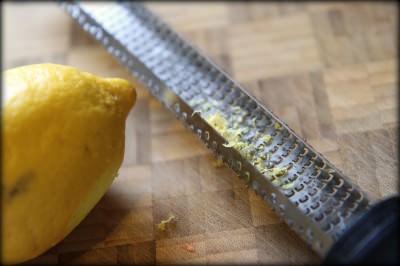
You can now add the broth to your carrots and garlic. Add two boxes (eight cups) of low-sodium chicken broth. Next, you will add your secret weapon…one can of beef broth.  This is going to add to the meaty taste of your soup since you are baking your meatballs instead of cooking them in the soup. Finally, add the zest of one lemon to the broth. Save this lemon since we will be adding the juice to the broth later!

Pull your meatballs out of your fridge and add them to your soup broth along with your drained & cooked pasta. If you don’t have any meatballs on hand, you can use our recipe below for an easy (and lower fat) way of cooking meatballs for your dishes. Now that I bake my meatballs, I will never make them any other way again! These are full of flavor with Italian breadcrumbs, cheese, and a hint of tomato. I promise, they are just as delicious as the fried versions and incredibly moist and flavorful.  Yum.

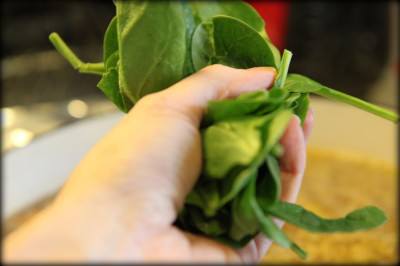
Add the final ingredients to your soup! Mix in fresh spinach, freshly chopped basil, and the juice of one lemon. Give your soup a taste and check your seasonings. Ladle into bowls and serve with a side of my Portuguese White BreadPumpkin Cornbread Muffins, an Artisan Loaf, or my Homemade Whole Wheat Bread to make a delicious accompaniment.

California Italian Wedding Soup

8 cups low-sodium chicken broth
1 can (2 cups) beef broth
1 lemon, zested (save the juice for finishing the dish)
2 tablespoons olive oil
3-4 carrots, chopped into uniform pieces
2 cloves of garlic, minced
1 cup pasta (preferably orzo or small shells)
1 pound of prepared meatballs (see recipe below)
2 cups fresh baby spinach
2 tablespoons freshly chopped basil
Juice from one lemon
Parmesan cheese (for sprinkling on your finished bowls)

Bring a large pot of lightly salted water to a boil. Add noodles and cook until tender. Drain, and rinse under cool running water. Meanwhile, in  a large saucepan or Dutch oven, saute the carrots in two tablespoons of olive oil for five minutes to start your soup base or you can skip this step and proceed as directed, if you desire a crunchier vegetable. Add the minced garlic and cook for one minute (being careful to not allow the garlic to burn).   Heat up the broth (chicken & beef) and add the zest of one lemon, allowing the broth to simmer.   Gently add your cooked meatballs to the pot.  Reduce heat and cook until the meatballs are heated through. Toss in a handful of fresh chopped basil, the juice of one lemon, and fresh spinach.  Ladle into bowls and sprinkle with Parmesan cheese.

Baked Turkey Meatballs

This recipe will give you a double batch of meatballs. I recommend using the other half of this recipe for our Homemade Spaghetti & Meatballs, Rotini With Turkey Meatballs, or a fun make-your-own meatball sub night for a busy weeknight dinner!

1/2 cup Italian bread crumbs
1/2 cup chopped fresh flat-leaf parsley
4 large eggs, lightly beaten
2 tablespoons milk
2 tablespoons tomato paste
1 1/2 cups grated Parmesan cheese
2 teaspoons salt
1 teaspoon freshly ground black pepper
1 pound Italian turkey sausages (remove the casings)
1 pound lean ground beef

In a medium bowl, stir together the bread crumbs, parsley, eggs, milk,tomato paste,Parmesan cheese, and the salt and pepper. Add the turkey & ground beef, then gently stir to combine. Make your meatballs the standard size and put them on a baking sheet. Bake at 400 degrees for ten to fifteen minutes. When done cooking, drop in the baked meatballs for a few minutes. This will be just as delicious with a lot less mess and fewer calories.

This concludes my soup series as we move into fun grilling ideas and dishes for Spring. I hope you have gotten a little soup inspiration here and are enjoying the picture tutorials to go along with our recipes too! I would love to hear your feedback!

Amy’s Notebook 03.16.11

Wednesday, March 16th, 2011

My kids would adore these rainbow waffles (@ Random Thoughts of a Supermom)

I love these five ideas for organizing your pantry (@ Infarrantly Creative)

I need someone to sew me one of these knitting needle cases (@ design sponge)

My son would flip for these Lego man cookies (@ The Sweet Adventures of Sugar Belle)

These fully loaded granola bars look like a healthy snack (@ shutterbean)

This weeknight bolognese sounds like a fun way to switch up spaghetti night (@ Annie’s Eats)

These St. Patty’s smoothies would be a great way to get in those fruits & veggies (@ One Charming Party)

Nutella meringues? Be still my beating heart. (@ Cream Puffs in Venice)

These homemade whole wheat goldfish crackers look so yummy! (@ smitten kitchen)

These toy spice jars would be a cute addition to your child’s kitchen accessories (@ ohdeedoh)

This fruity pulled chicken looks like a fun weeknight meal (@ Coconut & Lime)

These little squirrel mailing labels would a fun way to dress up a package (@ How About Orange?)

This Greek-style chickpea salad would make a delicious & satisfying lunch (@ Remodeling This Life)

I am going to make one of these moss letters for my front door for Spring (@ Be Sweet)

These Easter egg hunt bags are just precious (@ the purl bee)

This chicken wire wall adds so much pizazz to the wall for just a little money (@ Under the Sycamore)

The kids and I are going to have to make some plastic egg garland for the house (@ Family Chic)

I am dying to make this cute ruffled rosette belt (@ Happy Together)

This rainbow pudding would be a cute St. Patrick’s Day treat (@ Craft)

This low-fat carrot cake would be a sweet Spring treat (@ The Farm Chicks)

Who knew you could dye feathers for your art projects (@ Maryjanes & Galoshes)

This week we sampled these Oatmeal Chocolate Chip Sea Salt Cookies from Weelicious that were in our notebook (circa 02.16.11 entry).  I used kosher salt to top my cookies and mini chocolate chips instead of the bigger chips since we are a family that loves a hint of chocolate rather than big bite of it.  I don’t think I will make another kind of oatmeal cookie again. They are so good and have been devoured in record time.  You must try them!

Have you tried anything from our featured notebook entries? We would love to hear what projects you tried and how they worked out for your family!

Favorite Coffee Snack: Light Snickerdoodle Biscotti

Tuesday, March 15th, 2011

If you have been a reader here for awhile, you will have no doubt that coffee is my ultimate weakness. Coffee plus coffee treats…well, where do I sign up for that? After having such a blast participating in the Better Homes & Gardens cook-off, I was asked if I would like to participate in another fun contest where our readers could vote on their favorite coffee snack. Better Homes & Gardens sent me their new Stand Mixer ($129) , a Grind & Brew Coffeemaker($99), and a 5 Piece Nonstick Bakeware Set ($34.97), (all exclusively available at Walmart) to create my snack.

Considering I severely burnt the bottom of my cookie sheet, I am a coffee addict, and my stand mixer chose that week to kick the can…I couldn’t wait to create some treats with some fresh new kitchen accessories.

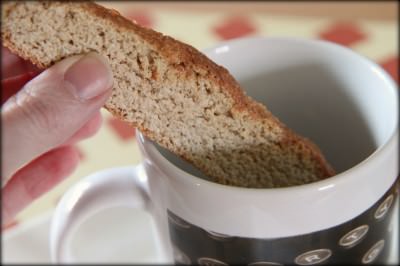
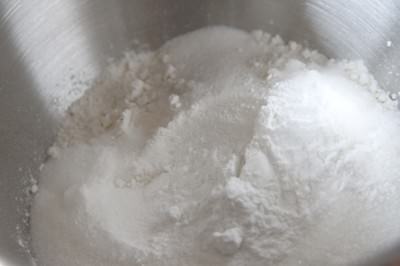
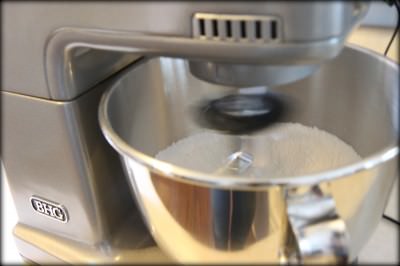
If you can make cookies, you can make biscotti! Biscotti is basically a twice baked cookie that is perfect for coffee dunking. In your mixing bowl, whisk or stir on low your flour, sugar, cream of tarter, cinnamon, baking powder, and salt.

In a second bowl you will mix together your wet ingredients. In this bowl will be your egg, vegetable oil (only two tablespoons), and vanilla extract.

Turn on your mixer to low and add your wet ingredients to the dry ingredients. Here is the new BHG stand mixer that they sent. As someone who bakes a lot, I really love how quiet this mixer is, the thoughtful attachments that are included, and the rubber suction cups on the bottom so your mixer doesn’t hop around. I am sure it is going to get a lot of love in our kitchen! I am also doubly impressed that it is a mere $129, which is a steal in the stand mixer world.

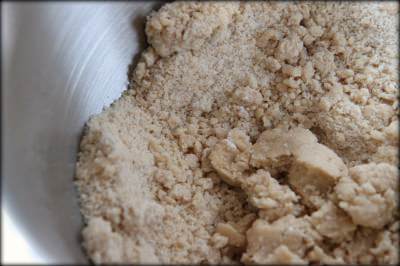
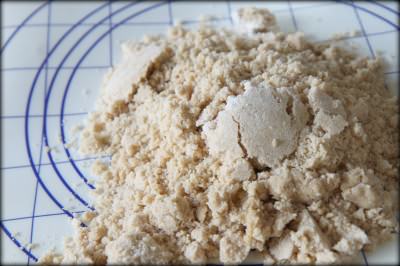
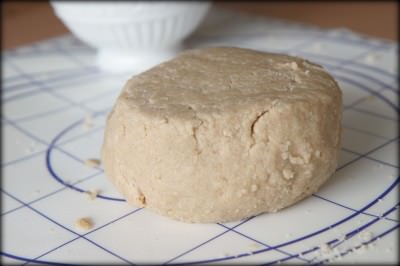
After it is done mixing, it will look like this… a big crumbly mess. You are going to be scratching your head wondering if you did something wrong. I promise you didn’t, it will all pull together.

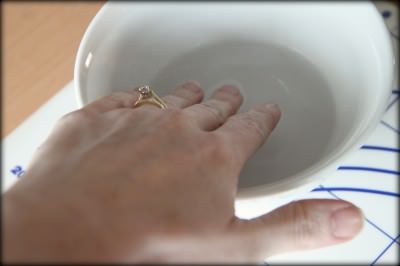
Grab a small bowl and fill it with water. You are going to want to dip your hands in the water and then with wet hands, start kneading the dough and pulling it together.  It will take a bit of work, but eventually it will look just like that dough ball pictured above.

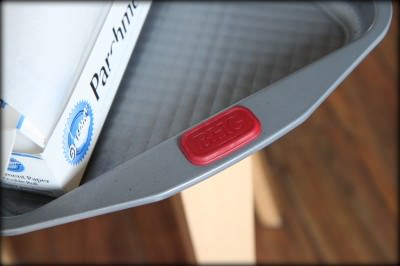
Line your cookie sheets with some parchment paper. This will make clean-up a breeze! I love the silicone handles on these cookie sheets and how easily they do come clean. I am not much of a cookie baker, I will admit, so if my cookies fly off a cookie sheet and turn out looking like a cookie…I am super impressed.

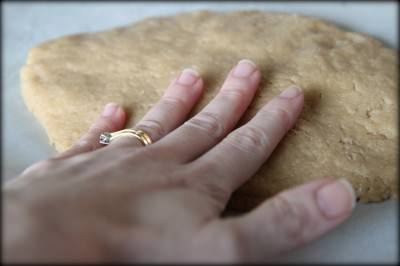
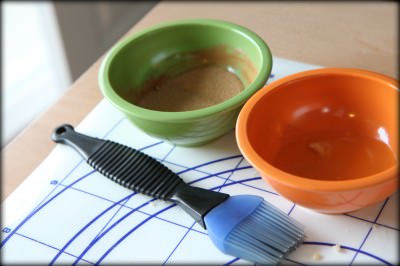
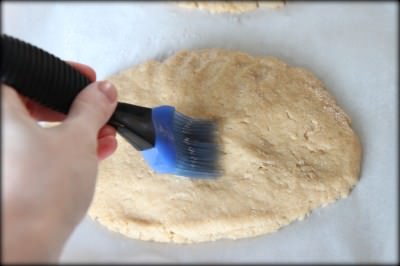
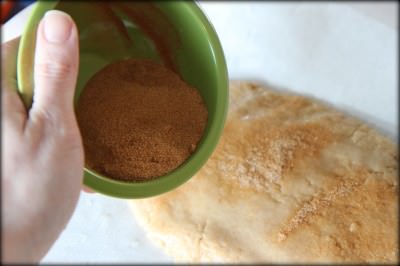
Divide your dough into two equal parts and then flatten the dough until it is roughly 8 inches in length, with about a 1 inch thickness. Make sure that the two balls have enough space to grow when they are baking. In two small bowls, you will have the final ingredients to dress the biscotti. In one bowl, mix cinnamon & sugar, in the other add one egg white. Brush the biscotti with the egg white and then shake on cinnamon & sugar (very liberally) to the top. Slide in a 350 degree oven for a half hour.

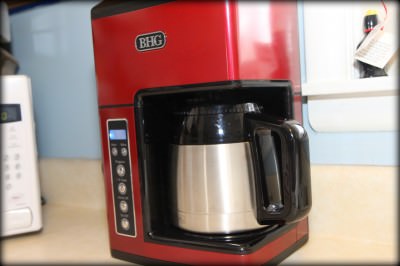
Now you will have a half an hour to do whatever suits you best…coffee happens to suit me best. Please ignore my travesty of a look this morning. Daylight Savings Time could nearly kill a mom. I was very happy to wake up to freshly ground and brewed coffee. I have never had fresh coffee beans or had coffee that was freshly ground.  This coffeemaker is unbelievable- you can program it to grind & brew before you even wake up.

Remind me to tell you about my embarassing story about buying coffee beans. Apparently, I didn’t understand what buying in bulk was and couldn’t understand what idiot wouldn’t fill the bag all the way to the top when it had little markings on the bag. I figured I would get all the beans I was paying for and filled that bag until it was practically bursting.

Costly mistake, my friends, costly mistake. Wow, I really feel like we are sharing over coffee together today.

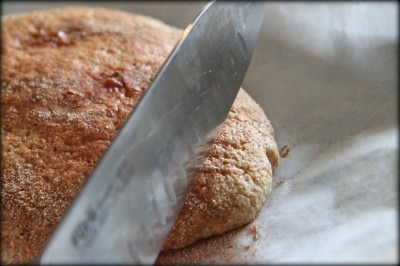
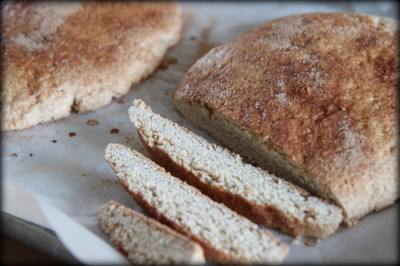
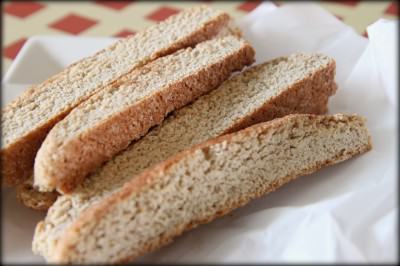
Pull the delicious biscotti from the oven. Now patiently wait and drink more coffee for ten more minutes before slicing it.

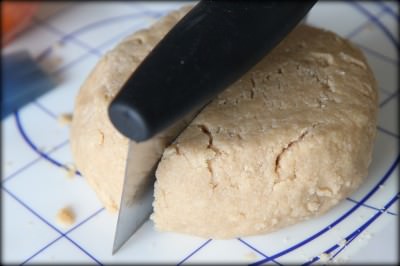
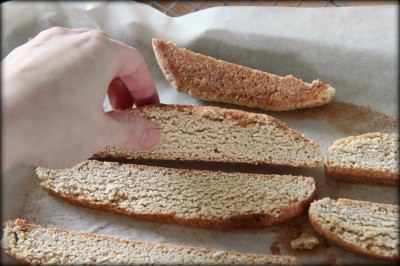
With a very sharp knife, cut your biscotti on a slight angle, into roughly fifteen pieces for each dough ball. Lay them flat and slide them back into an oven that has been lowered to 325 degrees for ten minutes. Drink more coffee while you wait and eat all the crumbs that fell off. Purposely break and crumble a few because you can’t stand how good they smell and you are impatient. And you had to get up an hour early. And your kids have no mercy on you because you are tired.

For the final step, flip the biscotti and then bake the flipped side for ten more minutes. Allow them to cool and then store in an airtight container.

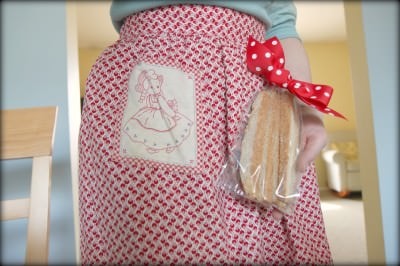
Eat or share with a friend! Packaged with pretty ribbon and in a clear bag, these would make a wonderful gift for someone you love. I hope you will love them as much as I do! It really is the ultimate little coffee treat!

Snickerdoodle Biscotti (adapted from Cooking Light Magazine)

2 3/4 cups all-purpose flour

1 cup sugar

2 teaspoons baking powder

1/4 teaspoon salt

1 teaspoon cream of tartar

1 teaspoon cinnamon

1 tablespoon vegetable oil

1 teaspoon vanilla extract

3 large eggs

2 tablespoons sugar

1 teaspoon cinnamon

1 large egg white

Preheat Oven to 350. Measure flour, sugar, baking powder, salt, cinnamon, and cream of tartar in a large mixing bow bowl. Mix Oil Vanilla and whole eggs in a small bowl and add to the large bowl, your dough will be dry and quite crumbly. Turn dough out onto a floured surface and knead until it pulls together into a ball. Divide in half. Shape each portion into a roll about 8 inches long, and place them six or so inches apart on a cookie sheet lined with parchment. Flatten each roll to 1 inch thick. Combine the 2 tablespoons Sugar and cinnamon, then gently brush the tops of the rolls with the egg white and sprinkle with cinnamon sugar. Bake at 350 for 30 minutes. Remove from the sheet and cool for 15 minutes. Cut diagonally into 1/2 inch slices and lay them cut sides down on the cookie sheet again. Reduce oven temp to 325 and then bake 10 more minutes, turn over and bake 10 more. They’ll be soft in the middle but will harden as they cool. Cool completely on a wire rack and store in an airtight container.
**************************
This recipe is a contest submission for Better Homes & Gardens Favorite Coffee Snack contest. The contest will go live tomorrow and you can vote for your favorite snack between now and March 30th. The person with the most votes will get three sets of bakeware and a $100 Walmart gift card to giveaway to their readers. Check tomorrow and throw in a vote if you love my biscotti! I was provided the bakeware sets, stand mixer, and coffeemaker to complete my submission. All thoughts and opinions are my own.

What is your favorite coffee snack at your  house? Do you have any fun tips for a coffee experience at home? We would love to hear them!

An Apron Full of Giveaways 03.15.11

Tuesday, March 15th, 2011

Cafe Gnome, $13

Welcome to our Apron Full of Giveaways! I hope everyone is having a great week this week! As we do each week,  here is our round-up of giveaways for our readers. We hope that this is beneficial to you and your family! Please let us know if you guys win anything- I love to hear the success stories!

Below are the contest links-if you are hosting a contest please link it up below. Sorry, we aren’t giving away the aprons just showcasing them! Please put your site name and then what type of contest you are hosting. For example, “MomAdvice (Kid’s Movies).”

Please let me know if you have any questions and good luck to each of you!

Greek Lemon Chicken Soup With Bread Machine Pitas

Monday, March 14th, 2011

This soup… oh, this soup. Words seem indescribable to explain how it tastes like love, like comfort, and like coming home. If ever there was a soup that a girl could be proud of, this is my soup. It is rich and creamy tasting, but lightened with lemon. It is, in my humble opinion, the best pot of soup I have ever made.

Let me not say that this comes without effort. The day I made this soup our kitchen was a roaring 500 degrees, I was stripped down to my workout clothes and my hair was in a frizzy singed state from leaning into an oven to flip pitas. I mistakenly had picked up cilantro to garnish my soup instead of parsley and there were bits of food all over my sad apparel. As my sweaty hand clutched my camera to take the preparation pictures,  I sadly watched my soup getting colder by the minute garnished with cilantro (my least favorite seasoning) for that perfect finish photo. At that moment,  I heard something roaring in my head….

“THIS IS NUTS.”

Then I sat down and I ate it…and every moment of crazy was worth this effort. The soup kept giving to me for an easy midweek lunch, a shared lunch with a good friend, and then the final bowl was enjoyed this weekend.

Those moments of effort seem worth the crazy sometimes. And crazy is likely what my husband thought when he saw me sweating, red-faced, in my tank top with a singed hair halo around my pink face…but he & my kids agreed it was worth mommy’s crazy for a bowl of this.

The beginning preparation will look familiar to you if you have prepared my Chicken & Noodle Soup. We are going to chop some carrots for our soup base. I like four carrots, but you can do more or less, depending on how many carrots you like in your soup.

In a large pot, drizzle a couple of tablespoons of olive oil and drop your carrots into the pot. Season these with salt and pepper. Let them cook for five minutes to get a good base to your quick soup going.

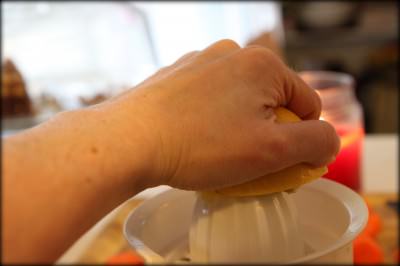
Juice a couple of lemons to add to your chicken broth. You will need 1/2 a cup of juice for this recipe. Please use real lemons, not the bottled stuff…it really is worth it!

Pour eight cups of low-sodium chicken broth into your pot that is filled with the carrots.  Add the juice of the lemons to the pot and season with another round of salt and pepper. Bring this liquid to a nice, slow simmer.

Take advantage of a sale like I did, and snag a rotisserie chicken to use for your soup. Rest your bird in the simmering liquid and let it cook for fifteen minutes, allowing the seasonings from the bird to season your broth. Oh, this is going to be so delicious!

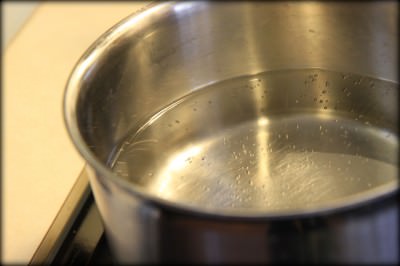
In a separate pot, bring a pot of water to a boil. Season generously with a little salt. Add 1 cup of orzo pasta to this pot and cook as directed. Once, it is cooked, drain the pasta and set it aside for your soup.

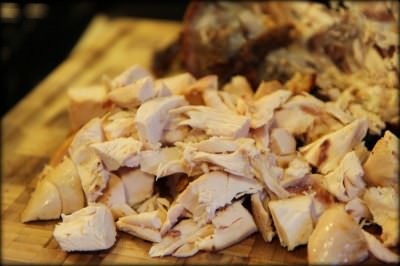
Carefully pull your chicken out and dice the meat from the bird for your soup. Let it rest for a few minutes while you finish your soup base.

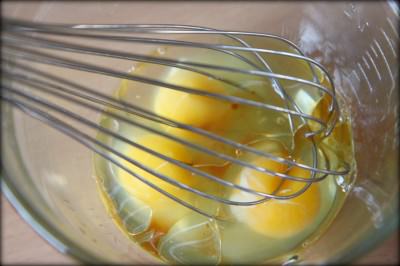
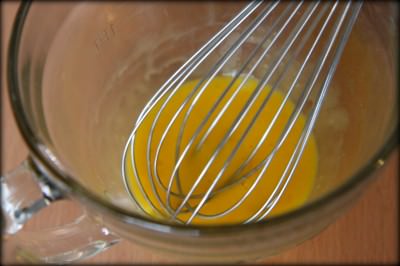
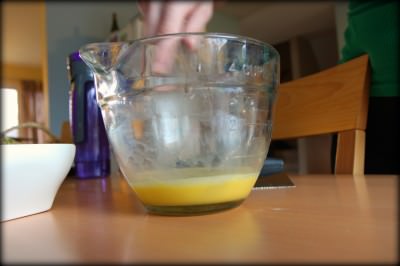
Now comes your secret ingredient to the creaminess of your soup…egg yolk. Whisk three egg yolks in a separate bowl. Now you need to temper your egg yolks (sounds fancy, but it is not),  by adding a little of the hot soup base to your eggs and then whisking the heck out of it.  By adding a little of the hot liquid to your egg yolks, you are preventing a scrambled egg mess in your soup. Once you have added some of this hot liquid to the eggs and whisked it, you can whisk the egg mixture into your whole pot of soup. Again, whisk the heck out of it. Don’t freak out- you got this!

Add back in your chicken and the orzo pasta. Stir and ladle immediately into bowls garnished with parsley and lemon slices.

You can serve your soup with store-bought pitas, or you can give my bread machine pita recipe a shot. I highly recommend at least attempting this recipe sometime, these homemade pitas are heavenly and are so yummy, hot out of the oven.  The best part, is that your bread machine can do all of the hard work for you!

Greek Lemon Chicken Soup

8 cups chicken broth

1/2 cup fresh lemon juice

4 carrots, chopped

1 cup cooked orzo pasta

Diced, cooked chicken meat (from a rotisserie chicken)

Lemon slices, fresh parsley, salt & pepper for seasoning & garnish)

3 egg yolks

Bring a large pot of lightly salted water to a boil. Add orzo noodles and cook until tender. Drain, and rinse under cool running water. Meanwhile, in  a large saucepan or Dutch oven, saute the carrots in two tablespoons of olive oil for five minutes to start your soup base or you can skip this step and proceed as directed, if you desire a crunchier vegetable.  Heat up broth and fresh lemon juice and bring it to a simmer. Gently add your rotisserie chicken and all of the drippings from the pan and put a lid on your pot.  Reduce heat, cover, and simmer 15 minutes.  Pull out your chicken and set aside to dice.  Meanwhile, beat the egg yolks until light in color. Gradually add some of the hot soup to the egg yolks, stirring constantly. Return the egg mixture to the soup pot and heat through. Add the orzo and chicken. Ladle hot soup into bowls and garnish with lemon slices. Toss in a handful of fresh chopped parsley and ladle into bowls.

Side note: If you like a thicker soup base, you can melt two tablespoons of butter and then spoon two tablespoons of flour in the pot, after you have cooked your carrots. Add a little of your chicken broth to the flour & butter and whisk it, then whisk the rest of your soup broth and lemon juice in, to help prevent lumps. This will give you a thicker base to your soup broth.

Pita Bread (for the Bread Machine)

1 1/3 cup water
3 tablespoons olive oil
1 1/2 tablespoons sugar
1 teaspoon salt
3 cups bread flour
1 1/2 cups whole wheat flour
2 teaspoons yeast

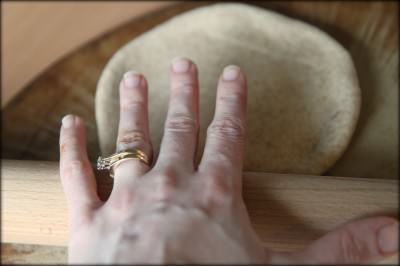
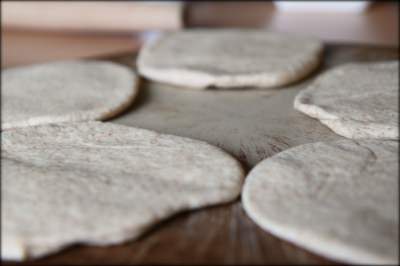
Put ingredients into the bread machine in order listed. Run the dough cycle on your machine. When the bread machine beeps, pull the dough out of the bread machine and divide the dough into ten pieces. Roll each piece into a six inch circle. Place these on a baking sheet (or your pizza stones) and let them rise for twenty minutes (I can fit about four rounds per pizza stone or three pitas per baking sheet). Bake at 500 degrees for three minutes. Using a spatula, flip the pitas and cook for another three to four minutes on the flip side.

Side Note: When you pull the pitas off of your baking sheet, wrap them into a damp kitchen towel for a few minutes. This helps keep them from drying out. Once they are cool, you can store them in a food storage bag. Freeze extras for a rainy day! After the pitas have cooled, slip a piece of wax paper between them and store in a freezer bag. You can take out what you need…when you need it!

What is a dish that you are so proud of, but feels like it takes a lot of effort to make? I would love to hear your crazy kitchen confessions!