Archive for the ‘Home’ Category

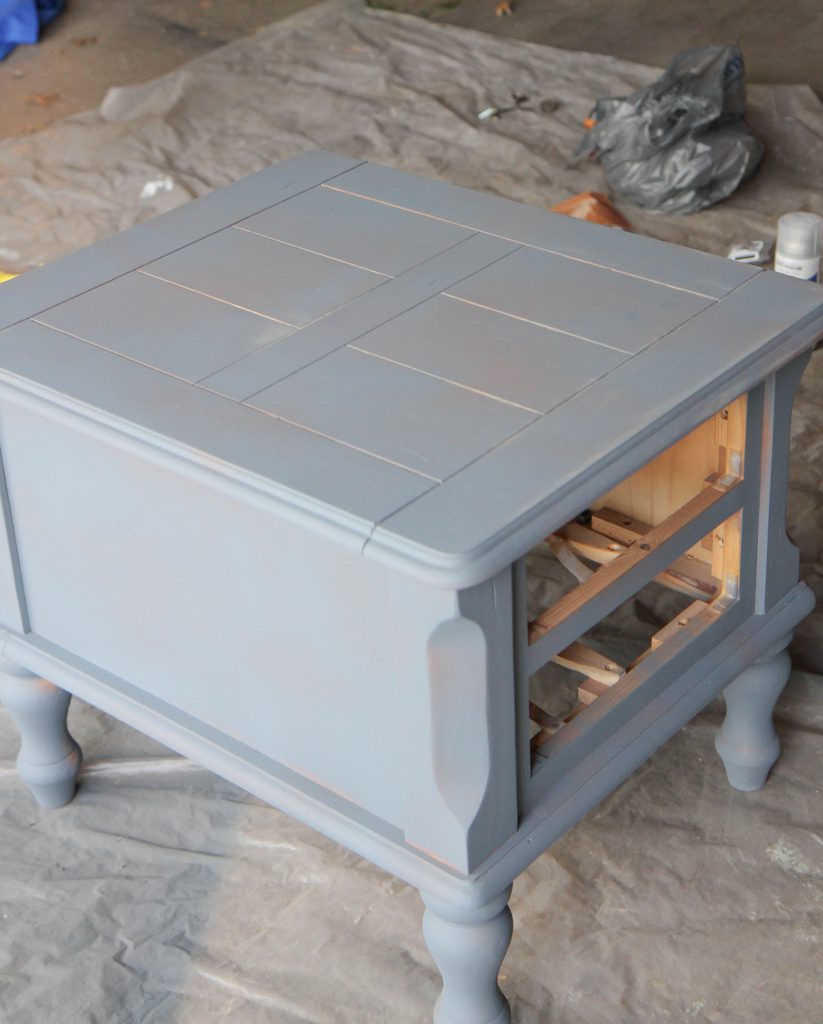
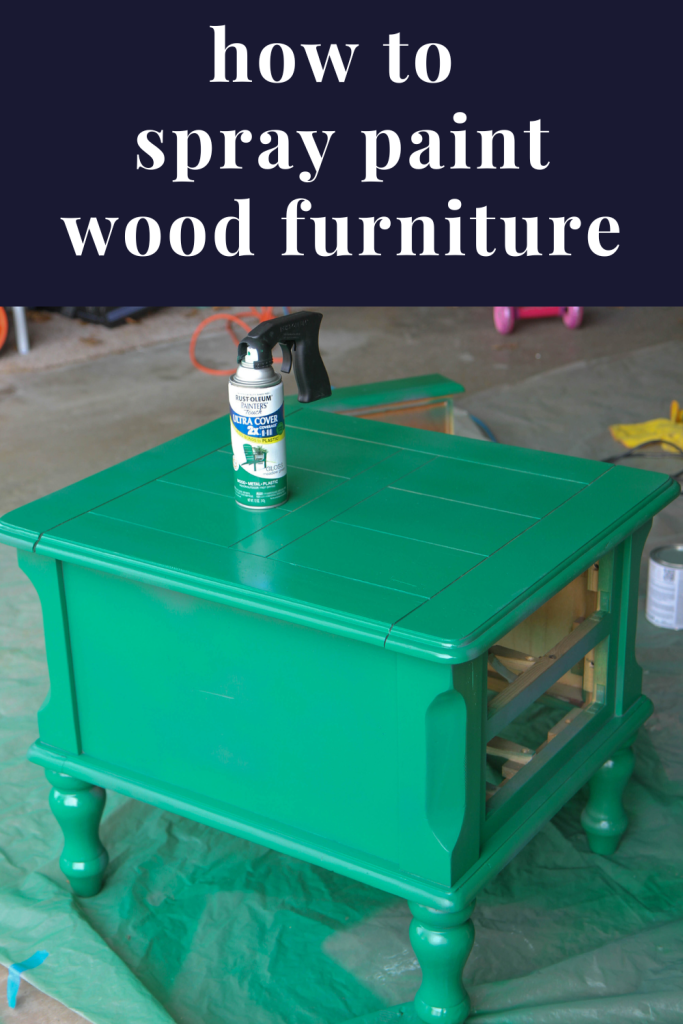
The Spray Painting on Wood Furniture Technique You Need Now

Tuesday, February 27th, 2024
The Spray Painting on Wood Furniture Technique You Need Now

This EASY tutorial teaches you how spray painting on wood furniture can transform a piece. This paint job is a budget-friendly beginner project.

Painting furniture with a brush can be time-consuming, so I have fallen in love with this spray painting technique, which gives a fresh new look with a small time investment.

Today I am going to show you how to spray paint your wood furniture to give an old piece in your home a new lease on life.
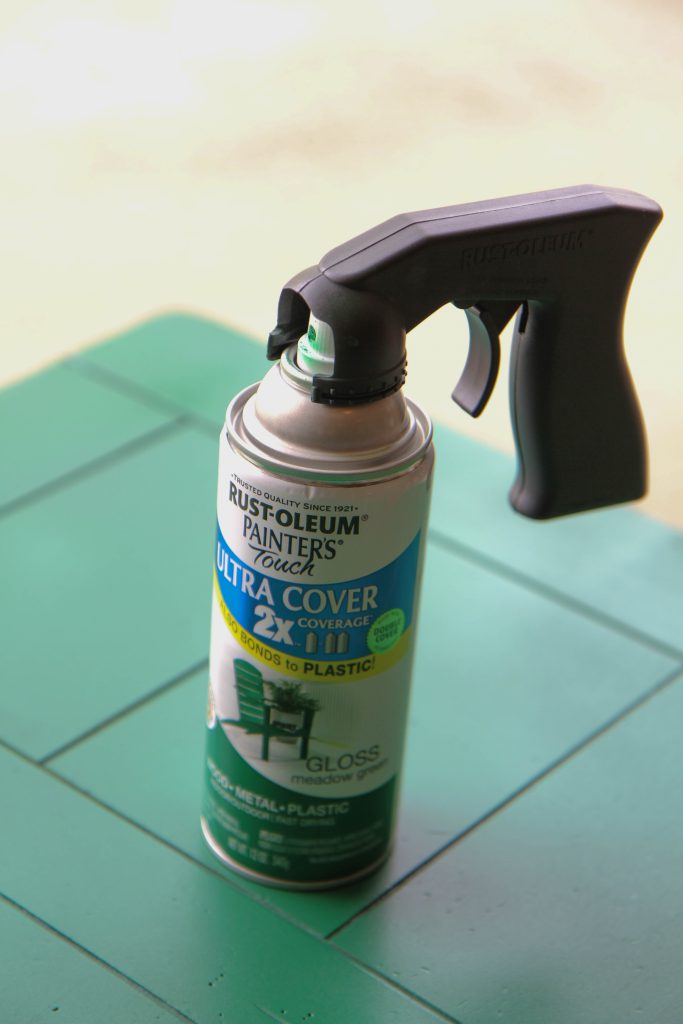
Rust-Oleum Ultra Cover 2X Spray Paint

Can you use spray paint on wood?

You might be surprised to learn that spray painting on wood furniture IS a great way to update your wood furniture pieces.

I have spray-painted many pieces in our home with great success.

Much of your success with this painting project will be found in these valuable tips, including inverting your furniture when painting, using a spray grip, and picking the right spray paint for your project. 

How to Spray Paint Furniture

Today, I’m painting furniture pieces that have withstood the test of time for TEN YEARS in our home. I’d love to share some tips for your first project if you have never spray-painted furniture. 
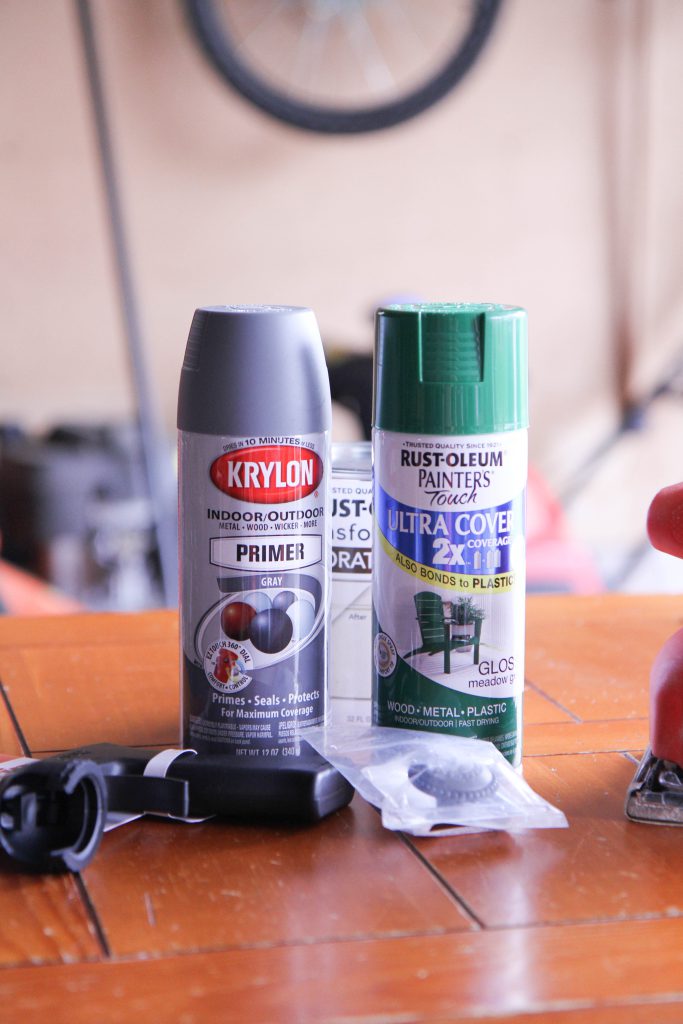
The Spray Painting on Wood Furniture Technique You Need Now- Painting Supplies

Considerations for Spray Painting Wood:

You can scroll down to see the complete supplies list and step-by-step instructions.

Choose the Right Spray Paint:

When spray painting wood furniture, the quality of your spray paint matters. 

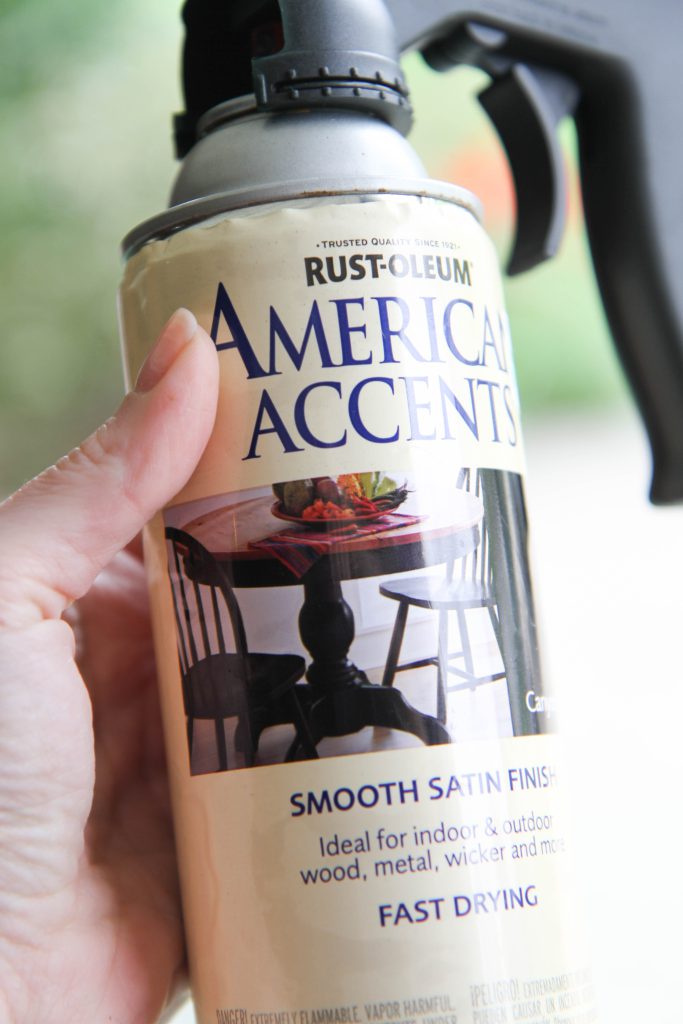
I’ve had great success with Rust-Oleum spray paint for its excellent coverage, fast drying times, and durable finish. 

Not only will you find a wide variety of gorgeous colors, but they also offer fabulous finishes like metal and stoneware to experiment with on other elements in your pieces.

Determine Paint Quantity:

Before starting your project, estimate how much spray paint you’ll need to cover your furniture adequately. Having extra spray paint on hand is better than running out midway through. 

Most spray paint cans indicate the coverage area on the label to help you calculate, but at minimum, you will need 2-3 cans for each project. 

Prepare Your Space for Spray Painting:

Whether you paint indoors or outdoors, ensure proper ventilation to avoid inhaling fumes and overspray. 

If painting indoors, protect surrounding surfaces from overspray with drop cloths or cardboard. You can also use a paint tent to help with this process. 

Prepping Wood for Spraying

Proper preparation is critical to any successful spray painting project.

Clean the wood thoroughly to remove dirt or grime. 

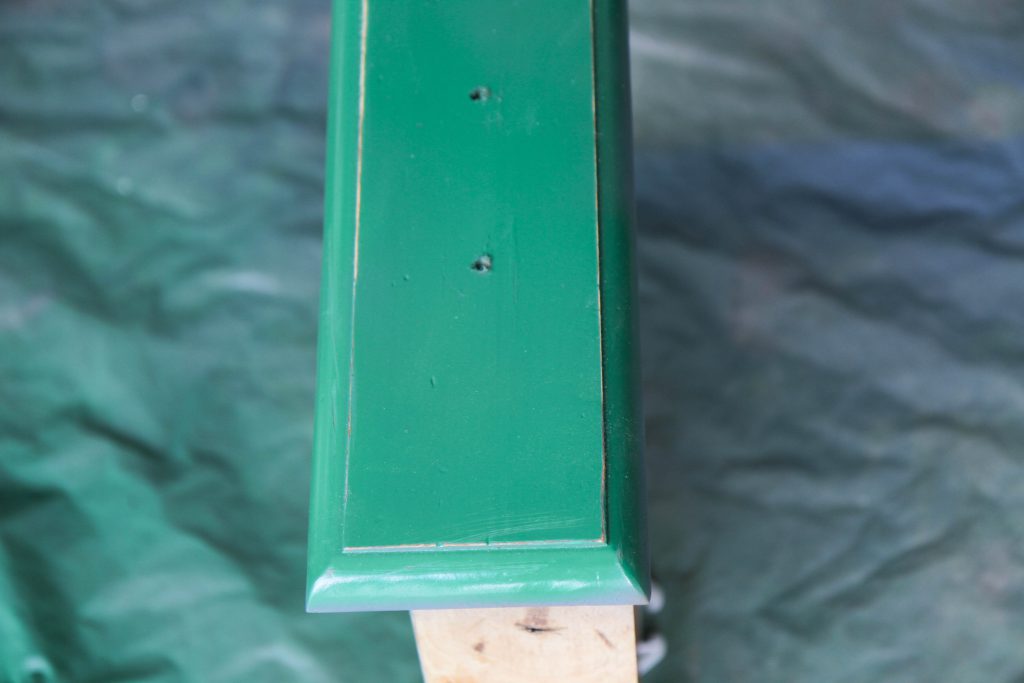
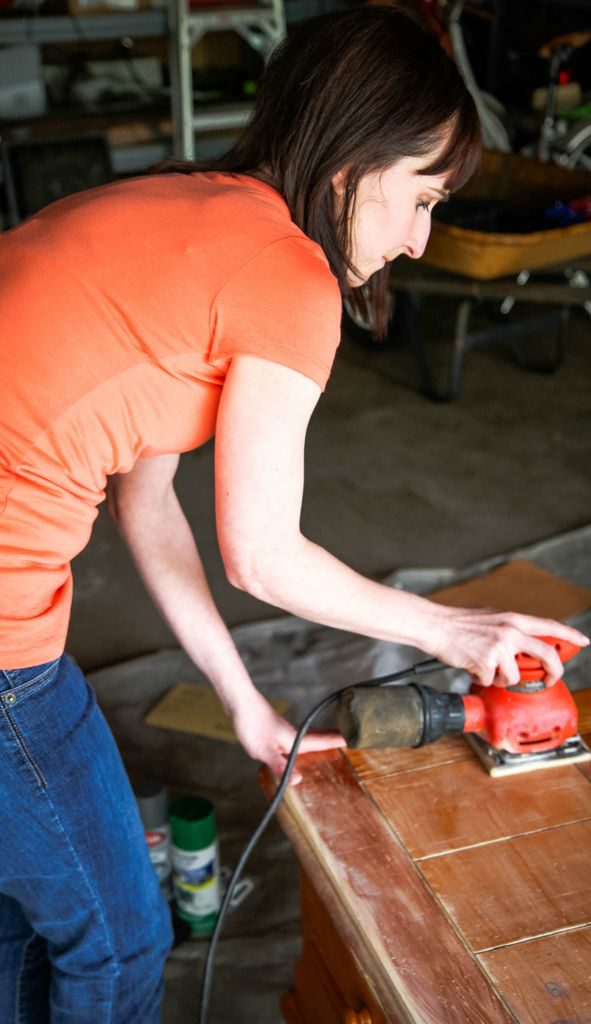
Next, sand the wood furniture for better paint adhesion. Sand any edges with your sander to smooth the top of your piece. 
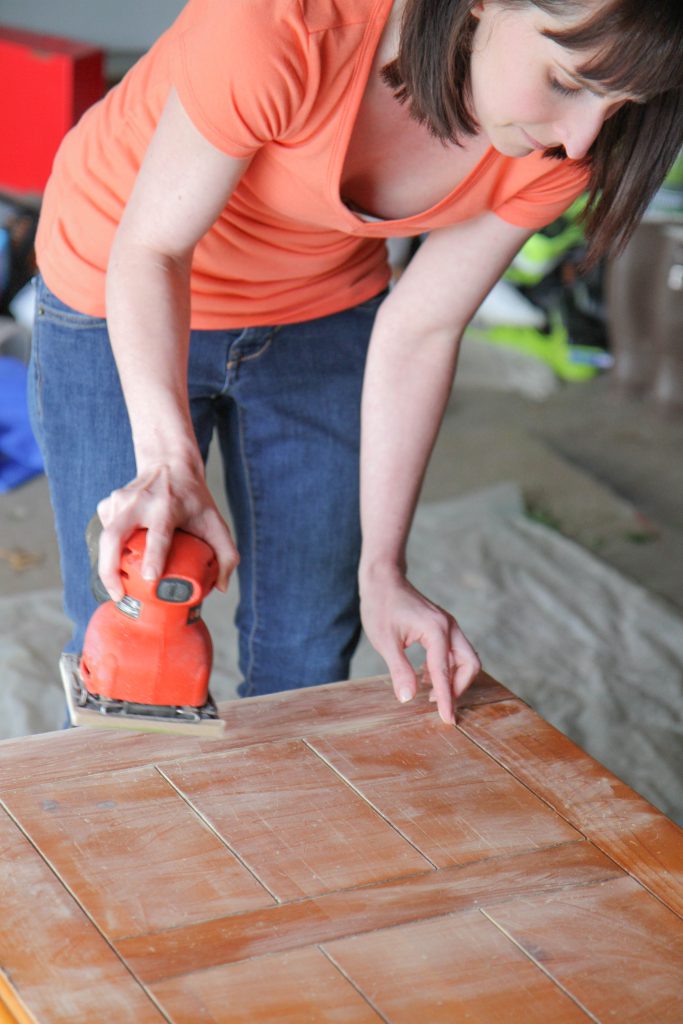
Sanding Wood Furniture for Spray Painting

Taking your time when you sand your furniture is necessary to have an excellent base for painting.

Once the piece is thoroughly sanded, wipe it down with a damp cloth to prepare it for priming.

Finally, fill any imperfections with wood filler and sand smooth before painting.
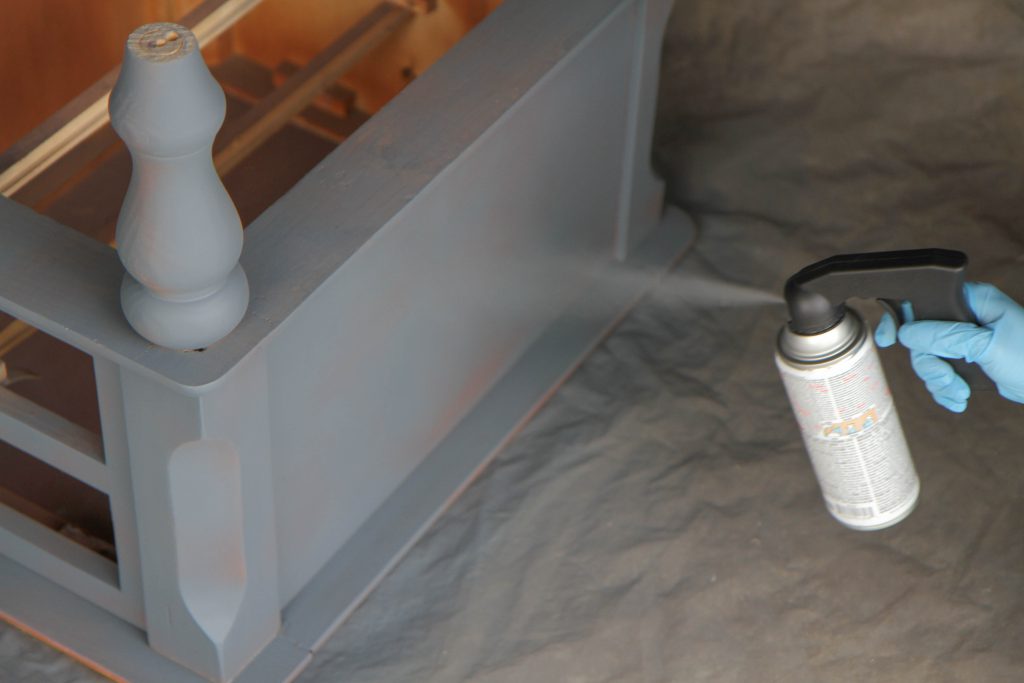
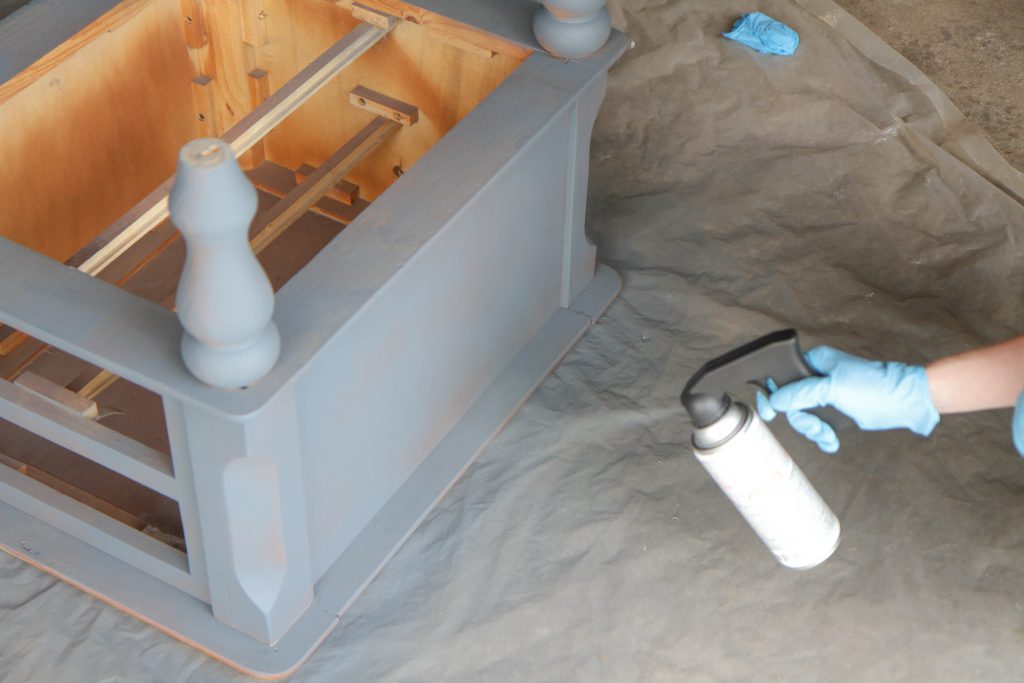
Primer for Spray Painting Furniture

Apply Thin, Even Coats:

To achieve a smooth finish, apply thin, even coats of spray paint, holding the can 8-12 inches away from the surface. 

Avoid heavy application to prevent drips and runs.

Allow each coat to dry completely before applying the next.

Consider Weather Conditions:

Temperature and humidity can affect the drying time and finish of spray paint. 

Choose a day with mild temperatures and low humidity for optimal results. 

Avoid spray painting on windy days to prevent dust and debris from sticking to wet paint.

Practice Proper Spray Painting Technique:

Practice spray painting on scrap wood or cardboard before tackling your furniture.

Practicing is especially important if this is your first time using a spray grip on your spray paint.

Maintain a consistent spraying motion and overlap each pass slightly for even coverage.

Keep the nozzle clean to prevent clogs and ensure a smooth paint flow.
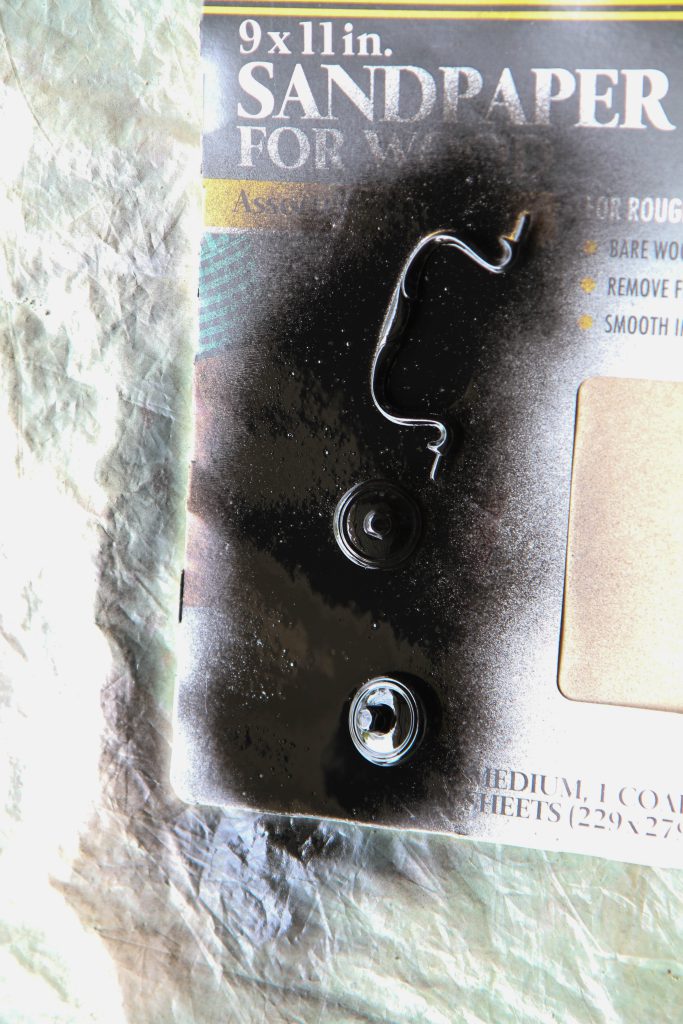
Spray Painting Metal Pulls on Spray Painted Table

Optional: Customize Your Hardware

If you desire, you can spray paint your hardware.

As you know, cabinet pulls and drawer handles can be expensive to replace, and sometimes older pieces have more custom-fitting hardware, so spray paint can be a great way to freshen it up.

We replaced the wooden handle with a black hardware piece and then spray-painted the old gold accessories black with a can I had in my craft supplies. 

I recommend purchasing a metallic spray paint in your desired finish.
Glaze for Spray Painting on Wood Furniture

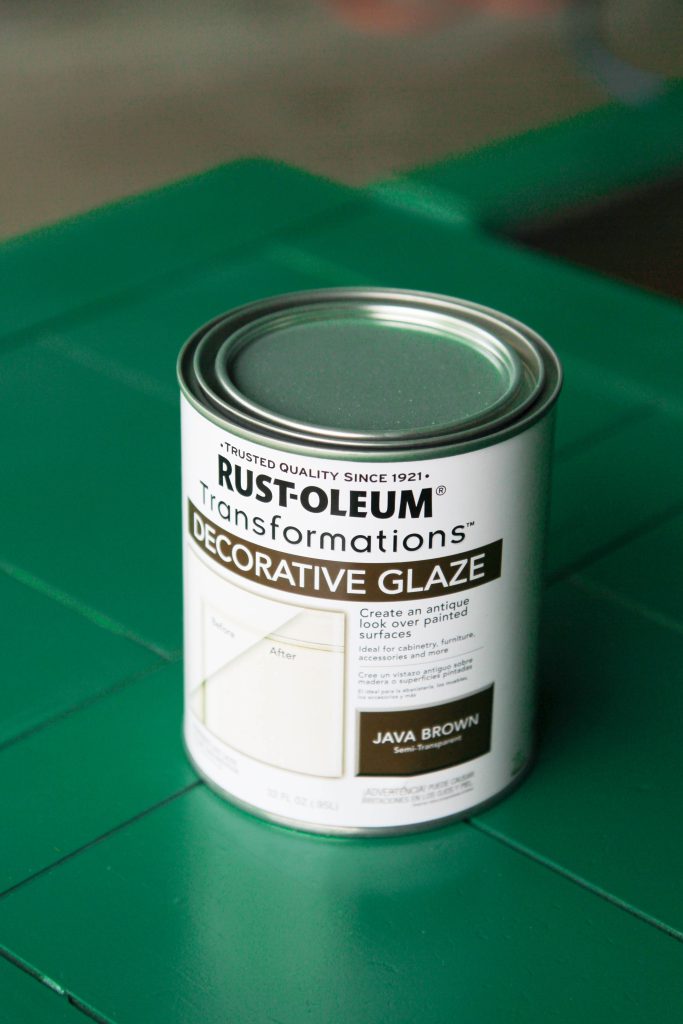
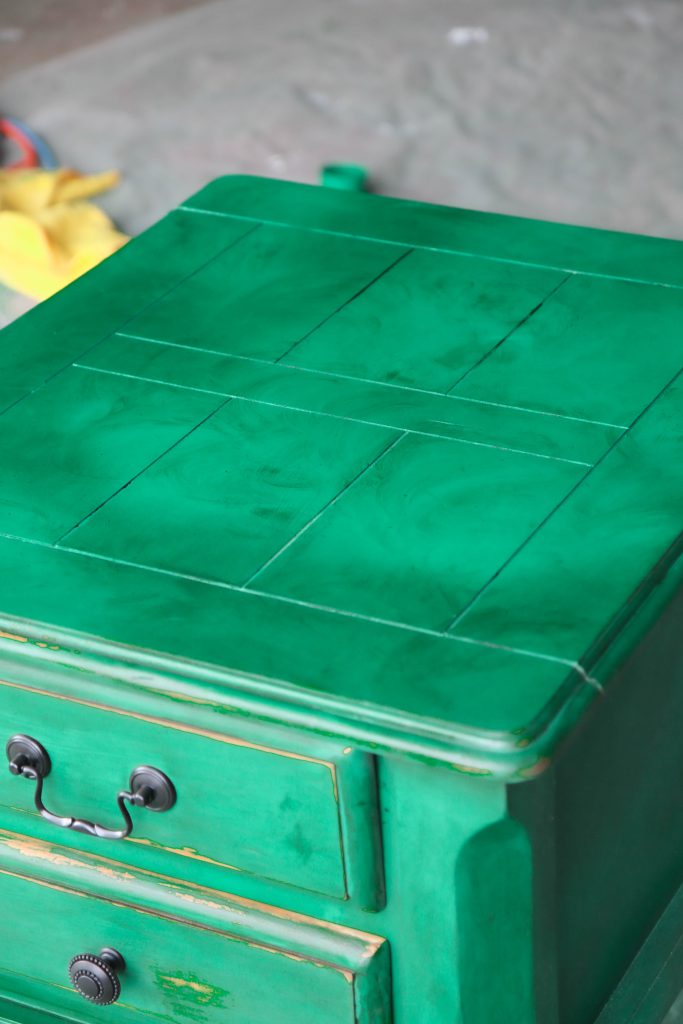
Optional: Add An Antique Glaze

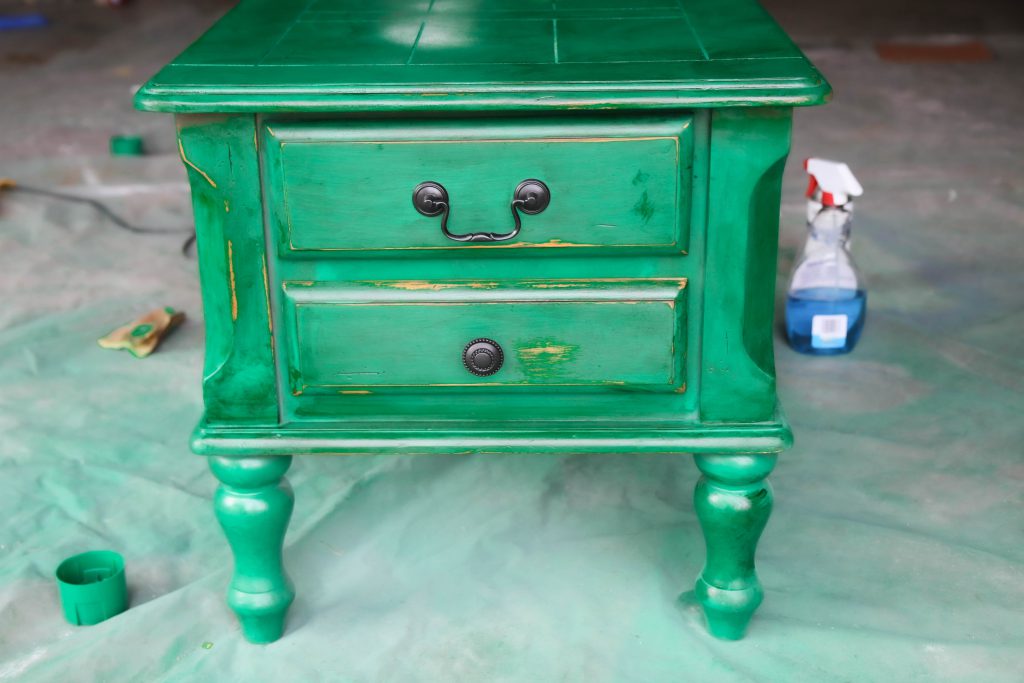
An antique glaze can add depth and dimension to your furniture piece after spray painting furniture.

Follow the instructions below for timing your application of the wood glaze after painting your piece.
Sanding Wood Furniture for Glaze

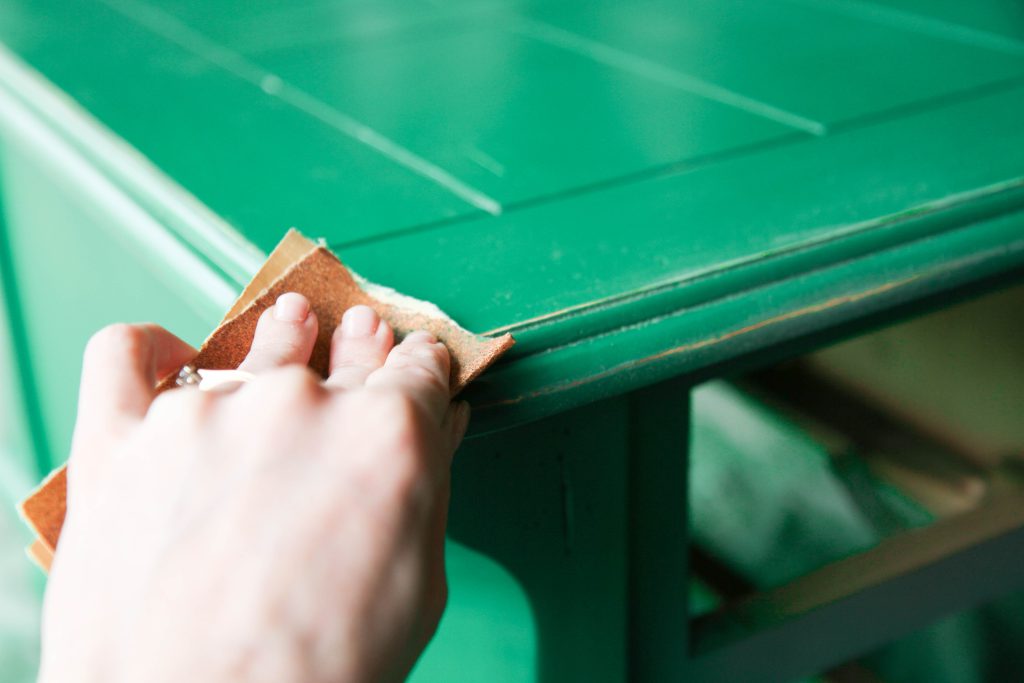
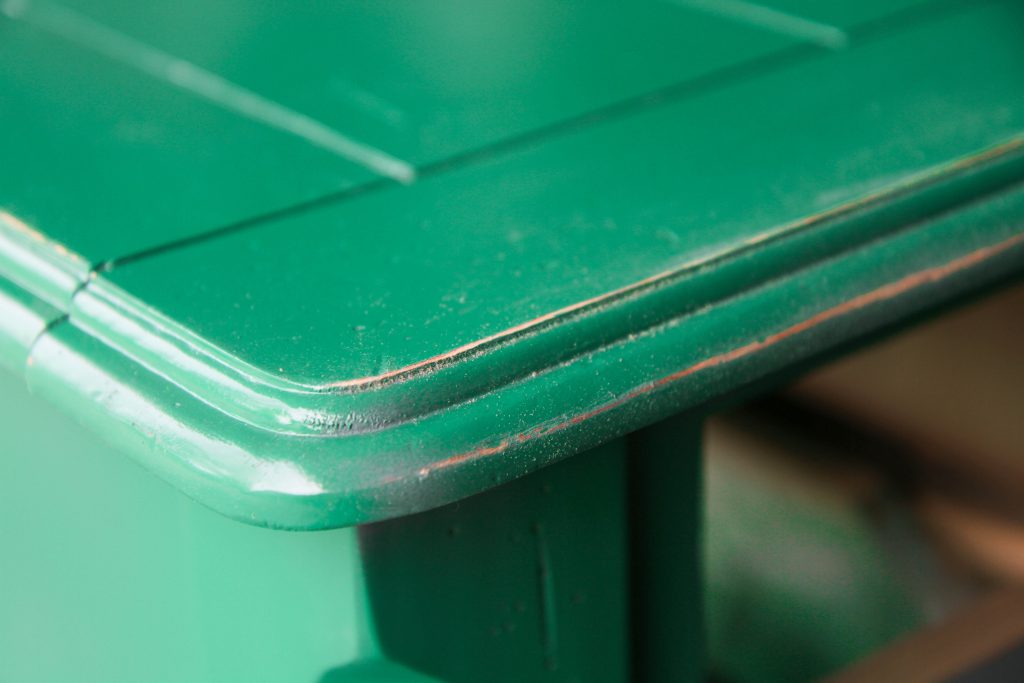
To apply, rough up the edges with your sandpaper to expose the wood.
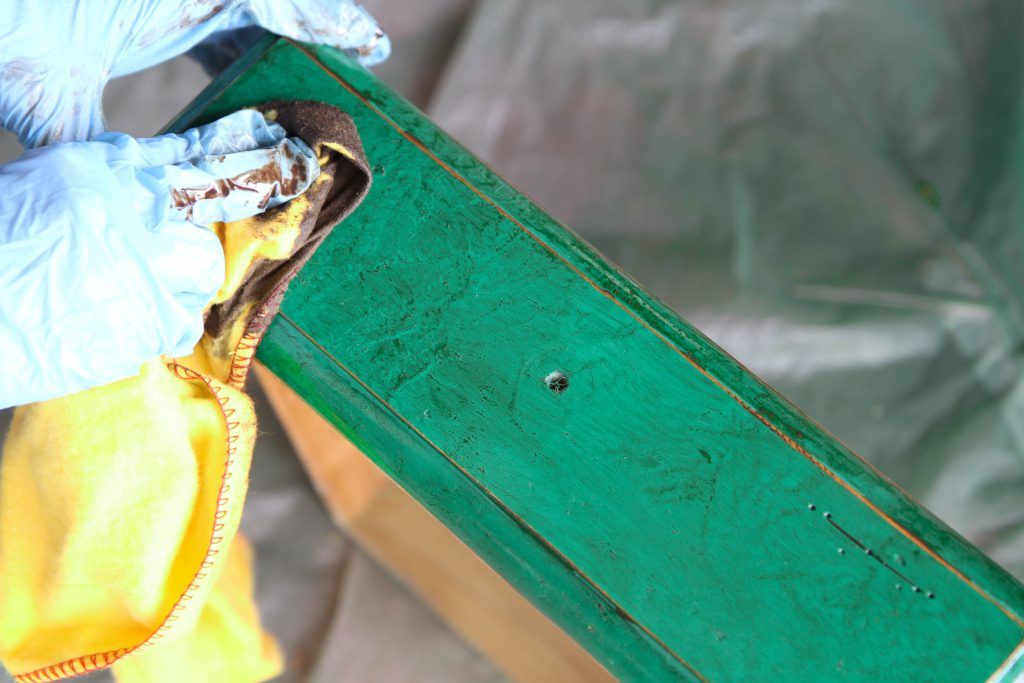
Sanding Wood Furniture for Glaze

Next, using a clean rag, dip it in your glaze and then apply the glaze to your piece in a circular motion.
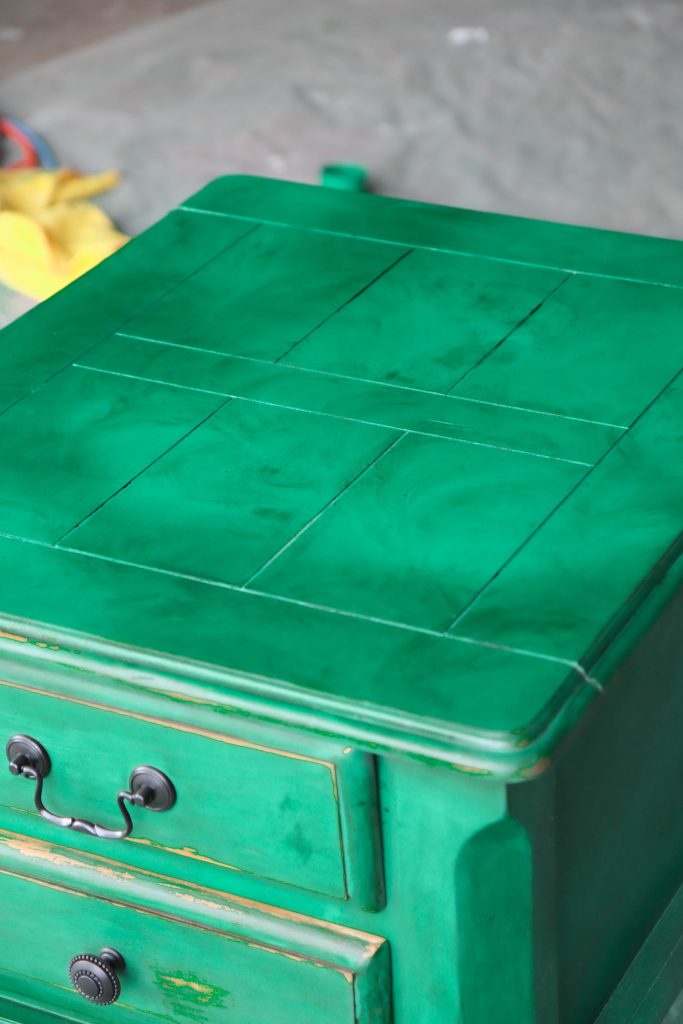
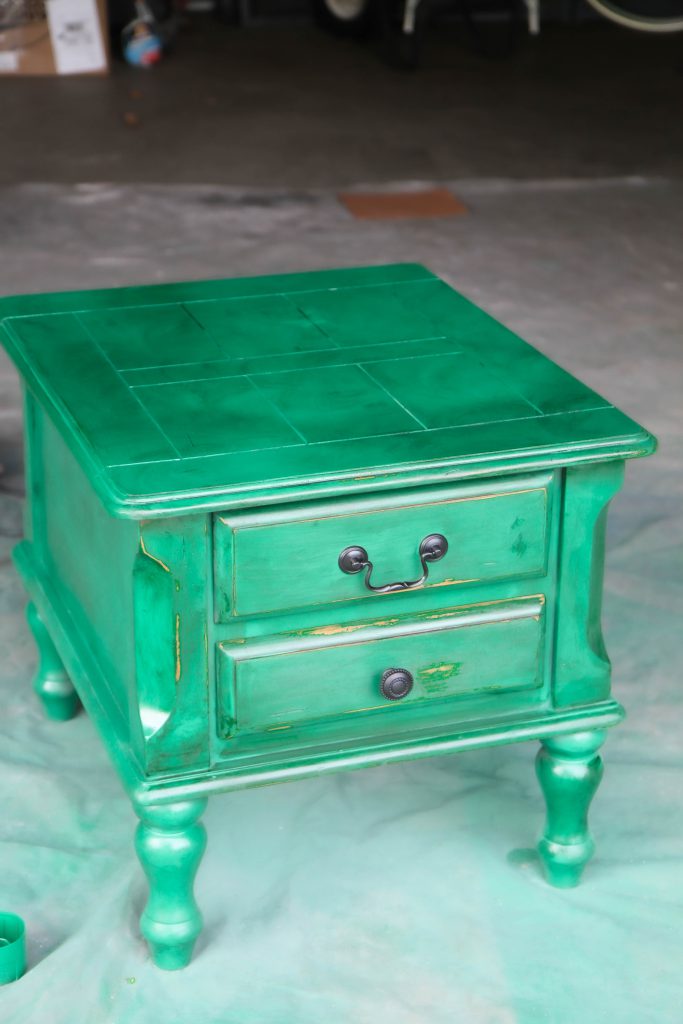
The Spray Painting on Wood Furniture Technique You Need Now

With a clean and damp cloth, remove as much of the glaze as you would like.

I, again, removed this in a circular motion from the piece until it added a hint of variation to the wood. 
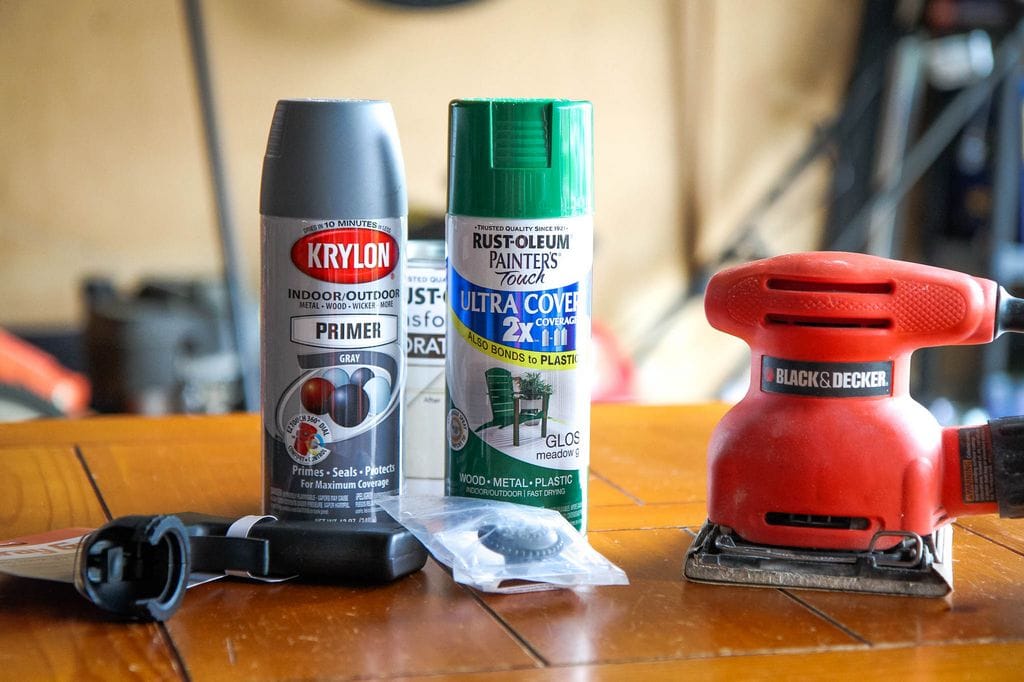
Spray Painting Furniture Paint Supplies

How to Spray Paint Wood

Materials Needed:

  1. Spray Paint Primer– Use gray if doing a dark color or white if doing a light color
  2. 1-2 Cans Rust-Oleum American Accents Ultra Cover 2X Spray Paint, any shade (I am using Moss Green)- make sure the one you choose is a spray paint for wood
  3. Rust-Oleum Standard Spray Grip (make sure you choose a paint sprayer nozzle that fits the spray paint brand you choose for your project)
  4. Rust-Oleum Decorative Glaze in Java Brown
  5. 220 Grit Sandpaper
  6. Wood Filler, if needed, for filling in imperfections
  7. Putty Knife
  8. Drop Cloth
  9. Rags
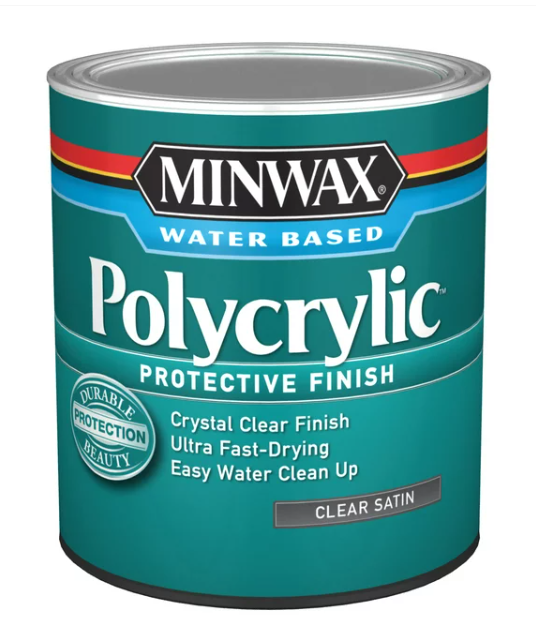
  10. Polycrylic in a Clear Satin (Water-Based)

Instructions:

  • Prepare the Surface: Wipe the entire piece down with a clean cloth to remove dirt or debris. Disassemble any drawers and hardware to prepare it for painting. Fill any spots with wood putty or wood filler that need it.
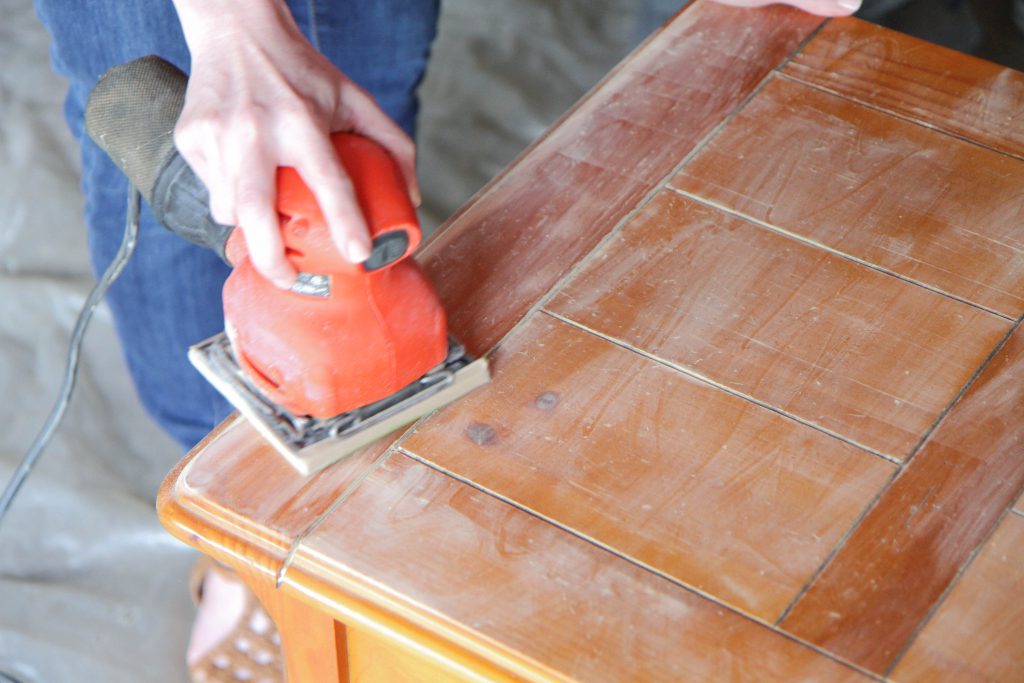
  • Sand Your Wood Furniture: Sand the wood furniture thoroughly to improve paint adhesion and create a smoother surface. Pay extra attention to sanding the edges and the top of the piece.
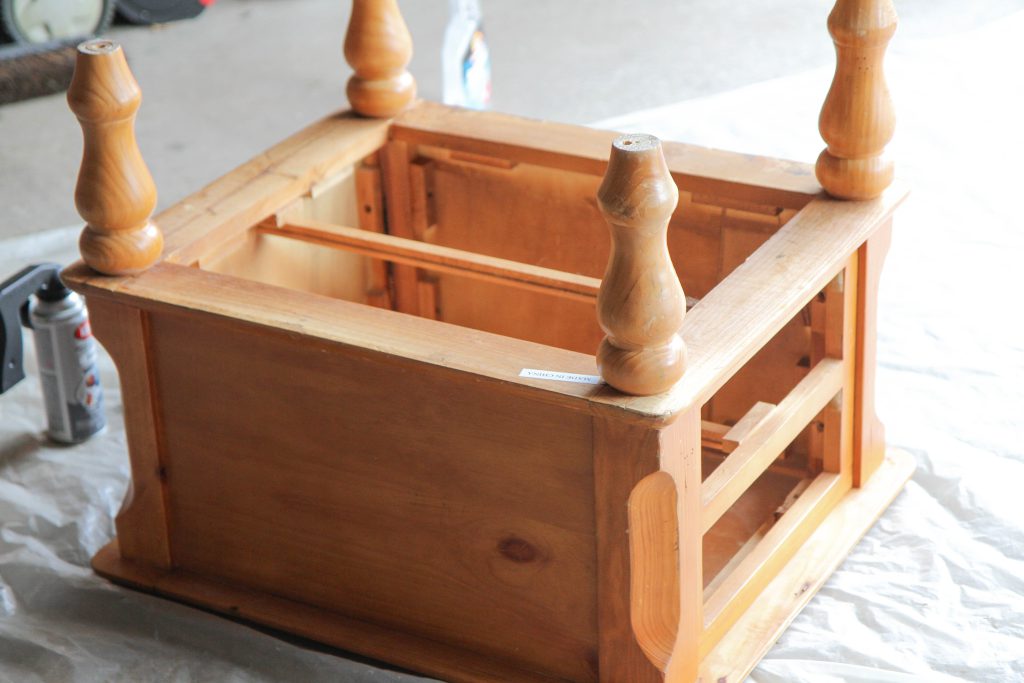
  • Prime the Piece: Start with your piece inverted to prevent drips and ensure full coverage. Hold your can 8 inches away from your surface and spray your primer in a sweeping motion side to side with a slight overlap. Allow the primer to dry for one hour. Once dry, put the piece right side up and finish priming the top.
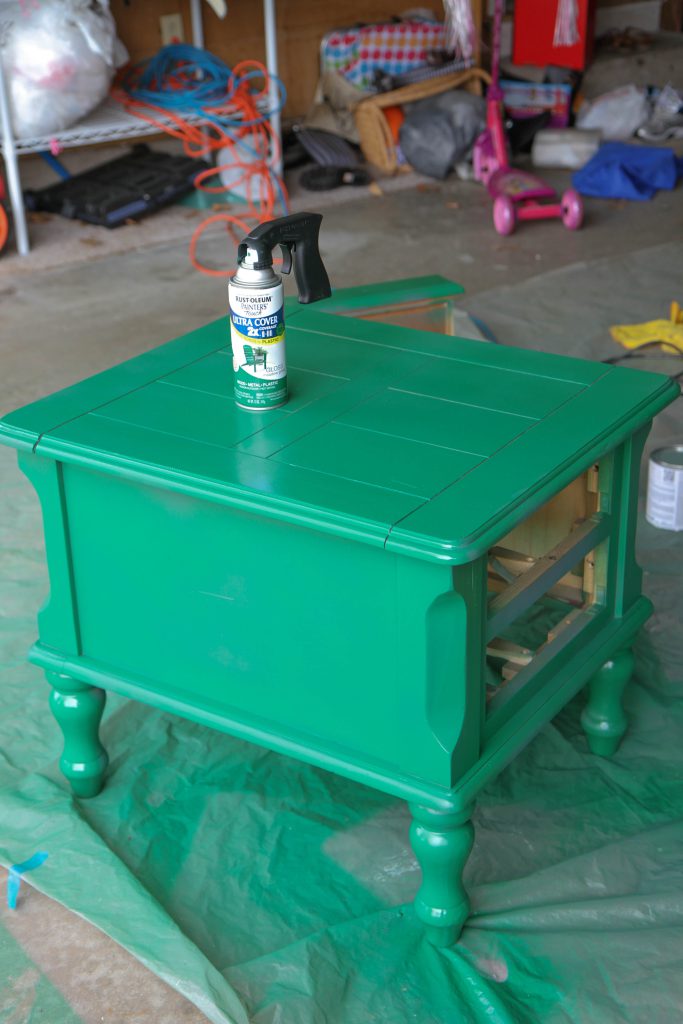
  • Apply Base Coat: Now, it is time to paint over primer. Repeat the same spray painting process with your choice of Rust-Oleum American Accents Ultra Cover 2X in your favorite shade. Once the piece is fully painted, allow it to dry overnight before glazing (optional).
  • Finish with Polycrylic: Once the paint is dry, apply two coats of Polycrylic in a Clear Satin finish, giving your piece a slick, smooth finish. Use a clean paintbrush or foam brush to apply evenly.  
After you are done, make sure to allow the sealer to dry for two hours before reapplying.

I recommend allowing the piece to dry overnight before using or moving it.

Here are some FAQs on Spray Painting Wood:

Can I spray paint wood without sanding?

Yes, you can spray paint wood without sanding; however, achieving the best results depends on the quality of your wood furniture, its condition, and being mindful of the Rust-Oleum product you choose. 

When it comes to this painting project, sanding is necessary to help the spray paint stick. 

If you are determined not to sand your piece, practice spray painting on the the underside to discover if it will work. 

Remember, if the surface is not smooth, that will pull through no matter how much paint you put over it. 

How Do I Apply Wood Putty or Wood Filler to Repair My Furniture?

If your furniture piece has been well-loved, you can still achieve a smooth finish spray painting wood furniture by using a product like wood putty or wood filler to repair spots on your piece. 

Wood putty or wood filler fills gaps, holes, or cracks in wood surfaces, providing a smooth and even finish. 

It helps to improve the appearance of the wood to prepare the surface for painting, staining, or sealing.

To apply wood putty, scoop a small amount onto a putty knife or your fingers, then press it firmly into the imperfection. 

Scrape away any excess putty and allow it to dry according to the manufacturer’s instructions before sanding smooth.
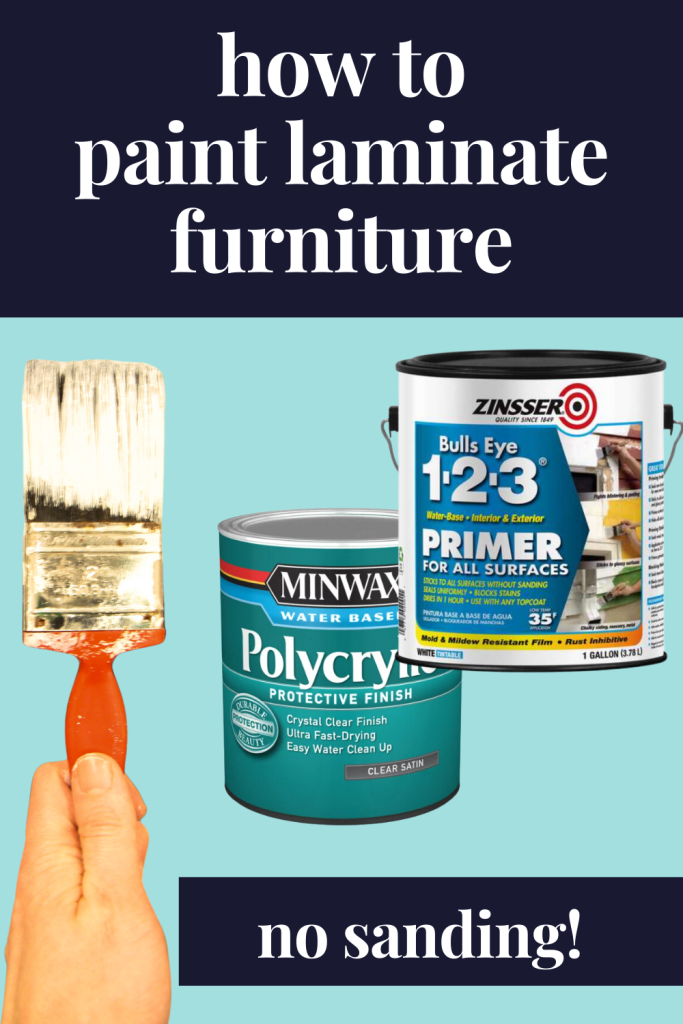
How to Paint Laminate Furniture Without Sanding

Can I use spray paint on laminate furniture?

Visit my how to paint laminate furniture without sanding tutorial for tips on the best primer for these types of laminate wood projects. 

To try this with spray paint technique, follow my instructions for priming laminate furniture and then use today’s spray painting tips after your piece is primed. 

Is it better to spray paint or brush paint wood?

Spray painting wood furniture is ideal for smaller pieces in your home. Use this painting technique for coffee, accent, or decorative elements around your house. 

How do I get a smooth finish with spray paint on wood?

To achieve a smooth finish, apply thin coats of paint, maintain consistent strokes, and sand between coats if necessary. If you follow my tuturial, you should have great success!

Love this tutorial?  Don’t miss these other fun home improvement projects:

How to Paint a Kitchen Table– Revitalize your kitchen table with a coat of paint. Discover easy steps to give your dining area a new lease on life.

How to Paint Laminate Furniture Without SandingDiscover the secrets of painting laminate furniture effortlessly, no sanding required! The possibilities are endless, whether it’s Ikea laminate pieces or electric fireplaces with heaters liike our family! 

Stain Picnic Table Tutorial– Enhance outdoor gatherings by staining your picnic table with this tutorial. Explore how to protect your outdoor wood furniture so you can use it year after year. 

How to Stain Wood Furniture– Bring new life to your furniture by staining it. Follow these straightforward steps to add rich color and depth to your favorite pieces.

The best part is that you can combine this staining project with today’s tutorial!

This post contains affiliate links.

Tutorial updated: February 27, 2024

Pin It
The Best Electric Fireplaces With Heaters For Small Homes

Tuesday, February 20th, 2024

Discover the benefits of electric fireplaces with heaters as an affordable and beautiful way to upgrade any corner. We share the top designs for small spaces.

The Best Electric Fireplaces With Heaters For Small Homes

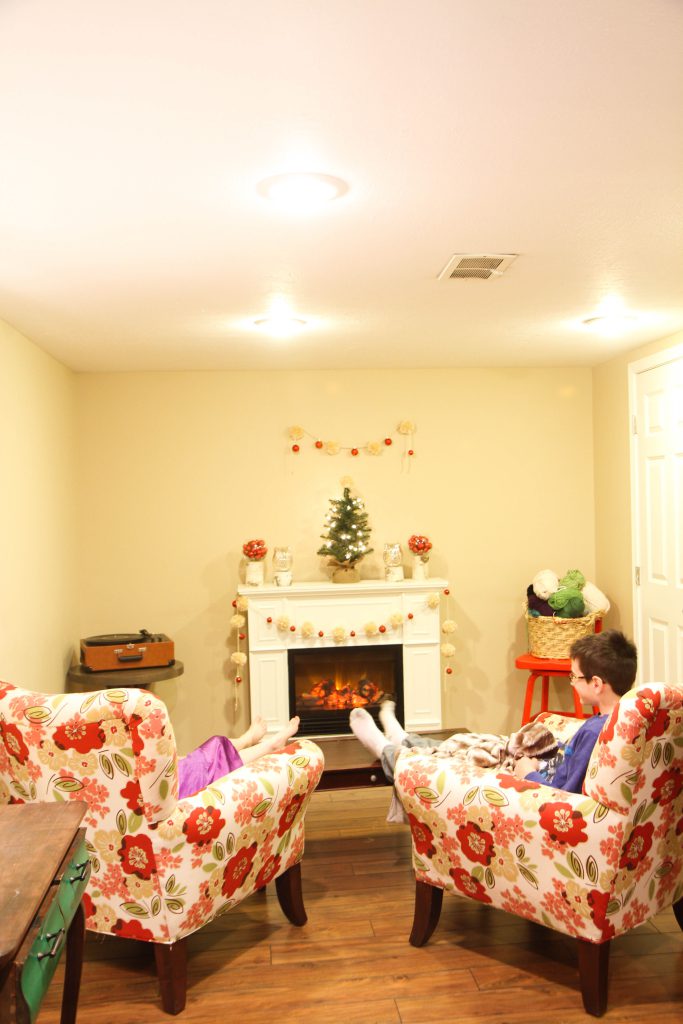
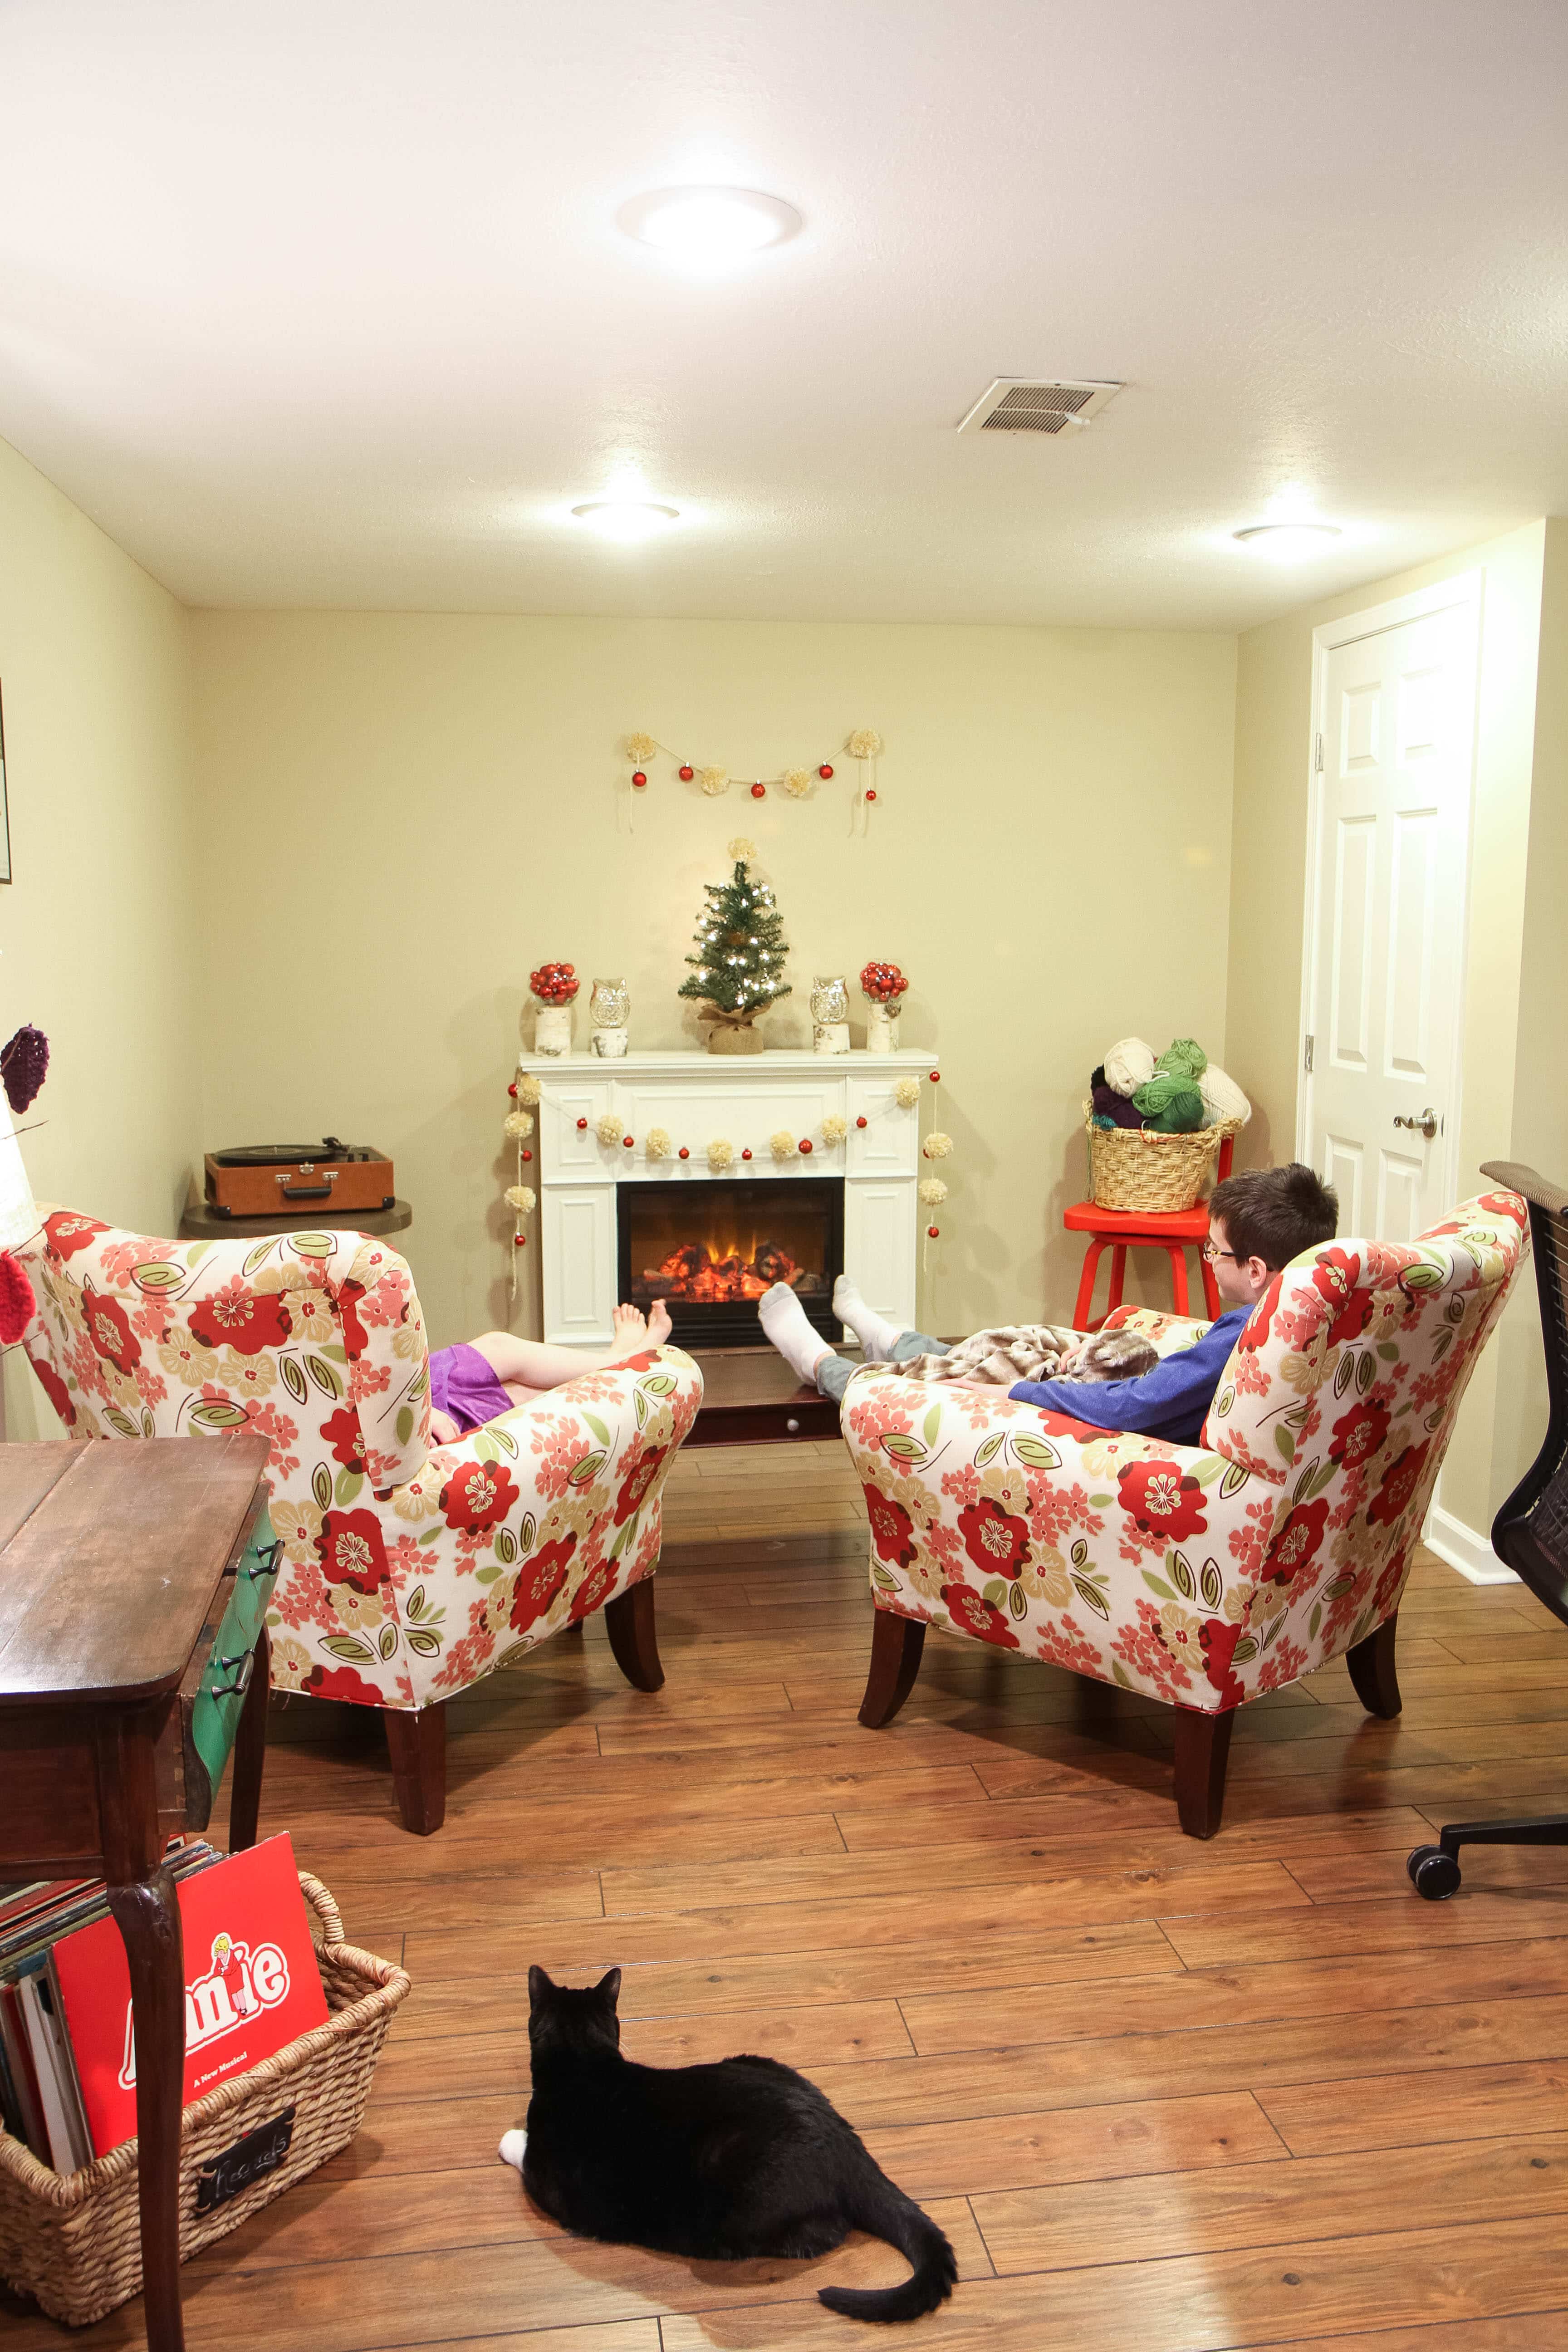
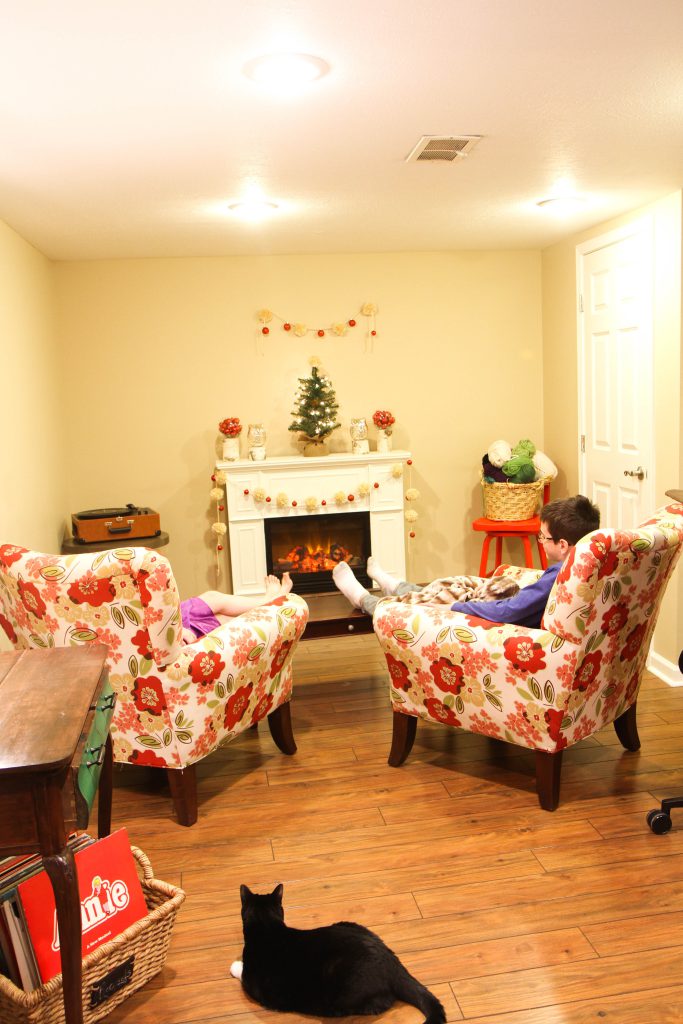
Our family decided to install a faux fireplace in our home a decade ago, and it remains one of our best investments.

It is also the space in our home that is most remarked upon because of its unusual location. 

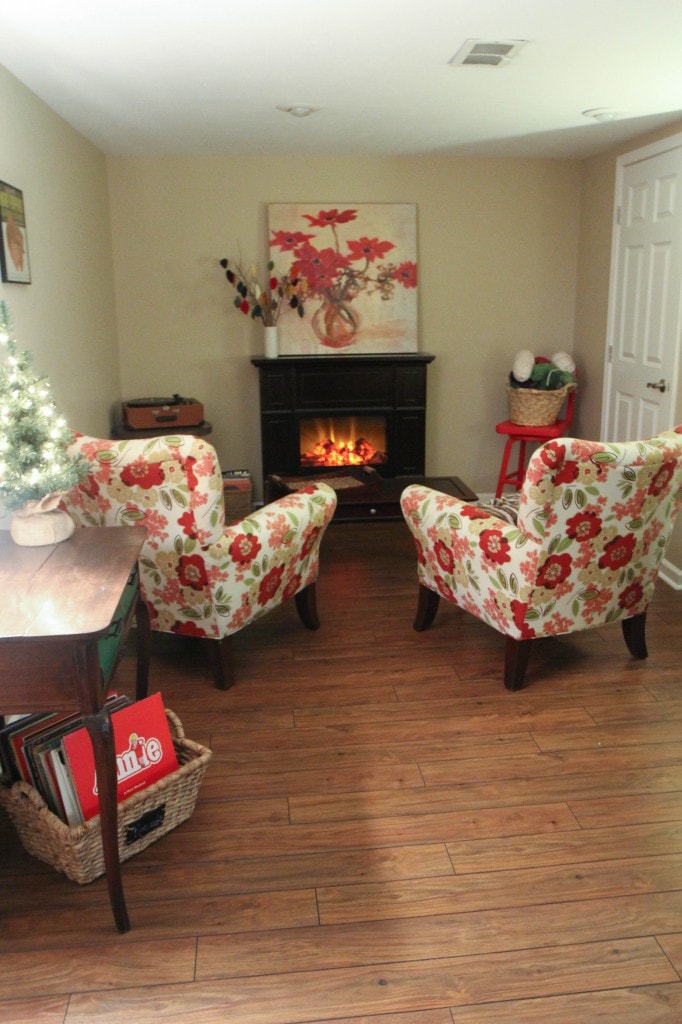
This fireplace is nestled in our subbasement, adding warmth to our chilly basement and a cozy corner to read a good book. 

The Best Electric Fireplaces With Heaters For Small Homes

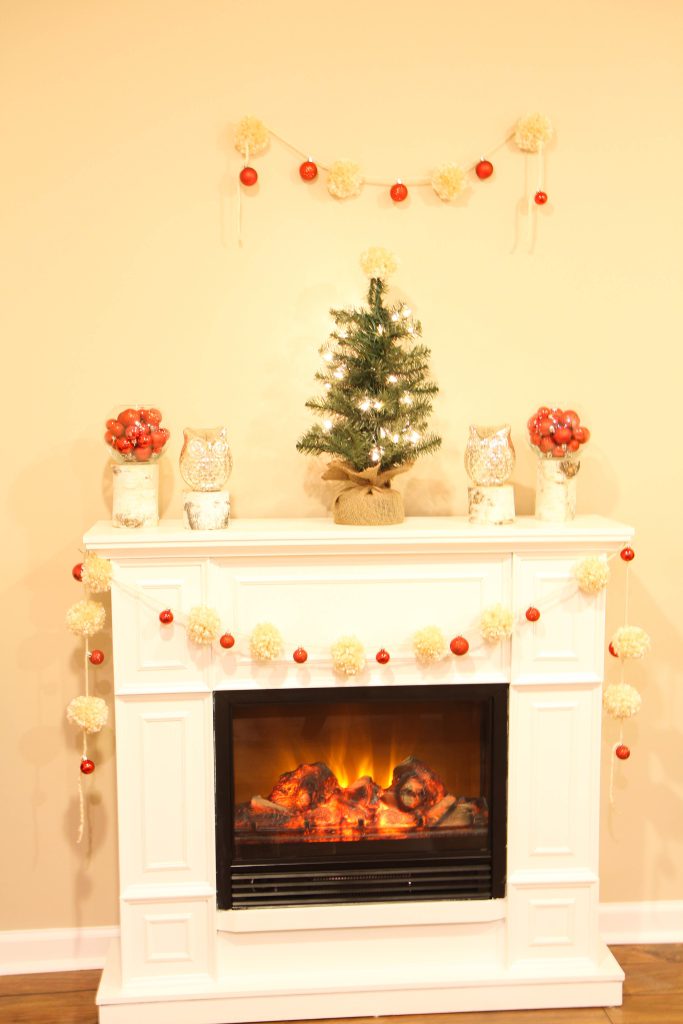
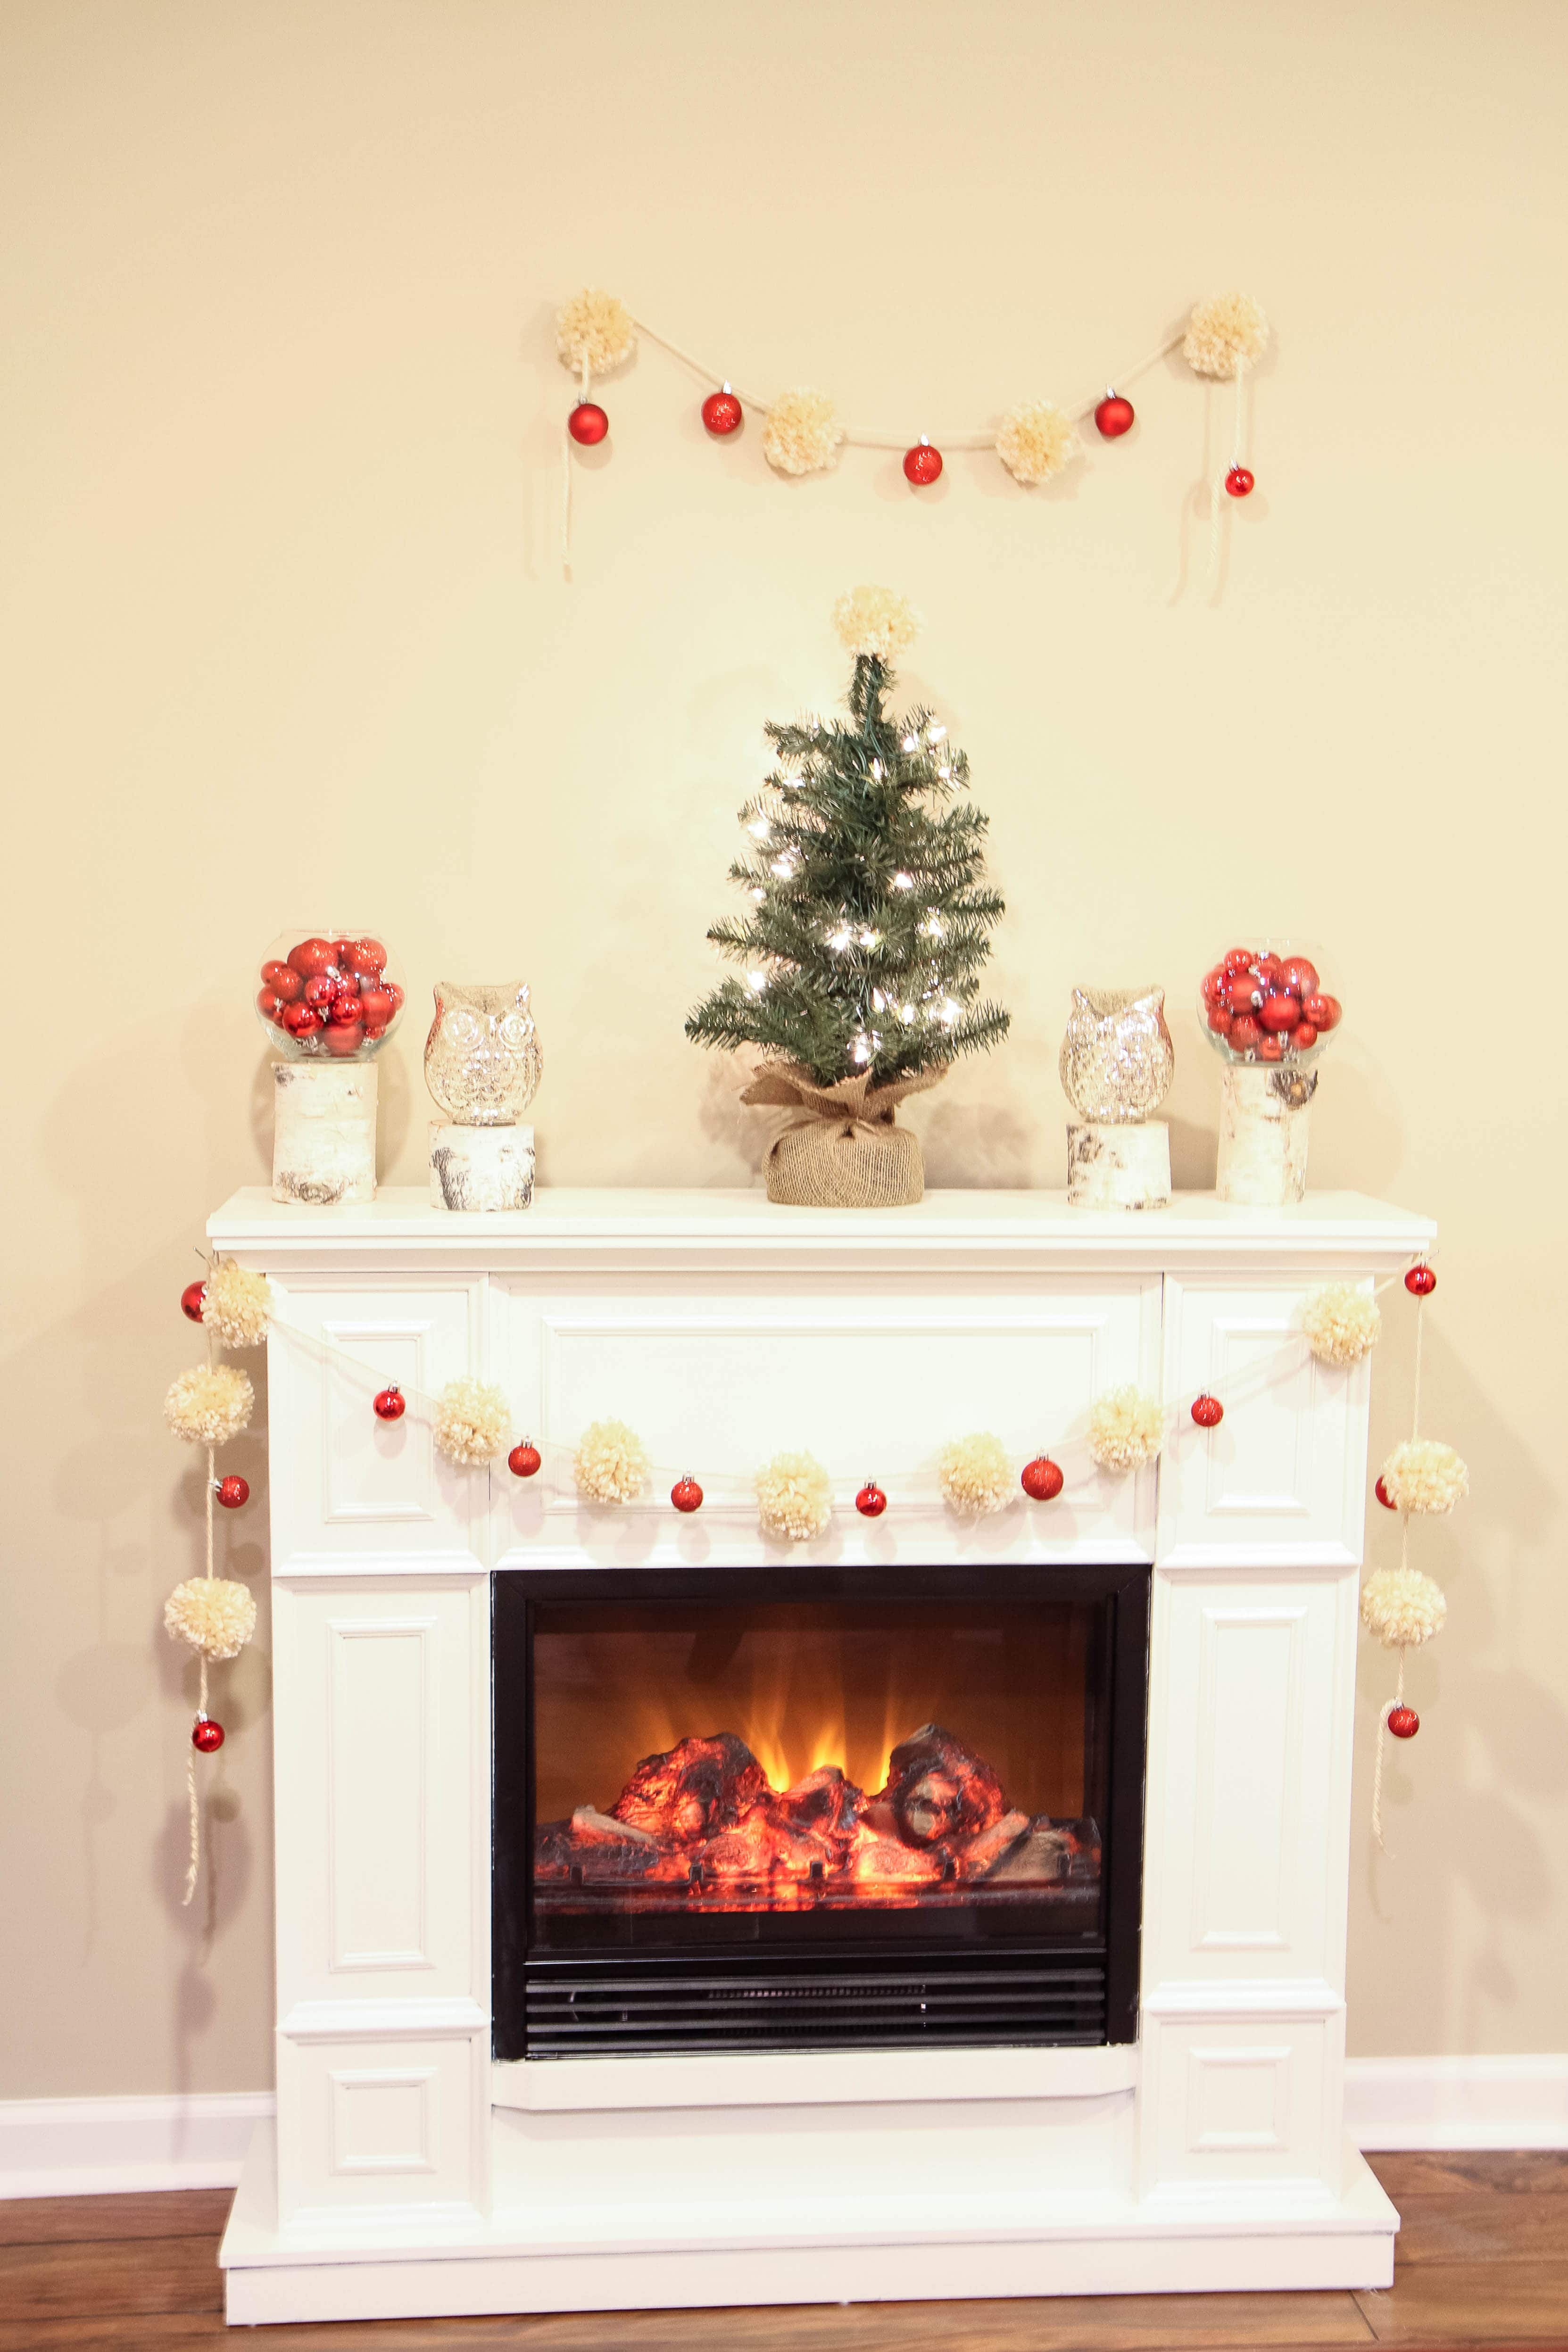
Remarkably, after a decade of use, the only maintenance required has been replacing the fireplace bulbs after daily use, which is cheerfully glowing in our home office. I can even attest to my pom-pom garland still going strong!

Today, I wanted to share why an electric fireplace heater can be a wise investment and what I wish I had known before installing one in our house. 

What is an Electric Fireplace?

An electric fireplace is a heating appliance that simulates the appearance and ambiance of a traditional wood-burning or gas fireplace without needing a chimney or venting system. 

Instead of burning wood or gas, electric fireplaces use electricity to power LED lights and heating elements that create the illusion of flames and emit heat.

Electric fireplaces typically consist of a mantel, firebox, and heating unit.

But as we show below, they can come in surprisingly fun designs and add additional storage to your home.

How Does an Electric Fireplace Work?

Some units are freestanding and can be placed anywhere in a room, while others are designed to be wall-mounted or inserted into existing fireplaces for a more seamless look.

Electric fireplaces use electricity to power LED lights and heating elements that simulate flames and generate heat.

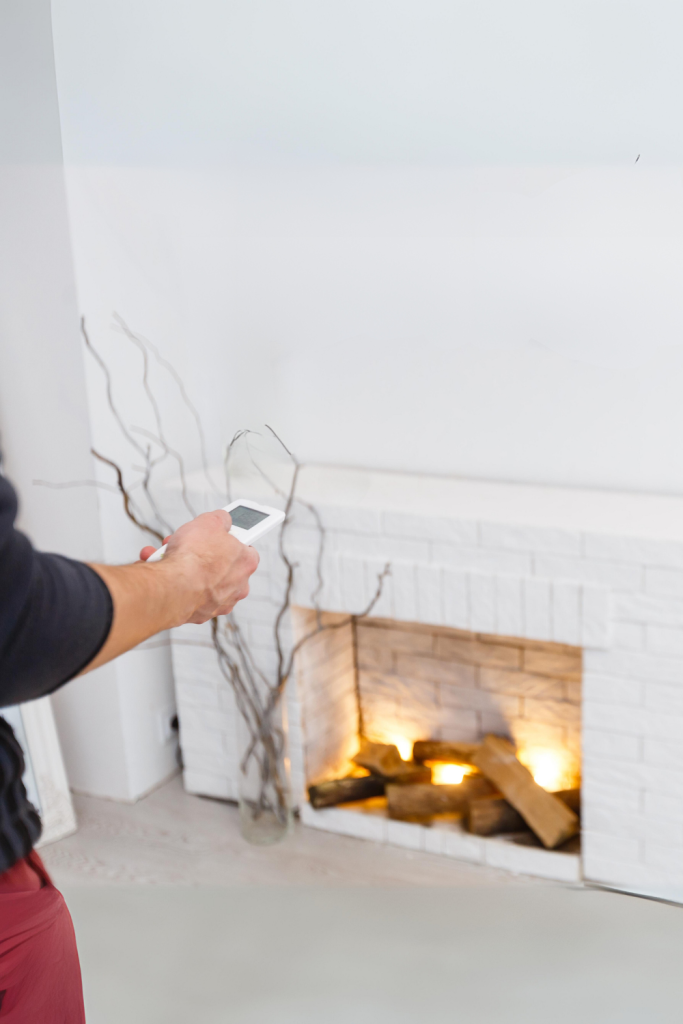
Some models, like ours, allow you to adjust the flame intensity and heat output for customized comfort.

The Best Electric Fireplaces With Heaters For Small Homes

Do Electric Fireplaces With Heaters Really Warm a Room?

The amount of heat electric fireplaces produce can vary depending on the model and specifications.

Generally, electric fireplaces are designed to provide supplemental heat to a room rather than serve as the primary heating source.

That said, this pumps out a SURPRISING amount of heat.

On average, electric fireplaces can produce anywhere from 4,000 to 9,000 BTUs (British Thermal Units) of heat per hour.

However, it’s essential to note that the heat output can be adjustable on many models, allowing users to customize the level of warmth according to their preferences.

Additionally, some electric fireplaces come with built-in thermostats and timers, allowing for precise temperature control and automated operation.

Our unit has a dial to adjust warmth to our desired temperature. It is even possible to blow cool air when dialed down while viewing the unit’s faux flames.

This unit also offered the option just to have the electric flame on so we could create a cozy room without the heat. 

While electric fireplaces may generate less heat than traditional wood-burning or gas fireplaces, they offer several advantages, including energy efficiency, safety, and convenience. 

Electric fireplaces are an excellent option for adding cozy warmth and ambiance to any space without venting or the hassle of maintaining a traditional fireplace.

The Best Electric Fireplaces With Heaters For Small Homes

When deciding where to put an electric fireplace with heater, there are several factors to consider:

Room Size and Layout: 

Evaluate the size and layout of the room where you plan to install the fireplace. Choose a location where the fireplace can serve as a focal point and complement the overall design and flow of the space. 

Consider the heating capacity of the electric fireplace and how it will meet the heating needs of the room.

Place the fireplace in a central location to distribute heat evenly throughout the space.

Electrical Accessibility: 

Make sure that the chosen location has access to electrical outlets to power the fireplace.

Consider consulting with an electrician to ensure an older home can handle the power required to run an electric fireplace. 

In our older home, for example, it can switch off if a vacuum is also running on that same breaker. We weren’t aware of it when adding this to our home. 

Aesthetic Appeal of Electric Fireplaces With Heaters

Choose a location for the electric fireplace that enhances the room’s visual appeal and complements your existing decor and furnishings.

Consider placing the fireplace in a prominent spot where it can be enjoyed from multiple vantage points.

The only downside to this design is that it isn’t the real deal with crackling wood and cozy embers, but it’s a beautiful artificial substitute, especially for small spaces that need a little coziness.

The Best Electric Fireplaces With Heaters For Small Homes

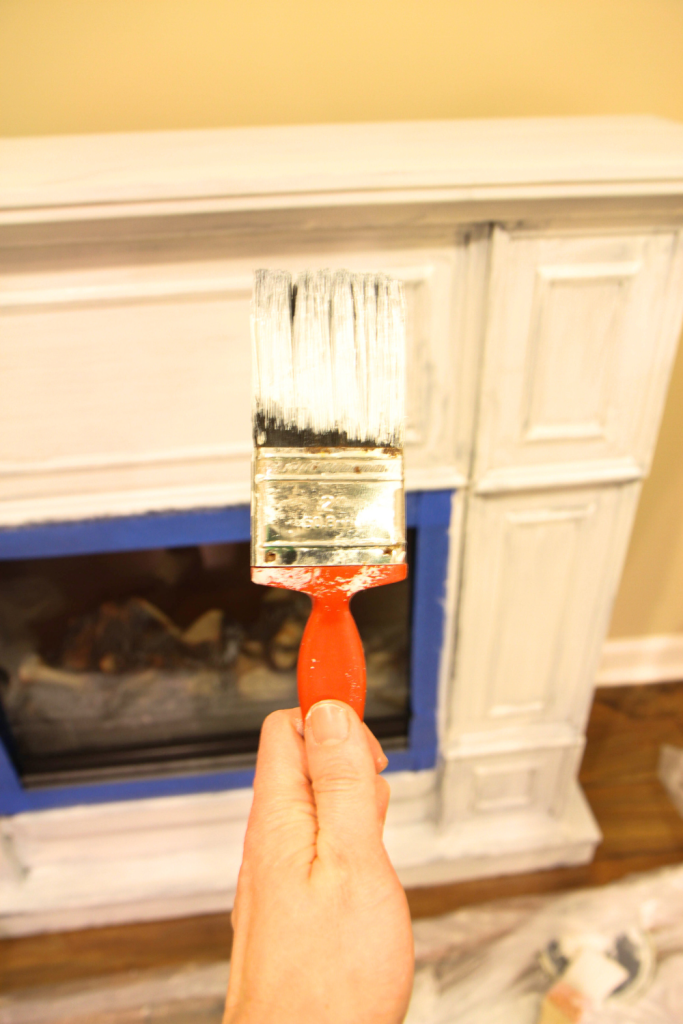
This is how our laminate fireplace looked after assembling.

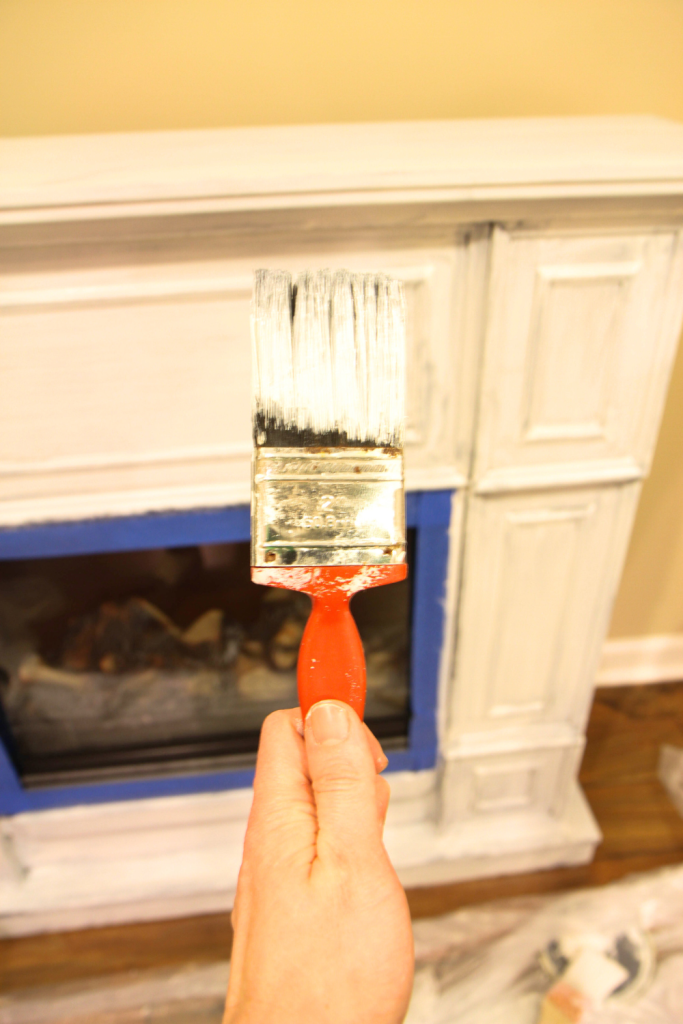
While I loved the cozy vibes of this piece, I knew the fireplace could look even better with a fresh coat of paint to brighten it up and hide its laminate wood construction.

You can read my How to Paint Laminate Furniture guide that can instantly elevates any of these fireplace options, including MINE!  

Since I wrote this tutorial, we have had this electric fireplace for a decade now, and the bulbs are the only thing we have had to replace.

To enhance this space, we added a Kamika Perry painting– an incredible local talent from South Bend, Indiana.

I can attest- this is one of our most loved spaces in our home after all these years. If you would like to explore an option like this for your home, I’ve got some great ideas!

The Best Electric Fireplaces With Heaters For Small Homes

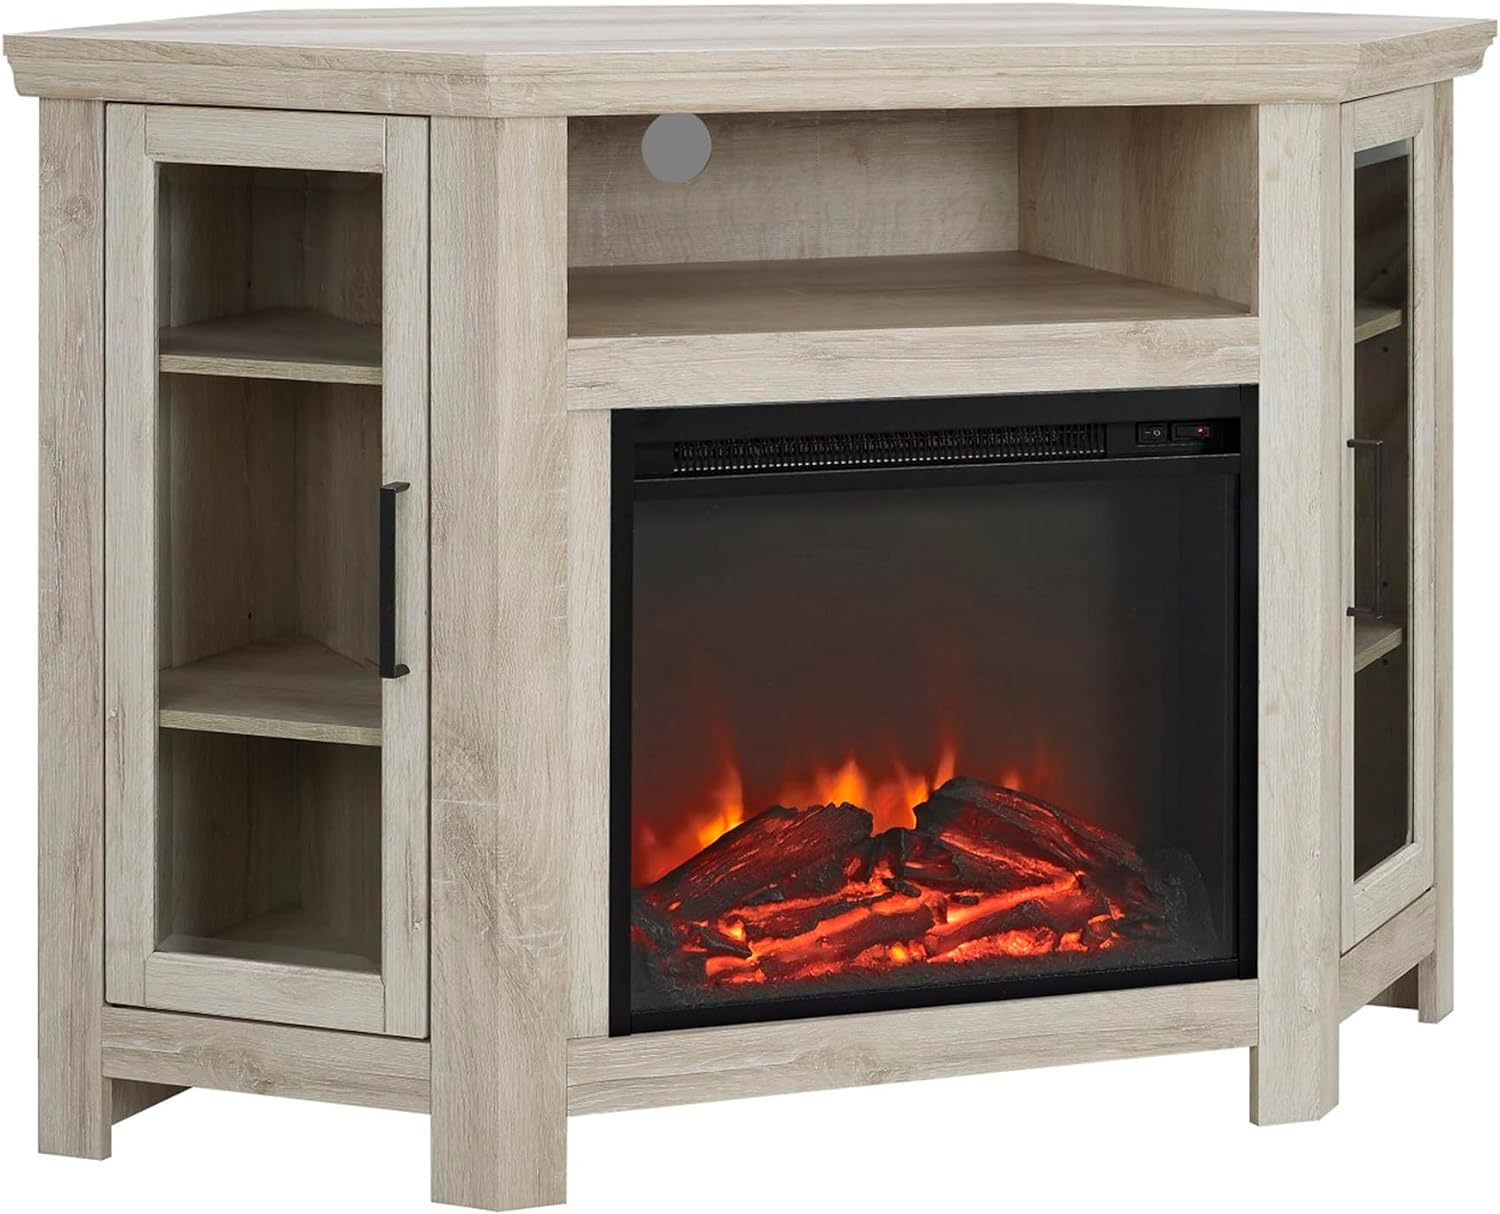
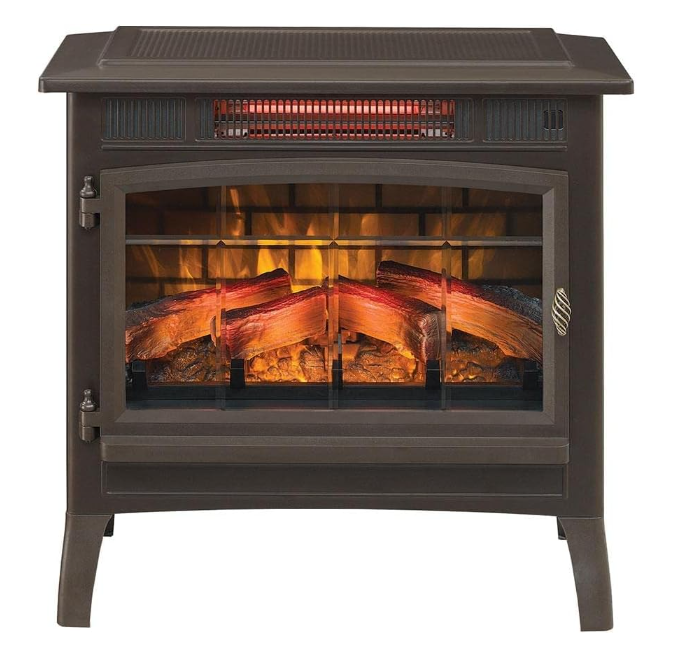
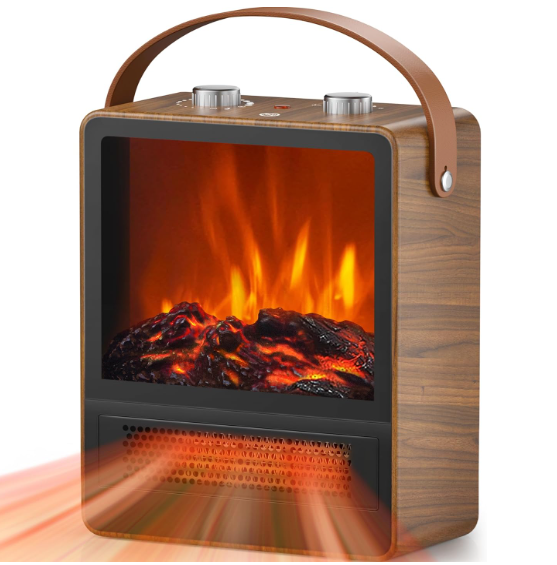
This list offers the best types of electric fireplace options to research for your small space.

As suppliers change and move quickly in the furniture market, these selections will put you on a landing page for each style option.

Remember, you can customize any design with paint, so let your imagination go wild!

Here are a few answers to commonly asked questions about electric fireplaces with heaters:

What is the difference between Electric Fireplace vs. Space Heater?

The main difference between an electric fireplace and a space heater is their design and purpose. 

An electric fireplace is designed to mimic the appearance of a traditional fireplace, complete with a flame effect, and often includes mantels or decorative features.

While they both provide supplemental heat, this option offers a focal point for your room. 

On the other hand, a space heater is designed solely for heating purposes, usually featuring a compact and portable design.

Space heaters are portable warmth often used to heat specific areas or rooms. 

While both can help keep you warm, choosing between an electric fireplace and a space heater depends on what your room needs.

Stamped Concrete Fire Pit

Can I Use an Electric Fireplace Outdoors? 

Electric fireplaces are typically designed for indoor use and may not be suitable for outdoor installation. Your best option for outdoors is an outdoor fire pit or table or propane heater.

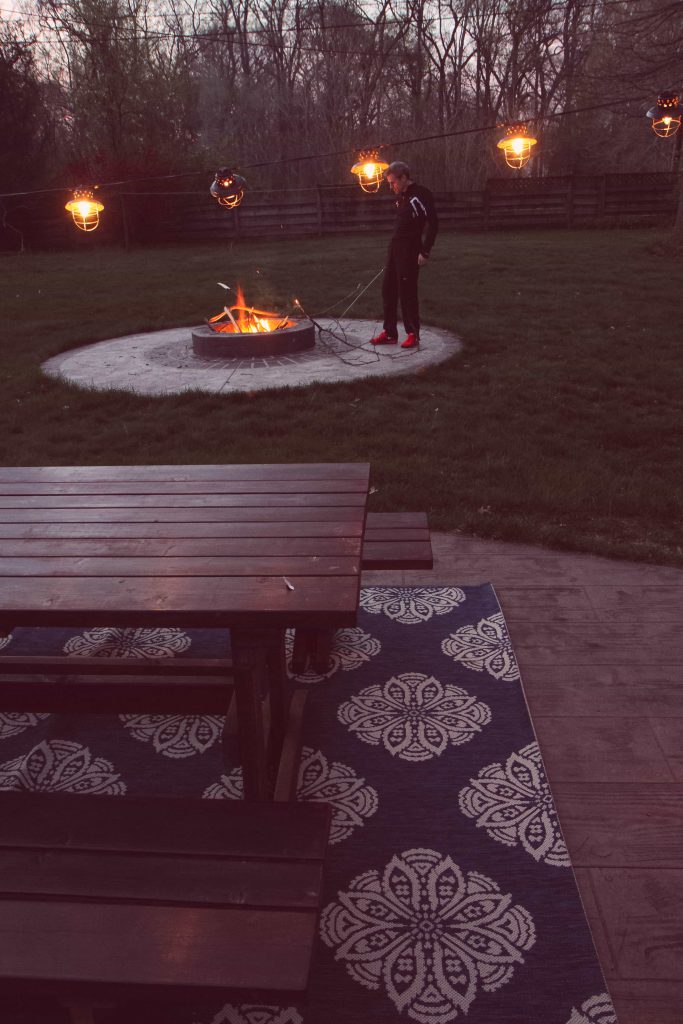
At our house, we had a stamped concrete fire pit installed.

Between that and renovating a shed, we have created a permanently cozy spot outdoors.

Exposure to the elements, such as rain, snow, and extreme temperatures, can damage an electric fireplace’s electrical components and materials, leading to safety hazards and reduced lifespan.

How Do You Clean an Electric Fireplace?

To clean an electric fireplace, turn off the unit and cool completely.

Remove any dust or debris from the exterior using a soft brush or microfiber cloth.

For the interior, gently vacuum or brush away any loose debris, being careful not to damage the heating elements or wiring.

If applicable, use a damp cloth to wipe down the interior surfaces, including the glass front and logs or crystals. 

As most units are enclosed, we have only had to do this once. 

Finally, carefully reassemble the unit and plug it back in, ensuring all connections are secure. Regular cleaning will help maintain the appearance and efficiency of your electric fireplace for years to come.

I hope this idea can create a joyful and cozy reading corner for your home!

If you are looking for more ideas, don’t miss our incredible guide- The Best Tools for Cozy Reading With Chronic Pain that offer ideas for making this space as supportive to your body as possible.

TELL ME: If you have any experience with an electric fireplace, let us know! Would you consider this a heating option for your home?

How to Paint Laminate Furniture Without Sanding

Tuesday, February 20th, 2024
How to Paint Laminate Furniture Without Sanding

Learn how to paint laminate furniture without sanding! Whether you plan to paint Ikea laminate furniture or a fireplace like us- you need this easy tutorial!

Laminate furniture often has a reputation for looking cheap. Let’s be honest- that faux grain finish does not fool anyone!

However, a simple paint job can completely transform and elevate any piece in your home in a single day, and I would love to show you how.  

How to Paint Laminate Furniture Without Sanding

Today’s painting tutorial is an excellent technique to try on new pieces.

Fresh paint can also cover up scratches, discoloration, and other imperfections on furniture you already own.  

Painting pieces to match can make a room feel cohesive. And as our decorating styles evolve, we can choose any color or finish to match where you are at NOW with your style.

What has surprised me about this process is just how easy it is.

How to Paint Laminate Furniture Without Sanding

For today’s tutorial, we will paint the electric fireplace that I featured in this guide- The Best Electric Fireplaces With Heaters

I’m excited to share with you how to make this laminate piece look more expensive than it is with a coat of paint- NO SANDING REQUIRED.

This comprehensive guide will walk you through the step-by-step process of painting laminate furniture without sanding, including the materials you’ll need and expert tips for achieving professional-looking results.

How to Paint Laminate Furniture Without Sanding

Here is a picture of our fireplace TEN YEARS after we painted it. There is no nick or chip in sight, so you are in wonderful hands today!

Understanding Laminate Furniture

Before diving into the painting process, it’s essential to understand what laminate furniture is and why it requires special preparation.

Laminate furniture is made of particleboard or MDF (medium-density fiberboard) covered with a thin layer of laminate. This synthetic material mimics the look of wood, stone, or other textures. 

This laminate layer can challenge paint adhesion, as it is smooth, non-porous, and moisture-resistant.

To paint laminate furniture without sanding, you will need a special primer, latex paint, and water-based acrylic to finish. You can scroll down to see the complete step-by-step instructions.

FAQs on Painting Laminate Furniture Without Sanding:

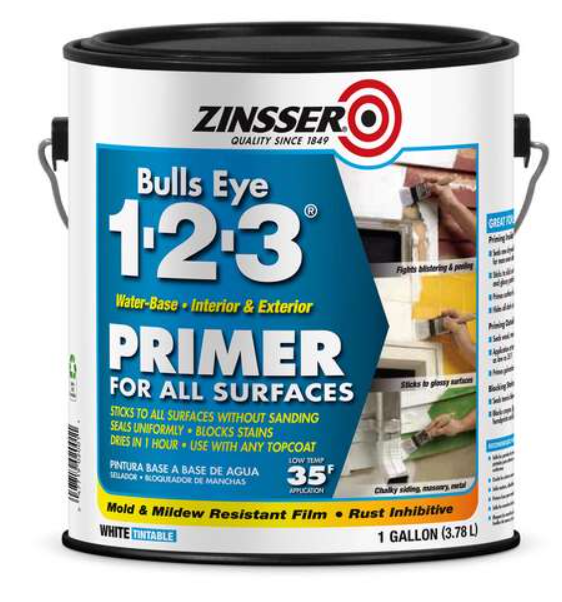
What is Zinnser primer?

Zinsser primer is a shellac based primer that acts as a versatile base primer for various surfaces, including laminate furniture.

This primer sticks effectively to surfaces without sanding, making it an ideal choice for prepping laminate furniture for painting. This is a top coat for your project, but you may need more than one coat depending on your furniture piece.

What kind of paint do you use on laminate furniture?

It’s essential to use really high-quality paint when painting furniture.

Latex paint is recommended for laminate surface painting projects because of its durability and smooth finish, and we have had the best success with the Benjamin Moore brand.

Many of our projects have stood up to over a decade of use without any need for retouching.

Can This Tutorial Be Used With Chalk Paint?

Yes, you can use chalk paint on laminate furniture, but I have yet to do this personally and can only provide instructions on what I’ve read elsewhere. You may not achieve the glossy results that I’ve shared today.

Follow the same steps I’ve outlined.

Once your primer is dry, you can paint your laminate furniture with chalk paint.

Keep in mind this paint will offer a matte finish.  

Be sure to add a protective topcoat to ensure durability, especially if the furniture will see regular use.

What Fireplace Paint Did You Use For This Project? 

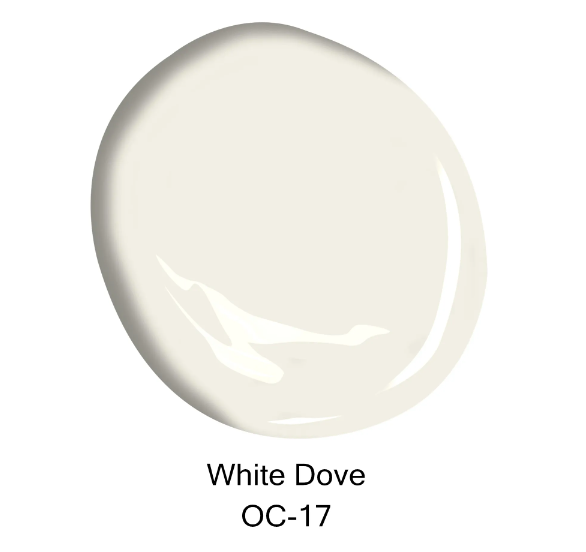
This color is Benjamin Moore White Owl, the white paint we use in our home’s trim and furniture pieces. This piece from Architectural Digest showcases the versatility of the color and why it has become such a go-to white paint color choice! 

Do you have to sand laminate furniture before painting?

As we shared in this tutorial, using a product like Zinsser Primer eliminates the need to prime your laminate furniture. This bonding primer is designed for laminate furniture projects like this one and is a great option for Ikea furniture or painting laminate cabinets in your home. 

Can I Use Oil-Based Acrylic On Laminate Furniture?

We learned the hard way that using an oil-based acrylic finish on white furniture can lead to undesirable yellowing over time. 

Two dressers I had finished began to slowly turn yellow, a devastating DIY mistake that meant I had to repaint our pieces to restore the white color. 

Oil-based acrylic finishes contain ingredients prone to oxidation, a chemical process that can cause the paint to develop a yellowish hue when exposed to light and air. 

Additionally, oil-based acrylic finishes may take longer to cure and harden compared to water-based alternatives, leaving the furniture vulnerable to damage and staining during the curing process.

As a result, the finish may not provide adequate protection against everyday wear and tear, making the furniture more susceptible to scratches, stains, and other forms of damage.

I ALWAYS recommend a water-based acrylic finish or clear protective coating to prevent yellowing.

How to Paint Laminate Furniture Without Sanding: A Step-by-Step Guide

Materials Needed:

  1. Zinsser Primer
  2. Latex Paint 
  3. Water Based Polycrylic in Clear Satin (no substitutions- this product will not yellow your furniture)
  4. Drop Cloth
  5. Foam Roller
  6. Paint Brush

Instructions:

  1. Apply Zinsser Primer:
    • Clean the laminate surface thoroughly to remove any dirt or grease.
    • Apply a coat of Zinsser Primer to the surface using a paintbrush or foam roller.
    • Ensure even coverage and allow the primer to dry completely, usually within an hour or two of time.
  2. Apply Paint:
    • Once the primer is dry, apply your chosen paint color (see the suggestion below for my favorite white paint option)
    • Use a paintbrush or foam roller to apply the paint in thin, even coats.
    • One coat may be sufficient, but additional coats may be needed for full coverage or touch-ups.
  3. Finish with Polycrylic:
    • Once the paint is dry, apply two coats of Polycrylic in a Clear Satin finish, giving your piece a slick, smooth finish using a clean paintbrush or foam brush to apply evenly.  
    • Allow each coat of Polycrylic to dry for two hours before reapplying.
    • After applying the final coat, allow the piece to dry overnight before using or moving it.
How to Paint Laminate Furniture from MomAdvice.com

How Do I Keep Laminate Furniture Clean?

While painted laminate furniture can be durable, it must be treated carefully to prevent chipping, scratching, or other damage. 

Avoid placing hot or heavy objects directly on the surface, and use coasters or protective pads as needed.

To clean painted laminate furniture, use a mild detergent, water solution, and a soft cloth or sponge. Avoid abrasive cleaners or scouring pads, which can damage the finish of your piece. 

I can’t wait to hear how your first project goes!

Paint Laminate Furniture Without Sanding Furniture Ideas

Here are a few examples of furniture pieces you could try as a great beginner project for painting laminate furniture. 

This post contains affiliate links.
How to Spray Paint Furniture

Love this tutorial don’t miss these other fun painting and staining projects:

How to Paint a Kitchen Table– Revitalize your kitchen table with a coat of paint. Discover easy steps to give your dining area a new lease on life.

How to Spray Paint Furniture– Upgrade your furniture with a professional finish using spray paint. Follow simple instructions to achieve a flawless makeover for any piece.”

Stain Picnic Table Tutorial– Enhance outdoor gatherings by staining your picnic table with this tutorial. Explore the process to protect your outdoor wood furniture so you can use it year after year. 

How to Stain Wood Furniture– Bring new life to your furniture by staining it. Follow these straightforward steps to add rich color and depth to your favorite pieces.

TELL ME: Did you have success with this painting project? What has been your experience painting laminate wood?

Pin It
How to Make a Burlap Wreath (VIDEO)

Sunday, September 10th, 2023
How to Make a Burlap Wreath

Learn how to make a burlap wreath with a wire wreath frame and burlap ribbon. This beginner craft takes 30 minutes. and can be customized for any holiday.

I am all about beautiful and simple decorations for the holidays. Today’s tutorial will show you how to make a simple burlap wreath that can be customized for any holiday.

This is a no-sew, no-glue, no-cut wreath project that should be easy to create in about 30 minutes.

How to Make a Burlap Wreath

Burlap ribbon does not only come in brown. There are so many different colors and patterns to choose from.

At the end of this post, you can see how I made a beautiful fall wreath in orange burlap.

How to Make a Burlap Wreath (Pictures)

SCROLL DOWN FOR PRINTABLE HOW-TO INSTRUCTIONS WITH SMALLER PICTURES INSERTED.

How to Make a Burlap Wreath
The Easiest Burlap Wreath You Will Ever Make from MomAdvice.com


Before you visit your craft store, make sure to sign up with Rakuten to make money back on all your craft store purchases.

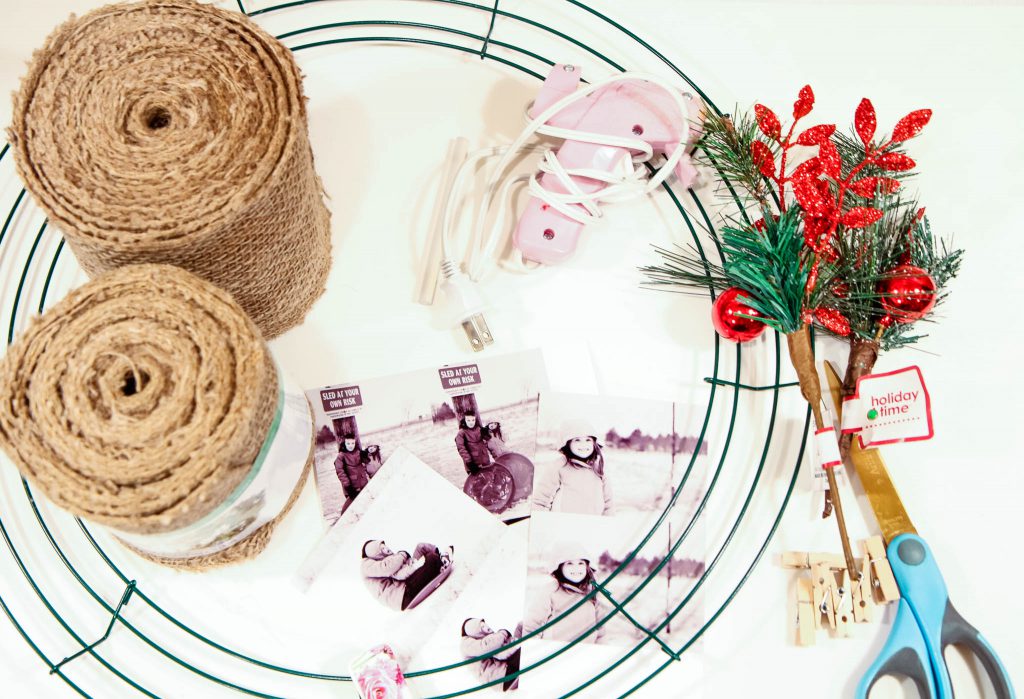
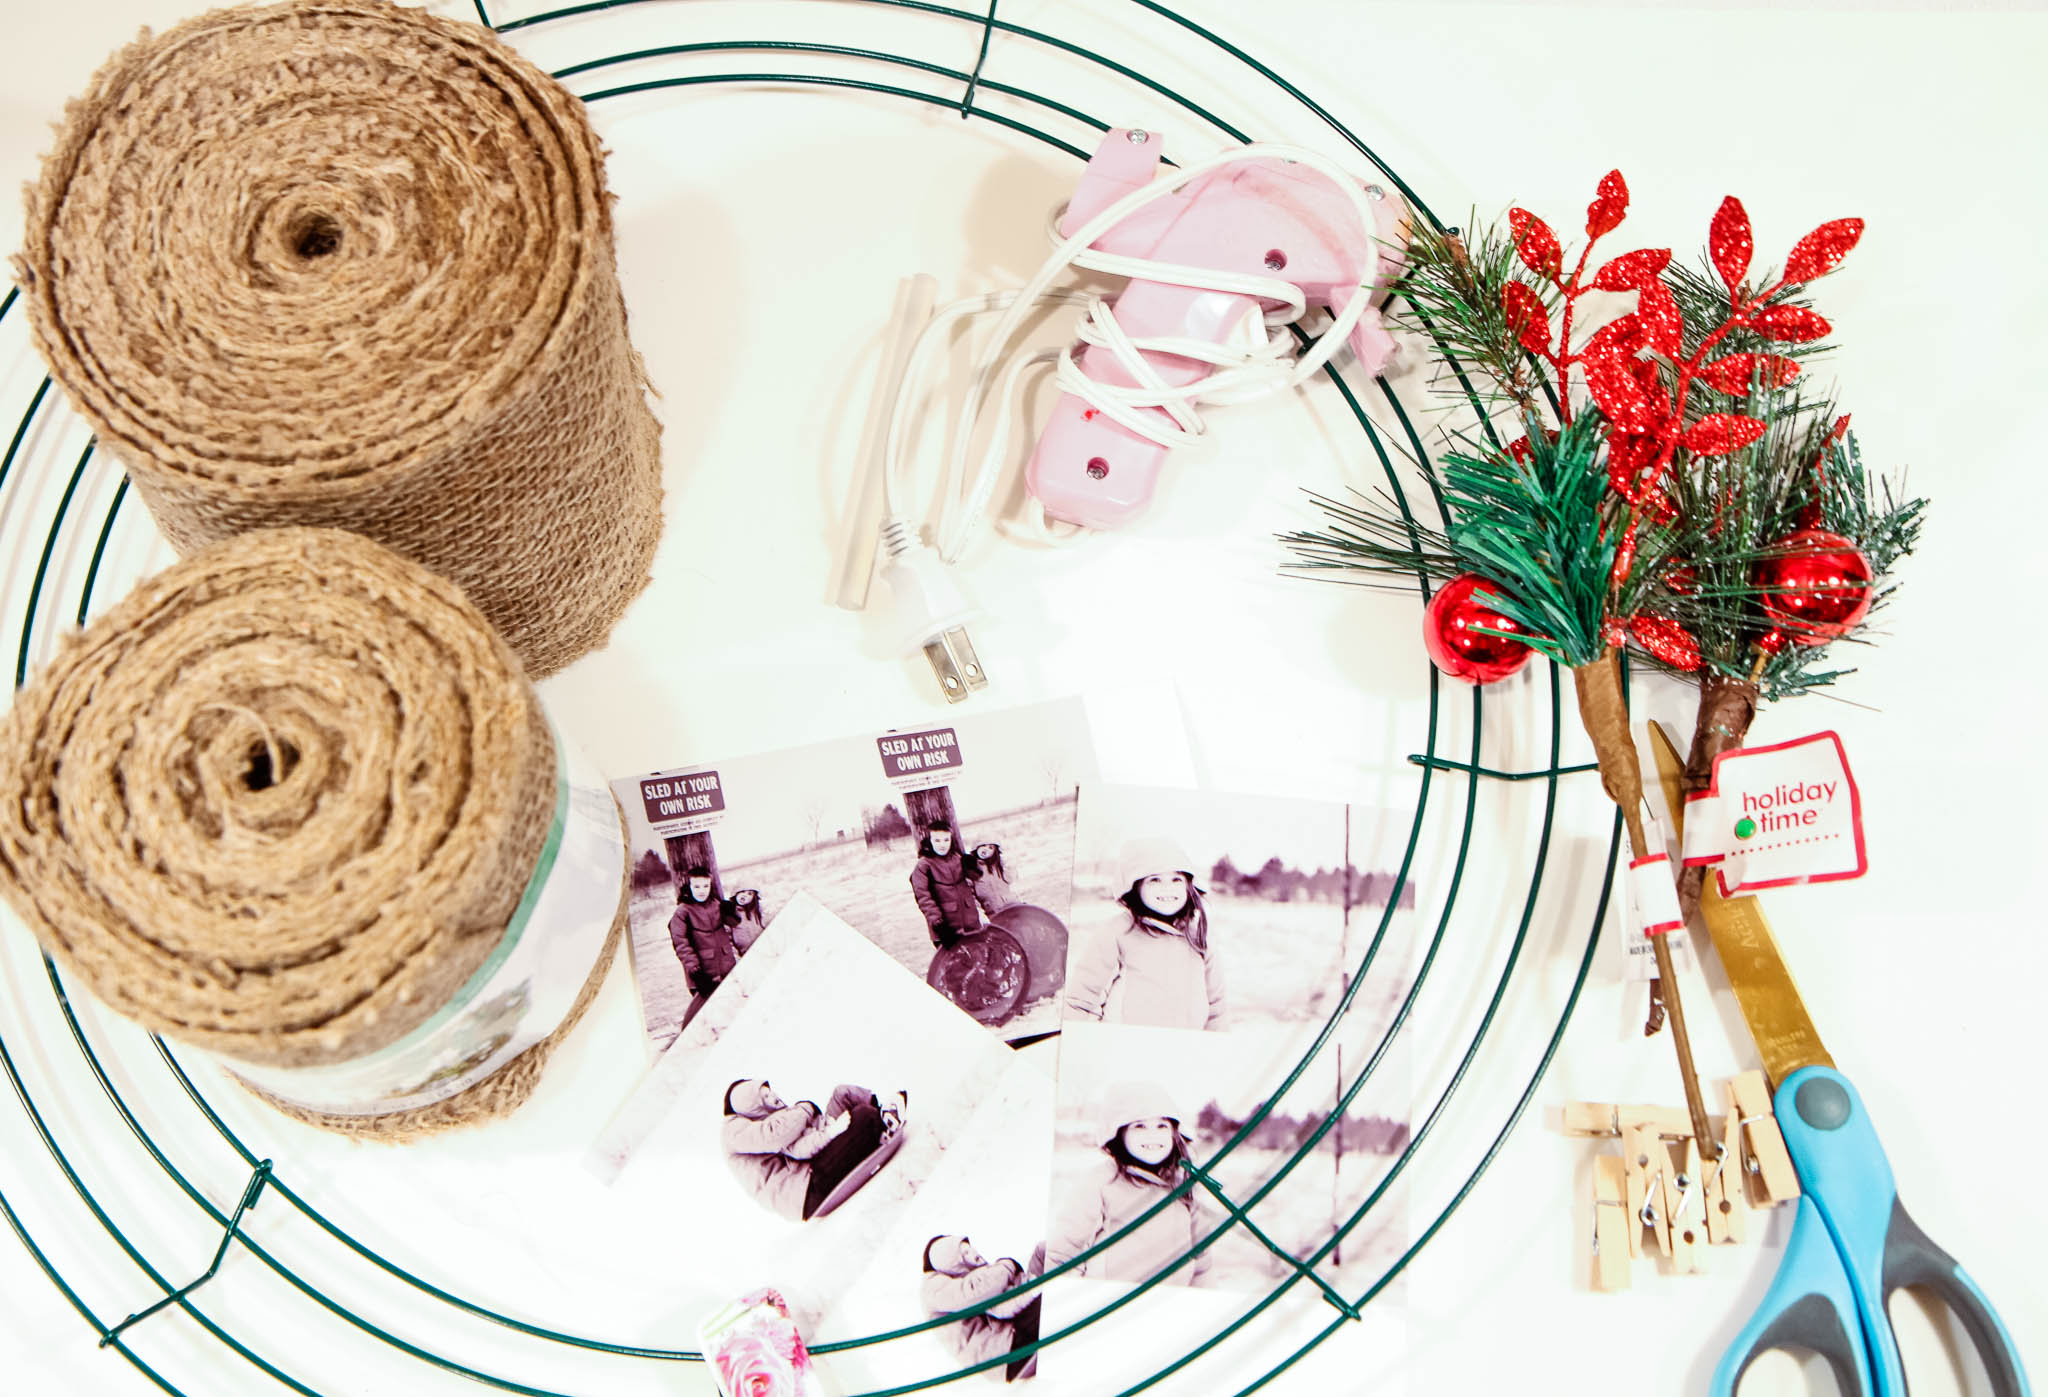
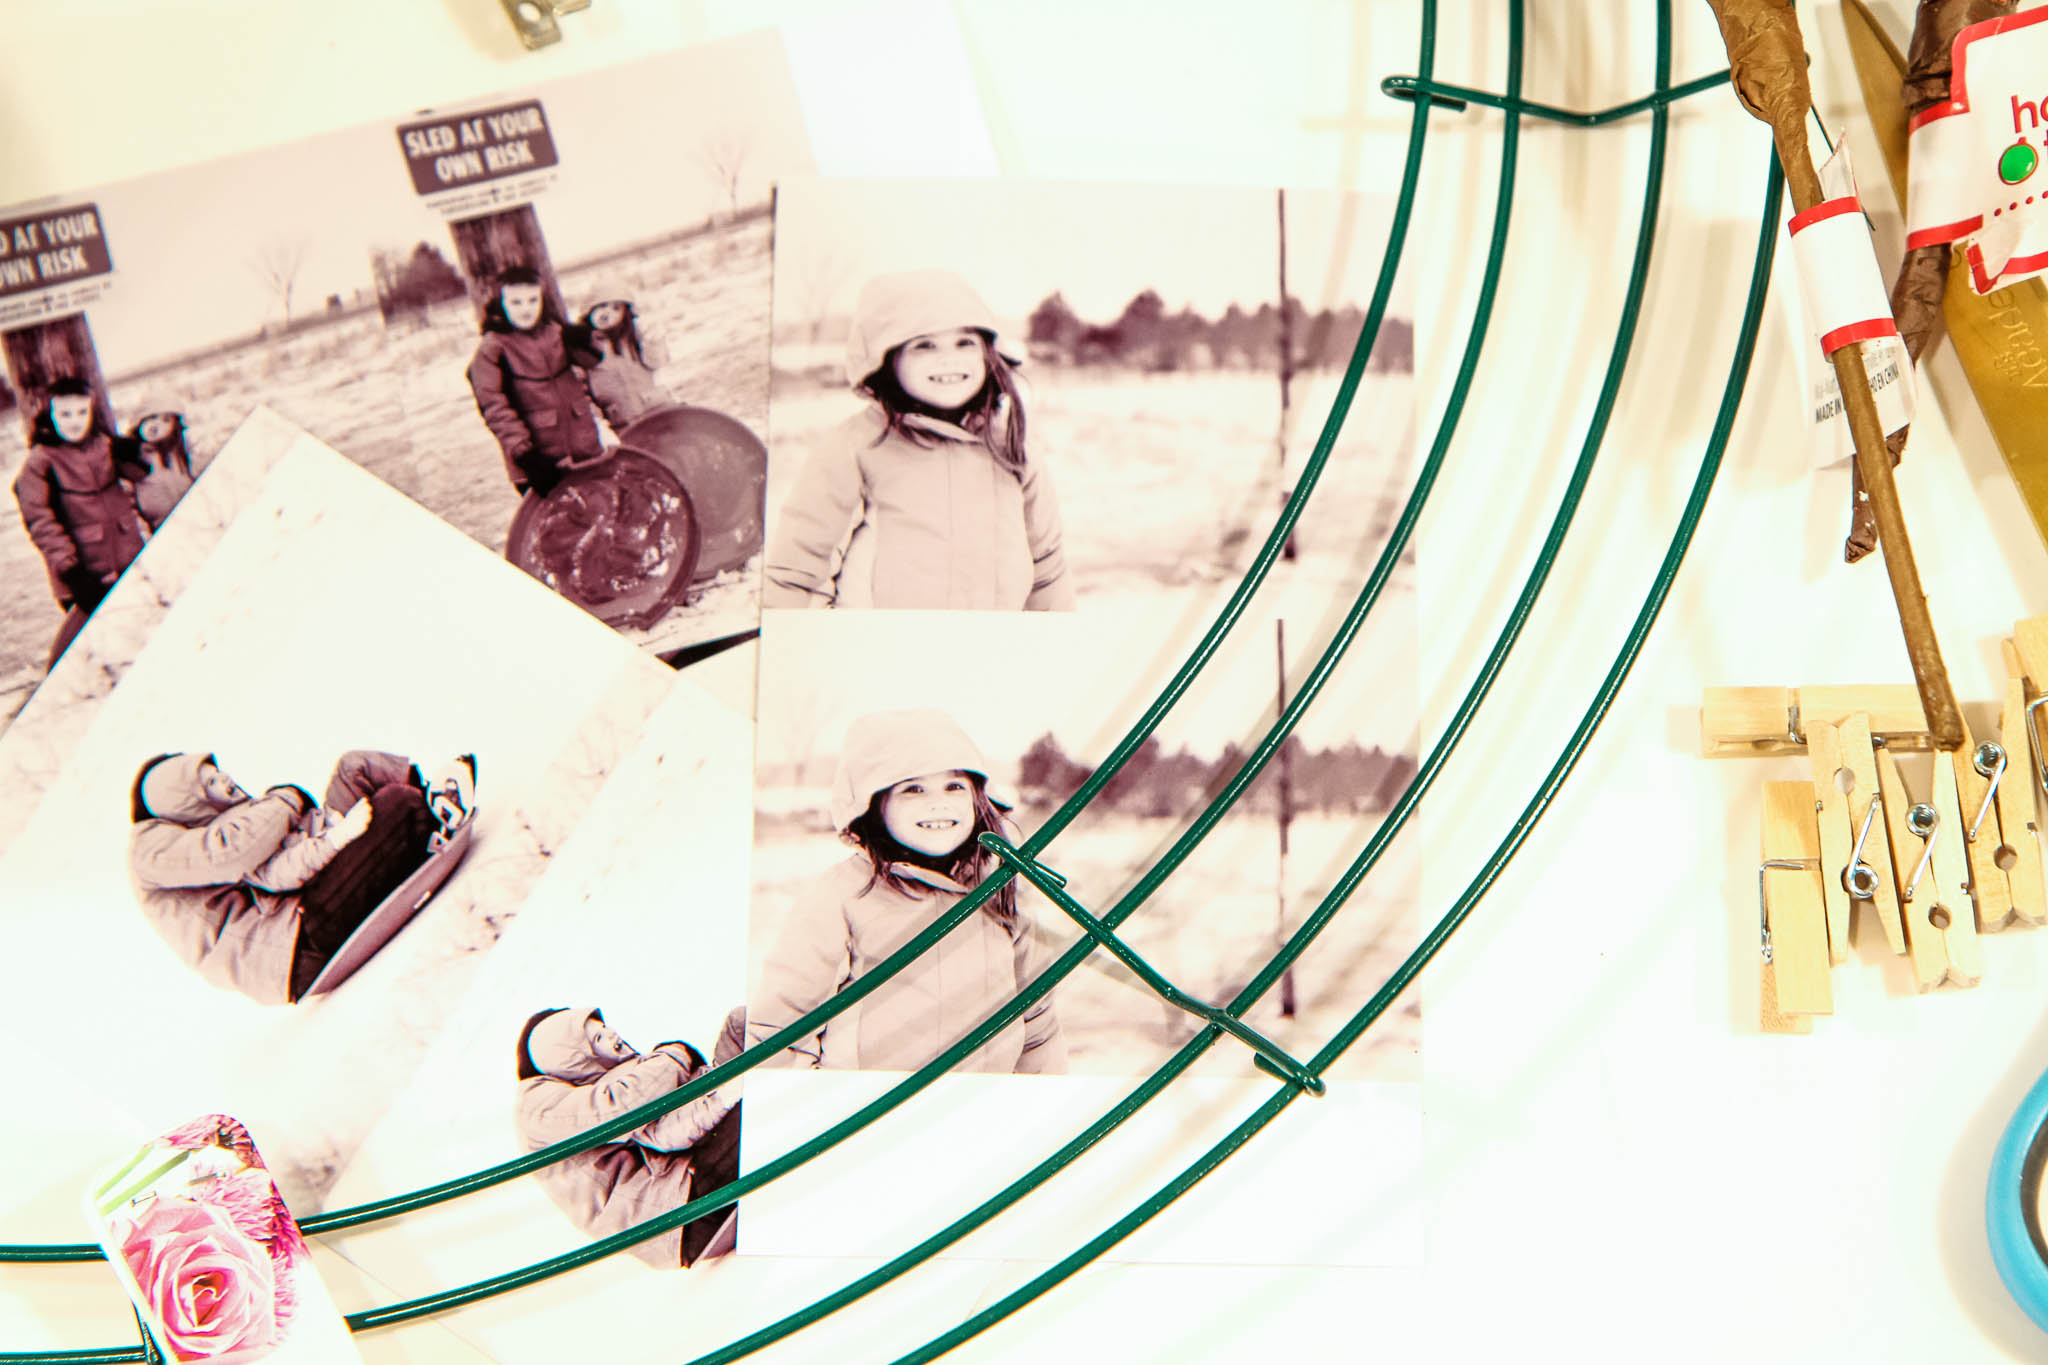
Gather your supplies. You will need burlap ribbon, a wire wreath form, mini clothespins, floral picks, floral wire, scissors, and wallet-size holiday photos.

Easy Burlap Wreath Tutorial

Get wallet-sized photos printed or print them at home with a mini photo printer.

How to Make a Burlap Wreath

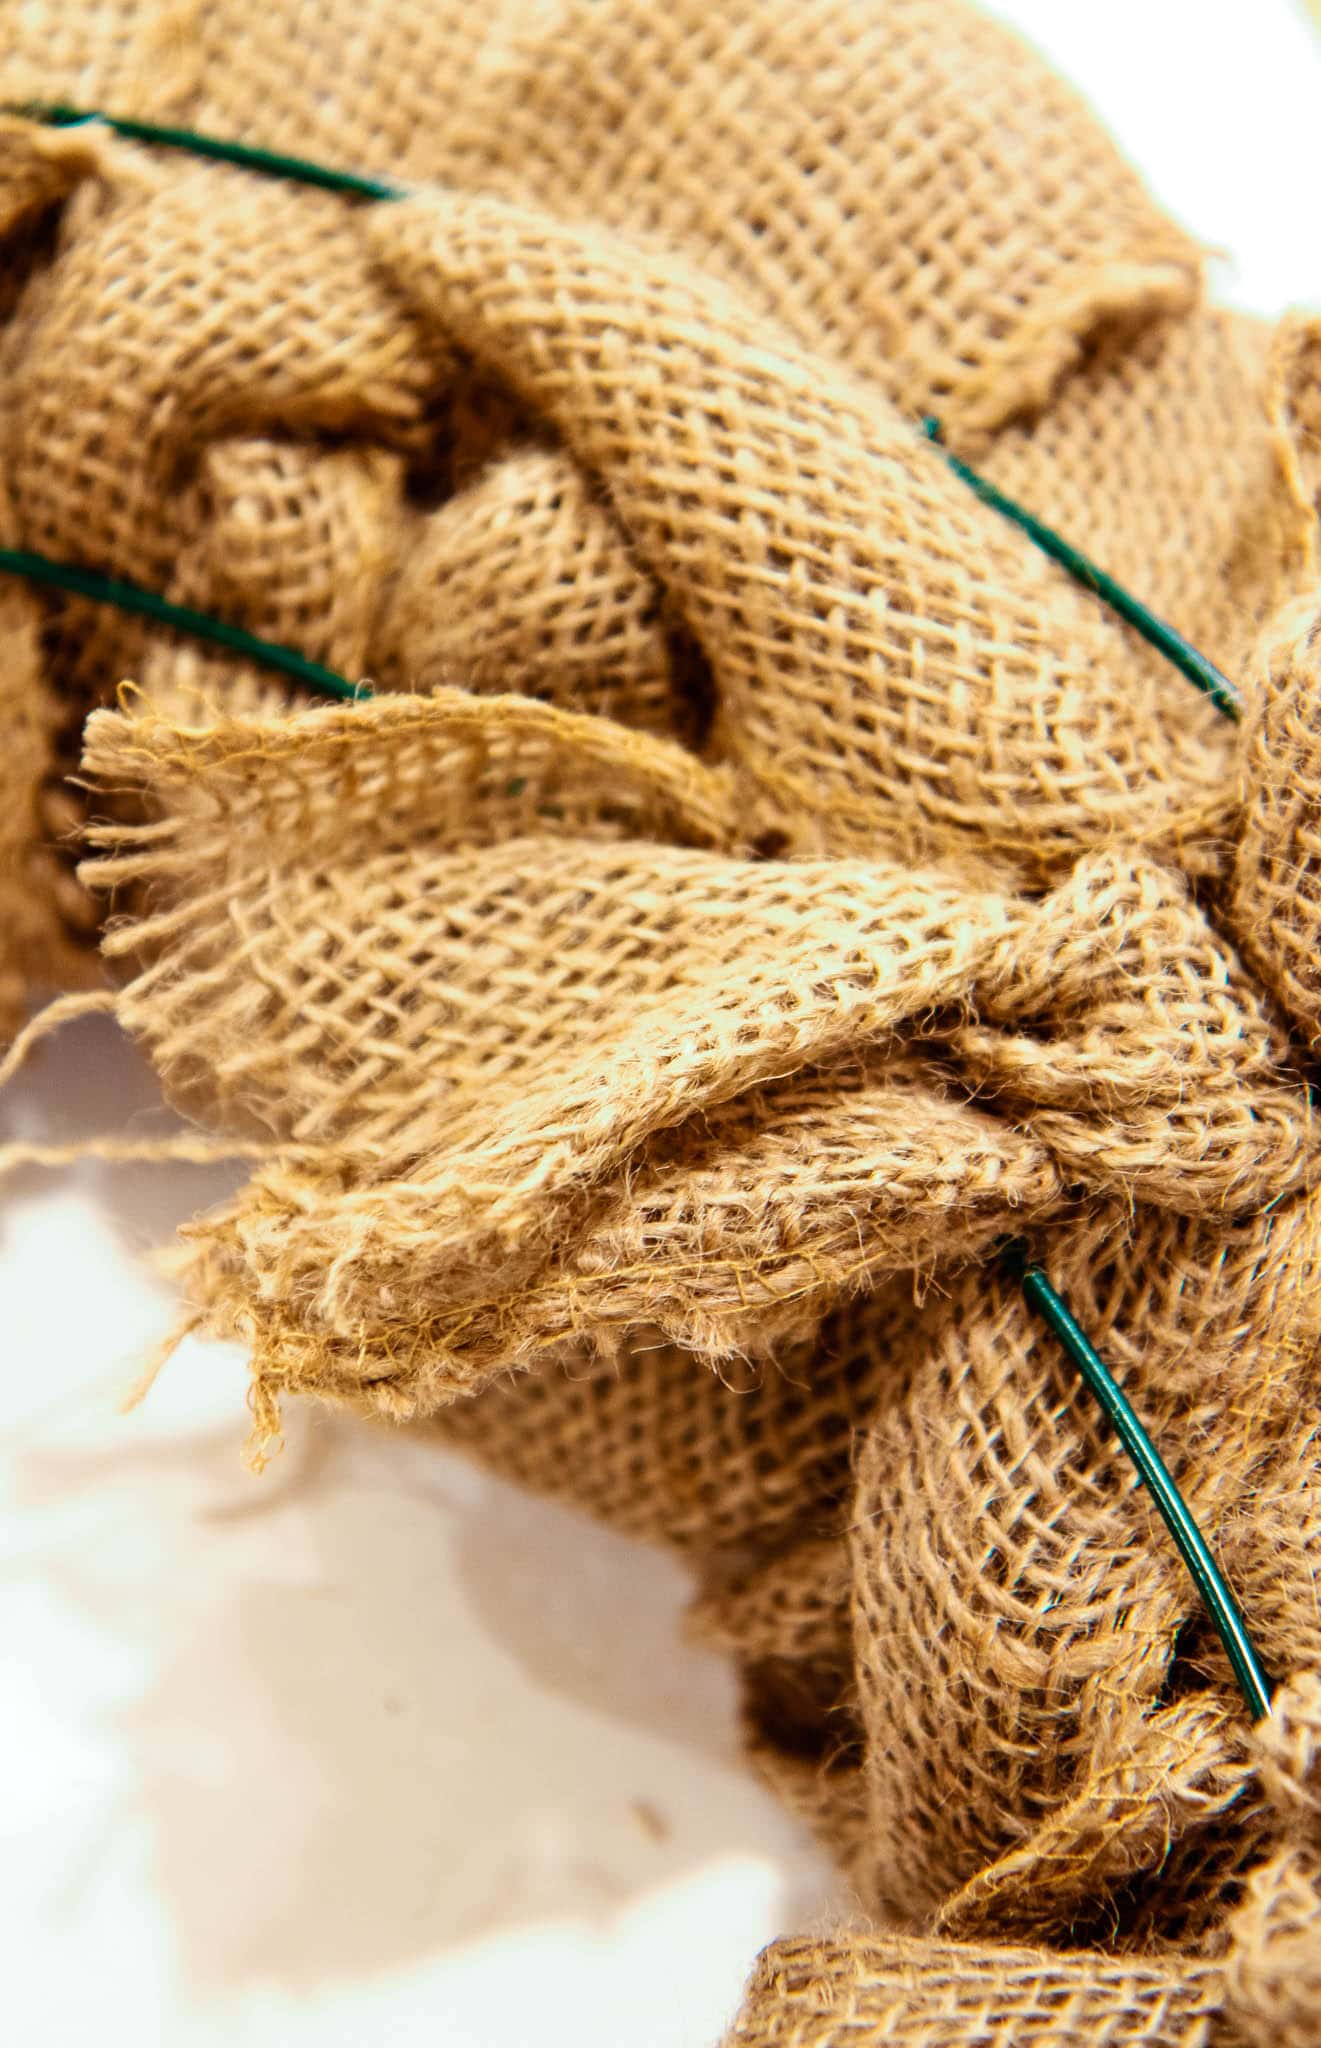
Now let’s begin weaving the burlap through our wire wreath form.

This is going to take a little time and practice with your first one so don’t get discouraged.

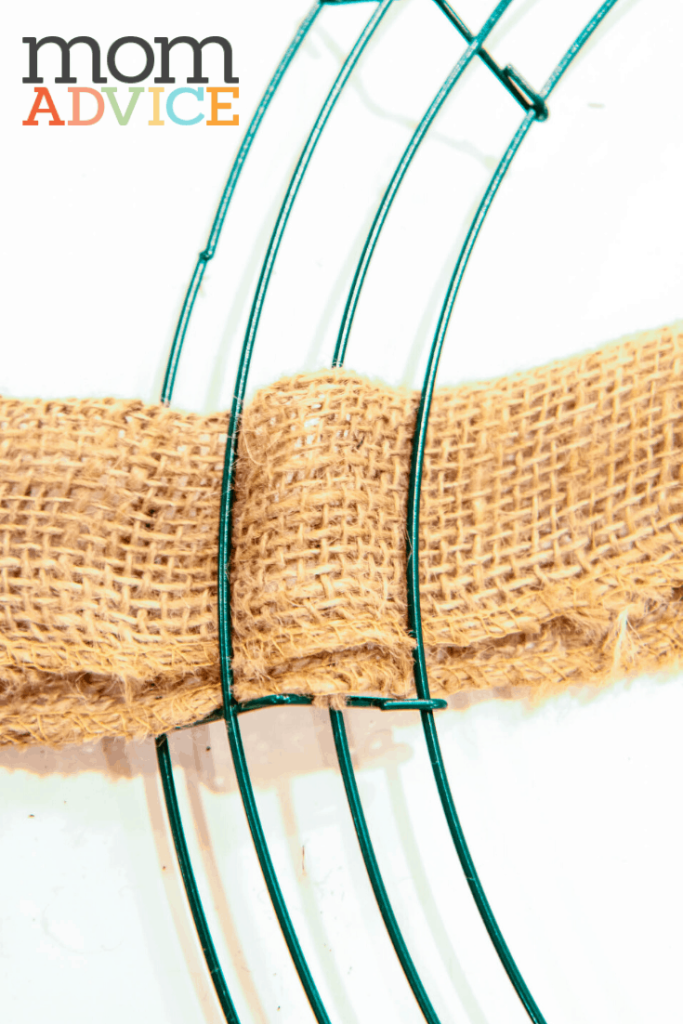
Begin by folding your burlap in half, like I have shown above, and keep it folded like this as we go.

Select one section of the wire wreath to start in.

How to Make a Burlap Wreath

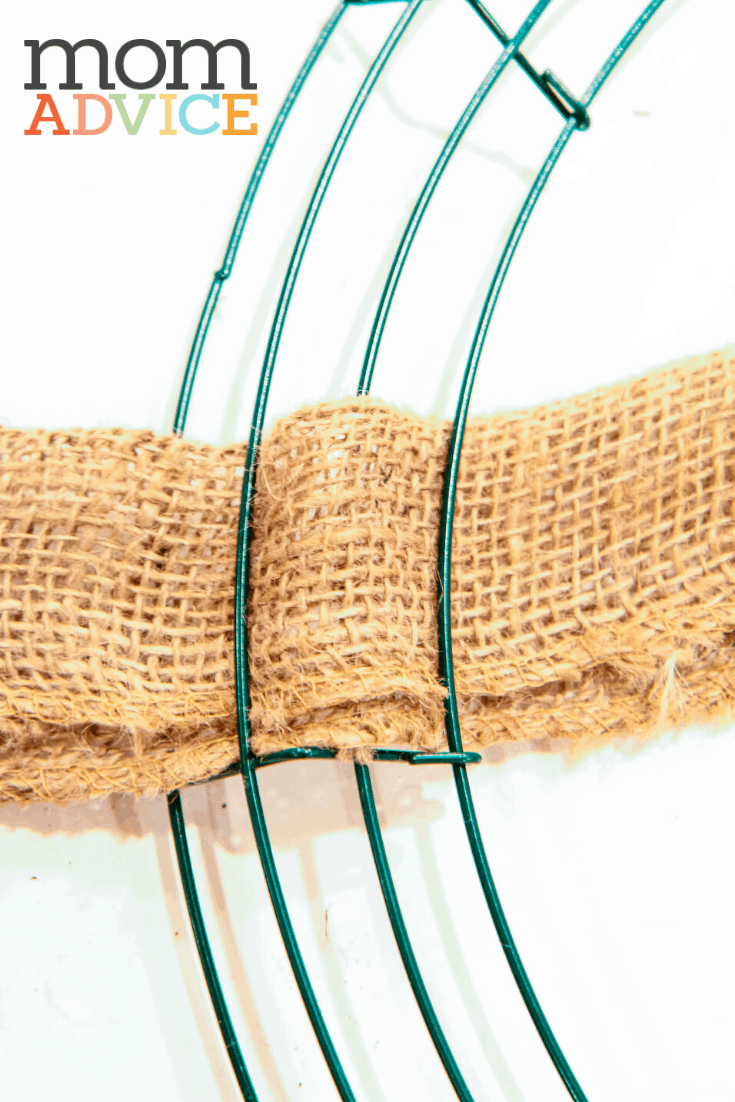
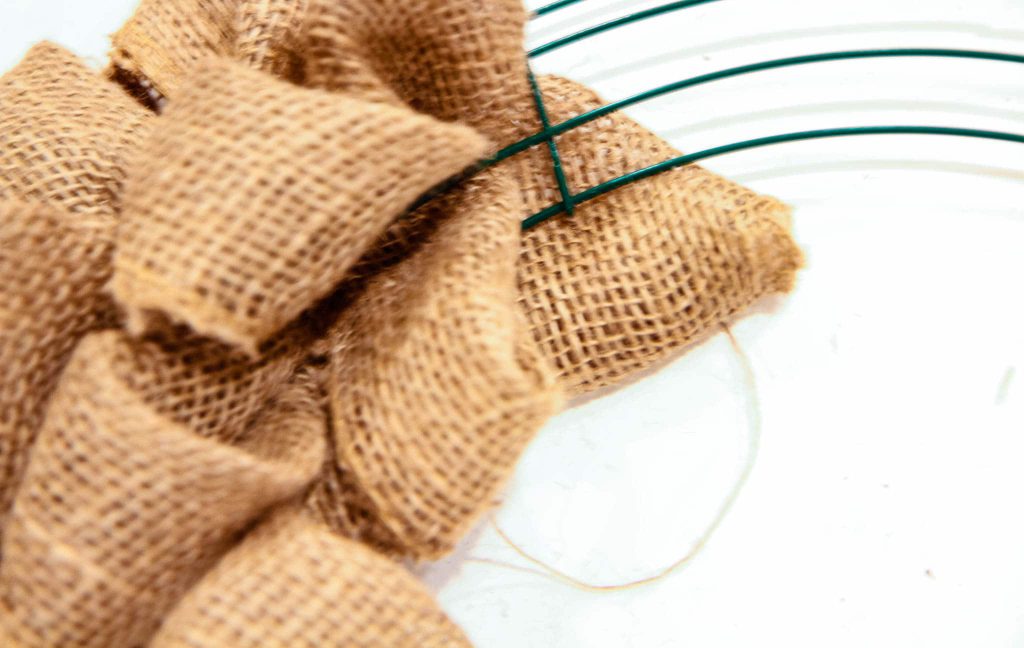
Feed the beginning end through the wreath as shown above.

Leave a little loose end to tuck in or you can wire it to the wreath with a little floral wire in the back.

How to Make a Burlap Wreath

Over the outer ring, under the next, over the next, and under to finish.

How to Make a Burlap Wreath

This is the technique we are using throughout.

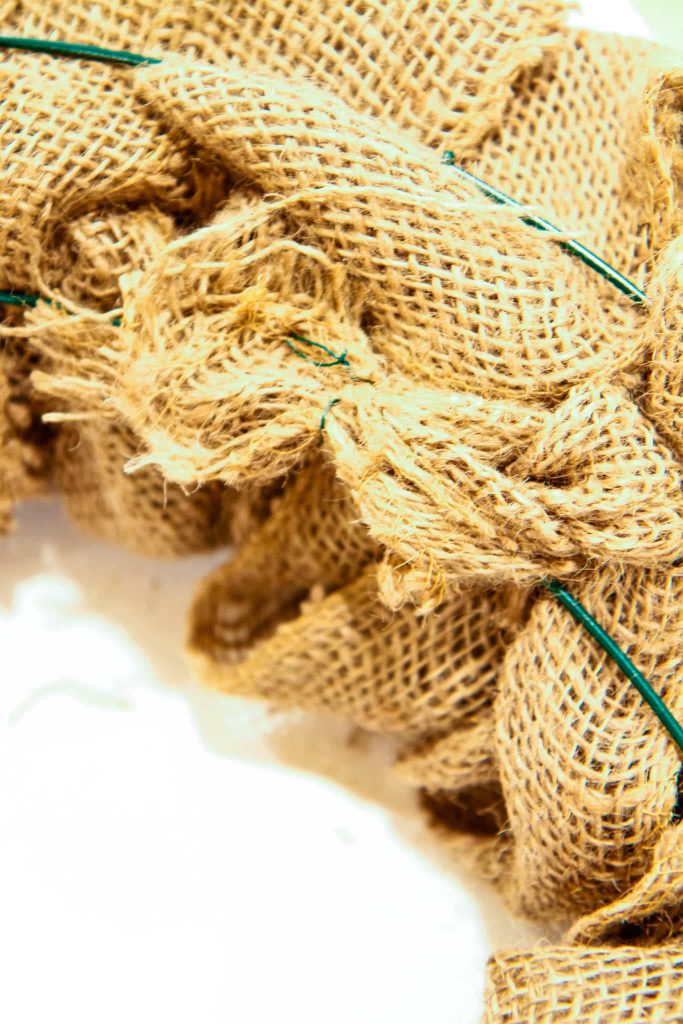
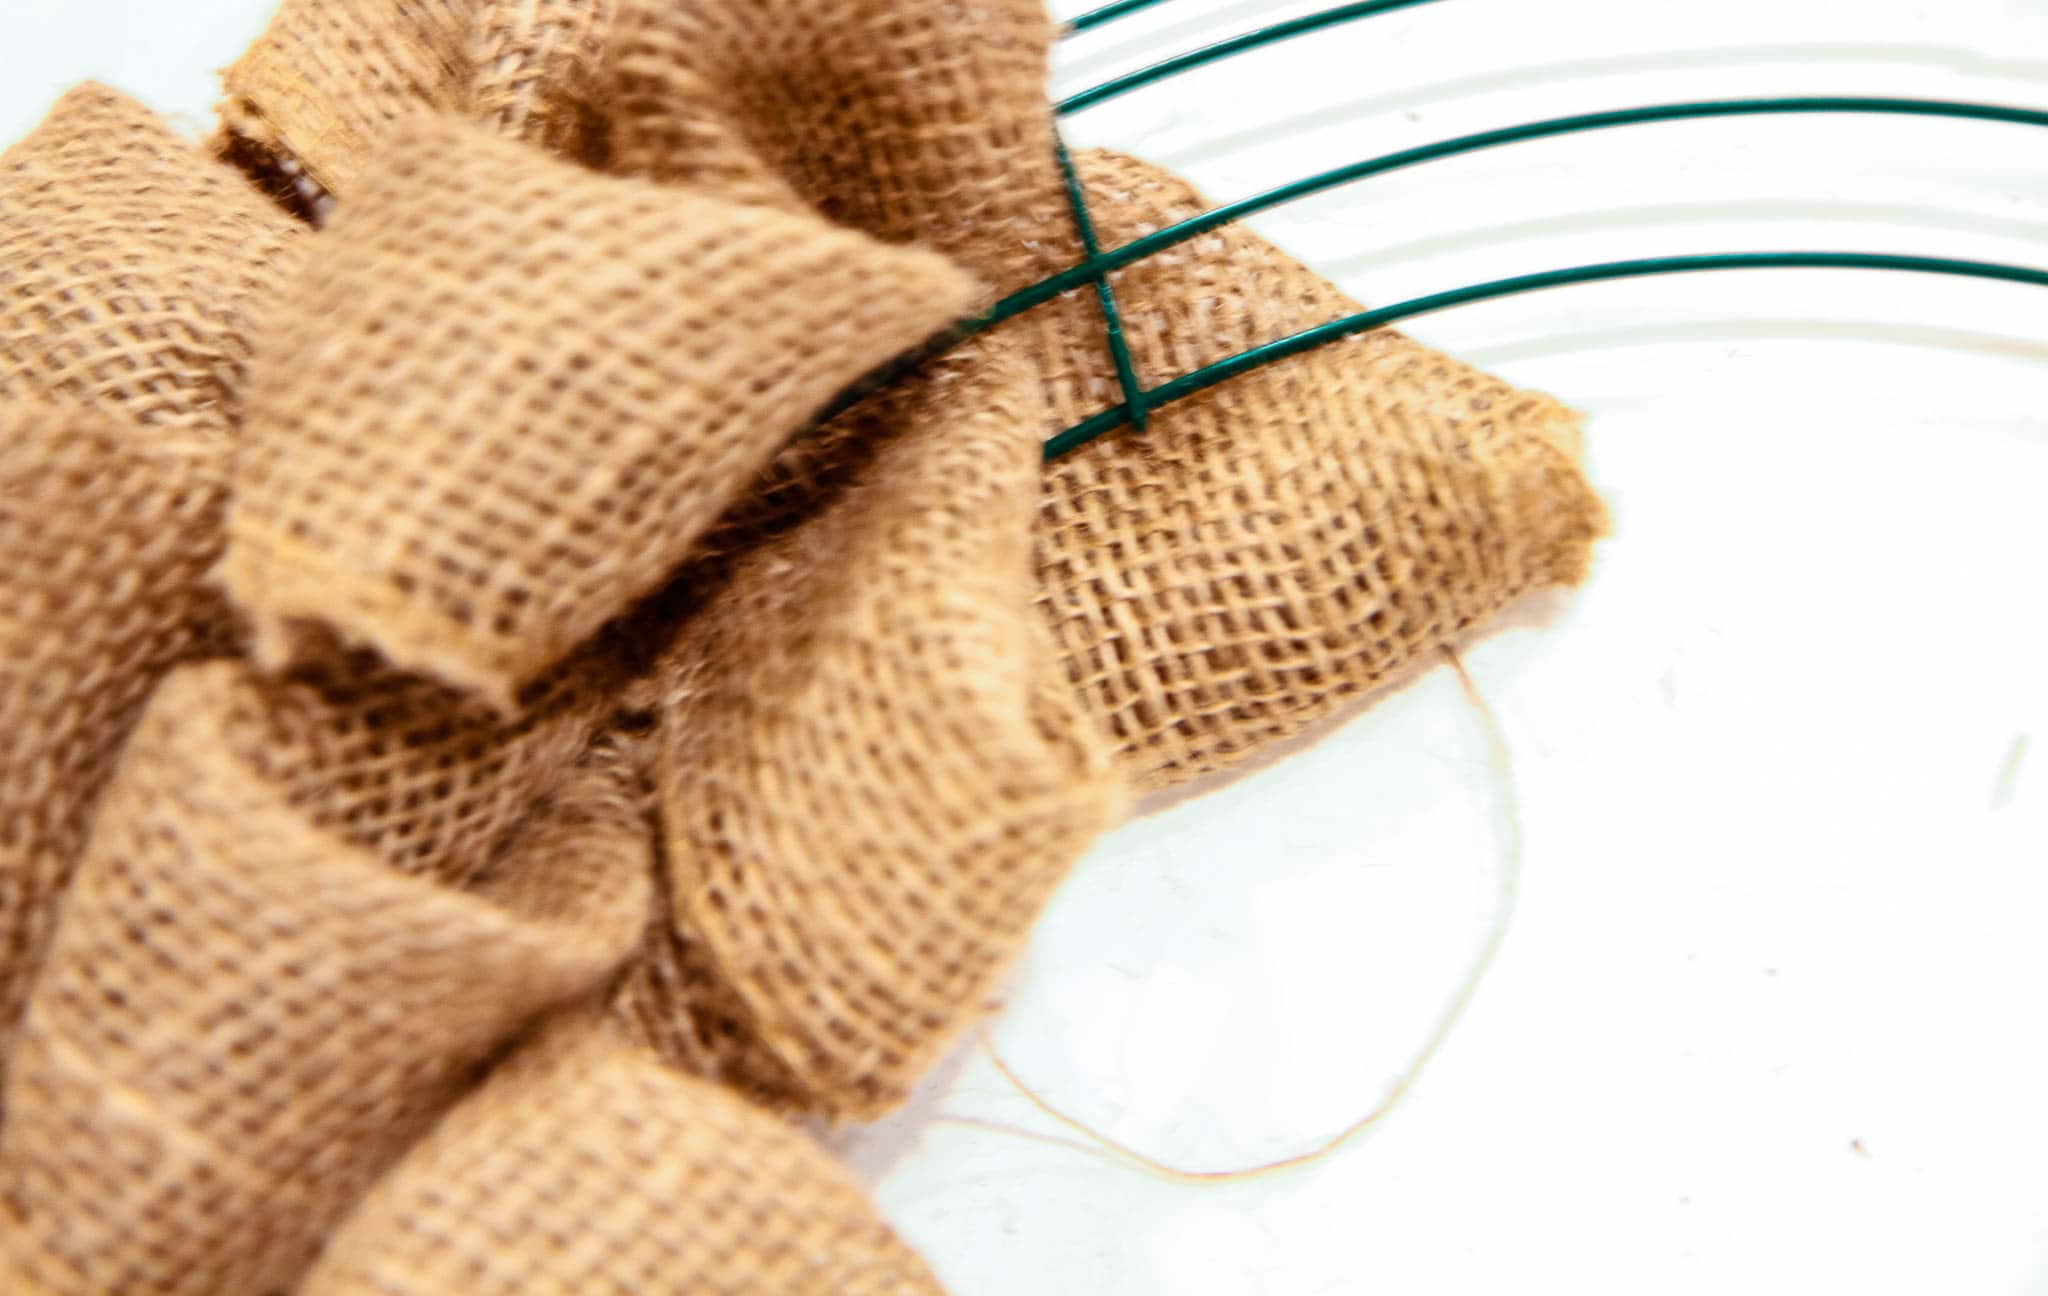
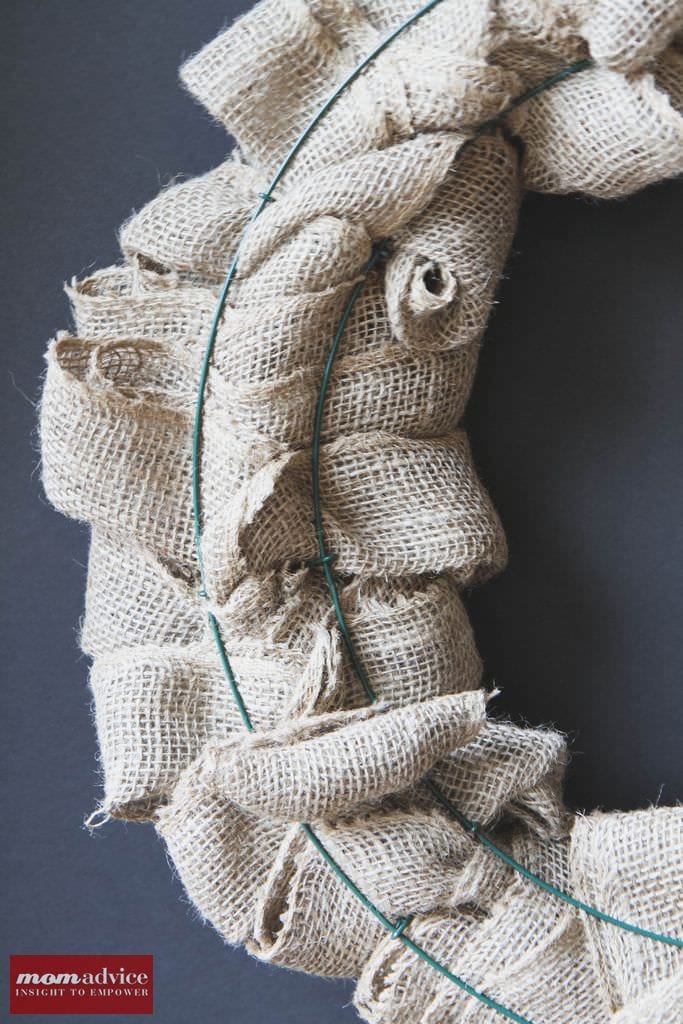
I am showing it to you tightly so you can see how this will work, when you do this, you will be actually pulling out the burlap a bit to give it to that bubble effect that we are going for. 

Begin right next to the previous row, within the same section of the metal wreath.

However, this time, we’ll weave in the opposite direction.

As you go along, keep pulling out the burlap to create bubbles. Move the working burlap into each section, alternating the weaving direction.

How to Make a Burlap Wreath

When you run out of burlap (it should be when you are about halfway through covering the wreath), tuck the end towards the back and pick up where you left off.

Again, you can wire these ends with a little floral wire on the back.

How to Make a Burlap Wreath

Finish the wreath with your holiday accessories.

You can trim any of the pieces down that were wired to help your wreath lay more flush to your front door.

How to Make a Burlap Wreath

Wouldn’t this just make the most fabulous little gift for someone you love for the holidays? I’ve provided some bulk purchasing options if you want to make more than one wreath.

Happy crafting!

How to Make a Burlap Wreath

How to Make a Burlap Wreath

Yield: 1 Wreath
Prep Time: 10 minutes
Active Time: 20 minutes
Total Time: 30 minutes

This no-sew, no-glue, no-cut wreath is the perfect DIY burlap wreath for decorating your door or gifting to a friend! Follow this step-by-step to make your own.

Tools

Instructions

  1. To begin, select a few of your favorite holiday photos that can be attached to your wreath.
    Tip: Send them to a photo lab and have them printed in wallet size.
    burlap wreath supplies
  2. Choose one section of the wire wreath to start in. Begin by folding your burlap in half, as I have shown below.
    How to Start a Burlap Wreath
  3. Feed the beginning end through the wreath. Over the outer ring, under the next, over the next, and under to finish.
    Leave a little loose end to tuck in or you can wire it to the wreath with a little floral wire (or zip tie) in the back.
    How to Make a Burlap Wreath
  4. Using the end of the burlap you're working with, begin creating burlap bubbles right next to the previous row, in the same section of the metal wreath. However, this time, weave it in the opposite direction.
    Keep pulling and forming bubbles in the burlap as you proceed.
    Move the working burlap into each section, first weaving in one direction and then in the other direction.
    Each fold should be about 4-6 inches wide. The continuous piece of burlap will naturally form a series of loops or bubbles.
    How to Make a Burlap Wreath
  5. When you run out of burlap (it should be when you are about halfway through covering the wreath), tuck the end towards the back and pick up where you left off. Again, you can wire these ends with a little floral wire on the back.
    How to Make a Burlap Wreath
  6. Once the entire wreath is covered, secure the final end with floral wire.
  7. Begin puffing up some of the folded bubbles (if desired) or you can leave them as is, if you prefer a more ruffled, rather than bubbly effect.
  8. Finish the wreath by hot gluing or wiring two floral picks on the wreath. Attach a few of your favorite holiday portraits with those mini-clothespins.
    How to Make a Burlap Wreath

Notes

You can use a small amount of hot glue, not too excessively to attach your floral pick. These floral picks can be switched for the seasons.

Looking for more burlap craft ideas? Here are a few of my most visited projects!

Crafting With Burlap

The Easiest Burlap Wreath You Will Ever Make from MomAdvice.com
Pin It

Unique Jigsaw Puzzles for Adults You’ll Fall In Love With

Thursday, August 10th, 2023

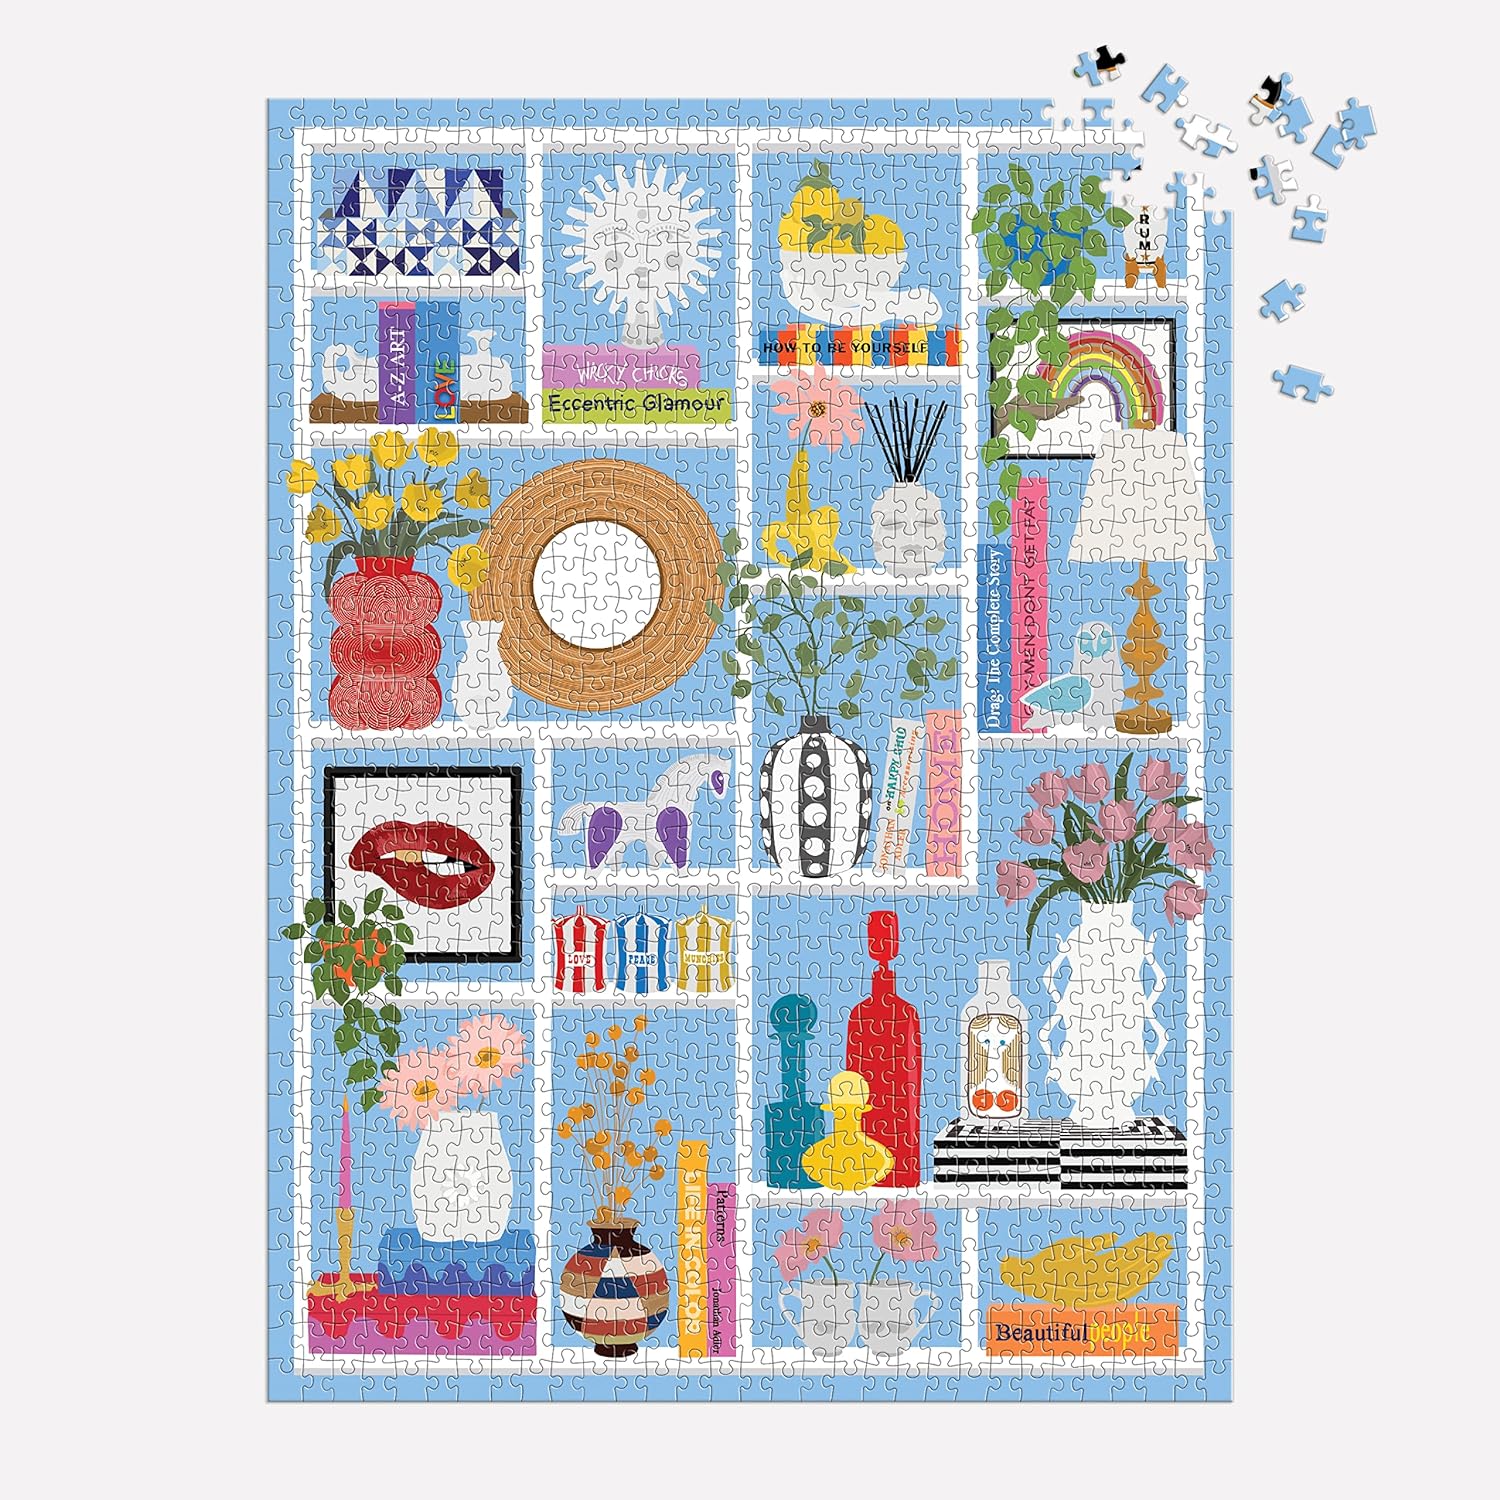
These jigsaw puzzles for adults offer unique designs in 500, 1,000, or 2,000 piece counts. This list has easy puzzle designs to more challenging jigsaws shapes.

Unique Jigsaw Puzzles for Adults You'll Fall in Love With

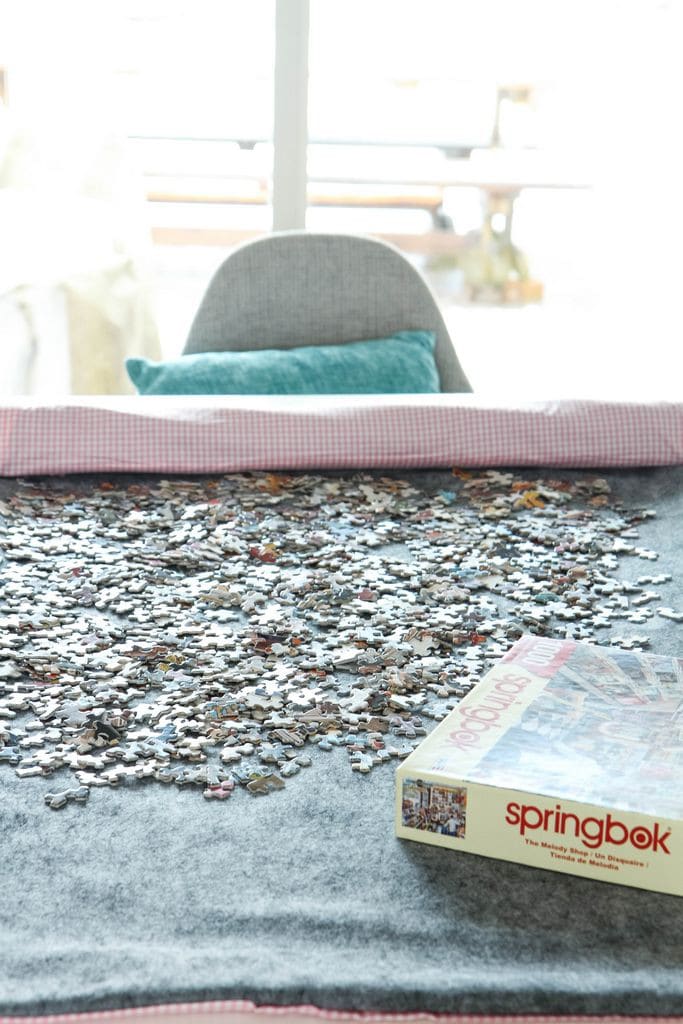
As soon as the weather turns crisp, we designate a table in our home as the puzzle table for the season. I love to have a puzzle that we can work on in those early morning hours with coffee or at the end of the day with a cup of tea.

Today I’m sharing a few of my favorite puzzles we’ve done at our house and some that made my wish list this this year. We have had the best time updating this guide for you.

Make sure to bookmark this list for gift-giving this year. Puzzles make incredibly unique hostess gifts, housewarming presents, and holiday gifts.

try this tutorial for a diy jigsaw puzzle mat

DIY Jigsaw Puzzle Mat

Before we dive into the puzzles, I do want to mention a few ways that we have saved A LOT of money over the years on our puzzle collection.

Three Easy Ways to Save on Jigsaw Puzzles

Find Out if Your Local Library Lends Puzzles- I can’t tell you all of the ways we have saved money over the years with our local library.

Contact your local library to see if they offer any jigsaw puzzle exchanges or if you can check out puzzles with your library card.

Life's a Beach Puzzle

Start a Puzzle Swap With Friends- One of the best ways we have saved is offering a puzzle swap with our friends.

When we have coffee together, we just bring our puzzles we have finished and trade them for a fresh puzzle.

Check Deals Sites For Deep Discounts On Puzzles- If you want to buy puzzles at a brick and mortar spot, our used bookstores offer huge savings on used puzzles as well as new.

No matter where you shop make sure that you are signed up with Rakuten and that you activate your savings before any shopping!

If you are new to the Rakuten app, this discount code should give you $30 on your first puzzle purchase! I also wrote a tutorial on how to use the app on items you regularly buy that will give you cashback rewards.

Unique Jigsaw Puzzles for Adults You'll Fall In Love With

Unique Jigsaw Puzzles for Adults You’ll Fall In Love With

Spend a cozy night with these jigsaw puzzles that are great gifts for adults AND kids.

Trade in a board game night for these fun-themed puzzles that embrace bookish themes and more in their puzzle designs.

As an Amazon Associate and member of other affiliate programs, I earn from qualifying purchases.

500 Piece Jigsaw Puzzle

Craving a quick win? These 500 piece puzzles are the perfect fit.

JIGSAW PUZZLES FOR BOOK LOVERS

Celebrate your love for books with this jigsaw puzzle collection that honors your love for reading.

JIGSAW PUZZLE GIFTS

Looking for a unique gift idea for a jigsaw puzzle lover? I recommend these jigsaw puzzle ideas and fun packaging ideas.

CHALLENGING JIGSAW PUZZLES

Are you craving more of a challenge? Try one of these difficult puzzles we have gathered for the puzzle enthusiast in your house.

Looking for more fall activities to try? Check out these fun additions to your puzzle routine!

watch these fall shows & movies while doing your new puzzle

The Best Fall Shows & Movies to Stream Right Now

download an audiobook from scribd while puzzling

How to Use Scribd for Your Reading Life from MomAdvice.com

What has been your favorite puzzle to do with your family?

How to Make Homemade Laundry Detergent (A Picture Tutorial)

Thursday, December 29th, 2022
How to Make Homemade Laundry Detergent (A Picture Tutorial) Header

This homemade laundry detergent recipe can save your family lots of money at the grocery store. Try this powdered laundry detergent made with Borax, washing soda, & a laundry soap bar. Try this recipe

A homemade laundry detergent recipe can save your family lots of money. Try this DIY powdered detergent made with Borax, washing soda, & a castile soap bar.

As we look to reduce our spending this year, I wanted to revive a few of our most popular DIY projects and this is one my FAVORITE DIY projects we have done for our family. 

This homemade laundry soap has been one of our tried-and-true projects for both savings AND for getting our clothes clean even with our most sensitive skin problems. 

I made this tutorial WAY back in 2013 and have adjusted the prices to the current pricing to ensure that this is as accurate as possible. 

As you can imagine, materials pricing went up, but not as much as I had expected. 

This is still much more economical than buying store-bought detergent. To add to the cost savings, I’ve included some ways that you can make it even more economical. 

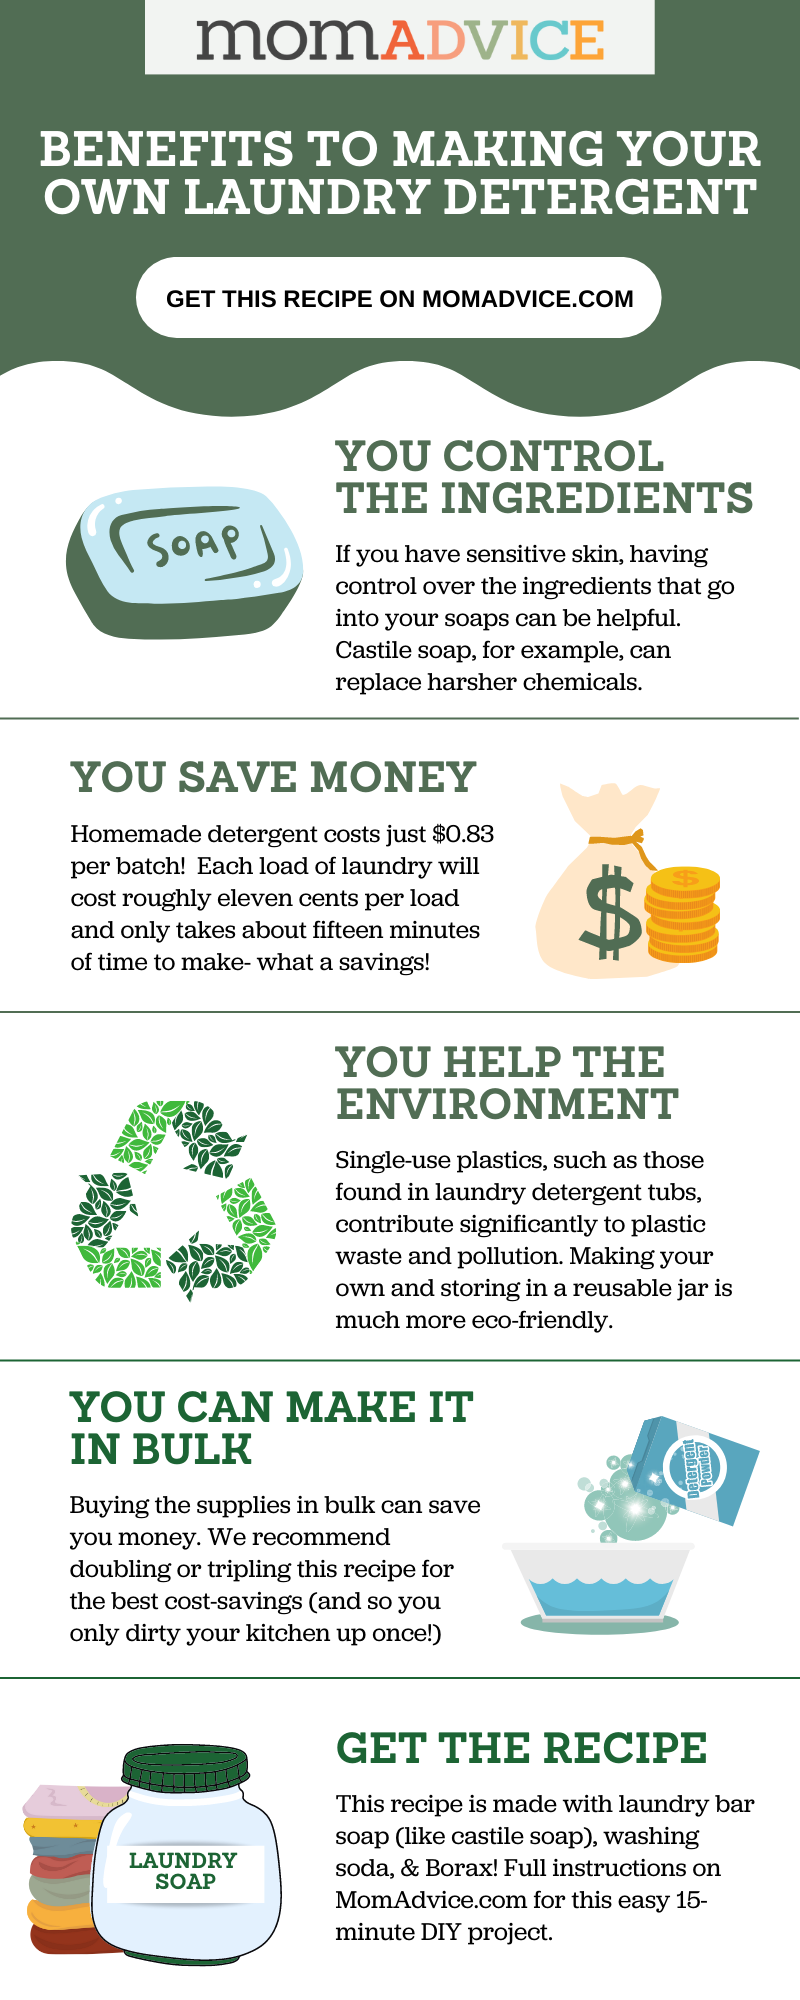
How to Make Homemade Laundry Detergent Money-Saving Infographic

What are the Benefits to Making Your Own Detergent?

The top question I get asked is if these homemade detergents work and if it is worth the effort. Not only does it work AMAZING,  but the cost savings (detailed below) is also worth it as we combat these rising grocery prices. 

Not only does making your own laundry detergent save you money, but it can also reduce your environmental impact. 

For example, homemade detergents have a smaller carbon footprint than store-bought detergents, simply from a plastic packaging perspective alone.  

On top of that, you can control the ingredients that go into your laundry detergent.

What Ingredients Do I Need to Make My Own Laundry Detergent?

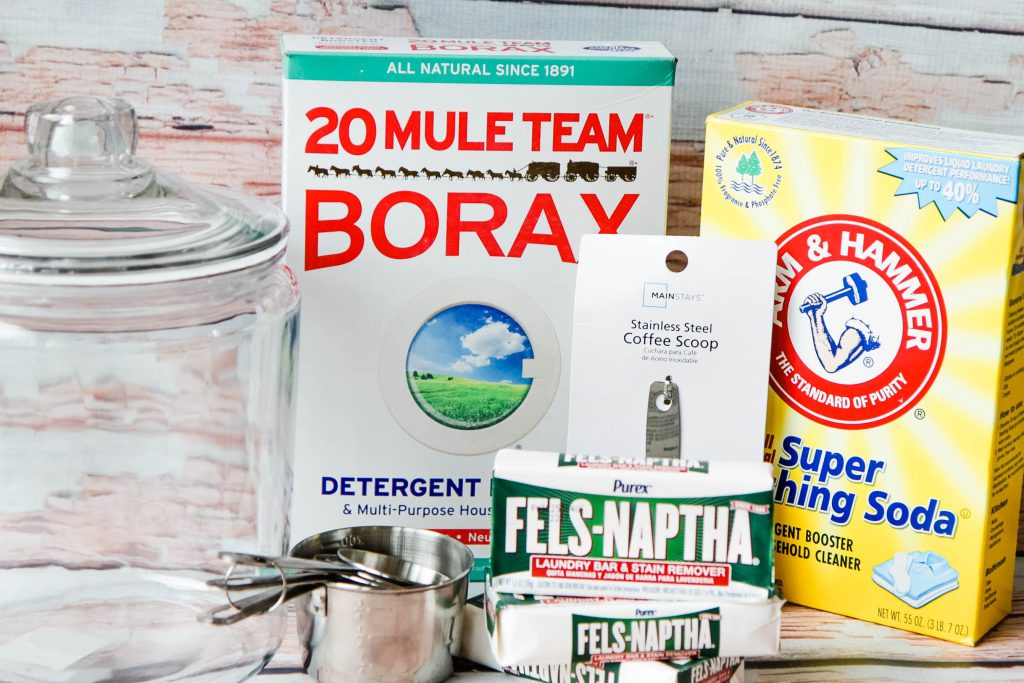
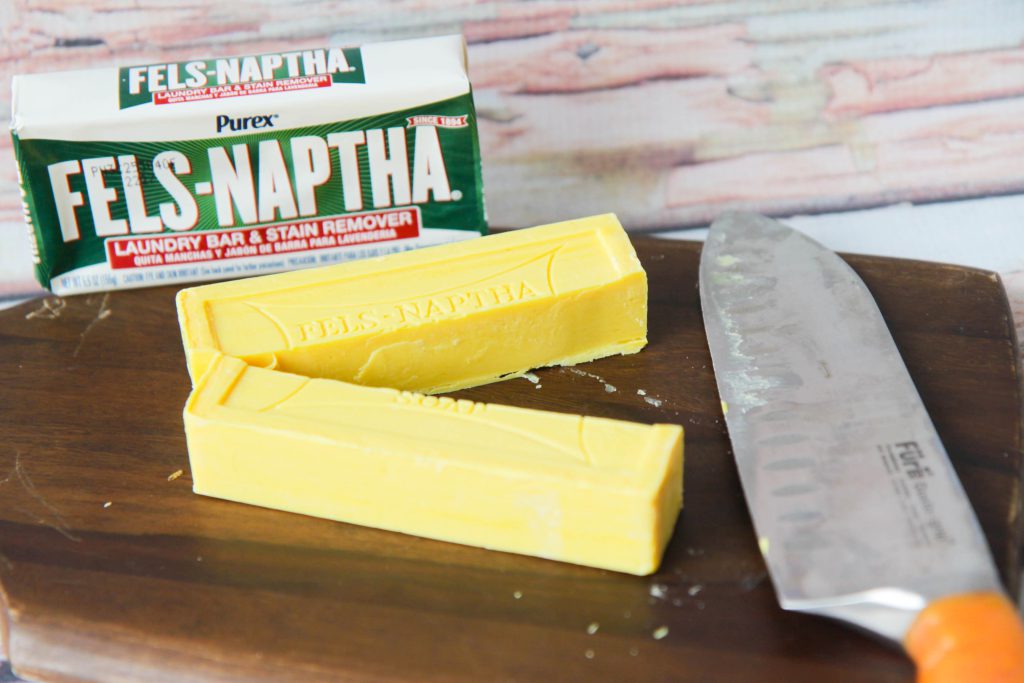
Homemade laundry detergent is a simple and cost-effective way to clean your clothes. It can be made with just three ingredients: Fels-Naptha Laundry Bar Soap, washing soda, and borax.

The Fels-Naptha Laundry Bar Soap is a powerful stain remover that can help to lift dirt and grime from your clothes. It is a staple ingredient in many homemade laundry detergents and can be found at most grocery stores or online.

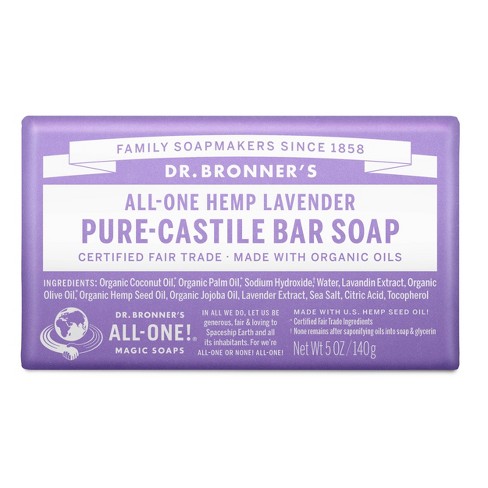
Alternatively, you can also use Zote, Ivory Bar Soap, or Dr. Bonner’s Castile Bar Soap as a substitute.

Washing soda, also known as sodium carbonate, is a powerful cleaning agent that can help to remove stains and brighten whites.

Borax, also known as sodium borate, is a natural mineral used for cleaning and laundry for centuries. It is a powerful stain remover and can help to brighten whites and remove odors.

How to Make Homemade Laundry Detergent- Supplies

How Much Does It Cost to Make a Homemade Batch of Laundry Detergent? (pricing updated for 2023) 

The current pricing on these three ingredients is:

Fels-Naptha Laundry Bar– $2.59 per bar (currently unavailable online at a reasonable price through Walmart- check on your store shelves)

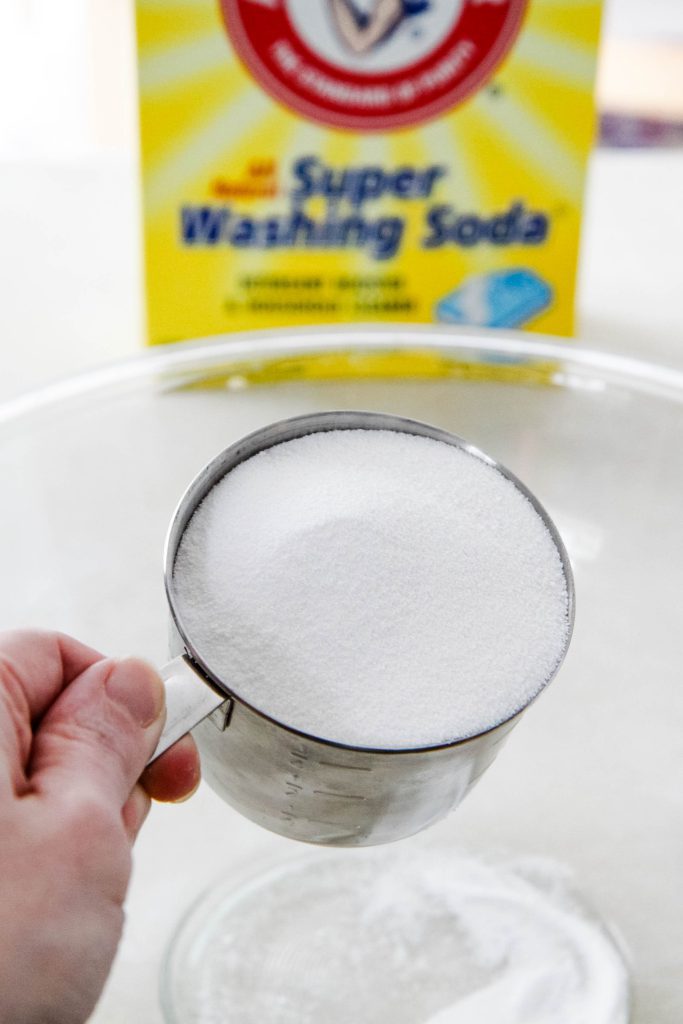
Arm & Hammer Washing Soda (55 ounce box)- $4.59

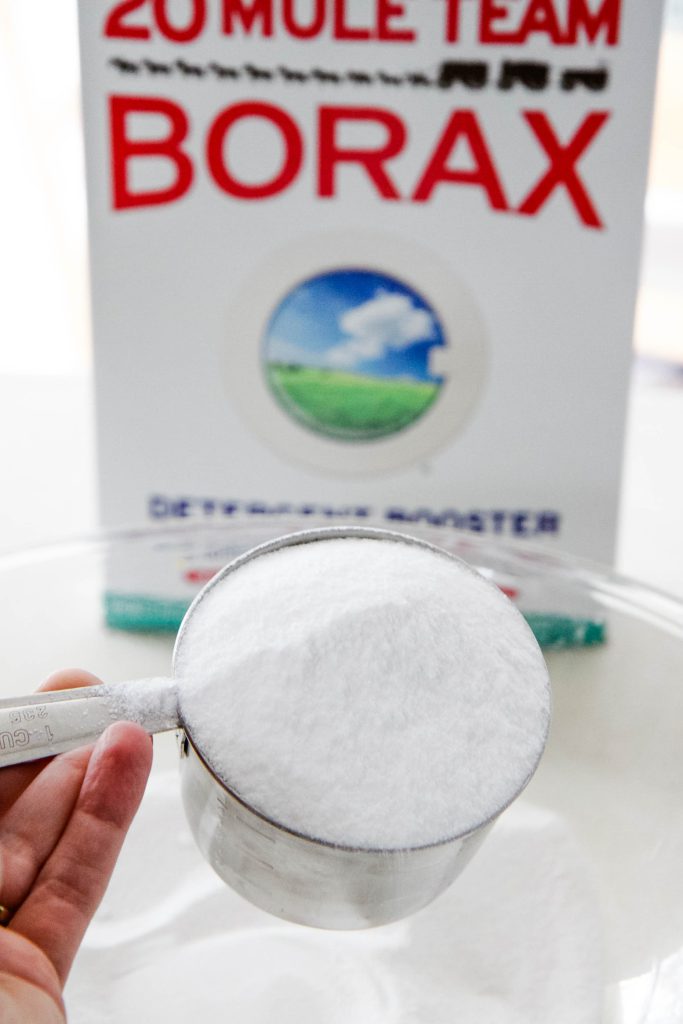
20 Mule Team Borax (65-ounce box)- $5.97

One batch of laundry detergent takes one cup of the borax, one cup of the washing soda, and one bar of soap.

Using these current prices, if the total cost of the ingredients is $2.59 for the laundry bar + $4.59 for the washing soda + $5.97 for the borax, the total cost is $13.15.  Dividing this by the number of batches you can make,  it gives us a cost of about $0.83 per batch! 

If you use one tablespoon of detergent per load, it will cost you just $0.06 per load! 

If you have a particularly dirty load, you can use two tablespoons, then it would cost  just $0.11 per load.

It is possible that buying these items locally will yield even more savings versus buying the ingredients online.

Where Do I Buy the Ingredients for My DIY Laundry Detergent?

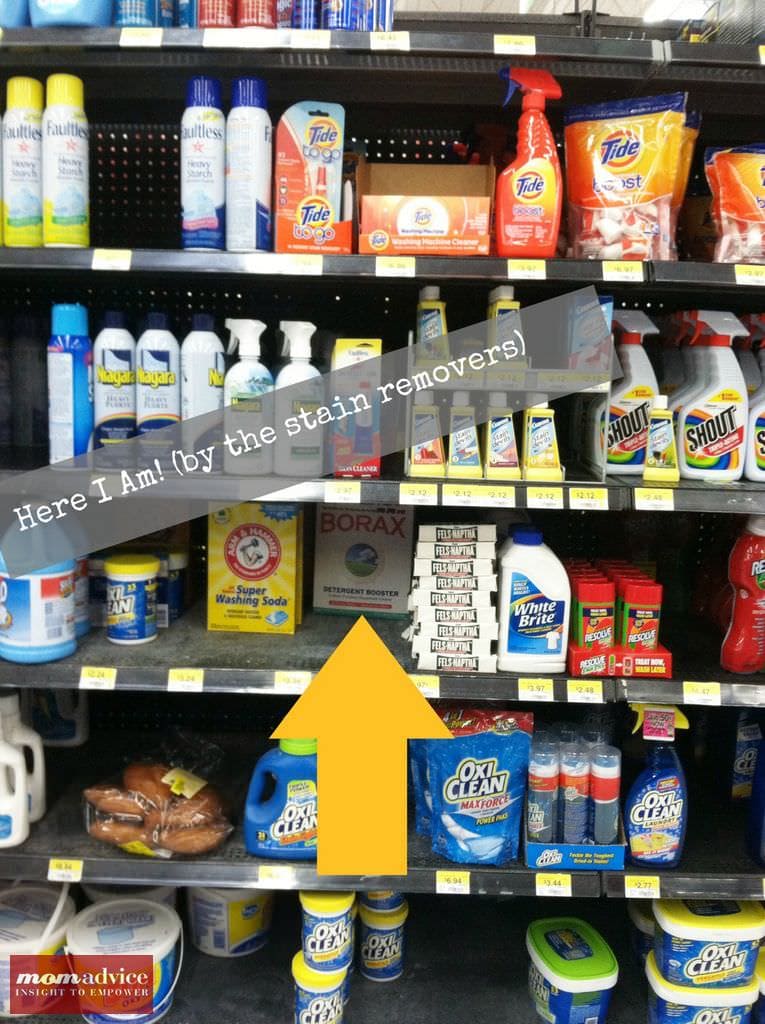
Walmart can be a great option (only purchase IN STORE to avoid those third-party online prices). These supplies are all right in a row at your local store and are located on the opposite side of the laundry detergents, over by the stain remover. 

If you don’t have success at your store, another unexpectedly frugal spot to shop is your local hardware store. 

How to Make Homemade Laundry Detergent (A Picture Tutorial)

How Do you Grate the Laundry Soap Bar?

You can definitely use an old-fashioned cheese grater, but the soap can clump up and not completely dissolve in your load unless you grate it extremely fine. 

I allow my food processor to do the work for me because it is much easier to do and allows you to also double or triple your batches of laundry detergent in no time flat.

What Can I Use if I Prefer to Use a More Natural Homemade Laundry Detergent? 

One update to this recipe we will try this year is substituting our Fels-Naptha with Dr. Bronner’s Bar Soap

Although we have never had any sensitivities to the current recipe, castile soap is made from plant-based oils (olive oil, coconut oil, and hemp oil), and I think it will be a smart switch for a greener formula. 

In case you didn’t know, castile soap is known for its more gentle and moisturizing properties, as well as its versatility in a range of cleaning applications. 

It is why it is often used as a base for homemade cleaning products, such as laundry detergent, dish soap, and all-purpose cleaner.

Because it is made from plant-based oils, Castile soap is biodegradable and environmentally friendly. It is also typically free of synthetic fragrances, dyes, and preservatives, making it suitable for people with sensitive skin or allergies.

Keep in mind, making this switch will add to your cost per  load of laundry. Right now the pricing is roughly $4.50 per bar.  Even with the higher cost of this bar, it is still much cheaper than conventional laundry detergent prices. 

To save on this item, shop through the Rakuten app to get money back on your grocery purchases (including Instacart!). I’ve also written a full tutorial on how to get cash back on lots of common items you buy for your household.  

Is Homemade Detergent Safe to Use With High-Efficiency (HE) Washers?

The true beauty of using this homemade detergent is that it doesn’t have a lot of suds. You can’t use laundry detergents not made for high-efficiency washing machines because of the suds factor in many store-bought detergents. 

Thanks to the small amount of suds and the minimal amount of soap you need to wash your loads, it is the perfect detergent to use with your HE washer! You can use this homemade laundry detergent with confidence!

Is This Homemade Laundry Detergent Septic Friendly?

The ingredients in this soap contain zero phosphates and zero fillers (like montmorillonite clay) that cause commercial powder detergents to clog lines. 

I am sure other items you have lurking in your home are less septic friendly than this one, so this is a perfectly safe product to make and use.

How to Make Homemade Laundry Detergent (A Picture Tutorial)

How Do I Store Homemade Laundry Detergent? 

I love to store my detergent in a glass jar, but you could also store this in a plastic container with a tight-fitting lid. 

How Can I Prevent Static When Drying My Clothes? 

You can use vinegar as a natural fabric softener by adding it to your fabric softener compartment in your washing machine. To use vinegar as a fabric softener, you can add 1/2 to 1 cup of white vinegar to the rinse cycle of your laundry.

Keep in mind, vinegar can be harsh on certain types of fabrics, such as wool and silk, so it’s best to test a small, inconspicuous area before using it on your entire load.

Personally, I have become a big fan of these wool dryer balls and love to add a few drops of essential oils to my dryer balls to add a fresh scent to my loads. This one natural homemade laundry routine that our whole family has gotten behind. 

Now that you know all about it, let’s get started on our project!

How to Make Homemade Laundry Detergent (A Picture Tutorial)

Supplies Needed

1 box of Arm & Hammer Super Washing Soda

1 Bar of Fels-Naptha Soap or Dr. Bonners Castile Bar Soap (or more if you plan to double, triple, or quadruple your batch) 

1 box 20 Mule Team Borax

Food Processor

Large Mixing Bowl

Measuring cups

Jar for Storage (found in the kitchen supplies)

Coffee Scoop (found in the kitchen supplies aisle, optional, but is great for perfect measuring of your detergent)

How to Make Homemade Laundry Detergent- Fels-Naptha Soap Cut in Half

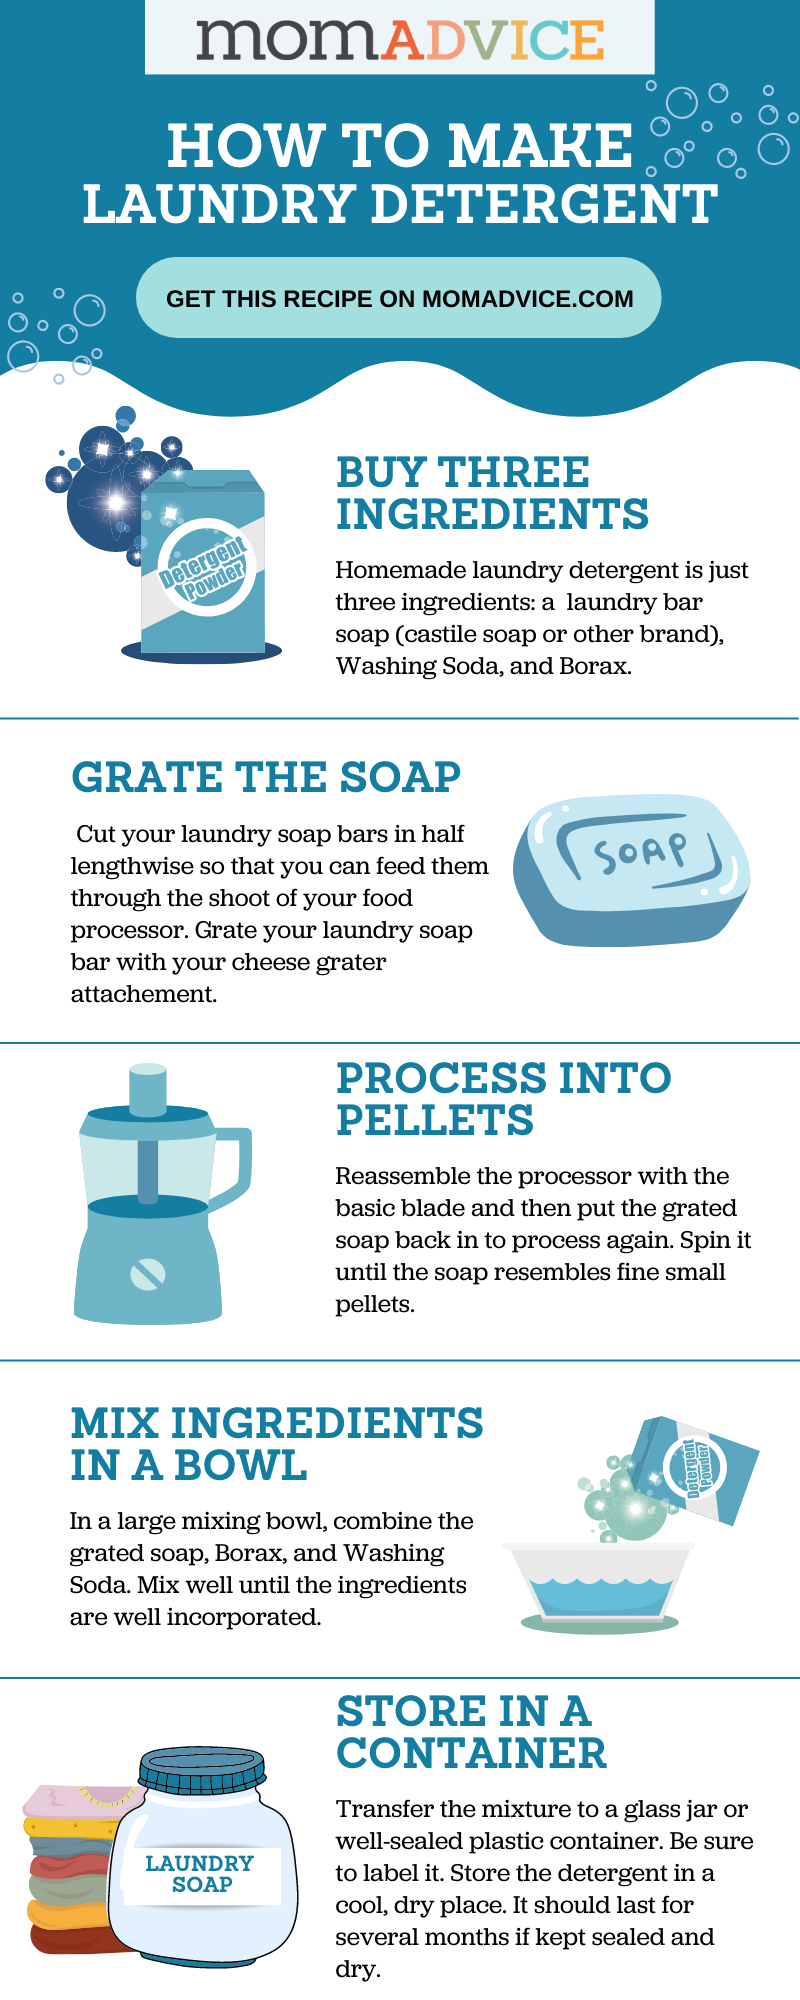
Cut your bars of soap in half lengthwise so that you can feed them through the shoot of your processor. 

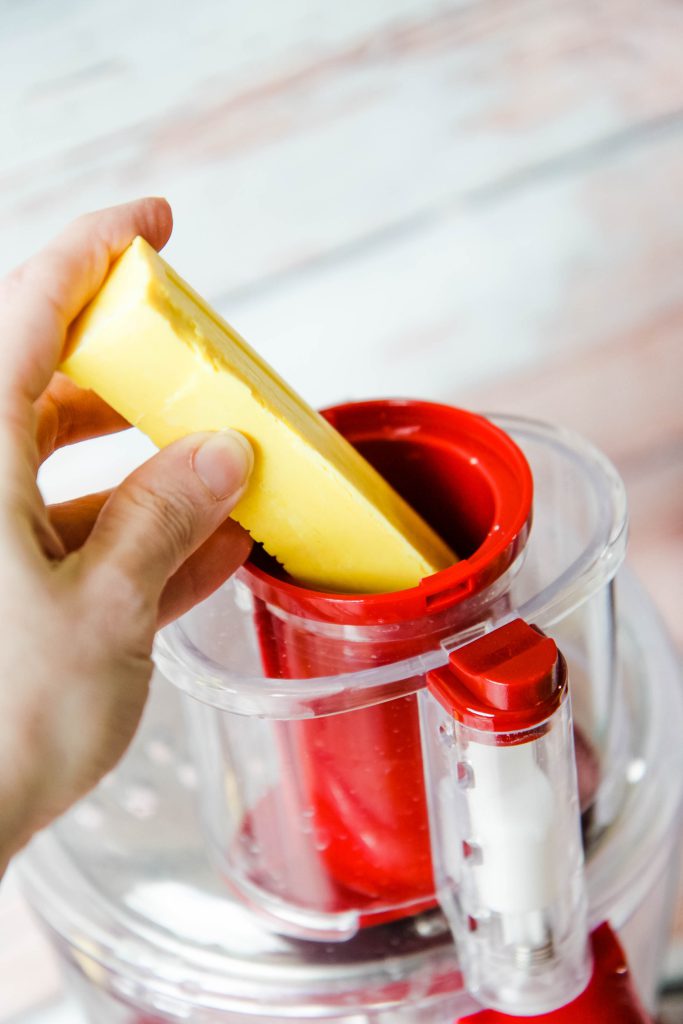
How to Make Homemade Laundry Detergent- Feeding the Soap in a Food Processor

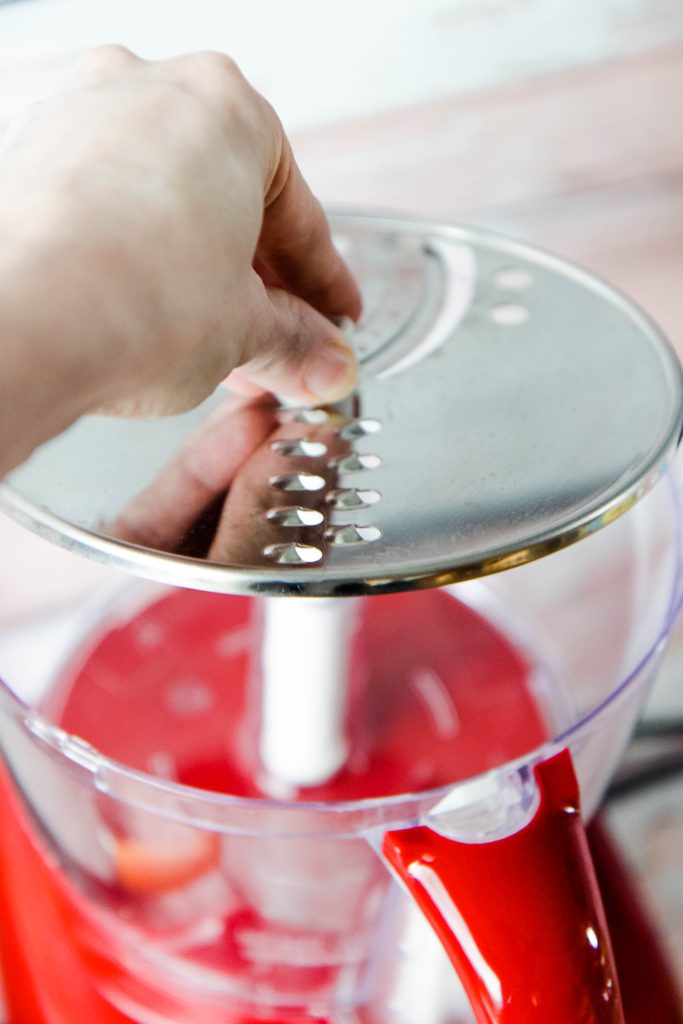
Assemble the processor with your cheese grater attachment and feed your soap in slowly and gently through the top shoot. 

How to Make Homemade Laundry Detergent-Grating Soap in Food Processor
How to Make Homemade Laundry Detergent-Grated Fels-Naptha Soap

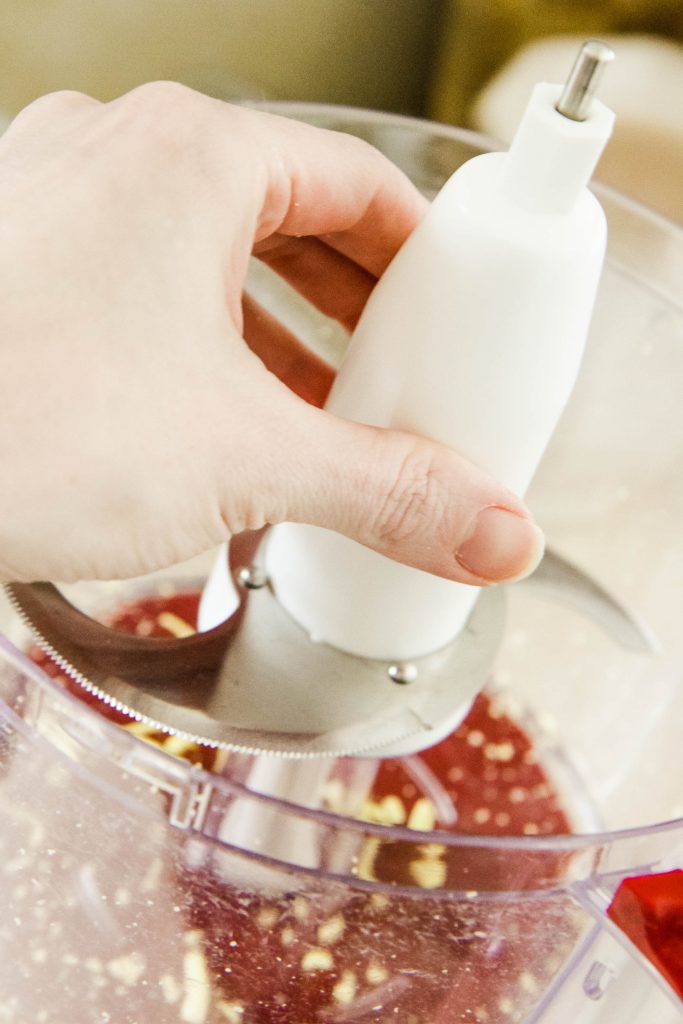
Once all the soap has been grated, dump it into a bowl and remove the cheese grater attachment. 

How to Make Homemade Laundry Detergent- Switching Food Processor Blades
How to Make Homemade Laundry Detergent- Laundry Soap After Second Processing

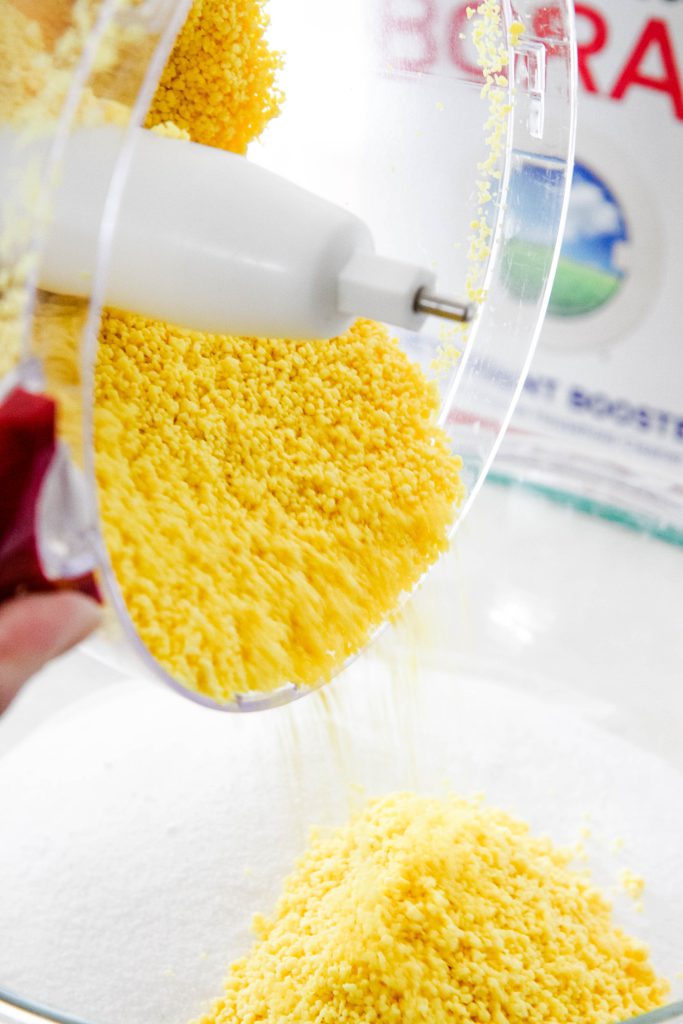
Reassemble the processor with the basic blade and then put the grated soap back in. Spin it again until the soap resembles fine small pellets. Your soap is now ready to be incorporated into your laundry detergent!

How to Make Homemade Laundry Detergent (A Picture Tutorial)- Pouring Soap Into Bowl
How to Make Homemade Laundry Detergent (A Picture Tutorial)- Pouring Borax
How to Make Homemade Laundry Detergent (A Picture Tutorial)- Pouring Washing Soda

In a large mixing bowl, combine the grated soap, borax, and washing soda. Mix well until the ingredients are well incorporated.

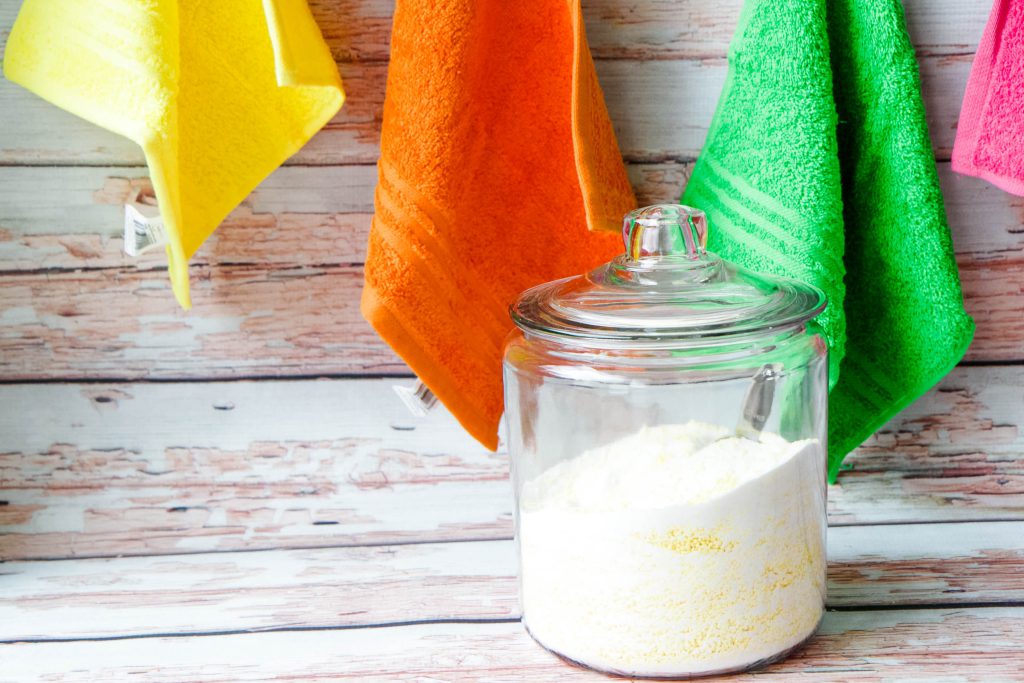
Transfer the mixture to a glass jar or well-sealed plastic container. Be sure to label the container with the ingredients and the date, so you know what’s inside.

How to Make Homemade Laundry Detergent (A Picture Tutorial)- Mixing Homemade Laundry Soap
How to Make Homemade Laundry Detergent (A Picture Tutorial)- Jar of Homemade Laundry Soap

To use the detergent, add one tablespoon of the mixture to a load of laundry (or two tablespoons for heavily soiled loads). You can adjust the amount as needed depending on the size of the load and the soil level.

Store the detergent in a cool, dry place. It should last for several months if kept sealed and dry.

You now have a simple and effective homemade laundry detergent that can save you money and customize your laundry routine. Enjoy the savings and the satisfaction of making your own cleaning products!


Homemade Laundry Detergent Recipe

Prep time: 15 mins
Total time: 15 mins
Homemade laundry detergent can be made with just three ingredients! Try this simple recipe and enjoy the savings!


Ingredients:
1 bar (or 4.5 ounces) of shaved bar soap (Ivory, ZOTE, Fels-Naptha, or Dr. Bonners Castile Bar Soap)
1 cup of borax
1 cup of washing soda

Instructions:
Shred your bars of soap as shown in the tutorial above.
Mix one cup of borax, one cup of washing soda and the grated soap in a large bowl until incorporated
Store in a glass jar or well-sealed plastic container.

Love this tutorial? Don’t miss these other money-saving ideas!

Grocery Tips for Shopping at ALDI Supermarket

THE ALDI SECRETS YOU NEED TO KNOW

Earn Money Investing In Women With Ellevest

HOW TO INVEST THAT SAVED MONEY FOR YOUR FAMILY

The Best Libby Tips & Tricks for Using the Library App

LEARN HOW TO USE THE LIBBY APP TO SAVE ON BOOKS

Do you make your own laundry detergent? What is your winning recipe for the perfect homemade laundry detergent? Feel free to share your tips!

How to Make Homemade Laundry Detergent Infographic
Pin It
Accomplish More With a Virtual Body Double

Wednesday, September 7th, 2022
How to Accomplish More With a Virtual Body Double from MomAdvice.com

Learn how body doubling can help you stay on task and improve your executive function as an adult or teen with ADHD. Get my top virtual videos to get started!

Friends, I have missed you!

It’s so good to be back at my desk after battling “the virus that must not be named.” It was just as awful as I’d expected, but we had a protocol to activate as soon as I got that positive test.

I’ve struggled with motivation since all of this, but today I wanted to share the incredible productivity hack that has changed my work-from-home life since the health chaos began.

How to Accomplish More With a Virtual Body Double from MomAdvice.com

After eighteen years of working from home, you would assume that I would have the best systems to be productive in my daily life.

You would be wrong.

The truth is, I struggle EVERY DAY and had even considered spending the money on a co-working space to hold me accountable to my work day. 

I did unlock the secret for working alone while incorporating a motivating presence in my life though and it just might surprise you.

Not only is this hack helpful for people with ADHD. It’s also helpful for anyone struggling with mental health or chronic illness. 


I want to talk about how body doubling can improve the lives of you or your teen/tween today!

What is Body Doubling?

Body doubling is a productivity strategy where someone can work alongside you to complete a challenging task. You can do these sessions virtually or in person with a friend or family member.

I want you to close your eyes and think about the thing that you have been putting off. 

Do you see a stack of bills you haven’t paid yet?

An overflowing hamper?

The refrigerator with expired food?

The basket of socks that never got matched? 

Now imagine you had a friend to do that with you.

How would this change your perception of that task? 

For many people with ADHD, the presence of someone else can be just the motivation they need to stay on track.

When I think about this, I think about ways I have unknowingly done this for people in my life. There have also been people who have come to our house that sat as I folded a load of laundry, meal prepped, or cleaned my kitchen.

In those moments, it didn’t feel so burdensome. It is, perhaps, why body doubling works so well for my work life.

Do You Need ADHD to Benefit From This? NOPE!

I have not gone through the process of ADHD diagnosis because the medications that I would use to treat it wouldn’t be an option for me with my current health issues.

In case you missed it, this is something we talked about on my Book Gang podcast with Paula Engebretson, a Certified Life Coach specializing in helping adults with ADHD (Attention Deficit Hyperactivity Disorder) live their best lives. 

Specifically, we discussed how many women get diagnosed at this stage in our lives and some ways to improve reading memory and focus through that.

It’s such an impactful episode that has changed my reading life and many of my listeners. 

Listen to this episode below:

Personally, I know that I display every symptom of ADHD because it runs in my family, AND I happen to live with people who have it too.

I have gotten around treatment by choosing a job that works with my brain, but hormonal shifts and brain fog have made things even more challenging. 

After that episode, I’ve been on a quest to figure out how to continue working WITH my brain, and it is through that research I discovered how body doubles work and how to use them to motivate me.

In fact, I’m using a body double RIGHT NOW to write this post. 

The best part is that this productivity hack is completely free. 

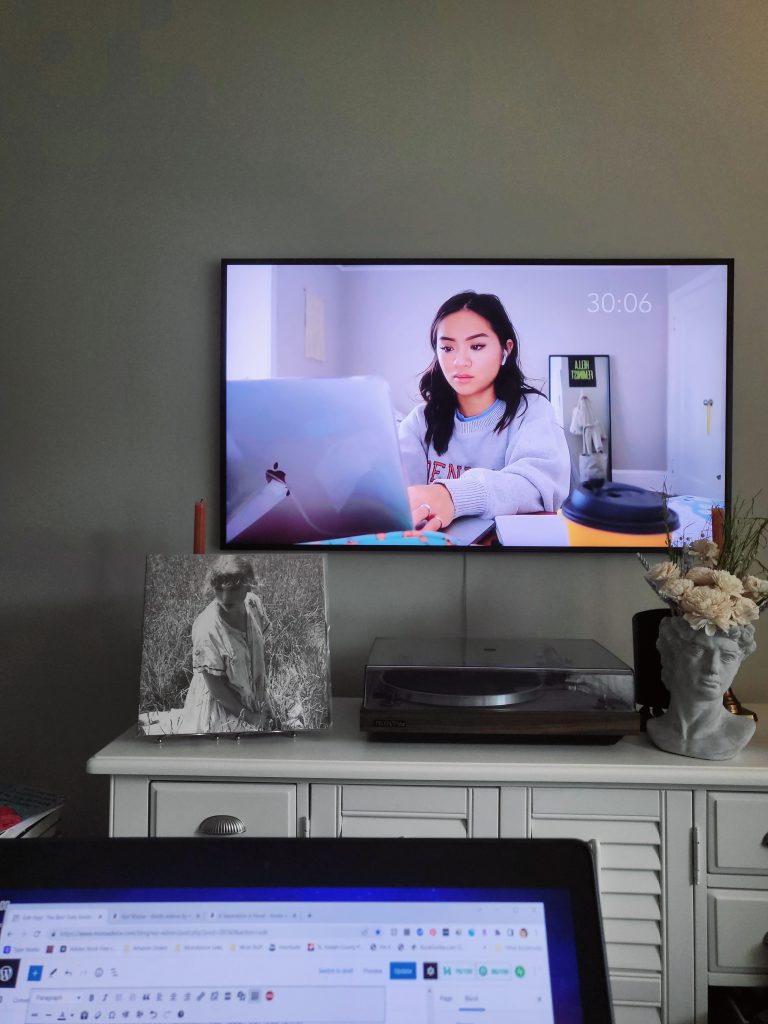
How I Use YouTube for Body Doubling

There are several excellent virtual options if you need a body double but don’t have a partner to work with at home.  

This is how I manage the work portions on my to-do list and how my daughter finds study-date partners when she needs to accomplish studying for tests.

My preferred working method is recorded sessions on YouTube (see below for some of my favorite options).  

this is an example of the breaks that are provided on screen

Many of these previously recorded sessions rely on the Pomodoro setup technique. Five-minute breaks follow these 25-minute sessions of work for recorded sessions that are, typically, two hours.

I didn’t know how motivating it would be to have a “pretend” work-from-home buddy, but I find it even more effective than anything else I’ve done for my WFH life. 

There is no pressure to make small talk, someone else is monitoring the timer for our work sessions, and it puts me in the mood to get my to-do list done. 

How Do I Set-Up My Office To Use This Strategy

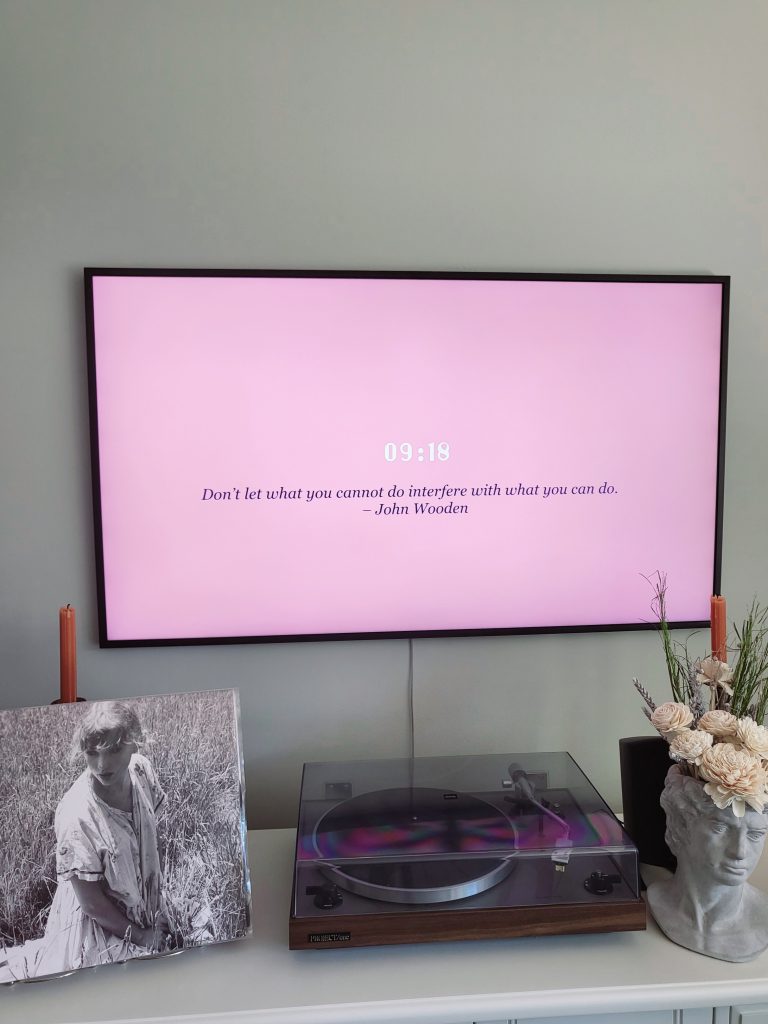
I use this pop-up desk (we covered the top with this inexpensive marble paper) and set my workstation up in front of our television in our family room.

We have the Samsung Frame TV, and I can cast my favorite videos onto the television. 

If you don’t have a room with a TV, you can utilize your tablet or phone to pull up the video. 

Personally, I do find the larger screen to be more impactful while I’m working, and I love it displaying at eye level.

It helps brings the accountability aspect into focus.

How to Find a Live Virtual Body Double

Focusmate offers body doubling sessions with an accountability partner for a live, virtual co-working session that will keep you on task. They offer three free sessions a week or you can pay $5 to have unlimited sessions. 

They have shared that 95.5% of their users reported a significant increase in productivity and reduced procrastination.

You can also find users sharing live sessions on TikTok if you search for body doubles.

So I guess social media isn’t ALL bad, is it?

How We Help Each Other as Body Doubles in Our Home

If you live with a friend or family member that can act as your support group through a task, you might not need to call on a virtual double. 

As longtime readers know, my son has ADHD (you can read about that diagnosis process here when he was young), and we continue to tweak and refine what works best to help him. 

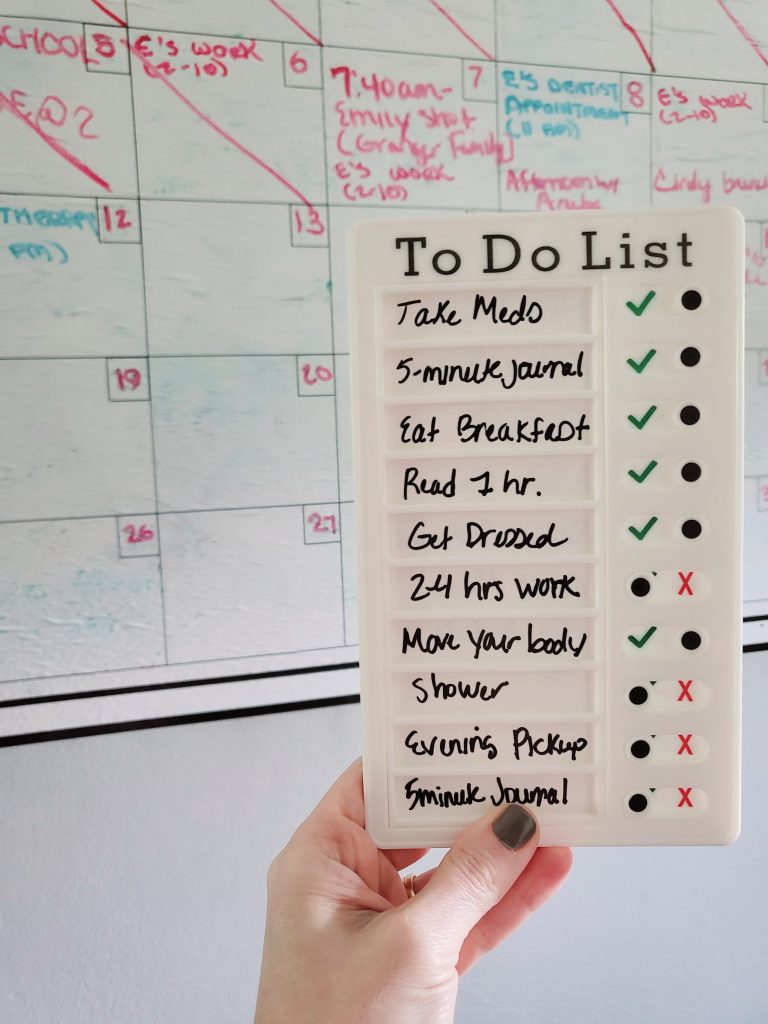
Now that he is TWENTY (how is this possible?), we still work together as accountability partners and utilize this simple to-do checklist board with our most important tasks. Our to-do list is almost identical, so we check on each other throughout the day or do these tasks together.

You can see that these are VERY modest goals because I want to honor my body and where it is now. 

I usually work much more than the time on my chart, but this allows me to check it even when I’m having a bad day.  That is the difference between a day I’m proud of and a day that makes me feel bad about myself.

Want to give this productivity hack a try? Here are some of my favorite videos to get you started!

Try These Videos For Working at Home (or Studying)

Be sure to also look up any task you need help with- folding laundry, daily hygiene tasks, or cleaning/organizing are all available with a simple search.

Want more help with that WFH life? Check out these posts!

Do you think you would try this productivity hack? I would love to hear if this has worked for you or for your teen?

Book Gang Podcast Episode 28: Use These Cleaning Hacks For A Better Reading Life

Friday, April 8th, 2022
Book Gang Podcast Episode 28: Use These Cleaning Hacks for a Better Reading Life

Dana K. White is a bestselling author who shares reality-based cleaning and organizing tips on her podcast, A Slob Comes Clean. This discussion embraces the best time-saving cleaning tricks so you can read more and focus less on cleaning. Get her advice on the best decluttering projects to pair with audiobooks. Don’t miss the “container concept” that will help reduce the clutter quickly so you can do the things you love…like READING.

Book Gang Podcast Episode 28: Use These Cleaning Hacks for a Better Reading Life

Listen to the Show:

Listen below or listen on your favorite podcast listening platform!

Mentioned in this episode:

A Slob Comes Clean

Amy’s Container Reorg

Unmissing by Minka Kent

The Round House by Louise Erdrich

Montana 1948 by Larry Watson

Girl With The Louding Voice by Abi Dare

The Goldfinch by Donna Tartt

Mercy Street by Jennifer Haigh

Decluttering at the Speed of Life by Dana K. White

Organizing for the Rest of Us by Dana K. White

How to Manage Your Home Without Losing Your Mind by Dana K. White

Dana on YouTube 

Connect With Me:

Amy is @momadvice on Instagram

Join the Patreon Community For the Bonus Content

Join Our Patreon Book Gang Today

Do you want to have the best reading year ever? 

Join the MomAdvice Book Gang for just $5 for an exclusive one-of-a-kind reading experience, and let me be your tour guide. I have selected 12 phenomenal books to read together that were picked just for you.  These are thought-provoking stories that deserve discussion, and many are hidden literary treasures. The official 2022 MomAdvice Book Club selection announcement will happen on December 1st. Your $5 membership will grant you access to the following exclusive features.

Monthly in-depth video interviews with each of our chosen authors. Learn the stories behind each of their stories and what they hope you will walk away from each of their books.

Exclusive Bookstore Coupon Discounts. Our Fables Bookstore partnership will give Patreon members 15% off ALL the book club selections for our year. This can be applied to both paperback and hardback selections. 

Exclusive MomAdvice Book Gang Podcast Episodes & Early Access Book Reviews. Your stack will be toppling over with my real-time reviews each month. These reviews are available in both audio and printable formats.  

Monthly Themed Playlists & Digital Downloads. Pair your favorite thriller with my spooky playlist. Brew some tea and listen to an instrumental mix with your favorite classic. Embrace short story songs with my favorite storytellers. The playlists are endless and digital downloads are available for your reading journals.

Sneak Peek Upcoming Content. You will know before anyone else what to expect in upcoming podcast episodes and what I’m researching for our next shows. Be bookishly curious with me and give your input for these MomAdvice Book Gang podcast shows.

This post contains affiliate links.

Shop the above (Amazon) links or shop through my new MomAdvice Book Gang Bookshop Page!! They pay a 10% commission on every sale and give a matching 10% to independent bookstores.

Book Gang Podcast Episode 28: Use These Cleaning Hacks for a Better Reading Life

Sign Up For The MomAdvice Newsletter!

More Cleaning Hacks:

Creating a Weekly Cleaning Routine (Free Printable Charts) Header
Weekly Chore Routines with Free Printables

Tech-Chore Tickets Free Printable
Free Printable Chore Tickets

Cleaning Your Fridge

Clean Your BBQ While you Sleep

How to Make a Succulent Terrarium

Tuesday, April 21st, 2020

How to Make a Succulent Terrarium Header

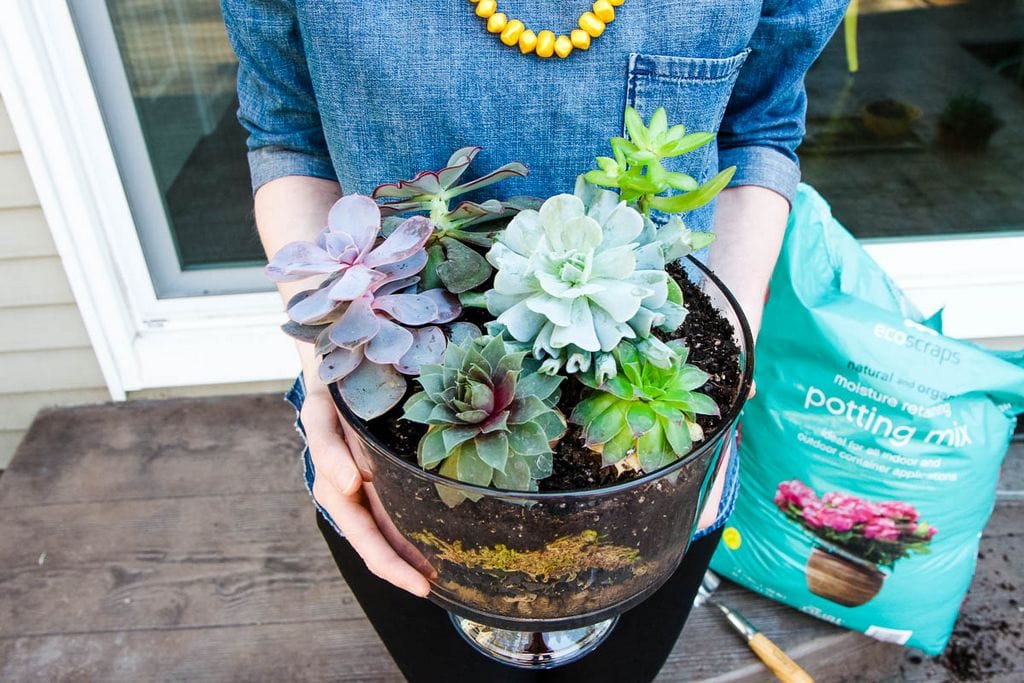
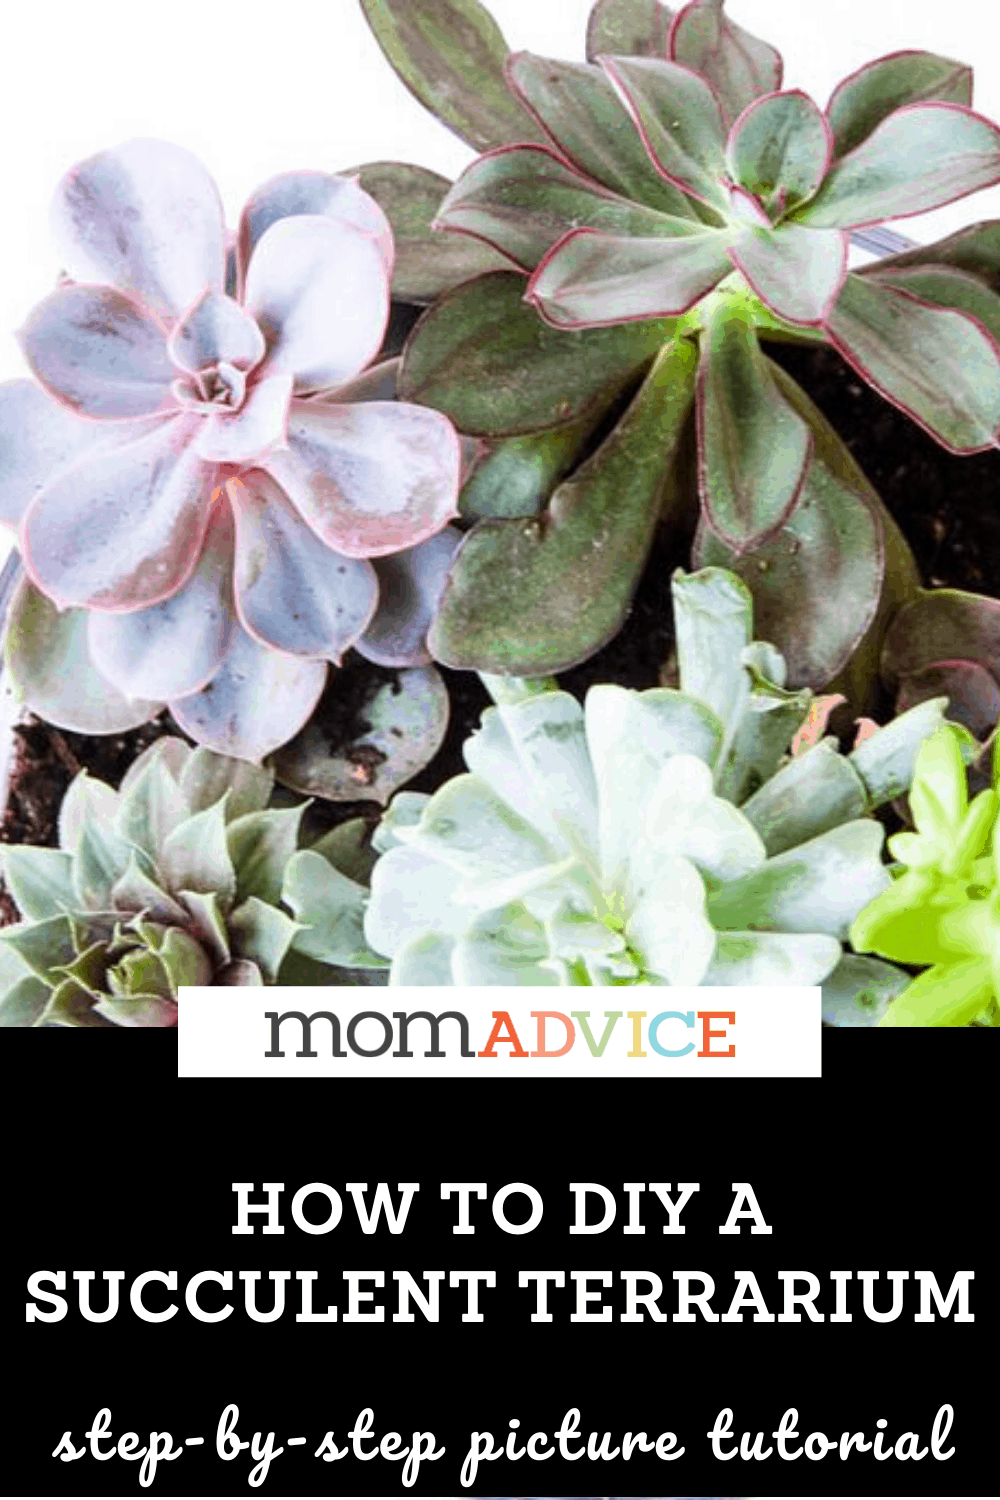
Looking for the perfect indoor gardening project? Today I’m sharing how to make your own succulent terrarium. This budget-friendly diy project has a picture tutorial to show you how to layer your soil and create that perfect humid environment for your plants.

As regular readers know, I have a black thumb.

I have never been successful at growing anything and my lawn can prove it.

Succulents are my kind of plants because they are so low maintenance and they don’t require a lot of water.

Today I want to show you how to make a succulent terrarium and how I made it as budget-friendly as possible.

Sweet!

First, here are a few answers to a couple of frequently asked questions about making your own indoor terrarium. These step by step directions should you walk you through this entire process.

Where Can I Get Fresh Succulents Delivered Online?

Before we begin this project, you may be wondering how to obtain the supplies you need for your projects.

Many of the garden and home improvement stores are offering curbside pick-up right now.

Many companies also these in bulk and a bulk order would be perfect for making a few special Mother’s Day gifts for someone in your life.

This is one of those plant purchases that require little upkeep and are enjoyed all year-long.

Here are a few other options for getting fresh succulents online.

How Can I Save Money on Making My DIY Terrarium?

  • Fairy gardens are very popular right now. Ask your local nursery if they have smaller bags of pea gravel or moss available for purchase. I was able to get small bags of these items for a lot less.
  • Look to see if there are any succulent arrangements that are already prepared and the pricing and compare it to individual succulents. At my nursery, succulents individually were $4 each, but for $20, I was able to get double the succulents AND it helped to know which ones worked and looked nice together.
  • Thrift shops or Facebook Marketplace are two great places to look for containers. You also can shop your own house and see what serving pieces you have, that just might be gathering dust in your own home.

How to Make a Succulent Terrarium from MomAdvice.com

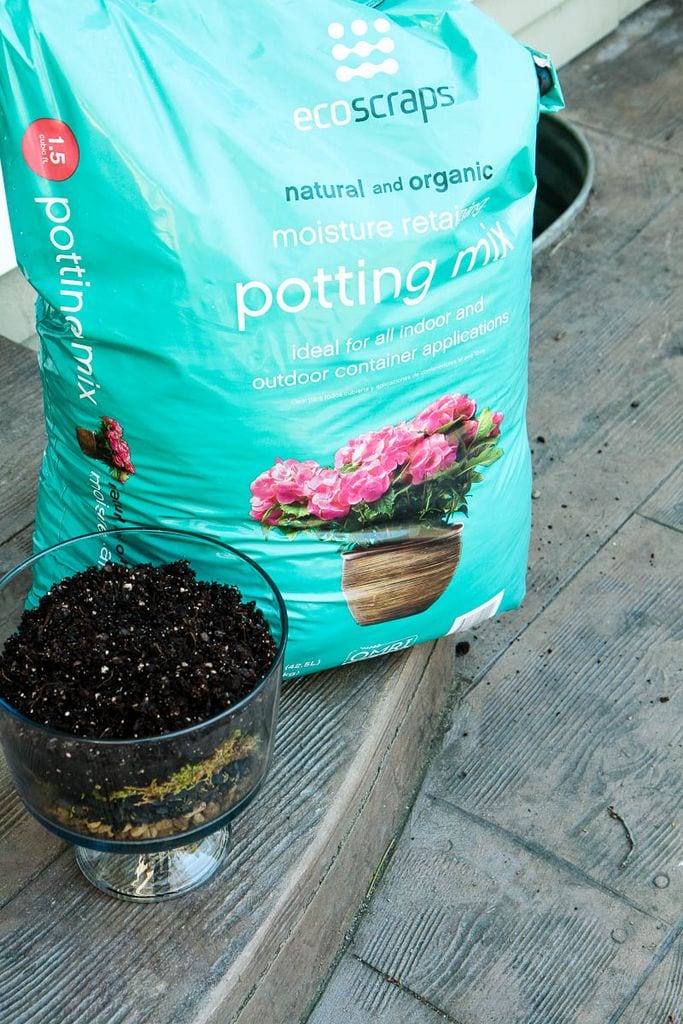
We are going to be making our succulent terrariums with a product called Ecoscraps.

I’m so excited to share about it because the company’s mission is so awesome and really aligns with our family values.

EcoScraps recycles food scraps and turns them into organic and sustainable lawn and garden products.

They recycle by collecting wasted food from from stores and restaurants andconvert it all into natural garden products.

Simple switches will do so much for our world.You can find out more on the EcoScraps website and find their products on Target shelves.

Now that you know the company’s mission, let’s make a succulent terrarium with their eco friendly potting soil!

How to Make a Succulent Terrarium

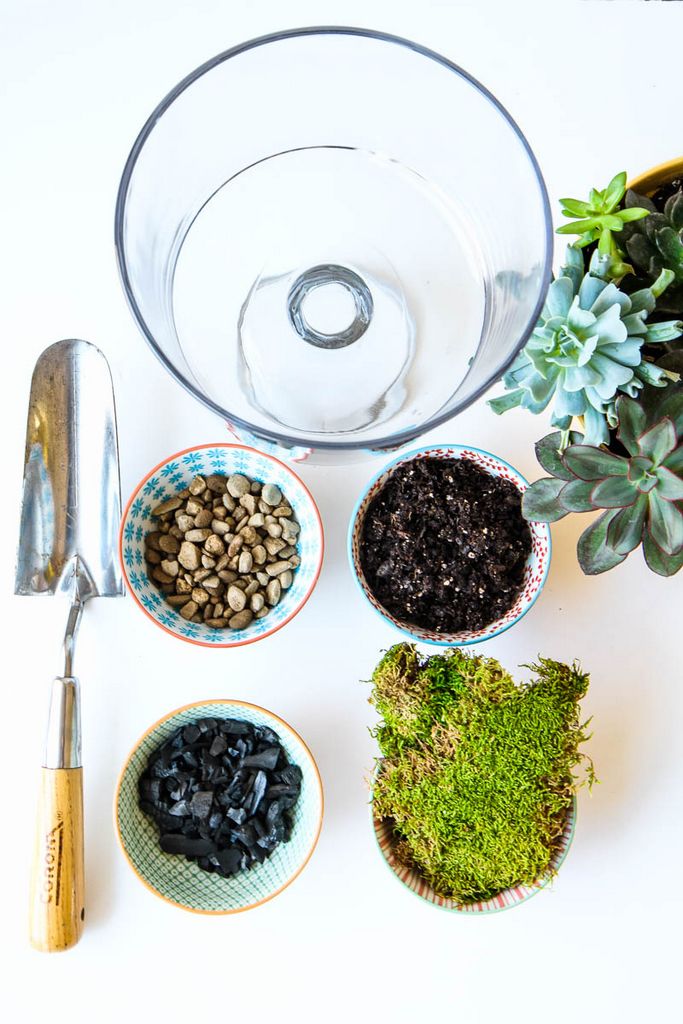
Supplies Needed for a Succulent Terrarium

Supplies Needed

Glass Trifle Container

Pebbles

Charcoal or Perlite

Sphagnum Moss

EcoScraps Potting Soil (link is to Walmart, but you can also obtain this product on Target shelves too!)

Succulents (See Above for Sources)I like to choose an odd number for arranging. Mine had 7 of various sizes)

Garden Trowel

How to Make a Succulent Terrarium from MomAdvice.com

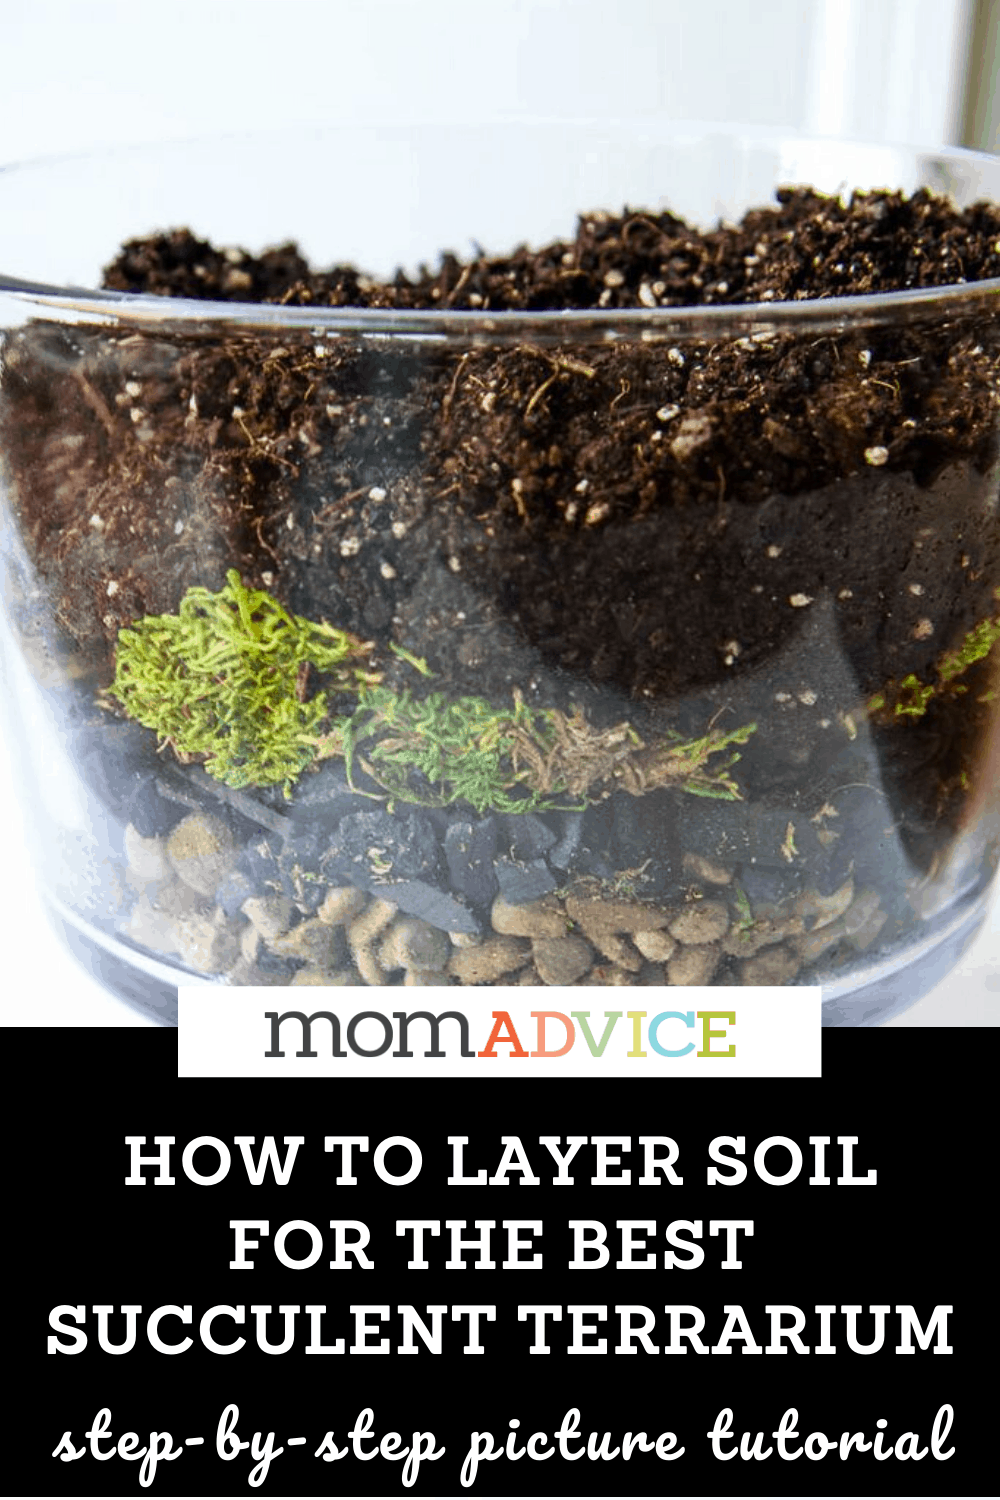
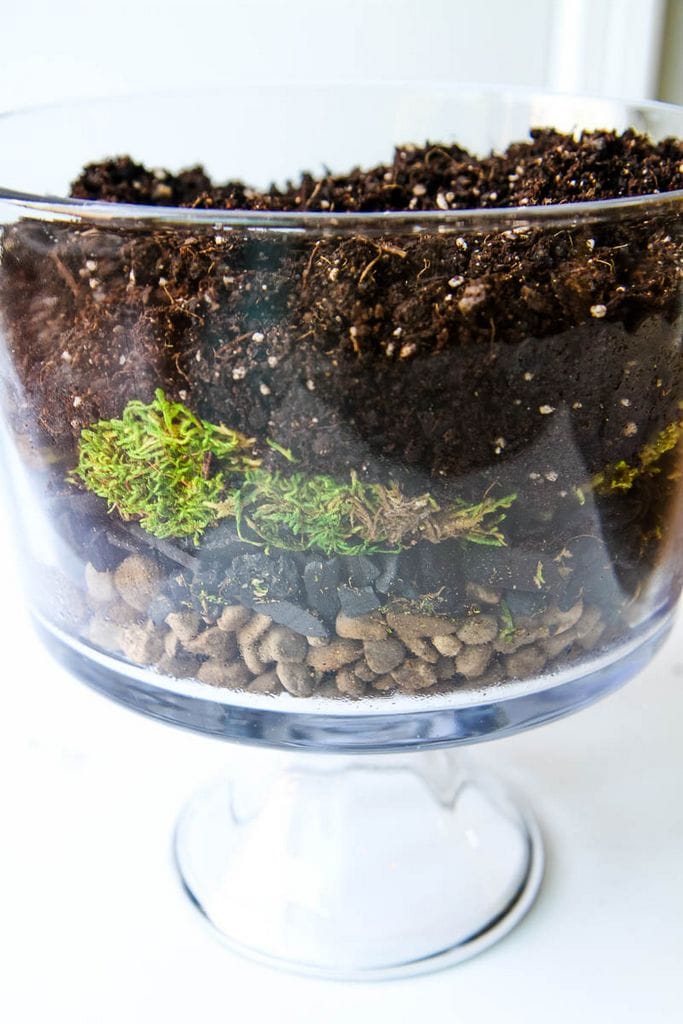
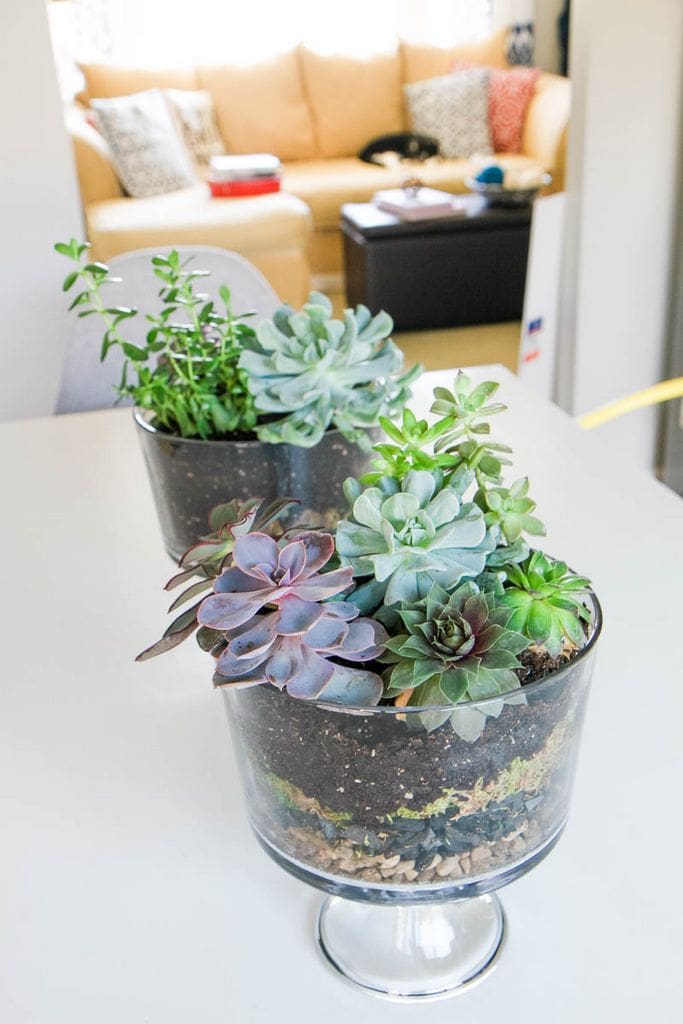
Creating a terrarium is a lot like creating a layered cake or trifle so that is why I thought this container was so fitting!

How to Make a Succulent Terrarium Header

Layering Soil in a Terrarium

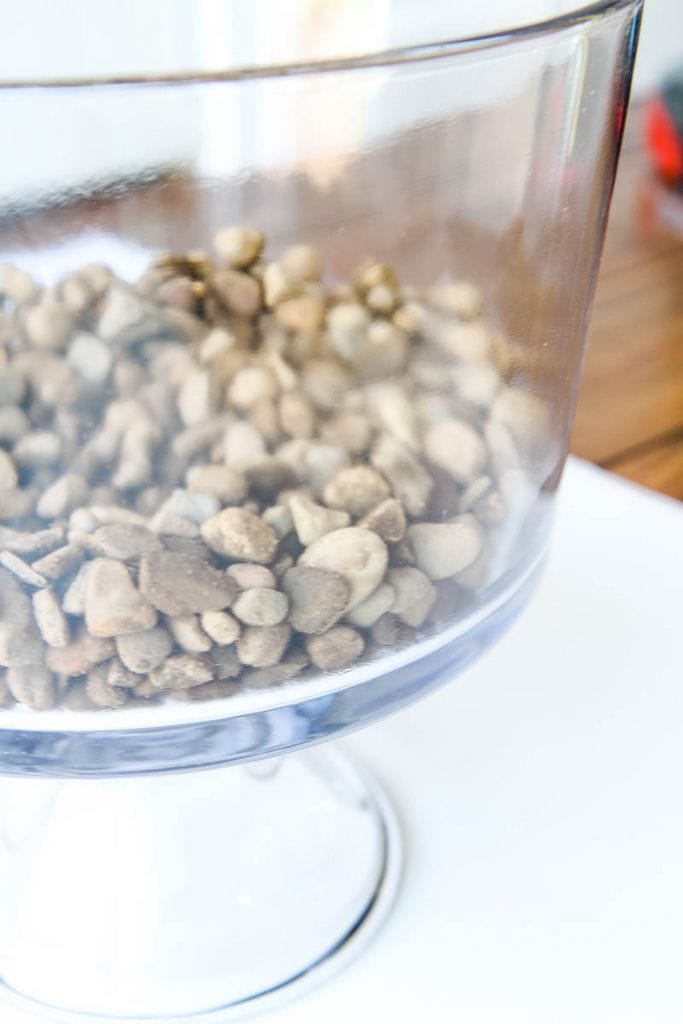
Pebble Layer in a Succulent Terrarium

Directions

1. Begin by adding your pebbles to the bottom of your container. This is to create a false drainage layer so water can settle and not flood the plants. You will want to add one inch to two inches of stone, depending on the size of your container.

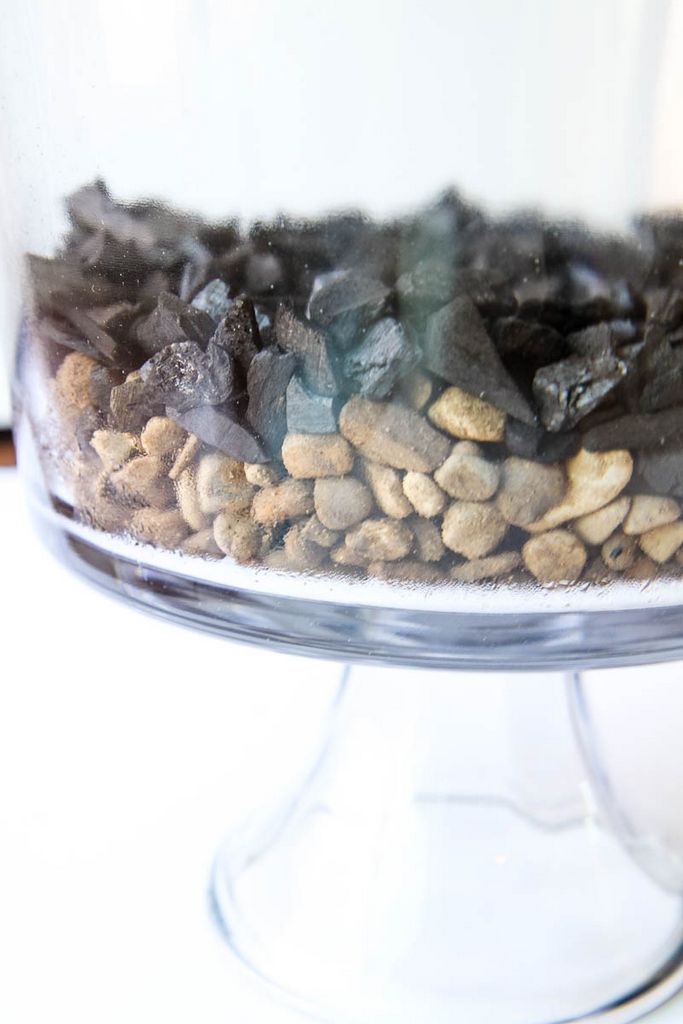
Charcoal or Perlite Layer

2. Next, we will layer our activated charcoal or perlite. The charcoal can come in granules or shards (the type I am using is shards). We will spread a layer of this over the rock to help reduce bacteria, fungus, and odors in our terrarium.

Moss Layer in Terrarium

Moss Layer in Terrarium

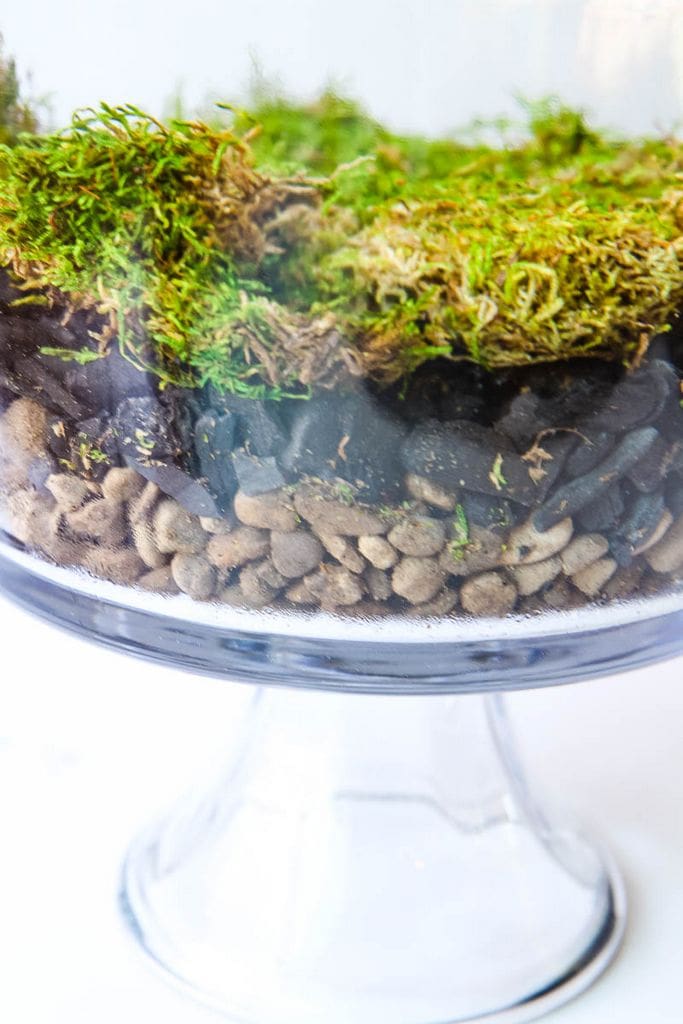
3. Next add a layer of moss to create a barrier between the potting soil and charcoal.

4. Prepare your plants for planting by removing them from their pots and loosening up the root ball and exposing the roots. If the roots are particularly long, you can trim them down a bit.

Potting Soil for Terrarium

Potting Soil Layer in Terrarium

Layers in Soil for Terrarium

How to Make a Succulent Terrarium

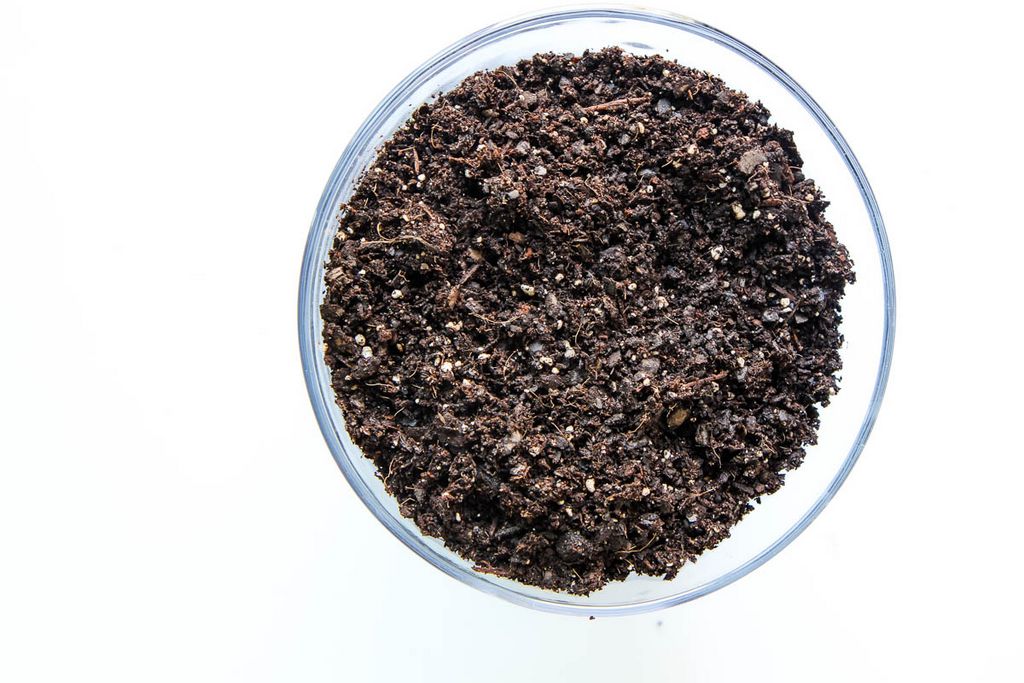
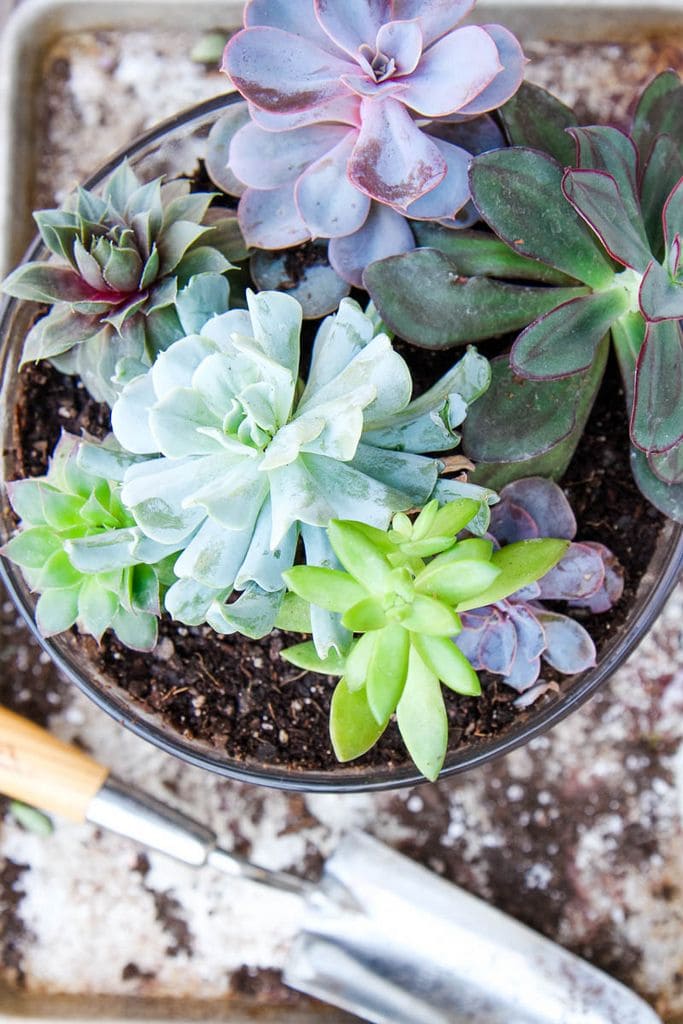
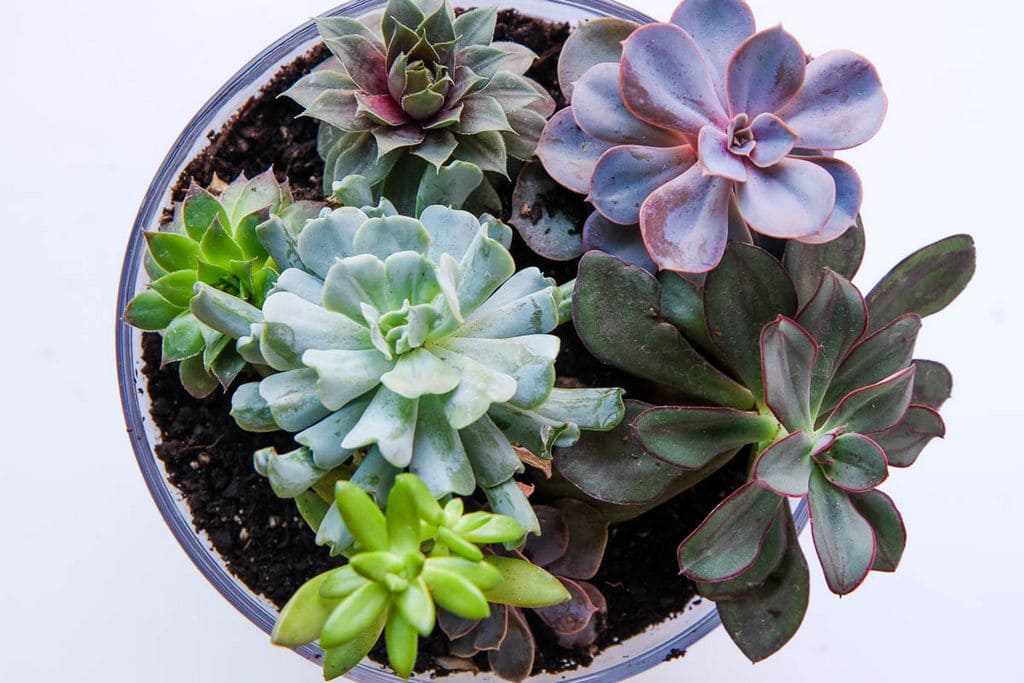
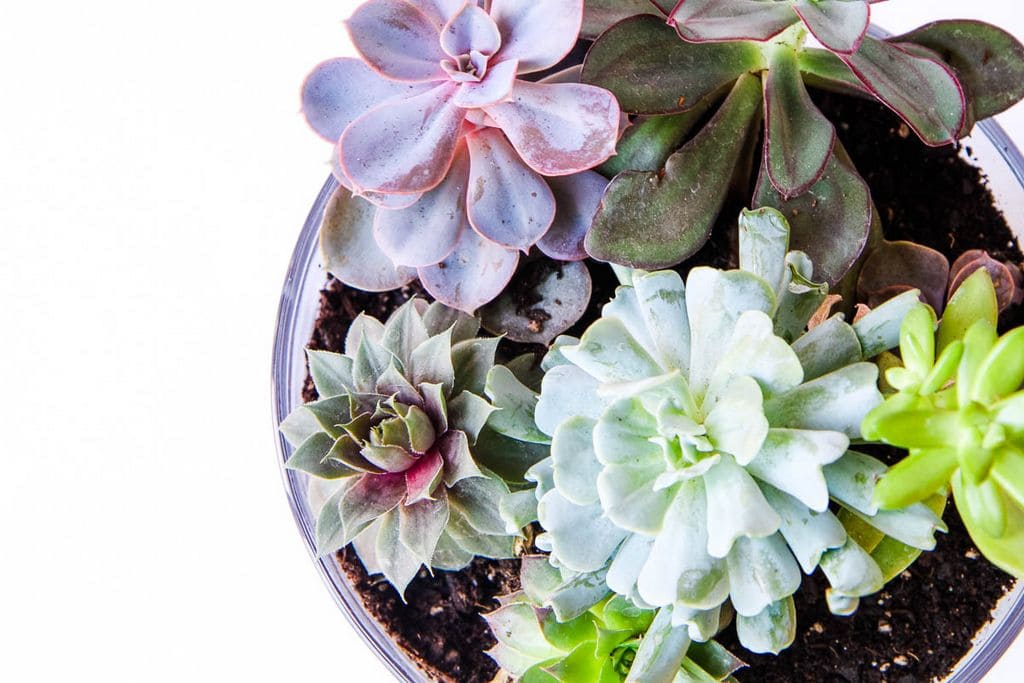
5. Add a layer of dirt to your terrarium. Gently place your plants inside and then top them off with a bit more dirt, using your hands to gather the dirt firmly into place around each of the plants. Be mindful where you are planting them, mixing up your plants of varying heights and foliage, to fill your jar.

How to Make a Succulent Terrarium

How to Make a Succulent Terrarium

How to Make a Succulent Terrarium

How to Make a Succulent Terrarium

Siri Reminder To Water Plants

5. Finish by watering your terrarium lightly, being mindful not to overwater it because succulents do not like to be soggy. Caring for your terrarium is easy, especially if you are a terrible gardener like me. I’m so terrible, I put Siri in charge. Feel the soil weekly to see if it is dry and add water if it is.

How to Make a Succulent Terrarium from MomAdvice.com

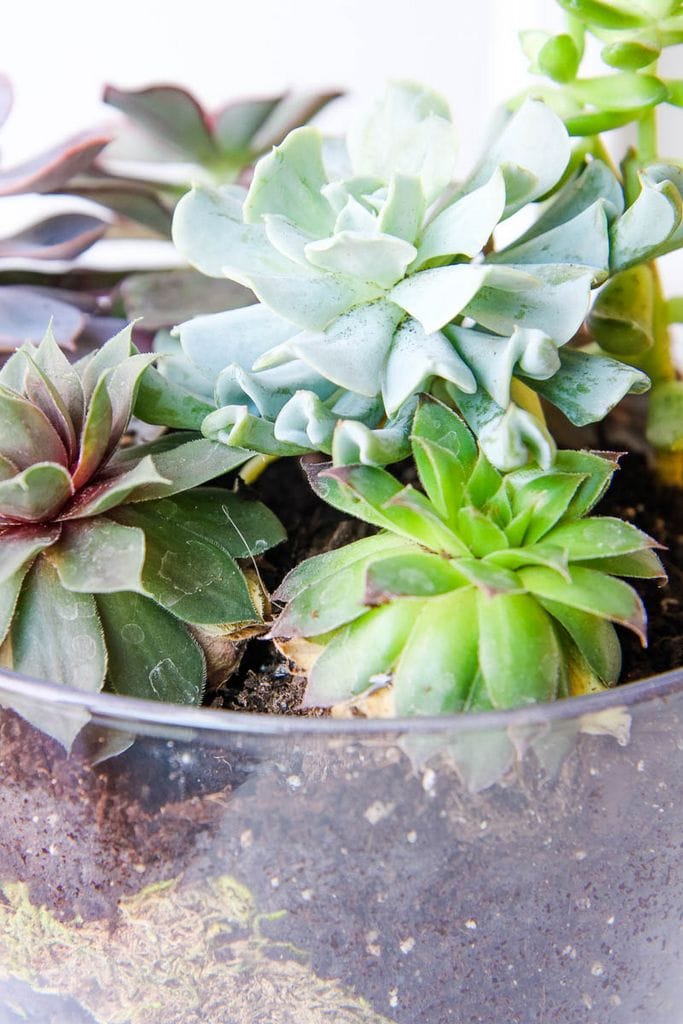
Here is another view of what our terrarium should look like from the side. Make sure to place it in a spot that gets a little sun on their beautiful leaves, but not scorching hot spot in your home.

How to Make a Succulent Terrarium

How to Make a Succulent Terrarium

These are beautiful to keep or to give to someone special in your life.

Thank you, EcoScraps, for letting me share about your amazing mission to reduce food waste in a really wonderful way.

I hope you guys can try their products!

This post was sponsored by EcoScraps.Thank you for supporting the sponsors that help support our site!

This post contains affiliate links.

Don’t miss these other great spring project posts on MomAdvice.com:

How to Make Slushies With Kool-Aid learn how to make slushies with inexpensive kool-aid packets

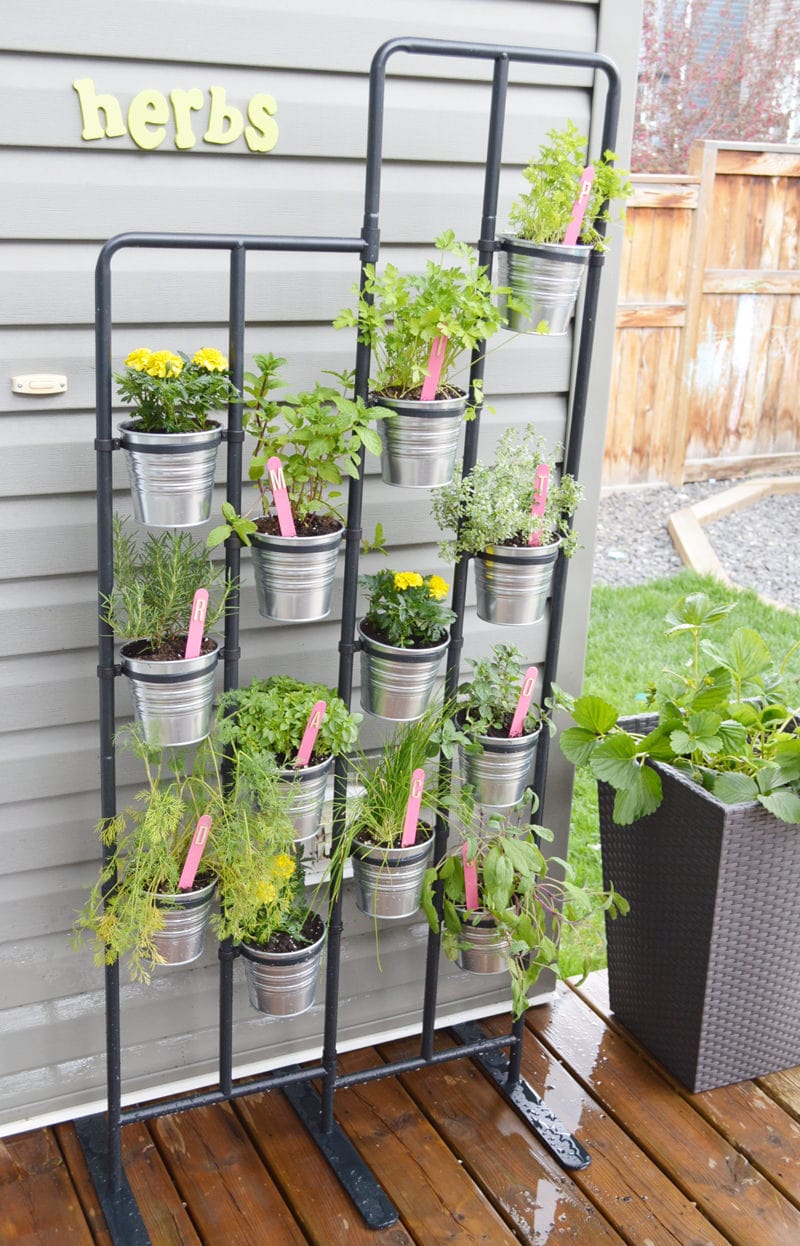
Herb Wall & DIY Garden Markers make these adorable diy garden markers out of popsicle sticks

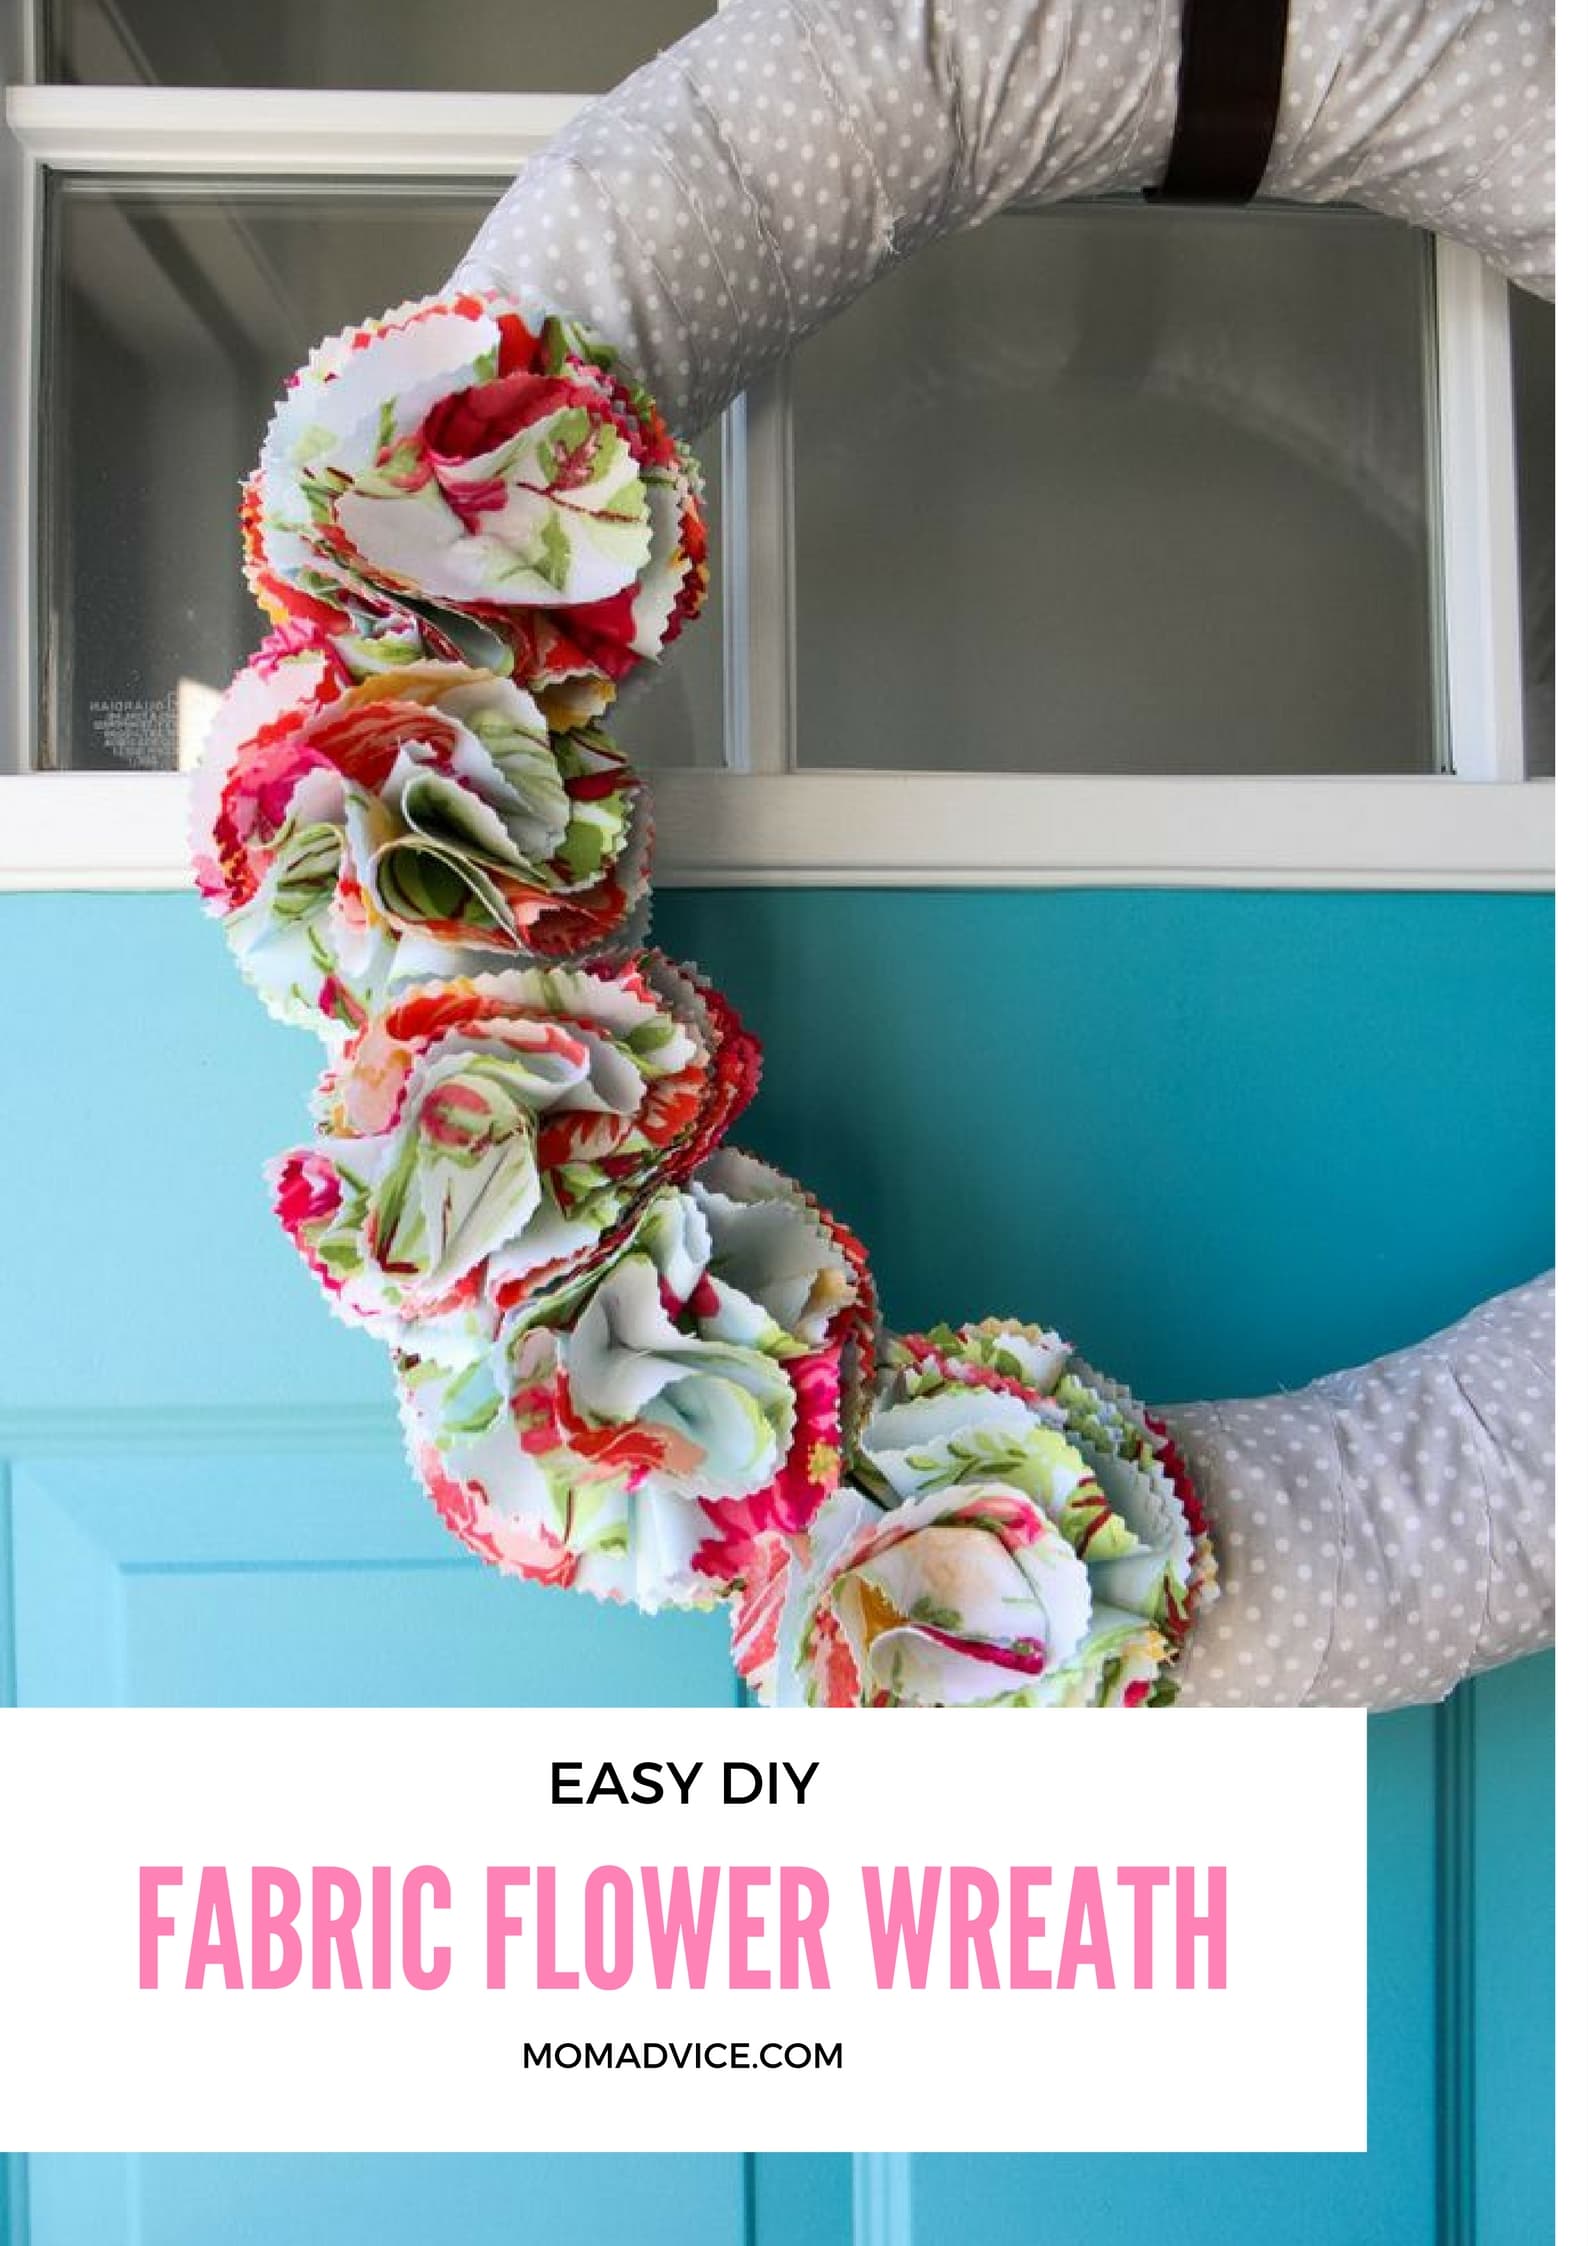
fabric floral wreath turn scrap fabric into a spring wreath for your front door

DIY Grilling Seasoning Mix mix up some burger seasonings with these adorable free printables for grilling season

DIY Slow Cooker Citronella Candles with Printable Tag make diy citronella candles in your slow cooker to keep the bugs away

plan an outdoor movie night with the kids with these fun tips

Happy Gardening Friends!

How to Make a Succulent Terrarium Header Pin It
Creating a Weekly Cleaning Routine (Free Printable Charts)

Tuesday, March 31st, 2020

Creating a Weekly Cleaning Routine (Free Printable Charts) Header

Are you looking for some new ways to divide the daily chores and house cleaning? This weekly cleaning schedule teaches kids to participate in household chores and helps them learn valuable life skills. Use these free printable chore charts to motivate your kids to participate in achieving a clean home and learn how we have taught our kids to help at all ages of life.

Before I launch into our household routines, I just want to acknowledge that we are all in VERY different places, both mentally and physically, since this pandemic has descended up on our world.

For me, I have been very consumed by worry for our family’s health, a growing concern for my sister who works in healthcare, and about our extended family members.

This pandemic, in fact, became so all-consuming that I reached out to my physician for some anxiety medication and have found a heightened sense of insecurity with my own safety being out in our world.

Although this week is better, I do find myself hitting big waves of grief, anger over others not doing what they are supposed to, and frustration with communication from politicians.

I do believe these waves will continue, especially as more and more people around me have been diagnosed or as jobs are lost and financial struggles have increased.

What I do know is that, FOR ME, I was also feeling really unprepared with everyone being here all day, the endless food preparation, and our home feeling more and more chaotic.

Can you relate?

My husband said it would be incredibly helpful if I would start making a list of all the things that need to be done around our house and begin to split these duties.

Chore Tickets download my chore and tech tickets for younger kids

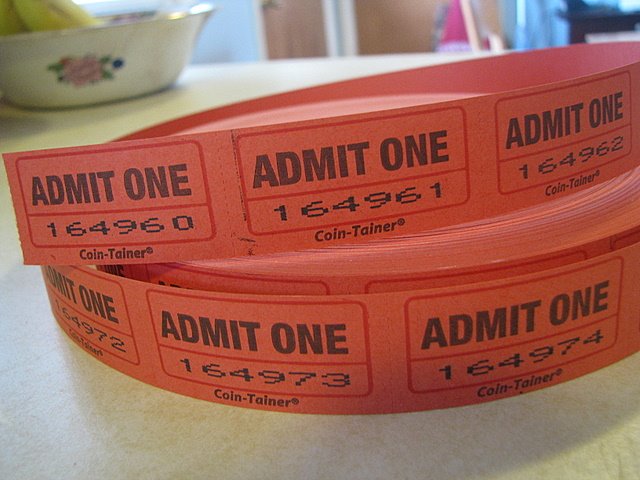
When the kids were young, I was big on the weekly chore chart and even made these punchable tickets for tackling chores and reducing screen time.

When I started to have health problems, we decided to hire a cleaning service to help me with our weekly cleaning tasks.

Anyone who has had the privilege of hiring a cleaning service knows that a lot of preparation is required before the cleaning.

I would, honestly, spend an entire day prepping for their arrival and welcomed this as part of our bi-weekly routine. #whiteladyproblems

Hiring them was more about the accountability than just the help with the harder physical tasks of cleaning.

I fully acknowledged, without this visit, our house would start falling apart.

Now that we are all home together (and practicing social distancing), I needed to figure out chore lists that would give my kids responsibilities and divide up tasks evenly so that all the chores did not fall on me.

Family

For the record, my kids are 17 and 14 so they are more than capable of pitching in to assist. I don’t have to worry as much about kid chore charts or making sure they are age appropriate chores, they really are becoming mini-adults.

What I DID have to do though was teach them how to do these tasks so that we could all enjoy our space.

If anything comes out of this awful time it is that my kids are learning some very valuable life lessons about caring for a home, preparing food, and working more as a family unit.

I am sure these are all things that we could have been doing before, but having the space to do them has really helped our family a lot.

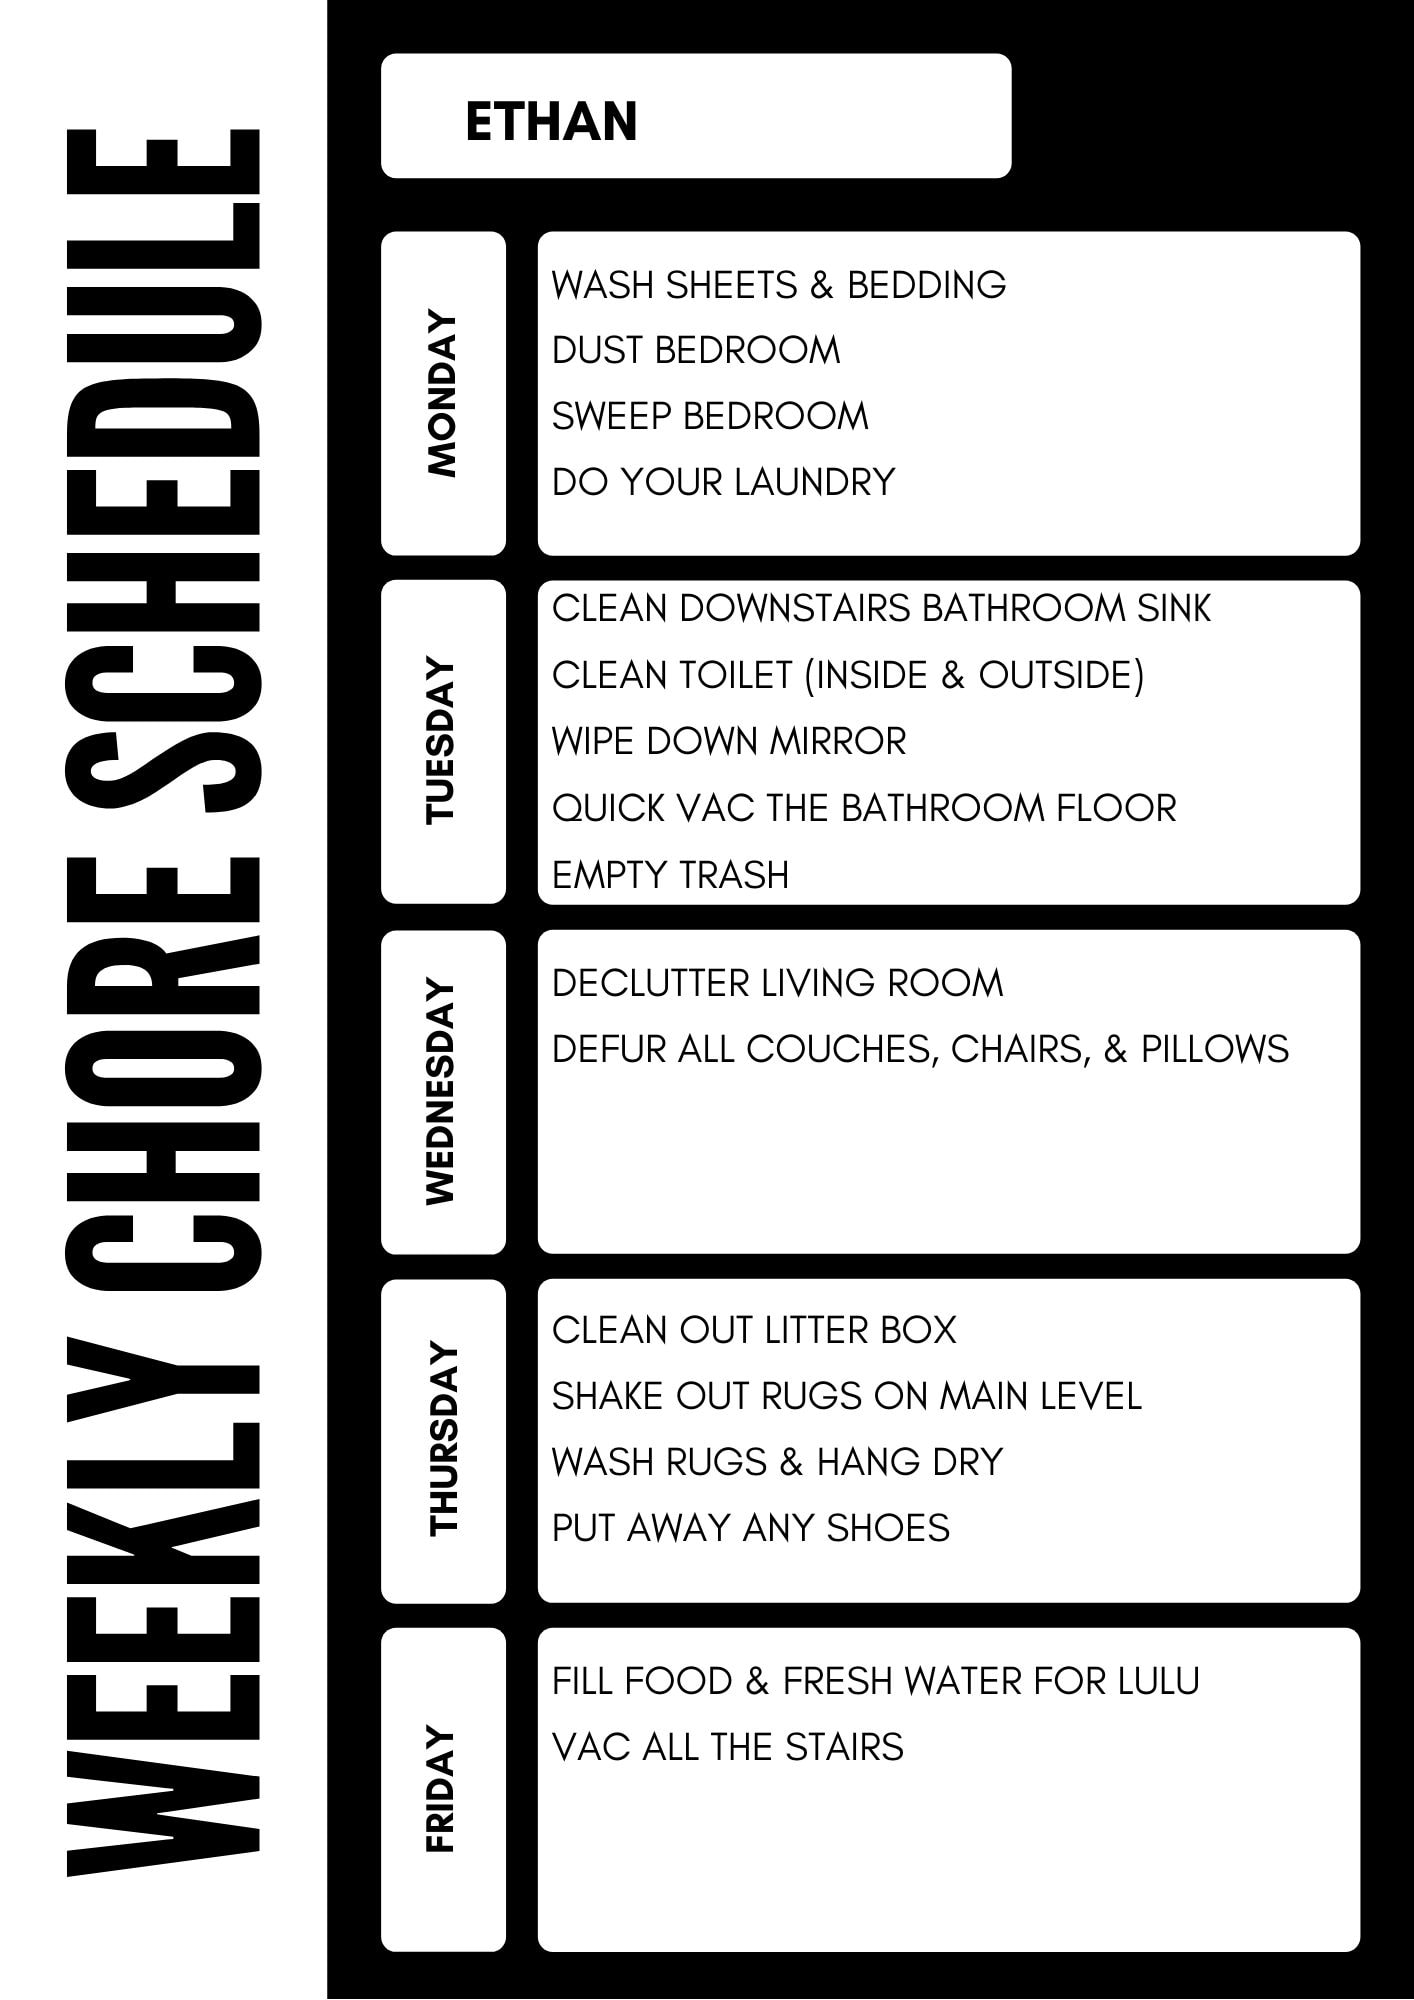
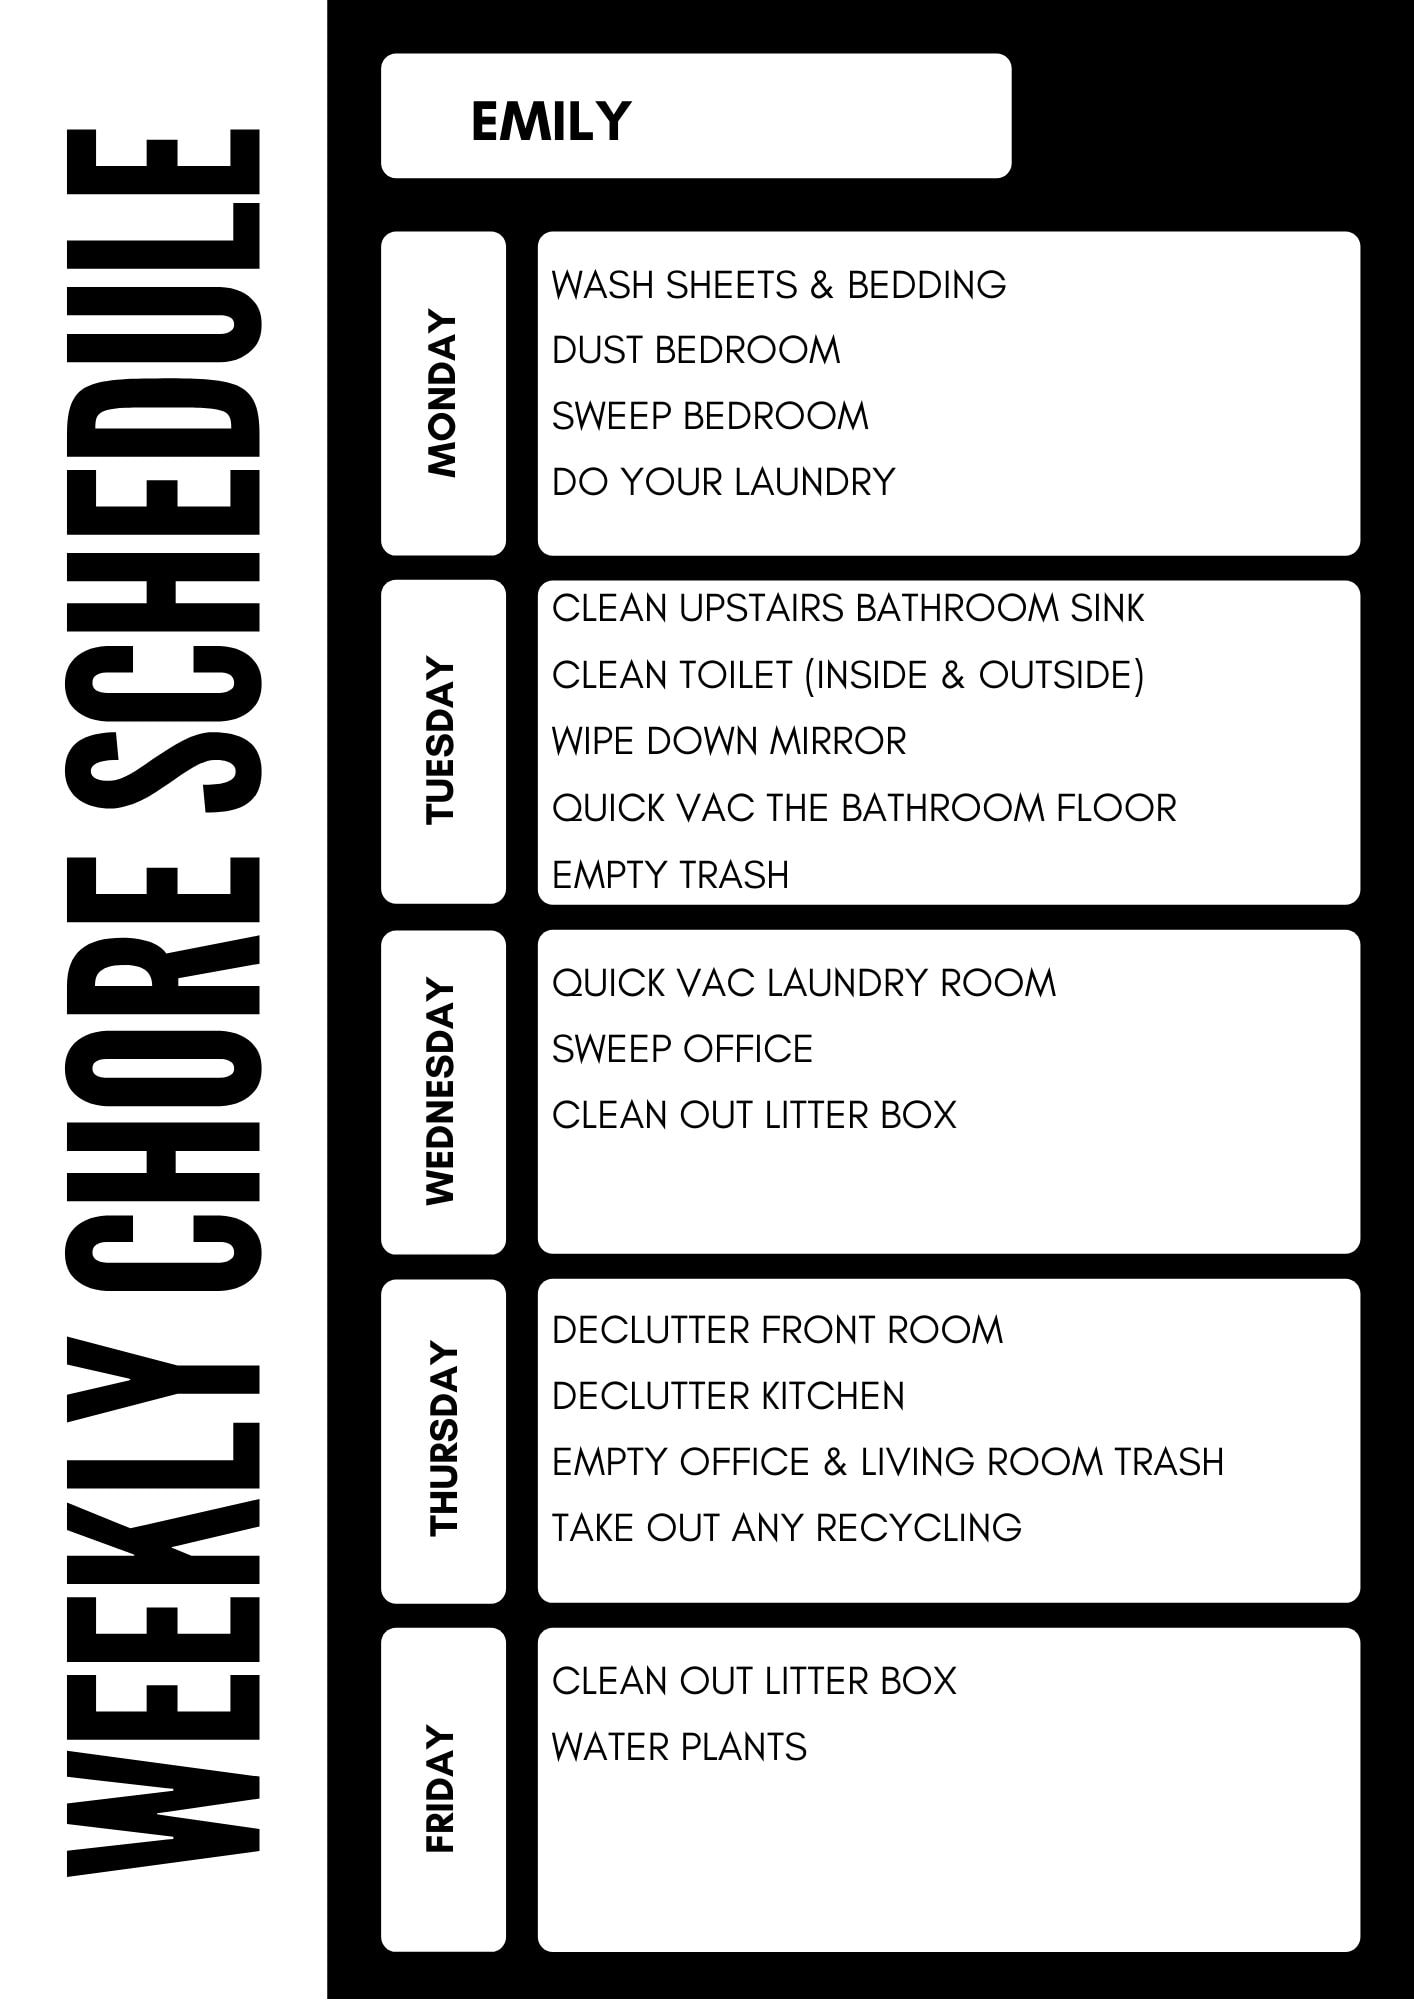
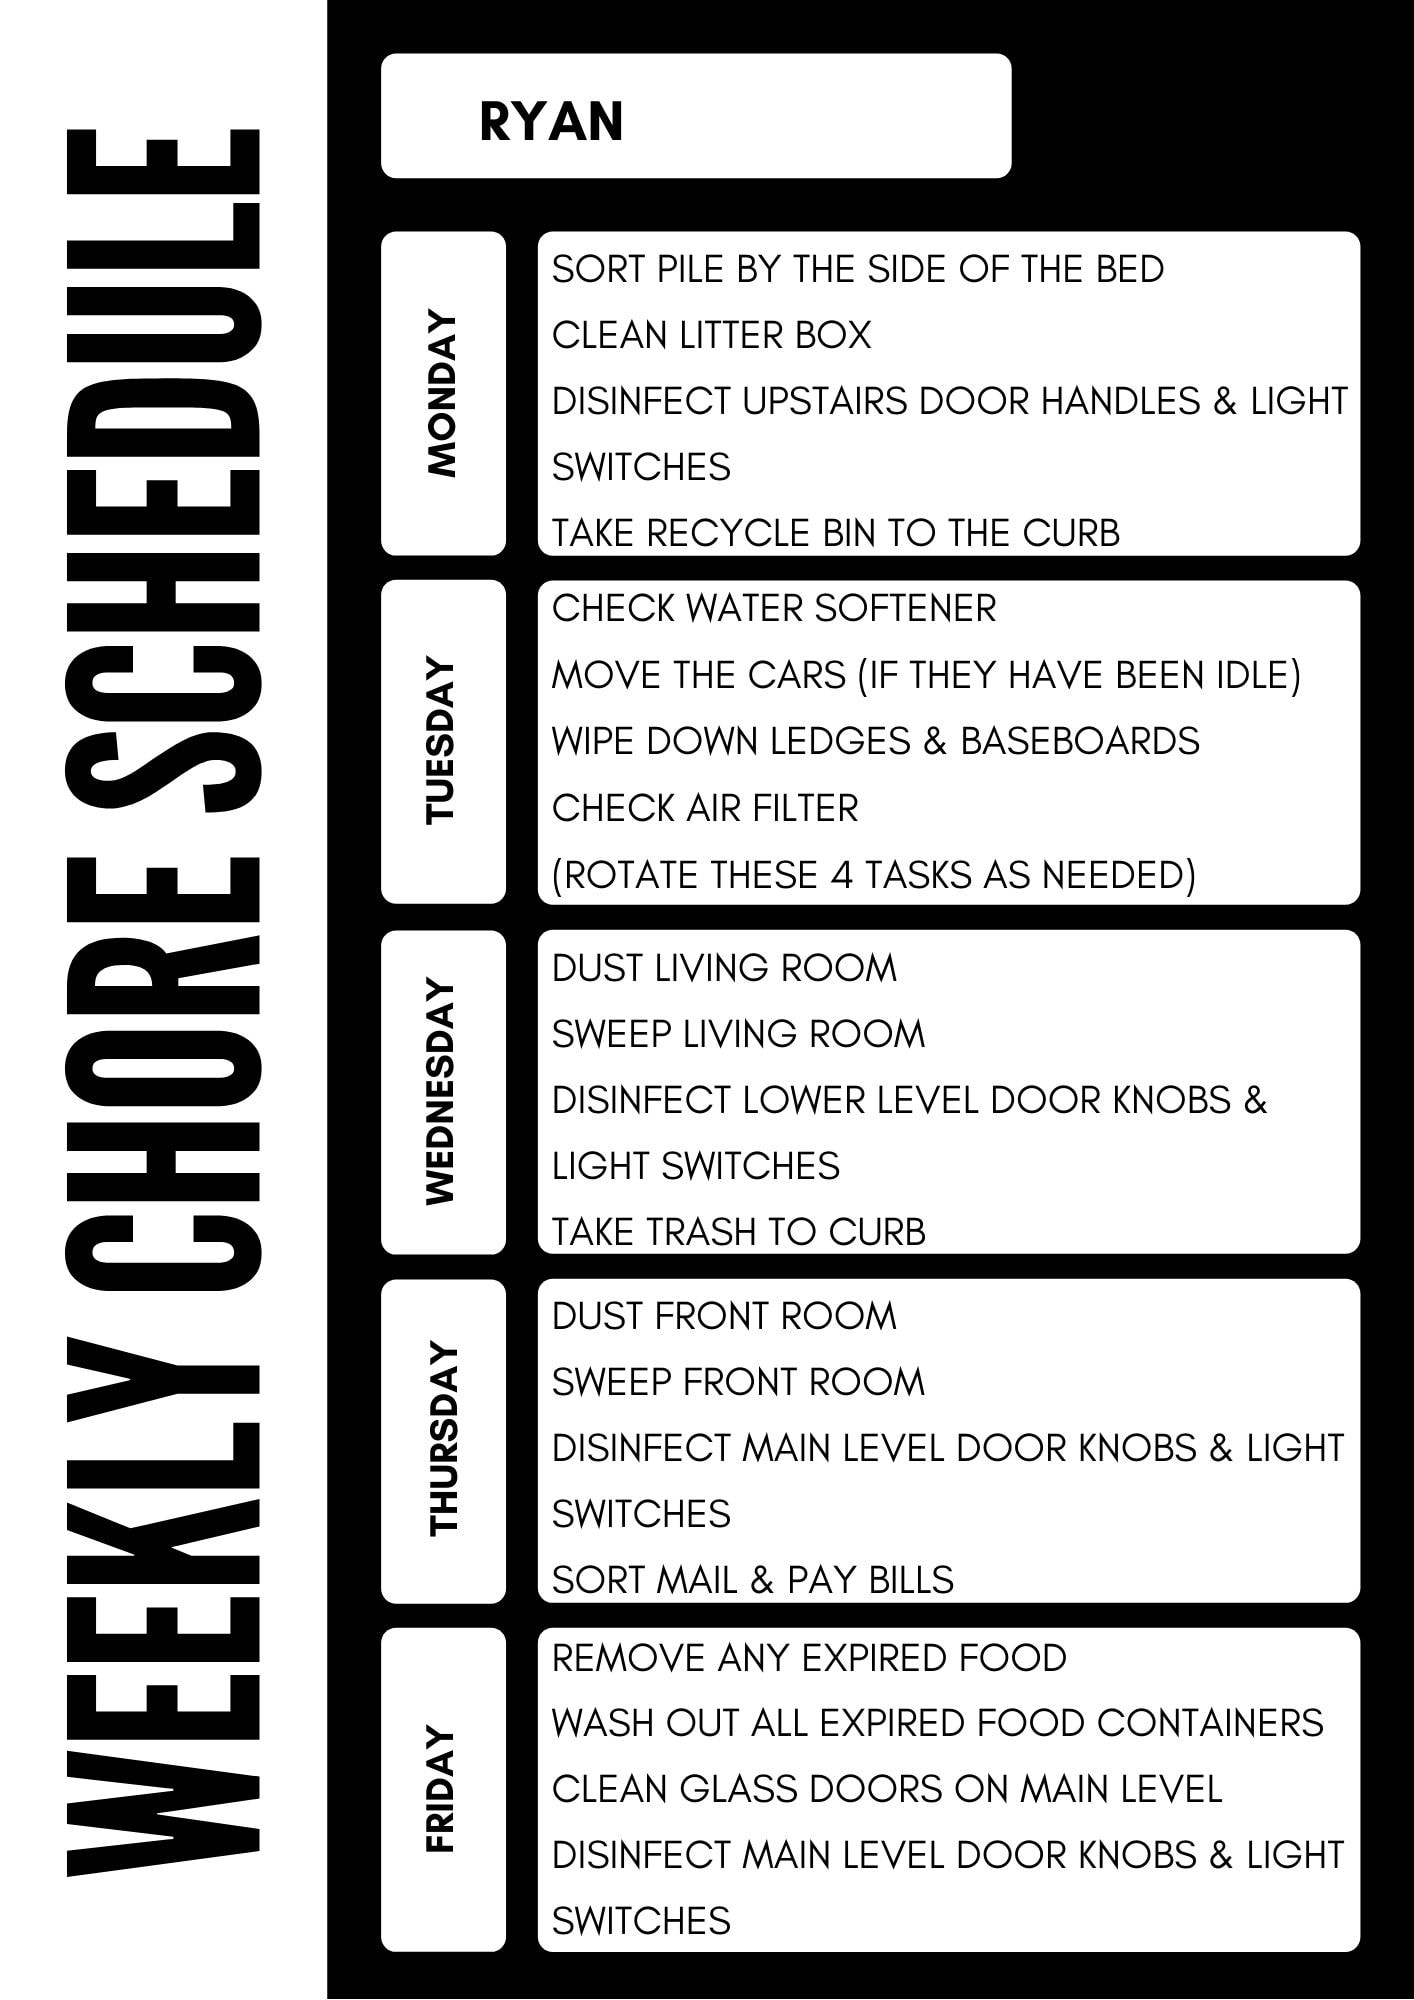
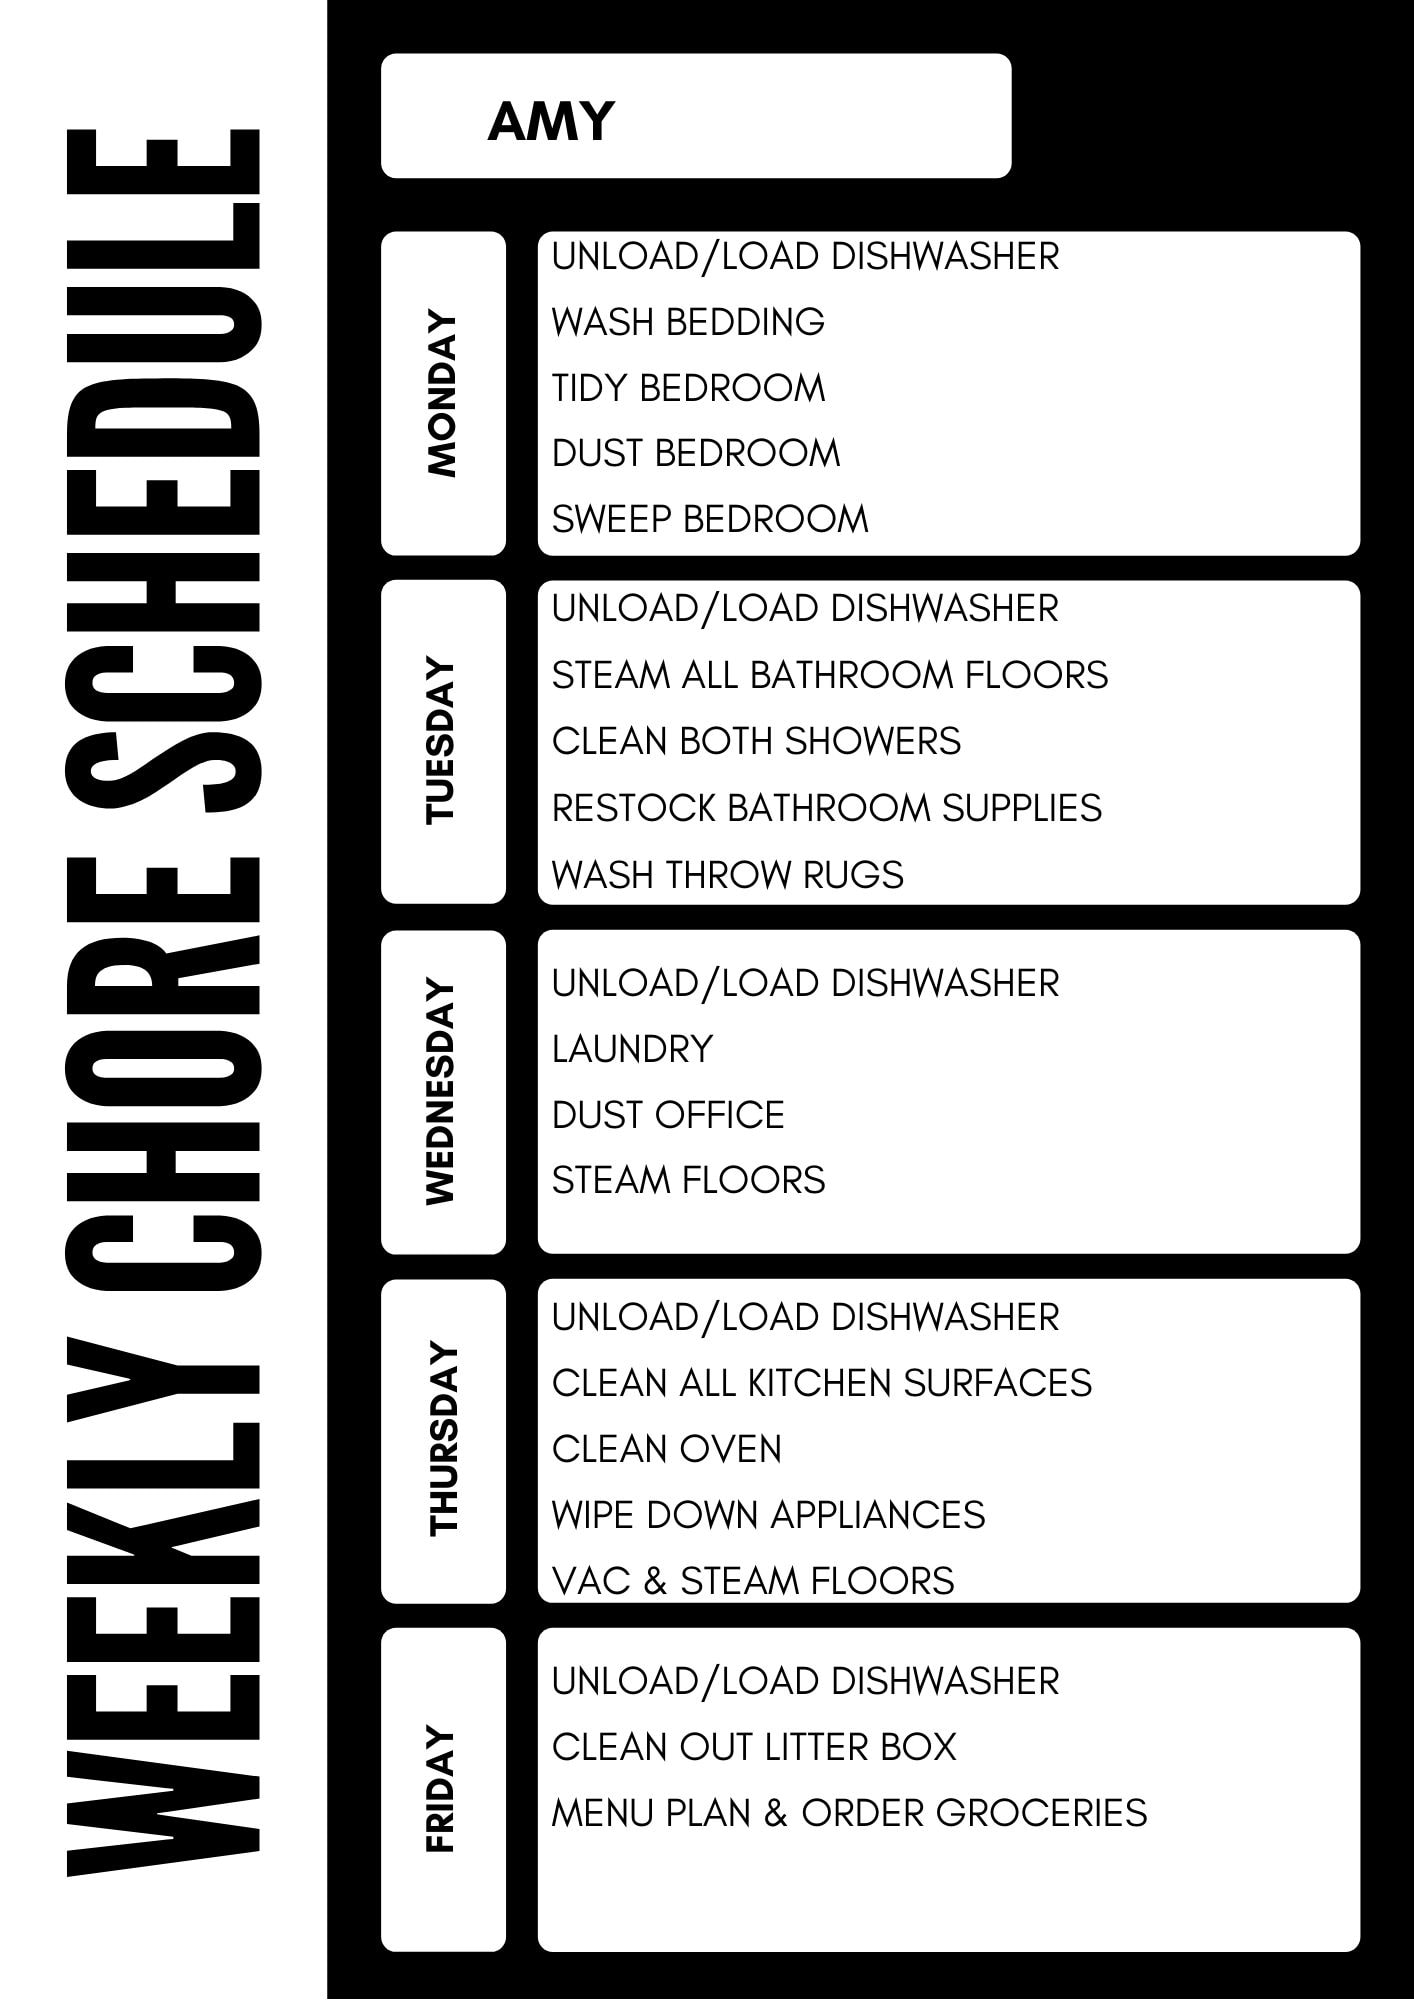
Creating a Weekly Cleaning Routine (Free Printable Charts) Printable Example examples of tasks for my 17 year-old

Creating a Weekly Cleaning Routine (Free Printable Charts) Chore Chart examples of tasks for my 14 year-old

Creating a Weekly Cleaning Routine (Free Printable Charts) Example Chart examples of tasks my husband is assisting me with

Creating a Weekly Cleaning Routine (Free Printable Charts) examples of tasks I’m doing each week

Creating a Weekly Cleaning Routine (Free Printable Charts)

Make a List of Tasks That Need to Be Done

I started with a lined sheet of paper and wrote down every chore that I would like to see happen throughout the week.

Chores around the house were jotted down, as well as more general tasks like laundry, menu planning, changing the air filters, checking our water softener, moving the cars around, and grocery shopping.

Divide Routine Tasks So They Don’t Fall on One Family Member

Instead of telling one kid that they need to clean out the kitty litter box, for example, each family member is rotating a day on that single task.

This means that we all get a turn cleaning up our cat’s poo-poo.

How fun is that? Hahaha!

Figure Out How You Can Do These Tasks In Tandem Together

The idea of working as a family unit is that no one person is responsible for everything.

Instead of just one person working in the living room, for example, each person is assigned a task in that room or a task that is on that level in the home.

To tackle cleaned bathrooms, for example, we have the family divided working in our two bathrooms and doing one or two elements of that routine.

One person is quick vacuuming the floors, swiping sinks, and emptying trash.

Another person is cleaning the tubs, washing the throw rugs, and restocking bathroom supplies.

We do have to work together to nail the order down of task completion, but this system is already proving to be really effective in not weighing one person down.

To make this happen, I also did have to purchase some more cleaning equipment (welcome to your new cleaning caddy, kids!)  so that we all had the tools that we needed. 

If you are looking for a good online source, this is the site that I would recommend for doorstep delivery. (affiliate link, but should give you a free 5-piece cleaning set to get started!)

Daily Tasks During Quarantine

Try to Make Daily Standing Routines

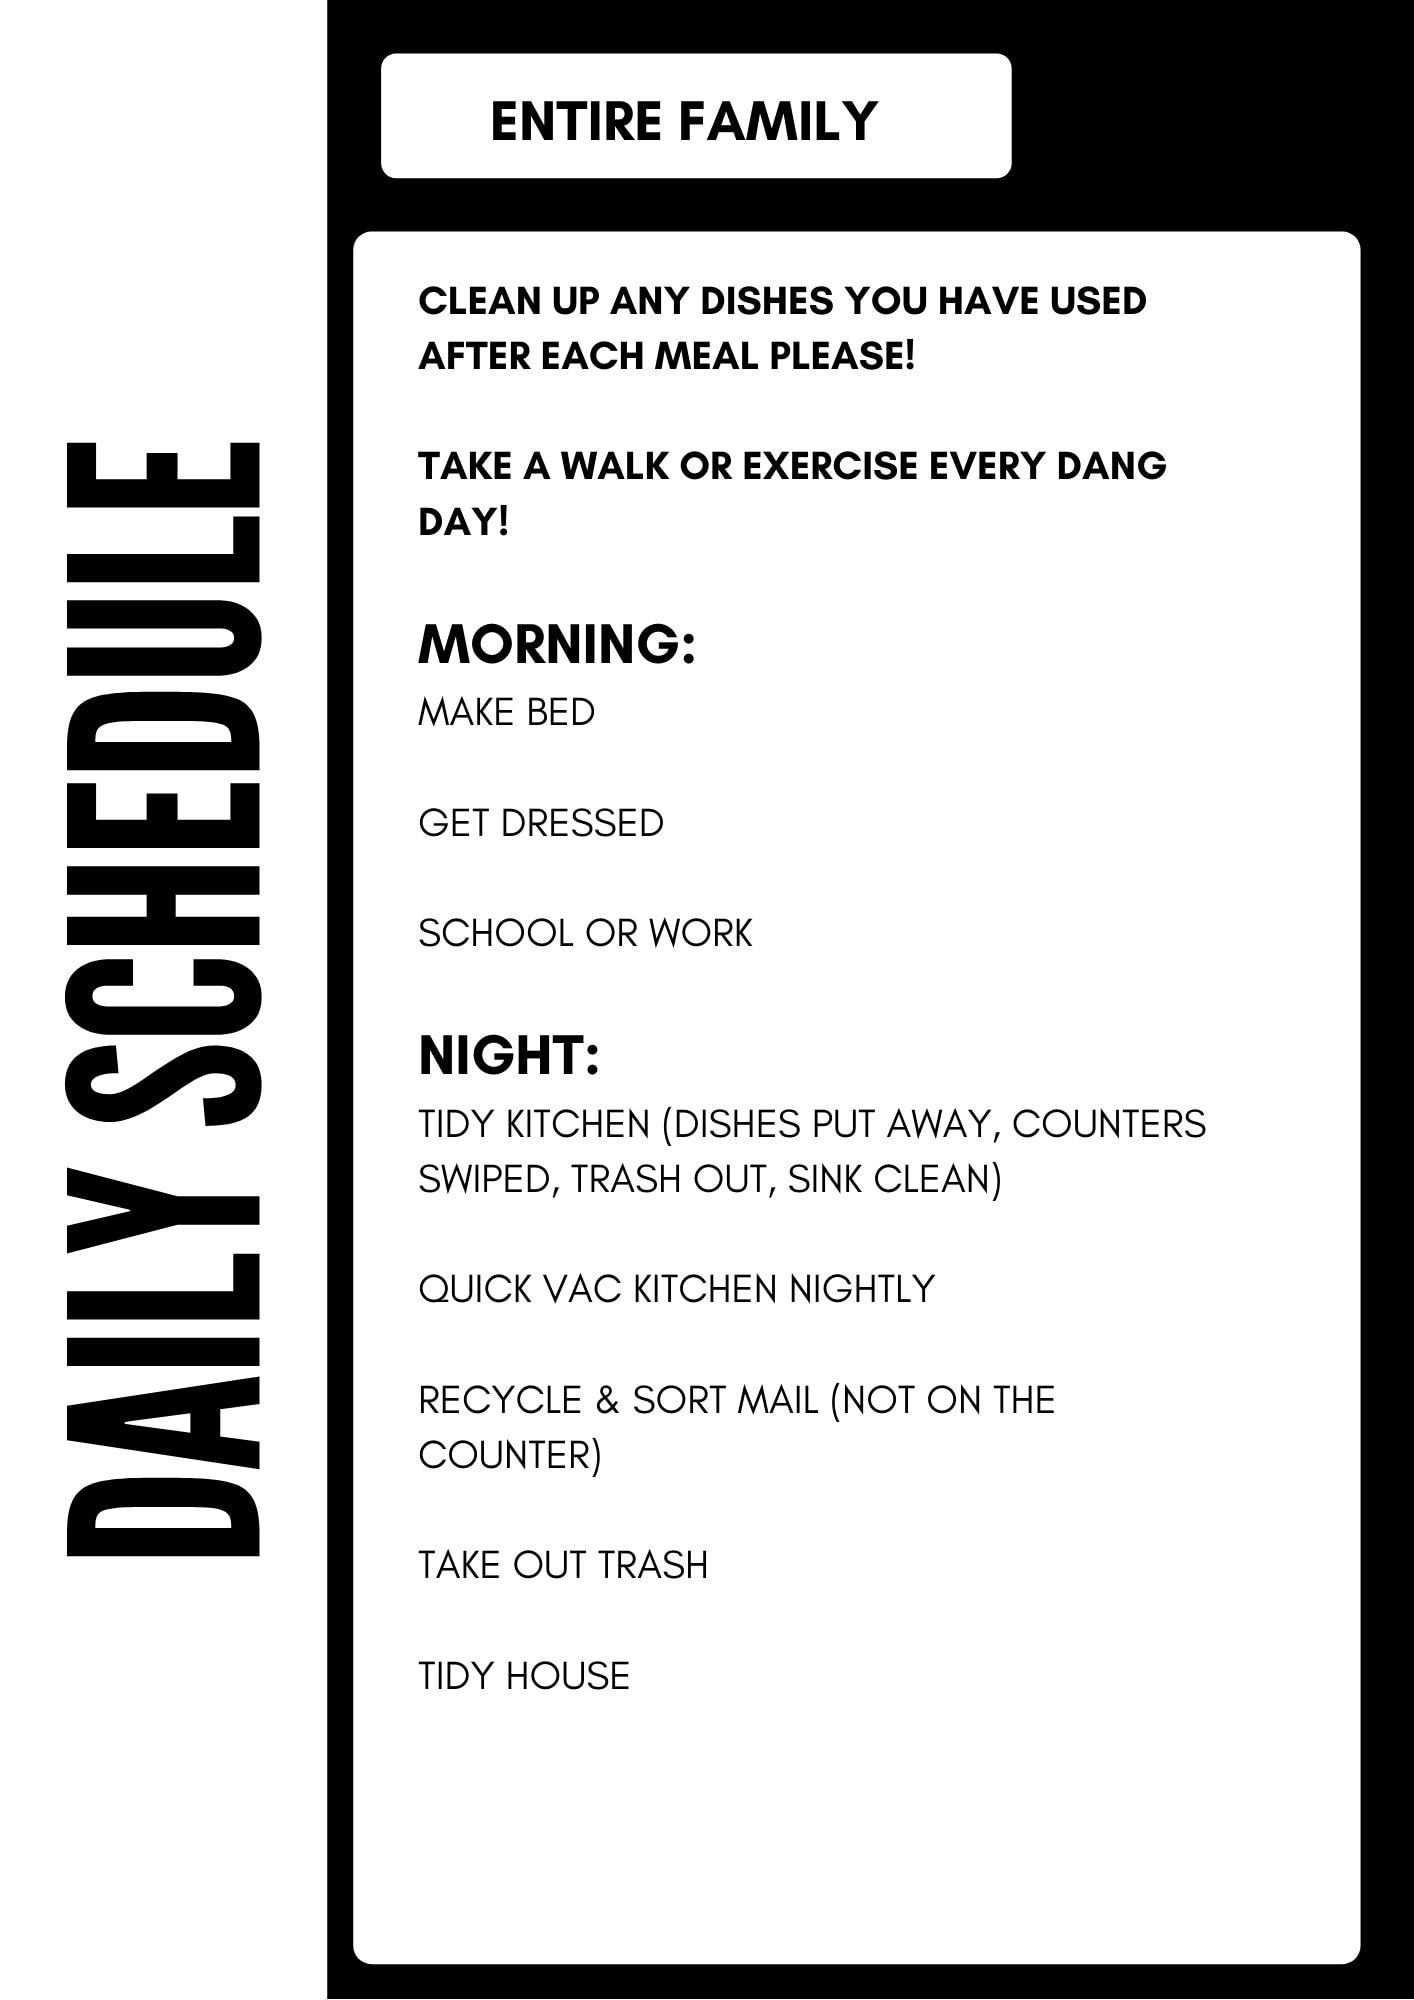
While practicing our social distancing, I’m trying not to fall into a complete slump with personal hygiene, getting dressed, and moving. We made a list of things that are important to us (like, a daily walk!) that help keep us moving and help us manage our day better.

This was inspired by this incredible guidance on how to reduce anxiety while we are quarantined.

It really is incredible how much this helps.

I also will say that limiting myself to a coffee hour and a virtual New York Time subscription has allowed me to feel informed and not consumed.
These don’t have to be productive routines, just routines that you know will work well for your mental and physical health right now.

Don’t Be Afraid to Rotate Tasks

Even though I have tried to make things as evenly as possible, in our home, I have offered that the kids can switch roles monthly so that they don’t get stuck doing the same tasks over and over again.

If your kids are liking their habits though, don’t switch it up unless it is necessary.

Allow Room for Rest

I don’t want to clean on the weekends and feel like we ALL deserve to put our feet up on the weekend. That means that our routines are just outlined for Monday-Friday. This gives us Saturday and Sunday with the freedom to allow for rest and relaxation.

Once again, you do NOT need to be doing chore charts if you don’t care about this right now.

YOU DO YOU.

For me, establishing routines (even if it is just 15 minutes a day) makes me feel normal and helps give flow and purpose to this time.

I hope this helps inspire you to create your own routines that help you feel a little more like yourself too.

Sending loads of love and protection over each of your families. 

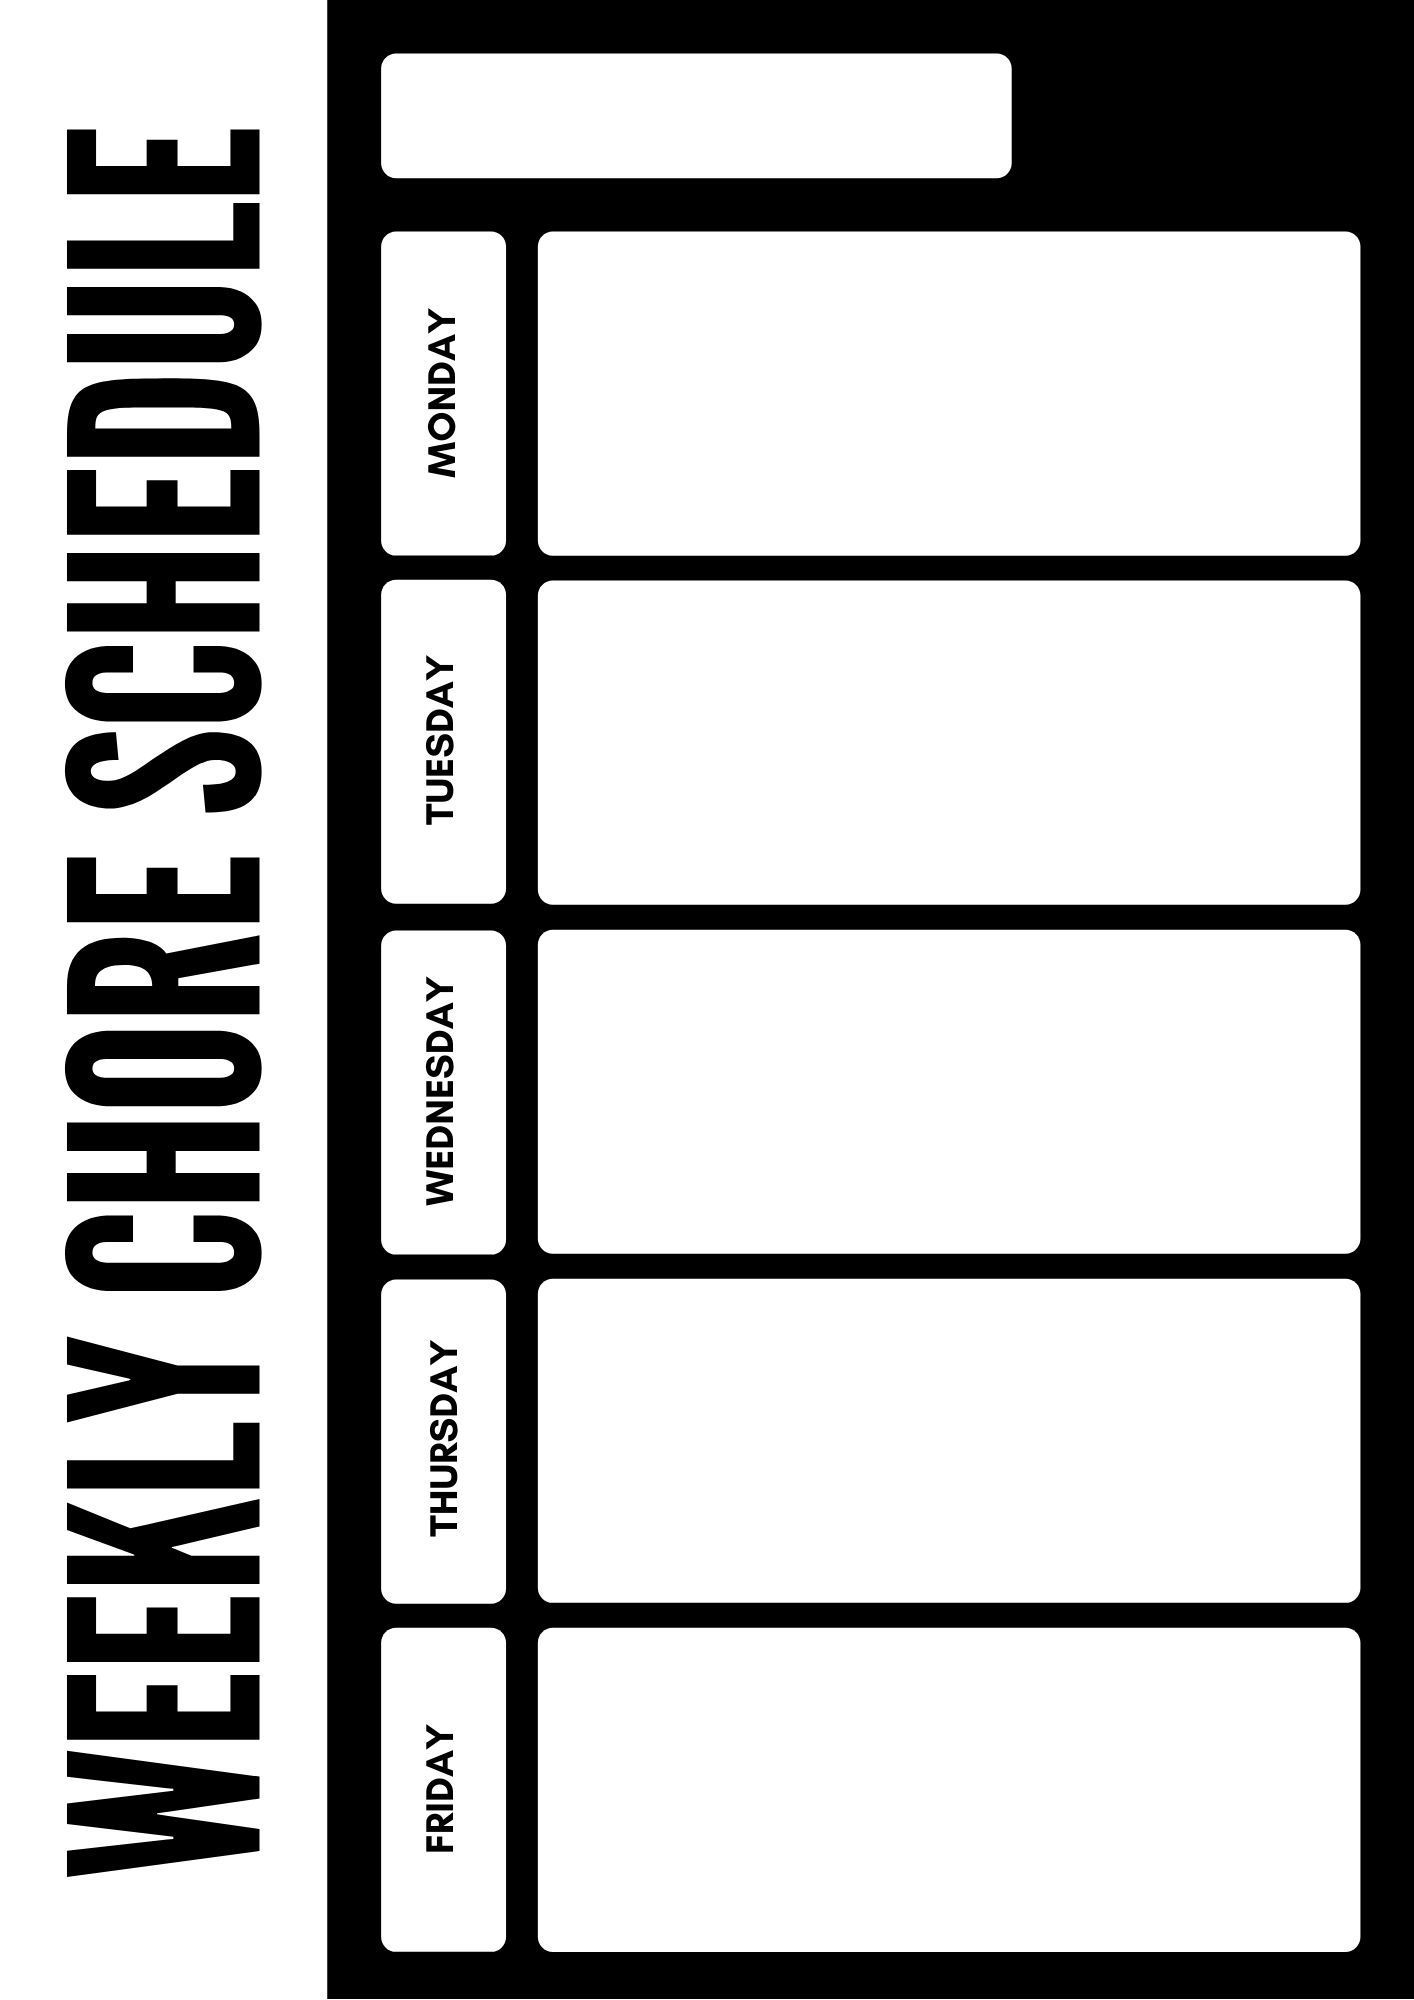
Click here to download my blank chore chart

Click here to download a blank daily schedule chart

Tech-Chore Tickets Free Printable Click here to download our printable chore or tech time tickets

Click here to read how we did our chore charts when our kids were small

Looking for more help around the house? Check out these articles!

how to successfully menu plan

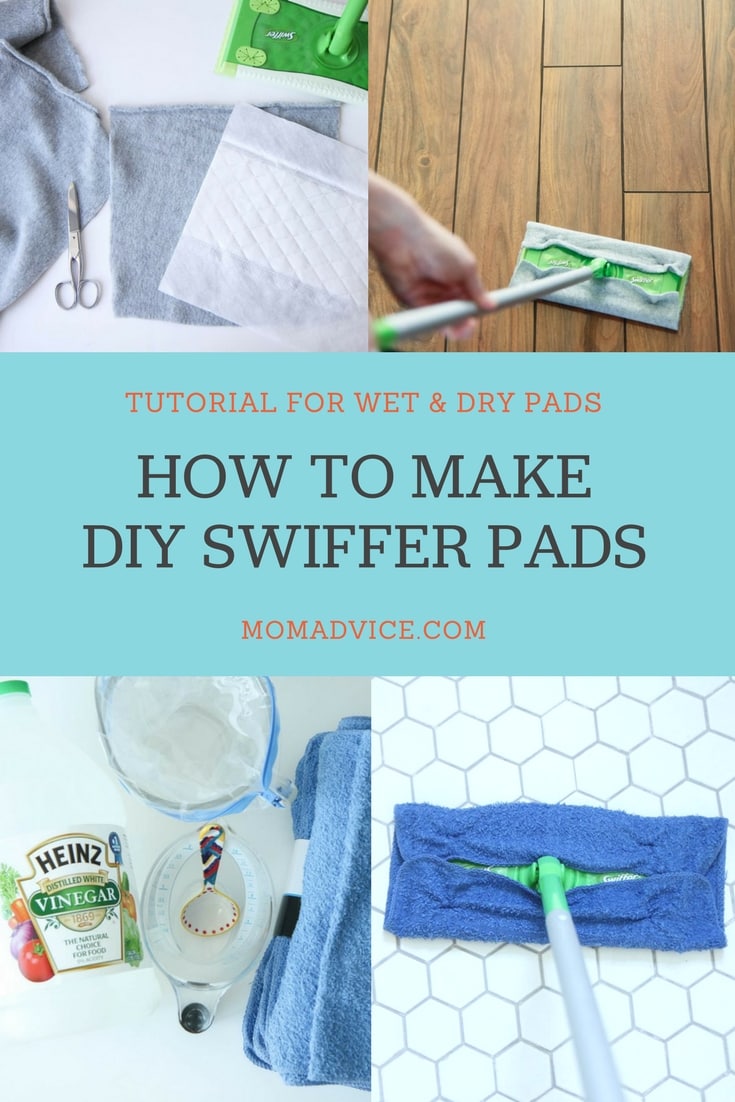
how to make diy swiffer pads

how to clean and stock your refrigerator

How have your cleaning routines changed now that you are all home together?