Archive for the ‘Home’ Category

How to Reupholster A Chair

Tuesday, September 20th, 2011

We have been hard at work on completely redoing our old dining set. My kitchen chairs were in solid condition and didn’t require any painting, but I was tired of the faux leather fabric that I had purchased for the chairs when my kids were little. Today I wanted to share with you just how easy it is to reupholster those chairs and add a little pizzazz to a tired dining set for very little money.

Supplies Needed For This Project

New Fabric (I am using outdoor fabric to help prevent staining from spills. You could also choose a faux leather fabric or any type of fabric and then treat it with Scotch Guard to prevent staining). This fabric should be measured to the width of your chair and then add 4 inches  to each measurement so you have enough fabric to reach around the cushion.  My chair seat was 20×20 so I needed 24×24 for each seat. For all six seats it required 2 yards of fabric total.

Upholstery Staple Gun (available at fabric stores)

Upholstery Staples (heavy-duty)

Needle-nose pliers

Screwdriver

Pinking Shears (or regular sewing scissors)


Invert your chair and use your screwdriver to remove the four screws on the bottom that are securing your cushion to the chair.

If the cushion has fabric stapled on it already, use your needle-nose pliers to remove the old staples and fabric from the cushion. If you only have one layer of fabric, it should be okay, but this chair had two so I had to remove my last round of reupholstering to get back to the base of the chair.

Now it is time to cut your new fabric to replace the old fabric that was on your chair.  This fabric should be measured to the width of your chair and then add 4 inches  to each measurement so you have enough fabric to reach around the cushion.  My chair seat was 20×20 so I needed 24×24 for each seat. For all six seats it required 2 yards of fabric total.

I prefer to cut my fabric with a pair of pinking shears instead of regular scissors because the fabric does not fray with these and I don’t have to mess with trimming and pulling strings on fabric. If you don’t have a pair of these though, you can always use regular shears.

When buying your fabric, be sure to ask if they offer any specials or discounts to customers. I got this fabric at Jo-Ann Fabrics and signed up for their email list while I was at the register. They gave me a coupon that took $16 off of my total fabric purchase so I was able to get fabric for six chairs for $25!

Once you have your fabric cut, it is time to staple. Center your cushion upside down and make sure there is approximately the same amount of fabric on all four sides and then pull the fabric tightly over your cushion and staple it. You are going to want to put your whole body into this one, friends.  Staple all the fabric down along the cushion securely.

Corners can be a tricky terrain, but they don’t have to be. I like to bring the top part down and then fold in the other side of the fabric on top. You can do your corners on your cushion however you like. I think the trick with this one is just to play with it, flip it over and take a peek, and then play with the fabric again until you find a corner you like. Once you figure out how you like your corners, replicate it with the three other corners and then again on your next chair. Trim the excess corner fabric.

Center your cushion back on your chair and make sure all of the fabric is tucked nicely underneath and on top. Secure your cushion back on with the four screws again.

Now just repeat the same process over and over and over again until all of your chairs are done. I was able to get six chairs reupholstered in one afternoon. It isn’t hard to do and is a great job to tackle while watching your favorite shows.

I am madly in love with this fabric that I chose and can’t believe how much more I love these chairs. They look like brand new and I only spent $25 to shine them up.

Of course, what are new chairs without a new-to-me table? Looking forward to revealing what I have been up to this past week and sharing with you our new kitchen tabletop!

This tabletop has needed attention for eight years now and I am finally doing it.

Procrastination is the name of the game.

I hope I am not the only one with an eight year project that has been bugging her.

What is one home improvement project you have been vowing to do, but just haven’t made time to tackle yet?

Mistreating My Windows the Type-A Way

Wednesday, March 17th, 2010

Decorating is not my thing and window treatments are really not my thing.  I think this is why I am really excited to showcase an idea for home decorating that anyone can do… especially people who don’t sew and love to wing it! I don’t sew, but am very Type-A so this project was a bit of a challenge for me. Regardless,  I am so pleased with the results and it was worth every little minute of my type-a-ness to complete this project!

Now that we have completed our home renovations,  I needed to do some focusing on the details of pulling my two rooms together to create one room. Pictured above is an example of a detail that needed to be addressed… the window treatments. The office had bamboo shades while the family room had faux wood blinds. Now that this room was one large room, I needed to match the window treatments up and make it look like a uniformed space.

We had curtains before, but trying to find curtains and hardware that matched exactly would have been impossible to do. I don’t sew, although I have tried, and I didn’t want to spend a ton of money on new curtains for five windows. I decided to do a little window mistreating courtesy of The Nester that had been featured in the notebook a long time ago.  She said it can be done in ten minutes per window so I was completely on board!

I also had this piece that I wanted to dress up and pull into the rest of the room. It originally was a buffet in our kitchen that held our glass stemware. It is now the place where we house all of the kid’s coloring books and crayons. Life has certainly changed, hasn’t it?  I wanted to try to dress this up inexpensively on top and keep the chaos inside (unlike how it is pictured here)

Two trips to Hobby Lobby, sweating in the fabric aisle, hardcore number crunching to figure out the perfect amount of fabric, $25 in materials to make the curtains and I was ready to roll. I kicked off my super awesome shoes and I was ready to get to work.

This is where I do everything wrong. I measure every curtain to make sure they have exactly the same amount of fabric, I carefully pin the corners of each piece, fold everything in and make sure nothing is showing, line them all up on top of each other and pin them again, practice hanging them, make my husband hold them up and then stand back, go down the steps and look at him holding them to make sure I still like them, pin them again, tack them, then re-tack them into the wall, practice different poofing techniques (not a word according to spell check), etc…. This is why Type-A personalities do not do well with projects where you just wing it.

It is now about ten at night before I finally finish with my measuring and obsessing. I then try to hang them, but because I am a girl of small stature, I realize that there is no way I can even reach that high. My poor husband has to do the hanging with my constant barking. He gets out a glass of wine to soften the blows of my barking and then we end up having a great time.

Here are my perfectly imperfect window mistreatments. I had my husband practically tack them to the ceiling so that the walls looked taller since this is our basement and the windows are so squat. I think the chocolate brown was a good choice of color since the walls were light beige and we had chocolate throw pillows on the couch. I also love that these can be switched out easily and fairly inexpensively when we need a breath of fresh air in the room.

Did I save money doing these? Absolutely! The curtains at Target ran about $20 per panel and the hardware was around $10-12 per window. Including the upholstery tacks, I only spent $26 on four windows.

The fifth window will remain without curtains due to the fact that it is right at the top of a lower wall and doesn’t need window treatments. We did have to buy more faux wood shades, but now everything will match in this room and we still did it inexpensively with these DIY window mistreatments.

I decorated my little corner of this side of the room with black-and-white photos of my children that I took of them (zero cost for photographer). I printed them on my little photo printer (no purchases made) and then got inexpensive frames at Hobby Lobby for $5 each. The glass container ($14.99 at Target) was filled with some fillers in green and brown to tie in the rest of the room. I look forward to switching the items inside with the seasons and switching the photos to keep this corner fresh!

Thanks to The Nester for inspiring me to mistreat those windows and visit  Nesting Place for more great ideas on budget-friendly home decor!

What are some ways that you have saved your family on home decor? Any DIY projects that have kept your budget low? Please share!

Welcome to Our “New To Us” Home

Tuesday, March 2nd, 2010

Small space living has never defined who I am or stopped me from being the best hostess I can be in my house. While some might shy away from space challenges, I have opened our home until it practically screamed for mercy to every friend and family member I possibly could.

Of course, small space is all relative, isn’t it? Our home is 1,500 square feet. While that may sound like a lot or a little, the space is made smaller and more challenging with a tri-level floor plan. If it was spread on one or two levels, it would feel much larger. I think it is the floor plan that is more of a challenge than the square footage of our home.

Despite the challenges as they existed, I can cram an entire Bunco group of 17 in my little house, I have hosted large birthday parties for my kids, an entire Redbook photo shoot in my home, a news crew out monthly so I could share frugal tips, and  Thanksgiving dinner was made and people shoved into the crevices of  two rooms for a delicious family feast. Small spaces should never stop you from sharing your home with others… although it might take a little furniture rearranging to make it happen!

That being said, I knew that there were ways that we could make the most of the spaces we already had. It started with the knocking out of a wall to create more open space in our kitchen. We felt like we had an addition to the space we already owned. What other possibilities could happen within our existing walls?

In the middle of the night, one January evening, I sat up in bed and had a vision for what we could do to make it work. I cornered my husband in the wee hours of the morning and explained my vision for the space. He looked at me like I grew another head and said I could get estimates, but the ball was in my court.

The estimates rolled in, the numbers crunched, the contractor for the job chosen, and just three weeks later, we have a brand new home.

All this said without the agony and woe that I experienced over the difficulties of living without flooring, a film of dust on everything I own, the close quarters that we endured, the challenges of keeping two children out of the way, the demise of our marriage, the demise of my parenting abilities, the irritation of losing my privacy, the crap food we ate, the budget we completely blew on eating out/entertainment, the cluttered and disgusting home I have had to live in, the short fuse that I never knew I possessed, the copious amounts of coffee I drank through the project, the glass of wine I drank to unwind in my dusty tub every night,  the day I cried in the garage in my bathrobe in front of one of the workers because I couldn’t find a specific paint color…Yeah, all of that is shamefully shoved under my welcome mat to never be spoken of again.


Pictured above is my family room before. This is where our family spends the majority of our time. Our two couches were crammed and people had to scoot their legs through a narrow opening to get behind the coffee table. One rocker in the corner couldn’t rock because the space was too narrow and had to be shoved against the wall. The room was long, but narrow, making it a difficult space to navigate. My furniture was bulky, but bought for a house in Massachusetts that we owned that fit that space perfectly.

The television was placed into an empty closet and framed with curtains. This definitely helped us free up some space since the entire television unit was out of the way, but the space was still small.


Next to our family room was the office/home gym equipment. The main challenges with this space…well, there were a lot of challenges with this space. It was in the heart of the activity of the home so I could hear the television through the walls when I was trying to work, the closet couldn’t be shut because of the length of our desk so I had to look at my clutter all of the time and if the treadmill was used in the mornings, it woke everyone up in the house.

Below that level of the home, was this half of the basement that was not being used for anything except to hold a bunch of junk in our house. As I was partying it up at BlissDom, my hubby was clearing this room for a major transformation to happen. It was a underutilized space that could potentially be awesome.


The kitchen had some storage challenges that I wanted to address. My pantry was so small and lacked the storage space that I needed for our food. I had to keep our food in the basement and go down two sets of stairs to get to the food storage at the bottom of the steps.

The console table in the kitchen made it difficult to maneuver around the kitchen table. We liked having the computer in the kitchen, but we needed to create a space for it that wouldn’t conflict with our eating space or make it difficult for our guests to dine at our house.  We knew that when the computer is phased out, we would likely put a television in that spot for our fun family nights.

Our entryway was fine, it just needed a spot for wet boots. We would love a new front door, but it wasn’t in the budget for now.

The kitchen floors were not my first choice for flooring, but I was okay with them…until the flooring started falling apart. The floor had not been installed properly and we had potential problems on our hand. For example, no flooring had been installed behind the dishwasher which makes it difficult to spot leaking if it occurs. Around the stove, the pieces were shifting. When the contractor agreed to give us the floors at builder’s cost and not charge for the install and give us a new entryway (in exchange for my husband’s web design services), we were on board!


The entire project took three weeks of them working on our home from 8-5 every weekday and two of the three weekends we had drywall and electric being done. That being said, the changes in that short time are jaw dropping. I still can’t believe that this much can be done in such a short time span.

Welcome to my new-to-me home! Pictured here is the new entryway that has been tiled for all of those muddy boots and then transitions into our new laminate flooring. We chose this plank-style laminate flooring because it had a beautiful faux grain to it and looked like hardwood without going the hardwood route. The tile was leftover from another job that the contractor had done and I loved the beautiful earth tones this porcelain tiling had in it.

This is the new kitchen wall with the cubbyhole built in for our computer. We added an extra shelf above for decoration or to hide the DVD’s and CD’s that we pick up from the library. I love that the kids can pull a chair into this spot to work on the computer and that we can watch family movies together in this room. They added a light above it to light this little area in our home.

All of the doors were updated with new six panel doors and new door hardware. This was one of the twelve doors that was replaced and painted white. Just these details alone made our home feel so much more modern!

The pantry shelves actually extended further than the door and I requested that they make them as big as we could fit into the space that we had. They are heavy-duty shelves that were painted white.

To me, this is truly one of the most exciting things in the house. I have always wanted a pantry in my kitchen and this space is going to be put to good use. I am in heaven and was so excited to organize and fill this space with our food.  Grocery day just got a whole heck of a lot easier!

I have plenty of space on bottom so I put our potatoes, extra soda, and my reusable grocery bags there. It is so nice to have all of this extra room!

Heading down the stairs is our brand new family room. You can see how it is one room now instead of two. A supporting beam was put in and the wall was taken out to create one room instead of the two smaller rooms that we had before.

I am so proud of how the family room turned out and amazed at how much more spacious this room is. The kids are nuts about their new space, in fact, they have been running themselves silly around the room with all of this extra space. The updated trim, canned lighting, and textured ceiling really made this space so much more updated!

The disorganized home office closet has now become a functional space for our kid’s toys and family games. The doors can keep the chaos away and the kids love that they each have their own shelf in the closet for their toys.  A special spot for my vacuum was also carved out so I don’t have to figure out where to put it anymore!

Down below our basement is the subbasement where we decided to put our new home office. I can keep the door open and have coffee downstairs while the kids play or I can lock the door and keep the chaos away or just leave the door slightly closed so I can get a little quiet time to work.

This is our new home office! The flooring matches the kitchen flooring that was installed and we brought our double desk downstairs where it would have more room to fit. Two shelves, the length of the desk, were installed for office storage.

We saw these chairs at Value City Furniture and just had to have them. The painting was one that we had already owned from Target and the bench that rests between them was a recovered Goodwill purchase years ago.

We would like to thank J. Wilson Construction for completing our renovation on time and within our budget. We could not be happier with our new space and highly recommend them if you live in the Michiana area. I am happy to be your referral too!

I hope you enjoyed the tour and thank you for your patience as we get ourselves organized and situated back into our home!

I just want to say that I am so thankful for your support and am so proud that we did this the way we wanted to- by saving and paying cash for this moment. It makes everything about this whole experience so much sweeter and that much more gratifying!

Our Kitchen Makeover

Wednesday, September 3rd, 2008

When we moved into our house, one of the big things that attracted us to it was the size of our kitchen. Now that we have lived in our house for four years, I don’t think my kitchen is as big as I would like, but it seemed enormous when our last house had only a galley kitchen. Isn’t that funny how accustomed we can become to more space?

The thing that I was not fond of about the kitchen was the dated look of it and the lack of storage and cupboards. The walls were white, the floors a really light pine color, and the cabinets were oak with no hardware. We didn’t have enough cabinet space, the appliances all needed to be updated, and the kitchen lacked the style I wanted. If this was a reflection of the “heart of our home,” it was certainly missing something. The owner before us had completely renovated the kitchen, but it wasn’t our style and wasn’t cohesive or finished the way we would have liked.

Our kitchen makeover has been a gradual process and we are still working on the details of it, but it has come a long way from the dated eighties look. We would replace things as they went out and updates would come when we had a little extra money. I did want to show where we are at now, with the updating process, and to share how we have renovated our kitchen on a budget.

I wish I would have taken more before pictures of the kitchen, but I hope my descriptions will help.
These are the pictures of our cabinets before the makeover. Nice, but not much to write home about. We had received a $50 Lowes gift card for Christmas (thanks, mom & dad!) so we thought we would put the money to good use. I used the steps provided in this tutorial to paint our cabinets. This meant no messy sanding and so it helped to save a step and saved me a lot of cleaning too!
We took all of the doors off and gave them a really good cleaning with a liquid degreaser that I had purchased from the hardware store. Once cleaned, we applied two layers of primer to each side of the doors and to the outside of the cabinets themselves. We allowed the primer to dry one day and then we began painting them the next day. The color that we chose was a Martha Stewart “Wainscot White.” It wasn’t a true white, but was definitely not a cream either.

The hardware for the cabinets was purchased from Target. They have ten packs of knobs that very closely resemble the stuff at Restoration Hardware, but they only cost $14.99 for ten versus $5-10 each. The drawer pulls were $4.99 each (also purchased from Target) and they all were in oil rubbed bronze.

These are the cabinets after. What a difference a weekend can make! The cupboards are so beautiful and have brightened the kitchen up so much. Not only that, but the whole space feels so much larger because of the white cabinets. The walls were also painted a pretty gray blue to bring the more up-to-date feel to our space. We left our counters the same, but hope to one day replace them with a more high-end material (or at least make them look more high end).

We replaced our dishwasher with a new GE dishwasher that we purchased from Sears. It is the stainless steel look instead of the real stainless steel, so little hands can smudge away without mommy having to clean the surface as often. We actually won the dishwasher in an advertising contest that was sponsored by Sears. Technically, all of you AWESOME people helped us earn the dishwasher so we thank you for that. This one is so much prettier than the other one and better yet…it works! What a novel idea!
Next to my stove are hooks for my aprons. This was a great way to add some “art” to the walls without making an investment. $3.99 to display a few of my favorite things in the world.

We updated our stove with this fancy stainless steel number. It has everything I could ever want for this space and, while not free, I was able to get a killer deal on it. The stove was marked for $1K and I was able to get them to accept $500. Always pick those floor models, I say, and point out any and every flaw you can…even the stupid stuff. That is how we were able to score this stove.

The range hood was free and part of our Sears shopping spree that we won. Our refrigerator is the last of the white appliances to make an exit, but we are watching Craigslist to see if we can score a good deal on that.
Since cabinet storage was an issue, I was able to find an old ugly eighties desk with a hutch from a thrift store to remedy the problem. I did my makeover work on it and it is now my favorite piece in the house. This was cheaper than buying new cabinets and I just love how it is open for guests to grab their own dishes. The white dishes really make me happy and make me feel like a little Martha when I am entertaining! These dishes were priced at $14.99 for a service for six, including all of the serving dishes! They aren’t the best quality, but I love the clean lines and design on them.

I also have my new china from my mother-in-law that looks so elegant on our tables. She recently brought this over to add to my dishes and I was so thrilled.

While it can make our seating a little more cramped, we did add a narrow table along the back wall to keep our computer. This has our dinner music on it and I can watch the television while I cook. The two plants on either side were purchased from Target, clearance to $14.99 each. The basket on the table, normally brimming over with fruit, is empty since I need to head to the grocery store. The basket was also a clearance item that I purchased from Marshalls along with some of the decor for our walls.
Like this piece that is centered along our back wall! This was a clearance item at Marshalls for $9.99. It got discounted with some of their summer pieces and I thought it would be a perfect focal point in that open spot.

I hope you enjoyed the tour of our kitchen!
We could not be more proud of the space we created…on a budget!

*Originally aired on January 2, 2008*

Our Kitchen Makeover

Wednesday, January 2nd, 2008

When we moved into our house, one of the big things that attracted us to it was the size of our kitchen. Now that we have lived in our house for four years, I don’t think my kitchen is as big as I would like, but it seemed enormous when our last house had only a galley kitchen. Isn’t that funny how accustomed we can become to more space?

The thing that I was not fond of about the kitchen was the dated look of it and the lack of storage and cupboards. The walls were white, the floors a really light pine color, and the cabinets were oak with no hardware. We didn’t have enough cabinet space, the appliances all needed to be updated, and the kitchen lacked the style I wanted. If this was a reflection of the “heart of our home,” it was certainly missing something. The owner before us had completely renovated the kitchen, but it wasn’t our style and wasn’t cohesive or finished the way we would have liked.

Our kitchen makeover has been a gradual process and we are still working on the details of it, but it has come a long way from the dated eighties look. We would replace things as they went out and updates would come when we had a little extra money. I did want to show where we are at now, with the updating process, and to share how we have renovated our kitchen on a budget.

I wish I would have taken more before pictures of the kitchen, but I hope my descriptions will help.
These are the pictures of our cabinets before the makeover. Nice, but not much to write home about. We had received a $50 Lowes gift card for Christmas (thanks, mom & dad!) so we thought we would put the money to good use. I used the steps provided in this tutorial to paint our cabinets. This meant no messy sanding and so it helped to save a step and saved me a lot of cleaning too!
We took all of the doors off and gave them a really good cleaning with a liquid degreaser that I had purchased from the hardware store. Once cleaned, we applied two layers of primer to each side of the doors and to the outside of the cabinets themselves. We allowed the primer to dry one day and then we began painting them the next day. The color that we chose was a Martha Stewart “Wainscot White.” It wasn’t a true white, but was definitely not a cream either.

The hardware for the cabinets was purchased from Target. They have ten packs of knobs that very closely resemble the stuff at Restoration Hardware, but they only cost $14.99 for ten versus $5-10 each. The drawer pulls were $4.99 each (also purchased from Target) and they all were in oil rubbed bronze.

These are the cabinets after. What a difference a weekend can make! The cupboards are so beautiful and have brightened the kitchen up so much. Not only that, but the whole space feels so much larger because of the white cabinets. The walls were also painted a pretty gray blue to bring the more up-to-date feel to our space. We left our counters the same, but hope to one day replace them with a more high-end material (or at least make them look more high end).

We replaced our dishwasher with a new GE dishwasher that we purchased from Sears. It is the stainless steel look instead of the real stainless steel, so little hands can smudge away without mommy having to clean the surface as often. We actually won the dishwasher in an advertising contest that was sponsored by Sears. Technically, all of you AWESOME people helped us earn the dishwasher so we thank you for that. This one is so much prettier than the other one and better yet…it works! What a novel idea!
Next to my stove are hooks for my aprons. This was a great way to add some “art” to the walls without making an investment. $3.99 to display a few of my favorite things in the world.

We updated our stove with this fancy stainless steel number. It has everything I could ever want for this space and, while not free, I was able to get a killer deal on it. The stove was marked for $1K and I was able to get them to accept $500. Always pick those floor models, I say, and point out any and every flaw you can…even the stupid stuff. That is how we were able to score this stove.

The range hood was free and part of our Sears shopping spree that we won. Our refrigerator is the last of the white appliances to make an exit, but we are watching Craigslist to see if we can score a good deal on that.
Since cabinet storage was an issue, I was able to find an old ugly eighties desk with a hutch from a thrift store to remedy the problem. I did my makeover work on it and it is now my favorite piece in the house. This was cheaper than buying new cabinets and I just love how it is open for guests to grab their own dishes. The white dishes really make me happy and make me feel like a little Martha when I am entertaining! These dishes were priced at $14.99 for a service for six, including all of the serving dishes! They aren’t the best quality, but I love the clean lines and design on them.

I also have my new china from my mother-in-law that looks so elegant on our tables. She recently brought this over to add to my dishes and I was so thrilled.

While it can make our seating a little more cramped, we did add a narrow table along the back wall to keep our computer. This has our dinner music on it and I can watch the television while I cook. The two plants on either side were purchased from Target, clearance to $14.99 each. The basket on the table, normally brimming over with fruit, is empty since I need to head to the grocery store. The basket was also a clearance item that I purchased from Marshalls along with some of the decor for our walls.
Like this piece that is centered along our back wall! This was a clearance item at Marshalls for $9.99. It got discounted with some of their summer pieces and I thought it would be a perfect focal point in that open spot.

I hope you enjoyed the tour of our kitchen!
We could not be more proud of the space we created…on a budget!

After Photos: Making Our Home More Inviting

Wednesday, September 26th, 2007

I am beat, but I got some of our outdoor projects done today. I discussed yesterday that we are working on making our home more inviting to our friends and neighbors and I hope that we have accomplished that.

The project is incomplete until I can plant some annuals and fill out the beds, but I did freshen the beds up for fall and hopefully give the impression that we care a teeny bit about the outside of our home. Unfortunately, while I have been working hard on the outside of the home, the inside has gotten neglected so that is what I will be working on the rest of the week. Remember, I am still attending boot camp!


First, this is the new wreath that I put on our front door. Our front door used to be an ugly boring brown color and our house lacked a little spark to it. The coat of fresh red paint added a little pop to our house and a pretty wreath completes the look. This wreath was made from a grapevine wreath (that I had in our basement) and I got the sprigs of autumn touches from Wal-Mart for $3 total. The ribbon happened to be in my ribbon collection so I used that to hold the wreath in place. I hope this lets our visitors know that this is the place to be!

I love fall mums for my flower beds so I bought some of these from Home Depot for $3.88 each. It adds a little color to my beds and I love that these plants will be back next year. An inexpensive solution for a boring bed.

These beds also were looking overgrown and tired so I thinned them out and cleaned them up. This was a free solution for freshening the beds up a bit!

I loved the color of these mums so I added them to a pot for my front step. It was a great way to make our front step look more inviting and add some color to the front of the house.

The tired tree (with no grass around it) also got a face lift. We used our free brick and bricked around the tree. I added four hostas ($5.99 each) and three bags of red mulch ($3.38 each). Next year I will plant some pretty impatients to add some color to this spot. I loved how it all turned out!

The last thing I did (although I didn’t take a before picture, but I am sure you can imagine boring and dull!) was frame our mailbox out with the plants and brick. The greenery came from one of my beds, on the side of the house, so this was free. Another addition of a mum and a little of the mulch completed the look.

What a Difference a Day Makes

Monday, April 2nd, 2007

I decided to hit the thrift store this Saturday in search of a china cabinet or unit where I could rest my laptop for our kitchen. I have been hunting for awhile, but just haven’t seen anything with the good bones that I was looking for. I walked around for awhile before I saw IT. You know? The one! The one that I have been hunting for ages looking for? Well, I basically threw my body upon an old eighties cabinet and requested the crew help me load it in my vehicle. The cost was only $99 and the units that I had been looking at in the stores were a minimum of $250 and upwards of $600. This piece looked like it was going to be perfect and I headed over to the hardware store and got all of the supplies to tackle this project.

I was inspired by Meredith’s recent post about a project that was done on Notes from a Cottage Industry. This blogger had painted her unit black and had gotten hers for a mere fifty bucks and made it look like a million.

This was my first attempt at refinishing a piece of furniture and I was pretty nervous at first, but my tentative paint strokes turned to fast swipes as I became more confident with what I was doing.

This particular piece was a knotty oak wood and had worn brass handles on it. We prefer a more contemporary look with clean lines and a silver finish to our pieces so that is what I wanted to achieve when I refinished this piece.

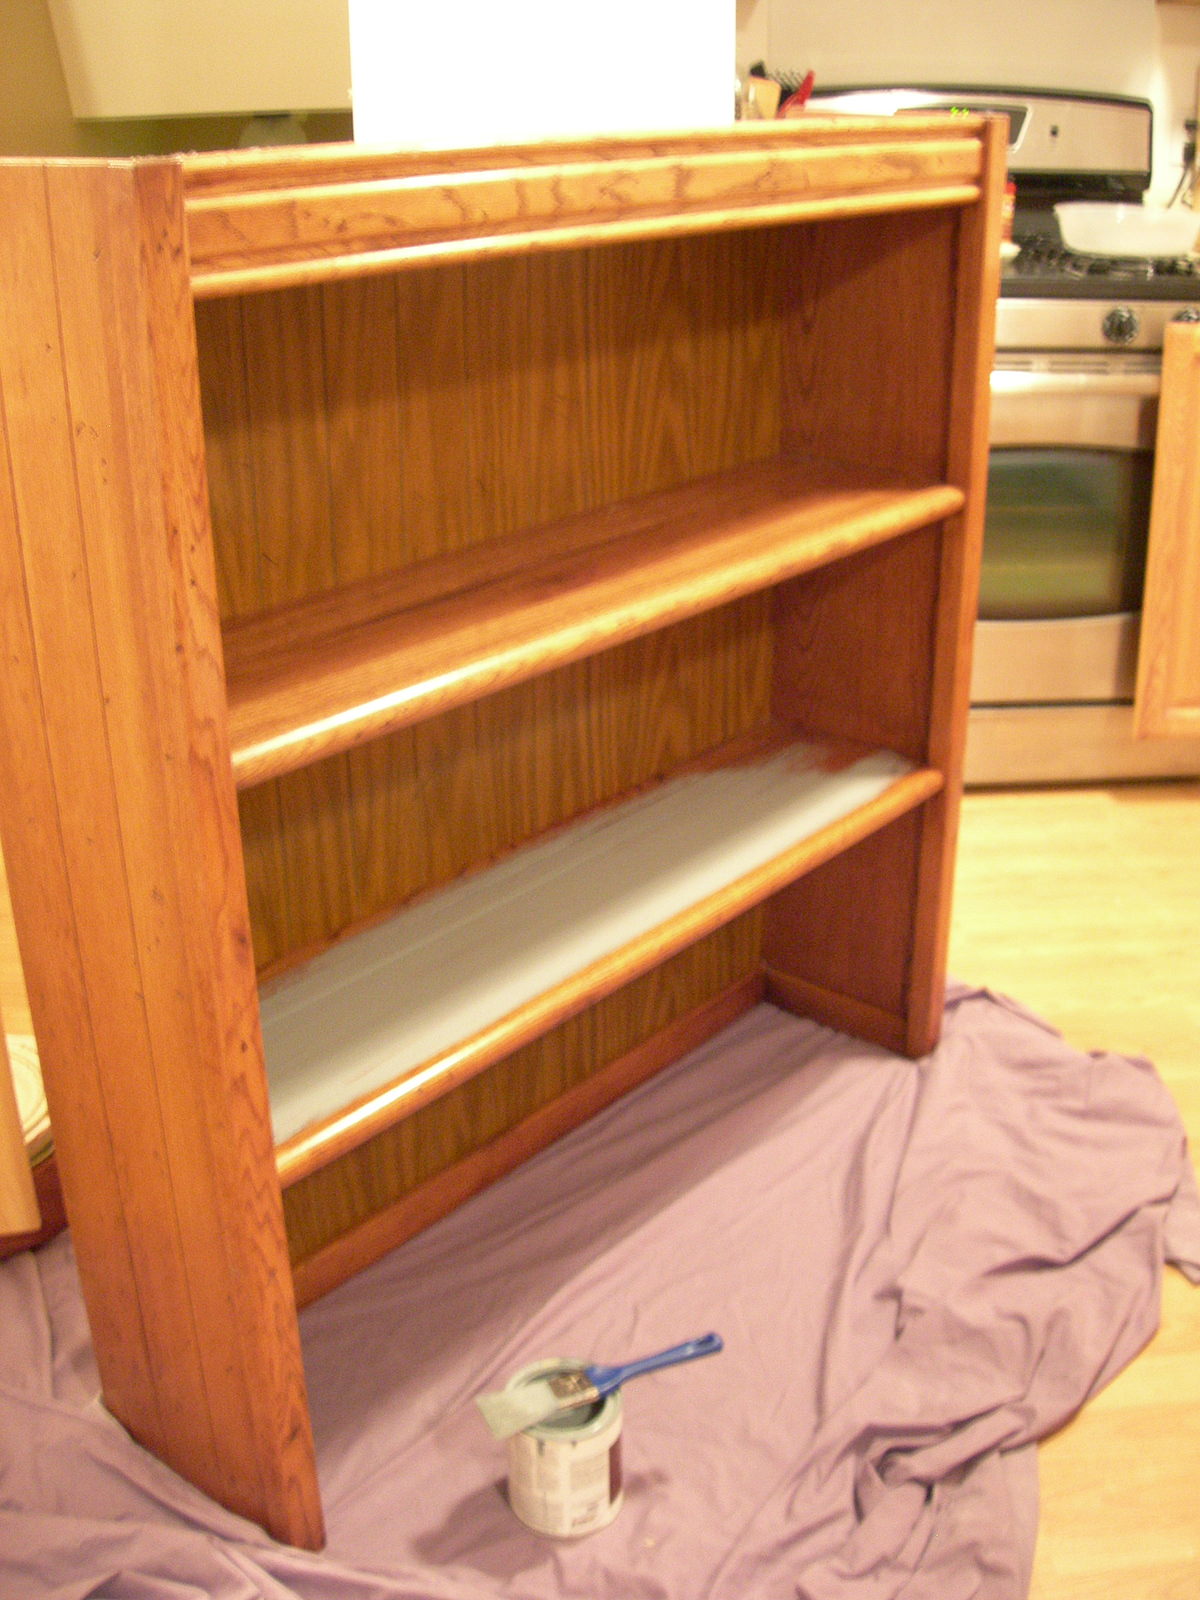
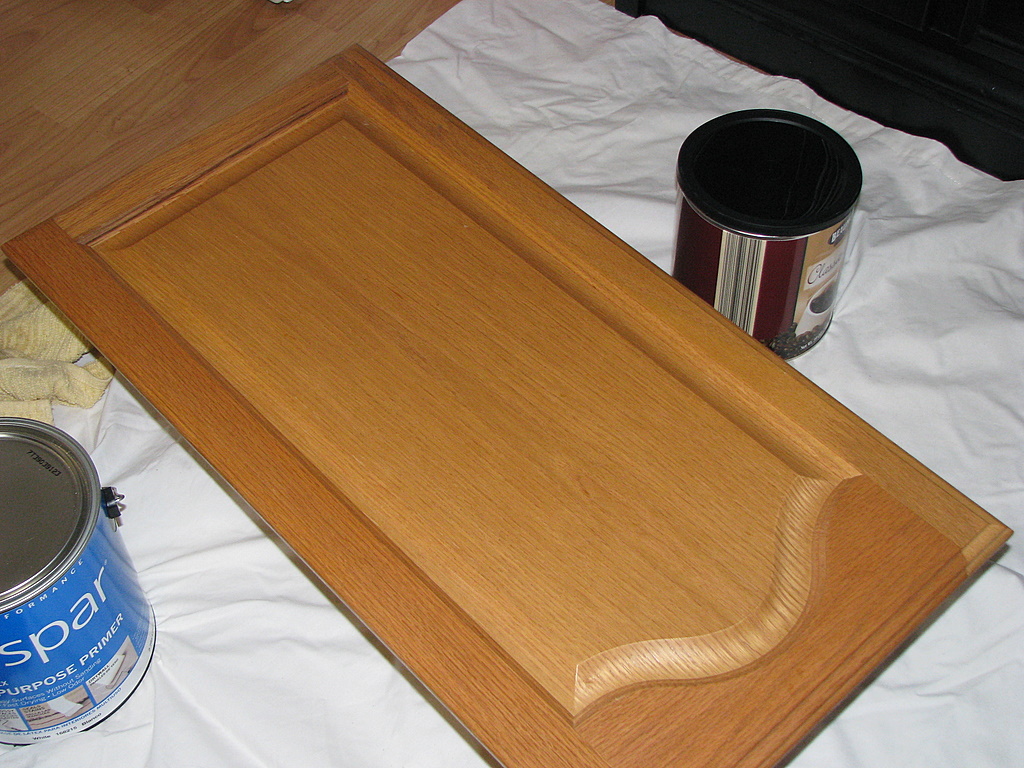
I decided to leave the piece with the knots in the wood, opting to skip the spackling step altogether, and purchased a primer tinted grey to give us a good start on the piece.

I sprayed the unit with a liquid degreaser to get all of the grime and muck of off the wood. Next I primed it with primer and allowed that to dry for a couple of hours. The next step was to put on the black paint and then another coat. Then another coat. Finally, another coat was applied before I could do the final touch-ups to the wood.

The hardware was the type that had been dropped into the a cut-out in the wood of the piece so there was no way that I could replace it. The worn dingy handles received a face-lift with a coat of stainless steel spray paint that was made especially for metal. Fifteen minutes to dry and only four dollars to redo all of the hardware. We are going to be spraying some other ugly brass fixtures around our house that need a little TLC, rather than purchasing new pieces which would cost us a lot more.

I started the project at six o’clock in the evening and painted until 2:30 in the morning. I collapsed in bed and then picked it back up at nine and had it fully assembled with my dishes and cookbooks on it by six the next evening.

It was a bear of a project, but I can’t stop glowing or patting myself on the back for what I accomplished in a single day. The unit is absolutely enormous and I did all of this by myself with the only help from my husband being the help with moving and reassembling it.

The finished product reminds of something you would get at Pottery Barn or Restoration Hardware and I doubt that it would be only $99!

The history of the piece was as interesting as the furniture was itself. A quick discussion with one of the employees seemed to indicate that it was repossessed. After pulling it all apart we found a very mysterious hole that at been cut out of the bottom. A hole that would have no purpose except to hide something. Weed, perhaps? Who knows!

What has been your biggest accomplishment that you have done in or around your house? Have you ever attempted to refurbish a thrift store or yard sale piece? Any blunders refurnishing anything?

A Tutorial On Painting Kitchen Cabinets

Tuesday, March 6th, 2007

We are going to be refinishing our cabinets and I happened upon this great tutorial on how to update them. Has anyone had any experience in this? Have any tips to share?

Organize Your Week – Daily Tasks

Tuesday, June 22nd, 2004

Introduction

I am a big fan of the Flylady website because I think they give such great tips on keeping up with your home. I wish that I could say that I follow them all and have a house that is in fantastic condition all of the time, but unfortunately I have not been that diligent about it. I do take basic principles from the site and try to apply them in my home, but I have worked out a system of cleaning that works for me. Maybe my system will not work for you, or maybe you can take ideas from it and make it your own.

I divide my system by days of the week, but I do have those chores that come up daily that need to be accomplished. If I can get these simple chores done and not even accomplish the day of the week chores, I am pretty pleased with myself. These are the things that I must get done in order for me to feel a sense of accomplishment for the day. You can really tell that I have a toddler because my list seems to get shorter and shorter as my son becomes more active. Here is my to-do list each day:

Amy’s Daily Routine List

1. Make the Bed

As soon as I get out of it and not a second later. If I wait any length of time on this chore, I can guarantee that it will not get done.

2. Do the Dishes & Wipe Down the Kitchen

This includes loading and unloading the dishwasher for the day. I try to unload the clean dishes by the end of the day because this helps me stay ahead of the game for the next day. I also do the dishes as I go when I am cooking and preparing our meals. By doing this, I end up with less dishes at the end of our meals. I wipe down the counters, stove, and appliances before I got to bed. I always have a clean sink at the end of the night as well as a clean dishtowel and washcloth to work with for the next morning.

3. Wipe Down the Bathroom

Now my routine may seem a little ridiculous, but it works for me. I wipe down the bathroom when I am getting ready to take my shower. While I have the water warming up and I am getting ready to hit the tub, I work on wiping down the bathroom instead of wasting that time. Each minute to me is invaluable and this is the perfect time for me to get this done. I wipe down the bathroom with a bathroom cleaner, pour the toilet bowl cleaner in the toilet, and empty the trash while waiting for the water to fill up. After my bath/shower, I then scrub the toilet, clean the tub out (this I only do once a week), and then dispose of the trash as well as the dirty towels. To save time on this chore I keep bags underneath my trash bag in use, that way I always have another bag ready to go when I empty the trash. I also keep household cleaners in each of my bathrooms and in the kitchen. I find that if I have a shelf of cleaners in the room with me, I am more inclined to use them more frequently and I have less of a chance of putting it off. I know this makes me sound like the laziest person in the world, but if those cleaners are not in the same room, then you can forget about me cleaning it. I have a basket of cleaners in almost every room of our house so that I can get my chores done.

4. Do the Bills

I do the bills as they come in because I don’t like to have them pile up on me and to have to do them all at once. As soon as I get the bill I put it together and get it ready to go minus the stamp. In the stamp spot, I write the date for when the bill is due. I put all of my bills in order with the bill that is due first on top. I also separate these bills into two piles with a post-it note. The reason for this is that my husband gets paid every two weeks. Since we are always written down to the last dime I save those bills until he gets paid and send out the first batch with his first check of the month and the second batch with the second check of the month. I have found that this system saves me from a lot of late fees and has enabled me to be on top of these bills. Some people save even more time and money by paying their bills either online or having them automatically withdrawn from their accounts. Personally, timing is everything for me and because we have to be so careful with our money, I don’t want to chance it with automatic withdrawals considering there are times that there just isn’t money in our account to cover the bills.

5. Make Dinner

This is one that I do almost every day with the exception of a meal out once in awhile. I try to do all the prep work in the morning so that I can save my time later in the day. I lay out any meat that needs defrosting, cut up any vegetables that are going in my dishes, and lay out the dishes I will need to prepare the dinner. By doing all of the prep work ahead of time, I find it much easier to accomplish a nice meal within a timely fashion. I have found that the crock-pot is a busy mom’s best friend as well. If I use this, I put everything in it the night before and stick the crock in the fridge. I then take it out in the morning and have it ready to go in plenty of time for the dinner hour.

So now that you know my everyday routine we can begin discussing how to break the other tasks down into more manageable chunks. Once again, you can make your daily tasks fit your daily life. Maybe you have obligations in the evening or during the day that would not allow you to accomplish what I get done. In this case, you feel free to change my schedule around to fit your needs.

Organized Move

Wednesday, June 9th, 2004

Here is a true story of a move from hell.  My husband was offered a job in Indiana, which would require us to make a cross-country move from Massachusetts to the Midwest so we were then faced with the daunting task of moving our belongings. Being in the insurance field, I realized that there were a few important things I needed to do in order to make sure my belongings would make it to our new home without any mishaps.

I researched moving companies and priced them out to make sure that I was receiving the best deal, I asked for my estimate to be made to me in writing, I checked the company with the Better Business Bureau, requested a binder of insurance, and added extra coverage to our homeowner’s policy to cover our contents while we were transitioning into our new home. Doesn’t that sound like an educated consumer?

Well, we were in for the shock of our life when the move actually took place. The cost of the move was about four thousand higher than the original estimate, all of our furniture was ruined (many of which was irreplaceable), and the movers kept on telling us that they were going to move our belongings, but then would not show up on the days that were promised.  To say it was a nightmare would be putting it mildly. So how does an educated consumer avoid living a horror story like mine? The honest truth is that sometimes these scenarios are unavoidable, but it never hurts to be educated and to know what precautions to take to avoid becoming victim of your own move from hell.

Moving Stress

Let it first be said that most of us are going to have to move at least once. In fact, the average American moves between seven and eleven times in their lifetime (depending on your source for statistics) so it will probably hold true that you are going to have to do this a few more times then you realize.  Moving stress is inevitable and even the most organized person is going to be stressed out by the time moving day comes around. Psychiatrists list moving as one of the top trauma-creating circumstances right after death and divorce. With as many times as we move in our lifetime it should come as no surprise that the moving industry generates seven billion dollars a year in revenues. Moving is taxing physically, emotionally, and financially…. so take a deep breath and let’s begin the steps towards an organized move.

Choosing Your Mover

Before you can begin thinking about moving you need to be thinking of whom you are going to hire to accomplish this task or if you are going to try and move yourself.  Obviously, ideally you would like to hire someone else to take care of this for you, but many of us cannot afford the luxury or there are those of us who just don’t trust anyone else with our belongings. Although, financially speaking, you may think that moving yourself is in your best interest, you really must weigh your time, the gas for the vehicle, the rental of the vehicle, the mileage on the car, and the loading and unloading, versus the amount paid for someone else to do it.

Dave Ramsey, who wrote, “The Complete Idiot’s Guide to Smart Moving” came up with his own Unreal Formula for Pricing the Do-It-Yourself Move.”

His formula for this was:

Miles x cubic feet x days on the road x current price of a Big Mac Meal + distance between your location and Puckerbrush, Nevada + distance required to avoid driving by Aunt Martha’s / rental fee for videos in your new hometown. Reverse the formula if you cross a longitudinal line during your move. Margin for error: 100%.

Of course this formula was just a joke, but as with all moving expenses, it is very hard to gauge the true cost of the move.

Should you decide to hire a mover, you have to begin researching companies to find out which mover is going to provide the best service for you as well as the best price.  A good resource for you when choosing a mover is your friends who have experienced first-hand what a move with a particular company is like. Upon getting a few referrals, then you will want to check with the Better Business Bureau to make sure that the company does not have any claims against them.  You really want to research the company well and request references from each of the companies to receive other first-hand accounts on the mover.

The best advice I can offer is to check the company and then check the company again. I think George E. Bennett put it best at the American Movers Conference when he said, “You have people wanting to move all their earthly possessions, and they just look in the Yellow Pages and call somebody. It’s amazing. The truck pulls over; they take everything and drive away. That’s fantastic faith in your fellow human beings. A lot of people just don’t do enough checking.

Getting Your Estimate

I find this to be one of the trickiest parts of moving because it is so hard to estimate what you have especially when nothing is in boxes and you are supposed to estimate how many boxes you anticipate having along with the estimates for furniture and all that you have in storage.

The most important thing you need to know is that you must get your estimate in writing- this is a must. If a company will not put the estimate in writing, then this is not a company that you want to work with. The most reliable estimate you can get is if they send a representative to your home to come out to do the estimate. The reasoning for this, of course, is that they will be able to provide a very accurate estimate and usually are held within a certain percentage limitation for how high they can raise the price.  Many movers, in fact will guarantee their estimate if they compete a home survey.

If you are unable to get a home estimate, you will have to tally up everything as best as you can.  Go from room to room making a list of all appliances and belongings. Make rough estimates on the amount of boxes that you think you will have and I think it is always better to overestimate rather than underestimate because you probably have more than you think you have. Use this list as a guideline for the moving company to come up with their estimate. Don’t forget to include things like bicycles, exercise equipment, large screen televisions, and stereo equipment.

There are two types of estimates that you can request- a binding or a nonbinding estimate. A binding estimate is a guaranteed final price estimate. Most companies charge you extra to have this type of estimate, but Consumer Reports magazine recommends going with this type of estimate “even though they can run slightly higher than nonbinding ones.” A nonbinding estimate is just an estimate with no guarantees. The final cost is then determined primarily by the actual weight of the shipment multiplied by the distance traveled.

Once you have received your estimates and you have chosen your mover after thoroughly checking them, it is time to begin gathering up some paperwork you will need to protect your belongings.

Insurance Not Just For You

Many people do not think to contact their own insurance agency, let alone their mover’s insurance agency to make sure that they are carrying the proper coverage. This is one of the most important steps in your move because if you do not have the proper insurance coverage and something happens to your belongings, you will be kicking yourself later.

First, contact the mover’s insurance agency and request that they send you an Insurance Binder, which will show what type of coverage they have. Usually this type of coverage is minimal at best. Usually it will say that it will insure something like fifty cents per pound. What does this mean? Well, let’s say that your stereo system weighs ten pounds, then their insurance will pay you five dollars if it becomes damaged. This insurance is not going to truly protect you if your belongings are ruined so that is when you call your own insurance agent and find out if there is any special coverage endorsement that can be added to your own policy to make sure that your belongings are safe. This endorsement is usually very expensive, but worth it when you have thousands of dollars of belongings on a truck that could not make it through the move.

Packing Up

You can save yourself a lot of money if you pack your belongings yourself. Be creative in your packing to save money. Here are a few ideas for frugal ways that you can pack your belongings.

  1. Use all of your dishtowels, bathroom towels, and linens to help pack up precious stereo equipment and other electronic equipment.
  2. Another frugal wrapping material is newspaper.  If you do not have a lot of newspapers on hand, ask your friends and family to save their papers for you. You can also check your neighbor’s recycling boxes on recycle day and ask if you can take their newspapers from them to meet your packing needs. Finally, another place to check for newspaper is with your local newspaper’s office. Many times they offer newspaper that has not been printed on to the general public if you ask.
  3. Call around to your local hardware and grocery stores to see what day they receive their shipment and ask if you can take some boxes off of their hands. Be careful to not overload these boxes and make sure that they are made of very sturdy cardboard when loading with heavier items.
  4. Use all of your baskets, hampers, and suitcases to fill with clothing and linens.

When packing your belongings, it is always good to have a system that identifies the box clearly to both the movers and yourself when you are unloading the truck. On the outside of the box (both on the top and the side) write the room and place a sticker next to the label to color-code it to a room. When you arrive, hang a matching balloon outside of the room or other easily identifiable color-coded object that will direct the mover to the room that you want the box placed. Nothing is more frustrating than to have tons of “mystery” boxes that you have no idea where they go or what to do with them. This is especially true when the “mystery” box weighs about five hundred pounds. It really does pay to clearly label your boxes.

Payment and Delivery

The mover is contractually bound to pick up and deliver your shipment on the terms set in the bill of lading. Usually your mover will provide a range of dates of when they expect to deliver your belongings.  The mover is required to notify you by telephone, telegram, or in person if pickup or delivery will not be on schedule. You want to make sure that you are always available to the mover by providing numbers of cell phones or where you are planning to stay so that your belongings do not end up in storage and they force you to foot the bill for them being put there.

Make sure that you hang on to all your bills during this time that way if you are claiming the move for taxes you will have all of the paperwork you need to complete them. They will also come in handy if you have to incur any costs because of your belongings not being delivered on time that may have to be recovered from the moving company’s insurance policy.

Payment, like the estimate, is another tricky part of moving when dealing with a moving company. Most movers will require your payment before they unload the truck and it is important to know that they will not accept any personal checks. Most will accept payments that are made by cash, certified checks, money orders, travelers checks, and sometimes through a credit card.

If you chose to go with a nonbonding estimate and the mover asks for more than the estimate you are responsible for paying ONLY the estimate plus ten percent before unloading, and the remaining balance is to be paid within thirty days. You are also responsible for any services not included in the estimate. I wish that we would have known this when we had made our move, so I hope this helps a future new homeowner from making the mistake of feeling forced to come up with payment the day that you have received your belongings, especially when the estimate is four thousand dollars shy of what was originally quoted.

Another important thing that I wish we had been aware of is to NEVER sign a receipt or delivery paper until you have checked to make sure that all of your belongings are intact and have survived the trip to your new home. If you discover damage to any of your belongings, make sure that you make a note of it on both your paperwork and the mover’s paperwork. If you discover damage after your mover has left, leave everything in the box and contact the moving company immediately to find out how to proceed. I think a red-flag should have went up when the mover unloaded and left without helping to put any of our furniture together or checking to see if all of our belongings were okay…it seemed as though they didn’t want to see our horrified faces when we opened up our boxes of broken goods and caught glimpse of our ruined furniture.

Recovering From a Bad Move

Let’s say that you end up having a bad move- what is the next step to take in order to recover financially and whom do you report this information to?  If your move does result in the loss of or damage to any of your property, you have every right to file a claim against the mover to recover money for the loss or damage.

The first step that you will want to do is make note of any damages to your furniture or belongings. A good thing to have on hand in order to back up any of your claims is a digital camera. Take several pictures of everything and write down very clearly what exactly has been damaged and where it was damaged. Keep all of this information together and then contact your moving company. You will want to call them as soon as you find the damage and send them copies of the documents and pictures that you took of the damage. All movers are supposed to respond promptly to complaints or inquiries from customers. They have thirty days to address your claim. Should they not address your complaint, then you need to work your way up the corporate ladder and ask to speak with the person in charge of the moving company. If they decided not to address your complaint, then you need to move up to a bigger organization.

First, contact your homeowner’s insurance agency and explain to them what happened. If you carried a special coverage endorsement as was recommended by MomAdvice, then you should be able to have your insurance company handle the claim. Send your insurance company the documentation, and allow them the dirty work of trying to get the money from the moving company.

If you did not carry this insurance as was recommended and your mover is not addressing your claim or has denied the claim, then you have sixty days from the date of your move to write to the American Movers Conference and request arbitration.  Their website is http://www.amconf.org and you can fill out a form online. If your dispute meets their guidelines, they will notify the mover and send you the forms to fill out. This method of getting what is owed to you does not come without a price tag, however, and you will need to know that in order to do this that you will be responsible for half of the cost of the arbitration proceedings (total cost $150). The arbitrator will review your paperwork and evidence that you have and then reach a decision within sixty days.

Dan Ramsey explains it best in his book (“The Complete Idiots Guide to Smart Moving”) in how to figure out what is applicable and what is not for arbitration.  “The arbitrator’s decision is legally binding on you and the mover.  However, the arbitrator has jurisdiction only over claims for loss or damage to the household goods, and their transport. The arbitrator can’t rule on claims such as loss of wages, punitive damages, or violation of law. In addition, the amount of any award probably won’t exceed the carrier’s liability noted in the bill of lading.”

In the meantime, you can also contact the Better Business Bureau to process a complaint with them. It is important to do this not only for yourself, but to help protect other people from living the nightmare that you have just lived through. Many times, companies are more apt to work with you if their reputation is on the line and they realize that they have the potential to lose business by not processing your claim.

In the case of a bad move, it truly pays to be diligent.

Conclusion

Moving is never going to be easy, but I hope by arming you with some of this great information, that your move will go much smoother and that you will know what to do in the case of a bad move.