Archive for the ‘Home’ Category

How to Set the Perfect Thanksgiving Table

Tuesday, November 6th, 2012

Setting a great Thanksgiving table is something anyone can do with the right tools in their entertaining supplies, a few new additions, and a little bit of thriftiness. Today’s perfect Thanksgiving tables is particularly important to me because today I am sharing with you a way that you can make your table and earn money for your favorite charities in the process.

This month I am partnering with Pure Charity to share about their incredible mission to give back to charities through the holiday shopping that you already happening to be doing. 

What is Pure Charity?

Pure Charity is a simple, but awesome concept for giving back to those causes you care most about. Basically, you install a simple toolbar into your web browser and then it alerts you with a small banner at the top when a store you are shopping with has a partnership with Pure Charity. Click on that little button and you are making a percentage deposit into your Giving Fund. Your Giving Fund can then be applied to the charities that are important to you and that you have a desire to support.

Pure Charity asked me to show everyone what could be done via their partners and gave me a small budget to get started. This month I am sharing ideas for setting the perfect Thanksgiving table, to sharing Thanksgiving recipes with you, and showcasing some fun ideas for keeping the kids entertained. All supplies were ordered through their partners and I have created a Giving Fund for the charities that are most important to our family. At the end of this series, I will share with you just how much I was able to earn through this spending.

How to Set the Perfect Thanksgiving Table

Mix Texture and Color Into Your Basics- I have always had a fondness for my white dishes simply because they match everything that you want to layer on top of them.  (West Elm Napkins)

Spice up your basics with a bold colored napkin in a fresh autumn shade. I love to mix texture in by tying napkins off with scraps of burlap instead of buying napkin holders. If you don’t have any burlap, a piece of twine or yarn would be just as lovely. 

Mix in One New Element to the Tableware- In a perfect world, we would have loads of storage and dishes for every season. Most families just don’t have this type of limitless space in their kitchen. Instead of buying new dishes for each holiday, focus on adding one new element each year to the existing pieces you already have.

My white dinnerware is perfectly paired with these elegant Thanksgiving dessert plates (West Elm Dessert Plates) as a nod to the season and they take up far less room than an entire set of dishes.

Have Your Kids Create the Centerpiece- My kids love helping me in the kitchen and one way they can assist with the Thanksgiving table is to help create the centerpiece.

I have been dying to have a chalkboard in my kitchen and using this as a centerpiece for our table was the perfect excuse for the purchase. Center this chalkboard (Pottery Barn Small Chalkboard) on your table and then give your kids the assignment to fill this with all of the things that they are thankful for.

Once Thanksgiving is over, this will be proudly hanging in our kitchen for all of our family announcements!

Decorate With Nature- Right now there might not be a lot blooming, but if your yard is anything like ours, there are plenty of rustic and beautiful elements that could be added to your table.

I pruned one of my flowering bushes and used the clippings as a filler for three vases.  (West Elm Vases). I love how these branches add dimension to my table and skip the expensive vase fillers.

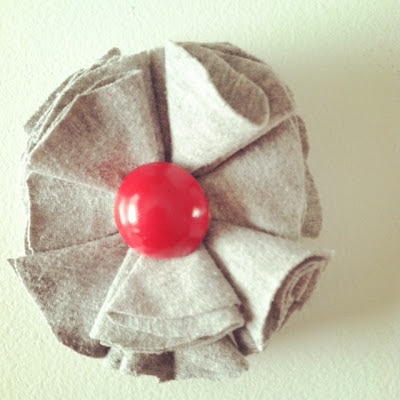
Add Your Own Personal Touch- Everyone has their own personal touch that they can add to their centerpieces. For you, it might be your mad spray painting skills. For me, it is the ability to knit yarn into leaves and flowers. It might not sound like a very useful skill, but it certainly helps when it comes to fall centerpieces. I relied upon this knitted leaf pattern and these easy garter stitch flowers for knitted embellishments to my sticks.  It will take me awhile to knit all of this, but I promise to share more once it is done!

My husband may or may not have made fun of me when I said the branches needed “whimsical leaves,” but even he agreed that they looked pretty sweet once I finished this project.

After these purchases to dress up my Thanksgiving table, I was able to bank $7.22 in my Giving Fund for my favorite charities through Pure Charity

I hope you love these ideas for setting the perfect Thanksgiving table and I look forward to sharing more about my partnership with Pure Charity in the coming weeks.

I am working with Pure Charity, and Pure Charity has provided me with compensation for these posts. My participation is voluntary and opinions are always my own.

Pin It

How to Make Chalkboard Pumpkins

Monday, October 15th, 2012

If there is one thing you know I love around here it is chalkboard paint. Chalkboard painted pumpkins are a fun way to avoid the pumpkin carving and allow your kids to unleash their inner Picasso. Chalkboard pumpkins are easier to make than you might think and today I wanted to show you how to transform ordinary pumpkins into Chalkboard Pumpkin People that lets your kids be creative while creating a unique accessory to your front step!

Let’s get started with creating your very own Chalkboard Pumpkin People.

Supplies Needed (all found at Walmart):

1 real pumpkin

1 can of chalkboard paint (over in the hardware department)

Masking or electrical tape (this is optional, I ended up not covering my stem)

Wet wipe

White Chalk

1 Skeleton or Witch Body (these are found in the Halloween supplies by the pumpkin carving tools, $7.97 each)

How to Create Your Chalkboard Pumpkin

1. Wipe down your pumpkin well with a wet wipe or damp paper towel to remove any dirt or debris.

2. Hold your can 10-14 inches away from your surface and spray in a sweeping motion side to side with a slight overlap around your entire pumpkin. Follow this pattern horizontally and then vertically. Wait fifteen minutes or so and then apply another coat. You need two coats to create your chalkboard surface.

3. Allow your pumpkin to cure. Do not use any chalk on this for 24 hours! The chalkboard paint will need to harden and will not be ready until then. If you try it before it is ready, it will just scratch the paint through, creating marks and exposing the orange on your pumpkin.
Let your little artists go to work with their chalk. Before giving it to them, make sure to rub down the corners so that they don’t scratch their pumpkin’s surface. I also reminded them to draw gently on these so their paint would remain intact.

Mistakes made? No problem! These can easily be erased and started over again. We had many false starts before deciding on our perfect faces.

Here are our finished faces that the kids drew (the witch’s creator might have had a little help from her Dad). We really loved these cute little faces and couldn’t wait to put them on the pumpkin bodies.

The best part about these though is that you can erase these and use them over and over again through the Thanksgiving holiday with written notes of thankfulness or a countdown to the holidays.

Of course, if you are more of the carving pumpkin type, Walmart has you covered with loads of great carving tools this year!


Don’t know what to do with the rest of that can of chalkboard paint? How about a DIY Lunchbox Creation Station, Chalkboard Food Label Frames, or Conversation Bubble Cookie Jars…just to name a few!


I am a part of the Walmart Moms program, and Walmart has provided me with compensation for these posts. My participation is voluntary and opinions are always my own.

Pin It

How to Make a Duct Tape Pumpkin

Sunday, October 14th, 2012

Carving pumpkins isn’t for everyone and I am so excited to share with you this easy craft for a duct tape pumpkin that you can pull out year after year. You may have never even noticed the patterned duct tape lurking in the craft aisles, but this is one easy & inexpensive craft material with endless possibilities for a customized duct tape pumpkin that can match any room in your home.

Supplies Needed:

1 craft pumpkin

1 roll of patterned duct tape (Duck Brand)- available in the craft section of Walmart

1 roll of solid colored duct tape (Duck Brand)- available in the craft section of Walmart

Hot glue gun & glue sticks

Scissors

To create your chevron pumpkin base:

1. Twist off the pumpkin stem to create an even surface on top for covering your pumpkin with tape.

2. Pull a strip of duct tape off the roll that will cover the entire pumpkin. Attach it to the pumpkin, doing your best to try not to wrinkle it.

3. Continue covering the pumpkin until it is fully covered with the duct tape, doing the best you can to line up the patterns. If you have wrinkles, overlap the duct tape to cover any minor flaws.

4. Place a dab of hot glue on the top and reattach your pumpkin stem, holding it  in place for a couple of minutes to secure it.

To create duct tape rosettes for the top of your pumpkin, you will need to do the following:

1. Measure a 10″ strip of your solid-colored duct tape and cut it off the spool.

2. Fold the duct tape in half (sticky sides in), doing your best to line the tape up evenly. If you don’t get the tape perfectly even, just trim the edge until you don’t see the white anymore.

3. Twist the tape to create a tight center to the rosette.

4. Begin twisting your tape as tightly or as loosely as you would like to create your rosette. Add a dab of hot glue periodically between the twists to secure it all together.

5. Once you have finished your rosette, add a dab of hot glue to the bottom and secure it to the top to create a rosette “leaf.”

6. Repeat this process again and create one more rosette. Secure the second rosette next to or slightly overlapping the first rosette to add your second rosette “leaf.”

Create your own pumpkin with your family and you could win $1,000 in the Stick or Treat Duck Brand Jack O’ Lantern Contest. The company offers over 100 colors, prints and licensed prints such as Hello Kitty and each roll of tape retails for $3.37 at Walmart stores!

Looking for more pumpkin crafts? Be sure to check out my tutorial for my Painted Address Pumpkin Topiary and Decoupaged Pumpkins that you can do with more of these fun faux pumpkins!


I am a part of the Walmart Moms program, and Walmart has provided me with compensation for these posts. My participation is voluntary and opinions are always my own.


Pin It

Painted Milk Allergy Mugs

Tuesday, October 2nd, 2012

In our family each family member seems to need to drink a different variety of milk. I wanted to create these painted milk allergy mugs for our family and wanted to show you this easy fifteen minute craft that might help your own family with the dinner hour.

Without going into an annoying list of all of our health issues these days, we have all had to make some dietary changes for our health and that means three varieties of milk in our fridge. I recently snapped a picture on Instagram (find me on there under momadvice!) and commented that our family doesn’t need an additional fridge in our garage for beer, but one just for all of our milk. It is a game of milk tetris in this fridge. I knew we weren’t alone, but it surprised me just how many friends commented that their fridge looked just like ours.

Pouring three varieties of milk each dinner hour can get confusing. One mix up could really ruin someone’s day… literally.  Since one of us would rather not spend the afternoon in belly pain if they grab a cup of whole milk instead of their almond milk, I thought it was time to make labeled cups for each of us. I had been dying to try out Martha Stewart’s new line of paints at Michael’s so I headed over there to grab the supplies and found some inexpensive glasses at a local discount store to complete the supplies for this project.

How to Stencil Your Glassware

1. Clean your glasses with soap and water, then rub with rubbing alcohol to remove any remaining residue on the glass.

2. Apply the reusable adhesive stenciled letters for your milk labels. If you have a shorter cup, feel free to substitute words like, “almond” or “coconut” with the word “nut,” to save on space.

3. Pour a small amount of paint on a disposable plate. Using your brush, apply a thin layer of paint, doing your best to stay within the stencil. If needed, apply a second coat.

4. While your paint is still wet, carefully peel off stencil.

5. Allow the paint to dry for one hour and then place the glasses on a cookie sheet.  Set the glasses in a cool oven.  Set oven to 350°F and bake for 30 minutes.  Glass must heat gradually with the oven to avoid breakage.  Do NOT place glass in a hot oven.  After 30 minutes, turn the oven off.  Allow glass to cool completely in oven.  Wait 72 hours before using.

6. Clean all stencils, rushes, and tools immediately after using them, before the paint has dried. You can use a stencil cleaner to clean. Let dry. Attach backing to stencils and then store for another use.

It’s that easy, friends! I hope it helps another family struggling to keep track of the milk cups! Of course, I can’t wait to do some other fun projects with these stencils! Have a great day!

Pin It

Painted Address Pumpkin Topiary

Tuesday, September 25th, 2012

One of my favorite things about Fall is the fun crafts that I get to do with all of those beautiful Fall pumpkins! Today I wanted to showcase an easy painted address pumpkin topiary that you an create with just a few supplies from your local Walmart store. This painted address pumpkin topiary would the be the perfect way to dress up your porch, porch step, or a little corner in your room.

Craft Supplies Needed

2- 75 inch pumpkins (any color)- $4.87 each

8″ pumpkins (how ever many you need to complete you house number)- $4.87 each

Black Plaid FolkArt acrylic paint (I chose the shiny variety)- $1.77

4″ Plaid letter stencils ($3.77)

Stencil Brushes ($5.47)

Clear tape (in supplies)

Hot glue gun & glue sticks (in supplies)

8″ pot (I found mine in the clearance section of the store for $11.96)

1. Begin by twisting off the stems on all of the pumpkins that will be going on the bottom of your topiary. You will want to leave your top pumpkin (the 75″ one) with the stem intact. All the other stems can come off.

2. Center your stencil on your pumpkin and attach it with clear tape. Make sure when positioning your numbers that when you stack the pumpkins, you will be able to see the number clearly in the center. You will especially want to do this for your bottom pumpkin since it will be wedged in your pot.

3. Trace your number with a pencil. Remove your stencil.

4. Pour your acrylic paint in a disposable cup or bowl. Using a small paintbrush, carefully paint your number on your pumpkin. If you make an error, use a cloth or a damp Q-tip to remove any painting errors. Set your pumpkin aside, and repeat the process on each of the other pumpkins until you have stenciled your address number.

5. Wedge your 75″ pumpkin into the pot. This should be a tight fit so you will not need to glue or attach your pumpkin into the base. Stack your next pumpkin and carefully hot glue in each spot where the pumpkins are joined together. Hold the pumpkins together to secure for a minute or two. Repeat this process until you reach the top of your pumpkin stack!

Stand back and behold your pumpkin glory! Isn’t this just the cutest thing ever? I know all of my neighbors are going to be so jealous!

I hope they are half as impressed as my cat.

Seriously.

Looking for more Fall crafts? Be sure to check out my round-up of the Best Fall Crafts on MomAdvice. I hope you will find it inspiring, friends!


Pin It

Fall Into Fall CRAFTS with MomAdvice.com

Tuesday, September 18th, 2012

With Fall upon us, I suddenly get the urge to start tackling some crafts that have been on my to-do list for the year. Fall is also a great time to get a jump start on holiday crafts that you might want to tackle this year for our family and friends.

Today I wanted to highlight a few of my favorite crafts and DIY projects for the Fall season that have appeared on MomAdvice.com!

The GAP-Tastic Cowl

Cowls are still highly fashionable this year, especially the warm and bulky variety. I love this easy cowl that can be created with inexpensive yarn in your favorite fall color to add a little spice to a tired fall jacket you might have in your closet. If this cowl doesn’t get you excited to start knitting, be sure to check out these seven easy scarf and cowl patterns to knit this year!

Easy Felt Fabric Brooch

You are going to fall in love with this beautiful felt fabric brooch and it would be the perfect addition to your fall jacket this year or as an embellishment to last year’s winter hat. Check out this tutorial for these easy brooches!

Anthropologie DIY Ruffled Lampshade

Perhaps one of my most favorite projects in our house was this burlap ruffled lampshade made from inexpensive burlap. If you are wanting to dress up a tired lamp for fall, be sure to check out this tutorial! This project was so easy to create and would be so cute on a side table, in your office, or a cute way to spruce up a craft room.

DIY Chalkboard Food Label Frames

All you need is a dollar store frame to get started with this easy craft. These food label frames would be a great addition to your fall entertaining and tailigating this year. The best part is that this craft can be done in fifteen minutes, making it a great fast to create

Knitted Dishcloths 

If you are new to knitting, dishcloths are the perfect project because they are like swatches of pattern rather than tackling a larger project piece. On top of that, it can make you feel braver doing patterns with more complexity and learning new knitting techniques. For the first few months after I learned how to knit, I knit a lot of dishcloths. I happen to think these are one of the best projects for Fall, and they also happen to be a fabulous little hostess gift for the holidays!

Yarn Wreath (for all seasons)

It’s time to dress up your front door for Fall! Yarn wreaths are easy to create with a mere ten-fifteen dollars  in supplies and a whole lot of your own individual creativity. Find out how to create this easy yarn wreath that can be dressed up for all of the seasons with this simple yarn base!

Painted Tabletops & Reupholstered Chairs

If your kitchen table and chairs are looking a little tired, Fall is a great time of year to spruce them up!  Last Fall, I painted my kitchen tabletop and reupholstered my kitchen chairs and one year later, they are still going strong!

Oatmeal Cookies & Milk Bath

There is nothing I love more than a good long soak in the tub in the evenings when the weather is chilly. I highly recommend this easy oatmeal bath soak you can create in your kitchen. I call it Oatmeal Cookies & Milk because it blends together the ingredients of an oatmeal cookie with powdered milk to make a soft & soothing bath for anyone who has sensitive skin.

Coffee Filter Posies

Looking for a cute addition to a side table for Fall? I highly recommend making these cute coffee filter posies for a fun Fall decoration. Dyed in yellows and oranges, they would look beautiful in a jar on your kitchen table or a cute way to dress up a dresser in your bedroom.

Decoupaged Pumpkins

I love to create inexpensive decorations for fall and these easy decoupaged pumpkins are a craft that I have been wanting to try for awhile after spotting this technique in an old issue of Better Homes &  Gardens Magazine. You won’t believe how easy it is to decoupage a pumpkin and since they were so easy to create, I made two to adorn each side of my console table.  This pumpkin is made with paper napkins, if you can believe it, and some other inexpensive craft materials you can pick up at your local craft store!

Charity Knitting Craft Projects

This is going to be the season when my friends that knit & crochet really spring into action for hat drives for those in need! One things I am proud and humbled to do is to knit for those in need. You will find loads of fun projects to knit for those in need in the Knitting section of our site. While you are enjoying the latest season of Fall shows on the television, add a little something for someone in need to your knitting needles this year!

What is your favorite Fall craft project you have tried from our site? I would love to hear from you!

Pin It

Dollar Store Craft: DIY Chalkboard Food Label Frames

Wednesday, September 5th, 2012

If you are a regular reader here, you may have been following my obsession with chalkboard spray paint for crafting on the blog. Today I wanted to show you how I used chalkboard spray paint to transform dollar store frames into DIY chalkboard food labels for parties and entertaining.

For this craft you will need one can of spray paint in your favorite color, 3.5 in x 5 in frames (I got ten of these), and a can of chalkboard spray paint. I actually am using the same spray paint that I used for our lunchbox creation station labels and my conversation bubble cookie jars that I created this summer. One bottle will really go a long way!

Take the frames apart and lay them on a drop cloth to spray paint. For the best spray paint results, shake the can for one to two minutes and during use.

For the frame itself: Hold your can 8 inches away from your surface and spray in a sweeping motion side to side with a slight overlap. It has always been my experience to go thin with the paint, allow it to dry, and then to add another layer for the best results and minimal drip. Allow the paint to dry for one hour. Flip the frames and then repeat the process on the back of the frame. Allow it to dry for another hour.

For the glass inside: Shake the chalkboard paint can vigorously for two minutes. Hold can 10-14 inches away from your project and begin spraying. Spray a thin coat in a sweeping motion beginning off the surface and continuing off the other side. Follow this pattern horizontally and then vertically. Wait fifteen minutes or so and then apply another coat. You need two coats to create your chalkboard surface.

Most importantly though, do not use any chalk on this for 24 hours! The chalkboard paint will need to harden and will not be ready until then. If you try it before it is ready (as I promptly did), it will just scratch the paint through, creating marks and exposing the glass of the frame.

Once everything has dried, you can put it back together. Now it is time to prep your mini chalkboards.

Rub a piece of chalk from side to side and then up and down to prepare your chalkboard surface. Now it is ready for your food labeling at your next party, tailgating event, or holiday feast!

Showcase how you now write like a first grader because you no longer write anything and only type. Jealous?

Tomorrow I will share with you some of these yummy recipes that I have been working on for the tailgating season! In the meantime, happy crafting with this fun dollar store craft!

Pin It

10 Unique Ideas for Projects To Do With Goodwill T-Shirts

Friday, April 13th, 2012

If there is one craft material I love, it is t-shirt material.

If you have ever been in a Goodwill store, one thing you will notice is that there is an abundance and plethora of donated t-shirts in every size, style, variety, and color.
The next time you visit your local thrift store, don’t just visit the t-shirts in your own size for ideas.
Look in the Men’s section and in the larger sizes to find t-shirts that will offer you extra and a generous amount of craft material for the same amount of money as your smaller t-shirts.
Try to select t-shirts that are not as faded or that have fabric pills on them for optimal material for your projects.
Today I wanted to share with you ten of my favorite projects that I have found to do with old t-shirts from some very amazing bloggers.
I love that all of these ideas are extremely unique and that most require no sewing skills at all.

T-Shirt Scarves

I have seen lots of varieties of t-shirt scarves on many different blogs, but I absolutely love this DIY Dish episode you can watch to discover three different varieties of scarves you can make from an old t-shirt.
My favorite is the one, pictured above, with a bright pom-pom trim.

T-Shirt Bibs

If you are looking for a fast sewing project that would make a fun baby gift, then these t-shirt bibs are the project for you.
For little boys, you could look for their dad’s favorite sports teams and for little girls you could look for a fun t-shirt with sparkly letters or flowers.
Don’t forget that these could also be embellished with rick-rack, ribbon trim, or an easy t-shirt rolled rosette flower.

T-Shirt Bracelets

There are many varieties of cute bracelets that I have seen using t-shirt materials, but this one has to be one of my favorites.
This twisted knot bracelet can be made from just a single t-shirt or it could be made with a mix of prints or a mix of solid colors.
I can’t wait to make some of these for myself and my daughter this summer.
Nothing could be cozier than a gently worn t-shirt bracelet on your arm!

T-Shirt Produce Bag

Nothing could be greener than carrying your groceries in a cloth grocery bag…until you start using recycled materials for your bag.
Even if you are a beginning sewer, this simple produce bag can easily be created for a visit to the grocery store of your local farmer’s market.
I think these would be fun to make in a variety of pastel colors or to give as a gift to someone special in your life.

T-Shirt Pom Poms

Looking for a fun way to dress up your home for the warmer months?
I absolutely love these adorable t-shirt pom poms for a fun way to add a pop of color to your mantle, as a fun adornment to a wreath, or hung in a gathering on a door handle or front door.
The best part about this project is that no sewing skills are required for this one!

Petal Tees

I have seen many, many refashions of old t-shirts, but I think this Petal Tee is simply genius because the petal trim on this t-shirt is made from a variety of t-shirts, adding a cute pop of color for the Spring.
Visit your favorite thrift shop on their half off days and stock-up on a fun mixture of colors for a fun addition of color to your wardrobe.
If you are looking to add a little of the fluorescent color trend to your wardrobe, this would be a great way to do it without having to commit to an entire fluorescent piece!

T-Shirt Yarn

My favorite craft in the world is knitting and I love the idea of using t-shirts to create fun yarn for my projects.
This would be a fun gift to give to a friend that knits or crochets.
If you can use a pair of scissors and cut in a relatively straight line, then you can do this craft and use this yarn for a variety of projects!

T-Shirt Aprons

I have a true affection for aprons and have a little collection of my own thrifted aprons that I have acquired from Goodwill and antique shops.
I had never thought to use t-shirts to create aprons, but I think this t-shirt apron is the cutest thing I have ever seen.
This would be a cute craft to make for yourself or for your helpers in the kitchen.
The best part?
No ironing required and it can handle the messes that you might make in the kitchen.

T-Shirt Necklaces

I love t-shirt necklaces for adding a splash of color to your neckline.
This rolled rosette t-shirt necklace is a fun way to add some feminine details to your outfit very inexpensively.
I think it would be cute to make the t-shirt bracelet in a coordinating color and one t-shirt should more than cover both of these cute projects.

T-Shirt Flower Pin

Our tenth project is actually a fun t-shirt project we did here on the MomAdvice blog.
Be sure to visit my tutorial on creating a cute t-shirt flower pin made from an old t-shirt and spray painted clip-on earrings.
This is so cute and would be a fun addition to a Spring top or jacket.

What are your favorite craft projects to do with old t-shirt?

Don’t miss these craft ideas from MomAdvice.com:


8 Fun Sweater Crafts


Easy DIY Fabric Flower Wreath


Easy Paint-Dipped Spoon Sets


DIY No-Sew Reversible Cloth Napkins


Sign up for the MomAdvice newsletter


Pin It

Valentine’s Day Yarn Wreath

Tuesday, January 24th, 2012

Since Valentine’s Day is just around the corner, I thought it would be fun to decorate my little yarn wreath for one of my favorite holidays. Today I wanted to share with you another fun way to decorate that wreath of yours and some fun creations you can make with a simple piece or two of felt.

You may recognize this yarn wreath that I made this Fall to decorate our front door. This wreath was created because of the limited amount of storage in our house. I created this wreath to transition with the seasons and figured out a way to create accessories that could easily be removed and switched out with the holidays. Say goodbye to this old Fall look and let’s brighten things up with some Valentine’s Day fun today!


For this wreath, I wanted to create some loopy flowers in pinks and purples for my wreath.  I found a multi-pack of fun felt colors at Walmart over by the craft supplies with my Valentine’s Day colors in it.  You will also need a hot glue gun, glue sticks, scissors, a tape measure, and your choice of a clip (like I have shown here) or a jewelry pin (you can find those in the jewelry-making supplies).

Taking your felt square (which is roughly the size of a sheet of paper), measure 1 1/2 inches width. You will cut a strip 1 1/2 inches wide along the long edge of your piece of felt. Repeat one more time so that you have two of these strips for your loopy flower.

Dab a little hot glue on each end of the piece of felt and fold in half. I also like to make sure it is a little secure in the middle with one more dab of glue, but you can judge for yourself how secure you like it.

Cut slits down the side that is not glued.  You can make them fat or thin depending on what type of look you are going for. You can cut them straight or cut them on an angle. Basically, anything goes with the cutting!

Now start rolling your little loopy flower up and add a dab of hot glue here and there to make sure it all holds secure.

So pretty! You can leave it like this for a small loopy flower or you can use that other strip of felt you cut and start cutting it up just like the last one.

Once you have that second piece of felt cut, you can start wrapping it around the outside of your loopy flower you started, picking up where you left off with the last piece of felt. You can do two different colors of felt or keep it sweet and simple with the same color. Apologies for switching colors on you, my pictures from the first flower didn’t turn out as good.

Hot glue a small circle of felt to the back of your loopy flower to hold it all together. Add your pin or clip to attach the flowers to your wreath.

If you have any stray strips of felt, you can transform them into bows. I just fashioned this one into a bow shape and then secured it with a little floral wire in the center. Cover your wire with another little scrap of felt and you have another fun element to your wreath.

Here are all of my fun Valentine’s Day accessories on my wreath. I made these felt roses, several of these loopy flowers, and a bow in the middle clipped to the top. You could also add some cute fabric flowers, if you like, in other fun Valentine’s Day shades.

Same exact wreath.

Totally different look.

I saved all of my accessories (that my daughter did not run away to accessorize her room) and I can just reapply those fall accessories next year.

It is much easier to store a box of accessories than a million wreaths in my basement.

What special traditions have you created for your family for Valentine’s Day in your house? Do you have any special crafts you do together or any special food traditions? I would love to hear your ideas!

Pin It

Anthropologie DIY Ruffled Lamp

Tuesday, November 15th, 2011

We have come to the final project in my daughter’s big girl room makeover. I am so proud of all of the little detai this room.  Many of the items in my daughter’s room had great bones, but seemed a little young for her.  The lamp in her room looked like it belonged in a nursery so I was excited to update this for her.  Instead of getting rid of a perfectly good lamp though, I wanted to figure out a way that I could do a stylish budget-friendly update to it. I happened upon this Ruffled Burlap Lamp tutorial on mama says sew and knew that this would be the perfect way to update her lamp and add a little big girl style to her nightstand.


As you can tell from the picture above, I was planning to just spray paint the original base and save myself a few dollars. Unfortunately, it rained that night and I had a spray paint fail with the paint never hardening and creating a big giant mess. I ended up buying a new lamp base for $12 at Walmart and then spray painted that to match her room. It goes to show that I can screw up even some of the simplest craft projects around here.

I bought one can of spray paint and two yards of burlap which worked out to be eight dollars in supplies (if you don’t count my big spray paint screw-up).

You will first want to cover the entire base of your lamp with a layer of burlap. Any of the metal around my lamp shade base, I just snipped a tiny slit to work the burlap around it. I used my hot glue to cover around it and secured the glue along the edge of the interior of the base.

If you have never worked with burlap before, this material is a MESS to work with. I had burlap pieces and strings everywhere. You definitely want to cut this on newspaper that you can toss out when you are done.

I got out this clothes-presser-thingie (can’t remember what this contraption is called) and pressed strips of burlap that were 1 1/2 times the length of my shade. These were 2″ strips that were then folded in half.

Just attach the pieces in a roughly manner all around the lamp. I went around it once and then filled in any empty spots with a ruffle in the middle where any holes were.

Keep going around and around until the shade is full. It is so pretty and I absolutely love how this turned out. I want to make one for our bedroom now since it is such a fun way to dress up a lamp.


This is definitely one of my favorite projects in my daughter’s big girl room and I would highly recommend making a lamp for a room in your house too. Thanks to mama says sew for the inspiration. Please visit her blog for the full details on measurements and a tutorial on how to make a ruffled lamp for a corner in your room.

What craft projects have you been working on?  Feel free to share any links to what you are working on! Access all of our craft fun on MomAdvice by visiting our Craft Section. Happy crafting, friends!