Author Archive

Welcome to Our “New To Us” Home

Tuesday, March 2nd, 2010

Small space living has never defined who I am or stopped me from being the best hostess I can be in my house. While some might shy away from space challenges, I have opened our home until it practically screamed for mercy to every friend and family member I possibly could.

Of course, small space is all relative, isn’t it? Our home is 1,500 square feet. While that may sound like a lot or a little, the space is made smaller and more challenging with a tri-level floor plan. If it was spread on one or two levels, it would feel much larger. I think it is the floor plan that is more of a challenge than the square footage of our home.

Despite the challenges as they existed, I can cram an entire Bunco group of 17 in my little house, I have hosted large birthday parties for my kids, an entire Redbook photo shoot in my home, a news crew out monthly so I could share frugal tips, and  Thanksgiving dinner was made and people shoved into the crevices of  two rooms for a delicious family feast. Small spaces should never stop you from sharing your home with others… although it might take a little furniture rearranging to make it happen!

That being said, I knew that there were ways that we could make the most of the spaces we already had. It started with the knocking out of a wall to create more open space in our kitchen. We felt like we had an addition to the space we already owned. What other possibilities could happen within our existing walls?

In the middle of the night, one January evening, I sat up in bed and had a vision for what we could do to make it work. I cornered my husband in the wee hours of the morning and explained my vision for the space. He looked at me like I grew another head and said I could get estimates, but the ball was in my court.

The estimates rolled in, the numbers crunched, the contractor for the job chosen, and just three weeks later, we have a brand new home.

All this said without the agony and woe that I experienced over the difficulties of living without flooring, a film of dust on everything I own, the close quarters that we endured, the challenges of keeping two children out of the way, the demise of our marriage, the demise of my parenting abilities, the irritation of losing my privacy, the crap food we ate, the budget we completely blew on eating out/entertainment, the cluttered and disgusting home I have had to live in, the short fuse that I never knew I possessed, the copious amounts of coffee I drank through the project, the glass of wine I drank to unwind in my dusty tub every night,  the day I cried in the garage in my bathrobe in front of one of the workers because I couldn’t find a specific paint color…Yeah, all of that is shamefully shoved under my welcome mat to never be spoken of again.


Pictured above is my family room before. This is where our family spends the majority of our time. Our two couches were crammed and people had to scoot their legs through a narrow opening to get behind the coffee table. One rocker in the corner couldn’t rock because the space was too narrow and had to be shoved against the wall. The room was long, but narrow, making it a difficult space to navigate. My furniture was bulky, but bought for a house in Massachusetts that we owned that fit that space perfectly.

The television was placed into an empty closet and framed with curtains. This definitely helped us free up some space since the entire television unit was out of the way, but the space was still small.


Next to our family room was the office/home gym equipment. The main challenges with this space…well, there were a lot of challenges with this space. It was in the heart of the activity of the home so I could hear the television through the walls when I was trying to work, the closet couldn’t be shut because of the length of our desk so I had to look at my clutter all of the time and if the treadmill was used in the mornings, it woke everyone up in the house.

Below that level of the home, was this half of the basement that was not being used for anything except to hold a bunch of junk in our house. As I was partying it up at BlissDom, my hubby was clearing this room for a major transformation to happen. It was a underutilized space that could potentially be awesome.


The kitchen had some storage challenges that I wanted to address. My pantry was so small and lacked the storage space that I needed for our food. I had to keep our food in the basement and go down two sets of stairs to get to the food storage at the bottom of the steps.

The console table in the kitchen made it difficult to maneuver around the kitchen table. We liked having the computer in the kitchen, but we needed to create a space for it that wouldn’t conflict with our eating space or make it difficult for our guests to dine at our house.  We knew that when the computer is phased out, we would likely put a television in that spot for our fun family nights.

Our entryway was fine, it just needed a spot for wet boots. We would love a new front door, but it wasn’t in the budget for now.

The kitchen floors were not my first choice for flooring, but I was okay with them…until the flooring started falling apart. The floor had not been installed properly and we had potential problems on our hand. For example, no flooring had been installed behind the dishwasher which makes it difficult to spot leaking if it occurs. Around the stove, the pieces were shifting. When the contractor agreed to give us the floors at builder’s cost and not charge for the install and give us a new entryway (in exchange for my husband’s web design services), we were on board!


The entire project took three weeks of them working on our home from 8-5 every weekday and two of the three weekends we had drywall and electric being done. That being said, the changes in that short time are jaw dropping. I still can’t believe that this much can be done in such a short time span.

Welcome to my new-to-me home! Pictured here is the new entryway that has been tiled for all of those muddy boots and then transitions into our new laminate flooring. We chose this plank-style laminate flooring because it had a beautiful faux grain to it and looked like hardwood without going the hardwood route. The tile was leftover from another job that the contractor had done and I loved the beautiful earth tones this porcelain tiling had in it.

This is the new kitchen wall with the cubbyhole built in for our computer. We added an extra shelf above for decoration or to hide the DVD’s and CD’s that we pick up from the library. I love that the kids can pull a chair into this spot to work on the computer and that we can watch family movies together in this room. They added a light above it to light this little area in our home.

All of the doors were updated with new six panel doors and new door hardware. This was one of the twelve doors that was replaced and painted white. Just these details alone made our home feel so much more modern!

The pantry shelves actually extended further than the door and I requested that they make them as big as we could fit into the space that we had. They are heavy-duty shelves that were painted white.

To me, this is truly one of the most exciting things in the house. I have always wanted a pantry in my kitchen and this space is going to be put to good use. I am in heaven and was so excited to organize and fill this space with our food.  Grocery day just got a whole heck of a lot easier!

I have plenty of space on bottom so I put our potatoes, extra soda, and my reusable grocery bags there. It is so nice to have all of this extra room!

Heading down the stairs is our brand new family room. You can see how it is one room now instead of two. A supporting beam was put in and the wall was taken out to create one room instead of the two smaller rooms that we had before.

I am so proud of how the family room turned out and amazed at how much more spacious this room is. The kids are nuts about their new space, in fact, they have been running themselves silly around the room with all of this extra space. The updated trim, canned lighting, and textured ceiling really made this space so much more updated!

The disorganized home office closet has now become a functional space for our kid’s toys and family games. The doors can keep the chaos away and the kids love that they each have their own shelf in the closet for their toys.  A special spot for my vacuum was also carved out so I don’t have to figure out where to put it anymore!

Down below our basement is the subbasement where we decided to put our new home office. I can keep the door open and have coffee downstairs while the kids play or I can lock the door and keep the chaos away or just leave the door slightly closed so I can get a little quiet time to work.

This is our new home office! The flooring matches the kitchen flooring that was installed and we brought our double desk downstairs where it would have more room to fit. Two shelves, the length of the desk, were installed for office storage.

We saw these chairs at Value City Furniture and just had to have them. The painting was one that we had already owned from Target and the bench that rests between them was a recovered Goodwill purchase years ago.

We would like to thank J. Wilson Construction for completing our renovation on time and within our budget. We could not be happier with our new space and highly recommend them if you live in the Michiana area. I am happy to be your referral too!

I hope you enjoyed the tour and thank you for your patience as we get ourselves organized and situated back into our home!

I just want to say that I am so thankful for your support and am so proud that we did this the way we wanted to- by saving and paying cash for this moment. It makes everything about this whole experience so much sweeter and that much more gratifying!
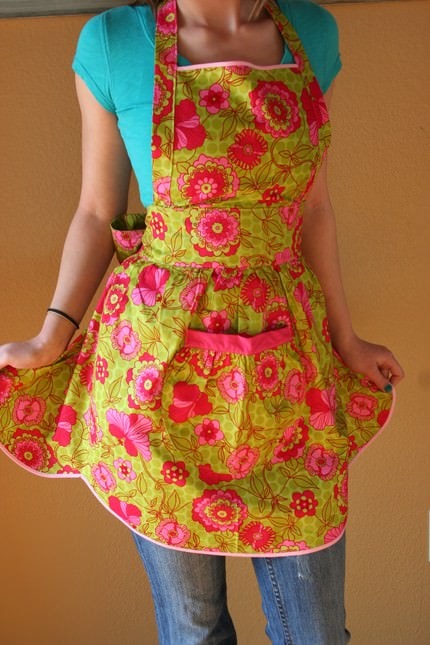
An Apron Full of Giveaways 03.02.10

Tuesday, March 2nd, 2010

Sonshine Designs, $28.50

Thanks so much for swinging by for our Apron Full of Giveaways! Each week we share a link list of great contests to enter all over the web. Below are the contest links to our contests and to yours! If you are hosting a contest please link it up below. I would love to point our readers over your way!

Sorry, we aren’t giving away the aprons just showcasing them!

Please put your site name and then what type of contest you are hosting. For example, “MomAdvice (Children’s Movies).” Please let me know if you have any questions and good luck to each of you!

Good luck, everyone!


Simply Delicious Apple Pork Chops

Monday, March 1st, 2010

Have you ever had a recipe in your to-be-tried pile for years and finally get around to it and wonder, “Why the heck didn’t we eat this sooner?” This recipe has been gathering dust in my house and I decided to finally shake the dust off and try a new pork chop dish for a new weeknight meal.

The skeptics in my house were not impressed with my enthusiasm of pairing apples with pork chops and it took a lot of coaxing to take them over to the dark side of this deliciously sweet pork combination. Before the end of the dinner though, I had sold everyone on the idea of pairing these ingredients and decided that this would be a great meal to add to our rotation.

It is a satisfyingly sweet and savory dish that pairs ingredients that I typically have around our house. The brown sugar and cinnamon sauce adds a delicious glaze to this perfectly cooked pork.  Baking the pork helps it to achieve the perfect temperature and my husband couldn’t believe how tender these chops were.

The best part for me about this dish though is the timing of other dishes and being able to cook an entire meal at the same temperature.  Paired with my roasted green beans and a side of baked brown rice, dinner was all baking along together and I was enjoy a magazine reading before the dinner chaos. I love when everything can bake at the same time so I don’t have to stand over the stove!

Simply Delicious Apple Pork Chops (Adapted from Recipezaar)

1 tablespoon olive oil
4 pork chops (1/2-inch thick)
1/2 teaspoon salt
ground black pepper
2 apples, peeled cored, and sliced (I used Granny Smith apples)
3 tablespoons brown sugar
1/2 teaspoon ground cinnamon
3/4 cup apple juice

Preheat oven to 375 degrees. Heat oil in large skillet. Brown the pork chops on both sides in oil. Place chops in a baking dish just large enough so they do not overlap and sprinkle them with salt and pepper. In a small bowl, combine the brown sugar, cinnamon, apple juice, and and apples. Give them a toss together. Pour the mixture over the chops.
Pour over the chops. Cover and bake in the preheated oven for 30 to 45 minutes. (My chops took about 35 minutes, but it will depend on the thickness of the chops).

MomAdvice Monthly Recap: February ’10 Edition

Monday, March 1st, 2010

I just want to say a special thank you to each of you for visiting my website and sharing it with your friends, family, and your own readers. This month was a big move for us over to a new WordPress blog and we hope that you are able to find everything easier, that you are enjoying the new full feed, and that the site is continuing to be a fun and inspirational destination.

If there is anything you would like to see on here, please contact me (amy@momadvice.com) and let me know what you would like to see in the upcoming year.

Are you on Facebook? Please be sure to Fan our MomAdvice.com Page. We would love to continue to share and interact with you! If you are on Twitter, you can find me there too sharing about our daily life and what is happening on our site. There are so many ways to connect regularly with the site and I would love to interact with you daily!

Don’t forget, you can subscribe to my feeds and never miss another thing on our site again! We have a landing page where it makes it easy to subscribe to our blogs and you can even subscribe to my article feed. Everything is right at your fingertips and we want the site to be a daily destination for you and your family!

This month’s top referrers were:

1. LifeHacker
2. Freebies 4 Mom
3. Facebook
4. I’m An Organizing Junkie
5.  Tip Nut
6.  Swagbucks
7. Like Merchant Ships
8.  WiseBread
9. Feels Like Home
10. Common Sense With Money

Please take some time this month to check out each of their sites. They are amazing at what they do and we are thankful that we have such great supporters!

This month’s top articles & entries were:

1. The Best Steakhouse Experience on a Poor House Budget
2. Boosting Energy By Transforming the Clutter
3. Throwing a Baby Shower on a Budget
4. We Lived Thrifty So We Could Do This
5. 9 Simple Ideas for Frugal Date Nights
6. Great Reads for Moms: January ’10 Edition
7. How To Get Back in the Groove of Reading
8. All Knitted Up: Knitted Gifts With Purpose
9. Frugal Carpet Steaming
10. Taking Great Pictures: Figuring Out Your White Balance

Freebie Friday: February 26, 2010

Friday, February 26th, 2010

Welcome to another week of Freebie Friday! This list comes courtesy of Freebies 4 Mom and we are so grateful for this opportunity to share these great freebies. Make sure to get your entry in for Heather’s contest to win a $300 Apple gift card that closes at the end of the day Sunday.

This week we are serving up our first Retro MomAdvice featuring some of my favorite posts over the years, 4 new ways to cook rice, our weekly list of over 120 giveaways to enter, a notebook filled with DIY ideas to try, and a fantastic guest post on how to achieve white balance in your photos (even on those point and shoots)!

Health & Beauty
Pampers Cruisers (Sam’s Club)
Olay Total Effects Body Wash (Walmart)
Hyland’s Restful Legs

Food
Jennie-O Turkey (up to $5 rebate)
Beech-Nut Let’s Grow Toddler Welcome Kit
South Beach Living Fiber Fit S’mores Bar
ZonePerfect Indulgence (on Facebook)
Bahama Breeze $10 gift card

Home & Garden
Photo Book for Troops (shipping is free too)
Tide plus Febreze
Conagra Child Hunger Ends Here House Party
Poise Ladies Who Laugh House Party
Ziploc DIY Home Organization House Party
DiGiorno Champions House Party

Upcoming Freebie Events:
Please call your local store or restaurant to confirm they are participating in these freebie events

FEBRUARY
William-Sonoma Cooking Demos & Classes
27 – Target Dr. Seuss Story Time 9-11
27 – Walgreens SaturDate with Beauty featuring L’Oreal 10-5
27 – Lowe’s Build and Grow Clinic make a LoweBot 10-11

MARCH
6 – Home Depot Kids Workshop make a rain gauge 9-12
13 – Lowe’s Build and Grow Clinic make a tabletop basketball 10-11
20 – Rita’s Ice free italian ice noon-10pm

Retro MomAdvice: 02.25.10

Thursday, February 25th, 2010

One Year Ago:

Italian Vegetable Soup

Simplifying Your Accessories Podcast

We were in the midst of our No Spend Challenge

Two Years Ago:

A Sad Life for the Clark Kids- Lots of Chores!

Budget-Minded Easter Celebrations

Saturday Morning Treat: Homemade Cinnamon Rolls

Staying Fashionable Through Ebates

Three Years Ago:

Frugality Births Creativity

Frugal Carpet Steaming

Dressing Your Kid Like a Celebrity… or Die Trying!

Things to Do When You Are Snowed In

Welcome, All You Magazine Readers

Wednesday, February 24th, 2010


I would like to extend a warm welcome to this month’s All You Magazine readers. You can find the March issue on newsstands this month with tips on how to stay under budget on those beautiful Easter clothes! We love sharing tips about how to stay under budget for the holidays and you can get many more ideas in our Budget-Minded Easter Celebrations article!

While I was at the BlissDom Conference, I had the opportunity to share a meal with some of the editors from All You Magazine. They are a fantastic team and are so enthusiastic about sharing money-saving ideas with their readers. I am not much of a coupon queen and I know many people subscribe for the coupons and grocery savings. I admit that I am a reader because I love their budget-minded features especially the fashion section and recipe ideas. This magazine is available at Walmart and I encourage you to run out and get a copy this month! Thank you, All You Magazine!


If you are visiting from All You Magazine this month, I would love to take a moment to introduce myself!

My name is Amy and I am the Founder of MomAdvice.com. I am a busy mom of two and live in the beautiful Midwest with my web designing husband and our two children. I love to cook, knit, drink coffee, take pictures, and am a total bookworm. I am dedicated to anything that will help make my life simpler, keep me on my budget, and that promotes family time!

We started this site six years ago as a platform to share about all of those topics that I had been searching for when I became homemaker. How do I cook? How do I clean this house? How do I keep my children entertained without breaking the bank? How do I manage a daily routine? Most of all though…how do I do all of this on a limited income?

Please grab a cup of coffee and let me shake the dust off of a few of my favorite reads on the site. If you like what you see here, you can subscribe to my feeds and never miss another thing on our site again! We have a landing page where it makes it easy to subscribe to our blogs and you can even subscribe to my article feed.

I love staying connected with my readers so you can find me on Facebook, Twitter, GoodReads, and Ravelry…just to name a few! Chances are, if you search for someone named momadvice, you will likely find me there!

Regardless, I am so thankful for your visit and I hope only to offer inspiration that will make your life easier!

Simplify

Simplify Your To Do List
How to Get Back in the Groove of Reading
Finding Beauty in the Ordinary
My New Year’s Goal: Get Happy

Save

Our Debt-Free Party
Vrooming Through Our Debt
The No Spend Experiment
Six Easy Ways to Save on That Weekend Getaway
At-Home Hair Color Savings
Price Book 101
How You Can Help the Unemployed Today

Home

Making An Addition to Our House for Less
Our Kitchen Makeover
Patio Renovation on a Budget
Weekend Project: New Workspace

Eat & Drink

The Frugal Mom’s Guide to Good Coffee
Boxed Wines: An Eco & Wallet-Friendly Choice
The Cost of a Homemade Happy Meal
One Month of  Slow Cooking

Family

DIY Rainy Day Survival Kit
Just Call Me Ticketmaster
Fun Ways to Make Outdoor Living a Priority
Being a Crafty Parent… When You Just Aren’t
Cloth Diapering 101
Finding a Mom’s Group

This is just a tiny sampling of what our site has to offer! I hope you will stick around and enjoy our site for years to come.

I would just love to be a part of your day and hope that the site can empower you to simplify your life and your home management routines!

Amy’s Notebook 02.24.10

Wednesday, February 24th, 2010

This DIY glass ball chandelier is simply stunning along with her shared nursery tour (@ Small Notebook)

I love this post on how to raise great readers (@ Life As Mom)

This is a great way to recycle those old Valentines (@ Feels Like Home)

These blueberry sour cream muffins look divine (@ The Idea Room)

This post made me think of using fabric in new ways (@ The Shabby Nest)

I want to try this recipe for oatmeal bread (@ Posie Gets Cozy)

This KitchenAid mixer cover is so cute (@ homemade by jill)

These soft baby blocks would make a great DIY baby shower gift (@ Smile & Wave)

This 3-2-1 pasta dinner is a great formula for a quick weeknight dinner (@ goodLife {eats})

My daughter would love this rose petal tutu (@ Candace Creations)

I love this activity creating stencils for brownies (@ Make & Takes)

Taking Great Pictures: Figuring Out Your White Balance

Tuesday, February 23rd, 2010

Hi! I’m Katie from goodLife {eats} and I’m guest posting today for Amy. I’m not a professional photographer by any means, but I use photography a lot for my blog. With each recipe I post, I include at least 1 photo. Sometimes upwards of 4 or 5. I hope I can share a few tips with you that I’ve learned a long the way that will help improve your photography skills – even if you use a Point-and-Shoot!

Not long ago I had absolutely no idea what terms like shutter speed, ISO, aperture, and white balance meant. I was stuck on “auto” and I spent a significant amount of time post processing my photos until they were to my liking. Surprisingly, (after reading my camera manual – something I should have done in the beginning – and exploring my camera’s menu) I found that I was actually able to adjust a couple of these settings on my basic point-and-shoot to further improve my photos.

I found that while I was using my point-and-shoot camera, the one of the things that made the biggest difference in my photos was moving away from “manual” white balance settings.

Are you confused yet? Are you asking any of the following questions? Read on and I’ll explain!

  • What is White Balance?
  • How do I adjust my white balance?
  • Is this complicated?

What is White Balance?

Simply stated, the colors in the photo will look correct. The image will look how you viewed it with your own eyes (our amazing brain processes and adjusts the color for us), rather than the camera’s guess at what the color temperature is. Color temperature is the comparative warmth or coolness of the white light.

Can you see the difference below? Which one looks more natural to you?

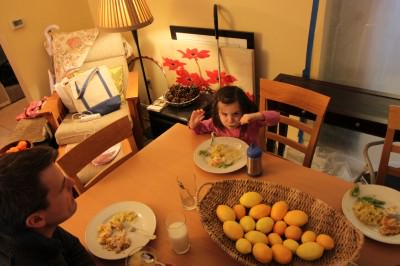
The first photo has that terrible blue cast. It doesn’t make for a very attractive photo. I’m not in love with the shoot either, so it isn’t a big loss. The second photo is a beautiful shot of my daughter. I love the twinkle in her eye and the way she’s not looking straight at the camera, but it’s all yellow. Unfortunately, I didn’t have the white balance custom set for that photo. So that is a disappointment. The third photo was taken with the white balance set to custom (see below for details on how to do that). Combination of great shoot with a cute grin in her lips and natural looking color.

When set to Auto White Balance, the camera just guesses at the color temperature. Sometimes it guesses correctly and other times it doesn’t. An incorrect white balance will leave you with an unnatural color cast, often times yellow or blue, and disappointing pictures – especially if you are photographing people or food.

A blue plate of fettuccini alfredo? Not thanks. I want to see the creamy white sauce. The same holds true for portrait photography as well. I want to capture exactly what my daughter looks like at age 2, because some day I might not be able to remember that anymore.

Is this Complicated

Setting the White Balance might feel clumsy at first. It is definitely an extra few steps that you’ll have to add in your picture taking routine, but I will tell you that it gets easier and becomes routine quickly. Especially, when you see the difference these few steps can make in your photography.

How do I set my White Balance?

Go into your camera’s menu.

Scroll through to find the white balance menu.

Scroll through the different preset options listed in white balance:

  • Auto
  • Daylight
  • Cloudy
  • Shade
  • Tungsten
  • Fluorescent (my point and shoot doesn’t have this one)
  • Custom
  • If one of those looks like it will work, based on the lighting I have available, I go ahead and select it. On my point-and-shoot I can look at the screen and see how the image will look with the selection I’ve made. On my DSLR, I have to take a test photo first.

    If I want to custom set my white balance, I select that option. And then proceed with a few more steps. The steps may vary slightly according to your camera, so I recommend looking at your user manual for instructions tailored to you, but this should give you a general idea of how simply it is.

    Take a photo of a plain white sheet of paper. The paper should fill the entire frame of the photo so that only white is showing.

      1. Take a photo of a plain white sheet of paper. The paper should fill the entire frame of the photo so that only white is showing.
      2. Select the white photo as the camera’s reference point.
      3. Begin shooting.
      4. Take a couple of test shots and check them out to see if the colors look right to you. If not, try again

      I hope that makes sense! Give it a go and if it doesn’t make sense or you have a question, let me know and I’ll answer it as best as I can! I hope to see you around at goodLife {eats}, where I share what I find good in the kitchen and in life.

      We would like to thank Katie for sharing her fantastic photography advice with our readers as we finish our last week of home renovations. We encourage you to visit Katie’s beautiful and thoughtful site and are so thankful that she was able to help us with the blog this week!

      An Apron Full of Giveaways 02.23.10

      Tuesday, February 23rd, 2010

      French Bee, $26

      Thanks so much for swinging by for our Apron Full of Giveaways! Each week we share a link list of great contests to enter all over the web. Below are the contest links to our contests and to yours! If you are hosting a contest please link it up below. I would love to point our readers over your way!

      Sorry, we aren’t giving away the aprons just showcasing them!

      Please put your site name and then what type of contest you are hosting. For example, “MomAdvice (Children’s Movies).” Please let me know if you have any questions and good luck to each of you!

      Good luck, everyone!