Archive for the ‘Home & Organization’ Category

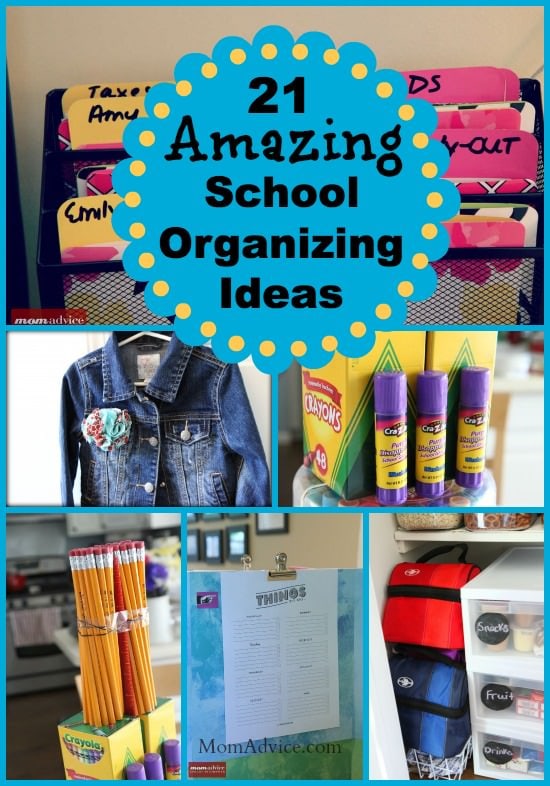
21 Back To School Organizing Ideas

Monday, August 19th, 2013

Can you believe that school has started for many already, and will be starting for everyone else within the next couple of weeks? It’s crazy how fast the summer goes, yet I always look forward to a brand new school year and that great fresh feeling of fall!  Dealing with all the busy schedules, paperwork, homework, and meals during the school week is part of the fun, but also can lead to feeling overwhelmed if not tackled in the beginning.

Now that my kids are a bit older, I’ve found that if I start out on the right track with simple, doable organizing strategies, then the rest of the year goes much better than when I put off setting up simple systems or decide to just wing it.

21 School Organizing Ideas

With this in mind, I’ve put together 21 Back To School Organizing ideas to inspire you and help you get the year off to a good start for you and your kids. I’ve picked some classic tried-and-true Mom Advice systems that work for us and gathered a few other amazing ideas in three main categories:

  • Making School Memories/Showing Love
  • Life Organization Tips for The School Year
  • Organizing Dinners, Lunches, and Snacks

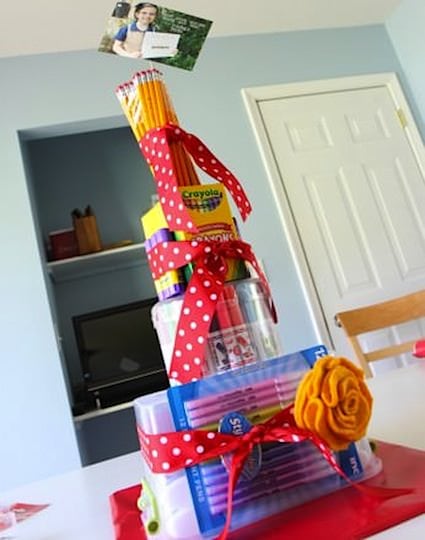
Teacher School Supplies Cake :: MomAdvice.com

Making School Memories/Showing Love


Teacher’s School Supplies Cake (use the sales!)

Creating Back to School Traditions

First Day of School Pin/Barrette

19 Teacher Appreciation Ideas

Mason Jar With Chalkboard Printable Tags @ The Crafted Sparrow

First Day of School Journal @ Happy Clippings

School Year Time Capsule @ Family Volley

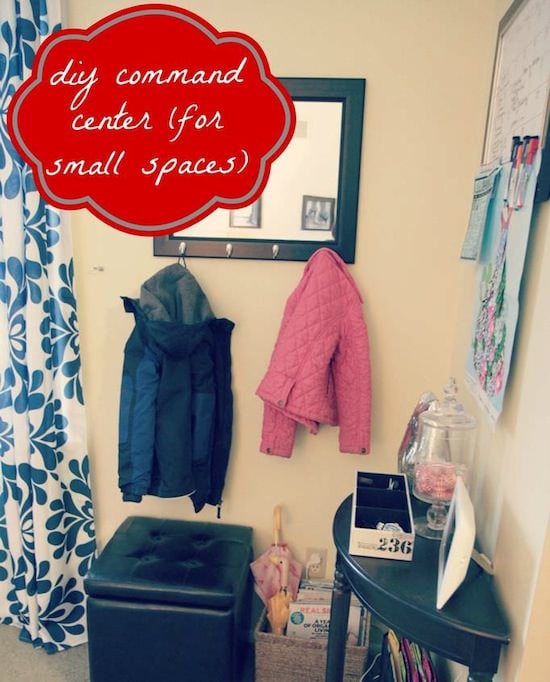
DIY Command Center :: MomAdvice.com

Life Organization Tips for The School Year


DIY Command Center

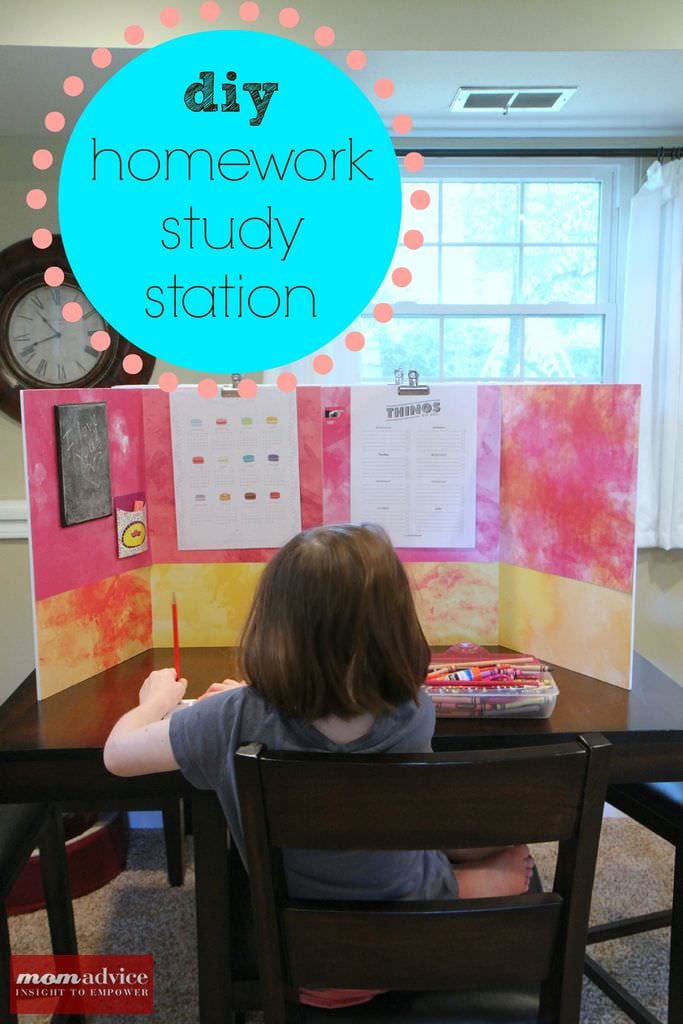
DIY Homework Station

The Top 7 Apps to Organize Your Life

Simplifying Your To-Do List

Organizing School Papers @ One Creative Housewife

Simplifying the Morning Routine @ Homey Home Design

After School Routine with Free Printable @ Living Locurto

Clothing Organization @ The Idea Room

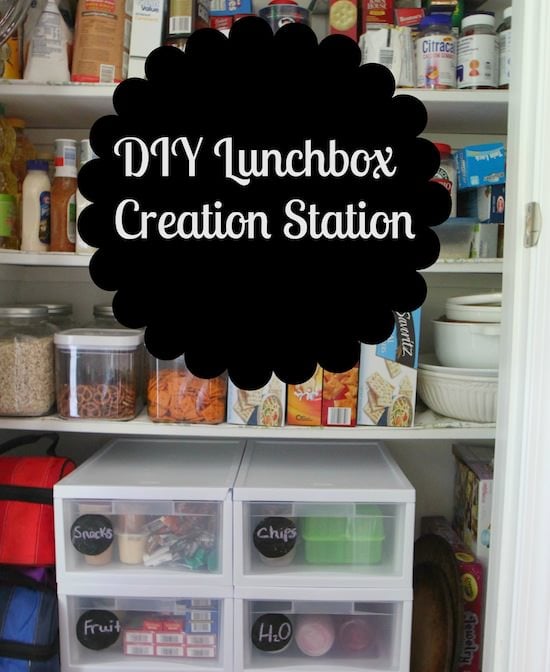
DIY Lunchbox Creation Station :: MomAdvice.com

Organizing Dinners, Lunches, and Snacks


DIY Lunchbox Creation Station

Dorm Mini-Fridge Healthy Makeover

Free Weekly Menu Planner Sheet

15 Back to School Treats @ Rainbows & Honeysuckle

Quick Tips for Packing Lunches @ House of Hepworths

Pantry Organization for Easy Weeknight Meals @ BHG

I hope this helps you all get off to a successful school year start. And I hope you share with us some of your favorite back-to-school organizing tips!


Pin It

DIY Homework Study Station

Thursday, August 15th, 2013

DIY Homework Study Station from MomAdvice.com.

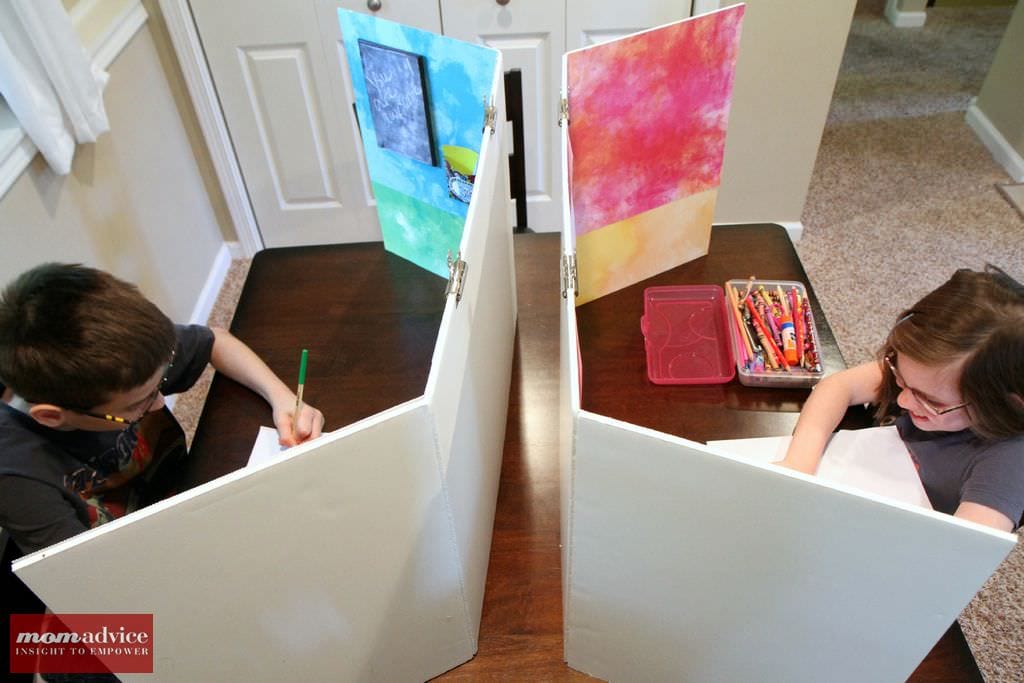
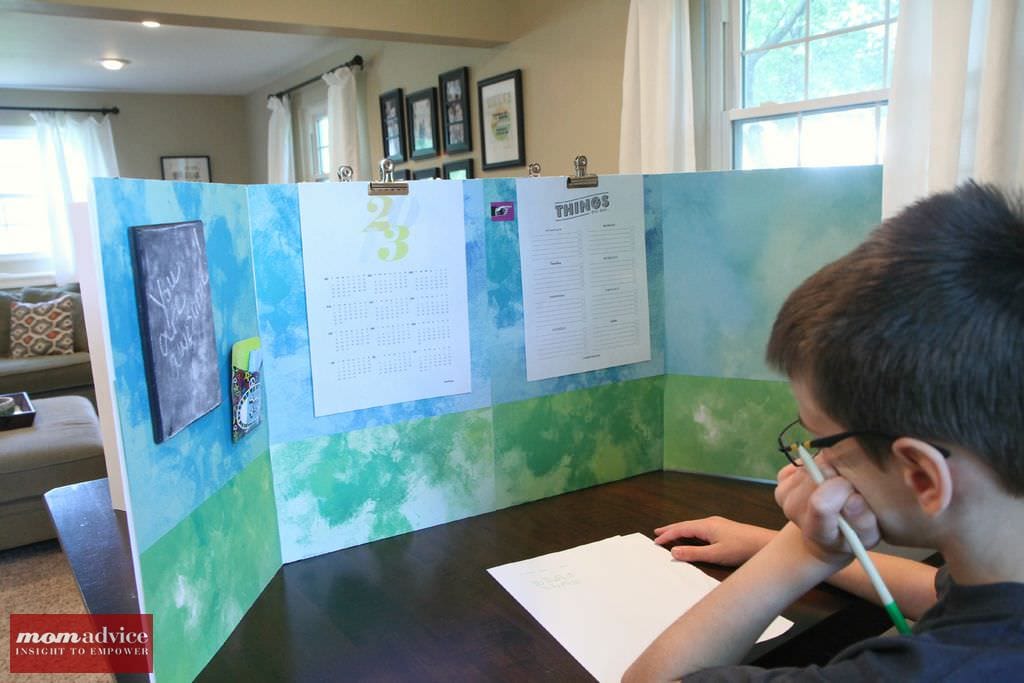
Back-to-School time is almost here for my crew and today I wanted to show you an easy DIY Homework Station you can create for a fun, focused, and quiet little spot you can create for your homework time. This Tri-Fold Homework Station idea was something that I came up with to do for the back-to-school season with Walmart. Each month they give me a fun craft challenge and I couldn’t wait to create these for my kids.

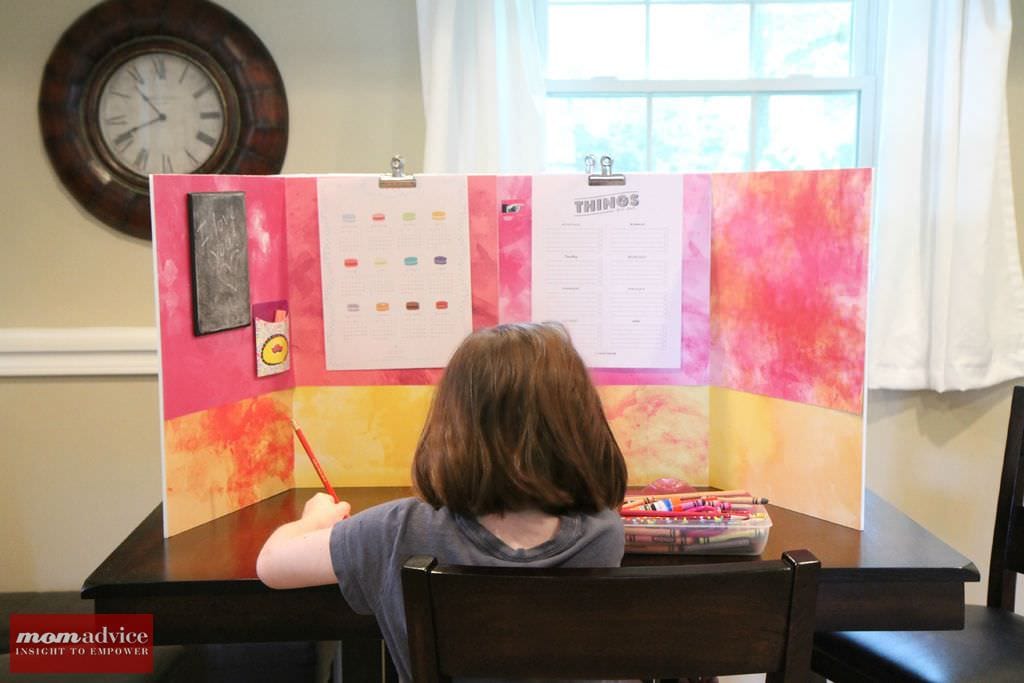
DIY Homework Study Station from MomAdvice.com.These homework stations are perfect for small space living. Two kids at one table, but each having a place to call their own, so they can focus on their own coursework.  The best part is that these can fold flat and be stored elsewhere when not in use! I can’t wait to show you just how easy it is to create these for your kids!

DIY Homework Study Station from MomAdvice.com.

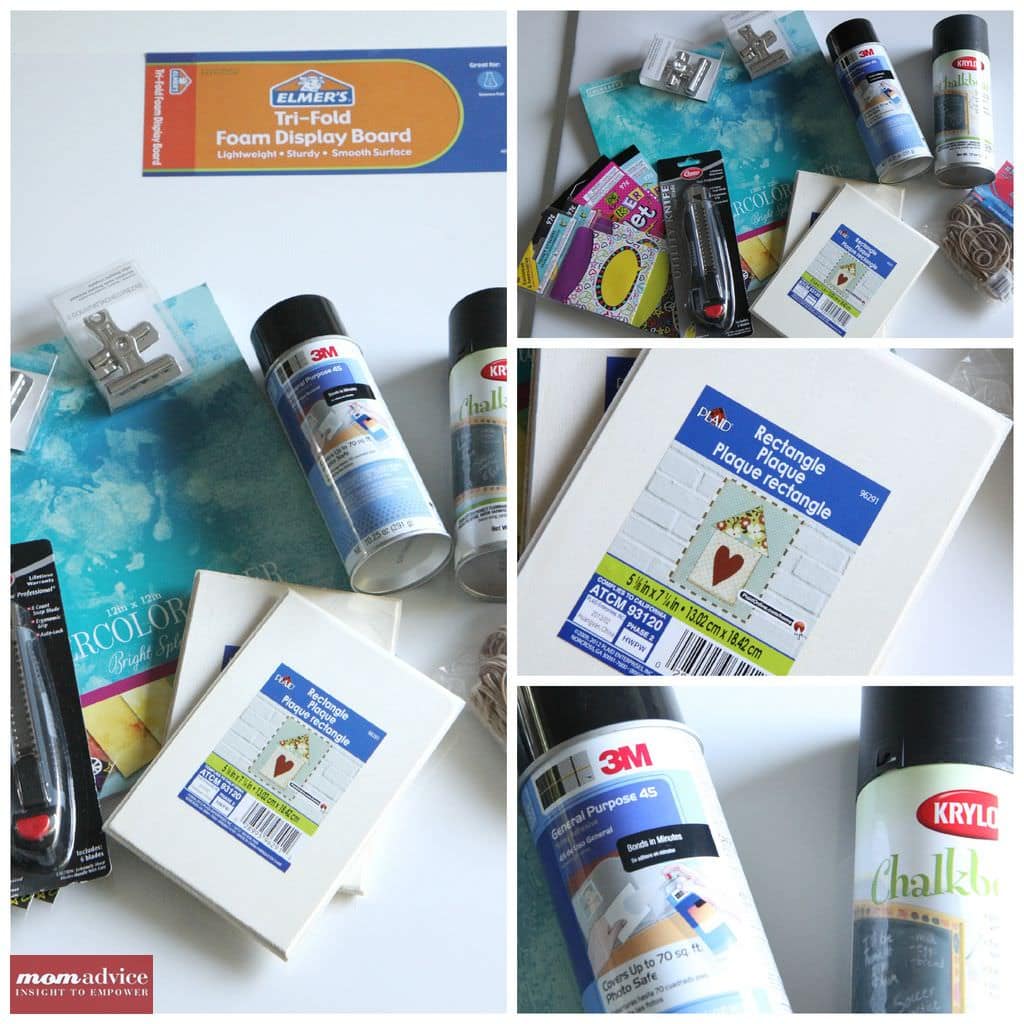
Supplies List

1- tri-fold foam display board (this will make two homework stations for you)

Razor Blade

General  Purpose Spray Adhesive

Chalkboard Spray Paint (over in the paint aisle)

Rectangle Wooden Plaques (one or two depending on how many stations you are creating)

Decorative envelope(s) and stickers

Binder Clips (we did two for each one)

Scrapbook Paper in coordinating colors (8 sheets total per homework station. The type of paper we are using is their Watercolor Paper that they offer for $5 for the pack)

Hot glue & glue gun

DIY Homework Study Station from MomAdvice.com.Directions

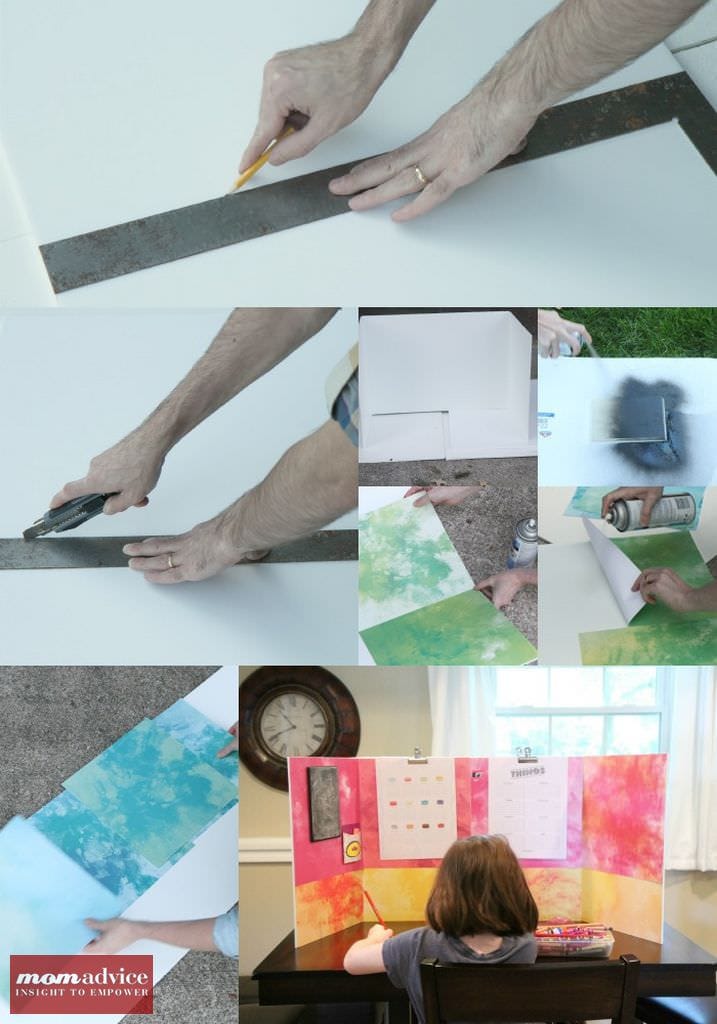
1. Begin by measuring and marking the halfway point for your tri-fold display board. The display board is 48″ total, so you will want to cut it so that each side is 24″ long.

2. Cut the display board with a utility knife, making sure to cut carefully through all of the layers.

3. Spray paint your wooden plaques to create your chalkboards for your homework station.  Make sure to shake the can really well, as instructed on the back of the can. Hold your can 8 inches away from your surface and spray in a sweeping motion side to side with a slight overlap. It has always been my experience to go thin with the paint, allow it to dry, and then to add another layer for the best results and minimal drip. Allow the paint to dry for one hour.

DIY Homework Study Station from MomAdvice.com.

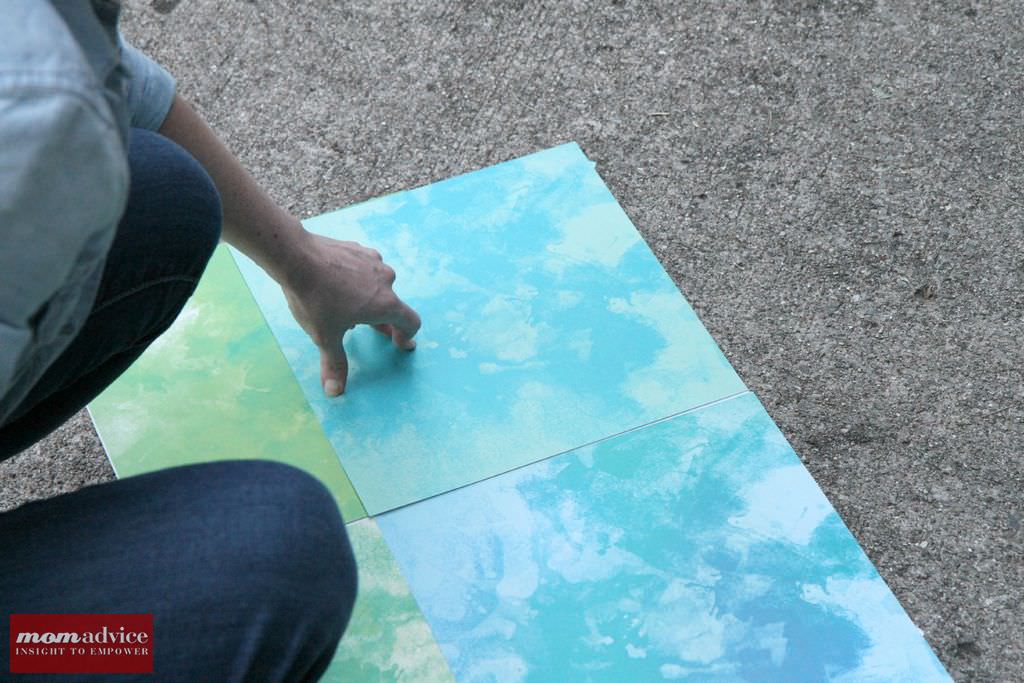
5. While the frames are drying, pick out eight sheets of scrapbook paper and set them up for where you would like to display them. Set them aside and, beginning with one side, line the bottom sheets up and, holding them in place with your hands, flip them up to add a little spray adhesive to the underside. Do this all along the bottom of your display board.

6.  Now do the same process again on the top, making sure that they line up with each other and with the top edge of the display board.

7. Once your chalkboards have dried, use your hot glue gun to mount it to your display. Attach an envelope next to it with chalk. Make sure to give your chalkboard 24 hours to cure before writing on it and prepare your chalkboards as I have show in this handy tutorial.

8. Add any stickers or decorations you might like to your homework station or let your kids decorate it themselves.

DIY_Homework_Study_Station_8 9. Clip your binder clips to the top of your display and then add any printables, thoughtful motivational quotes, calendars, etc… to the homework station.

Here are some free printables that I found that I really love:

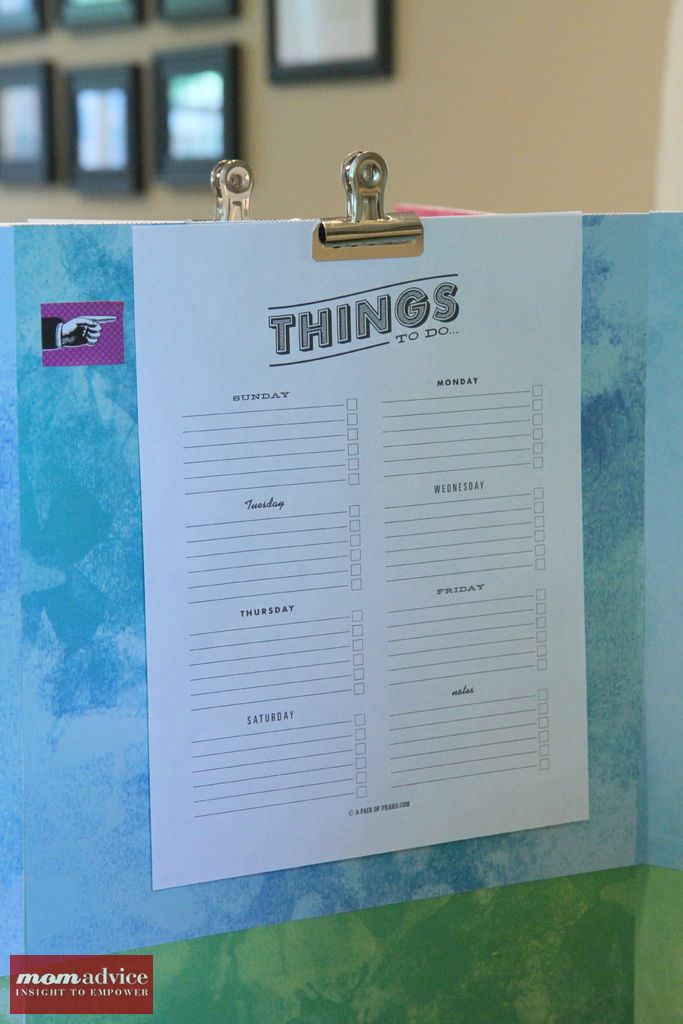
Weekly To-Do List (A Pair of Pears)

Macaron Calendar (from Jolie Jolie Designs)

Modern Calendar (from LAUs NOTEbook)

If you are looking for more, be sure to check my Printable Goodness Pinterest Board for more ideas.

DIY Homework Study Station from MomAdvice.com.

DIY Homework Study Station from MomAdvice.com.

Good luck to everyone heading back to school! I hope this homework station inspires a fun new homework hangout for your kiddos!  I look forward to showcasing more fun back-to-school ideas to inspire your life this year!

walmart_mom_disclaimer

Pin It

Dorm Mini-Fridge Healthy Makeover

Wednesday, August 7th, 2013

Dorm Mini-Fridge Healthy Makeover

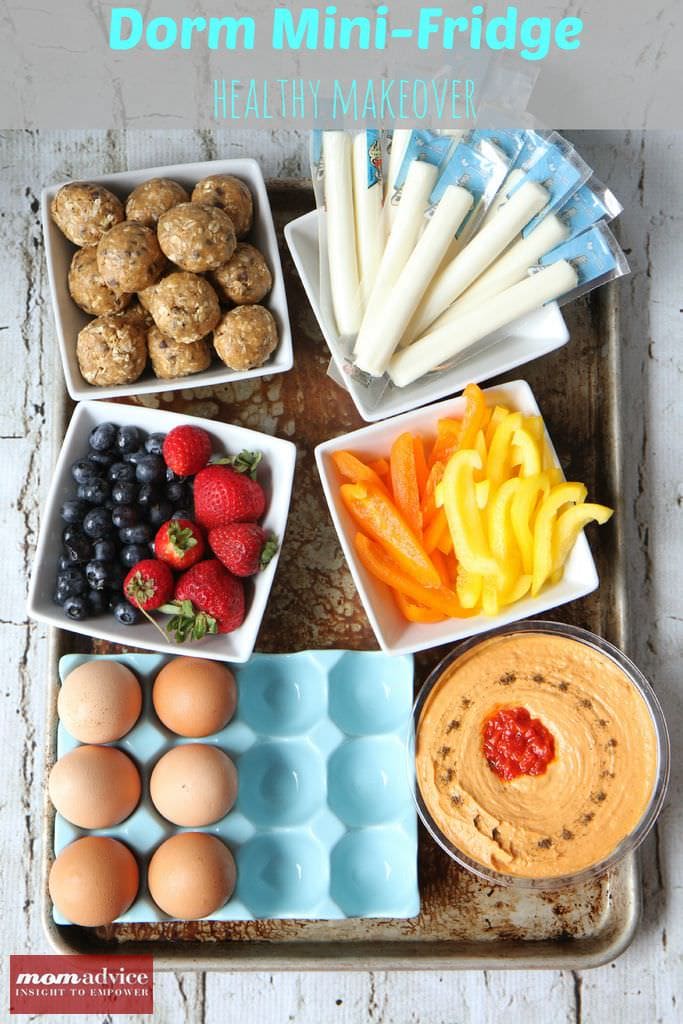
When I attended college, I lived on junk & convenience food and I had the inevitable, “Freshman 15,” to prove from my bad eating habits throughout the year. I only wish I knew how great I would have felt and how much better I would have performed if I had stocked my dorm fridge with healthy options.

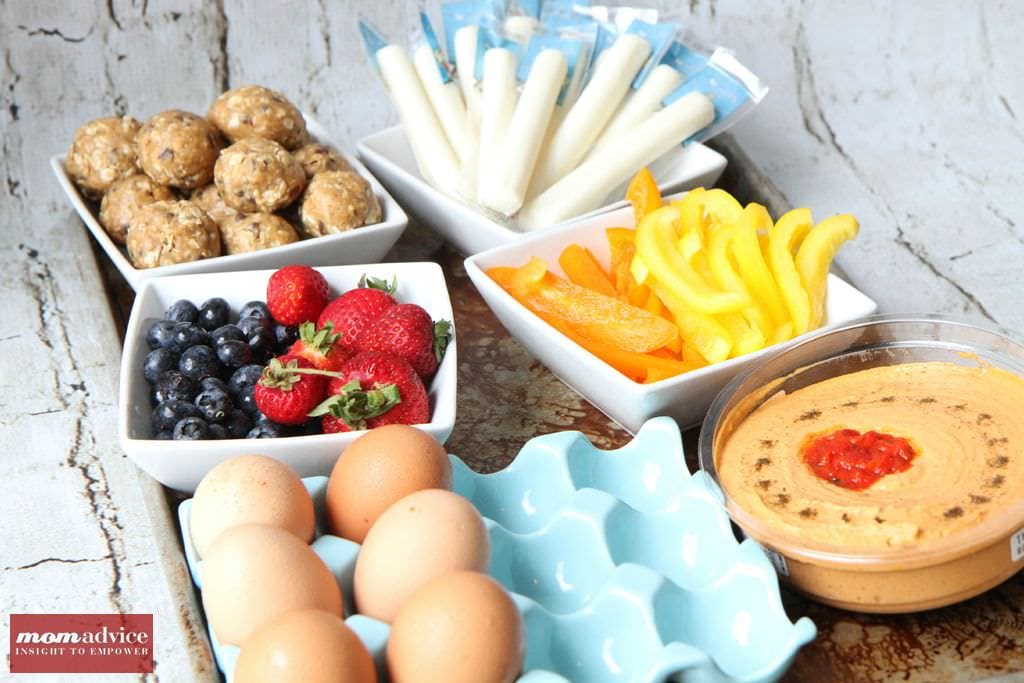
Today I wanted to share with you some healthy ideas for stocking your dorm mini-fridge for the school year along with an easy no-bake energy bite that you can mix up in a bowl for easy snacks on-the-go when heading to your classes.

Dorm Mini-Fridge Healthy MakeoverHead on over to the Kenmore Blog today to read my ideas for smart back-to-school snacking and grab  my easy no-bake recipe for smart snacking on-the-go!

Pin It

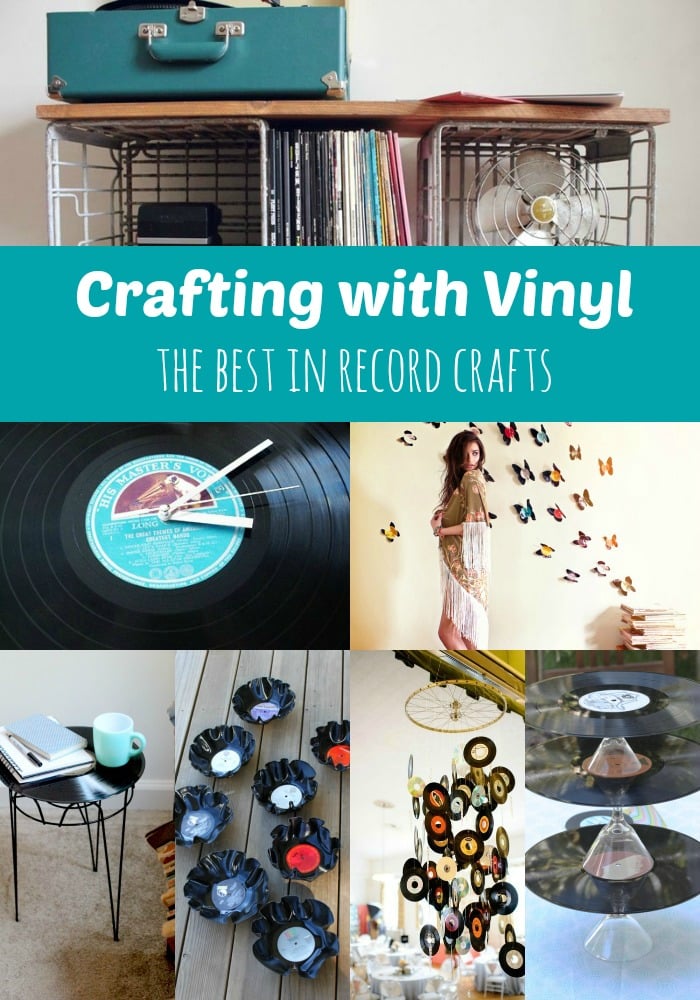
Crafting With Vinyl: The Best in Record Crafts

Monday, July 29th, 2013

Crafting_With_Vinyl_Records

I am so excited to share with you these fun ideas to try when crafting with vinyl records.

Today is all about the best in record crafts and things you can do with old or scratched records.

Did you know records are a mere quarter at our local Goodwill? Record crafts are a fun and frugal craft hobby to try!


Crafting With Vinyl: The Best in Record Crafts from MomAdvice.com. Crafting With Vinyl: The Best in Record Crafts from MomAdvice.com.

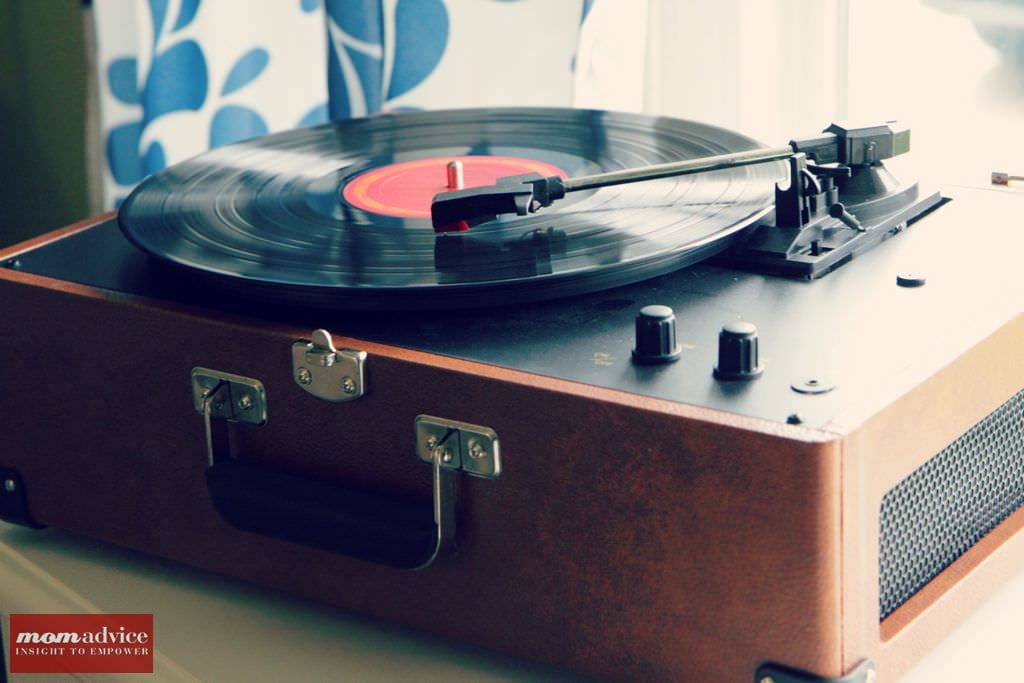
This winter to celebrate my birthday and the launch of my book, my amazing friends all pitched in for a record player and my first stack of vinyl for my birthday.

Since then, it has been my little weekly hobby while the kids are in school to head to the stacks of records at my store and spend an hour flipping through records to bring home to listen to over our evening meal.

At a mere quarter, it is easy to get a little carried away with my record collecting, but it has proven to be the perfect thrifty hobby for me.

There is nothing more fun than settling in with some of my favorite albums from my youth and hearing them on record, just like when I was a kid.

Records that are scratched can still get a great deal of love in your home and today I wanted to showcase some fun record craft ideas you could create for your home with these budget-friendly wonders!


Make a Wall Decal

Did you know that you can create, cut, and mold shapes with records to make a wall decal?
Me either, but I am so excited to try this amazing idea for decorating a wall as demonstrated in this easy DIY butterfly craft from Threadsence.
I am already imagining all the possibilities with this craft and think it would be a fun way to dress up a craft room wall or a fun addition to a teen/tween bedroom.

Decorate a Corner With Records

Records come in different sizes and I often see the smaller 7″ records available for purchase at our store.
Don’t overlook the overabundance of these tiny little powerhouses of music because they make the perfect size for tackling smaller crafts.
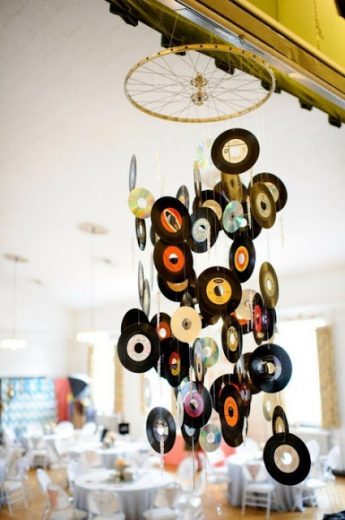
These tiny records are the perfect size for creating a cute hanging fixture to decorate a room.
I can picture this as a fun mobile in a trendy nursery or as a fun addition to a family game room.(Source Unknown)

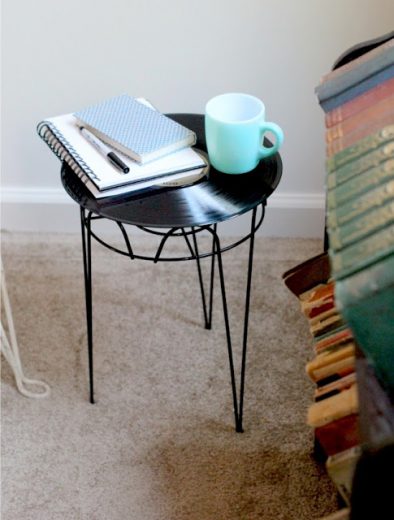
Create a Side Table

If there is one thing I love, it is easy crafts and you can’t get any easier than grabbing your hot glue gun and attaching a record to a plant stand for a side table.
This little table would be adorable in any room or the perfect gift for the music lover in your life.
Scratched records make the perfect little resting place for your morning coffee and breathe new life into a tired piece of vinyl.

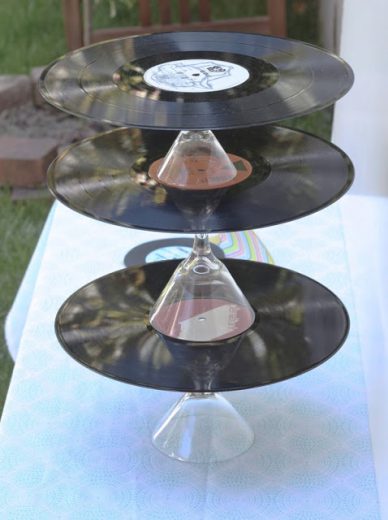
Craft a Cake Stand

I am all about turning anything that I can find from Goodwill into a cake stand. Remember these adorable board game cake stands I created for a party?
You can attach an inverted candlestick holder or martini glass for an easy stand for these.
These would be adorable at themed parties you are hosting or just a fun way to serve up retro food for an evening with friends.
Check out cake for the full scoop on this fun addition to a party.

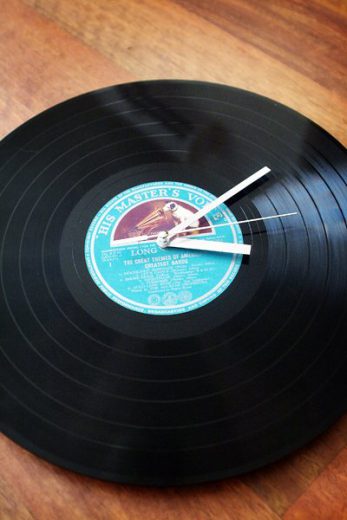
Make a Clock

Wall clocks can be expensive, but a necessary addition to many rooms in your home.
That is why I love this easy DIY Vinyl Record Clock idea featured on Apartment Therapy.
Simply choose a record with a label that compliments the color of the room and use a few clock hardware pieces to create your own version for your wall.
Can’t you picture one of these adorable clocks in a dorm or teen/tween bedroom too?
I love it!

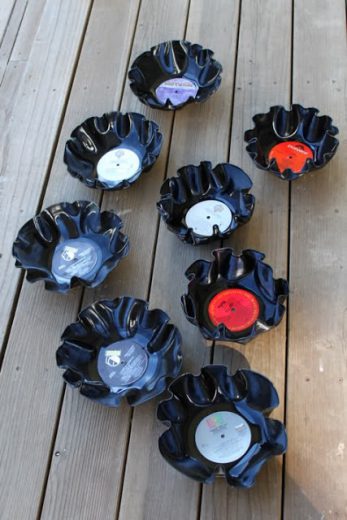
Make a Record Bowl

Looking to add a fun fluted bowl to your party table?
Just as was showcased in the wall decal craft that I talked about here, you can also shape and mold records into bowls to adorn your tables at parties.
This easy DIY requires no cutting of records, but simply a heating and shaping of them to create these adorable bowls.
I can picture popcorn, candy, or nuts as fun appetizers for a party.
Check out Prudent Baby for this easy record bowl tutorial.
Don’t forget that you will need a spot to store your new-to-you record collection!
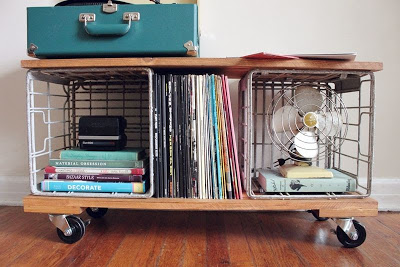
I have fallen in love with this DIY Industrial Storage Cabinet on A Beautiful Mess for an adorable stand and place to display your favorite records.
It looks like the cabinets I have been eyeing online, but is made at a fraction of the price.

My collection has grown so much that I had to find a way to store all of my treasured vinyl in my house.

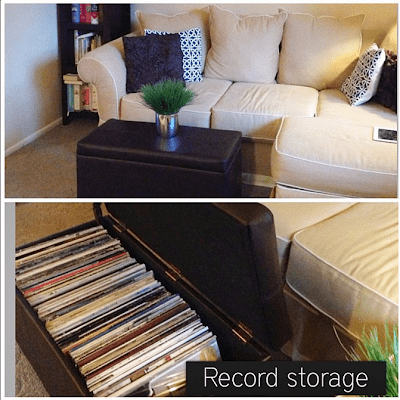
I found a storage ottoman at Target was the absolute perfect size for my collection and brought it home with me to store all of my new (to me) finds.

It makes hunting for a record much easier than sorting through the stacks in my cabinet and it also is fun for my friends to flip through when they want to grab a record they love.


Happy record crafting & hunting, friends!


This post contains affiliate links.


Don’t miss these other great ideas from MomAdvice.com:


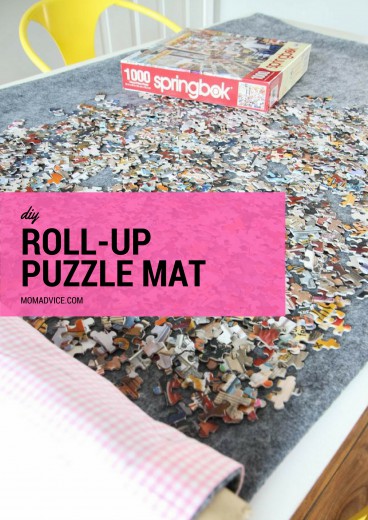
DIY Roll-Up Puzzle Mat


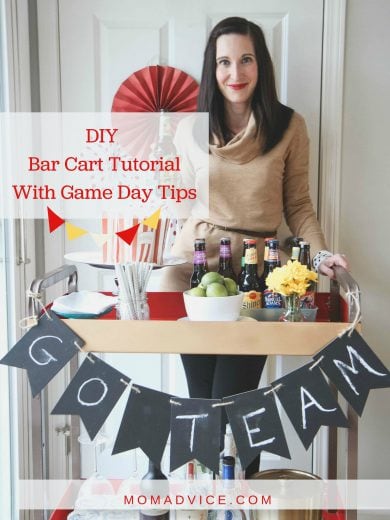
DIY Bar Cart Tutorial


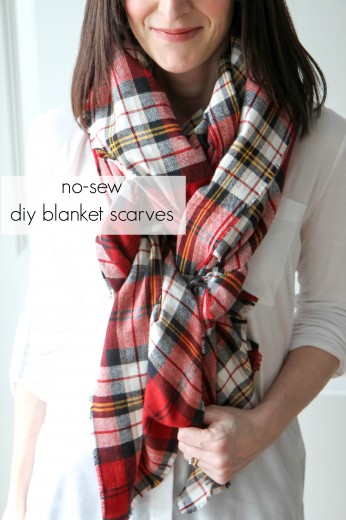
No-Sew DIY Blanket Scarves


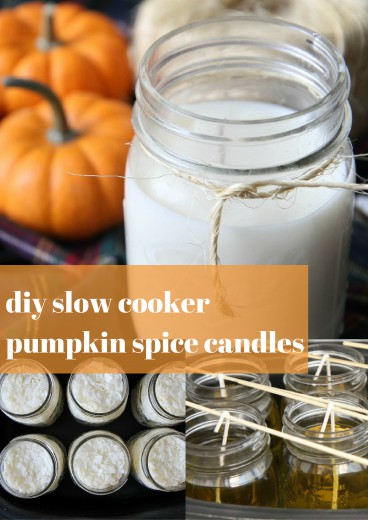
DIY Slow Cooker Pumpkin Spice Candles


Sign up for the MomAdvice newsletter


Pin It

DIY Outdoor Chalkboard Door

Wednesday, July 17th, 2013

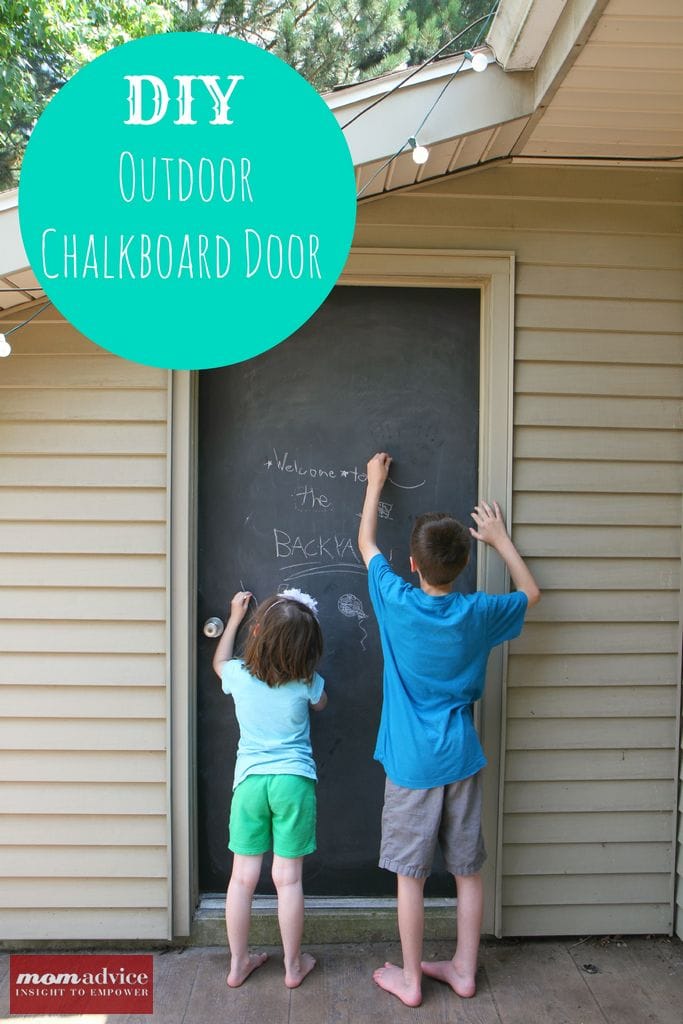
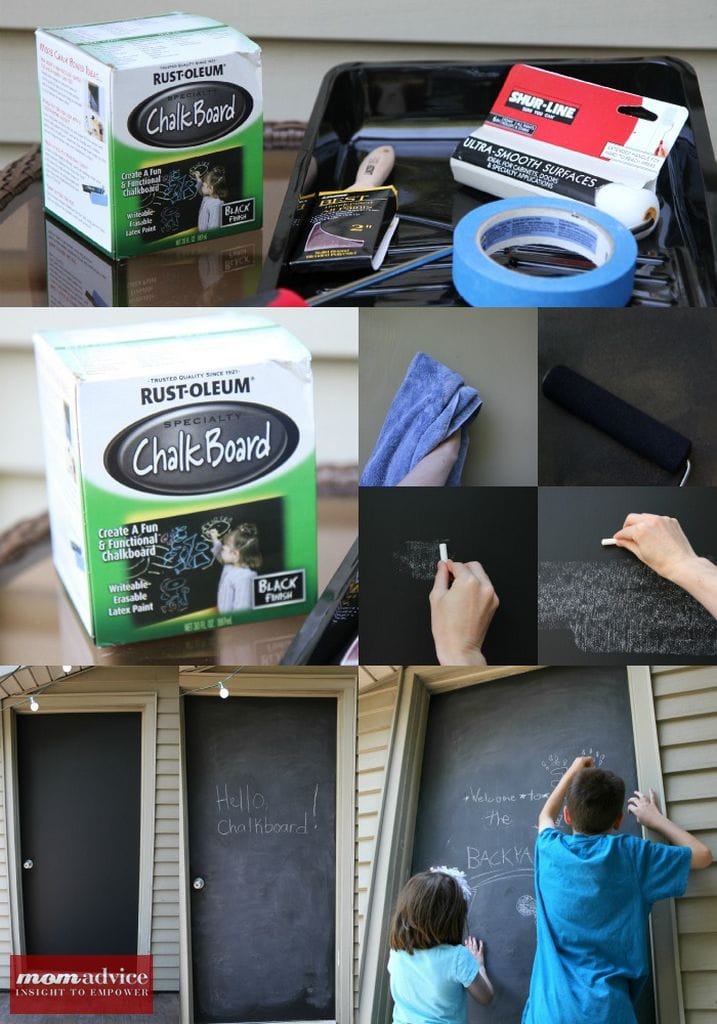
DIY Outdoor Chalkboard DoorWhat could be better than a fun summertime outdoor project? Today I want to showcase an easy DIY Outdoor Chalkboard Door that I created to entertain my kids in the summer months. This DIY chalkboard project that we created is one of my new favorite things in our backyard.  This project featured is in conjunction with my job as a Walmart Mom and all of the supplies can be found at your local Walmart store.

DIY Outdoor Chalkboard Door

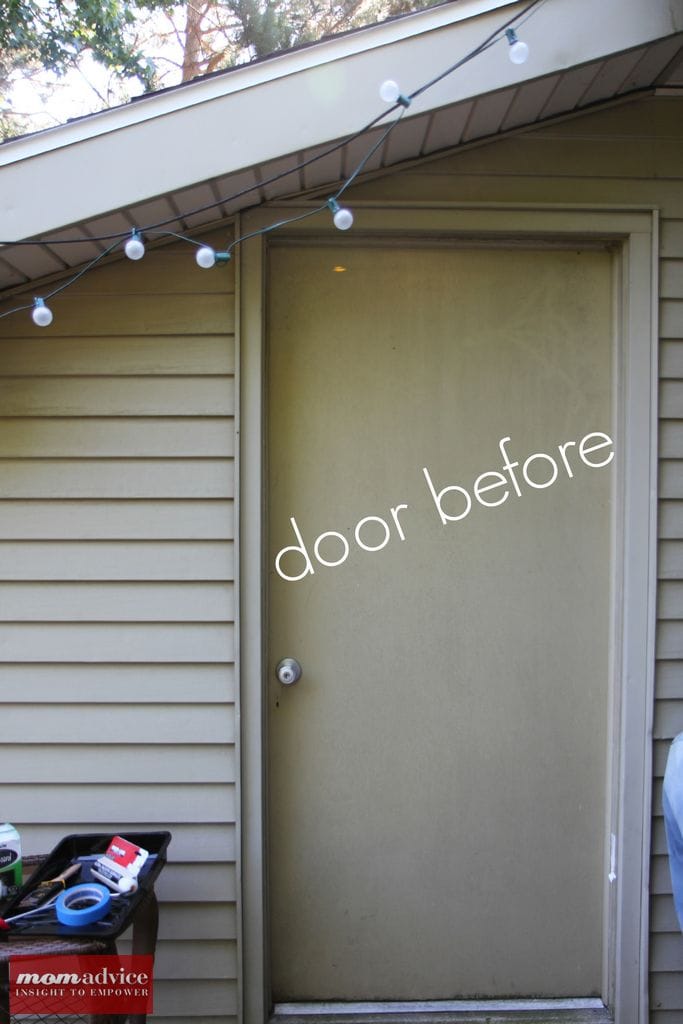
Here is a picture of what our tired old door looked like on our outdoor shed. The neutral paint showed all of the dirt, debris, and water drip marks all over it. It was becoming an eye sore in our backyard. Instead of painting it with regular paint, I decided to transform this spot into a new backyard activity area and give the kids a spot to do their drawing outside.

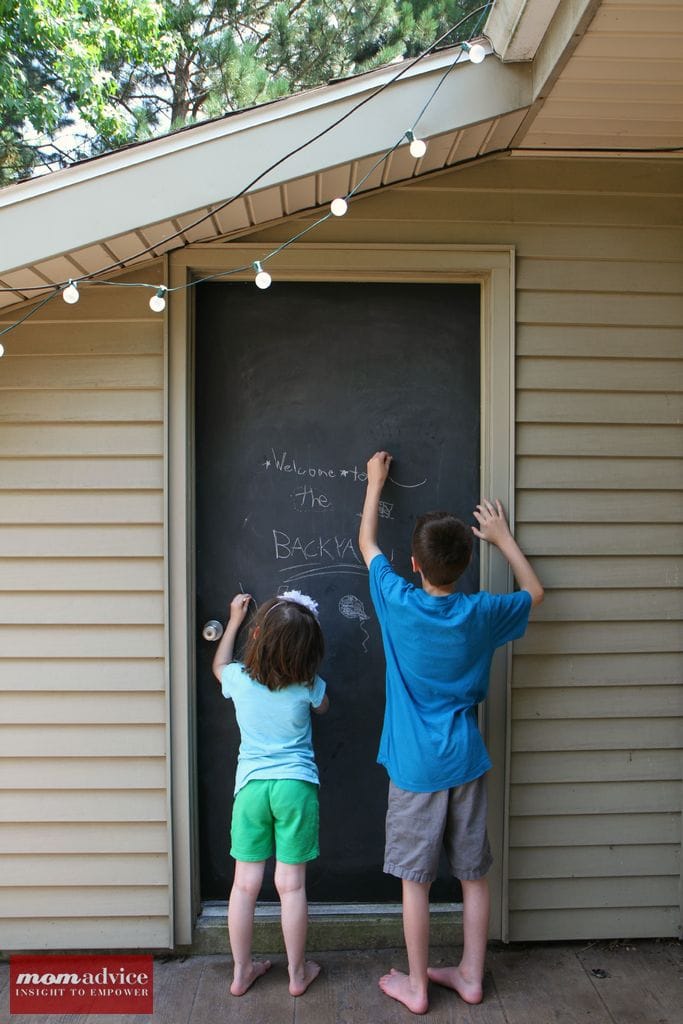
For adult entertaining, this can double as a place to jot down a menu, create a welcome sign for your guests, or keep tally of game scores in a wild game of badminton.

We are crazy like that.

DIY Outdoor Chalkboard DoorSupplies List (if you buy everything it will be less than $25 in supplies!)

1- 30 ounce container of Rust-Oleum Chalkboard Paint in Black Finish (over in the painting supplies)

Soapy Water & Rag (for wiping down your door)

Painters Tape

Paint Roller

Paint Brush

Paint Tray/Liners

Directions

1. Clean your surface and let it dry. I wiped my door down with a grout brush and a pail of sudsy water and then rinsed it with our hose.

2. Tape off around your door handle to protect it from getting paint on it.

3. Pour your paint into your paint tray and begin applying your first coat with your paint roller. The paint will be dry to the touch within thirty minutes, but give it a full four hours before applying your second coat.

4. Add a second coat of paint and repeat with the same timing above, if you desire, to add a third coat.

5. Allow the door to dry for three whole days before beginning  your conditioning or writing on it.

6. Before writing on it, after three days time, condition the surface by rubbing the side of a piece of chalk on the surface and then erase.  I like to rub my chalk in one direction and then rub it in the opposite direction for good coverage. This  will leave a coat of chalk dust that will provide erasability. Your chalkboard can be wiped clean with a damp towel, but wait seven days after painting before wiping it down. Repeat the conditioning step after cleaning.

DIY Outdoor Chalkboard Door

DIY Outdoor Chalkboard Door

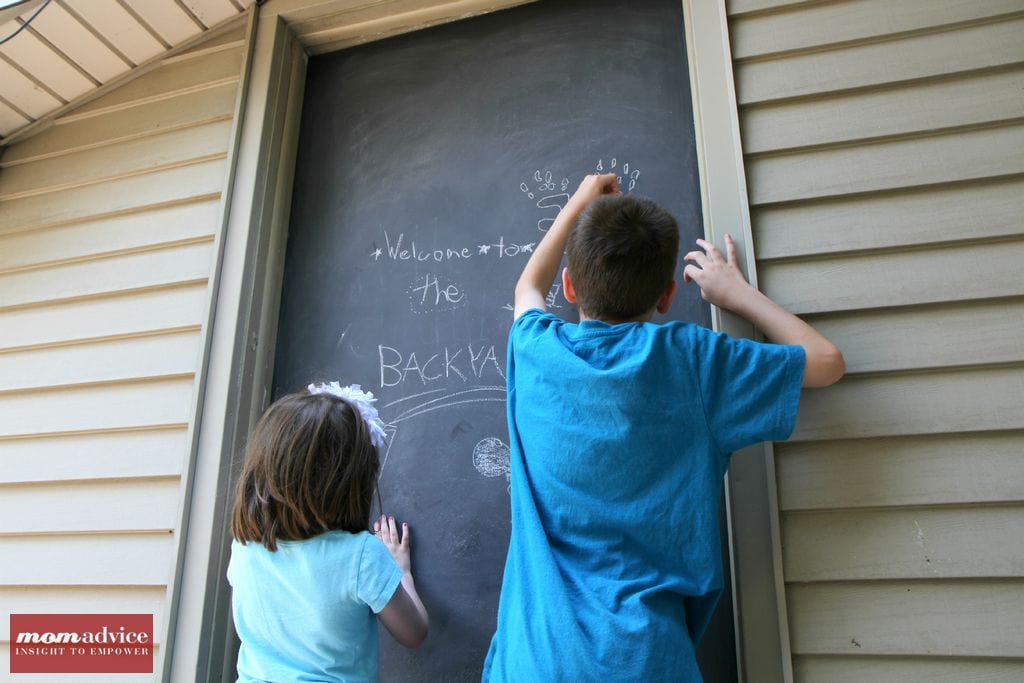
Give your kids some chalk and the chance to create their own welcome sign for your guests outdoors!  I hope your family loves this project as much as we do! The best part is the hours of enjoyment they get and the lack of dirt showing on my outdoor door in the backyard.

A win-win for both kids and parents!

If you loved this project, I just know that you will love these ideas for Chalkboard Fun & Outdoor Entertaining!

S’More Toppings Bar Party

DIY Chalkboard Conversation Bubble Cookie Jars

Dollar Store DIY Chalkboard Food Label Frames

DIY Lunchbox Creation Station

walmart_mom_disclaimer

Pin It

Easy Tips for Making Over Patio Furniture

Thursday, June 20th, 2013

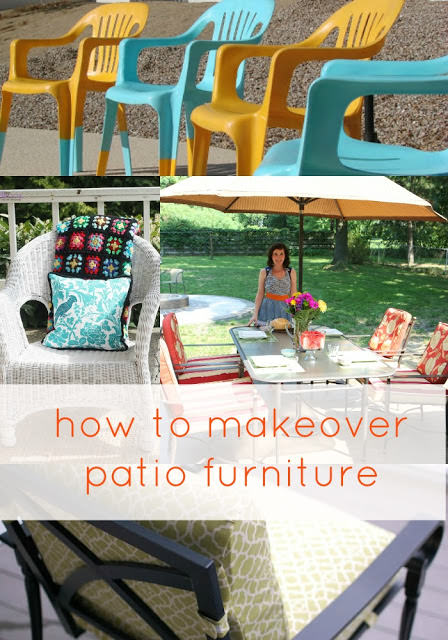
Easy Tips for Making Over Patio Furniture

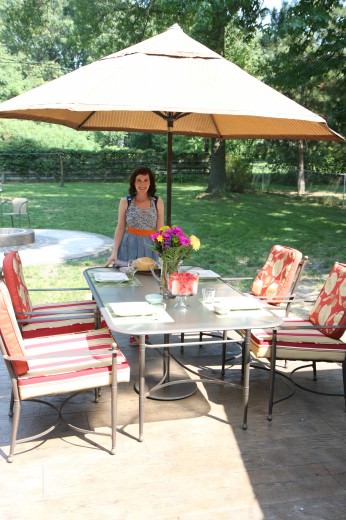
The season for outdoor entertaining and eating is upon us and if you are looking to upgrade your patio set, you just might want to check your local thrift store.
Today I wanted to share with you easy ways to update, refinish, and refresh an outdoor patio set into a set that is uniquely you with a few easy tools and strategies to help get you started.
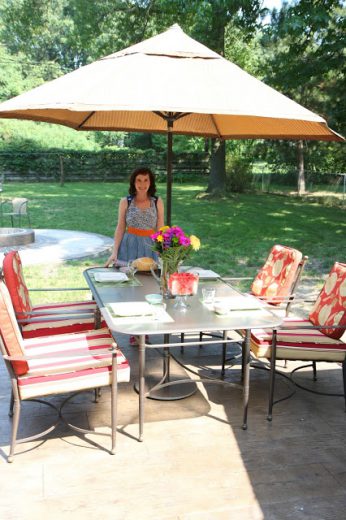
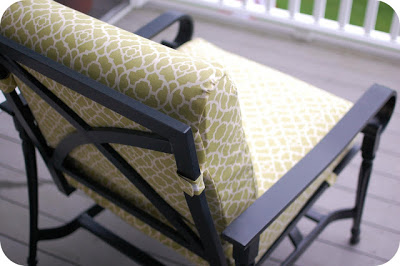
I, in fact, recently refinished my old set (pictured above) and have fallen back in love with it again, thanks to an easy afternoon of spray painting.
 
Here are a few strategies for making over an old set.

Refinishing Metal Furniture

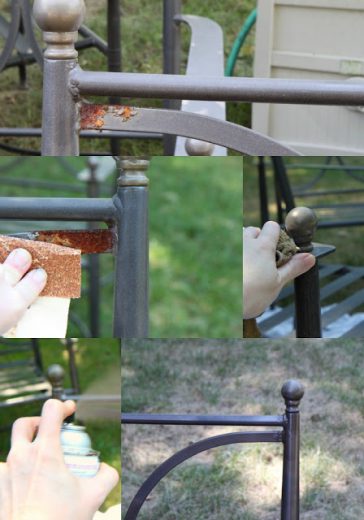
Rusting on metal furniture happens and if you spot a set that looks a little worn in spots, a makeover transformation is easy to do and requires only an old cloth to wipe down the furniture, sandpaper, and spray paint (in any color you desire).
Give your furniture a good wipe down to remove any dirt or debris that may be lingering from summers past.
Use a medium-grit sandpaper to rub down any rust spots or imperfections on the furniture until they are level and no longer flaking off on the piece.
Once the all of the areas have been sanded, spray paint the furniture and allow it to dry fully.
I recently discovered a spray paint nozzle for recovering my furniture pieces and it really helps to coat the furniture evenly.
If you plan to do a lot of spray painting to refinish your pieces, I highly recommend the small $6 investment to get a more even finish on your pieces.

Refinish Plastic Furniture

Plastic furniture is one of the easiest types of furniture to update.
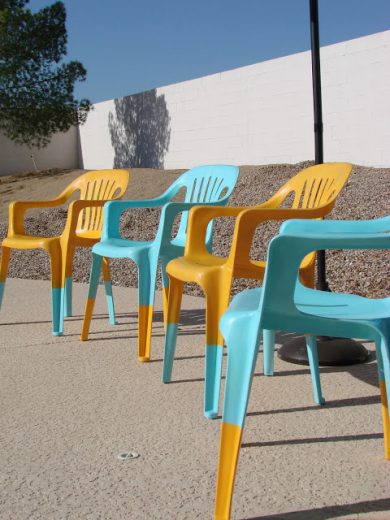
There is no need to rough up the plastic with sanding, in fact, all you need to do is purchase spray paint that is made specifically for plastic (I recommend Krylon Fusion for Plastic) because it specifically bonds to plastic and requires no priming or sanding.
I’m dying to score a few gently used garage sale chairs to makeover for our back patio.
You see, even plastic furniture can look trendy with the right colors and painting techniques.
Stay up-to-date on fun trends, like paint-dipped furniture as pictured above from The Homemade Diva, for a fun splash of color on your patio.

Refinish Wicker Furniture

Perhaps one of the most intimidating types of furniture to many DIY’ers is wicker furniture.
There is no need to be intimidated though because it is easy to spruce up and to even make minor repairs to.
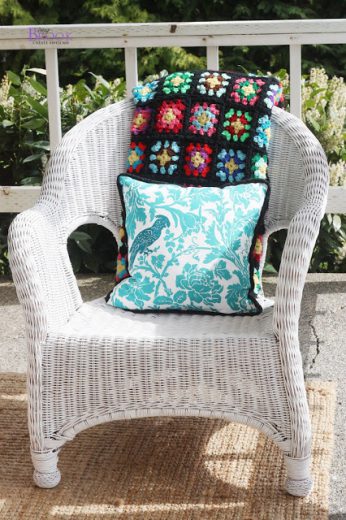
Look for a waterproof glue to fix any minor repairs and make sure that the glue has plenty of time to set (read the back of the glue bottle for specific times) before beginning your painting.
After thoroughly giving the wicker a good scrubbing and air drying, spray paint your piece in several sessions of very thin coats of spray paint in your desired color.
Try these spray painting wicker furniture tips from Rust-Oleum for refinishing your wicker pieces using their Rust-Oleum Universal spray paint line, that allows you to skip the step of priming.

Recover Old Patio Cushions

Old patio cushions can get a new lease on life with fresh fabrics.
If you have ever priced out new cushions at stores, you quickly realize that it would cost hundreds of dollars to get new cushions for all of your outdoor furniture.
Did you know that you can actually buy weatherproof outdoor fabric at the fabric store? It’s a handy tip to have in your DIY arsenal for a couple of different reasons.
I actually used this material on my dining chair indoors to help with easy clean-up from spills and stains with two small kids.
This same material can be used to freshen up your old patio cushions.
Although I am no seamstress, this tutorial from 33 Shades looks like a great one for how to recover old patio cushions.
Next time you see these at your local Goodwill, consider trying this DIY to get new cushions at a fraction of the retail price.

Have you ever made over patio furniture? What are your tips and techniques for this DIY project?


This post contains affiliate links.


Don’t miss these other great ideas from MomAdvice:


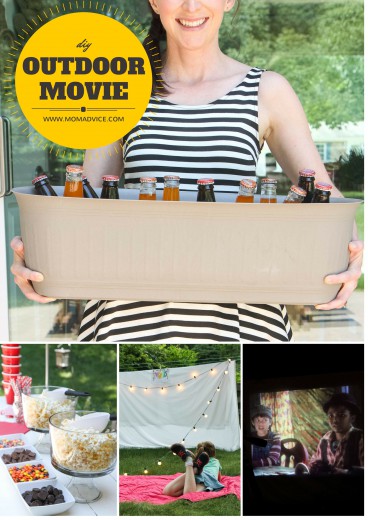
DIY Outdoor Movie


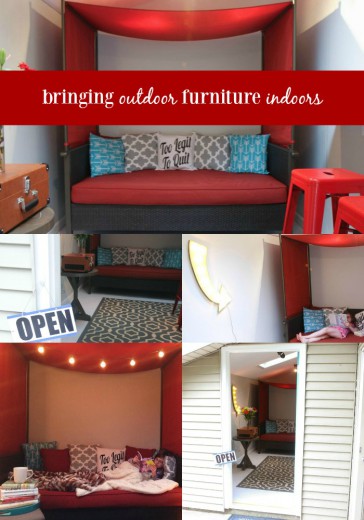
Bringing Outdoor Furniture Indoors


She Shed Makeover

New Spins on Outdoor Entertaining 


Sign up for the MomAdvice newsletter

Pin It

4th of July Flag Cupcake Pick Wreath & Easy Flag Bunting

Tuesday, June 18th, 2013

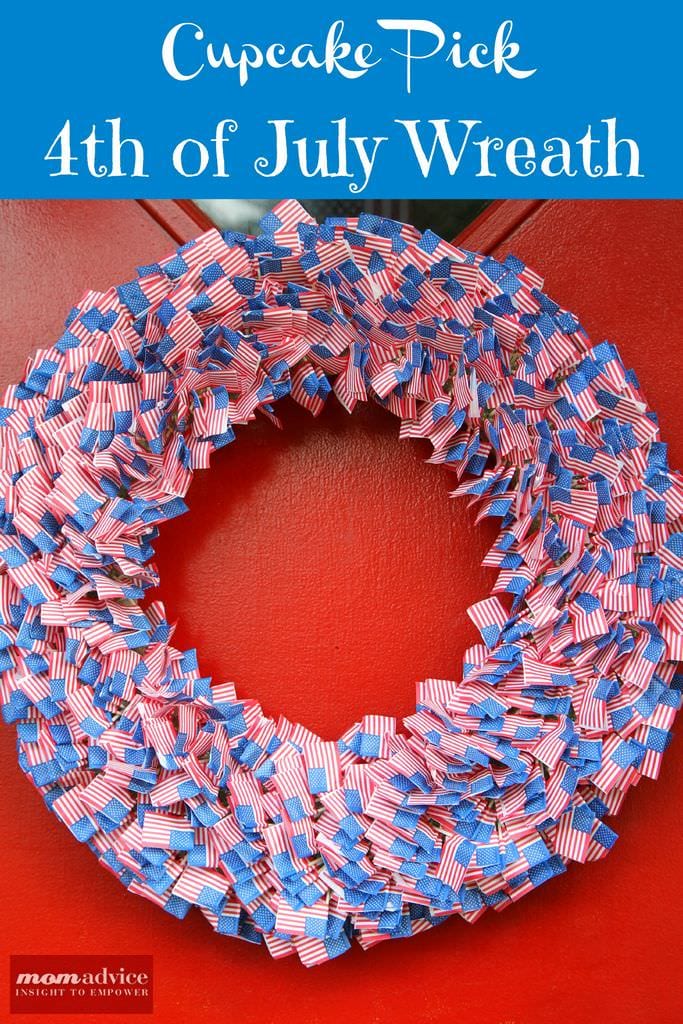
4th of July Cupcake Pick Wreath from MomAdvice.com.

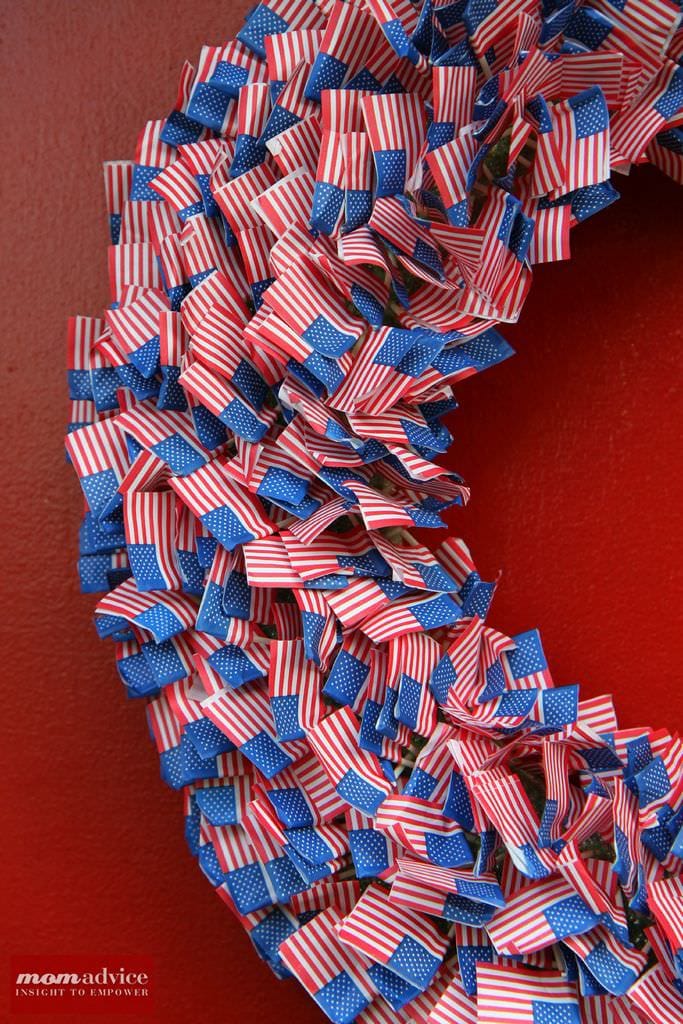
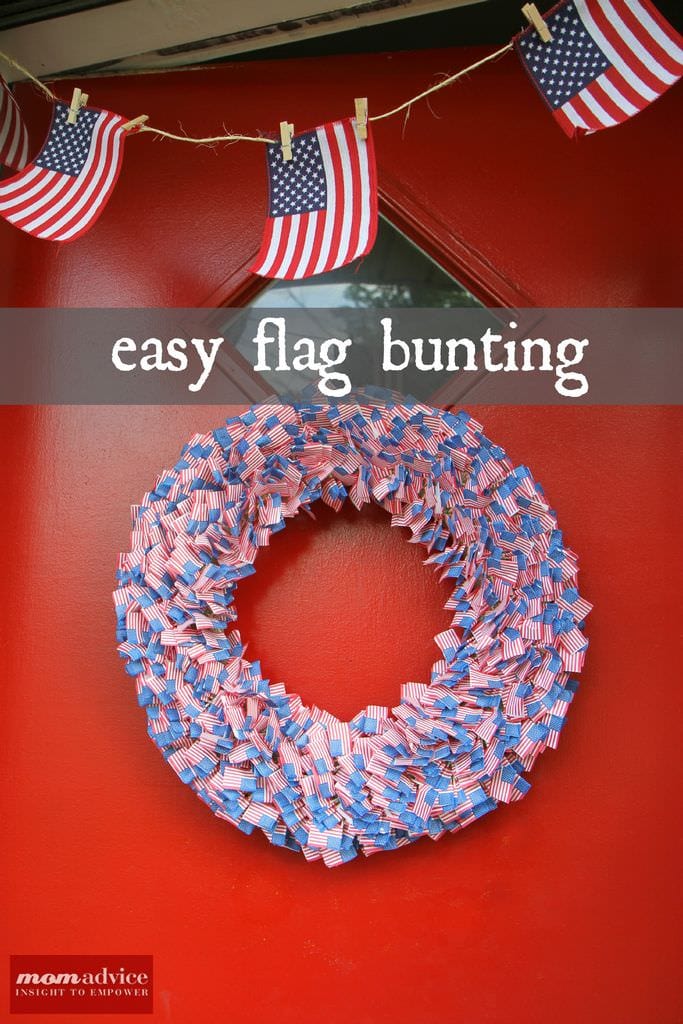
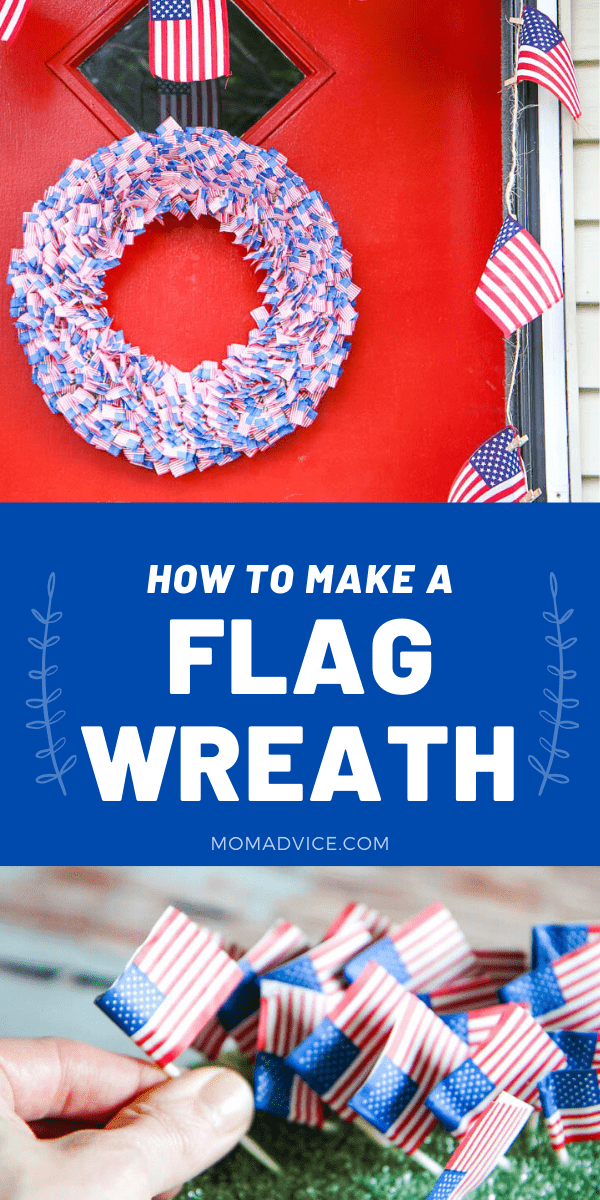
4th of July happens to be one of my favorite decorating seasons and today I want to show you how to make an easy 4th of July wreath from flag cupcake picks.

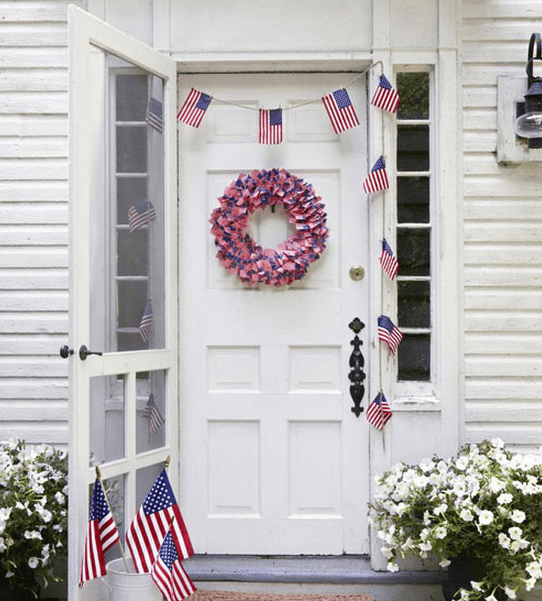
This 4th of July wreath idea and easy flag bunting were inspired by a picture from a magazine that I found.


Good Housekeeping Magazine

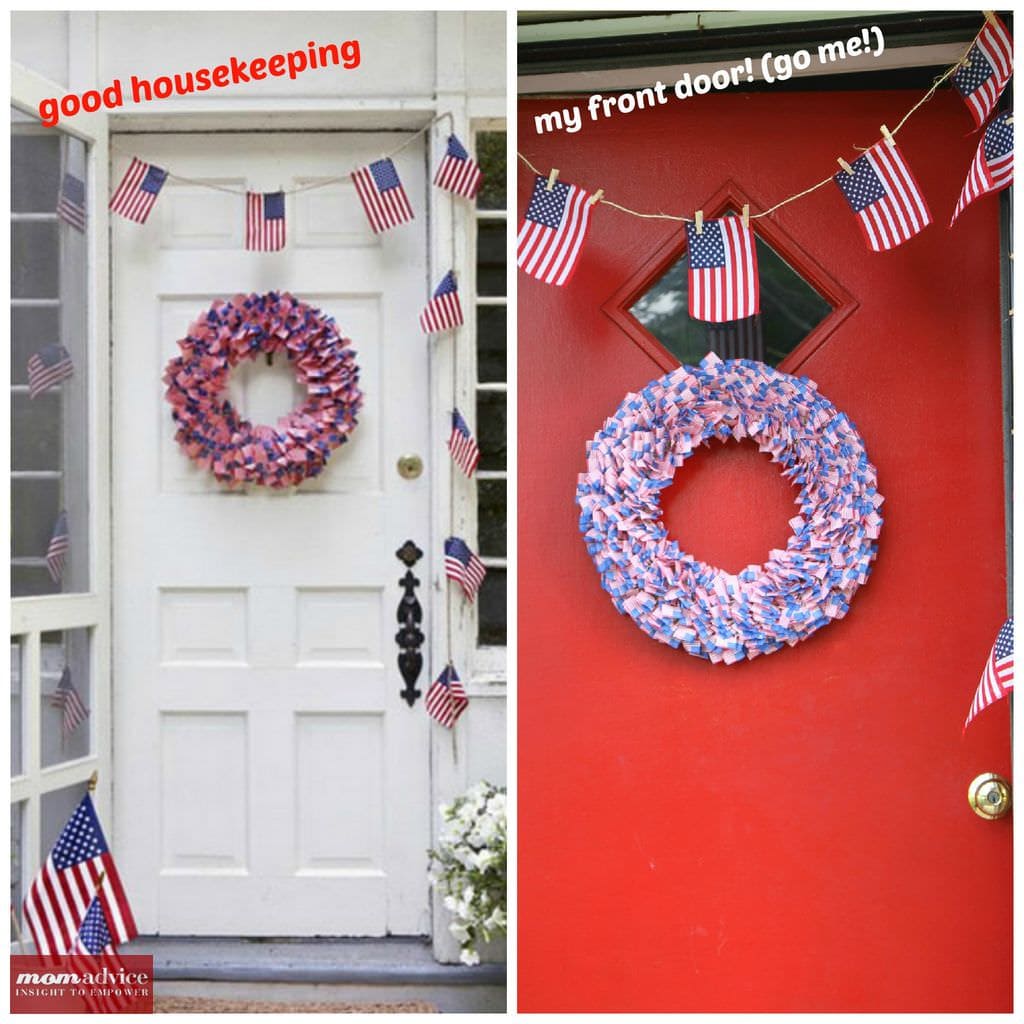
This picture from Good Housekeeping magazine caught my eye and I knew I wanted to decorate my front door just like it.

Unfortunately, there were no directions on how to create this wreath, what supplies to buy, or how to execute this project.

When Walmart challenged me to come up with a 4th of July project for their customers, I just knew that I had to recreate this door.

My husband said I couldn’t do it.

His doubt fueled this wreath into its amazing flag glory…even when a little voice in my head wasn’t too sure it would look like the picture. If I can make a wreath out of yarn, out of coffee filters, out of Peeps for goodness sake, how could I fail at  a simple cupcake pick wreath?

If you are not crafty this is the project for you.

It requires no sewing, gluing, cutting, or any other crafty-type behavior.

I think that is why I am most excited about it because it is just so easy to do! 

Let’s get started with what you need to tackle this fun patriotic project!


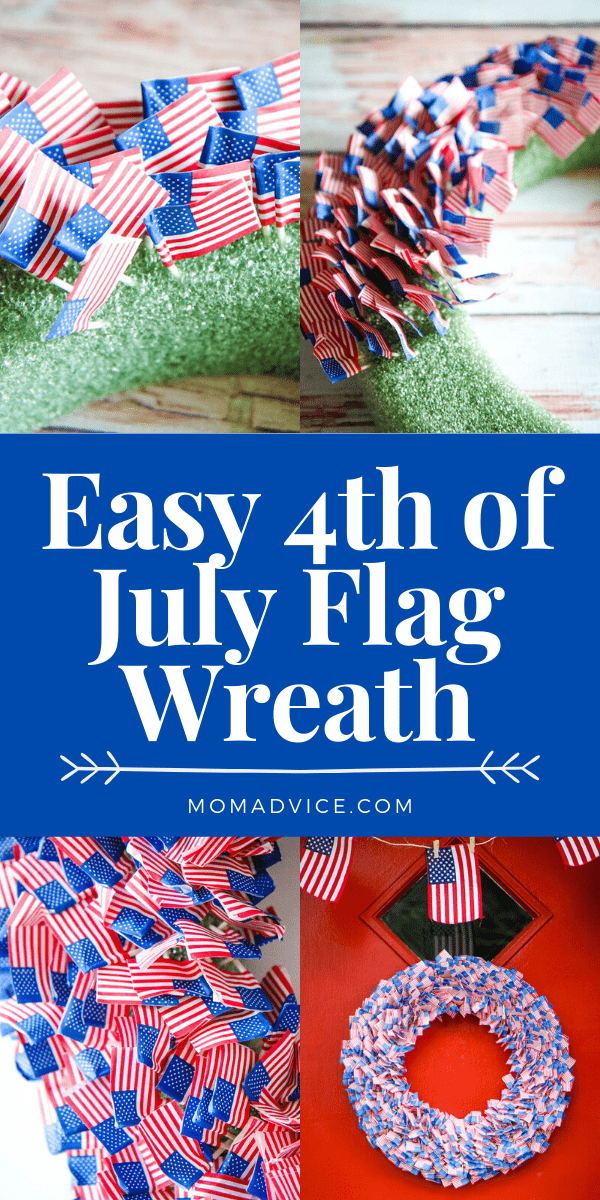
Easy 4th of July Wreath - MomAdvice


4th of July Cupcake Pick Wreath from MomAdvice.com. 4th of July Cupcake Pick Wreath from MomAdvice.com. 4th of July Cupcake Pick Wreath from MomAdvice.com. 4th of July Cupcake Pick Wreath from MomAdvice.com.


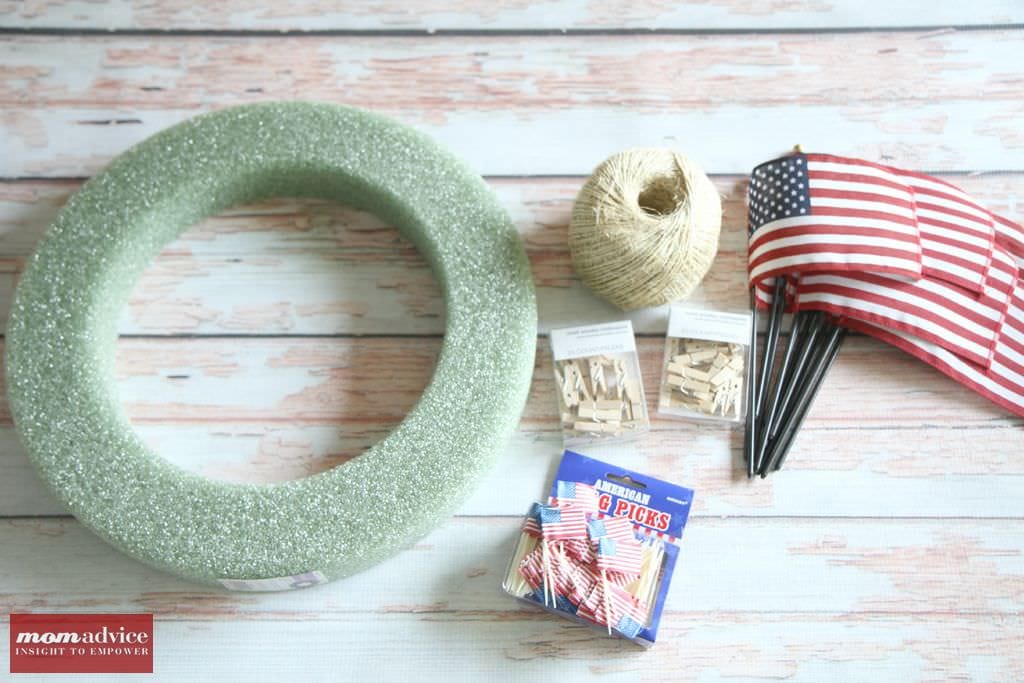
Supplies List

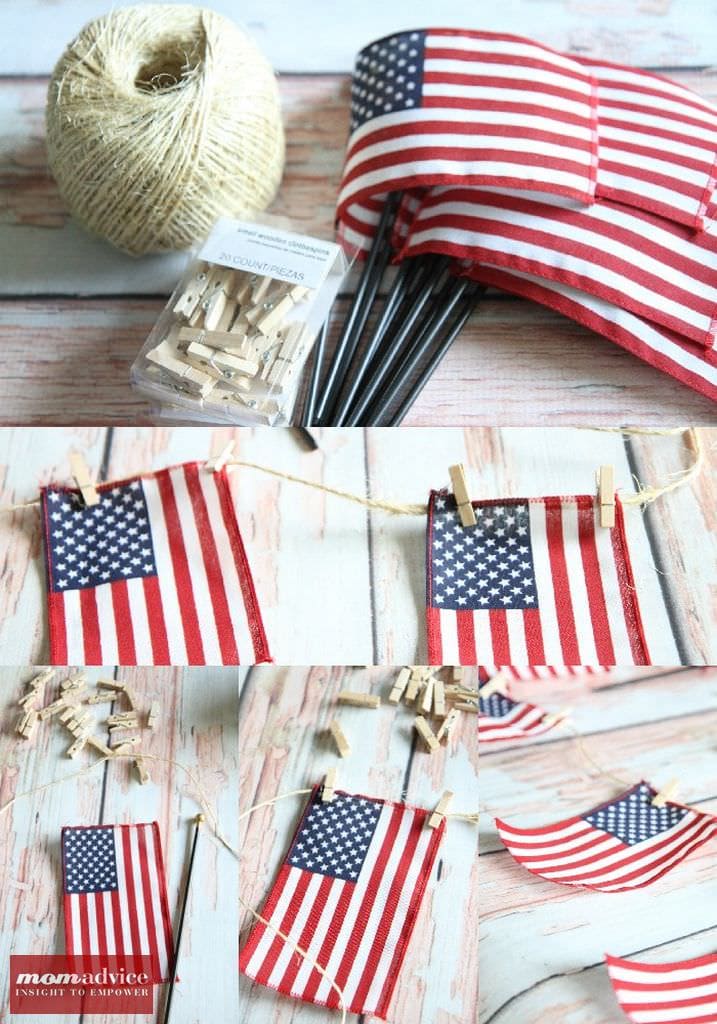
Above are some pictures of the supplies you will need (for visual learners, like myself!) Prices listed are what they are listed at currently at the store!

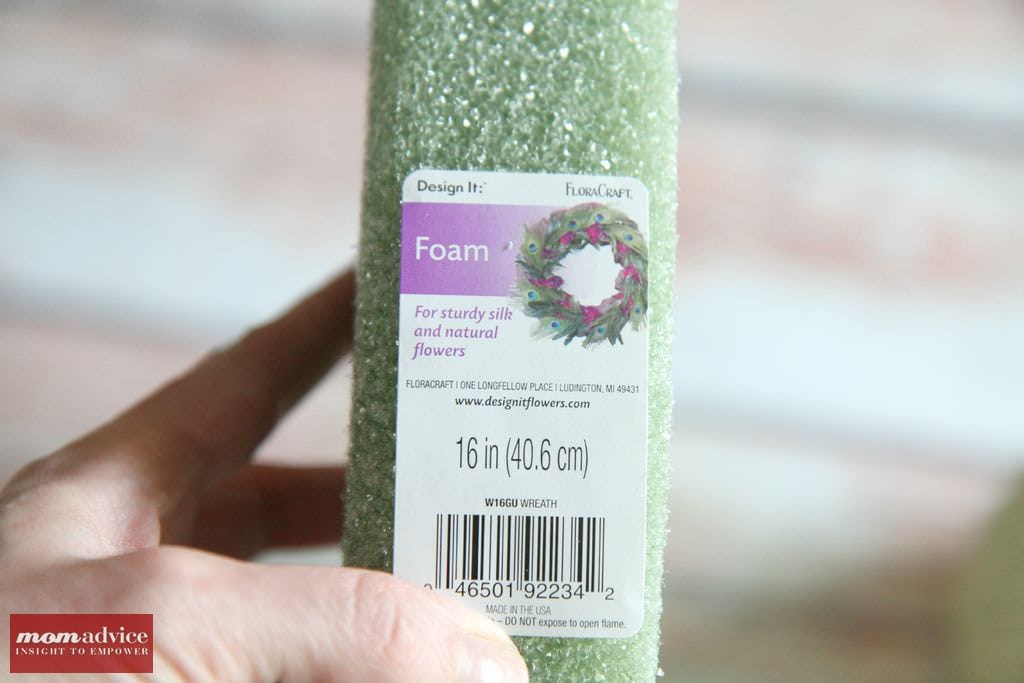
  • 1- 16″ foam wreath form (that is flat on the back)- $6.99
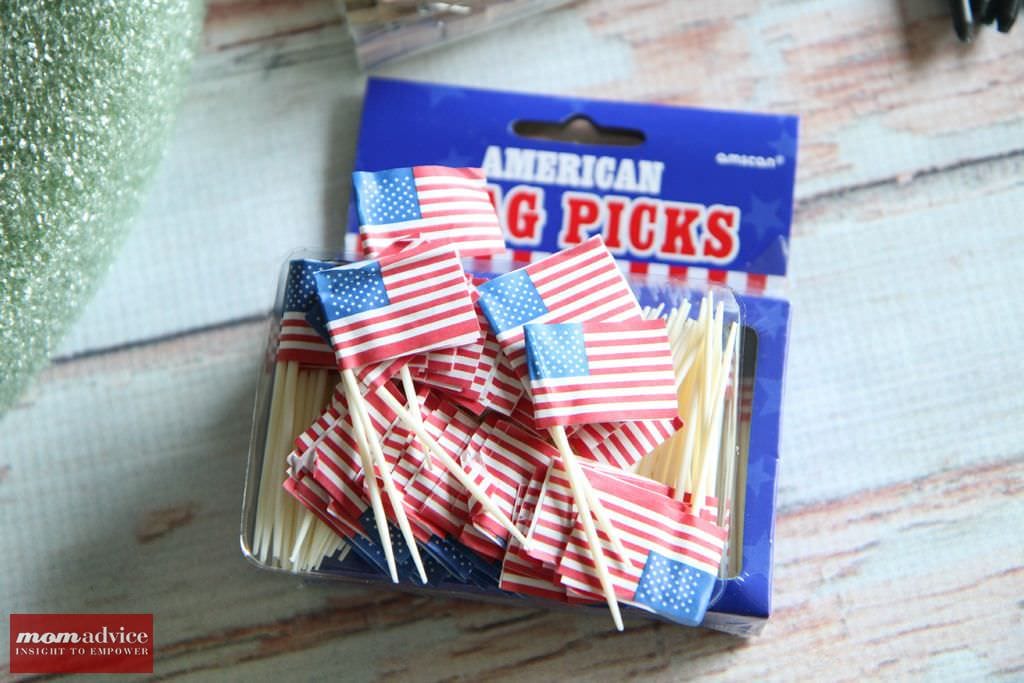
  • 6 packages of 120 count flag cupcake picks (Note: These are NOT available at Walmart stores. You can find these, however, at your local party supply store)- $2.99 per box (approximately)
  • Jute Rope- $3.24
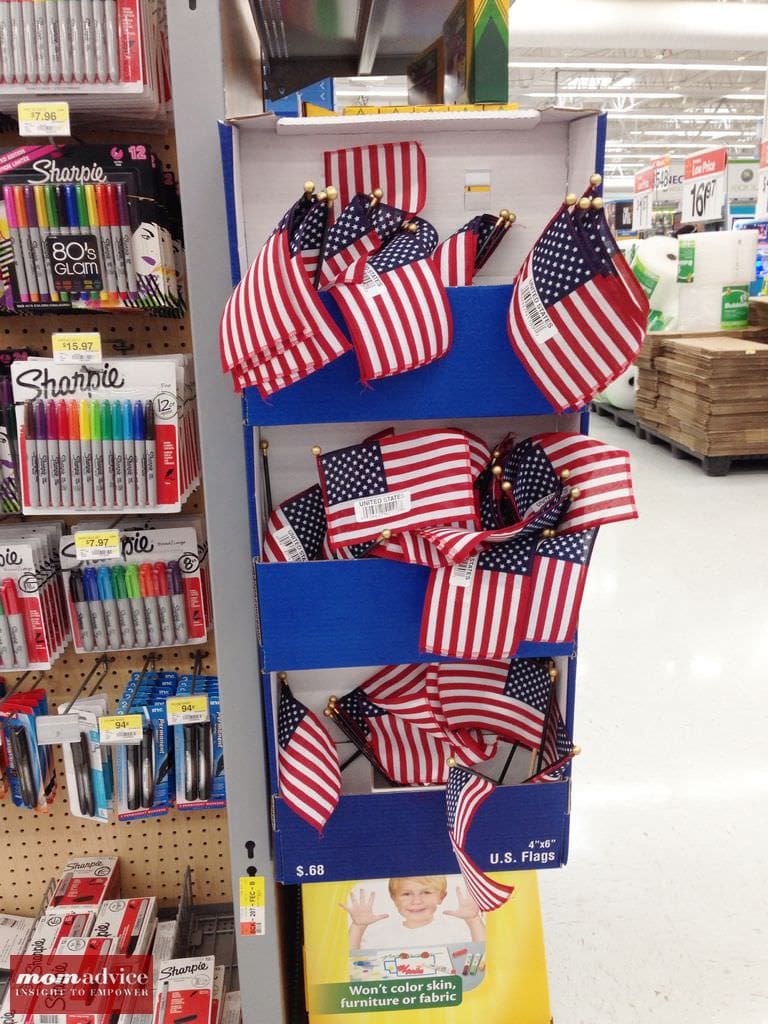
  • 12- 4×6 US Flags (found on the ends of the aisles in the office supplies)- $.68 each
  • 2- 20 count packages of mini clothespins (over in the office supplies)- $2.48 each

4th of July Cupcake Pick Wreath from MomAdvice.com.

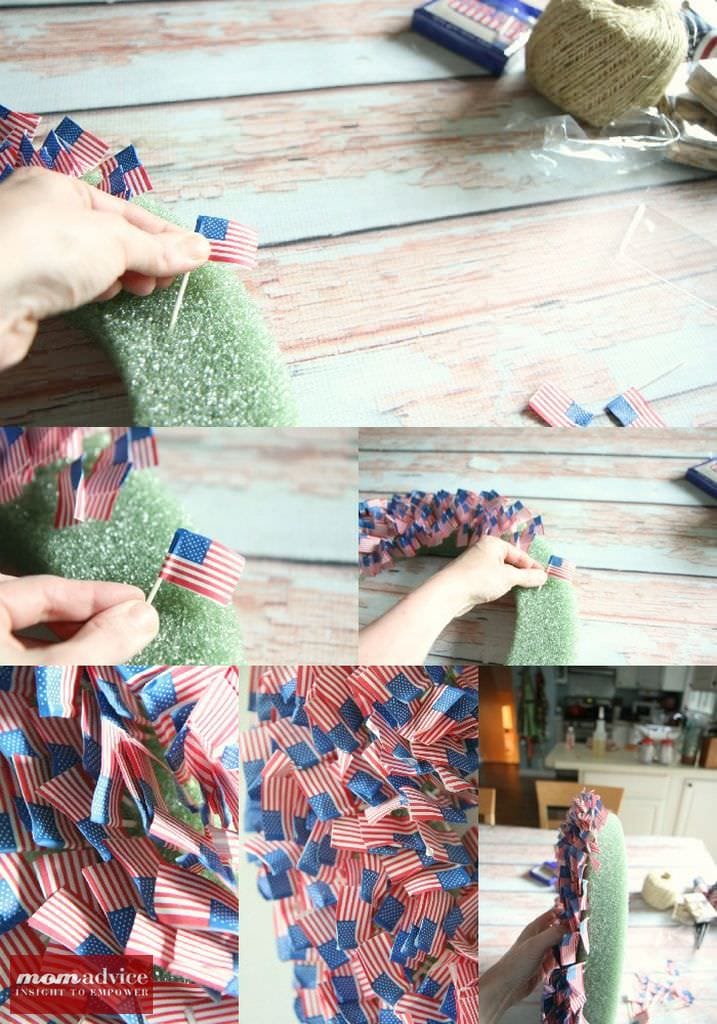
  1. Take your flag cupcakes and insert them on a slight angle into your foam wreath form. These will not slide in and out easily so you will have to put a little oomph behind it.
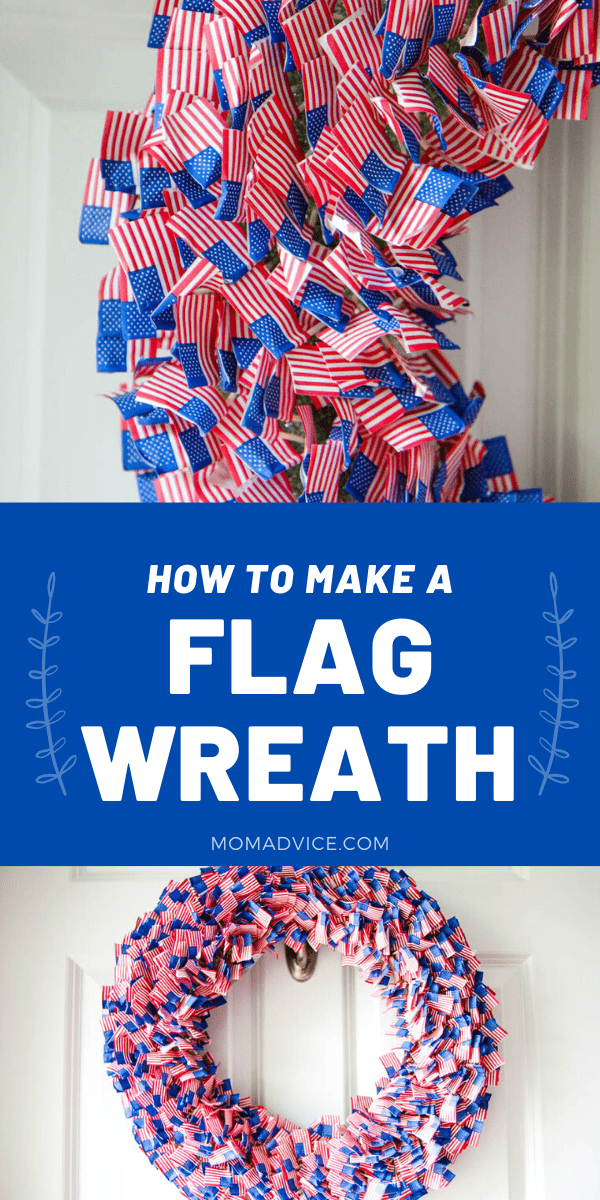
  2. Continue filling them in, around and around until you can no longer see your wreath form peeking through. About a box of the flag cupcake picks (120 of them) filled one quarter of my wreath. 
  3. Once the front is filled, build up the behind it, but with a thinner layer, just to camouflage the back of the wreath a bit. Make sure not to stack these too deep so that the wreath can still lay flush against your door.
  4. You can fill in the center of the wreath as well with flags, again adding a thinner layer just to hide any of your wreath form, until all you can see is a sea of little flags. It took 720 flags to fill this wreath form. Yes, your fingers will hurt, but you will be so happy about your wreath, you will forget all about the pain!

4th of July Cupcake Pick Wreath from MomAdvice.com.


Easy Flag Bunting from MomAdvice.com.

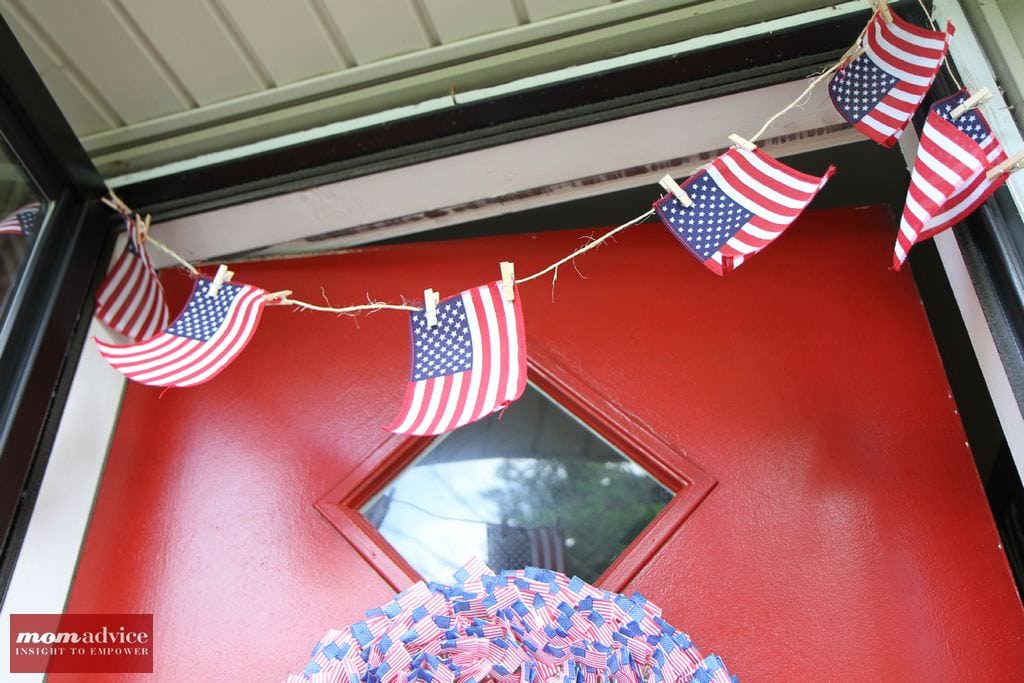
Now that you have your wreath done, we can create our adorable flag bunting to go around the outside of your door, to frame your wreath!


Easy Flag Bunting from MomAdvice.com.


  1. Disassemble your flags from their mini poles. These are stapled on so I just pulled them off, or you can use a staple remover to remove the staples from the flags.
  2. Take two mini clothespins and clip the flags to the jute twine, spacing them evenly, until all twelve have been attached.
  3. Leaving a little bit of length, clip the end of the twine to finish your bunting.

Easy Flag Bunting from MomAdvice.com. This easy bunting could be added to a doorway, dress up a mantle, to frame out your patio doors, or to decorate a ledge for the holiday. I love that it is so sweet and so simple to create.

4th of July Cupcake Pick Wreath from MomAdvice.com.

Here is a side-by-side comparison of my door and the door I spotted in the magazine.

I am so proud how this turned out and I love that these decorations can be used year after year for the holiday!

I look forward to sharing more fun patriotic projects in the next few weeks with you!

I hope you enjoyed today’s easy 4th of July craft projects!


How to Make a Flag Wreath - MomAdvice.com


walmart_mom_disclaimer


How to Make A Flag Wreath - MomAdvice.com

Pin It

9 Ways to Spice Up a Goodwill Lamp

Tuesday, May 21st, 2013

goodwill_lamp_makeovers

One walk through the aisles of Goodwill and I guarantee you will find a handful of great lamp choices just begging for a fun DIY lamp makeover that can dress up a corner in your home.

To inspire you, I have gathered 9 of my favorite ways to spice up an old lamp.

These lamp makeover ideas are so inspiring, in fact, that I can’t wait to snag a lamp for myself!
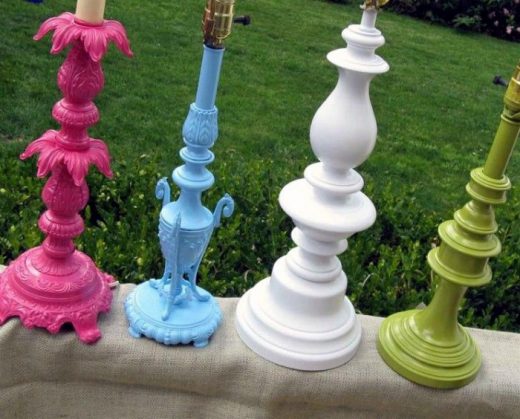


Be Bold With Paint

There is no need to go overboard if you lack the craft skills to tackle a more complex craft project and one way that you can easily spice up an old lamp is just to add a bright pop of color to it with spray paint.

With all of the fun colors in the spray paint aisles, the only hard part will be choosing your favorite color.

Be sure to browse around the Housewares section for other fun additions you can add to a table in your home and can spray paint in the same hue.

One bottle of spray paint will go far with a fun project like this. (Source: Mr. Kate)


 Make It Into a Bird Bath (Say What?)

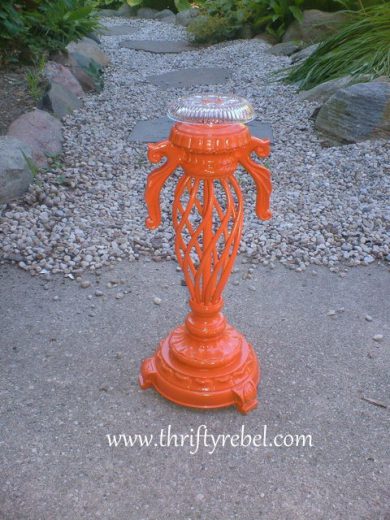
Sometimes one has to rethink the original purpose of a thrift store item, that is why I am IN LOVE with this idea to turn a lamp into a birdbath for the backyard.

With this DIY, you simply spray paint your base in a fun color to match the colors in your patio set, and then add a bowl on top to create the perfect little birdbath for the backyard.

Why spend a fortune at the garden center, when a birdbath can be made for a fraction of the price? (Source: Thrifty Rebel)


 Add A Whimsical Accent to Your Game Room

Do you remember all of the fun I had with board games over the Fall?

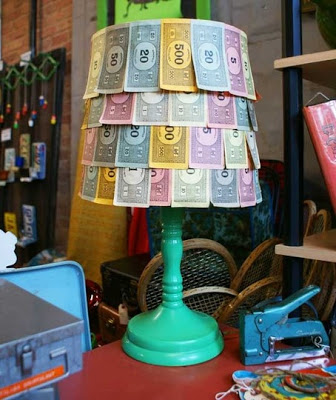
If you remember how much fun I had with that, I am sure you will understand my enthusiasm for this adorable lamp for a family’s game room.

The best part about this one is that not only can you pick up the lamp from Goodwill, but you can even pick up the board games there too.

This is a lamp that you could definitely make together as a family and would be absolutely adorable in your game room, family room, or kids playroom. (Source: Apartment Therapy)


Make it Sentimental

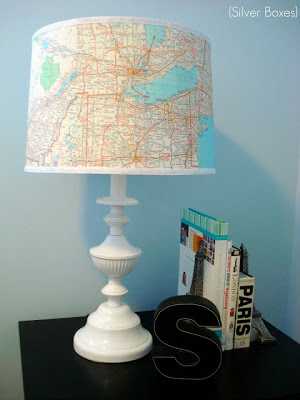
Map crafts are just as popular as the book crafts we highlighted last month and I absolutely love this DIY lampshade makeover made from a map.

Select a map from a location that is special to you, perhaps where you honeymooned, where you grew up, your favorite family vacation, or where you live right now, and make an homage to that location with this sweet lamp.

Finish it with a grosgrain ribbon or an embellished edge ribbon trim from the craft store. (Source: Silver Boxes)


Rethink Your Fixture

Who says you need a lampshade to even create a light.

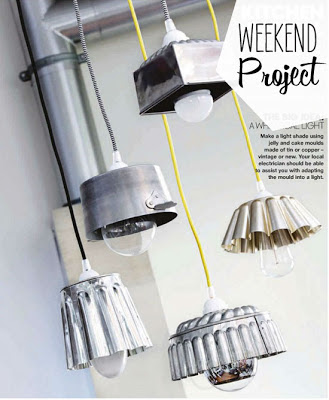
Have you ever thought of using a cake or jelly mold for a fun industrial fixture.

It is rare that I stop in a thrift store and don’t spy a cake mold with pretty fluted edges and they are often priced at a dollar or less.

Add a spray paint that adds a hammered metal appearance to them or go vintage with a pretty aqua blue.

These light fixtures are not only unique, but they utilized an item that is frequently donated. (Source: Poppytalk)
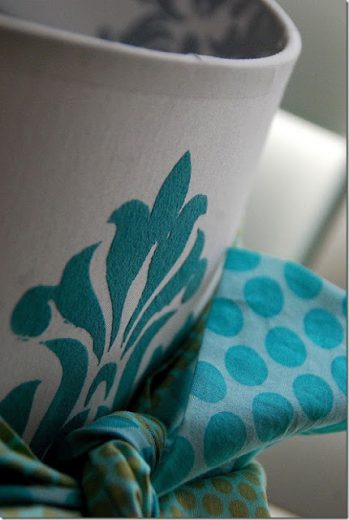


Add a Stenciled Accent

Stencils are all the rage in home decor whether it is a stenciled accent to a wall, to stenciled window treatments, to stenciled accessories in your room.

You can find beautiful stencils to choose from at your local hardware store in the paint aisle or you can create your own if you have a craft cutter, like a Cricut or Silhouette.

This stencil adds texture to the fabric, thanks to the Tulip Soft Fabric paint.

I love the fun bow and cute additions made to this lamp from a scrap of burlap and fabric.

I am sure you will love this one too! (@ Tatertots & Jello)
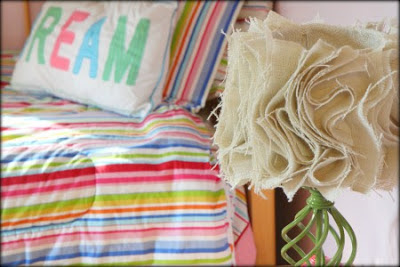


Add a Ruffle

Don’t sew?
No problem!
There are so many fun ways to add fabric to a tired lampshade that you might just be overwhelmed with the choices and few of them involve more than fabric and a glue gun.
This lamp that I created replicated a lamp spotted in Anthropologie, but was made at a fraction of the price with a little burlap and a hot glue gun.
This lamp redo is a great one to add to a craft room or to a little girl’s room for a feminine touch.
Spray paint the base any color to match the room and add a burlap ruffle in whatever shade you can find on sale at your craft store. (@ MomAdvice)

Add Some Script

I love when bloggers are inspired by expensive lamps they see in store catalogs and find  a way to replicate that beauty in their homes.

A $159 lamp might not be in your budget, but one created for less than $10 just might be.
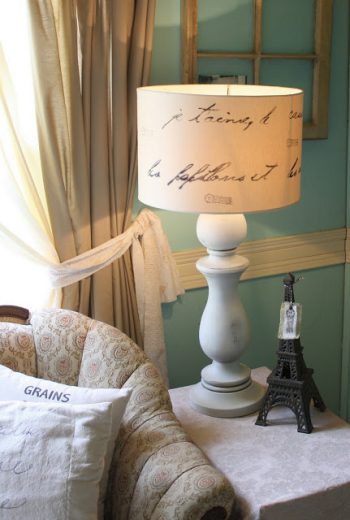
Who wouldn’t love a love letter written right on a lampshade?
I am all about sentimental decor in my home and I have a feeling that this lamp makeover is as sweet as it gets (@ The Shabby Creek)
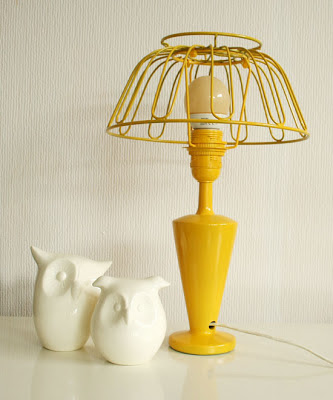
 

Rethink Your Shade

Industrial lighting is very in right now and one way that you can incorporate that industrial feel to your lighting is by simply creating a different lampshade from other items you might find lurking at your Goodwill store.
A metal basket is the perfect way to add that industrial touch to a lamp and when they are both spray painted in the same shade, it is a match made in heaven. (@ DIY Wilma)

Have you ever spiced up a lamp? Let us know in the comments what you have done with this frequently donated item!


This post contains affiliate links.


Don’t miss these other crafty ideas from MomAdvice.com:
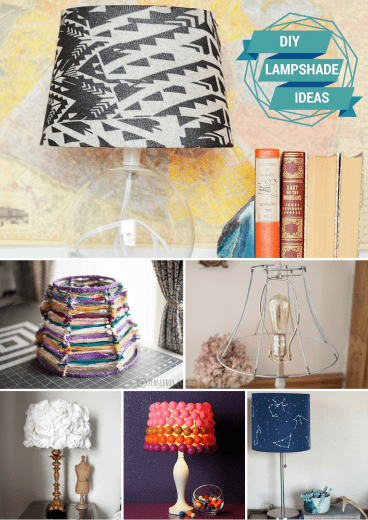
 

DIY Lampshade Ideas


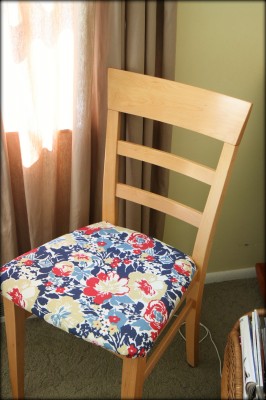
How to Reupholster a Chair


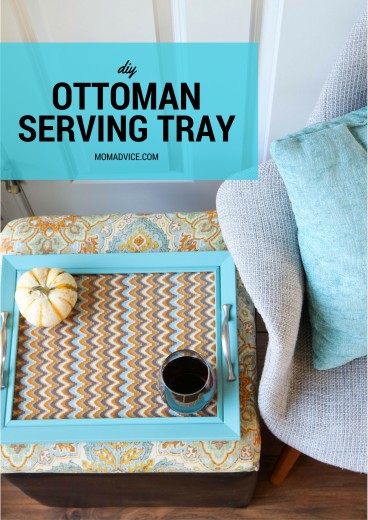
DIY Ottoman Serving Tray


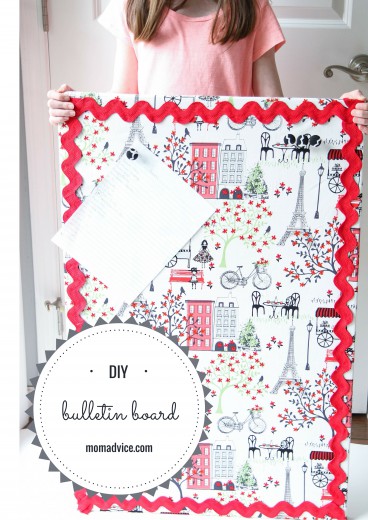
DIY Bulletin Board


Sign up for the MomAdvice newsletter

Pin It

DIY Book Page Flower Tutorial (With Free Printable)

Tuesday, April 30th, 2013

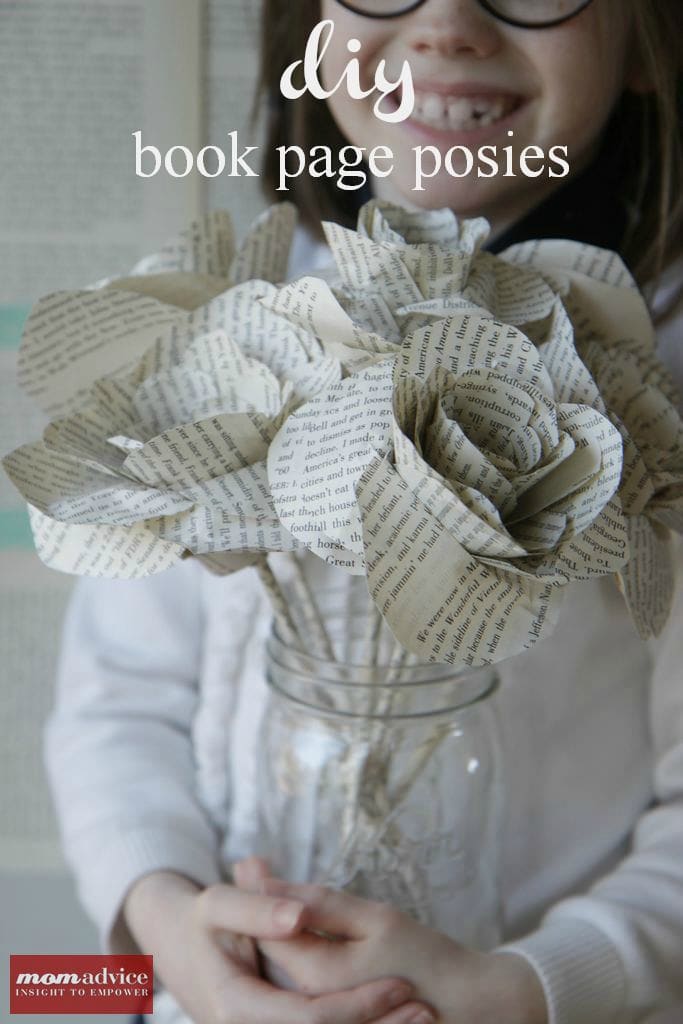
If there is one thing our family loves to do it is spoil our teachers. Today I am sharing how to make book page flowers out of old books to brighten a teacher’s day. I hope you will enjoy this book page flower tutorial and be able to use our free printable to create your book page flowers.

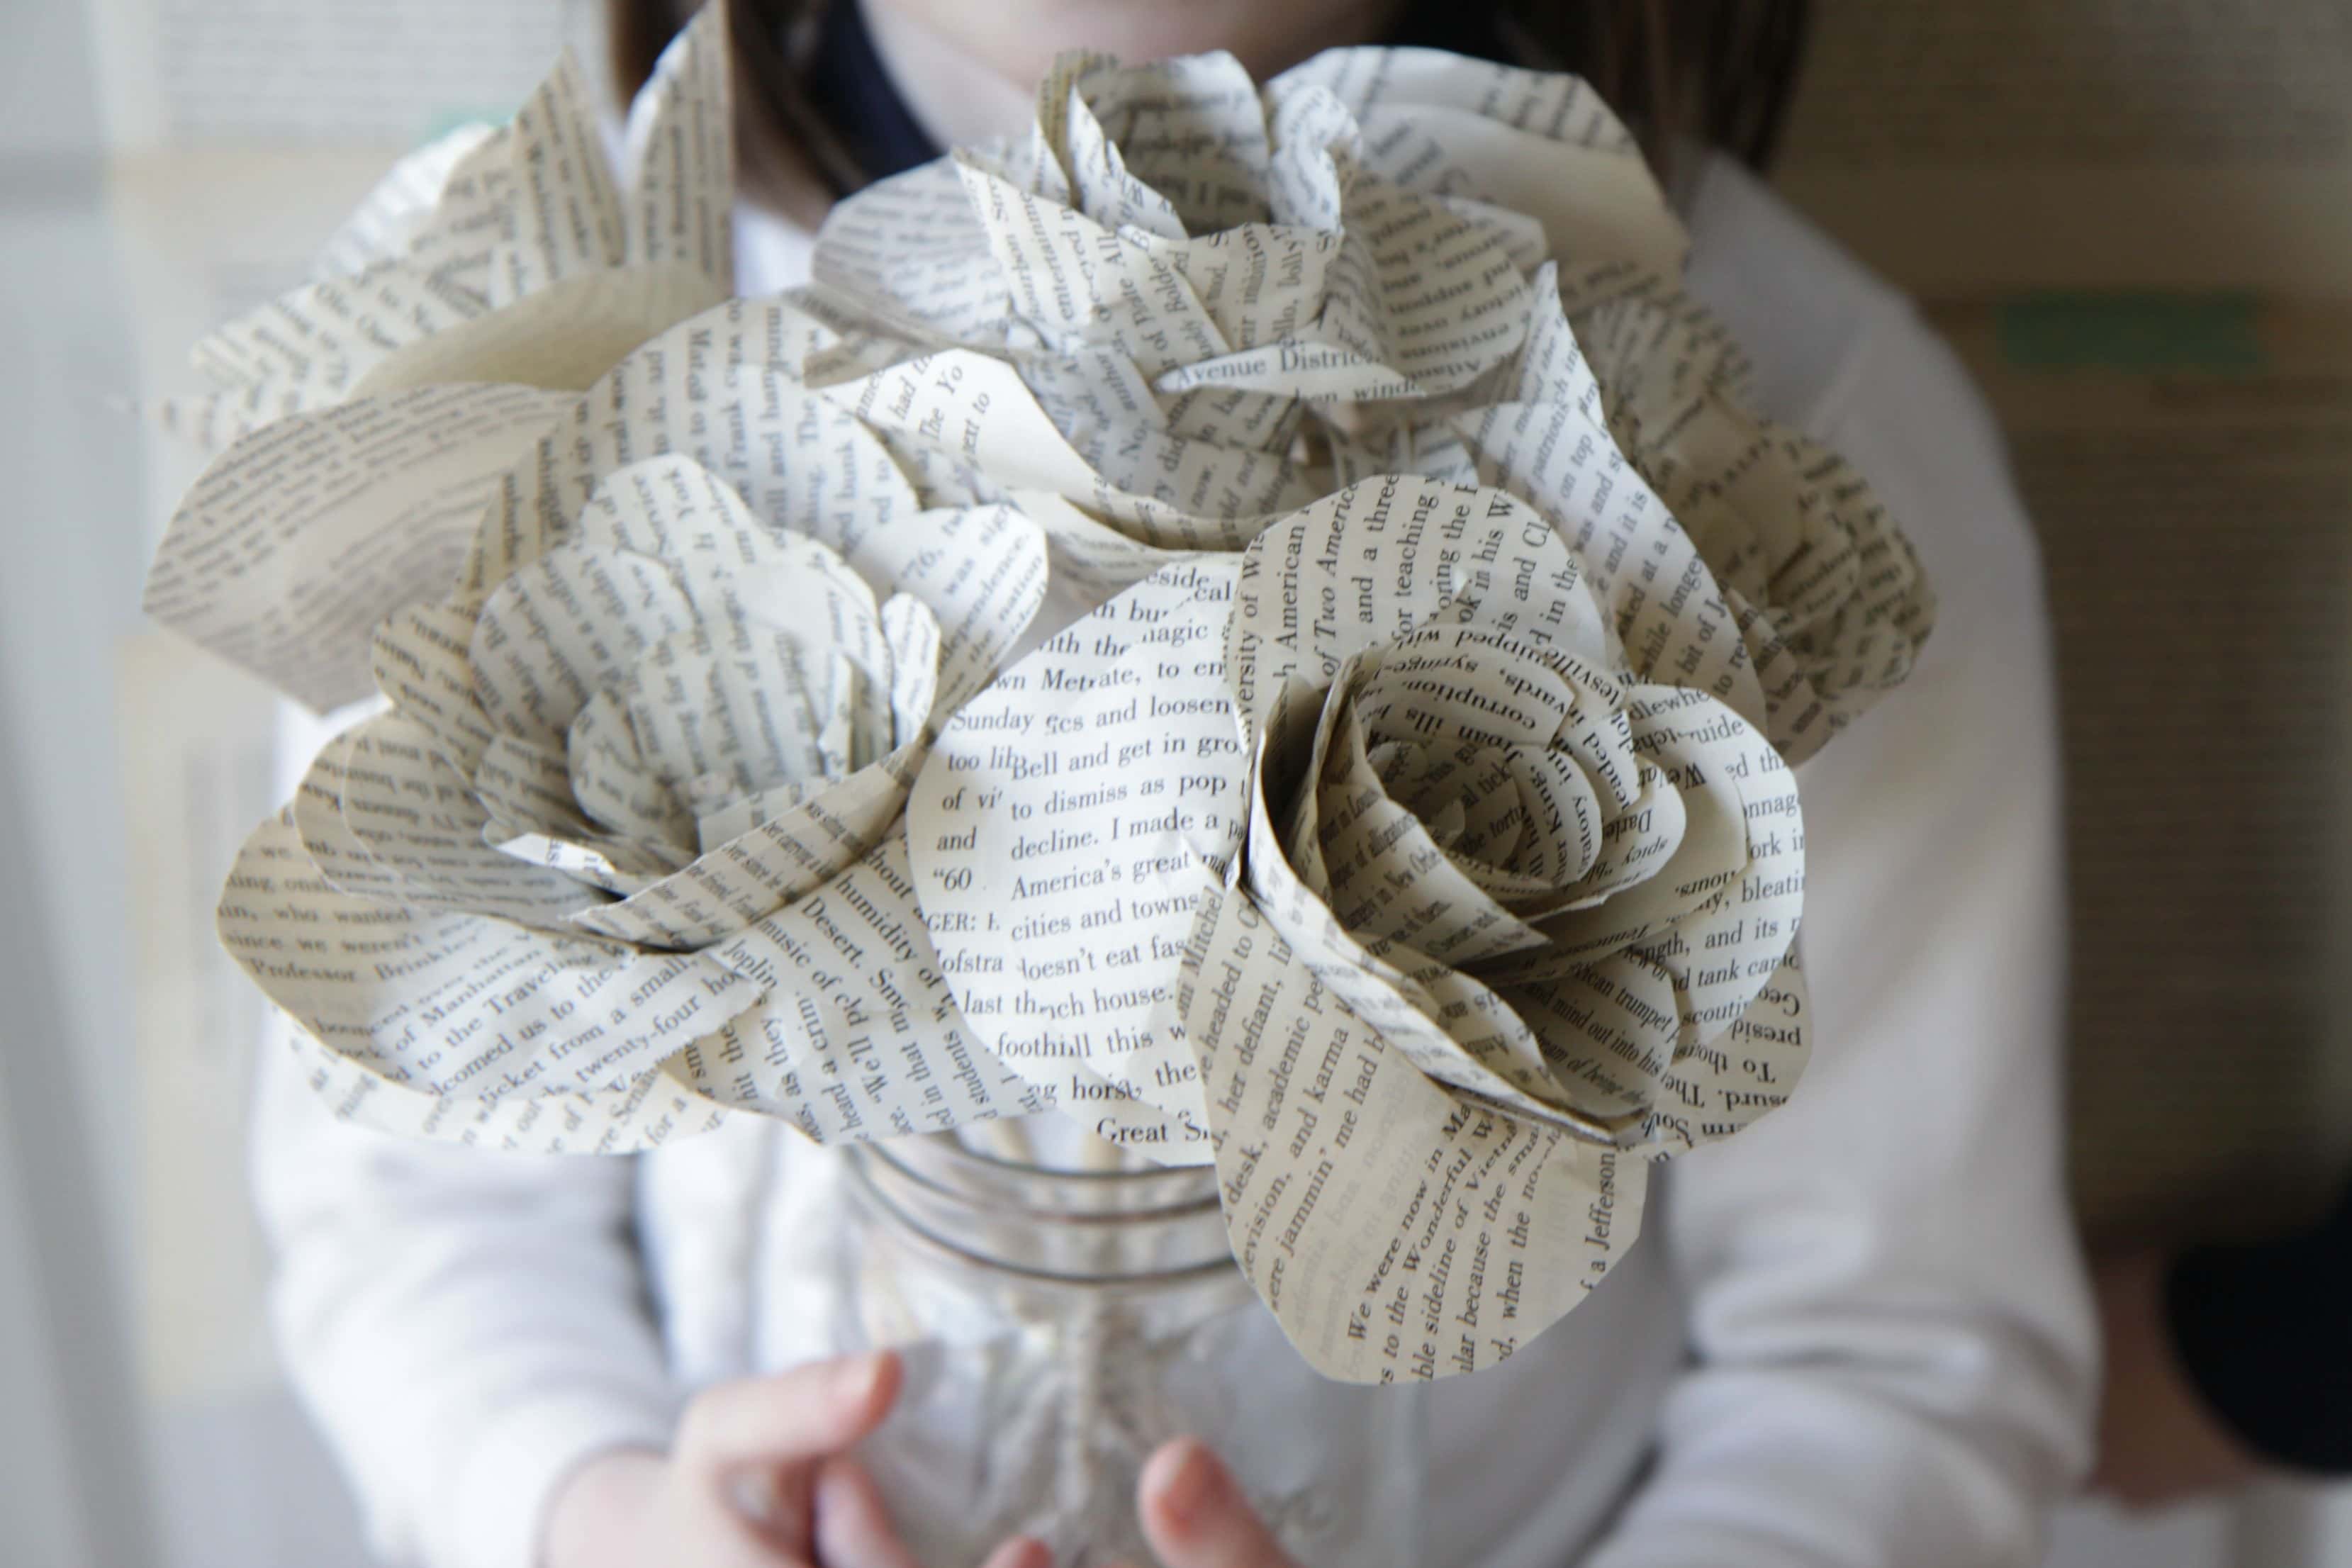
As you know, book page crafts are something that I have recently grown fond of and I wanted to create a bouquet of book page posies that you could share with a favorite teacher. A great way to build upon this thrifty gift is to pair it with a gift card to a favorite local bookstore for your teacher.

Supplies Needed:

1 old book/textbook (I picked one up at Goodwill for $.50- it was WELL loved with loads of notes, yellowed edges, and bent corners.)
Jar or Vase
Grilling skewers
Hot Glue Gun
Glue Sticks
Book Page Flowers Template

Directions:

1. Cut out your five flower petals from the provided flower petal template

2. Begin by pulling out five pages of your book and leave them stacked. Using one of your flower petal templates as a guide, cut out your first petals. Since you are cutting through the stack of papers, you should have five petals cut. Repeat this process with the other four petal templates until you have five of each kind.

3. Using your grill skewer as a paper shaper, roll each of the petals to create curving of the petals around it. I simply rolled these around the skewer, then released them.

4. Pull out another page from your book and tear a strip lengthwise from the book. Just as you would with floral tape wrap, pulling down gently, the skewer with the strip from your page. You may need two strips to cover the entire length. (pictured above).

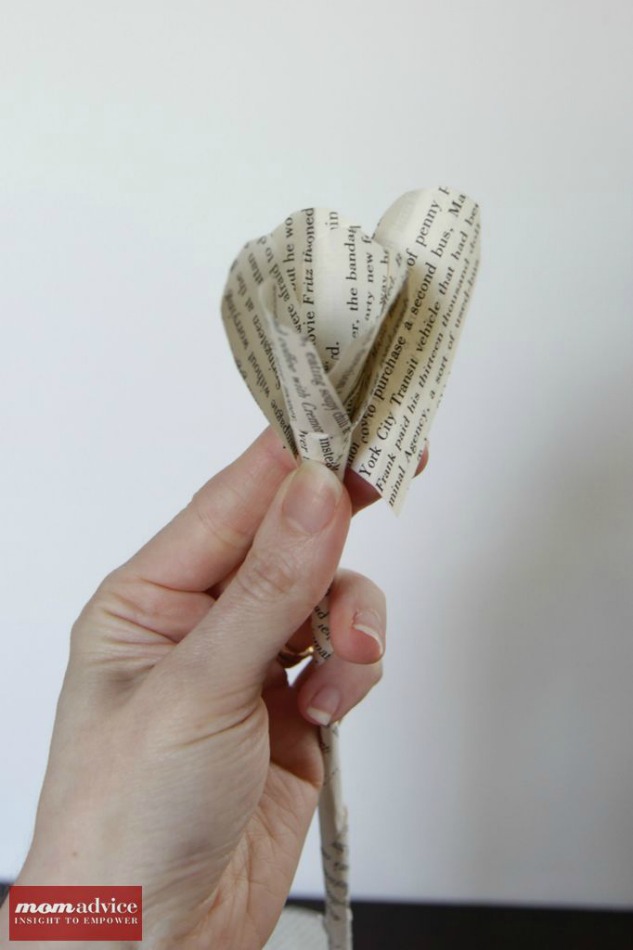
5. Tear another strip lengthwise and roll this at the top of your skewer to create the center of your flower (just ignore that bare stem!).  I just add a bit of glue at the beginning and then a bit of glue at the end to hold it together. Now you are ready to start adding your petals.

6.  Add a drop of glue almost at the edge of the bottom of your petal and begin with the smallest layer. Add these petals all around the flower center. Repeat this process with the petals the next size up. Repeat again, again, and again until all of the petals are attached to your flower. If the base feels loose at all, add a little dab of hot glue around the bottom of the flower with your hot glue gun.

DIY Book Page Flower Tutorial
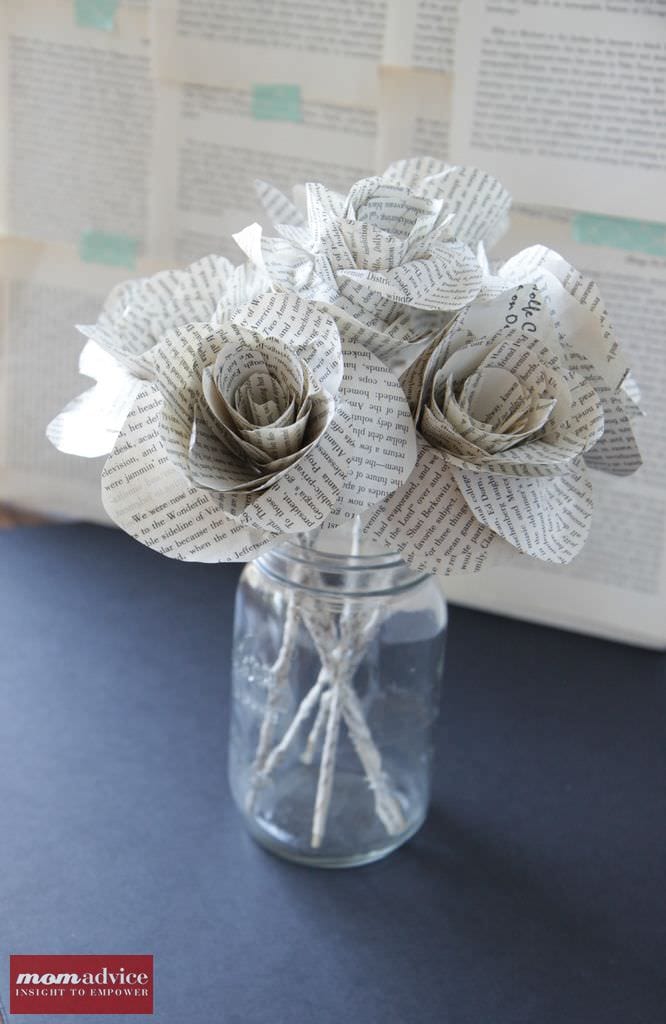
7. Finish by placing them in a thrifted jar or vase and spread and fluff the petals of your flowers. Give these to your favorite teacher with a gift card to their favorite bookstore.

Be sure to check back this week for more fun teacher gift ideas!

Pin It

DIY Fabric Softener Sheets

Tuesday, April 23rd, 2013

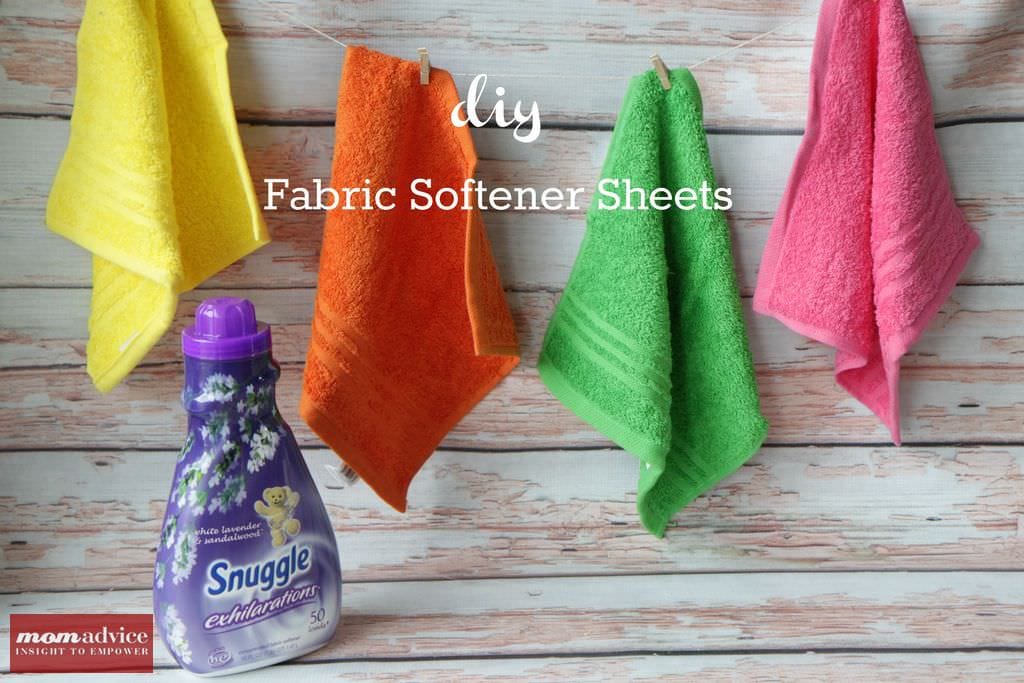
For years I have been making my own DIY fabric softener sheets and today I wanted to share an easy process for making your own homemade fabric softener sheets for your laundry. These DIY fabric softener sheets will stretch your bottle of fabric softener much further, there is nothing to throw away, and when they finally begin to lose their effectiveness,  you simply repeat the process and can continue using them again. Pairing these with a jar of my homemade laundry detergent really can keep your laundry budget down!

How Can I Make My Own Fabric Softener Sheets?

When making your own fabric softener sheets, visit the housewares aisle of your favorite store and look for the brightest colors of washcloths to use. By picking bright fabrics, it will be easier to spot the softener sheet to pull out and reuse after you are done with your load of laundry.

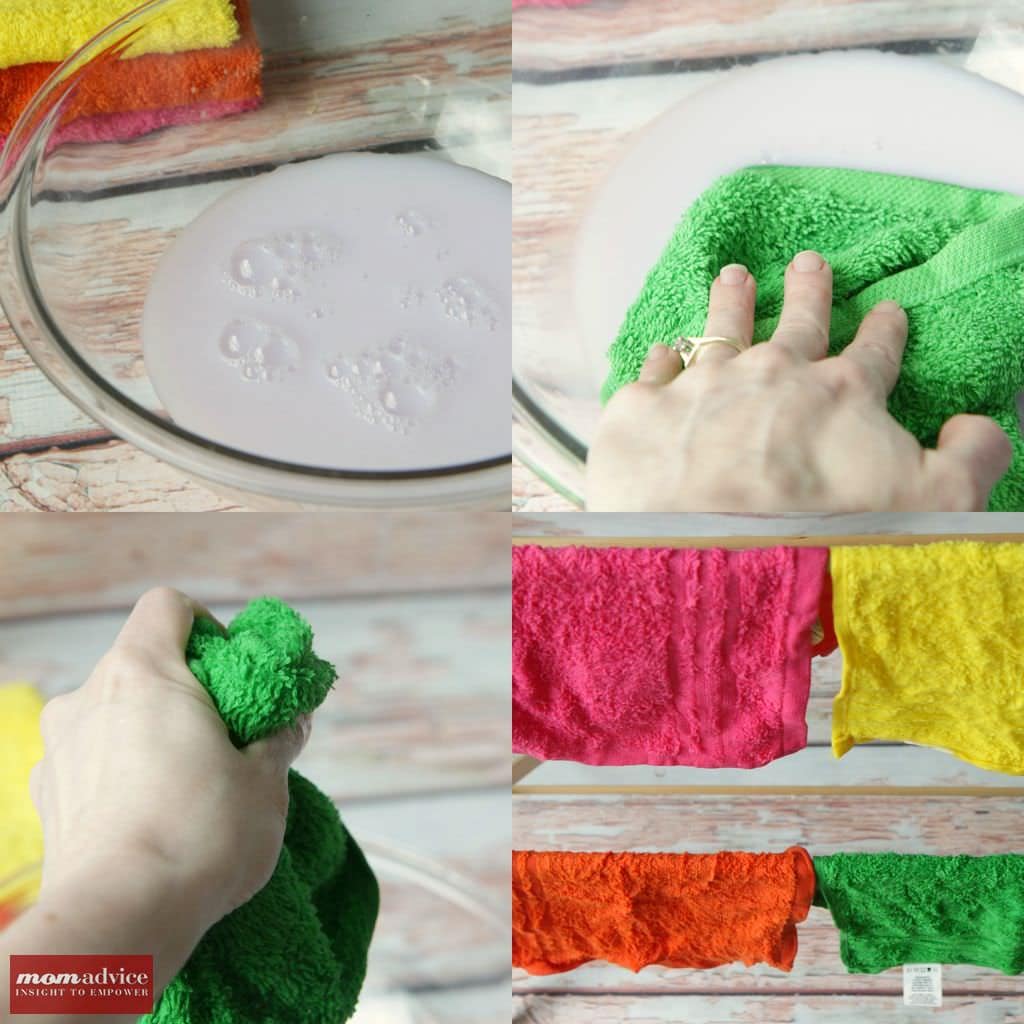
Choose your favorite fabric softener and pour it into a bowl. Soak your washcloth in the softener and then wring it out well. Hang the washcloth to dry overnight.

That’s it. Done.

How Many Times Can You Reuse Your DIY Fabric Softener Sheets?

You can reuse your dryer sheets on up to twenty loads of laundry before you need to repeat the process. If you make a set of these and alternate them with your loads, they should last a long time. The best part about this sheets is that they perform better than putting fabric softener in your washer compartment and you don’t have to worry about any staining on your fabrics.

Are There Any Green Alternatives to Fabric Softeners?

Seventh Generation (affiliate) offers a green alternative to fabric softeners and could be used to create your own DIY fabric softener sheets. The best part about that one is that it still offers a scent, but this version is better for the environment over the other commercial brands.

I also was sent a bottle of the Method fabric softener (affiliate) and used that with fairly good results on my loads of laundry, although I did find that my loads still had a little bit of static in them, particularly if they needed to be refreshed.  The unique thing about the Method cleaner was that you sprayed it directly onto your fabrics and the tumbling of the dryer dispersed the softener throughout the load. It never stained my fabrics and also offered a fresh scent to them.

If you are looking for a frugal and green method for fabric softener, you can use vinegar to replace your fabric softener. Add 1/2 cup of vinegar in your fabric softener compartment of your washer or during the Rinse cycle of your load.

Using vinegar will help to soften the fabric, but it doesn’t always perform effectively in reducing the static in fabrics. You can either crumple aluminum foil into a ball and use that as a dryer ball, buy a store-bought dryer ball alternative like this one (affiliate), or even make dryer balls from yarn.

What Should I Not Use Fabric Softener On?

This might come as a surprise since those fabric softener commercials always seem to be about fluffy towels, but you really shouldn’t use fabric softener on your towels. Fabric softener can reduce the absorbency of your fabrics so avoid using it on your towels.

If you are a big fan of cleaning with microfiber cloths, like I am, you should also avoid using fabric softener on those. I just wash them with my towels so I know they won’t get mixed up into my other loads.

DIY Fabric Softener Sheets
Recipe Type: Cleaning
Author: Amy Allen Clark
Prep time: 2 mins
Total time: 2 mins
Serves: 20
An easy DIY fabric softener sheet that will save you money on your laundry loads!
Ingredients
  • Brightly colored washcloths
  • Fabric Softener (your favorite variety)
Instructions
  1. Pour fabric softener into a bowl.
  2. Submerge your washcloth in the fabric softener and soak it for a few seconds.
  3. Wring the washcloth out and and hang it to dry.
  4. Allow the washcloth to dry overnight.
  5. To begin using, just throw it in your dyer with freshly washed cloths.
  6. You can reuse the same DIY fabric softener sheet on up to 20 loads before you need to repeat the process again.


Pin It