Archive for the ‘Home & Organization’ Category

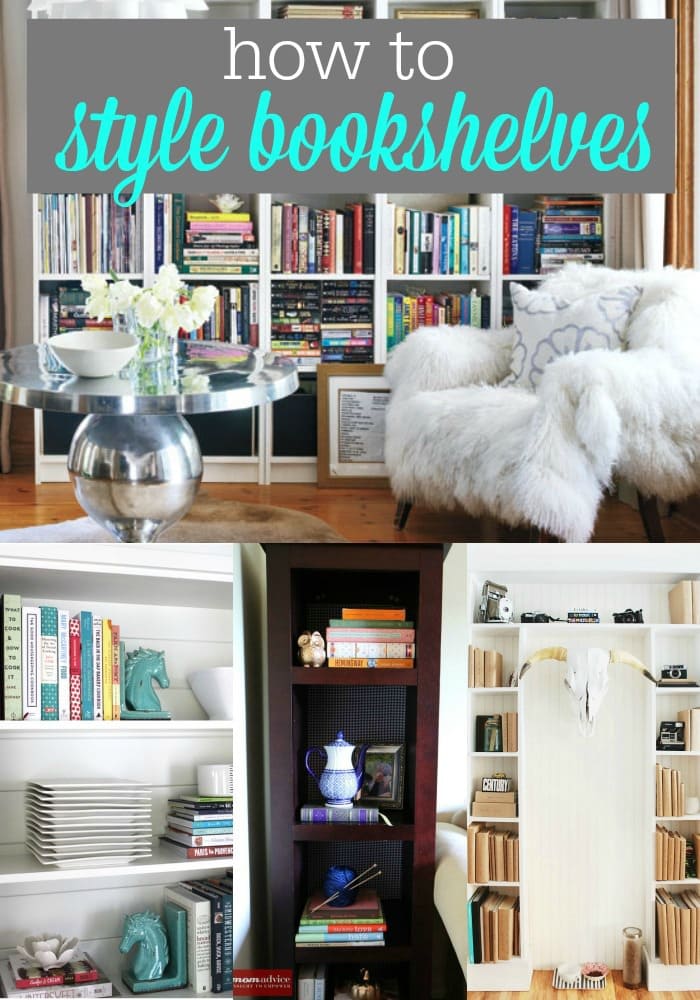
How to Style Your Bookshelves

Thursday, April 10th, 2014

How to Style Your Bookshelves from MomAdvice.com.


The art of styling bookshelves had never really been important to me until I started perusing pictures on Pinterest and saw the carefully curated collections and beauty in the organized book spines.

Of course, I don’t have an unlimited budget where I can add decorative books in one carefully choreographed color or an unlimited budget for fantastic looking odds-and-ends to update my bookshelves.

That is why I am excited to share with you some easy ideas for updating your bookshelves with inexpensive items and a few budget-friendly craft materials.


Cover Books With Paper

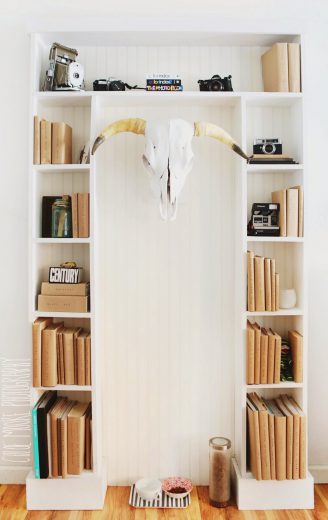
If you have an eclectic collection of books or you want to pick up a collection of books at Goodwill to stock your shelves, one frugal way you can add order and beauty to your bookshelf is to simply wrap each book in paper.

These beautiful bookshelves from Chloe Moore Photography have beautifully hand-stamped spines that add a unique detail to them.

I also love how she has weaved in her photography equipment, adding her own personal nods to her favorite interests.


Spray Paint Items to Create a Cohesive Collection

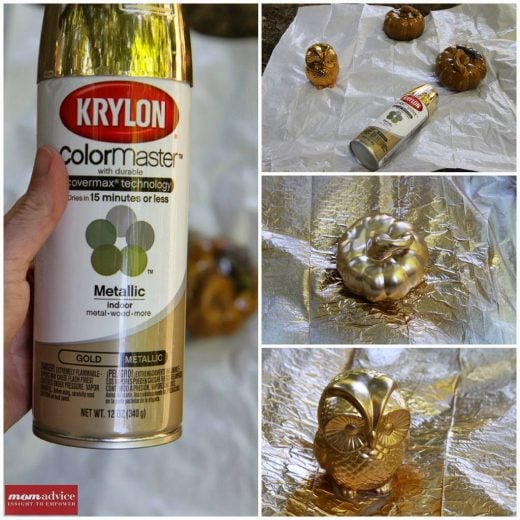
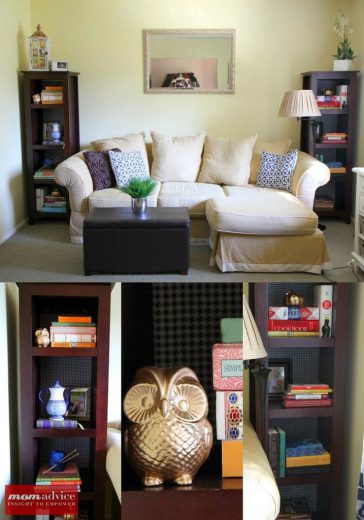
Instead of trying to find items of a similar color for your bookshelves to add those unique details, consider creating your own collection of groupings with an inexpensive bottle of spray paint.

My own bookshelves were cluttered with items that did not mean anything to me and did not showcase my personality.

I took a day to declutter my shelves, added a fabric back to my bookshelf and then found items that I loved and spray painted them with a little gold spray paint.

It created just the look I was going for, and cost $15 to update my shelves.


Stack Your Books In a New Way

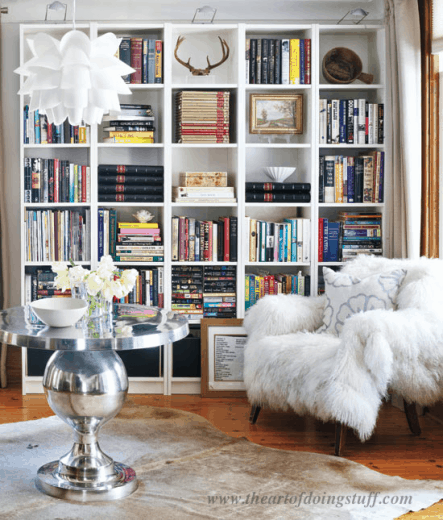
Sometimes we get into a rut with our styling. I thought there were only two ways to style my books- vertically or horizontally.

The Art of Doing Stuff though has me rethinking my book stacks and groupings because there are actually 7 ways you can stack your books.

The names are even fun- the Sandwich Stack, On the Bias, and the Spiral Stack…just to name a few.

Consider regrouping your stacks in new ways and adding to your stacks with items you can find at your store to round out your collection.


Add an Eye-Catching Design to Your Bookcase

Even inexpensive laminate bookcases finds can be transformed with a little paint and thoughtful styling into true things of beauty.

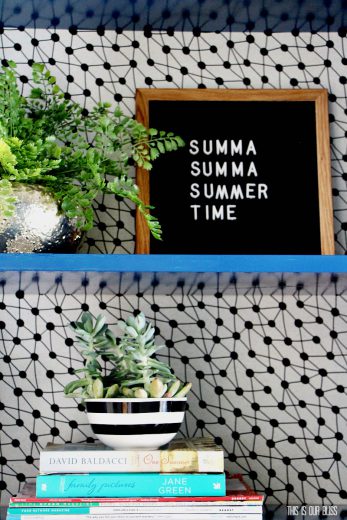
One thing I love to see on bookcases, is an interesting color on the inside of the bookshelves.

This can be added with a pop of color from a brightly colored paint, a pretty fabric, scrapbook paper, or even stenciling.

I love this fantastic idea from This is Our Bliss to use removable wallpaper to add a decorative touch that is both frugal and fast.


Add Your Own Personality

One thing that I have been trying to do is to weed out the clutter in my life and make room for the good stuff.

The same tactic can be applied towards our bookshelves and what we place on them.

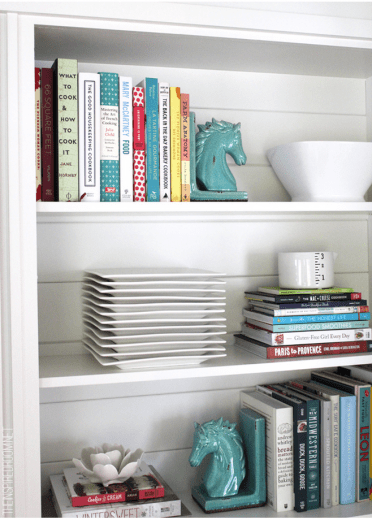
My shelves have yarn and knitting books, a shelf dedicated to my favorite classics, and I have a cookbook shelf that not only holds my cookbooks, but also holds the biscuit cutter that my great-grandma used to make biscuits for me when I was a little girl.

Consider creating a bookcase or shelf towards your own personal hobbies and collections.

I love this beautiful cookbook collection from The Inspired Room that celebrates her love for beautiful cookbooks.

This would also be a great spot to find some pretty vintage cookbooks or vintage kitchen items that you could weave into your shelves.

What’s one of your favorite things on your bookshelves? What is one styling trick you like to use when styling your bookshelves? Feel free to share here!


This post contains affiliate links.


Don’t miss those other great ideas from MomAdvice.com:
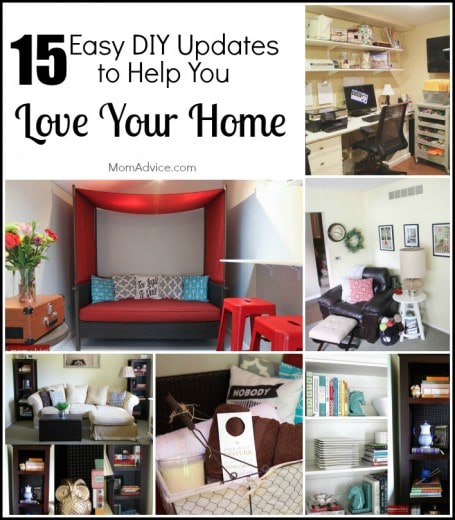


15 Easy DIY Updates To Help You Love Your Home

15 Easy DIY Updates to Help You Love Your Home
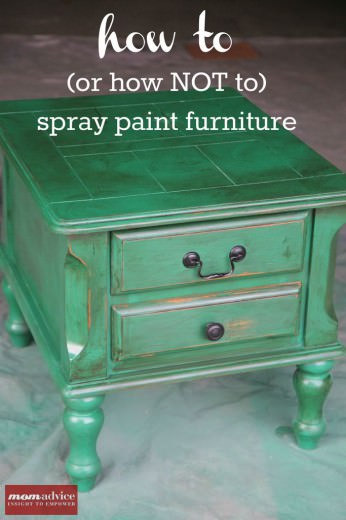


How to Spray Paint Furniture
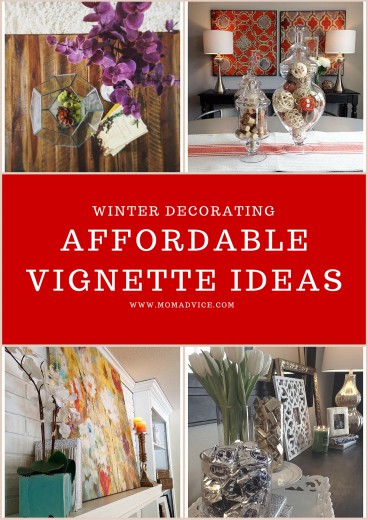


How to Create Vignettes in Decorating
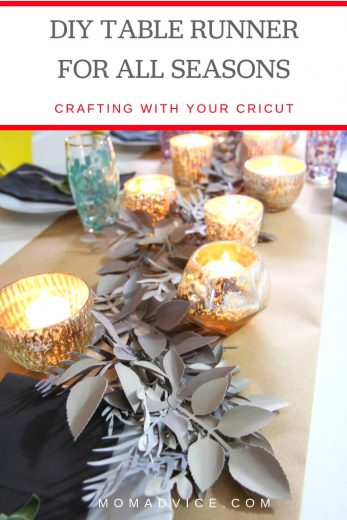


DIY Table Runner


Pin It
Get Your Home Organized With Goodwill

Thursday, March 20th, 2014

Get Your Home Organized With Goodwill


At the beginning of the year, I get the strong urge to donate everything in my house and start fresh.

I am also always on the hunt to find new strategies for organization in my home that don’t cost a lot.

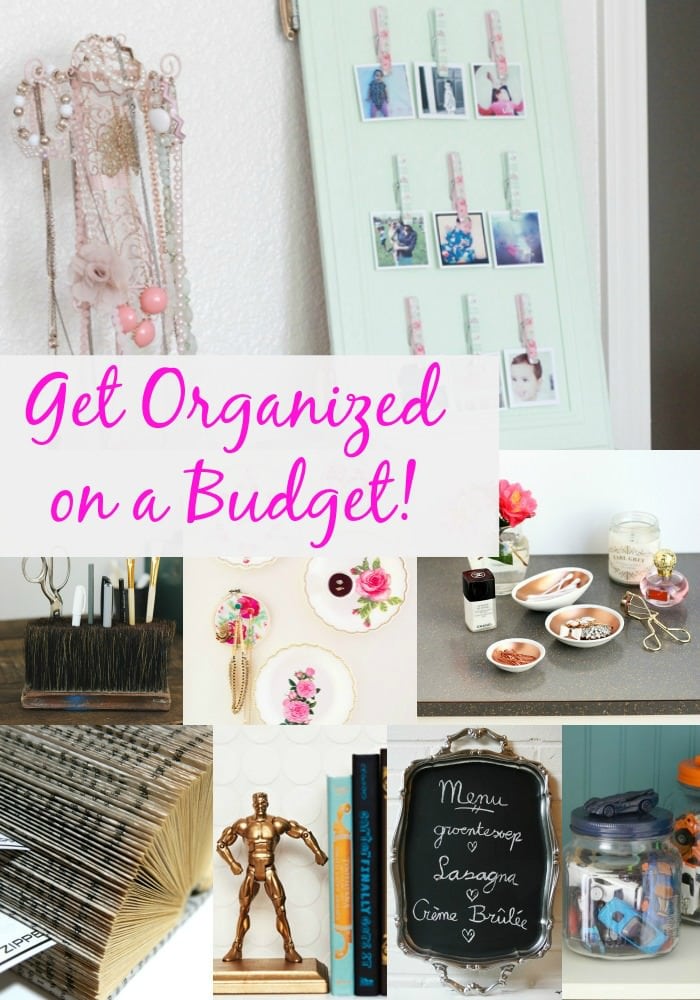
Today I am featuring some great ideas for organization from commonly found items at your favorite thrift store.

I am so inspired by these bloggers that I have a trip planned for myself this week to try to snag a few of these items.


Get Your Desk Organized

This last month I spent organizing my office and craft space.

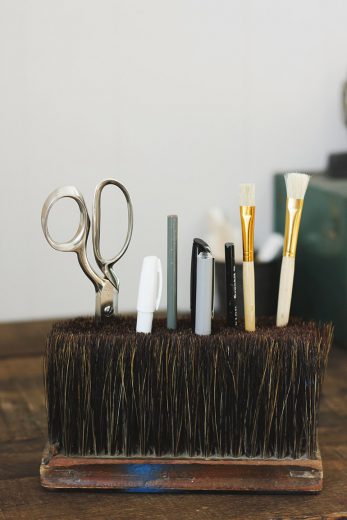
One thing I really hate is desk clutter and I have been using a thrift store mug to organize all my writing and cutting tools.

I love this fresh idea for using a broom head as an office caddy for organizing these item in a fun nod to industrial-style and to add a little whimsy to your desk.

Grab the inspiration for this project from merry thought.


Get Your Bathroom Organized

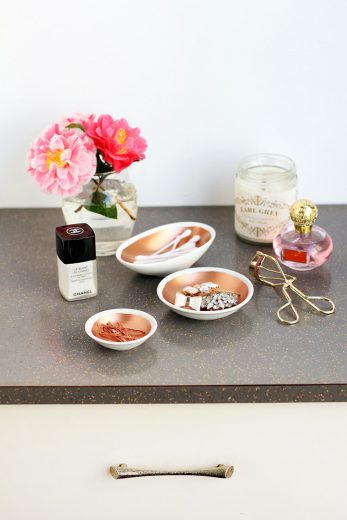
One area I always struggle with organization is our bathroom.
You can always find an abundance of white dishes at Goodwill though and this painting tutorial from Fruetcake shows how to turn plain white dishes into copper vanity bowls with just a little spray paint.
This would be a fantastic way to organize things like bobby pins, cotton balls, or even as a small jewelry holder.

Organize Your Photos

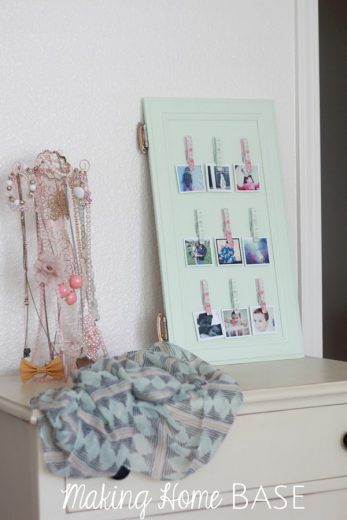
One thing I have vowed to do this year is to print more photos.
Of course the dilemma always is where to hang and display these items.
Luckily for me, I found this adorable cabinet door photo display that you can create with just a few items for decorating the top of your dresser.
If you are an Instagram-addict like me, this is a must-do project for displaying your favorite pictures.

Organize Your Jewelry Collection

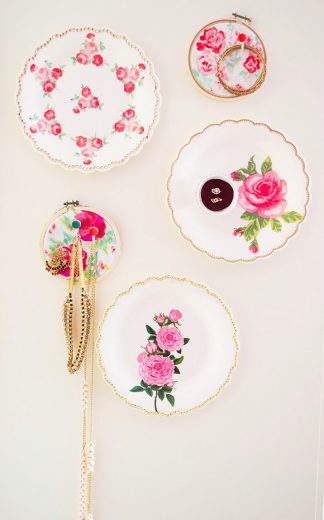
Vintage plates and china can be adorned or just allowed to show their original vintage beauty in this adorable jewelry display that you could create from plates at Goodwill.
I love that this organizing project not only organizes, but it also doubles as a cute way to decorate a wall or the interior of a walk-in closet.
To round out this display, check Goodwill’s sheets, linens, and kitchen towels for fabric to add to these embroidery hoops.
If you are a woman that isn’t as fully accessorized (pity the thought!) you can even add to your jewels with items found in their jewelry department.

Organize the Bookcase

Bookcases can become untidy quickly especially in my kid’s rooms.
Consider whittling down the book collection into a more manageable size and then create these adorable bookends from your child’s old action figures and toys.
With a quick mount and a little spray paint, you have a unique bookend that can tidy those stacks.
Grab the tutorial for these easy DIY Bookends from Canadian Family today!

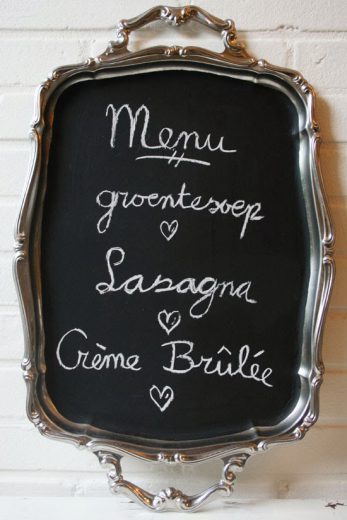
Organize Your Menu Plan

If one of your goals this year is to save money, the one place I always recommend starting is with your grocery shopping and menu planning.
I am a visual person, so I love my chalkboard in my kitchen as a reminder of what we have in store for the week and to prompt me to prep and thaw ingredients for the days ahead.
If you don’t have a chalkboard in your kitchen, making one is very easy thanks to chalkboard paint.
Check your local thrift store for a frame, canvas, or serving tray that you can use to get your menu plan visual.

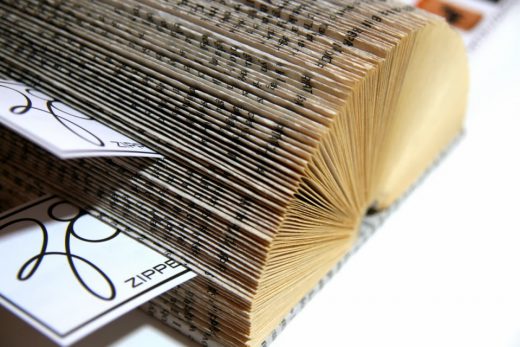
Organize the Paper Clutter

We talk a lot about book page crafts because this is an item you can always find at your local thrift.
Did you know that you can transform a donated book into an organizer?
As someone who frequently has a pile of cards and tiny notes to myself, I love this thoughtful storage idea for these items!

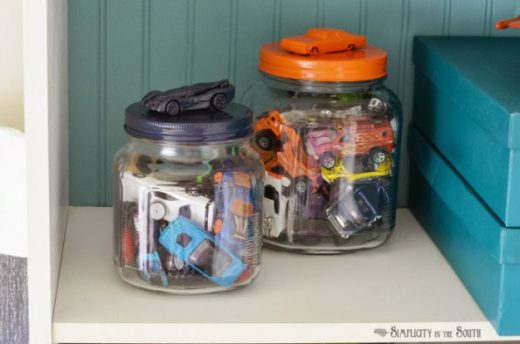
Organize the Toys

After the holidays, the toy clutter always seems to get out of control at our house.
Thankfully, you can find lots of jars at your favorite recycle shop that can be transformed into adorable containers to house those smaller toys in.
With a little spray paint and a figurine, car or train, you can create an adorable accent to your child’s bookshelves or to tuck away in your toy storage closet.
You can get the scoop on making these adorable toy corrals on Simplicity in the South.

What are your favorite things to use to organize your home? Have you upcycled anything into the perfect storage solution? Feel free to share it here!

This post contains affiliate links.


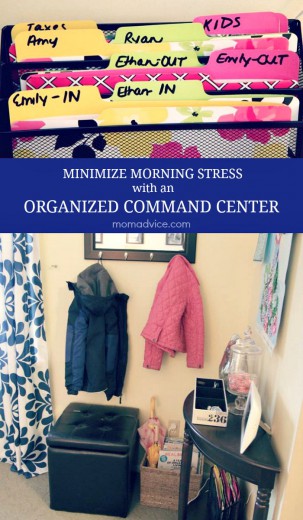
Need more organizing ideas? Check out these posts from MomAdvice.com:


Minimize morning stress with an organized command center

Organized Command Center


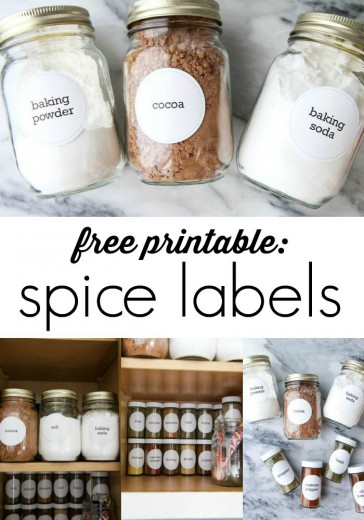
Organize Your Spice Rack


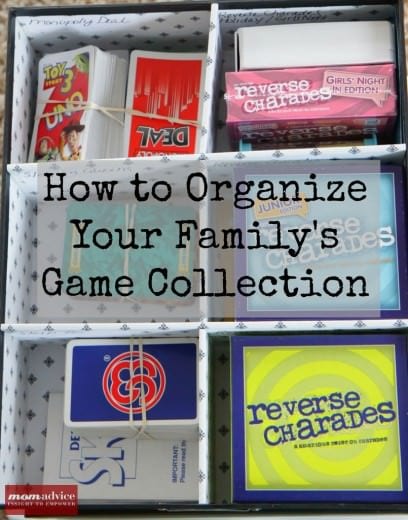
How to Organize Board Games


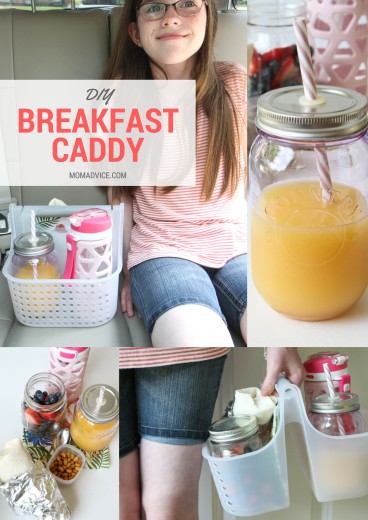
DIY Breakfast Caddy


Sign up for the MomAdvice newsletter

Pin It
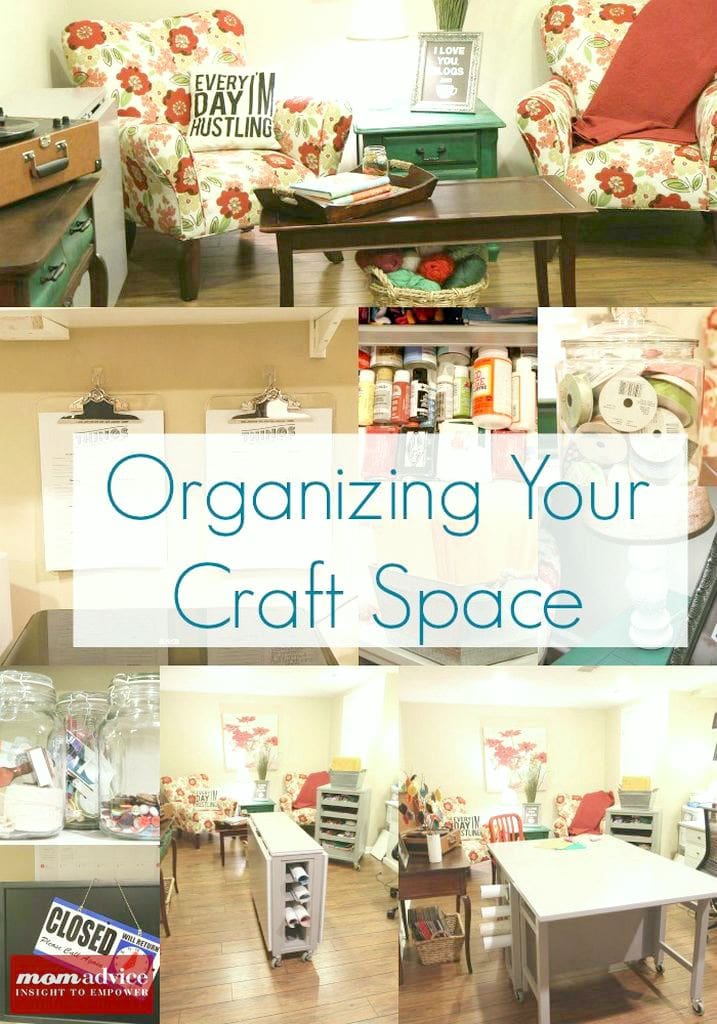
Smart Solutions for Craft Room Organization

Wednesday, February 5th, 2014

Smart Solutions for Craft Room Organization from MomAdvice.com

It’s been a long time since I have shared some pictures of our home. I have been in the thick of organizing my craft room and today I wanted to share with you some ideas for organizing your own craft space in your home.

For my part on the Walmart craft team, they requested that I tackle a craft project. I made a special request that I could share with you today my organized craft space and see if I could find any fun additions to my space at their store and they agreed. So today instead of crafting it up, I am showing off what I have been up to in my space.

Smart Solutions for Craft Room Organization from MomAdvice.com

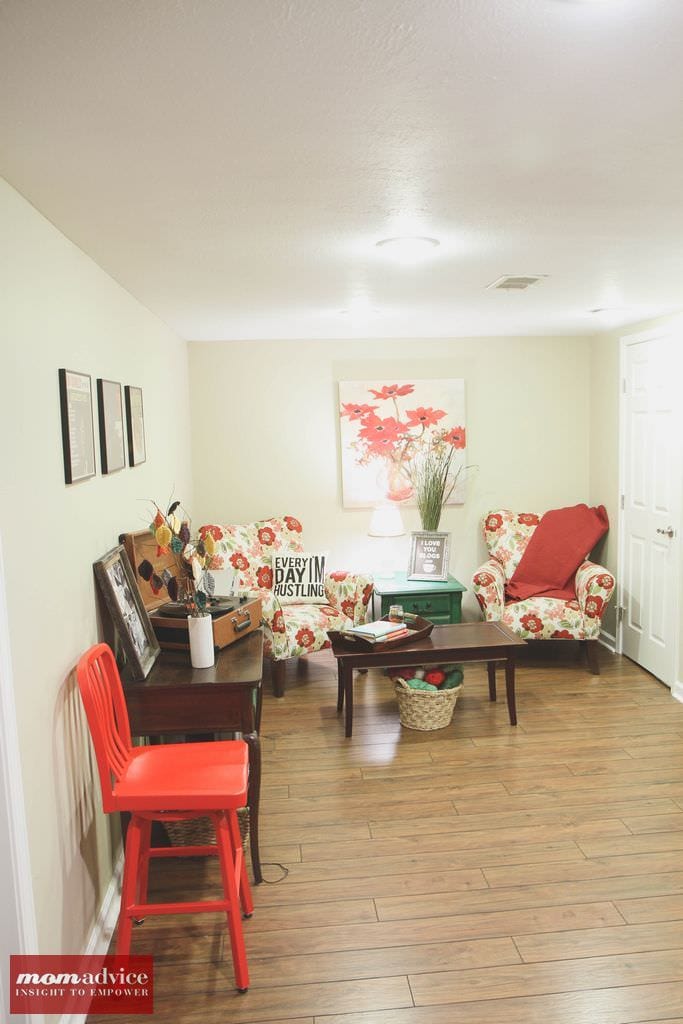
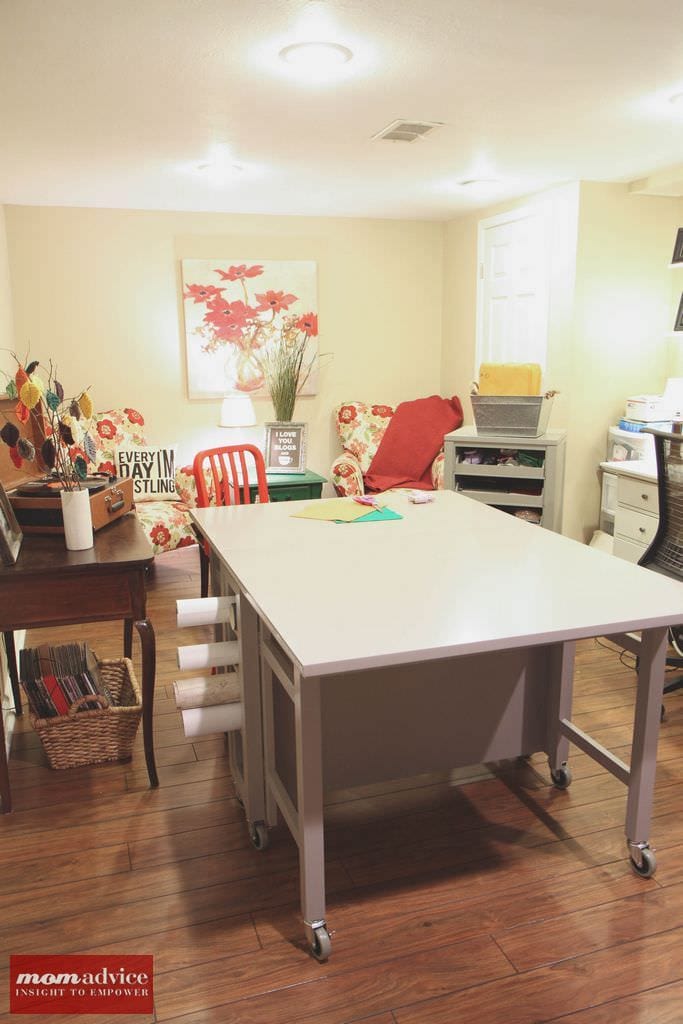
Let’s start from the very beginning. Three years ago, this was our space that I envisioned turning into our office space. We have a tri-level home, now lovingly called a quad now that we finished this fourth level, and this was what we started with. This space was where we threw our stuff that we didn’t know what to deal with. We had to majorly declutter and we had to save enough cash to make the updates to our home. We were able to accomplish both (loan free!) and create the space I had been dreaming of.

I am starting with this picture to show you that maybe there is an area in your home that could be your special space and you just don’t know it. Maybe it just requires a fresh eye, a bit of decluttering, and a few smart craft solutions to carve a space just for you.

Smart Solutions for Craft Room Organization from MomAdvice.com Smart Solutions for Craft Room Organization from MomAdvice.com Smart Solutions for Craft Room Organization from MomAdvice.com Smart Solutions for Craft Room Organization from MomAdvice.com Smart Solutions for Craft Room Organization from MomAdvice.com

Smart Solutions for Craft Room Organization from MomAdvice.com Smart Solutions for Craft Room Organization from MomAdvice.com

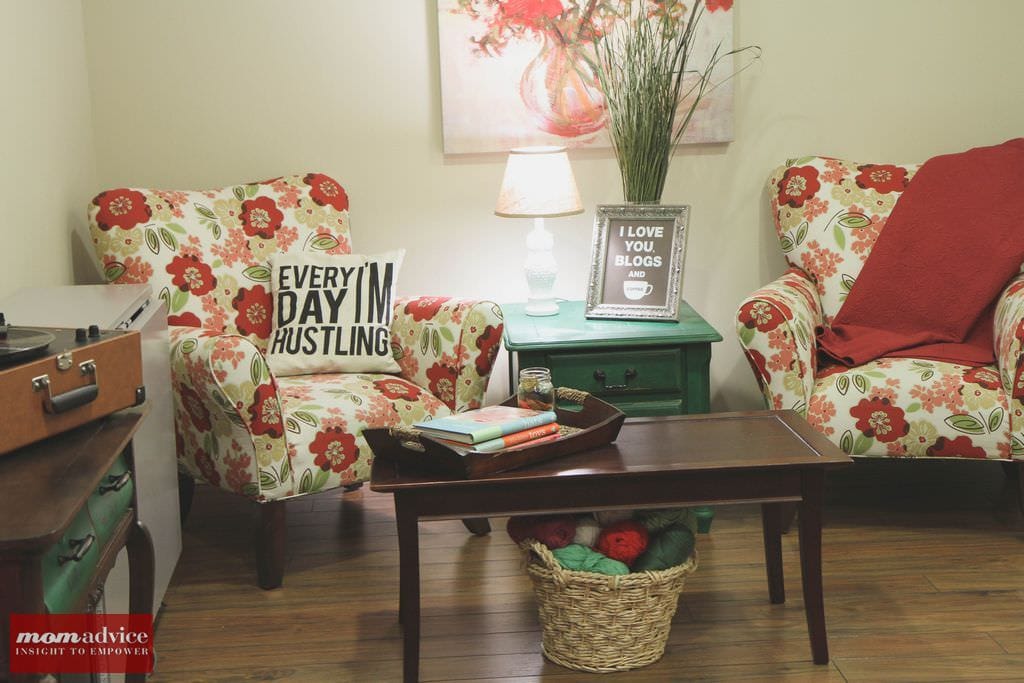
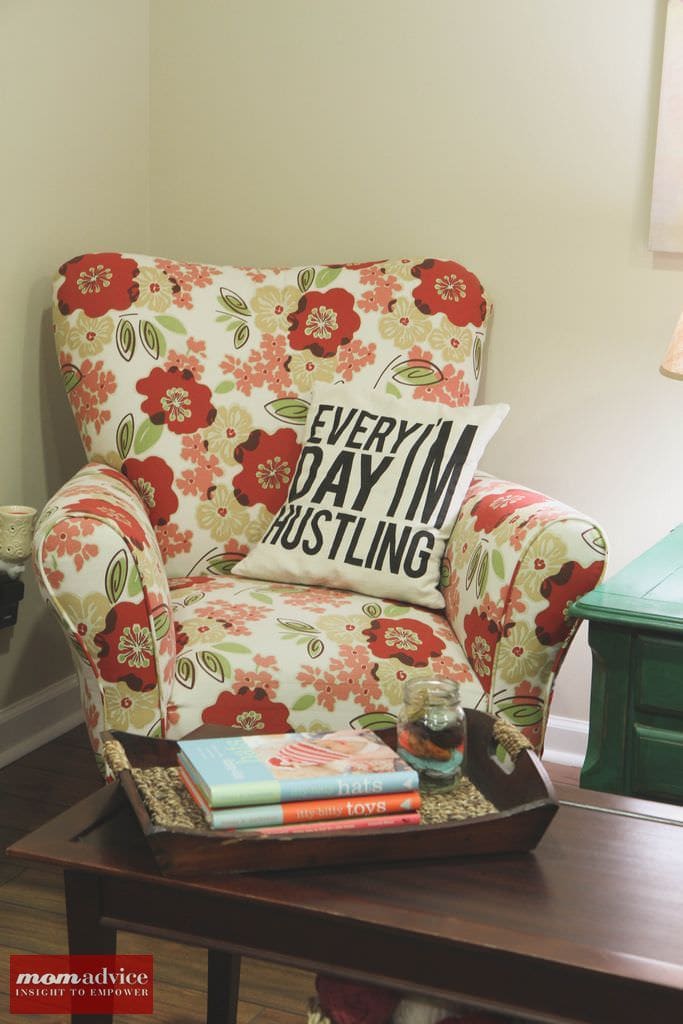
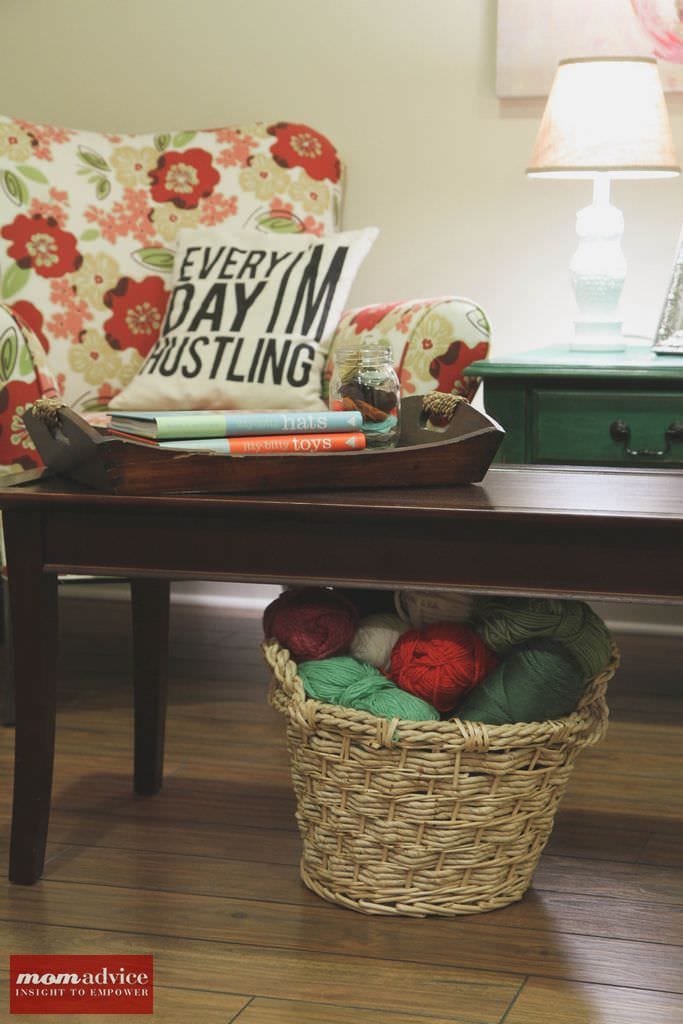
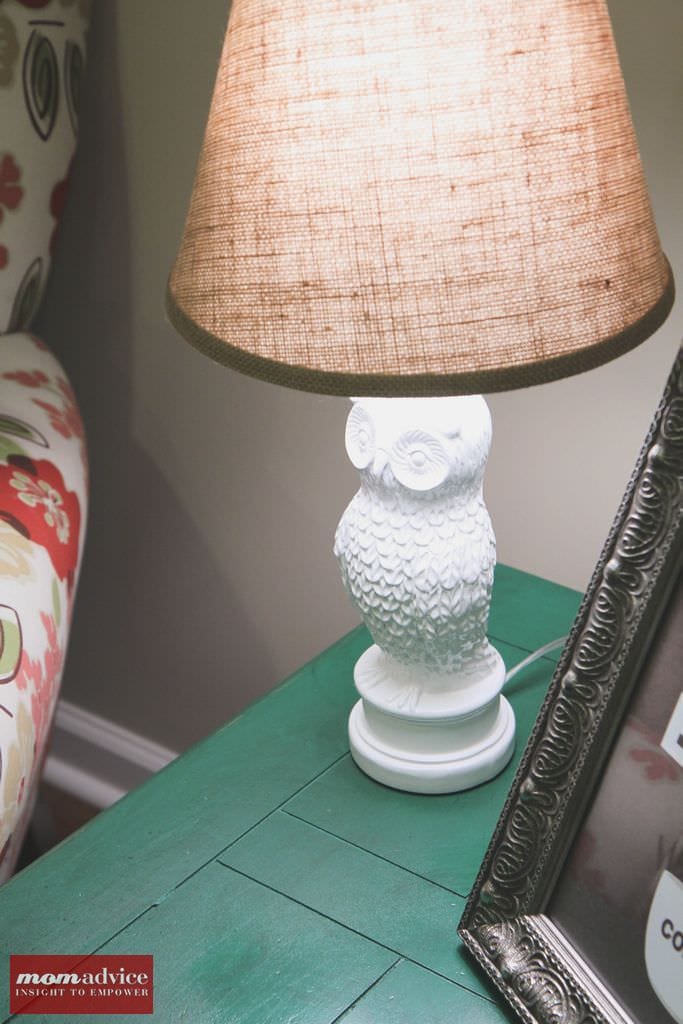
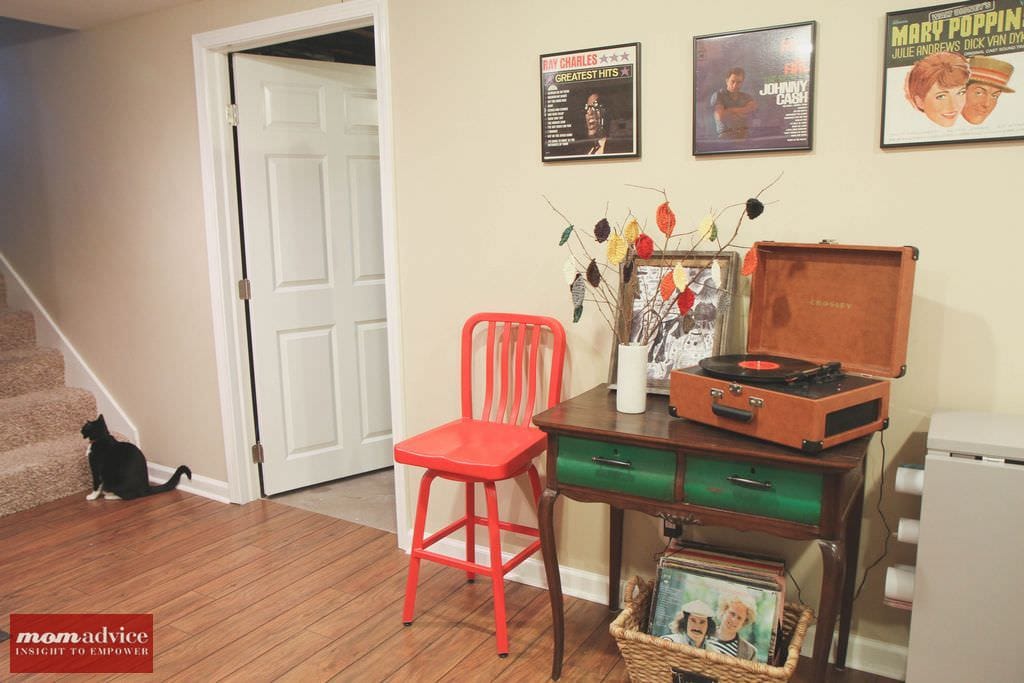
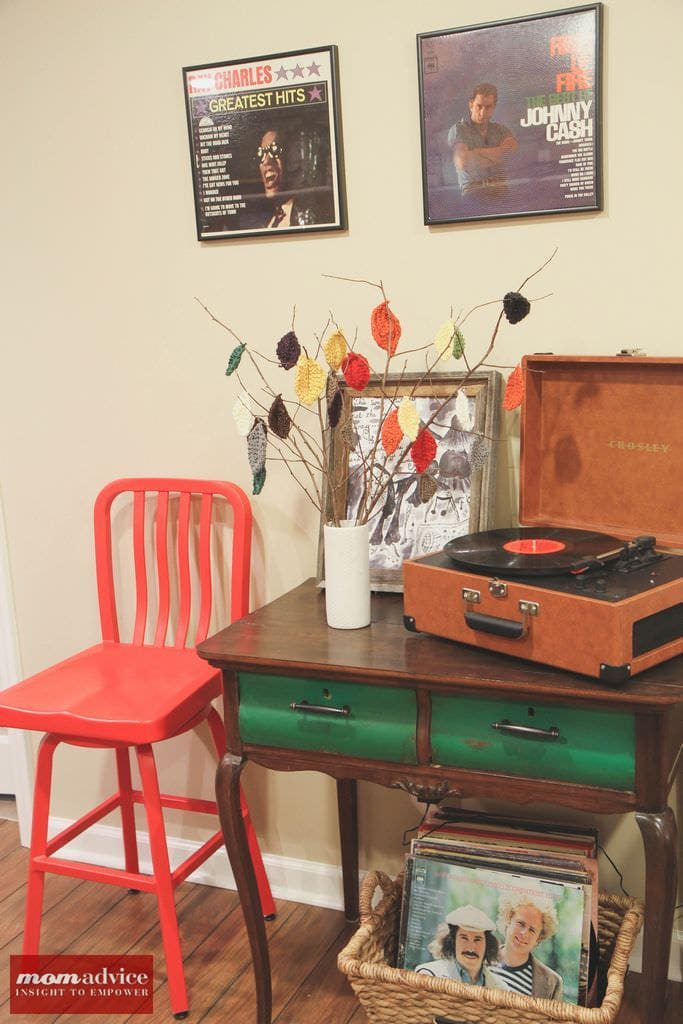
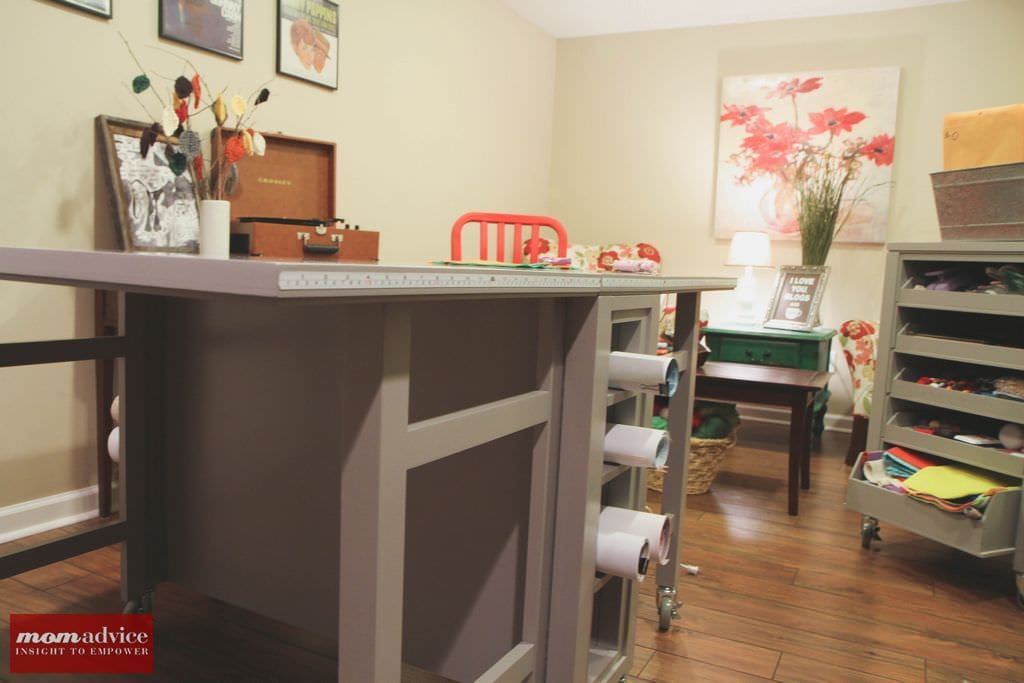
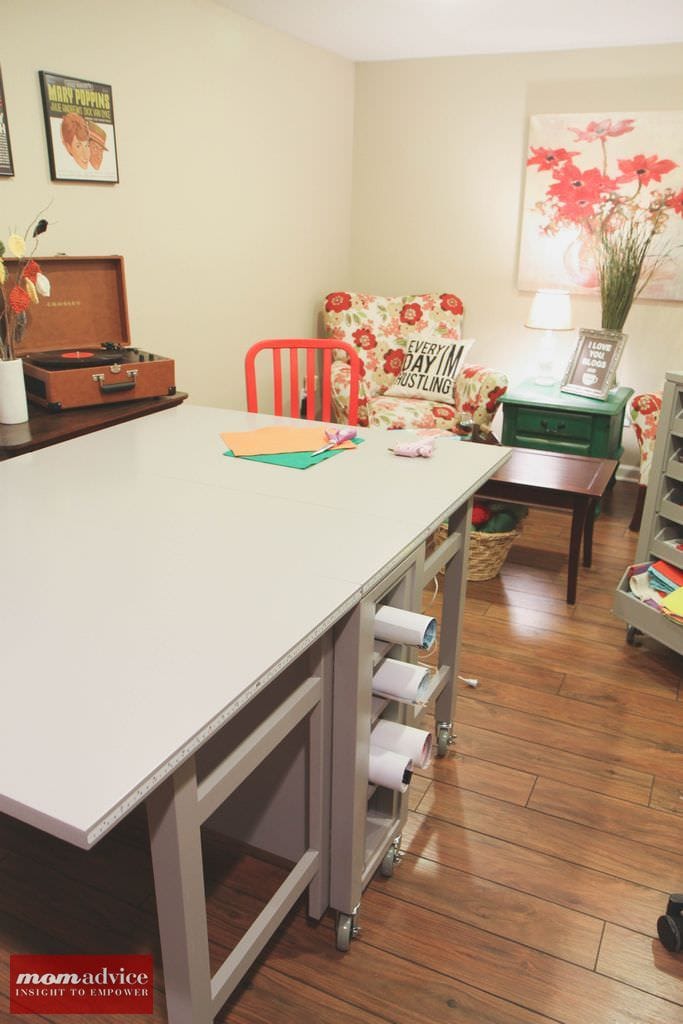
Here is my craft and office space today. When I post these types of pictures, people ask me where I found certain things. Here are some of the things you will find in my space.

Floral Chairs- Found at a local Value City (no longer available-sadness)!

Green Side Table- A side table we owned, but spray painted & distressed

Owl Lamp & Burlap Lamp Shade–  Walmart

Record Table- Thrift Shop Find Stained & Painted

Swivel Metal Stool- Home Decorators

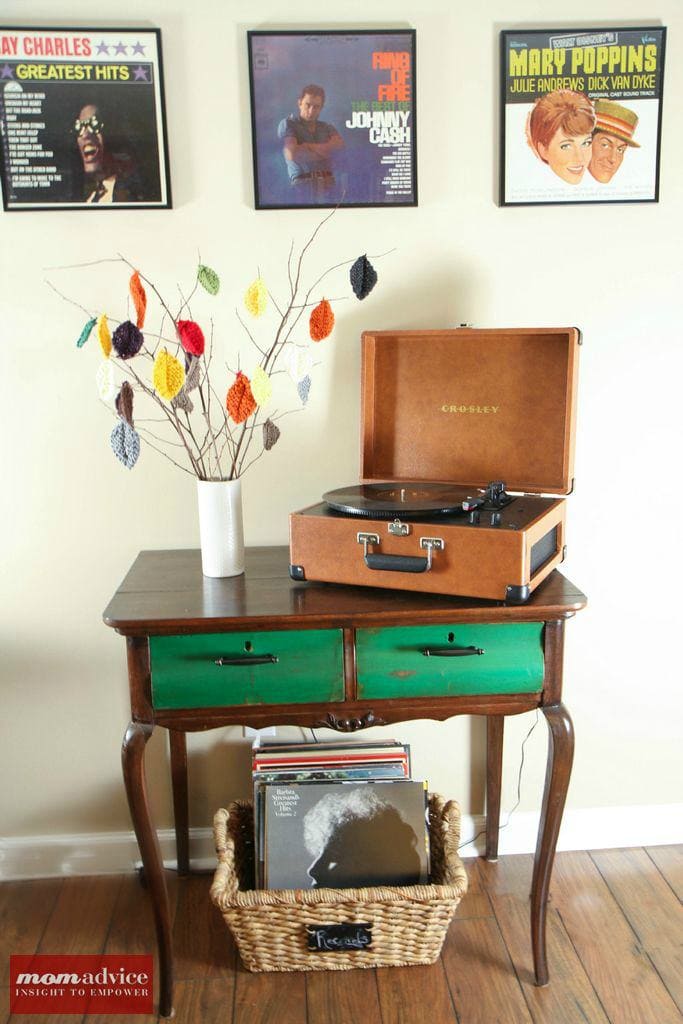
Knitted Leaf Centerpiece- Handmade

Everyday I’m Hustling Pillow- Michelle Dwight Designs

Record Frames- H&M

Smart Solutions for Craft Room Organization from MomAdvice.com Smart Solutions for Craft Room Organization from MomAdvice.com Smart Solutions for Craft Room Organization from MomAdvice.com Smart Solutions for Craft Room Organization from MomAdvice.com Smart Solutions for Craft Room Organization from MomAdvice.com

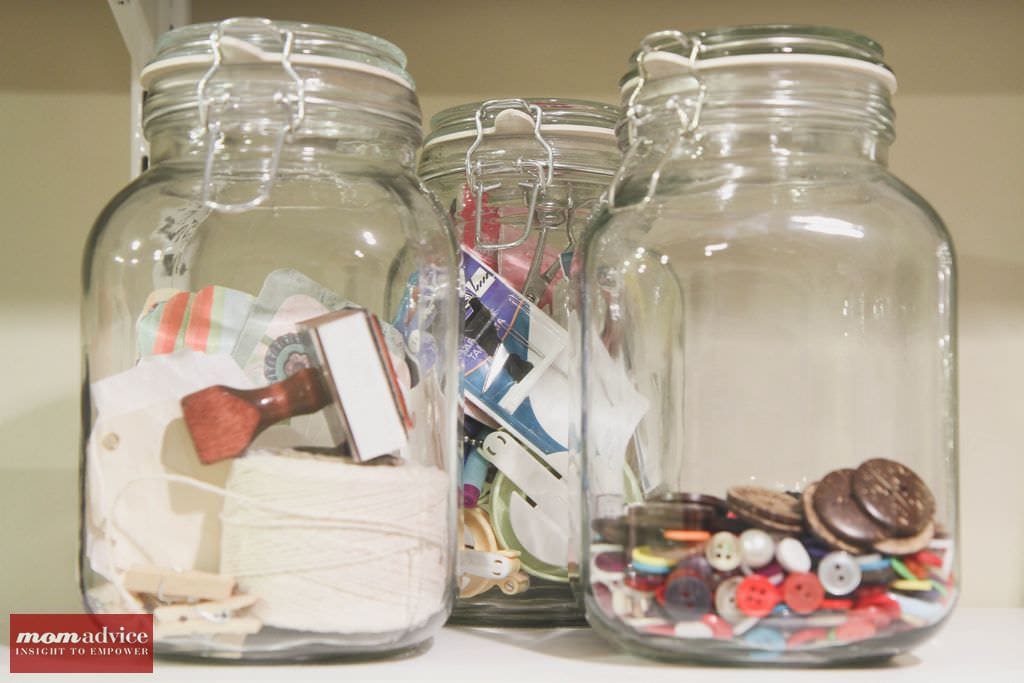
Crafting and organization do not go hand in hand for me.  I spent a good month getting this room organized and trying to figure out the best solutions for my space. Here are some of the solutions I found inexpensively at Walmart.

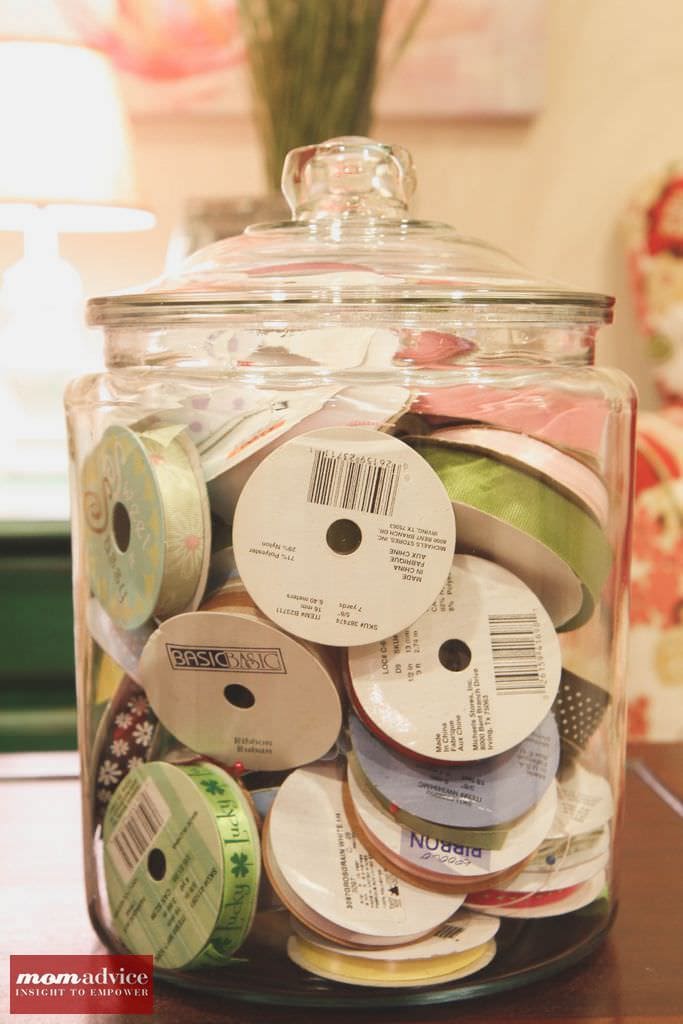
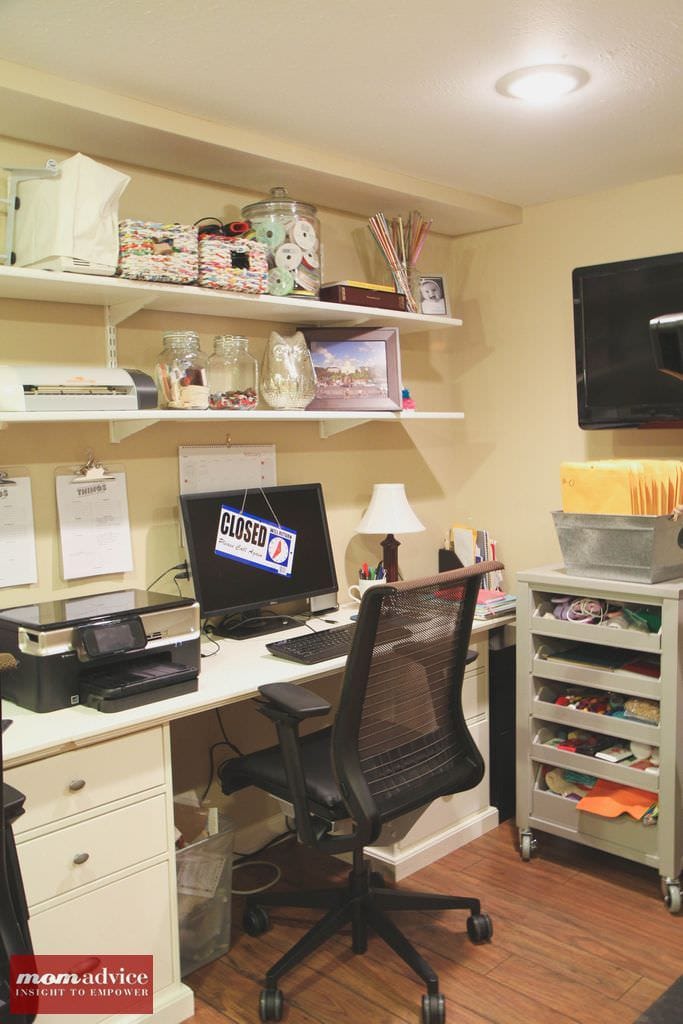
Glass Jars– I had all of my craft supplies tucked away in baskets. This meant I spent a lot of time digging through baskets and trying to figure out where I tucked all my crafting odds & ends. Glass jars truly helps me visualize what I have and where it is. I found the smaller jars for just $4.97 and my giant 2 gallon glass jar is the perfect home for my ribbon collection (priced at $9.97).

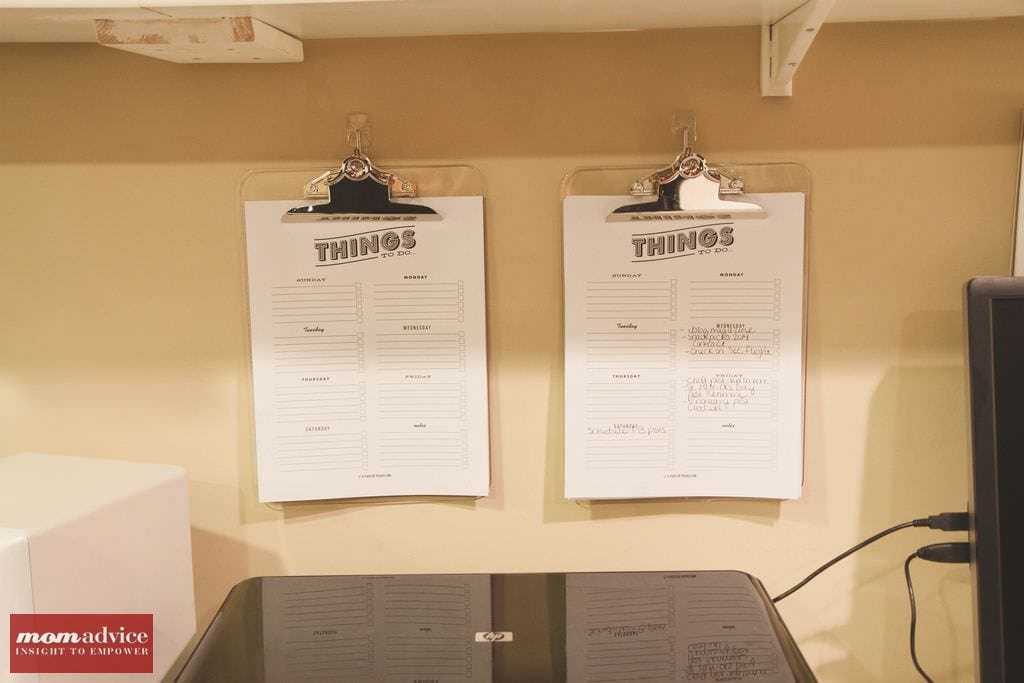
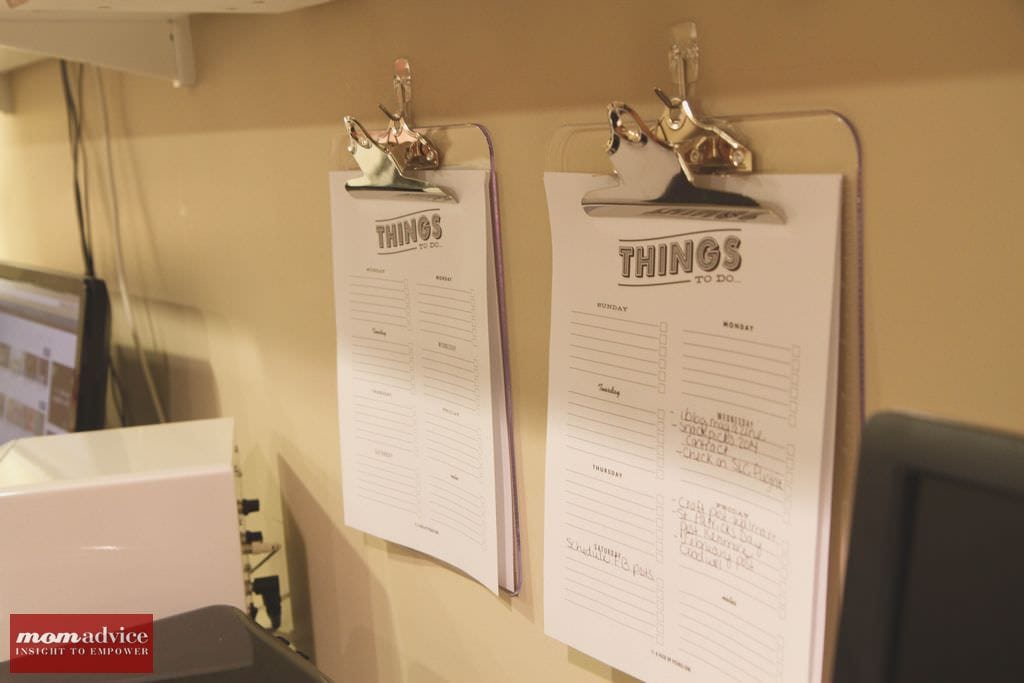
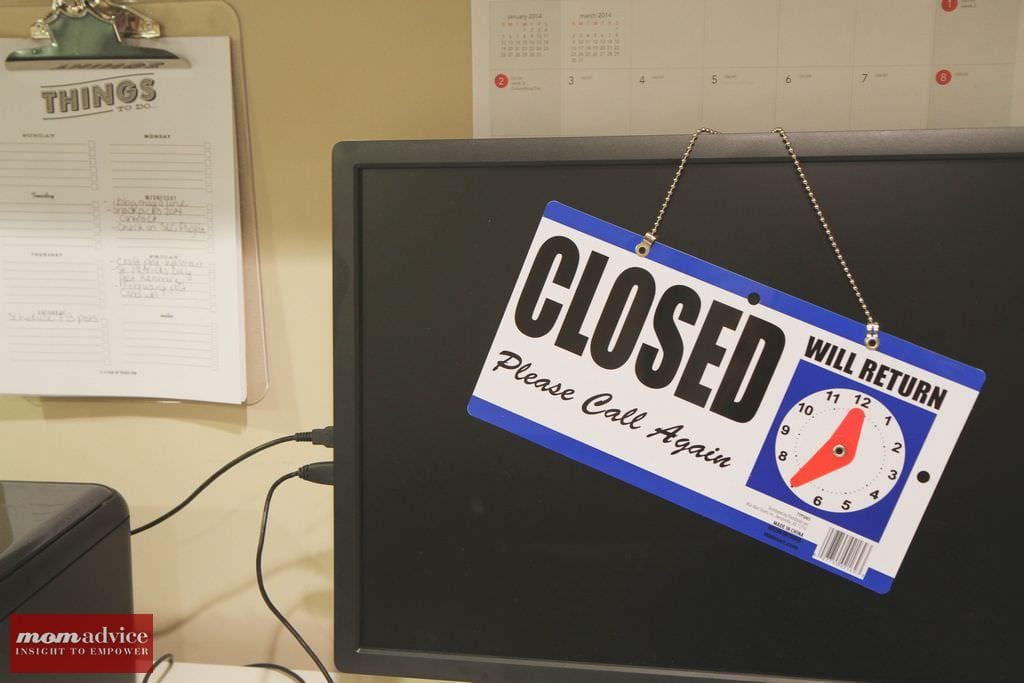
Clear Clipboards– As a craft blogger, I always have a running to-do list for my site and craft projects. I utilized this to-do list printable (previously featured in our DIY Homework stations) and mounted them on these clear clipboards ($3.88)  with 3M hooks ($3.67) on my wall. I also have my favorite Mead Wall Calendar I buy every year to keep track of when all my projects are due ($7.97).

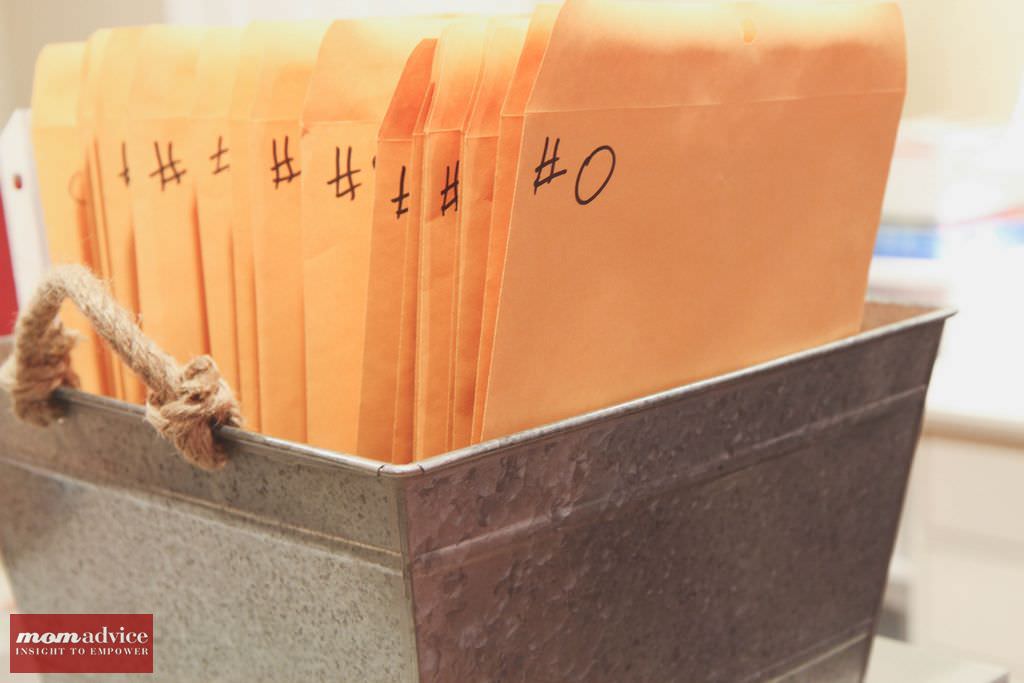
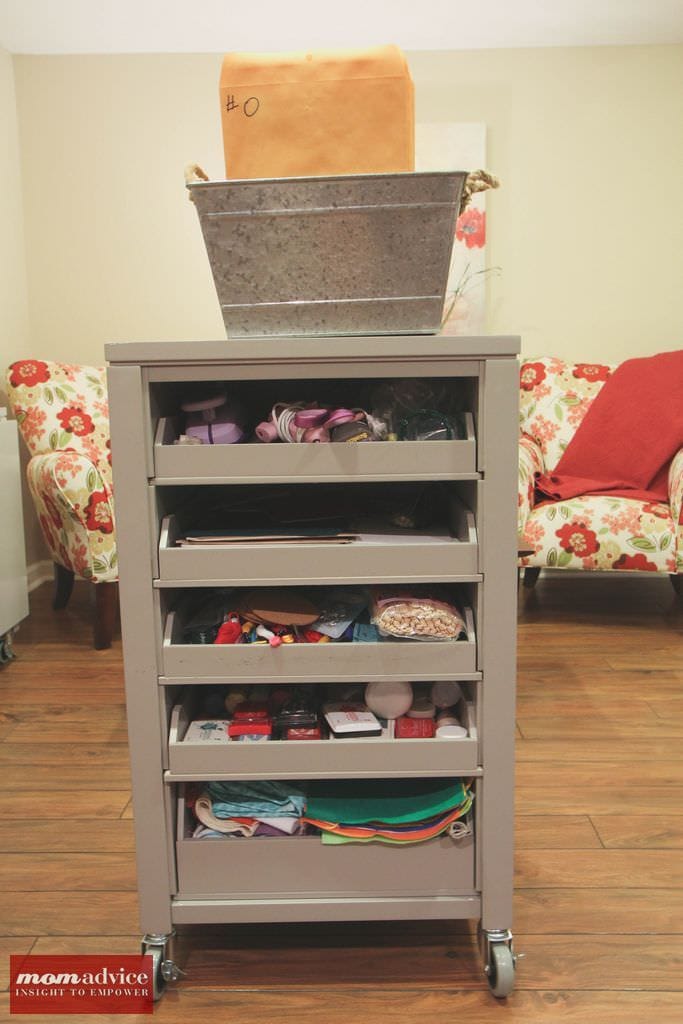
Metal Bins- Over in the closet solutions, I found a metal tub that I could use to organize my knitting needles. When you start really building up your knitting needle collection, you may have four or more different sizes of the same size needle. I was constantly digging through baskets to find the right needles. I decided to use manilla envelopes and label them #0-15 and then put my needles for each size in these envelopes. This saves me tons of time hunting for the right needles and makes it easy to see what I might need to buy. I put all of these in this metal tub ($9.74) and it is on top of my newly organized craft cart.

Smart Solutions for Craft Room Organization from MomAdvice.com Smart Solutions for Craft Room Organization from MomAdvice.com Smart Solutions for Craft Room Organization from MomAdvice.com Smart Solutions for Craft Room Organization from MomAdvice.com Smart Solutions for Craft Room Organization from MomAdvice.com Smart Solutions for Craft Room Organization from MomAdvice.com Smart Solutions for Craft Room Organization from MomAdvice.com Smart Solutions for Craft Room Organization from MomAdvice.com

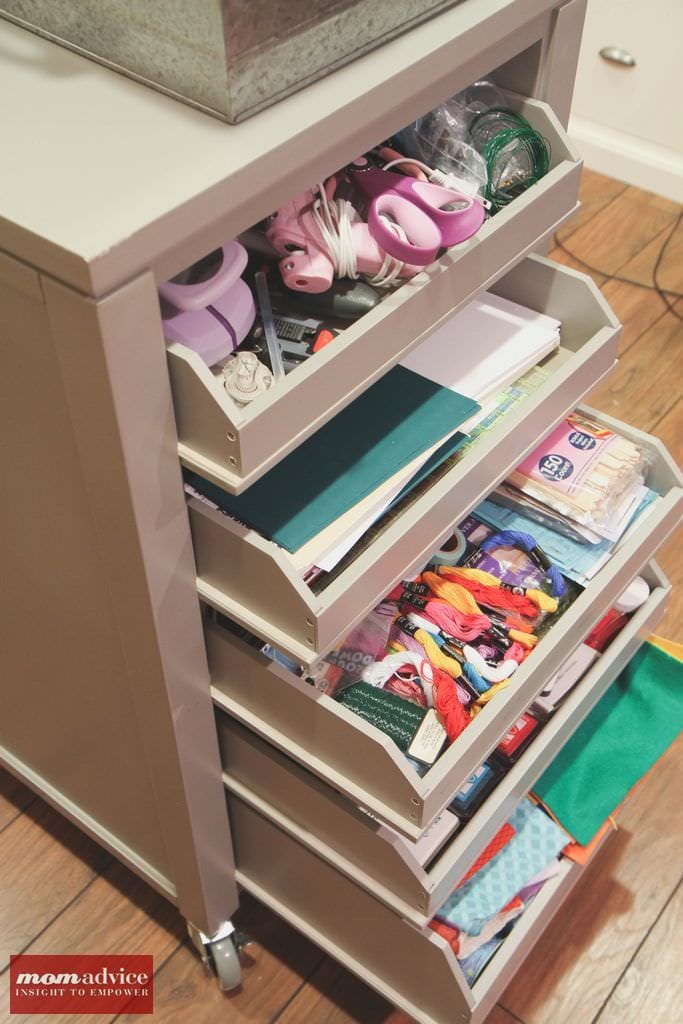
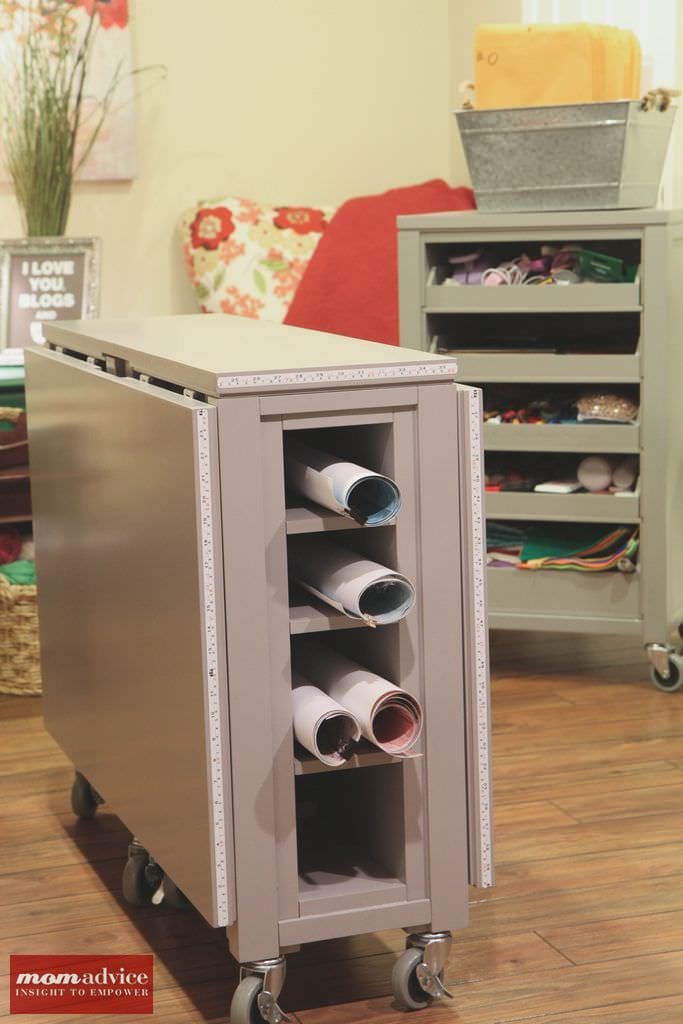
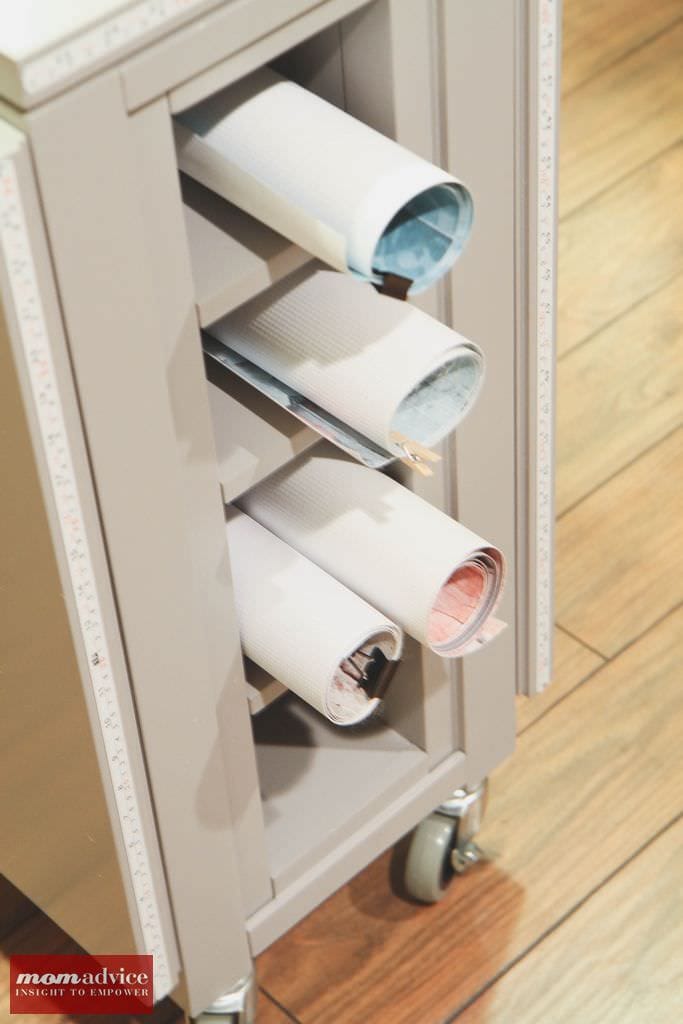
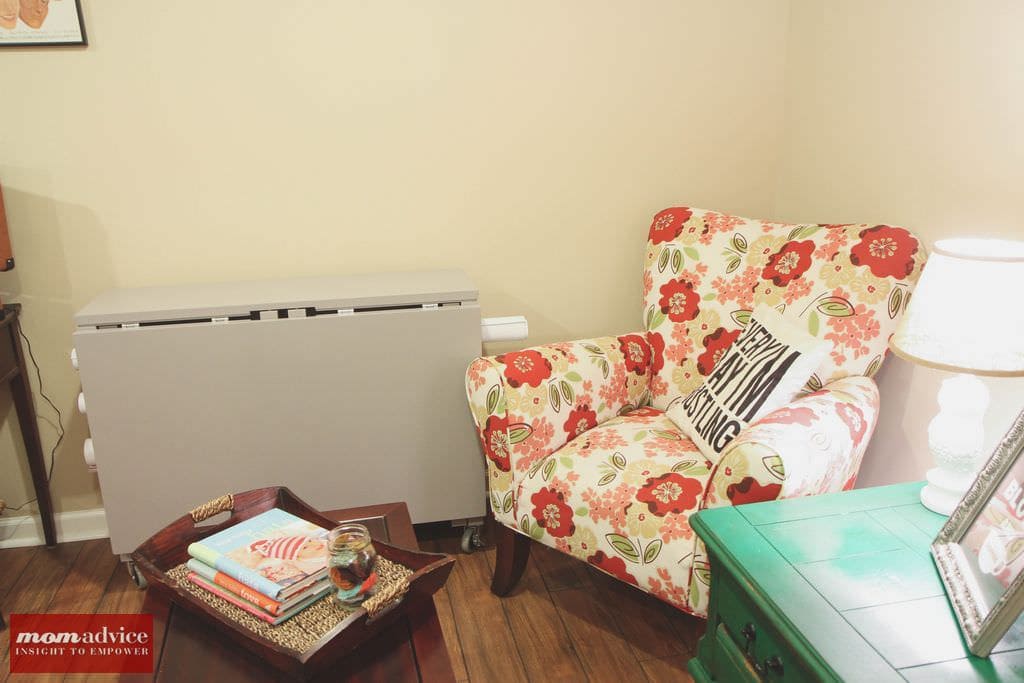
Two things we purchased to finish out my crafting space was a crafting table and a crafting cart that I could roll out into the middle of our office when I needed to do my crafting. We found this Martha Stewart Collapsible Crafting Table & Crafting Cart on Home Decorators. If you are struggling with a small space, this is a dream come true. You can fold down one side if your space is small or open it all the way out if you need a large surface to work on.

This space also doubles as an indoor photography studio when the weather isn’t cooperating. I have my photography backdrops stored in the gift wrap center and can really spread my work out, if I need to on this space.

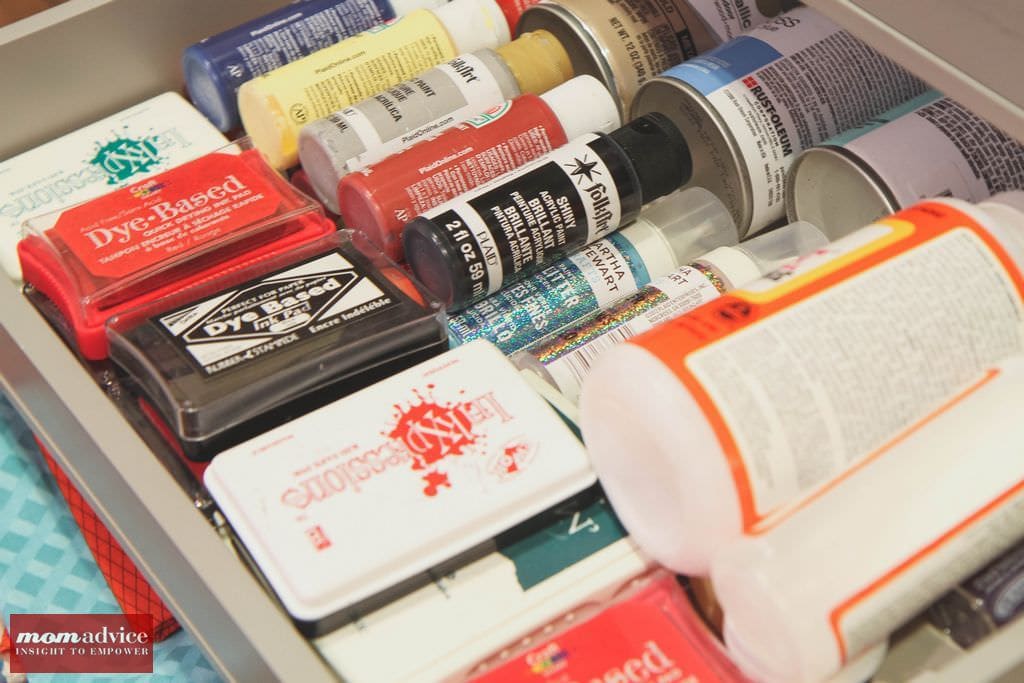
I spent an entire weekend whittling down my craft supplies to what I truly needed in my craft cart. I now everything I need right at my fingertips. I had to keep reassuring myself that it was okay to part with some of my craft supplies. If it hadn’t been used in the last year, it was definitely something that could be donated to free up precious space in my craft cart.

Smart Solutions for Craft Room Organization from MomAdvice.com Smart Solutions for Craft Room Organization from MomAdvice.comAs you can see, I can wheel them over to corners in our office so they don’t get in the way. I am so thankful for these smart solutions for our space. I am also thankful that I finally feel organized in this space.

Smart Solutions for Craft Room Organization from MomAdvice.com

And as a good old-fashioned reminder that all good things should be enjoyed in moderation, I found this old-fashioned closed sign over in the office supplies at Walmart ($1.97). I mounted a 3M clip upside down and hooked it on the back of my computer. This now offers an in-my-face reminder of how I should be spending my evenings.

I hope you enjoyed the tour of my craft space! Feel free to ask me any questions and I promise to try to help!

walmart_mom_disclaimer

Pin It
DIY New Year’s Eve Craft Ideas

Thursday, December 19th, 2013

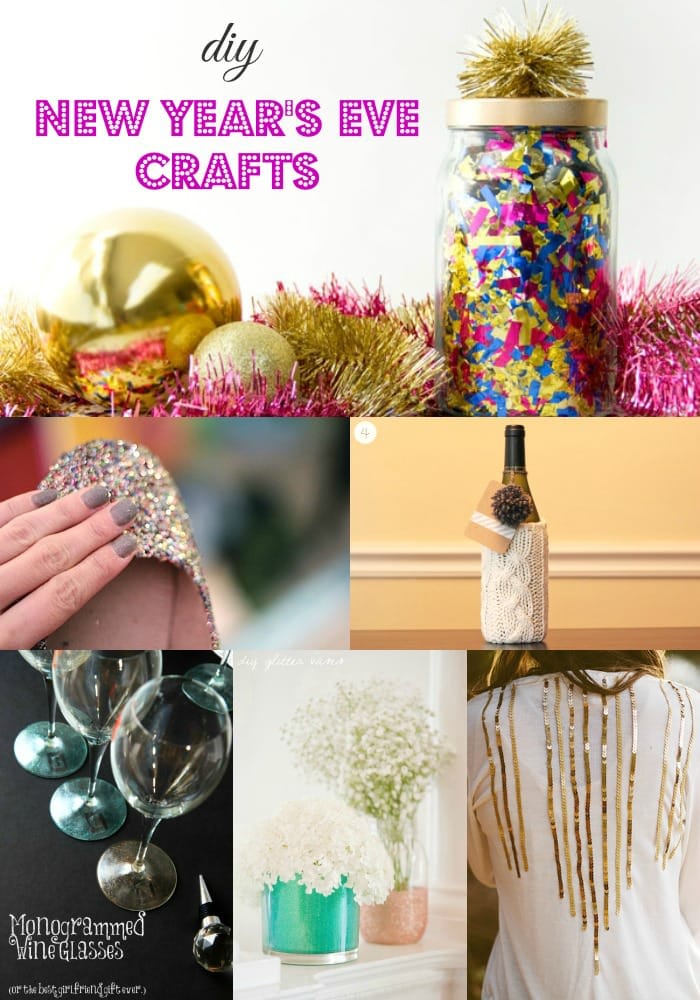
DIY New Year's Eve Crafts

I can’t believe that December is already here and we are dreaming up great New Year’s projects for you!

Of course, I am featuring glittered projects and upcycle projects that could be enjoyed any time of the year.

The best part is that you can find many of the materials for these projects at your local thrift store for a fraction of the price compared to other retail stores.

Let’s find some thrifty ways to ring in the New Year!


Create Glittered Ballet Flats

If there is one thing I love, it is glitter!

I am always looking for festive additions to add to my wardrobe and these glittered flats couldn’t be easier to create and, according to We Are Not Martha, making these is less messy than you think.

For this craft, head to Goodwill to pick up a basic flat and then create a glittered layer with a little Modge Podge and glitter.

How festive would these be for the holidays?

Or your birthday?

Or everyday?


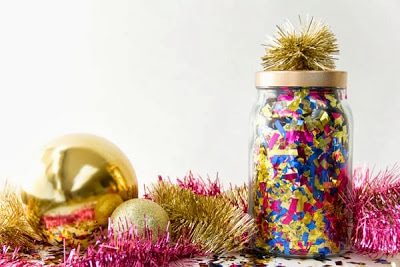
Make Confetti Surprise Jars

Sometimes the simplest of things bring us the most joy and this craft from diy studio is a joyful & frugal one.

My children would adore these Confetti Surprise Jars for a fun family NYE tradition.

Pick up a jar at Goodwill and spray paint the lid a dazzling shade of gold or silver, fill it with confetti, and add a special surprise inside for the recipient.

For your surprise choices, check out the jewelry section or locate small toys or game pieces that you can add as their surprise.

Don’t be afraid to spray paint those treasures in the same shade of gold or silver for the holiday.


Add A Little Sparkle to Your Wardrobe

If there is one thing that thrift stores have an overabundance of, it is sweaters and cardigans for the Winter season.
Don’t worry if you don’t sew (like me!), this is a project that can be done in minutes with just a little fabric glue.
Sincerely Kinsey offers this fantastic DIY that will add just a hint of sparkle to your wardrobe with this easy sequin cardigan.

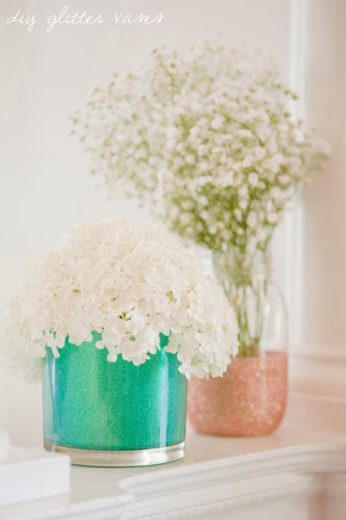
Add A Little Sparkle To Your Home

There is always an abundance of vases and jars at Goodwill so I love that I can shop their store for this project.
These easy glittered vases are pulled together much like the glittered flat that I shared about earlier.
You simply need a vase or jar, Mode Podge, glitter, and a sponge brush to create these fun vases.
I think these would make the cutest NYE centerpiece or they could be a fun craft to do with your kids for the holiday season.
Check out this tutorial from the sweetest occasion.

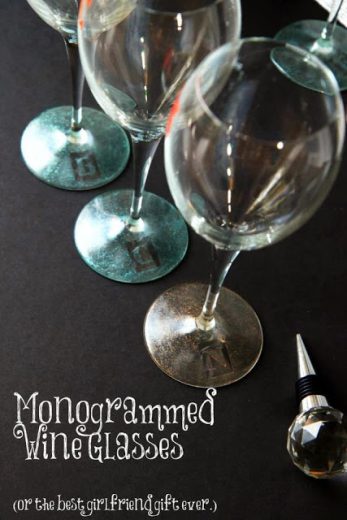
Add Sparkle to Your Wine Glasses

I am no stranger to adding sparkle to stemware and last year I created these monogrammed wine glasses for my girlfriends.

If you are having a small NYE party, consider making these as a fun favor for your guests.
If you lack the ambition to monogram them, keep it simple and just add a glittered stem to your glasses.

Give a Cozy Hostess Gift 

As the resident craft expert for the Goodwill Tips blog, I can tell you that sweater crafts are one of our favorite projects to share about on here.
Yet again, the ever-versatile-and-available sweater makes its appearance in another craft post.
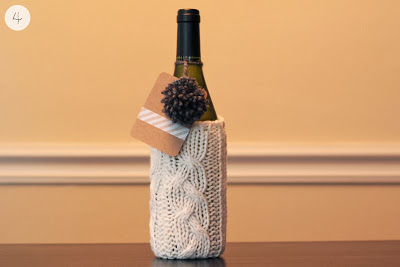
Warm Hot Chocolate shares an easy no-sew tutorial for creating a cozy sweater that can dress up a bottle of wine or champagne.
She adds an adorable pom-pom embellishment with a tag to complete this beautiful gift.

Wine hats and scarves

Wishing you the hap-hap-happiest of New Year’s from MomAdvice.com!! May your holiday be beautiful and thrifty this year!

This post contains affiliate links.
Here are a few more wonderful crafts from MomAdvice.com:

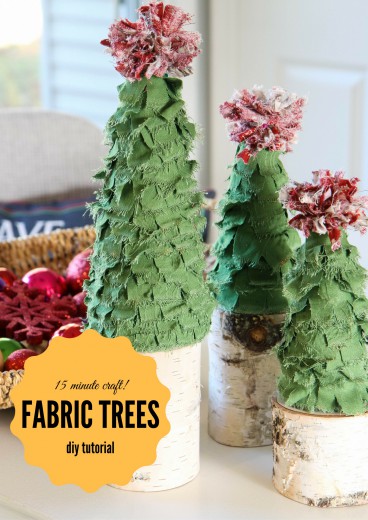
Scrappy Fabric Trees


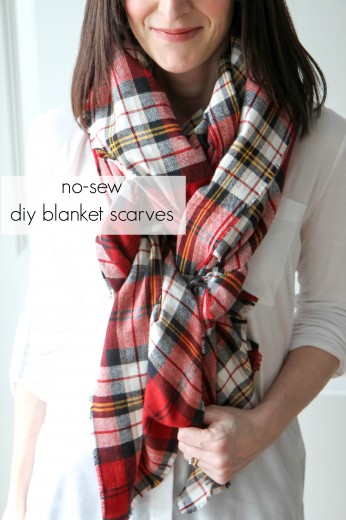
No-Sew DIY Blanket Scarf


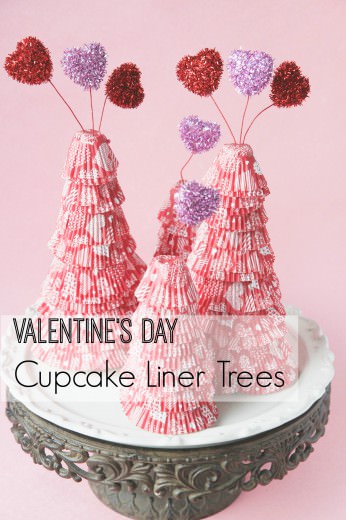
Valentine’s Day Cupcake Liner Trees


Paint-Dipped Spoon Set


Sign up for the MomAdvice newsletter


Yarn Ball Ornaments

Wednesday, December 4th, 2013

Easy Yarn Ball Ornaments from MomAdvice.com

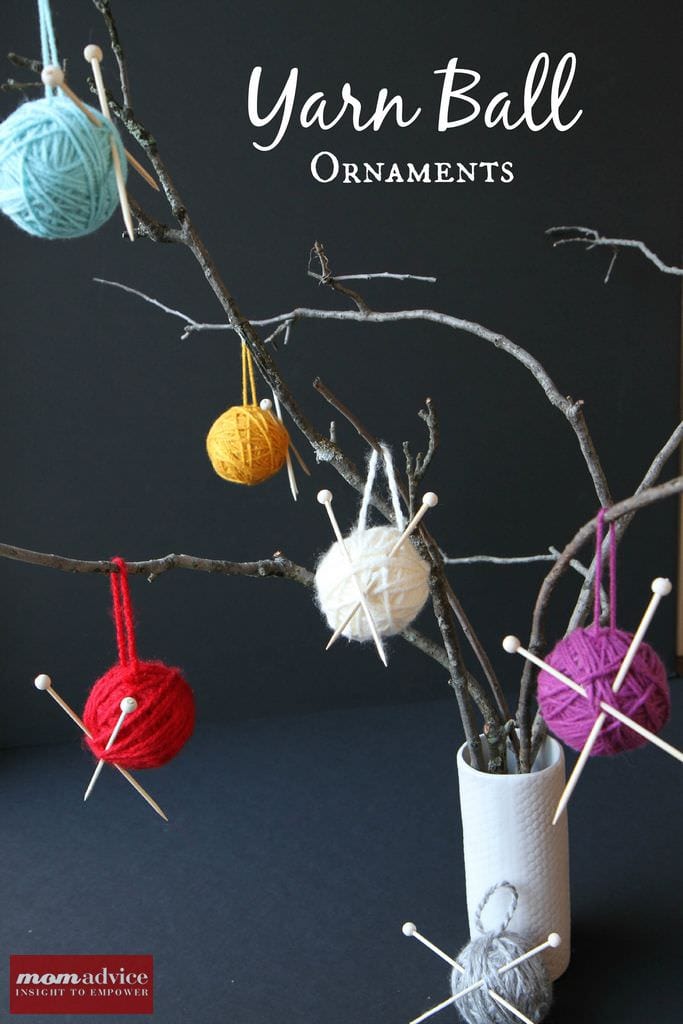
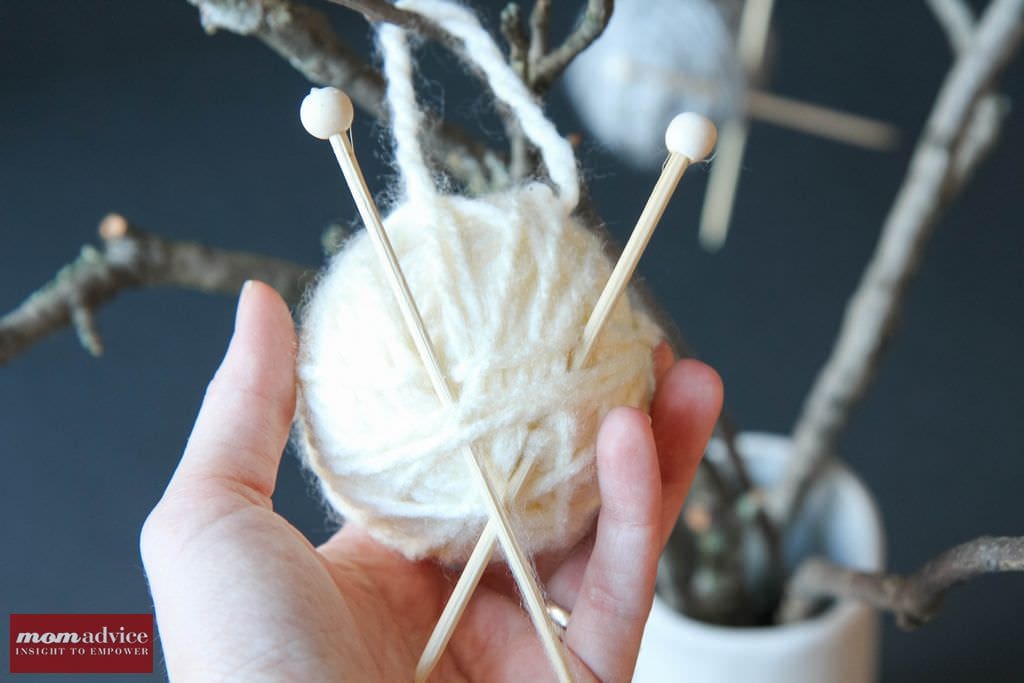
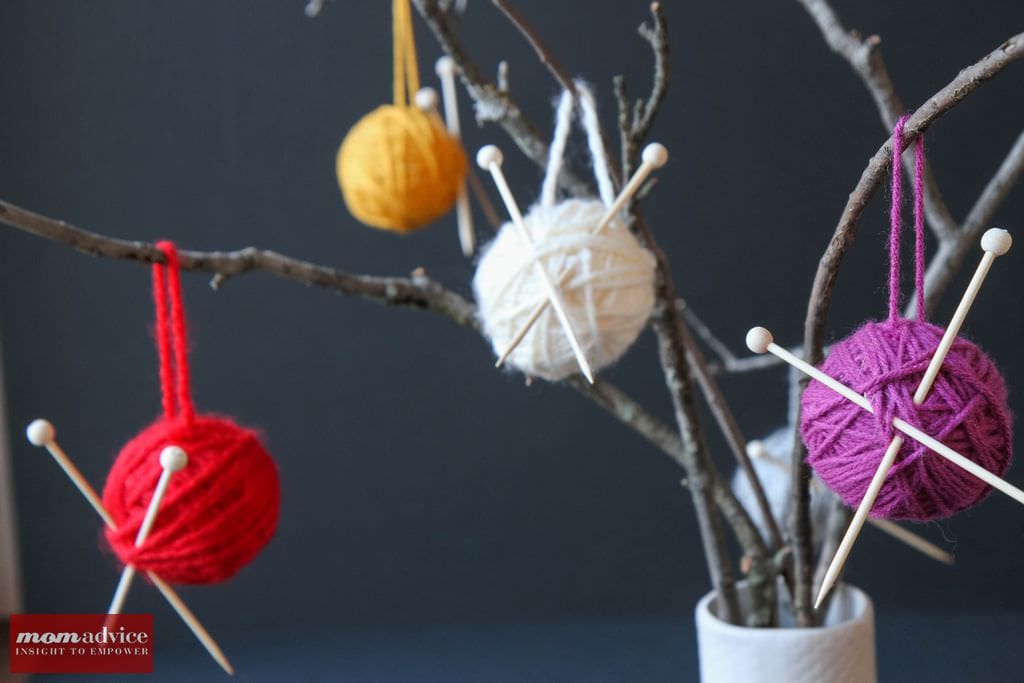
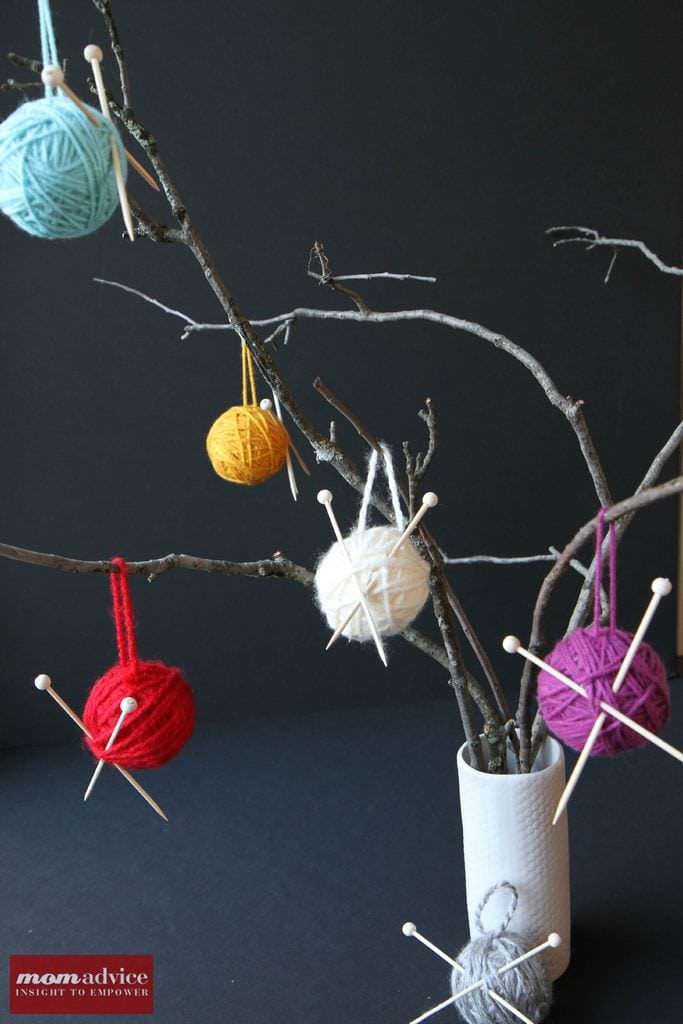
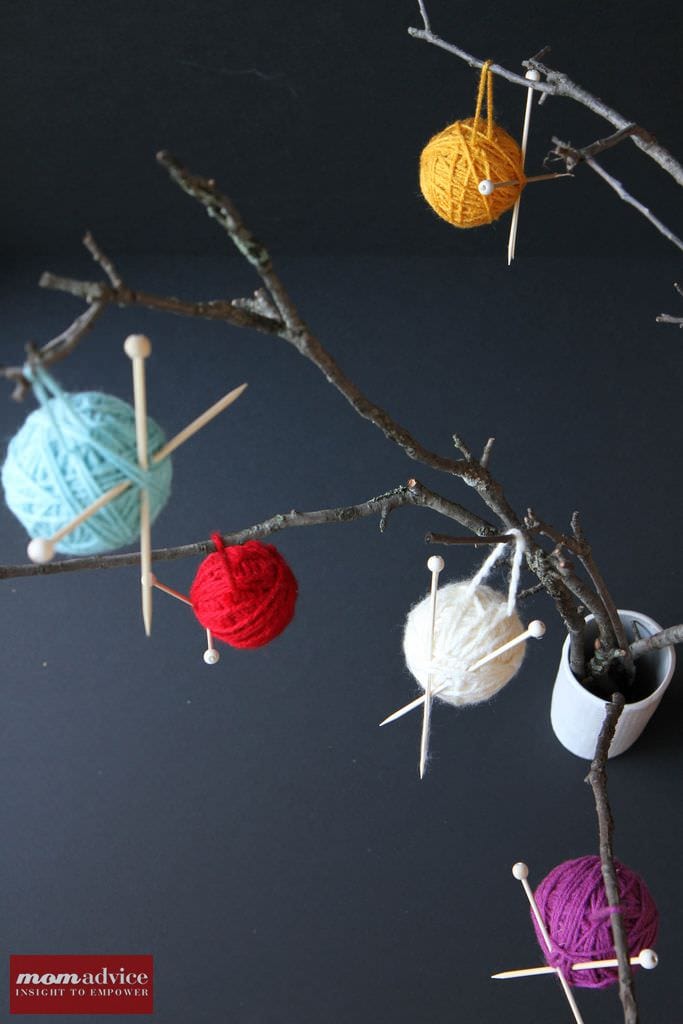
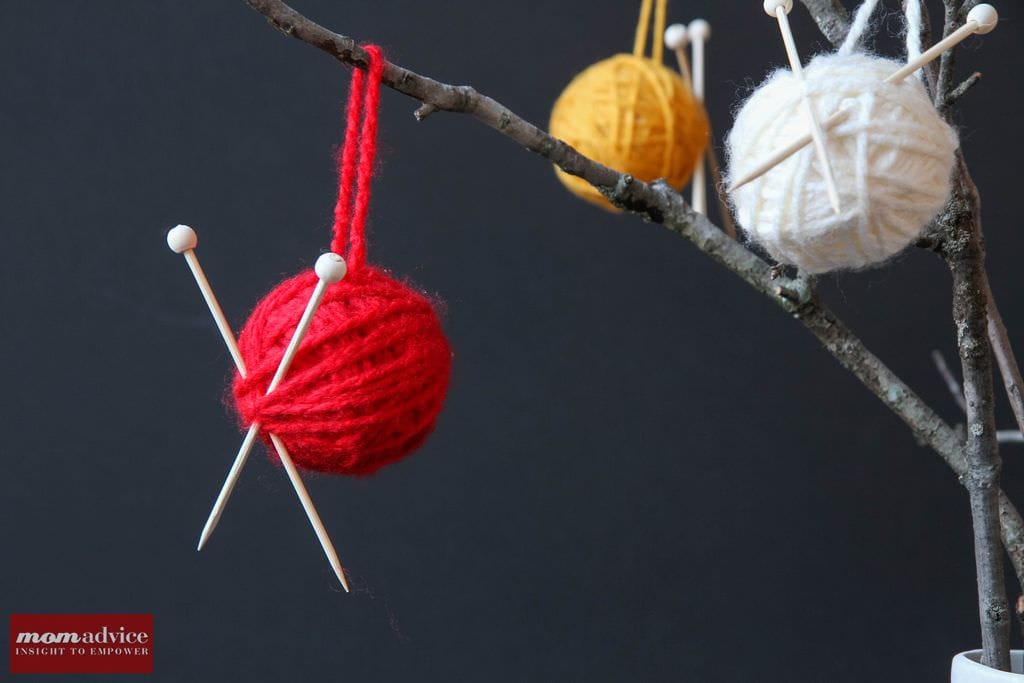
Looking for a creative gift to craft up that requires zero crafting skills and can be made in under 15 minutes. These yarn ball ornaments are the perfect gift to give for the holidays and are unbelievably easy to create for the holiday season. The best part is that it is a gift perfect for knitters, but doesn’t require knitting! If you are a knitter, like me, it is a fantastic stash-buster of a project!

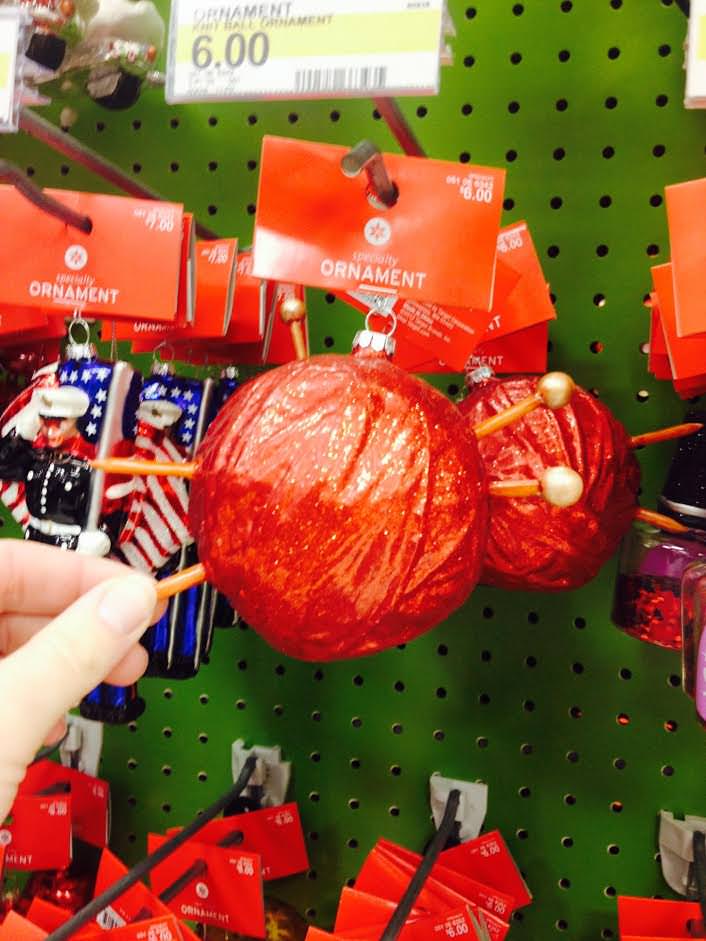
Target Yarn Ball Ornament

The inspiration for this craft came from this picture of an ornament at Target that my girlfriend sent to me. I loved the idea of this ornament, but wanted to create something a little more authentic for my knitting friends. After a few trips to the craft store and some test ornaments, I am sharing with you how you can make these cute ornaments for someone you love!

Easy Yarn Ball Ornaments from MomAdvice.com

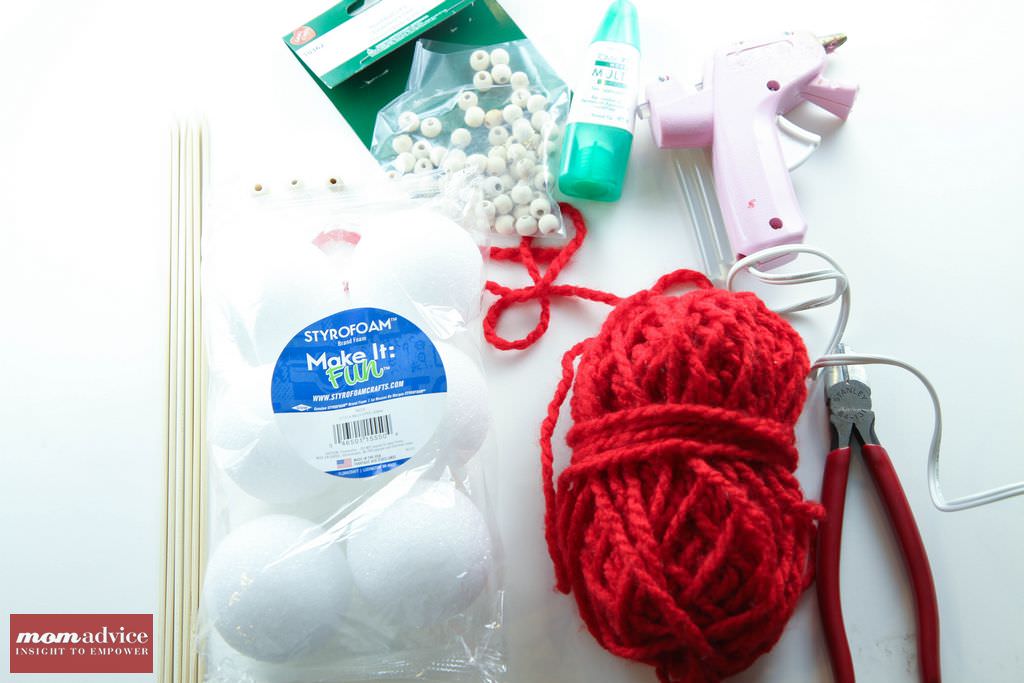
Supplies List

1 package of 2 1/2″ Styrofoam balls

Wooden Skewers

1 package 3/8″ Round Wooden Beads

Craft Glue

Glue Sticks & Glue Gun

Wire Cutters

Ruler

Scissors

Scrap Yarn

Easy Yarn Ball Ornaments from MomAdvice.com

Easy Yarn Ball Ornaments from MomAdvice.com

Directions

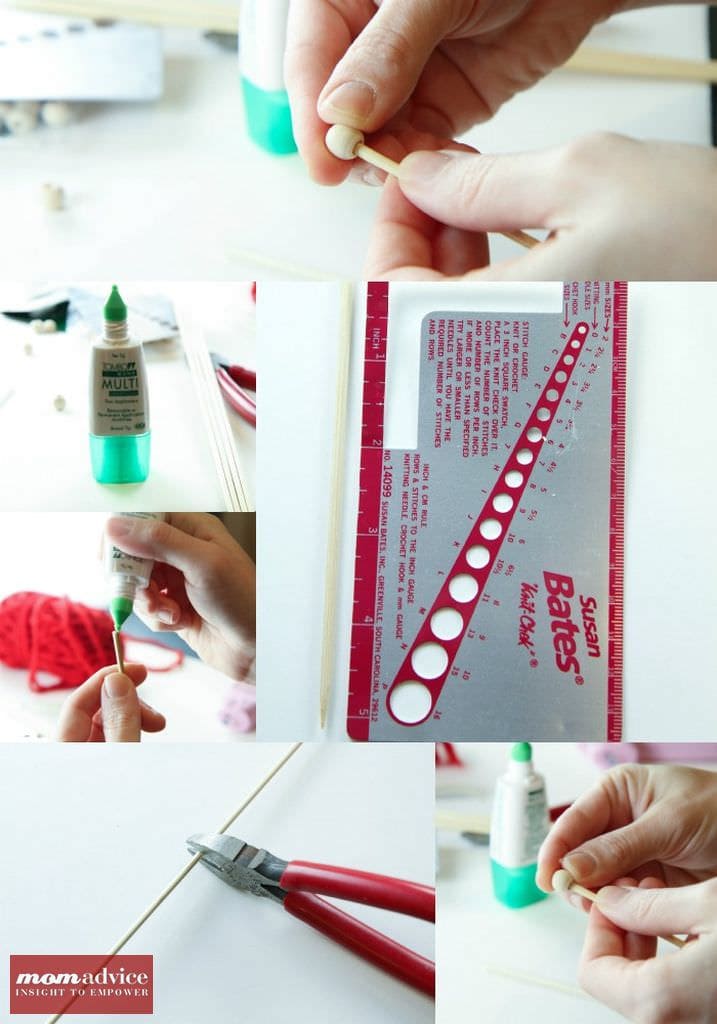
1. Grab two wooden skewers and measure them to 5 inches. Using your wire cutters, clamp down and break off the top end of the skewer to create the knitting needles.

2. Dab a little craft glue on the end of the skewer and top it with the wooden bead. Make sure the top of the bead lines up with the top hole so that you no longer see it. Repeat with the other skewer and set these aside to dry.

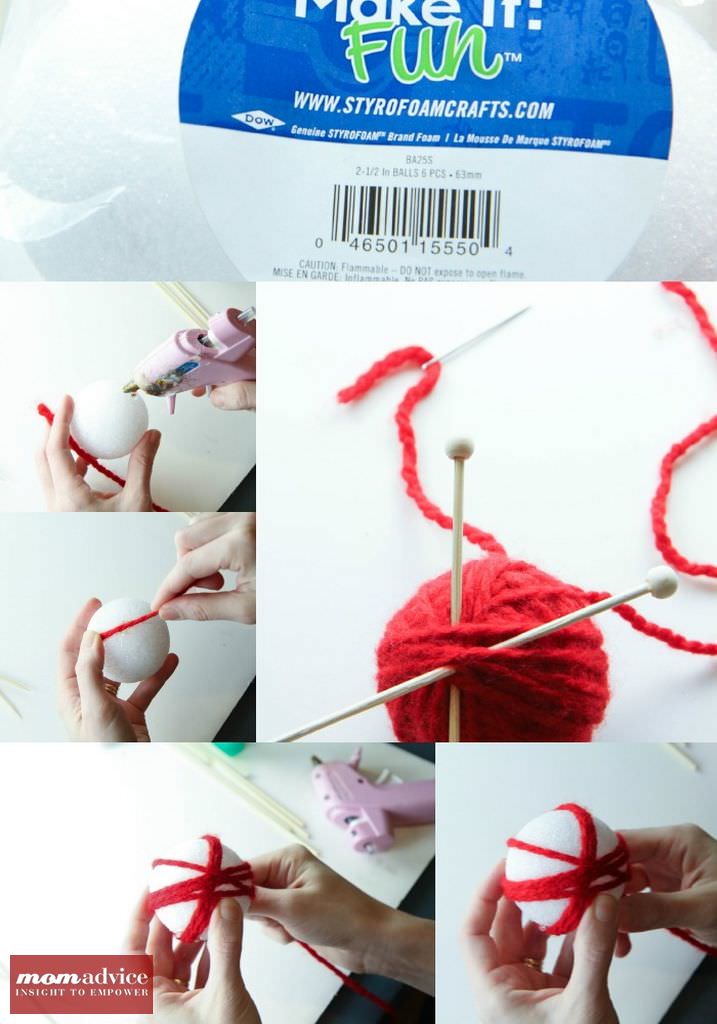
3. Add a dab of hot glue to your Styrofoam ball and start wrapping it with yarn. Keep wrapping around and around until the yarn ball is completely covered. Add one more dab of hot glue and secure the end of the yarn to the ball. Trim to keep it flush with the ball and set aside to dry.

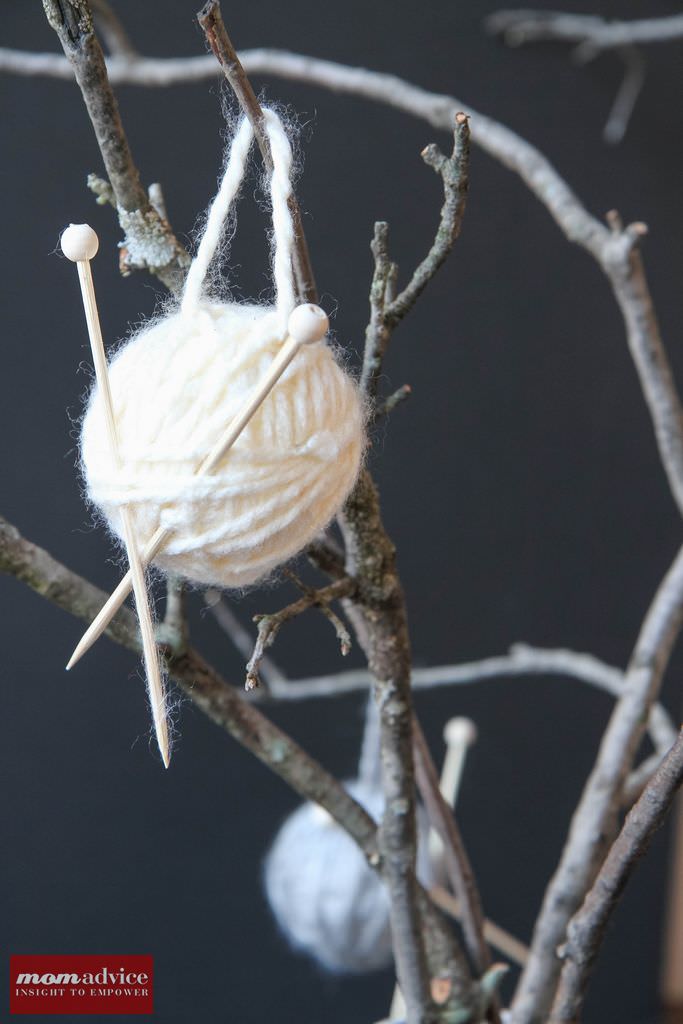
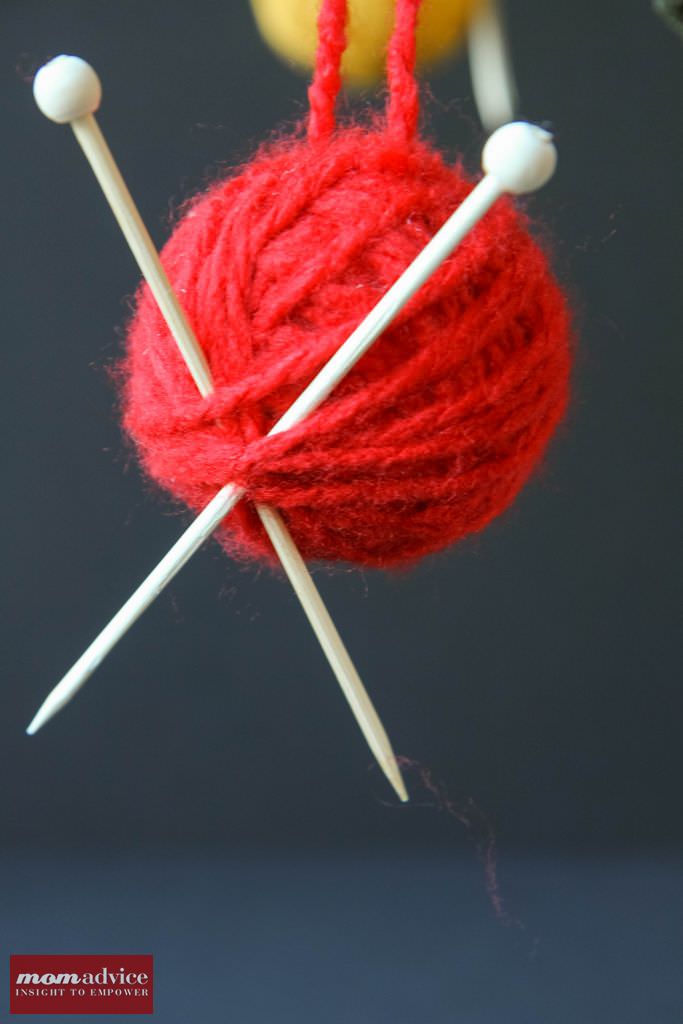
4. Grab your wooden knitting needles and cross them through the front of the yarn ball.

5. Trim another strand of yarn and, using an embroidery needle, loop the yarn through the top of the yarn ball. Knot it, and then slide the knot into the opposite side of the ball, tucking your knot in so it is no longer visible.

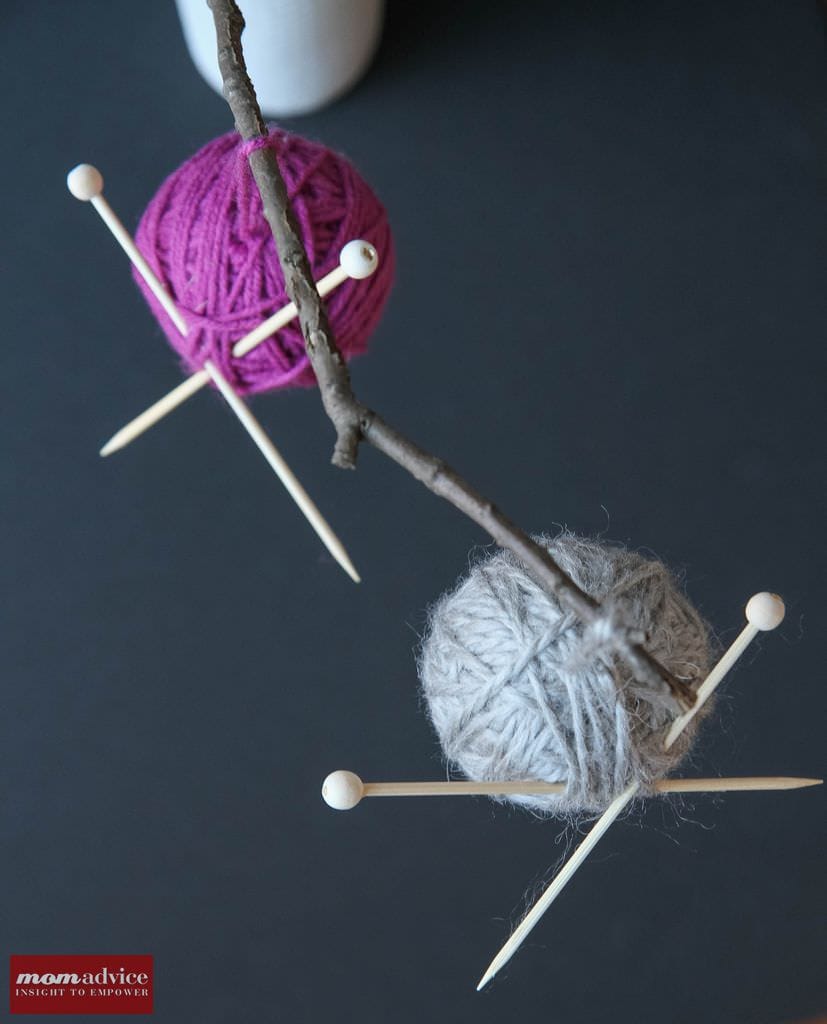
Easy Yarn Ball Ornaments from MomAdvice.com Easy Yarn Ball Ornaments from MomAdvice.com Easy Yarn Ball Ornaments from MomAdvice.com Easy Yarn Ball Ornaments from MomAdvice.com Easy Yarn Ball Ornaments from MomAdvice.com Easy Yarn Ball Ornaments from MomAdvice.com Easy Yarn Ball Ornaments from MomAdvice.com Easy Yarn Ball Ornaments from MomAdvice.comI hope this craft inspires you for your holiday giving. I will confess to you now that I am going to have a very hard time parting with these cute ornaments. I just might be making myself a few over the holidays!

Be sure to check out our list of 54 Handmade Gift Ideas, our Easy No-Sew, No-Glue, No-Cut Burlap Wreath, and a fun little Cinnamon Roll Christmas Tree you can make with the kiddos while you are crafting!

Pin It
DIY Thanksgiving Centerpiece

Tuesday, November 19th, 2013

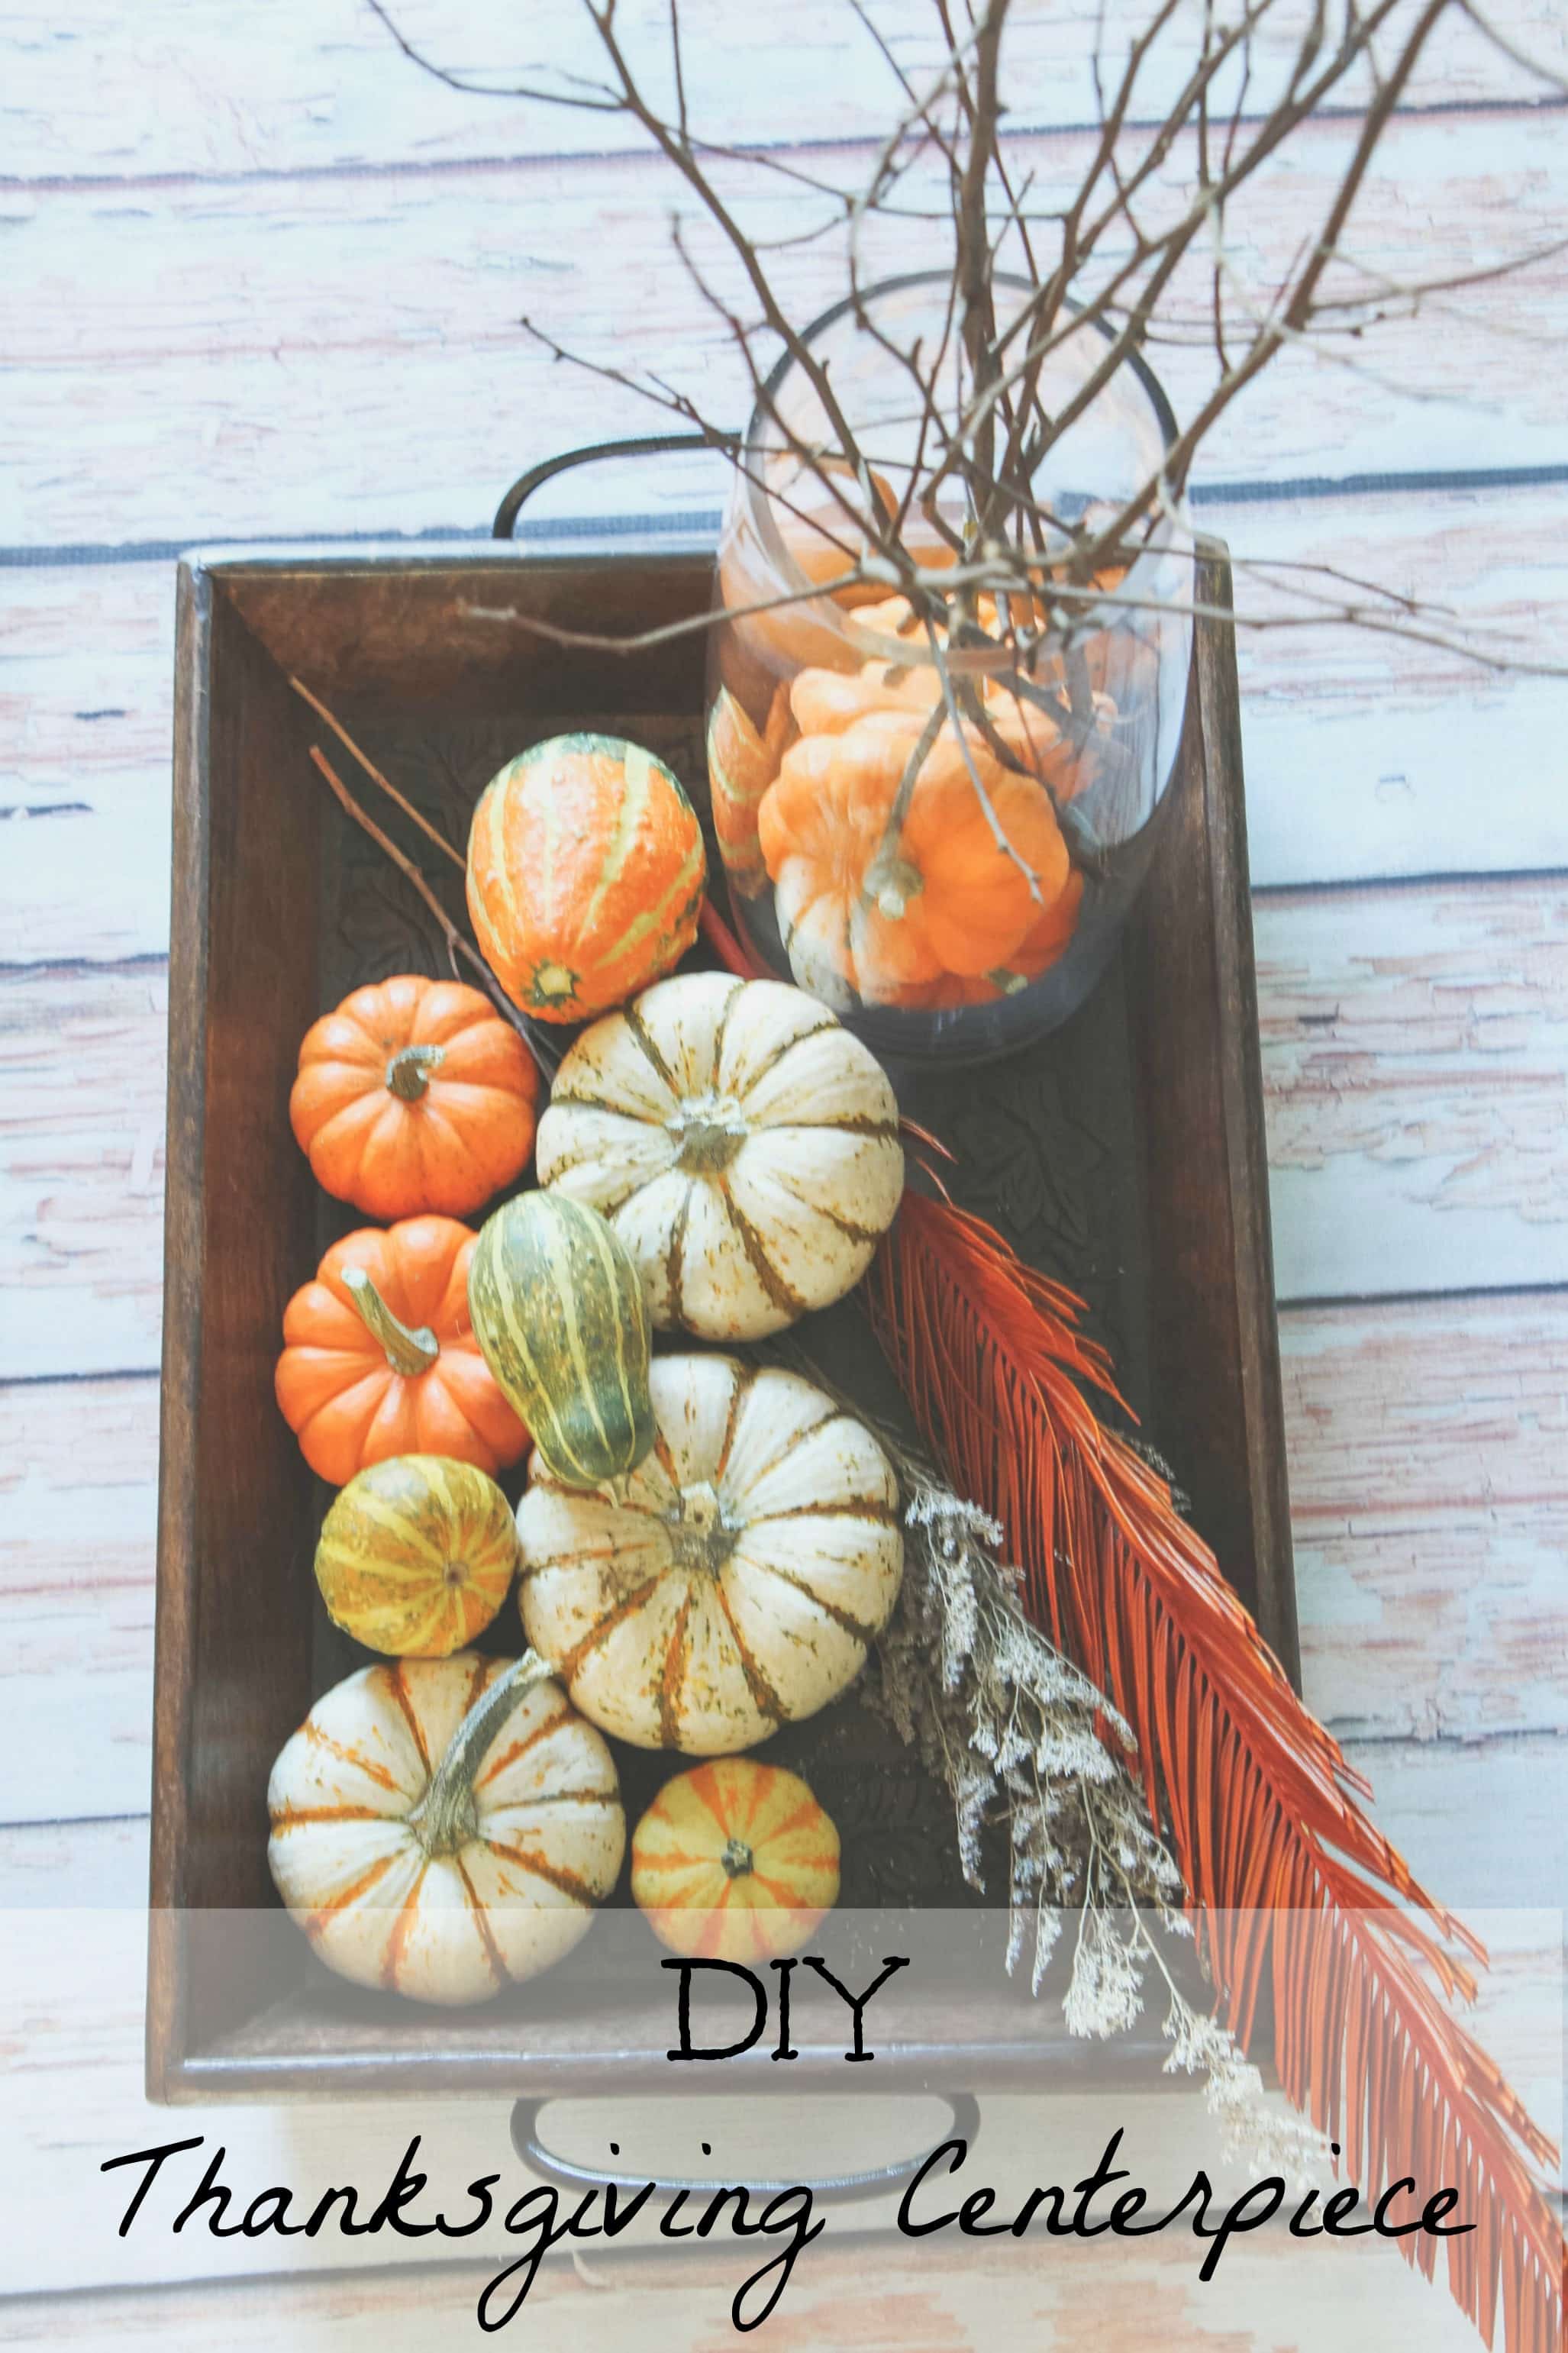
DIY Thanksgiving Centerpiece from MomAdvice.com.If there is one holiday I love it is Thanksgiving. Any holiday that focuses on all of the blessings of the year around a dinner table filled with those I love is definitely a holiday that I love to celebrate. Oftentimes though, the details of holiday preparation and decorating can interfere with the things that really should matter the most.

Today I wanted to share with you a beautiful and effortless centerpiece you can create for your table with some items you have on hand combined with a few items from your local grocer. To find out how to make this fast and easy DIY Thanksgiving centerpiece, head on over to the Kenmore Blog to grab the supplies list and read my easy tutorial for creating this for your own home!

See you there!


Fall Decorating With Goodwill Store Items

Monday, November 18th, 2013

Fall Decorating With Goodwill Store Items from MomAdvice.com.


This time of year is among my favorites because I just love decorating for the Fall season and for Thanksgiving with my family.

Thankfully, decorating for Fall doesn’t need to be expensive at all!

With a few inexpensive tools and some items from your favorite thrift shop, you will have all you need to start decorating your home for Fall.

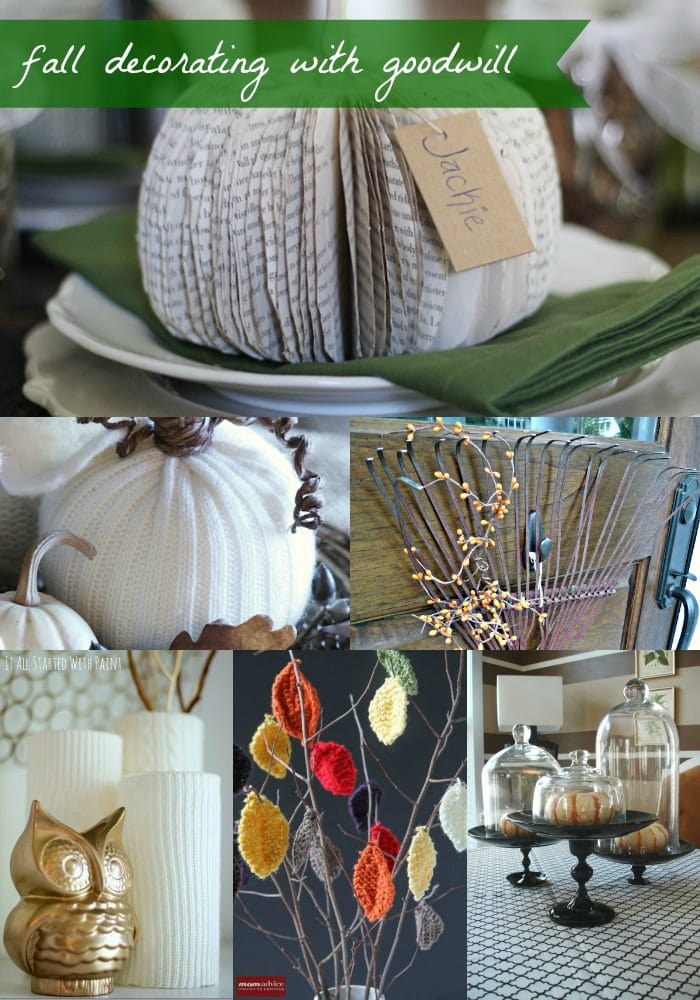
Here are six fun ways to decorate your home for Fall using some easy to find items! 


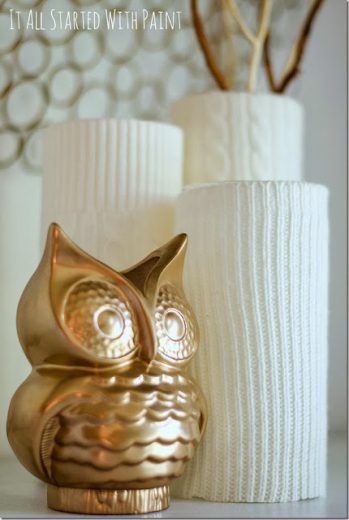
Make a Sweater Vase

Vases are readily available at Goodwill and there happen to be dozens upon dozens of sweaters just waiting to adorn those vases.

Select a color scheme that goes along with your home and simply glue the sweater fabric to your inexpensive vase.

Fill your vase with bare branches from your yard and you have a beautiful and cozy vase to decorate your mantle!

As someone who lacks the sewing gene, I totally love that this craft is a no-sew project!

Check out Made From Pinterest for the scoop on this adorable craft.


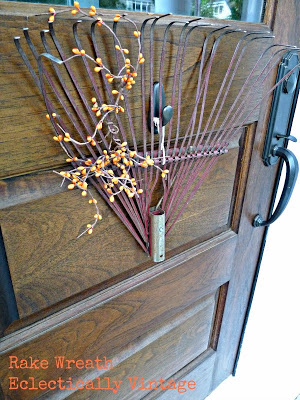
Add a Fall Touch To Your Door

Making a wreath can be time-consuming and buying a wreath can be expensive.

Why not decorate your door beautifully and simply with the top of a rake?

I love this adorable rake adornment for the front door dressed simply with a little sprig of Fall branches that you could pick up from the craft shop.

You could even spray paint this to match your front step decor.

This would also be such a fun way to decorate a shed door!

Visit Eclectically Vintage for some beautifully thrifted inspiration!


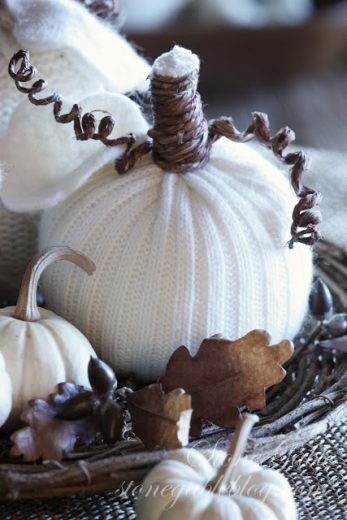
Make a Cozy Pumpkin Centerpiece

Sweater crafts are all the rage for Fall and I love the idea of creating a centerpiece of pumpkins that have been covered in cozy sweaters for the Fall season.
On the StoneGable blog, you can find some fabulous instructions for creating a few cozy pumpkins of your own.
I love that they chose this white color scheme for the pumpkins because these could remain out for Winter decor too!
Be sure to look for sweaters with interesting cabling schemes and chose sweaters with different textures to really make your pumpkin centerpiece stand out!

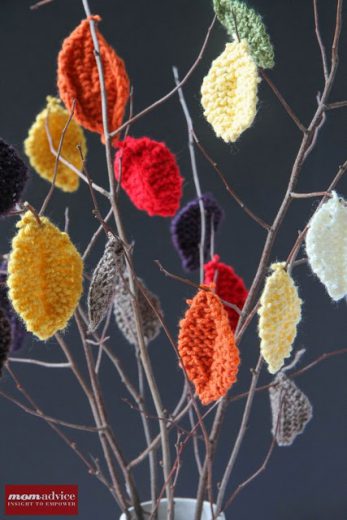
Give Branches a New Lease On Life

While bare branches can be beautiful, it can be fun to spruce them up and adorn them for the Fall season.

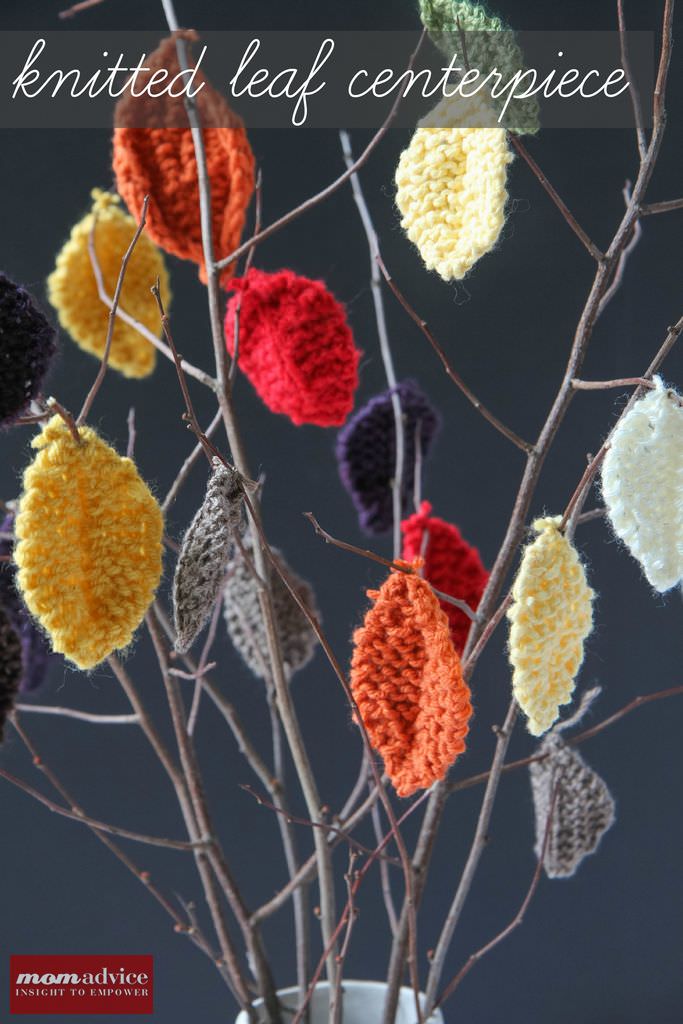
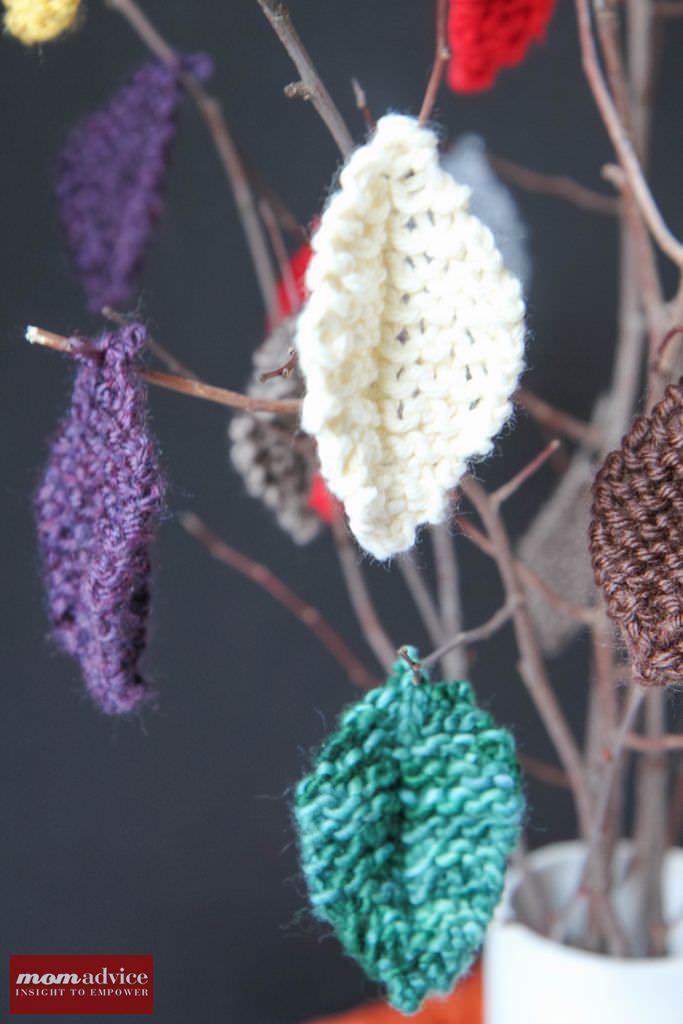
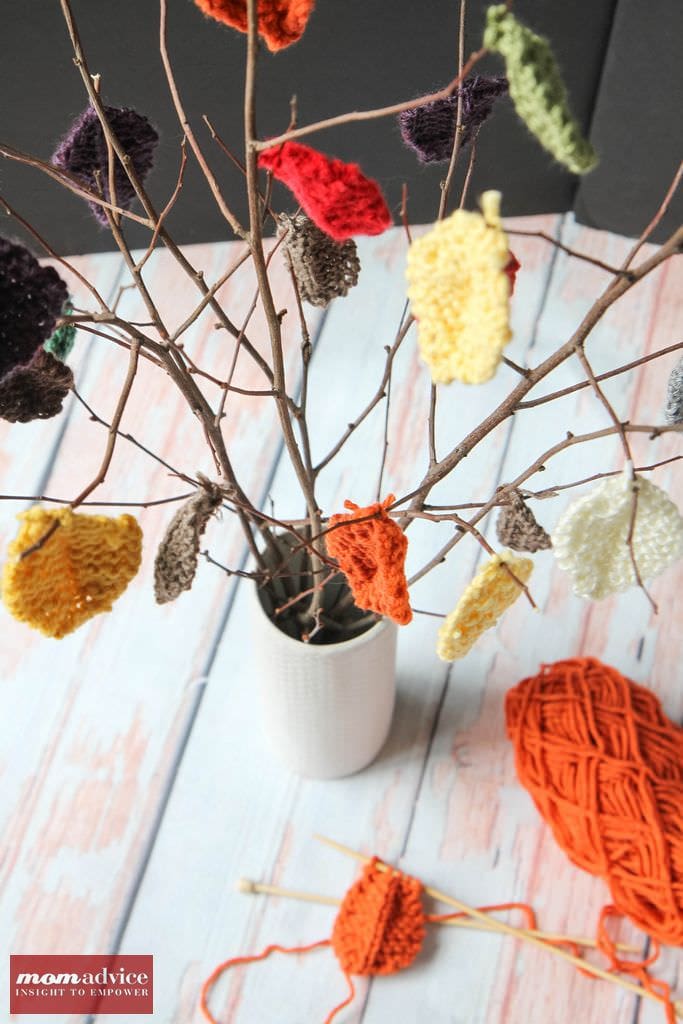
Yarn is a commonly donated Goodwill item and this year I made my very own little Knitted Leaf centerpiece out of scrap yarns that I had.
Leaves can be made out of just about anything though, consider cutting leaves from sweaters or book pages to create your own unique centerpiece and place them in a pretty vase from your favorite thrift store.

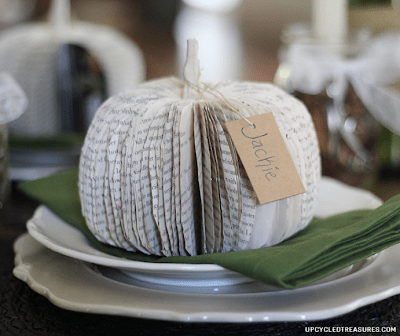
Make a Pumpkin From Book Pages

Are you hosting a Thanksgiving dinner this year?

Consider making a unique centerpiece out of a book from Goodwill.
These book page pumpkins make a beautiful place setting that could later sit on a side table, ledge, or mantle after your dinner is done.
Check out Upcycled Treasures for a great tutorial on how to make these for your own Thanksgiving table.
Of course, regular readers know that we are BIG fans of book page crafts over here so be sure to check out our fantastic round-up of things to do with old books!

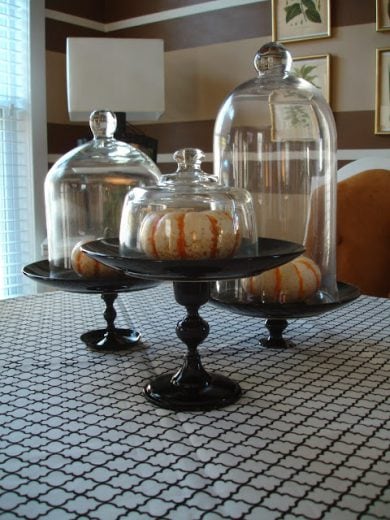
Take a Stand with Your Decorating

Cake stands are so easy to make with just a candlestick holder and a plate.

Spray paint them to create a cohesive collection and place these on your buffet table or mantle.
Head to the local farmer’s market or grocer to find interesting pumpkins to adorn the top of these stands.
Check out this easy tutorial from Dwellings by Devore to get the scoop on how to make these for your own home!
I am wishing you the happiest of Thanksgivings this year!
I hope these ideas will help you with decorating your own home for the holidays!
Don’t miss these other Fall Ideas from MomAdvice.com:

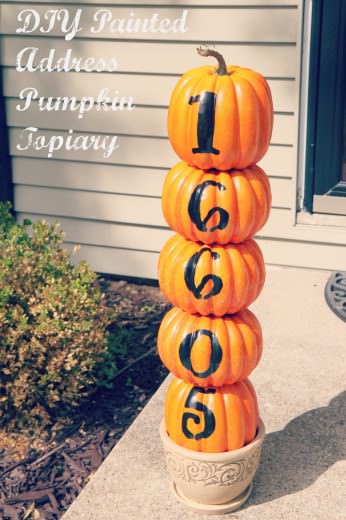
DIY Painted Address Pumpkin Topiary

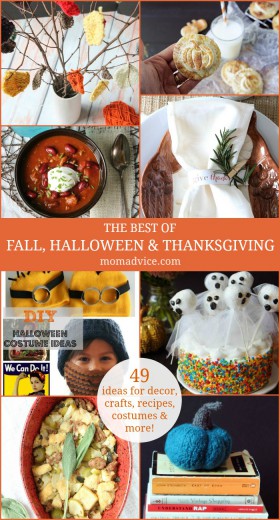
The Best of Fall, Halloween & Thanksgiving-49 Ideas for Decor, Crafts, Recipes, Costumes & More

The Best of Fall, Halloween & Thanksgiving

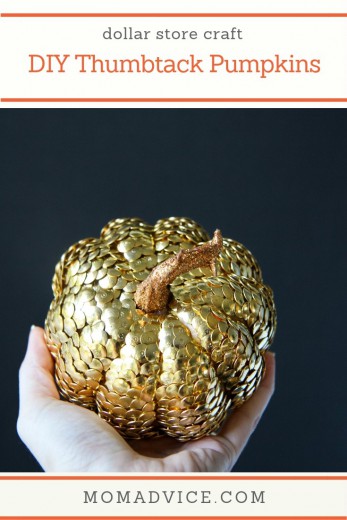
DIY Thumbtack Pumpkins


Tips to Enjoy Autumn at MomAdvice.com

Enjoy Autumn to the Fullest


SaveSave

SaveSave

SaveSave

Pin It
Knitted Leaf Centerpiece

Monday, October 28th, 2013

Knitted Leaf Centerpiece from MomAdvice.com.

I have been thinking about creating a knitted leaf centerpiece for so long and I can’t wait to show off my knitted leaf centerpiece that you can create to adorn your Thanksgiving table or as a fun addition to your holiday decorations. This thrifty knitted leaf centerpiece takes less time than you might think and is so much fun to knit up.

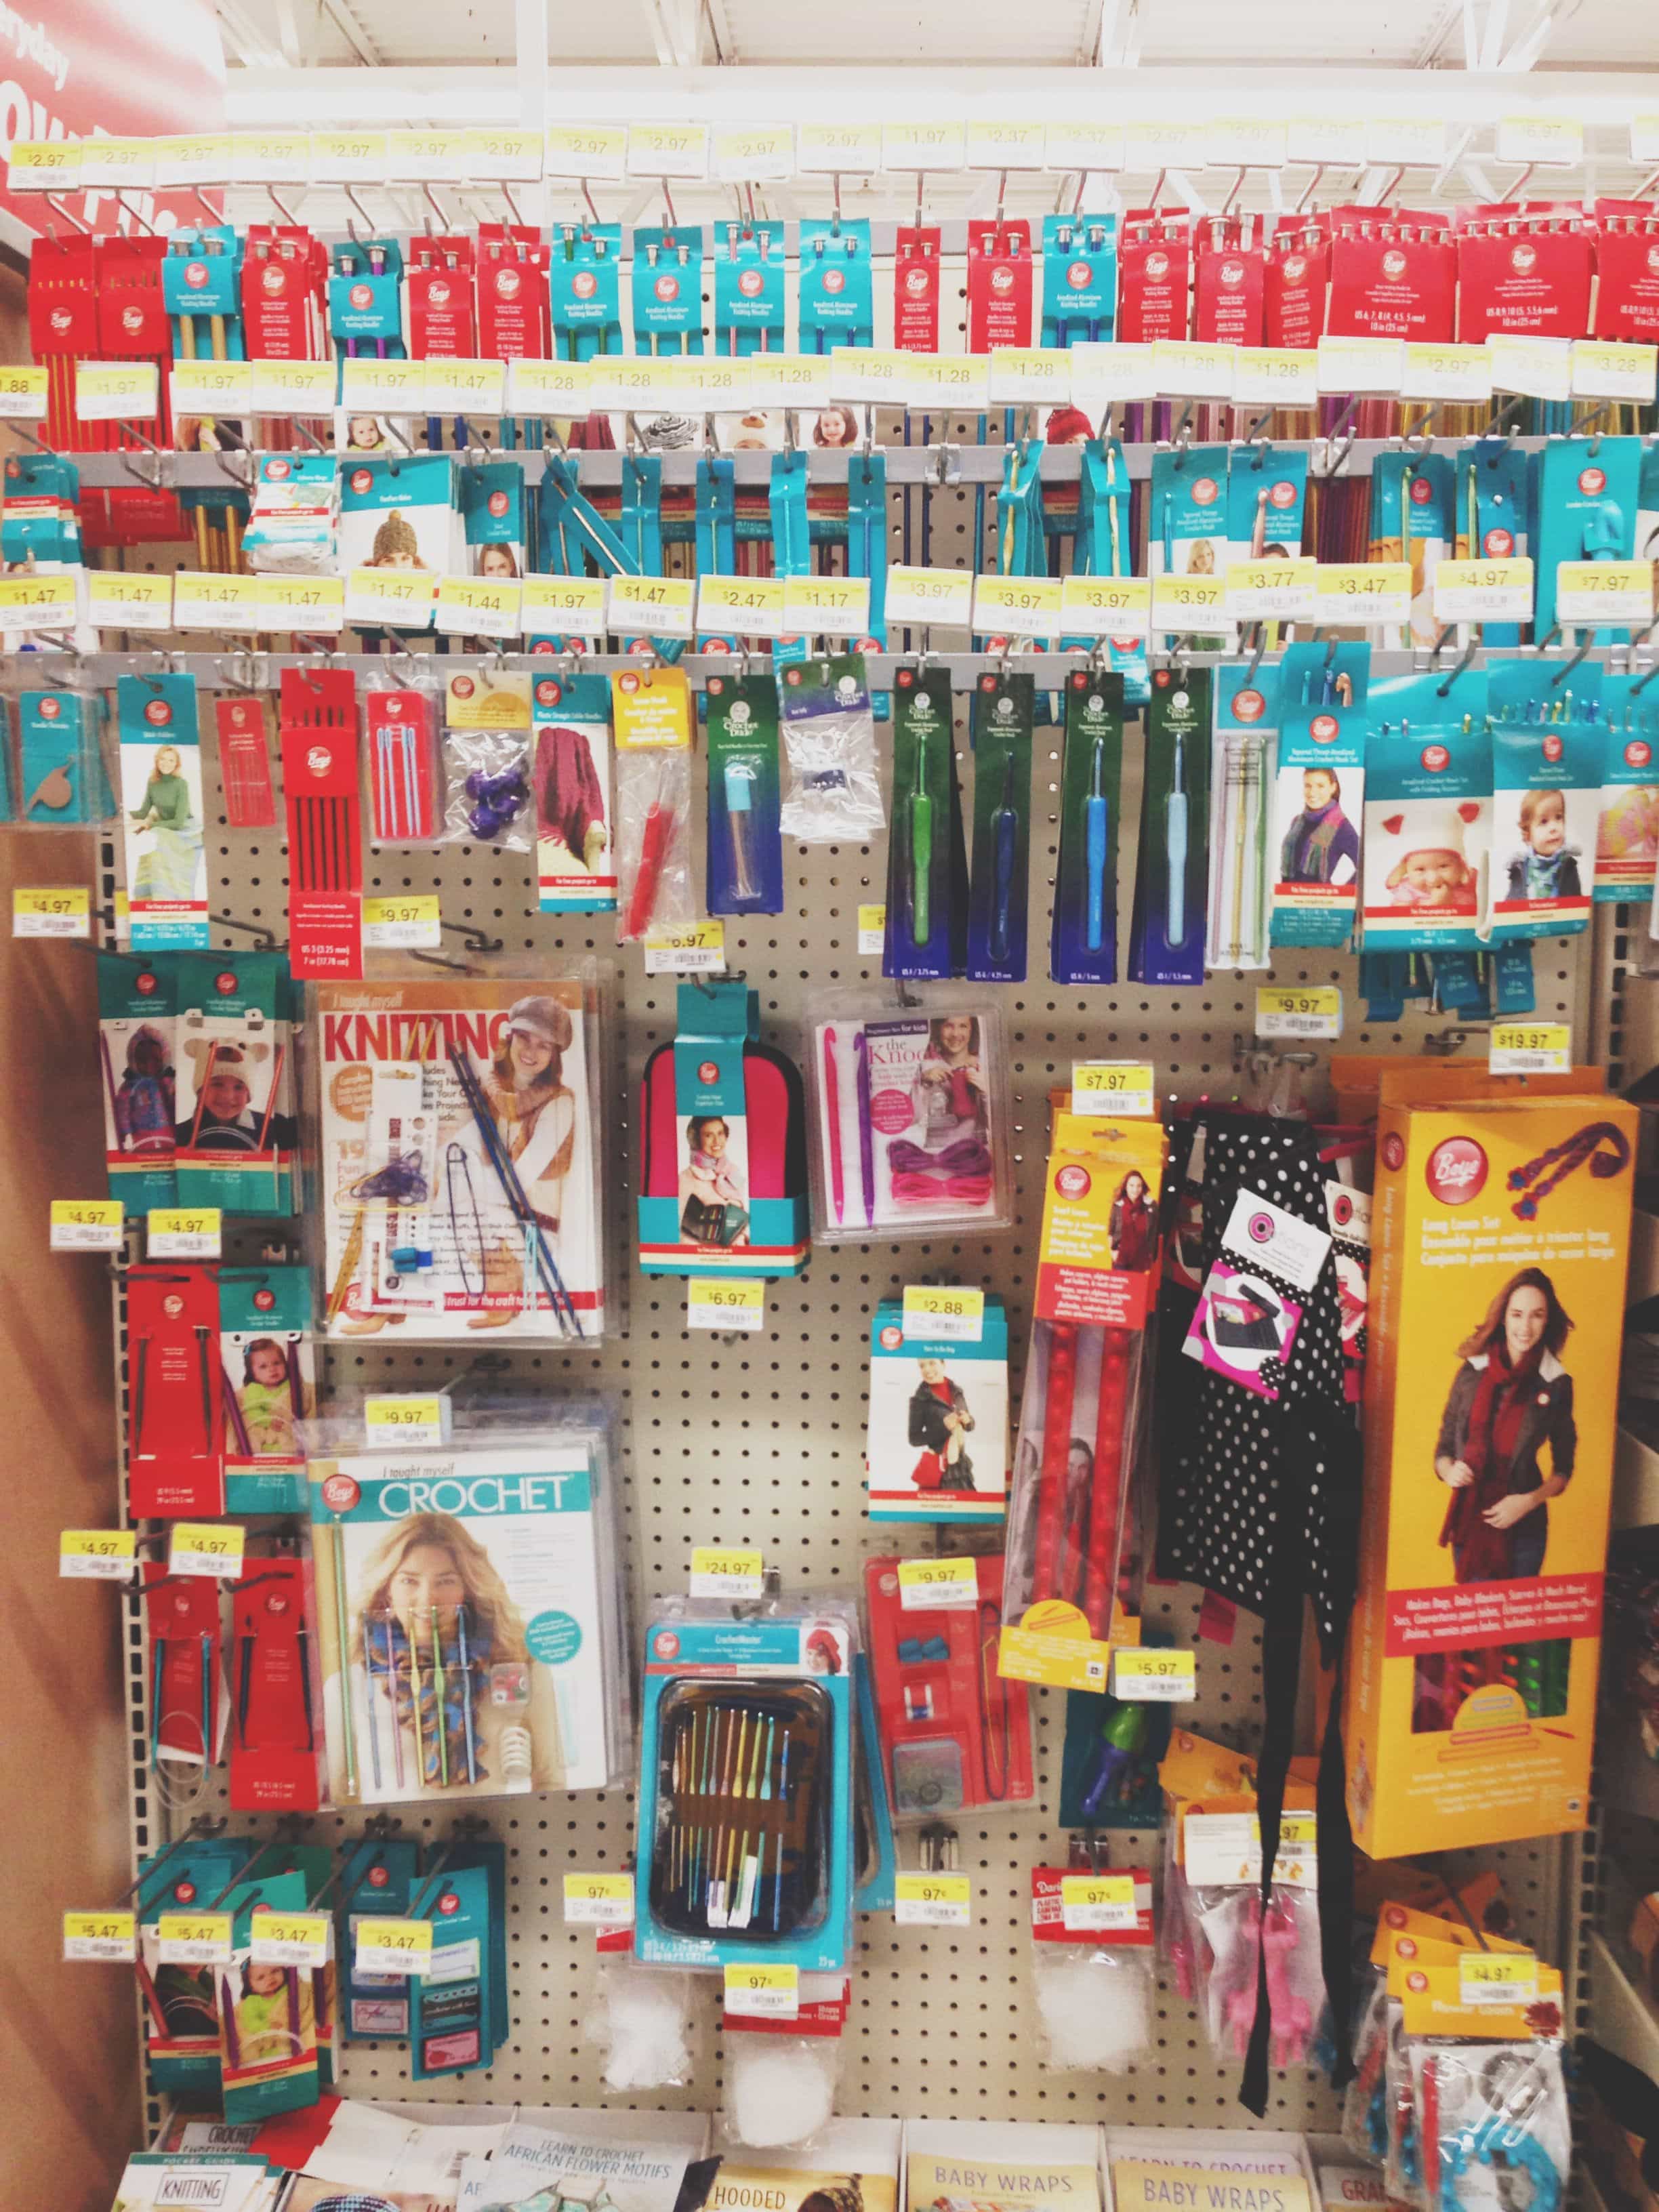
I am teaming up with Walmart for this fun project and being a DIY blogger for them is truly one of my favorite jobs. Over the years I have working with them, their knitting & crochet section of their store has grown significantly and they now offer every color in the rainbow for yarn and fun notions to organize and tackle all of your knitting & crochet projects.

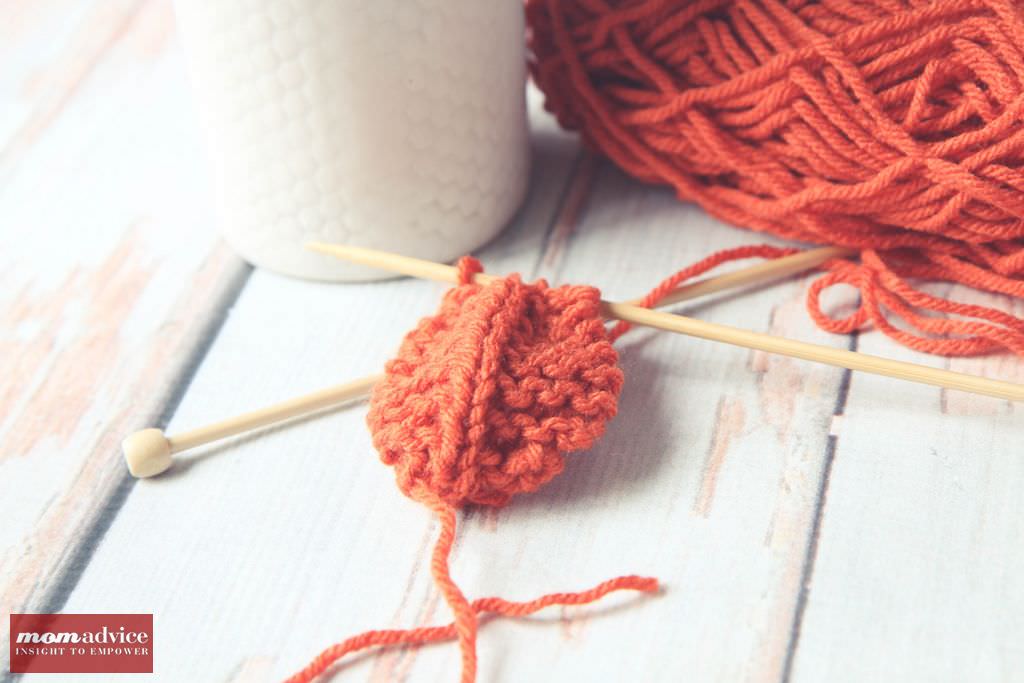
Walmart Yarn Display From the knitting/crochet accessories section, you will need size 5 straight needles. If you want to vary the sizes though of your leaves, you can select anything between 2-5 to play around with different sizes. This might be fun especially if knitting the leaves in just one color.

Knitted Leaf Centerpiece from MomAdvice.com.

For this project, you can select any yarn except the super bulky yarns to work with. After working with several different types of yarn I would highly recommend the Lion Brand Vanna’s Choice in either solid or patterned finishes for this project or the Red Heart Soft Yarn for a soft & smooth finish on your leaves. Of course, this project is also a fantastic little stash buster and a great way to use up those odds & ends from other projects too.

Knitted Leaf Centerpiece from MomAdvice.com.

Knitted_Leaves-4

I gathered some branches from our backyard for the branches of this centerpiece and then would knit and add a leaf to the branches as I went along until I felt the entire piece was full enough. You could make this piece smaller or larger depending on your own centerpiece needs. Each leaf was secured to the branches using a small scrap of yarn and double knotting it to the ends of each of the branches. I then trimmed the edges with a pair of scissors.

No need to knit the leaf stick on these, a huge time-saver when creating this many leaves, just leave them as they are without the leaf stick attachment.

The vase I already owned, but you could certainly buy a new vase for your centerpiece or repurpose a tall glass jar from your cupboard. I found this vase when pulling together my tips and tablescape last year for setting the perfect Thanksgiving table!

Knitted Leaf Centerpiece from MomAdvice.com.

I have fallen so in love with this centerpiece that I doubt I will ever put it away. As we await Thanksgiving, it has been a nice addition to my new-to-me stained & painted thrift store table I worked on last month.

Want to make a Knitted Thanksgiving Centerpiece of your own? Grab this FREE knitted leaf pattern from Natural Suburbia. Oh, and let’s be friends on Ravelry! It’s where I get all my best knitting ideas!

walmart_mom_disclaimer


Pin It
$15 Fabric-Lined Bookcase Makeover

Tuesday, October 1st, 2013

$15 Fabric-Lined Bookcase MakeoverThis Fall I am committed to ridding my home of some unnecessary clutter. My bookshelves were in need of some true organization and updating. Today I am sharing a fabric-lined bookcase makeover to update a tired bookcase and some ideas for adding a little budget-friendly seasonal beauty to your bookshelves.

I work with Walmart and this project update can be done with $15 of supplies found at your local Walmart store.

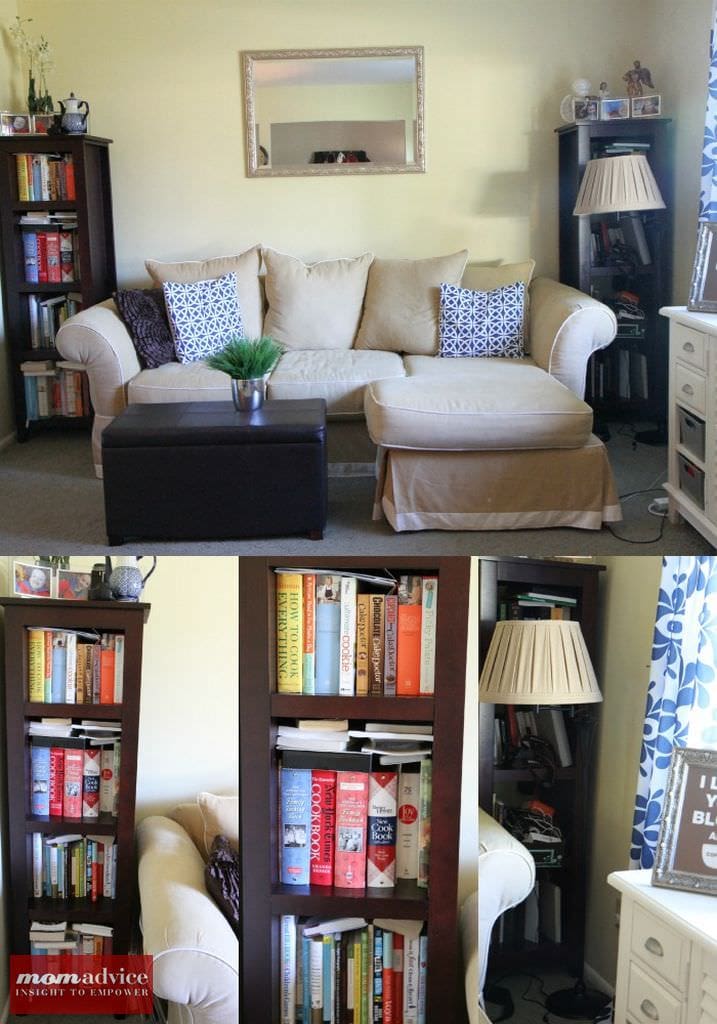
$15 Fabric-Lined Bookcase MakeoverLet’s start with a before picture of my bookshelves. As you can see, they are brimming over with far too many books and clutter than you could ever imagine. One side housed a million books, while the other housed random junk in our house. Since this is the front room in our house, it really embarrassed me that they had gotten this cluttered.

The first step was to remove EVERYTHING from these bookshelves and figure out what to do with them. One pile was to keep, one to donate, and some were relocated into better places (cookbooks in the kitchen, productivity/work books in the office, etc…). Once you have cleared your shelves, it is time to make them pretty with some inexpensive fabric.

Supplies

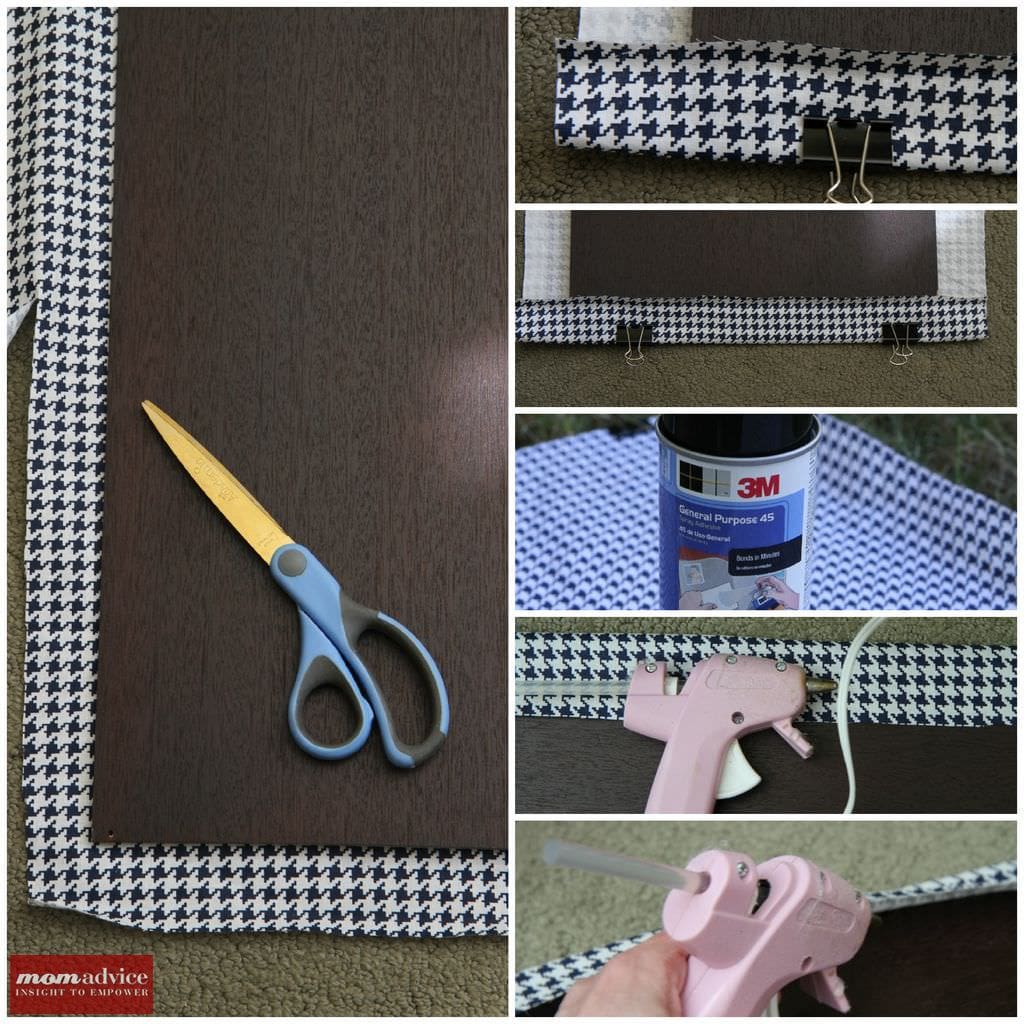
2 yards of fabric (to cover two bookshelves- definitely measure for your own bookcases. This houndstooth fabric I found was only $4 per yard!)

General All-Purpose Spray Adhesive (I had some leftover from last month’s diy homework stations)

Glue Gun & Glue Sticks

2 Binder Cliips

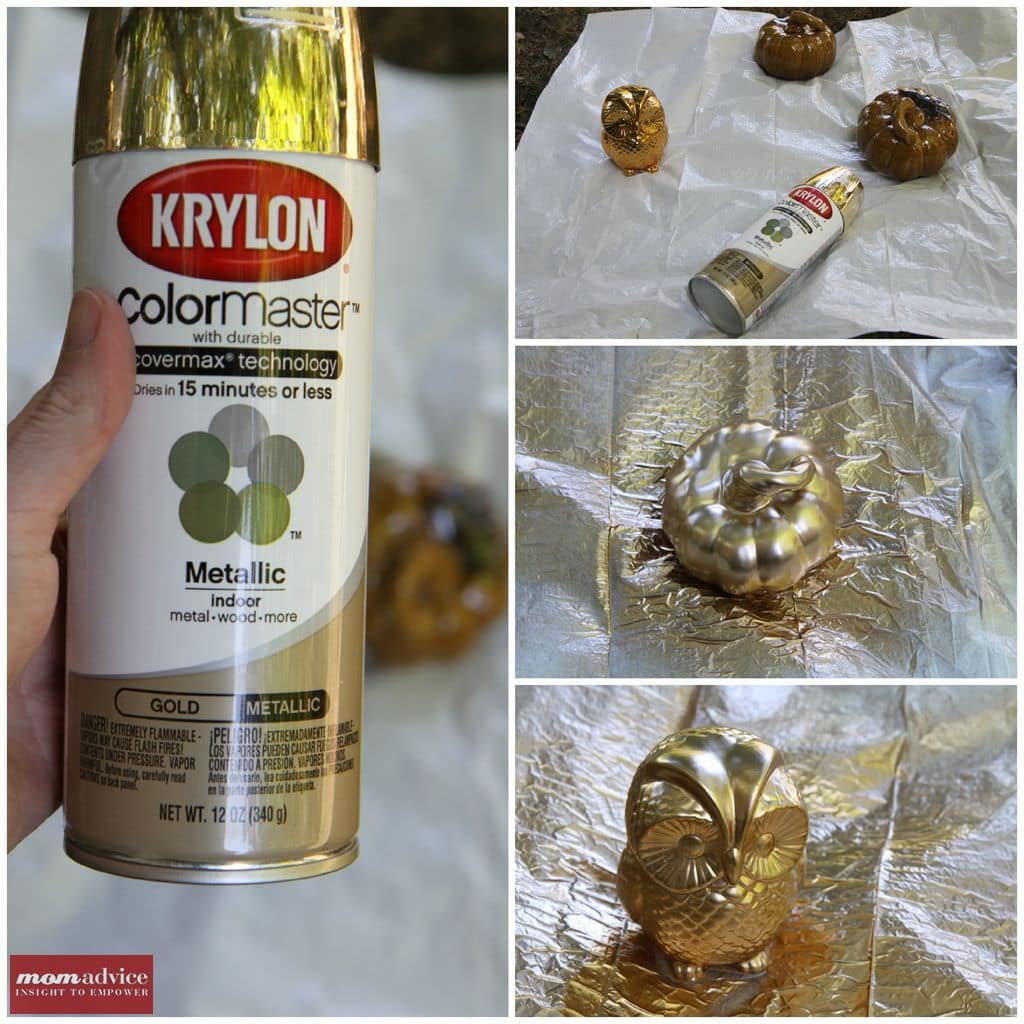
Optional: Gold Spray Paint & inexpensive items in Seasonal Supplies

$15 Fabric-Lined Bookcase Makeover

Directions

1. Take the back off of your bookcase on top of your fabric. Cut around the bookcase leaving approximately one inch of fabric all away around to tuck on the back.

2. Once the fabric is cut, flip the fabric with the right-side out. Clip the fabric to the bookcase at the top, using two clips. Be sure you double check the front of the fabric to make sure it lines up if it is patterned.  Relocate your project outside to spray it with the spray adhesive.

3. Lifting the fabric up, spray the entire bookcase side with spray adhesive and then carefully lay the fabric back down, doing your best to keep the fabric even and flush to your bookcase.

4. Flip the bookcase back over and using your hot glue gun, add a dab of glue along the seam and pull the fabric tight behind the bookcase. Continue adding the glue down the seam of the fabric until it is all secure. Fold the corners in just as you would wrapping a present, and glue those to secure them.

5. Secure your bookcase back to your bookcase and begin assembling the items for your bookshelves.

$15 Fabric-Lined Bookcase Makeover

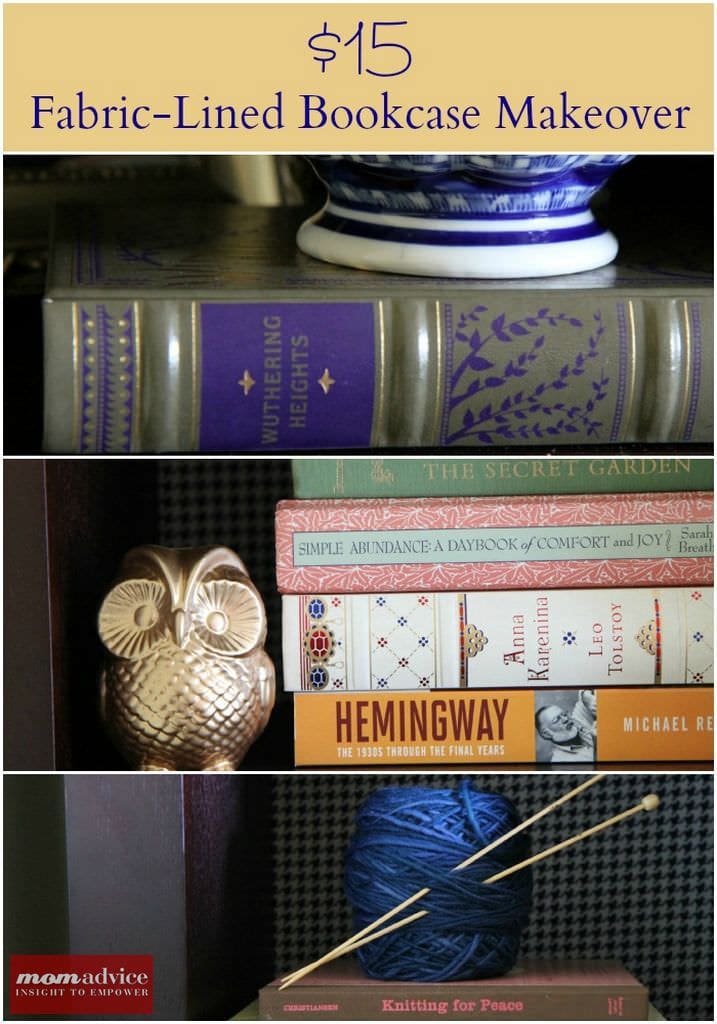
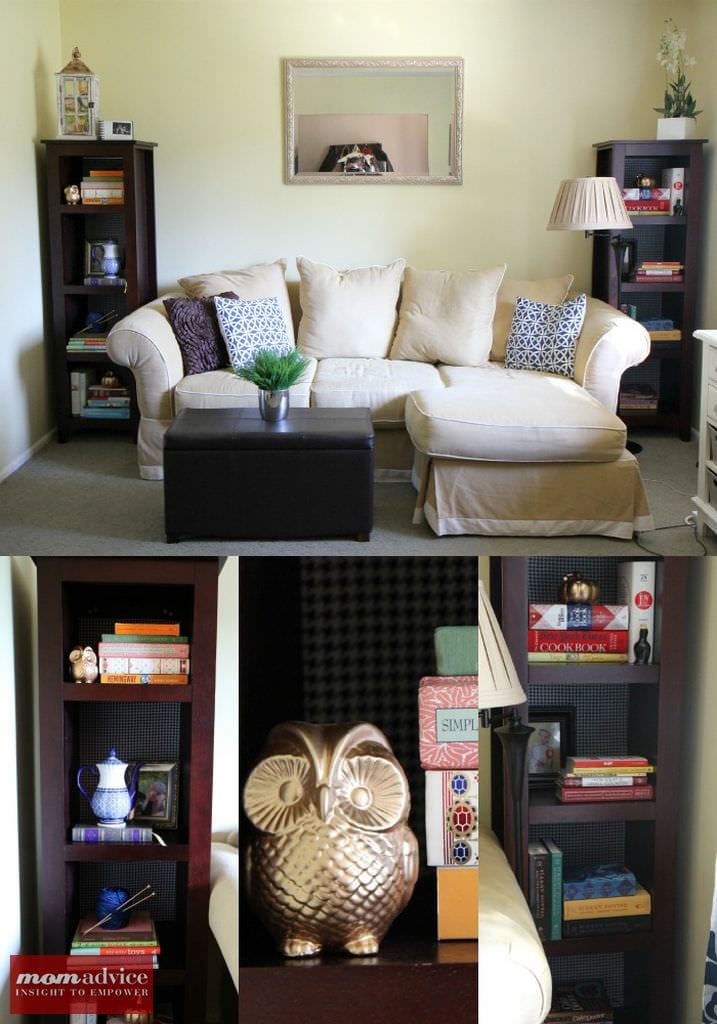
I wanted to add a little nod to the season and another little nod to the Gold trend right now so I picked up another can of spray paint and a two little pumpkins and an owl that I found over in the Seasonal supplies for only $2.49 each and gave them a shiny new gold finish.

Did you catch my spray painted side table tutorial I did this summer? I am such a spray paint addict.

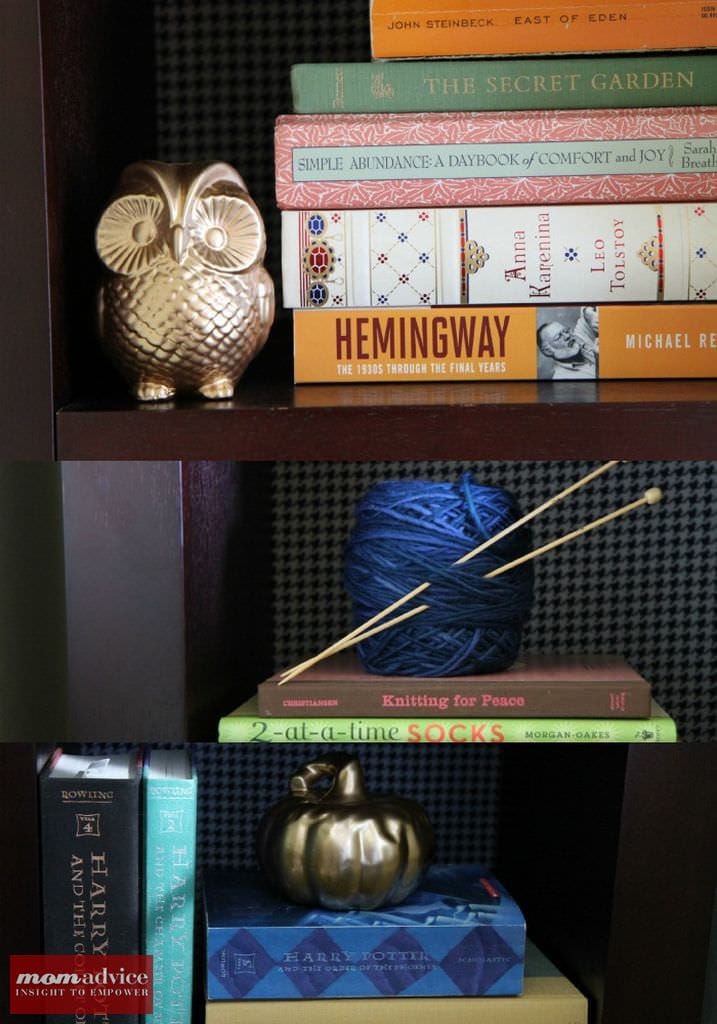
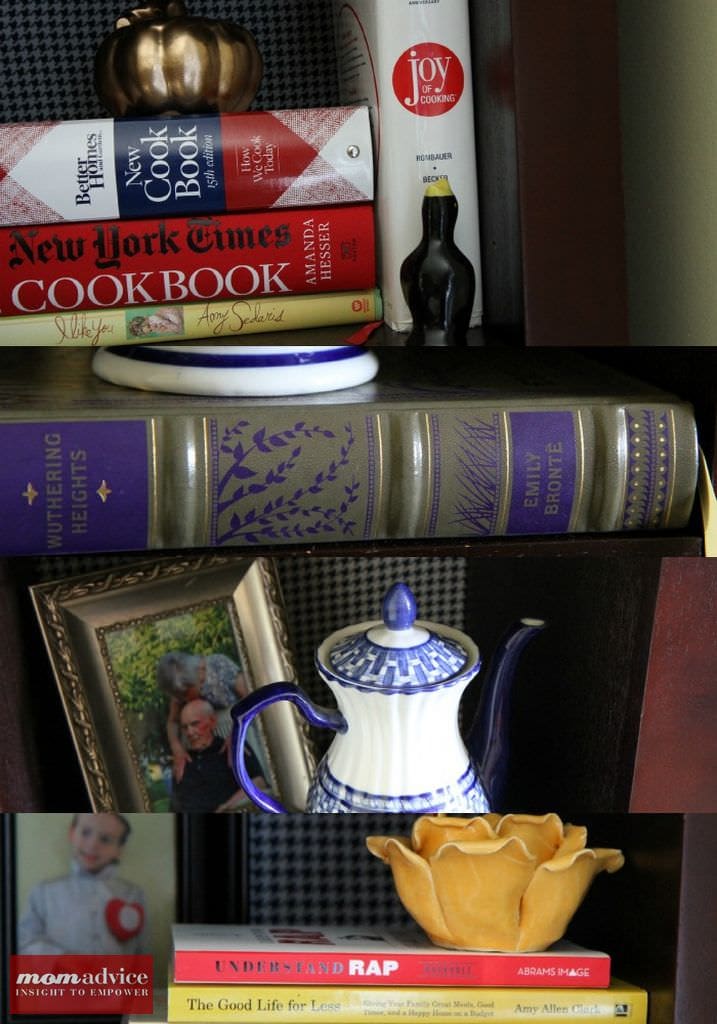
$15 Fabric-Lined Bookcase MakeoverHere is a close-up of my, “new-to-me,” shelves for Fall. The books at the top are among my favorite. I read East of Eden this summer for the first time, my childhood copy of Secret Garden from my great-grandma is in the pile, I’m Hemingway obsessed, and each year I am collecting one new reissued pretty classic from Barnes & Noble for a holiday gift to myself. My little $2.49 owl fits perfectly in there next to a few of my very favorite books.

The second shelf is simple with yarn and tiny bamboo needles I rarely use along with a few of my very favorite knitting books.

The bottom shelf is just for my hubby with his Harry Potter books and a golden pumpkin.

$15 Fabric-Lined Bookcase MakeoverThe top shelf in this photo holds a few of my favorite cookbooks, a golden pumpkin, and my little Pie Bird that I think is oh-so-sweet and reminds me how much I love a good piece of pie.

My copy of Wuthering Heights (which I read this winter) rests beneath the beautiful China teapot that my grandfather gave me before he passed away. Behind it is the last picture I took of him with my grandma. That shelf makes my heart ache.

The last shelf holds my galley copy of my first book, a picture of my sweet boy when he was little in the beautiful Tin Man costume my mother-in-law made for him, our Boston Drivers Handbook which was a gift when we moved to Massachusetts and were terrified to drive, and my hubby’s copy of, “Understand Rap,” from his sister. It is always a great conversation piece.

Can you see the theme? They are ALL special and ALL mean something to me.

The mess before…how could we even see the gems in there? 

$15 Fabric-Lined Bookcase MakeoverHere are some shots of my beautiful bookshelves now. It is one of those projects that I sit and look at over and over again because it makes me so happy. The fabric completely transformed these and the clutter removed from them brings a lot more peace and order to the room.

Looking for more bookshelf styling ideas? Check out these ideas for decorating bookshelves and this post for bookshelf styling tips!

walmart_mom_disclaimer

Pin It
7 Easy Chalkboard Paint Crafts

Thursday, August 29th, 2013

Chalkboard_Paint_Crafts


The back-to-school season is in full swing and to honor that oh-so-wonderful time of year, I thought we could talk about fun chalkboard paint crafts today.

What could be more fun than chalkboard paint projects and what better time to tackle a project like this then when the kids return to school?


Before I begin, I must disclose that I am absolutely obsessed with chalkboard paint and chalkboard paint projects.

Don’t believe me?

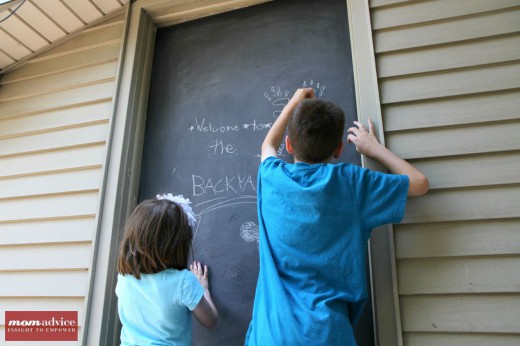
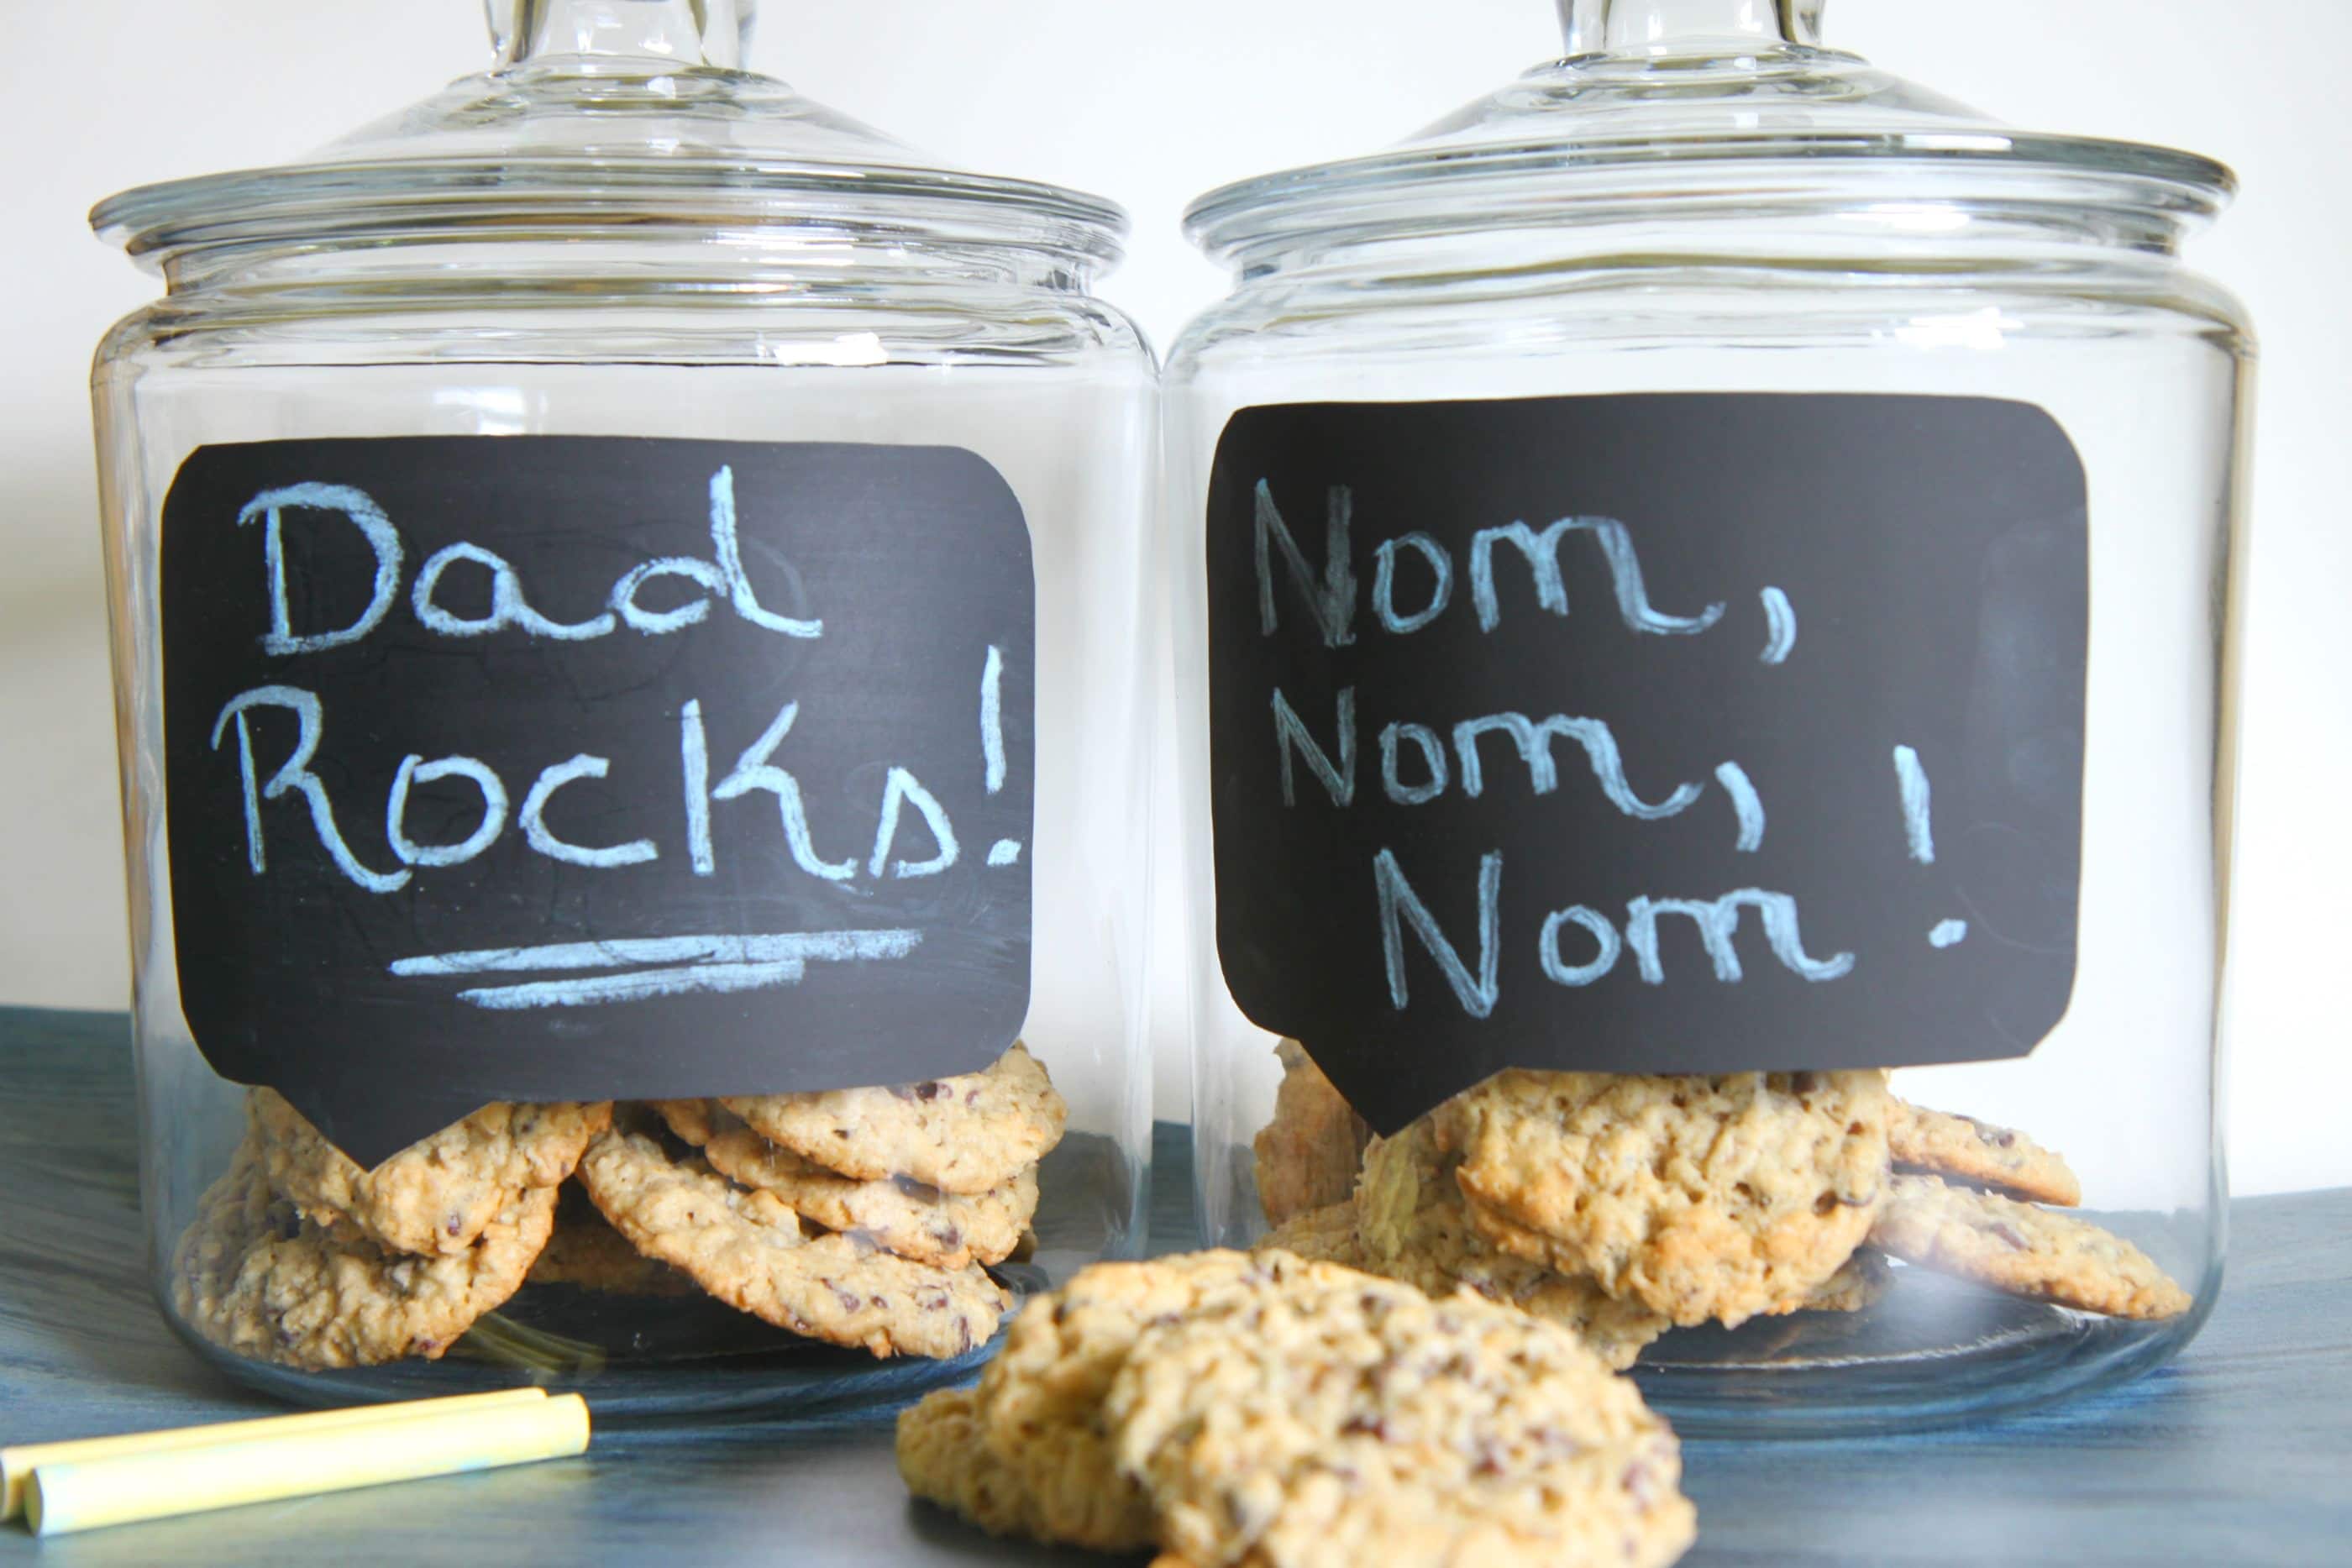
Check out our outdoor chalkboard door, our chalkboard lunchbox station, our chalkboard pumpkin people,  our chalkboard cookie jars, even our homework stations are adorned with chalkboards.

I, basically, have chalkboard paint under my nails almost every day and I have even accidentally spray painted my feet a time or two with chalkboard spray paint.

Whoops!

It just goes to show that the possibilities are absolutely ENDLESS with chalkboard paint and how much fun these projects are.
Today I wanted to show you all of the fun DIY chalkboard paint projects you could try in your home with items that are cheap and easy to find.

Just doing this gathering of ideas is quite dangerous for me because I am already planning my next trip out there to do these fun projects!

You won’t believe how fun or how easy the projects are that we are featuring today!


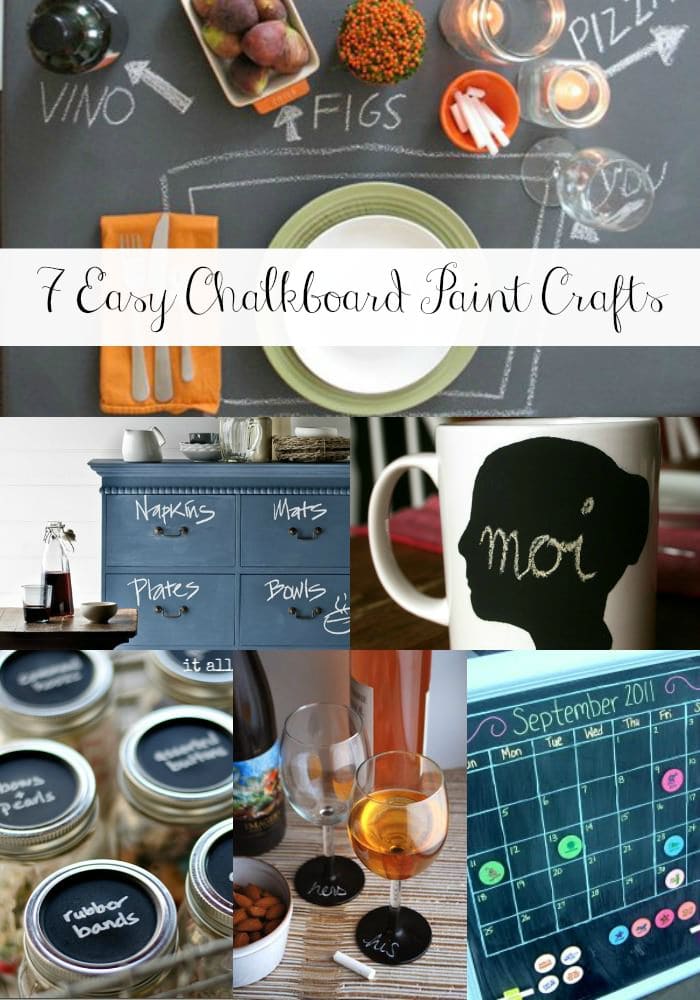
Personalize a Mug

Plain white mugs can often be found inexpensively just about everywhere, but I am particularly in love with this chalkboard paint mug because it can also be a great way to cover up a mug that has a company logo on it.

I am madly in love with this adorable mug from Craft-Werk because it can be personalized to its recipient or even personalized just for yourself.

Check out the tutorial to find out how to create & cut your silhouette for your very own “moi mug.”  (@ Craft-Werk)


Organize Your Family

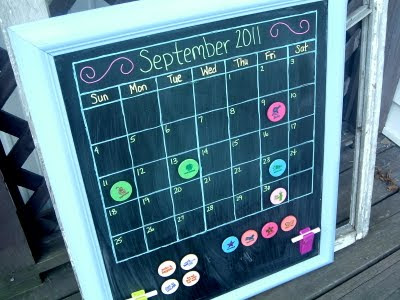
‘Tis the season for getting organized so why not do it with a magnetic chalkboard calendar that can be personalized just for your family.

To create this craft, head to your favorite second-hand store to find the perfect frame in the size you need for your wall.

Spray paint the frame a color to match your home and then, utilizing some cut-to-order sheet metal, create a surface to jot down all of your families activities.

Visit PSA Stamp Camp to find the tutorial for this magnetic chalkboard calendar. (@ PSA Stamp Camp)


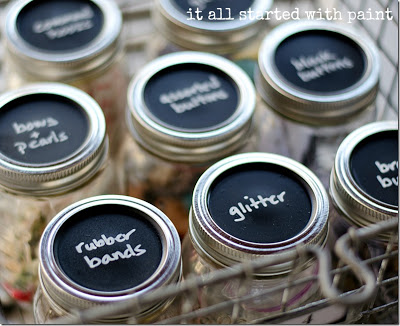
Organize a Junk Drawer

One trip down the housewares aisle and I am sure you will spot many a jar that could use a good home.
Open one drawer in my home and you will quickly see that creating a chalkboard jar organization system would be a lot better than the exploding drawers that are currently residing in my office.
I love this fun and easy chalkboard mason jar storage from It All Started With Paint.
Have no fear if you only find yourself with jars and no lids.
Lids and bands can be purchased separately at just about any superstore that sells canning supplies  (@ It All Started With Paint)

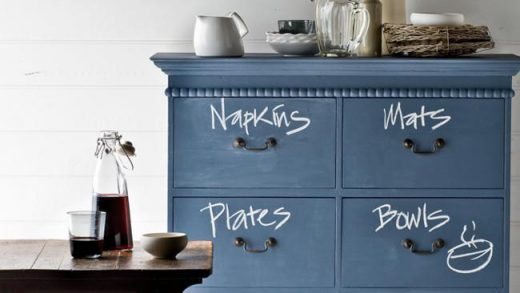
Create a Chalkboard Labeled Cabinet

There are so many places that are a wonderful resource for gently-loved furniture and just about any piece could be transformed into useful and organized storage with the addition of a little chalkboard paint.

I love the functionality of this beautiful chalkboard-painted piece featured on homelife for one clear reason…it showcases the beauty of chalkboard paint in other colors.
Don’t feel like you have to be limited to just the black chalkboard paint.
This piece is not only eye-catching, but it also offers smart functionality for kitchen storage.

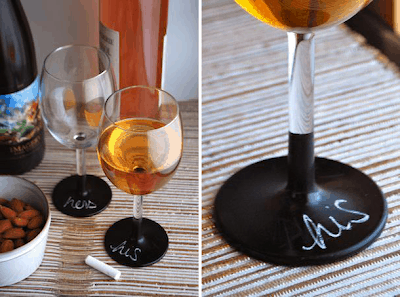
Personalize Your Stemware

Anything to prevent ending up with the wrong glass at parties is a win for me and I have fallen in love with this idea to add a chalkboard stem to a wine glass from Always Order Dessert.
If you head to your local thrift store you will find a lot of beautiful stemware that just might not match together.
Adding a chalkboard stem to each wine glass adds a little cohesiveness to a mismatched set and makes for a fun addition to your entertaining supplies. (@ Always Order Dessert)

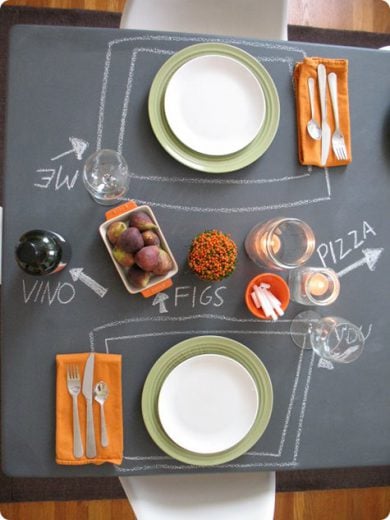
Make Dining Fun Again

Do you have a worn table in need of a face-lift?

Maybe you have spotted a table at a garage sales or Goodwill that could use a little personal touch to it?
Look no further than this amazing chalkboard table transformation for making dining as a family, fun again.
I love the idea of adding this touch to both dining tables or to craft tables.
Consider adding a thought-starter question to the table, adding the evening’s menu, or simply labeling the food that is laid out for the meal.
Check out this fun table makeover from design sponge for some inspiration for your thrift store purchase (@ design sponge)

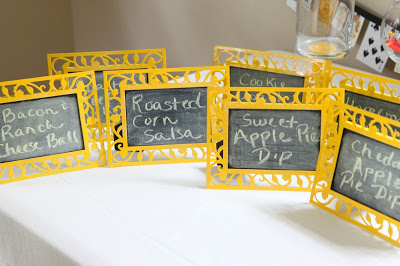
Add Food Labels to the Buffet

Is a chalkboard table too big of a commitment?

No worries!
Consider visiting the housewares section for simple small frames instead and give them a new look with chalkboard paint.
Did you know that chalkboard paint can be applied to glass?
Using a little chalkboard spray paint, you can transform any frame at Goodwill into a mini chalkboard to add a label to your dishes at holiday or large gathering meals.
To make mismatched frames feel part of a set, spray paint them all in one color like this cheery yellow! (@ MomAdvice)

Have you tried any chalkboard paint projects in your home? Share your success stories here!


This post contains affiliate links


Don’t miss these other great ideas from MomAdvice.com:


DIY Chalkboard Cookie Jars


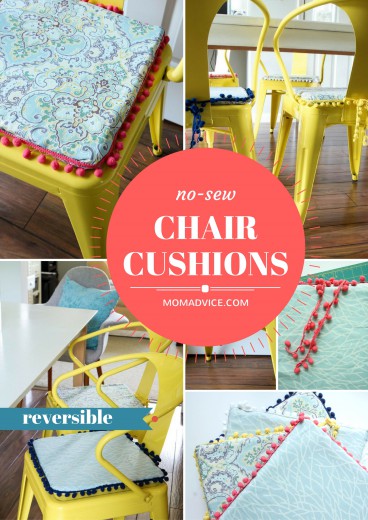
No-Sew Chair Cushions


How to Spray Paint Furniture


Meal Prep Ideas


Sign up for the MomAdvice newsletter


Pin It