Archive for the ‘Main Dishes’ Category

3 Quick & Easy Recipes for Delicious Grilled Kabobs

Monday, April 11th, 2011

It was a long winter in Indiana and we got our first taste of Spring with warm weather this weekend. Of course, nothing says Spring to me like grilling outdoors again and one of our favorite things to cook in the summer just happens to be grilled kabobs! Kabobs are a fantastic way to create a dish for each individual family member that incorporates each of their favorite meats and vegetables. It also happens to allow for individual personalization without the inconvenience of being a short-order chef.

Today I wanted to share three easy grilled kabob recipes that are sure to be a hit with your family and when entertaining. These recipes deserved their constant rotation in your menu planner because they are easy to prepare and the leftovers can be recreated into delicious salads and wraps. Unfortunately, no matter how much I prepare, these kabobs go unbelievably quick in our house. I hope you will have more leftovers to enjoy than we do!

Without further adieu, here are three fun recipes for grilled kabobs to try on your grill!

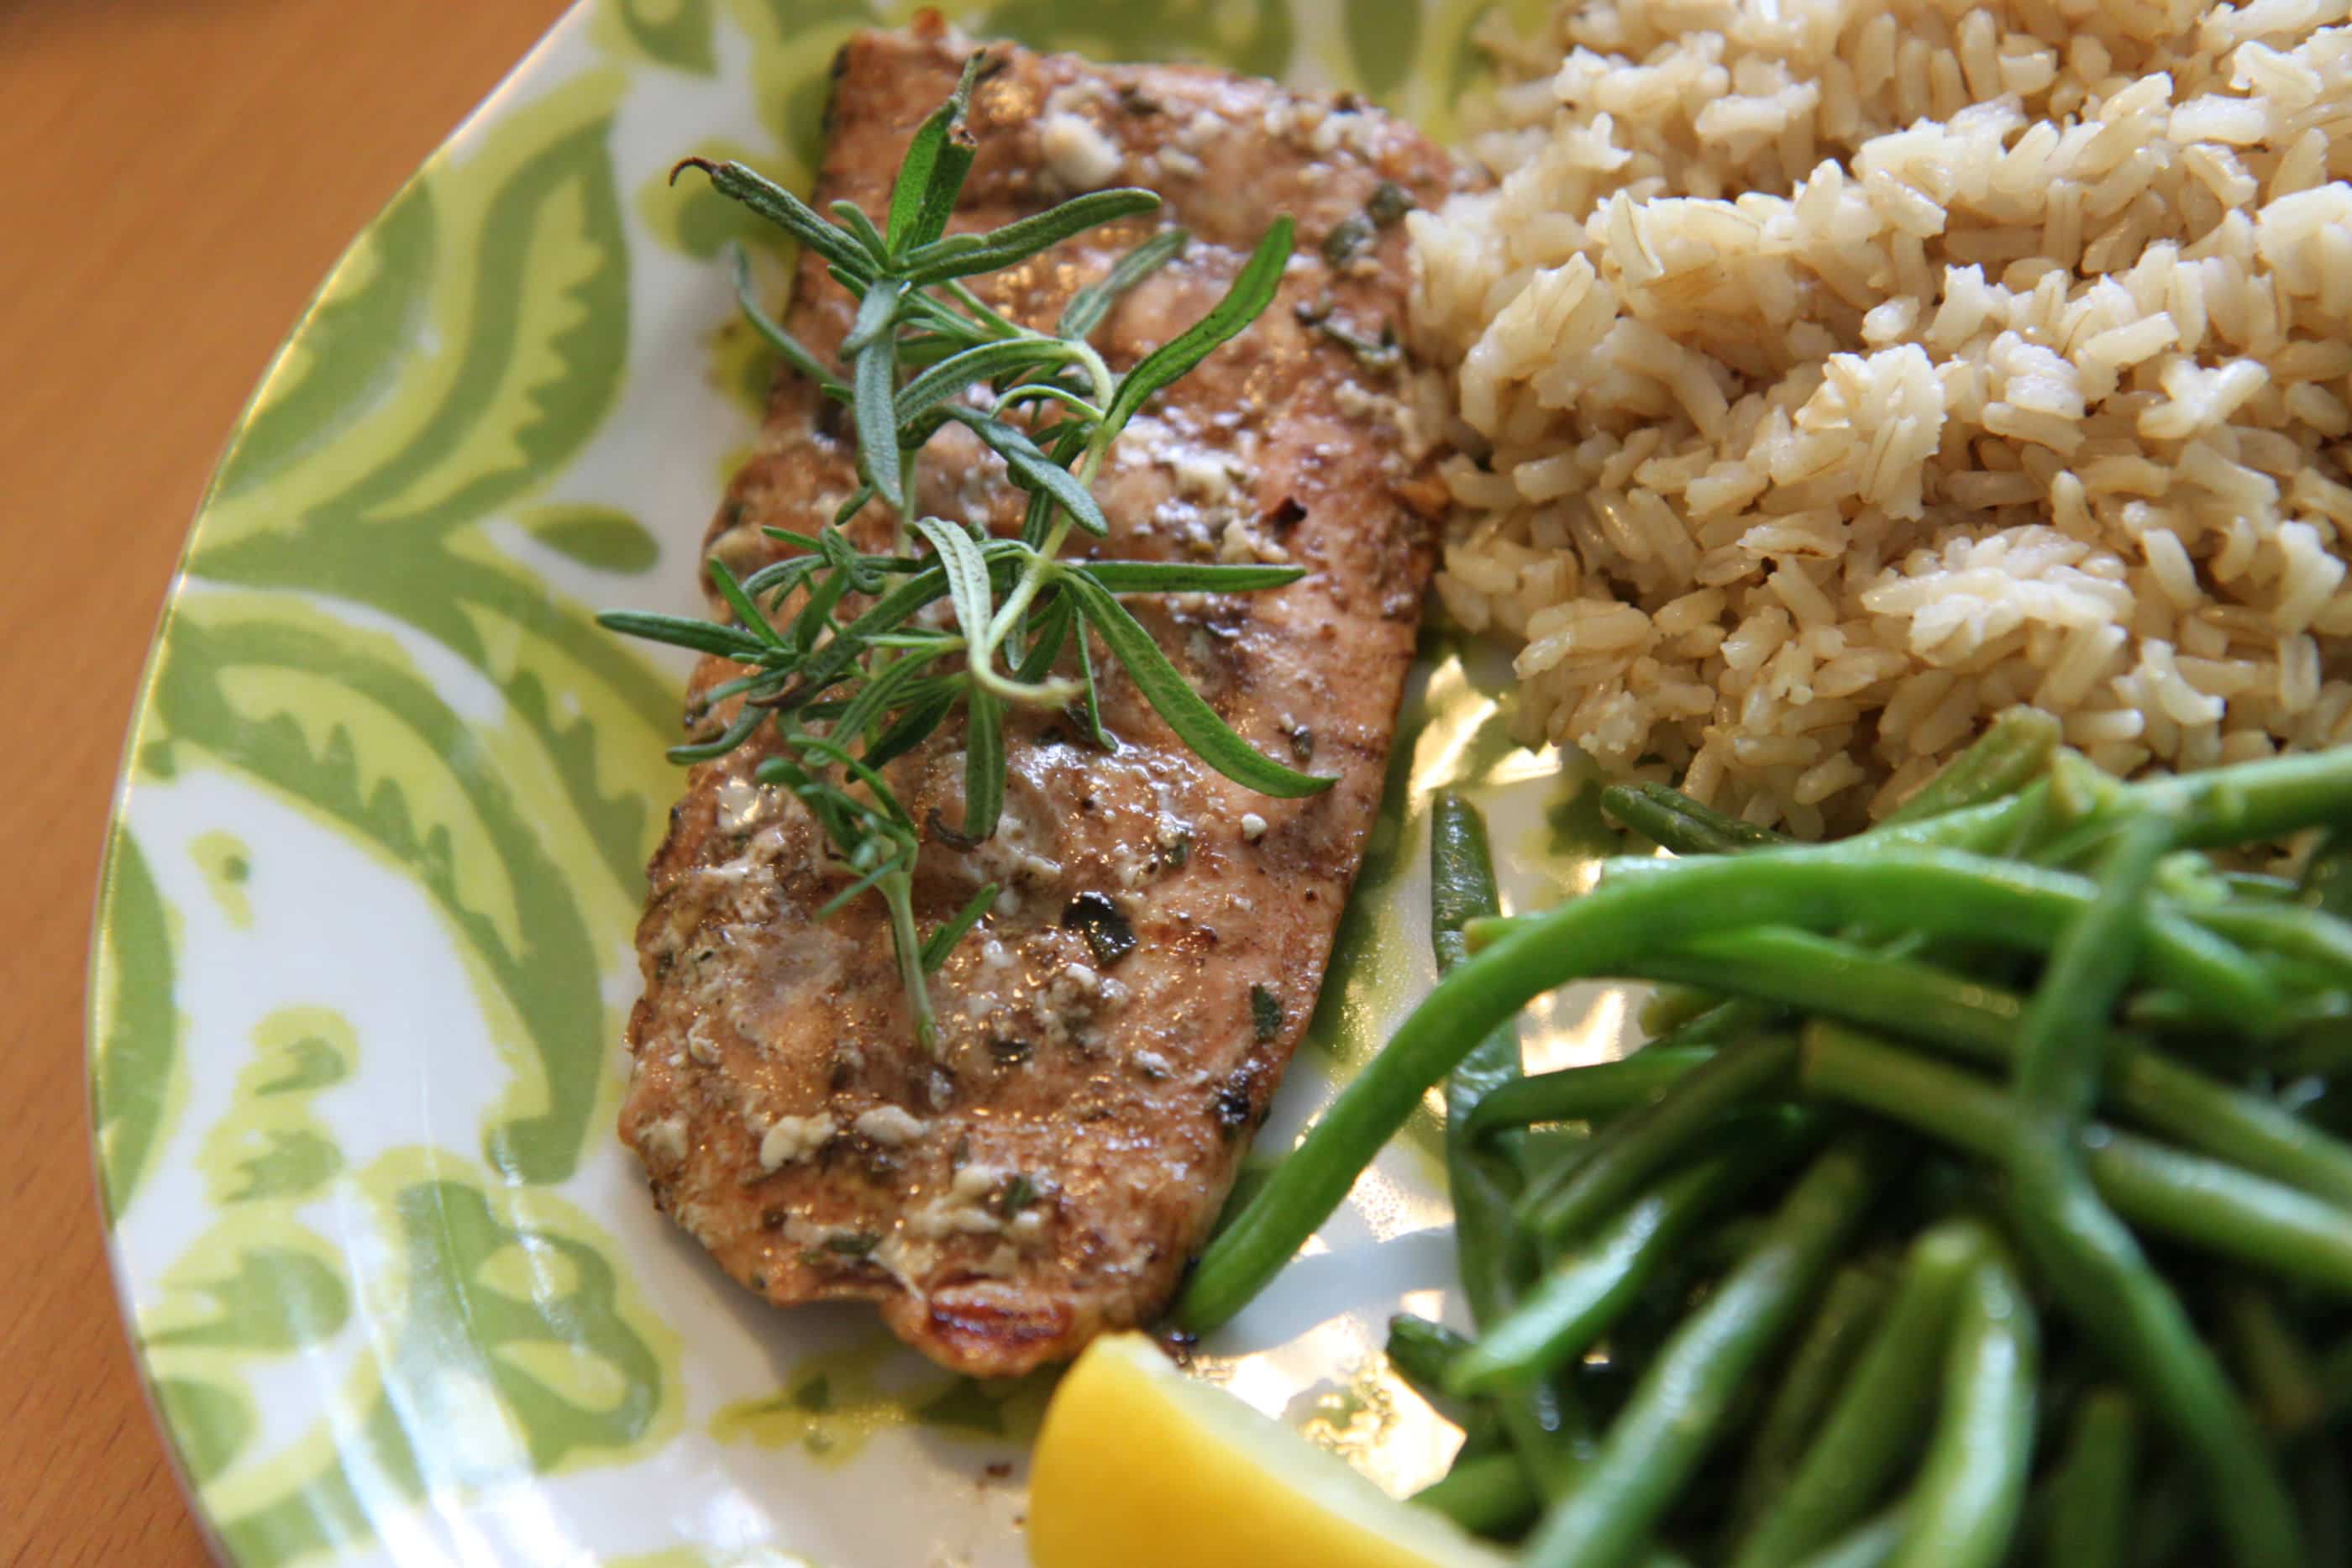
The rosemary and ranch add such a wonderful depth of flavor to the chicken and these come off the grill so juicy! If you actually have any meat leftover (which is debatable in our house), I love to put these on top of a salad the next day. The chicken is still surprisingly juicy even after being zapped in the microwave and it has been a wonderful way to spice up my daily salads for lunch!

Rosemary Ranch Chicken Kabobs (Courtesy of AllRecipes)

1/2 cup olive oil
1/2 cup ranch dressing
3 tablespoons Worcestershire sauce
1 tablespoon minced fresh rosemary (If you haven’t planted rosemary yet like me, 1 teaspoon of the dried stuff works great!)
2 teaspoons salt
1 teaspoon lemon juice
1 teaspoon white vinegar
1/4 teaspoon ground black pepper, or to taste
1 tablespoon white sugar, or to taste (optional)
5 skinless, boneless chicken breast halves – cut into 1 inch cubes

In a medium bowl, stir together the olive oil, ranch dressing, Worcestershire sauce, rosemary, salt, lemon juice, white vinegar, pepper, and sugar. Let stand for 5 minutes. Place chicken in the bowl, and stir to coat with the marinade. Cover and refrigerate for 30 minutes. Preheat the grill for medium-high heat. Thread chicken onto skewers and discard marinade. Lightly oil the grill grate. Grill skewers for 8 to 12 minutes, or until the chicken is no longer pink in the center, and the juices run clear.

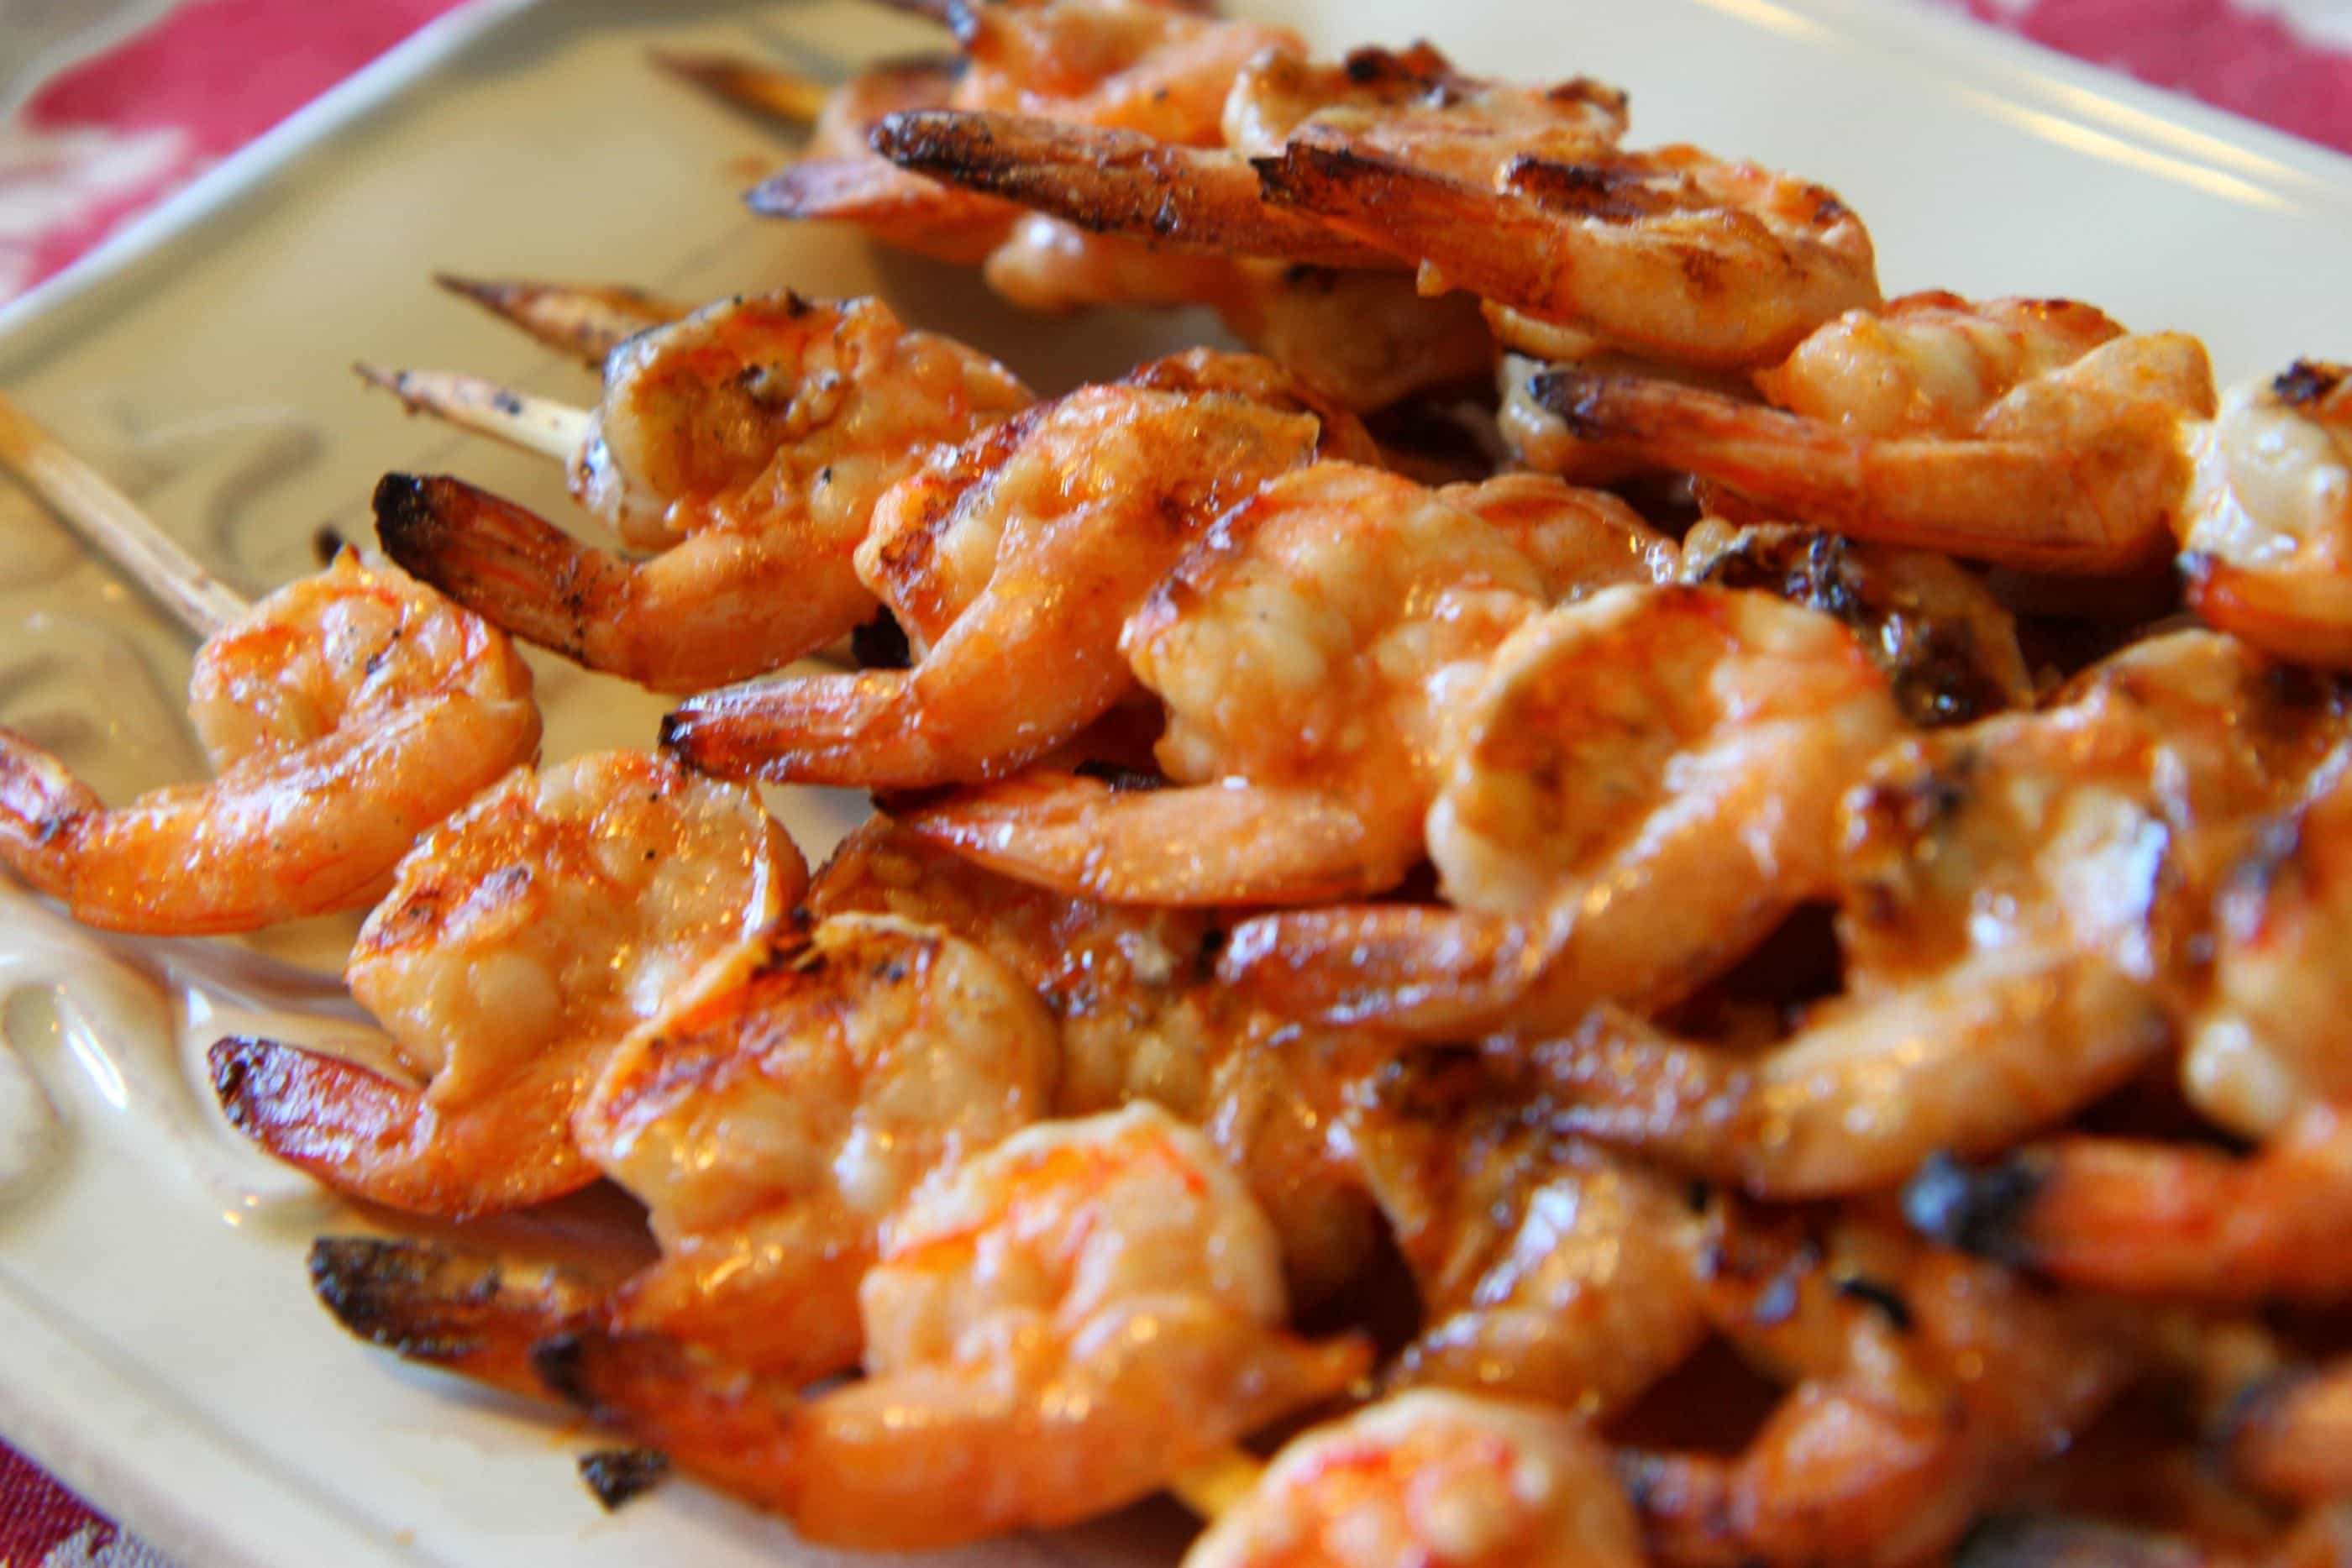
This shrimp tastes exactly like something you would eat at a fancy restaurant and it is bursting with flavor. It is unbelievable how these simple pantry ingredients can make the shrimp taste so good, but I doubt I will ever make another shrimp recipe again! It is the perfect dish to entertain with since it can be served hot or cold. The marinade adds so much flavor that there is no need for any special sauce accompaniment. You have to love anything that only requires four or five minutes on the grill and is still wildly impressive to your dinner guests!

Marinated Grilled Shrimp (Adapted from AllRecipes)

3 cloves garlic, minced
1/4  cup olive oil
1/4 cup tomato sauce
2 tablespoons red wine vinegar
2 tablespoons chopped fresh basil (I omitted because we did not have any on hand)
1/2 teaspoon salt
1/4 teaspoon cayenne pepper
1 pound fresh shrimp, peeled and deveined
Skewers

In a large bowl, stir together the garlic, olive oil, tomato sauce, and red wine vinegar. Season with basil, salt, and cayenne pepper. Add shrimp to the bowl, and stir until evenly coated. Cover, and refrigerate for 1-2 hours, stirring once or twice. Preheat grill for medium heat. Thread shrimp onto skewers, piercing once near the tail and once near the head. Discard marinade. Lightly oil grill grate. Cook shrimp on preheated grill for 2 to 3 minutes per side, or until opaque.

This marinade can be prepared up to a day before and makes a deliciously sweet (but not too sweet) meat. The flavors remind me a little bit of those port-a-pit chickens that are sold for fundraisers… just as messy, but not half as greasy.

Yummy Honey Chicken Kabobs (Adapted from AllRecipes)

1/4 cup canola oil
1/3 cup honey
1/3 cup soy sauce
1/4 teaspoon ground black pepper
8 skinless, boneless chicken breast halves – cut into 1 inch cubes (I used one bag thawed frozen chicken breasts)
2 cloves garlic
5 small onions, cut into 2 inch pieces
2 red bell peppers, cut into 2 inch pieces
Skewers
In a large bowl, whisk together oil, honey, soy sauce, and pepper. Before adding chicken, reserve a small amount of marinade to brush onto kabobs while cooking. Place the chicken, garlic, onions and peppers in the bowl, and marinate in the refrigerator at least 2 hours (the longer the better). Preheat the grill for high heat. Drain marinade from the chicken and vegetables, and discard marinade. Thread chicken and vegetables alternately onto the skewers. Lightly oil the grill grate. Place the skewers on the grill. Cook for 12 to 15 minutes, until chicken juices run clear. Turn and brush with reserved marinade frequently.
********************************************

Quick Grilling Tip:

I have become a huge fan of those disposable containers for marinating foods because they are so easy to transport out to our grill and are easy to stack, especially if you are headed out for a picnic. It may also be because I have had  a few too many leaky bags in my fridge so I find these to be a great option for me!  These freezer containers plus our handy dandy meat thermometer have made grilling out practically foolproof and have streamlined our grilling effortlessly.

I love to stick these, marinade and all, in the freezer and prep a few different marinades in one afternoon. Most marinades have similar base ingredients (dressings, olive oil, vinegars, salt, pepper, seasonings, Worcestershire sauce, etc..) and it is so much easier to do this all at once rather than getting them out each time. What a time saver!

What are your favorite grilling recipes in your house? Feel free to share your recipes and links here! I would love to get some new grilling recipes for our menu planner!

California Italian Wedding Soup

Monday, March 21st, 2011

Last week we celebrated my husband’s birthday and his birthday dinner request happened to be my Rotini With Turkey Meatballs. Since I was making meatballs already for our dinner, I decided to make a double batch and make a little California Italian Wedding Soup for our soup this week.

Each family member has their own favorite soup. My daughter loves my chicken & noodle soup and now begs for it every time she has a tiniest bit of ache or pain. She claims that this soup is the only thing that could make her feel better. My son flips for my Pesto Chicken Tortellini Soup and asks for this weekly. My Greek Lemon Chicken Soup is my new favorite thing… in fact, I can almost taste it! My husband though firmly states that this California Italian Wedding Soup is the most comforting and satisfying soup on our family’s soup agenda.  Satisfyingly hardy with meatballs blended with ground turkey & beef , but also surprisingly light with fresh basil, spinach, and hints of lemon in every bite… it truly is a delicious soup treat for the whole family.

You won’t believe how easy it is to make this soup and with a double batch of baked meatballs in the fridge, you will have a great soup to feed a small army with a minimal amount of effort!

Grab four carrots out of your crisper drawer and chop them in small even pieces for your soup. This is a great time to get rid of any carrots that have lost some of their crispness since we will be cooking them up!

In a pot of salted & boiling water, add one cup of any small pasta that might be lurking in your pantry. I love to use small shells or orzo for this dish since those are two pastas we always have on hand. Cook as directed on the package.

In another pot, add a couple of tablespoons to the bottom of the pot and then add carrots, salt, and pepper. Let them cook for five minutes. Add two cloves of minced garlic to the pot and let the garlic cook for one minute. Be careful and don’t have your heat up too high for this or the garlic will burn.

You can now add the broth to your carrots and garlic. Add two boxes (eight cups) of low-sodium chicken broth. Next, you will add your secret weapon…one can of beef broth.  This is going to add to the meaty taste of your soup since you are baking your meatballs instead of cooking them in the soup. Finally, add the zest of one lemon to the broth. Save this lemon since we will be adding the juice to the broth later!

Pull your meatballs out of your fridge and add them to your soup broth along with your drained & cooked pasta. If you don’t have any meatballs on hand, you can use our recipe below for an easy (and lower fat) way of cooking meatballs for your dishes. Now that I bake my meatballs, I will never make them any other way again! These are full of flavor with Italian breadcrumbs, cheese, and a hint of tomato. I promise, they are just as delicious as the fried versions and incredibly moist and flavorful.  Yum.

Add the final ingredients to your soup! Mix in fresh spinach, freshly chopped basil, and the juice of one lemon. Give your soup a taste and check your seasonings. Ladle into bowls and serve with a side of my Portuguese White BreadPumpkin Cornbread Muffins, an Artisan Loaf, or my Homemade Whole Wheat Bread to make a delicious accompaniment.

California Italian Wedding Soup

8 cups low-sodium chicken broth
1 can (2 cups) beef broth
1 lemon, zested (save the juice for finishing the dish)
2 tablespoons olive oil
3-4 carrots, chopped into uniform pieces
2 cloves of garlic, minced
1 cup pasta (preferably orzo or small shells)
1 pound of prepared meatballs (see recipe below)
2 cups fresh baby spinach
2 tablespoons freshly chopped basil
Juice from one lemon
Parmesan cheese (for sprinkling on your finished bowls)

Bring a large pot of lightly salted water to a boil. Add noodles and cook until tender. Drain, and rinse under cool running water. Meanwhile, in  a large saucepan or Dutch oven, saute the carrots in two tablespoons of olive oil for five minutes to start your soup base or you can skip this step and proceed as directed, if you desire a crunchier vegetable. Add the minced garlic and cook for one minute (being careful to not allow the garlic to burn).   Heat up the broth (chicken & beef) and add the zest of one lemon, allowing the broth to simmer.   Gently add your cooked meatballs to the pot.  Reduce heat and cook until the meatballs are heated through. Toss in a handful of fresh chopped basil, the juice of one lemon, and fresh spinach.  Ladle into bowls and sprinkle with Parmesan cheese.

Baked Turkey Meatballs

This recipe will give you a double batch of meatballs. I recommend using the other half of this recipe for our Homemade Spaghetti & Meatballs, Rotini With Turkey Meatballs, or a fun make-your-own meatball sub night for a busy weeknight dinner!

1/2 cup Italian bread crumbs
1/2 cup chopped fresh flat-leaf parsley
4 large eggs, lightly beaten
2 tablespoons milk
2 tablespoons tomato paste
1 1/2 cups grated Parmesan cheese
2 teaspoons salt
1 teaspoon freshly ground black pepper
1 pound Italian turkey sausages (remove the casings)
1 pound lean ground beef

In a medium bowl, stir together the bread crumbs, parsley, eggs, milk,tomato paste,Parmesan cheese, and the salt and pepper. Add the turkey & ground beef, then gently stir to combine. Make your meatballs the standard size and put them on a baking sheet. Bake at 400 degrees for ten to fifteen minutes. When done cooking, drop in the baked meatballs for a few minutes. This will be just as delicious with a lot less mess and fewer calories.

This concludes my soup series as we move into fun grilling ideas and dishes for Spring. I hope you have gotten a little soup inspiration here and are enjoying the picture tutorials to go along with our recipes too! I would love to hear your feedback!

Greek Lemon Chicken Soup With Bread Machine Pitas

Monday, March 14th, 2011

This soup… oh, this soup. Words seem indescribable to explain how it tastes like love, like comfort, and like coming home. If ever there was a soup that a girl could be proud of, this is my soup. It is rich and creamy tasting, but lightened with lemon. It is, in my humble opinion, the best pot of soup I have ever made.

Let me not say that this comes without effort. The day I made this soup our kitchen was a roaring 500 degrees, I was stripped down to my workout clothes and my hair was in a frizzy singed state from leaning into an oven to flip pitas. I mistakenly had picked up cilantro to garnish my soup instead of parsley and there were bits of food all over my sad apparel. As my sweaty hand clutched my camera to take the preparation pictures,  I sadly watched my soup getting colder by the minute garnished with cilantro (my least favorite seasoning) for that perfect finish photo. At that moment,  I heard something roaring in my head….

“THIS IS NUTS.”

Then I sat down and I ate it…and every moment of crazy was worth this effort. The soup kept giving to me for an easy midweek lunch, a shared lunch with a good friend, and then the final bowl was enjoyed this weekend.

Those moments of effort seem worth the crazy sometimes. And crazy is likely what my husband thought when he saw me sweating, red-faced, in my tank top with a singed hair halo around my pink face…but he & my kids agreed it was worth mommy’s crazy for a bowl of this.

The beginning preparation will look familiar to you if you have prepared my Chicken & Noodle Soup. We are going to chop some carrots for our soup base. I like four carrots, but you can do more or less, depending on how many carrots you like in your soup.

In a large pot, drizzle a couple of tablespoons of olive oil and drop your carrots into the pot. Season these with salt and pepper. Let them cook for five minutes to get a good base to your quick soup going.

Juice a couple of lemons to add to your chicken broth. You will need 1/2 a cup of juice for this recipe. Please use real lemons, not the bottled stuff…it really is worth it!

Pour eight cups of low-sodium chicken broth into your pot that is filled with the carrots.  Add the juice of the lemons to the pot and season with another round of salt and pepper. Bring this liquid to a nice, slow simmer.

Take advantage of a sale like I did, and snag a rotisserie chicken to use for your soup. Rest your bird in the simmering liquid and let it cook for fifteen minutes, allowing the seasonings from the bird to season your broth. Oh, this is going to be so delicious!

In a separate pot, bring a pot of water to a boil. Season generously with a little salt. Add 1 cup of orzo pasta to this pot and cook as directed. Once, it is cooked, drain the pasta and set it aside for your soup.

Carefully pull your chicken out and dice the meat from the bird for your soup. Let it rest for a few minutes while you finish your soup base.

Now comes your secret ingredient to the creaminess of your soup…egg yolk. Whisk three egg yolks in a separate bowl. Now you need to temper your egg yolks (sounds fancy, but it is not),  by adding a little of the hot soup base to your eggs and then whisking the heck out of it.  By adding a little of the hot liquid to your egg yolks, you are preventing a scrambled egg mess in your soup. Once you have added some of this hot liquid to the eggs and whisked it, you can whisk the egg mixture into your whole pot of soup. Again, whisk the heck out of it. Don’t freak out- you got this!

Add back in your chicken and the orzo pasta. Stir and ladle immediately into bowls garnished with parsley and lemon slices.

You can serve your soup with store-bought pitas, or you can give my bread machine pita recipe a shot. I highly recommend at least attempting this recipe sometime, these homemade pitas are heavenly and are so yummy, hot out of the oven.  The best part, is that your bread machine can do all of the hard work for you!

Greek Lemon Chicken Soup

8 cups chicken broth

1/2 cup fresh lemon juice

4 carrots, chopped

1 cup cooked orzo pasta

Diced, cooked chicken meat (from a rotisserie chicken)

Lemon slices, fresh parsley, salt & pepper for seasoning & garnish)

3 egg yolks

Bring a large pot of lightly salted water to a boil. Add orzo noodles and cook until tender. Drain, and rinse under cool running water. Meanwhile, in  a large saucepan or Dutch oven, saute the carrots in two tablespoons of olive oil for five minutes to start your soup base or you can skip this step and proceed as directed, if you desire a crunchier vegetable.  Heat up broth and fresh lemon juice and bring it to a simmer. Gently add your rotisserie chicken and all of the drippings from the pan and put a lid on your pot.  Reduce heat, cover, and simmer 15 minutes.  Pull out your chicken and set aside to dice.  Meanwhile, beat the egg yolks until light in color. Gradually add some of the hot soup to the egg yolks, stirring constantly. Return the egg mixture to the soup pot and heat through. Add the orzo and chicken. Ladle hot soup into bowls and garnish with lemon slices. Toss in a handful of fresh chopped parsley and ladle into bowls.

Side note: If you like a thicker soup base, you can melt two tablespoons of butter and then spoon two tablespoons of flour in the pot, after you have cooked your carrots. Add a little of your chicken broth to the flour & butter and whisk it, then whisk the rest of your soup broth and lemon juice in, to help prevent lumps. This will give you a thicker base to your soup broth.

Pita Bread (for the Bread Machine)

1 1/3 cup water
3 tablespoons olive oil
1 1/2 tablespoons sugar
1 teaspoon salt
3 cups bread flour
1 1/2 cups whole wheat flour
2 teaspoons yeast

Put ingredients into the bread machine in order listed. Run the dough cycle on your machine. When the bread machine beeps, pull the dough out of the bread machine and divide the dough into ten pieces. Roll each piece into a six inch circle. Place these on a baking sheet (or your pizza stones) and let them rise for twenty minutes (I can fit about four rounds per pizza stone or three pitas per baking sheet). Bake at 500 degrees for three minutes. Using a spatula, flip the pitas and cook for another three to four minutes on the flip side.

Side Note: When you pull the pitas off of your baking sheet, wrap them into a damp kitchen towel for a few minutes. This helps keep them from drying out. Once they are cool, you can store them in a food storage bag. Freeze extras for a rainy day! After the pitas have cooled, slip a piece of wax paper between them and store in a freezer bag. You can take out what you need…when you need it!

What is a dish that you are so proud of, but feels like it takes a lot of effort to make? I would love to hear your crazy kitchen confessions!

Crispy Baked Chicken Tenders

Monday, March 7th, 2011

We don’t eat fast food very often in our house and are more the type to indulge in a really amazing meal a few times a year, rather than waste the money on a lot of fast food eating.

That being said, I will admit that I I do love fast food drinks and my favorites happen to be the $1 Diet Cokes from McDonald’s, an occasional iced coffee, and of course a little Starbucks every now and again.

It became a habit when my daughter was small to get myself a Diet Coke or coffee to deal with those demanding toddler days. Caffeine was my lifeline with a daughter who didn’t sleep the first 21 months of her tiny life.

As we pulled into the line to place our order one day, my son said to me, “Do you think we could go to that McDonald’s that has food? You know, not just the McDonald’s that has coffee?”

Yes, even now my kids think our McDonald’s only has fun drinks for grown-ups.

They never even ask for food when I order.

Pretty funny stuff.

Although my kids love my homemade Happy Meals (and I love the cost on them), last week I wanted to switch up our Friday pizza routine so I decided to make fancy gourmet chicken tenders for a fun family treat. These tenders are crispy and delicious, but have a lot fewer calories since they aren’t deep fried.

The kids absolutely flipped for them, but still had to be reassured that I would make their favorite pizza on Saturday night instead. Some family traditions just shouldn’t be messed with.

I made a triple of these tenders and these will be reheated for fun lunches and topping salads and made into gourmet wraps with a drizzle of ranch dressing and lettuce for a fun weekend lunch. I think your family will flip for these too and I can’t wait to share how to make them!

Here is this week’s cast of characters. You may recognize a few of  these ingredients from our Panko Crusted Tilapia Nuggets that I made a couple of weeks ago on the site. This week we will need chicken tenderloins (or chicken breasts cut into strips), panko breadcrumbs, Parmesan cheese, eggs, canola oil (or olive oil), cooking spray, Dijon mustard, thyme, cayenne pepper, garlic powder, salt, pepper, and flour. Basically, everything except the kitchen sink goes into these delicious tenders.

Get out three bowls and make your filling station for your chicken tenders. In one bowl,  mix together Parmesan cheese, panko bread crumbs, and oil together. In a second bowl, mix together the egg whites, water, mustard, thyme, and the Dijon mustard. In the third bowl, mix together salt, cayenne pepper, flour, and your garlic powder.

Next to your filling station, place a baking sheet with a cooling rack on top that has been sprayed with your cooking spray. This is going to give you a crispy tender without having to flip anything halfway.

Now it is time to bread your tenders. Dredge your tenders in the flour, then the seasoned egg white mixture, and then the panko coating.

Gently place each chicken tenderloin the greased cooling rack. It is okay if a few of the crumbs come off. You want a tender that looks nice and evenly coated with the cheese and panko breadcrumbs.

Just continue repeating this process until all of your tenders have been breaded. Make sure that all the tenders have enough room to evenly cook. Feel free to spread them out on two cookie sheets if you need to!  Lightly spray them with a little cooking spray on top to help them achieve their golden fried color.

Bake these at 475 degrees for ten to twelve minutes or until the chicken is cooked through.

Serve with your favorite sides like roasted green beans, lemon rice pilaf, or even crispy oven fries for a finger food night. Dips can include a mustard dipping sauce, ranch, honey barbecue sauce, or ketchup. The leftover tenders are fabulous reheated and wrapped in a tortilla with fresh spinach, a drizzle of ranch dressing, and a sprinkle of Parmesan cheese . Making a big batch of these is like a gift that keeps on giving throughout the week and eased lunchtime preparation a lot for our family.

I hope you like them as much as I do.

PS- Please don’t tell my kids that our McDonald’s has food. I don’t know how I have gotten away with it for eight years now.

Crispy Baked Chicken Tenders (Adapted from America’s Test Kitchen Healthy Family Cookbook)

2 cups panko breadcrumbs
1/4 cup Parmesan cheese
2 tbsp. canola oil or olive oil
½ cup all-purpose flour
1 tsp. garlic powder
1 tsp. salt
¼ tsp. cayenne pepper
3 large egg whites
1 tbsp. water
1 tbsp. Dijon mustard
1 tsp. minced fresh thyme or ¼ tsp. dried
Cooking spray
1½ lbs. boneless, skinless chicken breasts, cut into ¾-inch wide strips (or chicken tenderloins)


Preheat the oven to 475˚ F.   In a shallow dish, mix together the panko breadcrumbs, oil, and Parmesan cheese. In a second shallow dish, whisk together the flour, garlic powder, salt, and cayenne pepper.  In a bowl, whisk together the egg whites, water, mustard and thyme. Spray a wire rack lightly with cooking spray and place over a rimmed baking sheet.  Working in batches, dredge a few pieces of the chicken in the flour, then the egg whites, and finally the breadcrumbs to coat, shaking off the excess between each step.  Lay the coated pieces on the prepared wire rack and repeat with the remaining chicken. Spray the tops of the chicken pieces lightly with the cooking spray.  Bake until the chicken is cooked through, 10-12 minutes.  Serve warm.

Optional: Before pulling together your breading, in a large skillet, toss the panko with the oil.  Toast over medium-high heat, stirring occasionally, until golden brown, about 8-10 minutes.  Transfer the toasted crumbs to a shallow dish or pie plate. I skipped this step, but you could do this, if you desire a crisper exterior to your panko crumbs. The toasting will help the tenders taste even more fried!

What fast food dishes do you like to recreate at home? Feel free to share those recipes and links! I would love to hear how you makeover fast food dishes into healthier ones!

Pin It

Poor Man’s Date Night: Linguine With White Clam Sauce

Monday, February 21st, 2011

There was a time in our married life when even an inexpensive steak dinner was far from something we could afford. When the grandparents would offer to take the kids for us for a date night, we would run to the supermarket and buy ingredients for a date night at home. At the time, it wasn’t because I was such a great cook and because we loved to be home so much, but it was because we had no money to spend on a night on the town.

I really did try to do what I could to make our life feel special, no matter how much or how little money we had. Through that effort, we began a tradition of making Linguine With White Clam Sauce for our fancy dinner  together, and it became a tradition to make that every time we wanted a date night at home. We would indulge in a loaf of artisan bread and bakery cupcakes for dessert and then indulge all week long in the leftovers.

To be honest, I had never thought to serve it to the kids, but one night the pantry was bare except for a few ingredients for that dish. I decided to go ahead and make it for the kids and had a back-up plan of eggs and toast if it didn’t work out. To my amazement, my kids went nuts for mommy’s linguine and have been begging for it every day since.

It seems those kids are always teaching me a lesson about my own inhibitions towards foods when I was young, and this linguine is now not only a date night treat, but a fabulous treat for them too. Your kids might be different than mine, but it is always worth a shot!

Gather all of the ingredients you will need to make your Linguine with Clam Sauce for your fun weeknight dinner (or poor man’s date night). You will need butter, olive oil, garlic (fresh or bottled minced), one or two lemons, white wine (I love boxed wine for this dish), two or three cans of whole baby clams, linguine noodles, and fresh parsley.

Now you can certainly subsitute with real baby clams, but I live in Indiana where it is harder to get the real deal anymore and they add a lot of expense to the dish here. They have a couple of varieties of clams on the shelf and you definitely want to go with the fancy whole baby clams over the minced clams that come in the smaller cans. Trust me, your dish will taste much better with the whole clams then those smaller clam pieces.

Heat a large pot of boiling water for your linguine noodles. Meanwhile, chop, chop, chop up a generous amount of fresh parsley to be mixed into the linguine and for garnish on top of your dish.

In the bottom of your pot, melt a couple of tablespoons of butter. You like how well-seasoned my dutch oven is? Yeah, should probably pay more attention to it, but I think it showcases how loved it is in our house.

Add the olive oil and quickly saute your garlic. You want to make sure your pot isn’t too hot or your garlic will burn.  Next add your white wine, the juice from the canned clams, and the zest of one or two lemons. Allow this to cook for a few minutes to cook off the alcohol and season generously with a little salt and pepper.

Once your noodles are about done, you will want to add the baby clams to your sauce.

Squeeze in the juice of one or two lemons, depending on how much you love lemon flavor.

Finish with your generous handfuls of fresh parsley. Don’t skimp on the parsley since it adds so much fresh flavor to those canned ingredients.

Add your drained linguine noodles and toss everything together, incorporating all of those delicious flavors. Add a little bit more salt and pepper, seasoning the dish to your own personal taste.

The final touch to bring everything together is a generous amount of freshly grated Parmesan Cheese. Don’t skimp on this, it really is what brings the sauce together and makes the sauce hug the noodles.

Finally, revel in being the cheapest date in town as you bask in the glory of the compliments from your significant other.

Sweet.


Linguine with White Clam Sauce

1 pound linguine
Salt
1/4 cup extra-virgin olive oil
2 tablespoons of butter
4 cloves garlic, chopped,
1/2 cup wine
Juice and zest from one or two lemons
2-3  (15-ounce) can whole baby clams, with their juice
Handful flat-leaf parsley, chopped.

Bring a large pot of water to a boil. Add salt and the linguine and cook as directed or until al dente. The linguine will continue to cook in sauce, later. To a large skillet heated over medium heat, add oil, butter, garlic. Cook together. Add wine, the juice from the clams to the pan, and the zest of one or two lemons. Finally, add the clams and the juice from one or two lemons. Drain pasta and add it to the clam sauce. Toss and coat the pasta in sauce with clams until the pasta absorbs the flavor and juices, 2 to 3 minutes. Remove from heat and season with salt, add parsley and serve with a loaf of crusty bread.

Do you attempt fancy date night dinners at home? What is your favorite frugal date with your significant other?

Bread Machine Puffy Calzone Hearts With Dipping Sauce

Monday, February 14th, 2011

I was inspired by the notebook last week (specifically the entry by Craftzine) to whip up a batch of heart-shaped calzone hearts for my valentines. We used to make calzones more often around here, but I will happily admit that our pizza routine takes a little less time and my kids seem just as happy with it.  I knew that they would love this as a special Valentine’s Day surprise and I wanted to share with you my favorite calzone recipe that utilizes one of my favorite appliances… the bread machine.

This recipe is foolproof and makes a deliciously fluffy dough that has just the right balance of flavors. Fill these with whatever toppings you have on hand and then brush lightly with a little olive oil and a shake of a little garlic salt to add a little fun flavor to the top. We served these with a big bowl of dipping sauce and the kids were in amazement that their mom could make such a fun food for them.

Of course, as I was making these, my camera battery stopped working so I hope the instructions and the few pictures that I do have will help explain how to make these cute little puffy calzone hearts for the special people in your life.

Bread Machine Puffy Calzone Hearts With Dipping Sauce

1 1/4 cups water

2 teaspoons active dry yeast

1 1/2 tablespoons white sugar

3 cups bread flour (can substitute with all-purpose flour, half white flour/half wheat flour, or whole wheat white flour)

1 teaspoon salt

1 teaspoon powdered milk

3/4 cup pizza sauce

1 1/4 cups shredded mozzarella cheese

your choice of fillings (pepperoni, sausage, extra cheese, etc.)

2 tablespoons olive oil

garlic salt for sprinkling

To Make Dough: Place water, yeast, sugar, flour, salt and powdered milk in the pan of the bread machine, in the order suggested by the manufacturer. Select Dough cycle. After cycle is completed, roll out dough on a lightly floured surface.

Roll out flat and then cut into hearts with a heart-shaped cookie cutter, cutting two hearts for each puffy heart. Transfer to a lightly greased cookie sheet, and spoon a small amount of sauce, cheese, and (optional) toppings on one heart. Top with the other heart-shaped cut-out and then crimp the edges with a fork to seal in the toppings (Side Note- Because these are puffy hearts, make sure you seal them well with the forks, but they will likely puff up and not hold the markings from your fork).  Brush the tops with olive oil and sprinkle with garlic salt on each heart. Bake at 400 degrees for 12-15 minutes. Serve with a bowl of dipping sauce and lots of hugs and kisses for your valentines.

Looking for another way to say, “I Love You,” today?  Be sure to check out our Be Mine Donuts that are guaranteed to capture hearts!  Planning to make a romantic dinner for your heart’s desire? Be sure to check out our elegant steak dinner and our favorite inexpensive wine selections! If you have a few more moments, swing by our podcast on choosing great wines!

Happy Valentine’s Day, everyone! Do you have any fun ways you will be celebrating today?

Panko Crusted Tilapia Nuggets With Dipping Sauce

Monday, January 31st, 2011

I am always looking for new ways to make food and the dinner hour fun for my kids. I also really desire for them to eat healthy and appreciate foods that are good for them. In my quest to continue offering fun and healthy foods,  I was looking to replicate the chicken nuggets my kids love, but with some healthier fare. With a bag of frozen tilapia in the freezer, I thought I would try to create a fun tilapia nugget that was baked, but had the taste and crunch of their fried nuggets.

With that in mind, let me introduce you to my new favorite pantry addition to creating great fried flavor without the grease and frying. Panko is a Japanese bread crumb that is light in texture and offers a coarse crumb texture to your breading.  Panko is made from wheat bread, but has a surprisingly golden color that looks just like that golden color and texture you love from your fried dishes.

While it may sound a little more exotic than our good old breadcrumbs, these are actually available at our local Walmart. They have these in two spots in the store and you can grab them in the Asian food section or the baking aisle. I found the ones in the baking aisle were about twenty cents cheaper so I grabbed them over there. A box of these was $1.88 so they are very inexpensive, but can add a lot of crunch to your dishes that you will soon become addicted to.

The Panko is mixed with Old Bay seasoning for a kick of spice with a little heat in it. You can find the Old Bay seasoning over in the baking spices aisle or by the seafood section of your supermarket. It has a variety of spices in the blend with everything from mustard to cinnamon to ginger.  Basically, it is a fun blend of everything in your spice cabinet that adds a ton of flavor to all of your seafood dishes.

Tilapia happens to be my most favorite fish and we usually eat it about once a week in our house. It is a very mild white fish that even fish haters can appreciate because it doesn’t have a strong fishy taste to it. It also happens to be a great bargain for families and is available at every supermarket. I buy the larger value size bags and can get two meals with leftovers out of those.

When creating your nuggets, just cut down the center line and then chunk them into nugget-like shapes. This can totally be rustic, it adds to the homemade deliciousness, in my opinion!

What did our family think about these? Well, after they picked their mouths off of the floor that mom could whip up fish nuggets, they absolutely loved them!  The dippers in our family were very happy because I served these with a little fun dipping sauce and the non-dippers were pleased that these were flavorful even when they were eaten alone.

The accompaniments to the nuggets was my lemon rice pilaf and steamed edamame (or “little mommies” as my daughter likes to call these). I put both of these into my rice cooker and enjoyed having dinner ready in under thirty minutes.  A dinner that is filled with happy smacks, empty plates, and questions about when I can make it again for them is a dinner success story with a happy ending!

Panko Crusted Tilapia Nuggets With Fancy Dipping Sauce (Adapted from Martha Stewart’s Everyday Food)

2 large eggs, lightly beaten

Coarse salt and pepper

2 cups panko (see notes above about where to locate that ingredient)

1 tablespoon Old Bay Seasoning

2 tablespoons olive oil

1 1/2 lbs tilapia fillets, cut into wide strips (see note, above)

1/2 cup light mayonnaise

1/4 cup fresh parsley, chopped

1 tablespoon Dijon mustard

1 tablespoon fresh lemon juice, plus lemon wedges for serving

2 teaspoons prepared white horseradish (we omitted and just added 1/4 teaspoon of Old Bay to the seasoning for a little kick)

To make fish nuggets, cut tilapia fillets in half and then chunk into nugget size pieces.  Preheat oven to 475, with racks in top and bottom third. Line two baking sheets with aluminum foil; set aside. Place egg in a wide shallow bowl; season with salt and pepper. In another bowl, combine panko, Old Bay, and oil. Dip tilapia into egg, shaking off excess, then into panko mixture, pressing to adhere. Place on prepared baking sheets.  Bake until lightly browned, 12 to 15 minutes, rotating sheets from top to bottom halfway through.

Meanwhile, in a small bowl, stir together mayonnaise, parsley, mustard, lemon juice, and horseradish; season with salt and pepper. Serve fish sticks with sauce and lemon wedges on the side.

Looking for other fun ways to enjoy adding seafood into your diet? Be sure to check out our recipe for  Tilapia with Lots of SpiceBaked Salmon, a deliciously gourmet salmon patty recipe, Balsamic & Rosemary SalmonMarinated Grilled Shrimp,  & Herb Baked Tilapia, just to name a few!

What foods are you trying to get your children to eat more of? What recipes would you like to see here to make healthier versions of the foods your kids love? Feel free to share your own healthy dish makeovers!

Grilling In: Slammin’ Salmon Marinade

Monday, January 24th, 2011

Slammin Salmon Marinade recipe from MomAdvice.com

With the new year in full swing, I have been trying to make a conscious effort to get back to healthier eating.

I think our family eats relatively healthy… with the exception that we tend to be carb-loving fools and could really benefit from cutting back on the pasta and bread in our house.

I am trying to incorporate more meat-free nights, embrace those whole grains, encouraging lots of fruit and veggie eating, and adding lots more fish into our diet.

I am hoping to share a few of the ways that we are working on our healthy eating in our house as well as share the recipe success stories from our kitchen.

I love grilled fish and once a week  I have been trying  to prepare a marinade for a quick and easy weeknight dinner.

In the winter months, I rely on our little indoor grill a lot to get that delicious grilled flavor without being outside and braving the cold.

A few holidays ago, I spent my Christmas money on a Cuisinart 5-in-1 griddle at a home goods store.

It was the last one on the shelf and missing the griddle portion of it so I got it for a 75 percent discount.

I ran home with it and couldn’t wait to start making fancy panini sandwiches on it and grilling our food on it.

At the time, we had an electric stove and it was the perfect way to enjoy our grilled foods in the winter.

Now that we have a gas stove, I have longed for a grill pan to rest on top of my burners.

Of course, it isn’t anything I truly need so I continue to give our little Cuisinart a good workout in our kitchen.

It is a handy little gadget that has served us well in the winters and you can’t beat a fancy panini and soup night in these cold winter months.

My new favorite salmon recipe is this Slammin’ Salmon marinade that is perfect for quick cooking and getting dinner on the table in a hurry.

This marinade is rich and flavorful with a good balance of sweetness on the fish. I paired this with my easy microwave lemon broccoli and brown rice for a filling and satisfying dinner.  

Everyone absolutely love this marinade.

My husband & I loved it for the flavor it added to our salmon, my daughter loved it because it is pink, and my son…well, he will eat just about anything.  

This recipe is definitely a keeper for our family.

Below is our modified version of this delicious marinade!

Give it a try and see if you can’t find a new way to appreciate seafood in your house.

Slammin’ Salmon Marinade (Adapted from AllRecipes.com)

1/4 cup balsamic vinegar
1/4 cup lemon juice
1/4 cup soy sauce
1 teaspoon salt
1 tablespoon brown sugar
1 1/2 teaspoons ground ginger
1 teaspoon paprika
1 teaspoon black pepper
1/4 teaspoon crushed red pepper flakes
4 cloves garlic, minced
1 teaspoon sesame oil
1/4 cup olive oil
8 (4 ounce) skinless, boneless salmon fillets

Stir balsamic vinegar, lemon juice, and soy sauce with salt, brown sugar, ground ginger, paprika, pepper, and red pepper flakes until the salt has dissolved. Stir in garlic, sesame oil, and olive oil until well combined.. Pour marinade into a resealable plastic bag or glass bowl. Add salmon to marinade and gently toss to coat. Place into refrigerator and marinate 2 to 4 hours. Prepare your grill for medium-high heat. Drain excess marinade from salmon fillets. Grill until firm and opaque, about 4 minutes per side (may need shorter cooking time depending on the thickness of your salmon fillets).

Looking for other fun ways to enjoy adding seafood into your diet? Be sure to check out our other recipes: 


Balsamic Salmon


Balsamic & Rosemary Salmon


Marinated Grilled Shrimp

Marinated Grilled Shrimp


Herb Baked Tilapia Sheet Pan Meal

 Herb Baked Tilapia 

What is your favorite way to incorporate fish into your family’s diet?  Feel free to share your favorite recipes and links!


Grilled Salmon Marinade from MomAdvice.com

Our Thanksgiving Feast

Tuesday, November 30th, 2010

I hope everyone had a wonderful holiday! It was so wonderful to take time off from the blog and get ready for the holidays that I think I just might have to do that the week of Christmas too! I am having a hard time getting back in the swing of things now that I have had that time off though.  I did a lot of crafting, cooking, and tackling some of  our holiday shopping & chores. It was definitely not a vacation, but it was really nice to get to spend more quality time in the evenings with my family.

Our Thanksgiving feast this year was really special because I got to have both sides of our family together for the big dinner. Pictured above were the beautiful crafts that my children created at school that adorned the kid’s table this year. I have to say, with beauty like that, who needs to splurge for fancy centerpieces!

We started the day off with the annual Thanksgiving Day parade. The kids really seemed to love the parade this year and the Rockettes were a huge hit with Emily.  Next year I am hoping to incorporate this Thanksgiving Parade Bingo into our annual traditions!

This year I was in charge of the turkey, mashed potatoes, gravy, pumpkin cornbread, the cheese ball, and the punch. I tried to make as much as I could ahead of time, but left the turkey, cornbread, and gravy for last. This year, I opted for two turkey breasts instead of the whole turkey since no one is really a big fan of the dark meat. I had thirteen pounds of turkey breast and only had enough for a sandwich leftover. Now I am craving leftover turkey sandwiches so I am thinking I am going to make another one just for us to enjoy now that the festivities are over.

These turkeys did turn out great, but I will admit that I am still learning about turkey roasting. I watched a lot of Martha Stewart Thanksgiving episodes before I made these birds! I will share the recipe with you next year for another idea for your Thanksgiving recipes.

More importantly though, I got to spend time with my family!

My brother & sister.

My husband’s side of the family (mom, dad, sister-in-law, & us)

My mom & dad.

My grandma & mom.

My grandma-in-law, sister-in-law, & my mother-in-law.

My sister’s family (my nephews, sister, & brother-in-law)

My little family.

I hope you had a wonderful holiday too that was spent with those you love! We are excited to share more ideas for the holiday season and ways to enjoy simple celebrations on a budget!  I will be dusting off lots of our older entries and sharing more on our Facebook page as we prepare for the holidays!

Weeknight Chicken Noodle Soup

Monday, November 1st, 2010

There are few things that I love more than a comforting bowl of soup on a cold day, but there are few things I love to do than stand hours over the stove preparing that delicious soup. Homemade chicken noodle soup is a delicious thing, but not on a typical weeknight for me with homework and evening activities going on.

If you are looking for a soup with that tastes deliciously homemade, but can be prepared in about 30 minutes and happily feed your family for a week, then this is the soup for you. The trick with this soup is starting with a good well-seasoned base and then working from there with quicker cooking techniques and ingredients.

Of course, after I showcased the Presto Pesto Pasta Con Pollo as an easy weeknight meal that was prepared with a rotisserie chicken, I began to think about some other scenarios where that chicken would work for a busy weeknight dinner. I settled on this quick version of Chicken Noodle Soup that, dare I say it, rivals any homemade version I have tasted and could satisfy my Panera Bread soup cravings easily.

Begin by chopping your ingredients in uniform size pieces. I chopped up three carrots and two stalks of celery for this one.

In a large pot, get two tablespoons of olive oil heated up and then add your vegetables to the oil. Give them a gentle toss to get them all coated and then season with your salt and pepper. I like to get these sweating for about five minutes to get the vegetables going and start with a good base flavor. If you like a crunchier texture in your soup, you can skip this step.

Once they are good and sweating, add three boxes (or approximately 12 cups) of of low-sodium chicken broth to the pot and  get this liquid simmering. From here on out, you need to go very easy with the salt because the final stage, we are adding cornstarch to thicken it and we don’t want it to be too salty.

Now it is time to add your secret weapon to your soup.  I found this rotisserie chicken at our local Walmart for $4.98, or approximately the same cost as the whole fryer chickens that I would have to prepare myself.  They offered a few different varieties, but I thought this Lemon Pepper one would offer an interesting flavor to the soup. Don’t be afraid to experiment a little bit, or just go with the traditional variety, if that is all you can find.

Very carefully slide your rotisserie chicken into the simmering broth and put a lid on  your pot. Let this simmer for about fifteen minutes.  Then very carefully pull the chicken out and dice for your soup. Mix together a bit of cornstarch and water to make a thickener, if you like a thick broth and add it gently while whisking frantically into your broth.

Once that is done, you can add in two to three cups of noodles. You can have these cooking in a separate pot and then add them in, so they don’t absorb all of the soup liquid, or you can add them right into your bubbling broth and make it a thicker soup.   To  add to the homemade taste, I used the bagged egg noodles in the frozen section of the store, but you can use any variety that you like.

After the noodles have cooked, add your chicken back in and a handful of fresh parsley. Give it a stir and ladle into your bowls for a quick weeknight dinner. A side of my Portuguese White Bread, Pumpkin Cornbread Muffins, an Artisan Loaf, or my Homemade Whole Wheat Bread all would make a delicious accompaniment.

What does the soup taste like? Soulful, satisfying, rich, delicious, comforting, and restaurant-worthy! This is definitely a lot cheaper than going out for soup and you can enjoy these leftovers all week long! Loved by all in our family, it is a recipe that I will be repeating again and again!

With the Thanksgiving holiday quickly approaching, remember that this soup can easily be adapted with your yummy leftover turkey for another great way to use up those leftovers!

Quick Weeknight Chicken Noodle Soup

2-3 cups egg noodles (I like the Ream’s brand in the frozen foods section)
2 tablespoons of olive oil
12 cups low-sodium chicken broth
salt & pepper to taste
2 stalks chopped celery
3 chopped carrots
1/3 cup cornstarch
1/4 cup water
1 rotisserie chicken
Bring a large pot of lightly salted water to a boil. Add egg noodles and cook until tender. Drain, and rinse under cool running water. Meanwhile, in  a large saucepan or Dutch oven, saute the carrots and celery in two tablespoons of olive oil for five minutes to start your soup base or you can skip this step and proceed as directed, if you desire a crunchier vegetable.  Heat up broth and bring it to a simmer. Stir in celery and carrot. Gently add your rotisserie chicken and all of the drippings from the pan and put a lid on your pot.  Reduce heat, cover, and simmer 15 minutes. In a small bowl, mix cornstarch and water together until cornstarch is completely dissolved. Pull out your chicken and set aside to dice.  Gradually add the cornstarch to soup, stirring constantly. Stir in noodles and diced rotisserie  chicken, and heat through. Toss in a handful of fresh chopped parsley and ladle into bowls.
************************
Not enough soup for you? We’ve got the soup pot on with Black Bean & Roasted Red Pepper Soup, Pesto Chicken Tortellini Soup, Lentil Soup, Italian Veggie Soup, & Tuscan Tomato Soup to fill your soups bowl frugally and deliciously!