Archive for the ‘Kids Crafts’ Category

Yarn Ball Ornaments

Wednesday, December 4th, 2013

Easy Yarn Ball Ornaments from MomAdvice.com

Looking for a creative gift to craft up that requires zero crafting skills and can be made in under 15 minutes. These yarn ball ornaments are the perfect gift to give for the holidays and are unbelievably easy to create for the holiday season. The best part is that it is a gift perfect for knitters, but doesn’t require knitting! If you are a knitter, like me, it is a fantastic stash-buster of a project!

Target Yarn Ball Ornament

The inspiration for this craft came from this picture of an ornament at Target that my girlfriend sent to me. I loved the idea of this ornament, but wanted to create something a little more authentic for my knitting friends. After a few trips to the craft store and some test ornaments, I am sharing with you how you can make these cute ornaments for someone you love!

Easy Yarn Ball Ornaments from MomAdvice.com

Supplies List

1 package of 2 1/2″ Styrofoam balls

Wooden Skewers

1 package 3/8″ Round Wooden Beads

Craft Glue

Glue Sticks & Glue Gun

Wire Cutters

Ruler

Scissors

Scrap Yarn

Easy Yarn Ball Ornaments from MomAdvice.com

Easy Yarn Ball Ornaments from MomAdvice.com

Directions

1. Grab two wooden skewers and measure them to 5 inches. Using your wire cutters, clamp down and break off the top end of the skewer to create the knitting needles.

2. Dab a little craft glue on the end of the skewer and top it with the wooden bead. Make sure the top of the bead lines up with the top hole so that you no longer see it. Repeat with the other skewer and set these aside to dry.

3. Add a dab of hot glue to your Styrofoam ball and start wrapping it with yarn. Keep wrapping around and around until the yarn ball is completely covered. Add one more dab of hot glue and secure the end of the yarn to the ball. Trim to keep it flush with the ball and set aside to dry.

4. Grab your wooden knitting needles and cross them through the front of the yarn ball.

5. Trim another strand of yarn and, using an embroidery needle, loop the yarn through the top of the yarn ball. Knot it, and then slide the knot into the opposite side of the ball, tucking your knot in so it is no longer visible.

Easy Yarn Ball Ornaments from MomAdvice.com Easy Yarn Ball Ornaments from MomAdvice.com Easy Yarn Ball Ornaments from MomAdvice.com Easy Yarn Ball Ornaments from MomAdvice.com Easy Yarn Ball Ornaments from MomAdvice.com Easy Yarn Ball Ornaments from MomAdvice.com Easy Yarn Ball Ornaments from MomAdvice.com Easy Yarn Ball Ornaments from MomAdvice.comI hope this craft inspires you for your holiday giving. I will confess to you now that I am going to have a very hard time parting with these cute ornaments. I just might be making myself a few over the holidays!

Be sure to check out our list of 54 Handmade Gift Ideas, our Easy No-Sew, No-Glue, No-Cut Burlap Wreath, and a fun little Cinnamon Roll Christmas Tree you can make with the kiddos while you are crafting!

Pin It

Easy Christmas Tree Cinnamon Rolls

Tuesday, December 3rd, 2013

Easy Christmas Tree Cinnamon Rolls from MomAdvice.com.

Ever since my children were small we have had a tradition of making a Cinnamon Roll Christmas Tree. The best part about this tradition is that it is fast to create, can be decorated by your kids, and it is something they will look forward to every year.

Easy Christmas Tree Cinnamon Rolls from MomAdvice.com. Easy Christmas Tree Cinnamon Rolls from MomAdvice.com.

There is no recipe to this one unless you are feeling ambitious and want to create some easy bread machine cinnamon rolls to make this with, which is something I love to do on Christmas morning!

Shape these into a Christmas tree shape on a parchment-lined cookie sheet. Bake as directed on the packaging. Tint the icing green with a few drops of food coloring and let them decorate the rolls themselves.

I slide the rolls off of the hot cookie sheet and let them decorate while they are still hot, reducing the risk of burn elbows and arms by removing that hot sheet.

Easy Christmas Tree Cinnamon Rolls from MomAdvice.com. Easy Christmas Tree Cinnamon Rolls from MomAdvice.com. Easy Christmas Tree Cinnamon Rolls from MomAdvice.com.

This recipe is practically fool-proof, unless you were up with a screaming baby one night and on Christmas morning grabbed blue instead of green.

And maybe you declared it the year of the retro Christmas tree.

Maybe.

I hope you can embrace this as part of your annual holiday traditions. Be sure to check out my other ideas for Great Family Traditions to Celebrate the Holidays in a MEANINGFUL way. If you didn’t get around to creating an advent calendar yet, don’t worry! Check out my Use What You Have Advent Calendar!


Pin It

How to Make a Minecraft Steve Costume for Halloween

Thursday, October 10th, 2013

How to Make a Minecraft Steve Costume from MomAdvice.com

Halloween is just around the corner and today I wanted to share a fun Minecraft Costume you can create for your very own little Minecraft-addict. DIY Minecraft costumes are fun to make with your kids and give you a chance to spend time together.

Do you have a Minecraft fan on your hands? Trick or treating in this easy diy Steve costume couldn’t be easier (or more fun). Snag the pdf files to transform a cardboard box into a fun mask.

DIY Minecraft Costume Ideas

My son and I made this Steve Halloween costume way back in 2013 together. This adorable little boy, in these pictures, is now in his junior year of high school and supporting a mustache.

My, how time flies!

When I look back on these pictures, they fill me with a lot of joy because we did this together. While my daughter is ALWAYS game for a diy project, my son is far less interested in crafting with his old mom.

Luckily, his Halloween costume request was just what we needed to enjoy a day of crafting together.

If you are looking for an affordable minecraft costume, this post is just your ticket. Not only am I sharing our homemade Steve costume with you, I’m also sharing several other costume ideas for your Minecraft obsessed kid.

How to Make a Minecraft Steve Costume for Halloween

DIY Minecraft Costume Ideas

Supplies Needed:

1- 11x11x11 box (This size is NOT available at Walmart. We got ours at FedEx, but you can try Kinkos or the UPS store)

Minecraft Steve Printables– PDF’s printed on 11×17 paper (either print at home or have them printed at the same shipping/printing supplies stores that I have listed above)

Glue Stick and/or glue gun & glue sticks

Paper Trimmer or Scissors

Box Cutter

Packing tape

Aqua Blue Shirt


DIY Minecraft Costume Ideas

DIY Minecraft Costume Ideas

Directions:

1. Print out your Minecraft Steve Head printables. I put these files on a jump drive and brought them to Kinkos with me and asked them to print the files on 11×17 paper.

Read through this comment thread for printing options. It appears that UPS Store is the most affordable of the options.

You can also print at home or try printing the files on smaller paper and piecing them together to save on costs. Feel free to also share your own experience with printing these by leaving a comment below!

2. Begin by taping together the bottom of you box. Once the bottom of your box is taped, you can begin folding in the flaps of the box on the other end, to create a hole for your child’s head.

3. Using a paper trimmer or scissors begin trimming off any of the white portions on the printables.

4. Cover the backside of the first printable with glue. We found the glue stick provided a great start and then I reinforced it, using my glue gun, with little dabs of hot glue along the seam underneath.

5. Repeat the above process and finish with Steve’s hair on top, carefully gluing the edges of the hair down around the top of the box with a little hot glue to secure.

6. Have an adult cut the holes out for Steve’s eyes and wear your new Steve head proudly. Pair it with an aqua t-shirt and blue jeans to complete the look.

DIY Minecraft Costume Ideas

DIY Minecraft Costume Ideas

If you think that Halloween is just for kids, you aren’t doing it right. 

Here was our couple’s costume from 2013

Glee Costume Ideas

Glee Costume Ideas Glee Costume Ideas

Glee Costume Ideas Glee Costume Ideas

We sure do love Halloween around here! You can check out our favorite couples costume ideas over here. My husband sure does make a dashing Sue Sylvester! Yes, we get into it just as much as the kids do. And why shouldn’t we?

Looking for more fun DIY Minecraft Costume Ideas? Check out these fun ideas!

Easy Painted Steve Head

Iron Sword & Diamond Pickaxe Printables

DIY Minecraft Wither Skeleton Costume

DIY Minecraft Zombie Costume

Telescoping Minecraft Creeper Costume

DIY Minecraft Costume Printable

20 Amazing Minecraft Costume Ideas (for some extra Minecraft-y inspiration)

And why shouldn’t YOU?

here are a few other halloween diy ideas you might like to try this year!

How to Make Glow in the Dark Jell-O how to make glow-in-the-dark jell-o

Doughnut Hole Ghost Cake doughnut hole ghost cake

How to Paint Pumpkins with Acrylic Paints from MomAdvice.com how to paint pumpkins with acrylic paints (a fun halloween craft idea!)


If you are still looking for fun Halloween ideas, you must visit this DIY Halloween Costume Ideas article and this list of 7 More DIY Halloween Costumes to try creating. Happy Halloween, friends!

How to Make a Minecraft Steve Costume from MomAdvice.com


A Happy & Healthy Halloween Night Feast

Tuesday, October 8th, 2013

Googly Eyed Apples for Halloween from MomAdvice.com.

Googly Eyed Apples for Halloween from MomAdvice.com.Who is ready for a happy & healthy Halloween feast? Halloween is just around the corner and this year Kenmore has you covered with an easy Halloween dish and treat that you can enjoy with your family before or after your trick-or-treating has begun. That’s right, there is no need to order a pizza or stress out about festive snacks, at least not this year!  This year I am sharing an easy slow cooker recipe idea and a treat that is not only healthy, but also a festive addition to your dinner offerings!

Head on over to the Kenmore blog to find a recipe and tips for throwing a happy and healthy Halloween feast this year!

Pin It

7 New DIY Halloween Costumes

Monday, October 7th, 2013

7 New DIY Halloween Costumes from MomAdvice.com

Halloween is just around the corner and today I wanted to showcase even more DIY Halloween Costume Ideas that you can create using commonly found items at your local second-hand store.

Last year I compiled a really great list of Easy DIY Halloween Costumes that were truly a hit with our readers.

Luckily, I was able to find seven more DIY Halloween costumes that I think would be easy to pull off and oh-so-affordable!


DIY Minion Costumes

One of the biggest movies this summer was Despicable Me 2.

Often costumes from our favorite movie characters are expensive, but I found this easy DIY Minion Costume on make and takes that would be perfect for your own little minion.

The best part is that you only need to find a yellow hat and the other supplies are commonly found in your home or inexpensive to purchase (pipe cleaners, toilet paper roll, scissors, stapler, elastic, and a little paint).

This costume wins for both ease of creation and for being wallet-friendly too!


Rosie the Riveter

What could be more recognizable than the, “We Can Do It!” campaign?
I love this costume because you can create the headpiece with an old red t-shirt that you decorate with a little paint.
The rest of the outfit can most likely be pieced together with items you already have in your closet and with a simple flex of your muscle, you are ready to go!
Check out Crafted in Carhartt for several great DIY ideas including the Rosie the Riveter costume.

Holly Golightly Costume

One of my favorite movies of all-time is, “Breakfast at Tiffany’s.”
I love this Holly Golightly costume that you could piece together with items you found at your store along with items you probably have tucked away in your closet.
With a simple little black dress, some costume jewelry, a pair of sunglasses, and some black gloves you have the makings for a perfectly classy Halloween costume.
This is a great costume for yourself or for an adorable little girly-girl in your life!

Sun-Maid Raisin Girl

I am sure it comes as no surprise that I am a huge fan of good old-fashioned costumes and this Sun-Maid Raisin Girl costume is about as cute as they come!
Add a little ric rac to a white Goodwill t-shirt and pick up a basket from the Housewares department.
Fill it with real (or fake) raisins and grapes for the big night and hit your local Halloween party supply store for a bonnet.
Head on over to wip to get the scoop on this great costume idea full!

 Mona Lisa

You don’t have to have spend a lot to pull off a great costume and that is why I absolutely love this Mona Lisa costume for its simplicity and ease in creation.

Head to Goodwill to get a frame and then use the printable that is provided in the MAKE instructions to create the background.
Dress your child up in a a dress and they will be ready to wow everyone with this costume that is truly a work of art!

Lumberjack

Boy costumes can be tough around here and this DIY Lumberjack costume is one of my new favorite boy costumes.
Grab a knitted hat and flannel shirt and whip up one of these cute little felt beards to go with the costume.
Bonus points should be given if you have time to make an ax out of cardboard!
Visit The Gold Jellybean for this awesome costume tutorial!

LEGO Indiana Jones Costume

My son is LEGO obsessed and that is why I love this fun LEGO Indiana Jones costume for Halloween.
Although creating the LEGO head is a bit of work, what little boy wouldn’t love creating this with you or their Dad?
Pair this costume with a pair of brown pants and shirt!

I hope these ideas inspire you this year! Here is a flashback costume that I created for myself two years ago! Yes, even I love to dress up for the season!

Happy Halloween, everyone!


Check out more Halloween costume ideas from MomAdvice.com:


Easy DIY Halloween Costumes


Minecraft Costume Ideas


Fun Halloween Costume Ideas for the Whole Family


This post contains affiliate links

Sign up for the MomAdvice newsletter

SaveSave

SaveSave

SaveSave

SaveSave

SaveSave

SaveSave

SaveSave

Pin It

DIY Homework Study Station

Thursday, August 15th, 2013

DIY Homework Study Station from MomAdvice.com.

Back-to-School time is almost here for my crew and today I wanted to show you an easy DIY Homework Station you can create for a fun, focused, and quiet little spot you can create for your homework time. This Tri-Fold Homework Station idea was something that I came up with to do for the back-to-school season with Walmart. Each month they give me a fun craft challenge and I couldn’t wait to create these for my kids.

DIY Homework Study Station from MomAdvice.com.
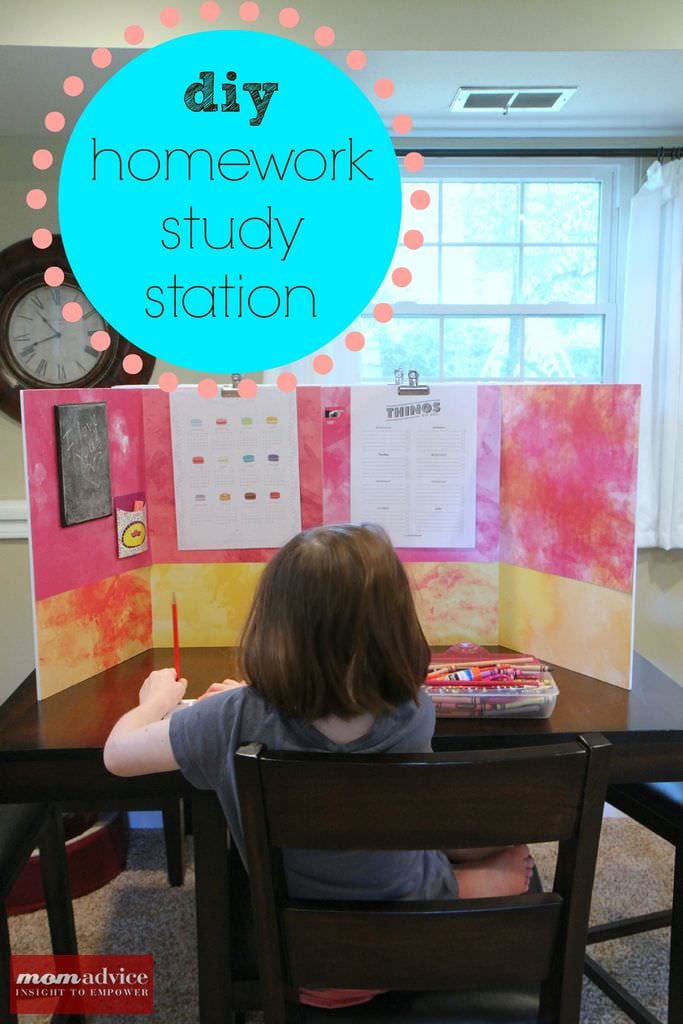
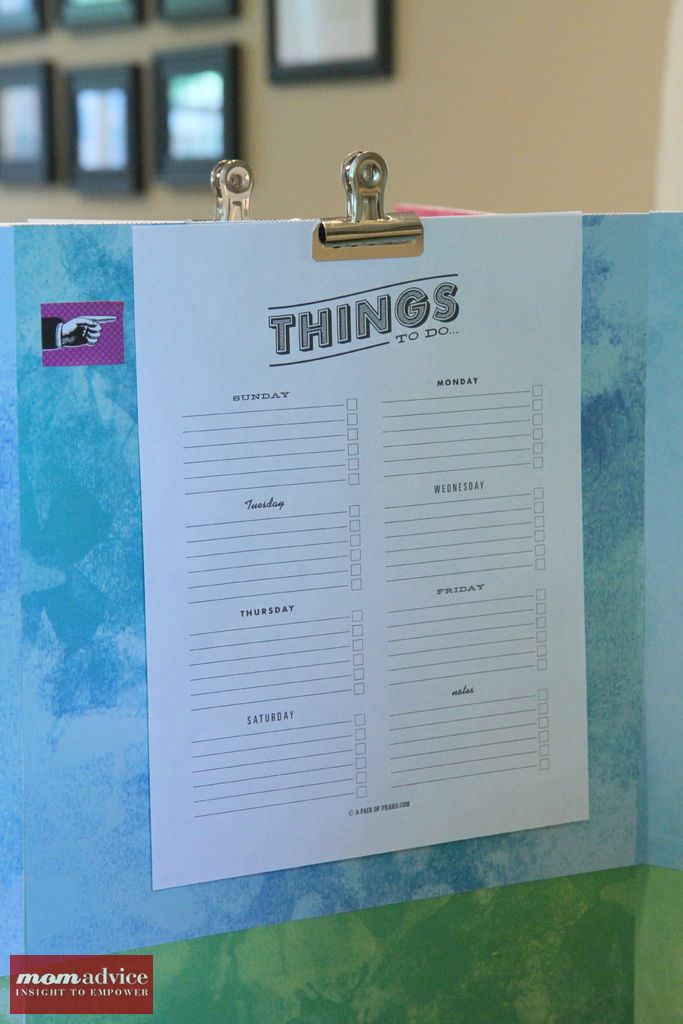
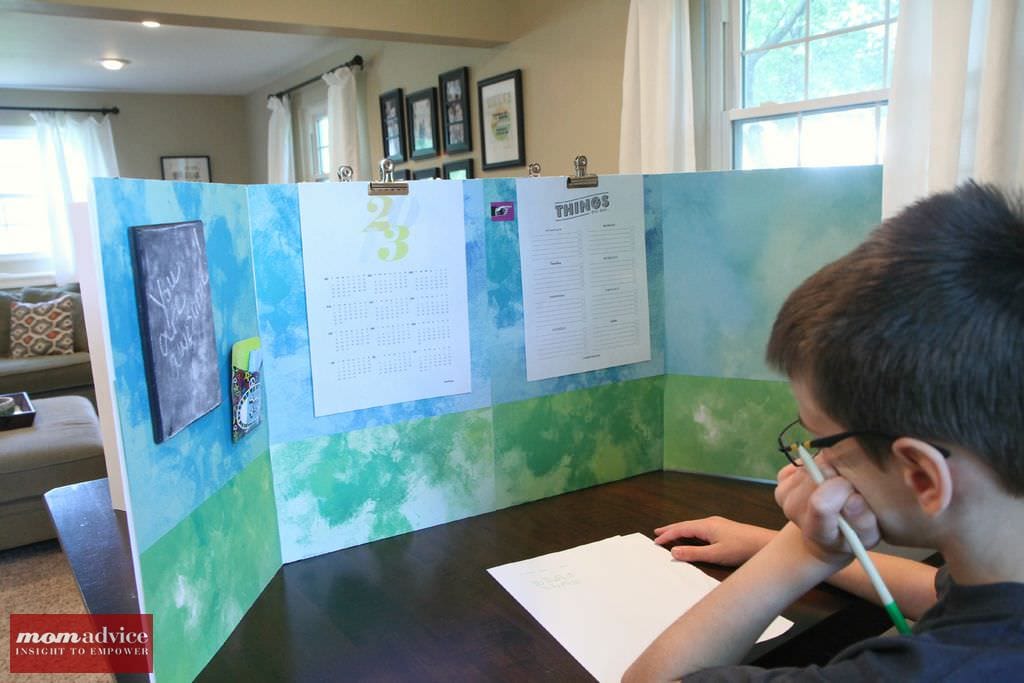
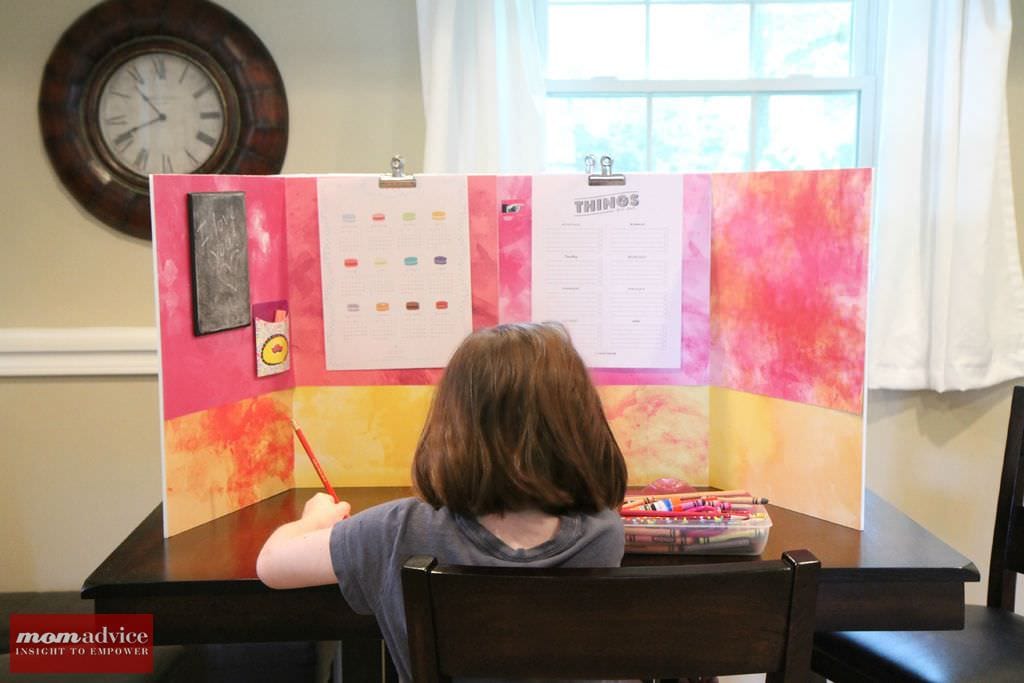
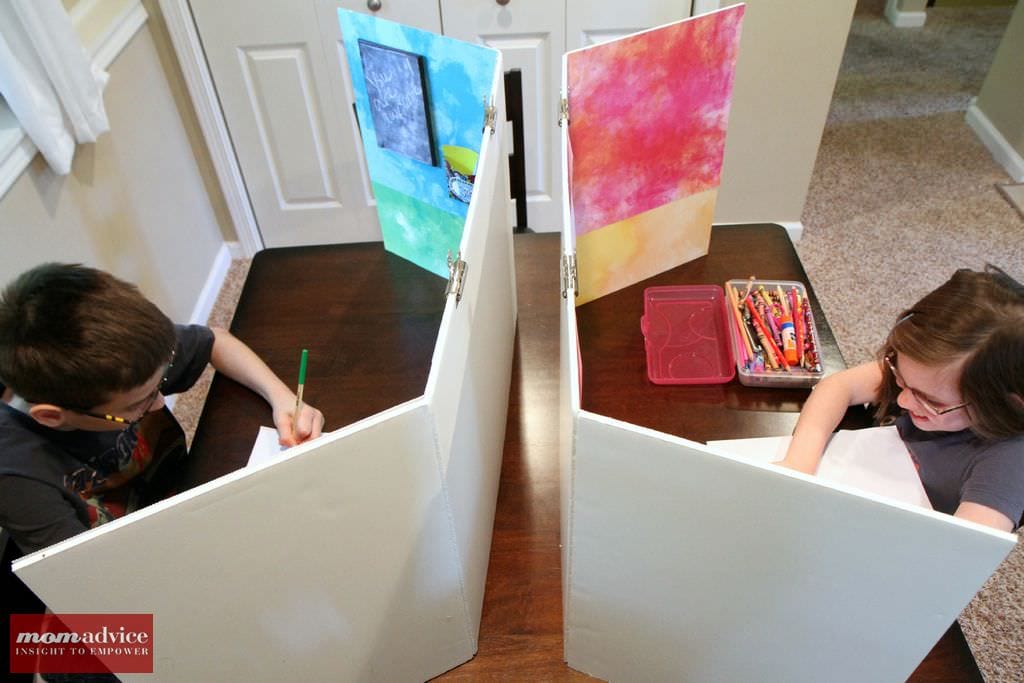
These homework stations are perfect for small space living. Two kids at one table, but each having a place to call their own, so they can focus on their own coursework.  The best part is that these can fold flat and be stored elsewhere when not in use! I can’t wait to show you just how easy it is to create these for your kids!
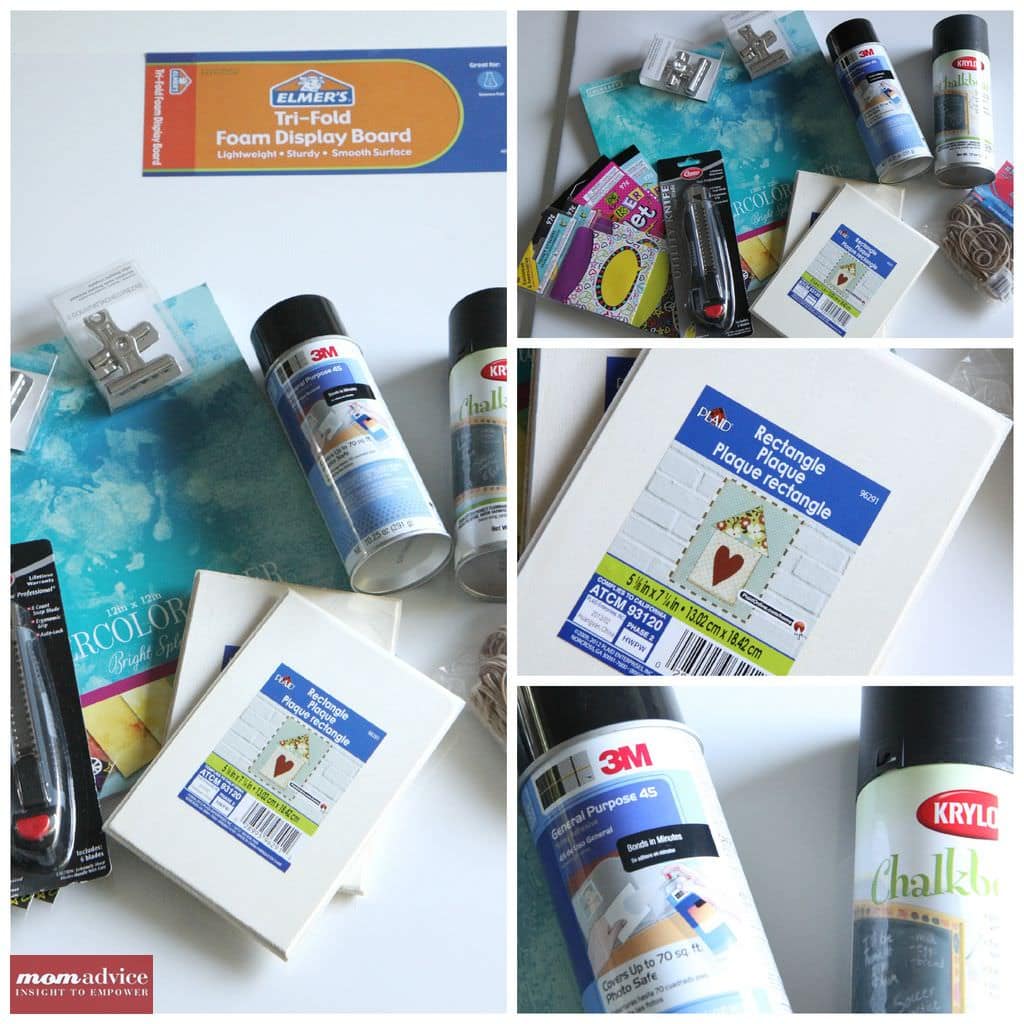
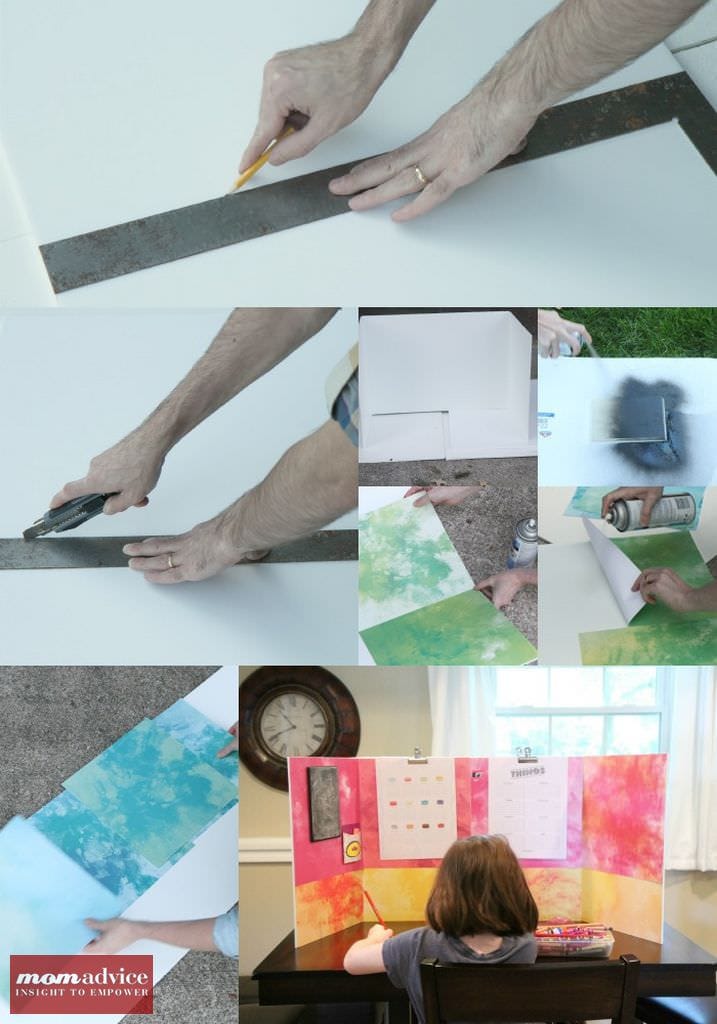
DIY Homework Study Station from MomAdvice.com.

Supplies List

1- tri-fold foam display board (this will make two homework stations for you)

Razor Blade

General  Purpose Spray Adhesive

Chalkboard Spray Paint (over in the paint aisle)

Rectangle Wooden Plaques (one or two depending on how many stations you are creating)

Decorative envelope(s) and stickers

Binder Clips (we did two for each one)

Scrapbook Paper in coordinating colors (8 sheets total per homework station. The type of paper we are using is their Watercolor Paper that they offer for $5 for the pack)

Hot glue & glue gun

DIY Homework Study Station from MomAdvice.com.Directions

1. Begin by measuring and marking the halfway point for your tri-fold display board. The display board is 48″ total, so you will want to cut it so that each side is 24″ long.

2. Cut the display board with a utility knife, making sure to cut carefully through all of the layers.

3. Spray paint your wooden plaques to create your chalkboards for your homework station.  Make sure to shake the can really well, as instructed on the back of the can. Hold your can 8 inches away from your surface and spray in a sweeping motion side to side with a slight overlap. It has always been my experience to go thin with the paint, allow it to dry, and then to add another layer for the best results and minimal drip. Allow the paint to dry for one hour.

DIY Homework Study Station from MomAdvice.com.

5. While the frames are drying, pick out eight sheets of scrapbook paper and set them up for where you would like to display them. Set them aside and, beginning with one side, line the bottom sheets up and, holding them in place with your hands, flip them up to add a little spray adhesive to the underside. Do this all along the bottom of your display board.

6.  Now do the same process again on the top, making sure that they line up with each other and with the top edge of the display board.

7. Once your chalkboards have dried, use your hot glue gun to mount it to your display. Attach an envelope next to it with chalk. Make sure to give your chalkboard 24 hours to cure before writing on it and prepare your chalkboards as I have show in this handy tutorial.

8. Add any stickers or decorations you might like to your homework station or let your kids decorate it themselves.

DIY_Homework_Study_Station_8 9. Clip your binder clips to the top of your display and then add any printables, thoughtful motivational quotes, calendars, etc… to the homework station.

Here are some free printables that I found that I really love:

Weekly To-Do List (A Pair of Pears)

Macaron Calendar (from Jolie Jolie Designs)

Modern Calendar (from LAUs NOTEbook)

If you are looking for more, be sure to check my Printable Goodness Pinterest Board for more ideas.

DIY Homework Study Station from MomAdvice.com.

DIY Homework Study Station from MomAdvice.com.

Good luck to everyone heading back to school! I hope this homework station inspires a fun new homework hangout for your kiddos!  I look forward to showcasing more fun back-to-school ideas to inspire your life this year!

walmart_mom_disclaimer

Pin It

DIY Outdoor Chalkboard Door

Wednesday, July 17th, 2013

DIY Outdoor Chalkboard Door
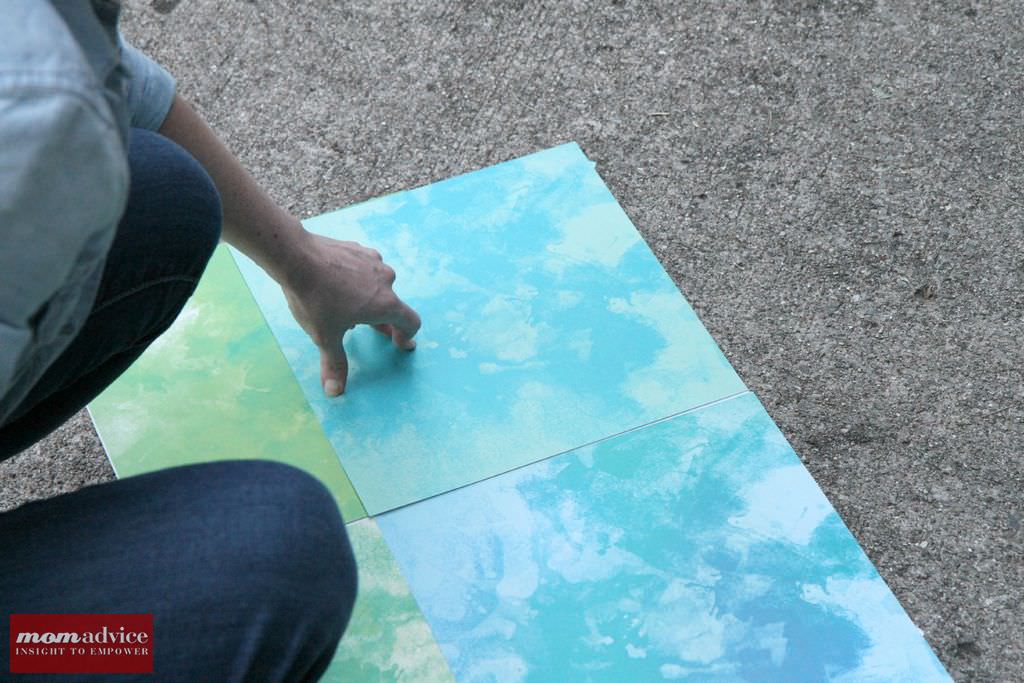
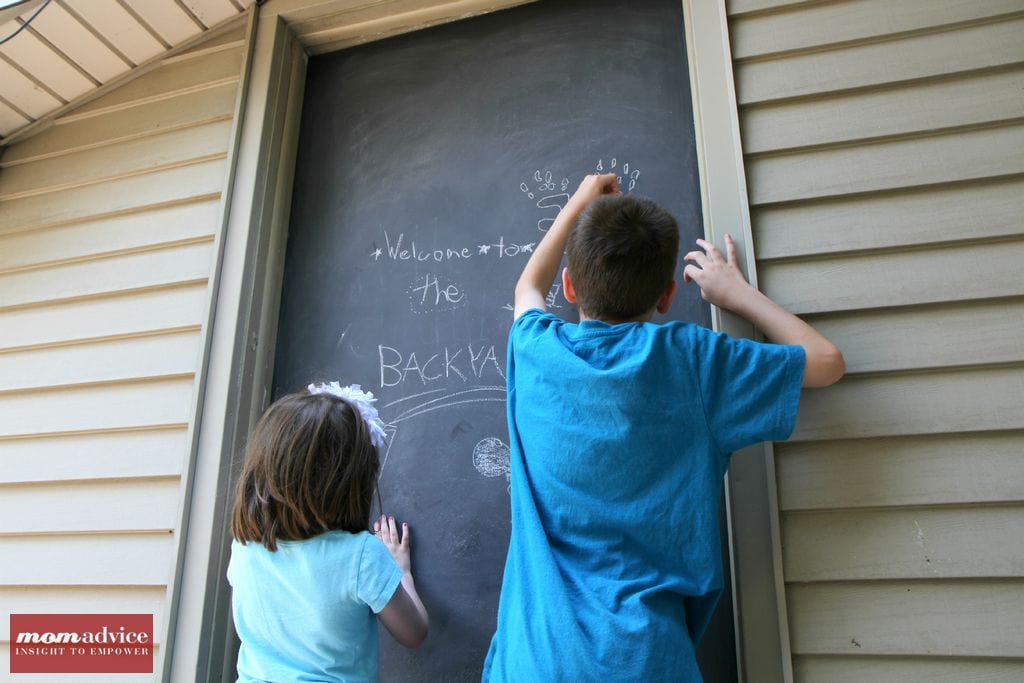
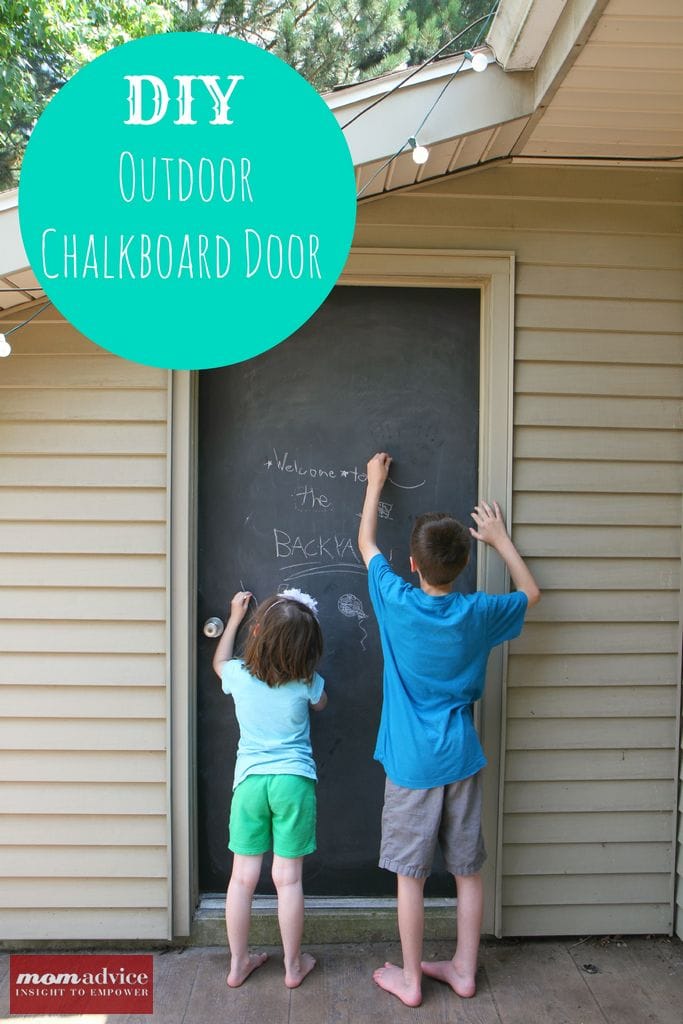
What could be better than a fun summertime outdoor project? Today I want to showcase an easy DIY Outdoor Chalkboard Door that I created to entertain my kids in the summer months. This DIY chalkboard project that we created is one of my new favorite things in our backyard.  This project featured is in conjunction with my job as a Walmart Mom and all of the supplies can be found at your local Walmart store.

DIY Outdoor Chalkboard Door

Here is a picture of what our tired old door looked like on our outdoor shed. The neutral paint showed all of the dirt, debris, and water drip marks all over it. It was becoming an eye sore in our backyard. Instead of painting it with regular paint, I decided to transform this spot into a new backyard activity area and give the kids a spot to do their drawing outside.

For adult entertaining, this can double as a place to jot down a menu, create a welcome sign for your guests, or keep tally of game scores in a wild game of badminton.

We are crazy like that.

DIY Outdoor Chalkboard Door
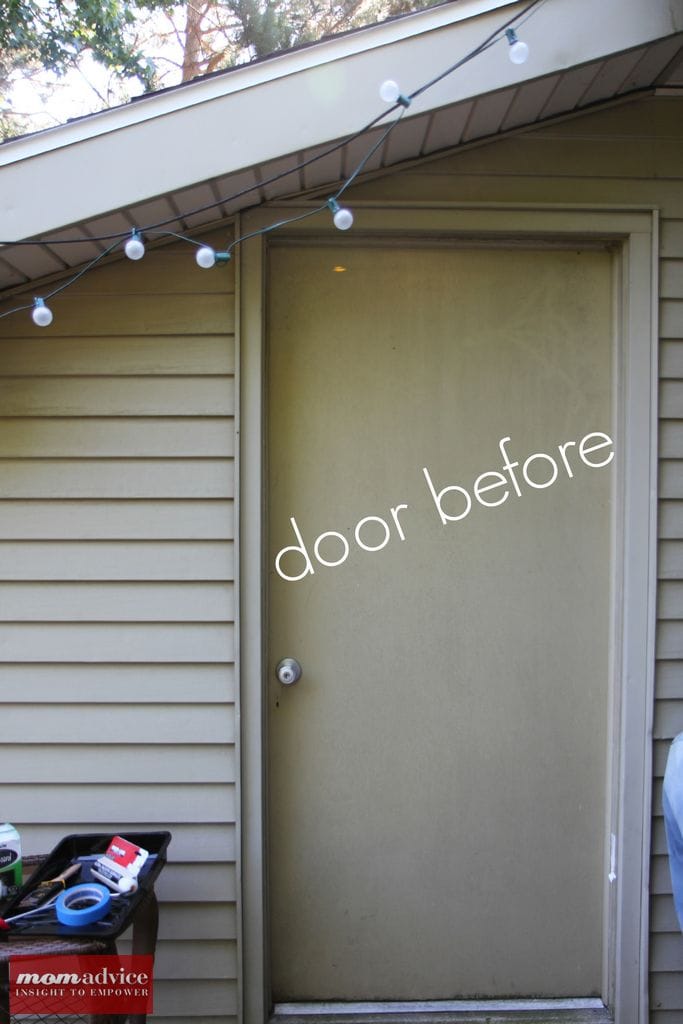
Supplies List (if you buy everything it will be less than $25 in supplies!)

1- 30 ounce container of Rust-Oleum Chalkboard Paint in Black Finish (over in the painting supplies)

Soapy Water & Rag (for wiping down your door)

Painters Tape

Paint Roller

Paint Brush

Paint Tray/Liners

Directions

1. Clean your surface and let it dry. I wiped my door down with a grout brush and a pail of sudsy water and then rinsed it with our hose.

2. Tape off around your door handle to protect it from getting paint on it.

3. Pour your paint into your paint tray and begin applying your first coat with your paint roller. The paint will be dry to the touch within thirty minutes, but give it a full four hours before applying your second coat.

4. Add a second coat of paint and repeat with the same timing above, if you desire, to add a third coat.

5. Allow the door to dry for three whole days before beginning  your conditioning or writing on it.

6. Before writing on it, after three days time, condition the surface by rubbing the side of a piece of chalk on the surface and then erase.  I like to rub my chalk in one direction and then rub it in the opposite direction for good coverage. This  will leave a coat of chalk dust that will provide erasability. Your chalkboard can be wiped clean with a damp towel, but wait seven days after painting before wiping it down. Repeat the conditioning step after cleaning.

DIY Outdoor Chalkboard Door

DIY Outdoor Chalkboard Door

Give your kids some chalk and the chance to create their own welcome sign for your guests outdoors!  I hope your family loves this project as much as we do! The best part is the hours of enjoyment they get and the lack of dirt showing on my outdoor door in the backyard.

A win-win for both kids and parents!

If you loved this project, I just know that you will love these ideas for Chalkboard Fun & Outdoor Entertaining!

S’More Toppings Bar Party

DIY Chalkboard Conversation Bubble Cookie Jars

Dollar Store DIY Chalkboard Food Label Frames

DIY Lunchbox Creation Station

walmart_mom_disclaimer

Pin It

Rainy Day Summertime Activities

Wednesday, July 10th, 2013

Since we’ve been having a run of rainy weather where we live, I thought it would be a great idea to pull together some fun rainy day summertime activities (and even one outdoor project that uses rain!) to help get you through those inevitable wet, summer days.

Rainy Day Activities: MomAdvice.com

You’ll find a few kid-friendly recipes, some projects to give to others, and fun classic indoor games and activities to inspire you to take advantage of summer’s rainy days.

The best part? This is only the tip of the iceberg of summertime activities – both indoor and outdoor! You’ll find oh, so much more on our 100 Days of Summer Pinterest Board – 2013 edition. And if that weren’t enough, there’s the 2012 and the 2011 editions of 100 Days of Summer boards, too. So, no excuses – take some time to have fun with your kids and make some memories!

Here are some MomAdvice classics:

kid_made_cookbook

Create a Kid’s Cookbook

whole wheat toaster tart

Make Whole Wheat Toaster Tarts

homeless_care_package

Create a Homeless Care Package and give it away.

Glow_In_The_Dark_Jello

Wow the kids with our famous diy Glow in the Dark Jello.

Spaghetti_Cupcakes

Cook up some cute Spaghetti Cupcakes.

And here are some more way cool activities to help beat the wet weather boredom (please be sure to pin from the original source I’ve provided- thanks!).

Rain-Painting

Paint in the Rain @Housing a Forest

coloured-butterflies

Paper Butterfly Garland @ My Poppet

balloon-powered-lego-car

Balloon Powered Lego Car @ The Crafty Mummy

draw-build-and-play-zoo

Build an Indoor Zoo @ No Time for Flash Cards

duct tape bag

Duct Tape Tote Bag @ Little Birdie Secrets

glowing rainbow rice sensory play 08

Glowing Rice Sensory Play @ Growing a Jeweled Rose

DIY bath paint

DIY Bath Paint @ Kristan Lynn

Recycled necklaces

Colorful Recycled Necklaces @ Captain Crafty

spoon puppets

Spoon Puppet Theater @ Creative Jewish Mom

washitape car track

Washi Tape Car Track @ Le jardin de Juliette

indoor hopscotch

Indoor Hopscotch @ Giver’s Log

indoor obstacle

Indoor Obstacle Course @ Crumb Bums

indoor car wash

Indoor Car Wash @ What Do We Do All Day?

Kid easy embroidery

Easy kid-friendly embroidery idea @ Anna Maria Horner

Remember to visit our 100 Days of Summer Pinterest Boards for tons more ideas for your summer fun!

Pin It

How to Make a Candy Bouquet Gift for Father’s Day

Tuesday, June 4th, 2013

How to Make a Candy Bouquet

I don’t mean to brag, but my kids are so blessed to have such an incredible Dad. He is the ultimate go-to guy from helping the kids with their homework, to kicking around the soccer ball, to indulging my daughter in her fancy tea parties, to the ultimate bedtime storyteller.

This Father’s Day we wanted to make a gift that we just knew he would love to show just how special he is to us. Our Dad happens to have a sweet tooth so we decided to make him a candy bouquet that he could place on his desk at work when those sweet tooth cravings strike!

The best part about this gift though is that it only takes fifteen minutes to create, costs about $20 in supplies, and can be created with your kids in honor of their favorite Dad.

To find out how to make this easy craft, head on over to the Kenmore Blog to get the supplies list and directions for making these sweet candy bouquet gift for Father’s Day.

Pin It

A Monster of a Father’s Day Gift: Monster Cookie Bars & Monster Printable Cards For Dad

Monday, June 3rd, 2013

Monster Cookie Bars & Printables from MomAdvice.com.
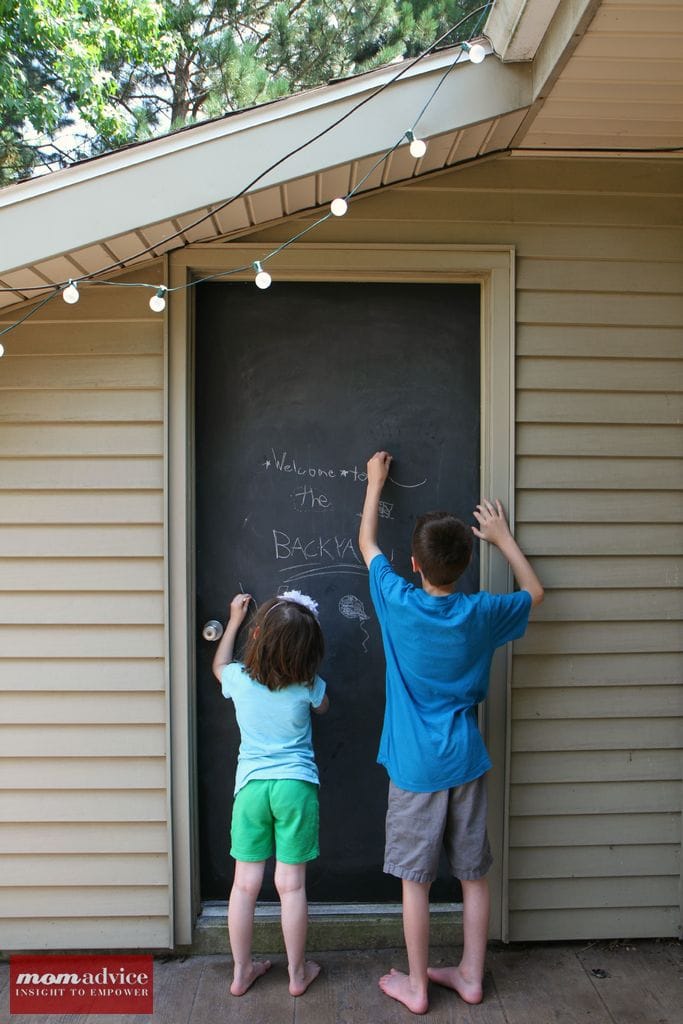
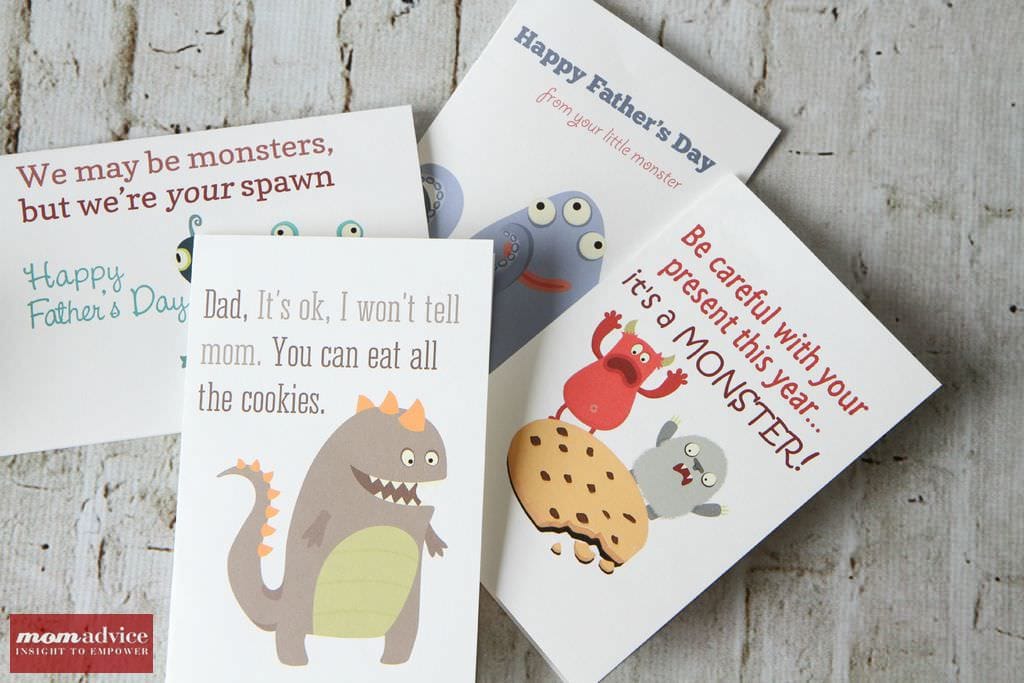
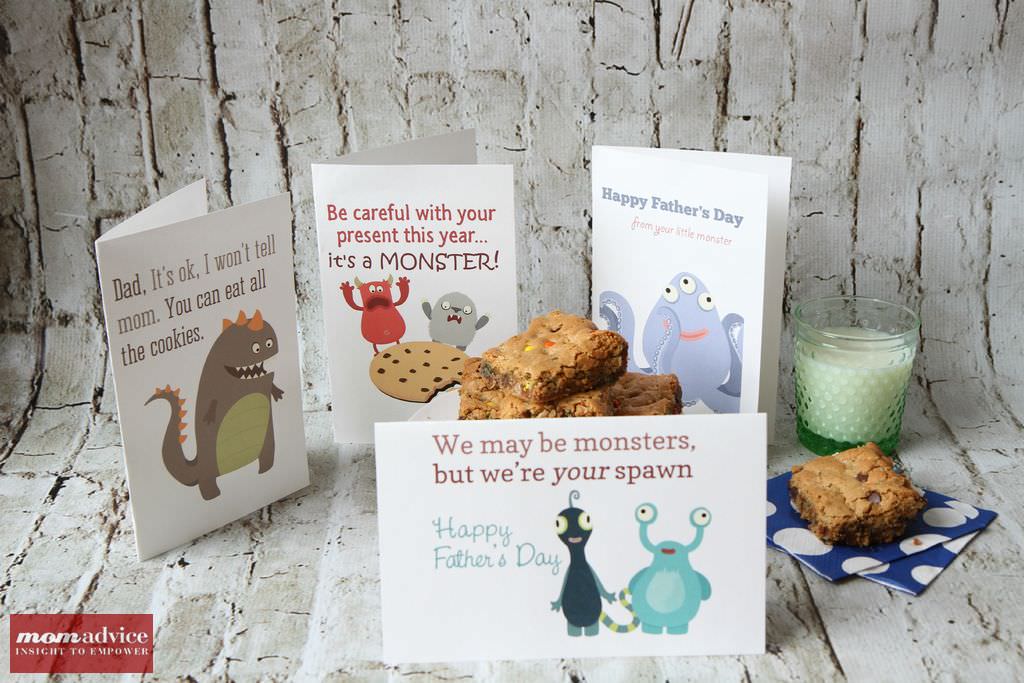
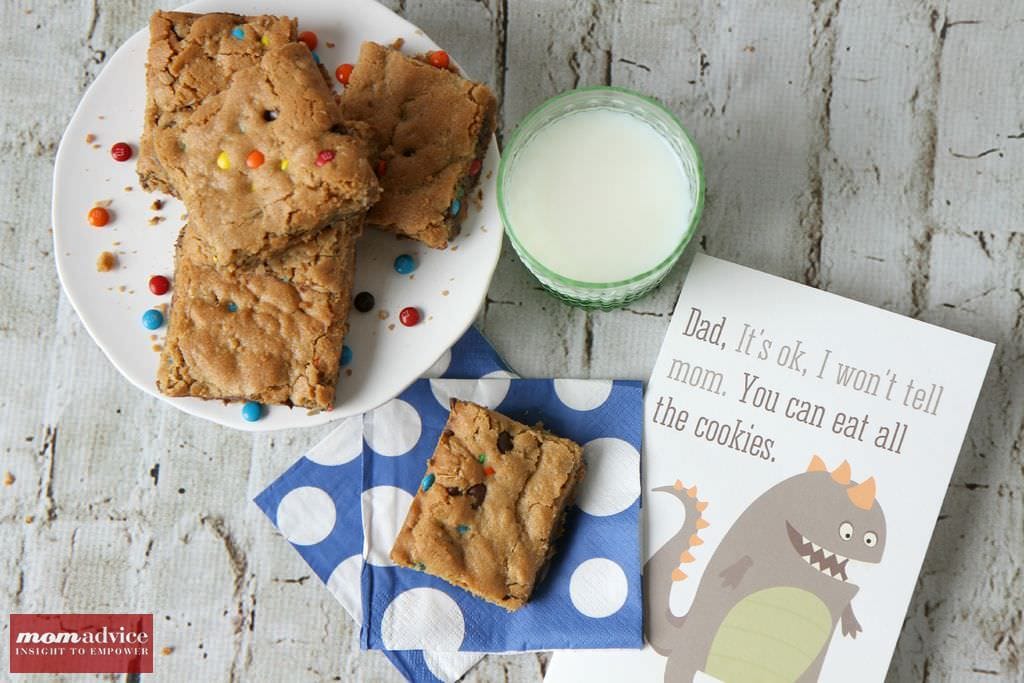
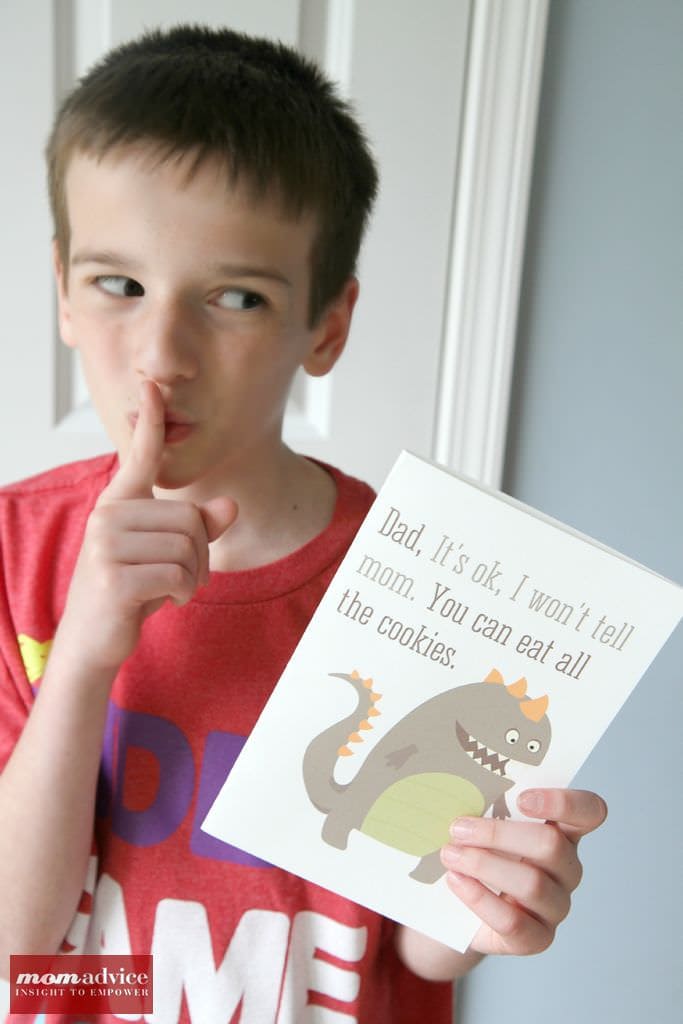
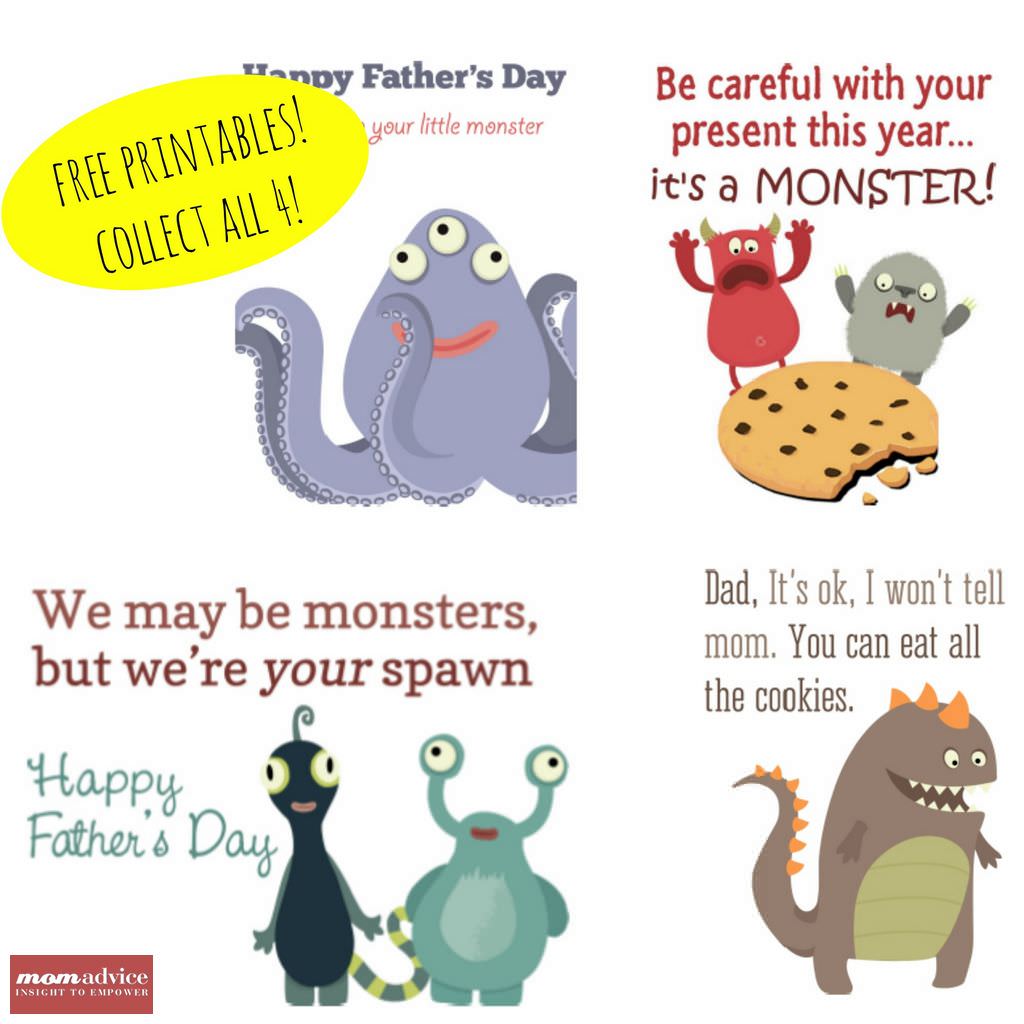
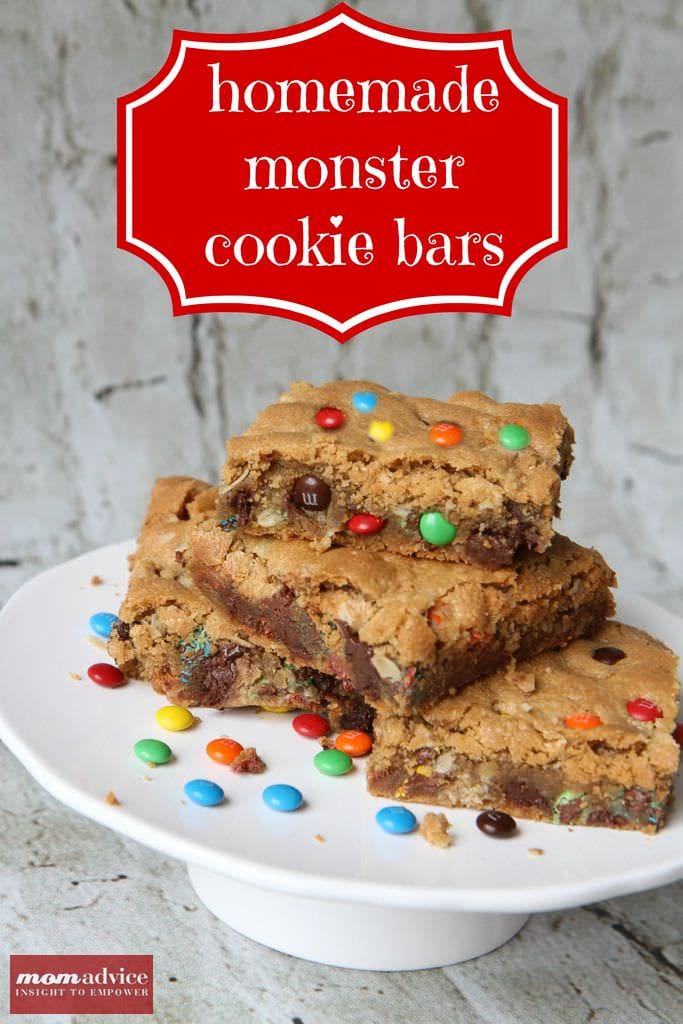
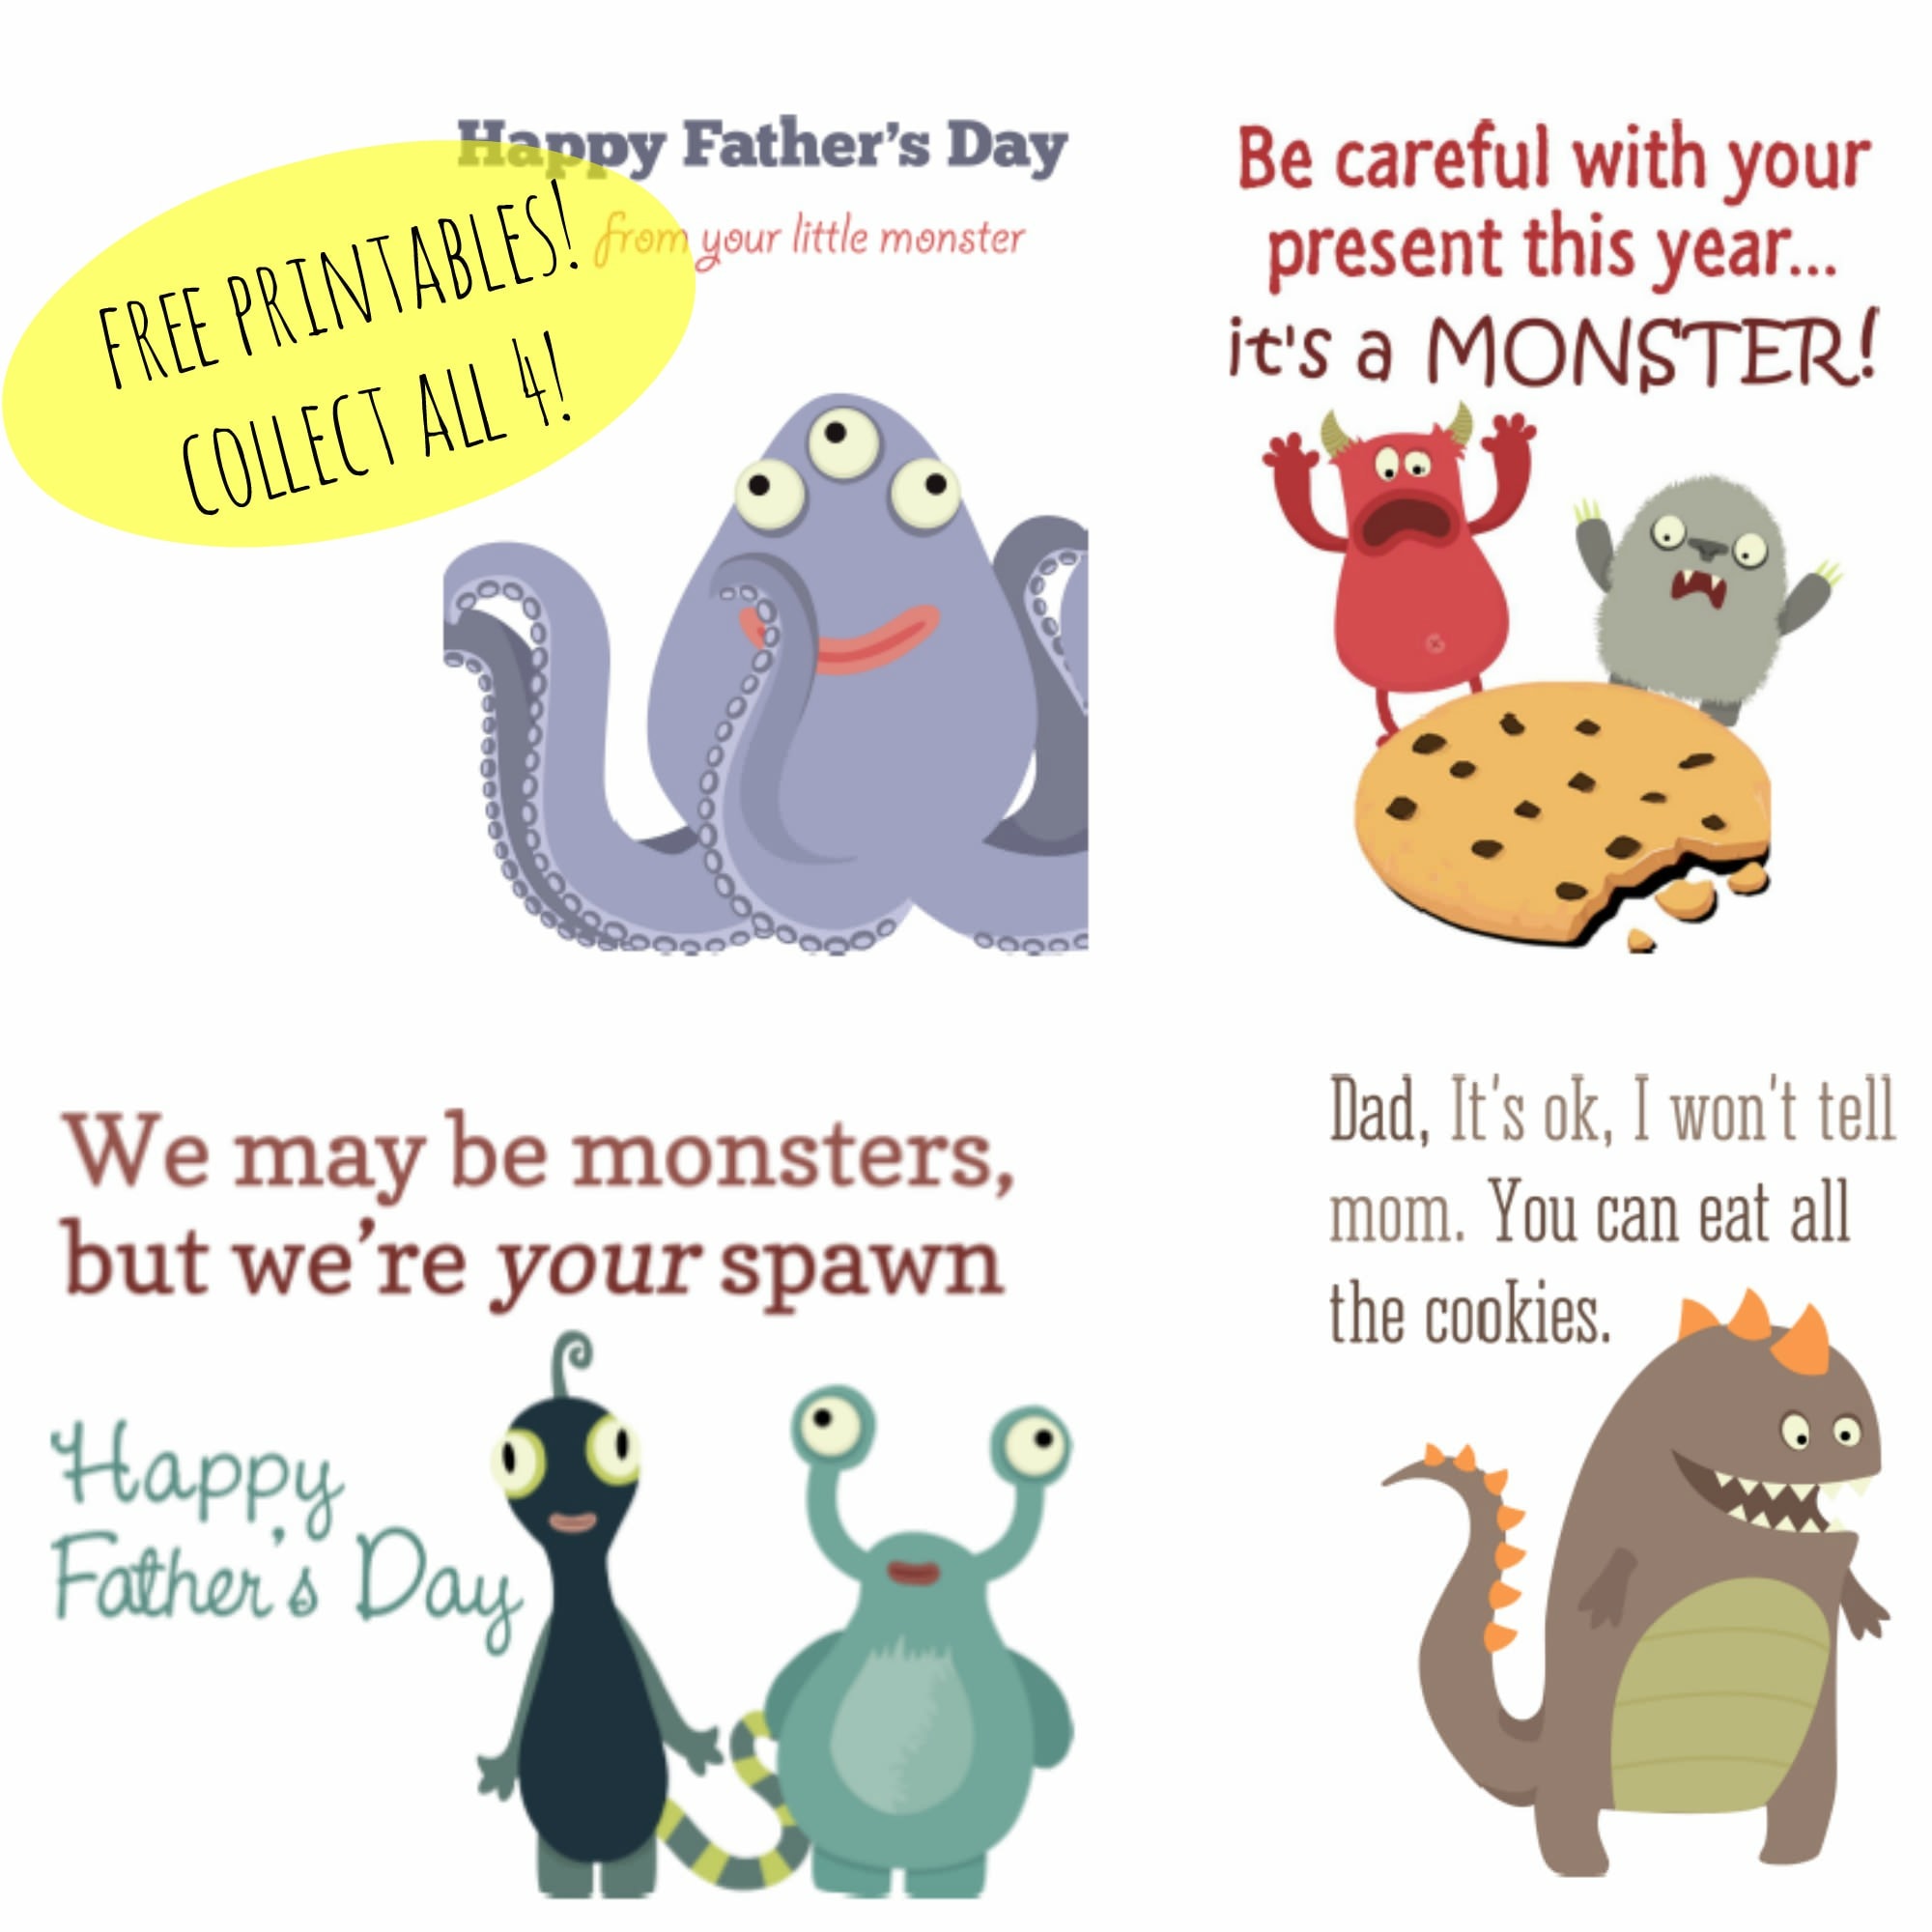
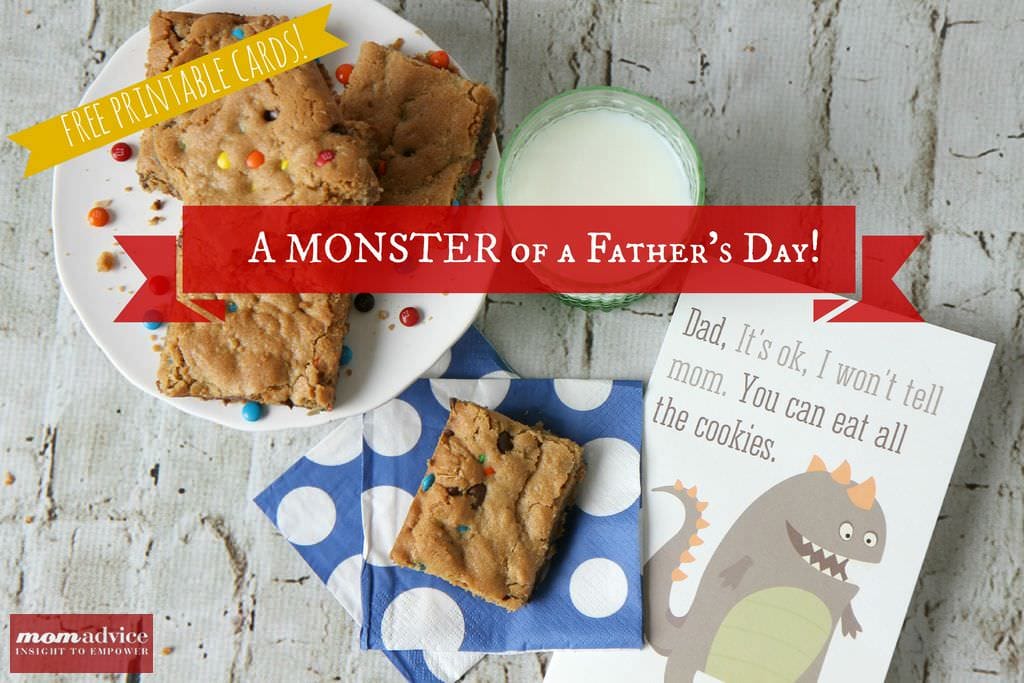
Father’s Day is just around the corner & today we wanted to share a monster of a Father’s Day gift with a cute spin on the monster theme with easy monster cookie bars and printable monster cards for a special Dad in your life.
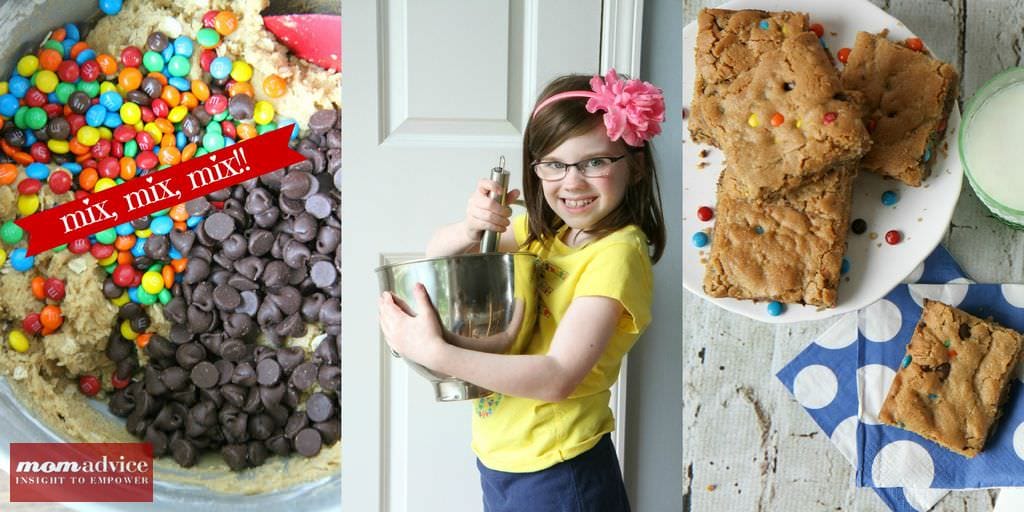
Monster Cookie Bars & Printables from MomAdvice.com.

This week’s challenge from Walmart was to create an inexpensive Father’s Day gift that would wow your Dad. Well, if your dad is anything like our Dad, he is certainly wowed with homemade treats and funny cards with a great sense of humor. Our idea was to mix up a batch of thick and delicious Monster Cookie Bars made with rolled oats, peanut butter, mini M&M’s (found over in their candy aisle), and chocolate chips.

Monster Cookies can be a bit of a monster to create as a drop cookie because of their monster size. I choose to echo the words of an amazing woman I once heard speak these wise words…

“Ain’t nobody got time for that.”

Wise, right?

Bar cookies get a big fist pump from this busy mom and if a celebration requires a cookie, I often rely on these chocolate chip cookie bars to get us through whatever baking requirements are made for those occasions. These Monster Cookie Bars are equally delicious and offer that crusty exterior with that soft interior that makes, in my humble opinion, the perfect cookie.

Monster Cookie Bars & Printables from MomAdvice.com.

Monster Cookie Bars & Printables from MomAdvice.com.Monster Cookie Bars & Printables from MomAdvice.com.

What Father’s Day would be complete without a card to accompany your sweet gift? We are so excited to debut these adorable Monster cards that you can print out to attach with your Monster Cookie Bars for your favorite Dad. We have included three fun printable cards for Father’s Day and then 1 that could be used for any occasion to accompany your sweet treat. Print these printables out on white card stock  and you will be all set for this Father’s Day!

Monster Cookie Bars & Printables from MomAdvice.com.Monster Cookie Bars & Printables from MomAdvice.com.


Printable Monster Cards from MomAdvice.com.

Download Your FREE Monster Card Printables HERE:

Happy Father’s Day From Your Monster FREE printable card

Your Gift is a Monster! FREE printable card

Eat All the Cookies FREE printable card

We Are Your Spawn FREE printable card

Monster Cookie Bars & Printables from MomAdvice.com.

I can admit that this family has had Monsters on our brain after getting a sneak peek at the Monsters University movie that is set to hit theaters on June 21st. While our family was at the Disney Social Media Moms conference, we got an exclusive sneak peek at the film. It is FANTASTIC, and dare I say it, even funnier than the first one. I have no doubt that your family will love it!

Our Monster Cookie Bars would really pull together a fun family night out to see this fantastic film and you can find loads of fun Monsters supplies in the party favors aisle of your Walmart store including fun cups, plates, and other party favors for an inexpensive night to enjoy while tackling your summer bucket list or our 100 Days of Summer Pinterest Board.

Now that you have the printables, here is the deliciously easy and tasty recipe for these Monster Cookie Bars. We recommend preparing these in a metal 9×13 pan for best results!

Monster Cookie Bars & Printables from MomAdvice.com.

Monster Cookie Bars
Recipe Type: Dessert
Author: Adapted from The BakerMama
Prep time:
Cook time:
Total time:
Serves: 15
Monster cookies made easy in a bar cookie. Be sure to pair these easy cookies with our free Monster printables.
Ingredients
  • 1-1/2 cups all-purpose flour
  • 1 teaspoon baking soda
  • 1 teaspoon salt
  • 1/2 cup (1 stick) unsalted butter, softened
  • 1-1/2 cups creamy peanut buter
  • 1 cup brown sugar
  • 1 cup granulated sugar
  • 2 teaspoons vanilla extract
  • 2 eggs
  • 1 cup rolled oats
  • 1 cup semi-sweet chocolate chips
  • 1 cup mini M&M’s (approximately half a bag)
Instructions
  1. Preheat oven to 350°F. Grease a 9×13 pan with nonstick spray.
  2. In a medium bowl, whisk together the flour, baking soda, and salt. Set aside.
  3. In a separate bowl, beat together the butter and peanut butter until smooth. Add the sugars and beat until blended. Add the vanilla and eggs and mix until light and fluffy.
  4. Gradually add the flour mixture until just combined.
  5. Mix in oats until well combined.
  6. Stir in chocolate chips and mini M&M’s
  7. Press dough evenly into prepared baking dish. Bake for 30-35 minutes or until lightly golden brown and set in the middle. Let cool completely in baking dish then cut into bars. Store in an airtight container.

 Happy Father’s Day to all of our Dad readers (I know you’re out there!) and here’s hoping you get spoiled by a few of your favorite monsters!

Be sure to check back this week for more great Father’s Day gifts on a budget!


walmart_mom_disclaimer

Pin It