Archive for the ‘Kids Crafts’ Category

100 Days of Summer Pinterest Board- 2013 Edition!

Wednesday, May 22nd, 2013

100 Days of Summer 2013

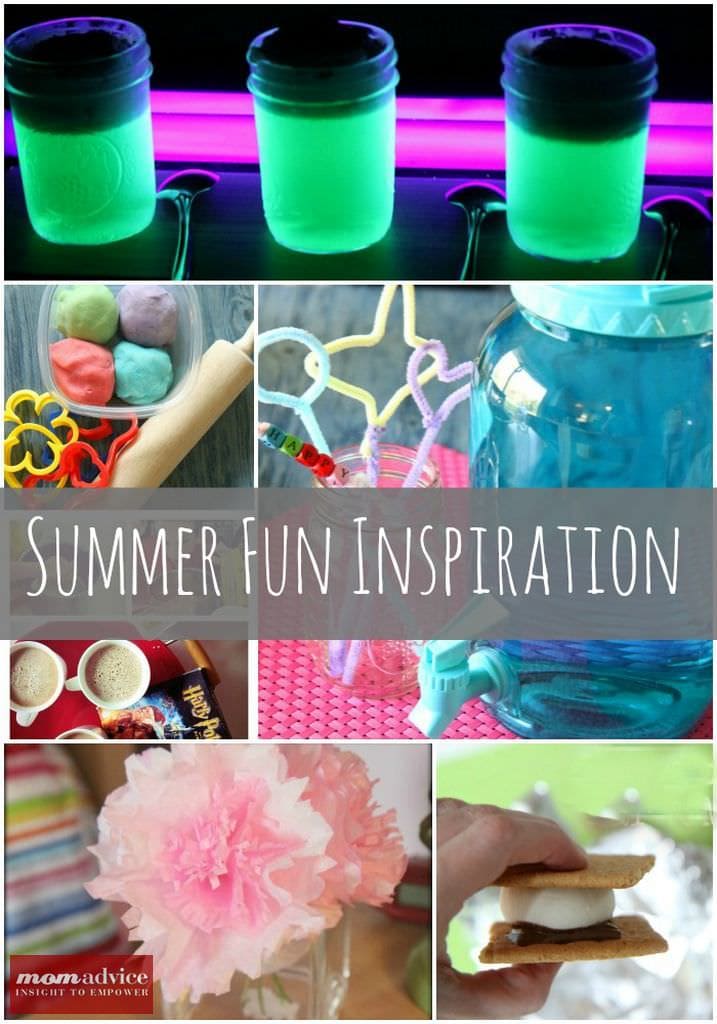
Summer is just around the corner and I am so excited to share with you that I have gathered another 100 Days of Summer activities for you to do with your kids in the summer months. These are 100 activities that are all low to no cost, screen-free, and a fun way to build truly memorable moments with your kids in the summer months.

I had the best time creating our very first 100 days of summer activities board for our family to do and share with you and then last year’s 100 Days of Summer was another huge hit. It was so huge that I just knew I had to repeat it all again this year for you.

100 Days of Summer 2013

I am looking forward to tackling our own summer list and will be documenting our projects through mobile pictures.You can catch me on Instagram, where I am documenting our summer. Just search for the username momadvice and you will find me there. Just as a side note, I try to always answer all the comments on my pictures if I can. If you have questions about projects we are doing or just want to say hello, I will do my best to respond!

If you are on Instagram, you can join in on the fun by taking pictures and sharing all of your summer adventures through there. Let’s use the hashtag #100summerdays again like we did last year.

By tagging your photos, it will make it easy to find each other in the group and share the projects we are tackling together. You can add the tags to your caption or you can add them as a comment later. In either scenario, the tag will pull it into our summer group.

I still will be sharing our apron full of giveaways and our notebook of inspiration each week. I will also have fresh content through my freelance writing jobs this summer with Kenmore, Goodwill, Jack’s Pizza, & Walmart that will keep our site fully loaded with great ideas for your summer.

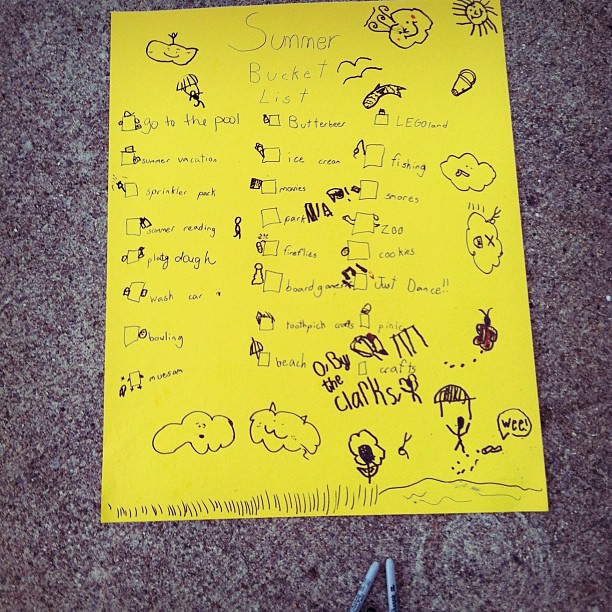
For the rest of my entries, I will be sharing what we are working on from our summer list through mobile pictures and quick notes on what fun activities we are doing at our house. I am hoping it will be an inspiration to you to get out and enjoy the summer with your children. I can’t say we will tackle a hundred activities, but I will be awfully proud if we do one cool activity a week.

100 Days of Summer 2013

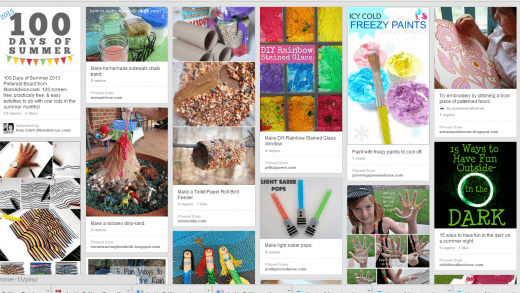
This year’s list is AMAZING and my favorite so far from making chevron friendship bracelets, to building race tracks, to painting techniques on rain days, to creating popsicle light sabers. There really is something for EVERY age group this year.

Be sure to follow me on Pinterest for inspiration for your meal planning, home, reading, wardrobe and more! I am one happy little pinner!

Happy summer to each of you!

xo,
Amy


Pin It

Homemade Sidewalk Chalk Paint Recipe

Monday, May 20th, 2013

Homemade Sidewalk Chalk Paint Recipe

Summer is just around the corner and before it gets here I wanted to share my favorite homemade sidewalk chalk paint recipe. Making DIY sidewalk chalk paint couldn’t be easier and many of the supplies are likely lurking right in your cupboard.

Today’s project is sponsored by Walmart and you can find all of the supplies you need to create this easy recipe, right at your local store, from the brushes to the food coloring to the paint storage containers.

Homemade Sidewalk Chalk Paint Recipe
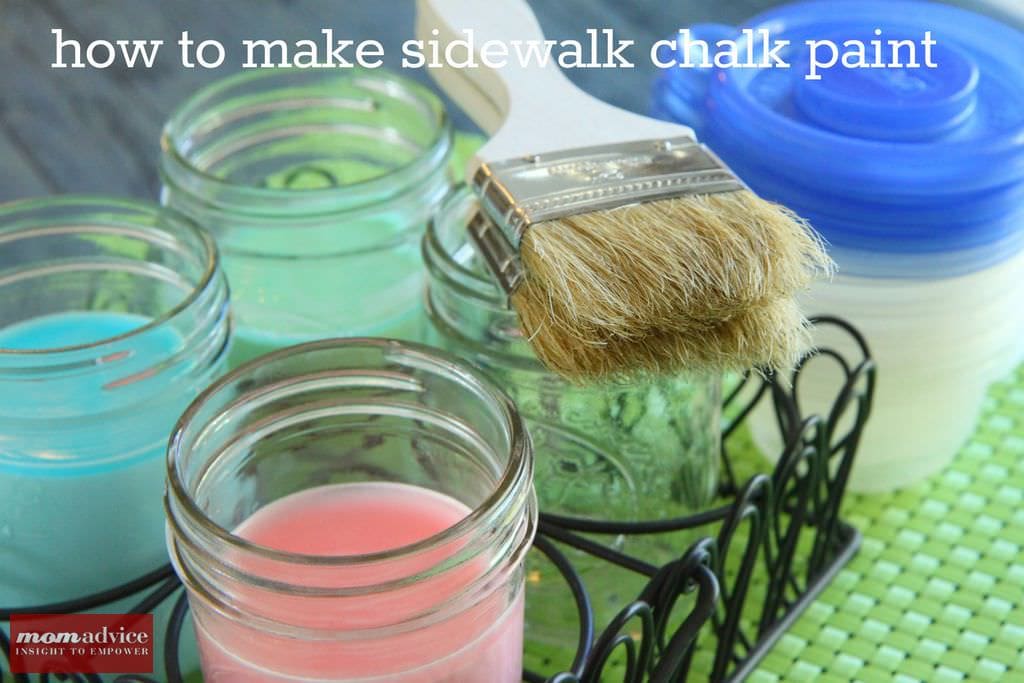
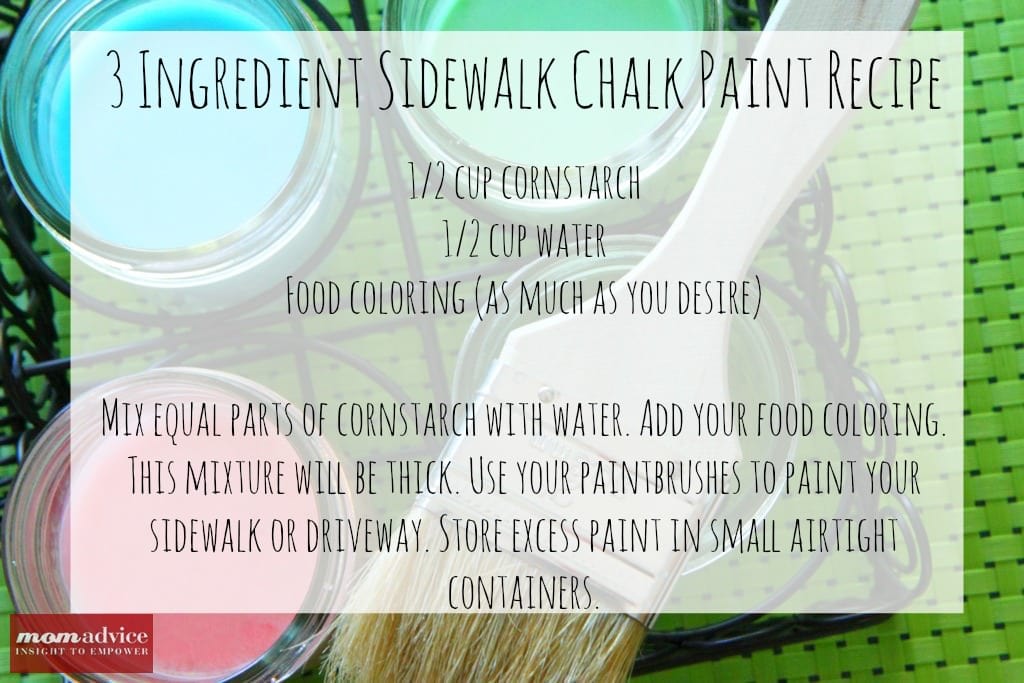
Did you know that you can make sidewalk chalk paint from three simple ingredients? Homemade sidewalk chalk paint is made from a mixture of cornstarch, water, and food coloring. When visiting the baking aisle to get your food coloring, be sure to pick up the brightest and most vivid colors you can find to really make the colors pop on your sidewalk.
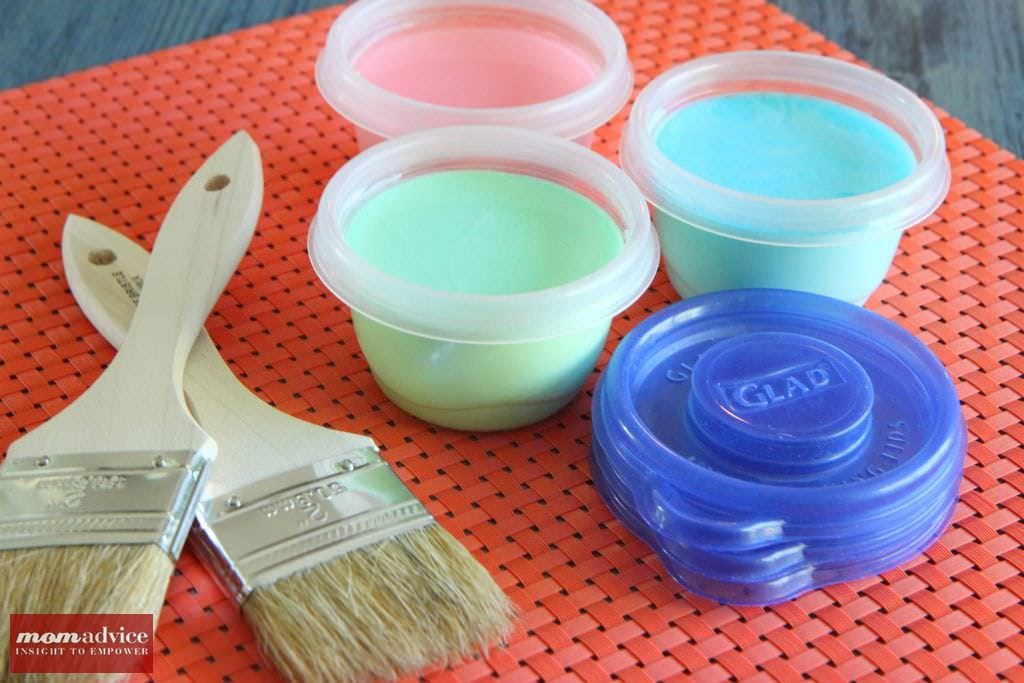
Homemade_Sidewalk_Chalk_Paint_Recipe_4 Proper storage of your paints will help them go farther. I love to grab lidded disposable containers to store the extra paint in and with a quick rinse of your brushes, your supplies are ready for the next day of painting.

Summer Bucket List

Of course, this isn’t the only recipe we have to keep your kids entertained in the summer! I am so excited to share with you that I will be doing another 100 Days of Summer AGAIN (third year running!) on Pinterest and will be sharing 100 SCREEN-FREE, FREE or PRACTICALLY FREE activities to keep your kids entertained this summer. Be sure to start following on Pinterest so you don’t miss the big reveal and so you can begin adding a few of these ideas to your summer bucket list! 

I think this year’s list will be the best one yet, but in the meantime, here are a few of our favorite activities we did this past year to get you inspired!

Summer Fun Inspiration

Glow-In-The-Dark JELL-O

The World’s Greatest Homemade Bubbles

Homemade Butterbeer Lattes

Easy Coffee Filter Posies

Easy Homemade Playdough

How to Make Car S’mores

Homemade Sidewalk Chalk Paint Recipe
Recipe Type: Kid Recipes
Author: Amy Clark
Prep time:
Total time:
Serves: 2
Skip buying sidewalk chalk paint and make your own with this easy DIY recipe!
Ingredients
  • ½ cup cornstarch
  • ½ cup water
  • Food coloring (as much as you desire)
Instructions
  1. Mix equal parts of cornstarch with water. Add your food coloring. This mixture will be thick. Use your paintbrushes to paint your sidewalk or driveway. Store excess paint in airtight containers.
I can’t wait to share more fun summer ideas with you and in the meantime, I hope you can give this easy sidewalk chalk paint recipe a spin in your kitchen!
walmart_mom_disclaimer


Pin It

How to Make Painted Drip Jar Vases

Wednesday, April 10th, 2013

Earth Day is upon us and I love to have reminders of the beauty of nature around me when this day comes around. Pairing my love for nature with my love of upcycling commonly found items in our home, and it is the perfect marriage of the things I love for such a special day.

Today I wanted to share with you an easy craft that you can do with your kids to commemorate Earth Day. These painted drip jar vases are a fun way to experiment with paint and pattern to create a vase that is uniquely your child.

Come join me over on the Kenmore Blog to learn how to make these easy painted from recycled jars and pretty trimmings from your garden to commemorate the holiday!

Pin It

Easy Knitted Ruffled Scarf With Sashay Yarn

Monday, April 1st, 2013

I love to find fast & easy knitted projects and today I have the perfect beginner knitting project for you using a new yarn from Red Heart called Sashay Yarn. Red Heart Boutique Sashay Yarn is a unique yarn that creates a beautiful ruffled scarf with a simple six stitch cast-on. Red Heart sent me this yarn and some knitting supplies to show off just how easy it is to create a project with this inexpensive and fun yarn.

The first thing you will notice is that this yarn is very different than a traditional yarn. I will admit that I usually avoid novelty yarns except for trimming knitted projects so it is the type of yarn that I have probably walked by countless times at our local Walmart. Instead of a traditional single strand, this yarn is actually a woven yarn that features a touch of metallic for an extra edge to your ruffled projects. The yarn is made of 97 percent acrylic and 3 percent metallic polyester. One skein yields 30 yards of yarn, which can create a five foot ruffled scarf with just one ball.

Longtime readers may have remembered these amazing ruffled scarves I knitted for gifts one Christmas. As the last picture shows you, it was an insane amount of stitches that required an infinite amount of patience to cast on and to cast off. The last two rows on this scarf had over a thousand stitches each. The beauty of that ruffle made it all worthwhile, but for a beginning knitter, this process is both daunting and time-consuming. For an experienced knitter, it just takes a long time to  yield impressive results.

Knitting with Sashay Yarn creates a fast ruffle in no time and with only six stitches cast on!  As you can see from this picture, the yarn is already woven so it creates the ruffle without you needing to knit it and when knitting this scarf, you just gather this woven yarn into ruffles with simple garter stitches.

Rather than casting on with your traditional cast-on, you will simply pick up stitches off of the edge of the yarn. When knitting, you knit as you would normally, just picking up along the edge, but you skip the first loop of yarn and then slip into the second loop for the stitches. Casting off is done in the same way, with the skipping of one loop between each stitch, and then with the final loop of thread on your needle, you just weave the tail end through to finish your project. I then trimmed the edges of my scarf to make them even.

Some of my own personal recommendations when knitting this pattern (linked below)  are to choose needles that are shorter in length and to use bamboo ones (these are the ones that I use)  that will help to grip the threads better and keep your stitches in place.

The scarf is simply stunning and costs a mere $4.67 (at Walmart) to create and took about two nights of knitting to create. With simply six stitches and no pattern to follow, this is the perfect project to do while watching your favorite shows on television or to take with you while the kids are doing their extracurricular activities.

I imagine that this will make a perfect Mother’s Day gift this year and I can’t wait to show you what else I am up to with the next ball of yarn I have! What can I say? I am addicted to fast and easy projects these days!

Grab the Free Knitted Ruffled Scarf Pattern HERE.


Grab the Free Crocheted Ruffled Scarf Pattern HERE.


Let’s be friends on Ravelry (you can find my project there!) and check out my other Knitting Projects.

 
Watch my favorite You Tube tutorial I found on how to knit with this yarn below. It really helped me to get the hang of it and I think it can help you too!
 

Pin It

11 Fun New Ways to Decorate Eggs

Friday, March 22nd, 2013


Easter is just around the corner and we have you covered with 11 fun new ways to decorate your eggs this year.

Before you tackle these egg dying projects, be sure to check out the store for fun ways to display your beautifully dyed eggs.

Your favorite thrift or discount store offers a plethora of choices for beautiful glasses, jars, cake stands, baskets, and bowls in the Housewares department to showcase your handmade beauties!

Here are 11 new ways I have discovered to decorate your eggs this year!

I have a feeling you are going to LOVE these new spins on egg dying and decorating.


Trying to create a statement?

These Subway Art Eggs with Lil’ Luna are just the subway ticket!


Why should Christmas be the only advent holiday?

Tackle a countdown to Easter with a dozen eggs from A Subtle Revelry.


Do you have packets of Kool-Aid in your pantry?

Put them to work with Kool-Aid dyed eggs from MomAdvice!


Budding artists in your family?
Give them a Sharpie and let them create beautifully decorated doodled Sharpie eggs from Alisa Burke.
Watercolor prints are a hot trend right now.
Replicate that beauty by letting your kids create watercolor eggs with Nest of Posies.
Do you gravitate towards a more minimalist decor?
These minimalist Easter eggs are a sweet & simple nod to the season from Kaley Ann at Live Well Travel Often.
Do you prefer your eggs bright like a rainbow?
These rainbow dyed eggs are vivid in hue and statement from no. 2 pencil.


Love using more natural elements in your decor?
These naturally dyed Easter eggs are dyed with a variety of items you probably already have in your pantry & fridge from Two Men & a Little Farm.


Can’t choose between colors?

Try this simple marbleizing technique created from pantry items from MomAdvice.


One thing that will never go out of style is the sweetly speckled egg and you can find a tutorial for this technique over on Crafts By Amanda.


Should you be feeling a little more trendy, you can create beautiful ombre eggs in your favorite hues from Sugar and Charm.


I hope these ideas inspire you and be sure to visit your local thrift store for cute supplies to show off these beautiful eggs.
Not only will you have a fun new nod to the season, but you will be able to do it all on a budget that fits absolutely beautifully in your life. (image source: momadvice)

What is your favorite way to dye or decorate eggs?

Feel free to chime in below!


Don’t Miss these other great ideas from MomAdvice.com:


Peep Martinis


Easy DIY Fabric Flower Wreath


Peep Wreath


spring-easter projects

21 Fun Easter & Spring Projects


Sign up for the MomAdvice newsletter


Pin It

How to Make Embroidery Thread Eggs

Thursday, March 14th, 2013

Easter is another fun season for family, food, and crafts that you can do together as a family. Embroidery thread eggs are an easy craft that yield impressive results that can be used as an Easter table centerpiece or can be strung with yarn to adorn a mantle or decorate a window. I want to show you how to create your own Embroidery Thread Easter Eggs for a fun decoration in your home.

To grab this EASY Easter Embroidery Thread Egg Tutorial, head on over to the Kenmore Genius Blog to learn how I made these with cute eggs with my kids!

I hope you love this tutorial half as much as I love our new decorations in our house!

Pin It

22 Spring Break Boredom Busters

Wednesday, March 13th, 2013

It’s that time of the year again – over the next month it will be Spring Break somewhere in the US and MomAdvice has you covered with Spring Break Boredom Busters for your kids. No need to worry about how to fill those days when you have fun and free Spring Break activities to do at home.

If you’re anything like me, you’re looking for some quick, clever, and kid-tested ways to fill some of those school-less hours. How about a list of twenty-two awesome Spring Break Boredom Buster Ideas I found – everything from classics like homemade playdough, fun foods, and games to a “how’d you make that?” activity such as glow-in-the-dark jello?

Here are six Mom Advice classics:

homemade_playdough_recipe

Homemade Playdough
homemade_bubbles

World’s Greatest Homemade Bubbles
car_smores

How to Make Car S’Mores
Glow_In_The_Dark_Jello_1

Make Glow-In-The-Dark Jello
butterbeer-lattes

Homemade Butterbeer Lattes
shower_curtain_canvas

Shower Curtain Art Canvas
Coffee_Filter_Flowers

Easy Coffee Filter Flowers
And sixteen more fun boredom busters:

Fizzing Sidewalk Paint @ Kid’s Activities Blog

Food Coloring Art @ B-Inspired Mama

Make the always popular Gak-Slime @ Skip To My Lou

DIY Indoor Obstacle Course @ Crumb Bums
ladybug-game

Ladybug Spots Game @ Piikea Street
Lego Capes

Duct Tape Lego Capes @ Busy Kids Happy Mom
Painted-Garden-Marker-Rocks

DIY Painted Rock Garden Markers @ Mom Endeavors
pretzel letters

Easy, Soft Pretzel Letters and Shapes @ An Oregon Cottage
Scribble Card

Tape-resist Scribble Card @ Lines Across
rice-rainbow-main

Rice Rainbow @ Kid Spot
sandpaper-print-tshirt

Sandpaper-Print T-Shirt @ Alpha Mom
tp birdseed feeder

TP Tube Bird Feeder @ Juggling With Kids
Make-a-Pretend-Birds-Nest

Pretend Bird’s Nest @ My Nearest and Dearest
kids_chips

Custom Tortilla Chips @ Martha Stewart
create-a-tornado

Create a Tornado @ KC Adventures

Do you have any tried-and-true activities you like to do on Spring Break?

Pin It

DIY Peep Wreath With Rolled Ribbon Rosette

Tuesday, March 5th, 2013

Easter is just around the corner and today’s DIY Easter Wreath is an adorable Peep Wreath created with that infamous Easter candy and adorned with a simple rolled ribbon rosette. Peep wreaths are easy to create for the Easter season and are inexpensive Easter decoration to add to adorn a wall or interior door of your home.

Here is a picture of the supplies you will need for this craft and all of the supplies for this tutorial can be found at your local Walmart store. You will need one 14″ straw wreath (leave this covered in the plastic wrap), 12 packages of Peeps in whatever color your heart desires, 1 yard of rosette ribbon (this will need to be cut in the fabric department), 1 piece of white felt, toothpicks, hot glue gun, and glue sticks. 

As an aside, if you haven’t visited the craft section of the store in awhile, you will be amazed at the new ribbon & trim offerings they are carrying. If making a flower isn’t your thing, they also have a variety of pre-made flowers by the hair and new baby accessories line that you could use in lieu of making the flower I am going to show you today.  It had been awhile since my last visit, and I was a little overwhelmed with the new choices available!

Assembling the wreath is easy and can be done one of two ways.  Poke your toothpick through your Peep almost until the toothpick pokes out of the top and then push your toothpick through your straw wreath OR you can just poke the toothpick directly in to your wreath and then stick your Peep on top of it.

My only aside to this is that I do think that if you are planning to keep the wreath, I would add a dab of hot glue to each of the Peeps. The idea of just skewering with a toothpick just didn’t work for my wreath due to the depth of how I positioned all of these. They really needed a little extra hold especially the Peeps that were on the bottom and inverted upside down. 

Find a design that makes sense for you. I did three rows of Peeps with them all uniform and in a row.  My Type-A personality does not allow me to be whimsical with design. I want them all in a row, the right way, all in a line. If you know me, this would not surprise you at all.  To add depth, I also did a few in between rows of two Peeps (as pictured above).

Once again, I would recommend hot gluing a bit as you go to add a little extra security, otherwise, you will hear those sad little plops of Peeps committing suicide and jumping ship from the wreath. It is heartbreaking, but can you blame them?

If you do your wreath right, you will end up with six Peeps to spare and Peep dust all over your table. I can only give you an estimate on the number though (give or take a few) since I find Peeps (and Peep dust) awfully delicious!

You may remember this Rolled Rosette tutorial from this adorable Easter bow I made my daughter last year to go with her Easter outfit.

To start your rolled ribbon rosette,  you will want to start with one of the roses on the ribbon to create the center of your pretty flower. Now all you need to do is start twisting your ribbon in between each of the little roses (find those spot where there is only tulle like I have pictured above)  add a dab of hot glue, and then twist again, glue again, and repeat. If you twist the ribbon tightly, you will have a tighter and flatter flower. If you twist a little looser, you will get more of the petal effect with the frayed edges working their way out more on the ribbon. Either way, it will be beautiful. Keep twisting until you reach almost the end of the ribbon. Add a dab of glue and tuck it into the back of your bow.

Finish by cutting a circle out of felt. You can use a drinking glass to trace your circle on the felt or just freehand it. This felt circle will hold all of that ribbon secure and together underneath your Rolled Ribbon Rosette Hair Bow. Hot glue your felt circle to the back of your flower. Hold this for a couple of seconds to secure it.

Once you have secured your felt circle, add more glue and attach it wherever you want on your Peep wreath. Feel free to add other rolled rosettes like these or cute felted loopy bows or just add a fun fabric bow. As you can see, the possibilities for adorning your wreath are endless.

This wreath makes me so happy and is a fun nod to the season. The best part? It will cost you about $20 in supplies (assuming you have a glue gun, glue sticks, & some scissors in your craft supplies like me!)

Be sure to check back in the next couple of weeks for more fabulous Easter projects! In the meantime, try some Kool-Aid dyed eggs, bake a batch of Bunny Bread in your bread machine, make a cute hair accessory to go with your daughter’s Easter outfit this year, or try your hand at marbleizing some eggs. These are just a few of my favorite projects you will find for the Easter season on the blog. 

Be sure to also check out all of the fun Easter offerings this year that are offered at your local Walmart store for all of your Easter needs!


Pin It

The Best Paper Snowflake Templates on the Web

Friday, January 4th, 2013

Winter days can be long with kids, but paper crafts can be a fun way to keep little hands busy with items you already have. Today I want to showcase the best snowflake tutorials we found on the web as a fun winter craft to break up those long winter days. Good old-fashioned paper snowflakes don’t have to be old-fashioned. In fact, there are so many fun snowflake tutorials with current fun characters that, I bet, you will have a hard time choosing where to start.

How to Make Basic Snowflakes

Step 1: Fold your  paper in half diagonally to make a triangle.

Step 2: Now, fold the triangle in half so the pointy corners meet.

Steps 3 and 4: Fold your triangle in thirds.

Step 5: Cut across the bottom of your paper so it is straight.

Step 6: Cut your folded paper so it looks like the triangle above. Then unfold it very gently. Be careful, these tear easily!  Decorate, embellish, and make your snowflake stand out. After all, no two snowflakes should look alike!

(If you are looking for a printable you can use, I like this design-your-own snowflake printable)

If you are looking for a template to create snowflakes, here are a few of our favorites: 

Snowflakes for Little Kids (but don’t tell her that!)

Little hands will benefit from less complex designs that will help them feel more accomplished with snowflake cutting. Mom & Dad may have to help guide the cutting process through the layers, but little ones can help to accessorize their snowflakes with a little sparkle, glitter glue, or crayons/markers, even if they aren’t able to cut them all by themselves. Cutting skills can be challenging with kids and I find this activity to be one that helps challenge them, but also can be fun at the same time.

Happy Dots Snowflake (Pictured Above)

Simply Snow Snowflake Pattern

Cork Stamped Snowflakes

Coffee Filter Snowflakes (a thinner medium for small hands)

Snowflakes for Big Kids (Rock On, With Your Bad Selves!)

Even if your kids are big, cut-outs in the center of the designs can be tricky even for the most skilled adults. I use my self-healing cutting mat and a utility knife to try to cut out eyes and mouths on these super cool snowflakes. As you can see, there is nothing old-school about these snowflakes!

Angry Birds Snowflakes (Pictured Above)

Star Wars Snowflakes (Pictured Above)

More Star Wars Snowflakes

Classic Snow Crystal

3-D Snowflakes

Thanks so much to Walmart for challenging me to craft up some snowflakes with my kids. It turned into a morning of smiles and delight  as watched our snowflake creations unfold.

Happy snowflake-making, friends!

I am a part of the Walmart Moms program, and Walmart has provided me with compensation for these posts  My participation is voluntary and opinions are always my own.

What is your favorite winter craft to do with your kids?

Pin It

“Use What You Have” DIY Advent Calendar

Monday, November 26th, 2012


It is that time of year again and that means another Advent season.  You don’t have to have a fancy advent calendar to celebrate the advent season, in fact, I have a DIY Advent Calendar made from items you already have in your home. This free DIY Advent Calendar is the perfect way to celebrate the holiday season without breaking the bank.

Today I wanted to share with you a “use what you have” Advent calendar that we created last year. It was such a hit that I plan to make another one for this year! This requires no pricey materials and is based around what the holiday season should be all about… being together!

In the years past, we have always had a Christmas Jar of activities. Each day we would randomly draw from a set number of activities and enjoy a holiday activity together as a family. This year, our life with our two children has become increasingly busy and scheduled. We have two school schedules, extracurricular activities, homework, holiday programs, holiday family events, and so much more going on. Our life of leisure seems to have taken a detour and I have had to be more thoughtful in our approach towards carving time out for what we would hope to accomplish this year.

I wanted to create our own countdown to Christmas in a creative way, but I didn’t want to spend any money on it. I decided to use what I had to create our homemade Advent filled with fun activities and wanted to share with you what we created!


Homemade Advent Calendar

Supplies needed:

A large circle punch (in scrapbook supplies at craft store) or a jar or glass for tracing
Tape
Scrapbook or festive holiday gift wrap
Ribbon
Marker
2 Muffin Tins
A picture frame stand or a place to prop your finished tins


I began this project by punching out 48 circles. On half of these write the numbers 1-24 and on the other half you can write fun activities to do with your children in anticipation of the big day.

Stick your holiday activity folded up inside of each muffin tin and then attach the numbered circles to each individual muffin tin. Secure with tape on both sides to hold your activities in securely.

Break out your trusty calendar and jot down the activities for each day to remind yourself what you need to plan for and what supplies will need to be purchased to accomplish the activities.

Add a little festive ribbon to the top of your muffin tin. Display the muffin tin by using a picture frame stand or finding a sturdy wall to prop it up with. Have your child draw an activity each morning to complete as a family.


Here are 24 Ideas for Advent Activities

1. Decorate the Christmas tree.
2. Big bubble baths with holiday music playing.
3. Go to the library to pick out holiday books.
4. Special popcorn and hot cocoa snack with a holiday movie.
5. Head to a holiday concert.
6. Decorate gingerbread houses.
7. Make Christmas cards for your special friends.
8. Watch a holiday movie.
9. Color a holiday coloring page.
10. Bake Christmas cookies.
11. Go see holiday lights.
12. Go see Santa in your local downtown.
13. Write a letter to Santa.
14. Pop popcorn & play a board game together.
15. Host an ornament decorating party.
16. Make gingerbread waffles or gingerbread donuts for breakfast.
17. Wrap holiday gifts while listening to holiday music together.
18. Go to the dollar theater and see a movie.
19. Go see the Christmas lights in your pajamas.
20. Deliver holiday treats to your friends & the firefighters in town.
21. Watch your favorite holiday movie.
22. Open one gift early.
23. Go caroling.
24. Do a holiday puzzle together

Total cost for this project was zero and very little money will be spent to do these activities together. The memories I hope to create with my children though, I hope those will be priceless!

Do you do an Advent calendar or have a special way your family celebrates the countdown to Christmas? I would love to hear your ideas!

Pin It