Archive for the ‘Gifts’ Category

Oreo Biscotti Gifts For Your Favorite Teachers

Tuesday, May 3rd, 2011

Hurray! Hurray! Hurray! Three cheers for our favorite teachers! We have had truly some of the best teachers this year and this is the official Teacher Appreciation Week to really show your admiration for all that they do.  After volunteering in my son’s classroom, I know that I would not have the patience or endurance to do a job like that. I so admire the infinite patience, love, and knowledge that our teachers possess.

Both of my children have blossomed this year. With the teachers that they have, I can certainly see why!

Today I wanted to showcase an easy and fun gift that you can give to the teachers in your life. This Oreo Biscotti recipe is a dream to make and to eat. If you can make cookies, you can make biscotti! Biscotti is basically a twice baked cookie that is perfect for coffee dunking. You can find everything you need to complete this project at your local Walmart store.

Just as an aside, if I was a teacher, I would be drinking a whole heck of a lot of coffee.

Let’s shower them with cookies that they can dunk in all of that coffee today!

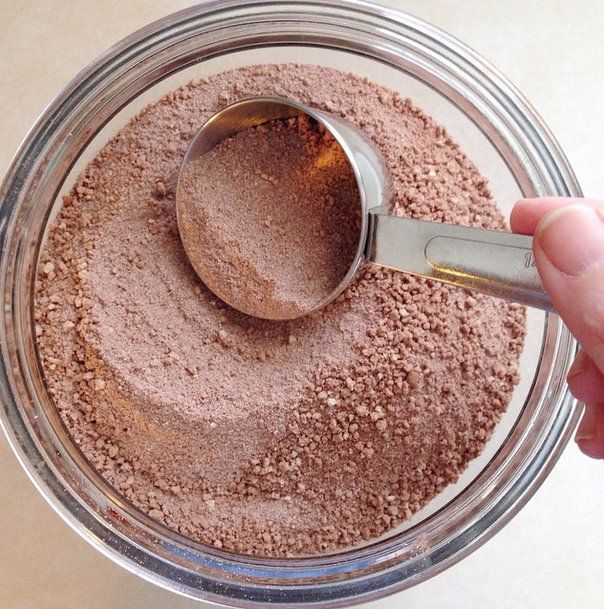
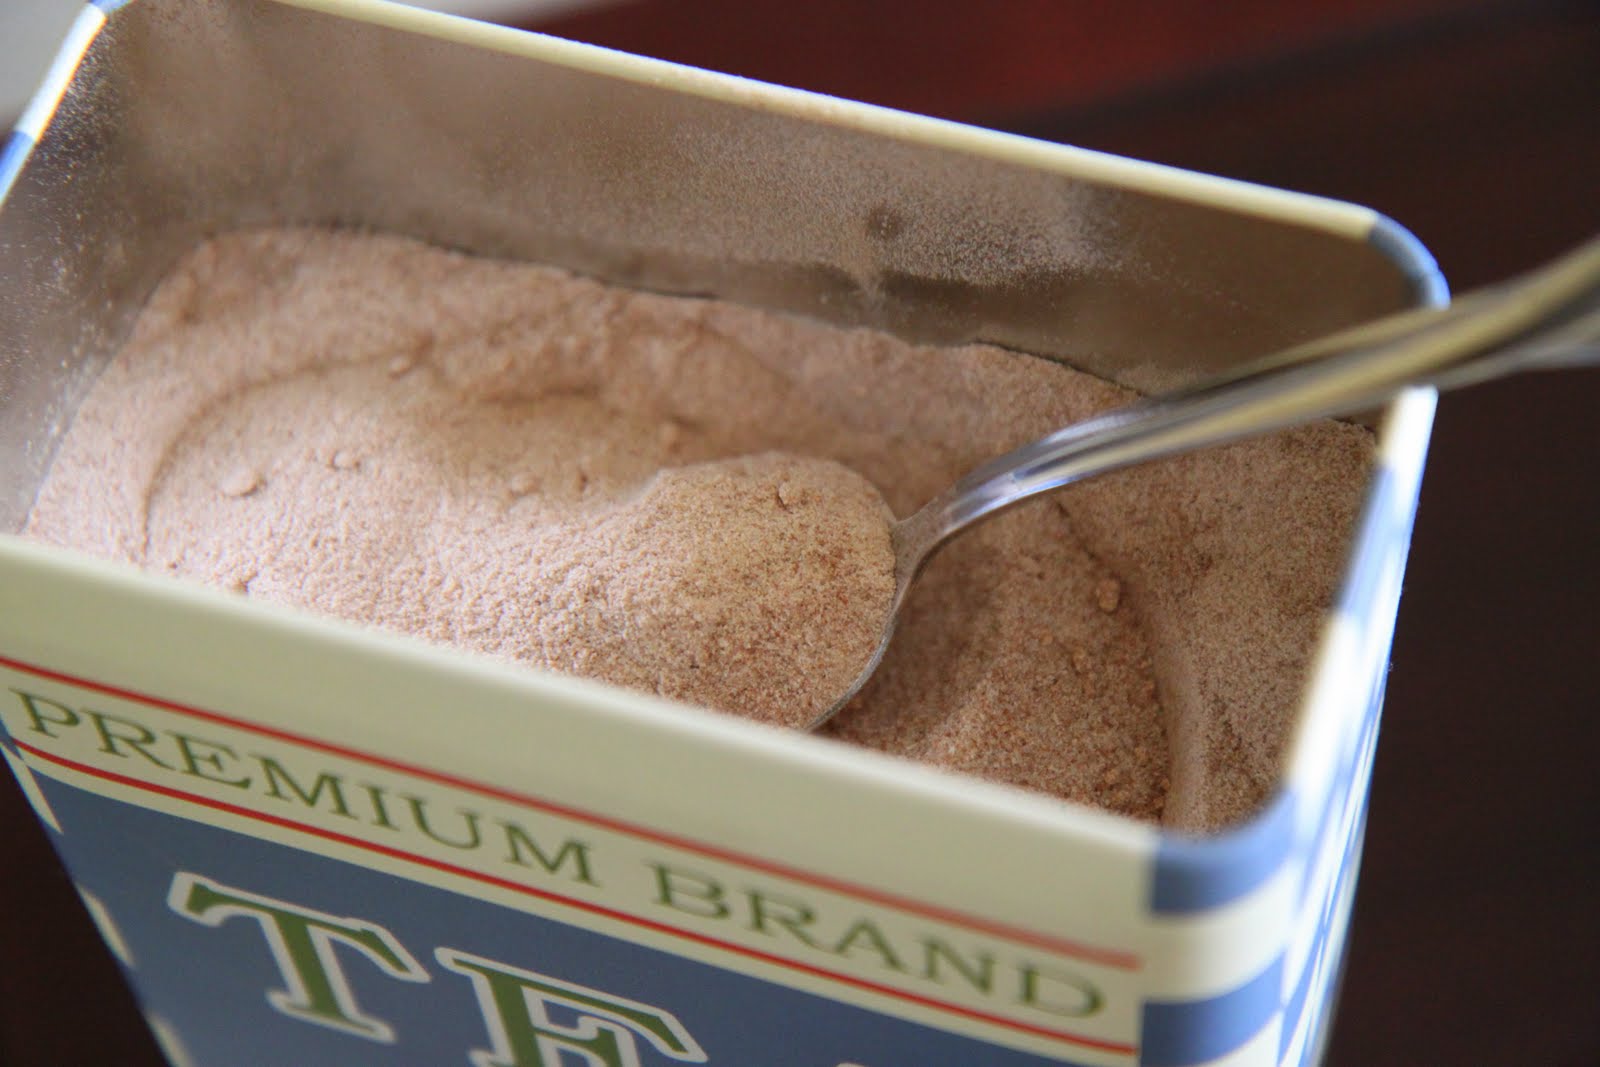
In your stand mixer, mix together melted butter, eggs, vanilla extract, and sugar.

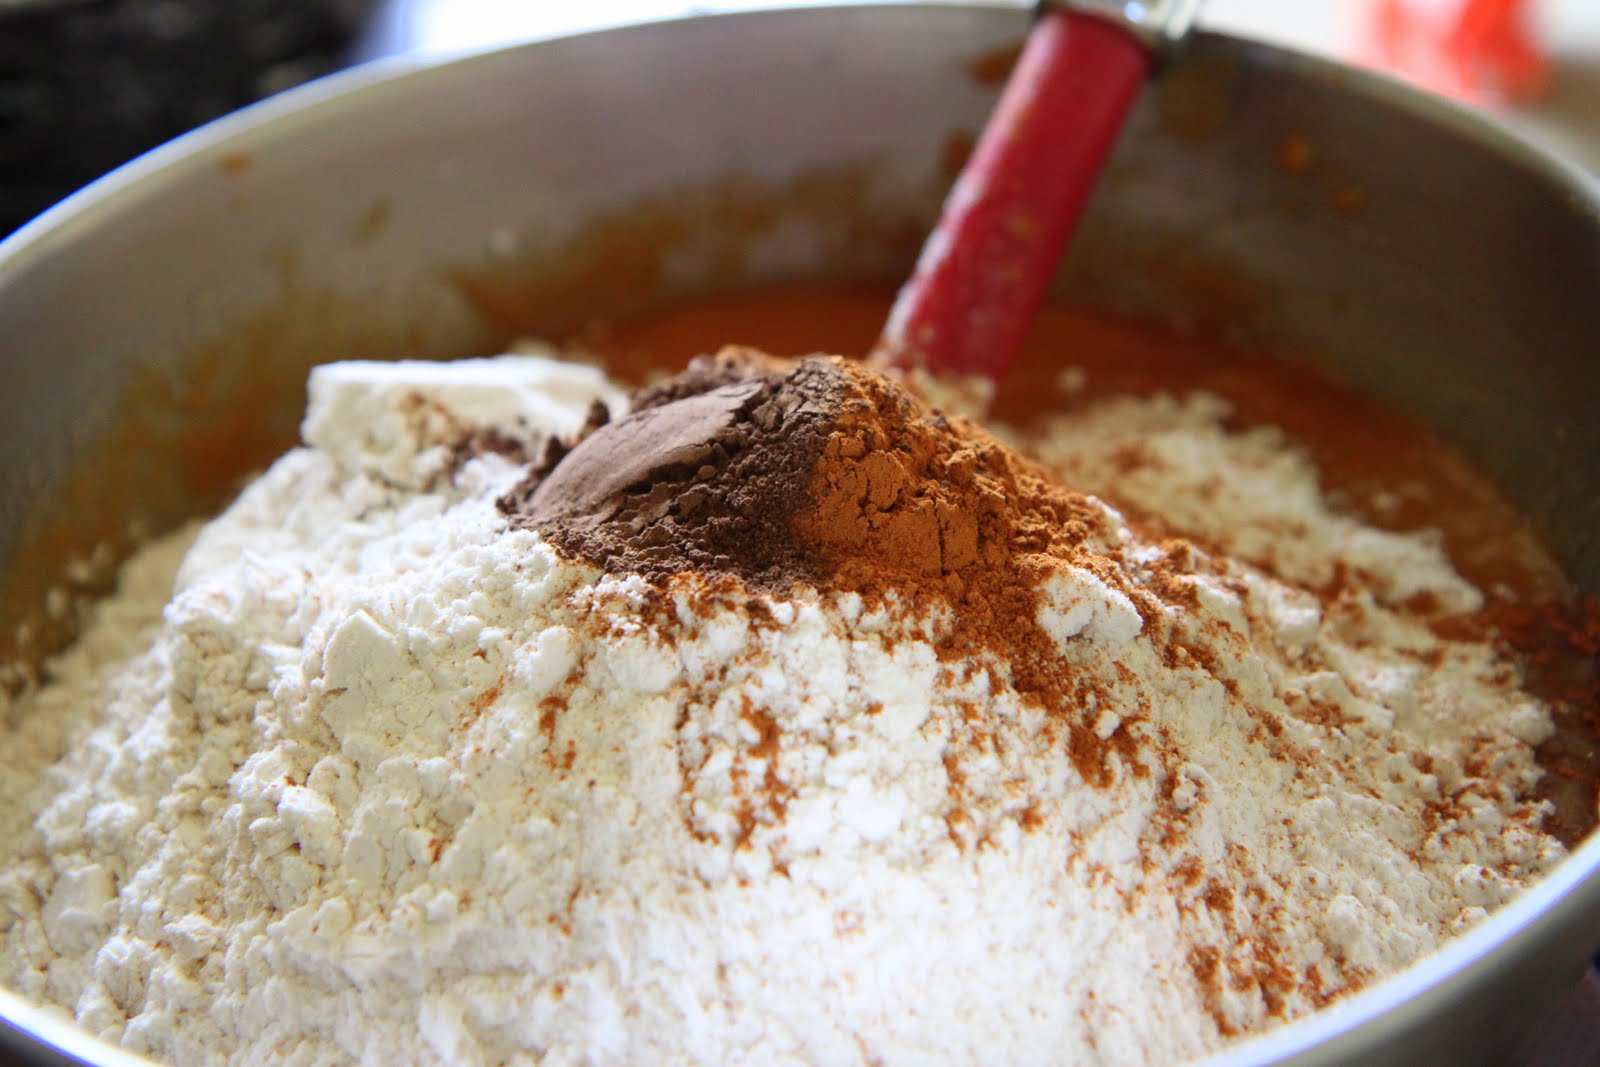
In a separate bowl whisk together your flour, baking powder, and salt. Add these dry ingredients to your wet ingredients in your stand mixer and mix just until the ingredients are incorporated.

Now it is time to add the star to the biscotti show! Grab a bag of Oreo cookies (feel free to save money and substitute with the store brand on these). Use a rolling pin to break up the cookies so that you can get a bite of Oreo in each bite of your biscotti.

Add the cookies to your batter and then give the mixer a quick spin. It should look a little like cookies and cream ice cream. Resist the urge to eat the entire bowl of batter. It will be tough- this smells so good!

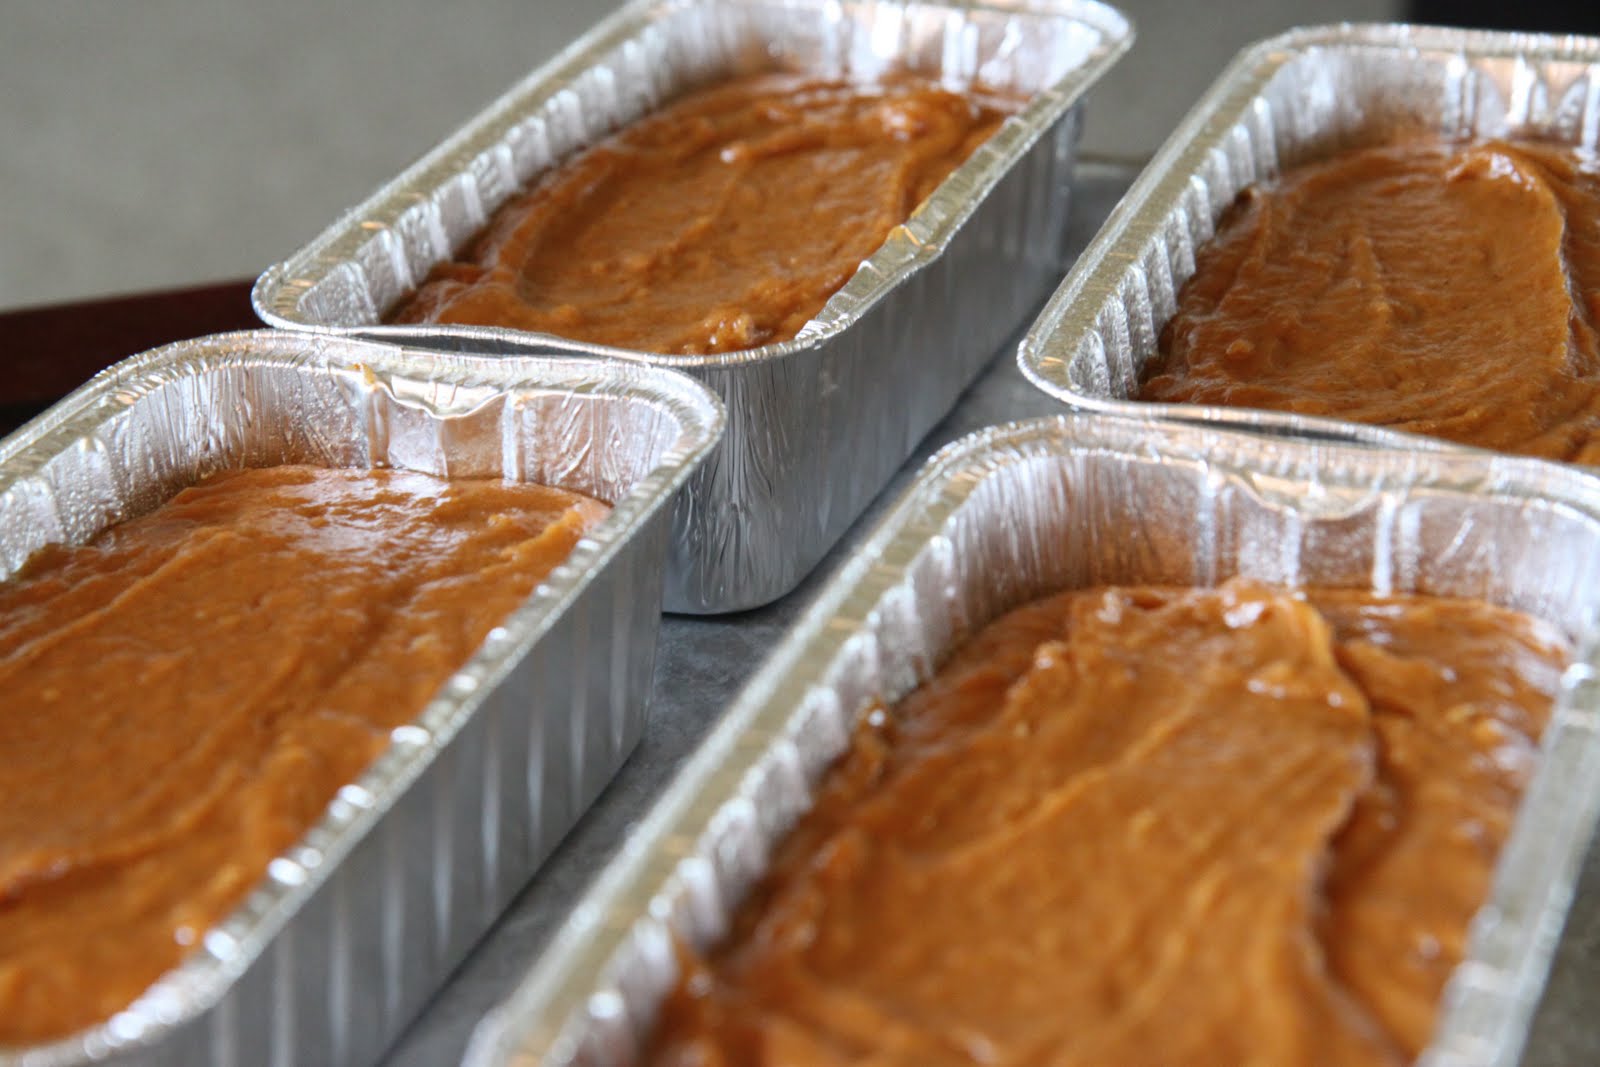
Dump the batter on a parchment lined cookie sheet. This dough is so easy to work with that you don’t even need to flour your hands. Divide your dough into two equal parts and then flatten the dough until it is roughly 8 inches in length, with about a 1 inch thickness. Make sure that the two balls have enough space to grow when they are baking.

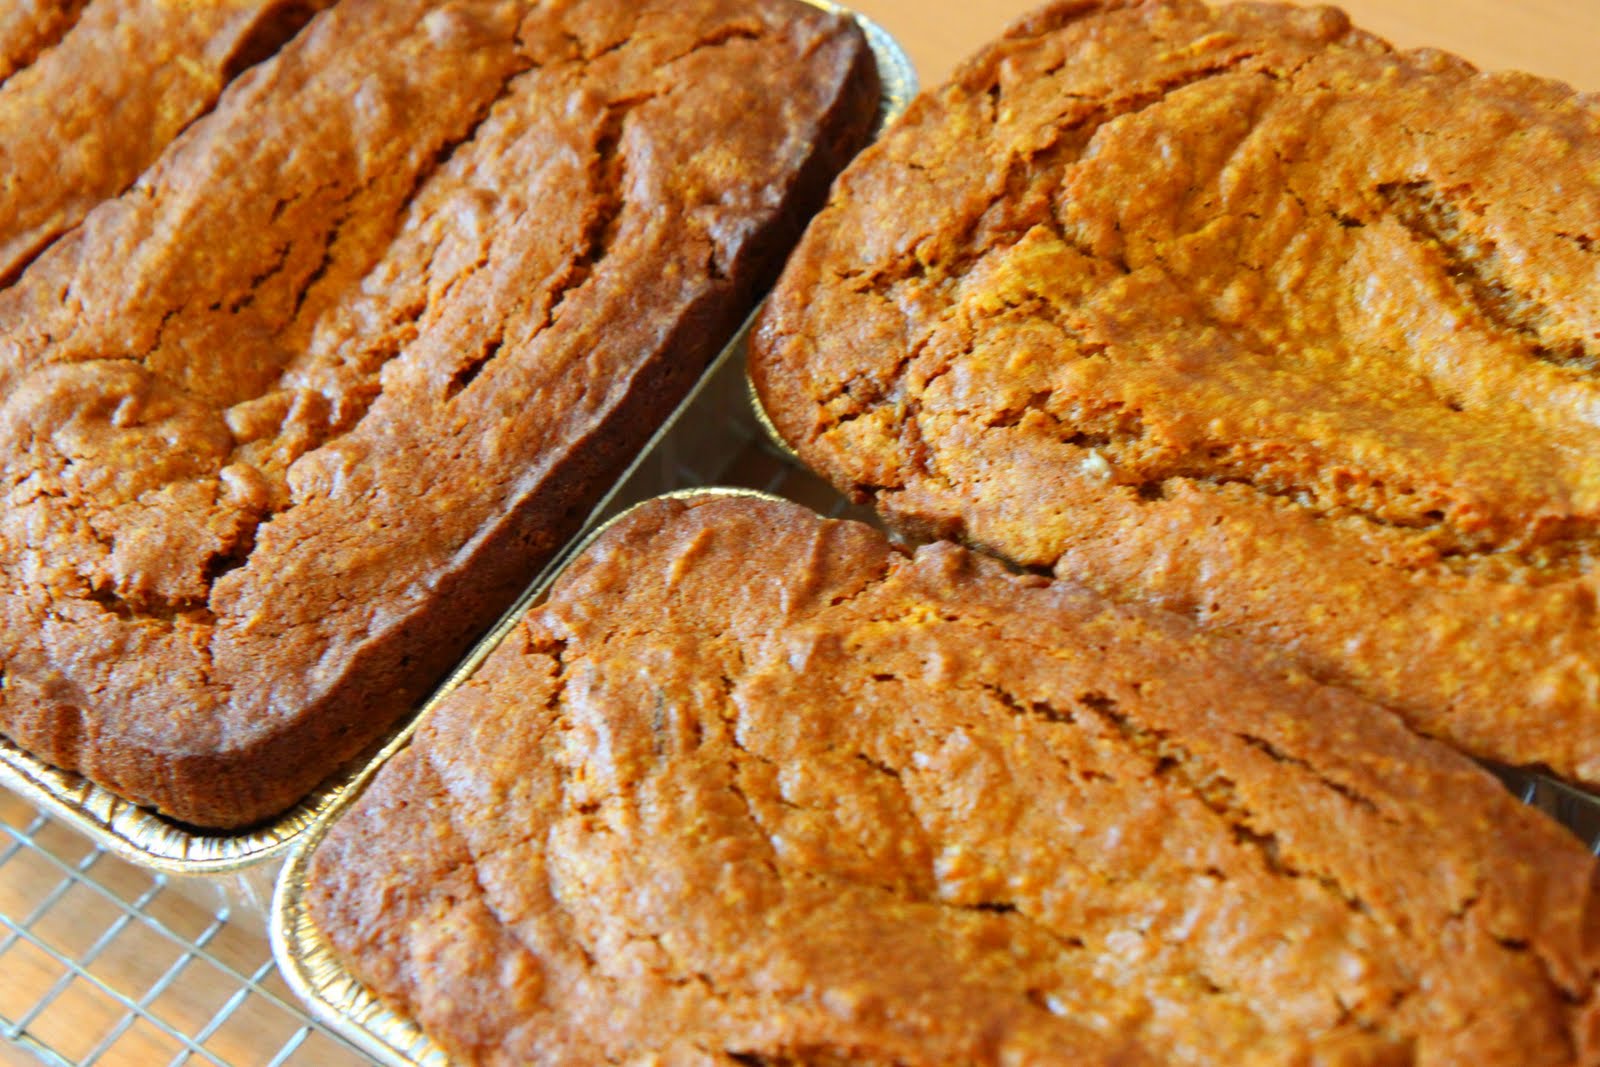
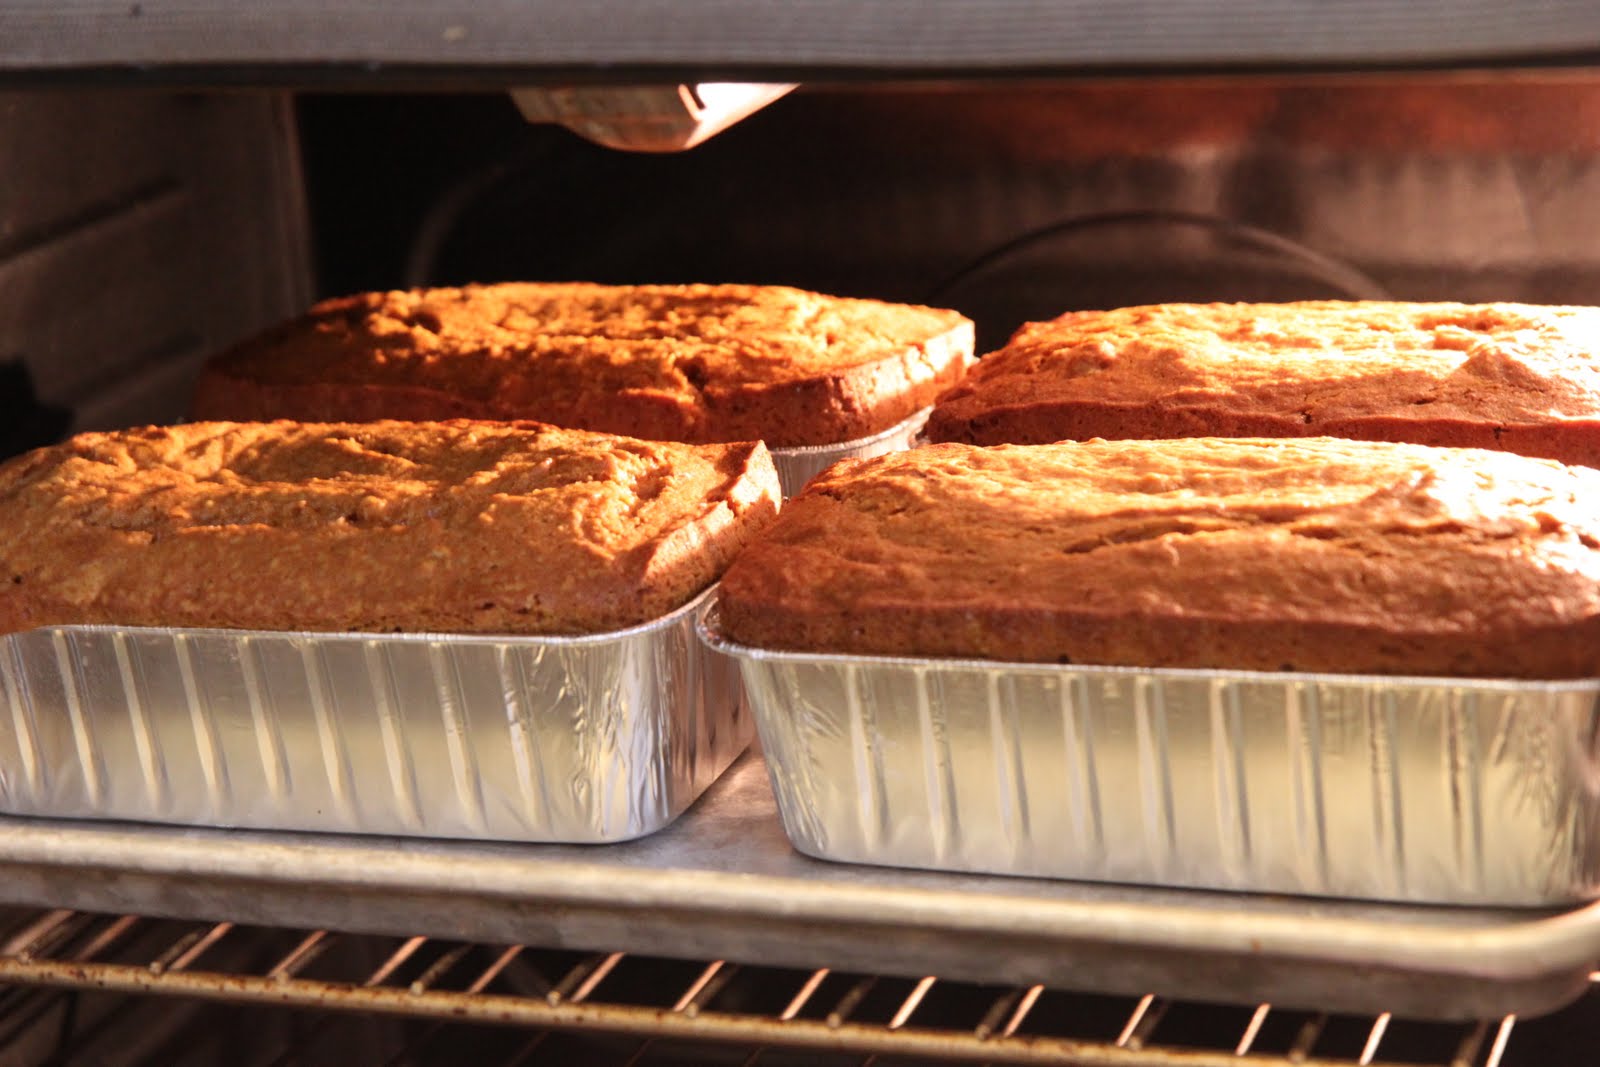
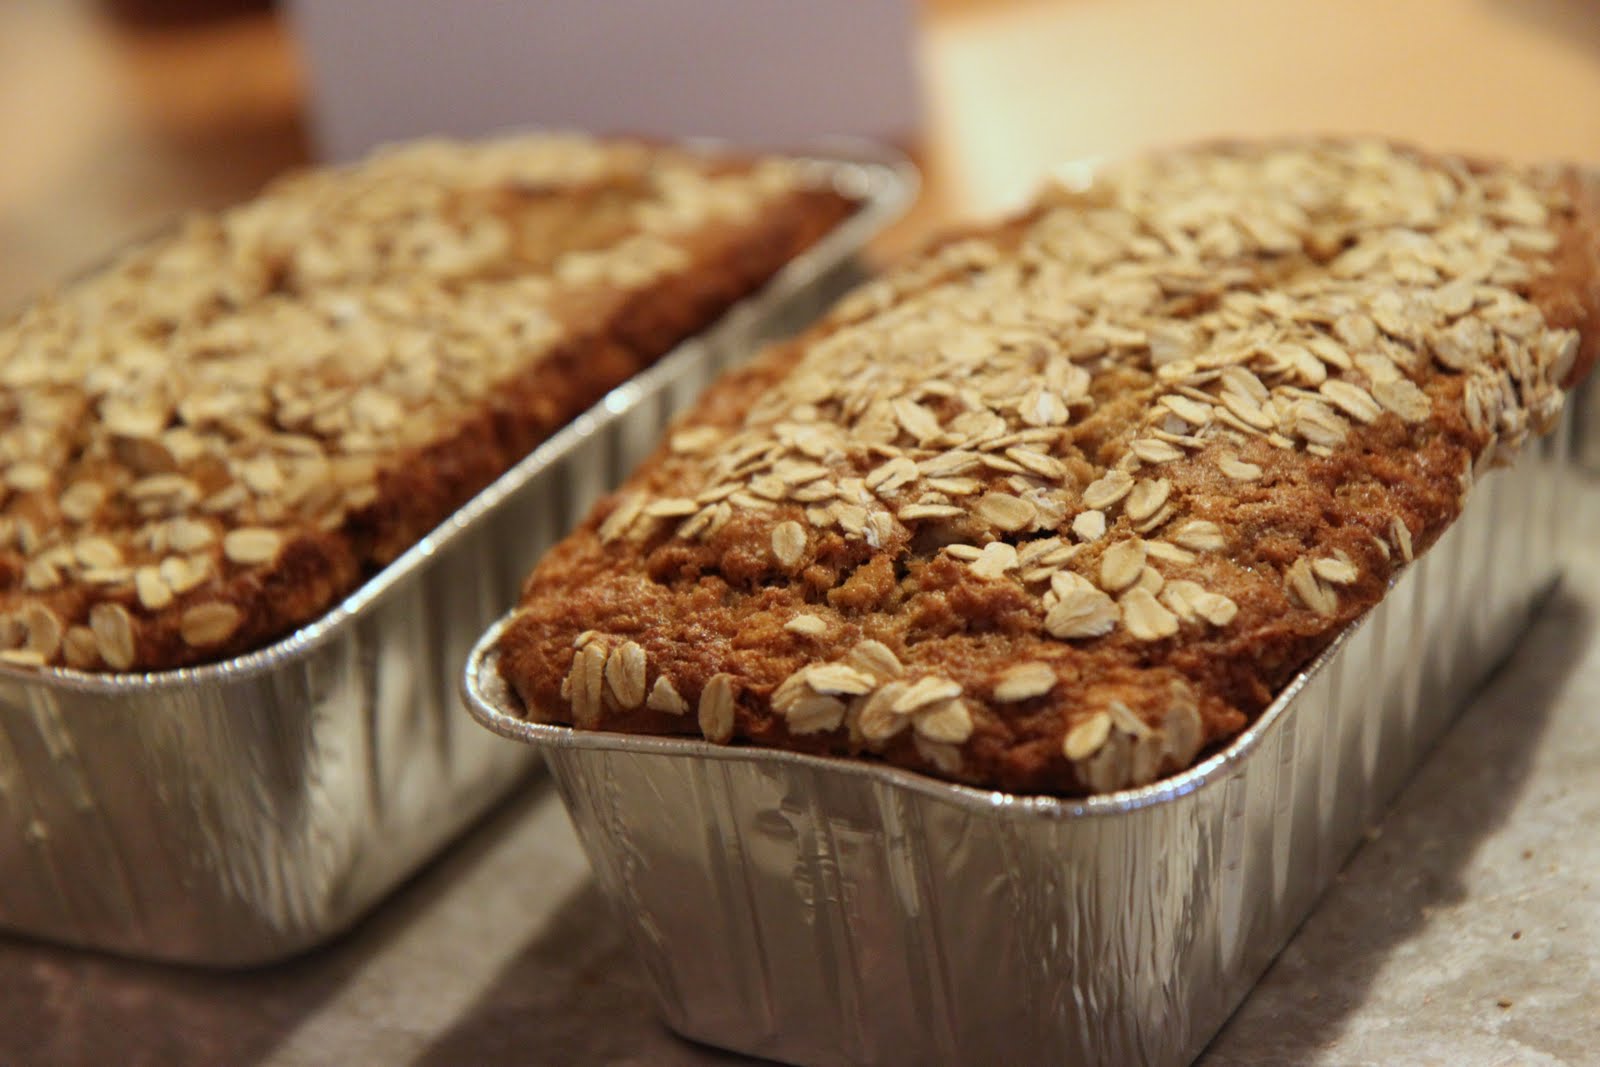
Bake the biscotti at 350 for 25-30 minutes until the dough is cooked through and the edges are golden. Let the biscotti rest for ten minutes before you cut into it.  Then with a very sharp knife, cut your biscotti on a slight angle, into roughly fifteen pieces for each dough ball. Lay them flat and slide them back into an oven for eight minutes. Pull them out and flip them again. Bake an additional eight minutes on the flip-side of the cookie. Finally, let them cool while you put the rest of your gift together.

Find a cute mug for your teacher over in the aisle with all of the lunchbox supplies or even over by the coffeemakers themselves.  Cute reusable mugs are an inexpensive addition to your gift and can be found for anywhere between $4-10 depending on your budget. Fill the bottom with colored shredded paper or a little colored tissue paper. Nestle your biscotti in a clear plastic treat bags on top of your cute mug.

Editor’s Note: Now that Picnik has shut down, you can do the same edits through PicMonkey instead! Follow the directions below:

Look through pictures that you have of your child and see if you can find a picture where you can add a little text to your photo. Upload your photo to Picnik. Under the CREATE tab,  select EFFECTS, then select the BLACK & WHITE option to change your picture to a black & white image. While still under the CREATE tab, select the option for TEXT. Once you are in text, put in your message for your teacher. Make sure not to put your text all of the way to the edge of the photo because it may cut it off when you print it. It is better to get it a little further in to assure that you don’t waste ink, paper, or your time!

You can choose from a variety of fonts and colors. The font I choose for these images was Pupcat. You can do all of this with a free membership to Picnik. Additional fonts are available with a membership, but I find that the free fonts are equally fantastic!

Save your image once you have finished it. If you have a photo printer, you can print these out at home. I printed mine on 5×7 Kodak paper with my photo printer. If you don’t have a photo printer, Walmart offers one hour prints (for a 5×7) for $.58. The cards themselves are almost as awesome as the biscotti!

Whatever you do, I hope that this adds a little inspiration to your gift-giving this year. These not only would make a great teacher gift, but I can see this being made into a perfect Mother’s Day gift for a special mom in your life too.

Homemade Oreo Biscotti

1 cup sugar
1/3 cup  butter, melted
3 eggs
2 teaspoons vanilla
3 cups flour
1-1/2 teaspoons baking powder
1/4 teaspoon salt
16 Oreo cookies, coarsely chopped (about 2 cups)

Preheat oven to 350°F. Mix sugar, butter, eggs and vanilla in large bowl until well blended. Add flour, baking powder and salt; mix well. Stir in chopped cookies. Divide dough in half. Shape each half into 8″ loaf on a baking sheet lined with parchment paper.  Bake 25 to 30 minutes or until golden brown and toothpick inserted in centers comes out clean. Remove from oven; cool 10 minutes. Cut each loaf diagonally into 15 (1/2-inch-thick) slices. Place slices, cut sides up, on same baking sheet. Bake an additional 8-10 minutes on each side or until lightly toasted on both sides. Cool completely on wire rack.

Recipe Source: Kraft Food & Family Magazine

What gifts do you have up your sleeve for you teachers this year? What gift has been the biggest hit? I would love to hear your ideas!

I am a part of the Walmart Moms program, and Walmart has provided me with compensation for these posts. My participation is voluntary and opinions are always my own.

Great Gifts When You are Eight and a Boy

Tuesday, February 8th, 2011

I find buying boy gifts to be quite a bit more challenging than girl gifts. As my children get older, the other challenge becomes finding a gift that they don’t already have and something that isn’t electronic-related.  This year I really tried to find games that would challenge Ethan to use his imagination. These are some of our favorite gifts to get our favorite eight year-old little man.

ZOOB 250-Piece Set

My son is a big fan of Legos and last year we bought a lot of Lego sets for him. The challenge with Lego sets has always been keeping all of the pieces together. This year we decided to try something a little different and got him a set of these ZOOB pieces that he could build with and both of the kids have been in heaven with these. The pieces fit together easily and you can create moving pieces that are three dimensional. The set came with a huge booklet of designs that you could create and 250 pieces was just the right amount of pieces to create just about anything. They are larger pieces than the Lego blocks so they are easy to clean up and find in the carpet.  Once our son got the hang of these, we were encouraging him to develop his own designs for creations, which further challenged his imagination. He plays with these almost every single day and they have been a great set to build with.

ZOOBMobile Car Designer

Ethan’s grandparent’s helped us add to Ethan’s ZOOB collection and purchased the car designer kit for him.  This added another fun layer to the building pieces and he could design his own cars to be built as well. There are 76 pieces in this kit and twelve car designs that could be created and Ethan loved these as much as the building pieces themselves. I would definitely recommend this as a great way to keep little boys busy on a rainy day!

The Boys’ Doodle Book

We are huge fans of doodle books and over the years I have bought five or six of these books for birthdays and Christmas in our house.  If you have not seen these doodle books before, you love the imagination that is involved in designing these books and how they foster imagination in your child.

Instead of having you simply color, each page tells you something that it would like you to draw. One page will tell him that the alligator is angry and have him fill in his face. Other pictures are exactly alike, but may request colors and patterns to make each of the pictures different. This book is specifically boy-driven and is filled with pictures of dinosaurs, cowboys, knights, pirates, robots, and more things that would be adored by a little boy in your life.

Diary of a Wimpy Kid Series

I am so lucky because my son is a ferocious reader and I have no trouble getting him to read books at all. He will read anything from Pokemon comic books to the newspaper to The Hardy Boys. His favorite books over the past couple of years have been the Diary of a Wimpy Kid book series. Every little eight year-old boy I know has a love for this series and it is a fantastic series to encourage kids that don’t have a lot of ambition to read, into reading again.

If you haven’t seen the books before, the books are perfect for little boys filled with fun illustrations that help tell the story.  I find these books in his bed almost every night and he reads them over and over again. This book set that is featured above contains the first four books, but for Christmas this year, Ethan got the fifth book in the series, “The Ugly Truth.”

If your child likes Diary of a Wimpy Kid, we have found that the Bad Kitty, Big Nate, and Captain Underpants (although it has gross boy humor and I am not as big of a fan of those) are other great books to tackle for this age group!

Rush Hour Traffic Jam Game

We love board games in our family and have quite a collection of games since we try to buy one every year for the kids. Rush Hour is a very unique game because it is played alone and is intended for kids that are ages eight to adult.  The board game has squares that the cars can fit into. It comes with a set of cards and each card displays how the traffic jam is supposed to look and how to arrange the colored cars on the board. The object of the game is get the red car out through a small opening on the board, but the cars can only be moved up and down or side to side, depending on where the cars are located. There are forty different cards ranging from easy to advanced and the solutions for play are on the back of each of the cards.

This is a fun game to set up in the morning that can be worked on while my son is eating his cereal before school. He absolutely loves this game and I love that this is one that he can play on his own!

LEGO Harry Potter: Years 1-4 Wii Game

Of course, I did want to include one electronic game that our son really loved! Ethan and I have been working our way through the Harry Potter book series (we are currently on the third book in the series) and we are loving it. Ethan’s aunt gave him this Harry Potter Wii game that he has absolutely loved, that brings to life the stories in books 1-4 through LEGO characters.  The best part about the LEGO games though is the lack of violence and the hilarious scenes that are written using the LEGO characters. He has had to fight for control of the Wii to play this one because it is just as much of a hit with his sister as it is for him.  I would definitely recommend this cute game for any of the Harry Potter fans in your life (including the grown-up ones)!

Search & Win

For Christmas and birthday gifts I do try to horde my Swagbucks rewards and use my points to buy Amazon gift cards. To begin earning rewards, all you need to do is use Swagbucks.com as your search engine tool instead of your usual route with Google. It pulls the same results, but when you are surfing, you can earn points just by making it your search engine tool. These points are then deposited into your account and can be redeemed for your rewards.

I put my points towards Amazon gift cards which has been a fantastic way to enjoy a little shopping without dipping into my bank account. Not only has it covered birthday gifts, but I also have ordered countless books for my Kindle and other fun little extras in my life.

I rarely use affiliate programs, but can’t recommend Swagbucks enough. If you start now, it is quite possible that you could have a free (or discounted)  Christmas in your future! Every little bit helps in this tough economy and the best part is that it is free tool to assist with your shopping needs.

Disclosure: All of the links above are affiliate links and are provided so you can locate the products quickly and easily. Feel free to order what you need, but we encourage wise spending & buying things you & your family will truly love and appreciate.  We promise though to only refer you to products that we are really loving and using. We also bought each of these fair and square- no one asked me to promote them or gave me anything. Don’t you like people who disclose far too much information? That is me! Enjoy!

Do you have any boy gifts that were a hit this Christmas? Please feel free to share your son’s favorite gifts!

Great Gifts When You Are Five & a Girl

Tuesday, February 1st, 2011

It has been so much fun sharing with you all of our ideas for celebrating our daughter this year!  If you haven’t been here for that, I encourage you to take a peek at our DIY Barbie Doll Cake, our step-by-step tutorial for tissue paper pom poms, & and our tips & recipes for an inexpensive winter party.

I am not big on promoting buying things, but I do think it is fun to see what other people are giving their children for their birthdays so I can get inspired with great gift ideas for my child. We do not spend a lot on Christmas or on birthdays. For Christmas we do the four gifts for each child (Want, Need, Wear, & Read-inspired giving) and then for birthdays I typically give the kids two or three gifts that I think they will really love. We are blessed with a big family of generous givers so my children never feel our more simple gifts are not enough for them.

I wanted to share with you Emily’s favorite gifts that she received for her birthday & Christmas this year!  I try to wait awhile before I share what our favorites are so you can know that they are really hits if they have been loved long past the excitement of their birthday and holiday festivities.

Knuffle Bunny Free by Mo Willems

It is is no secret that I am an avid reader so it should come as no surprise that my children love to read too! We are longtime fans of Mo Willems and the Knuffle Bunny series is my daughter’s favorite book series by him. The book series is about a little girl who loves her bunny and Emily is a bunny-loving fool who carries her own bunny everywhere she goes. I am sure you can see the appeal of this book series to her!

Mo Willems brings to life a little girl who has a habit of leaving her Knuffle Bunny everywhere and the books chronicle her adventures to get her Knuffle Bunny back. We loved the character of Trixie when she was a baby and left her bunny at the laundromat, but couldn’t tell her daddy why she was so upset when he was left. We sympathized with Trixie when there was a case of mistaken identity and she brought home the wrong one-of-a-kind Knuffle Bunny after a show & share at school where another girl had brought the same exact bunny…making him sooo not one-of a kind.

In Knuffle Bunny Free, Trixie is older now, but she still loves her bunny. When they take a flight to Holland to visit her grandparents, Trixie accidentally leaves her bunny on the airplane where her daddy just can’t get him back for her. Your heart breaks a little bit inside as Trixie realizes that she really is old enough to go without him. Try to have your tissues handy for this one. I simply can’t get through the last part as I look at my own little girl and how big she is getting, clutching her own bunny tight in her fist. This book is beautifully written, beautifully illustrated, and offers comedic writing that adults will truly love.

Knuffle Bunny Plush Toy

Now that you know that we are Knuffle Bunny groupies, it will make sense why Emily was so thrilled to receive her very own Knuffle Bunny to go along with the books. Some kids are into plush toys (like my daughter) and some kids never really get into them (like my son). If your children are into plush toys, this is a wonderful one to pair with the book series.  This Knuffle Bunny is super soft and squishy with long ears that are perfect for clutching and dragging around the house.  Knuffle Bunny has been hitting the road with Emily every day and I find her snuggled up in bed with him every night.  Although I thought this was a little expensive for a simple plush toy, he has gotten $20 of love out of him already! If you have a Knuffle bunny lover in your house, this makes a wonderful gift!

Ladybug Girl at the Beach by David Soman

Another series that our daughter has been a fan of for a very long time is the Ladybug Girl book series. Lulu reminds me so much of my own spunky Emily with her own fashion sense and spirit for adventure, that this book series seems to echo they way our Emily thinks.  Lulu is the type of girl that your daughters can look to as a role model because she is very brave, she uses her imagination, and she is a friend to others.

We loved Lulu when we were first introduced to her and she finds her alter-ego, “Ladybug Girl,” who can do anything. We loved when Ladybug Girl found a friend on the playground and fought crime together as the Ladybug Girl and Bumblebee Boy duo. Now Lulu is making her very first trip to the beach and she finds that there is so much to love at the beach, but also finds that she is a little fearful too of the water. You can watch Lulu overcome her fear of the water and discover that Ladybug Girl can even brave the ocean- she truly can do anything!

Lana the Ladybug Groovy Girl

We came into collecting Groovy Girl Dolls completely by accident.  I bought a doll for Emily at a gift shop on a trip and she absolutely loved it. She slept with her every night and I loved her yarn hair, rag doll style exterior, and that she was so wholesome.  I wanted to find another one like her for Emily and discovered there are actually many Groovy Girls out there and accessories to go with the dolls.

Since Ladybug Girl is such a superhero in our house, Lana the Ladybug Groovy Girl was absolutely perfect for Emily!  These dolls are so adorable and Emily loves playing with them for hours on end! Ladybug Girl was the perfect addition to our accidental collection!

Midnight Star Groovy Girl Horse

In our house there is lots of talk about sparkle, glitter, horses, and unicorns. Imagine, Emily’s delight when Grandma & Grandpa got her this sparkled and bedazzled Groovy Girl horse to go with her dolls! Yes, this horse has been making quite a few pony rides around our house and offers a lot of entertainment & imaginative play for Emily.

This toy is really well-made and includes lots of little extras that Emily really loves. There are reigns that the dolls hands can go into and stirrups for the doll’s legs. Since it has all of these stirrups and reigns the dolls can actually ride on this horse and have adventures without her having to hold on it. I am not a big fan of toys that make noise (I know, I am such an old, grumpy mom) and we discovered that this horse makes horse sounds when you press a little button on the side. Luckily, it is a very quiet horse that gives just the right volume without being annoying.

Loving Family Fisher Price Dollhouse

Last Christmas we decided to buy Emily a dollhouse and asked that everyone buy her accessories to go into her house for a gift. I didn’t want to spend an arm and a leg on a dollhouse, but I did want something that would last. We decided to get her the Loving Family Fisher Price house because it was relatively affordable for a dollhouse (about $75) and it offered lots of fun accessories to go with it.

We got almost the whole collection last year, but she didn’t have any bedrooms for the dollhouse. She would make the dolls lie down on the floor with tiny rugs and would  sigh deeply at me, pointing to the absence of beds in her house. This year we added a little girl’s bedroom set and the parent’s bedroom set to her collection. All the dolls seem more well-rested and Emily is very happy to have a place for her dolls to sleep now.

This is a bit of an investment piece, but she plays for at least an hour in this house every single day. I love anything that helps her to use her imagination and when her friends come over, they park themselves in front of the dollhouse and play house for hours on end. It really is the perfect gift for a little girl with a big imagination!

Barbie & the Diamond Castle Princess Liana

You can’t have a Barbie party and not get a few Barbies for your birthday. It was a Barbie-filled extravaganza at our house filled with tons of Barbies and accessories. Everyone brought the coolest Barbies, fanciest clothes, and we even got a Barbie car for them to ride in!  We have been playing with and brushing Barbie hair nonstop since her birthday.

Of all the Barbies that Emily got, this Diamond Castle Barbie is Emily’s most favorite.  You turn a little dial on the back of her and her dress transforms into a different colored dress with a magical sound. She also sings…she sings an awful lot in our house. Emily ran her batteries out after three weeks of nonstop signing and I couldn’t get the song out of my head if I tried.  She is magical though because I still let her keep her even though she sang all the time.

This Barbie is from the Barbie & the Diamond Castle movie which she also got for birthday. We love all the Barbie movies, but I think this one is Emily’s favorite because it is about two friends. If you haven’t seen the Barbie movies, they are truly awesome. I am not a fan of the recent ones, but The Nutcracker, Barbie & the Twelve Dancing Princesses, & Swan Lake are just beautiful. Your daughter would love them and you will love the pretty music!

Barbie Tote

We are new to the Barbie scene. Boy, do we have so much to learn about navigating the Barbie world! My sister found this Barbie tote to put all of our Barbie accessories in and Emily really loves this bag for taking her Barbies everywhere. There is a zipper on the inside for tiny Barbie accessories and clothing. The bag size is generous, unlike some of the other totes on the market. All of her collection fits comfortably in this and the outside is a plastic exterior, making it easy to clean. I love this gift as much as Emily and we hang it on our playroom door so we can play with our Barbie’s or take them with us for fun on the go.

Search & Win

For Christmas and birthday gifts I do try to horde my Swagbucks rewards and use my points to buy Amazon gift cards. To begin earning rewards, all you need to do is use Swagbucks.com as your search engine tool instead of your usual route with Google. It pulls the same results, but when you are surfing, you can earn points just by making it your search engine tool. These points are then deposited into your account and can be redeemed for your rewards.

I put my points towards Amazon gift cards which has been a fantastic way to enjoy a little shopping without dipping into my bank account. Not only has it covered birthday gifts, but I also have ordered countless books for my Kindle and other fun little extras in my life.

I rarely use affiliate programs, but can’t recommend Swagbucks enough. If you start now, it is quite possible that you could have a free (or discounted)  Christmas in your future! Every little bit helps in this tough economy and the best part is that it is free tool to assist with your shopping needs.

Disclosure: All of the links above are affiliate links and are provided so you can locate the products quickly and easily. Feel free to order what you need, but we encourage wise spending & buying things you & your family will truly love and appreciate.  We promise though to only refer you to products that we are really loving and using. We also bought each of these fair and square- no one asked me to promote them or gave me anything. Don’t you like people who disclose far too much information? That is me! Enjoy!

Do you have any girl gifts that were a hit this Christmas? Please feel free to share your daughter’s favorite gifts! We will be back next week with great boy gifts to give!

Delicious Drink Mixes: Creamy Hot Cocoa or Vanilla Chai Tea Mix

Tuesday, December 14th, 2010

hot-cocoa-mix

I am trying to give as many precious homemade gifts that I can this year. Anything that I am unable to whip up myself, I plan to supplement with shopping on Etsy to fulfill my crafting skill downfalls.

First, I just want to say that I don’t think you necessarily have to be crafty to offer up beautiful handmade gifts for your friends and family…you just need to be a little resourceful. Resourcefulness might be looking to craftier bloggers for inspiration, checking out magazines or books at the library, or just stealing awesome ideas off of a good friend.

I am going to showcase my homemade gifts over these next few weeks, in hopes to breathe some life into your gift-giving. My crafting skills are limited, but my resourcefulness…I would say that is one of my strongest attributes.

Today we are going to discuss making hot drink mixes for yourself and to share with your friends. This is one of my favorite gifts to give in jars or tins for the holidays. I love to tuck jars of these in with a few holiday treats for the gift-giving season. The best part is that making a drink mix only requires the necessary ingredients and a blender or food processor. It also requires zero crafty skills. Hurray!

Let’s begin with my favorite cocoa recipe in the whole world. For this recipe, you only need a mixing bowl, a wooden spoon, and the necessary ingredients. If you don’t want the cocoa powder to look coarse, pop it in your blender or food processor and blend until it is the powdered consistency of the store-bought packets. I usually skip this step though because, frankly, this lasts about half a second in our house and I am on to making the next batch. For gift-giving though, processing is a nice touch!

****************
Hot Cocoa Mix

4 cups nonfat dry milk powder
1 1/2 cups sugar
1 cup non-dairy coffee creamer
2/3 cup unsweetened cocoa powder
1 (4 ounce) package instant chocolate fudge pudding

Mix all the ingredients together in a large bowl. If a finer consistency is desired, you can pour the mix into a blender or food processor and run it through that. Store in an airtight container. Add 1/4 to 1/2 cup (depending on your cocoa preference) of the mix to an 8 ounce mug of boiling water.

****************
The next drink mix has been made every year for the past five years in my house. It is my favorite drink in the colder weather and is always an impressive gift to give or to receive.

After you are done making your cocoa mix, use that same exact bowl to mix up the Vanilla Chai Tea. I have experimented with what needs a whirl in the food processor and what doesn’t this year. I discovered that if you give just the tea and spices together a whirl, that you don’t need to add the rest of the ingredients in the food processor. Since I have a small food processor, this cuts down on the time to make this and the clean-up after I dump it all over the countertops.


****************

Homemade Vanilla Chai Tea Mix

1 cup nonfat dry milk powder
1 cup powdered non-dairy creamer
1 cup French vanilla powdered non-dairy creamer
2 ½ cups white sugar
1 ½ cups unsweetened instant tea
2 tsp ground ginger
2 tsp ground cinnamon
1 tsp ground cloves
1 tsp ground cardamom
1 tsp nutmeg
1 tsp allspice
¼ tsp white pepper

Combine all ingredients in a food processor and blend until it is a fine powder (If you have a small food processor, you can combine just the instant tea and spices in the food processor & then combine everything together in a bowl). Add two-three tablespoons of mix to 8 ounces of hot water or milk.

****************

Packaging of your drink mixes can be done in jars tied with raffia or holiday ribbon or you can package them up in a green and lovely way… in those old Crystal Light containers. Use some holiday gift wrap to cover them and tie a gift tag with some raffia around the drink mix containers. These are ideal, particularly for teacher gifts, because I don’t have to worry that my son will break the jar in route to school. Waterproof and airtight, it keeps the drink mix nice and safe. With a handmade or store-bought scarf, it makes a perfectly cozy gift to give.

Pin It

Gifts You Can Make: Effortless & Elegant Quick Breads

Monday, December 13th, 2010

Today I am sharing a few recipes for elegant quick breads that can be given for the holiday season. There are three things that make this gift a total winner in my book. The first is that they can be frozen ahead of time and stored in your freezer for last minute gifts. The second element that I love about these gifts is that they are quick and you don’t need to be a fantastic baker to achieve success with these recipes. The third, of course, is that they can be multiplied to make several gifts for the holiday season in one afternoon.

Quick breads can be thrown together in a bowl, beaten with a wooden spoon, and made in a matter of ten minutes. Don’t believe me? I timed myself in the kitchen to see how long my hands-on time with these were. In ten minutes, I was sliding two loaves of pumpkin bread in the oven and could tackle other holiday chores around the house. You can’t beat that!


First, you need to choose what type of loaf pan you will be using for your gift-giving. I prefer the disposable loaf pans because it makes it easier to package and place in your freezer and because of the affordability factor. This was a three pack of loaf pans purchased at Walmart (over by the plastic containers in the housewares, not in the baking aisle) and it was $1.56 for the three. You could also check at your local dollar store to see if they have these. I happened to buy them there because I needed milk that day!

With these, the key to keeping things mess-free in your oven is to assemble your loaves on a cookie sheet. Because they are made from a flimsy material, it can lead to a major catastrophe in your oven. If you overfill a loaf pan, the cookie sheet can catch the excess batter and will save you from that horrible burning smell in your oven. Not that this has ever happened to me…nope, not ever!

Other options are those cute mini-loaf pans that you can find for $1 at Michael’s in festive holiday colors. You would need to reduce the length of baking time to adjust for these, but they can be a cute way to package those gifts.

I want to start with my favorite loaf of bread to whip up for the holidays and that is my Spiced Pumpkin Bread. I keep cans of pumpkin on hand all year round to make this bread because it is such a favorite in our house. It comes out perfectly every single time and is a favorite even with those weird pumpkin-haters in the family. To date, I have already made eight loaves of pumpkin bread this month and I think our family has ate six of them. It just goes to show that this recipe is a true winner for the holidays! It also goes to show why my New Year’s resolution will be to starting working out more.

****************
Spiced Pumpkin Bread

3 cups sugar
1 cup vegetable oil
3 large eggs
1 16-ounce can solid pack pumpkin
3 cups all purpose flour
1 teaspoon ground cloves
1 teaspoon ground cinnamon
1 teaspoon ground nutmeg
1 teaspoon baking soda
1/2 teaspoon salt
1/2 teaspoon baking powder
1 cup coarsely chopped walnuts (optional)

Preheat oven to 350°F. Butter and flour two 9x5x3-inch loaf pans. Beat sugar and oil in large bowl to blend. Mix in eggs and pumpkin. Sift flour, cloves, cinnamon, nutmeg, baking soda, salt and baking powder into another large bowl. Stir into pumpkin mixture in 2 additions. Mix in walnuts, if desired.

Divide batter equally between prepared pans. Bake until tester inserted into center comes out clean, about 1 hour 10 minutes. Transfer to racks and cool 10 minutes. Using sharp knife, cut around edge of loaves. Turn loaves out onto racks and cool completely.

****************


For a different spin on quick breads, I adore making a loaf of Cinnamon Delight Bread for the holidays. The unique thing about this bread is that sprinkled on the bottom of the bread is a cinnamon and sugar coating to line the bottom of the loaf. This is a sweet little surprise at the bottom that makes a deliciously yummy bottom cinnamon crust. While I will be the first to admit that this loaf isn’t the most amazing looking loaf, one slice of it and people will be begging for the recipe. Enjoy showing off your cooking skills with this delicious treat!

****************
Cinnamon Bread Delight

3 cups flour
2 cups sugar
1 large package instant vanilla pudding mix
1/2tsp baking soda
1 1/2 tsp baking powder
1/2tsp salt 2 tsp cinnamon
1 1/2 cups milk
1/2 cup oil
1/2 cup applesauce
2 eggs, beaten
1 tsp vanilla
2 tablespoons cinnamon sugar

Preheat oven to 325. Grease 2 5×9 loaf pans.
In a large bowl, mix flour, sugar, pudding mix, baking soda, baking powder, salt and cinnamon. In a separate bowl, mix the milk, oil, applesauce, eggs and vanilla. Stir the milk mixture into the flour mixture until smooth. Sprinkle the bottoms of the pans with cinnamon sugar and divide the batter between the 2 pans. Bake 1hr or until a toothpick comes out clean.

****************

My new favorite bread this year is our Light Banana Oat Bread. What makes this bread special enough for the holidays is the beautiful oats that decorate the top of the loaf. It is the perfect way to use up those ripe bananas and make a gift in the process. Banana bread is always a favorite in our house because it is a thrifty treat that is loved by just about everyone!

****************

Deliciously Light Banana Oat Bread

1 1/2 cups flour
2/3 cup brown sugar
1 1/2 teaspoons baking powder
1/4 teaspoon baking soda
1/4 teaspoon salt
3/4 cup rolled oats
1 teaspoon cinnamon
1 cup mashed banana (approximately 2 1/2 per loaf)
1/3 cup buttermilk (I substituted with half & half with 2 tsp of vinegar to sour)
1/4 cup vegetable oil
1 teaspoon vanilla
2 eggs, beaten
Cooking spray

Preheat oven to 350°F and spray a 8 x 4 inch loaf pan with cooking spray. Combine dry ingredients together in a large bowl. Combine banana, buttermilk, oil, vanilla, and eggs in a small bowl or measuring cup. Pour wet ingredients into the dry ingredients and stir gently just until the dry ingredients are moistened. Spoon batter into the prepared pan and bake for 55 minutes, or until a toothpick inserted in the center comes out clean. Cool on a wire rack, in the pan, for about 15 minutes (I left mine in longer and it was fine). Remove the bread from the pan after 15 minutes and cool thoroughly on the rack.

****************

Packaging your bread for gift-giving is super easy. I love to find ribbon with some wiring in it to get a beautiful bow that will stand to attention. One note about selecting ribbon is to look for ribbon that isn’t glittery, if you plan to leave your loaves exposed instead of wrapping and freezing them. Glitter from the ribbon can come loose and scatter across the top of your loaf. Again, this has never happened to me…nope, not ever!

For packaging, cover the bread with a little plastic and wrap your ribbon around the outside. Isn’t that just elegant and beautiful?

Isn’t it great when one day can easily yield ten beautiful gifts to give! Share these quick breads at your next holiday potluck, as a hostess gift, a sweet teacher gift, or for all of life’s little helpers (hairdressers, newspaper boy, postal worker, neighbor, bus driver, etc…) Trust me, they won’t stay in the freezer long and everyone will remember your delicious handmade gift!

****************
Quick Freezing Guidelines For Quick Breads

– Make sure your bread is completely cool before wrapping it or putting it in the freezer. To freeze, wrap securely in aluminum foil, freezer wrap or place in freezer bags. Label all packages with the name of the recipe and date. Use within the recommended storage time (up to 3 months) for the best flavor and texture.

****************

Do you have a favorite quick bread recipe to share or a secret to great packaging? Please share here!

Homemade Peppermint Bath Salts & Oatmeal Cookie Bath Soak (With Free Printable)

Thursday, December 9th, 2010

I was so excited to share this tutorial last year for creating these peppermint bath salts and oatmeal cookie bath for the gift-giving season. These are fabulous little “just because” gifts or a fun pick-me-up for a tired co-worker, friend, or teacher. I even have a cute little printable tag that you can use for decorating these!

Making bath salts and soaks are easy and require little effort on your part. I love to make a giant batch of these and keep them on hand for unexpected holiday occasions like hostess gifts or as a return gift for someone that may have been forgotten on the holiday gift-giving list. These are a thoughtful gift just perfect for a friend that needs a little rest and relaxation during the busy holiday season.

Today I wanted to share with you my favorite homemade oatmeal bath. I call it Oatmeal Cookies & Milk because it blends together the ingredients of an oatmeal cookie with powdered milk to make a soft & soothing bath for anyone who has sensitive skin.

****************
Oatmeal Cookies & Milk Bath

1 cup cornstarch
2 cups powdered milk
1/2 cup oatmeal (not instant)
1 teaspoon cinnamon

Mix all ingredients in blender or food processor until it is a fine powder. Just add 2 tablespoons of the mixture to your bathwater for a soothing bath.

****************

Once the oatmeal mixture is ground up, it will look just like this. I dumped the entire amount into one jar and it filled it to the top, with just a little leftover.

This homemade oatmeal bath can be packaged with a spoon, purchased from your local thrift store, and a little holiday ribbon. How easy and simple is that?

****************

The next gift I want to showcase is a very festive jar of Peppermint Bath Salts. I took a picture of all of the ingredients needed so you can see exactly what they look like when you go to the store. Don’t you hate it when you can’t picture what you should be looking for?

The kosher salt is over in the baking aisle with the regular salt, the Epsom Salts should be over in the first aid supplies of your superstore or drugstore, and the glycerin will be behind the drugstore counter where you pick up your prescriptions (and can also be used for your giant bubbles in the summer).

Now head to your craft store and go into the aisle where the soap making and candle making supplies are. There you will find colorants to dye your bath salts (you need the package with red in it) and the essential oils needed (for this craft it will be the eucalyptus mint). The last thing you can buy is some peppermint striped ribbon or whatever is on sale and festive will totally do the job!

As for jars, I found those at Big Lots and you can get a dozen of them for $6.50 or check the canning supplies section of Walmart (our store was out). I hope that helps with your shopping list and helps with the visuals for what to look for!

You will need two big bowls for this and a giant spoon to mix with. Don’t you love crafts that don’t require a lot of equipment? Now, empty one bag of Epsom Salts into one bowl. Next add 3 cups of your kosher salt, and stir well. Then stir in 1/4 teaspoon glycerin and eight drops of your eucalyptus essential oil. Mix well.

In your second large mixing bowl, empty one bag of Epsom Salts and add 3 cups of your kosher salt. Stir well. Next stir in 1/4 teaspoon glycerin and eight drops of your eucalyptus essential oil. To this bowl, you will add fifteen drops of your red colorant. This will give you a pale and pretty pink bowl of salts. Mix this side really well to incorporate the coloring throughout this batch.

Now grab a 1/2 cup measuring cup and start doing layers to create the peppermint candy look in the jar- a layer of white, a layer of pink, a layer of white, and then a layer of pink. I would recommend filling them on a cookie sheet to catch any runaway salts and to make clean-up a little bit easier. Once everything is filled, you should have 12 jars full and even a little leftover for yourself.

Now tie your gift up with a little festive ribbon and a beautiful gift tag instructing the recipient to put three tablespoons of salts in the bathtub to enjoy a relaxing holiday bath.

****************

Candy Cane Bath Salts

12 tall jelly (12-ounce) canning jars with lid and rings
2 bags of Epsom Salts, 4 pounds each (approximately 16 cups)
4 lb kosher salt (approximately 6 cups is needed, buy two boxes and cook with the rest)
1⁄2 teaspoon glycerin, divided
16 drops eucalyptus peppermint essential oil
15 drops red colorant

Empty one bag of Epsom Salts into large mixing bowl. Add 3 cups kosher salt, stir well. Stir in 1/4 teaspoon glycerin and eight drops of eucalyptus
essential oil. Mix well. In second large mixing bowl, empty one bag of Epsom Salts, and add 3 cups kosher salt. Stir well. Add 1/4 teaspoon glycerin, eight drops of eucalyptus essential oil, and red colorant. Stir until completely blended. Color should be even. Using a 1/2 cup measuring cup and fill canning jars at an angle, layer salts in jars, alternating white and colored mixtures.

****************
Just to make your gifts a tad more festive and to ease the burden of making those gifts, we have included free gift tags to download and print for the holiday season!

Printable Gift Tags

Luckily for you, there will be just a tad too much of both of these bath mixtures to fit into the jars and you will be forced to partake of your efforts. Throw whatever is left in that food processor or bowl and put it into your bath. Now fix yourself a cup of vanilla chai tea, light a candle, and smuggle in a good book or magazine. Promptly, lock the door and pretend like you have no idea how that happened when everyone starts knocking. Enjoy a moment to yourself and relax, you deserve it!

What are some of your favorite gifts to keep on hand as impromptu gifts for the holidays? Please share your ideas and links here!

Giving With the Scraps of Life: 10 Painless Ways to Give to Charities

Tuesday, August 24th, 2010

Do you ever feel like you don’t have the means to donate to make a difference in someone’s life? I often felt that the size of my wallet was a hurdle to the type of giving that I imagined that I could do in my adulthood. When financial times were particularly difficult for our family, I always envisioned the day that would come when I could give more to worthy organizations.

In the last few years though, I began to realize that there are so many more ways to give than I ever imagined possible. I refer to this giving in my house as my, “scraps of life giving.” There are so many things that I have within my possession and that I can do with the limited talents and budget that I possess that the possibilities for good old-fashioned giving are endless.

Today I wanted to share with you a few, “scraps of life giving,” opportunities that you just might not be aware exist! Within this list, I am confident you can find a few opportunities for giving a few scraps from your life to a worthy organization.

Clean Out Those Couch Cushions & Pockets- Do you have a spare change jar in your house that has been gathering dust? Rather than saving it for something for yourself, consider taking that donation to a worthy organization instead.  Ronald McDonald House Charities is just one great example of where your change could be put to good use.  While you are visiting the drive through for your next dollar soda (one of my own favorite inexpensive indulgences), consider dropping your change off in the boxes at your local McDonald’s and know that your change is being put to great use.

While that little bit of change may not seem to really make a big difference, the organization collected over $20 million dollars in spare change last year. That change goes to helping keep families together by providing shelter for them while their child is being cared for at a nearby hospital.  Just think of that impact you are making on a child and family’s life with that simple gesture of donating your change!

PS- RHMC’s Day of Change is happening on September 9th! Plan to take your change to your local McDonald’s & RSVP for the event here!

Call Up a Cell Phone Donation– The rapid rate that families go through cell phones these days is quite amazing!  With most cell phone plans now, the opportunities to upgrade come around every couple of years.  The dilemma of what to do with those old, outdated cell phones is no longer a problem now that organizations like  CellPhonesForSoldiers.com are around. Visit the website to find a place to drop off those gently used cell phones to the cause.

Cell Phones for Soldiers will recycle the cell phones, and use the proceeds to provide pre-paid calling cards and cell phones to troops serving in the U.S. Armed Forces. Just imagine that you can give a child or spouse the opportunity to hear from their loved one with something that was just taking up space in your house. How beautiful is that?

See Any Worthy Donations In Your House?– The cost for eyeglasses is astronomical when you don’t have an insurance plan that covers them. For lower income families, a pair of glasses can be the equivalent of a week’s salary or more, and is a cost that most just can’t afford. Consider taking your gently used glasses to a local Goodwill, Lion’s Club, or to LensCrafters and donating them to the worthy cause of helping those who need them.

Think of that child who is struggling in school because his family can’t afford a pair of glasses for him and think of that pair of glasses that are gathering dust in an old drawer in your house that could be benefiting him. It seems like a win-win situation to share the gift of sight with someone else.

Craft Your Way to Giving– Do you have the gift of crafting in your possession? You may not realize how valuable that talent is, but it can make the difference in the life of a child, a soldier, or someone who is undergoing treatment for an illness. A quick Google search of your craft skill and the word charity should pull up a number of worthy organization that you can give to.

I am a knitter and am currently working on knitting caps for a chemo drive through an organization. It is something that I can easily do while watching a little evening television with supplies that I already have on hand, but can make the difference in the life of a patient undergoing chemotherapy. I have found though that knitting has been a fantastic gift to share in so many ways and I always try to keep one charitable giving project on my needles at all times. Whether it is whipping up a cap for a chemo patient, donating a blanket to a project like Project Linus, or knitting a prayer shawl for someone who could benefit from this comfort, I am so proud I can use my talents for someone else.

Consider donating your crafting talents to a local homeless shelter, teaching a craft to underprivileged children, or just creating crafts in your spare time that could make someone’s day a tiny bit brighter. The possibilities with the gift of crafting truly are endless!

Whittle Down Your Shoe Collection Charitably– I will admit that I have a bit of a shoe purchasing habit and have developed quite a shoe collection over the years. The good news is that your old shoes do not need to go to waste because of a worthy organization called Soles4Souls.

Soles4Souls is a Nashville-based charity that collects shoes from the warehouses of footwear companies and the closets of people just like you. The charity distributes these shoes free of charge to people in need and has donated over 10 million pairs of new and gently worn shoes. These shoes have been distributed to people in over 125 countries, including Kenya, Thailand, Nepal and the United States.

In our town, the local New Balance offers a drop-off location for the organization which makes donating just as easy as all of the errand-running that you are already doing. Consider weeding through your shoe collections and giving to someone who doesn’t have the creature comfort of a good pair of shoes.

As you can see, the possibilities for giving are endless without really spending a dime. Of course, the best gift you could ever give to any organization is the gift of yourself. Read to a child, mentor a child, serve at your homeless shelter, visit a nursing home, or help at an animal rescue shelter… these are just to name a few!  For oodles of volunteer opportunities, please visit VolunteerMatch.org to find a worthy organization to donate your time and talent to.

Not enough giving opportunities  here? Here are 5 more easy giving ideas!

5 Surprising Things You Could Be Giving Today

  1. Soda Can Tabs– Collect these for a metal donation to Ronald McDonald House charities.
  2. Expired Coupons– Military families can use expired coupons for groceries.
  3. Books– Better World Books can take your old books, pay you, and the books that are sold create a donation to literacy programs.
  4. Old Cars– Goodwill will happily take your old clunker off of your hands.
  5. Diapers– Give your diapers to the diaper bank charity in your town to benefit needy families. If you are a Michiana resident, call 237-7888 and leave contact information to arrange for a donation drop off in our town.

What are your favorite scraps of life giving opportunities for your family? I would love to hear the giving opportunities that your family takes part in!

Creating Beautiful & Frugal Treasure Chests

Tuesday, August 3rd, 2010

When I was a little girl, I had a beautiful musical jewelry box with a twirling ballerina where I would store all of my little treasures. I wanted to create a little box just like that for my son and daughter so I headed to Michael’s and picked up the supplies to create their very own boxes to store all of the important treasures in their lives.

These wooden boxes were $4.99 over by the wooden crafts and paint supplies. I also selected two bottles of spray paint in the clearance section of the store. You just want to make sure to select a spray paint that says that it will work on wood so that your paint will adhere to your project.

When I got home, I spray painted the boxes evenly and then cut out the images that I wanted to decoupage on my treasure chests out of heavy card stock.  I used my Silhouette craft cutter (remember to get those entries in!) to cut out the images, but you could also stencil your images on heavy card stock and then cut them out with scissors.

If you do have  a craft cutter, I chose the princess set, a pirate flag, and a treasure map as my images. Each set was printed and then cut in two different colors that would look nice with my painted boxes and could be layered upon one another to create the images. The treasure map printed out without a “map” within it, so my husband added his art with a Sharpie to the map.

Now comes the fun part! It is time to get your decoupage on! If you have never decoupaged before, it is the coolest craft ever, requires no skills at all, and makes everything look fabulous. Just pour Mod Podge (I used a bottle of the matte finish I had in my craft supplies) into a plastic cup and then use a small sponge brush to glue each cut-out on to your boxes. Once you have glued all of the pieces on, do a light layering of glue over the entire surface, being careful to not shift or cause bubbling around your images. Allow it to dry, do another layer, allow it to dry, do another layer. Two to three layers should be plenty, but you be the judge!

If you want to add a little antiquing to it, just use a little sandpaper to rough it up. Oh, look at that vintage map on top of that little treasure chest. Don’t you just love it?

Once they are dry, they are all ready for treasure filling. Just imagine what could be stored in here. I see my son’s filling with rocks and Pokemon cards & my daughters will be stuffed with glittering plastic jewels or tiny little doll accessories. Whatever is in them,  I have a feeling that these treasure boxes will be loved for a long time.

These would make fantastic birthday gifts and are right within a frugal gal’s gift allowance (a mere $6 in supplies each!) and would be a gift that would be long- remembered!

Gift Giving: Putting Your Own Spin on Photo Journals

Tuesday, May 25th, 2010

I could not wait to show you guys what I made for my moms for Mother’s Day this year.  Unfortunately, to keep it a secret, I had to wait until the holiday was over to show them to you. That being said, these photo books would be perfect for just about any occasion, including the fast approaching Father’s Day holiday!

I know that many people are fans of the photo albums that you can create online, but I had never done one before. I adore taking pictures of my family, but I am not very good about printing them out and sharing them the way I should. I thought it might be neat to share with our moms this year a brag book that that they could enjoy for years to come. I admit that I prefer to make handmade gifts for these occasions (I doubt either mom will ever forget our infamous ping pong wreaths last year), but I knew that there could be a way that I could put a unique spin on these photo albums and add my own homemade touch.

I first weeded through all of the pictures and tried to get a good representation of both of the children as well as pictures of them with the other family members. After selecting my pictures and template (through the photo site I used), I then went to Quote Garden and tried to find a quote for each page of the photo album that would fit the pictures that I had selected. All in all, the process took four hours because of my own admitted perfectionism. I chose a soft-back cover (to save money) and I also visited Coupon Cabin to find a coupon code that I could use towards my purchase. These each cost roughly $16…and it was worth every penny.

These were a few of my favorite photos and quotes that were chosen:

“Everything is beautiful at the ballet” A Chorus Line

“If you obey all the rules, you miss all the fun.” Katherine Hepburn

“There are no seven wonders of the world in the eyes of  a child. There are seven million.” Walt Streightiff

“I have the same goal I’ve had since I was a girl. I want to rule the world.” Madonna

“Brothers and sisters are as close as hands and feet.” Vietnamese Proverb

“There’s no place like home.” Wizard of Oz

“The Force is strong with this one.” Darth Vadar

“A boy’s story is the best that is ever told.” Charles Dickens

“Grandmas hold our tiny hands for just a little while, but our hearts forever.” Author Unknown

“Everything has beauty, but not everyone sees it.” Confucius

“And thank you for a house full of people I love. Amen.” Terri Guillemets

I can honestly say that my copy of this book has already become lovingly worn as I have placed it on my coffee table and glance through it almost daily. Each time, I walk a way a little misty-eyed, a little more thankful, and really proud of my amazing kids.

As the gifts were given, there were a few tears and a whole lot of pride radiating from our proud grandma and nana. It is the perfect gift for purse-toting and brag sessions. From what I hear, they have already made the rounds in their workplaces and churches. To me, that is when you know that a gift is a total success..when it just must be shared!

Just a few quick tips:

– Don’t forget to check for coupon codes through whatever photo book publishing site you use. There are usually multiple coupons available. Be sure to compare which coupon will offer you the most bang for your buck. My 20% off coupon, for example, was less than the shipping cost so make sure you crunch those numbers before ordering. Just Google, “Photo company’s coupon code”  and you should get plenty of codes to use towards your purchase.

– I found it easiest to sort my pictures by date first so I could group pictures together on pages easier. Sorting by date also helps to allow the flow into the different seasons of the year and pictures to flow a little more naturally.

– Choose a template with a neutral palette, that will compliment and not detract away from the beauty of your photos.

– Edit your photos before putting them into your book. I use Picnik for my photo editing needs and I absolutely love it. You don’t need to get carried away with the editing (unless you just love to), but it can be a great tool for saturating the color, adjusting color temperature, switching to black-and-white, or adjusting the exposure or contrast in a photo.

Looking for some added Father’s Day inspiration? These crafty bottles brimming over with treats were a hit with my hubby last year.  Our dads also really loved our movie gifts and handmade photo compact disc jackets filled with great music in years past.

****************************

Ironically, I had some great timing on this post because today is the last day to enter for a $50 Snapfish gift card for Father’s Day. Please head over there and get your entry in today! And yes, I actually had to pay for all of those photo books so I am extremely jealous you can get one for free!! Entries are due by 8PM eastern time tonight! Good luck, friends

What did you do for Mother’s Day gifts this year? What is up your sleeve for Father’s Day? Please share!

Reminder: Glad to Give Bake Sale on Friday

Thursday, May 13th, 2010

Friday is our big bake sale day and I have been hard at work in my kitchen to share a fun, healthy, and easy recipe that could be shared at your next bake sale. Bake sale goodies are a specialty in our kitchen and for a moment’s worth of effort; you can produce dozens of goodies and treats for fundraising efforts.

This is a very special bake sale though because we are raising funds for the Glad to Give organization to help pediatric cancer research. Every single day, 36 children are diagnosed with cancer.  Sadly, one in every five children diagnosed dies. How heartbreaking for the parents of these children and for the children that are suffering, especially if more money could just be allocated to the cause to further cancer research. That is where our virtual bake sale comes in.

I am hosting a little bake sale tour and I am excited to show you what one winner (drawn randomly) will receive for participating. This goodie basket contains an apron with matching pot holders, silicone reusable bake cups, measuring spoons, a wire whisk, cupcake sprinkles, a new egg timer and, “The Best Bake Sale Ever Cookbook.”

I hope that you will consider participating and sharing a favorite baking recipe in honor of this campaign. It would mean the world to me, but it would mean a world more to the families of these children! Start gathering those recipes and think of the ways that you could help with my virtual bake sale. I can’t do it without you!

Meet back here on Friday morning to join in the fun and help raise awareness about the Glad to Give Campaign.

Disclaimer: I was paid for this campaign and invested every dollar back into it to spread the word about pediatric cancer. It is far better to give than to receive. I hope you will consider doing the same!