Archive for the ‘DIY’ Category

My Little Holiday Home Tour

Monday, November 30th, 2015

My Little Holiday Home Tour from MomAdvice.com

Can you believe that December is here? I am so excited to celebrate another holiday with my family in our home. You know bloggers that do those beautiful home tours? I am always in amazement at their beauty & style and it inspires me so much. Our ’60’s fixer upper has never felt blog tour worthy, but I started to think about the types of things that really appeal to me in my real life. They aren’t always the big and elaborate homes with loads of store-bought accessories or even what one might find Pinterest-worthy, but more simplistic in beauty & a nod towards homemade.

Doable stuff, that’s what I am after. I think that our home accomplishes those two things so well so I wanted to invite you in for a bit!

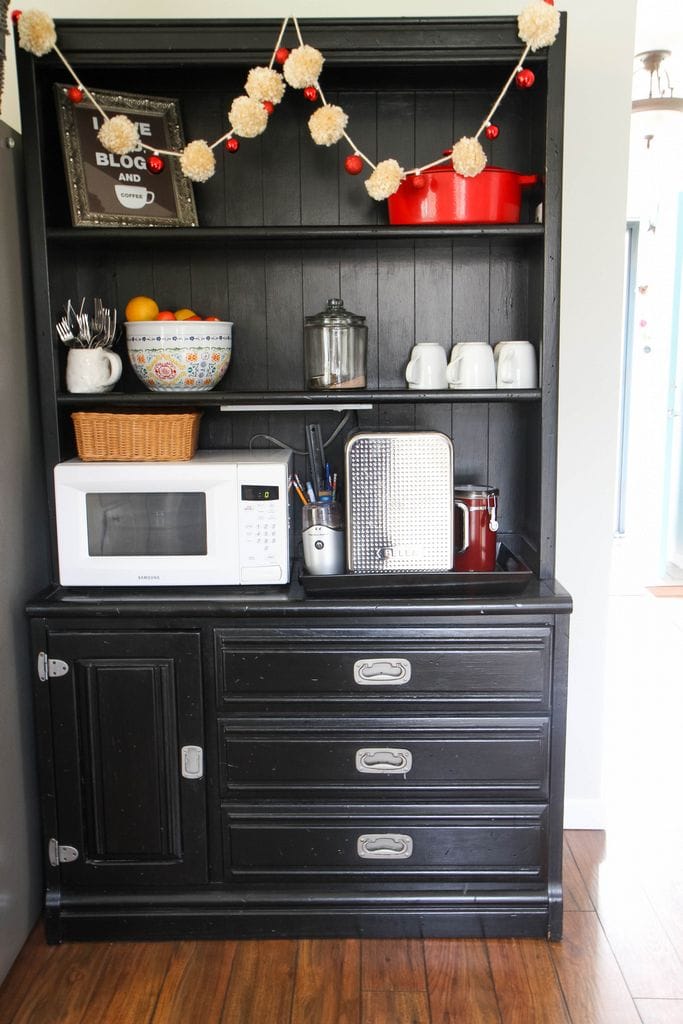
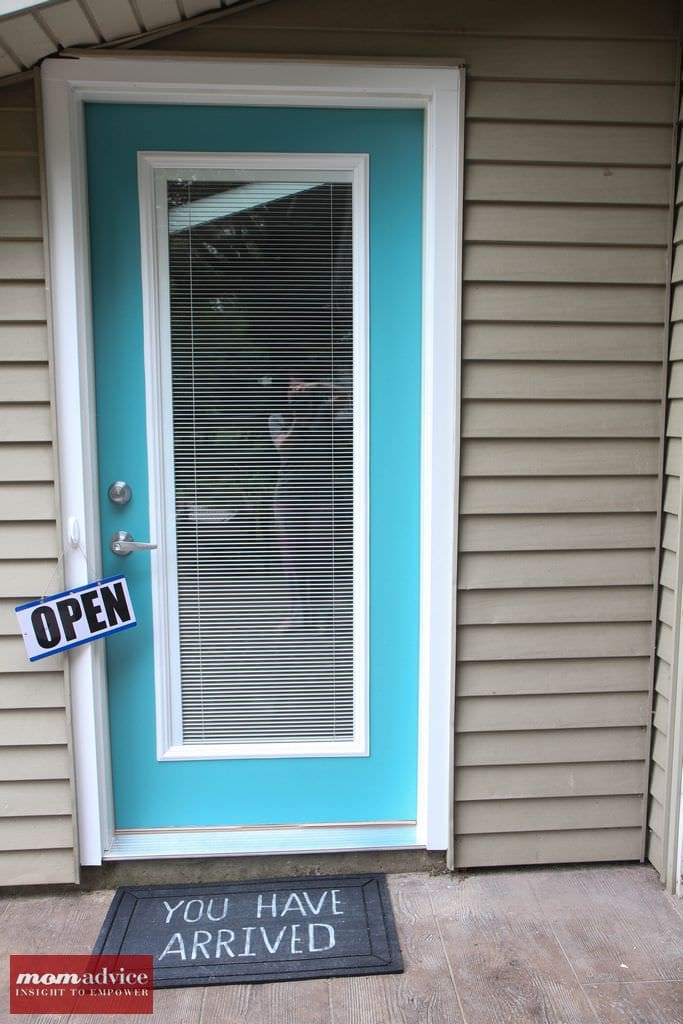
I hope you like coffee because that’s what we serve around here! Please leave your shoes at the door in our beautiful boot tray that I have left out for you. It’s usually one of the first things people remark on and I found that gem at Target years ago! It’s perfect for the narrowest of hallways like ours!
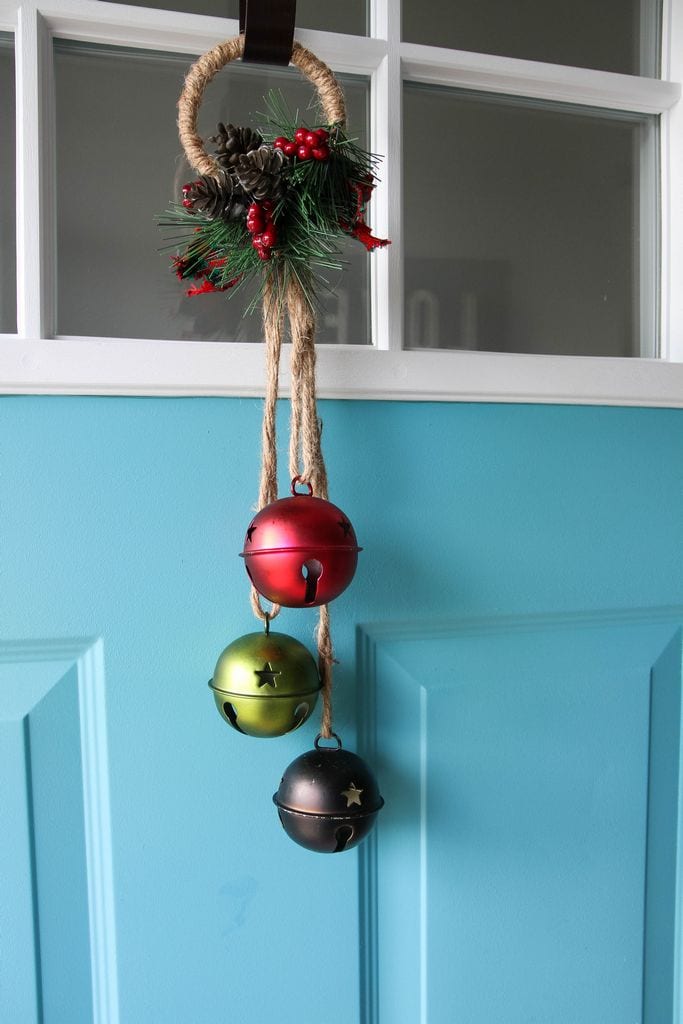
My Little Holiday Home Tour from MomAdvice.com

(bells: michaels)

Guess what? I will have already known you have arrived because I put bells on our door. Typically, I am more of a wreath girl, but I loved the minimalistic simplicity of these bells. I also happened to get them while they were 60% off  at Michael’s and I had a gift certificate to spend from my birthday so these babies were FREE. Yay! Welcome to our little house- we are awfully proud of it!

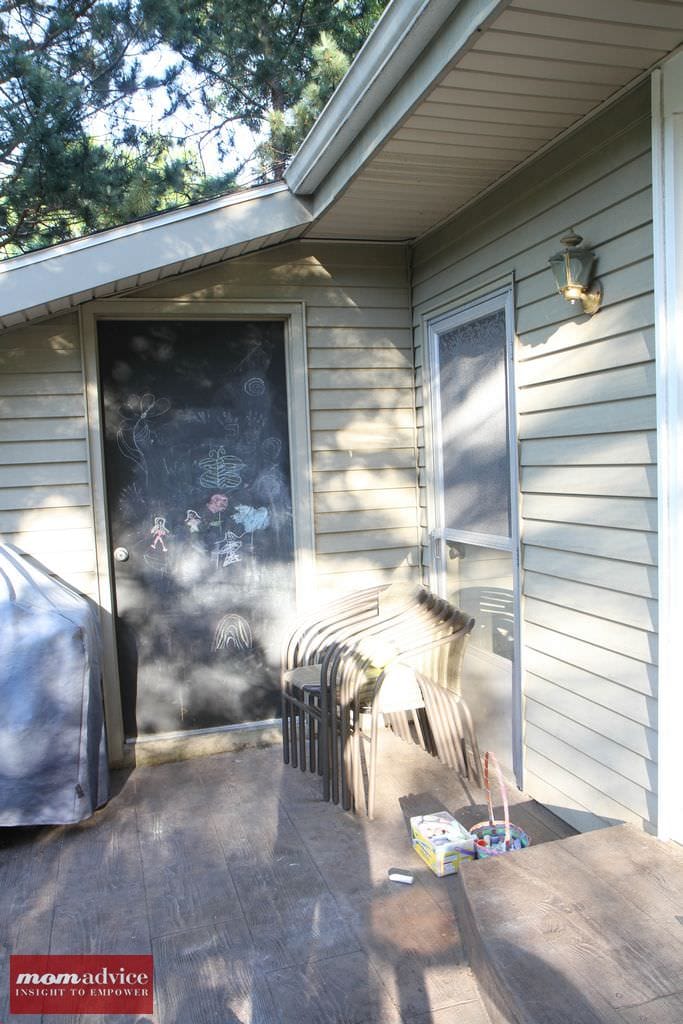
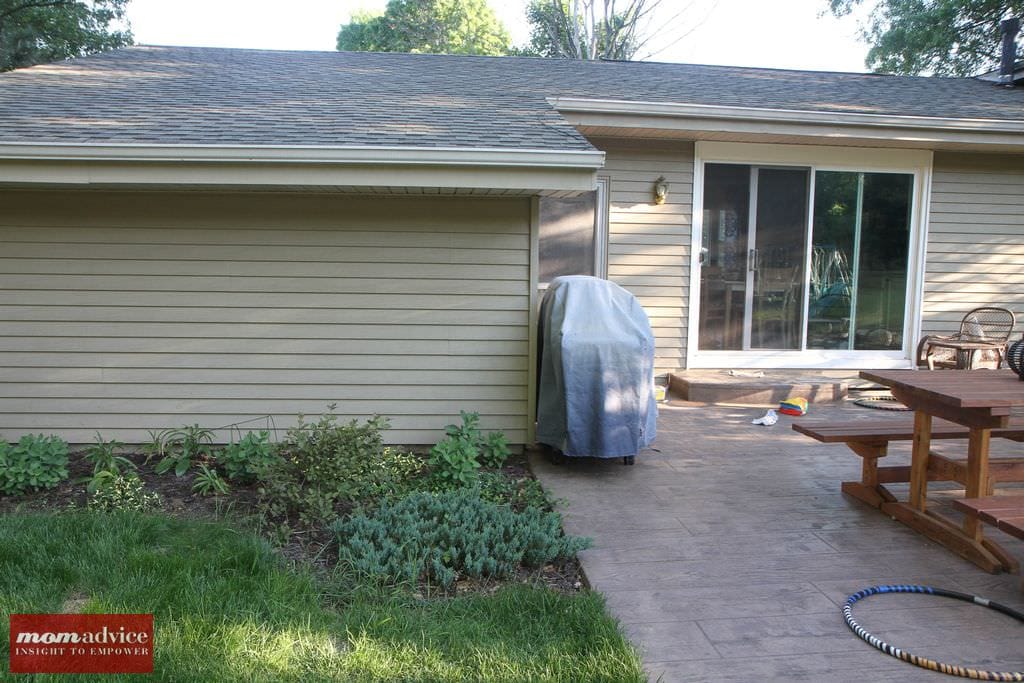
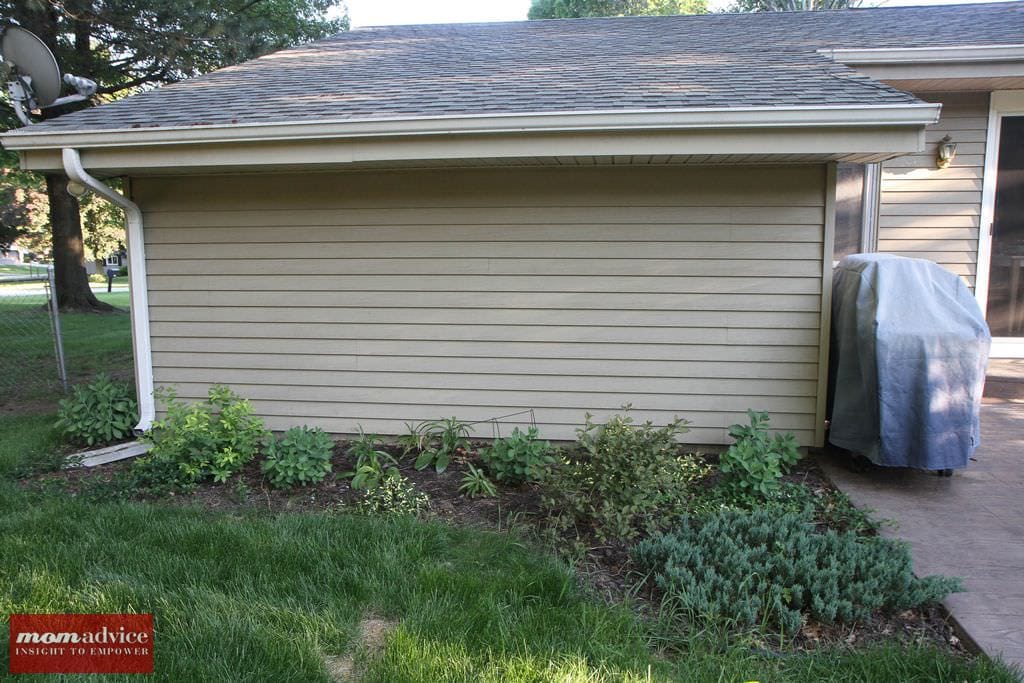
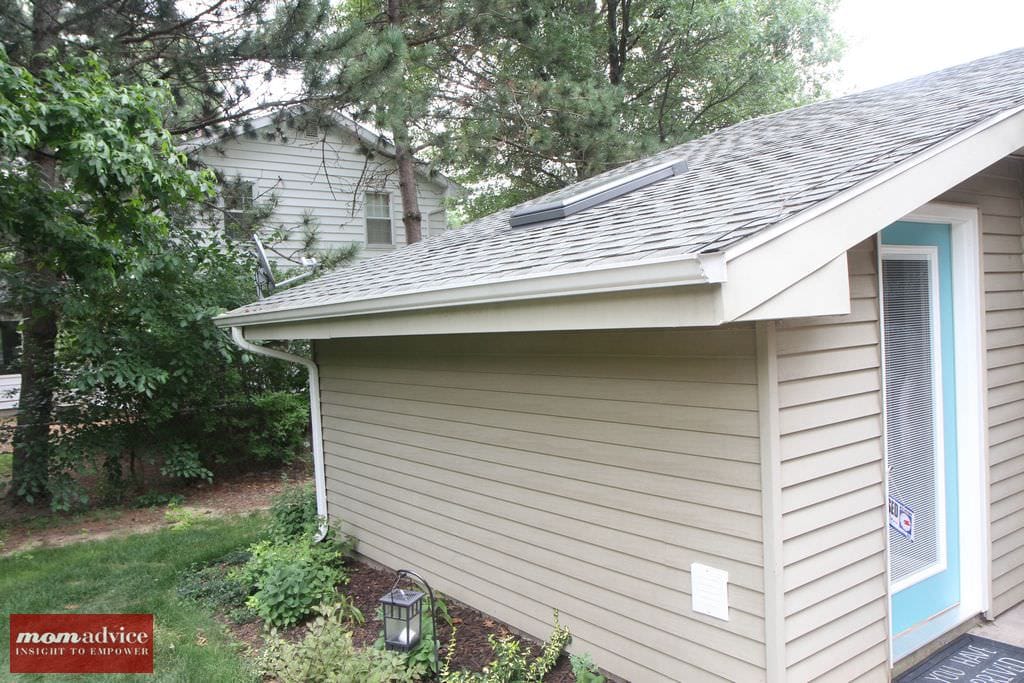
Pay no mind to our hideous yard and feel sad for our neighbors who must view it every day. Notice this is not a yard tour because, seriously, we aren’t that amazing at yard work.

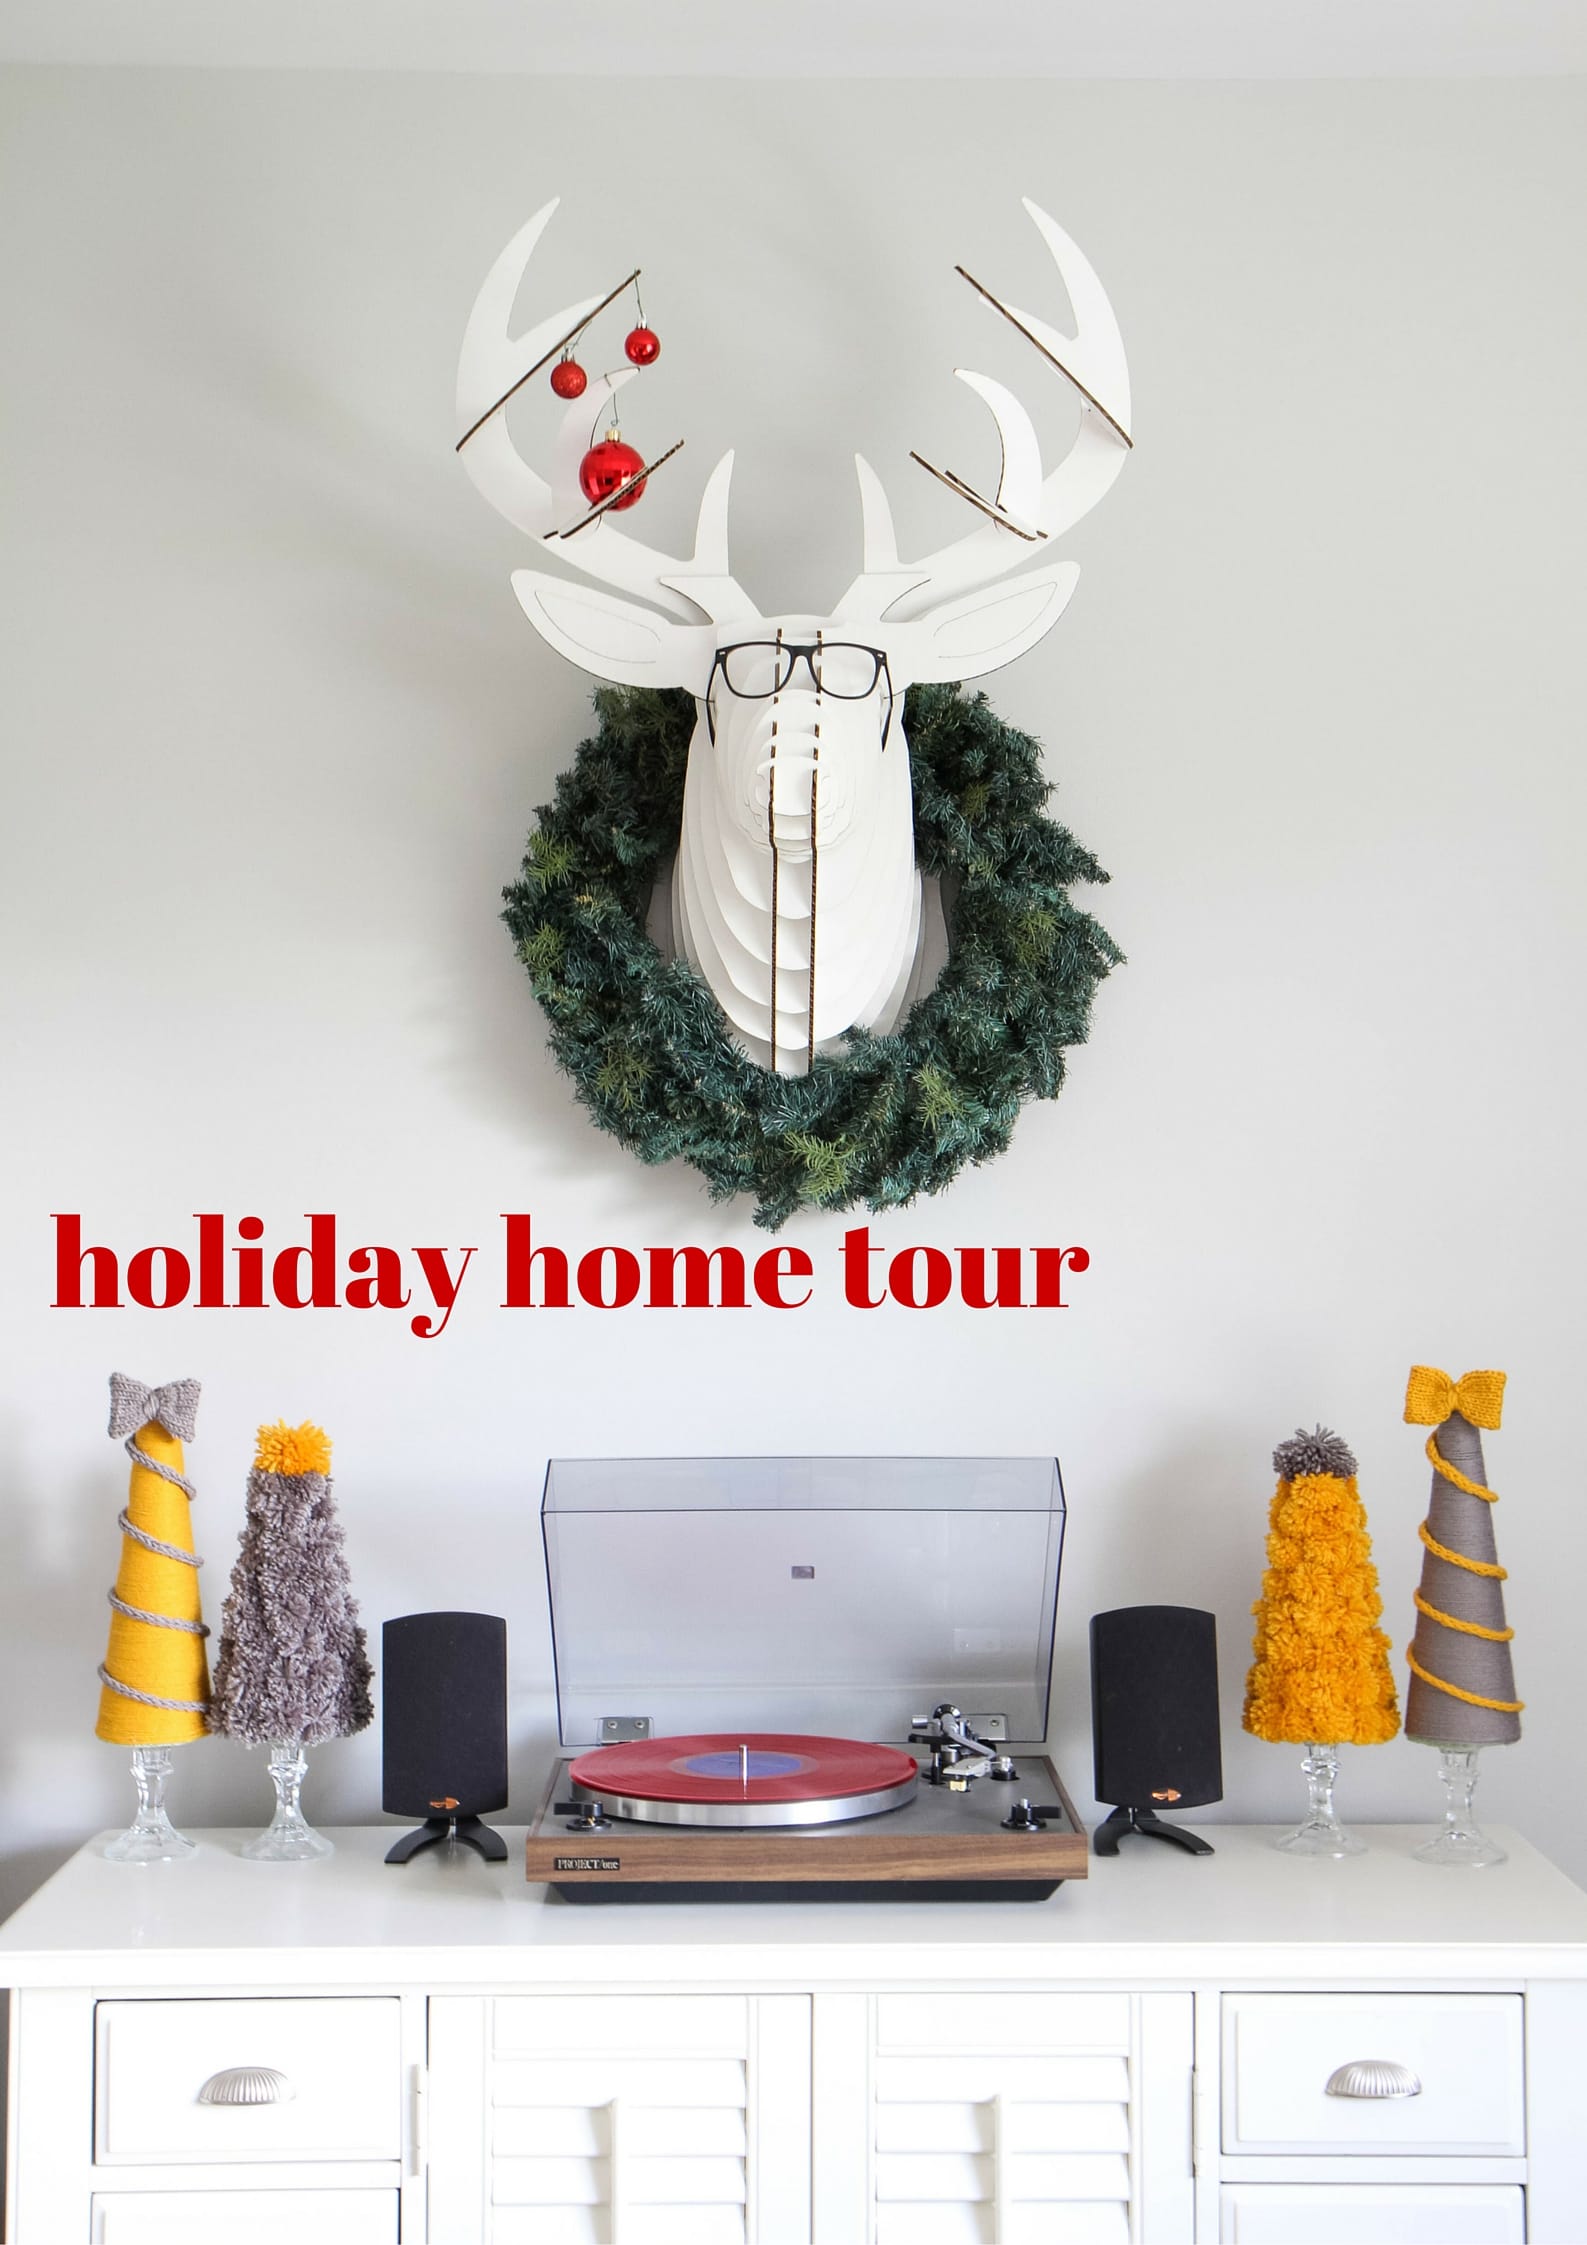
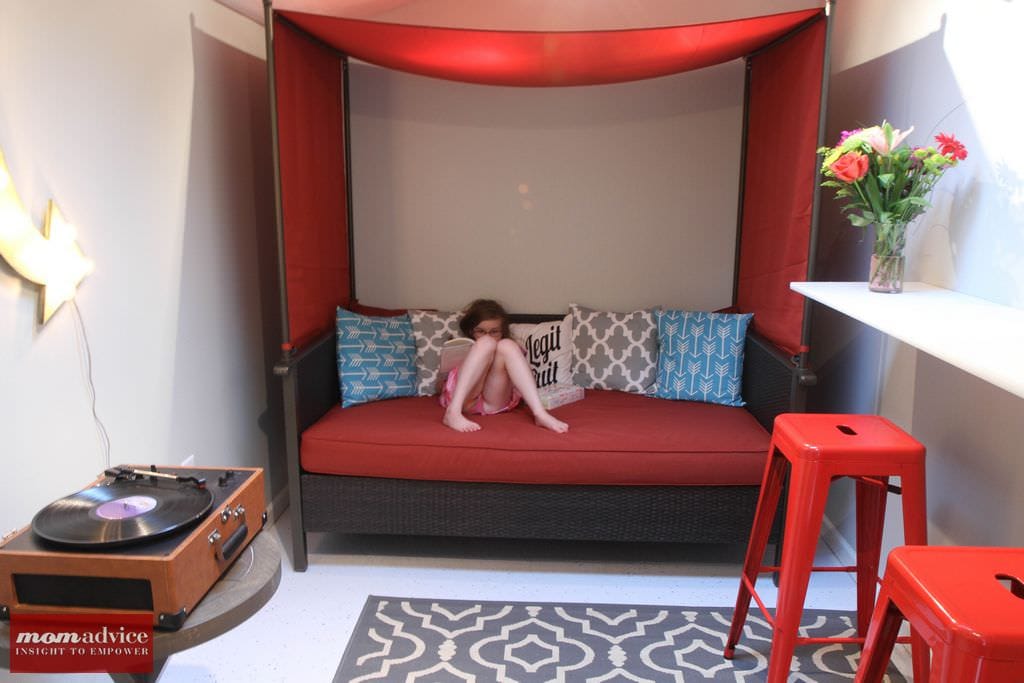
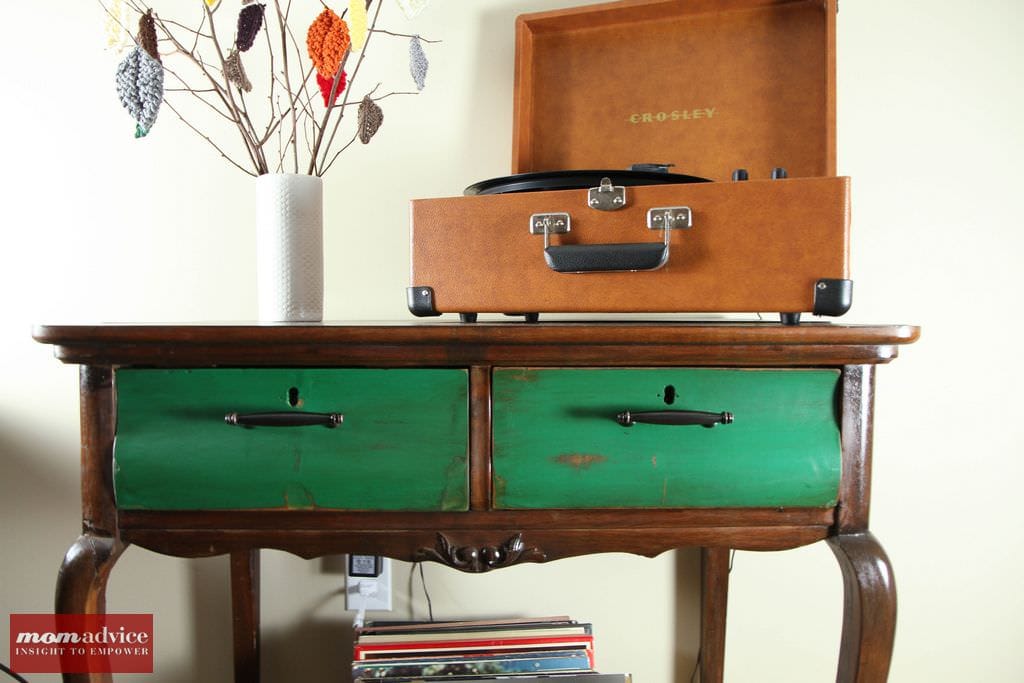
Let’s just ignore it for now and move on into our front room where no televisions are allowed, only vinyl.

My Little Holiday Home Tour from MomAdvice.com

My Little Holiday Home Tour from MomAdvice.com

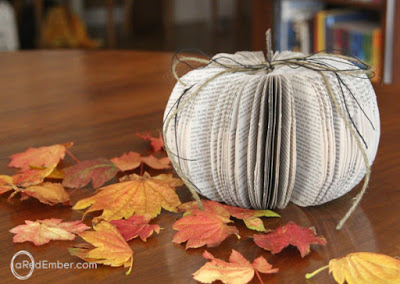
(sources: bucky cardboard deer head/yarn pom pom trees tutorial/every day i’m hustlin pillow/knitted leaves centerpiece tutorial/pillows (a daily deal)/curtains (a daily deal)/fabric-lined bookcases tutorial/ thumbtack pumpkin tutorial/charlie brown vinyl)

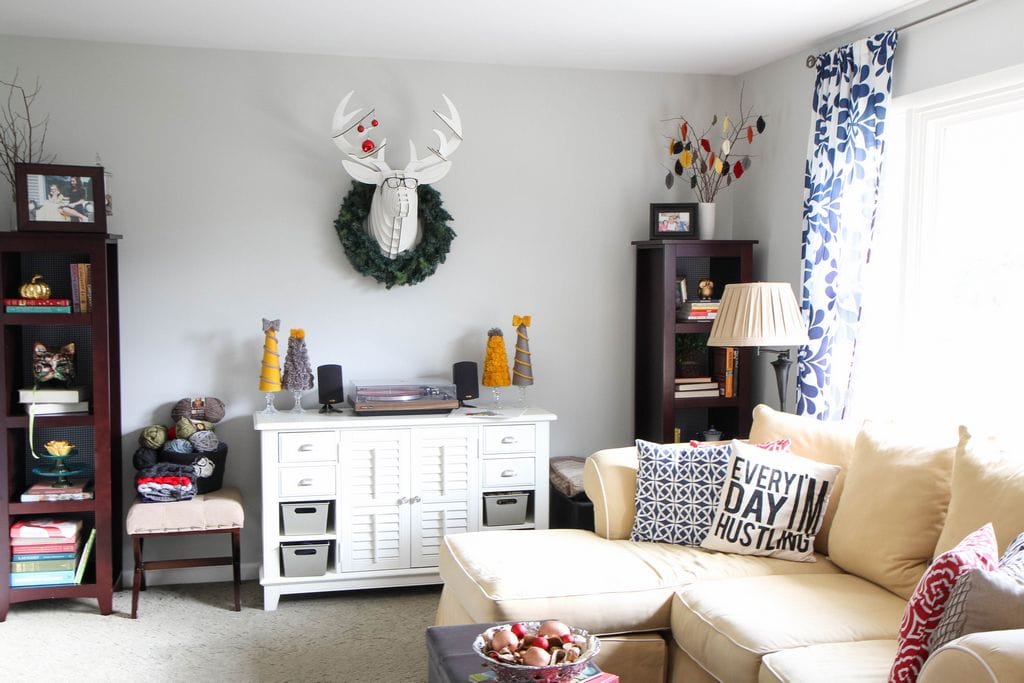
Here is a wide shot of our front room. I am leaving my mountain of knitted cabled earwarmer projects because I am too lazy to move them.

Now that I think about it, this is probably why I don’t get invited to do blog tours.

Hey, we live here!

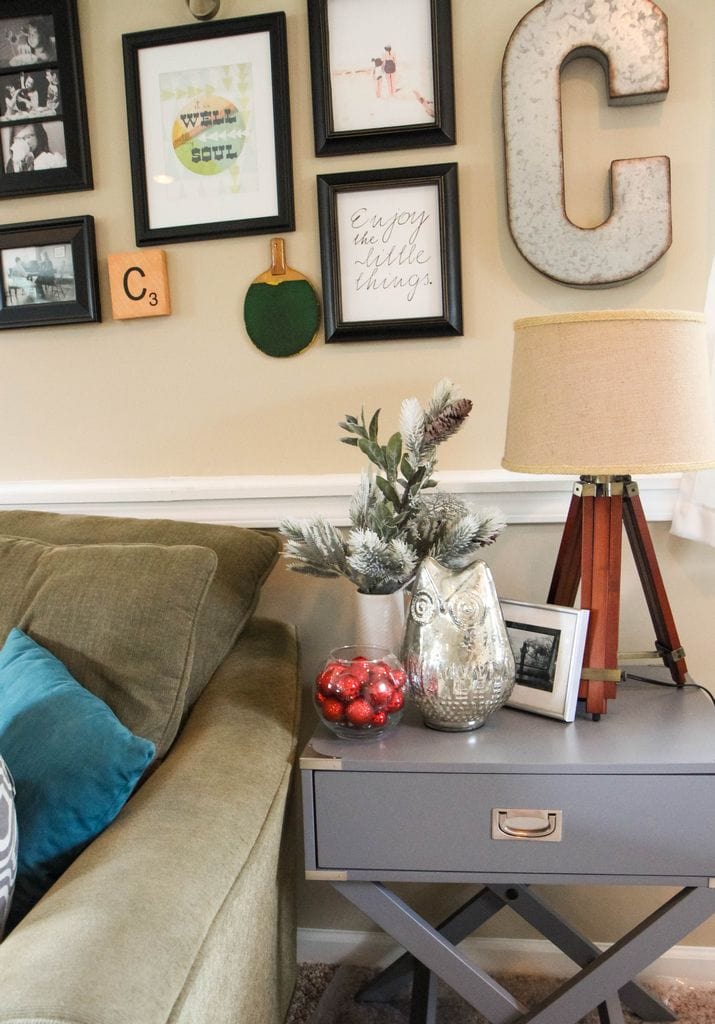
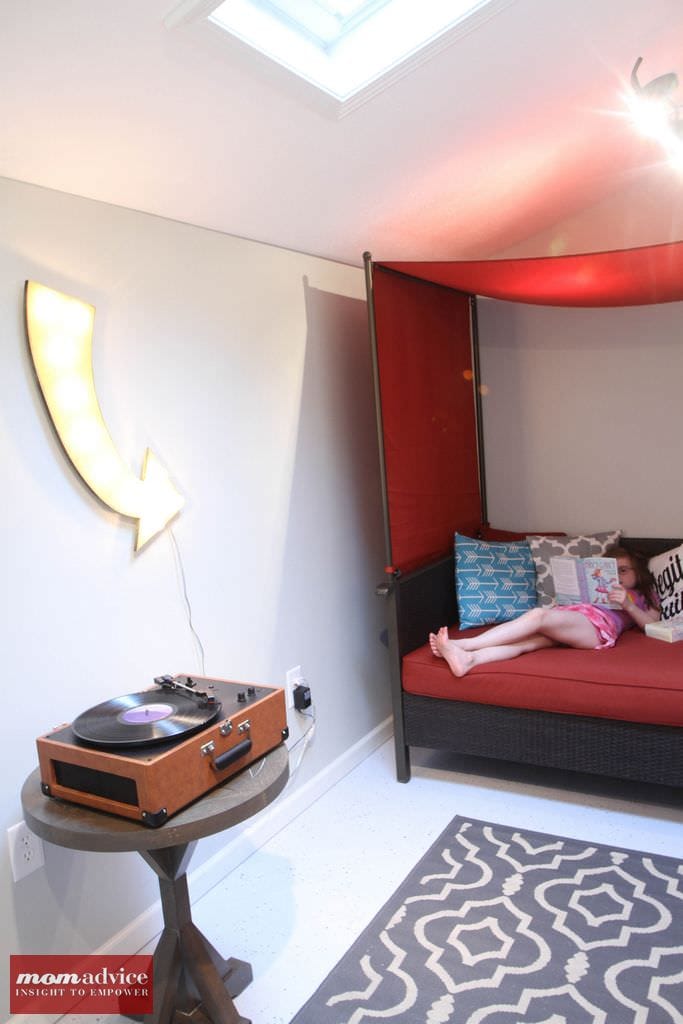
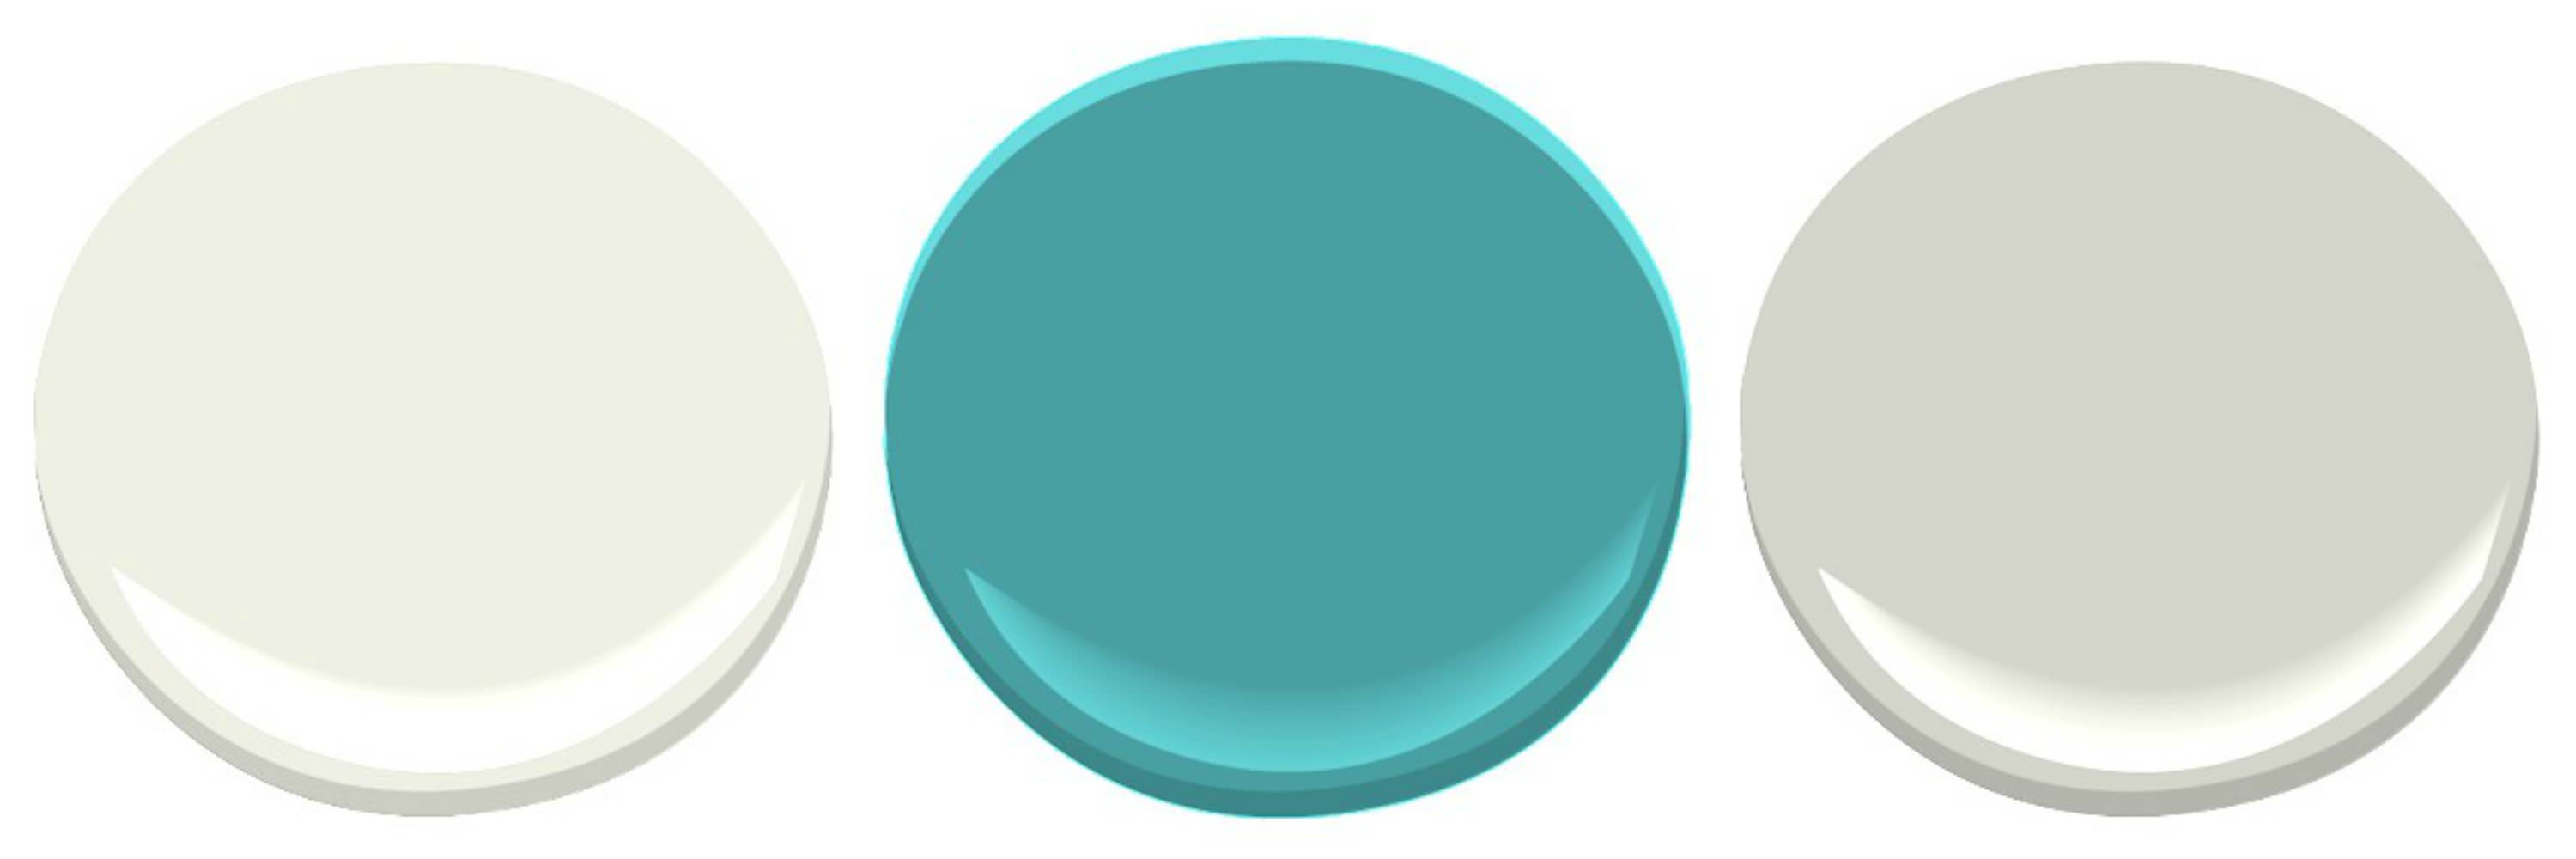
We just had this room painted in my favorite Benjamin Moore Gray Owl paint color along with fresh ceilings, new trim, and the window trim painted. This was a much needed update to this tired old house. This is my favorite room in our home now because it houses our record player that was gifted to us by my husband’s father and all the light spills into this room making it warm & cozy in the winter.

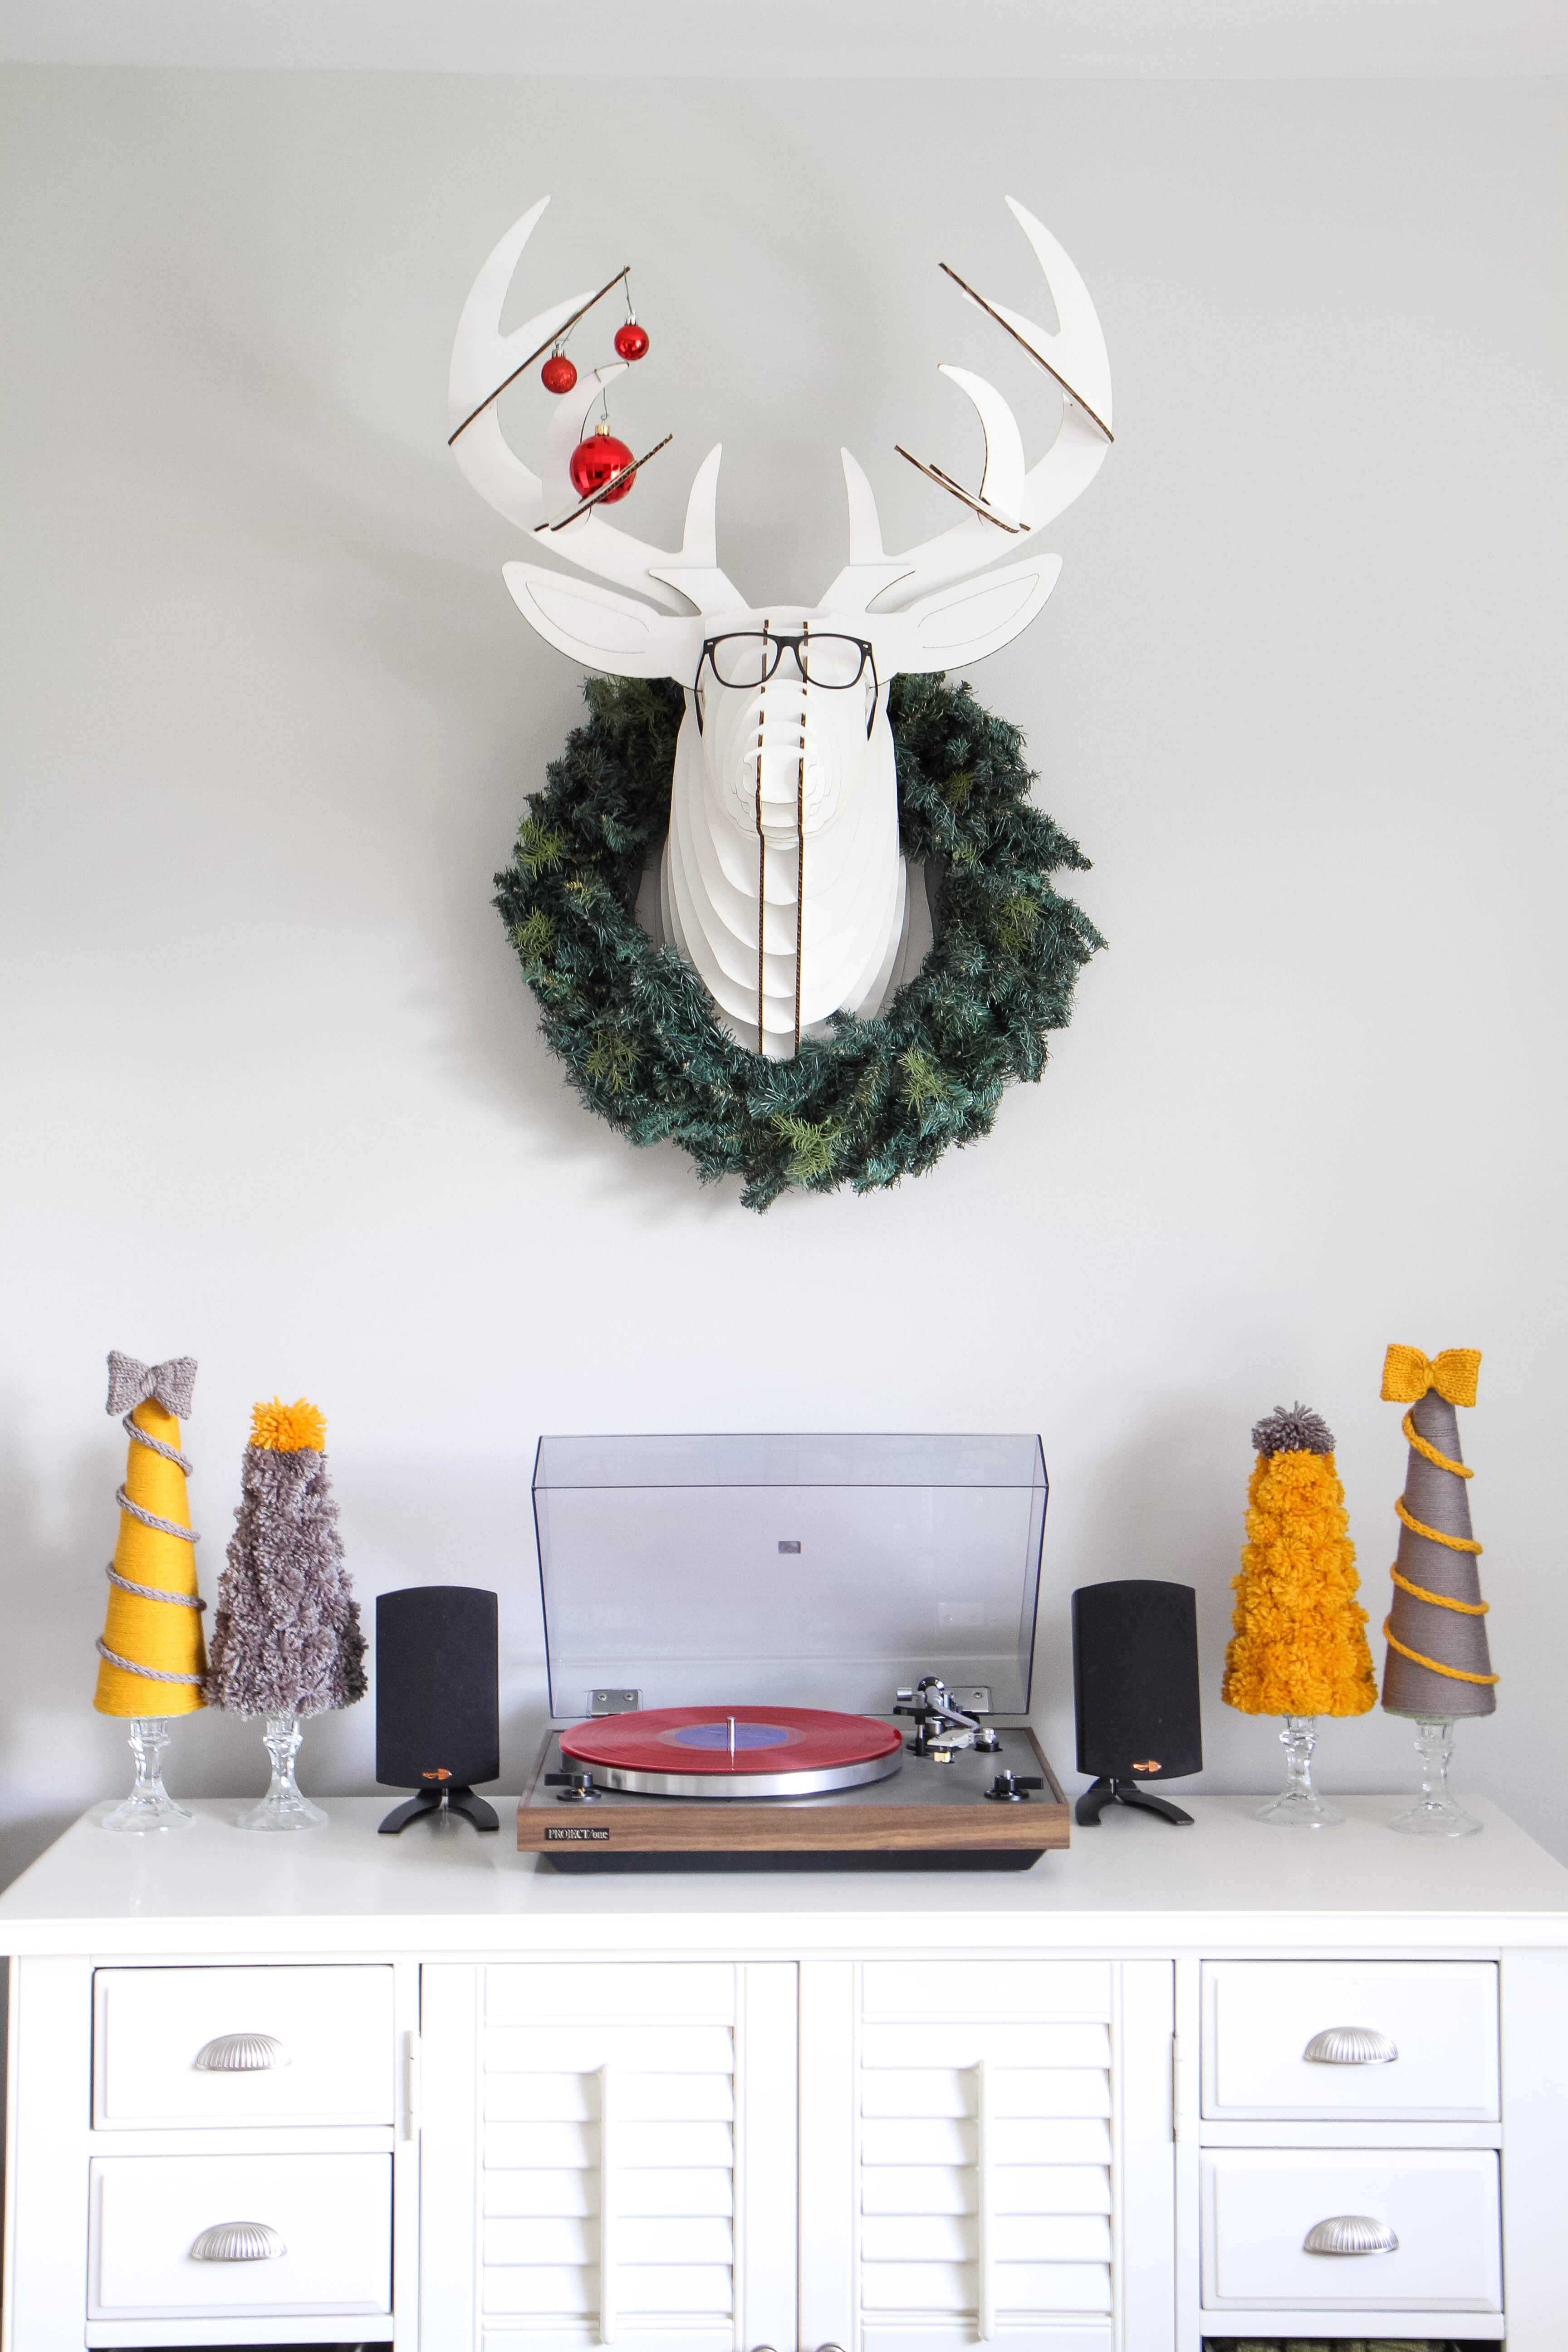
Our favorite accessory is our deer (I even included him in our gift guide!). We have way too much fun with this cardboard deer and decided to move the furniture around to really put him on display because Bucky is the star of the show. I loved decking him out for the holidays, although there is rarely a day when Bucky isn’t decked out in some way. In fact, he looks ridiculous now without glasses.

My Little Holiday Home Tour from MomAdvice.com

My Little Holiday Home Tour from MomAdvice.com

My Little Holiday Home Tour from MomAdvice.com

My Little Holiday Home Tour from MomAdvice.com

My Little Holiday Home Tour from MomAdvice.com

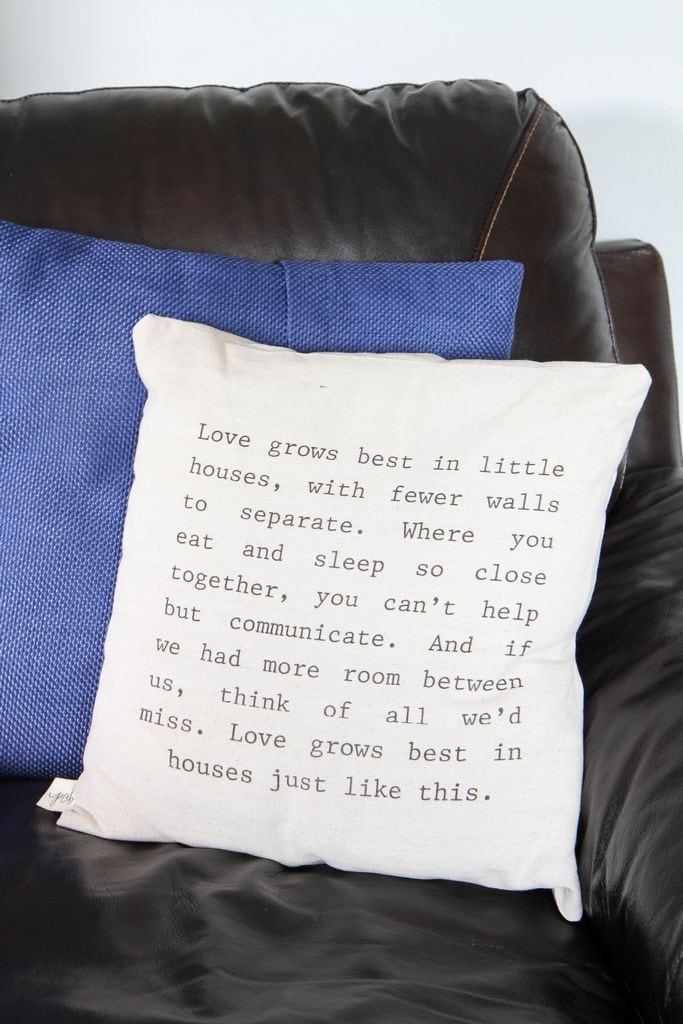
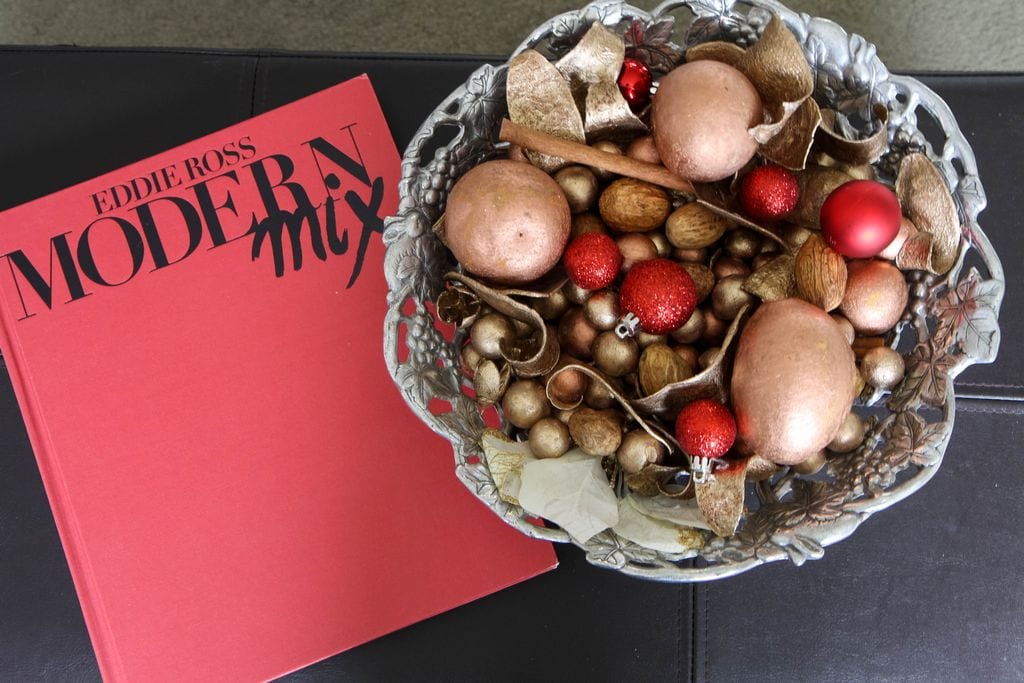
(sources: love grows best in little houses pillow cover/eddie ross modern mix/vintage home ec trophy (similar)/ pom pom wreath tutorial/ laura ingall’s wilder collection reissued b&n classic (similar)/wuthering heights reissued b&n classic)

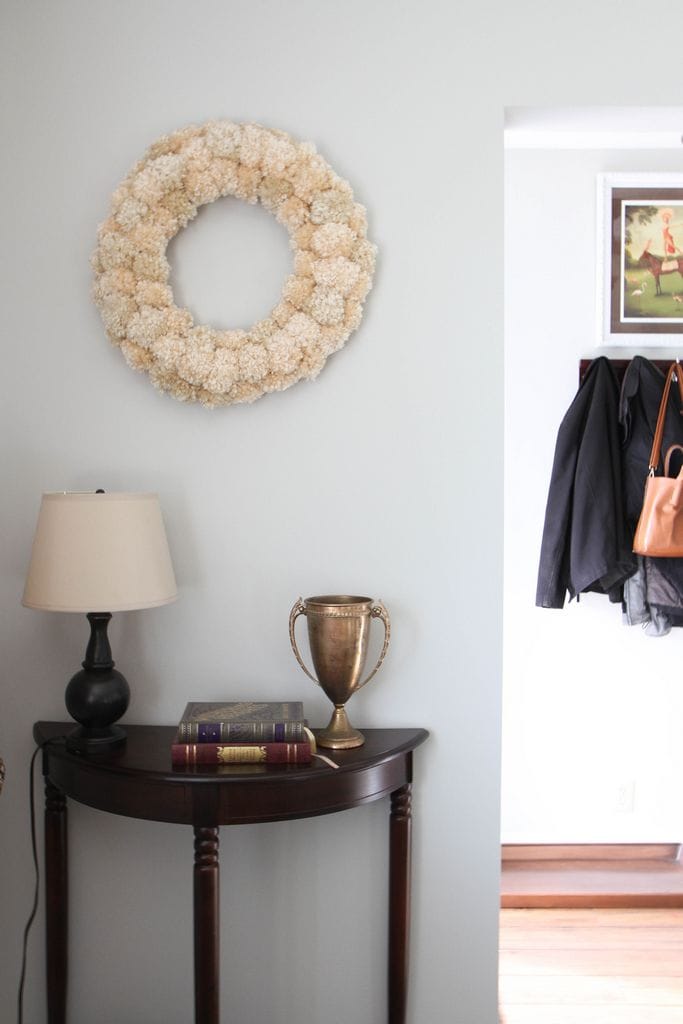
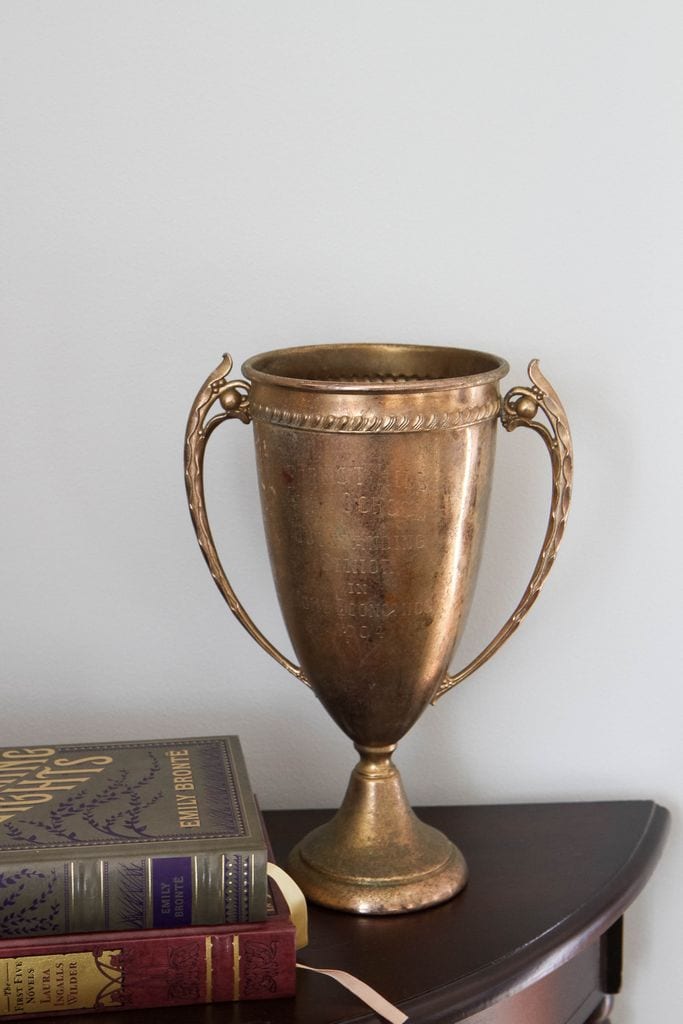
I wanted a creative spot to put our keys and found a vintage first place home economics trophy from the 60’s on etsy that I absolutely love for throwing our keys into.  Let’s face it, no one is giving me any awards around here so I have to award myself. Well done, self.  It’s not Christmas-y, but it is one of my favorite things in our house.

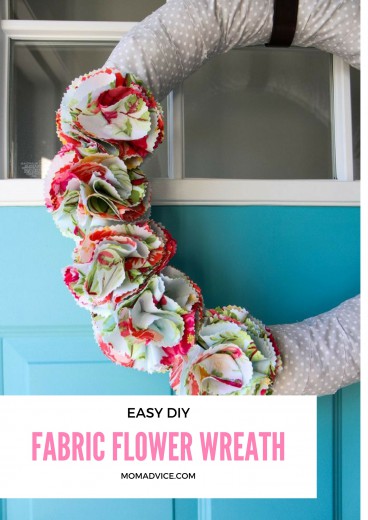
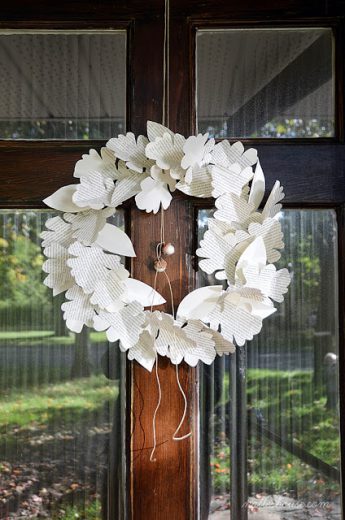
My pom pom wreath was so labor intensive that I never put it away and it is now a year-round addition. I find that happens with a lot of homemade goodness around here. When you work that hard on something you really should show it off!

My Little Holiday Home Tour from MomAdvice.com

My Little Holiday Home Tour from MomAdvice.com

My Little Holiday Home Tour from MomAdvice.com

My Little Holiday Home Tour from MomAdvice.com

My Little Holiday Home Tour from MomAdvice.com

My Little Holiday Home Tour from MomAdvice.com

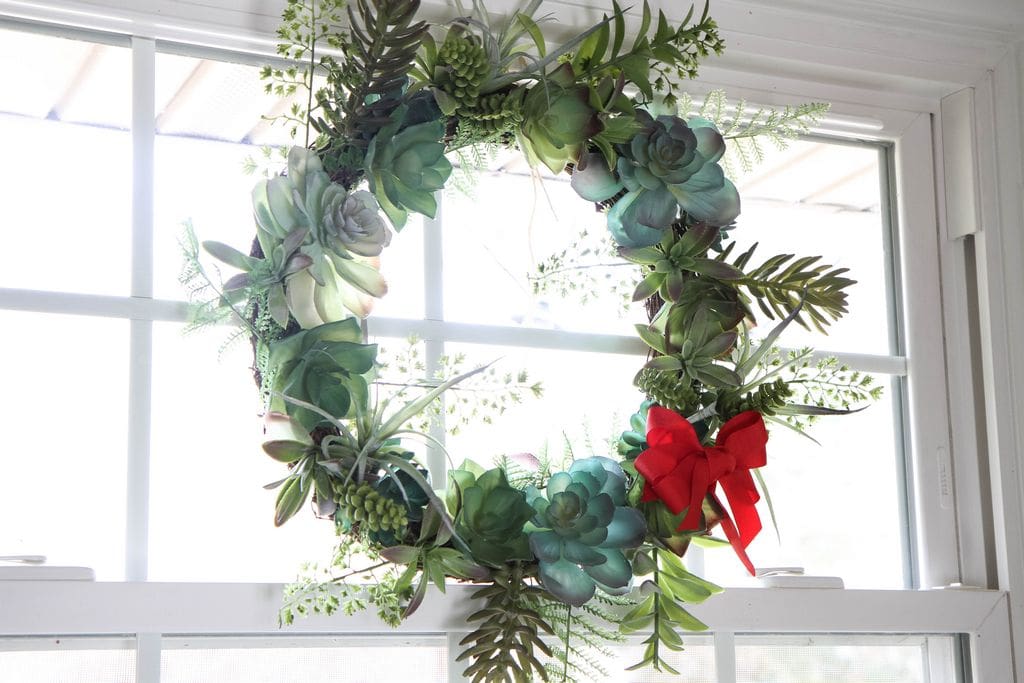
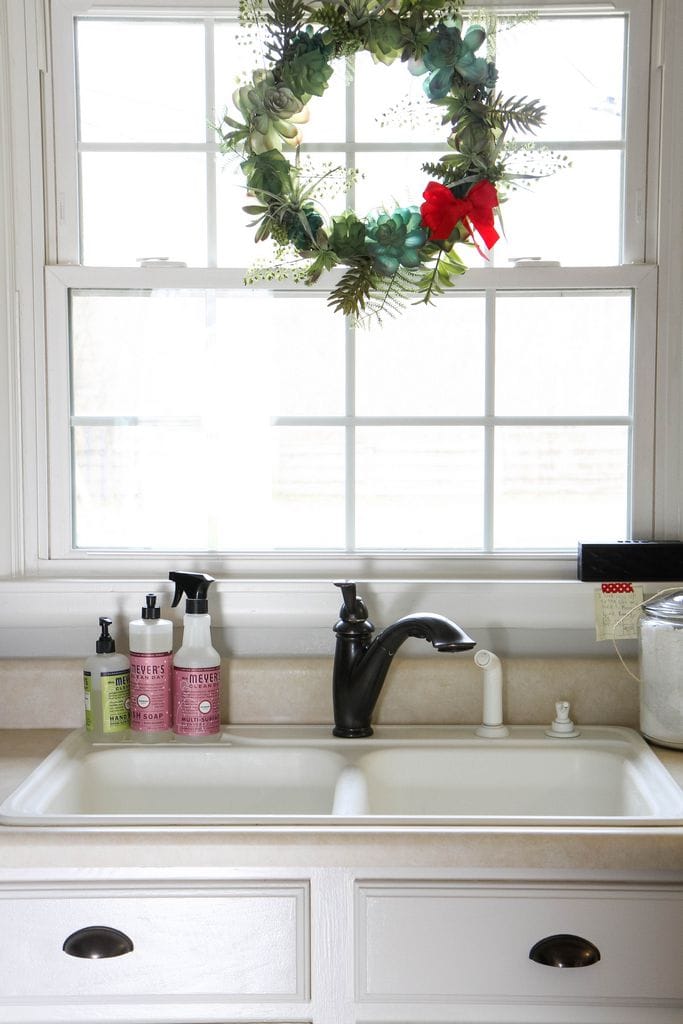
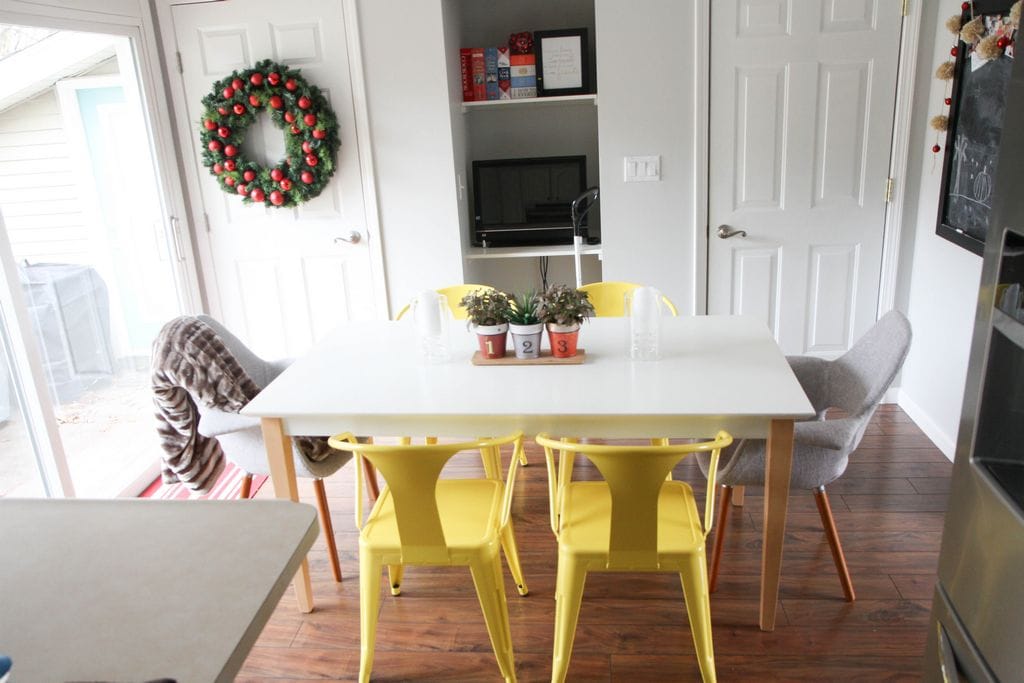
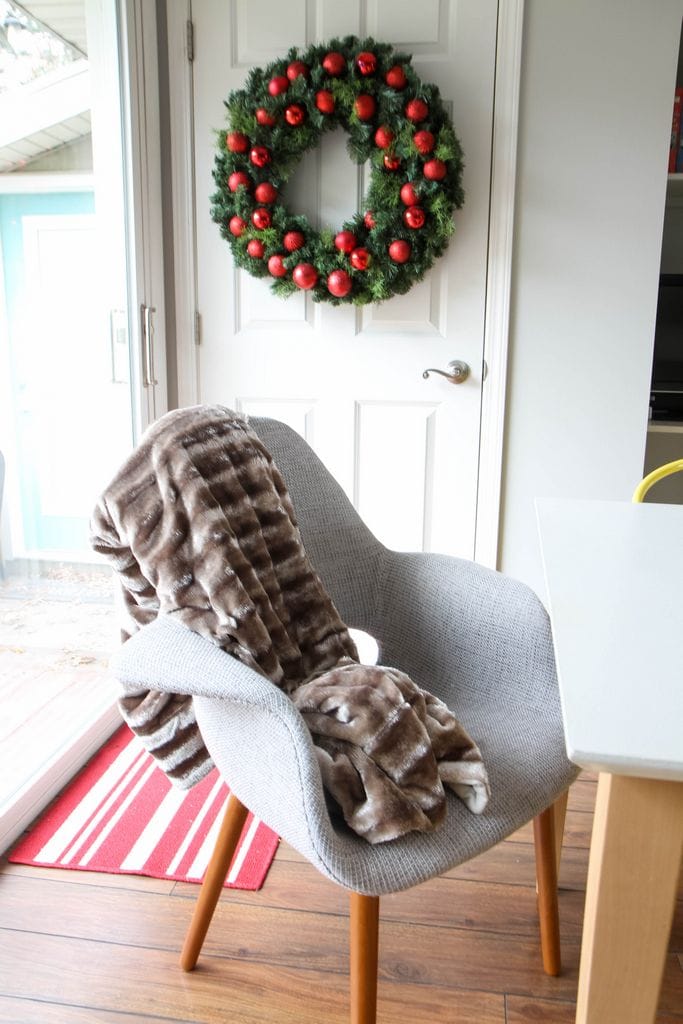
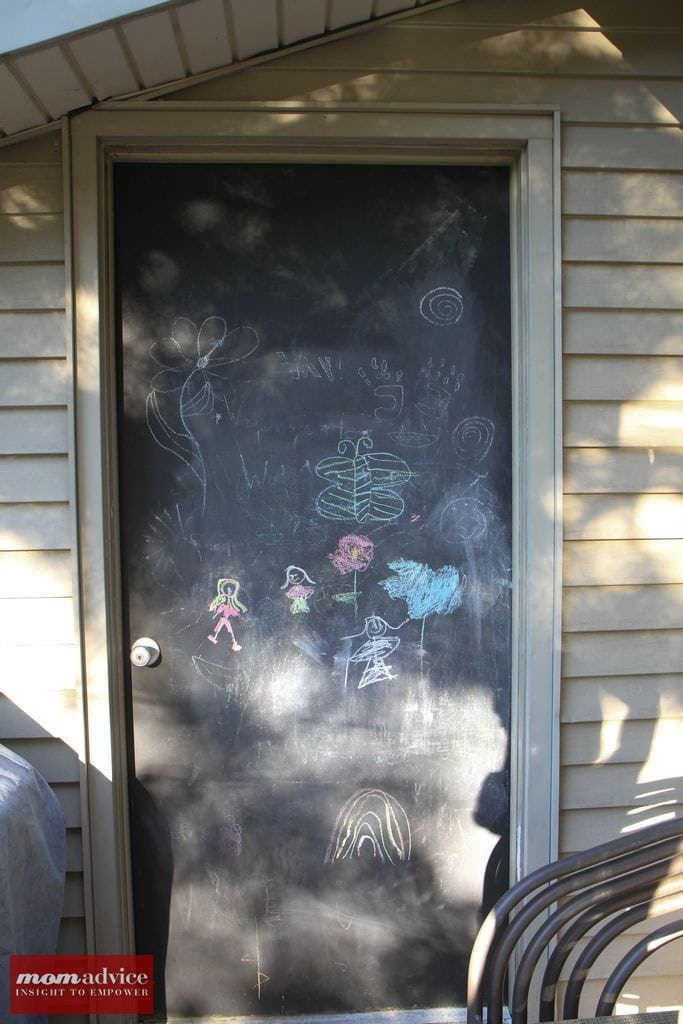
(source: mrs. meyer’s everything/ painted desk with bookshelf tutorial/ painted kitchen table tutorial/painted kitchen cabinets tutorial/ barclay light gray armchairs/yellow metal dining chairs/furry throw/ornament wreath handmade/succulent wreath/ yarn pom pom garland tutorial/chalkboard)

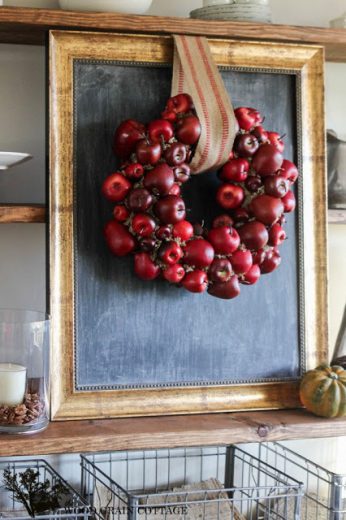
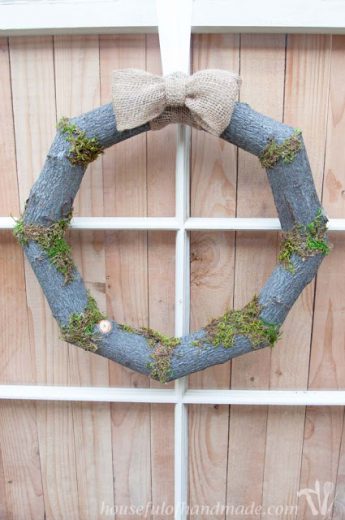
I have found the addition of red to anything green instantly makes it feel like Christmas. I tacked on a few bows to my green wreaths so I don’t have to switch them out for a month and just wired them on with a little floral wire for easy removal. Instant holiday!

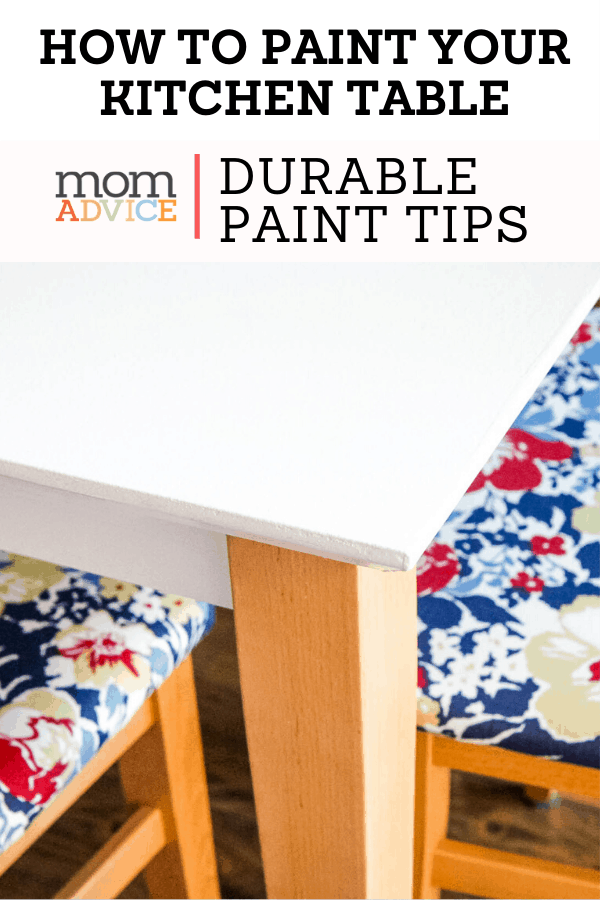
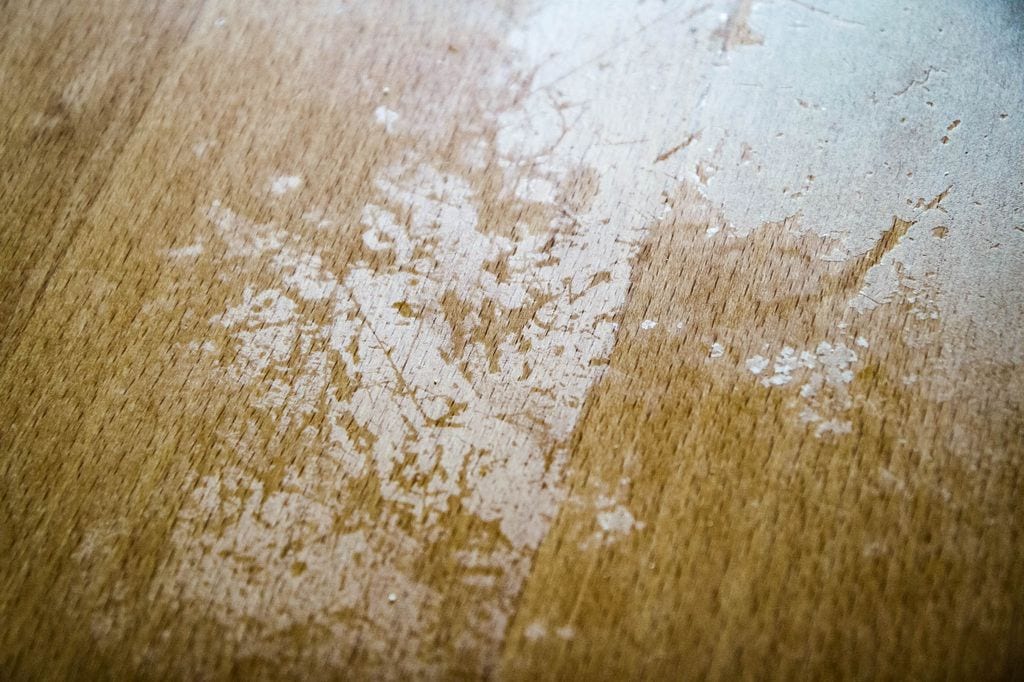
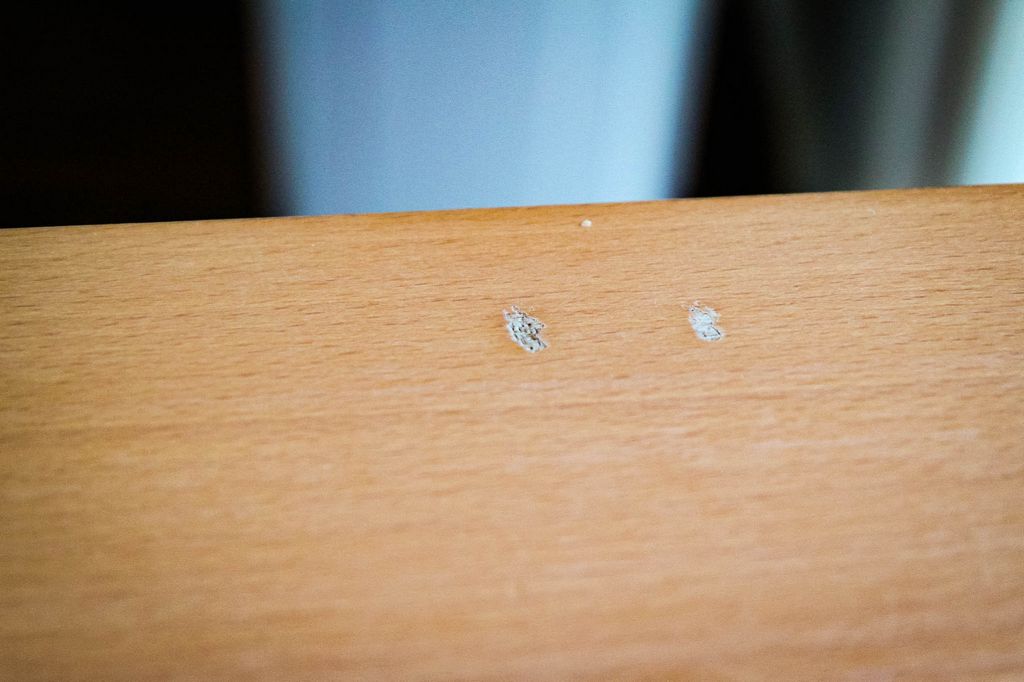
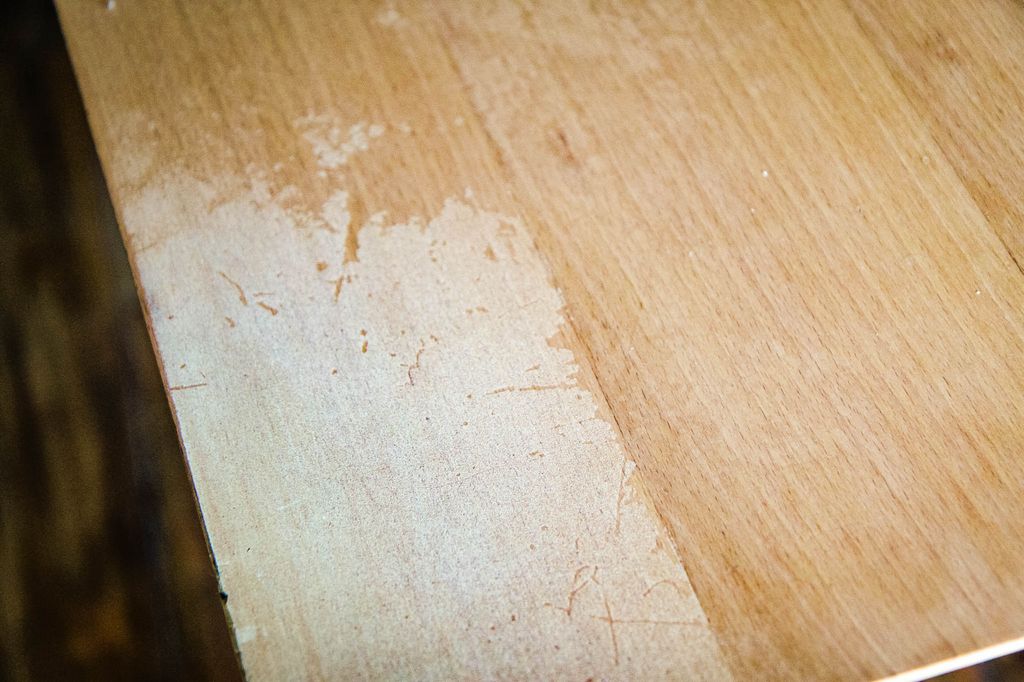
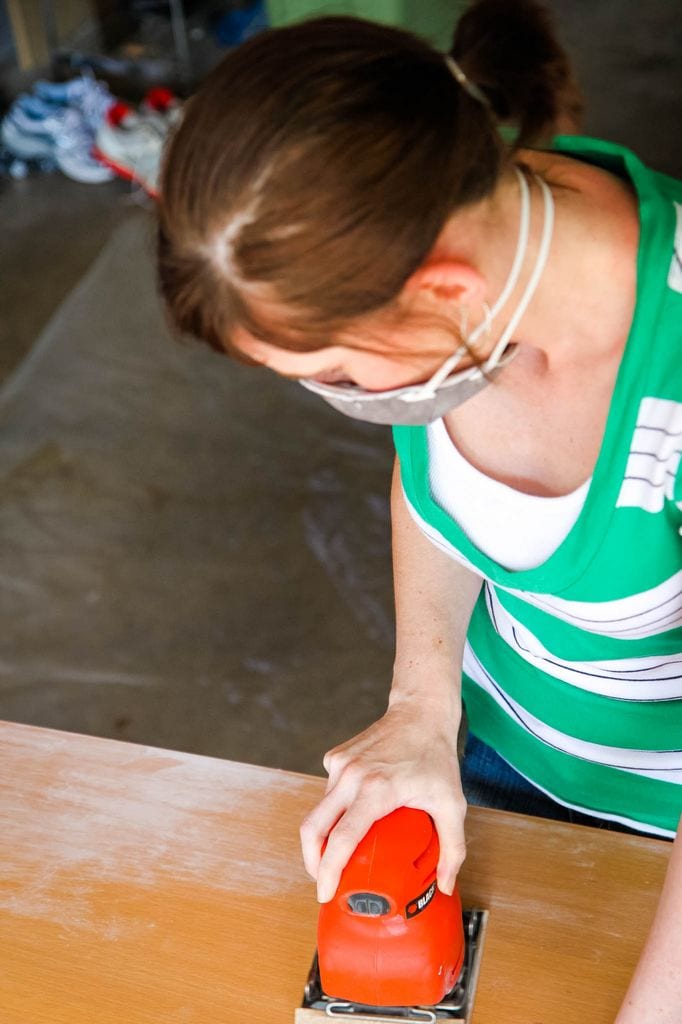
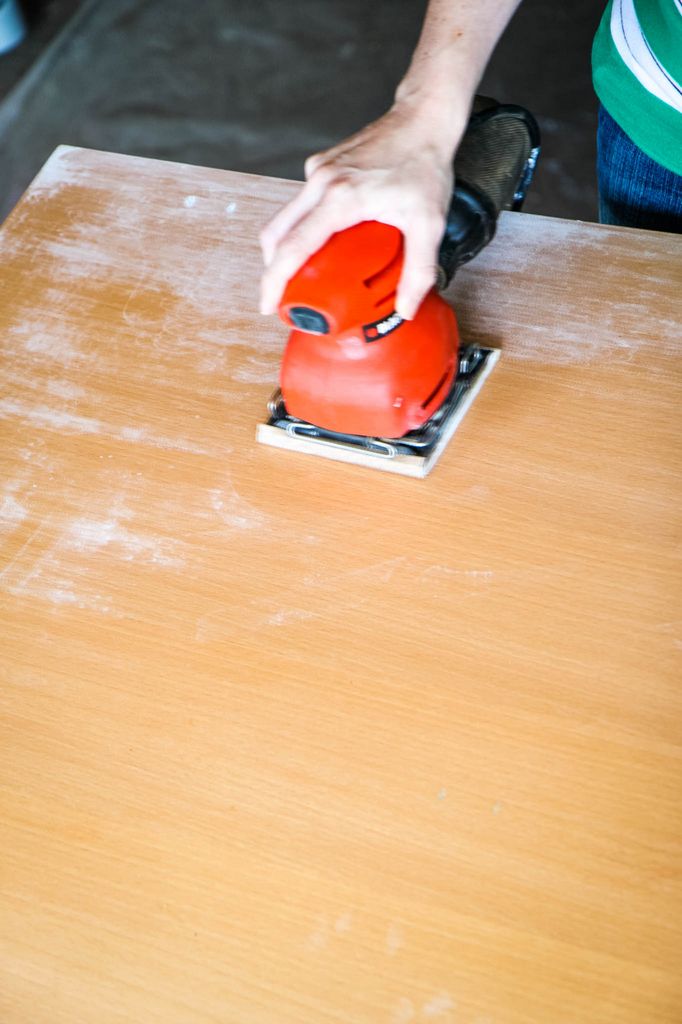
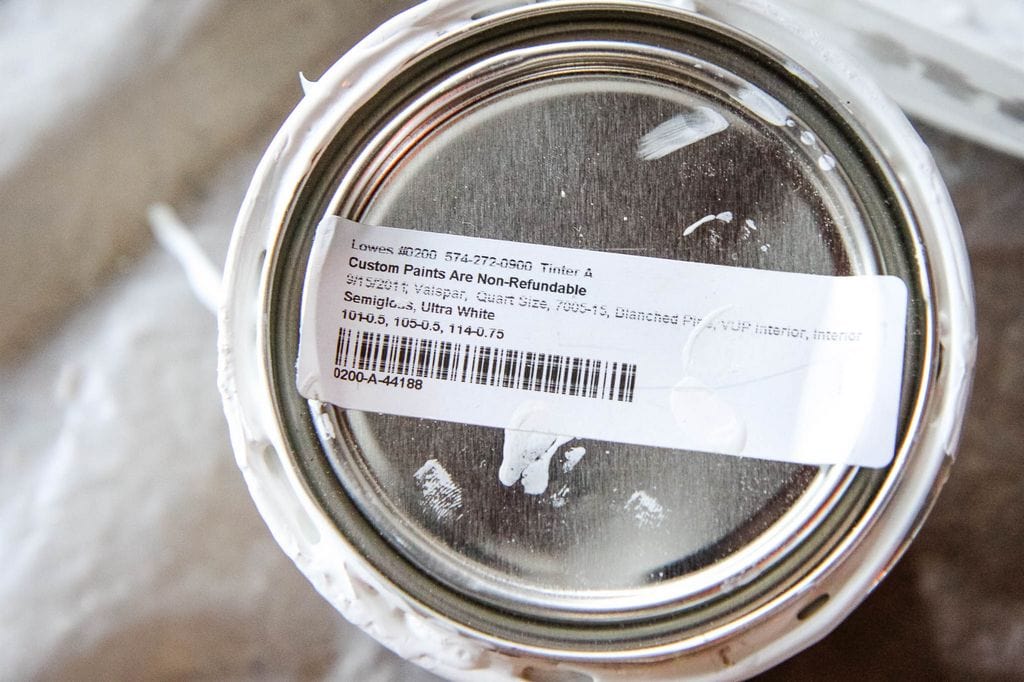
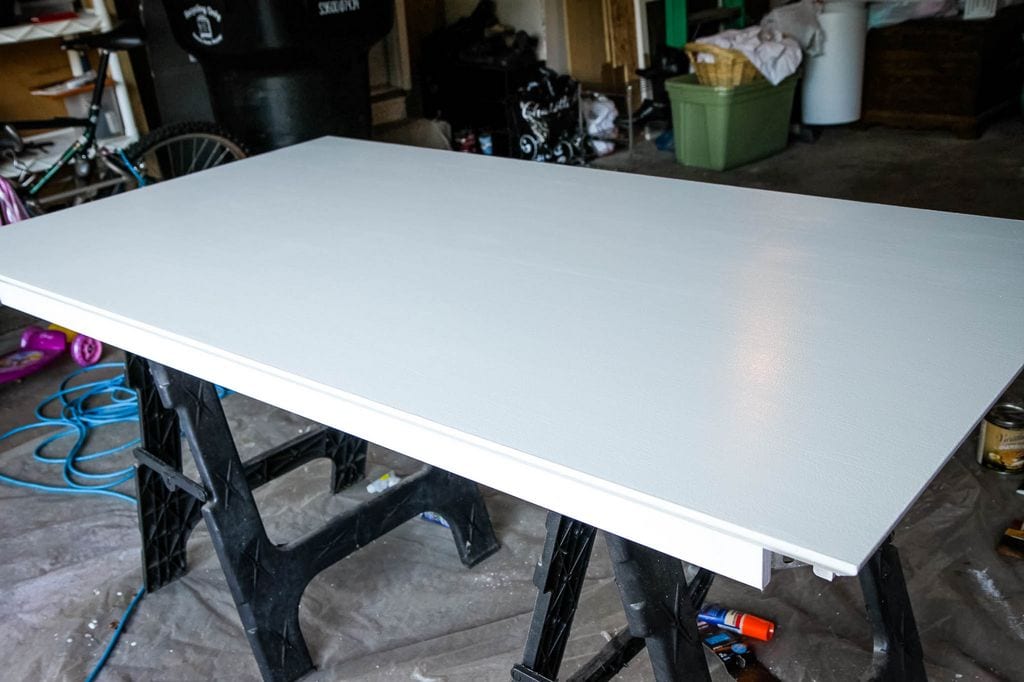
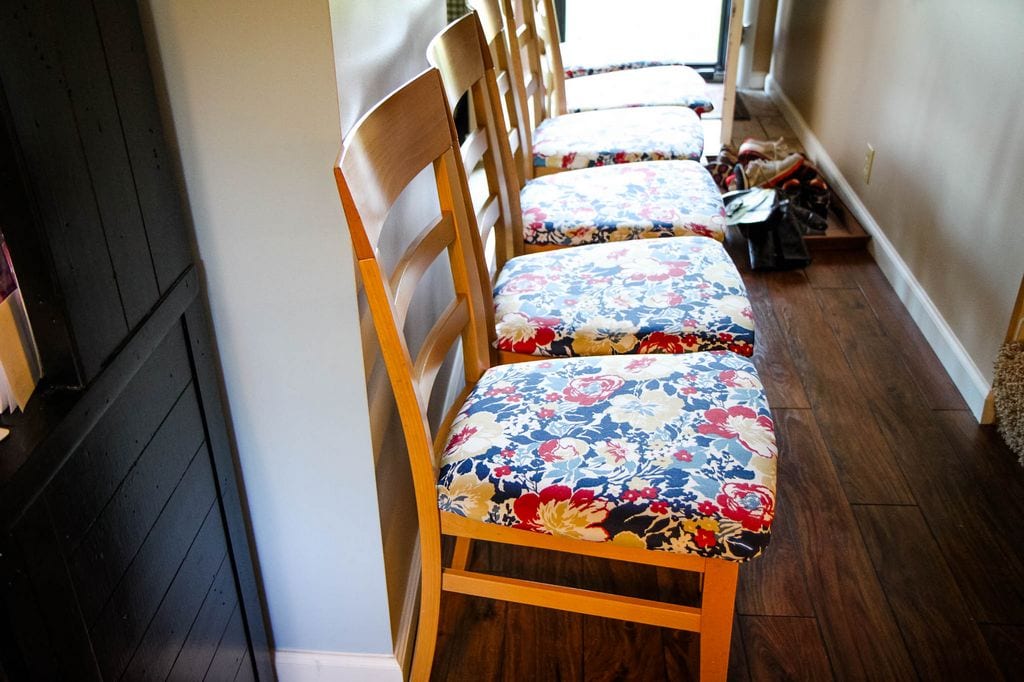
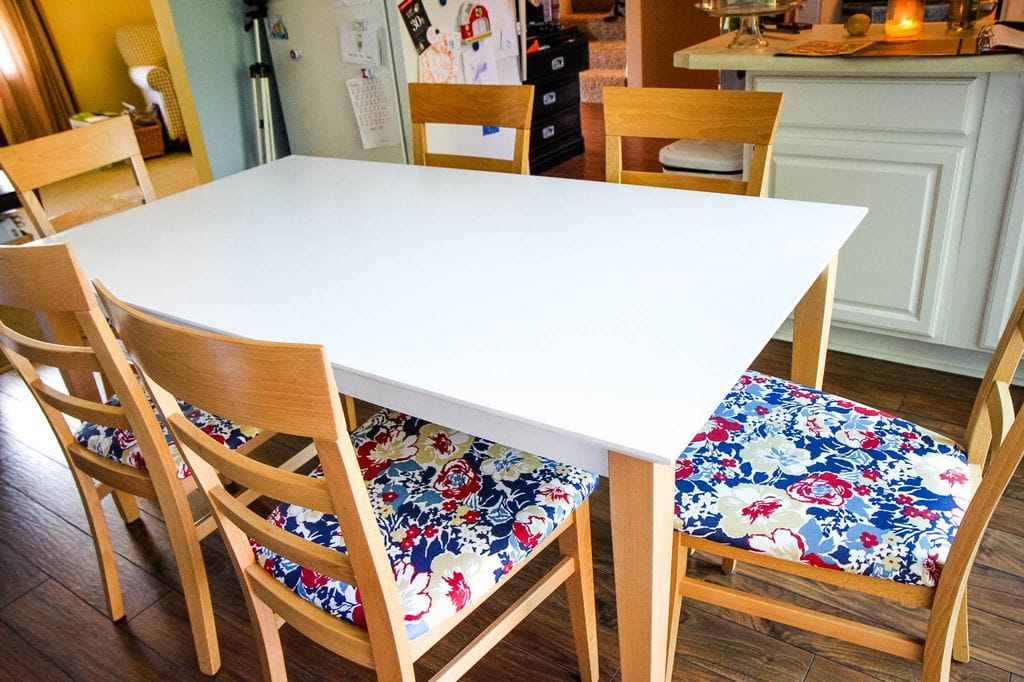
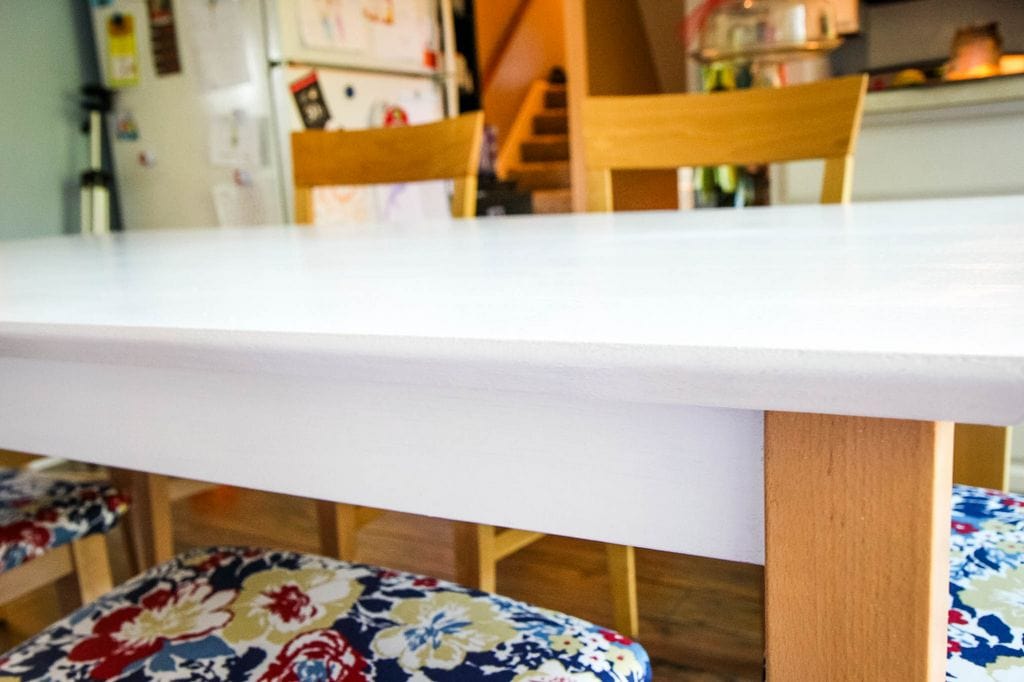
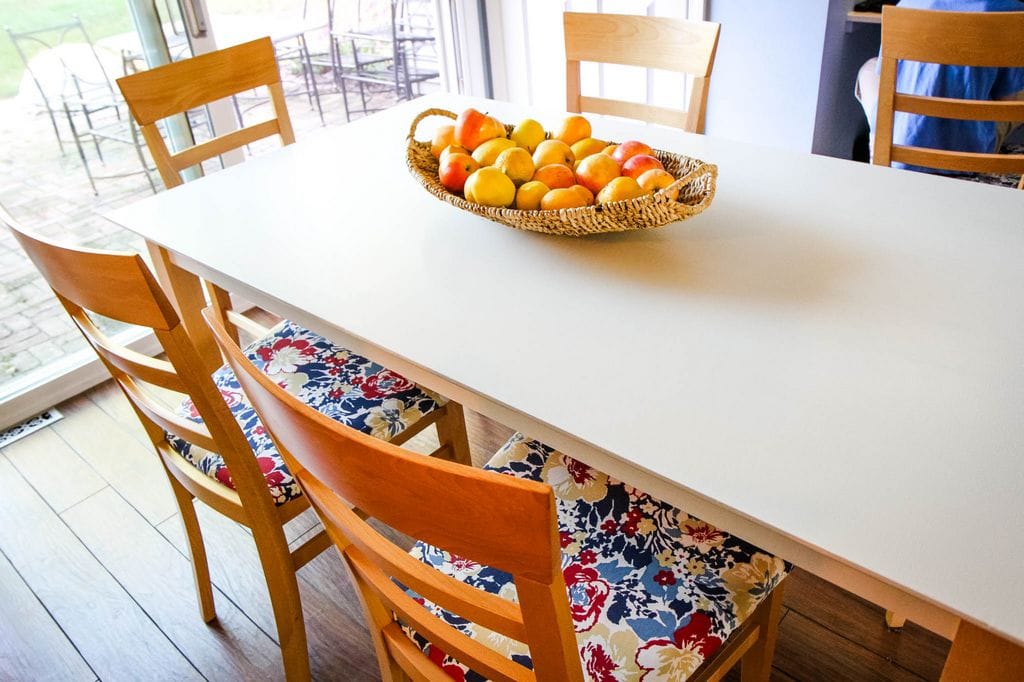
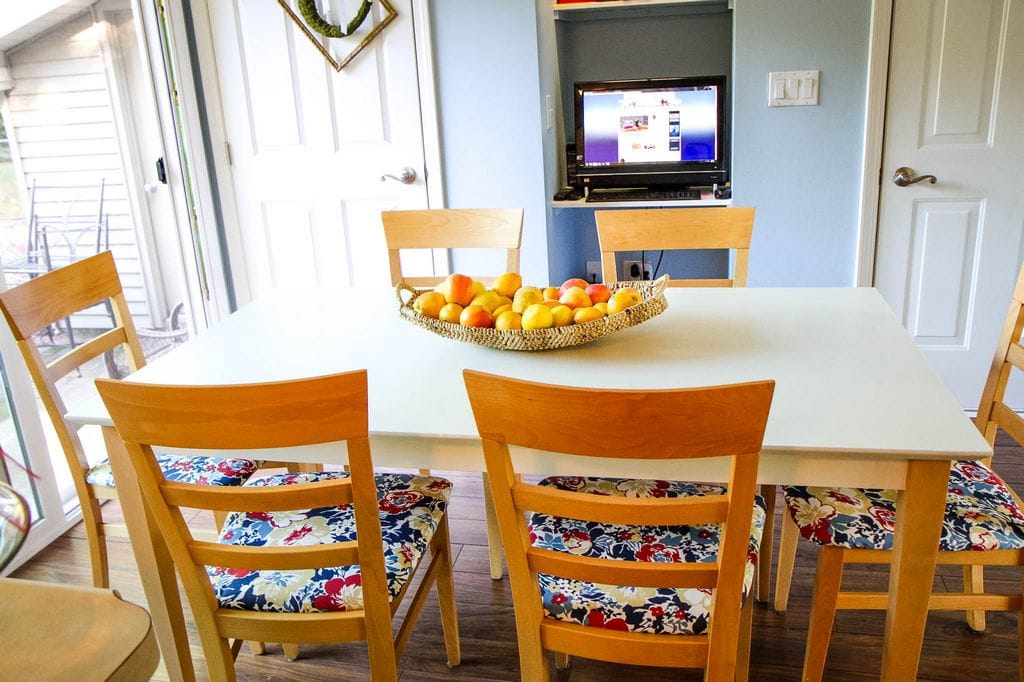
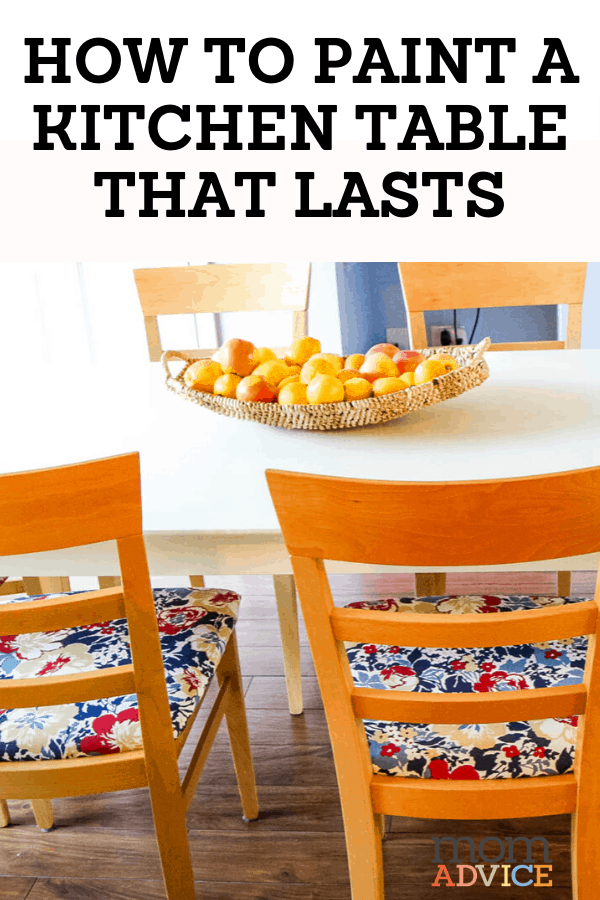
Our kitchen is transitioning slowly which can be hard to do for this go-getter, but the funds needed for a complete kitchen overhaul just aren’t there. I wasn’t ready to make a big financial commitment in a new table & chairs so we switched out chairs for now and added a fresh coat of paint to our 13 year-old table to make things feel new again. Those two things have brought a lot of contentment for me in this space.

My Little Holiday Home Tour from MomAdvice.com

My Little Holiday Home Tour from MomAdvice.com

My Little Holiday Home Tour from MomAdvice.com

My Little Holiday Home Tour from MomAdvice.com

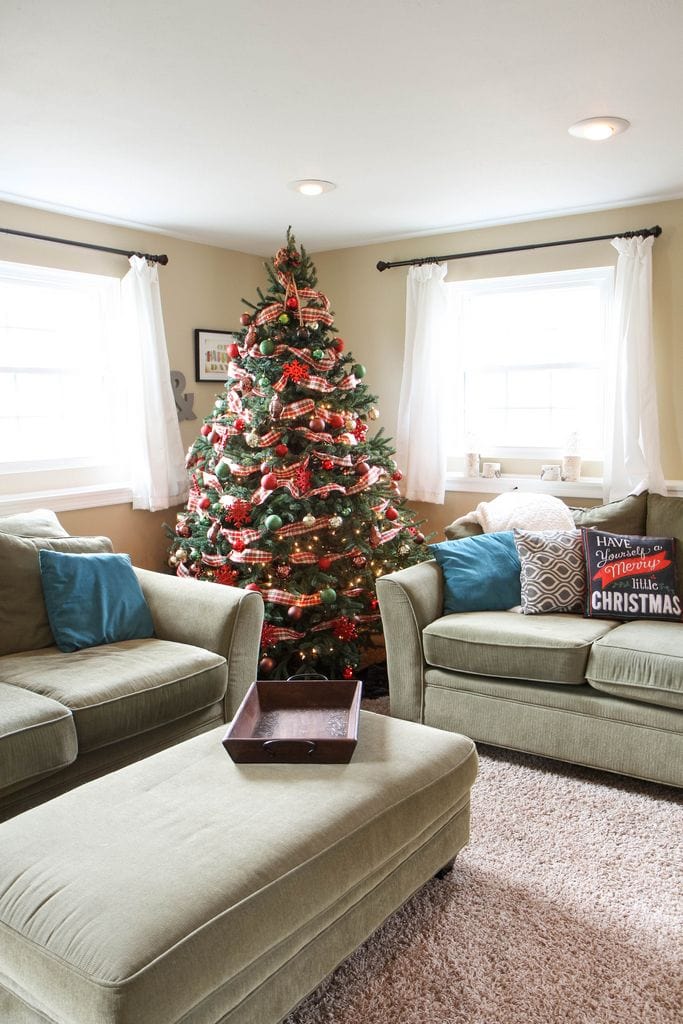
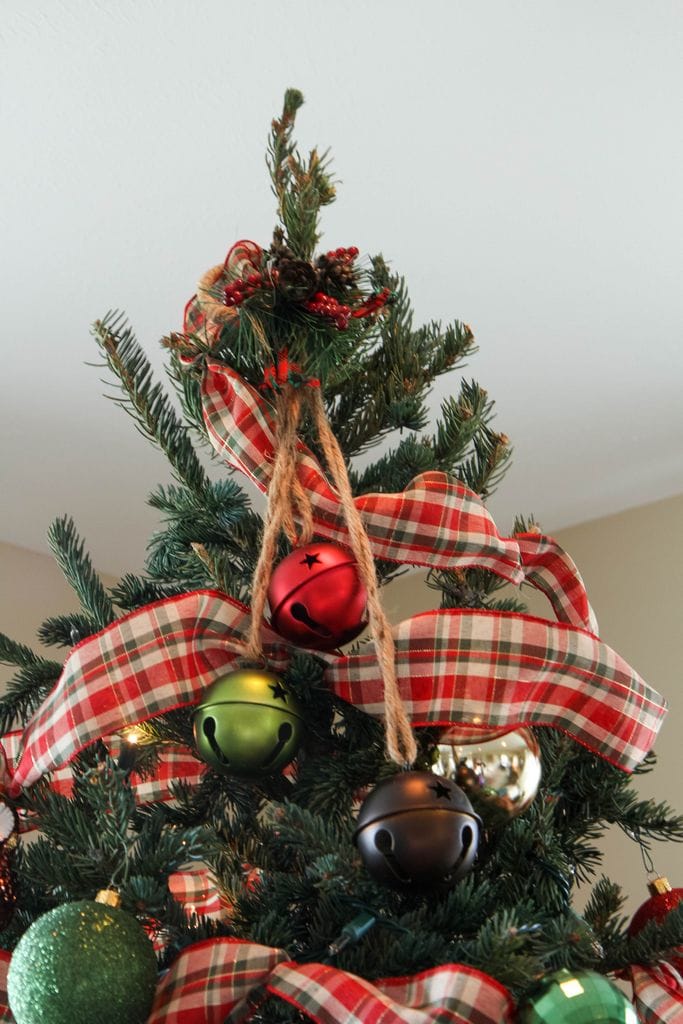
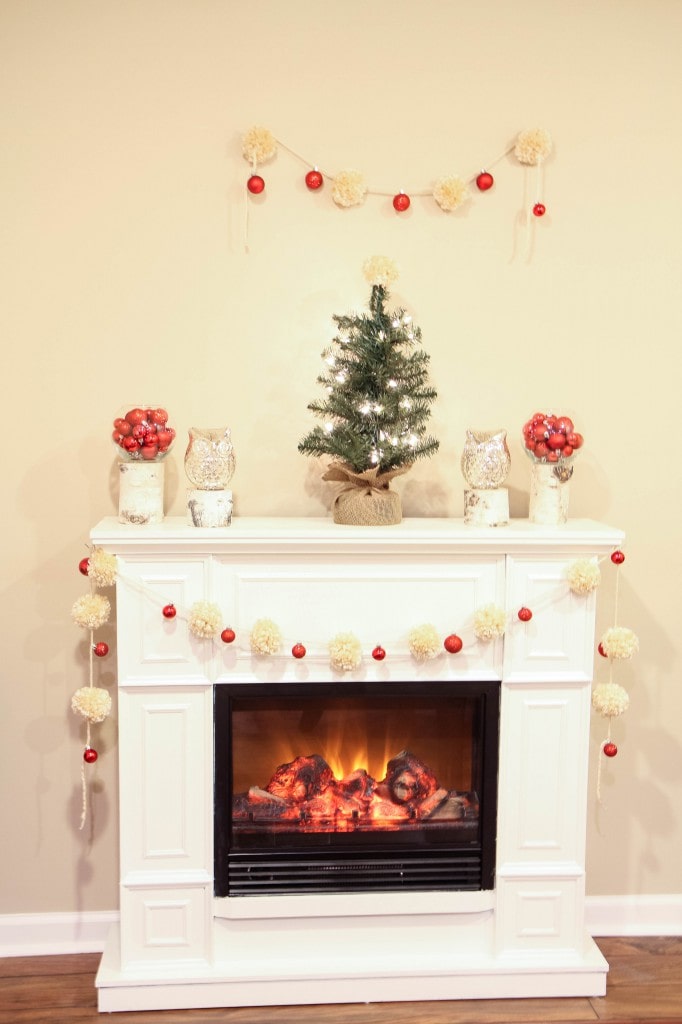
(source: owl ornaments/ornaments/bells/plaid ribbon/have yourself a merry little christmas pillow- all from Michael’s! Grab your coupons!)

We divided and conquered our tree this year. The boys went tree shopping and the girls purchased fresh ornaments. Our fifteen year-old ornaments looked REALLY bad last year, but I thought my kids would appreciate the sentiments behind them.  When I “broke the news” that I thought we should get some new ornaments, Emily said, “OH GOOD! You mean we will have Santas for our tree with TWO LEGS?”

So….surprisingly, they did not care one bit.

My husband was the only one who was like, let’s still have a tree with Santas with only one leg, but he got vetoed by the three unsentimental people in the family.

I guess he can have a tree for his office with the Island of Misfit Ornaments and we will keep this shiny tree here for the fancy folks!

My Little Holiday Home Tour from MomAdvice.com

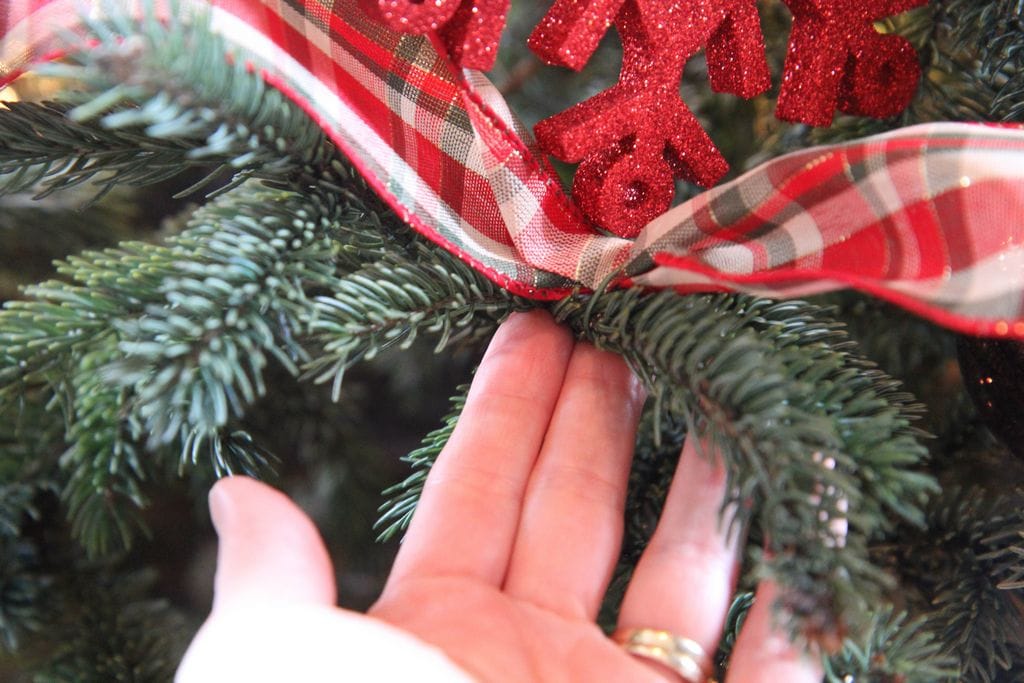
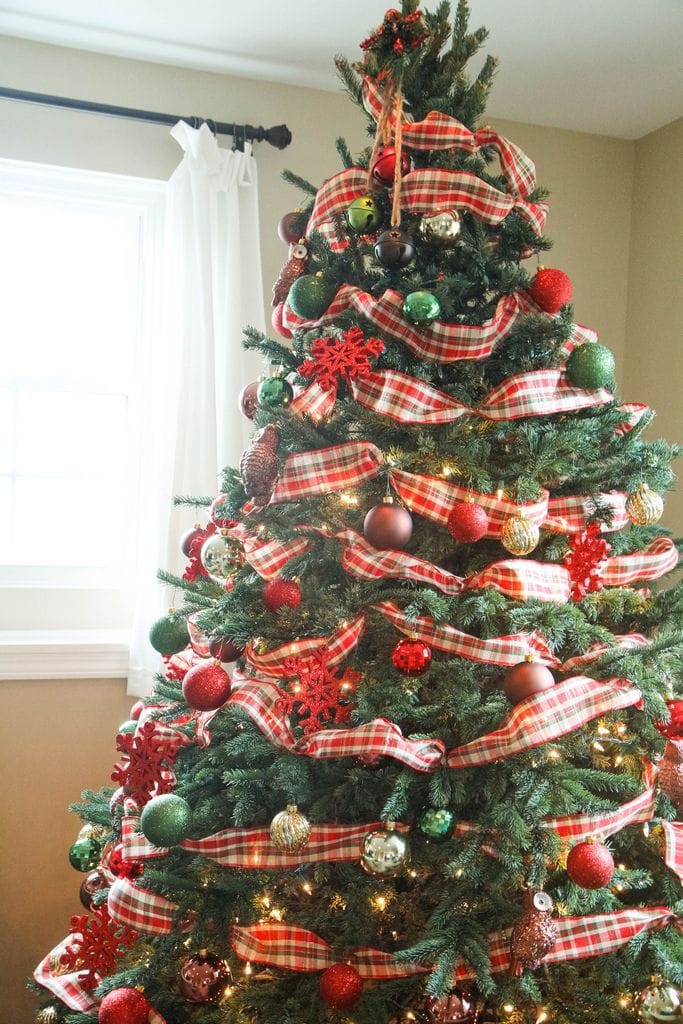
My best friend said I should show you all this because she had never seen anyone do this before. I wire my ribbon garland to the tree limbs. I know it is completely OCD, but I never want it to move once I put it on. You can twist it there or just do what I do which is kind of bubble it up and then cinch it with an ornament hook. It makes it look super PROFESSIONAL. Which I am not.

When I was in high school I worked at a hardware store where we decorated trees every holiday season so I know a lot of things that seem useless like how to make bows and make garland stick and wrap lights around limbs like your life depends on it,  but these useless things definitely comes in handy around the holidays!

My Little Holiday Home Tour from MomAdvice.com

My Little Holiday Home Tour from MomAdvice.com

My Little Holiday Home Tour from MomAdvice.com

My Little Holiday Home Tour from MomAdvice.com

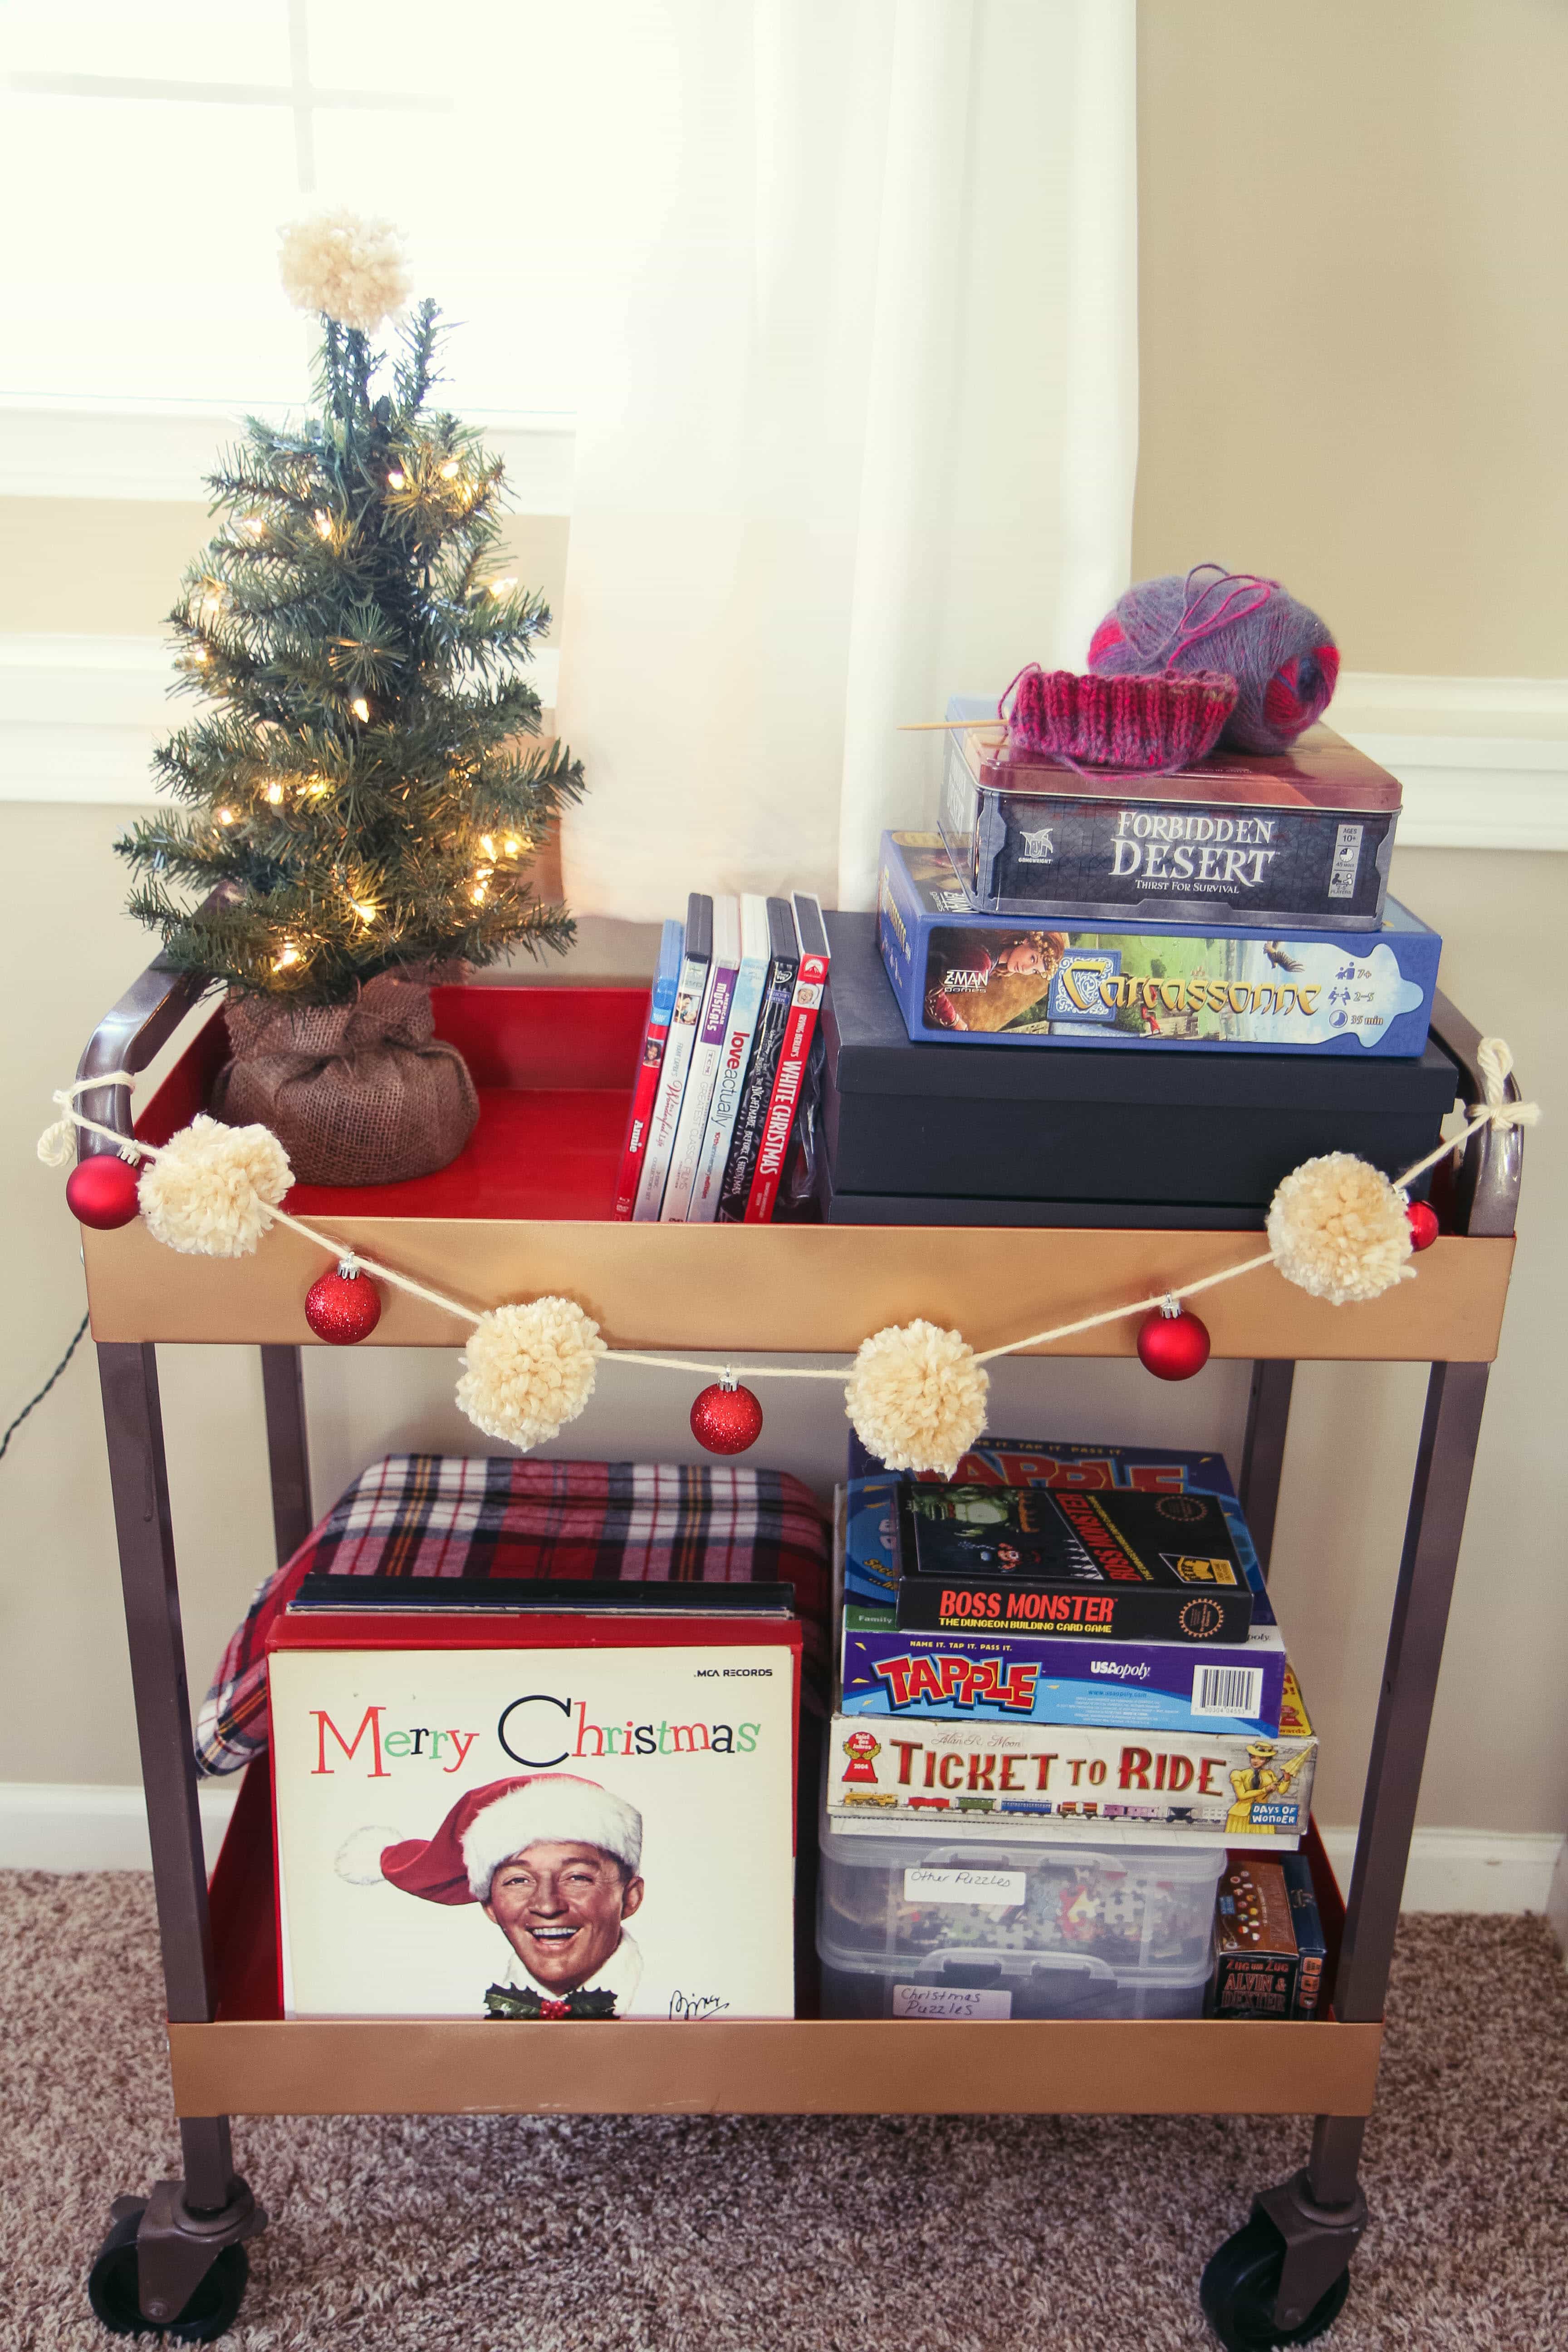
(source: bar cart tutorial/blanket scarf tutorial/forbidden desert/carcassonne/boss monster/tapple/ticket to ride/alvin & dexter/boss monster extension/love actually/white christmas/annie (don’t forget a treat!)/nightmare before christmas/yarn garland tutorial)

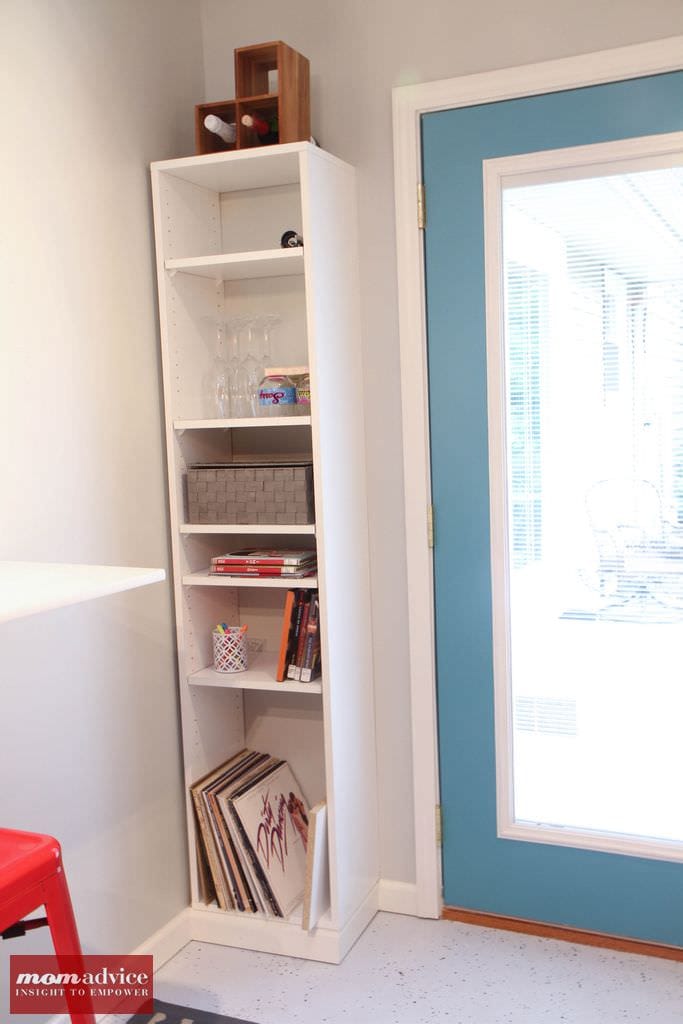
I switch the bar cart out for the season and it doubles as a great entertaining tool when hosting large groups in our home. Although our house is on the smaller size (about 1,500 square feet), we maximize every space with little storage ideas like this for our home. For the winter, it is loaded with our favorite board games, holiday movies, holiday puzzles, and all my vintage records that I collect from Goodwill for just a quarter each!
My Little Holiday Home Tour from MomAdvice.com

My Little Holiday Home Tour from MomAdvice.com

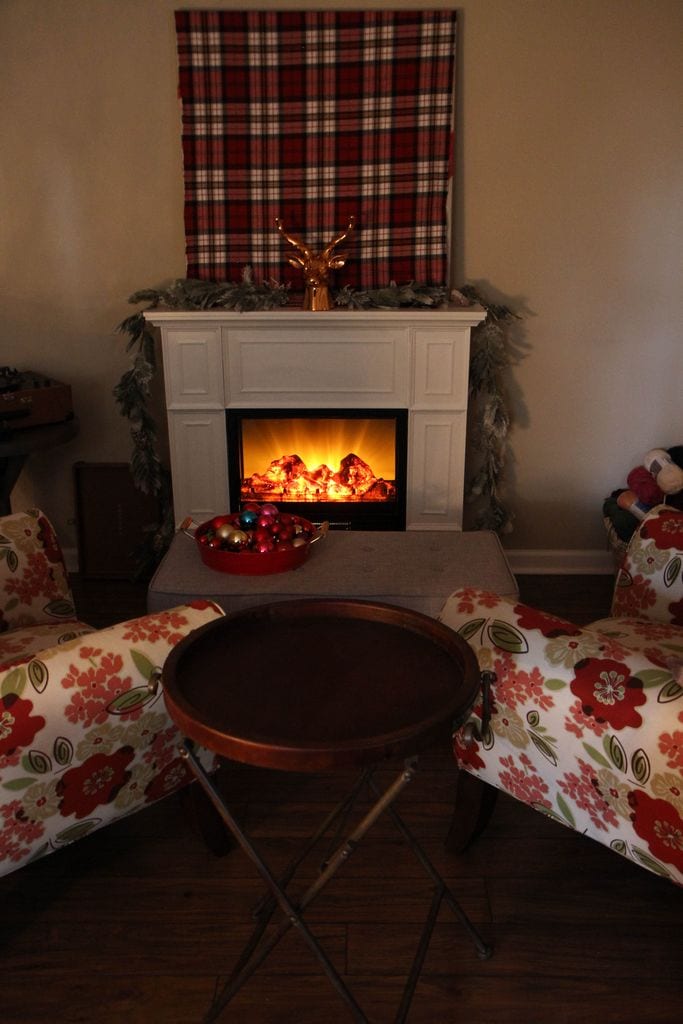
(source: blanket scarf tutorial/diy painted laminate fireplace/furry throw/copper deer head (michael’s)/winter garland (michael’s)/storage ottoman)

The picture above the mantle distracted from the beautiful copper deer head so I covered it with one of my blanket scarves for the holiday. This little fireplace is probably one of the smartest home investments we have made. This is our sub-basement (our home is a quad level) so it can get chilly down here in my office. This addition not only added warmth, but it added a focal point to this room that wasn’t my work and desk.

The only bad part is feeling motivated to work when I have such a cozy spot to curl up in.

I mean…look at that focal point.

My Little Holiday Home Tour from MomAdvice.com

My Little Holiday Home Tour from MomAdvice.com

My Little Holiday Home Tour from MomAdvice.com

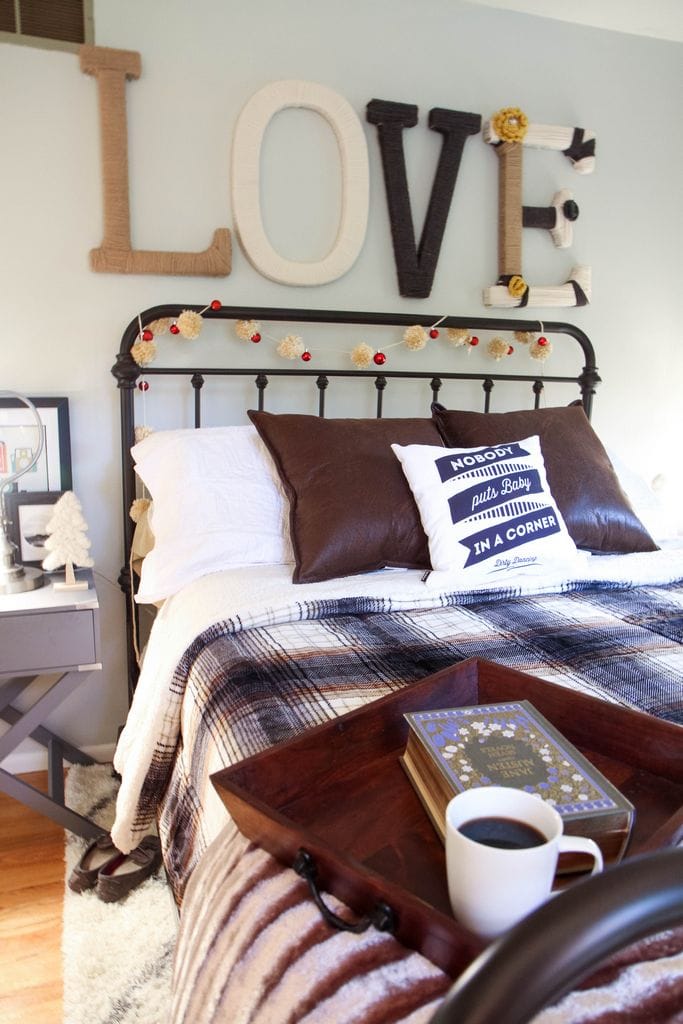
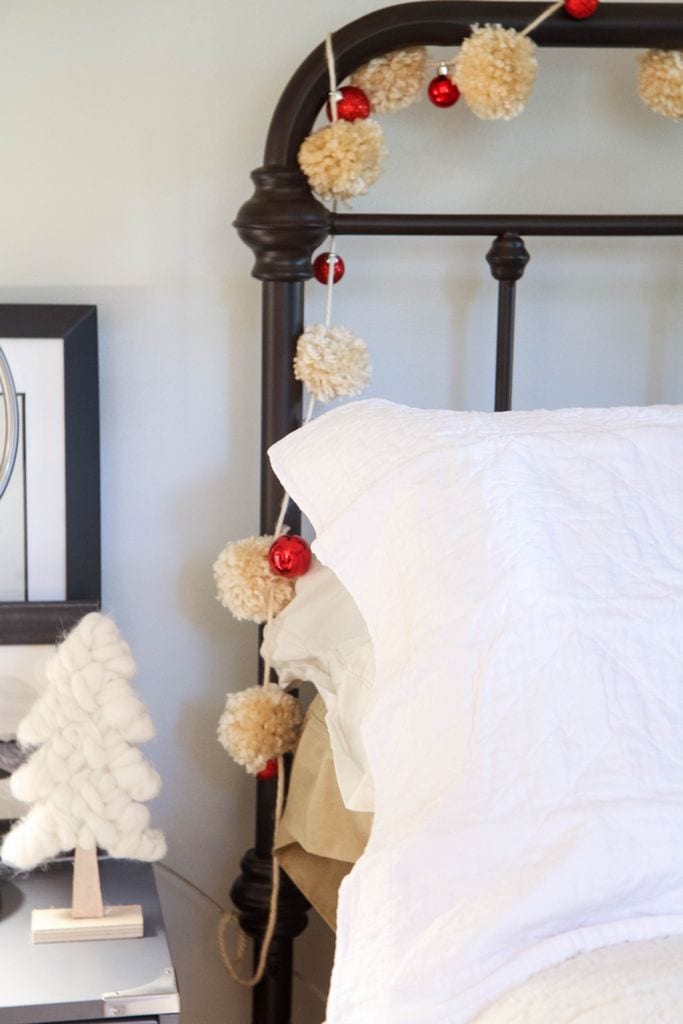
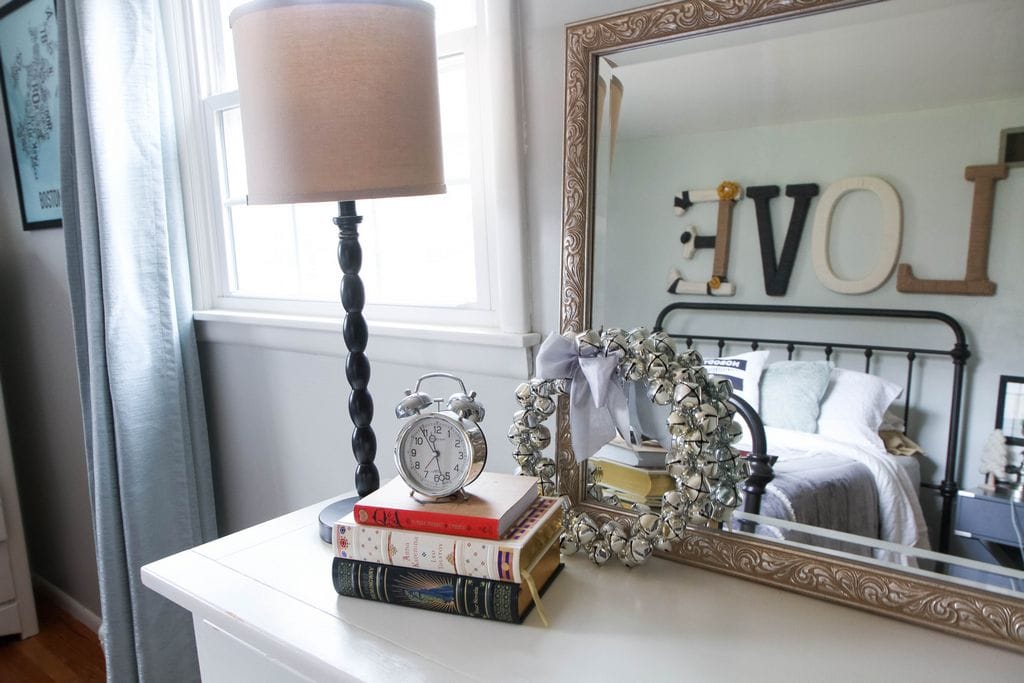
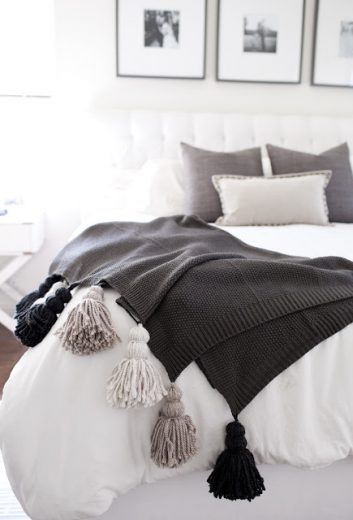
(source: yarn pom pom & ornament garland tutorial/yarn-wrapped letters tutorial/sherpa blanket/bed/nightstand/nobody puts baby in a corner pillow (similar)/q&a for couples/ yarn trees/bell wreath (similar))

I photographed my bed with yarn pom pom garland, but I think I pushed too much yarn bombing on my husband so we are back to the minimalist metal frame. He’s actually such a good sport about yarn, but maybe that is because his mom is a knitter.

Basically, he was raised right.

One vow I have always made to myself is that our room will be treated like a sanctuary which means NO CLUTTER. There is nothing relaxing about sleeping in a room that is filled with stuff so this is truly a retreat space for me during the holiday season. I would stay in this room all day if I didn’t have kids and have to work.

My Little Holiday Home Tour from MomAdvice.com

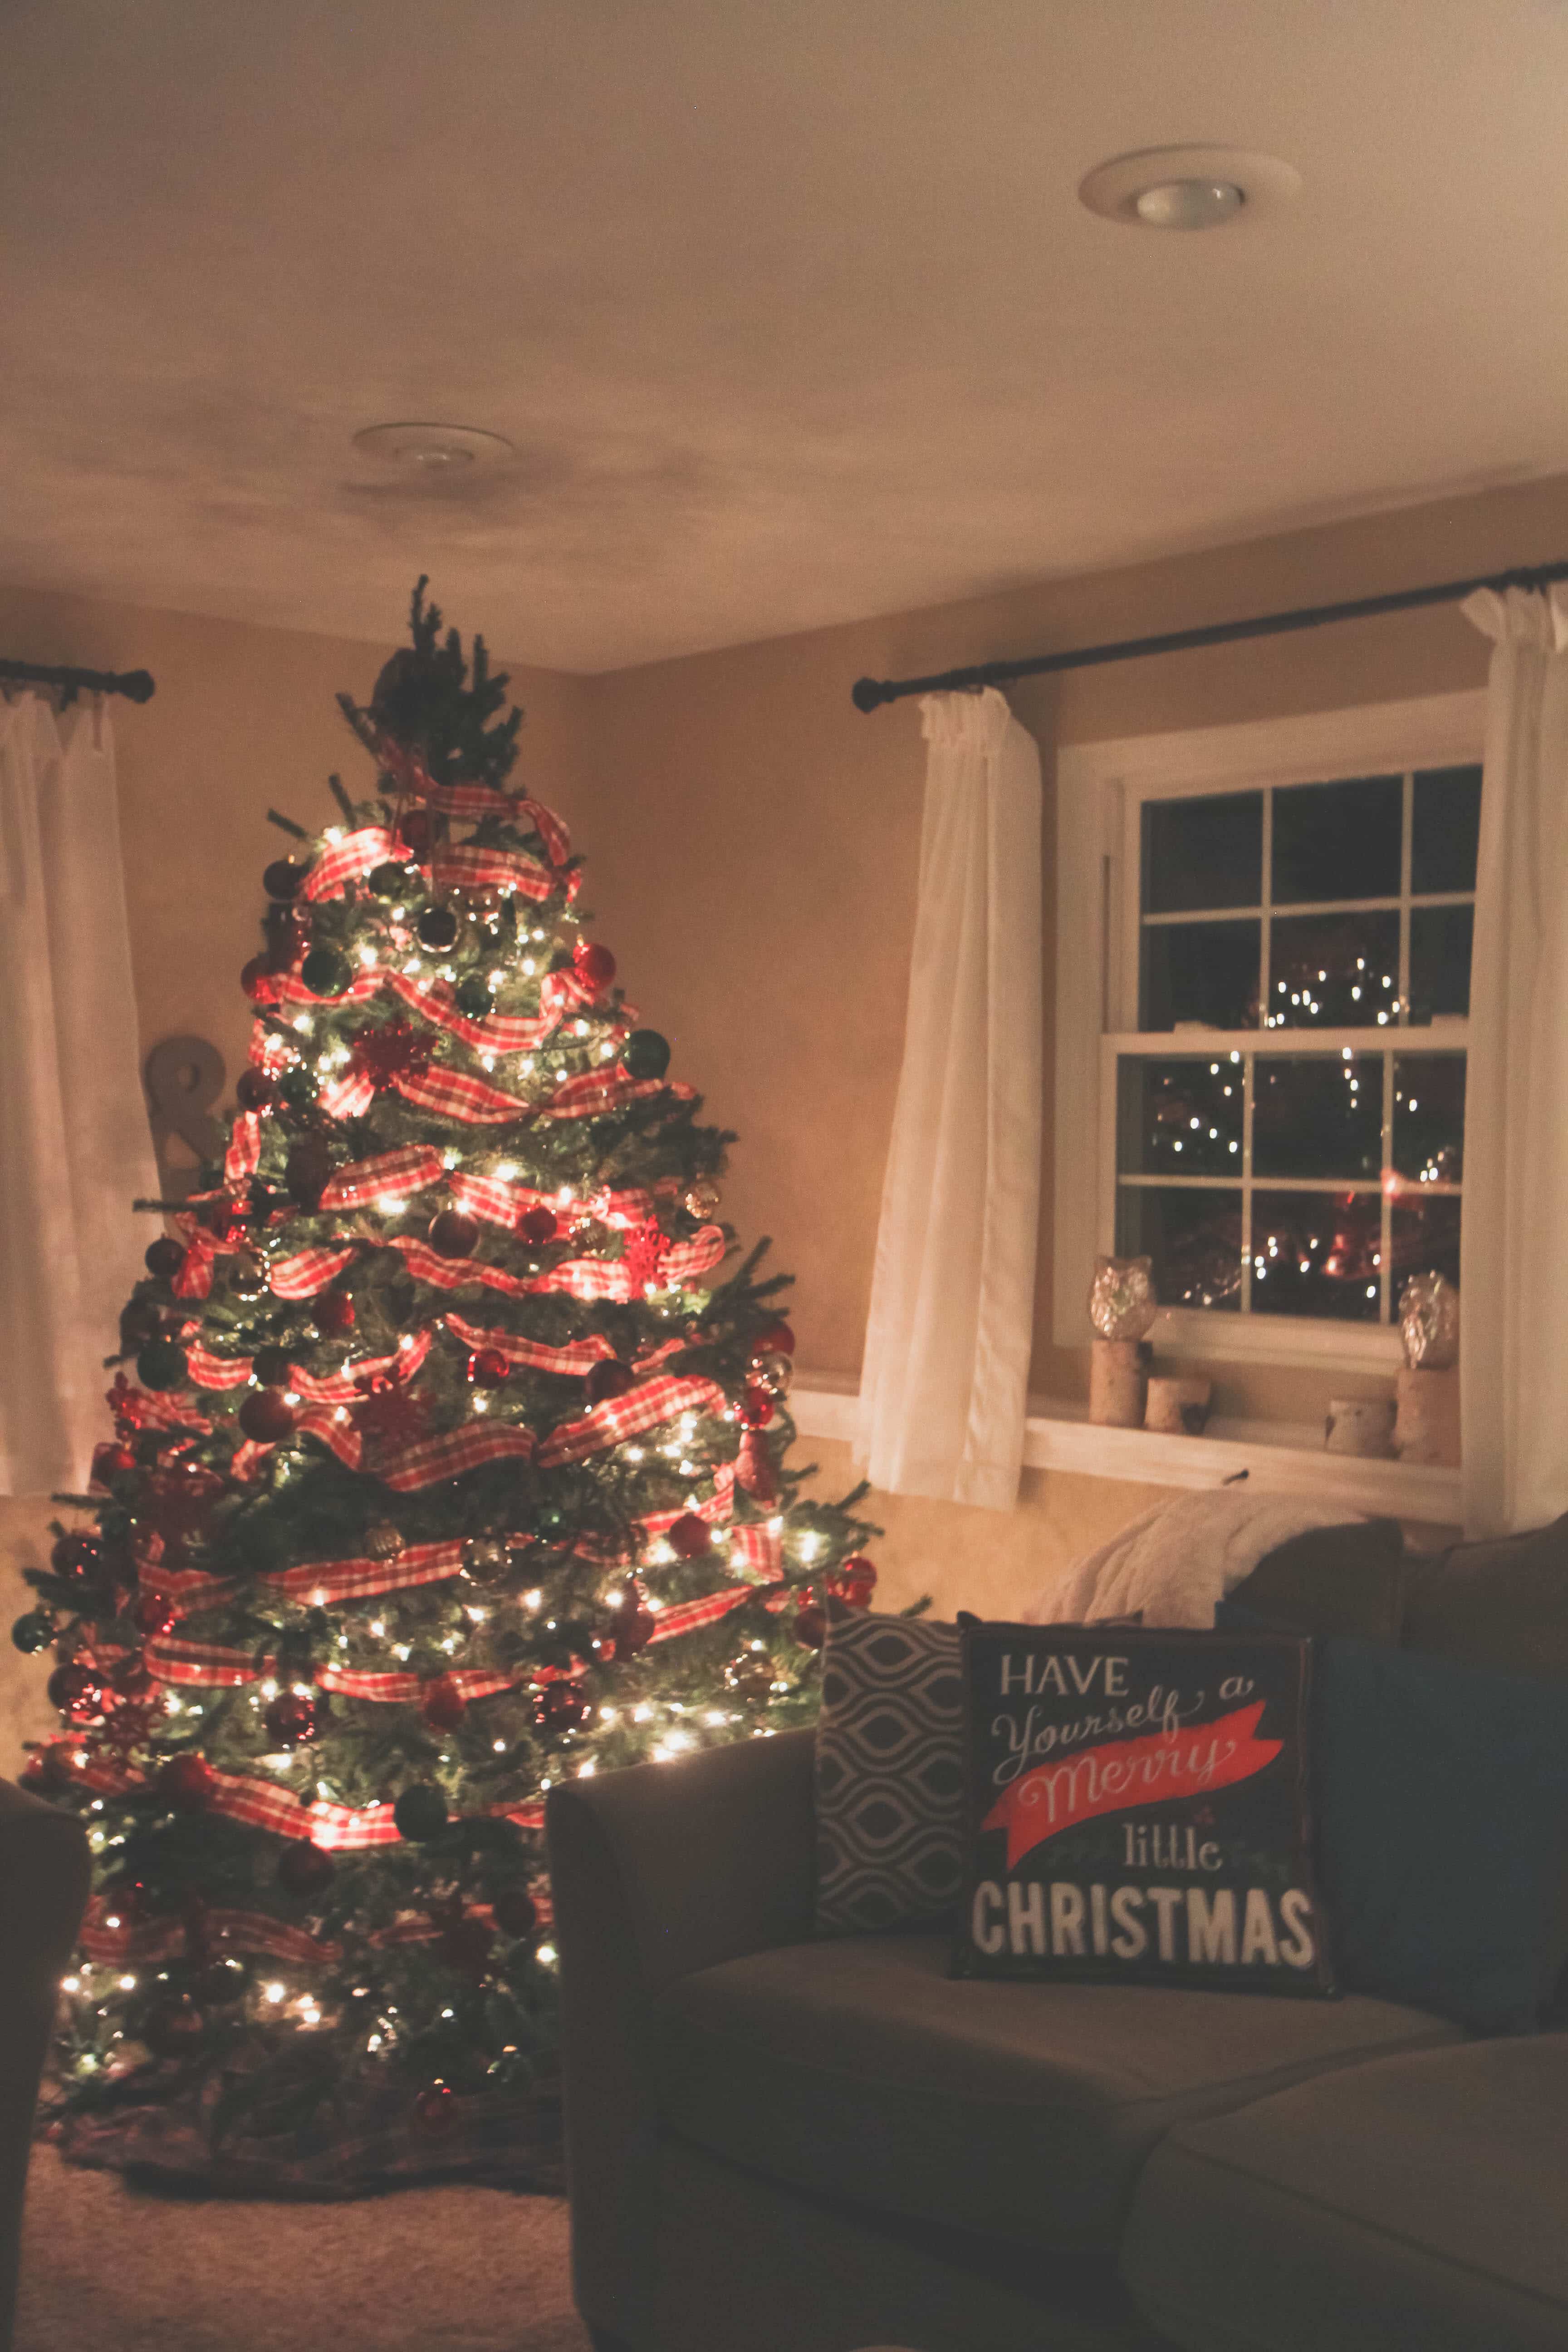
And just because everything feels more magical at night, I wanted to close with this photo. I love the twinkle of Christmas lights!

I don’t know if this home is “blog tour worthy,” but I couldn’t be prouder of our sweet little home if I tried. It is filled with my favorite people which makes it the most special place of all.

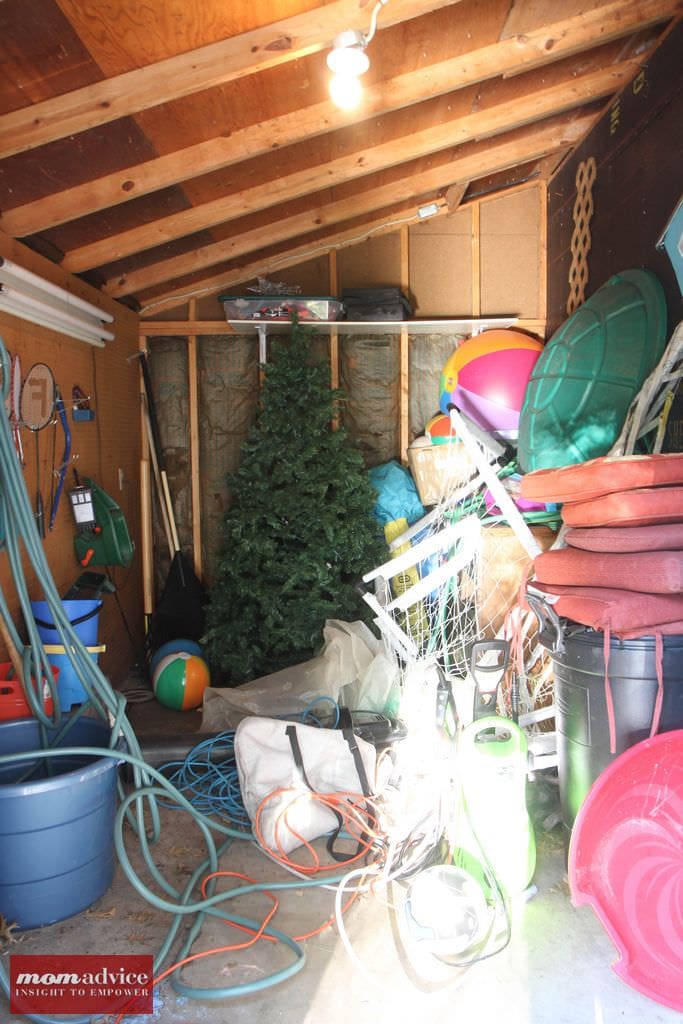
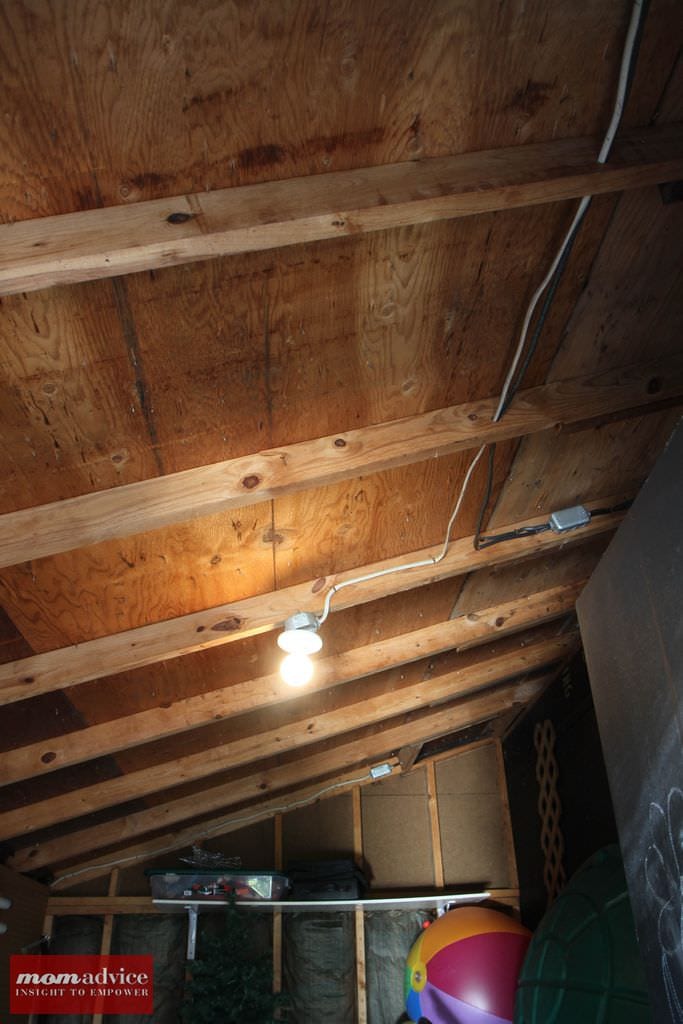
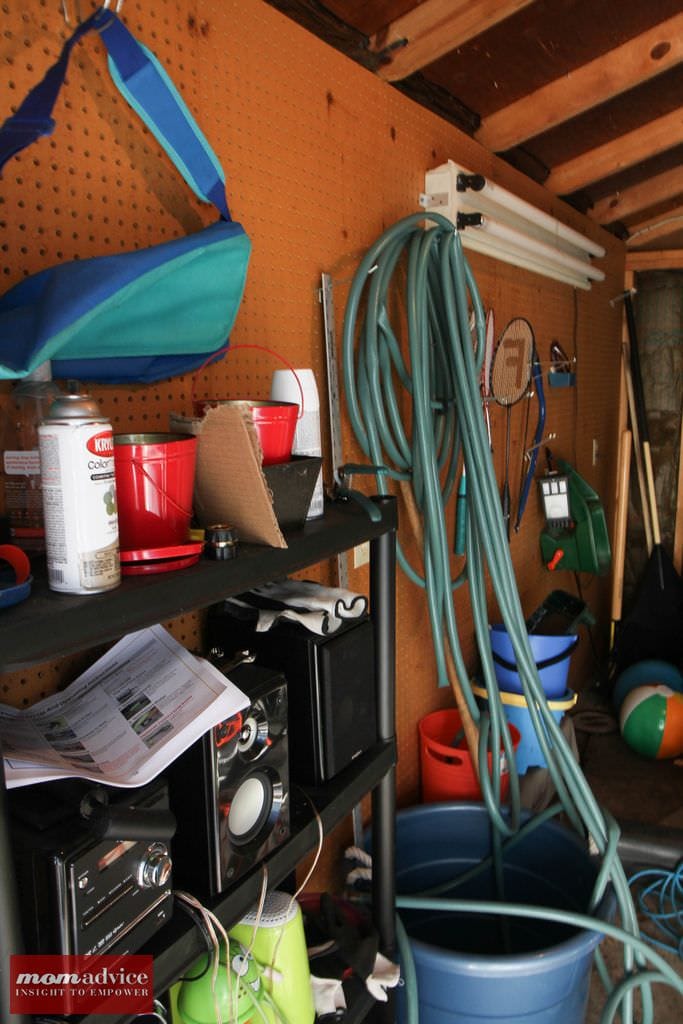
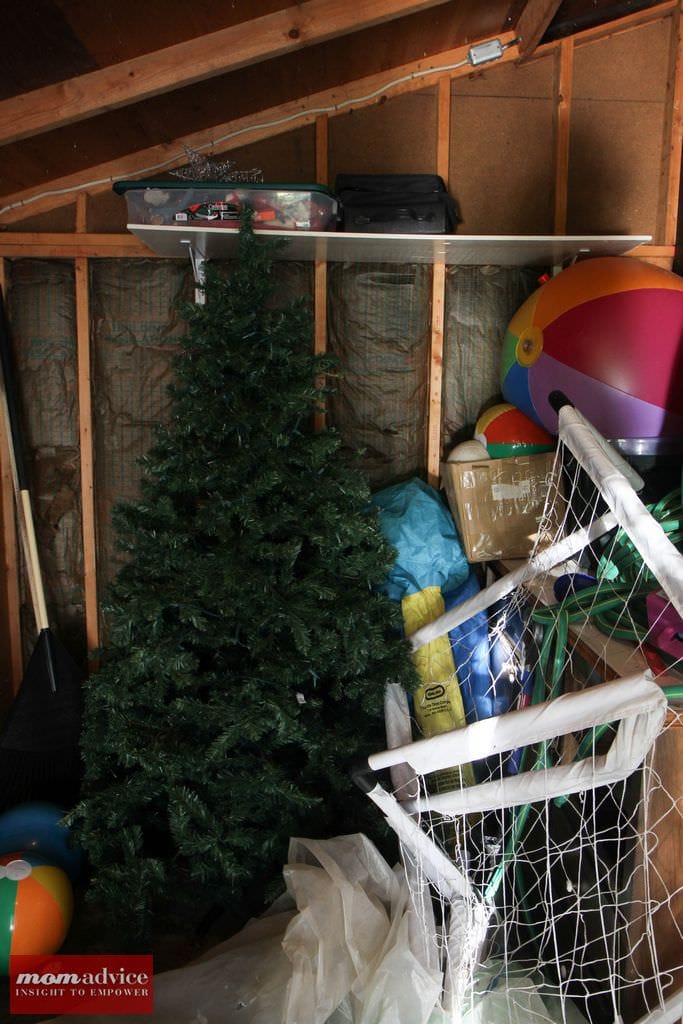
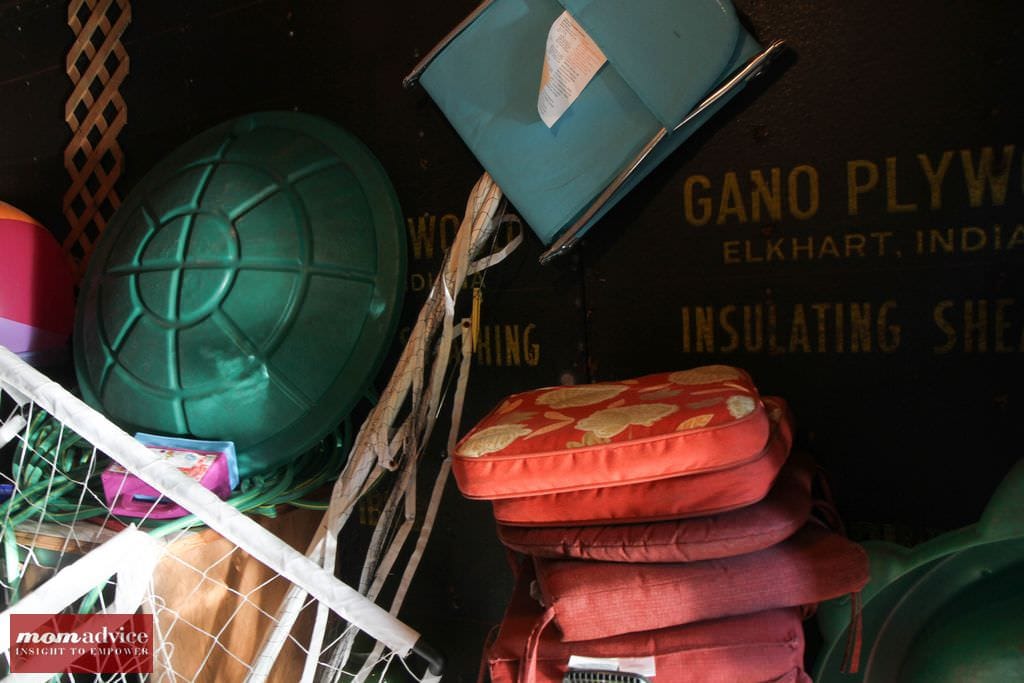
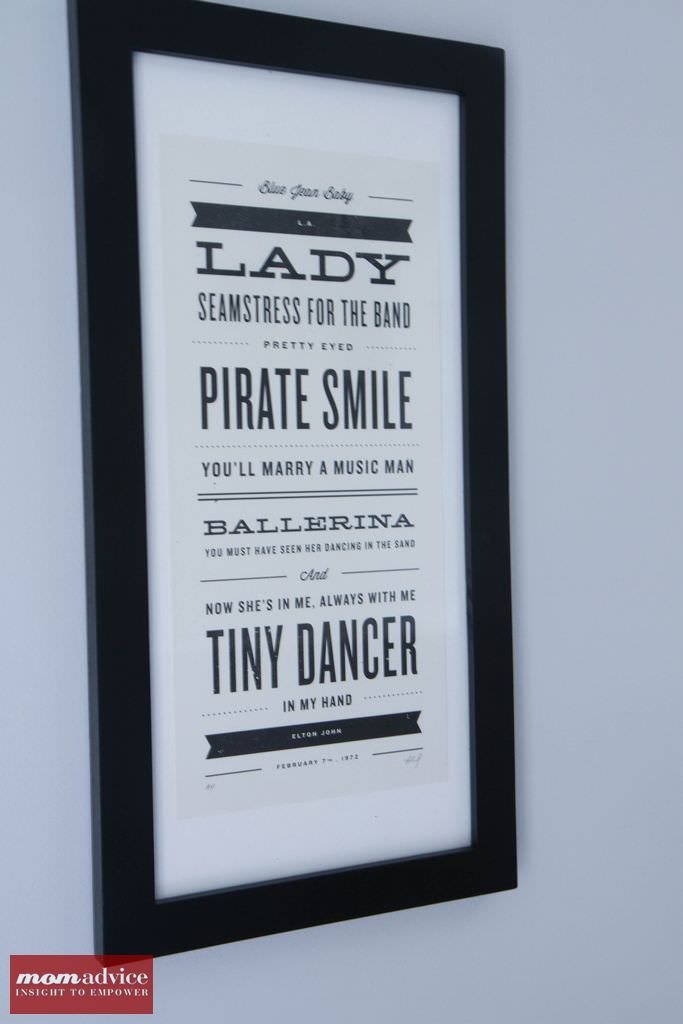
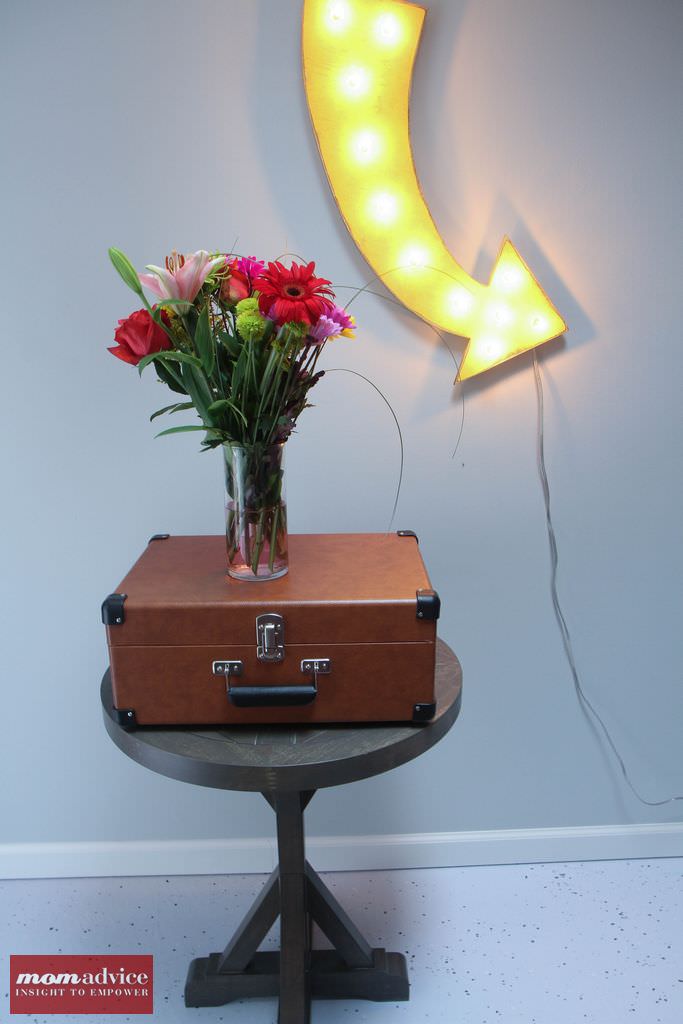
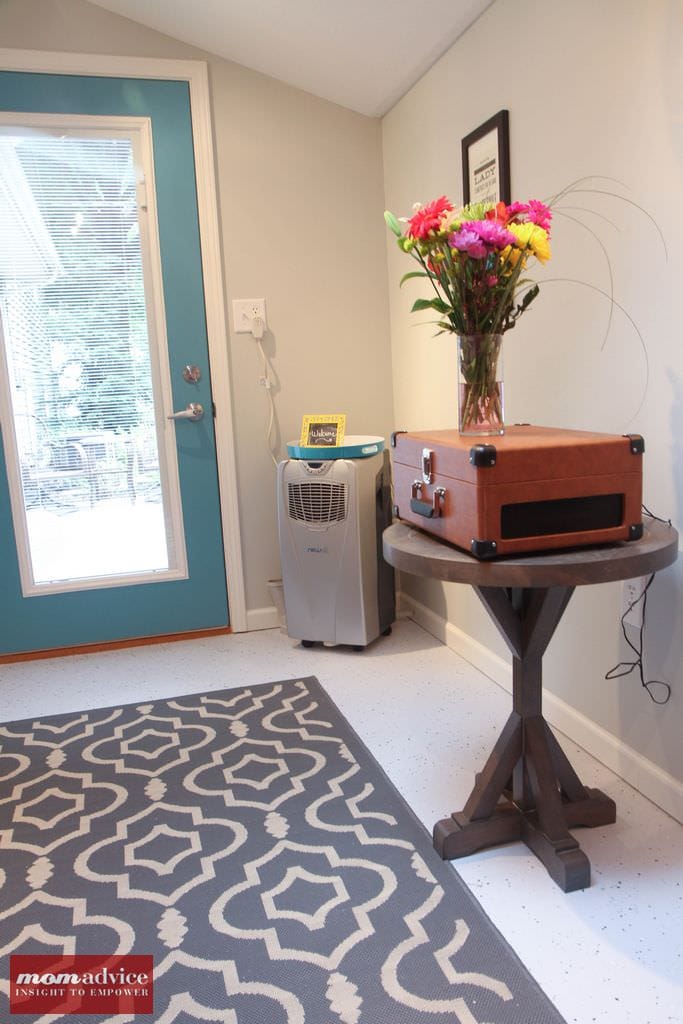
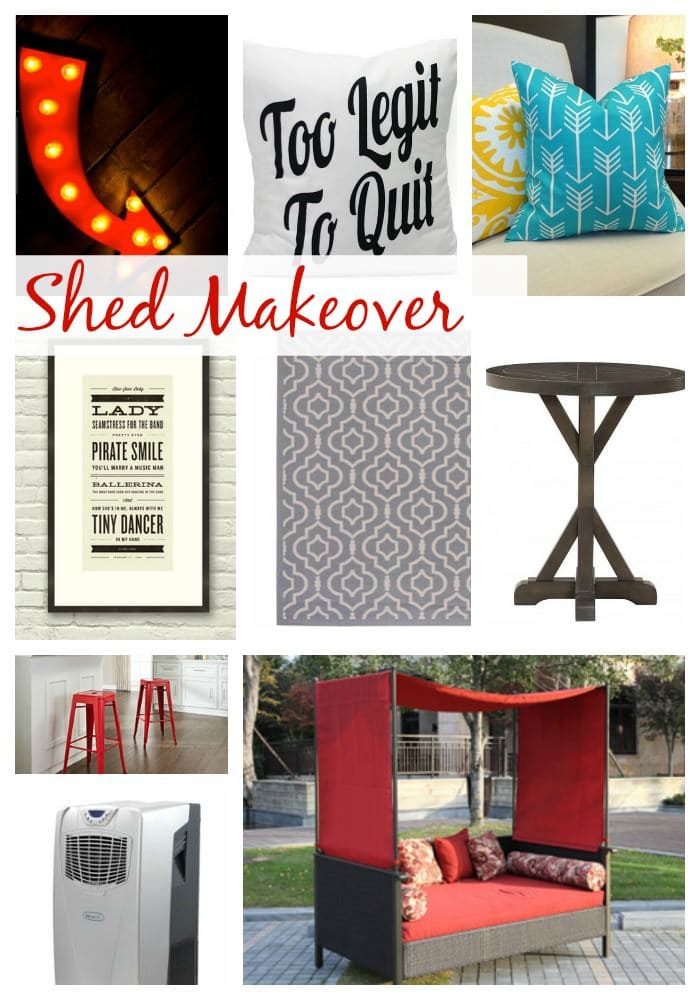
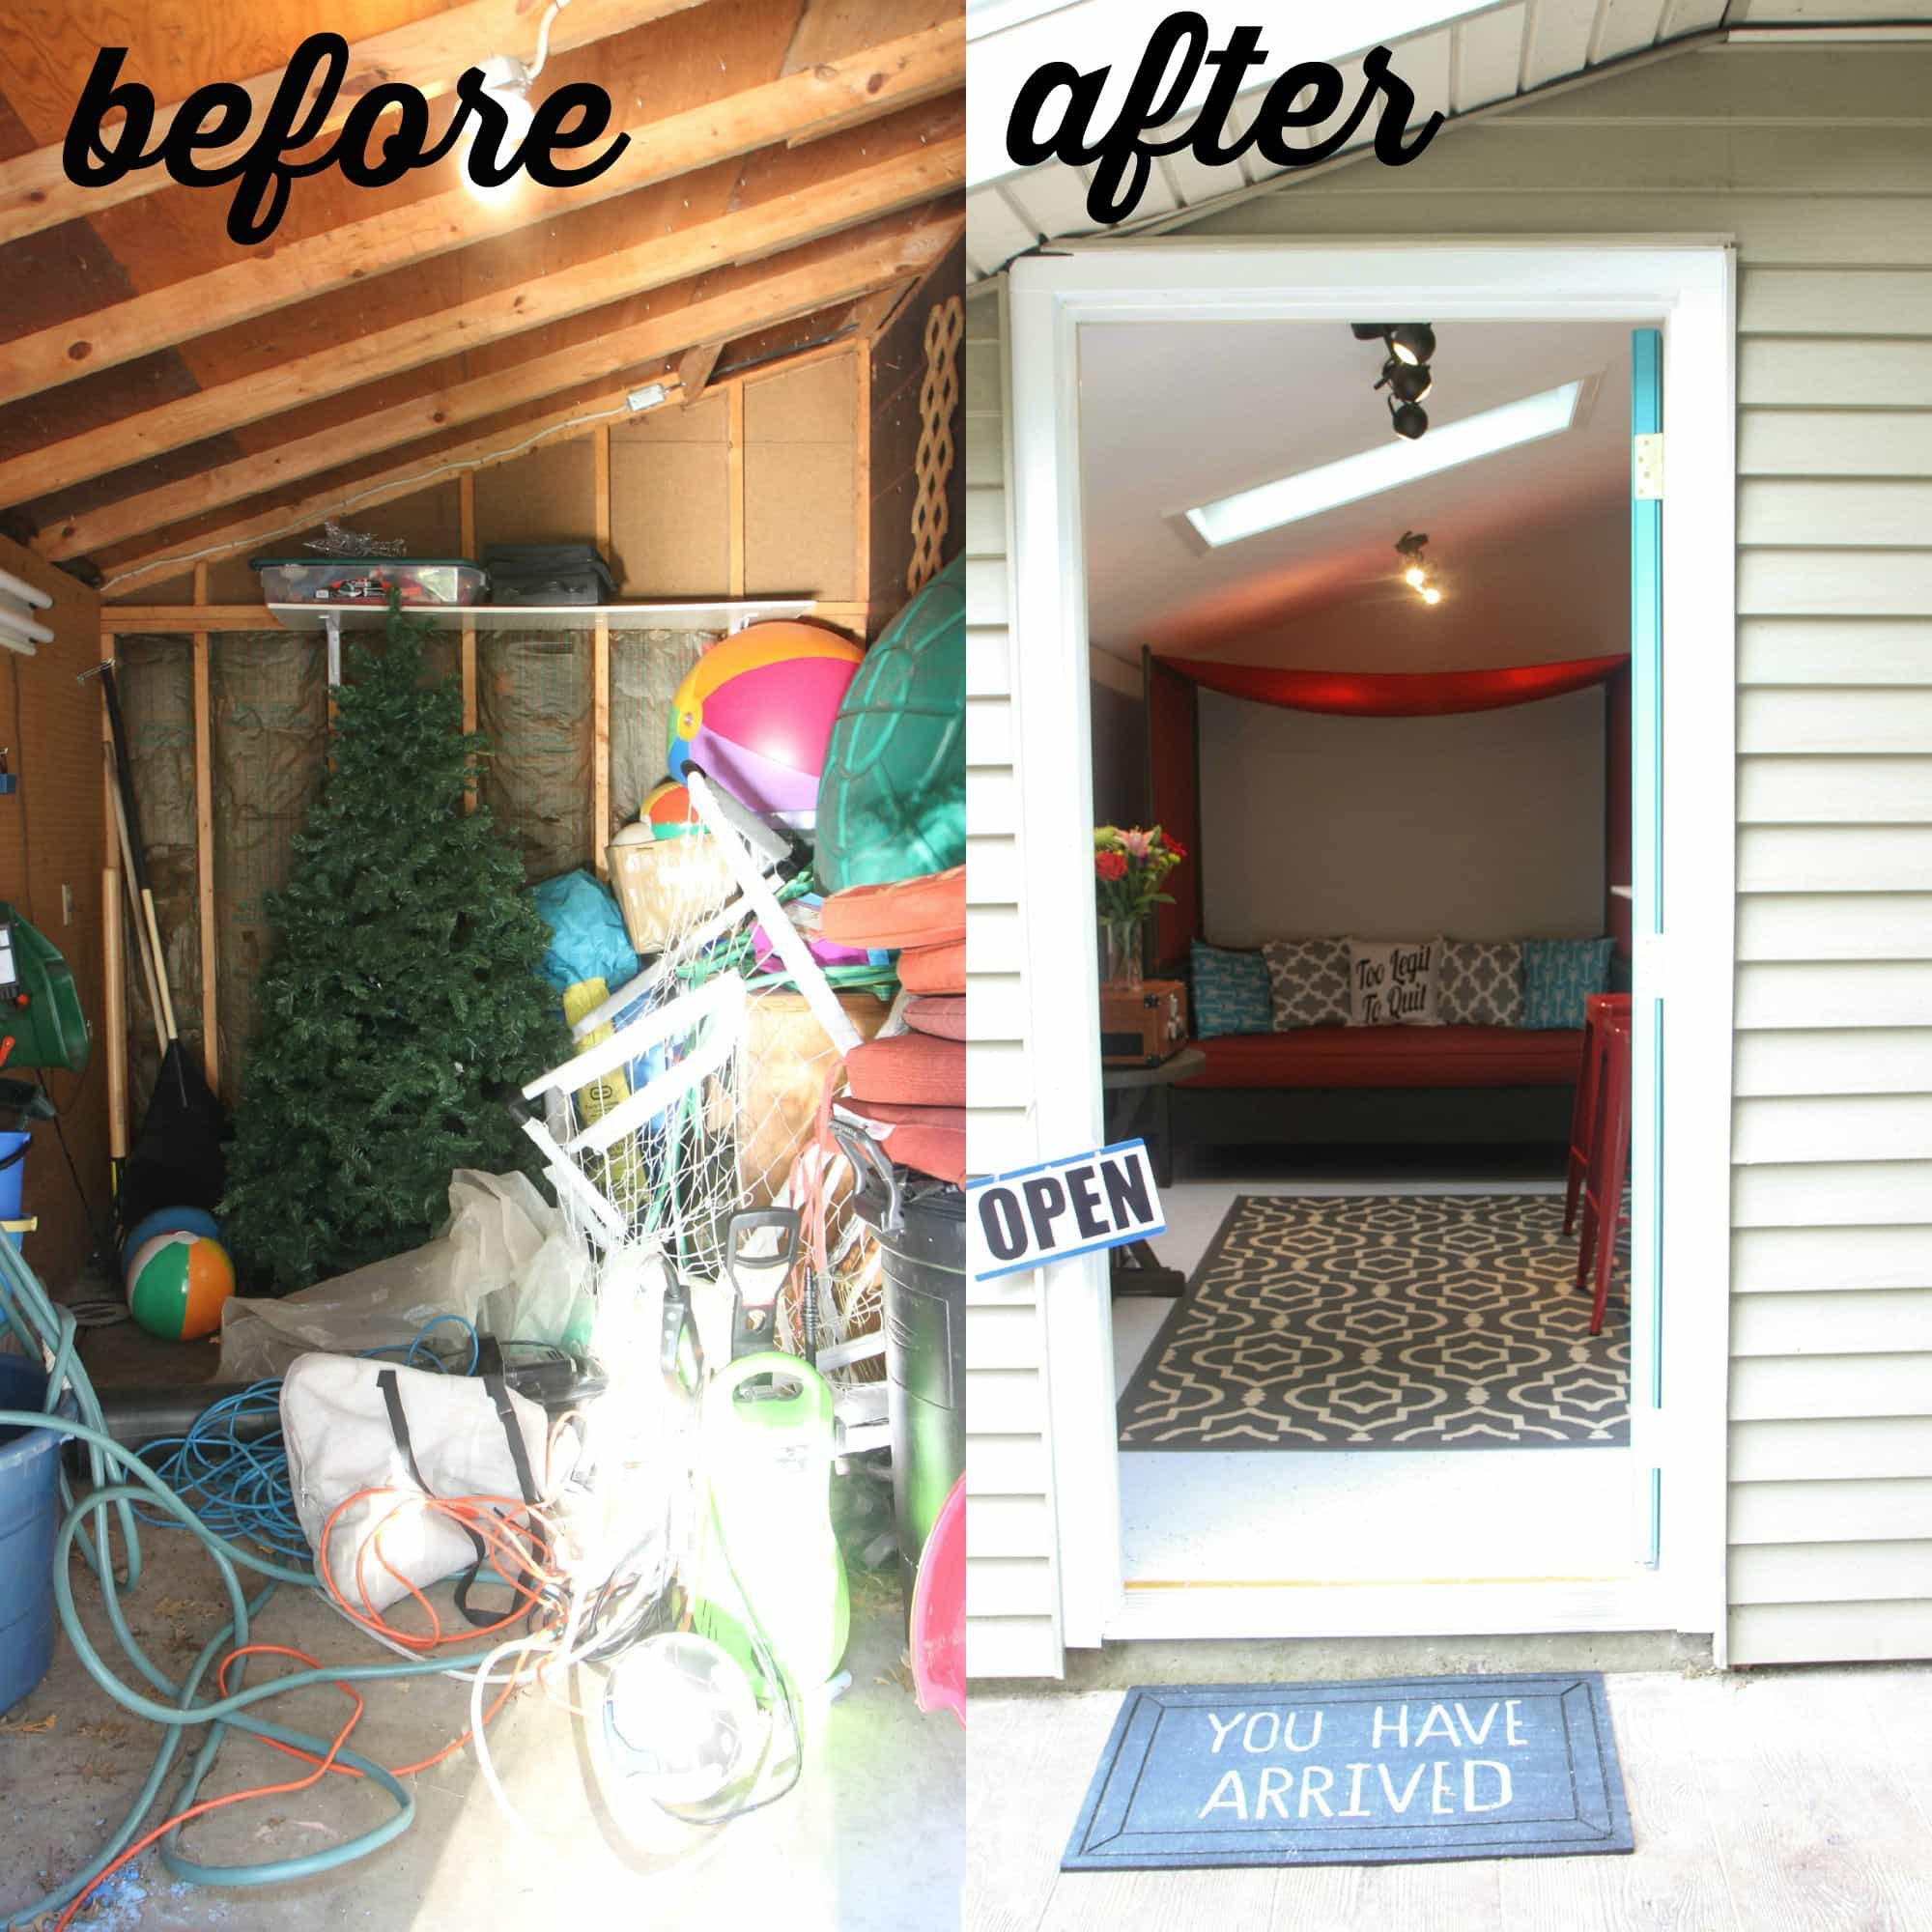
And if I want to retreat from those special people even more, you can find me hiding out in my She Shed thanks to the heating unit out there. It’s like my own private getaway.

I hope you liked touring our little house with us! Happy holidays!  xoxo

*This post contains affiliate links. I promise to only recommend what I love!

Pin It

Fall Wreaths That Wow

Wednesday, November 18th, 2015

Fall Wreaths That Wow from MomAdvice.com

I can’t believe that Thanksgiving is just around the corner!

Of course, the first thing our guests see when they pull up to our house is our front door adorned with a festive wreath for the occasion.

I have made a lot of wreaths over the years.

In fact, I used to shadow a silk florist at one of my first jobs and she taught me so much about creating beautiful wreaths.

Today I want to talk about dressing up a doorway, mirror, window, wall, or frame in your house with a fall wreath that really wows.

There is just something so great about a well-dressed door.

It doesn’t have to cost a lot to create a beautiful wreath and I have a stunning collection to share with you today of unexpected ways to decorate.

Just as a reminder, you can often find donated wreaths and various floral decor at your favorite resale store.

It’s a great place to start gathering items for your wreath projects and it is always a fun place to check for an unexpected detail.


Dye Flowers to Match Your Style

Never ever feel limited by the colors you might find at your resale shop because chances are really great that you can utilize a product like Rit Dye or even items in your pantry to achieve the colors you are after.
Songbird Blog shows you how she utilized tea to stain white roses into the natural hues she was after.
I love this so much that I can’t wait to try it on a wreath of my own!

Fake an Expensive Wreath (Inexpensively)

One of a decorator’s best kept secrets is the ability to achieve full wreaths without spending a lot of money by simply stacking them together.
I did this one year with Christmas greenery wreaths by wiring the two together to create the optical illusion of an expensive wreath.
Ella Claire shows you how to wire two wreaths together to do this with two thin wreaths to make a full and visually stunning wreath for your front door.
Consider buying not one, but two wreaths to create the look you are after!

Add Charming Detail to a Pie

Wreaths don’t just have to be on doors, in fact, imagine adding a wreath detail to a wrapped gift or homemade treat.
Proper shows you how she takes a beautiful homemade pie to another level altogether with a quick handmade wreath detail to shape over it.
What hostess wouldn’t be wowed by this charming pie?
Be sure to check Goodwill’s housewares section for beautiful pie tins that you can place your pies in for gift-giving!

Add Unexpected Texture

Wreaths don’t need to boring and flat, in fact, some of the most beautiful wreaths incorporate fluffy feathers, burlap textures, felted details, and yarn.
One of my favorite projects I have done for my own home was to replicate a ridiculously expensive Anthropologie pom-pom wreath into a beautifully affordable handmade detail for our home.
You can get the scoop on how I made this with some inexpensive yarn and a few Netflix binges.
I still count this as one of our favorite things in our home and love its cozy warmth all year-round!

Skip the Wreath, Try a Basket

Not everyone is an arranger of wreaths so I love the idea of adding that floral detail with a basket instead of a wreath form.

Four Generations One Roof adds a beautiful floral decoration in a small basket that hangs on her door.
Luckily for you, recycle shops always have loads of baskets to choose from that can be spray painted or left natural for your door decorating needs.
How fun is that?

Feed the Birds With Beauty

I can’t even begin to tell you how inspired I am by this beautiful bird seed wreath made by Infarrantly Creative for their birds.

What a thoughtful project to partner with learning about wildlife or for a day of bird-watching.
I hope to try making one of these with my kids this winter for our birds!

Add a Pop of Color

There is nothing I love more than a vibrant pop of color with an unexpected texture and The Wood Grain Cottage achieves both with this beautiful apple wreath.
I love how she weaves in natural elements to fill out the holes around these apples to create a cohesive piece.
This would be one apple gift that a teacher really would love too when thinking of gift-giving for the holiday season.
Be sure to check the store for a wreath form that you can repurpose.

Get Back to Nature

Don’t want to spend a lot to create the perfect wreath?
Consider hunting around the backyard for the perfect materials.
I love the idea of filling in these details with a little moss from the craft store!
Be sure to head to her blog to see how she secured these heavy materials!

I hope these ideas inspire you to get crafting for your own front door! Be sure to leave us a comment and let us know your favorite ways to dress a doorway!


Don’t miss these other wreaths from MomAdvice.com:


Apple Wreath Tutorial 


Fabric Flower Wreath


DIY_Peep_Wreath

Peep Wreath


Autumn Burlap Wreath


Sign up for the MomAdvice newsletter

SaveSave

SaveSave

SaveSave

Pin It

DIY Airheads Crown Cake Topper

Tuesday, November 17th, 2015

DIY Airheads Crown Cake Topper from MomAdvice.com

This post is sponsored by Airheads. Thank you for supporting the companies that support us! 

Are you a skilled decorator of cakes? I wish I was, but I am not!  I have never been good with fondant decorating and have always found the flavor lacking. Thankfully, there is a delicious substitute lurking in the candy aisle that you can mold & shape into whatever your heart’s desire is. Did you know Airheads candy can add that decorative touch to your cake decorating in just a few easy steps?

Today’s tutorial shows you how to transform Airheads into the perfect crown cake topper in just 5 easy steps. Wouldn’t this be a great princess cake? The best part is that, unlike fondant, it tastes sweet and delicious and will be a crown worth fighting for when those slices are dished up. For those with food allergies, it is also peanut and gluten-free! Yay!

DIY Airheads Crown Cake Topper from MomAdvice.com

Supplies Needed:

Airheads (I used Blue Raspberry, Cherry, & White Mystery for my crown)

Mini cookie cutters- metal or plastic, I used a heart with a jagged edging

Parchment Paper

Fondant Roller

Cake (we picked ours up in the bakery section of our supermarket)

DIY Airheads Crown Cake Topper from MomAdvice.com

Directions

  1. Pull out 3 cherry Airheads and line them up in one long line, slightly overlapping the edges. Place these between two sheets of parchment paper and roll with a fondant roller to smooth out your seams. Don’t worry if it isn’t perfect because we will be adding a dot detail to camouflage any flaws on the crown. Set aside.

DIY Airheads Crown Cake Topper from MomAdvice.com

  1. Microwave a white mystery Airheads for 3-5 seconds and then roll them out between two sheets of parchment paper. Using a mini heart shaped cookie cutter, press the cookie cutter firmly into the white mystery Airheads and pull up. Push the heart shape out gently and then place it upside down (with your heart tip pointing up) to create your crown points. Do this all the way around, layering one heart between two hearts as pictured. Feel free to microwave and re-roll the Airheads to get as many hearts as you can out of each one.  Press these firmly into the crown and continue layering until you get to the end.

DIY Airheads Crown Cake Topper from MomAdvice.com

  1. Bring one end of the crown, to the other to create your shape. Using your fingers, gently rub the seam in a bit to create a smooth finish. Set your crown aside.

DIY Airheads Crown Cake Topper from MomAdvice.com

  1. Grab your Blue Raspberry Airheads and pull off small sections of the candy and roll between your hands until you have created a dot shape. Take the dot and press firmly into the crown, spacing it as evenly as possible to add a decorative detail to finish.

DIY Airheads Crown Cake Topper from MomAdvice.com


  1. Place the crown in the refrigerator until it is time for your cake so it can harden up a bit and to help it keep its shape. Once it is cake time, remove from the fridge and rest it on the top of your cake. How easy is that?

Airheads-Crown-Cake-Topper-18

DIY Airheads Crown Cake Topper from MomAdvice.com

Airheads-Crown-Cake-Topper

DIY Airheads Crown Cake Topper from MomAdvice.com

 For more fun ideas on how to craft with Airheads visit and follow them on Pinterest. To learn more about Airheads candy visit their website and follow them on Facebook, Twitter, Instagram, and YouTube!

This post is sponsored by Airheads. Thank you for supporting the companies that support us! 

Pin It

DIY Knitted Boot Cuffs With Hazel & Ruby

Wednesday, November 4th, 2015

DIY Knitted Boot Cuffs from MomAdvice.com

Friends, I could not be more excited today to share with you my Knitted Boot Cuff Kit that I have created with Hazel & Ruby for their Holiday Crafternoon line that is available in Jo-Ann Fabric & Craft stores nationwide. It was such a great challenge for me as a crafter to design a kit like this and I have learned so much (and have a new appreciation for) about how people create these kits for the stores.

DIY Knitted Boot Cuffs from MomAdvice.com

What is Crafternoon?


The purpose of these kits is to be able to create a great gift in an afternoon for the holidays. In this kit, we have lovingly prepared everything you need to create a beautiful set of boot cuffs from lace to yarn to buttons. Instead of you spending time hunting down patterns, materials, or trying to muddle through a pattern alone, Crafternoon puts it all together to you in one easy-to-use package! Check out the video above to see what the fuss is all about!

Why I Know You Will Love This Kit

The thing that I believe really sells this kit though is a set of bamboo needles that you can use over and over again for knitting small projects in the round without the need for double-pointed needles. This particular set is typically not available in most craft and yarn stores. In fact, I have had to order my sets overseas and they cost about the price of this entire kit once I factored in shipping and the expense of the needles. This set includes my favorite needles and once you have them, you can use this pattern over and over again, adding your own unique and beautiful details to these cuffs.

DIY Knitted Boot Cuffs from MomAdvice.com

Will This Pattern Challenge Me?

I really hope so! I didn’t want to just a simple knitted pattern, although you can definitely do that with the materials provided too. I wanted to create a pattern that would help you learn a little bit of the lace technique (without that super thin yarn!), but that there are enough basic stitches that you could zone out a bit with a Netflix binge and just enough that will hold your interest and create beauty within the cuff.

DIY Knitted Boot Cuffs from MomAdvice.com

If you have never knit in the round before, these needles make it possible.  Crystal, from Money Saving Mom, shared on her Instagram feed her pride of knitting in the round for the first time thanks to this little kit. I couldn’t have been prouder of her and I know that you can do it too!

The kit not only includes step-by-step instructions, but you can also access a video where I walk you through every step of the way through this process and be accessed with the QR code on the back of your packaging or you can just watch it above! Doesn’t it feel like we are crafting together?

Amy Allen Clark from MomAdvice.com

Now hurry up and order a kit so we can knit together or order one for a holiday gift for a favorite crafter in your life. You can also pick a kit up at Jo-Ann that you can use this weeks 30% of total purchase on Wednesday AND of course they always have a 40% off coupon!

logo_1421272052

Have fun blog-hopping through all of the beautiful Crafternoon projects! Lolly Jane has a beautiful Christmas Art Kit that she would love to share with you so swing by to see her Crafternoon project.  Be sure to check out the entire Crafternoon line from Hazel & Ruby for all of your gifting needs!

xoxo


How to Easily Stain Furniture

Tuesday, October 27th, 2015

While I usually use paint to makeover furniture, I tried my hand at staining furniture – this sweet table I found that needed a ton of help to be beautiful – and I love how it turned out! It’s been one of my favorite transformations ever, so of course I wanted to share it for our Transforming Your Space M Challenge.

How to Easily Stain Furniture by MomAdvice.com.

Staining furniture seems like a pretty intimidating project if you have never stained before. Today’s tutorial is going to showcase how to easily stain wood furniture and how you can turn a tired piece into that piece of furniture you have been dreaming of with a simple stain technique.

Today I am working with Cabot Wood Stain to share their new Premium Wood Finish, a stain + sealer product that you can use to restore the finish on your furniture. This H2Oil™ formula provides the best of oil and water-based stains and makes for easy clean up with just a little soap and water!

What I really love about it most though is that it conditions, seals and protects in one step and doesn’t require primer or wood conditioner. You can find this stain at your local Lowes store and the stain color I am working with today is their Espresso finish.  Don’t feel like you have to be committed to just the traditional stain though because it can be tinted to nearly thirty different colors including non-traditional colors like teal and purple!

Premium Wood Finish Colors

Let’s get started on our fun project- I can’t wait for you to see the results!

How to Easily Stain Furniture by MomAdvice.com. How to Easily Stain Furniture by MomAdvice.com.

I headed over to our local thrift store and found this beat-up wooden table for $50. I sent a picture of it to my husband and he replied, “Please tell me you didn’t bring that home.” Yes, you know that you have picked the perfect piece if your husband requests that you not bring it home.

As you can see on the top, this was in extremely bad condition. The top of it looked irreparable and the drawers were deeply damaged. I knew that I would have to be creative with this piece, but the legs and pretty drawers made it a piece worth working on for our office. Because this piece is so damaged, my process took a few extra steps, but even with all the damage, I was able to finish it in a mere 24 hours. You won’t believe this transformation.

How to Easily Stain Furniture by MomAdvice.com.

Supplies Needed

Cabot Premium Wood Finish Stain + Sealer (in your color choice- I have used espresso)

Optional : Cabot Pre-Stain Wood Conditioner (I used this because my piece was so incredibly damaged, but it is an unnecessary step if your piece is in better condition)

Wood Filler

Medium & Fine Grit Sandpaper

Sander (or you can do this by hand)

Rags

Gloves

Drop Cloth

Painting Supplies (if adding painted details like me. The drawers are spray painted using this technique here)

New Hardware or Spray Paint for Old Hardware

How to Easily Stain Furniture by MomAdvice.com.

How to Stain Furniture

1. Begin by thoroughly cleaning your piece well with a clean rag. Once the piece has been cleaned, apply stainable wood filler to any gashes you may see on your piece. Allow the wood filler to dry (two hours) and then using your medium grit sanding paper to smooth and make the filler level to the rest of the surface.

2. Using a sander (or you can do this by hand), sand the piece to remove any old stain and any scratches. Due to the damage on my piece, this took a half hour to do which gave me a chance to begin painting the drawers to this piece.  Make sure that you have on gloves and a mask when sanding your piece and once finished that you clean it well with a clean tack cloth to remove any of the sanding particles before staining.

3. Because of the condition of my piece and how uneven the top still looked on this, I decided to brush on some Cabot Pre-Stain Wood Conditioner (be sure to do this with the grain of the wood)  to make sure that my stain really took evenly. If your piece is in better condition though, you can definitely skip this step. 

On larger surfaces, you will want to work quickly in small sections. Saturate wood with a uniform coat of Pre-Stain Wood Conditioner using a clean brush or sponge. Allow no more than 5 minutes for penetration. Then wipe off all excess. Immediately after removal of Conditioner, apply your Cabot Wood Stain If you are pre-conditioning DO NOT allow the Conditioner to dry. Surfaces which are allowed to dry will not accept stain!

How to Easily Stain Furniture by MomAdvice.com.

4. Now we are ready to stain and seal our piece. Before you begin, make sure your piece is clean and free of any debris using a clean tack cloth.  Again, using a foam brush apply the stain with the grain of the wood. Raw wood is very thirsty so it will absorb the stain quickly. After five minutes, using a clean tack cloth, and wipe it down to remove any stain that hasn’t been absorbed.

How to Easily Stain Furniture by MomAdvice.com.
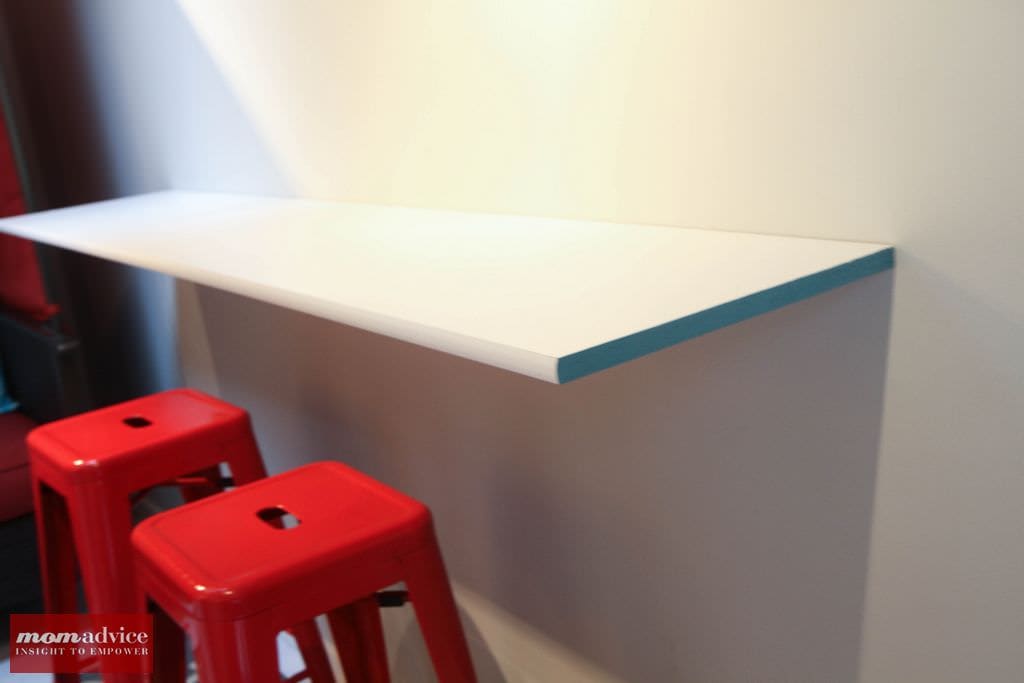
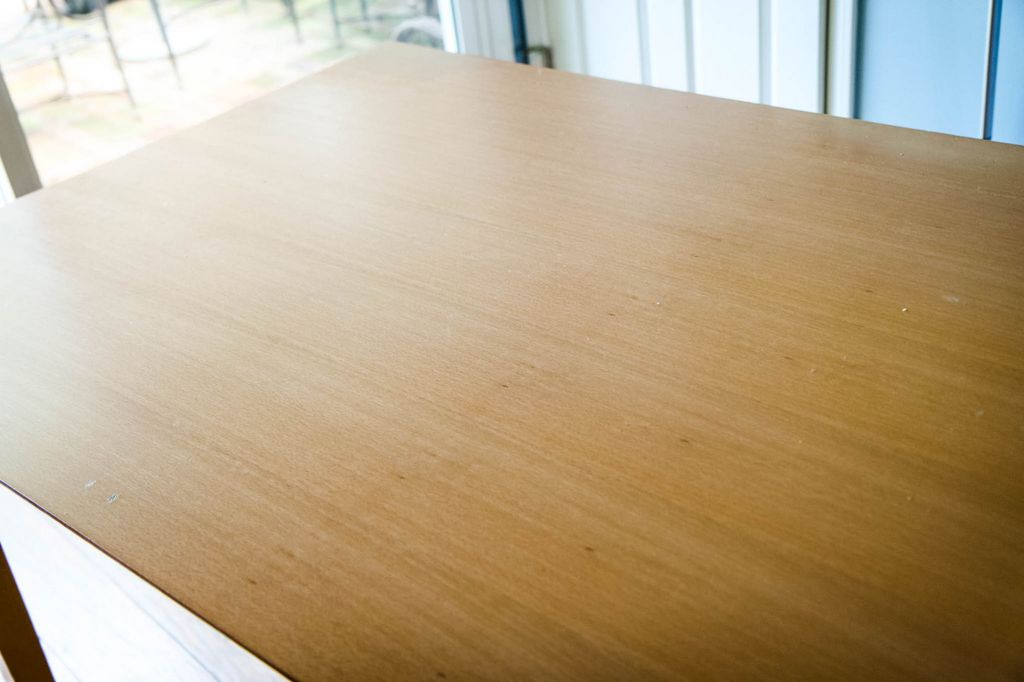
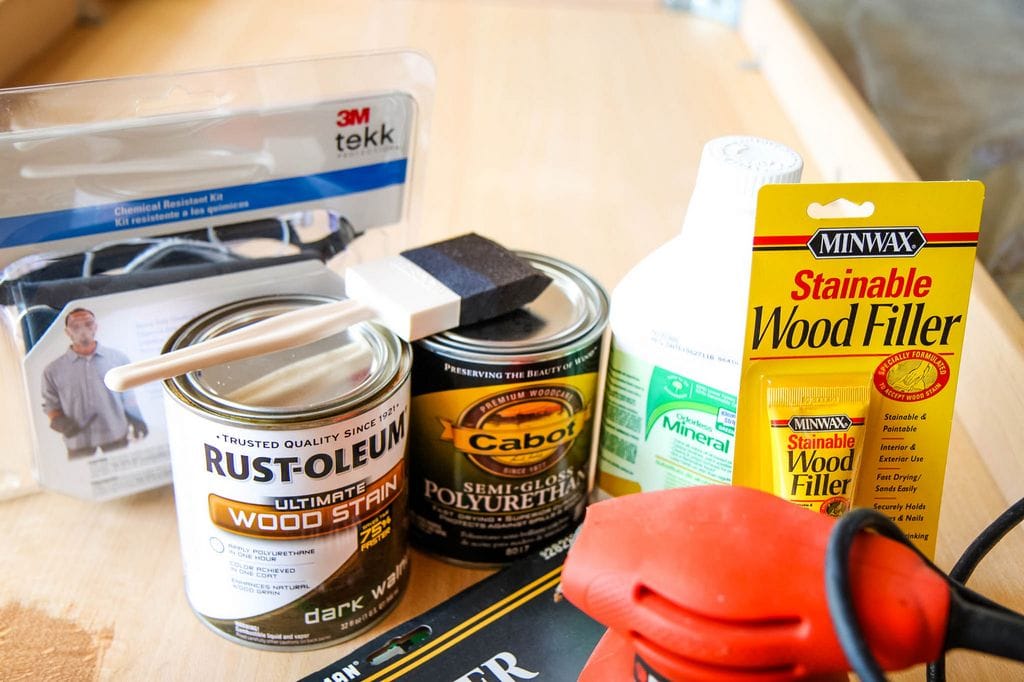
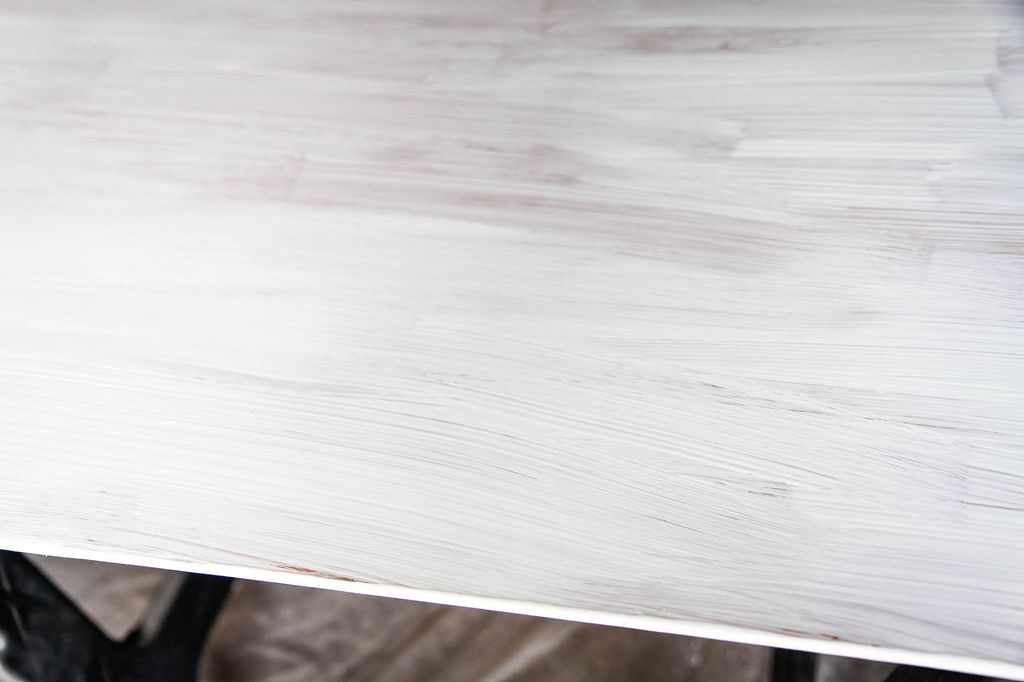
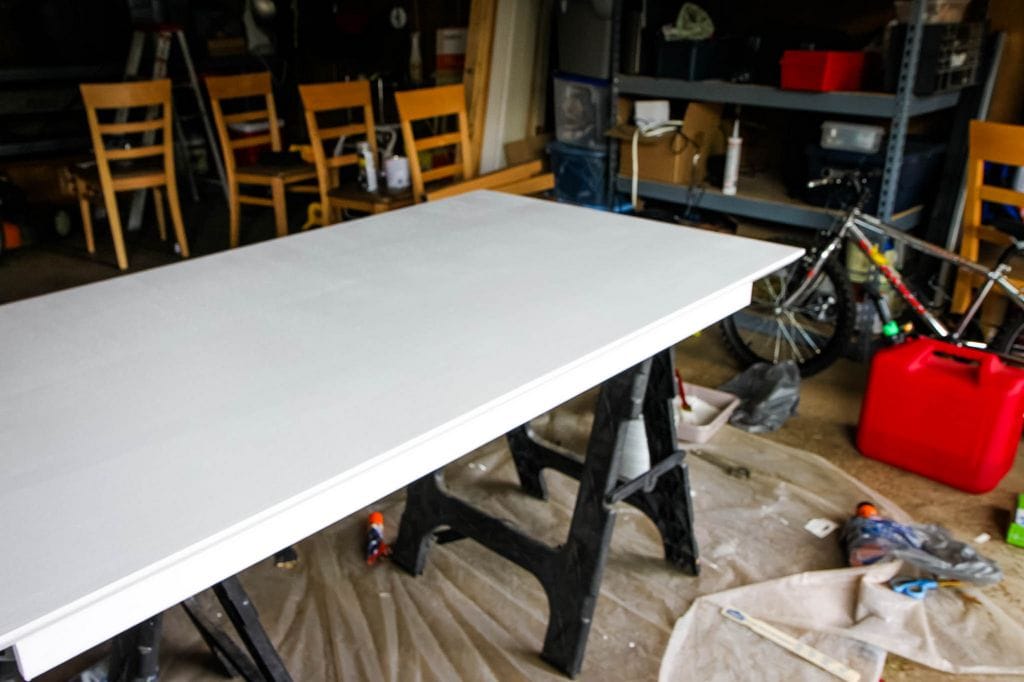
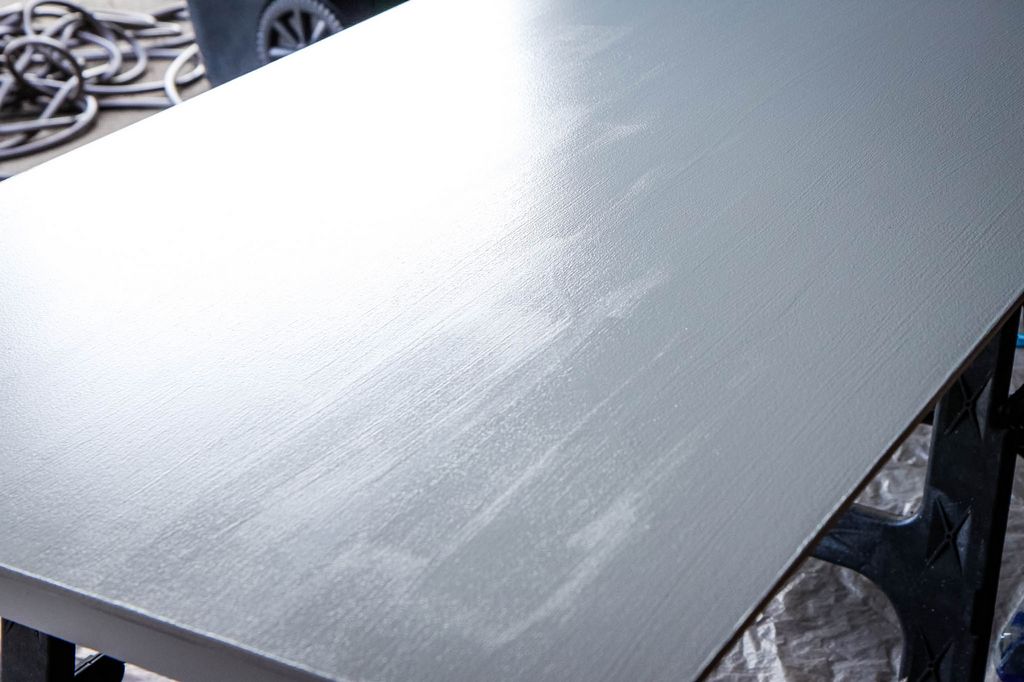
Here is what my tabletop looked like after the first coat. You can see that there is definitely still some unevenness to it, but we are off to a good start. Allow this to dry for 2 1/2 hours before applying the next coat.

How to Easily Stain Furniture by MomAdvice.com.

Sand very lightly with 600 grit sandpaper to smooth wood grain. Remove sanding dust with tack cloth and apply a second thin coat. For full color and maximum durability, apply 2 or more coats. For a muted, distressed look apply 1 coat.  For my table, I applied just two coats so I still had the distressed look that I was after. Since I am impatient, I really love that the Cabot Wood Stain is a fast drying formula that dries in 2-1/2 hours between coats and fully dries in only 6 hours.

Since I also have two kiddos that are rough and tough on my furniture, I also love that it offers a durable finish that will hold up to our abuse and that it protects against spills, water rings and even household chemicals like bleach, alcohol, and nail polish remover.

How to Easily Stain Furniture by MomAdvice.com. How to Easily Stain Furniture by MomAdvice.com. How to Easily Stain Furniture by MomAdvice.com. How to Easily Stain Furniture by MomAdvice.com. How to Easily Stain Furniture by MomAdvice.com.

How to Easily Stain Furniture by MomAdvice.com.

Hello beautiful new table of mine! I am absolutely smitten with this piece and I can’t believe the transformation. We updated the hardware with a couple of new drawer handles since the previous handles were falling apart. The drawers were distressed and antiqued up to match their chippy former days and then I applied my decorative glaze over these spray painted drawers to antique them up a bit more.

How to Easily Stain Furniture by MomAdvice.com.

I swear that this new-to-me table looks just like a table I was coveting in my West Elm catalog, but at a fraction of the price. This has become my new favorite corner in our house and I can’t believe the transformation! For other indoor stain ideas, check out Cabot’s Indoor Inspiration Pinterest board and be sure to follow me on Pinterest for more DIY inspiration! 

Have you ever stained furniture before? What are your tips and advice for updating a piece?

This post is sponsored by Cabot Wood Stain.  I’ve received product samples and compensation for my time and effort in creating this post. All thoughts and opinions are my own.


Pin It

How to Makeover a Shed Into a Bonus Room (Tour Our Shed!)

Tuesday, October 20th, 2015

How could I not share my “She Shed” with you again to go along with our Transform Your Space M Challenge? It remains my favorite transformation. ever. I hope you are inspired to take back space and make it work for you!

she-shed-makeover

Today I wanted to share with you how we transformed our outdoor shed into a bonus room. Shed makeovers are one of my favorite things to look at, but I had never considered our own shed a bonus room until this summer.  This transformation from a shed that housed our chaos and clutter into a multi-purpose retreat is one of my proudest makeovers we have ever done on our home.

I partnered with Walmart on this project to showcase a unique idea for outdoor living. Since they partnered with me, I did my best to utilize items from their store while weaving in handmade items from some of my favorite Etsy sellers.

Before I get ahead of myself though, let’s take a tour of our shed before the makeover. As an FYI,  I did not gloss this up for you one bit. This is exactly as awful and as embarrassing as it looked. It took me twelve hours to organize our garage, six donation runs, and a whole day to empty this shed. I am ashamed how bad it had gotten, but I wanted to be honest about all of that with you. This took a lot of preparation for me to empty this and rid my life of a lot of junk to execute this space. It was worth every moment of effort.

Shed Before Pictures

Shed Before Pictures

Shed Before Pictures

Shed Before Pictures

Shed Before Pictures

Shed Before Pictures

Shed Before Pictures

Shed Before Pictures

Shed Before Pictures

Our home is a late-sixties tri-level that had an attached shed on the home.  Although the shed is attached to our home, you do have to step outside to access it, but it is close enough that easy access is possible. This might be unlike  other sheds that might be residing further out from your property. After talking with our neighbor who has been a longtime resident here,  I understand that this wasn’t originally part of the home, but was an addition that had been made later to our house. Over the years, as other homeowner’s owned it things like insulation and electrical were added. The space had good bones to be a room, but no one had gotten any further than that. We have resided in this home 12 years and it only occured to me this summer that maybe we were missing out on a golden opportunity to have a unique bonus room.  After getting estimates and ideas from a few contractors, we hired All Pro Renovations to assist in transforming this dumping crowd of chaos into the room of my dreams.  They were able to address getting our space up to code and also got my vision for what I wanted to accomplish with this room.

My idea for the space was that it could be a retreat for my children during the day and a fun entertaining spot in the evenings. The most important aspect for this project was that we utilize every single inch of this 8×12 space in a thoughtful way. I wanted a bar that could fold down, flush to the wall when it was not in use. I wanted to utilize all the space that we could behind the door to house storage. I wanted furniture that could be stacked or wall mounted for entertaining.  Most of all, I wanted it to feel very modern and light-filled with a glass door and a window.

How to Makeover a Shed Into a Bonus Room

We painted the door with a bright coat of teal paint that I loved so much that we decided to paint the front door too.

How to Makeover a Shed Into a Bonus Room

We quickly figured out that when the kids were in this room that I couldn’t necessarily see that they were in there and would be hunting in the backyard for them. I added a plastic Open/Closed Sign from Walmart that I attached to the trim of the door with a 3M hook so the kids could let me know if they were in there. If they are inside it is open if they go back out to play in the yard, they flip it to closed. My daughter loves to also leave a time on the clock to let me know when she will be back.

How to Makeover a Shed Into a Bonus Room

How to Makeover a Shed Into a Bonus Room

How to Makeover a Shed Into a Bonus Room

Since our home had aluminum siding, All Pro recommended adding light with a skylight (which cost the same as adding a window), because if we damaged our siding, we would not be able to find matching aluminum siding for this home. They found a glass door that we could use for the space. They recommended doing an epoxy-paint floor with neutral tones that would be durable and ideal for this outdoor space. To warm up the floor, I added this outdoor rug in a 5’3×7’7 (an absolute steal at $77.58)   The room was drywalled, painted, and trimmed to finish out the bones of this room.  My color choice for this space was Benjamin Moore’s Gray Owl for the walls (which I now what to paint my entire house in) and Benjamin Moore’s glossy White Dove for all of the trim.  Although the original intent was to add canned lighting, our ceilings were too low for the space so track lighting was installed which adds to that modern retro feel that I was going for.

How to Makeover a Shed Into a Bonus Room

A built-in was added behind the door to make sure that every inch was used. Wine glasses, a rack, and opener are on the top shelves for evening entertaining. On the lower shelves, we have coloring books, crayons, and books. I also added a few of my favorites from our record collection and they fit perfectly on the bottom so we can use our turntable out there.

How to Makeover a Shed Into a Bonus Room

How to Makeover a Shed Into a Bonus Room

How to Makeover a Shed Into a Bonus Room

The focal point of the room is this beautiful Providence Outdoor Day Bed (priced at $399) from Walmart for the back wall.  This canopy bed is so beautifully made that I almost fall asleep every night on it while I am out there. It is generously deep and the canopy element really adds an eye-catching detail to the room. I switched out the pillows with a more modern printed pillow covers that I scored on Groopdealz as one of their deals-of-the-day. I also added this Too Legit To Quit pillow from Michelle Dwight Designs to add a splash of fun to the bed. I found inexpensive pillow forms from Walmart to create cushions with style for the back of this bed.  The pillow forms are two for $5.15 and feel like expensive cushions.   This bed not only is the perfect spot for a reading nook, but it also can double as a guest room year-round for our guests. I kind of want to stay here as a guest myself.

How to Makeover a Shed Into a Bonus Room

How to Makeover a Shed Into a Bonus Room

How to Makeover a Shed Into a Bonus Room


The bar can comfortably seat four people and I found retro Amelia Metal Cafe Bar Stools in red (2 for $159) from Walmart to complete the look.  I actually placed an additional order for two more now that I could see how many I can fit here.  All Pro Renovations created a bar that could be folded down and added a stripe of teal on the edge of my bar to add a little splash of color.

How to Makeover a Shed Into a Bonus Room

How to Makeover a Shed Into a Bonus Room


We added these modern floating shelves (only $19.95) and I filled them with a few fake succulents and wove in a few of my favorite books and a fake orchid.  It creates a soothing and maintenance-free splash of color over there.

How to Makeover a Shed Into a Bonus Room

How to Makeover a Shed Into a Bonus Room

The turntable I was gifted from my amazing girlfriends was placed on this pedestal table from Home Decorators and it was just the right size for this small space. I added this beautiful 30″ handmade arrow from Junk Art Gypsyz to the wall. We also added a beautiful typography piece that has the lyrics from Elton John’s, “Tiny Dancer,” to that wall.

How to Makeover a Shed Into a Bonus Room

Your question might be how we are keeping the room cool in the summer and warm in the winter? I have a great solution for you. We discovered that Walmart offers a Newair NewAir AC-10000H Portable Air Conditioner & Heater unit that not only act as an air conditioner, but a one piece solution for air conditioning, heating, and dehumidifying. The best part is that it can be set on a timer so you can set it for the day and it will automatically shut itself off.  All-Pro got the unit to drain outside of our home and installed a flap for the hose so that the unit is maintenance-free. This was the priciest of the purchases at $471.81, but eliminated the need for multiple units in such a small room.

How to Makeover a Shed Into a Bonus Room

Shed Makeover Shopping List

1. 30″ Marquee Arrow {Junk Art Gypsyz}

2. Too Legit To Quit Pillow {Michelle Dwight Designs}

3. Arrow Apache Blue  & Fynn Cool Grey Pillows {Groopdealz}

4. Tiny Dancer Typography {Concepcion Studios}

5. Safavieh Courtyard Outdoor Rug {Walmart}

6. Chloe Side Table {Home Decorators}

7. Amelia Metal Cafe Bar Stools {Walmart}

8. Newair NewAir AC-10000H Portable Air Conditioner & Heater unit {Walmart}

9. Providence Outdoor Day Bed {Walmart}

10. Danya Floating Shelves {Walmart}

11. Pellon Homegoods Decorative Pillow Inserts {Walmart}

12. Open/Closed Sign {Walmart}

Benjamin Moore Paint Choices


Paint Colors Used In Our Shed

1. Benjamin Moore White Dove (Glossy, Trim)

2. Benjamin Moore Blue Spa (Exterior, Door & Edge of Bar)

3. Benjamin Moore Gray Owl (Semi-Glossy, Walls)


I hope you enjoyed touring our shed.  I have found this room to be so good for my soul. It is so quiet and peaceful in there and is my new favorite place to unwind. Since the room is designed so differently from our home, it truly feels like I am going somewhere else in the evenings. The absence of clutter and our busy everyday life has been very calming to me.  I have been counting down the hours until my kids go to bed so I can escape. I also look forward to entertaining in here with my girlfriends, hosting book clubs, sharing a cup of coffee with good friends, writing alone,  and having a retreat for our kids on rainy days.

I’m thankful to All Pro Renovations for making all my dreams come true and exceeding my expectations for our former junky shed. Professional, courteous, on time (or early) every day, and quick to create smart solutions for this design challenge.  In ten short days, they created a space that I am so proud of and were as equally excited seeing it all come to life. They even came to my rescue when my daughter had a meltdown that her chalkboard door was disappearing and cut it to size for our garage door to surprise her while we were on vacation.  How amazing is that?

How to Makeover a Shed Into a Bonus Room

I could not have asked for more! I am already working on vision boards for other rooms in our home I would like to tackle with them again.

I hope this space inspires you and I’m thankful that Walmart gave me the chance to share about their beautiful outdoor options with you!

walmart_mom_disclaimer

Pin It

How to Paint a Kitchen Table: Our Kitchen Table Makeover

Tuesday, October 13th, 2015

How to Paint a Kitchen Table

Have you ever wanted to paint your kitchen table? This durable table top has lasted a decade and still looks like the day it was painted. Get tips to diy this painting project and give a dining table a makeover at your house too! 

I never dreamed that I would ever paint my kitchen table when we bought it. For ten years though we abused it daily, it survived a brutal move with a terrible moving company, and the polyurethane coating never did look right after it was damaged in route to our house on the day we bought it. The table was loved to pieces, literally, and that is why we had to paint it.

How to Paint a Kitchen Table Before

Passing through our kitchen, you might not have noticed the table’s beat-up appearance. From far away or cleverly covered with a tablecloth when it got really embarrassing, the table just didn’t look that bad.

How to Paint a Kitchen Table Before

How to Paint a Kitchen Table Before

How to Paint a Kitchen Table Before

Upon closer inspection though, your eyes are assaulted with the damage that has happened to it.

The polyurethane coating was flaking away, the ends were terribly damaged on the table, and a huge gash went right through the center of it that I never thought the table would ever recover from.

How to Paint a Kitchen Table Supplies

We decided that we would stain the table and restore the tabletop with a nice deep and rich color. We bought lots of supplies to stain the table and I couldn’t wait to get started.
How to Paint a Kitchen Table Sanding

How to Paint a Kitchen Table Sanding

How to Paint a Kitchen Table Sanding

For two days I sanded the table to within an inch of its poor little life.

The polyurethane coating remained.

I bought polyurethane stripper and left it on the table for twenty-four hours.

The polyurethane remained.

I sanded the table more.

The polyurethane remained.

I cried.

I rocked in the fetal position.

I kicked myself for starting a project that I didn’t feel as confident in.

I gave up.

We ate at a sad folding table and chairs for an entire week, only to discover this staining would not happen at my novice level of furniture staining.

How to Paint a Kitchen Table Primer

At this point, I had nothing to lose.

We decided to paint the kitchen table.

How to Paint a Kitchen Table

The chairs were in good condition other than a quick reupholster to the tired fabric that had been on them.

The table legs also happened to be in decent condition so we made the decision to leave the table legs and chairs in their natural wood color (partly out of laziness and partly because we needed our kitchen table back) which definitely cut down on the work.

I am no expert on painting furniture so I consulted with my best friend who has been painting her furniture recently and the ever amazing and wildly talented Kate, from Centsational Girl, who has this amazing tutorial on how to paint furniture.

Between the two of them, I felt a tad more confident than I did before.

How to Paint a Kitchen Table Primed

Once the table was sanded and wood filled in the spots that were really rough on the table, we applied two coats of the Zinsser Cover Stain Primer over the table.

Between each coat, once the tabletop was fully dry, I gave it another good sanding and wiped it clean with a cloth.

I had to admit, even with just the primer, the table was already looking better.

How to Paint a Kitchen Table

How to Paint a Kitchen Table First Coat

How to Paint a Kitchen Table First Coat

Once the primer was dry, I applied two coats of paint to the tabletop.

We wanted our tabletop to match our kitchen cabinets so we chose Valspar Blanched Pine (7005-15) for the shade of white we were looking for.

Two coats of paint were applied to it.

The first coat was applied with a brush and then the second coat, I used a roller and then used a brush to smooth out any roller marks.

I did take Kate’s recommendation and added Floetrol to the paint (as directed on the packaging) which really did seem to help cut down on the mistakes that I usually make when painting.

This paint conditioner will definitely be used again when I tackle another painting project.

How to Paint a Kitchen Table Polyurethane

How to Paint a Kitchen Table Poly Coat

After the paint was dry, we then applied two heavy coats of polyurethane to the tabletop with an angled brush.

We allowed the polyurethane to set on the tabletop for four days with no use.

I think this was one of the hardest parts about the process, but we wanted to make sure that the tabletop would really be able to withstand our daily abuse once we brought it inside.

The table legs were reattached, the new-to-me chairs were slid under it. We were in business.

How to Paint a Kitchen Table Matching Chairs

How to Paint a Kitchen Table

How to Paint a Kitchen Table

How to Paint a Kitchen Table

How to Paint a Kitchen Table

Here is our newly painted kitchen tabletop.  It is not perfect, but we truly did the best we could to improve upon something we already owned.

I am so happy to have a tabletop that I don’t have to cover with a tablecloth and my husband is thankful I am done with this project, I am thankful to have reclaimed the garage, and we are all thankful that we didn’t have to purchase a new set of furniture for this room.

Love this painting tutorial? You will love these other diy furniture updates!

How To Reupholster a Chair learn how to reupholster your kitchen chairs

How to Spray Paint Furniture Header learn some incredible tips for spray painting wood furniture

how to paint laminate learn how to paint laminate and spruce up a box kit fireplace

//www.momadvice.com/post/how-to-easily-stain-furniture learn how to stain a tabletop

Happy DIY Day, Folks!

How to Paint a Kitchen Table

Pin It

6 Festive Halloween Decorating Ideas

Monday, September 28th, 2015

6 Festive Halloween Decorating Ideas from MomAdvice.com

Halloween is just around the corner and with that season comes all of the fun decorating and costume ideas for your home and family.

Your favorite second-hand store is a top source for materials and costumes for most families.

Don’t forget while putting together your award-winning attire, that you can upcycle a lot of great materials for crafting a festive & spooky home too!

Gathered here are a few of my favorite ideas for decorating for Halloween that I think you will find both fun AND affordable!

Put a Few Skeletons in the Front Yard

I couldn’t stop laughing when I saw this hilarious idea for Halloween decorating from Ruffles & Truffles.
She scored a couple of these skeletons at her local Ross & Target stores and each year has so much fun setting the scene for the Halloween season.
With a couple of second-hand patio chairs, you have a quick and hilarious way to decorate for the season!
This idea is so fun because you could snag just about anything in the store and make it into a funny skeleton tableau.
Since I have a black thumb, I appreciate the exposed skeleton left to linger in the dead flower bed.
How fun is that?

Add Some Spooky Prints

One of my favorite trends right now for Halloween is the addition of a few spooky prints for a tabletop or mantle.
The House That Lars Built shows how easy it is to hunt for a free image to download and to print and get it printed as an engineer print for the mantle.
You could also go small with these prints and make a spooky mantle gathering with a few rummage sale frames spray painted in black.
I love the additions of the black taper candles as a finishing touch to this easy mantle idea!

Make a Candy Corn Treat Bag

I love pillowcases for holding our Halloween treats and I am so inspired by this super cute candy corn treat bag that Rit Dye made on their website.
I am such a big fan of the product for transforming everything from table linens to restoring color in my clothing, but I never thought to create a cute treat bag for my kids with the dye product.
The tutorial could not be easier and the results are picture perfect for a special trick-or-treater in your life!

Add a Witch to Your Fireplace

I feel like a good witch craft is mandatory when it comes to Halloween decorating. With a couple of pool noodles and some shoes purchased from Goodwill, you are well on your way to creating the cutest little witch to peek out of your fireplace.
The skirt was made with a little gathering of tulle and these tights can be found in abundance in the Halloween section of your superstore as well as your local costume shop.
I love that this is something you can do each year and that it can come apart for easy storage!
Visit Crafty in Crosby for the full tutorial on this one!

Mummify a Throw Pillow

I am a big fan of any cute home project that doesn’t require sewing and this mummified pillow is a perfectly cute way to decorate for the Halloween season with just a few simple craft materials.
This idea was inspired by Pottery Barn. Material can be found with the table linens/sheets and you could slipcover a throw pillow from the store to keep this adorable craft on budget!
Visit handmade mood for the tutorial on this super cute pillow!

Decorate Your Kids

All of you out there still getting away with picking your child’s Halloween costumes, I just couldn’t be more jealous.
I just love visiting Goodwill for fun Halloween costumes and prop ideas and this list wouldn’t be complete without one super cute costume idea for you to indulge in.
Skirt As Top has the sweetest little hipster Moonrise Kingdom costume idea I have ever seen.
Please tell me this is a favorite film of yours too!!
With a few fun props from Goodwill to complete this handmade adorableness, your kids are sure to win all the costume awards (and wow other parents in the process).
I will have to be content living vicariously through you this year now that I have a tween and teen on my hands!

I hope you leave this post feeling inspired to tackle a fun Halloween project of your own! Happy Halloween, friends!

This post contains affiliate links


More spooky crafts from MomAdvice:


Knitted Baby Viking Hat


Autumn Burlap Wreath Tutorial


Doughnut Hole Ghost Cake


DIY Thumbtack Pumpkins


Sign up for the MomAdvice newsletter

Pin It

7 Easy Upcycle Projects for Fall

Thursday, August 27th, 2015

Upcycle-Projects-For-Fall.jpg

Do you love decorating for Fall as much as I do?

Of all the seasons, this one is my favorite and I love that you don’t have to spend a lot to make a beautiful impact on your home during this season.

Nature brings so many free and fun elements to your home decorating.

Pairing these with a few simple upcycle DIY’s, you don’t have to spend a lot to make your space cozy and beautiful.

Today I want to share with you seven easy upcycle projects you can try to make yourself and your home cozy for Fall.

These projects were selected because they are easy to execute with some commonly found items!


Transform Book Pages Into a Wreath

Book page projects are always my favorite and I just love this easy DIY Paper Leaf Wreath created by Nalle’s House as a whimsical element of decor to a door or window in your home.
I particularly love that she uses a fallen leaf as a template to create a rustic feel to the wreath and the addition of fallen acorns really embrace the natural elements of autumn.

Add a Little Pottery Barn Style

Wouldn’t we all just love to fill our homes with everything from Pottery Barn?
I know I would, but just can’t justify the expense especially when it comes to simple seasonal decor.
Glass jars are always something I can snag at my favorite thrift store and filler for these can be purchased at your local craft store (with a great coupon, of course!)

Turn Sweaters Into Cozy Legwarmers

Living in Indiana, a girl can never have too many layers in the colder months. I love a good leg warmer or boot cuff to add a touch of color and warmth to my wardrobe.
Lucky for you, sweaters are available in every color of the rainbow.
As explained in the easy tutorial, this is a simple no-sew project since no one will ever see what’s lurking underneath your boots if you don’t feel like making a finished edge.
So cute AND easy!

Create a Book Page Pumpkin

I am always looking for thrifty seasonal touches to add to my bookcases and shelves.
Consider making a simple book page pumpkin out of a book from Goodwill and finish it with a little twine and twig to complete the rustic look.
If you select books in different sizes, you could create a beautiful coffee table display for your home!
Check out this easy step-by-step tutorial from Red Ember to create one of these (or ten!) for your own home!

Add a Fall Touch to a Mug

It is rare that I stop in the thrift store and can’t find a few white mugs for my DIY projects.
I have transformed many a mug into a beautiful gift and I love the idea of adding a fall touch to these treasures with a simple stencil.
Since these are a rub-on transfer (versus a permanent paint transfer) consider using these as a place to tuck your toothbrushes, to fill with a treat for a teacher, or plant a little succulent to place next to a kitchen window!
You can get the scoop on this easy stenciled mug over on Callaloo Soup.

Add Simple Details to a Faux Pumpkin

Although I love a glitzy pumpkin, my eye is drawn to these simple Baker’s Twine pumpkins because they create such a beautiful detail with such pretty lines.
If you aren’t crafty, this is the perfect DIY project for you and just requires a little wrapping of twine to complete.
This project is so easy, you can enlist your kids to help you!
Check out Design Improvised to see how to create these for your own home.

Add a Tassel Detail to a Cozy Throw

I am absolutely nuts about tassels and how they can transform anything from clutches to necklaces to pretty trims.
A basic vintage throw from Goodwill can be taken up so many notches with a beautiful tassel detail.
Design Sponge shows you how beautiful this detail can be in cozy neutrals for the fall season.
I’m dying to replicate this project for our home, aren’t you?
Get the easy tutorial over here today!

What is your favorite upcycle project that you have done for Fall? Feel free to leave your ideas in our comments below!

Check out these other Fall ideas from MomAdvice.com:


Apple Wreath Tutorial


DIY Bar Cart Tutorial with Game Day Tips


Autumn Burlap Wreath Tutorial


Painting Pumpkins with Acrylic Paints


Sign up for the MomAdvice newsletter


This post contains affiliate links.


Pin It

DIY Lunchbox Creation Station

Thursday, August 20th, 2015

For our Meal Planning M Challenge, we don’t want to overlook the challenge of creating school lunches day and and day out for the school year, so we’re republishing one of my favorite Organizing/DIY projects: making a “lunchbox creation station.” I love this organizing idea for two big reasons: it’s easy for the kids to find things for their lunches, putting a lot of the responsibility to them AND it’s easy for me to see what we have available and what I need to stock up on. That’s a win-win!

As our kids head back to school, I am in preparation mode to get our family organized & back on track for the new year. One area that I am always working on organizing is streamlining our lunchbox routines. I am excited to share with you my DIY lunchbox creation station that you can create in a corner of your home to streamline your lunch routines. You won’t believe how easy this is to create and you will love my idea for revamping this into something you can use in the summer months too!

For this craft you will need:

  • 3-6 Sterlite Medium Modular Drawer
  • Krylon Chalkboard Spray Paint (often home improvement sections)
  • Avery Removable Wall & Window Signage Sheets (in office supplies)
  • 16 count chalk (in office supplies)
  • Large circle hole punch or a jar or glass that you can use for tracing your circles (I had this in my craft supplies at home)

We are going to start this craft by creating our cute Chalkboard labels first.  You may recall that we made these easy chalkboard labels before when making my super cute Chalkboard Conversation Bubble Cookie Jars. We are going to do the same thing that we did in that craft for this one, but we are cutting them into circles instead of the conversation bubble!

First, pull out your Avery Sheets. For this craft, we are going to use the Wall Application Side for spraying with chalkboard spray paint. This is the side that has the sticky side that is removable and adjustable… perfect for people who can never get anything on their projects perfectly straight.

In a well-ventilated area covered with newspaper or cardboard, place your Avery sheet. Shake the can vigorously for two minutes. Hold can 10-14 inches away from your project and begin spraying. Spray a thin coat in a sweeping motion beginning off the surface and continuing off the other side. Follow this pattern horizontally and then vertically. Wait fifteen minutes or so and then apply another coat.  They should be dry and ready to cut in about an hour.

Cut these out into circles. One sheet should give you six generous size labels that you can write your labels on. While those are drying, you can begin assembling your drawers.

Your needs for your lunchboxes may be different than my own. I wanted to show you what I did in my drawers, though, to inspire your own categories for your lunchbox creation station. I used six drawers because that is what would fit on my pantry floor and would cover all of our lunchbox needs. I have a drawer for snacks, fruit, drinks, chips, water, and a drawer of fun (more about that below). Think of the problem areas in your kitchen and create a drawer to accommodate!

Here is an interior view of my drawers and here are some ideas for items you could keep on hand for your kids:

Snacks- Granola bars, low-fat puddings, natural fruit leathers, nuts, goldfish crackers, rice cakes, wheat crackers, sunflower seeds, homemade cereal mix, fruit snacks.

Fruit- Natural applesauce, yogurt covered raisins, raisins, dried fruit, apples, bananas, oranges.

Drinks- Juice Boxes and organic milk boxes.

Chips- Sweet Potato Chips, Veggie Chips, Pita Chips, Pretzels (I package my chips in tiny Glad containers and have used these a few years now with great success. This drawer also contains my new favorite sandwich cubes that I found at the The Container Store).

H20- This is where I have all of our water bottles so that the kids can grab one in the morning and before extracurricular activities.

Fun- This is where I keep my cookie cutters, homemade play dough, and craft supplies for our kitchen.

Next to the drawers, I nestled a basket for extra snacks to be placed in the drawers as needed and the lunchboxes. Place your designated labels on your drawers and stand back and behold your AWESOMENESS.

With this simple system in place, the kids are now in charge of creating their own favorite lunch combination, selecting one item from each of the lunchbox drawers. My kids have already been scheming and dreaming about their daily lunches and are excited to finally be in charge of their own lunch destiny.

When the summer months roll around, I plan to erase the labels and fill them with all of our summer necessities like pool snacks, water bottles, drinks, sunblock and insect repellent, and other items that tend to accumulate on counters and on top of my fridge. I think this is a great organizing solution for all year round!

Designate one day a week (my day is on Sunday) to creating your snack packs and making items that can be tucked into lunchboxes.

Another tip to keep your lunches organized and accessible is to designate one refrigerator drawer towards lunches. Items like freshly cut fruits and veggies, sandwiches, and Asian lunchbox noodles can all be waiting for the morning in this drawer.  I even tuck commonly forgotten items in the drawer like napkins and spoons to trigger my tired brain to kick in on busy school mornings.

Don’t forget about yourself in all of the hustle bustle of school preparation! I love this DIY Salad Bar to help keep me on track with healthy eating during the school year!

What do items do you love to keep on hand for your child’s lunchbox? I would love to hear your ideas!

I am a part of the Walmart Moms program, and Walmart has provided me with compensation for these posts. My participation is voluntary and opinions are always my own.

Pin It