Archive for the ‘DIY’ Category

Knitted Coffee Cozies

Monday, November 5th, 2012

The giving season is just around the corner and for those that make handmade gifts for the holidays, it is time to start our engines! Today’s craft project is for easy knitted coffee cozies that can keep your coffee nice and cozy during the cooler seasons. These coffee cozies are the best mindless-activity-my-kids-have-hours-of-sports-or-I-need-an-excuse-to-catch-up-on-t.v.- and-sit-on-my-couch-without-guilt type of knitting project.

Why should you throw this on your knitting needles? First, it is a great yarn stash buster. You know all of those tiny balls of leftover yarn that you don’t know what to do with? You now have the perfect excuse to use them up!

Trying to think of the perfect gift to give to your child’s teacher, principal, bus driver, hostess gift, postal worker, best friend, or your mom that will cost you $5 or less? Well, this is the perfect project for you.

Looking for a gift for the person who has everything? I bet they don’t have a cute sweater for their coffee!

If you know how to knit in the round, you can do this project.  If you don’t know how to knit in the round, YouTube and Knitting Help are your BFFs.

I do not love knitting on three needles and I have not mastered magic loop knitting yet so I like to knit on tiny 12′ circular needles.  This is the exact set I bought and they are what I use when knitting all tiny knitted projects like this. These are one of the best tools in my knitting arsenal and help keep me out of practice with double-pointed needles.

I found my coffee cups and individual packets of Starbucks Salted Caramel Hot Chocolate and Peppermint Hot Chocolate at our local Gordmans. If you don’t have one of those stores, I am sure you could find something very similar at Marshall’s or TJ Maxx.

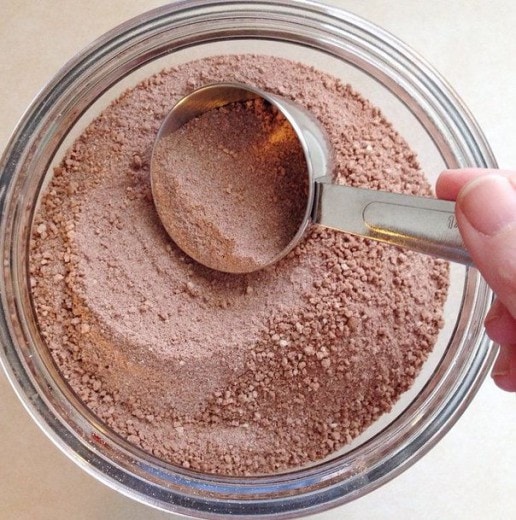
Use more of your scrap yarn to tie your cocoa packets or make your own homemade hot cocoa mix or homemade vanilla chai tea mix to include with your gift.

This gift cost me about $5, but I’m not telling the recipient’s that. I love when I spend $5 and make someone’s day. I have a feeling this little treat is going to do that for a few of the special helpers in our lives.

Rest assured, many $5-10 gift features will be happening these next two months! In the meantime, be sure to visit my list of 36 handmade gifts you can create for the holiday season!

Don’t forget to friend me on Ravelry! It’s where I share all of my fun knitting projects that I have been working on!


Grab the free and easy pattern over here!


Disclosure: The knitting needles are an affiliate link and is provided so you can locate what you need quickly and easily!

Pin It

Fun Halloween Costume Ideas For the Whole Family

Tuesday, October 30th, 2012


We are looking forward to another fun Halloween! I wanted to show you our Halloween costumes this year. Outfitting the whole family in costumes can be a challenge, but we tend to embrace it with a lot of enthusiasm.

Emily’s masquerade ballroom gown has to be one of my favorite costumes we have ever gotten her. I found it at Marshall’s for $24.99. I hate spending more than $20 on a costume, but this is one she is planning to use for dress-up play and it is so beautifully made that I am sure we will find many uses for this elegant dress (complete with a hoop skirt, cameo necklace and little masquerade mask).

We found Ethan’s knight costume inexpensively online and I was excited that their requests coordinated this year. Of course, we always manage to make it coordinate for photos, even if it doesn’t always really work!


For a couple that doesn’t really watch a lot of television, we embraced the television themes this year with our costumes. Our favorite show happens to be, “Glee.” I might be alone in this one, but I can’t get enough of that show!  For our couple costume this year, we gleeked it out with a Glee cheerleader costume for me and my husband pulled off the Coach Sue Sylvester costume far better than I could ever imagine.

We partied it up in these hilarious costumes and every time I saw this man out of the corner of my eye, it put me in a fit of giggles. Of course, following this year’s rocking costume party, we were already brainstorming what we would wear next year.

I was able to find these costumes on clearance for $10 each. My best friend altered the costume a bit for me (because one size does NOT fit all). What a rock star best friend to sew my cheap polyester costume for me!


Our Bunco theme this month was also Halloween themed so my best friend and I schemed a costume from our other favorite show, “New Girl,” I have a serious girl crush on Zooey and her character, “Jess,” on this show. For this costume, I just raided my own little retro wardrobe, threw on my nerdy glasses, curled my hair and slipped on a pair of ballet flats. I had the picture frame in my craft supplies and use that like she does in the intro of the show.

Becky went as Cece, Jess’ supermodel bestie  on the show.  Of course she just straightened her hair and wore her most awesome model clothes from her own wardrobe with a killer pair of heels.

You have to love a costume you can create from found items in your closet.

Looking for more last minute Halloween costume inspiration? Be sure to visit my Scary Deals on Halloween Costumes and our easy DIY Halloween Costume round-up with eight great costumes for the whole family. Happy Halloween!

Pin It

Easy DIY Halloween Costumes

Friday, October 19th, 2012

Stumped for Halloween costumes ideas this year?

It’s only a couple of short weeks until Halloween, but if you haven’t found a costume yet, have no fear!

Today I want to showcase eight easy DIY Halloween Costumes you can create using items found at Goodwill.

Last year, Americans spent 7 billion dollars on Halloween related expenses!

What was once a time to grab a sheet and be a ghost or peek around your house for easy costumes made from your mom or dad’s wardrobe has escalated into a spending frenzy of decorating, costuming, and trick-or-treat candy madness.

This list of easy DIY Halloween Costumes will hopefully help you gather some great ideas for throwing together a great last minute costume and save you money in the process.


Book Fairy Costume

A couple of hardback books from a local thrift store or garage sale can create a unique and adorable book fairy costume.

Using a hot glue gun, book pages, and the covers of the books to create your fairy wings you can create an entire costume from simply rolling paper for an adorable skirt!

You will love this one (via Lilliedale)


Mary Poppins & Bert Couple Costume

Couple costumes can be challenging, but with few things from your closet, it can be easy to create your look for less.

My husband & I created this costume for less than $20 and absolutely had a blast putting it together. (via MomAdvice)


Homemade Redbox Costume

I had to laugh at this adorable Redbox costume that this family created!

The Redbox costume was created using spray paint, a box, and snagging some of the Redbox images from Google.

I absolutely love this idea and it cost the family less than $5 to create.

The best part is that the whole family can jump in on the creating (Coolest Homemade Costumes)


Baby Cabbage Patch Doll

Looking for a costume that can work around pushing your baby in a stroller?

This Cabbage Patch Doll costume is simply genius and wouldn’t cost a lot to create.

Grab a green fitted sheet to cover your stroller, create the Cabbage Patch box, and then cover your baby in yarn pigtails. (Via Costume Works)


Will Work 4 Candy Costume

The best part about the, “Will Work 4 Candy Costume,” is that you need not buy any supplies at all to create this look.

Paint a beard on your child’s face, dress them in their most tired looking play clothes, mismatch their shoes, and add a cardboard sign from your recycle bin. (via Coolest Homemade Costumes)


Paper Doll Costume

Short on funds for Halloween costumes this year?

This paper doll costume can be created for about $1 using poster board or foam core.

Add your daughter’s laciest socks and a pair of Mary Jane shoes and you have a real-life paper doll to trick-or-treat with.

What little girl wouldn’t love that?  (via slapdashmom)


Baby Aerobics Instructor Costume

Holy cuteness!

This baby aerobics instructor outfit looks like an easy DIY to put together and I promise, it will be a memorable costume.

Create a baby headband from an old t-shirt, cut the bottoms off of a pair of socks to create baby leggings, and use your baby’s onesie and leggings to complete the look.

This mom created an adorable boombox out of felt to complete the look.  (via Primary)


Child’s Superman Costume

Leading a double life can be tough, but it doesn’t need to be expensive.

Grab a tie, shirt, and heavy glasses for Clark Kent, and dress him in a Superman shirt underneath.

This costume is adorable and affordable!


What is the best DIY Halloween costume you have created? Feel free to share your links and ideas below!


This post contains affiliate links.


Don’t miss these other great ideas from MomAdvice.com:


The Best of Fall, Halloween & Thanksgiving-49 Ideas for Decor, Crafts, Recipes, Costumes & More

The Best of Fall, Halloween and Thanksgiving


DIY Thumbtack Pumpkins


Minecraft Costume Ideas


Delicious Drink Mixes: Hot Cocoa and Vanilla Chai 


Sign up for the MomAdvice newsletter


Pin It

How to Make Chalkboard Pumpkins

Monday, October 15th, 2012

If there is one thing you know I love around here it is chalkboard paint. Chalkboard painted pumpkins are a fun way to avoid the pumpkin carving and allow your kids to unleash their inner Picasso. Chalkboard pumpkins are easier to make than you might think and today I wanted to show you how to transform ordinary pumpkins into Chalkboard Pumpkin People that lets your kids be creative while creating a unique accessory to your front step!

Let’s get started with creating your very own Chalkboard Pumpkin People.

Supplies Needed (all found at Walmart):

1 real pumpkin

1 can of chalkboard paint (over in the hardware department)

Masking or electrical tape (this is optional, I ended up not covering my stem)

Wet wipe

White Chalk

1 Skeleton or Witch Body (these are found in the Halloween supplies by the pumpkin carving tools, $7.97 each)

How to Create Your Chalkboard Pumpkin

1. Wipe down your pumpkin well with a wet wipe or damp paper towel to remove any dirt or debris.

2. Hold your can 10-14 inches away from your surface and spray in a sweeping motion side to side with a slight overlap around your entire pumpkin. Follow this pattern horizontally and then vertically. Wait fifteen minutes or so and then apply another coat. You need two coats to create your chalkboard surface.

3. Allow your pumpkin to cure. Do not use any chalk on this for 24 hours! The chalkboard paint will need to harden and will not be ready until then. If you try it before it is ready, it will just scratch the paint through, creating marks and exposing the orange on your pumpkin.
Let your little artists go to work with their chalk. Before giving it to them, make sure to rub down the corners so that they don’t scratch their pumpkin’s surface. I also reminded them to draw gently on these so their paint would remain intact.

Mistakes made? No problem! These can easily be erased and started over again. We had many false starts before deciding on our perfect faces.

Here are our finished faces that the kids drew (the witch’s creator might have had a little help from her Dad). We really loved these cute little faces and couldn’t wait to put them on the pumpkin bodies.

The best part about these though is that you can erase these and use them over and over again through the Thanksgiving holiday with written notes of thankfulness or a countdown to the holidays.

Of course, if you are more of the carving pumpkin type, Walmart has you covered with loads of great carving tools this year!


Don’t know what to do with the rest of that can of chalkboard paint? How about a DIY Lunchbox Creation Station, Chalkboard Food Label Frames, or Conversation Bubble Cookie Jars…just to name a few!


I am a part of the Walmart Moms program, and Walmart has provided me with compensation for these posts. My participation is voluntary and opinions are always my own.

Pin It

How to Make a Duct Tape Pumpkin

Sunday, October 14th, 2012

Carving pumpkins isn’t for everyone and I am so excited to share with you this easy craft for a duct tape pumpkin that you can pull out year after year. You may have never even noticed the patterned duct tape lurking in the craft aisles, but this is one easy & inexpensive craft material with endless possibilities for a customized duct tape pumpkin that can match any room in your home.

Supplies Needed:

1 craft pumpkin

1 roll of patterned duct tape (Duck Brand)- available in the craft section of Walmart

1 roll of solid colored duct tape (Duck Brand)- available in the craft section of Walmart

Hot glue gun & glue sticks

Scissors

To create your chevron pumpkin base:

1. Twist off the pumpkin stem to create an even surface on top for covering your pumpkin with tape.

2. Pull a strip of duct tape off the roll that will cover the entire pumpkin. Attach it to the pumpkin, doing your best to try not to wrinkle it.

3. Continue covering the pumpkin until it is fully covered with the duct tape, doing the best you can to line up the patterns. If you have wrinkles, overlap the duct tape to cover any minor flaws.

4. Place a dab of hot glue on the top and reattach your pumpkin stem, holding it  in place for a couple of minutes to secure it.

To create duct tape rosettes for the top of your pumpkin, you will need to do the following:

1. Measure a 10″ strip of your solid-colored duct tape and cut it off the spool.

2. Fold the duct tape in half (sticky sides in), doing your best to line the tape up evenly. If you don’t get the tape perfectly even, just trim the edge until you don’t see the white anymore.

3. Twist the tape to create a tight center to the rosette.

4. Begin twisting your tape as tightly or as loosely as you would like to create your rosette. Add a dab of hot glue periodically between the twists to secure it all together.

5. Once you have finished your rosette, add a dab of hot glue to the bottom and secure it to the top to create a rosette “leaf.”

6. Repeat this process again and create one more rosette. Secure the second rosette next to or slightly overlapping the first rosette to add your second rosette “leaf.”

Create your own pumpkin with your family and you could win $1,000 in the Stick or Treat Duck Brand Jack O’ Lantern Contest. The company offers over 100 colors, prints and licensed prints such as Hello Kitty and each roll of tape retails for $3.37 at Walmart stores!

Looking for more pumpkin crafts? Be sure to check out my tutorial for my Painted Address Pumpkin Topiary and Decoupaged Pumpkins that you can do with more of these fun faux pumpkins!


I am a part of the Walmart Moms program, and Walmart has provided me with compensation for these posts. My participation is voluntary and opinions are always my own.


Pin It

Easy Cupcake Photo Picks

Friday, October 5th, 2012

Halloween is drawing near and along with all of the costume fun comes many opportunities to share treats at school and fun parties. Today I wanted to show you a fun and easy way to dress up a cupcake with your very own personalized photo pick. This craft could not be easier or more cute for dressing up a homemade cupcake or a store-bought one (Shhh…I’ll never tell!)

Begin by going through your Halloween pictures and selecting a favorite one of your children. You could also get a jumpstart on Halloween pictures and have your children dress up in costume and take a picture in their new costume. If your children are anything like mine, they will be more than happy to oblige and get the opportunity to wear their costumes just one more time.

This is a favorite picture of mine from last year of my two goblins.  We decided to stage a Ninja attack on our little princess for some hilarious photos opportunities for Halloween.  This picture still makes me laugh!

Head on over to the Walmart photo site and upload your favorite Halloween photo to your photo account (you can create a new one if you don’t have one). Next just click here to create your own photo sticker sheet. Select CUSTOMIZE, select your album & then your picture, click the MORE tab, and then click MORE STYLES. Under that you will see all of the cute Halloween backgrounds to customize your photo sticker. You can leave them plain or you can add a cute font and message with your sticker.

Once you have created your sticker, you can have them shipped directly to you or pick them up at your store in 2-3 business days.

To create a cupcake photo pick, you will just need your sheet of photo stickers and a package of popsicle sticks (available in the craft supplies at Walmart)

  1. Grab one popsicle stick.
  2. Peel one sticker from your sticker sheet and stick it to your popsicle stick, carefully centering it.
  3. Peel another sticker off your sticker sheet and stick it to the flipside of your popsicle stick, lining the sticker up carefully with the other sticker.
  4. Stick your photo pick into the top of your cupcake.

Aren’t these so cute? I love that this is a craft that anyone can do and that can add a very special and personal touch to your Halloween treats this year.

Happy Halloween, friends!


I am a part of the Walmart Moms program, and Walmart has provided me with compensation for these posts. My participation is voluntary and opinions are always my own.

Pin It

Painted Milk Allergy Mugs

Tuesday, October 2nd, 2012

In our family each family member seems to need to drink a different variety of milk. I wanted to create these painted milk allergy mugs for our family and wanted to show you this easy fifteen minute craft that might help your own family with the dinner hour.

Without going into an annoying list of all of our health issues these days, we have all had to make some dietary changes for our health and that means three varieties of milk in our fridge. I recently snapped a picture on Instagram (find me on there under momadvice!) and commented that our family doesn’t need an additional fridge in our garage for beer, but one just for all of our milk. It is a game of milk tetris in this fridge. I knew we weren’t alone, but it surprised me just how many friends commented that their fridge looked just like ours.

Pouring three varieties of milk each dinner hour can get confusing. One mix up could really ruin someone’s day… literally.  Since one of us would rather not spend the afternoon in belly pain if they grab a cup of whole milk instead of their almond milk, I thought it was time to make labeled cups for each of us. I had been dying to try out Martha Stewart’s new line of paints at Michael’s so I headed over there to grab the supplies and found some inexpensive glasses at a local discount store to complete the supplies for this project.

How to Stencil Your Glassware

1. Clean your glasses with soap and water, then rub with rubbing alcohol to remove any remaining residue on the glass.

2. Apply the reusable adhesive stenciled letters for your milk labels. If you have a shorter cup, feel free to substitute words like, “almond” or “coconut” with the word “nut,” to save on space.

3. Pour a small amount of paint on a disposable plate. Using your brush, apply a thin layer of paint, doing your best to stay within the stencil. If needed, apply a second coat.

4. While your paint is still wet, carefully peel off stencil.

5. Allow the paint to dry for one hour and then place the glasses on a cookie sheet.  Set the glasses in a cool oven.  Set oven to 350°F and bake for 30 minutes.  Glass must heat gradually with the oven to avoid breakage.  Do NOT place glass in a hot oven.  After 30 minutes, turn the oven off.  Allow glass to cool completely in oven.  Wait 72 hours before using.

6. Clean all stencils, rushes, and tools immediately after using them, before the paint has dried. You can use a stencil cleaner to clean. Let dry. Attach backing to stencils and then store for another use.

It’s that easy, friends! I hope it helps another family struggling to keep track of the milk cups! Of course, I can’t wait to do some other fun projects with these stencils! Have a great day!

Pin It

Painted Address Pumpkin Topiary

Tuesday, September 25th, 2012

One of my favorite things about Fall is the fun crafts that I get to do with all of those beautiful Fall pumpkins! Today I wanted to showcase an easy painted address pumpkin topiary that you an create with just a few supplies from your local Walmart store. This painted address pumpkin topiary would the be the perfect way to dress up your porch, porch step, or a little corner in your room.

Craft Supplies Needed

2- 75 inch pumpkins (any color)- $4.87 each

8″ pumpkins (how ever many you need to complete you house number)- $4.87 each

Black Plaid FolkArt acrylic paint (I chose the shiny variety)- $1.77

4″ Plaid letter stencils ($3.77)

Stencil Brushes ($5.47)

Clear tape (in supplies)

Hot glue gun & glue sticks (in supplies)

8″ pot (I found mine in the clearance section of the store for $11.96)

1. Begin by twisting off the stems on all of the pumpkins that will be going on the bottom of your topiary. You will want to leave your top pumpkin (the 75″ one) with the stem intact. All the other stems can come off.

2. Center your stencil on your pumpkin and attach it with clear tape. Make sure when positioning your numbers that when you stack the pumpkins, you will be able to see the number clearly in the center. You will especially want to do this for your bottom pumpkin since it will be wedged in your pot.

3. Trace your number with a pencil. Remove your stencil.

4. Pour your acrylic paint in a disposable cup or bowl. Using a small paintbrush, carefully paint your number on your pumpkin. If you make an error, use a cloth or a damp Q-tip to remove any painting errors. Set your pumpkin aside, and repeat the process on each of the other pumpkins until you have stenciled your address number.

5. Wedge your 75″ pumpkin into the pot. This should be a tight fit so you will not need to glue or attach your pumpkin into the base. Stack your next pumpkin and carefully hot glue in each spot where the pumpkins are joined together. Hold the pumpkins together to secure for a minute or two. Repeat this process until you reach the top of your pumpkin stack!

Stand back and behold your pumpkin glory! Isn’t this just the cutest thing ever? I know all of my neighbors are going to be so jealous!

I hope they are half as impressed as my cat.

Seriously.

Looking for more Fall crafts? Be sure to check out my round-up of the Best Fall Crafts on MomAdvice. I hope you will find it inspiring, friends!


Pin It

Fall Into Fall CRAFTS with MomAdvice.com

Tuesday, September 18th, 2012

With Fall upon us, I suddenly get the urge to start tackling some crafts that have been on my to-do list for the year. Fall is also a great time to get a jump start on holiday crafts that you might want to tackle this year for our family and friends.

Today I wanted to highlight a few of my favorite crafts and DIY projects for the Fall season that have appeared on MomAdvice.com!

The GAP-Tastic Cowl

Cowls are still highly fashionable this year, especially the warm and bulky variety. I love this easy cowl that can be created with inexpensive yarn in your favorite fall color to add a little spice to a tired fall jacket you might have in your closet. If this cowl doesn’t get you excited to start knitting, be sure to check out these seven easy scarf and cowl patterns to knit this year!

Easy Felt Fabric Brooch

You are going to fall in love with this beautiful felt fabric brooch and it would be the perfect addition to your fall jacket this year or as an embellishment to last year’s winter hat. Check out this tutorial for these easy brooches!

Anthropologie DIY Ruffled Lampshade

Perhaps one of my most favorite projects in our house was this burlap ruffled lampshade made from inexpensive burlap. If you are wanting to dress up a tired lamp for fall, be sure to check out this tutorial! This project was so easy to create and would be so cute on a side table, in your office, or a cute way to spruce up a craft room.

DIY Chalkboard Food Label Frames

All you need is a dollar store frame to get started with this easy craft. These food label frames would be a great addition to your fall entertaining and tailigating this year. The best part is that this craft can be done in fifteen minutes, making it a great fast to create

Knitted Dishcloths 

If you are new to knitting, dishcloths are the perfect project because they are like swatches of pattern rather than tackling a larger project piece. On top of that, it can make you feel braver doing patterns with more complexity and learning new knitting techniques. For the first few months after I learned how to knit, I knit a lot of dishcloths. I happen to think these are one of the best projects for Fall, and they also happen to be a fabulous little hostess gift for the holidays!

Yarn Wreath (for all seasons)

It’s time to dress up your front door for Fall! Yarn wreaths are easy to create with a mere ten-fifteen dollars  in supplies and a whole lot of your own individual creativity. Find out how to create this easy yarn wreath that can be dressed up for all of the seasons with this simple yarn base!

Painted Tabletops & Reupholstered Chairs

If your kitchen table and chairs are looking a little tired, Fall is a great time of year to spruce them up!  Last Fall, I painted my kitchen tabletop and reupholstered my kitchen chairs and one year later, they are still going strong!

Oatmeal Cookies & Milk Bath

There is nothing I love more than a good long soak in the tub in the evenings when the weather is chilly. I highly recommend this easy oatmeal bath soak you can create in your kitchen. I call it Oatmeal Cookies & Milk because it blends together the ingredients of an oatmeal cookie with powdered milk to make a soft & soothing bath for anyone who has sensitive skin.

Coffee Filter Posies

Looking for a cute addition to a side table for Fall? I highly recommend making these cute coffee filter posies for a fun Fall decoration. Dyed in yellows and oranges, they would look beautiful in a jar on your kitchen table or a cute way to dress up a dresser in your bedroom.

Decoupaged Pumpkins

I love to create inexpensive decorations for fall and these easy decoupaged pumpkins are a craft that I have been wanting to try for awhile after spotting this technique in an old issue of Better Homes &  Gardens Magazine. You won’t believe how easy it is to decoupage a pumpkin and since they were so easy to create, I made two to adorn each side of my console table.  This pumpkin is made with paper napkins, if you can believe it, and some other inexpensive craft materials you can pick up at your local craft store!

Charity Knitting Craft Projects

This is going to be the season when my friends that knit & crochet really spring into action for hat drives for those in need! One things I am proud and humbled to do is to knit for those in need. You will find loads of fun projects to knit for those in need in the Knitting section of our site. While you are enjoying the latest season of Fall shows on the television, add a little something for someone in need to your knitting needles this year!

What is your favorite Fall craft project you have tried from our site? I would love to hear from you!

Pin It

Dollar Store Craft: DIY Chalkboard Food Label Frames

Wednesday, September 5th, 2012

If you are a regular reader here, you may have been following my obsession with chalkboard spray paint for crafting on the blog. Today I wanted to show you how I used chalkboard spray paint to transform dollar store frames into DIY chalkboard food labels for parties and entertaining.

For this craft you will need one can of spray paint in your favorite color, 3.5 in x 5 in frames (I got ten of these), and a can of chalkboard spray paint. I actually am using the same spray paint that I used for our lunchbox creation station labels and my conversation bubble cookie jars that I created this summer. One bottle will really go a long way!

Take the frames apart and lay them on a drop cloth to spray paint. For the best spray paint results, shake the can for one to two minutes and during use.

For the frame itself: Hold your can 8 inches away from your surface and spray in a sweeping motion side to side with a slight overlap. It has always been my experience to go thin with the paint, allow it to dry, and then to add another layer for the best results and minimal drip. Allow the paint to dry for one hour. Flip the frames and then repeat the process on the back of the frame. Allow it to dry for another hour.

For the glass inside: Shake the chalkboard paint can vigorously for two minutes. Hold can 10-14 inches away from your project and begin spraying. Spray a thin coat in a sweeping motion beginning off the surface and continuing off the other side. Follow this pattern horizontally and then vertically. Wait fifteen minutes or so and then apply another coat. You need two coats to create your chalkboard surface.

Most importantly though, do not use any chalk on this for 24 hours! The chalkboard paint will need to harden and will not be ready until then. If you try it before it is ready (as I promptly did), it will just scratch the paint through, creating marks and exposing the glass of the frame.

Once everything has dried, you can put it back together. Now it is time to prep your mini chalkboards.

Rub a piece of chalk from side to side and then up and down to prepare your chalkboard surface. Now it is ready for your food labeling at your next party, tailgating event, or holiday feast!

Showcase how you now write like a first grader because you no longer write anything and only type. Jealous?

Tomorrow I will share with you some of these yummy recipes that I have been working on for the tailgating season! In the meantime, happy crafting with this fun dollar store craft!

Pin It