Archive for the ‘Blogging’ Category

Father’s Day Craft: DIY Chalkboard Conversation Bubble Cookie Jars

Tuesday, May 22nd, 2012

 DIY Chalkboard Conversation Bubble Cookie Jars

I am so excited to share with you a fun craft today that you can do to spoil the dads in your life this year for Father’s Day. Today I am showcasing this EASY DIY Chalkboard Conversation Bubble Cookie Jar that you can create using some inexpensive supplies and fill with your dad’s favorite treat.

Before I get started, I want you to know that crafting is not easy for me. I really do think I was born lacking a natural crafting gene. I actually did this craft twice and failed at it the first time. I made a huge craftastrophe in my kitchen, dripped paint all over the place, and was about to give up. This craft took me THREE trips to the store and an entire day to execute. Once I figured out the best way to do it though, I felt like a craft rock star and tackled this project in less than an hour with amazing results. I just think it is nice to hear the behind-the-scenes stuff once in awhile. I have complete confidence that with this tutorial you are going to get to enjoy all of the rock star status without the drippy paint all over your kitchen.

 DIY Chalkboard Conversation Bubble Cookie Jars DIY Chalkboard Conversation Bubble Cookie Jars
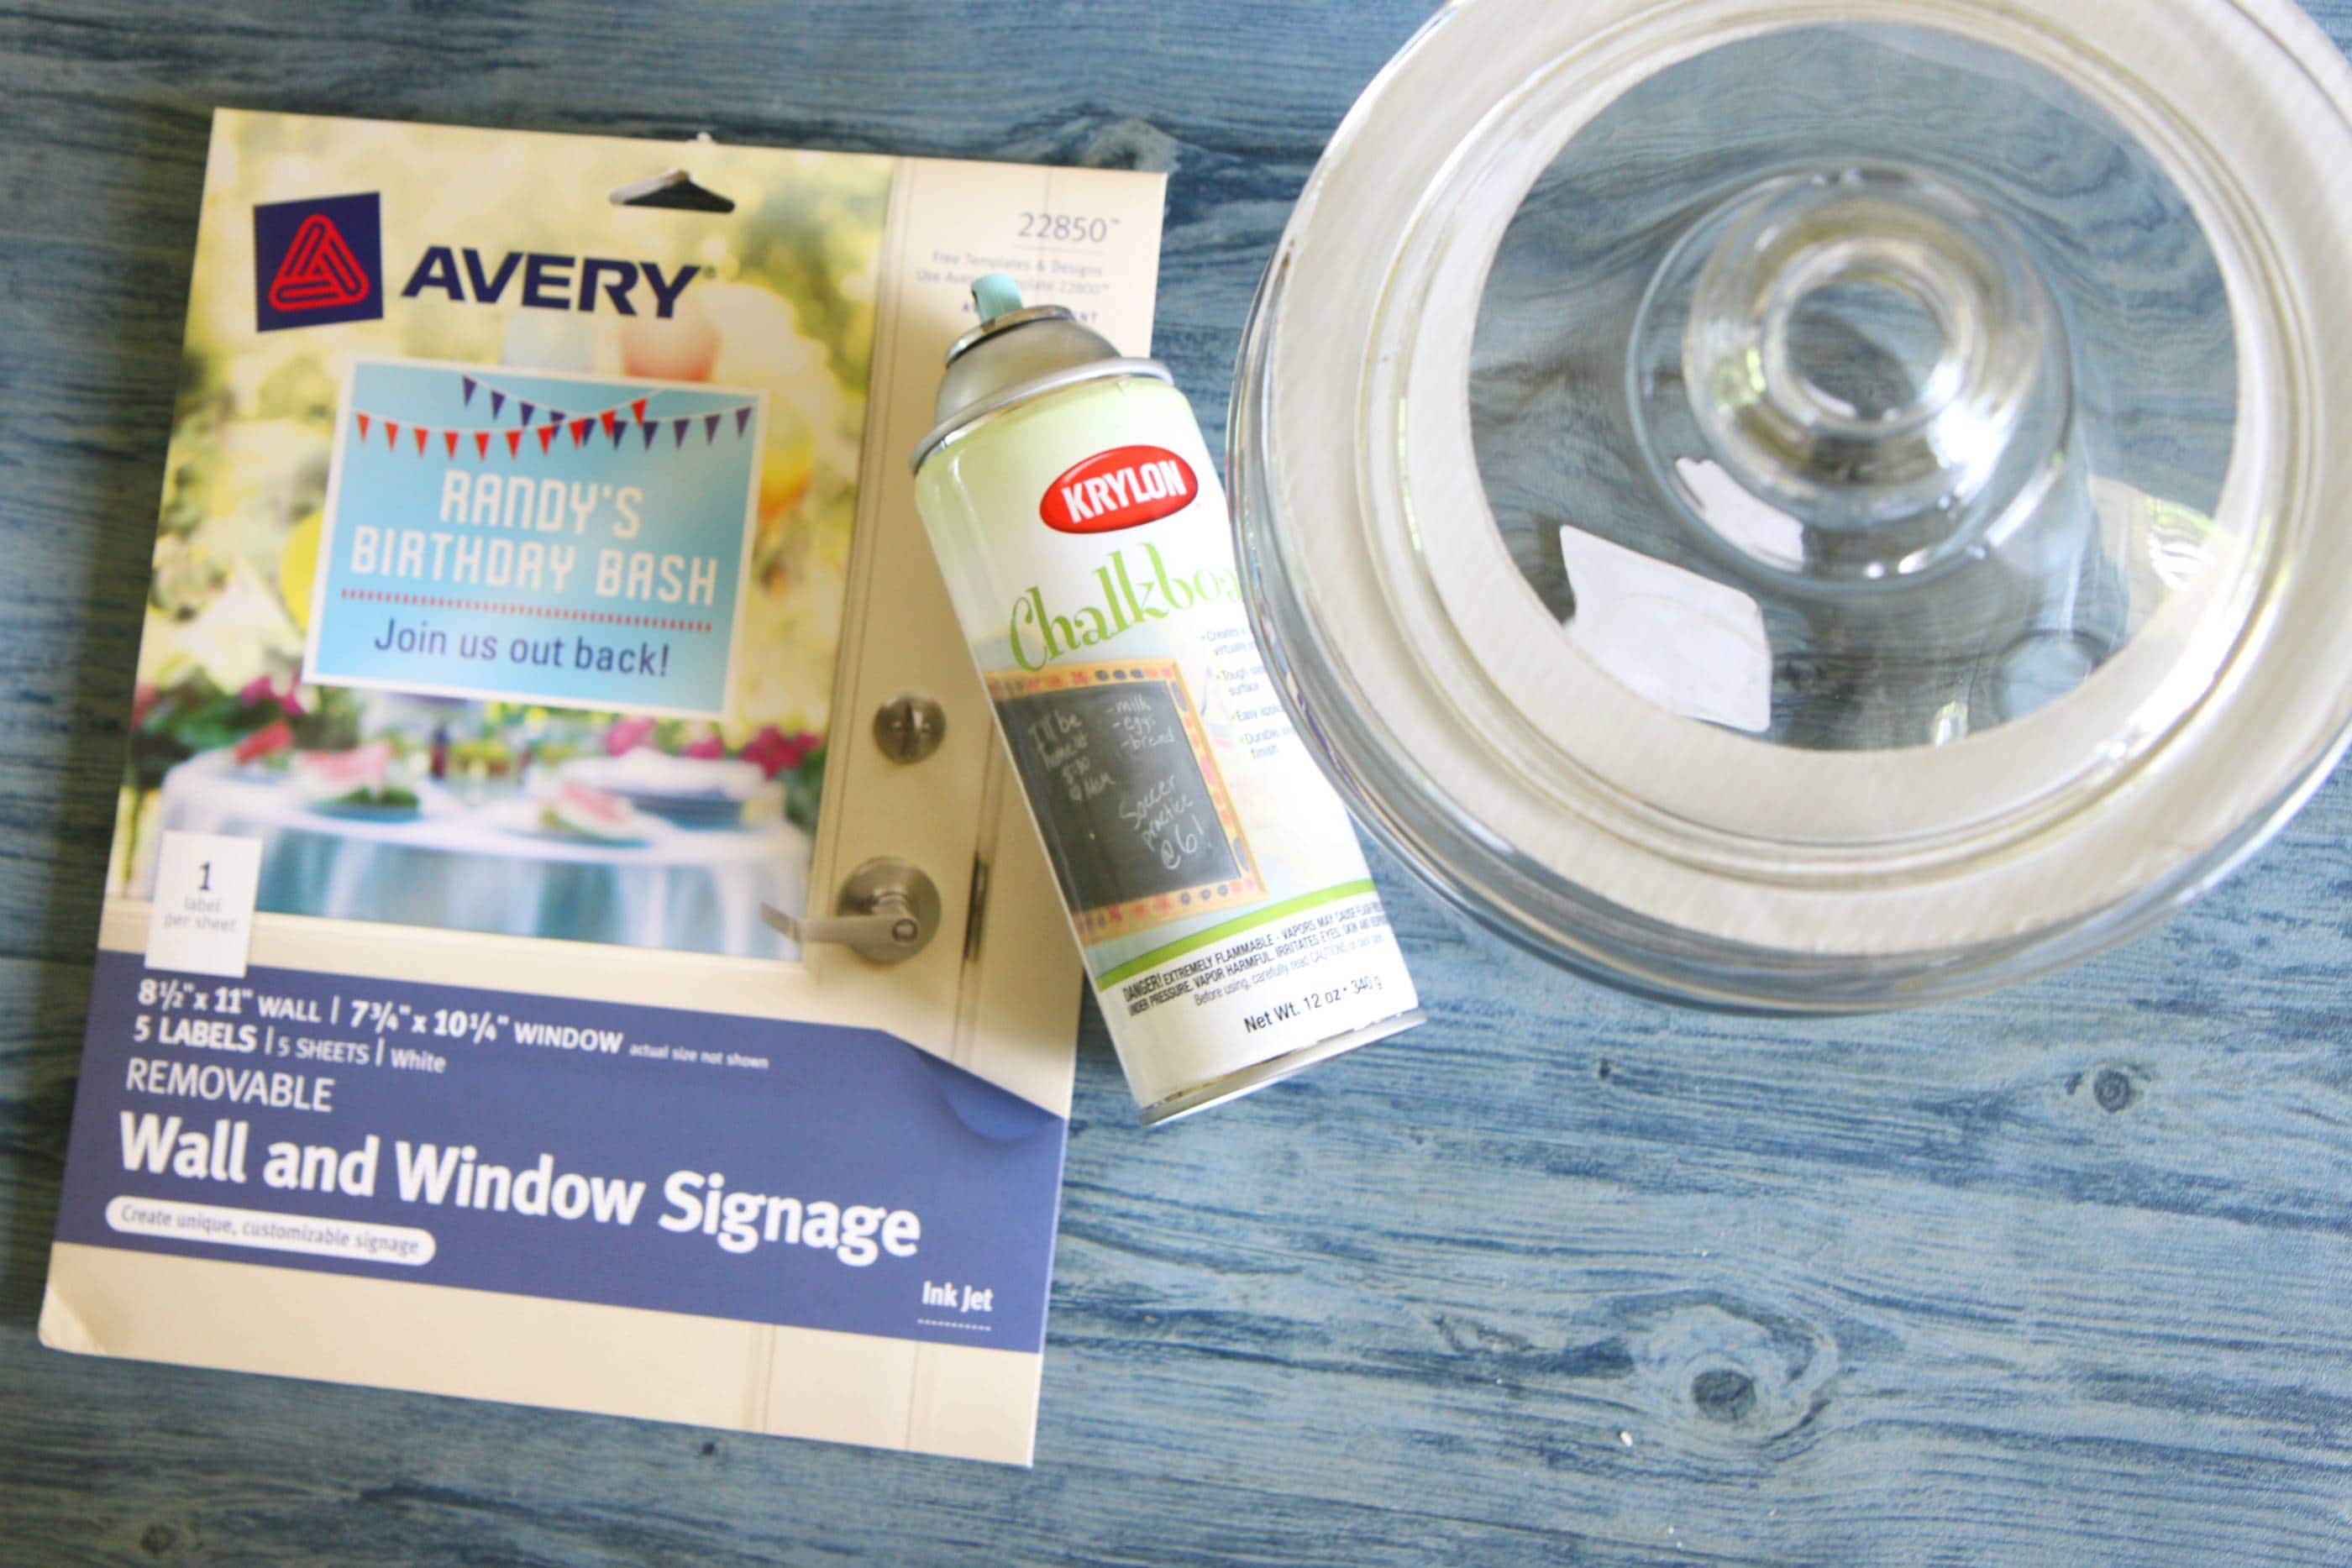
Let’s get started with our picture of supplies and the (approximate) cost of the materials for you to recreate this craft.

For this craft you will need (all found at Walmart):

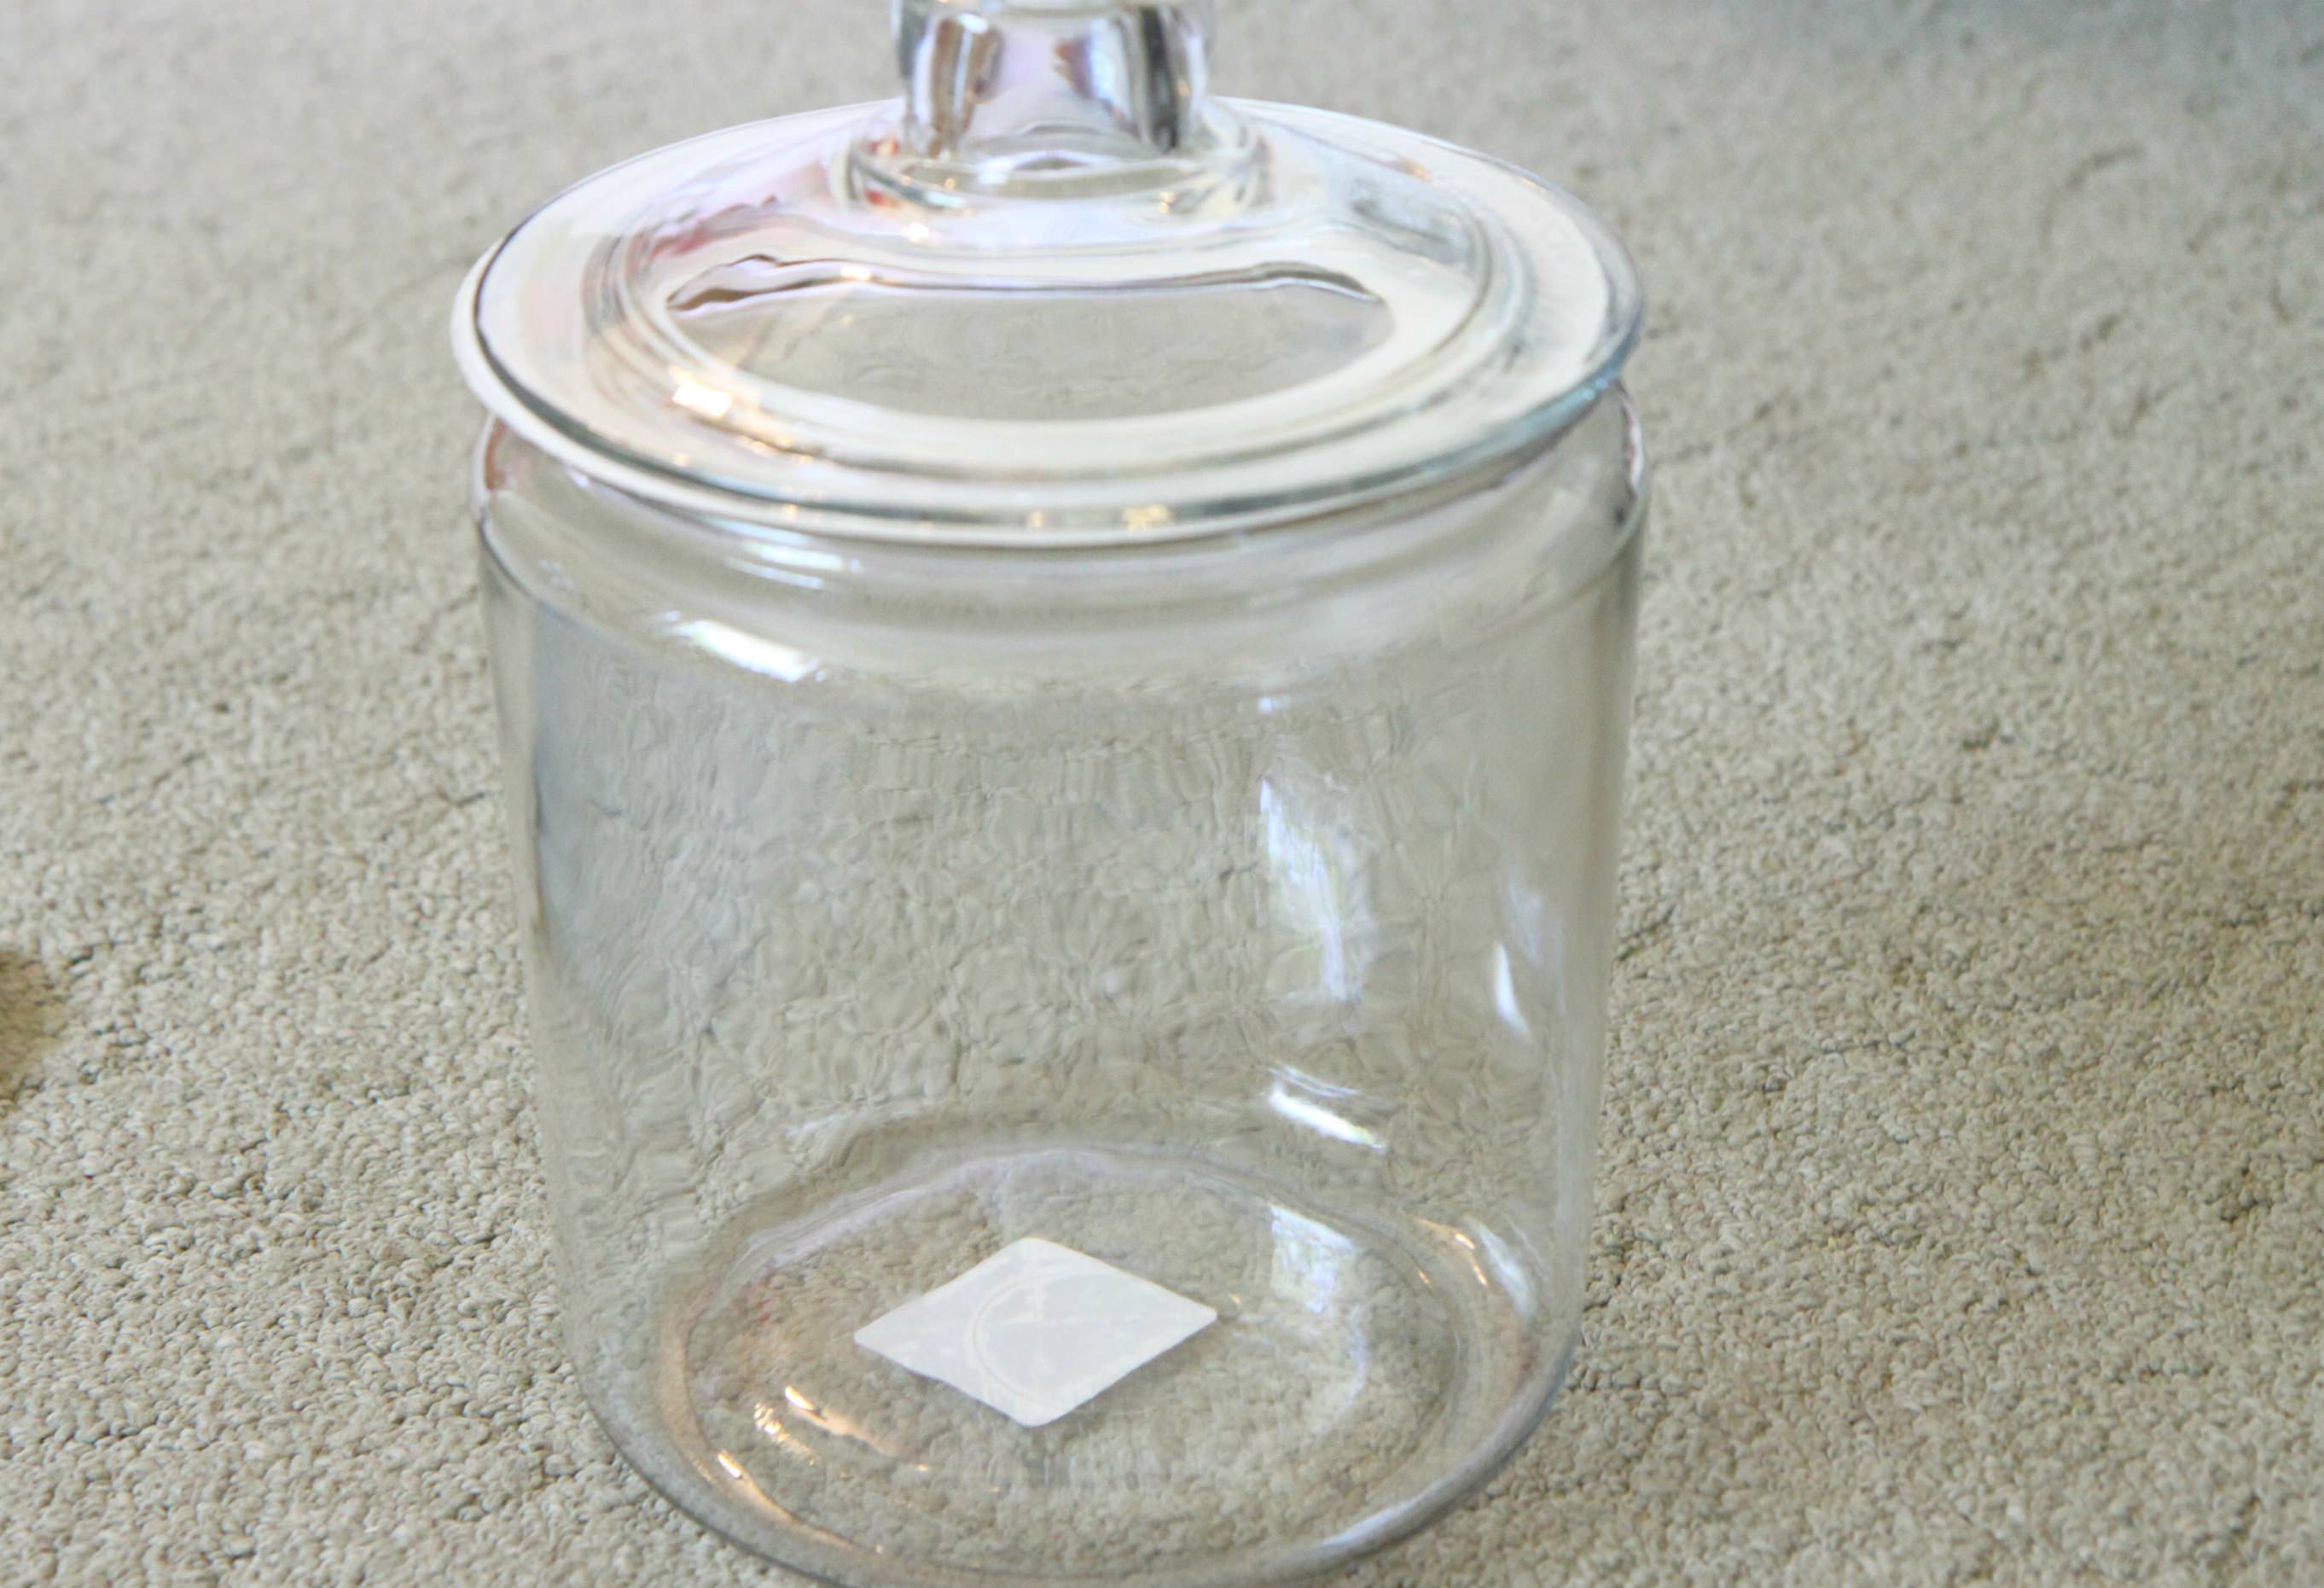
1 Gallon Cookie Jar (over by the jars in the kitchen section)- $7.44

Krylon Chalkboard Spray Paint (in the home improvement section)- $3.97

Avery Removable Wall & Window Signage Sheets (over by the office supplies)- $9.97 for 5 sheets

16 count chalk (in office supplies)- $.47

Scissors (in your craft supplies)

1 sheet of heavy cardstock (in your craft supplies)


 DIY Chalkboard Conversation Bubble Cookie Jars

 DIY Chalkboard Conversation Bubble Cookie Jars

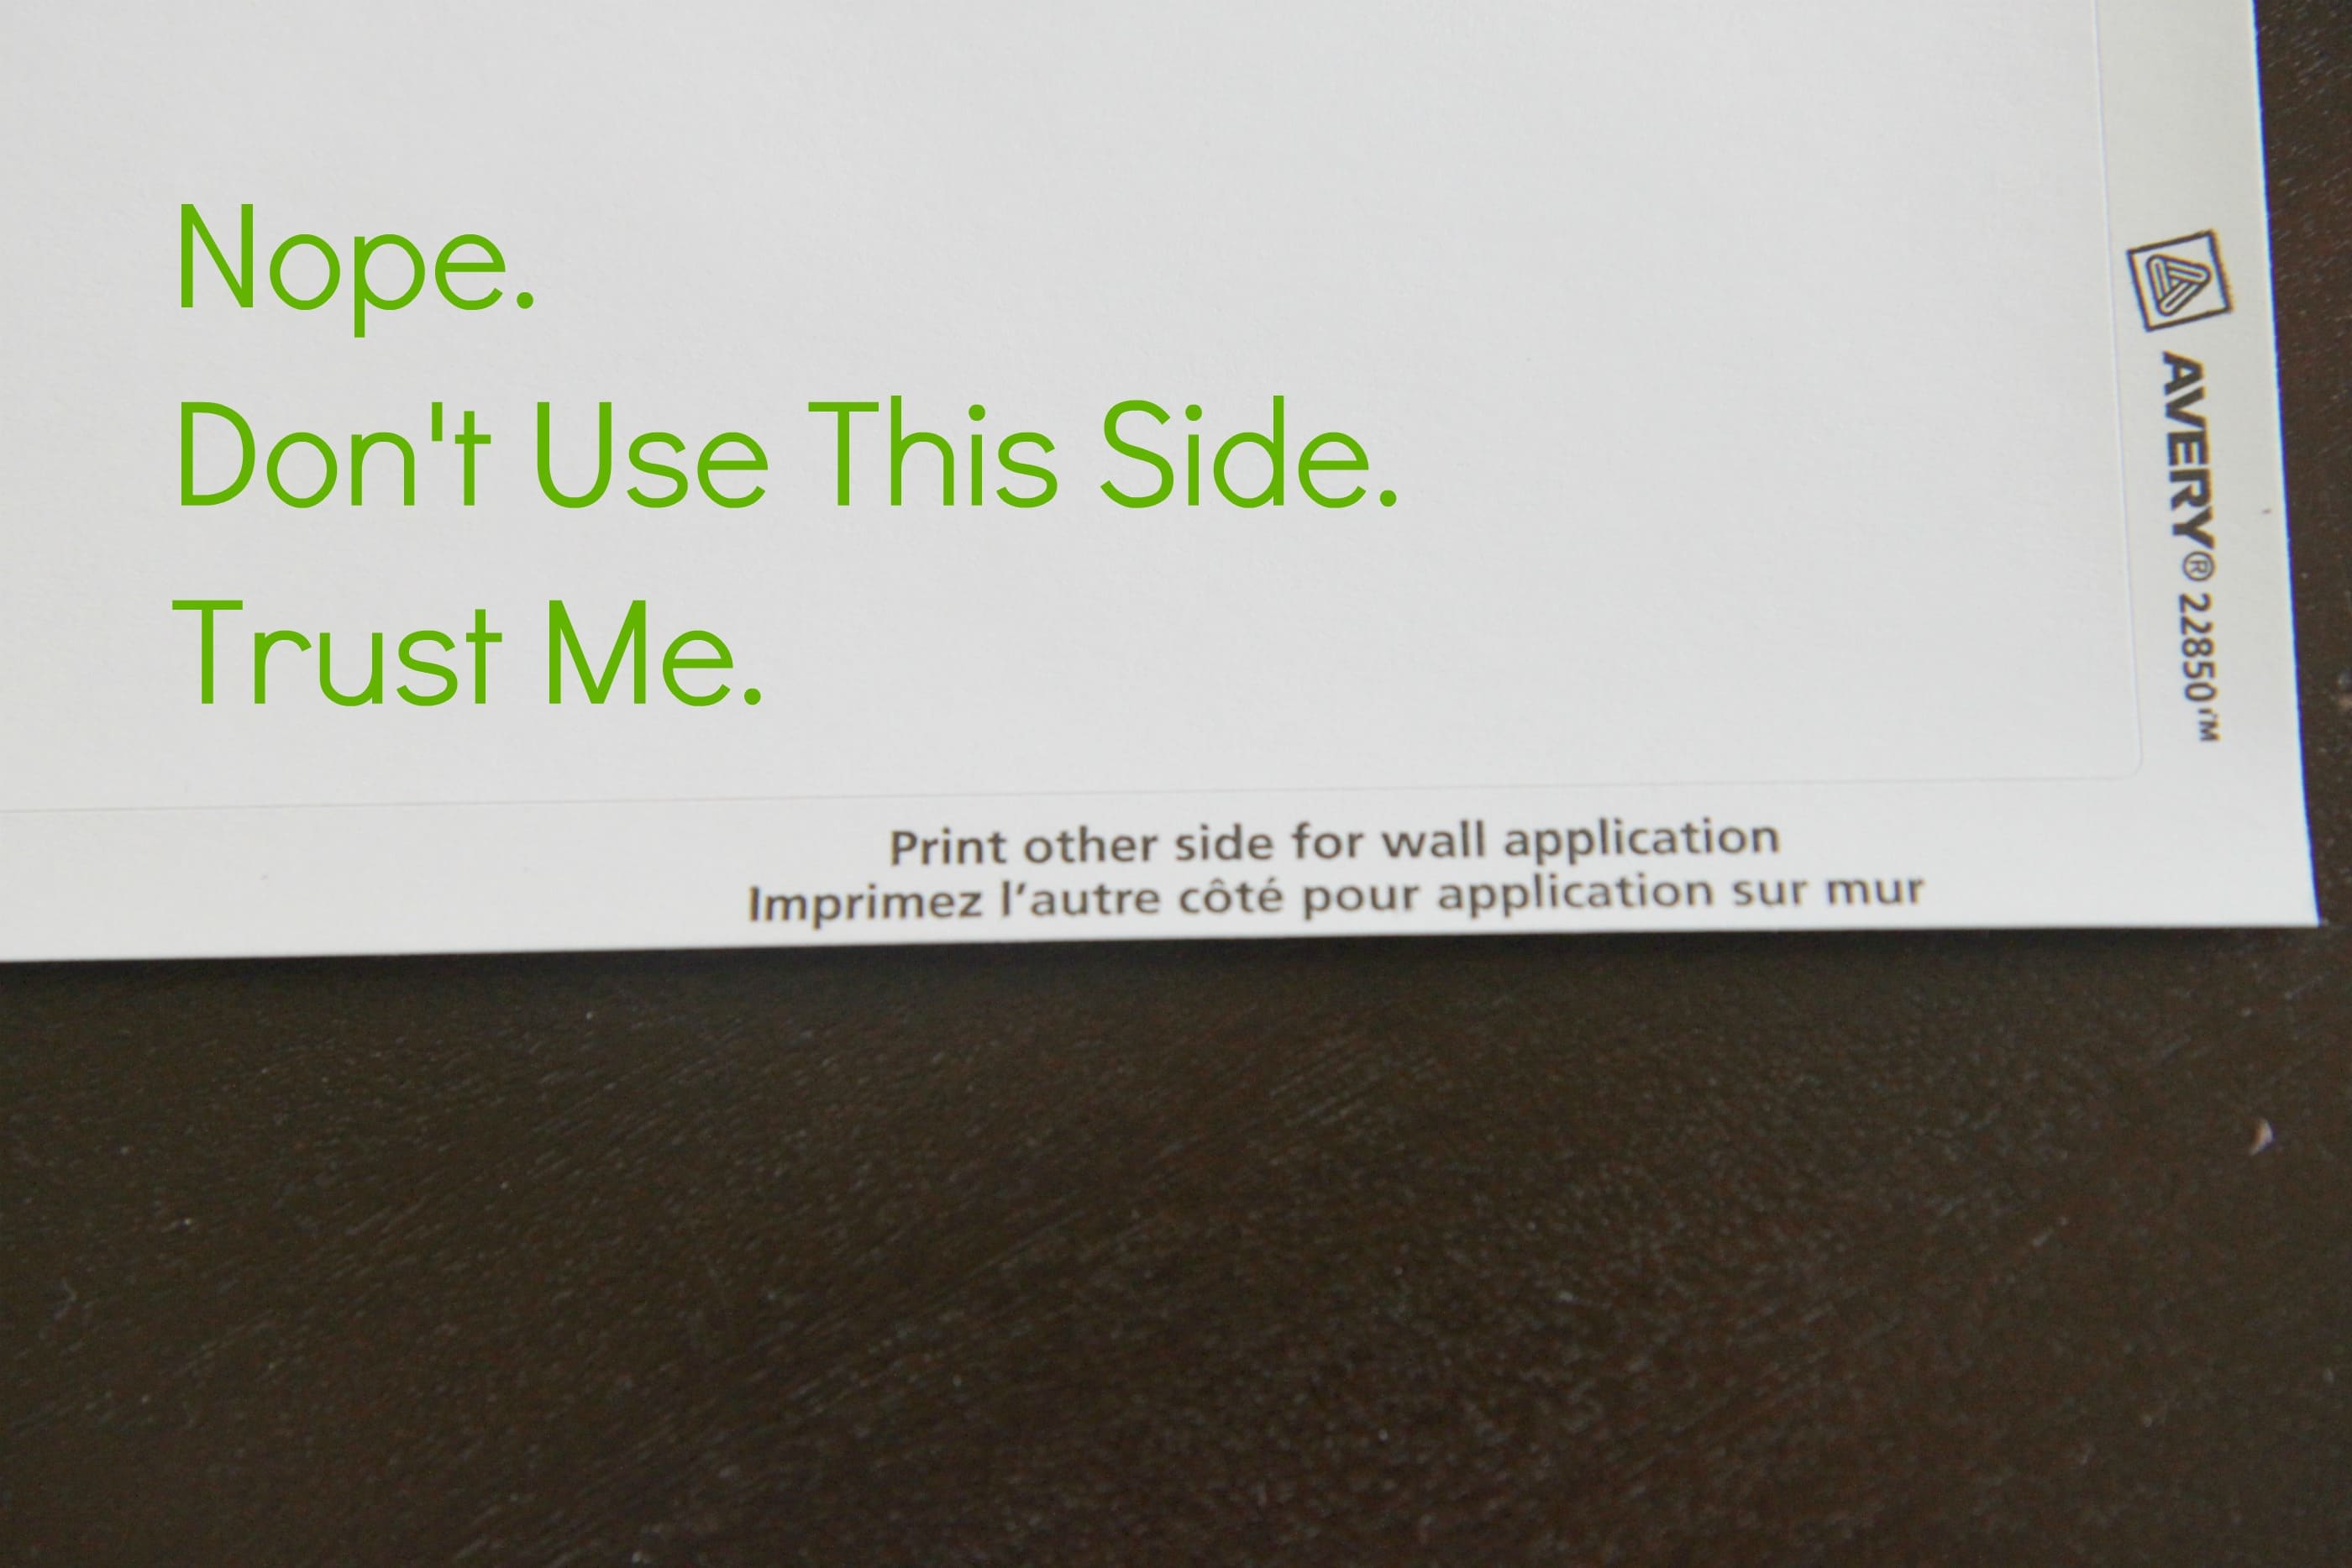
First, pull out your Avery Sheets. These are probably among the most awesome find EVER for creating labels and signs. My brain is buzzing with the possibilities for these. Focus, Amy, focus…

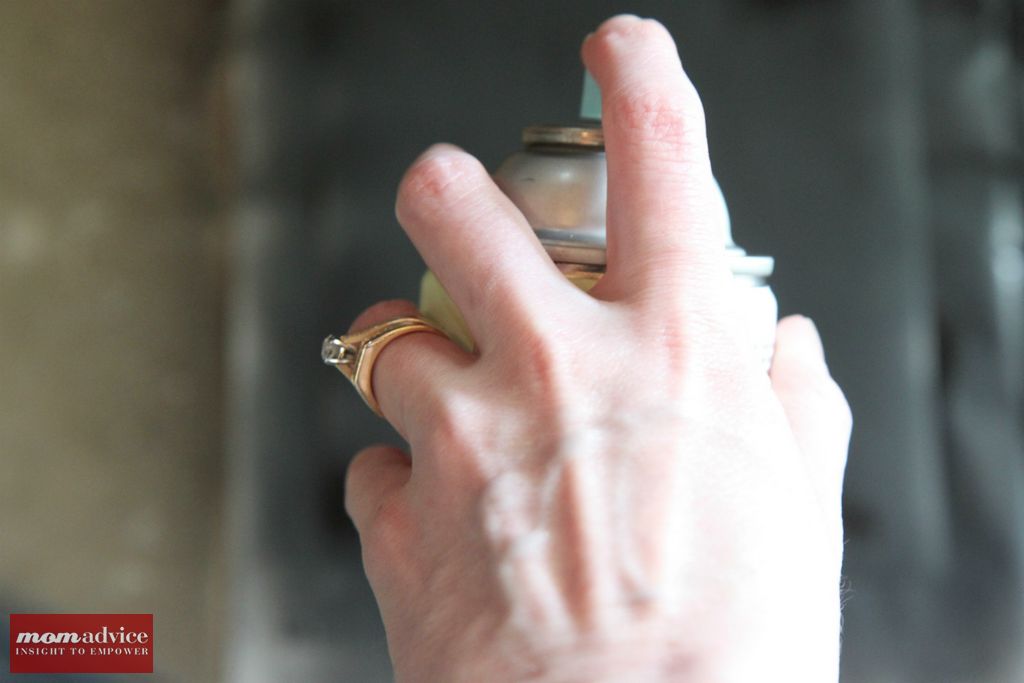
For this craft, we are going to use the Wall Application Side for spraying with chalkboard spray paint. This is the side that has the sticky side that is removable and adjustable… perfect for people who can never get anything on their projects perfectly straight.

In a well-ventilated area covered with newspaper or cardboard, place your Avery sheet. Shake the can vigorously for two minutes. Hold can 10-14 inches away from your project and begin spraying. Spray a thin coat in a sweeping motion beginning off the surface and continuing off the other side. Follow this pattern horizontally and then vertically. Wait fifteen minutes or so and then apply another coat.  They should be dry and ready to cut in about an hour.

 DIY Chalkboard Conversation Bubble Cookie Jars
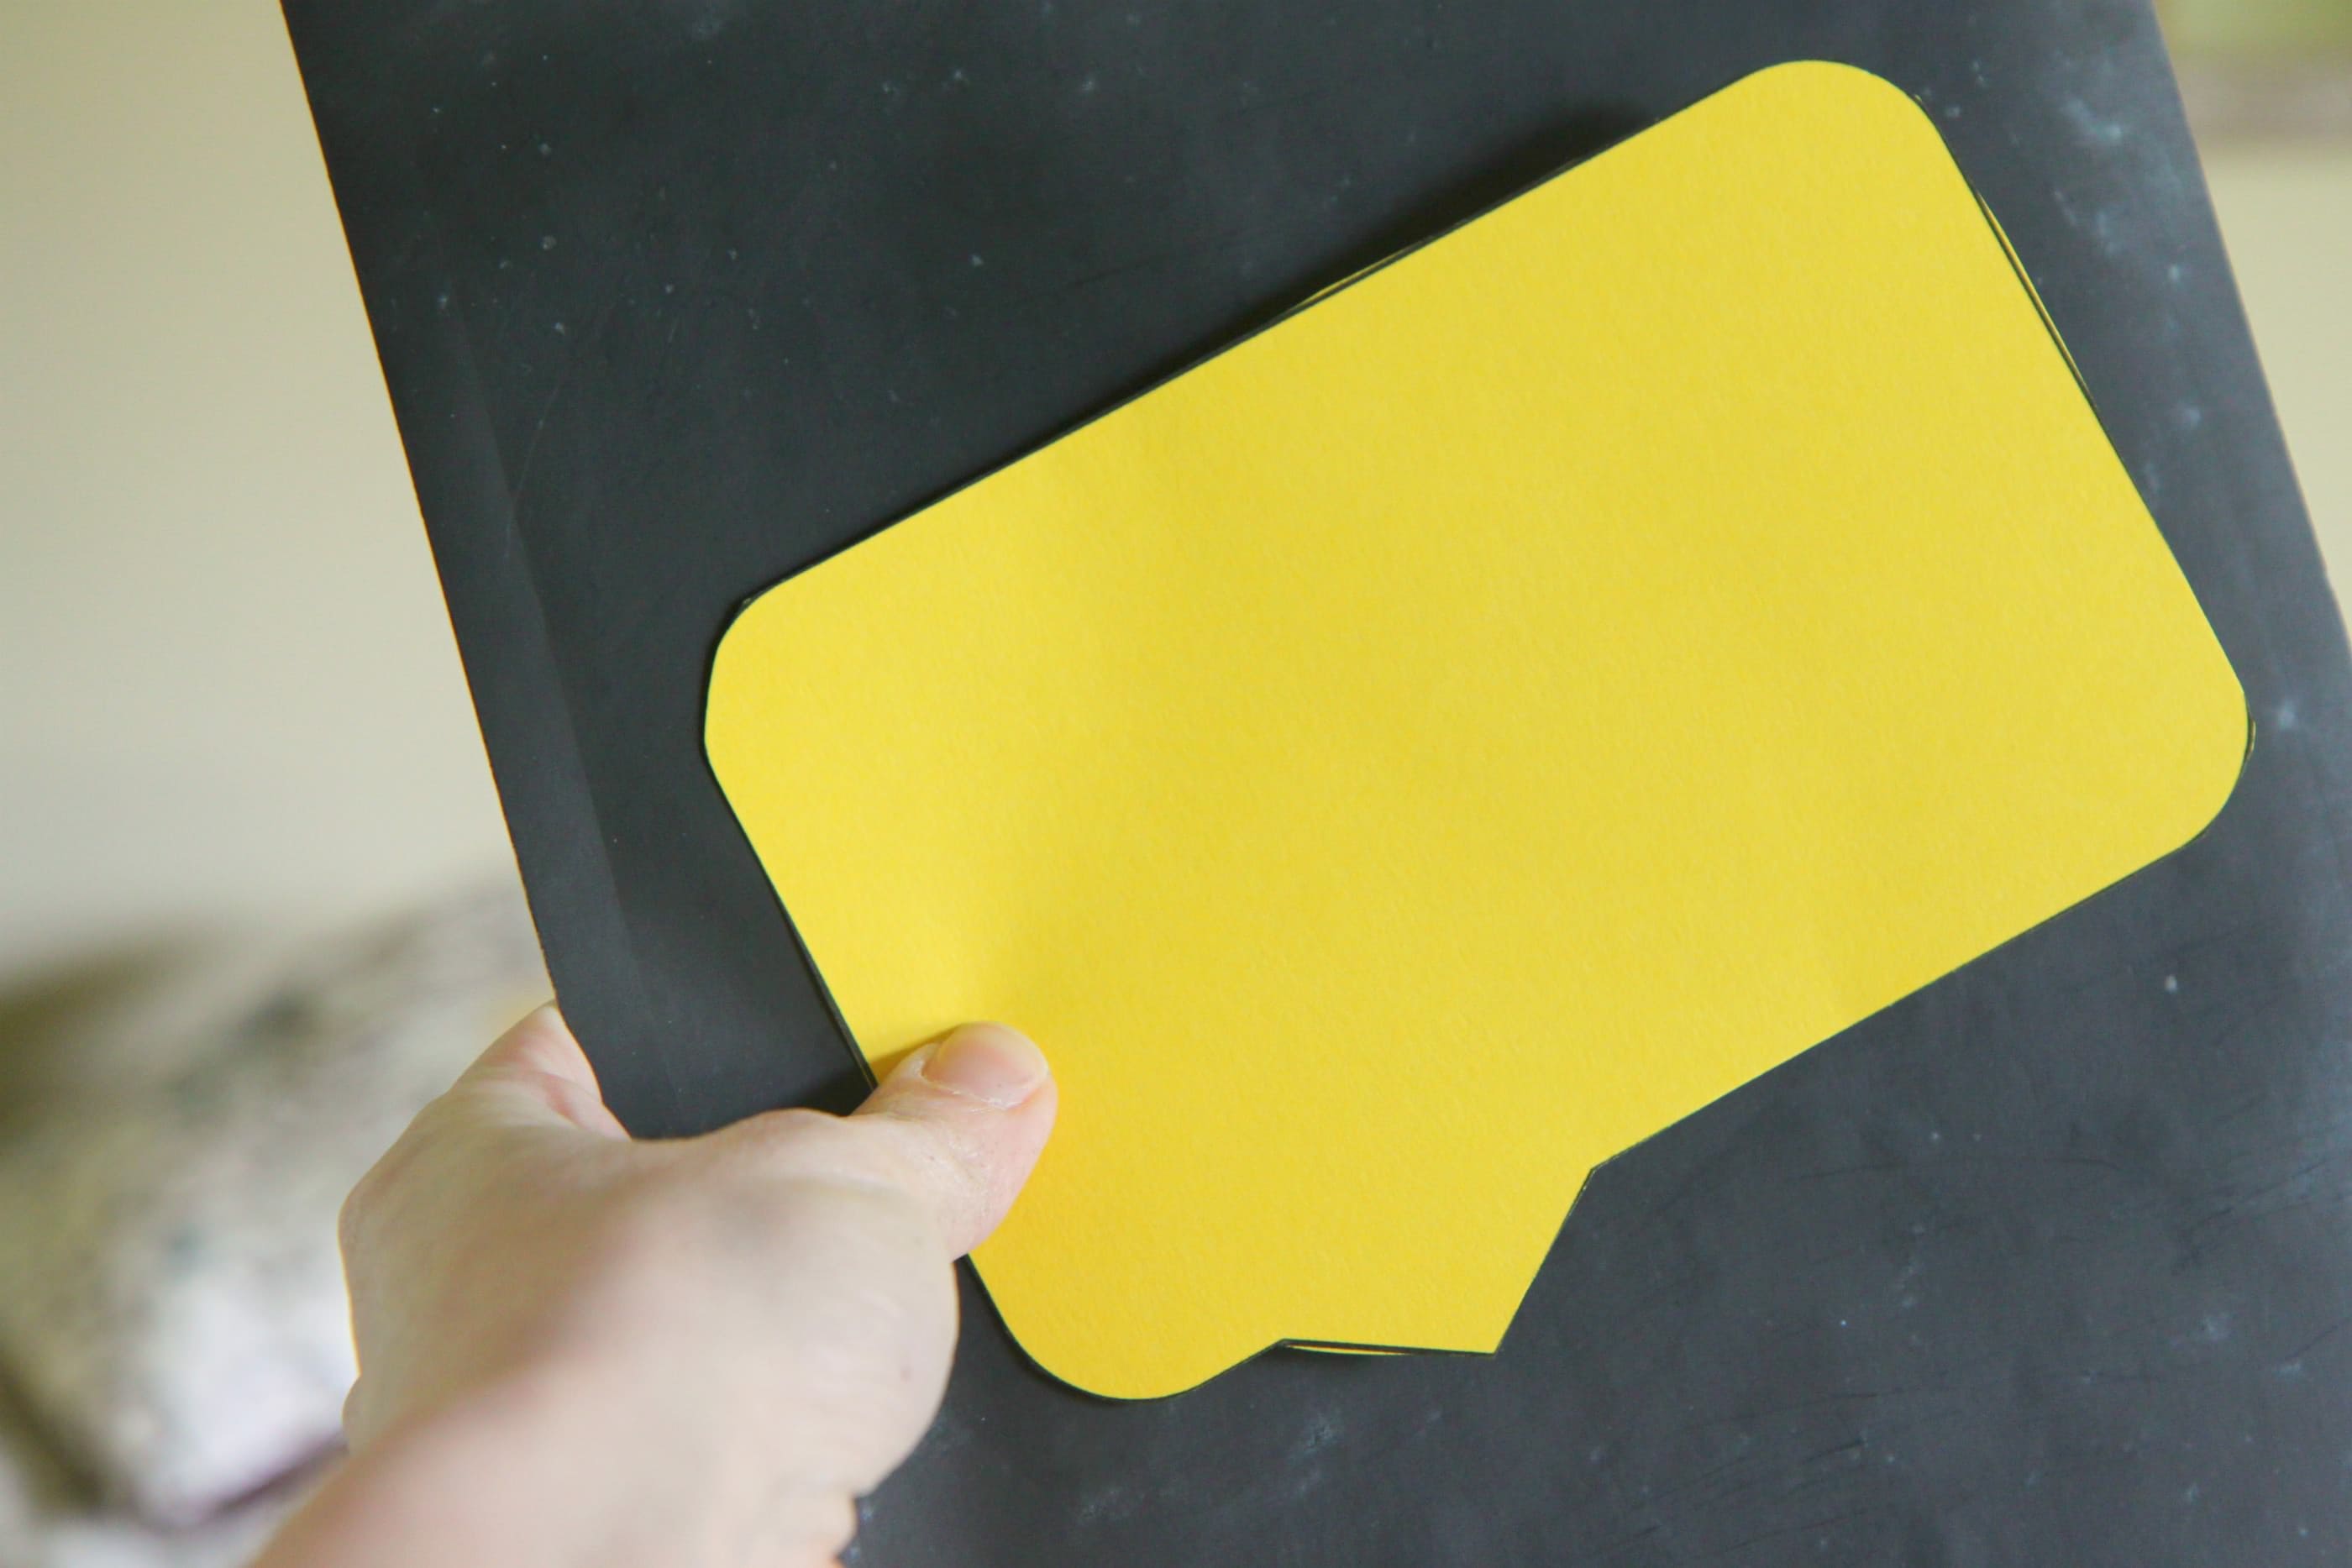
Print out my FREE Chalkboard Conversation Bubble template on some heavy-duty cardstock. Use this template to cut out your chalkboard conversation bubbles. You should be able to get two labels from each sheet with this size label.

 DIY Chalkboard Conversation Bubble Cookie Jars
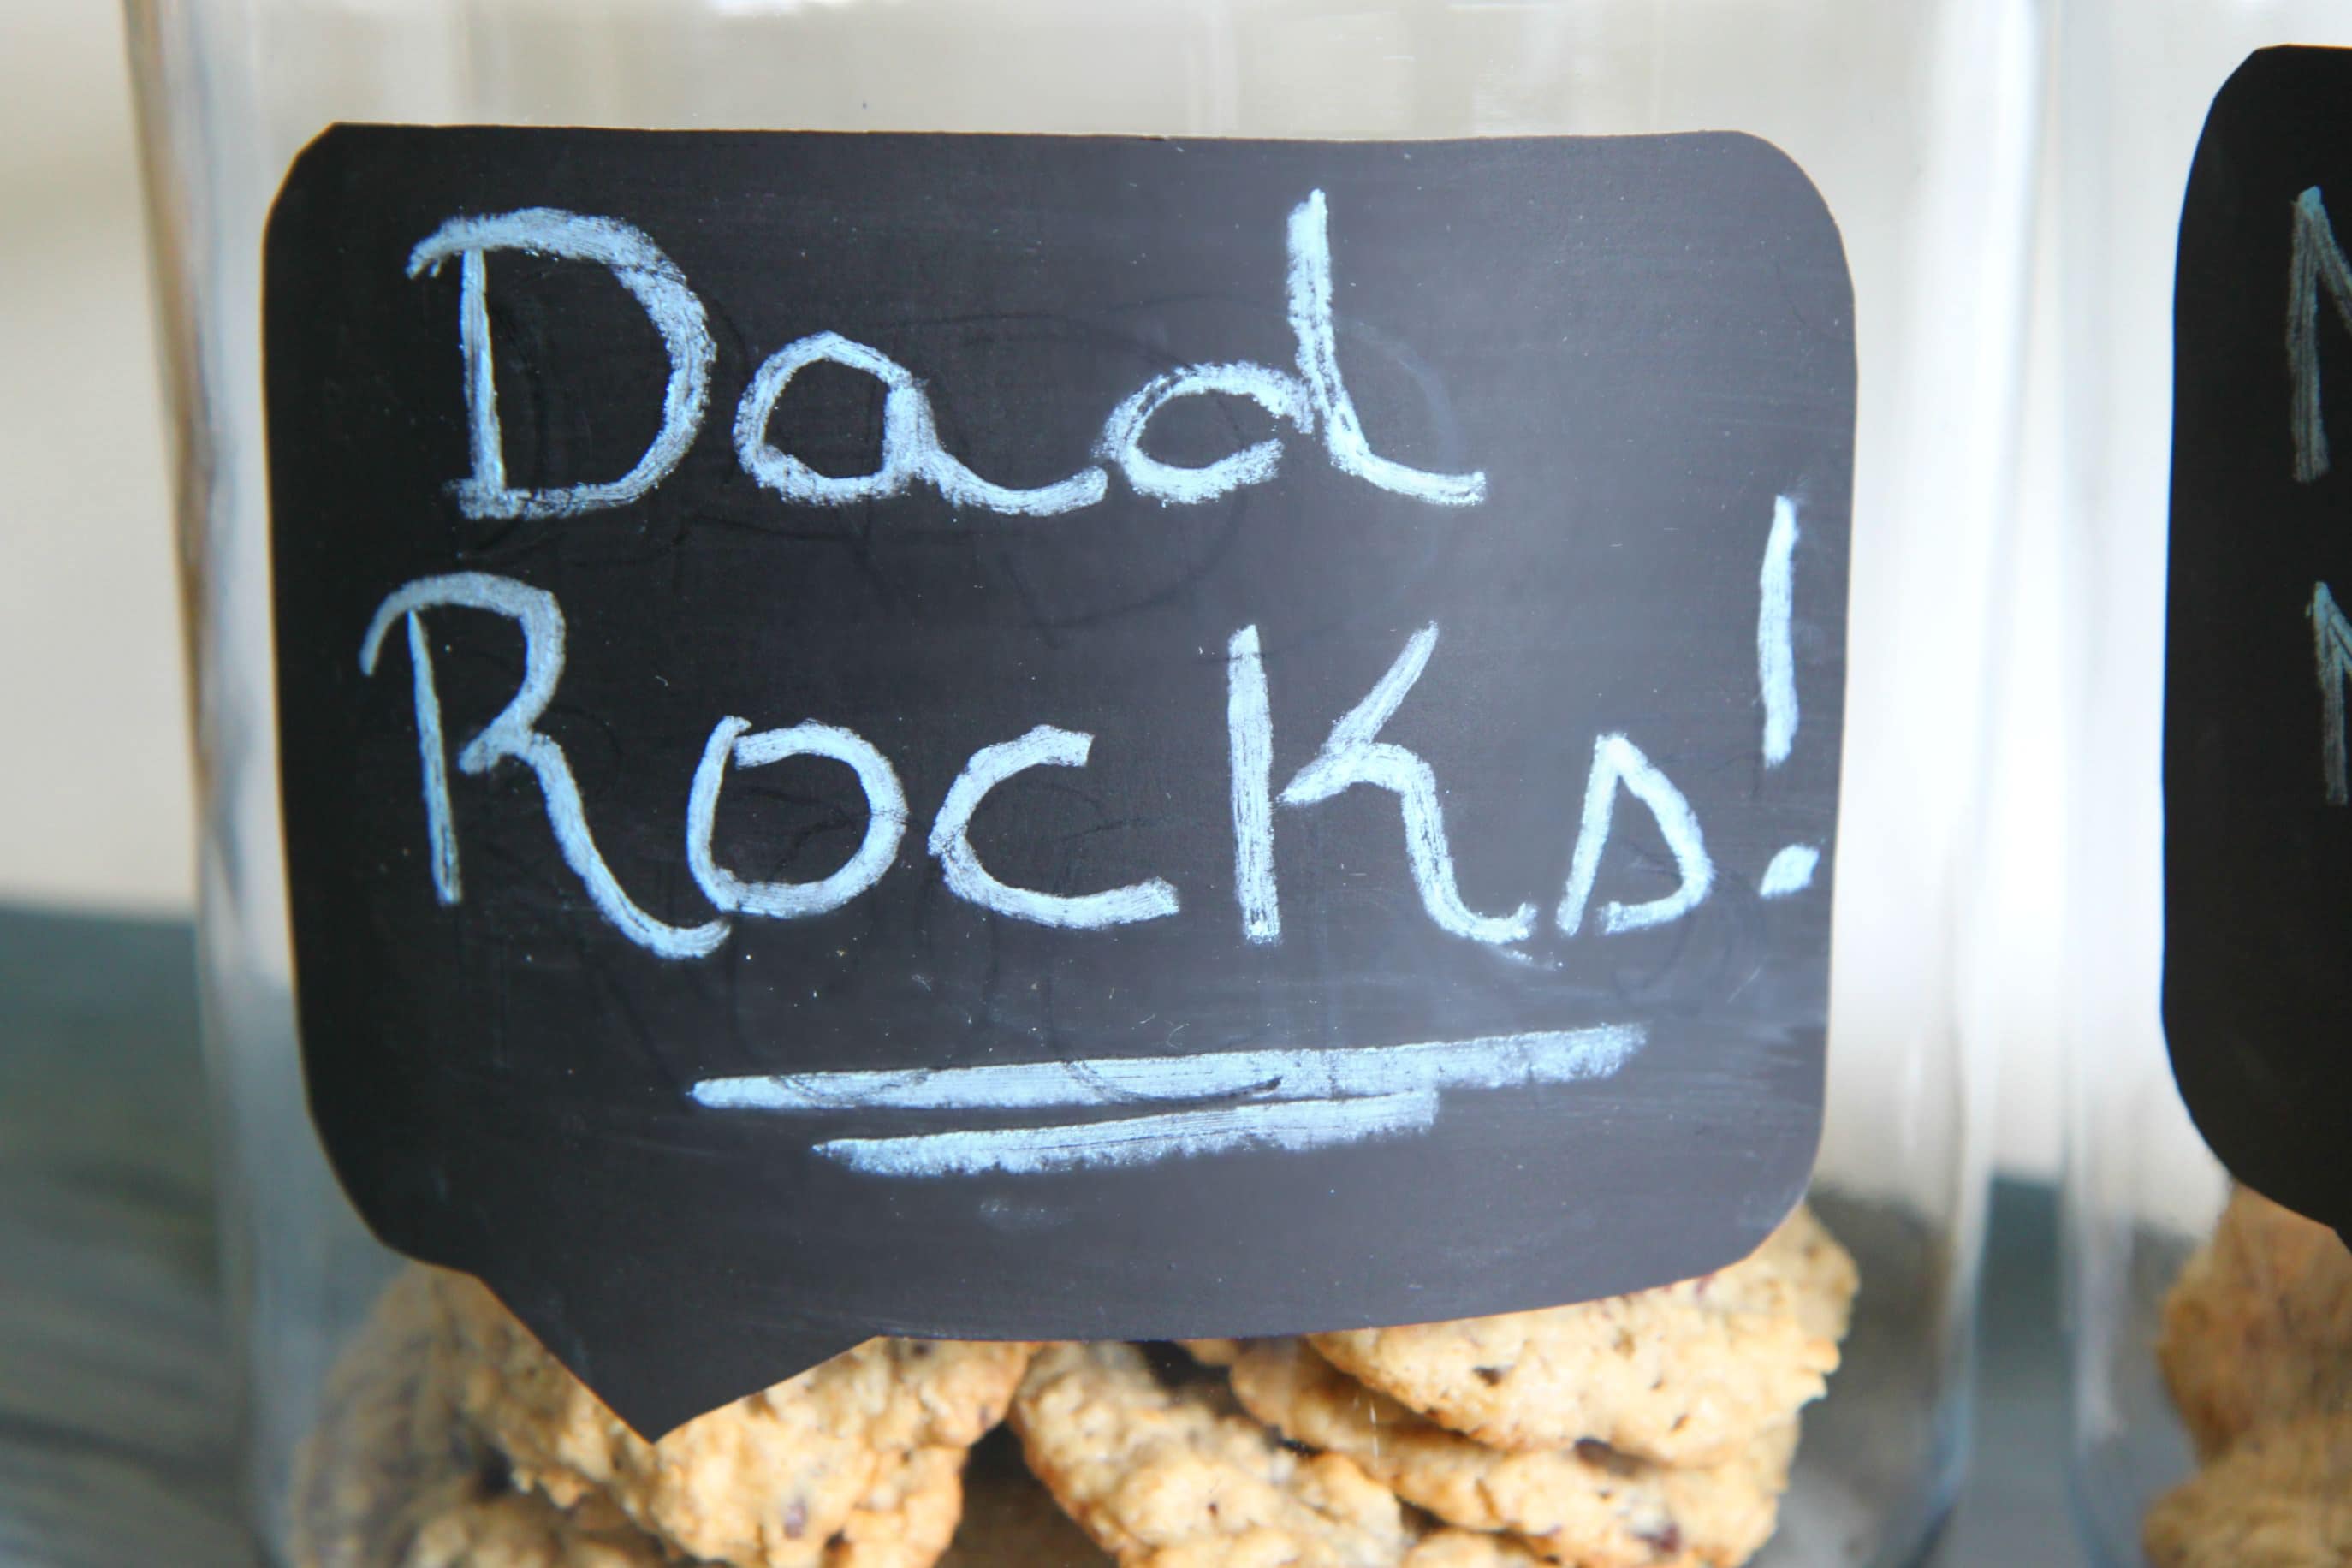
Write your chalk message on the conversation bubble and then adhere the message to your cookie jar. These Avery sheets are sticky, but do not leave a residue or tear. They are heavy-duty so if Dad wants to peel it off and give the jar a good wash, he can and then place the label back on.

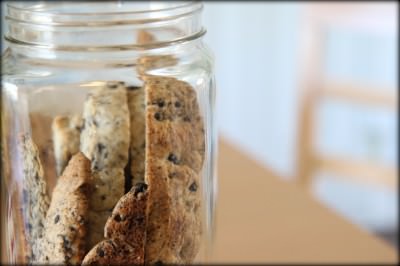
I filled my jars with Oatmeal Chocolate Chip & Sea Salt Cookies for each of my dads. I can’t wait to give these them and I especially love that this craft cost about $10 in supplies for each one. Not too shabby!

Grab your free conversation bubble template HERE

I am a part of the Walmart Moms program, and Walmart has provided me with compensation for these posts. My participation is voluntary and opinions are always my own.


Looking for more Father’s Day gift ideas? Be sure to check out my Power Pack for Your Superhero Dad and my idea for an Easy Movie Gift Basket for a special dad in your life!

Pin It

Great Gifts to Give Teachers From Goodwill

Friday, May 18th, 2012

The end of the school year is upon us and if you missed showering your teacher with gifts for Teacher Appreciation Week, I have some fun gift options for a final thank you for all the hard work your teacher has put in this year.

You may not think of Goodwill as a spot for accessorizing your teacher gifts, but I am showing you how to dress up thrift store items to create beautiful gifts for your teachers.

What is one gift you love to create with thrifty supplies for your teachers?

We would love to hear your ideas!


Frame a Fun Printable

Frame a fun free printable for your teacher.

I love to hunt for these inexpensive frames and then give them a fresh new look with a coat of spray paint.

I made these, “Raise Your Hand if You Mustache a Question,” printables for our teachers for the holidays and they loved them with spray painted red frames.

They coordinate perfectly with a white mug adorned with a painted mustache.


I also really love this fabulous printable and clipboard from eighteen25 that reminds the class to listen to their teachers.

What teacher would not love that?

Create a Pretty Pin

This year I have become obsessed with making cute pins and have found a way to incorporate these pins on everything from bags to belts to jewelry.

Teachers will love these fun accessories and it is an easy way to say thank you without spending a lot.

Pins can be created from recycled t-shirts

or you can create elegant roses from a felted sweater

or use fabric from a cute shirt you can snag on their sale rack.


Bake a Treat

One gift that I think says I truly appreciate you is spending time in the kitchen baking something special for someone you love.

Find cute tins, plates, or even give them right in the baking pans.

The best part about packaging these delicious treats with thrifty packaging is that you don’t have to worry about getting your dishes returned back to you.

I highly recommend these Dark Chocolate & Sea Salt Brownies for a treat that will knock your teacher’s socks off!

Just be prepared to have to share the recipe once they have tried them.


Give a Gift of Pampering

If there is one thing that you can find at Goodwill, it is a plethora of mason jars that can be used for all of your craft projects.

Consider giving your teacher a gift to pamper herself and packaging it in a mason jar and attach a spoon.

Mix up some easy bath salts or a hand scrub that she can use to treat herself.


Teacher School Supplies Cake :: MomAdvice.com


Give Them Something They Can Use

This year I decided to give our teachers a fun teacher supplies cake that I made with school materials I knew they might be missing in their classrooms.

Check the office supplies at your local thrift to see if you can find items you can weave into a school supplies cake for your teacher.

You will often find great folders, binders, and new office supplies that could easily create tiers for a cute school supplies cake to replenish their supplies for next year.

Simply configure your supplies and stack them on top of each other, securing with a little packing tape to hold everything together.

Half of the fun in this craft is in the creating of your cake.

Adorn it with a little ribbon and a picture of your child with a thoughtful message of thanks.


What is one gift you love to create with Goodwill supplies for your teachers?

We would love to hear your ideas!

This post contains affiliate links


Don’t miss these other great ideas from MomAdvice.com:


Teacher Gift Ideas


Oreo Biscotti Gifts


Mojito Bath Salts


Quick & Easy DIY Mother's Day gift ideas

Quick & Easy Mother’s Day Gift Ideas


3 Ways to Take the Hassle our of School Lunches

3 Ways to Take the Hassle Out of Packing School Lunch


Sign up for the MomAdvice newsletter

SaveSave

SaveSave

SaveSave

SaveSave

SaveSave

Pin It

It’s Another 100 Days of Summer Pinterest Board!!!

Tuesday, May 15th, 2012

I had the best time last summer creating our very first 100 days of summer activities board for our family to do and share with you. We had over 6,000 followers to that board and heard from many of you that the board inspired you to tackle fun projects with your kids.

Since that time I have been getting emails and comments requesting that we do another 100 days of summer list with you again! How could we turn away your cries of longing for cool stuff to do with your kids, sweet treats to share with them, and great craftiness on a dime?

I am so excited to share with you the 100 days of summer (’12) edition where you can get another amazing round-up of 100 ideas to inspire your summer bucket list. As I was gathering these ideas, I began to get more and more excited about the summer ahead and what we could do together.

This list has everything from making homemade butterbeer drinks for those Harry Potter enthusiasts, to making homemade shrinky dinks, to getting back to the basics with great dinner discussions with great family conversation starters.

There is something for everyone on here- boys and girls of all ages and craft levels. The best part is that they are ALL budget-friendly and will cost you very little in supplies.

I am looking forward to tackling our own summer list and will be documenting our projects through mobile pictures.You can catch me on Instagram, fellow iPhone and Droid users, where I am documenting our summer.  Just search for the username momadvice. Just as a side note, I try to always answer all the comments on my pictures if I can. If you have questions about projects we are doing or just want to say hello, I will do my best to respond! 

I still will be sharing our apron full of giveaways and our notebook of inspiration each week. I will also have fresh content through my freelance writing jobs with Snackpicks, Kenmore, Goodwill, Glad, & Walmart that will keep our site fully loaded with great ideas for your summer. Best of all, a weekly meal planner will be available to you to help you plan your summer menus.

On Tuesdays though, I will be sharing what we are working on from our summer list through mobile pictures and quick notes on what fun activities we are doing at our house. I am hoping it will be an inspiration to you to get out and enjoy the summer with your children. I can’t say we will tackle a hundred activities, but I will be awfully proud if we do one cool activity a week.

I hope you will enjoy our laid-back inspiration this summer!  I want to enjoy every moment I have with these two kids- my time with them is so fleeting and precious to me. I plan to soak up every moment with them that I can.

Cheers to an amazing summer with your families!

If you’d like, you can follow all of my Pinterest Boards here!

Pin It

Easy Cake Batter Ice Cream

Monday, May 14th, 2012


Last summer I got an ice cream maker for $20 at our local ALDI store. I was excited to try making homemade ice cream, but wasn’t willing to make an investment into my dream Cuisinart Ice Cream Maker until I figured out if ice cream making was something we would actually enjoy doing together. I am happy to say our little $20 purchase paid for itself over and over again since we enjoyed several fun varieties of ice cream.

Last week we had a new reason to break out our ice cream maker. We finally turned in the manuscript for, “The Good Life for Less,” to my Editor. My day has felt so divided between all of my client’s projects, my children and all of their school projects/activities, the book, and the blog. We all agreed that a party would be in order for this momentous family occasion. It is bringing a small fraction of my day back to me.

This cake batter ice cream is, by far, my favorite recipe for ice cream. There is no cooking of ingredients required, I usually have all of the ingredients on hand in my refrigerator, and the cake mix can be your own favorite variety or a cake mix that you need to use up in your cupboard. It is so rich and creamy and tastes just like your favorite ice cream shop, without the hefty price tag!

Top this ice cream with a few of your favorite sprinkles and find a reason to celebrate something in your family. Perhaps, it is the beginning of summer, a great report card, or just celebrating how awesome and amazing your child is. Party hats are optional, but sprinkles are not!

Easy Cake Batter Ice Cream
Recipe Type: Dessert
Author: Amy Allen Clark
Prep time: 5 mins
Cook time: 25 mins
Total time: 30 mins
Serves: 5
Choose any variety of cake mix or even a brownie mix to add to this deliciously rich ice cream. Top with your favorite toppings for a fun sundae party at home!
Ingredients
  • 1 cup skim milk, well chilled
  • 3/4 cup granulated sugar
  • 2 cups heavy cream, well chilled
  • 2 teaspoons pure vanilla extract
  • 2/3 cup cake mix (you can use any variety of cake mix or brownie mix)
Instructions
  1. Place freezer bowl of ice cream maker into the freezer. Chill the freezer bowl for a minimum of 24 hours.
  2. In a medium bowl, whisk the milk and granulated sugar until the sugar is dissolved.
  3. Stir in the heavy cream and vanilla.
  4. Whisk in cake mix, making sure there are no lumps.
  5. Pour mixture into the freezer bowl and let mix until it has thickened (about 25-30 minutes). Remove ice cream from freezer bowl and place into a separate freezer-safe container.
  6. Place freezer bowl and the ice cream into the freezer to further harden (at least three hours).
  7. Serve with your favorite sundae toppings.


Here are a few pictures of our Manuscript Done, Party for Four….

My hubby ran to the grocery store and picked up some party hats for us. My best friend contributed a bottle of bubbly grape juice for our little party. For our celebration dinner, I made my favorite Chicken Lo Mein, baked brown rice, steamed edamame, and this delicious ice cream. We finished our party, as all good parties should, with a little karaoke on our Craigslist-purchased Xbox. It was the perfect party with the perfect people!

You can always follow our family through Instagram! It is a fun little photo app for your iPhone or Droid. I am momadvice and would love to be friends with you on there!


Have you made homemade ice cream before? Have any recipes, techniques, or tools you use to make your family’s favorite summer treat?

Pin It

Creative Mother’s Day Gifts on a Budget

Tuesday, May 8th, 2012

Mother’s Day is just around the corner and it’s time to honor our moms! Each year we try to do something special for my mom and mother-in-law. I have found that often the simplest of gifts are the most treasured, especially if they are hand delivered by my children.

Today I am over at the Kenmore blog sharing a few of my favorite Mother’s Day gifts that are not only creative gifts to create, but they are also very easy on the wallet. Head on over there to get the scoop on my top gifts to give.

Enough about the giving though, let’s talk about the receiving. After all, it is your day too! What is your dream Mother’s Day gift this year?

Pin It

A Behind the Scenes Look at, “The Good Life for Less”

Tuesday, May 1st, 2012
(found on Pinterest– original source unknown)


These past few months have been among the most chaotic in my life, but also have come with many great rewards. This week we hand in the manuscript for my first book, “The Good Life for Less,”  (written with Jana Murphy).  It will be such a relief to not have that looming over our heads and to finally move on to another step in the process of publishing our book in January.

I have learned that the process of writing a book is one of the most agonizing, painful, and rewarding experiences that I have ever encountered. I am thankful for the amazing team that I have had, from my literary agent who was biggest cheerleader, to my co-writer who added the polish to my words and saw the vision of my book, to my editor who has held my hand through each stage.

When it came to the cover, I had a clear idea of what I wanted on the cover of my book. I wanted something that was pastel and illustrated inside and out. When I spoke to the publisher though they said that everything on the market on saving money was pastel and illustrated right now. They wanted this book to stand out among the crowd.

Our family pictures had caught their eye, taken by my dear friend Nancy Lary of Nancy Lary Studios (photo credit for the above photo). They wondered if they could see more of our pictures. After seeing these photos, they asked us how we felt about our family being the cover of the book.

I had a long talk with my kids about how they felt about it. I have always made it their choice, especially as they have gotten older, on if they want to be photographed for the blog or any of the other media appearances that I have done. Their response?

Ethan, “I am going to start practicing an epic pose for the cover.”

Emily, “I know why they want me on the cover of the book. Because I am awesome.”

Clearly, they were not the issue.

Who was the issue with the book cover?

Myself.

Don’t love the book? That’s okay! The illustrated me can take the criticism. For a long time on the site, we only had an illustrated version of me. Which suited me fine. It has taken a lot of bravery for me to come to terms with our family on the cover, but I also understand that it will make us more real and (hopefully) easier to relate to another mom reading the book.

After it was decided that we would be the cover family, it was a flurry of activity to pull everyone and everything together. Outfits were selected for the kids, I ordered and shopped for a dozen different options for myself, coffee was drank, our fabulous photographer was secured, more coffee was drank, a location was selected (my girlfriend, Andy, offered her beautifully renovated kitchen to us), and my best friend was on standby to take all my meltdown calls about dresses not being shipped, what props to choose, and how I was going to coordinate all these people on a Sunday afternoon.

Some small miracle occurred and everything came together. I still can’t believe our luck.

My baby girl looked amazing on this special day. The hairspray was flying and the curling iron was on full blast. After much primping, my Emily looked like a cover model. We are so thankful to Jesica Keller at, “That Hair Place,” in Mishawaka, Indiana, for coming in on her day off to make Emily & I look so fabulous. She is a fantastic hairstylist and I can’t recommend her services enough. If you live in the Michiana area, please hire her for your hair. You won’t regret it!

I am also so thankful to Gabrielle Thompson, from GabGlam,  for doing my make-up for this shoot. Gabrielle did my make-up for our Redbook Magazine photo shoot and I knew she was just the girl for the job. She is an amazing make-up artist with endless talent. If you live in the Michiana area, please keep her in mind for your next event! She is truly a miracle worker, especially for this tired mama with big bags and circles under her eyes!

I was so lucky to get to have my sweet friend Nancy of Nancy Lary Studios shoot this for our family. She has become one of my dearest friends and I was so happy that we got to have her capture our family. She does amazing lifestyle portrait sessions for families in the Michiana area. I would highly recommend hiring her for your next family photo.

My best friend, Becky, came and helped with everything from food props to doing the behind-the-scenes photography. She is truly the best and the first person I call when something big goes on in my life. I am so thankful to her for being a part of this day for our family. I could not imagine my life without her!

Here is my whole team- Andy (Nancy’s “assistant,” maker of great coffee, provider of the most awesome kitchen, a fantastic cheerleader always), Nancy, myself, & Becky. I am so lucky to have got to share this day with my amazing friends. I am truly, truly blessed.

Of course, the biggest supporter to this day was my husband. I never get tired of this guy. He spent hours and hours playing board games with the kids while I was changing outfits and getting my make-up touched up. He pushed me when I was ready to give up on this project and he believed in this book from the day we talked about it. I am forever grateful that God gave me such an amazing life partner.

I can’t wait to see what the cover ends up looking like and can’t wait to see it on bookshelves in January ’13!

Pin It

Teacher School Supplies Cake

Tuesday, April 17th, 2012

Hip, Hip, Hooray for amazing teachers! Teacher Appreciation Week is fast approaching (May 7-11), and it is time to begin thinking of some fun ways to shower your favorite teachers with some appreciation. What says I appreciate you more than a school supplies cake to replenish their school supplies?

Every single day, I count my blessings for the amazing school and the teachers that are in my kid’s lives. We wanted to show our teachers just how much we appreciate them with a special gift this year. Today I wanted to show you how to make a school supplies cake for your favorite teacher. The best part about this is that this project can be accommodated to your own budget. You can stock up on cute fillers at the dollars store, you can add tiers to the ceiling OR you can keep it simple with just a couple of layers. Whatever you budget, this project can fit with this easy craft.

Supplies Needed (if you are replicating my cake):

1 square of sturdy cardboard (I used an old box)
Wrapping Paper
Sterlite 5.5 Quart Clear Storage Container
4 White Glues
2 boxes of 48 count crayons
6 glue sticks
48 No. 2 Pencils (two boxes)
1 package of ballpoint pens (any variety)
1 Ruler
1 square box of tissues
50 count tub of markers (I got the Crayola Pip-Squeaks Telescoping Tower)
Packing Tape
Regular Tape
A picture of your child
A Skewer
Rubber Bands
3 yards of ribbon (I used the Offray Polka Dot Red Ribbon)
Scissors

To begin, we are going to cover our recycled cardboard base with your favorite color of gift wrap.

In the center of your base, securing with tape as you go, stack two glues on each side of your Kleenex square. (Side note: if you see the glue standing up in subsequent pictures, just know that I quickly realized that they needed to be flat for the base to be flush with the cardboard base. This is the right way to do it.)

Slide your plastic container over your glue and tissue paper. This should all fit together really tightly. You can secure your storage container to the cardboard base with more packing tape.

Next, using more packing tape, add your tube of markers on top. I taped the lid on the markers to make sure that everything stayed secure.

Next up, we will add our two boxes of crayons. I secured these on top of the markers with more packing tape.

On each side of your crayon layer, add three glue sticks. I stuck these on with a little regular tape or you can use double-stick tape for this one.

Bundle your pencils up into two bundles of 24 pencils. Wrap each bundle with rubber bands. Slip your ruler between the two boxes of crayons and secure the ruler with tape on the inside of the two boxes. Add each bundle of crayons on each side of the ruler and then secure with masking tape.

With a little tape, add a little package of ballpoint pens to the front of your storage container.

Wrap your layer of pencils, your layer of crayons, and your storage container base in ribbon, with a simple double knot.

For the final touch, add a cute picture of your child with a message to their teacher. I did this in Picnik and it breaks my heart to hear that they will be closing their doors for photo editing. I found that PicMonkey is a great place to upload your photo and add text very quickly and easily. You can choose from a variety of fonts and colors.

Save your image once you have finished it. If you have a photo printer, you can print these out at home. I printed mine on 4×6 Kodak paper with my photo printer. If you don’t have a photo printer, Walmart offers one hour prints (for a 4×6) for $.09.  With a little tape on the back of your image, secure it to a simple skewer and then tuck it in and tape it to your ruler.

I couldn’t resist adding a sweet treat just for our teachers. I am working on making these Easy Felt Fabric Brooches for each of them as a fun little surprise. I can’t wait to make these in a few other colors and I know they will be the perfect accessory to their jackets this year!

Looking for more great teacher gift ideas? Look no further! Here is a round-up of my favorite gifts to give to the amazing teachers in our lives.

1. Raise Your Hand If You Mustache a Question Printable & Mustache Mug

2. Rolled Rosette Pins

3. Light & Fluffy Baked Cake Donuts

4. No-Slip Bookmarks

5. Oatmeal Cookies & Milk Bath Soak

6. Dark Chocolate & Sea Salt Brownies

7. Easy Felt Fabric Brooches

8. Light Snickerdoodle Biscotti

9. Rolled Rosette Ribbon Rings

10. Fabric Flower Pins

11. Oreo Cookie Biscotti

12. Honey Nut Granola

What gifts do you have up your sleeve for you teachers this year? What gift has been the biggest hit? I would love to hear your ideas!

I am a part of the Walmart Moms program, and Walmart has provided me with compensation for these posts. My participation is voluntary and opinions are always my own.

Pin It

10 Unique Ideas for Projects To Do With Goodwill T-Shirts

Friday, April 13th, 2012

If there is one craft material I love, it is t-shirt material.

If you have ever been in a Goodwill store, one thing you will notice is that there is an abundance and plethora of donated t-shirts in every size, style, variety, and color.
The next time you visit your local thrift store, don’t just visit the t-shirts in your own size for ideas.
Look in the Men’s section and in the larger sizes to find t-shirts that will offer you extra and a generous amount of craft material for the same amount of money as your smaller t-shirts.
Try to select t-shirts that are not as faded or that have fabric pills on them for optimal material for your projects.
Today I wanted to share with you ten of my favorite projects that I have found to do with old t-shirts from some very amazing bloggers.
I love that all of these ideas are extremely unique and that most require no sewing skills at all.

T-Shirt Scarves

I have seen lots of varieties of t-shirt scarves on many different blogs, but I absolutely love this DIY Dish episode you can watch to discover three different varieties of scarves you can make from an old t-shirt.
My favorite is the one, pictured above, with a bright pom-pom trim.

T-Shirt Bibs

If you are looking for a fast sewing project that would make a fun baby gift, then these t-shirt bibs are the project for you.
For little boys, you could look for their dad’s favorite sports teams and for little girls you could look for a fun t-shirt with sparkly letters or flowers.
Don’t forget that these could also be embellished with rick-rack, ribbon trim, or an easy t-shirt rolled rosette flower.

T-Shirt Bracelets

There are many varieties of cute bracelets that I have seen using t-shirt materials, but this one has to be one of my favorites.
This twisted knot bracelet can be made from just a single t-shirt or it could be made with a mix of prints or a mix of solid colors.
I can’t wait to make some of these for myself and my daughter this summer.
Nothing could be cozier than a gently worn t-shirt bracelet on your arm!

T-Shirt Produce Bag

Nothing could be greener than carrying your groceries in a cloth grocery bag…until you start using recycled materials for your bag.
Even if you are a beginning sewer, this simple produce bag can easily be created for a visit to the grocery store of your local farmer’s market.
I think these would be fun to make in a variety of pastel colors or to give as a gift to someone special in your life.

T-Shirt Pom Poms

Looking for a fun way to dress up your home for the warmer months?
I absolutely love these adorable t-shirt pom poms for a fun way to add a pop of color to your mantle, as a fun adornment to a wreath, or hung in a gathering on a door handle or front door.
The best part about this project is that no sewing skills are required for this one!

Petal Tees

I have seen many, many refashions of old t-shirts, but I think this Petal Tee is simply genius because the petal trim on this t-shirt is made from a variety of t-shirts, adding a cute pop of color for the Spring.
Visit your favorite thrift shop on their half off days and stock-up on a fun mixture of colors for a fun addition of color to your wardrobe.
If you are looking to add a little of the fluorescent color trend to your wardrobe, this would be a great way to do it without having to commit to an entire fluorescent piece!

T-Shirt Yarn

My favorite craft in the world is knitting and I love the idea of using t-shirts to create fun yarn for my projects.
This would be a fun gift to give to a friend that knits or crochets.
If you can use a pair of scissors and cut in a relatively straight line, then you can do this craft and use this yarn for a variety of projects!

T-Shirt Aprons

I have a true affection for aprons and have a little collection of my own thrifted aprons that I have acquired from Goodwill and antique shops.
I had never thought to use t-shirts to create aprons, but I think this t-shirt apron is the cutest thing I have ever seen.
This would be a cute craft to make for yourself or for your helpers in the kitchen.
The best part?
No ironing required and it can handle the messes that you might make in the kitchen.

T-Shirt Necklaces

I love t-shirt necklaces for adding a splash of color to your neckline.
This rolled rosette t-shirt necklace is a fun way to add some feminine details to your outfit very inexpensively.
I think it would be cute to make the t-shirt bracelet in a coordinating color and one t-shirt should more than cover both of these cute projects.

T-Shirt Flower Pin

Our tenth project is actually a fun t-shirt project we did here on the MomAdvice blog.
Be sure to visit my tutorial on creating a cute t-shirt flower pin made from an old t-shirt and spray painted clip-on earrings.
This is so cute and would be a fun addition to a Spring top or jacket.

What are your favorite craft projects to do with old t-shirt?

Don’t miss these craft ideas from MomAdvice.com:


8 Fun Sweater Crafts


Easy DIY Fabric Flower Wreath


Easy Paint-Dipped Spoon Sets


DIY No-Sew Reversible Cloth Napkins


Sign up for the MomAdvice newsletter


Pin It

Easy Felt Fabric Brooch

Monday, April 9th, 2012

If there is one thing I love to do it is spend a little time with my glue gun and create something sweet for someone I love. I wanted to share with you a super cute and fun Spring craft you could create with just a few simple materials. This is a fantastic little craft to have in your back pocket for a sweet teacher gift or a fun Mother’s Day gift for a special mama in your life.

I am sharing this fun craft-a-long for our readers and all supplies can be found at your local Walmart store or can be ordered directly through the suppliers. Let’s get started!

Supplies Needed (Available at Walmart or online)

Dimensions Wool Felt- any color
Cutter Bee Scissors (or any scissors you might have on hand)
Laliberi Pins and Clips Multi-pack
Hot Glue Gun & Glue Sticks
Jolee’s Bumble Bees Cabochons
Cardstock (to print our FREE flower template- see below)
To begin, print out our free flower template to create this felt rose. Our template should be printed on heavy-duty card stock to help make it easy for tracing. We have put the numbers of how many to print in the center of each circle, but here is another picture of what you are doing. One piece of the Dimensions Wool Felt (12×12) will create one of these flowers. Save the scraps to create a center for your rose after you are done cutting all of your circles.

You will find the link for our flower template at the end of this post.


 Set your largest circle aside- this will be the base for your flower.  Now grab your other circles and your glue gun and let’s get gluing. Add a big dab of glue in the center of each of these circles and hold it steady for a minute. Repeat with every single circle, fifteen times in total, until your hands feel crampy and you are feeling the hot glue gun burn from trigger-holding forever. Feel the burn, baby!
If I was an octopus I could have posted better pictures, but I hope that this picture will give you the visual you need for now. Begin placing your five large circles on top of your largest circle, attaching with a strip of hot glue on the back. Repeat this process with another layer on top. Repeat this process again with your baby circles. You will have a small hole in the center of the circle once everything is stacked.

If you use the Dimension Wool, this wool is very thick and you may be able to get away with just three circles on the two smaller circles so you can fit everything nicely on your flower. I would just use your best judgement, depending on the thickness of your felt and how big you like your flower.
Taking a small scrap of felt and wrap it into a circle to create the center of your flower. Secure with a dab of hot glue. Position it in the center of your flower and cut it down (if needed) until it fits nicely in the center of your flower.

Grab your pin and secure it to the back of your felt flower brooch with more…you guessed it… hot glue!

Add a little whimsy to it and glue a little bumblebee to your flower to make it even more Spring-y.

Grab your FREE Easy Felt Flower Brooch Template here!

I am a part of the Walmart Moms program, and Walmart has provided me with compensation for these posts. My participation is voluntary and opinions are always my own.

Pin It

Celebrating Earth Day as a Family

Thursday, April 5th, 2012

Looking for some fun ways to celebrate Earth Day with your family? This week I am over at the Kenmore Genius Blog to share some ways that our family has found to celebrate Earth Day and make it special for our kids. We hope you can join us and find a new way to celebrate with your family with these fun tips!

If you are in the Spring Cleaning mood, you will also find my article on Spring Cleaning Your Refrigerator.  Your refrigerator might be one of those appliances that may get overlooked, but it is one of the most important appliances in a home. Simple maintenance and cleaning procedures though can greatly extend the life & efficiency of your refrigerator and today I wanted to show how to keep your refrigerator running efficiently for your family with a few of these easy spring cleaning tips!

Today I wanted to share with you some tips for spring cleaning your refrigerator and keeping it running smoothly for your family.

Pin It