Archive for the ‘Blogging’ Category

7 New DIY Halloween Costumes

Monday, October 7th, 2013

7 New DIY Halloween Costumes from MomAdvice.com

Halloween is just around the corner and today I wanted to showcase even more DIY Halloween Costume Ideas that you can create using commonly found items at your local second-hand store.

Last year I compiled a really great list of Easy DIY Halloween Costumes that were truly a hit with our readers.

Luckily, I was able to find seven more DIY Halloween costumes that I think would be easy to pull off and oh-so-affordable!


DIY Minion Costumes

One of the biggest movies this summer was Despicable Me 2.

Often costumes from our favorite movie characters are expensive, but I found this easy DIY Minion Costume on make and takes that would be perfect for your own little minion.

The best part is that you only need to find a yellow hat and the other supplies are commonly found in your home or inexpensive to purchase (pipe cleaners, toilet paper roll, scissors, stapler, elastic, and a little paint).

This costume wins for both ease of creation and for being wallet-friendly too!


Rosie the Riveter

What could be more recognizable than the, “We Can Do It!” campaign?
I love this costume because you can create the headpiece with an old red t-shirt that you decorate with a little paint.
The rest of the outfit can most likely be pieced together with items you already have in your closet and with a simple flex of your muscle, you are ready to go!
Check out Crafted in Carhartt for several great DIY ideas including the Rosie the Riveter costume.

Holly Golightly Costume

One of my favorite movies of all-time is, “Breakfast at Tiffany’s.”
I love this Holly Golightly costume that you could piece together with items you found at your store along with items you probably have tucked away in your closet.
With a simple little black dress, some costume jewelry, a pair of sunglasses, and some black gloves you have the makings for a perfectly classy Halloween costume.
This is a great costume for yourself or for an adorable little girly-girl in your life!

Sun-Maid Raisin Girl

I am sure it comes as no surprise that I am a huge fan of good old-fashioned costumes and this Sun-Maid Raisin Girl costume is about as cute as they come!
Add a little ric rac to a white Goodwill t-shirt and pick up a basket from the Housewares department.
Fill it with real (or fake) raisins and grapes for the big night and hit your local Halloween party supply store for a bonnet.
Head on over to wip to get the scoop on this great costume idea full!

 Mona Lisa

You don’t have to have spend a lot to pull off a great costume and that is why I absolutely love this Mona Lisa costume for its simplicity and ease in creation.

Head to Goodwill to get a frame and then use the printable that is provided in the MAKE instructions to create the background.
Dress your child up in a a dress and they will be ready to wow everyone with this costume that is truly a work of art!

Lumberjack

Boy costumes can be tough around here and this DIY Lumberjack costume is one of my new favorite boy costumes.
Grab a knitted hat and flannel shirt and whip up one of these cute little felt beards to go with the costume.
Bonus points should be given if you have time to make an ax out of cardboard!
Visit The Gold Jellybean for this awesome costume tutorial!

LEGO Indiana Jones Costume

My son is LEGO obsessed and that is why I love this fun LEGO Indiana Jones costume for Halloween.
Although creating the LEGO head is a bit of work, what little boy wouldn’t love creating this with you or their Dad?
Pair this costume with a pair of brown pants and shirt!

I hope these ideas inspire you this year! Here is a flashback costume that I created for myself two years ago! Yes, even I love to dress up for the season!

Happy Halloween, everyone!


Check out more Halloween costume ideas from MomAdvice.com:


Easy DIY Halloween Costumes


Minecraft Costume Ideas


Fun Halloween Costume Ideas for the Whole Family


This post contains affiliate links

Sign up for the MomAdvice newsletter

SaveSave

SaveSave

SaveSave

SaveSave

SaveSave

SaveSave

SaveSave

Pin It

$15 Fabric-Lined Bookcase Makeover

Tuesday, October 1st, 2013

$15 Fabric-Lined Bookcase Makeover
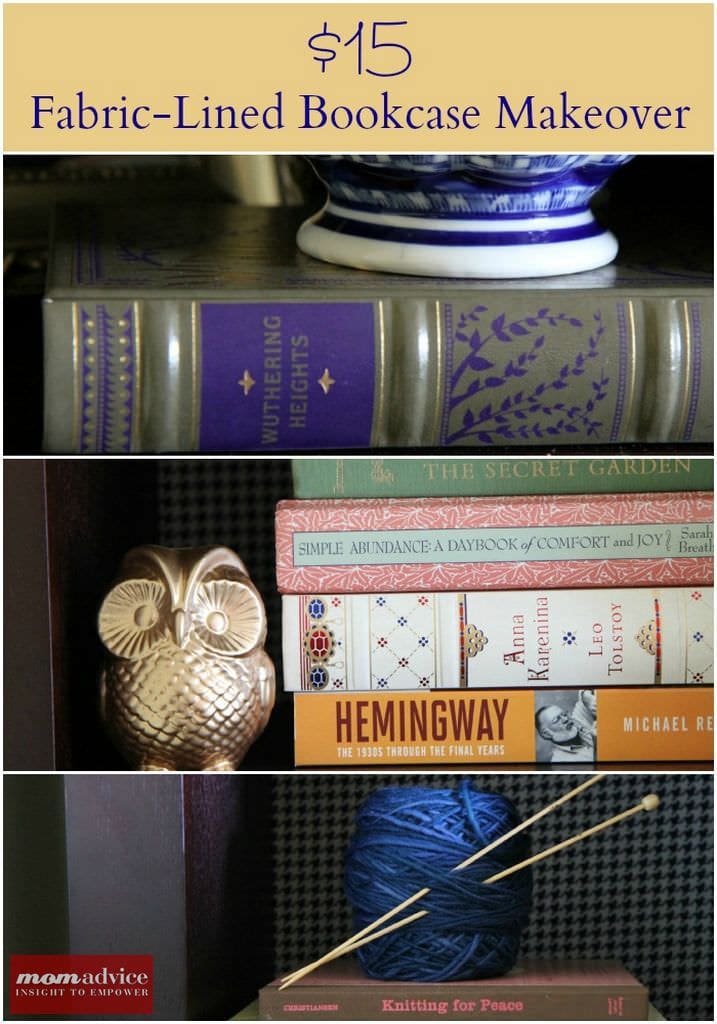
This Fall I am committed to ridding my home of some unnecessary clutter. My bookshelves were in need of some true organization and updating. Today I am sharing a fabric-lined bookcase makeover to update a tired bookcase and some ideas for adding a little budget-friendly seasonal beauty to your bookshelves.

I work with Walmart and this project update can be done with $15 of supplies found at your local Walmart store.

$15 Fabric-Lined Bookcase MakeoverLet’s start with a before picture of my bookshelves. As you can see, they are brimming over with far too many books and clutter than you could ever imagine. One side housed a million books, while the other housed random junk in our house. Since this is the front room in our house, it really embarrassed me that they had gotten this cluttered.

The first step was to remove EVERYTHING from these bookshelves and figure out what to do with them. One pile was to keep, one to donate, and some were relocated into better places (cookbooks in the kitchen, productivity/work books in the office, etc…). Once you have cleared your shelves, it is time to make them pretty with some inexpensive fabric.

Supplies

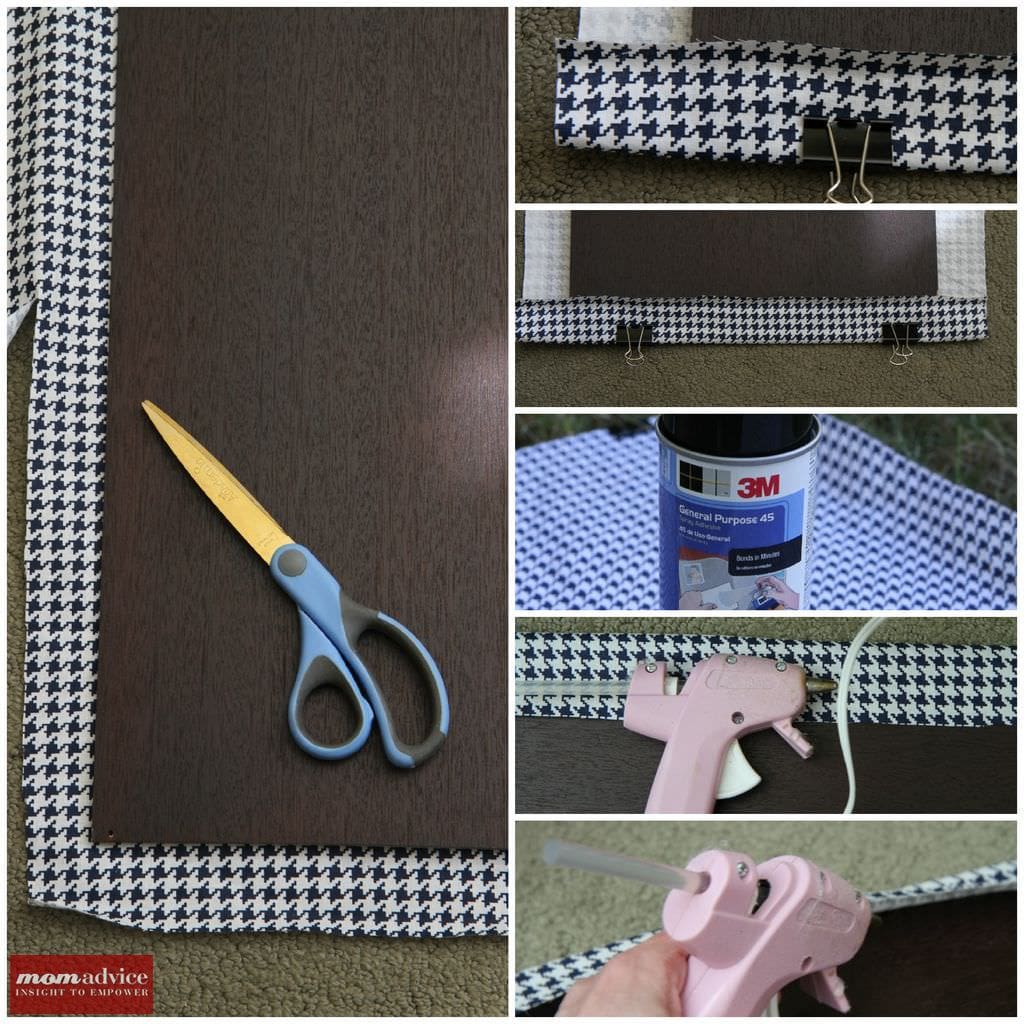
2 yards of fabric (to cover two bookshelves- definitely measure for your own bookcases. This houndstooth fabric I found was only $4 per yard!)

General All-Purpose Spray Adhesive (I had some leftover from last month’s diy homework stations)

Glue Gun & Glue Sticks

2 Binder Cliips

Optional: Gold Spray Paint & inexpensive items in Seasonal Supplies

$15 Fabric-Lined Bookcase Makeover

Directions

1. Take the back off of your bookcase on top of your fabric. Cut around the bookcase leaving approximately one inch of fabric all away around to tuck on the back.

2. Once the fabric is cut, flip the fabric with the right-side out. Clip the fabric to the bookcase at the top, using two clips. Be sure you double check the front of the fabric to make sure it lines up if it is patterned.  Relocate your project outside to spray it with the spray adhesive.

3. Lifting the fabric up, spray the entire bookcase side with spray adhesive and then carefully lay the fabric back down, doing your best to keep the fabric even and flush to your bookcase.

4. Flip the bookcase back over and using your hot glue gun, add a dab of glue along the seam and pull the fabric tight behind the bookcase. Continue adding the glue down the seam of the fabric until it is all secure. Fold the corners in just as you would wrapping a present, and glue those to secure them.

5. Secure your bookcase back to your bookcase and begin assembling the items for your bookshelves.

$15 Fabric-Lined Bookcase Makeover

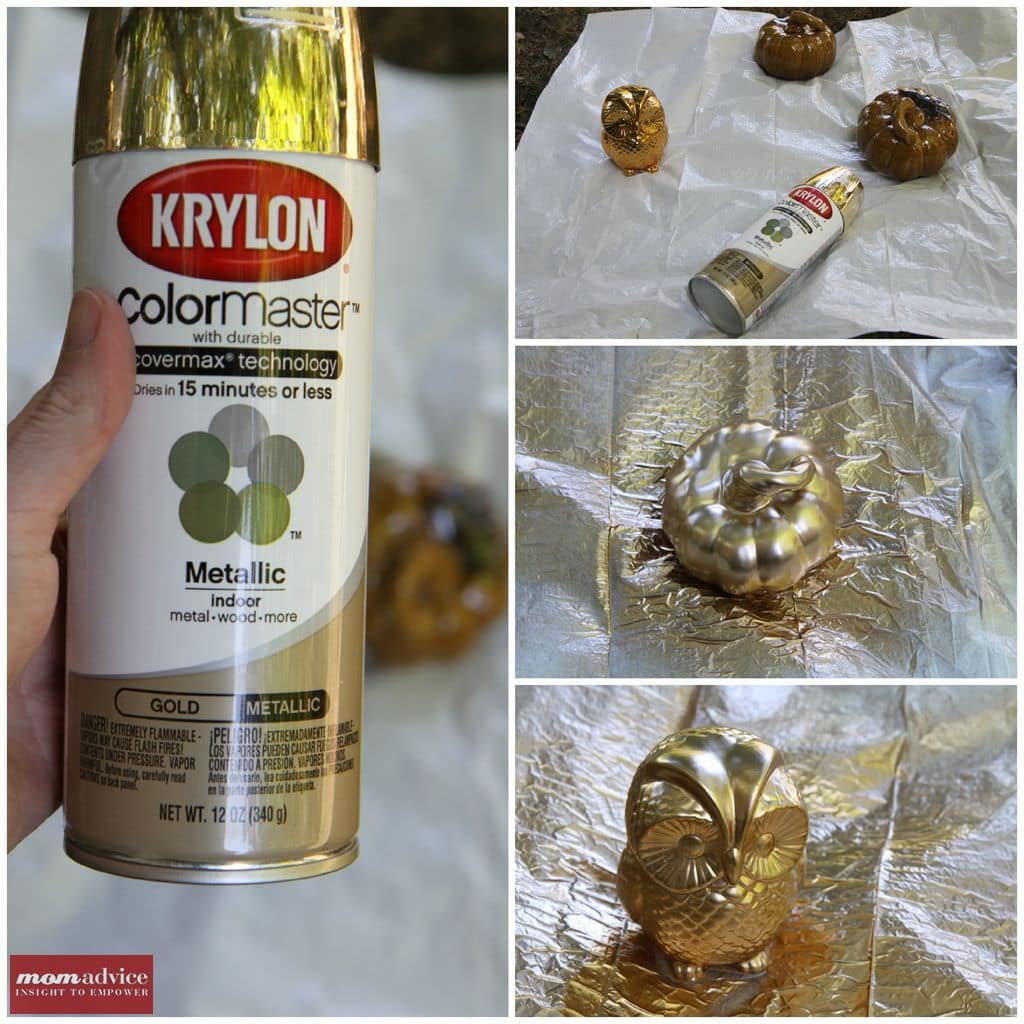
I wanted to add a little nod to the season and another little nod to the Gold trend right now so I picked up another can of spray paint and a two little pumpkins and an owl that I found over in the Seasonal supplies for only $2.49 each and gave them a shiny new gold finish.

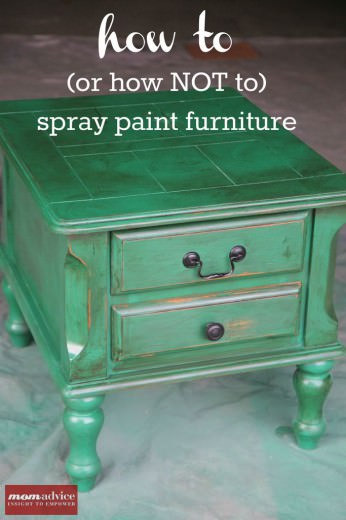
Did you catch my spray painted side table tutorial I did this summer? I am such a spray paint addict.

$15 Fabric-Lined Bookcase MakeoverHere is a close-up of my, “new-to-me,” shelves for Fall. The books at the top are among my favorite. I read East of Eden this summer for the first time, my childhood copy of Secret Garden from my great-grandma is in the pile, I’m Hemingway obsessed, and each year I am collecting one new reissued pretty classic from Barnes & Noble for a holiday gift to myself. My little $2.49 owl fits perfectly in there next to a few of my very favorite books.

The second shelf is simple with yarn and tiny bamboo needles I rarely use along with a few of my very favorite knitting books.

The bottom shelf is just for my hubby with his Harry Potter books and a golden pumpkin.

$15 Fabric-Lined Bookcase Makeover
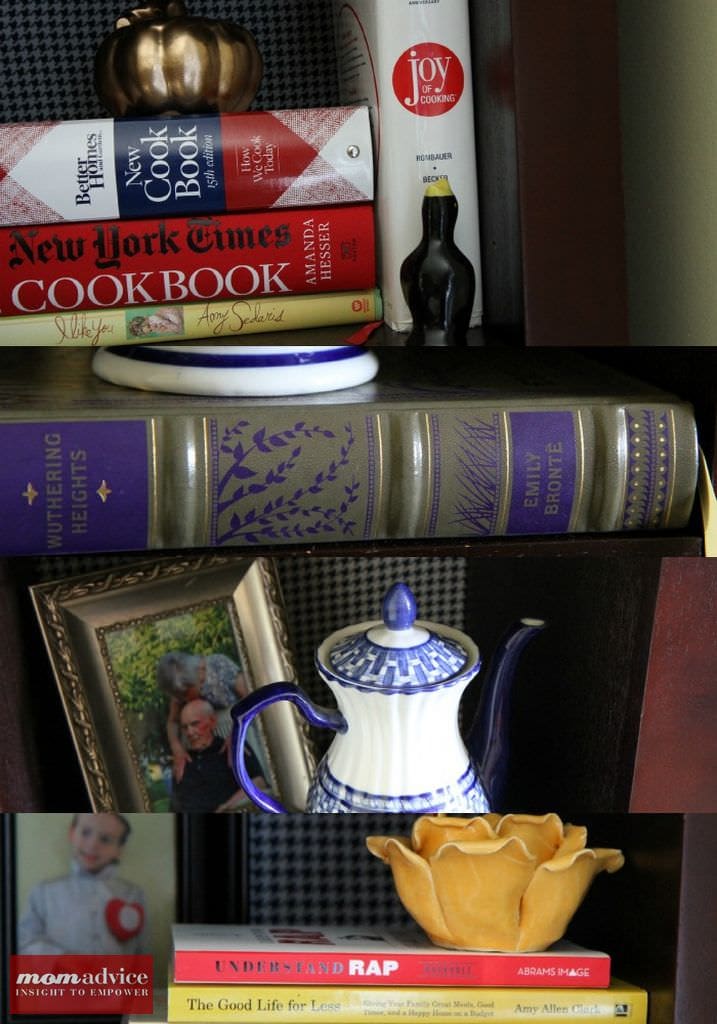
The top shelf in this photo holds a few of my favorite cookbooks, a golden pumpkin, and my little Pie Bird that I think is oh-so-sweet and reminds me how much I love a good piece of pie.

My copy of Wuthering Heights (which I read this winter) rests beneath the beautiful China teapot that my grandfather gave me before he passed away. Behind it is the last picture I took of him with my grandma. That shelf makes my heart ache.

The last shelf holds my galley copy of my first book, a picture of my sweet boy when he was little in the beautiful Tin Man costume my mother-in-law made for him, our Boston Drivers Handbook which was a gift when we moved to Massachusetts and were terrified to drive, and my hubby’s copy of, “Understand Rap,” from his sister. It is always a great conversation piece.

Can you see the theme? They are ALL special and ALL mean something to me.

The mess before…how could we even see the gems in there? 

$15 Fabric-Lined Bookcase MakeoverHere are some shots of my beautiful bookshelves now. It is one of those projects that I sit and look at over and over again because it makes me so happy. The fabric completely transformed these and the clutter removed from them brings a lot more peace and order to the room.

Looking for more bookshelf styling ideas? Check out these ideas for decorating bookshelves and this post for bookshelf styling tips!

walmart_mom_disclaimer

Pin It

Weeknight Chicken Lo Mein

Monday, September 30th, 2013

weeknight_chicken_lo_mein_1 Chinese takeout is my weakness, but it is also a budget-buster, especially as often as I would like to indulge in it. Today’s recipe is an easy Weeknight Chicken Lo Mein recipe that fills that takeout void beautifully.

I am working with Walmart and for this month’s grocery project they wanted me to share the good news that their rotisserie chickens are now on rollback pricing at just $4.98, regularly $5.98 each.

rotiserrie_chickens_1 rotiserrie_chickens_2 You may not have noticed that they offer chickens over in the cooler of your store, in front of the Deli counters. When I discovered these, I started purchasing them weekly for our favorite Weeknight Chicken Noodle and Lemon Greek Chicken Soup. There are, of course, a million recipes you can create with these, but I thought this would be perfect for my Chicken Lo Mein fix this week and wanted to show you how I create this recipe at home.

weeknight_chicken_lo_mein_3 I keep an arsenal of ingredients in our pantry and fridge for cooking our Asian dishes. You will find most of these items over in the Asian foods aisle of the store. Sesame Seed Oil, Rice Wine Vinegar, Reduced-Sodium Soy Sauce, and Oyster Sauce are all components to many of the sauces that I make in my dishes. I don’t go through fresh ginger very quickly so I love to keep a tube of this in our fridge for our dishes, like our favorite Mongolian Beef recipe!

The star of the show in this sauce is definitely the Oyster Sauce. It takes this sauce to the takeout level with just a tablespoon or two. Once you taste the sauce in this dish, I bet you will agree!

weeknight_chicken_lo_mein_6

In my Chicken Broccoli Lo Mein recipe I simply use linguine noodles for the recipe. You can definitely do this if you want or you can head to your local Asian grocery store to get the real deal. The fresh noodles in the cooler are ideal, but since I make this recipe often, I keep the dried noodles in my pantry. This package has four pounds of noodles in it… or basically one serving.

If you are wanting to experiment with different types of Asian noodles, here is a handy Asian Noodles Cooking Timetable to help figure out how long to cook the noodles. My packaging didn’t have any instructions on it so I used this timetable as a reference for my noodles.

Other than the noodles, all the other ingredients can be found at your local Walmart including an Asian stir-fry blend of shitake mushrooms and even fortune cookies and egg rolls to add an element of fun to your meal.

I hope you enjoy this faux-mein knockoff recipe of my favorite Chinese takeout dish!

weeknight_chicken_lo_mein_5

Weeknight Chicken Lo Mein
Recipe Type: Main Dish
Cuisine: Chinese
Author: MomAdvice.com
Prep time:
Cook time:
Total time:
Serves: 6
An easy weeknight chicken lo mein recipe that can be prepared with a rotisserie chicken.
Ingredients
  • 1 rotisserie chicken, cut into thin strips of meat
  • 2 teaspoons white sugar
  • 2 tablespoons rice wine vinegar
  • 2 tablespoons oyster sauce
  • 1/2 cup soy sauce
  • 1 1/4 cups chicken broth
  • 1 tablespoon sesame oil
  • 1/2 teaspoon ground black pepper
  • 2 tablespoons cornstarch
  • 12 ounces of your favorite Asian noodle or linguine (see suggestions above)
  • 2 tablespoons vegetable oil, divided
  • 2 tablespoons minced fresh ginger
  • 1 tablespoon minced garlic
  • 8 ounces Asian stir-fry blend of mushrooms
  • 3 green onions, sliced diagonally into 1/2
  • inch pieces
  • snow peas or any variety of your favorite veggies that you would like to add to your stir-fry (consider what you need to use up in your fridge for this one!)
Instructions
  1. In a medium bowl, combine the chicken broth, sesame oil ground black pepper sugar, vinegar, oyster sauce, and soy sauce.
  2. In a separate small bowl, dissolve the cornstarch with some of this mixture and slowly add to the bulk of the mixture, stirring well. Set aside.
  3. Cook the noodles according to package directions, drain and set aside.
  4. Heat 1 tablespoon of the vegetable oil in a wok or large saucepan over medium heat. Add the ginger, garlic, mushrooms, any of your other favorite stir fry veggies, and green onions. Stir fry these for 30 seconds.
  5. Add the reserved sauce mixture and then the chicken. Simmer until the sauce begins to thicken, about 2 minutes. Add the reserved noodles and toss gently, coating everything well with the sauce.


Pin It

Roasted Tomato Bisque

Monday, September 9th, 2013

Roasted Tomato Bisque

There is nothing like a big pot of soup and today I wanted to share with you an easy recipe for Roasted Tomato Bisque. This roasted tomato bisque recipe is so easy and can be made from those garden tomatoes that you might need to put to work in your kitchen or created with whole canned tomatoes that you can keep in your pantry.

Walmart challenged me this month to share an easy weeknight meal strategy with you. I admit that my best weeknight meal strategy is making a big pot of soup on the weekends that we can enjoy all week long. I have gotten so good at making soup that I told my husband that if this blogging gig falls through that I would open my very own little soup kitchen.

True story.

Roasted Tomato Bisque

Have you ever roasted vegetables for a soup? It adds another layer of flavor to your soup that will surprise you. This soup is packed with roasted carrots, tomatoes, and shallots. The soups depth of flavor comes from a few interesting additions that add a beautiful layering when you eat it. First, the veggies are coated in olive oil, salt, pepper, and brown sugar that adds a little sweetness and saltiness to the soup. The second addition that makes this soup so special is a little sherry that adds a real depth of flavor. The third is the finishing of just the tiniest bit of cream. If you have a dairy allergy or are looking for a vegan alternative, you could leave the soup without it or add rice milk to finish the soup.

Weeknight Meal Strategies

I wanted to dive in a little bit more about my weeknight meal strategy. You see, it rarely changes although as my kids get older it does get more challenging in the evenings with our homework and extracurricular activities. On Sunday afternoons I do all my shopping and planning for the week. I purchase a week’s worth of food and I try to plan our dishes around that week’s activities.

Here are the themes I use for menu planning although I never assign a day to them unless it is our weekly pizza night and Sunday brunch. Everything else falls into place depending on the week’s activities.

Weeknight Meal Ideas

Soup Supper

If you are looking for a little soup inspiration, here are six easy soup recipes to try, a delicious white chicken chili, and a Stuffed Green Pepper Soup that is always a slow cooker winner. Serve these with a loaf of crusty bread or find out how to make an easy big batch of toasted cheese sandwiches when cooking for a crowd.

Meat-Free Night

Here are 30 of our absolute favorite meat-free dishes that we try to create in our kitchen once a week. For a new spin on tacos, try this recipe for easy 10 minute tacos for your family.

Slow Cooker Night

I am a HUGE fan of my slow cooker and use it at least once a week. Here are a month of ideas to bookmark for slow cooker creations in your house.

Waffles/Pancake Brunch

Sundays are for brunching in our house. I love to make a variety of waffles and pancake recipes on Sunday to be frozen and eaten for weekday morning breakfasts. Now that it is Fall, our pumpkin pancakes will be in constant rotation.

Pizza Night

Have you tried making pizza dough in your bread machine? I have been making pizza dough in my bread machine for almost a decade now and our Fridays just wouldn’t be the same without our fun pizza night.

Sandwich/Burger Night

Easy dishes like sloppy joes, pulled pork sandwiches, chicken pesto burgers, and Italian beef sandwiches are just a few examples of easy sandwiches/burgers that can be easily doubled for easy lunches and dinners.

Seek And Ye Shall Find Night

It is Biblical. Sunday night you need to seek and ye shall find in the refrigerator.


As you plan out your week, I hope you enjoy this soup for your own weekly soup night. Of course, the best part about soup is that it is the perfect dish to share with others. Be sure to share this one with those you love because I know they will love you for it.

big_batch_toasted_cheese_sandwiches_2

Roasted Tomato Bisque
Recipe Type: Soup
Author: Adapted from Food Network
Prep time:
Cook time:
Total time:
Serves: 6
A delicious roasted tomato bisque recipe packed with delicious roasted vegetable flavor and a hint of cream.
Ingredients
  • Two 28-ounce cans whole tomatoes, drained of their juices. If using fresh tomatoes 20-24 fresh tomatoes, washed, cored, & cut in half.
  • 1 tablespoon light brown sugar
  • 4 carrots, peeled, cut in half, and chopped into sections
  • 2 shallots, quartered
  • Salt and freshly cracked black pepper
  • 3 tablespoons unsalted butter
  • 1/4 teaspoon crushed red pepper (can increase to 1/2 teaspoon if more spice is desired)
  • 2 cloves garlic, minced
  • 1 tablespoon tomato paste
  • 2 tablespoons dry sherry
  • One 28-ounce can crushed tomatoes
  • 1 to 2 cups chicken stock or vegetable broth
  • 1/4 cup heavy cream (or favorite milk substitute)
  • Salt & Pepper to taste
Instructions
  1. Preheat the oven to 400 degrees F.
  2. In a mixing bowl, combine the drained whole tomatoes (or fresh tomatoes), olive oil, light brown sugar, carrots and shallots, and toss to coat. Season the vegetables with salt and pepper.
  3. Place the vegetables on a silicone or parchment-lined baking sheet and roast until caramelized, about 30-35 minutes.
  4. Heat a soup pot over medium heat. Add the butter and cook until foaming. Add the crushed red pepper and garlic and saute for 1 minute. Add the tomato paste and cook for 1 to 2 minutes. Then add the sherry. Cook until all the liquid has evaporated and the alcohol has cooked off, 1 to 2 minutes.
  5. Add the roasted vegetables, crushed tomatoes and 1 cup chicken stock. Season with salt and pepper and bring to a simmer. Let simmer for 15 minutes.
  6. Add the heavy cream and, using an immersion blender, puree the soup until uniform in texture.
  7. Add more chicken stock to adjust the consistency to how you like it.

You can find tons more strategies for meal-time planning in my first book, “The Good Life For Less!”  Grab our free weekly calendar printable for your menu planning needs!  What is your strategy for meal planning?

walmart_mom_disclaimer

Pin It

7 Easy Chalkboard Paint Crafts

Thursday, August 29th, 2013

Chalkboard_Paint_Crafts


The back-to-school season is in full swing and to honor that oh-so-wonderful time of year, I thought we could talk about fun chalkboard paint crafts today.

What could be more fun than chalkboard paint projects and what better time to tackle a project like this then when the kids return to school?


Before I begin, I must disclose that I am absolutely obsessed with chalkboard paint and chalkboard paint projects.

Don’t believe me?

Check out our outdoor chalkboard door, our chalkboard lunchbox station, our chalkboard pumpkin people,  our chalkboard cookie jars, even our homework stations are adorned with chalkboards.

I, basically, have chalkboard paint under my nails almost every day and I have even accidentally spray painted my feet a time or two with chalkboard spray paint.

Whoops!

It just goes to show that the possibilities are absolutely ENDLESS with chalkboard paint and how much fun these projects are.

Today I wanted to show you all of the fun DIY chalkboard paint projects you could try in your home with items that are cheap and easy to find.

Just doing this gathering of ideas is quite dangerous for me because I am already planning my next trip out there to do these fun projects!

You won’t believe how fun or how easy the projects are that we are featuring today!


Personalize a Mug

Plain white mugs can often be found inexpensively just about everywhere, but I am particularly in love with this chalkboard paint mug because it can also be a great way to cover up a mug that has a company logo on it.

I am madly in love with this adorable mug from Craft-Werk because it can be personalized to its recipient or even personalized just for yourself.

Check out the tutorial to find out how to create & cut your silhouette for your very own “moi mug.”  (@ Craft-Werk)


Organize Your Family

‘Tis the season for getting organized so why not do it with a magnetic chalkboard calendar that can be personalized just for your family.

To create this craft, head to your favorite second-hand store to find the perfect frame in the size you need for your wall.

Spray paint the frame a color to match your home and then, utilizing some cut-to-order sheet metal, create a surface to jot down all of your families activities.

Visit PSA Stamp Camp to find the tutorial for this magnetic chalkboard calendar. (@ PSA Stamp Camp)


Organize a Junk Drawer

One trip down the housewares aisle and I am sure you will spot many a jar that could use a good home.
Open one drawer in my home and you will quickly see that creating a chalkboard jar organization system would be a lot better than the exploding drawers that are currently residing in my office.
I love this fun and easy chalkboard mason jar storage from It All Started With Paint.
Have no fear if you only find yourself with jars and no lids.
Lids and bands can be purchased separately at just about any superstore that sells canning supplies  (@ It All Started With Paint)

Create a Chalkboard Labeled Cabinet

There are so many places that are a wonderful resource for gently-loved furniture and just about any piece could be transformed into useful and organized storage with the addition of a little chalkboard paint.

I love the functionality of this beautiful chalkboard-painted piece featured on homelife for one clear reason…it showcases the beauty of chalkboard paint in other colors.
Don’t feel like you have to be limited to just the black chalkboard paint.
This piece is not only eye-catching, but it also offers smart functionality for kitchen storage.

Personalize Your Stemware

Anything to prevent ending up with the wrong glass at parties is a win for me and I have fallen in love with this idea to add a chalkboard stem to a wine glass from Always Order Dessert.
If you head to your local thrift store you will find a lot of beautiful stemware that just might not match together.
Adding a chalkboard stem to each wine glass adds a little cohesiveness to a mismatched set and makes for a fun addition to your entertaining supplies. (@ Always Order Dessert)

Make Dining Fun Again

Do you have a worn table in need of a face-lift?

Maybe you have spotted a table at a garage sales or Goodwill that could use a little personal touch to it?
Look no further than this amazing chalkboard table transformation for making dining as a family, fun again.
I love the idea of adding this touch to both dining tables or to craft tables.
Consider adding a thought-starter question to the table, adding the evening’s menu, or simply labeling the food that is laid out for the meal.
Check out this fun table makeover from design sponge for some inspiration for your thrift store purchase (@ design sponge)

Add Food Labels to the Buffet

Is a chalkboard table too big of a commitment?

No worries!
Consider visiting the housewares section for simple small frames instead and give them a new look with chalkboard paint.
Did you know that chalkboard paint can be applied to glass?
Using a little chalkboard spray paint, you can transform any frame at Goodwill into a mini chalkboard to add a label to your dishes at holiday or large gathering meals.
To make mismatched frames feel part of a set, spray paint them all in one color like this cheery yellow! (@ MomAdvice)

Have you tried any chalkboard paint projects in your home? Share your success stories here!


This post contains affiliate links


Don’t miss these other great ideas from MomAdvice.com:


DIY Chalkboard Cookie Jars


No-Sew Chair Cushions


How to Spray Paint Furniture


Meal Prep Ideas


Sign up for the MomAdvice newsletter


Pin It

Slow Cooker Honey Bourbon Chicken Wings

Tuesday, August 27th, 2013

Slow Cooker Honey Bourbon Chicken Wings from MomAdvice.com.With the Fall comes all of the game time festivities and today I wanted to share a slow cooker chicken wing recipe that you can enjoy at your next game day festivity. These Slow Cooker Honey Bourbon Chicken Wings are the perfect balance of sweet and spicy and are one of my favorite game time recipes I love to share with my family.

Walmart asked me to share a fun game time recipe with you and also would love to remind you that they are a one-stop-shop for all of your game time needs. The best part, of course, is that the will price match those competitor ads for you so you can get everything you need and the best deal on it while you are there. While you are there, I wanted to showcase one of my favorite game day recipes that I love to make for our family!

Slow Cooker Honey Bourbon Chicken Wings from MomAdvice.com.
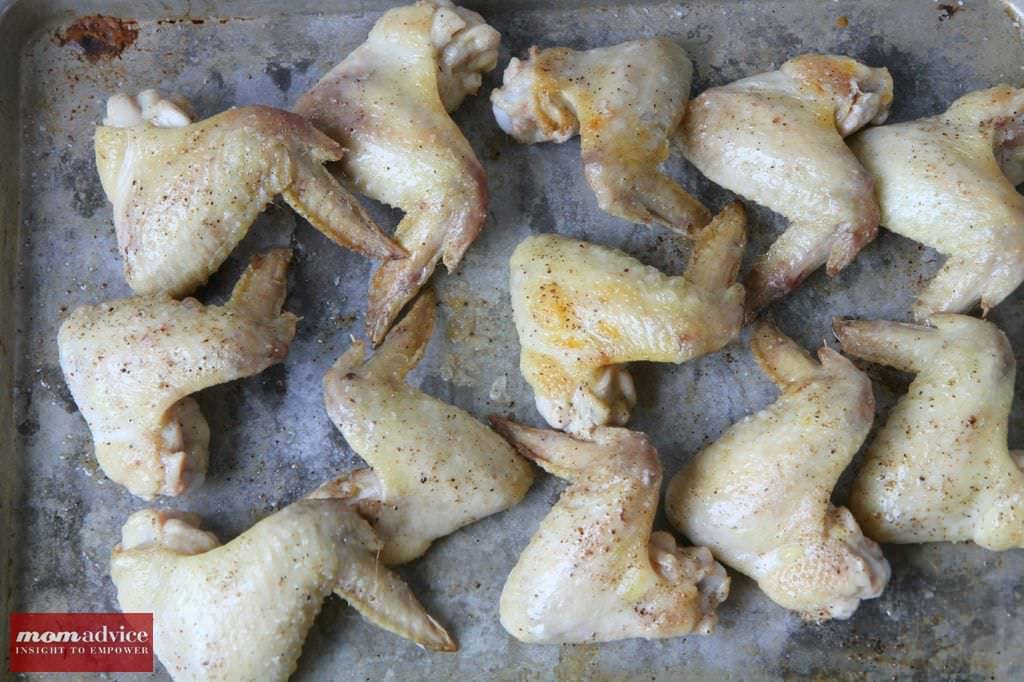
Making wings taste delicious in a slow cooker can be a challenge, but my trick is to season and broil my wings for ten minutes on each side to give it that beautiful color on the skin and to make sure that the wings start out well-seasoned before being slid into your slow cooker. I love that a lot of the fat renders out of the wings too while being broiled so it is a much healthier option than frying them.

Slow Cooker Honey Bourbon Chicken Wings from MomAdvice.com.
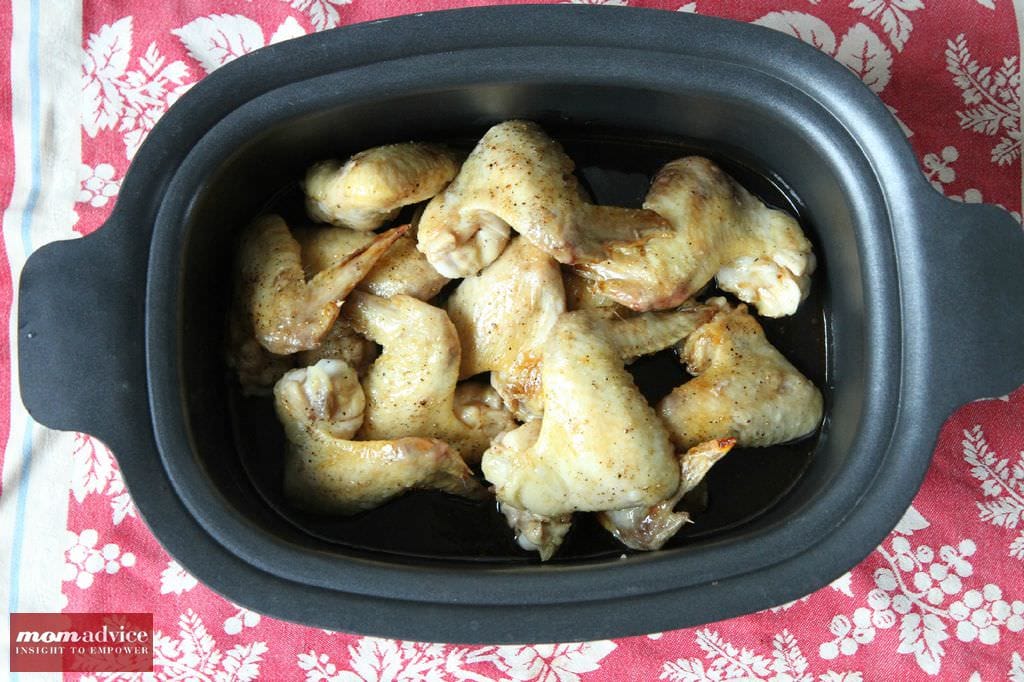
The secret is, of course, in the sauce that they are glazed in. My sauce has a mixture of soy sauce, teriyaki sauce, honey, garlic, and that bold and spicy Bourbon flavor comes from a new Sweet Baby Ray’s Kickin’ Bourbon Chicken Wing Glaze that you can find over in the condiment aisle of your store. The more of this you add to your sauce, the spicier it will be. This glaze will be thin, but will coat your wings beautifully.

Slow Cooker Honey Bourbon Chicken Wings from MomAdvice.com.
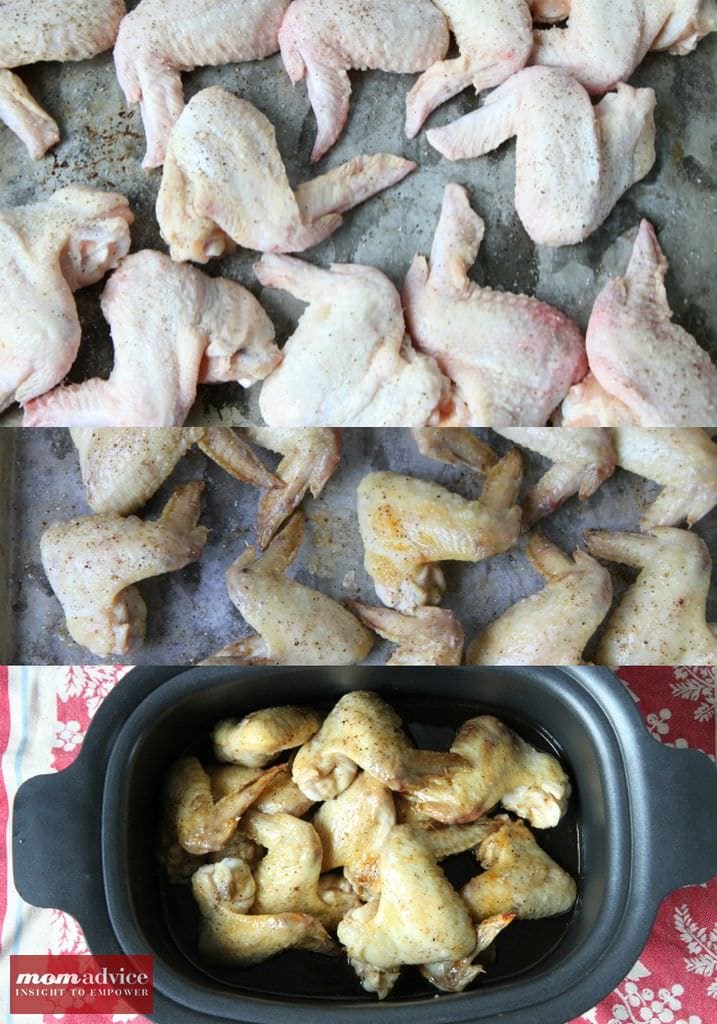
The slow cooker gets a little crowded with this many wings in there so I do the ultimate slow cooker no-no and open that lid up and shift them periodically. Thanks to broiling them beforehand though, these wings will be done in two hours on high or four hours on low!

Slow Cooker Honey Bourbon Chicken Wings from MomAdvice.com.

Slow Cooker Honey Bourbon Chicken Wings
Recipe Type: Appetizer
Author: Amy Allen Clark
Prep time:
Cook time:
Total time:
Serves: 6
These wings are the perfect balance of sweet and spicy. The best part though, is that they can be created right in your slow cooker for game day entertaining!
Ingredients
  • 4 pounds chicken wings
  • 1 cup honey
  • 1/4 cup soy sauce
  • 1/4 cup Teriyaki sauce
  • 1/4 cup Sweet Baby Ray’s Kickin’ Bourbon Wing Glaze
  • 1/8 cup olive oil
  • 1 clove garlic, minced
Instructions
  1. Season wings with salt & pepper. Place wings on a cookie sheet and broil for 10 minutes on each side.
  2. Transfer wings to the slow cooker.
  3. Combine all of the ingredients in a bowl or mason jar and mix well.
  4. Pour the sauce wings.
  5. Cook on high two hours or low for four hours.

Looking for more game day recipes? Check out this list of 12 Great Tailgating Delights! Looking for more slow cooker recipes? Don’t miss this One Month of Slow Cooking article with 30 recipe ideas for your family!

walmart_mom_disclaimer


Pin It

Greek Quinoa Salad

Monday, August 26th, 2013

Greek Quinoa Salad from MomAdvice.com.

Labor Day festivities are just around the corner and with that comes the fun with grilling out and sharing dishes with friends. Today I wanted to share a delicious Greek Quinoa Salad that can be made with many of the veggies lurking in that backyard garden and that easily pairs with a few items you just might have in your pantry.

Walmart challenged me to create a unique dish for Labor Day and I couldn’t wait to share this one. You see, I have been going through a bit of an identity crisis since my visit with my allergist. I was advised to limit my pasta intake and it has been a hard sacrifice for me because I happen to love my pasta…and, sadly, my pasta salads are my claim to fame in the cookout world.

I’m thankful that I discovered quinoa last year because it has helped me so much with my pasta hurdle. I hope you caught my Mexican Quinoa Stuffed Bell Peppers I made last week and that handy tutorial for preparing your quinoa in the rice cooker! I have been continuing to experiment with this delicious and protein-packed ingredient for my summer cooking and couldn’t wait to pair it with some of my favorite Greek flavors. This quinoa salad proves that there are certainly some fun ways around that pasta hurdle and I doubt you will even miss your pasta after you try this!

Greek Quinoa Salad from MomAdvice.com.

The most labor-intensive part of this recipe (no pun intended!) is the chopping. It is an awful lot of chopping, but the flavors are so worth it. This Greek Quinoa Salad is filled with fresh vegetables like cucumbers, tomatoes, red peppers, and fresh parsley. The salty bites come from the Greek olives and the bites of feta cheese (optional, should you be dairy-free). The whole salad is tied together with a delicious red wine vinaigrette made even more flavorful the longer that it sits.

Greek Quinoa Salad from MomAdvice.com.
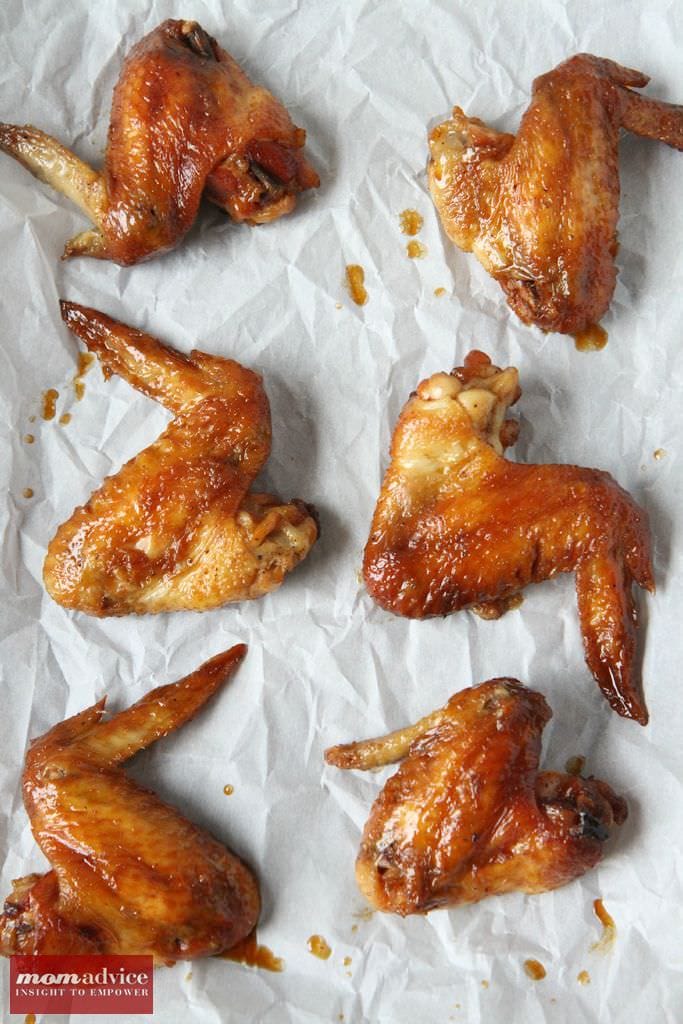
This is one of those recipes that you can customize depending on what you have growing in your garden or what is on sale that week in your store. If you are shopping Walmart, be sure to bring the competing store fliers in and have them price match those produce prices for you!

I hope you enjoy this recipe and I hope it can be your very own, “claim to fame,” at your next cookout! Happy Labor Day, friends! Greek Quinoa Salad from MomAdvice.com.


Greek Quinoa Salad
Recipe Type: Side
Author: Adapted From Bobby Flay Fit
Prep time:
Cook time:
Total time:
Serves: 4
This Greek Quinoa Salad has all the right flavors, colors, and textures with a light vinaigrette dressing to round it all out.
Ingredients
  • 1 lemon, zest and juice
  • 1 tablespoon red wine vinegar
  • 1/4 teaspoon dried oregano
  • 1 clove garlic, smashed and finely chopped to a paste
  • 1/4 cup extra-virgin olive oil
  • 1 cup vegetable or chicken broth
  • 1 cup quinoa
  • Kosher salt and pepper
  • 2 cups red and yellow grape tomatoes, halved
  • 1 cup pitted Greek olives
  • 1 red bell pepper, diced
  • 1/2 cucumber, diced and seeds removed
  • Feta for sprinkling on salad (optional)
Instructions
  1. In a bowl whisk together the lemon juice, vinegar, oregano, garlic, salt, pepper, and zest from one lemon. Slowly whisk in the oil until emulsified. Let sit at room temperature while you prepare the salad to allow the flavors to meld.
  2. Rinse the quinoa in a strainer until the water runs clear.
  3. Prepare quinoa as directed above in a rice cooker or according to package directions.
  4. Transfer the cooked quinoa into a bowl, fluff with a fork and let sit for 5 minutes to cool slightly.
  5. Add the tomatoes, olives, chopped red bell pepper, chopped cucumbers and dressing and toss to coat.
  6. Cover and refrigerate for at least 1 hour and up to 8 hours before serving. The longer it sits the better the flavor.
  7. Just before serving, transfer to a platter and sprinkle feta on top.
Adapted from Bobby Flay Fit

Looking for more fun cookout dishes? Be sure to check out the Best Steak Marinade in Existence, my Corn Grilled in the Husks, my Three Cheese Grilled Potatoes, and my delicious Grilled Portobello Burgers to tempt your tummy!


walmart_mom_disclaimer

Pin It

Late Night Entertaining With JACK’S Pizza

Thursday, August 22nd, 2013

What a fun summer this has been working with JACK’S Pizza and getting to share some tips on great outdoor entertaining. If you have missed my first two posts, I would love for you to check them out as I have covered everything from the basics of outdoor entertaining  to rethinking your outdoor entertaining altogether.

While you are out browsing, be sure to check out the JACK’S Facebook Page or JacksGrilling.com for some fun strategies for outdoor entertaining. You will love their great grilling tutorial and just how easy it is to grill out back with JACK’S Pizza.

Speaking of outdoor entertaining, do you ever do any late night entertaining? We love to spend the later hours in the summer out on our patio with friends. With that in mind, this month, I wanted to share with you some easy tips for making late night entertaining fun for the whole family.

Late Night Entertaining With JACK'S Pizza

Add A Little Sparkle to Your Patio

It is always nice when you can have friends over in the evening and not have to sit in the dark. Consider adorning your patio or deck with inexpensive twinkle lights to extend the hours of your outdoor entertaining. Just two strands of twinkle lights brightened our entire patio and allowed us to entertain for longer hours outside.

With the patio lit for the adults, have kids capture their own twinkle lights by providing good old-fashioned mason jars with perforated lids (so the bugs can breathe!) to catch fireflies in the evening hours. Encourage the kids to have a contest to see who can capture the most twinkles in the jar. Just make sure to have the kids set their new friends free before bedtime!

Add Glow-In-The-Dark Fun

If there is one thing my kids love in the summer months, it is getting the chance to stay up late and play outside with their friends. You can purchase glow-in-the-dark bracelets and glow sticks at your local dollar store that kids can use to play with as the sun goes down.

A Little Something Sweet

Who doesn’t want something sweet after dinner? S’mores are a fun treat to indulge in no matter what hour of the night and a s’mores bar is a fantastic way to spend an evening with friends.

Try a new spin on entertaining with s’mores and prepare them on the gas grill for speedy and delicious results. Set up your gas grill for indirect cooking over medium heat.  Simply put eight graham-cracker halves on a piece of aluminum foil and place on the cooler side of the gas grill. Top 4 graham-cracker halves with chocolate and the other four halves with marshmallows. Cover your ga grill and cook until chocolate melts and marshmallows soften. This should take a mere 3 to 5 minutes.

Leave the halves open and allow everyone to add their own fun additions to make their own favorite s’more combination. By doing them on the gas grill, there is no need to tend a fire or worry about kids around it, and it gives you a chance to make a large batch at once.

Late Night Entertaining With JACK'S Pizza

And A Little Something Savory

While your gas grill is nice and hot from all of your s’more making, consider grilling up some JACK’S Pizza for any guests who could not make dinner. Did you know that you can grill JACK’S Pizza on your gas grill? To learn more about this easy grilling technique just head to JacksGrilling.com to find out how. The  “JACK’S Summer Grilling” cooking directions explain how to cook up the same great tasting, crispy-crust JACK’S Original Pizza on the gas grill that the family has come to love from the oven. Consider preparing a few of these delicious pizzas for those late-night guests and enjoy the savings and convenience of affordable pizza at home while you enjoy the company of friends and family.

It has been such a pleasure sharing information about JACK’S Pizza with you and to get to work with this fantastic company this summer, sharing tips and strategies for outdoor entertaining. I am so thankful I had the opportunity to work with them and to share my experience with my readers. I hope you have enjoyed it as much as me!

For more information about how to enjoy JACK’S Pizza on the gas grill visit JacksGrilling.com


As a spokesperson for the JACK’S Summer Grilling program, I’ve received product samples and compensation for my time and effort in creating this post. All thoughts and opinions are my own.

Pin It

DIY Homework Study Station

Thursday, August 15th, 2013

DIY Homework Study Station from MomAdvice.com.

Back-to-School time is almost here for my crew and today I wanted to show you an easy DIY Homework Station you can create for a fun, focused, and quiet little spot you can create for your homework time. This Tri-Fold Homework Station idea was something that I came up with to do for the back-to-school season with Walmart. Each month they give me a fun craft challenge and I couldn’t wait to create these for my kids.

DIY Homework Study Station from MomAdvice.com.
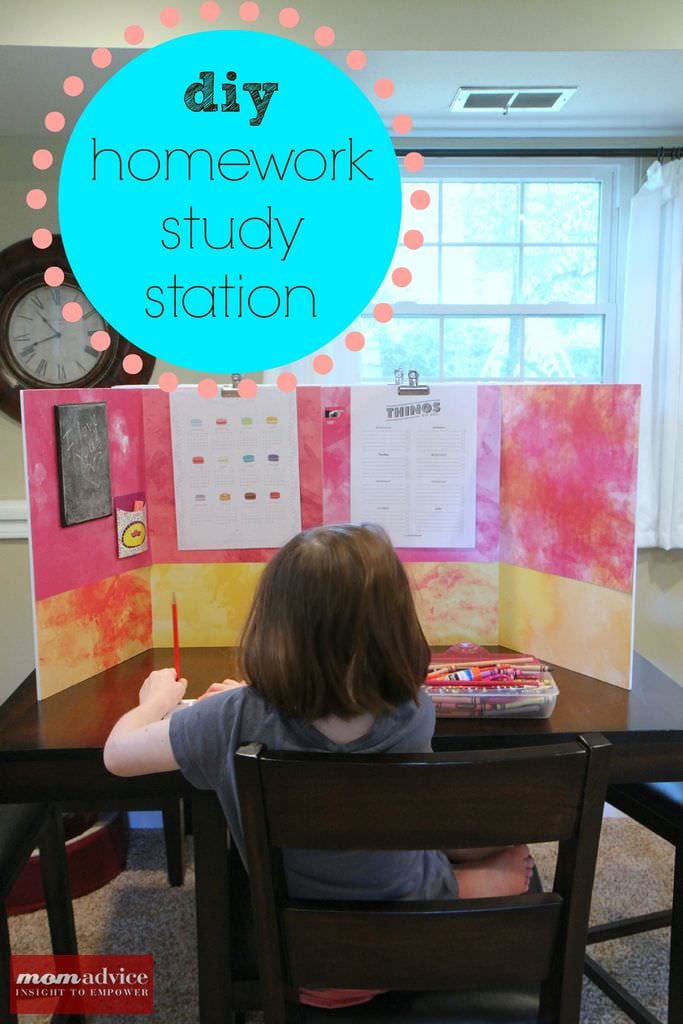
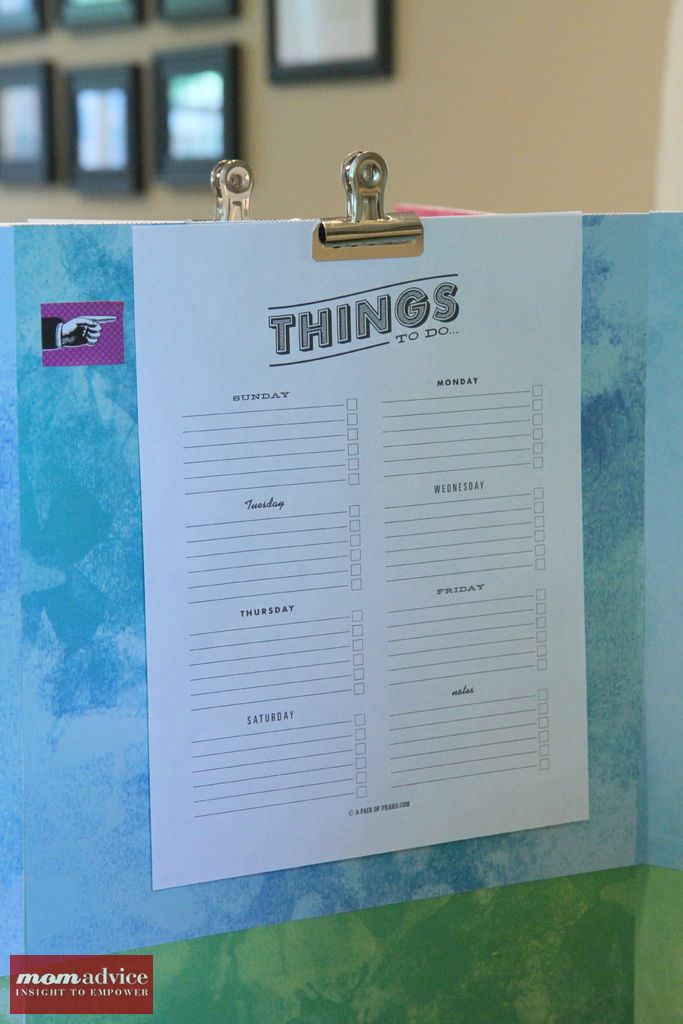
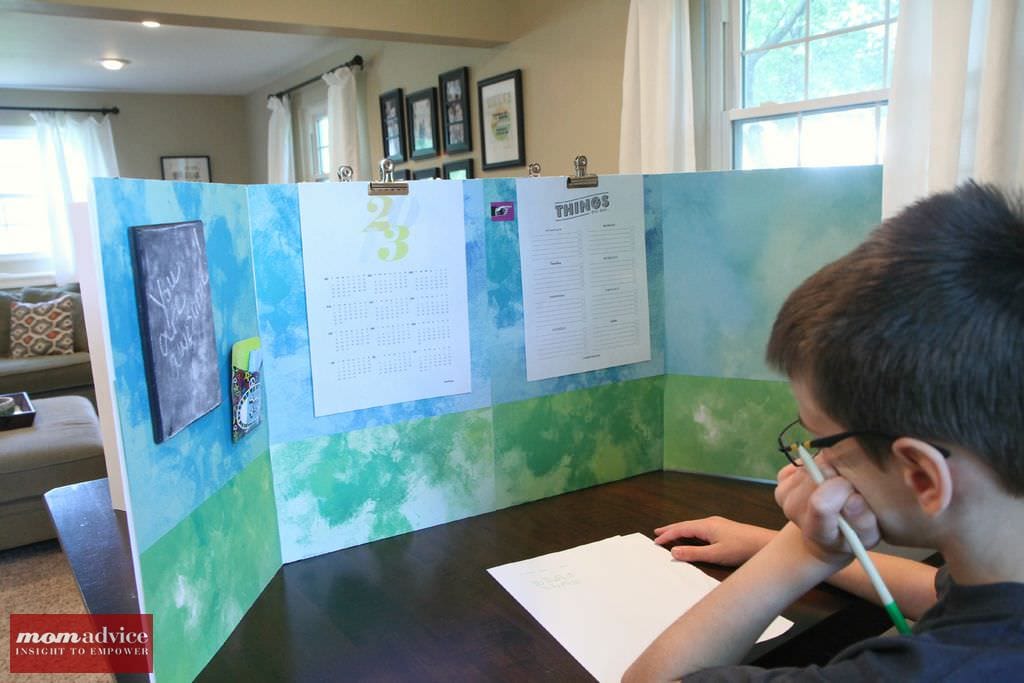
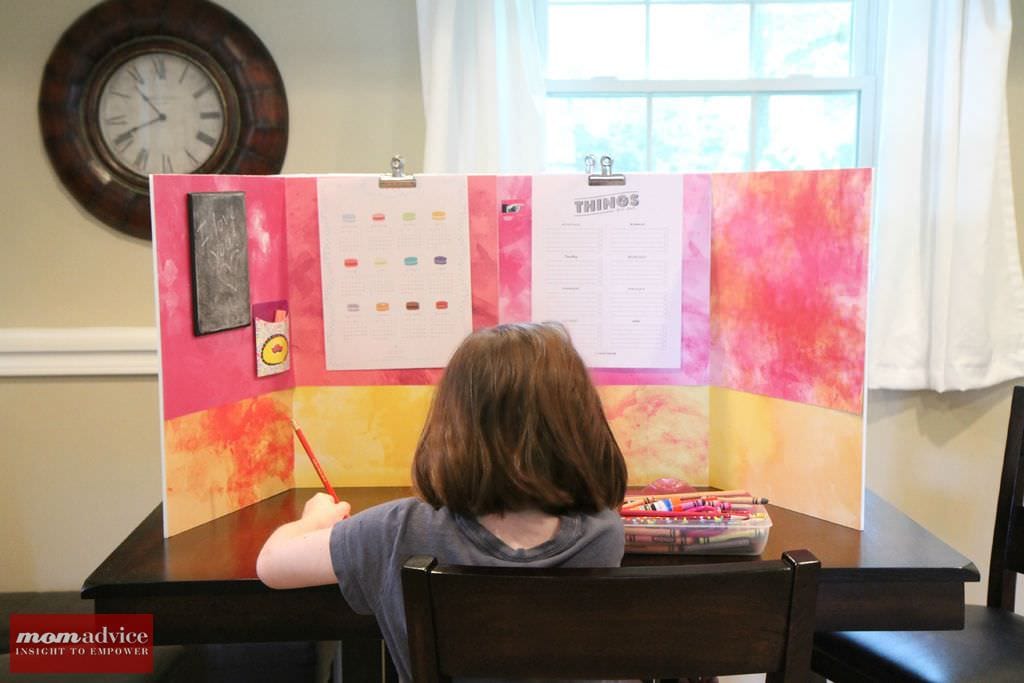
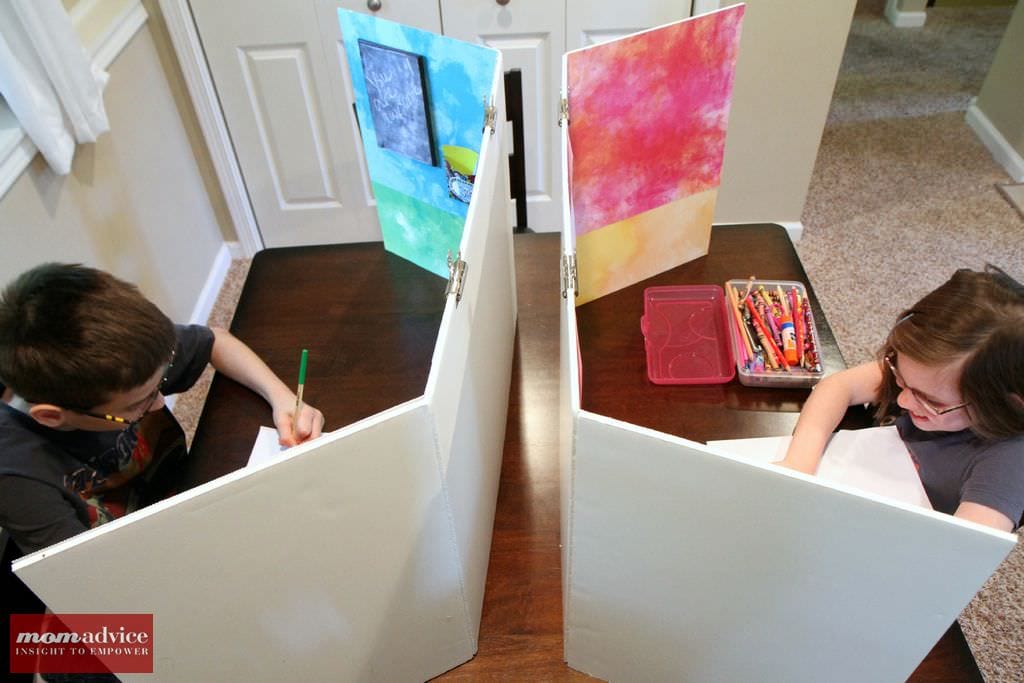
These homework stations are perfect for small space living. Two kids at one table, but each having a place to call their own, so they can focus on their own coursework.  The best part is that these can fold flat and be stored elsewhere when not in use! I can’t wait to show you just how easy it is to create these for your kids!
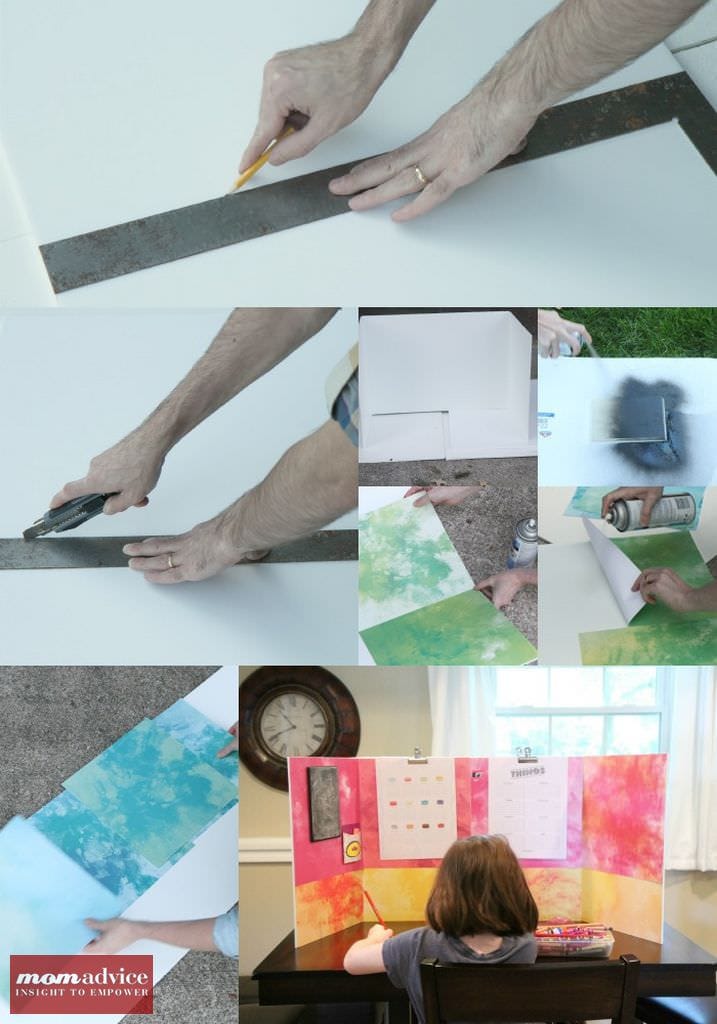
DIY Homework Study Station from MomAdvice.com.

Supplies List

1- tri-fold foam display board (this will make two homework stations for you)

Razor Blade

General  Purpose Spray Adhesive

Chalkboard Spray Paint (over in the paint aisle)

Rectangle Wooden Plaques (one or two depending on how many stations you are creating)

Decorative envelope(s) and stickers

Binder Clips (we did two for each one)

Scrapbook Paper in coordinating colors (8 sheets total per homework station. The type of paper we are using is their Watercolor Paper that they offer for $5 for the pack)

Hot glue & glue gun

DIY Homework Study Station from MomAdvice.com.Directions

1. Begin by measuring and marking the halfway point for your tri-fold display board. The display board is 48″ total, so you will want to cut it so that each side is 24″ long.

2. Cut the display board with a utility knife, making sure to cut carefully through all of the layers.

3. Spray paint your wooden plaques to create your chalkboards for your homework station.  Make sure to shake the can really well, as instructed on the back of the can. Hold your can 8 inches away from your surface and spray in a sweeping motion side to side with a slight overlap. It has always been my experience to go thin with the paint, allow it to dry, and then to add another layer for the best results and minimal drip. Allow the paint to dry for one hour.

DIY Homework Study Station from MomAdvice.com.

5. While the frames are drying, pick out eight sheets of scrapbook paper and set them up for where you would like to display them. Set them aside and, beginning with one side, line the bottom sheets up and, holding them in place with your hands, flip them up to add a little spray adhesive to the underside. Do this all along the bottom of your display board.

6.  Now do the same process again on the top, making sure that they line up with each other and with the top edge of the display board.

7. Once your chalkboards have dried, use your hot glue gun to mount it to your display. Attach an envelope next to it with chalk. Make sure to give your chalkboard 24 hours to cure before writing on it and prepare your chalkboards as I have show in this handy tutorial.

8. Add any stickers or decorations you might like to your homework station or let your kids decorate it themselves.

DIY_Homework_Study_Station_8 9. Clip your binder clips to the top of your display and then add any printables, thoughtful motivational quotes, calendars, etc… to the homework station.

Here are some free printables that I found that I really love:

Weekly To-Do List (A Pair of Pears)

Macaron Calendar (from Jolie Jolie Designs)

Modern Calendar (from LAUs NOTEbook)

If you are looking for more, be sure to check my Printable Goodness Pinterest Board for more ideas.

DIY Homework Study Station from MomAdvice.com.

DIY Homework Study Station from MomAdvice.com.

Good luck to everyone heading back to school! I hope this homework station inspires a fun new homework hangout for your kiddos!  I look forward to showcasing more fun back-to-school ideas to inspire your life this year!

walmart_mom_disclaimer

Pin It

Mexican Quinoa Stuffed Bell Peppers

Wednesday, August 14th, 2013

Mexican Quinoa Stuffed Bell Peppers

Looking for an easy recipe that is gluten-free, dairy-free, and vegan? Look no further than these Mexican Quinoa Stuffed Bell Peppers for a fun weeknight meal. You will love these bell peppers for a meatless dish that is packed with protein and very filling with just the right balance of sweetness, from the peppers, and spice from the enchilada sauce,  in this recipe.

Walmart challenged me to come up with a gluten-free dish made from their grocery aisles of ingredients. Quinoa may sound like an ingredient that you can’t find at your store, but Walmart not only sells quinoa, but they now sell a couple of varieties of quinoa on their store shelves. No need to run to a specialty market to find this ingredient anymore!

Mexican Quinoa Stuffed Bell Peppers

If you haven’t bought or prepared quinoa before, then be sure to check out my tutorial on preparing quinoa in an inexpensive rice cooker or on your stove-top. If you decide you love it as much as I do, a rice cooker makes making batches of quinoa for recipes simple.

You will find quinoa over in the rice aisle right at the top. I took a picture in our aisle to help you locate it.

Mexican Quinoa Stuffed Bell Peppers

To make these extra special, I mixed up a batch of my favorite homemade enchilda sauce for these to swim in. I love to make my own sauce because it gives me control over the amount of salt and spice in my dish. You can certainly use a jarred gluten-free enchilda sauce though If you are wanting to keep this gluten-free, be sure to read the back of the tomato sauce label or enchilada sauce label’s ingredients thoroughly before purchasing or eating. 

Unfortunately, Walmart doesn’t offer a lot of dairy-free cheese options (yet!), but you could definitely make these without cheese or head to a specialty market to pick up my favorite dairy-free shreds, Daiya Pepperjack Shreds, for an extra kick. I have been dairy-free for a year now and those happen to be my personal favorite. These peppers really don’t need the cheese though, thanks to the flavorful sauce on the bottom!

Mexican Quinoa Stuffed Bell Peppers

These peppers get a double protein punch thanks to the quinoa and the black beans in this recipe.  Roma tomatoes add a little tomato flavor and the green chilies add a little kick to to the dish. Sprinkled with a little fresh cilantro and a saucy bottom, I promise you won’t miss the meat or cheese or gluten at all!

I prepared mine with red peppers because I love their sweetness, but you can do this same preparation with any variety of pepper you love!

I hope you love these as much as me and I hope you won’t judge that I made a 9×13″ dish just for myself.

Because it is HARD being dairy-free so I have to treat myself all the time…and I do all.the.time.

You know, to get through it.

Mexican Quinoa Stuffed Bell Peppers
Recipe Type: Main
Cuisine: Mexican
Prep time:
Cook time:
Total time:
Serves: 5
A gluten-free, dairy-free, & vegan Mexican-inspired quinoa stuffed pepper that is delicious, filling, and protein-packed.
Ingredients
  • 5 bell peppers (any color), sliced in half stem-to-tip, seeds removed
  • 1c quinoa, uncooked
  • 2 cups water or vegetable broth
  • 1 (15oz) can black beans, drained and rinsed
  • 1 small tomato, seeded and diced
  • 1 (4oz) can diced green chiles, undrained
  • Handful of chopped cilantro
  • 1/2 teaspoon salt
  • Pepper, to taste
  • 1/2-1 cup dairy-free shreds (optional)
  • 28-ounce jar of enchilada sauce (or a double batch of my homemade version, linked above)
Instructions
  1. Prepare quinoa as instructed on the box or using the method linked above for cooking in your choice of vegetable broth or water.
  2. Prepare enchilada sauce recipe (linked to above) or omit this step if using prepared enchilada sauce.
  3. Slice the peppers in half and remove the seeds. Microwave pepper halves 3-4 minutes to soften slightly.
  4. Once quinoa is cooked, add it to a mixing bowl. Stir in the rinsed black beans, tomato, green chiles and their juices, cilantro, salt and pepper (to taste).
  5. Pour enchilada sauce into a 9×13″ baking dish.
  6. Fill the peppers with the filling and then rest them in the enchilada sauce. Sprinkle with cheese if desired.
  7. Cover the pan with foil and bake at 375 degrees 30 minutes.. Remove foil and cook about 5 minutes longer. If cheese isn’t melted still, turn broiler on high and cook for an additional 2 minutes.
  8. Serve peppers drizzled with enchilada sauce.
Recipe Adapted from One Lovely Life.


walmart_mom_disclaimer

Pin It