
Looking for a fun craft project that is perfect for Valentine’s Day? With tiny nails, embroidery floss, and our free heart pattern, you have everything you need for your first string art project. Learn how to make your own heart shapes with this easy diy project for yourself (or for your kids).
From our contributor, Sarah Milne
I LOVE gallery walls.
We have a few areas of our home that are littered with frames filled with art and photos, kid art, faux taxidermy and monograms.
I enjoy crafting items to include on the wall to add texture and uniqueness.
We had a vacant angled wall on our landing that I’ve always wanted to do something with since we moved in.
As I collected items, frames, and art for the gallery, I also crafted a few small projects to display.
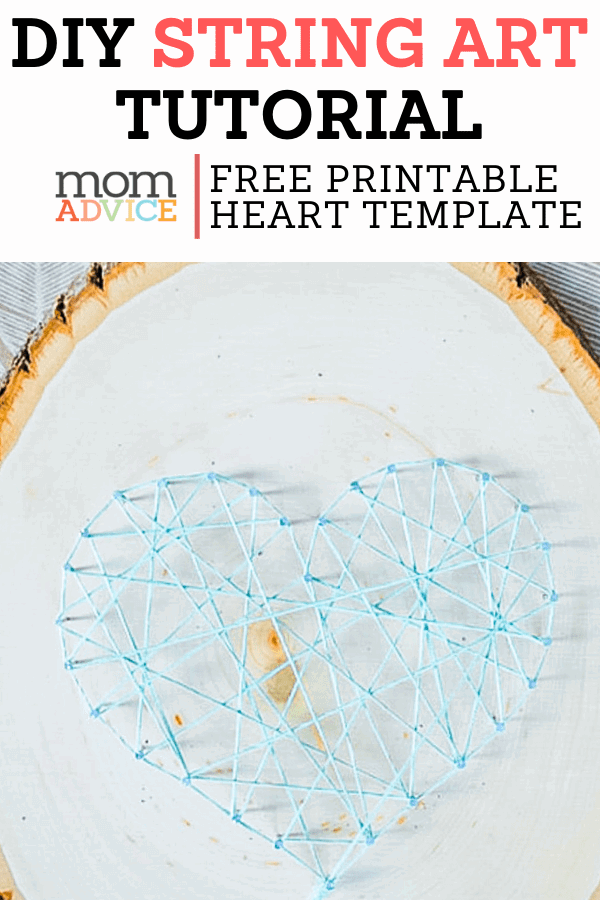
On this gallery wall, I crafted the dream catcher (check out this dream catcher tutorial), chalkboard tag, and heart string art on wood.


This simple DIY heart string art on wood project is perfect for a crafternoon while baby sleeps, or an evening of indulging in creative me-time.
And, the end result is beautiful and gratifying, considering it’s quite an inexpensive project.
DIY String Art Pattern (Free Heart Template)


Supplies:
How To Make Your Heart String Art:
- Begin your project by printing this free printable heart template. The heart is already conveniently marked for the positioning of your nails.
- Place your heart template on your wood log slice. You can tape the template down for security.
- On a solid surface, hammer the top and bottom nails in to keep your template from shifting. Hammer each nail into the log slice, about halfway, leaving enough space for you to wrap your thread.
- Hammer all of your nails along the heart’s border. Remove paper template.
- Tie a knot of your thread at the bottom nail head. Begin to randomly strand your tread to the nail heads, looping the thread around once. It’s important to keep tension on your thread the entire time to avoid the thread slipping or unraveling from your nails.
- Once you have your thread stranded over the entire heart, try to loop the end of your design at the same beginning point. Tie a knot to secure. Trim thread. I added a simple picture hanger to the back of my wood log slice for hanging.
download the free heart string art template


As an Amazon Associate I earn from qualifying purchases.
Love this string art tutorial? Here are a few other great craft projects we think you will like!
Happy crafting, friends!
Pin It