Revealed: 30 Day Cut the Clutter Challenge Results

April 19th, 2011

Last month I decided to challenge myself to cut the clutter in our home over the course of thirty days. My house and my life has been feeling chaotic these days and I knew that a thirty day challenge is just what I needed to get back to the roots of the organization in my home. If you have been a long time reader, you may remember the results from my clutter challenge last year. I am finding by making this clutter challenge a yearly one that it helps bring me back to center again in my home.

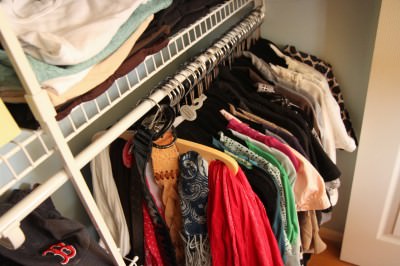
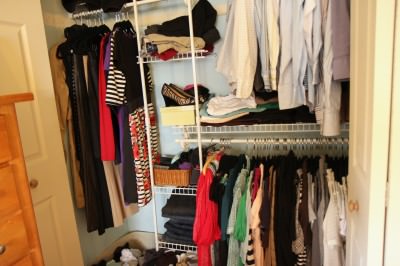
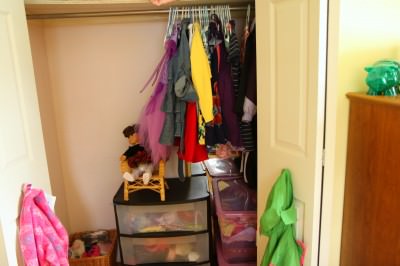
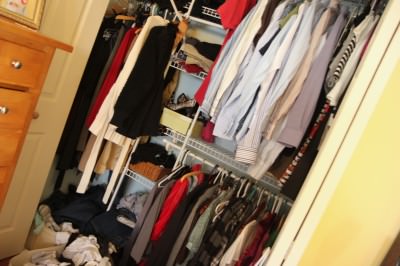
The closet, pictured above, is representative of what my home has been looking like. The bones of organization are there, but they are hiding amidst the overflowing drawers, shelves, and cupboards of endless amounts of unnecessary items. I planned to get rid of four car loads of items from my home and challenged myself to a weekly stop at Goodwill.
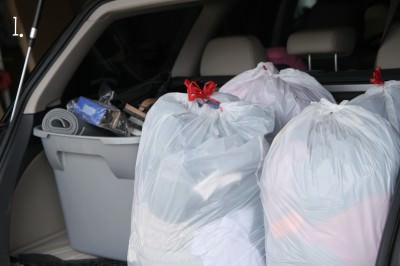
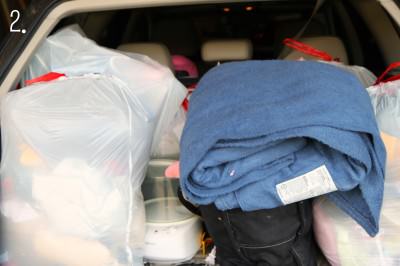
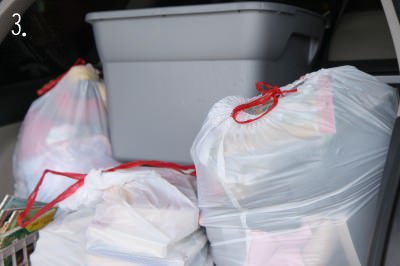
Pictured here are my first three drops to Goodwill. I have another round of items leftover from our home renovation to take over to the ReStore that are currently sitting in my garage. Once our weather finally warms up, my husband & I have a Saturday date planned with our cluttered garage.  All in all, I removed FIFTEEN garbage bags and three totes of random uselessness from our home. In these bags you would find books that we will never read, toys that the children have outgrown, clothing that is too small, a bazillion plastic containers that I do not need, bedding & blankets that are never used, shoes, & items from household projects that have been abandoned.

Can I say,  I was not sad to see any of these items leave our home?

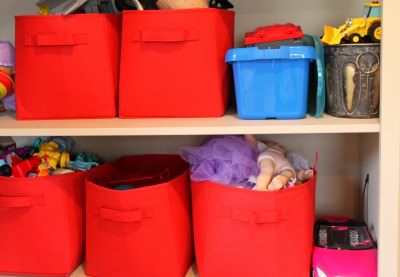
Maybe when you see some of the corners of my home now, you will know why!

There is still much more clutter to be conquered in our home, but these corners that I have worked on really have me reassured that having our home organized is an attainable goal. If I was going to offer any advice on tackling the clutter in  your home, I would say this:

Start Small…Really Small- When I would survey my house as a whole, I could immediately become defeated. There is so much to do and my to-do list on any given day is enormous. Adding on trying to organize my house to the list and it just did not even seem like a feasible goal. Instead, start with one small spot in your home that has been bothering you. It could be as small as the kid’s bath toys, a junk drawer that could give under its weight of uselessness, or simply a single shelf in your home office.  I found that once I began a junk drawer, for example, I would then start moving into the drawer below it, and then I would move to the next drawer. Most of the time it is just getting the momentum to climb that cluttered hill that holds us back from achieving a little organization that is the hardest part.

You Don’t Need Another Basket, But You Might Need Another Donation Bag- I remember when I first began organizing my home, I considered home organization to be about buying organizers, storage containers, and pretty baskets to house everything. All of a sudden my home was filled with a dozen baskets of items I didn’t need or never used. Instead of thinking of how to make the items you have more attractive, consider if you really need the items themselves. If you don’t really and truly love or use them, get rid of them!

Sentimentality & “This Was So Expensive” Has To Be Set Aside– Two things get in the way of me letting the items go in my home. The first is the sentimental feelings that I have about things in our house. Usually it is a gift, an item that was special to my children when they were small, or something that was special to me that I would like to push my children into also loving. The other thing that gets in the way is my, “This Was So Expensive,” feeling about items that we spent too much money on, but no longer have love for.  If I could get rid of these two feelings about things, I could almost gather another car load of items. Instead, I have dedicated one tote in our basement that is specifically for sentimental mementos and we are working on passing on the gadgets in our life that we don’t use on to others that can use them.

Your feelings about items might be different than mine and it may take some time to figure out what holds you back from letting things go in your life. When you feel an attachment to an item, try to address where that attachment is coming from and if there is a way that you can manage those attachments to achieve the space you desire.

Embrace Your Power to Live Small- The more I cut the clutter in my home, the more I find that I have just the amount of space that I need in my home. When my closets began to feel too small, when the cupboards are bursting at the seams, when the basement is overflowing…those are the times when I think how nice it would be to move to a bigger home. Each time I cut the clutter in those spaces, I rediscover how perfect our home is for us. Basically, I save myself from a heftier mortgage payment AND I find a renewed sense of commitment to stay right where we are.

Our story of giving things away didn’t end there though, in fact, this is a story about the coolest thing that I have ever gotten to give away.  My husband had his ’99 Ford Focus for almost eight years and it was very good to us over the years. For the last five years though, he had been price researching his dream car and dreaming of the day that he could own a Lexus.  At the end of this month, his dream car dropped below the price of my Subaru wagon and with some serious negotiating and a couple of hours in the hot seat at the dealership, he drove that car home.

We talked a lot about what we wanted to do with our Ford Focus. While we could have gotten a little money to trade it in, we knew we could make my brother’s whole year if we gave him our old car. That very day we bought our new car, his car began to leak gas and he had no idea how he was going to get around. Later that afternoon I called to tell him that we had a birthday present for him.

I felt a little like Oprah handing over those keys.

He told me he felt like he won the lottery.

We both couldn’t stop grinning.

I don’t say this to brag, but to showcase how wonderful it can be to pass on the things we have in our lives to others. No matter how much or how little you have, you can always give with your whole heart. Look for creative ways to give back to your community, pass the items on that you no longer use to someone in need, use your talents to bless someone else in your life, and live a life of great thankfulness for all that you have.
If you have taken the clutter challenge, feel free to link up below and share some of the spots in your home that have been transformed or what you plan to work on this month. I can’t wait to see your projects and hear what you have learned from this experience!

An Apron Full of Giveaways 04.19.11

April 19th, 2011

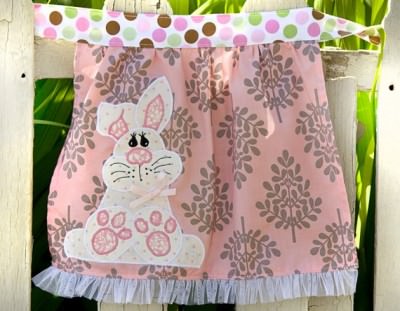
kandykissesboutique, $25

Welcome to our Apron Full of Giveaways! I hope everyone is having a great week this week! As we do each week,  here is our round-up of giveaways for our readers. We hope that this is beneficial to you and your family! Please let us know if you guys win anything- I love to hear the success stories!

Below are the contest links-if you are hosting a contest please link it up below. Sorry, we aren’t giving away the aprons just showcasing them! Please put your site name and then what type of contest you are hosting. For example, “MomAdvice (Kid’s Movies).”

Please let me know if you have any questions and good luck to each of you!

Cracker Barrel Grilled Chicken Tenders

April 18th, 2011

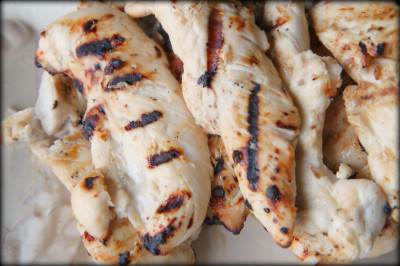
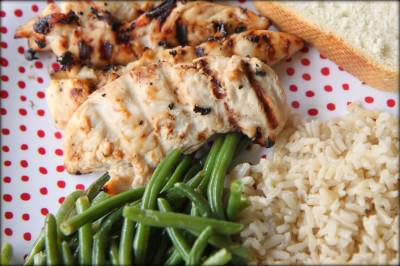
My kids can’t seem to get enough of my Crispy Baked Chicken Tenders, but there are those busy weeknights when breading and baking chicken is just not in the cards. Luckily, a few months ago I stumbled upon this fun recipe for grilled chicken tenders that my kids love just as much, but can be created in a few minutes of easy preparation time. We have been eating these about once a week ever since we tried this recipe and it is a hit every single time.

This is a knock-off recipe of Cracker Barrel’s grilled chicken tenders. I will admit though that I have never actually tried Cracker Barrel’s grilled chicken anything. If I spend the money to go out to dinner there it is fully spent on chicken & dumplings, fried okra, biscuits, and everything else breaded and delicious. If these tenders taste anything like what they serve in the restaurant though, I know that they would be a fun alternative to plates of fried foods.

Made from ingredients that are likely already in your refrigerator and pantry right now, these simple ingredients are exceptionally delicious and create a flavorful & juicy chicken tender that you will absolutely love. This recipe yields a pound’s worth of tenders. I triple the batch for salad topping and grilled chicken wraps that make easy weekday lunches or a busy weeknight dinner. My problem is getting the family to stop eating them so we have some leftovers on hand. I hope you will enjoy these as much as we have!

Cracker Barrel Grilled Chicken Tenders (adapted from Food.com)

1 lb chicken tenders
1/2 cup Italian dressing
1 teaspoon fresh lime juice
1 tablespoon honey
Mix dressing, lime juice and honey. Pour over chicken tenders. Marinate for 3-4 hours.  Cook tenders in a non stick pan or grill until golden in color, but not dry (approximately four minutes on each side depending on the size of your tenders). Base occasionally as you are grilling these to retain the moisture in the tenderloin.

Try this same technique with Yummy Honey Chicken, Zesty Chicken, or Rosemary Ranch Chicken for a quick weeknight dinner!

Amy’s Notebook 04.13.11

April 13th, 2011

I must make this knitting needle clock for my office! (@ Naughty Secretary Club)

I am going to have to make these Butterbeer Cupcakes to go along with our nightly Harry Potter readings (@ amy bites)

These roasted strawberries look like a fantastic topper to ice cream or yogurt (@ shutterbean)

Boston Creme Cupcakes sound like a fun new way to enjoy my favorite donut flavor (@ The Gourmand Mom)

This pinwheel garland would be a fun way to decorate for Spring (@ Peppermint Plum)

Red velvet crepes look like a fun treat to make (@ duhlicious)

Who knew you could make hard boiled eggs in your slow cooker? (@ the paupered chef)

I am madly in love with this camp-out birthday party theme (@ Hostess with the Mostess)

These homemade black bean burgers look like a delicious lunch (@ angry chicken)

This spaghetti frittata looks like a great way to use up leftover noodles (@ $5 Dinners)

These basic cinnamon rolls look like a fun breakfast treat (@ Food For My Family)

This secret message in an egg is so creative! (@ Poppytalk)

I want to try a batch of these cake cookies with sprinkles (@ V and Co.)

Nutella in coffee? That sounds like heaven! (@ brewed daily)

This salted caramel ice cream is my excuse to purchase an ice cream maker (@ brown eyed baker)

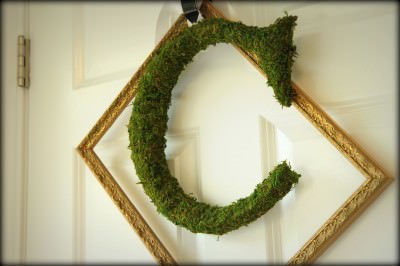
This week I made the cute knock-off Pottery Barn moss covered letter that was featured in our notebook (circa 03.16.11 entry) and on the blog, “Be Sweet.”  I absolutely love it and want to hit the craft store to get a larger letter to hang on our front door. This one is decorating a pantry door and I hung it in front of a broken frame I found in my basement on an angle. I plan to spray paint the frame black, but happened to be covering letters and marbleizing eggs at the same time. Who says this mama can’t multitask?

Proving that I can mess up just about any craft, I hot glued my finger to the “C” because the moss was a bit more aerated than I realized.  My husband says I am an “XXTREME HOT GLUE GUNNER.” He also makes an X in front of his face when he says this to me.  I blame the glue gun. Regardless, super cute project that cost $11 to create!

Have you tried anything from our featured notebook entries? We would love to hear what projects you tried and how they worked out for your family!

Crafting Fun: Marbleized Easter Eggs

April 12th, 2011

One of our favorite Easter activities is decorating Easter eggs. Every year we try to do something new with our eggs. The first year I ditched the boxes of Easter egg dyes and created our own out of pantry ingredients. Last year we had a blast trying Kool-Aid egg dying which really made beautiful and vibrant eggs without any effort.

This year I ran across a fun idea for creating marbleized eggs from common items in the pantry. If you have food coloring, vinegar, and olive oil…you have the makings for beautifully marbled eggs. Pictured above are the eggs that my children created this year. This was a lot of fun because each egg could be so different and unique!

1. Hard boil your eggs as desired. In shallow bowls, mix together three cups of warm water with two tablespoons of vinegar and ten drops of food coloring. I used the Betty Crocker Neon Food Coloring that I found in the baking aisle. Whisk the ingredients together well.

2. Submerge your eggs and leave them in there until they reach the desired color. One thing we learned is that it is better to have a lighter color as the base color so the second layer of color will take well on your eggs.

3. Dry your eggs with a paper towel.

4. Repeat the process with the rest of the eggs. Rest them gently on your inverted egg carton to allow them to dry.

5. To the dye that you have already prepared, add one tablespoon of olive oil and then, using a fork, run your fork through the oil to break the oil into pieces to create the solution to roll your eggs. As the oil swirls, roll your egg once through a contrasting color. Allow the oil to pick up & create another round of color on your eggs. Blot gently with paper towels. (Editor’s Note: Many apologies for the lack of pictures after this point. We just really got into it and it was getting a little crazy with eggs dropping rolling)

6. Admire your beautiful eggs!

Don’t forget to turn those eggs into delicious deviled eggs for a fun addition to your family dinner!

What is your favorite Easter tradition?  Are you trying anything new and exciting with egg dying this year? Would love to hear what Easter crafts you are working on!

An Apron Full of Giveaways 04.12.11

April 12th, 2011

Aprons2Tie4, $30

Welcome to our Apron Full of Giveaways! I hope everyone is having a great week this week! As we do each week,  here is our round-up of giveaways for our readers. We hope that this is beneficial to you and your family! Please let us know if you guys win anything- I love to hear the success stories!

Below are the contest links-if you are hosting a contest please link it up below. Sorry, we aren’t giving away the aprons just showcasing them! Please put your site name and then what type of contest you are hosting. For example, “MomAdvice (Kid’s Movies).”

Please let me know if you have any questions and good luck to each of you!

3 Quick & Easy Recipes for Delicious Grilled Kabobs

April 11th, 2011

It was a long winter in Indiana and we got our first taste of Spring with warm weather this weekend. Of course, nothing says Spring to me like grilling outdoors again and one of our favorite things to cook in the summer just happens to be grilled kabobs! Kabobs are a fantastic way to create a dish for each individual family member that incorporates each of their favorite meats and vegetables. It also happens to allow for individual personalization without the inconvenience of being a short-order chef.

Today I wanted to share three easy grilled kabob recipes that are sure to be a hit with your family and when entertaining. These recipes deserved their constant rotation in your menu planner because they are easy to prepare and the leftovers can be recreated into delicious salads and wraps. Unfortunately, no matter how much I prepare, these kabobs go unbelievably quick in our house. I hope you will have more leftovers to enjoy than we do!

Without further adieu, here are three fun recipes for grilled kabobs to try on your grill!

The rosemary and ranch add such a wonderful depth of flavor to the chicken and these come off the grill so juicy! If you actually have any meat leftover (which is debatable in our house), I love to put these on top of a salad the next day. The chicken is still surprisingly juicy even after being zapped in the microwave and it has been a wonderful way to spice up my daily salads for lunch!

Rosemary Ranch Chicken Kabobs (Courtesy of AllRecipes)

1/2 cup olive oil
1/2 cup ranch dressing
3 tablespoons Worcestershire sauce
1 tablespoon minced fresh rosemary (If you haven’t planted rosemary yet like me, 1 teaspoon of the dried stuff works great!)
2 teaspoons salt
1 teaspoon lemon juice
1 teaspoon white vinegar
1/4 teaspoon ground black pepper, or to taste
1 tablespoon white sugar, or to taste (optional)
5 skinless, boneless chicken breast halves – cut into 1 inch cubes

In a medium bowl, stir together the olive oil, ranch dressing, Worcestershire sauce, rosemary, salt, lemon juice, white vinegar, pepper, and sugar. Let stand for 5 minutes. Place chicken in the bowl, and stir to coat with the marinade. Cover and refrigerate for 30 minutes. Preheat the grill for medium-high heat. Thread chicken onto skewers and discard marinade. Lightly oil the grill grate. Grill skewers for 8 to 12 minutes, or until the chicken is no longer pink in the center, and the juices run clear.

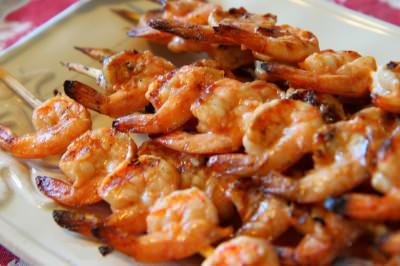
This shrimp tastes exactly like something you would eat at a fancy restaurant and it is bursting with flavor. It is unbelievable how these simple pantry ingredients can make the shrimp taste so good, but I doubt I will ever make another shrimp recipe again! It is the perfect dish to entertain with since it can be served hot or cold. The marinade adds so much flavor that there is no need for any special sauce accompaniment. You have to love anything that only requires four or five minutes on the grill and is still wildly impressive to your dinner guests!

Marinated Grilled Shrimp (Adapted from AllRecipes)

3 cloves garlic, minced
1/4  cup olive oil
1/4 cup tomato sauce
2 tablespoons red wine vinegar
2 tablespoons chopped fresh basil (I omitted because we did not have any on hand)
1/2 teaspoon salt
1/4 teaspoon cayenne pepper
1 pound fresh shrimp, peeled and deveined
Skewers

In a large bowl, stir together the garlic, olive oil, tomato sauce, and red wine vinegar. Season with basil, salt, and cayenne pepper. Add shrimp to the bowl, and stir until evenly coated. Cover, and refrigerate for 1-2 hours, stirring once or twice. Preheat grill for medium heat. Thread shrimp onto skewers, piercing once near the tail and once near the head. Discard marinade. Lightly oil grill grate. Cook shrimp on preheated grill for 2 to 3 minutes per side, or until opaque.

This marinade can be prepared up to a day before and makes a deliciously sweet (but not too sweet) meat. The flavors remind me a little bit of those port-a-pit chickens that are sold for fundraisers… just as messy, but not half as greasy.

Yummy Honey Chicken Kabobs (Adapted from AllRecipes)

1/4 cup canola oil
1/3 cup honey
1/3 cup soy sauce
1/4 teaspoon ground black pepper
8 skinless, boneless chicken breast halves – cut into 1 inch cubes (I used one bag thawed frozen chicken breasts)
2 cloves garlic
5 small onions, cut into 2 inch pieces
2 red bell peppers, cut into 2 inch pieces
Skewers
In a large bowl, whisk together oil, honey, soy sauce, and pepper. Before adding chicken, reserve a small amount of marinade to brush onto kabobs while cooking. Place the chicken, garlic, onions and peppers in the bowl, and marinate in the refrigerator at least 2 hours (the longer the better). Preheat the grill for high heat. Drain marinade from the chicken and vegetables, and discard marinade. Thread chicken and vegetables alternately onto the skewers. Lightly oil the grill grate. Place the skewers on the grill. Cook for 12 to 15 minutes, until chicken juices run clear. Turn and brush with reserved marinade frequently.
********************************************

Quick Grilling Tip:

I have become a huge fan of those disposable containers for marinating foods because they are so easy to transport out to our grill and are easy to stack, especially if you are headed out for a picnic. It may also be because I have had  a few too many leaky bags in my fridge so I find these to be a great option for me!  These freezer containers plus our handy dandy meat thermometer have made grilling out practically foolproof and have streamlined our grilling effortlessly.

I love to stick these, marinade and all, in the freezer and prep a few different marinades in one afternoon. Most marinades have similar base ingredients (dressings, olive oil, vinegars, salt, pepper, seasonings, Worcestershire sauce, etc..) and it is so much easier to do this all at once rather than getting them out each time. What a time saver!

What are your favorite grilling recipes in your house? Feel free to share your recipes and links here! I would love to get some new grilling recipes for our menu planner!

Amy’s Notebook 04.06.11

April 6th, 2011

My kids would love this old-fashioned strawberry milk (@ the kitchn)

Who knew that old pickle jars could look so good? (@ eighteen25)

I am in love with this wall photo collage (@ Under the Sycamore)

This lemon chicken orzo soup looks delicious (@ goodLife{eats})

This crepe ruffled cardigan sweater is so feminine (@ dear lizzy)

I am in love with this idea for having a family writing club (@ Soule Mama)

I want to try this recipe for a flourless chocolate cake (@ gimmie some oven)

This simple skirt would be the perfect addition to my daughter’s summer wardrobe (@ MADE)

I want to try this recipe for sour cream snickerdoodles (@ Under the High Chair)

I love this idea for creating coffee bags to go (@ Family Economics)

These Angry Birds cupcakes would be a hit at any party (@ the crafting chicks)

This boy-or-girl reveal party is amazingly cute (@ Supermom Moments)

I want to try this recipe for the world’s best banana bread (@ Picnics in the Park)

Tiny cupcake toppers for cupcakes? Adorable! (@ That’s Noice)

I am in love with this vintage superhero party (@ kara’s party ideas)

mobile upload on Picplz

We are still here…just barely. 3 weeks of no sleep is really catching up with me. Thanks for your patience as I try to get my life back in order. You can follow all of our Spring Break happenings with links to frugal things to do on our Facebook Page. I promise to try to be more inspiring next week, but know I am thinking of you guys and planning out  content for when we are all better.

I also recently joined Pinterest where you can grab a sneak peek into what might be featured in our weekly notebooks! Trust me, other people are much more inspiring than our sick bunch this week!

Have you tried anything from our featured notebook entries? We would love to hear what projects you tried and how they worked out for your family?

Fluffy Baked Chocolate Donuts

April 4th, 2011

Thank you guys so much for your patience last week!  That bronchitis really wiped me out and we are slowly returning to humanity again this week!  I will admit, there has been a whole lot of take-out since I was out of commission this week. I had to tie on my apron though to share a recipe with you for the week and I hope that these Baked Chocolate Donuts will do the trick!

If you have missed my past donut posts, I used a few Swagbucks that I had set aside and credited them towards an Amazon gift certificate to purchase two donut pans for free. I found these Norpro 6-count Nonstock Donut Pans for $12.99 and making donuts has become a new fun tradition in our house.

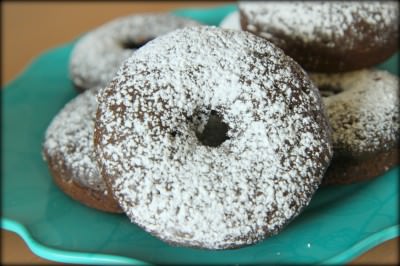
I have been dying to make chocolate donuts in my donut pan, but had a really hard time finding a good chocolate baked donut recipe that incorporated what we already had in our pantry. I decided to improvise and pulled together this recipe and, I have to say, these are AMAZING.

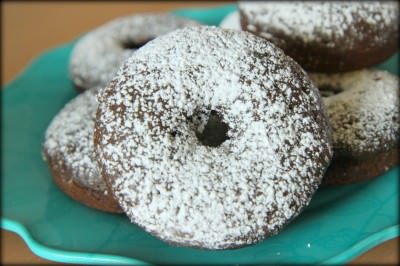
The donuts look rich and decadent, but are surprisingly light in texture. My secret ingredient of leftover coffee from my morning coffee, heightens the chocolate flavor of the cocoa powder. A light dusting of confectioners’ sugar finishes this delicious treat for a fun way to start the day or a mid afternoon snack.

Let’s get baking!

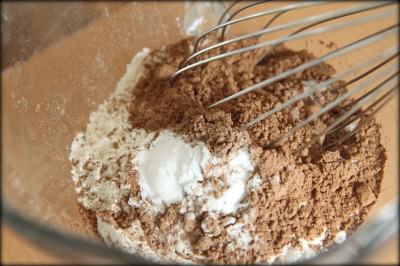
In a bowl, mix together your cocoa powder, flour, salt, and baking soda with a wire whisk.

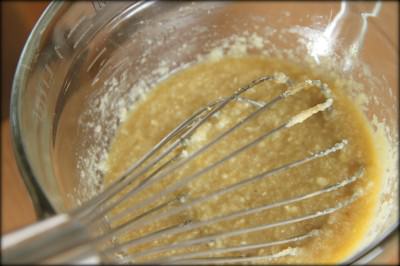
In another bowl, whisk together your melted butter, egg, brown sugar, vanilla, and coffee.

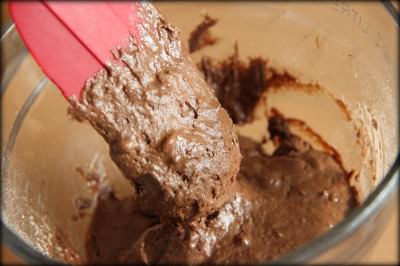
Mix the wet and dry ingredients together. Be careful to mix these just until they are incorporated so you have a nice & fluffy donut.

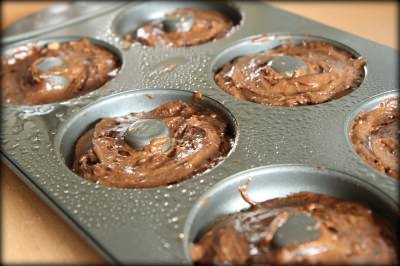
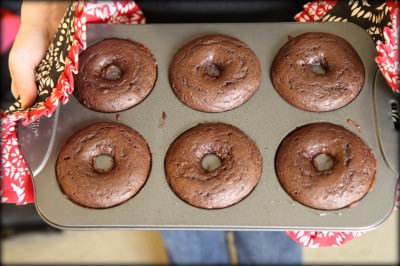
Spoon your batter into well-greased donut pans. I have found that an ice cream scoop can be the be the perfect way to scoop in the batter without a lot of spills or drips. You want to fill them about 3/4’s full which worked out to be six donuts worth. Slide them into your oven at 325 degrees  and bake them for thirteen minutes.

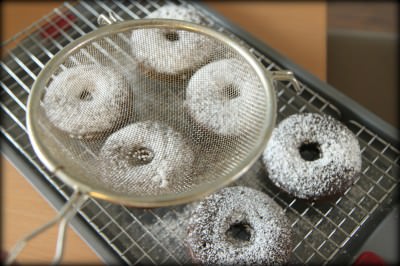
Once they are done baking, pull the donuts out and place them on a cooling rack to cool.

Give the cooled donuts a sprinkle of confectioners’ sugar or finish with a simple glaze. Enjoy with a ice cold glass of milk!

Baked Chocolate Donuts

1 cup all-purpose flour (may need to add 1/4 cup more of flour if your dough is looking too loose)
1/4 cup unsweetened cocoa powder
1/2 teaspoon baking soda
1/4 teaspoon salt
1/2 cup milk
1/2 cup packed brown sugar
1 egg
4 teaspoons butter, melted
2 tablespoons coffee
1 teaspoon vanilla extract

For the glaze (optional):

1 cup confectioners’ sugar
2 tablespoons hot water
1/2 teaspoon vanilla, butter, or almond extract

Heat oven to 325.  Coat donut pan with nonstick cooking spray. In large bowl, whisk flour, cocoa, baking soda and salt.  In small bowl, whisk milk, sugar, egg, butter, coffee, and vanilla until smooth.  Add milk mixture to flour mixture; whisk until blended and smooth. Fill each doughnut cup approximately 3/4 full. Bake at 325 degrees for thirteen minutes or until doughnuts spring back when touched. Allow to cool slightly before removing from pan. Dust with confectioner’s sugar.

Optional: To make glaze, blend confectioners’ sugar, hot water and extract in a small bowl. Dip doughnuts in the glaze and then dip them in sprinkles.

Looking for more fun ways to enjoy baked donuts at home? Check out our recipes for Fluffy Baked Cake Donuts with a Simple Glaze,  Baked Pumpkin Donuts with Maple Syrup Frosting and these delicious Baked Glazed Gingerbread Donuts for three more variations that your family will flip for!

Green Spring Cleaning Craft: Knitted Dishcloths & Homemade Cleaning Recipes

March 29th, 2011

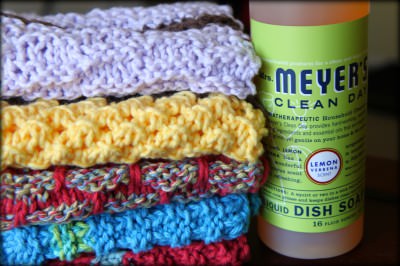
It is that time of year again, as we move into the beautiful season of Spring. Around this time of year, I usually start working on a batch of fresh new dishcloths to do the dishes with. If you could see how pitiful the rags I have been using are, you would understand why this is not only a hobby, but also a necessity!

As I mentioned last month, I get to share fun DIY projects as part of the Walmart Moms team, and when I was challenged with making something from the store for the spring cleaning season, I knew that I couldn’t wait to tackle some new dishcloth patterns made from the inexpensive Sugar ‘n Cream Yarn that you can pick up over in the craft section of the store. These balls of cotton yarn (in the knitting/crochet supplies) only run $1.57 per ball and you can usually get two generous sized washcloths out of them.

If you are new to knitting, dishcloths are the perfect project because they are like swatches of pattern rather than tackling a larger project piece. On top of that, it can make you feel braver doing patterns with more complexity and learning new knitting techniques. For the first few months after I learned how to knit, I knit a lot of dishcloths.

All of these patterns can be found on Ravelry, and you can find me there too! If you are a knitter, I would love for you to be my friend on Ravelry. My username is momadvice and I try to keep my little notebook updated with the current projects.

Here are four free fun new patterns to try to add an element of beauty and fun to your spring cleaning:

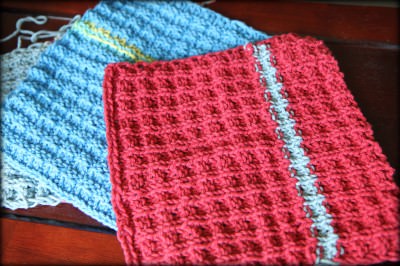
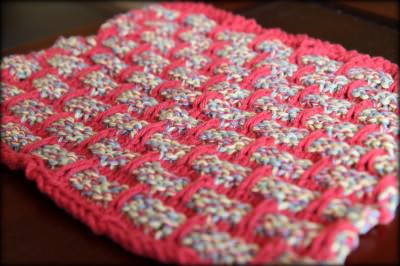
double bump dishcloths

Pattern: Double Bump Dishcloth Pattern by Missy Angus

Needle Size: US 7 Needles

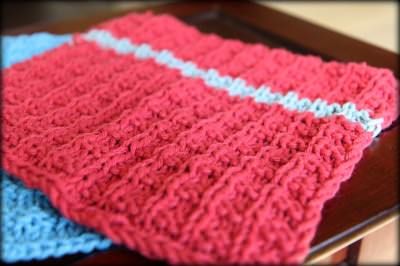
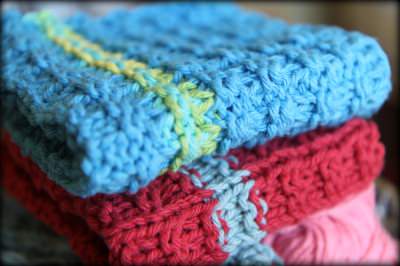
Yarn: Lily Sugar ‘n Cream Yarn- Pictured above is Country Red with Robin’s Egg Blue (accenting) &  Hot Blue with Summer Splash (accenting)

Notes: My girlfriend, Renee, alerted me to this pattern and I am so glad she did! This pattern makes the most perfect dishcloth and can be whipped up in an hour or so. If you know how to knit and you know how to purl, those are the only stitches that you need to know to create this.

While some patterns curl up on the edges or require a little blocking, this pattern knits up evenly without any curled corners, thanks to the slipping of the first stitch in each row.

These are highly addictive to make and I am already working on another one because it is an easy pattern to memorize and to knit while watching a few of your favorite television shows! I would highly recommend this pattern!

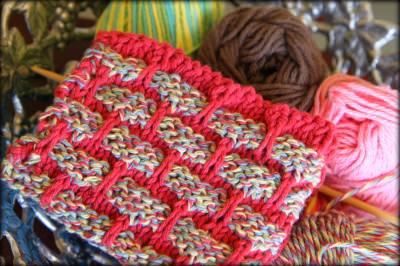
cottage ballband dishcloth

Pattern: Ballband Dishcloth by Pisgah Yarn & Dyeing

Needle Size: US 7 Needles

Yarn: Lily Sugar ‘n Cream Yarn- Pictured above is Country Red & Cottage Twists (Twists Chalet)

Notes: This is the free website link to the original pattern for Ballband Dishcloths, featured in the Mason Dixon Knitting Book by Kay Gardiner & Ann Shayne, the founders of MasonDixonKnitting.com

This pattern is beautiful worked in solids and variegated. Endless combinations of colors and variegated can be created using this pattern. Since you are using two different yarns for this cloth, it is a great one to use when stash-busting your yarn collection or for using different colors of yarn scraps you might have on hand that you can’t really make anything out of on their own.

When doing this pattern, I have found that knotting in the different yarns is the best way to go instead of just weaving in the new color because of the endless amount of abuse and washes that these dishcloths get in our house. I have lovingly weaved in many washcloths with no knots and the stitches have ended up falling out on these patterns. Live and learn!

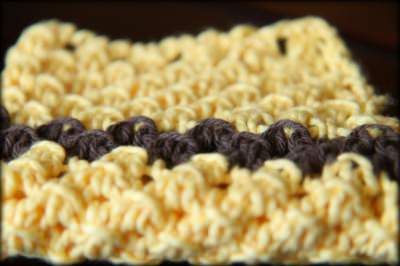
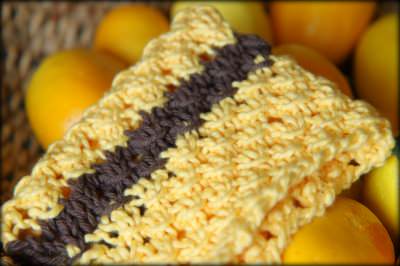
sunshine & stars dishcloth

Pattern: Open Star Dishcloth by Dishcloth Boutique

Needle Size: US 7 Needles

Yarn: Lily Sugar ‘n Cream Yarn in Sunshine & Warm Brown

Notes: I really loved this pattern because of how the simple yarn overs create a nubby pattern to this dishcloth and give it such a beautiful look and feel to the yarn. This pattern does not look as nicely when it is held open, but could be corrected if  it is blocked. The only time I would do that though is if it was a gift for someone.

This pattern is easy enough for a beginner and is a great beginning pattern for understanding yarn overs. I can’t wait to make more of these in other colors from my leftover yarn!

lavender squidge

Pattern: The Squidge Cloth by Sasha

Needle Size: US 7 Needles

Yarn: Lily Sugar ‘n Cream Yarn in Soft Violet & Warm Brown

Notes: The alternating rectangles of knit and purl give the ultimate squidge factor for a fabulously fondle-able cloth. The pattern is easy since you only need know how to knit and purl. It gives you a thickness to the pattern and would be perfect, not only for your dishes, but perfect as a face cloth too!

Not enough dishcloth patterns for you? Be sure to check out my Circle Cloth & Chinese Waves patterns or the Wedding Washcloth patterns that I have created in past entries!

Pair these with a few of these homemade cleaner recipes or a little of the fun Mrs. Meyers Cleaners (available at Walmart too) and you are ready to do a little spring cleaning of your own!

My Favorite Homemade Cleaner Recipes

All-Purpose Cleaner

Mix together two tablespoons of mild dishwashing soap and two cups of water in a spray bottle and give it a shake. Use these anywhere that you would use a commercial all-purpose spray. This cleaner is particularly great for countertops, bathroom surfaces, and high chairs.

Glass Cleaner

Mix together one part white vinegar to one part water in a spray bottle. Spray this solution on your mirrors and windows and dry your windows with newspaper.  The newspaper is great for lint-free drying and is a great way to repurpose some of those old papers you have laying around.

Homemade Oven Cleaner/ Deep Kitchen Cleaner

Mix a paste of three parts warm water to one part baking soda to clean away kitchen stains or to clean your oven.

Bathroom Cleaner

Mix dishwashing liquid with baking soda until you have a thick paste and use this throughout your bathroom.

Toilet Bowl Cleaner

No measuring is required with this recipe. Sprinkle a little baking soda into your toilet bowl and then pour a little vinegar in and watch it fizz it up. Give it a swish with your toilet brush and then flush.

Floor Cleaner

Add ½ cup of vinegar to a gallon of water.  The scent of the vinegar will fade in approximately an hour, but you can also add a couple of drops of essential oil to help with the scent. I like the smell of Tea Tree Oil, but you can buy any essential oil that smells best to you. Essential oils can be picked up at stores offering nutritional supplements or can be purchased online.

Furniture Polish

Mix ¼ cup olive oil with four tablespoons of vinegar and two teaspoons of lemon juice. Pour into a spray bottle and shake well before using.  If you do not use all of it in one cleaning session, store the remainder in the fridge, as the lemon juice can go sour. You can also substitute the lemon juice with twenty to thirty drops of lemon essential oil and then you won’t have to refrigerate it. Using the essential oils though will up the price a bit on your homemade product.

Silver Cleaner

Although I don’t polish silver very frequently, this is a great to have in your bag of tricks. This will clean all of those nooks and crannies that are hard to reach in more detailed pieces and is great if you have a big batch of silver that needs cleaning. In a large bowl (or you can use your kitchen sink) place strips of aluminum foil in and place the silver pieces on top. Cover the silver with boiling water and then add three tablespoons of baking soda and soak for ten minutes.

Do you have any fun green spring cleaning recipes or knitted patterns you are loving? Do you spring clean your home? Feel free to share those ideas here!

I am a part of the Walmart Moms program, and Walmart has provided me with compensation for these posts. My participation is voluntary and opinions are always my own.