Archive for the ‘Food & Recipes’ Category

To Die For Pot Roast Sandwiches

Monday, August 17th, 2009

Sometimes it is nice to have a recipe in your back pocket that you can throw on the dinner table in minutes and that will leave everyone feeling full and satisfied. This week my children will both start school and for the first time in my life, I am going to have a few hours on my own. I am sure there will be many more blog entries about this momentous occasion, but in the meantime I want to focus on the usefulness of that slow cooker that might be gathering dust in your kitchen.

When the school season starts, our slow cooker is the best tool that I can arm myself with to get dinner on the table. There are so many things that you can make in the slow cooker that are satisfying and will leave you with lots of yummy leftovers for the week.

This recipe is one of my favorites from our One Month with Your Slow Cooker article. If you haven’t seen this article, it is THE best tool for busy moms who want ideas for slow cooker meals that are true show-stoppers in the kitchen. I entertain with these dishes, I share them when I bring meals to families in need, and our family eats from these thirty recipes about once a week.

You will notice that few of our recipes have convenience foods or mixes in them, but this roast is my one exception to the rule. Do your best to look for low-sodium mixes though and avoid adding any salt to this recipe. These three little mixes and some water make the most flavorful roast. Not a hint of dryness in this roast and the leftovers heat up perfectly for a special lunch.

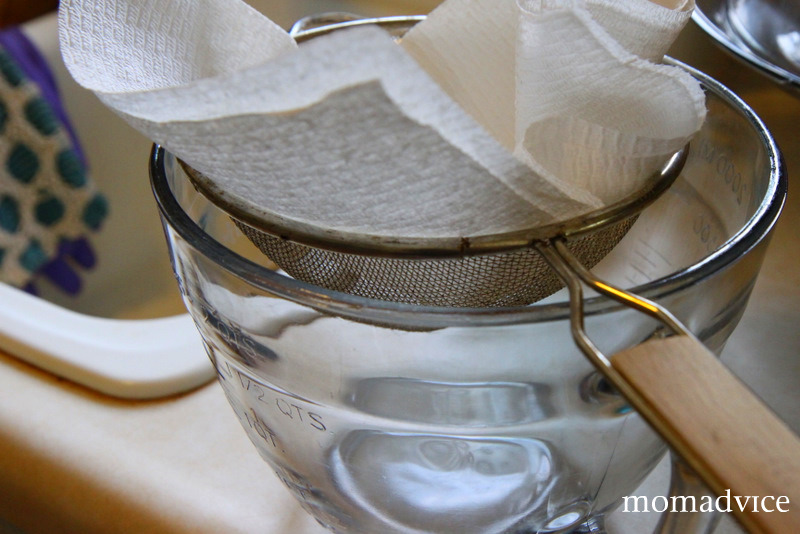
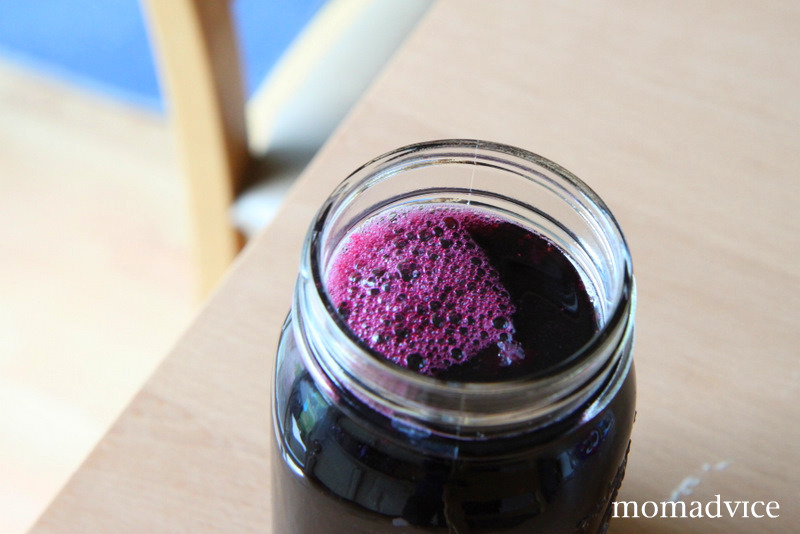
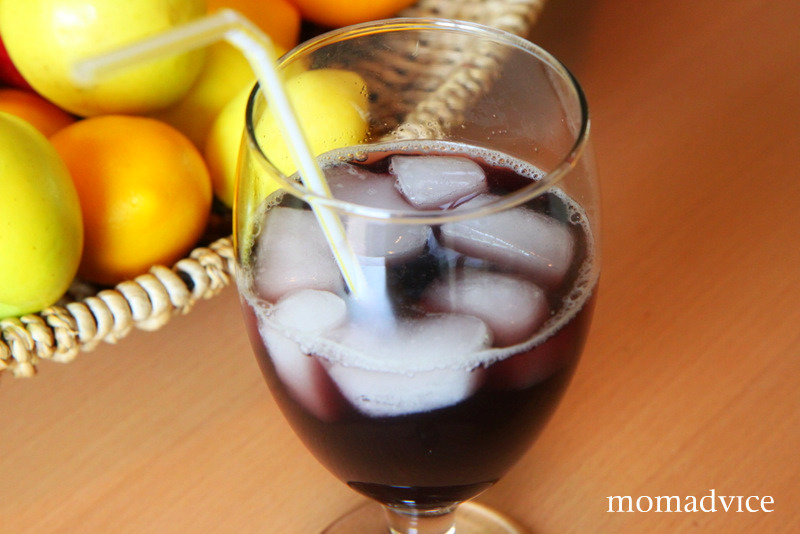
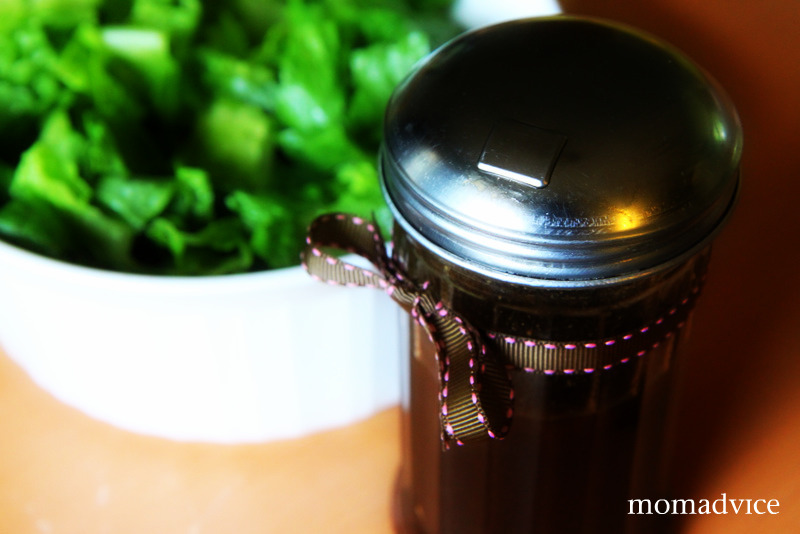
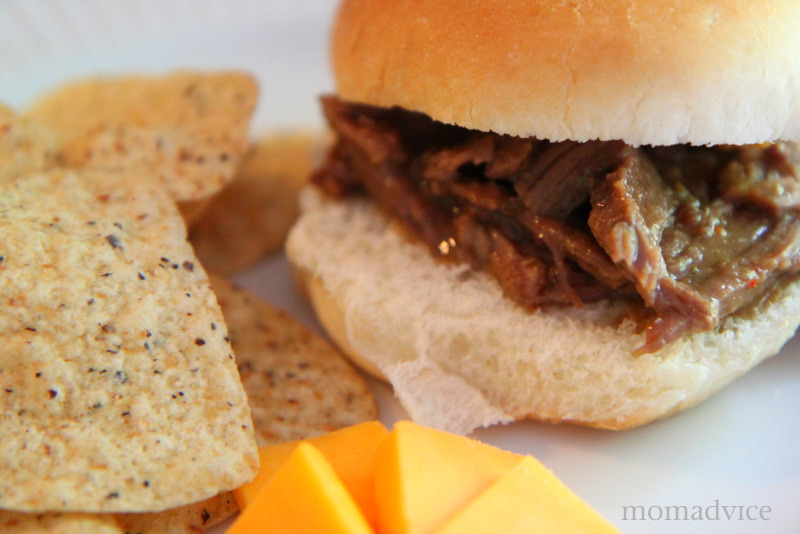
I shared the leftovers with my mom and served these sandwiches with multi-grain chips with salsa and a delicious batch of blueberry iced tea.

To Die For Pot Roast

1 beef roast – any kind (I look for roasts that are between 3-5 pounds)
1 package dried brown gravy mix (look for low-sodium varieties)
1 package dried Italian salad dressing mix (look for low-sodium varieties)
1 package dried ranch dressing mix (look for low-sodium varieties)
1 cup water

Place beef roast in slow cooker. Mix the dried mixes together in a bowl and sprinkle over the roast. Pour the water around the roast. Cook on low for seven to nine hours.

Do you have a favorite slow cooker recipe to share? I would love to get some new ideas for the school year! Please share!

Sinfully Sweet Cornbread & Chicken Caesar Pasta Salad

Monday, August 10th, 2009


This sinful cornbread is a “sometimes food” in our house, but a delicious addition as a special side treat. My family is from the South so I have a deep fondness for sweet tea and sweet cornbread. This cornbread takes the cake literally, in my opinion, because it is deliciously sweet and tastes almost like a little bakery cake with your dinner. Unlucky for me, it is made with all the items I have in my pantry so it is far too convenient to make!

You need to balance this side out with something nice and light though to make up for it so I love to pair this with a delicious summer salad. My Chicken Caesar Pasta Salad is loved by all and is a favorite recipe from my Cooking Light Magazine.

If you have a garden, don’t be afraid to work in whatever you have on hand. I tossed in a handful of fresh parsley and garden tomatoes from our little patio garden. Whatever you have on hand or see at the farmer’s market is fair game for this yummy dish.

Sinfully Sweet Cornbread

1 cup all-purpose flour
1 cup yellow cornmeal
2/3 cup white sugar
1 teaspoon salt
3 teaspoons baking powder
1 egg
1 cup milk
1/3 cup vegetable oil

Preheat oven to 400 degrees. Spray or lightly grease a nine inch round cake pan. In a large bowl combine flour, cornmeal, sugar, salt, and baking powder. Stir in egg, milk, and vegetable oil until well combined. Pour batter into prepared pan. Bake in a preheated oven for 20-25 minutes.


Chicken Caesar Pasta Salad

1 pound chicken (about three small breasts)
½ pound penne pasta (can do regular or whole wheat pasta)
1 romaine heart, chopped
½ pint cherry or grape tomatoes (I did regular tomatoes from our garden, but placed them on the side for those that wanted them)
1/3 cup Caesar dressing (I love the Kraft fat-free Caesar Dressing)
A sprinkle of Parmesan cheese on top

Bake chicken breasts as directed on package on a cookie sheet. While the chicken is baking, chop the romaine heart and halve the tomatoes. Cook pasta until al dente, as directed on package. Drain and rinse pasta with cold water. Dice the cooked chicken and put this in a bowl. Toss in pasta, tomatoes, lettuce, and the dressing. Mix until all the ingredients are incorporated. This can be served with a little sprinkle of Parmesan cheese.

Amy’s Notes- Because I wanted plenty of food for leftovers, I actually cooked the entire box of pasta and kept all the other ingredients the same. This stretched the dish further and we have enough for four more lunches. Additional dressing can be added to leftovers to keep pasta from tasting dried out. Basically, for forty more cents you can feed another four people! That makes this a great dish to entertain with!

Ravioli With Pesto Cream Sauce

Monday, August 3rd, 2009

I love meals that are fast, elegant enough to entertain with, and will free up needed pantry space. This dish fit the bill when I overbought on pesto for my son’s birthday. I kept thinking that the pesto would be fantastic mixed in a sauce. When I happened upon some chicken and cheese stuffed ravioli while perusing the wholesale club, I knew I would be able to whip something amazing up.

The flecks of green and foreign stuffing in the pasta would have been a turn off for many kids, but after a good five minutes of coaxing, the forks plunged into the dishes and quiet smacking was all that was heard the rest of the dinner hour…

Well, that and the request for more “honey” for bread by the sweet voices gathered around the dinner table. Yes, my children believe olive oil is a common commodity, much like other children request ketchup for dipping. Oh, if I only had such a gourmet palate when I was a child, I know I would be destined to create great things in the kitchen. Let’s hope these extravagant luxuries can be endured on a teeny grocery budget.

Ravioli With Pesto Cream Sauce

1 pound fresh or frozen ravioli
2 tablespoons olive oil
2 tablespoons minced garlic
1/4 cup butter
2 tablespoons all-purpose flour
2 cups milk (we used skim milk)
1 pinch salt
1 pinch pepper
1 1/2 cups grated Romano cheese
1 cup prepared pesto

Bring a large pot of lightly salted water to a boil. Add pasta and cook as directed and drain.
Heat olive oil in a large skillet over medium heat. Stir in garlic and butter, and saute until garlic is soft and fragrant, about 1 minute. Dissolve flour in milk, then stir in. Season with salt and pepper, and simmer 4 minutes, stirring constantly. Add cheese, and stir until melted. Stir in pesto. Dish ravioli on plates and then drizzle the pesto cream sauce over it. Garnish with a little fresh basil or chopped parsley.

PS- Be sure to serve with oodles of bread with “honey” for dipping for those gourmet palates!

Notebook Experiments: Is WHO Bread Delicious?

Wednesday, July 29th, 2009


Experiment: Is WHO bread really and truly delicious?

Experiment Taken From: Notebook Entry 02.14.07

Materials Needed: Please see SouleMama for the complete recipe and instructions.

Results: I have had this recipe bookmarked for a very long time and have finally replaced my bread machine so I can test another fun bread machine recipe.

We grilled out last night and I thought I would make a loaf of this bread and (just because I am over-the-top kind of gal) I decided to make a batch of my Honey Butter to spread on top.

This bread is delicious and smelled like heaven as it baked. It has all of my favorite elements in it- a dash of brown sugar, honey, oatmeal, and cinnamon. I did substitute one cup of the white flour with whole wheat flour, which gave it a deliciously chewy texture with a nice firm crust.

Conclusion: I would definitely make this bread over and over again. It is such a perfect balance of flavors and adding my addition of the honey butter really made it even more delicious. Every single person in the family loved this bread and I look forward to smearing some jam on it for toast in the morning.

If you don’t have a bread machine, don’t despair because Soule Mama also has an acoustic version for those without bread machines. Many thanks to Soule Mama for generously sharing her wonderful recipes!

A Fresh Blueberry Addition to Your Iced Tea or Coffee

Tuesday, July 28th, 2009

Making homemade syrups for drinks is something that I love to keep in our refrigerator to fancy up a glass of iced tea or a mug of coffee. Making homemade syrups does not take a lot of time, but it can make a regular glass of iced tea go from a standard glass to a fantastical gourmet treat.

Today, I wanted to share with you a fun recipe for making Blueberry Drink Syrup that can be added to your iced tea, your coffee, or even your margarita! Whatever gets you going in the morning, I promise not to judge!

To begin with, you will need four cups of fresh berries and two cups of water. Put these two ingredients into a pot and bring it to a boil. Once it is boiling, you can turn it down and let it cook for ten to twelve minutes on the stove.

While that is boiling away, grab a glass bowl (or something that won’t stain easily) and put your strainer on top. Line your strainer with a square of heavy-duty paper towel or cheesecloth.

Now bring your berries over to your bowl and pour them over the strainer. While you are doing this, stand way-the-heck-back because you will get splattered and it will be difficult to get those stains off of everything.

Once you have all of the juice strained, put it back on the oven and add one cup of sugar (or a 1/2 cup of sugar for each cup of juice that is strained). Reheat for two minutes or until the sugar is dissolved.

Now your syrup is all done and you can pour it into a clean jar. This can be stored in your refrigerator and you can use it whenever you feel like a little blueberry pie in your coffee or tea.

Add two tablespoons of blueberry syrup to your drink and please sit back with your feet up when you drink this! It is that kind of drink that speaks of summer and laziness to me. If you add a little cream to your coffee, I bet it will taste just like that slice of blueberry pie you have been craving!

This would also make a lovely summertime gift for a friend or loved one. Add a bowl and a label to the front with the instructions. I bet your friends will think you have truly risen to Martha Stewart status with this one!

Blueberry Syrup for Coffee or Iced Tea

4 cups fresh blueberries
2 cups water
1 cup sugar

Place blueberries in a saucepan with water. Bring to a boil, reduce heat and simmer 10 minutes. Set sieve or colander lined with cheesecloth or paper towel over a bowl and pour in the blueberry mixture. Gently press out the juice with a spoon or by twisting the cheesecloth. Discard the pulp and measure the juice into saucepan. Add 1/2 cup sugar for each cup of juice and cook over medium heat, stirring until sugar is dissolved. Bring to a boil and cook 2 minutes. Chill and pour into covered jar. Store in refrigerator. Add two tablespoons to each glass of prepared iced tea or coffee. Stir well.

Fresh Blueberry Pancake Syrup On Homemade Waffles

Monday, July 27th, 2009


I sincerely hope you love blueberries because I am afraid it is blueberry week on my blog. We brought home a ton of fresh berries that were dying to be poured on top of some deliciously light waffles this week.

I love making pancake syrup, but this is my first attempt making a berry syrup. It is amazing how sugar, water, a little vanilla, and fresh berries make such an incredible difference on a plain old waffle.

The burst of flavor, the happy dance in my mouth, and the smacking of lips at the table make me so incredibly joyful. The berries coat the waffle perfectly and add a little sweetness to my waffle without a sugary overkill.

This is really and truly a fantastic indulgence that takes about the same amount of time to cook as it does to make up a batch of waffles. Fast and delicious!


Fresh Blueberry Pancake Syrup

1 pint (or two cups) fresh blueberries
1 cup sugar
1 teaspoon vanilla
1/4 cup water

Place all ingredients in a saucepan. Cook over medium heat and stir to dissolve the sugar. Allow it to cook for 12-15 minutes and give the berries a little smash with your wooden spoon to break them up into the syrup. This syrup can be served warm over The Best Waffles Ever or you can serve the syrup cooled.

Best Waffles Ever (Courtesy of Better Homes & Gardens Cookbook)


1 3/4 cups all-purpose flour
1 teaspoon baking powder
1/4 teaspoon salt
2 egg yolks
1 3/4 cups milk
1/2 cup canola oil
2 egg whites

In a medium mixing bowl stir together flour, baking powder, and salt. Make a well in the center. In another bowl beat egg yolks slightly. Stir in milk and oil. Add egg yolk mixture all at once to the dry mixture. Stir just till moistened (should be lumpy). In a small bowl beat egg whites until stiff peaks form (tips stand straight up). Gently fold egg whites into flour and egg yolk mixture, leaving a few fluffs of egg white, Do not overmix. Spoon waffle batter into your waffle iron, making sure not to overfill it. Side NoteI doubled this recipe for my family of four and we had enough for three extra Belgian waffles.

And what did my children think of the new blueberry addition to their plate?

Sometimes a picture can say it better than I can!

Lemony Blueberry Muffins

Monday, July 20th, 2009


It is the berry season and nothing says summer to me like a big blueberry muffin. I am hoping to make it over to do a little berry picking with the kids this summer. This batch of berries was bought at our supermarket for only $.99 a pint. When berries are in season, they make a budget-friendly addition to the grocery cart.

I wanted to share with you my favorite little recipe for Blueberry Muffins. Growing up, my mom bought the Jiffy Blueberry Muffin Mixes. Did anyone else grow up on these? We always thought my grandmother’s blueberry muffins were so fancy because they were homemade. It is times like these when I reflect on how far I have come in the kitchen and the ease and pride I feel when making things myself. I will say though, those Jiffy mixes aren’t too bad, but to have the fresh blueberries makes all the difference in a muffin!

Lemony Blueberry Muffins

3 1/2 cups all-purpose flour
2/3 cups sugar

4 t baking powder

1/2 teaspoon salt

2 beaten egg

1 1/2 cups milk

1/2 cup cooking oil
(I like canola oil)
1 lemon (zest & juice)
1 pint blueberries (two cups)

Sugar for dusting

Mix together all dry ingredients. In a separate bowl mix together beaten egg, milk, and oil, lemon zest, and squeeze in the juice from one lemon. Add the wet ingredients to the dry and mix until just moistened. Try not to over mix your batter- I know it’s hard! Fold in blueberries. Place in prepared muffin pan and sprinkle the tops with a little sugar. Bake at 400 degrees for about 22 minutes, or until tops are golden brown. Be careful not to overcook these- they cook quickly!

What is your favorite berry recipe? I would love to get your favorite recipes!

Homemade Basic Vinaigrette Dressing

Monday, July 13th, 2009

I love making homemade dressings and it truly takes so little time. It is always funny how impressed people are about something that takes two minutes to whip up in the kitchen. The taste transformation that it has in your mouth though is considerable and worth those two minutes of effort.

I had to run a meal to a friend and wanted to bring her a side salad to accompany the dinner. I thought this thrifted sugar canister would be cute to put the dressing in and also make it easier to pour on her salad. I will say that you want to have an extra tight grip on the pour spout when shaking and it might not be ideal for transporting, but it certainly did look cute tied with some gingham ribbon.

Basic Vinaigrette (courtesy of, “How to Cook Everything“)

1/4 cup good vinegar (you can use sherry, balsamic, red, or white wine vinegar)
1/2 teaspoon salt, plus more if needed
1/2 teaspoon Dijon mustard
3/4 cup extra-virgin olive oil
2 teaspoons minced shallots (optional & I leave these out)
Freshly ground black pepper to taste

Briefly mix the vinegar, salt, and optional mustard with an immersion blender, food processor or blender, or with a fork or wire whisk. Slowly add the oil in a stream (drop by drop if whisking) until an emulsion forms or just whisk everything together briefly. Add the remaining oil faster, but still in a stream. Taste to adjust salt and add more oil or viengar if needed. Add the shallots and pepper. This is best made fresh, but will keep, refrigerated for a few days; bring back to room temperature before using.

To make a small amount of Basic Vinaigrette: Combine 1 to 1 1/2 tablespoons vinegar, 1/4 teaspoon salt, 1/2 teaspoon mustard, 3 to 4 tablespoons oil, and 1/2 teaspoon minced shallots as above. Add pepper, then taste and add more vinegar, salt, or oil as necessary.

Sweet Little Piggy Pancakes

Thursday, July 9th, 2009

I made piggy pancakes for the kids and they were a huge hit! I wasn’t sure if they would be able to figure out what they were so I let them guess. They decided these were cow pancakes instead so who knows what animal your own kids might pick?

I made a batch of this pancake batter. It is my absolute favorite because it doesn’t require any fancy ingredients and can be made out of everything in your pantry. The pancakes remind me of the McDonald’s pancakes and I absolutely could devour a few stacks of those in one sitting.

To save a little bit more money, I make a batch of powdered milk to mix into the pancakes. It isn’t a huge savings, but it saves me from making multiple trips for milk throughout the week.

You will want to make one large pancake and two silver dollar sized pancakes. When you see the bubbles bubbling up on top, give them a flip and cook until they are cooked through.

I used kitchen scissors and cut one of the small pancakes in half and slipped it under the large pancake, to make the ears. Plop a small pancake on top for the snout and use blueberries or chocolate chips for the eyes.

For preschoolers, you could tie in any good barnyard book or my personal favorite…”If You Give a Pig a Pancake.”

Oreo Fudge Ice Cream Cake

Monday, July 6th, 2009

We celebrated another birthday in our family this week and my summer child always seems to get all of the fun cakes for the warmer season. We made this same cake two years ago and I decided to dust the recipe off again for another fun celebration.

This cake is just as good as those DQ ice cream cakes for a fraction of the price. The ice cream sandwiches help eliminate the need for cake leveling and provide a smooth and crumb-free surface to swipe with the whipped cream layers.

The best part about this cake is how forgiving this cake is to being adjusted to accommodate your party size. We have celebrated this cake with ten and this time we celebrated with thirty and you just add an extra batch of ice cream cakes to feed the extra mouths.

This cake pictured had 36 ice cream sandwiches and we ate almost all of it. The original recipe says it will feed twelve people, but you would be surprised how quickly this gets consumed!


Oreo & Fudge Ice Cream Cake

1/2 cup hot fudge ice cream topping, warmed
1 tub (8 oz.) whipped topping, thawed, divided
1 pkg. (3.9 oz.) chocolate instant pudding
8 Oreo cookie sandwiches (approximately 1 cup)
12 vanilla ice cream sandwiches

Pour fudge topping into medium bowl. Whisk in 1 cup whipped topping. Add dry pudding mix; stir 2 min. Stir in chopped cookies. Arrange 4 ice cream sandwiches, side-by-side, on 24-inch-long piece of foil; top with half the whipped topping mixture. Repeat layers. Top with remaining sandwiches. Frost top and sides with remaining whipped topping. Bring up foil sides; double fold top and ends to loosely seal packet. Freeze (at least) four hours.

Amy’s Notes- One year I had difficulty with the tin foil sticking to my cake so this year I prepared the cake in a cupcake tote container with a lid and that worked much better than wrapping in tin foil and was easier to stack with other items in our freezer.