Archive for the ‘Desserts’ Category

Deliciously Spiced Pumpkin Bread

Monday, October 13th, 2008

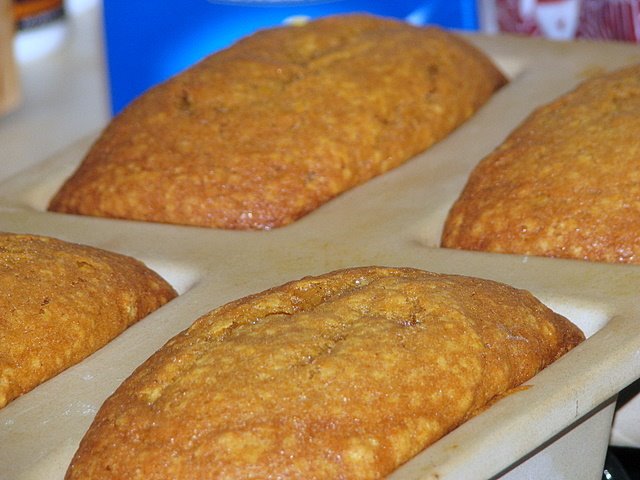
Before I left for my trip, I wanted to make sure that we had a yummy snack for the kids to munch on. I checked the pantry and had all of the ingredients to put together some mini-loaves of my favorite spiced pumpkin bread in the world. Smear this with a little butter and a cup of coffee, and you have the ultimate coffee shop experience at home.

This batter makes four mini-loaves so I was able to wrap one and put it in the freezer, leave two out for eating, and I gave a loaf of it to my mother-in-law who took a day off to help us with the kids while I am out-of-town. Wrapped in tin foil, I stamped a tag with a little thank you rubber stamp and tied the loaf off with a little raffia. I hope nothing says thank you and I appreciate you like a loaf of this pumpkin bread!

The best part about this bread, of course, is that all of the ingredients can be found and stocked in your pantry. The other great part is that it is inexpensive and easy to make. That makes it a winner in our house!

Spiced Pumpkin Bread

3 cups sugar
1 cup vegetable oil
3 large eggs
1 16-ounce can solid pack pumpkin
3 cups all purpose flour
1 teaspoon ground cloves
1 teaspoon ground cinnamon
1 teaspoon ground nutmeg
1 teaspoon baking soda
1/2 teaspoon salt
1/2 teaspoon baking powder
1 cup coarsely chopped walnuts (optional)

Preheat oven to 350°F. Butter and flour two 9x5x3-inch loaf pans. Beat sugar and oil in large bowl to blend. Mix in eggs and pumpkin. Sift flour, cloves, cinnamon, nutmeg, baking soda, salt and baking powder into another large bowl. Stir into pumpkin mixture in 2 additions. Mix in walnuts, if desired.

Divide batter equally between prepared pans. Bake until tester inserted into center comes out clean, about 1 hour 10 minutes. Transfer to racks and cool 10 minutes. Using sharp knife, cut around edge of loaves. Turn loaves out onto racks and cool completely.

A Good Old-Fashioned Apple Crisp

Monday, October 6th, 2008

A good blogger would have had an incredible picture of this apple crisp, but a good daughter was too busy preparing it for her parents. There are times were life gets in the way of my food photography and this was one of those times.

I love my quick apple crisp recipe (scroll to snack #2), but since my cake mixes are being used for my new favorite peanut butter cookies, I thought this would be a good time to try making an apple crisp the good old-fashioned way.

I found a recipe that I thought would fit the bill perfectly for an evening with my parents. I prepared the skillet ziti with chicken & broccoli, a big batch of breadsticks, this apple crisp and some decaf coffee to polish it all off.

The dinner turned out delicious and this apple crisp was perfection. This recipe is not too sweet and the crumbly topping came together beautifully. I used Granny Smith apples because I like how sturdy they are and how they can hold up to just about any bit of baking. I am also fond of a tart apple with a sweet topping. I served the crisp with a big scoop of Cool Whip.


The frugal gal in me can never waste anything though and while I worked on the rest of the dinner, the apple peelings and cores were simmering away (in water) on our stove, sprinkled with a little cinnamon from the pantry. It smelled like apple pie all day as I tidied the house and got everything ready for a fun evening.

I hope you can give this recipe a try- it was a great way to polish a meal off.

Apple Crisp (The Good Old-Fashioned Way)

6 cups sliced, peeled apples
1/4 cup sugar
2 tablespoons lemon juice
3/4 cup rolled oat
1/2 cup brown sugar
1/2 cup flour
1 teaspoon ground cinnamon
1/3 cup butter or margarine

Preheat oven to 350F degrees. Place apples in a buttered 2-quart casserole dish. Sprinkle with sugar and lemon juice. In a small bowl, combine rolled oats, brown sugar, flour and cinnamon. Using a pastry blender, cut butter into mixture until the mixture is crumbly. Sprinkle over the apples. Bake for 40 minutes or until apples are tender.

Company is Coming: A Fast Coffee Cake

Monday, September 29th, 2008


One of my favorite things to make for our company is my favorite Jewish Coffee Cake recipe. This recipe was given to me by my best friend’s mother. She told me that no matter how many other types of cakes she made, this was always the one that was requested and was always the favorite among her family members.

It should come as no surprise that it has become a favorite in our family too. This is the cake that made me a famous woman at my husband’s work, and I have scored more than a few friends at potlucks, toting my cake around town. It has even been served for my husband’s birthday dinners, making it just the right cake for any occasion.

The orange juice gives the cake a little tang and the cinnamon gives the cake a little spice to balance out the sweetness. With a dusting of confectioner’s sugar, you can hide any flaws and make it look like the star of any occasion.


This cake graced my table this past week, as I gathered my friends together to have a knitting night. My mother-in-law came to give us a class on how to knit hats and my girlfriends brought their knitting supplies to learn from the Master. Yes, I am finally learning to knit in the round and hope to have some fun projects to share with you soon!

Oh, and did I mention that the cake is made out of a cake mix? Don’t tell anyone! That will have to be our secret!

Fast Coffee Cake

1 package vanilla instant pudding
1 package yellow cake mix
½ cup oil
4 eggs
1 cup orange juice

Mix these ingredients together and then swirl the following through the cake batter 1/3 c. sugar, 4 t. cinnamon, 4 t. sesame seeds (optional). Bake for 50-60 minutes at 350 degrees in a well-greased and floured bundt pan. Allow cake to cool for 45-60 minutes in pan. Sprinkle with powdered sugar.

Company is Coming: Fast Peanut Butter Cookies

Monday, September 22nd, 2008

There are very few nights where we don’t have a guest sitting at our dinner table. Although I put a lot of thought into our main dishes, I have to say, dessert sometimes gets the short end of the stick when I am entertaining.

I happened upon this recipe for peanut butter cookies that will make a regular appearance for busy weeknight invitations though! The recipe yields between two to three dozen (depending on the size of your scoops) and is made from items out of your pantry. Best of all, you can get all the ingredients at Aldi, which is a bonus in my book!

Be sure to keep the cooking time to the ten to twelve minutes and don’t let the lighter color fool you. I had some burnt cookies in my first batch because I left them in the oven too long. Let them cool as instructed and then place them on a pretty plate for serving. Then you need to complete the most difficult step of all…Try to graciously accept the compliments without giving away your cooking secrets (which I never can do myself!).

I piled these on one of my trays with a carafe of decaf coffee, mugs, creamers, and and special coffee syrups. It was the perfect way to end an evening and I look forward to serving these again and again!

Elaine’s Peanut Butter Cookies (Courtesy of AllRecipes.com)

1 (18.25 ounce) package yellow cake mix
1 cup creamy peanut butter
1/2 cup vegetable oil
2 eggs
2 tablespoons water

1. Preheat oven to 350 degrees F (175 degrees C).

2. Pour the cake mix into a large bowl. Make a well in the center, and add peanut butter, oil, eggs, and water. Mix until well blended. Drop by teaspoonfuls onto ungreased cookie sheets. Flatten slightly using a fork dipped in water.

3. Bake for 10 to 12 minutes in the preheated oven. Let cookies set on cookie sheet for 2 to 3 minutes before carefully removing from the cookie sheet to cool on wire racks.

I am curious, what is your go-to dessert dish when you are having company? I would love some new desserts to add to our dinner table!

Notebook Experiments: Can I Make Homemade Breadsticks?

Thursday, September 18th, 2008


Experiment: Can I whip up a batch of homemade breadsticks?

Experiment Taken From: Notebook Entry 08.21.08

Materials Needed: Please see Chocolate On My Cranium for the full instructions on ideas for completing this task. I followed her instructions and just used my stand mixer for this project. I also added my own additions of a 1/4 tsp garlic powder, a 1/4 tsp of Italian seasoning mix, and a handful of Parmesan cheese for sprinkling on top. For a fast dipping sauce, I used a jar of Aldi’s spaghetti sauce.

Results: This is the first time that I have ever tried to make homemade breadsticks, but I really needed some type of bread for dinner and this recipe looked fast and easy. I was doubly inspired to try this because Heather, from Freebies 4 Mom, had attempted making these and I read through all of the suggestions on her comment thread before making them.

I added 1/4 cup of extra flour to make sure that the dough was sticky, but not too sticky. I let the stand mixer do all the work for me and plopped all of the ingredients in the mixer after the yeast, sugar, and water had proofed. Within five minutes, the dough was nicely incorporated.

I poured the butter onto a rimmed cookie sheet and then scooped the dough with a spatula onto the sheet. I flipped it, covering both sides in butter and then sprinkled my addition of Parmesan cheese.

I covered the whole cookie sheet with plastic wrap and popped it in my fridge until our dinner hour. About a half hour before our dinner, I pulled it out of the fridge and let it rest on the counter while our oven preheated.

I slid a big tray of my favorite baked ziti into the oven and then popped in the breadsticks for the last twenty minutes at 350 degrees. It needed a few extra minutes more than the required cooking time, but I think that was because they had been refrigerated.

Conclusion: These breadsticks were amazing and a great way to get a large batch of bread on the table while being creative with your pantry ingredients. Next time I will add a little bit more salt to add more flavor, but other than that, I thought they were perfect. I can see us making these over and over again in our house and I want to thank Chocolate On My Cranium for a wonderful new side dish we can add to our table!
********************

I am so excited to open our Notebook Experiments up to everyone and I hope that you will be able to participate this week or in weeks to come! I will be posting this each Thursday so please mark your calendars if you plan to participate. You can post your entries at any time throughout the week and then leave your entry in the links below.

We have this handy banner that you are more than welcome to use, but it is not a requirement! It is just something you can add to add a little sparkle to your entry.

Rules for Participation:

1. Choose anything from any of our notebook entries (past or present) to do with your family. We have hundreds of bookmarked links of crafts, ways to save money, and organizing ideas.
2. Complete an experiment from the notebook and share about it on your blog or website. We would love to see pictures of what you accomplished or a detailed description of how your projects turned out. Please include a link to this entry, a link to the original posting of the entry (at the original crafster’s blog), and (to help us relocate the project) the date or link of the notebook entry where you found it. You can use the same formatting as our entries or you can just include that information in your post in your own unique way!
3. Post a link below. Please include your name or blog name & a fast description of your project. Example- MomAdvice (WHO bread)

I can’t wait to see what you create and what you find inspiring!

Best Birthday Cupcakes In the World

Monday, September 1st, 2008
My sister-in-law’s boyfriend celebrated his birthday Friday night. To help out with the evening’s festivities, I offered to make the cupcakes for his special day. I found a recipe in my favorite cupcake book, “Cupcakes from the Cake Doctor” and picked her “Best Birthday Cupcakes” recipe.

These cupcakes are as close to a bakery cupcake as I will probably ever make. They are light and sweet, but not too sweet. They have a great consistency and are perfectly moist and sturdy enough to hold up to a good dose of yummy frosting.

I will probably never search for the perfect birthday cupcake again after sampling these. I paired the cupcake with her Chocolate Syrup Frosting which was the perfect way to top this delicious cake.

No more searching, ladies! This is THE cupcake for every celebration. Enjoy!!

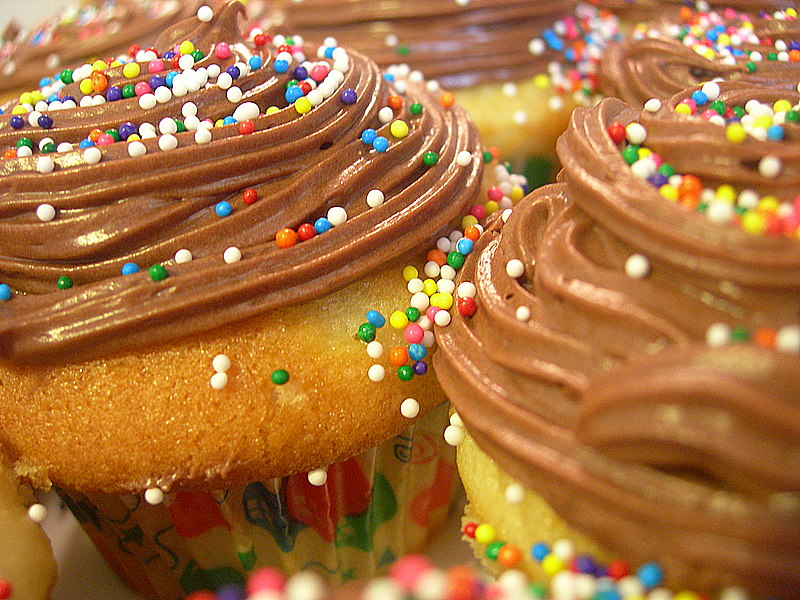
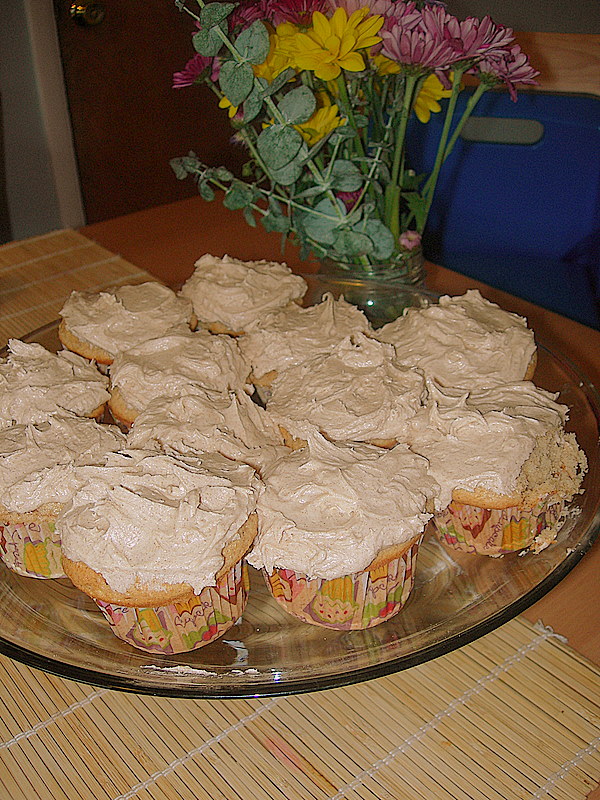
The Best Birthday Cupcakes

24 paper liners

1 package plain butter recipe golden cake mix (I subbed with white and loved it!)

1 package (8 ounces) reduced-fat cream cheese, at room temperature

1/2 cup sugar

1/2 cup water

1/2 cup vegetable oil

4 large eggs

1 tablespoon pure vanilla extract

Chocolate Syrup Frosting (recipe to follow)

Colored sprinkles or candy cake decorations for garnish

Place a rack in the center of the oven and preheat to 350 degrees. Line cupcake cups with liners. Set the pans aside. Place the cake mix, cream cheese, sugar, water, oil, eggs, and vanilla in a large mixing bowl. Blend on low speed with an electric mixer for 30 seconds, until the ingredients are well blended then stop the machine and scrape down the sides. Increase the mixer to medium speed and beat for 1 1/2 minutes to 2 minutes more, scraping down the sides again if needed. The batter should be smooth and thickened. Spoon or scoop 1/4 cup batter into each lined cupcake cup, filling it two thirds of the way full (You should get between 22-24 cupcakes). Place the pans in the oven. Bake the cupcakes until they are golden and spring back when lightly pressed with your finger, 24-27 minutes. Remove pans from oven and place them on wire racks to cool for five minutes. Run a dinner knife around the edges of the cupcake liners, lift the cupcakes up from the bottoms of the cups using the end of the knife, and pick them out of the cups carefully with your fingertips. Place them on a wire rack to cool fifteen minutes before frosting. Meanwhile prepare your frosting…
Chocolate Syrup Frosting

1 stick butter, at room temperature

1/2 cup unsweetened cocoa powder

1/2 cup chocolate syrup

3 cups confectioner’s sugar, sifted

1 tablespoon milk

1 teaspoon vanilla extract

Place the butter, cocoa powder, and chocolate syrup in a large mixing bowl. Blend with an electric mixer on low speed until just combined (about 30 seconds). Stop the machine and add the sugar, milk, and vanilla. Blend with the mixer on low speed until the sugar is incorporated, 1 minute. Increase the speed to medium and beat until light and fluffy, 1 minute more. Use to frost your cupcakes.

*This post originally aired on October 8, 2007*

Snickerdoodle Cupcakes

Monday, September 1st, 2008

Welcome to a Play It Again, Momma week! This week we will be highlighting some of our favorite entries and today we kick off the week with three great recipes. I hope you will join me this week as I highlight some oldies, but goodies!


We had a reason to celebrate this week because my husband started a new job. We are so grateful that he has been given this opportunity and that he will be able to start a new adventure on his career path.

We wanted to do something to celebrate his first day of work so we made him one of his favorite treats…Snickerdoodle Cupcakes!

These are so delicious and I got the recipe from one of the Cake Doctor books. It has been a favorite in our house for several years and a frequent request for family birthdays.

The cake has just the right blending of flavors and the cake mix make these easy to whip up for unexpected company. It is the cinnamon frosting that pushes it over the top though so take the time to make the icing from scratch since you are saving time on the cake by using the mix!

I hope you can try these in your house- let me know what you think!

Snickerdoodle Cupcakes (these can be made into a cake too- whichever you prefer)

1 package plain white cake mix
1 cup whole milk
1 stick of butter, melted
3 large eggs
1 teaspoon vanilla extract
2 teaspoons ground cinnamon

Frosting:
1 stick butter
3 3/4 cup confectioners sugar
3-4 Tablespoons milk
1 teaspoon vanilla extract
1 Tablespoon ground cinnamon

Preheat oven to 350 degrees and flour & grease 2 9″ pans (for cakes) or line your cupcake tin. Place cake mix, milk, melted butter, eggs, vanilla, and cinnamon in a large mixing bowl. Blend for three minutes (stop to scrape once). Pour into pans and bake for 27-29 minutes (for cake) or 22-25 minutes (for cupcakes). Allow the cakes to cool completely.

Beat butter until fluffy for frosting. Add all other ingredients.

Note: I froze half of these (without frosting) to keep in our freezer for another occasion. They freeze very nicely!

Notebook Experiments: Oatmeal, Chocolate Chip, & Pecan Cookies

Thursday, May 29th, 2008

Experiment: Will Oatmeal, Chocolate Chip, & Pecan Cookies satisfy my sweet tooth?

Experiment Taken From: Notebook Entry 11.14.07

Materials Needed: Please see Smitten Kitchen for specific directions on how to complete this experiment. We did omit a couple of ingredients in the recipe because of our personal taste. The recipe called for two cups of pecans, but my family doesn’t like pecans so we left those out. The batter was pretty wet without this addition though so I added an extra cup of the quick cooking oats to firm the dough up. I also omitted the orange zest because I had no oranges here.

Results: With the addition of the extra cup of oatmeal (minus the pecans), these turned out delicious. The dough was very easy to work with, in fact, I could mold the balls in my hands without sticking.

The first batch was a tad too crispy because the cookies did not look done and I left them in for an extra two minutes. This was a mistake. The next batch was perfect at 12 minutes at 350 degrees. Don’t make the same mistake and it should yield a cookie that is chewy, but also soft. The edges should be a light brown and don’t worry so much about the tops!

Conclusion: These cookies were absolutely delicious and the hint of cinnamon in them gave them that extra something special. By omitting the pecans and replacing this ingredient with oatmeal, it helped to keep the cost low on making this treat and yielded delicious results. Thank you, Smitten Kitchen, for generously sharing your recipes with the public!

Key Lime Pie With a Graham Cracker & Oatmeal Crust

Sunday, April 13th, 2008

For my brother’s birthday, he requested his favorite pie… Key Lime! I had never made this type of pie before, but was up for the challenge after hunting around on Recipezaar.com for the perfect recipe.

I used this recipe for the crust which contained the graham crackers and oatmeal, instead of just the plain oatmeal crust. It turned out perfect and made the crust a little heartier and a tad less sweet, which balanced the citrus wonderfully.

I don’t have any pictures of the pie because we gobbled it up too fast, but it turned out wonderful. I used this recipe for the filling and the only thing I didn’t like about it was that I thought I should have doubled the filling for these pies. I had a lot of crust and a little filling, which made it look more like a tart with too much crust. Regardless, everyone seemed to really enjoy it and I was proud to get to help with the celebration!

I look forward to making more of these this summer. Lucky for me, it is the only pie my husband will eat so I am glad to have found a recipe that he liked.


Starbuck Banana Pound Cake

Thursday, December 27th, 2007

Source: “Fast Food Fix,” by Devin Alexander

Starbucks Banana Pound Cake

Ingredients: Butter flavored cooking spray, 2 cups flour, 1 teaspoon baking soda, 1 teaspoon salt, 1/2 teaspoon baking powder, 1 cup mashed very ripe bananas, 1 cup sugar, 2 egg whites, 2/3 cup fat-free vanilla or banana yogurt, 2/3 cup chopped walnuts (I omitted the walnuts)

Directions: Preheat the oven to 350. Mist a 9x5x3″ nonstick loaf pan with cooking spray. Set aside. In a small bowl, combine the flour, baking soda, salt, and baking powder. Set aside. In a large mixing bowl, combine the bananas, sugar, egg whites, and yogurt. Using a sturdy whisk or a spoon, mix until throughly blended. Add the flour mixture. Stir until no flour is visible. Stir in the nuts. Pour into the reserved pan. Bake for 50-60 minutes or until a toothpick inserted in the center comes out dry. Cool in the pan on a rack for ten minutes. Remove to the rack and cool completely. Cut into eight slices. Serve warm or room temperature. Wrap and refrigerate any leftovers for up to three days.