Source: “Perfect Light Desserts,†by Nick Malgieri
These are absolutely delicious AND lower in calories than the traditional cookie recipe. Visit this post for a detailed review and pictures.
David’s Skinny Chocolate Chip Cookies
1 ¼ cup all-purpose flour
1 teaspoon baking soda
½ teaspoon salt
4 tablespoons unsalted butter, softened
½ cup light brown sugar, firmly packed
6 tablespoons granulated sugar
1 large egg
2 tablespoons whole milk
1 teaspoon vanilla extract
1 ½ cups (about ¾ of a 12-ounce bag) chocolate chips
2 cookie sheets lined with parchment or foil
Set racks in the upper and lower thirds of the oven and preheat to 350 degrees. Mix the flour, baking soda, and salt together and set aside. Beat the butter and sugars together by machine with the paddle attachment on medium speed until well mixed (about one minute). Beat in the egg and milk until they are absorbed and then the vanilla. Don’t worry if the mixture looks curdled, the flour mixture will smooth it out. Scrape down the bowl and beater and beat in the flour mixture on low speed. Use a large rubber spatula to fold in the chocolate chips. Chill the dough in the bowl for fifteen minutes to keep the cookies from spreading too much while they are baking. Form the dough into 1 1/2-inch balls or use a small ice cream scoop to form the cookies. Arrange the balls of dough 2 inches apart all around the prepared pans. Bake the cookies for eight to twelve minutes, or until they look dull on the surface, have spread, and are still quite moist. Cool the cookies on the pans on racks for five minutes. Slide the papers to racks and cool the cookies completely. For storing: keep the cookies between sheets of wax paper in a tin or plastic container with a tight-fitting lid.
Per cookie: 114 calories, 5 g total fat, 3 g saturated fat, 2 g protein, 17 g carbohydrates, 1 g fiber, 11 mg cholesterol, 85 mg sodium
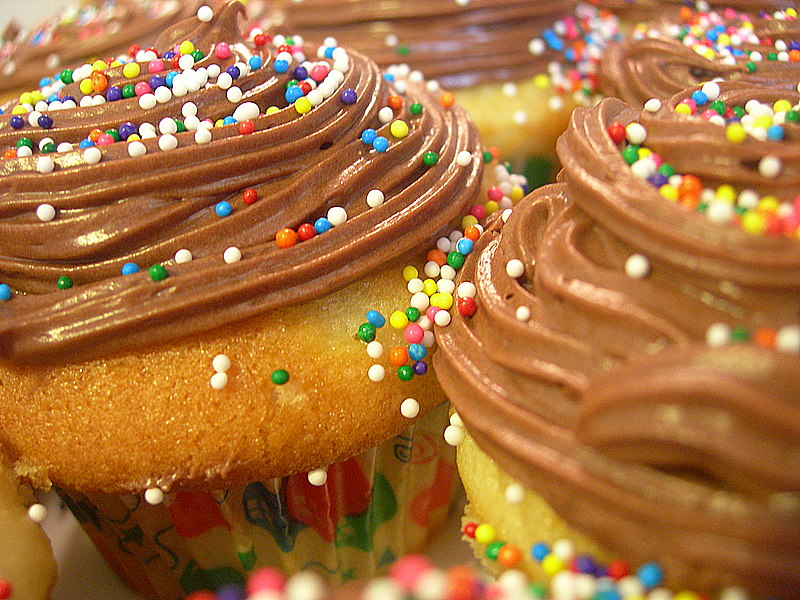
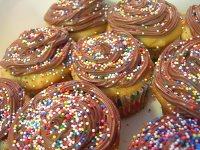
Pictures are posted here! You can’t go wrong with this cupcake and I have made these for many events in our family. Enjoy!
The Best Birthday Cupcakes
24 paper liners
1 package plain butter recipe golden cake mix (I subbed with white and loved it!)
1 package (8 ounces) reduced-fat cream cheese, at room temperature
1/2 cup sugar
1/2 cup water
1/2 cup vegetable oil
4 large eggs
1 tablespoon pure vanilla extract
Chocolate Syrup Frosting (recipe to follow)
Colored sprinkles or candy cake decorations for garnish
Place a rack in the center of the oven and preheat to 350 degrees. Line cupcake cups with liners. Set the pans aside. Place the cake mix, cream cheese, sugar, water, oil, eggs, and vanilla in a large mixing bowl. Blend on low speed with an electric mixer for 30 seconds, until the ingredients are well blended then stop the machine and scrape down the sides. Increase the mixer to medium speed and beat for 1 1/2 minutes to 2 minutes more, scraping down the sides again if needed. The batter should be smooth and thickened. Spoon or scoop 1/4 cup batter into each lined cupcake cup, filling it two thirds of the way full (You should get between 22-24 cupcakes). Place the pans in the oven. Bake the cupcakes until they are golden and spring back when lightly pressed with your finger, 24-27 minutes. Remove pans from oven and place them on wire racks to cool for five minutes. Run a dinner knife around the edges of the cupcake liners, lift the cupcakes up from the bottoms of the cups using the end of the knife, and pick them out of the cups carefully with your fingertips. Place them on a wire rack to cool fifteen minutes before frosting. Meanwhile prepare your frosting…
Chocolate Syrup Frosting
1 stick butter, at room temperature
1/2 cup unsweetened cocoa powder
1/2 cup chocolate syrup
3 cups confectioner’s sugar, sifted
1 tablespoon milk
1 teaspoon vanilla extract
Place the butter, cocoa powder, and chocolate syrup in a large mixing bowl. Blend with an electric mixer on low speed until just combined (about 30 seconds). Stop the machine and add the sugar, milk, and vanilla. Blend with the mixer on low speed until the sugar is incorporated, 1 minute. Increase the speed to medium and beat until light and fluffy, 1 minute more. Use to frost your cupcakes.
Preheat oven to 350 degrees and flour & grease 2 9″ pans (for cakes) or line your cupcake tin. Place cake mix, milk, melted butter, eggs, vanilla, and cinnamon in a large mixing bowl. Blend for three minutes (stop to scrape once). Pour into pans and bake for 27-29 minutes (for cake) or 22-25 minutes (for cupcakes). Allow the cakes to cool completely.
Beat butter until fluffy for frosting. Add all other ingredients.
Note: I froze half of these (without frosting) to keep in our freezer for another occasion. They freeze very nicely!
8 ounces cream cheese, softened 1/2 cup unsalted butter, softened 1/4 teaspoon vanilla extract 3/4 cup powdered sugar 2 tablespoons brown sugar 3/4 cup miniature semisweet chocolate chips
More chocolate chips (optional) or chopped nuts, to roll the ball in
In a mixing bowl, beat cream cheese, butter, and vanilla until fluffy. Gradually add sugars and beat until just combined. Stir in chocolate chips. Cover and refrigerate for 2 hours. Form cheese into a ball using hand protection (Saran wrap, wax paper, etc). Optional- just before serving, roll in additional chocolate chips or nuts of your choice. Serve with graham crackers.
My sister-in-law’s boyfriend celebrated his birthday Friday night. To help out with the evening’s festivities, I offered to make the cupcakes for his special day. I found a recipe in my favorite cupcake book, “Cupcakes from the Cake Doctor” and picked her “Best Birthday Cupcakes” recipe.
These cupcakes are as close to a bakery cupcake as I will probably ever make. They are light and sweet, but not too sweet. They have a great consistency and are perfectly moist and sturdy enough to hold up to a good dose of yummy frosting.
I will probably never search for the perfect birthday cupcake again after sampling these. I paired the cupcake with her Chocolate Syrup Frosting which was the perfect way to top this delicious cake.
No more searching, ladies! This is THE cupcake for every celebration. Enjoy!!
The Best Birthday Cupcakes
24 paper liners
1 package plain butter recipe golden cake mix (I subbed with white and loved it!)
1 package (8 ounces) reduced-fat cream cheese, at room temperature
1/2 cup sugar
1/2 cup water
1/2 cup vegetable oil
4 large eggs
1 tablespoon pure vanilla extract
Chocolate Syrup Frosting (recipe to follow)
Colored sprinkles or candy cake decorations for garnish
Place a rack in the center of the oven and preheat to 350 degrees. Line cupcake cups with liners. Set the pans aside. Place the cake mix, cream cheese, sugar, water, oil, eggs, and vanilla in a large mixing bowl. Blend on low speed with an electric mixer for 30 seconds, until the ingredients are well blended then stop the machine and scrape down the sides. Increase the mixer to medium speed and beat for 1 1/2 minutes to 2 minutes more, scraping down the sides again if needed. The batter should be smooth and thickened. Spoon or scoop 1/4 cup batter into each lined cupcake cup, filling it two thirds of the way full (You should get between 22-24 cupcakes). Place the pans in the oven. Bake the cupcakes until they are golden and spring back when lightly pressed with your finger, 24-27 minutes. Remove pans from oven and place them on wire racks to cool for five minutes. Run a dinner knife around the edges of the cupcake liners, lift the cupcakes up from the bottoms of the cups using the end of the knife, and pick them out of the cups carefully with your fingertips. Place them on a wire rack to cool fifteen minutes before frosting. Meanwhile prepare your frosting…
Chocolate Syrup Frosting
1 stick butter, at room temperature
1/2 cup unsweetened cocoa powder
1/2 cup chocolate syrup
3 cups confectioner’s sugar, sifted
1 tablespoon milk
1 teaspoon vanilla extract
Place the butter, cocoa powder, and chocolate syrup in a large mixing bowl. Blend with an electric mixer on low speed until just combined (about 30 seconds). Stop the machine and add the sugar, milk, and vanilla. Blend with the mixer on low speed until the sugar is incorporated, 1 minute. Increase the speed to medium and beat until light and fluffy, 1 minute more. Use to frost your cupcakes.
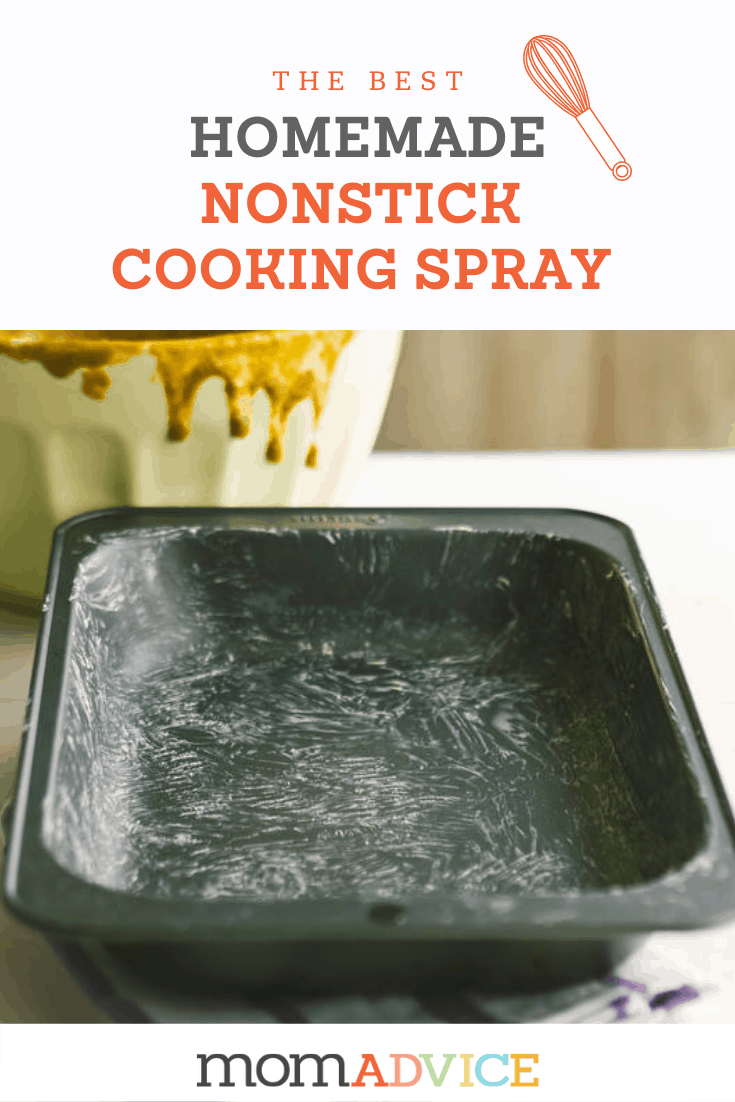
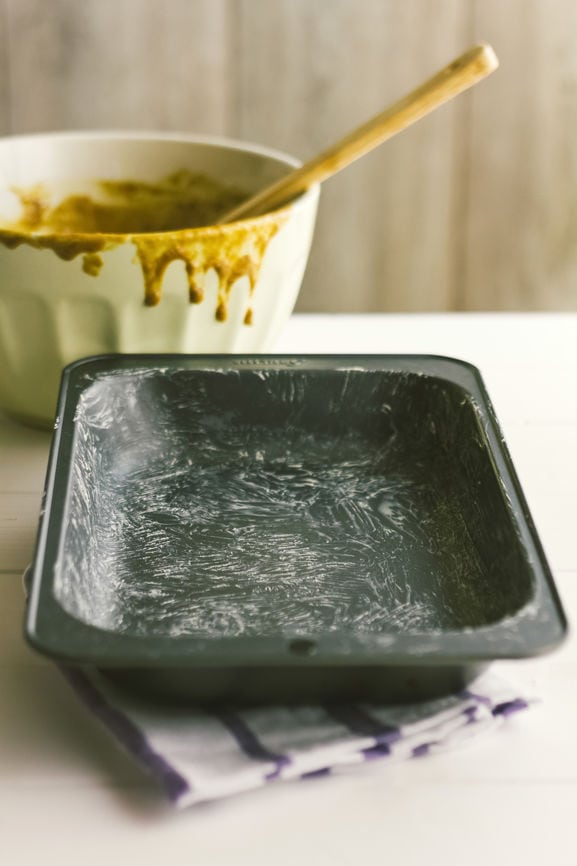
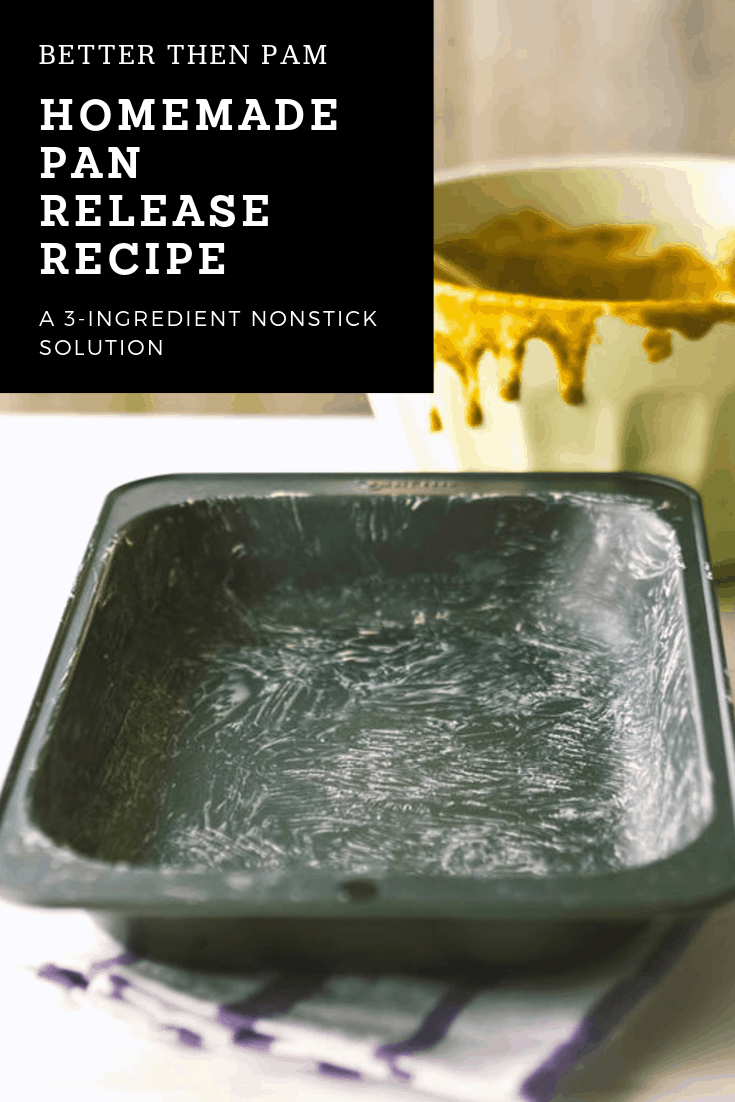
Did you know that you can substitute your Pam cooking spray with this amazing diy pan release recipe. Stored at room temperature, this homemade version works great and won’t gunk up your pans like the usual cooking oil sprays. You won’t believe how easy it is to whip up this homemade cooking spray for all your baking needs.
Did you know that you can make your own pan release with just a few simple pantry ingredients.
When I first began baking, I relied heavily on store bought sprays to insure that my baked goods wouldn’t stick.
What I didn’t realize was the gunk that can build up on my pans from these sprays. Experts say that gunk can be removed, from your pans with a soak of baking soda and vinegar. I’ll be honest though, I have found it pretty darn impossible to remove this residue from my pans.
One popular substitute is a to purchase a spray bottle oil mister. These reusable misters can be filled with your olive oil (or vegetable oil) and applied just as you would with Pam.
Even after buying this kitchen gadget, I found my cakes and quick breads continued to stick to the pans. This green alternative just didn’t end up begin the solution I thought it would be.
You could say that my cake pans and these spray misters went together like oil and water.
Hahaha!
What’s the Secret to A Nonstick Spray That Doesn’t Gunk Up Your Pans?
I discovered this recipe when I signed up for a cake decorating course, at my local Michael’s.
I couldn’t wait to learn the secrets to perfect cakes and one of her best tips was on cake removal. I assumed she would tell us a product to buy, but it ended up being a pantry recipe that anyone could make.
Instead of commercial sprays, she greased her pans with a homemade mixture of oils and flour.
Say what?
That sounds way more affordable!
While fancy commercial cake release sprays were available, she found making her very own version of this yielded way better results.
I decided to take her word for it and can’t believe how beautifully it performed. I was no longer battling the icky residue.
How Do You make DIY Pan Release Spray?
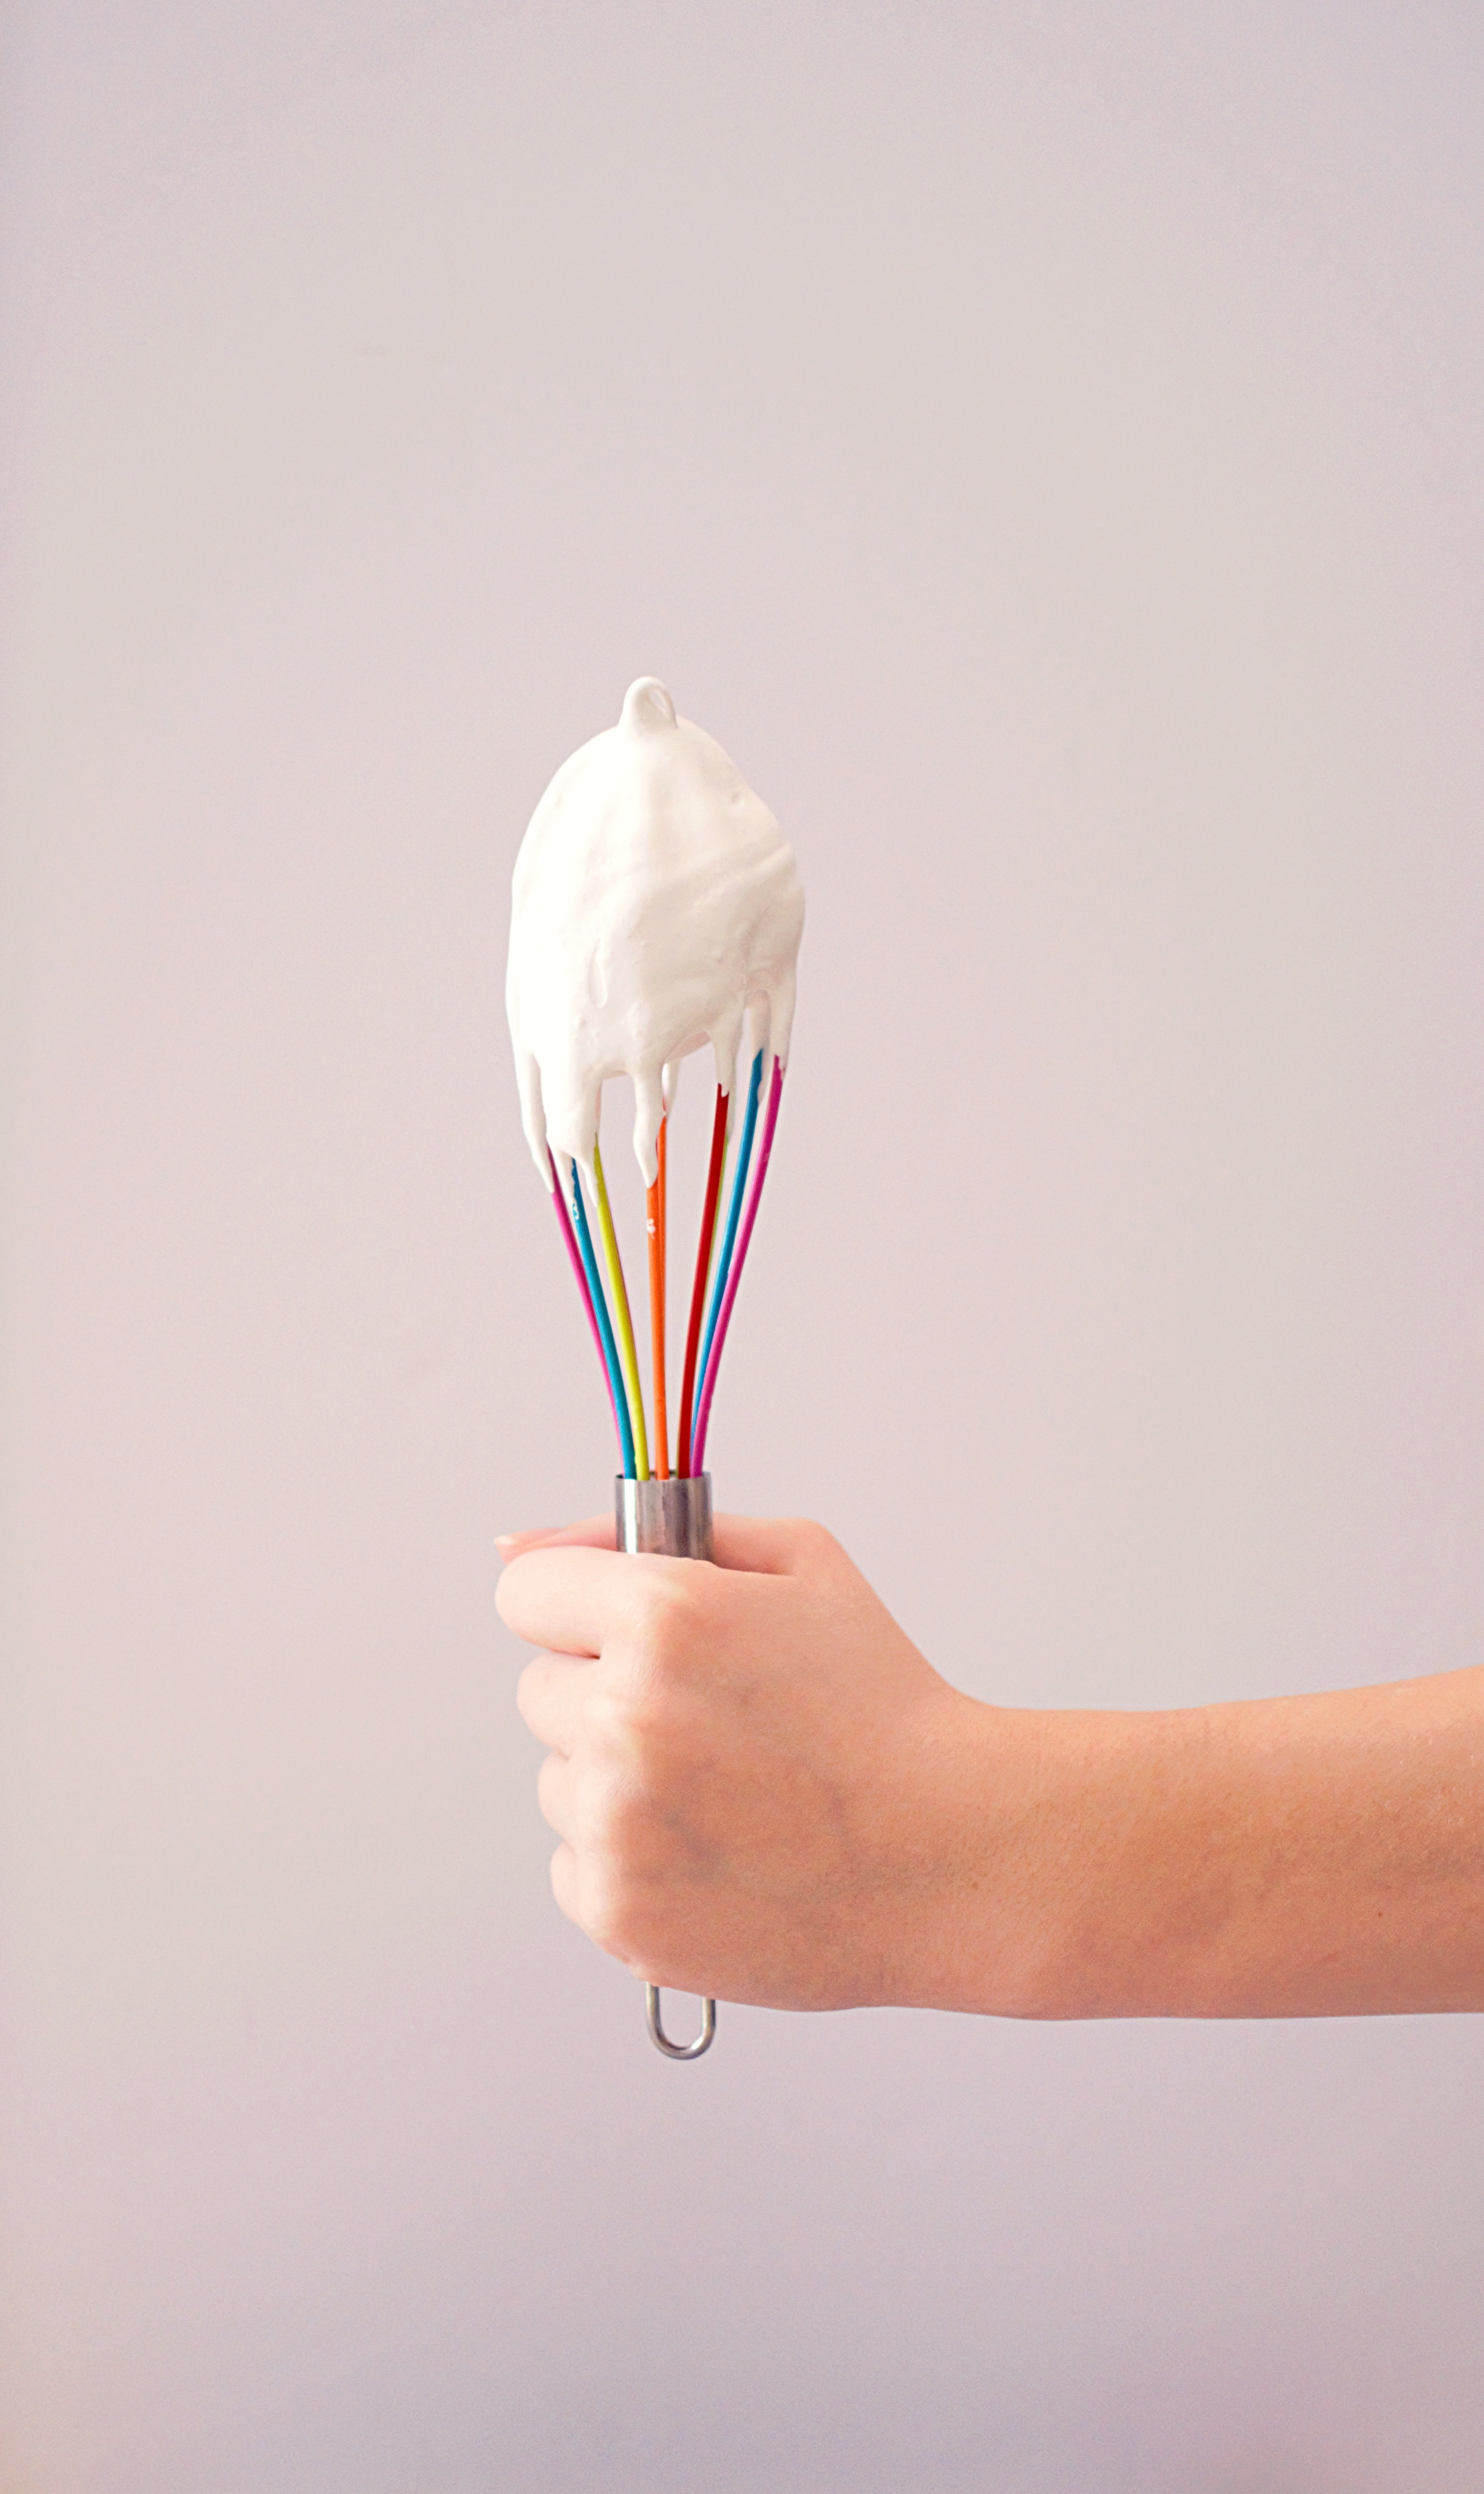
DIY Pam Spray can be made with equal parts canola oil and vegetable shortening. Finally, the addition of flour, is added in to give this mixture a marshmallow creme consistency. I have found the use of a stand mixer makes this even easier to pull together!
How Do I Store My Homemade Non Stick Spray?
No need to refrigerate this because it can be stored at room temperature. I keep mine in a simple mason jar and apply it with a pastry brush.
Unlike coconut oil, you don’t need to worry about warming up your oil before applying it to your griddles and pans.
These ingredients may separate, but I just use a spoon to mix them back together when that happens.
How Do I Use DIY Pan Release Spray?
Keep in mind, a little goes a long way so start small. I find it is easiest to apply with a simple pastry brush. Dip your pastry brush, into the pan release, and paint it on your pans. This can be used to create nonstick surfaces on cake pans, bundt cake pans, griddles, and cake pans.
This recipe is so inexpensive so you will save some money at the grocery store too! I hope you can try it- you really won’t believe how great the results are. I won’t ever use anything else again!
How to Make Homemade Nonstick Spray (DIY Pan Release Spray)
Author: MomAdvice.com
Prep time:
Total time:
Serves: 1 1/2 cups
Did you know that you can substitute your Pam cooking spray with this amazing diy pan release recipe. Stored at room temperature, this homemade version works great and won’t gunk up your pans like the usual cooking oil sprays. You won’t believe how easy it is to whip up this homemade cooking spray for all your baking needs.
Ingredients
1/2 cup canola oil
1/2 cup vegetable shortening (room temperature)
1/2 cup all-purpose flour
Instructions
Place all ingredients in a mixing bowl.
Using an electric mixer beat until mixture has increased in volume slightly and resembles marshmallow cream.
Place in an airtight container with a lid (like a mason jar). This can be stored in your cupboard. In the warmer months, you can keep it in your refrigerator.
If your mixture separates, just stir to bring these ingredients back together.
Use a pastry brush to brush on the your homemade cake release. Remember, a little goes a long way.
3.4.3177
Love this tutorial? Here are three other DIY projects I think you might like!
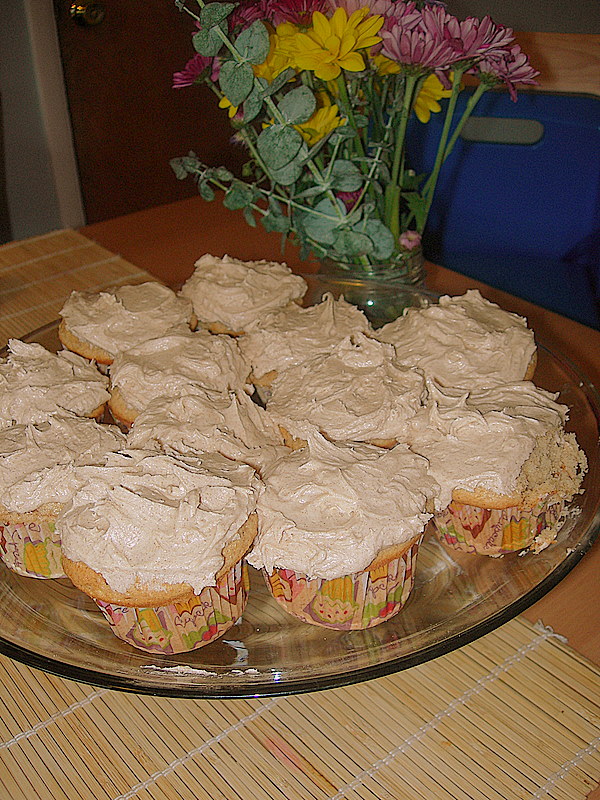
We had a reason to celebrate this week because my husband started a new job. We are so grateful that he has been given this opportunity and that he will be able to start a new adventure on his career path.
We wanted to do something to celebrate his first day of work so we made him one of his favorite treats…Snickerdoodle Cupcakes!
These are so delicious and I got the recipe from one of the Cake Doctor books. It has been a favorite in our house for several years and a frequent request for family birthdays.
The cake has just the right blending of flavors and the cake mix make these easy to whip up for unexpected company. It is the cinnamon frosting that pushes it over the top though so take the time to make the icing from scratch since you are saving time on the cake by using the mix!
I hope you can try these in your house- let me know what you think!
Snickerdoodle Cupcakes (these can be made into a cake too- whichever you prefer)
1 package plain white cake mix 1 cup whole milk 1 stick of butter, melted 3 large eggs 1 teaspoon vanilla extract 2 teaspoons ground cinnamon
Preheat oven to 350 degrees and flour & grease 2 9″ pans (for cakes) or line your cupcake tin. Place cake mix, milk, melted butter, eggs, vanilla, and cinnamon in a large mixing bowl. Blend for three minutes (stop to scrape once). Pour into pans and bake for 27-29 minutes (for cake) or 22-25 minutes (for cupcakes). Allow the cakes to cool completely.
Beat butter until fluffy for frosting. Add all other ingredients.
Note: I froze half of these (without frosting) to keep in our freezer for another occasion. They freeze very nicely!
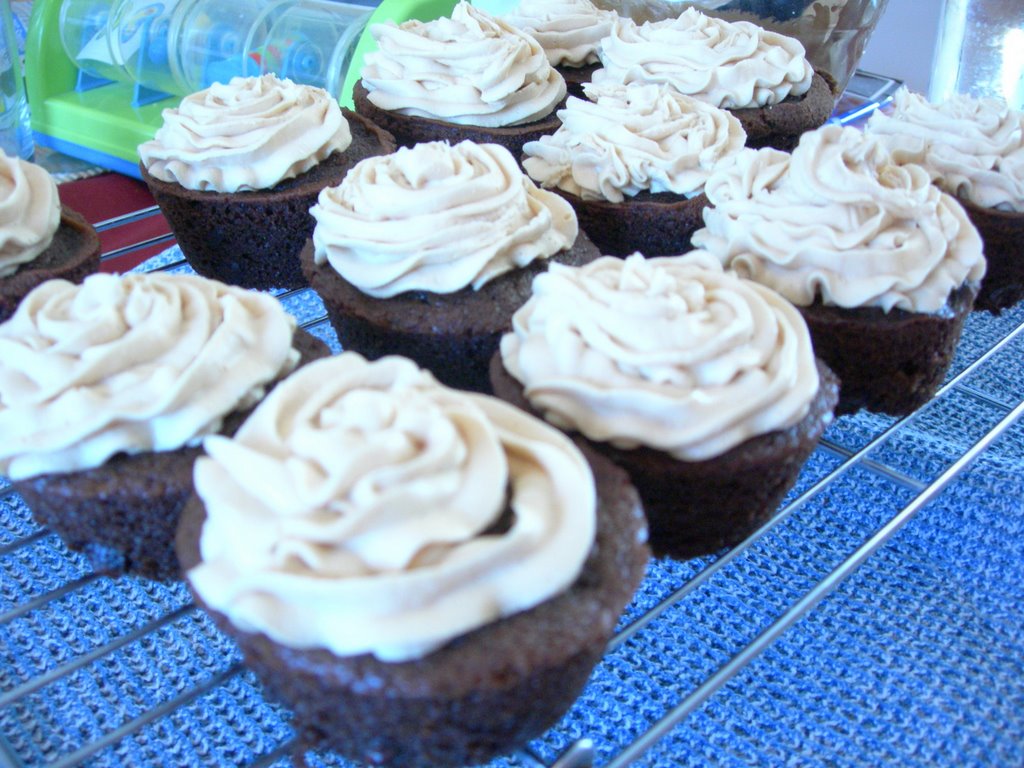
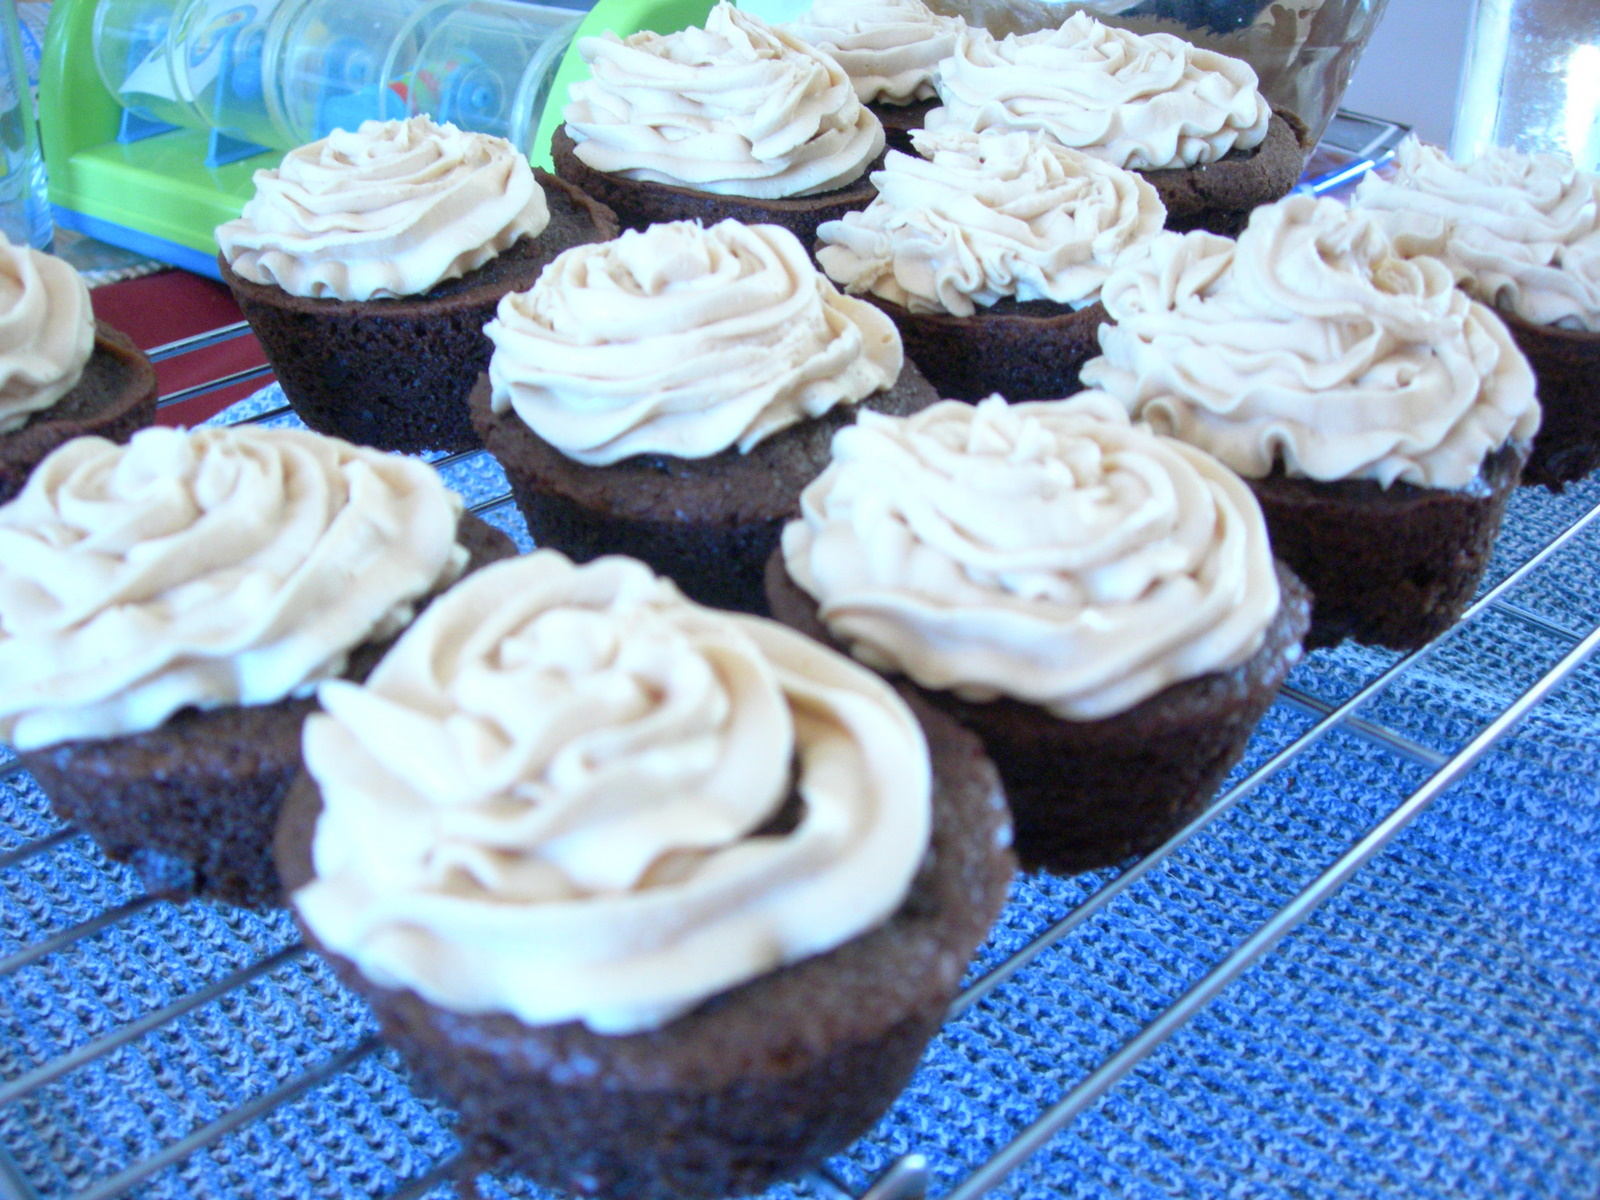
I know that I have posted these over on my other blog, but these were just too good not to post here too. After watching an episode of Barefoot Contessa, I was inspired to make a batch of these cupcakes. I didn’t have all the ingredients on hand to make her recipe, but I was able to dig up these recipes from Recipezaar.com to create something similar.
These cupcakes were chocolate cupcakes, but they do not have a rich chocolate flavor. If you wanted a really chocolaty treat, you could add an additional amount of cocoa powder.
What sets this cupcake apart from other cupcakes, is this amazing peanut butter frosting. I could have licked the bowl and skipped the cupcakes altogether. It is just so heavenly and light!
I am going to be mixing up the dry ingredients for these to have on hand just like I have my other mixes in our cupboard. These will be great for a last minute treat or for those countless potlucks & school functions we have. Just mix up your dry ingredients and write the wet ingredients and baking temperatures on the outside of the bag.
I hope you can enjoy this sweet treat!
Easy One-Bowl Milk Chocolate Fudge Cupcakes Courtesy of Recipezaar.com
1 3/4 cups all-purpose flour 1 cup brown sugar 1/4 cup unsweetened baking cocoa (sifted) 1 teaspoon baking powder 1 teaspoon baking soda 1/2 teaspoon salt 1/8-1/4 teaspoon cinnamon (optional) 1 cup milk or half-and-half cream 1 egg, slightly beaten 1/3 cup salad oil (use Canola or vegetable oil) 1 teaspoon vanilla 1 cup semisweet mini chocolate chips 1/2 cup chopped nuts (optional)
Set oven to 350 degrees. Line 12 regular size muffin tin with paper liners. In a medium-size mixing bowl, mix together the flour, brown sugar, sifted baking cocoa, baking powder, baking soda, salt and cinnamon (if using); mix with a wooden spoon to combine. In a two-cup measuring cup or bowl whisk together the milk, egg, oil and vanilla. Add the milk/egg mixture to the dry ingredients; mix very well with a wooden spoon to combine well. Mix in the chocolate chips and nuts (if using). Divide the batter evenly between the lined muffin tins. Bake for 22-25 minutes, or until a toothpick inserted in the middle comes out clean (don’t overbake!). Cool, and frost with favorite frosting
Easy One-Bowl Milk Chocolate Fudge Cupcakes
Courtesy of Recipezaar.com
1 3/4 cups  all-purpose flour
1 cup brown sugar
1/4 cup unsweetened baking cocoa (sifted)
1Â teaspoon baking powder
1Â teaspoon baking soda
1/2 teaspoon salt
1/8-1/4 teaspoon cinnamon (optional)
1 cup milk or half-and-half cream
1Â egg, slightly beaten
1/3Â cup salad oil (use Canola or vegetable oil)
1Â teaspoon vanilla
1Â cup semisweet mini chocolate chips
1/2Â cup chopped nuts (optional)
Set oven to 350 degrees. Line 12 regular size muffin tin with paper liners.
In a medium-size mixing bowl, mix together the flour, brown sugar, sifted baking cocoa, baking powder, baking soda, salt and cinnamon (if using); mix with a wooden spoon to combine.
In a two-cup measuring cup or bowl whisk together the milk, egg, oil and vanilla.
Add the milk/egg mixture to the dry ingredients; mix very well with a wooden spoon to combine well. Mix in the chocolate chips and nuts (if using). Divide the batter evenly between the lined muffin tins. Bake for 22-25 minutes, or until a toothpick inserted in the middle comes out clean (don’t overbake!). Cool, and frost with favorite frosting
1/2  cup  peanut butter, smooth
5Â tablespoons margarine, softened
1Â cup powdered sugar (or more, to taste)
1-3Â tablespoon milk (only if needed to thin) (optional)
Beat butters together with electric mixer, add sugar. If too thick, add a little milk.
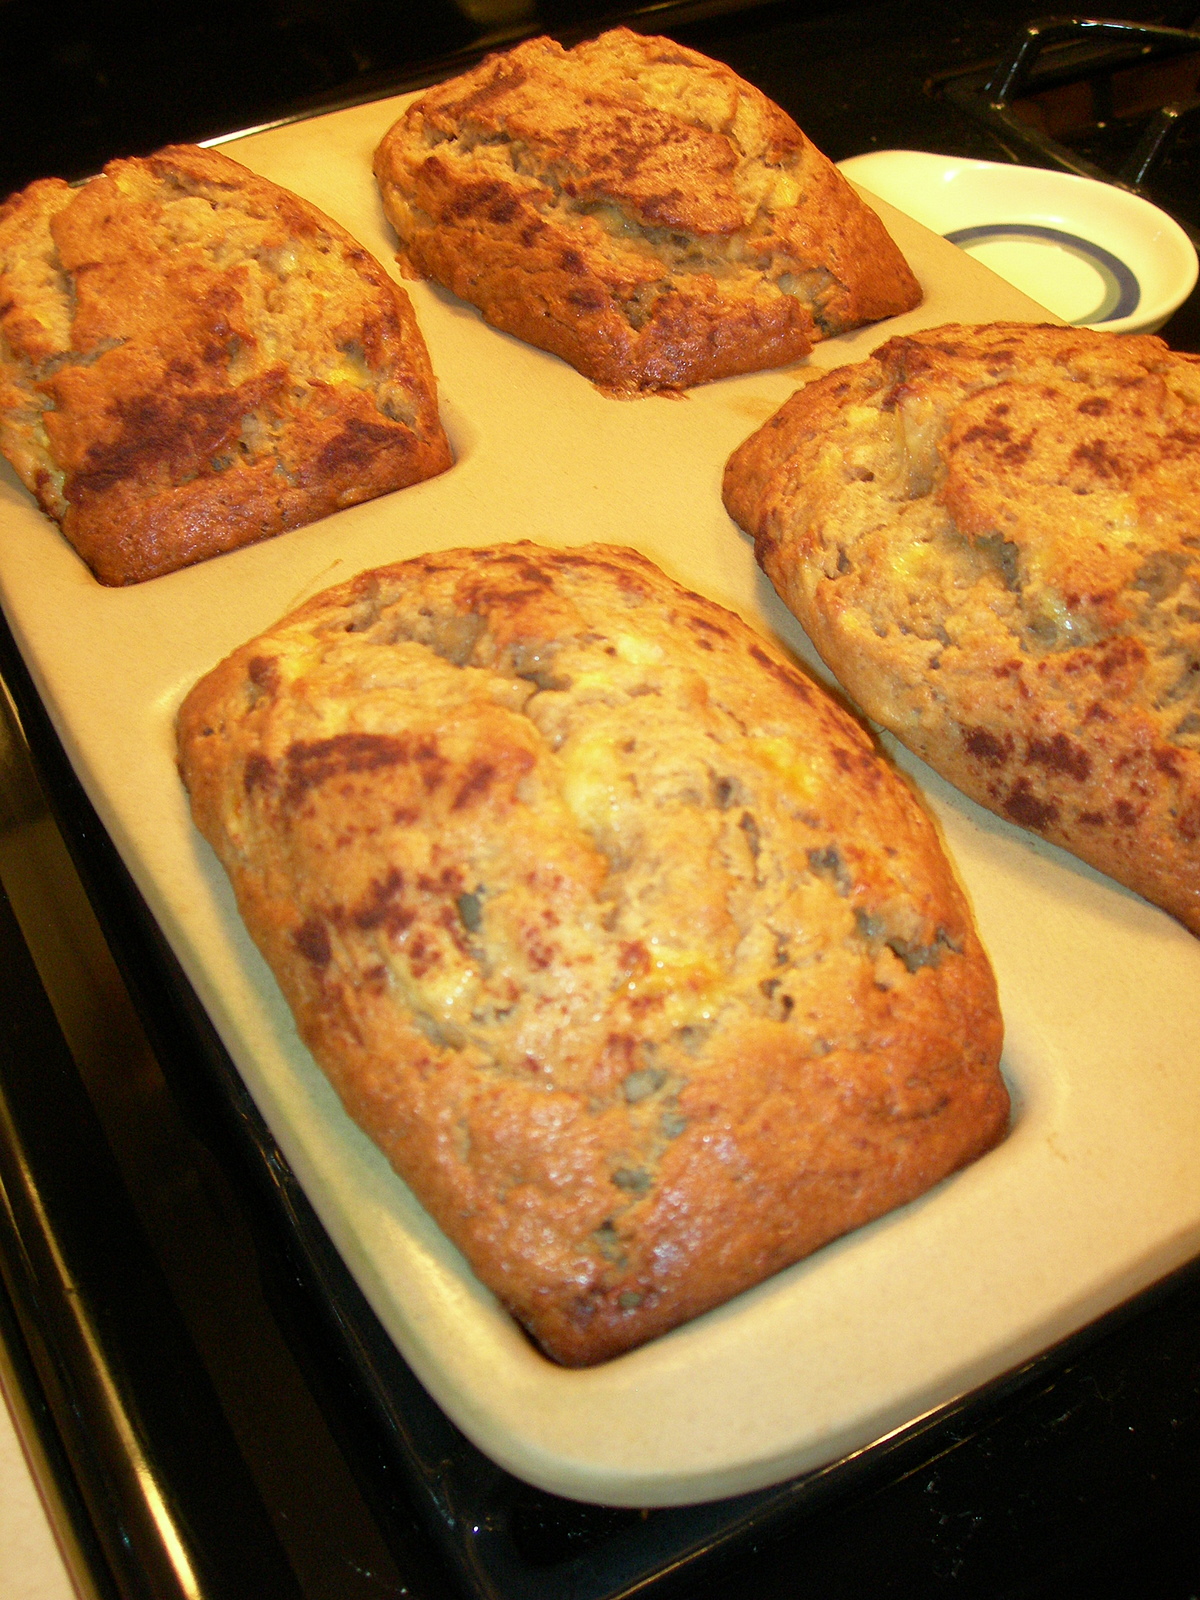
Note: If you are preparing this in a mini-loaf pan, just double the recipe to make four loaves. The cooking time will remain the same on these.
Heavenly Banana Bread Serves Eight
2 cups all-purpose flour
1 t. baking soda
1/4 teaspoon salt
1/2 cup butter
3/4 cup brown sugar
2 eggs beaten
1 teaspoon vanilla
1/2 teaspoon cinnamon
2 1/3 cups mashed overripe bananas – approximately four bananas
Preheat oven to 350. In a large bowl combine flour, baking soda, and salt. In a separate bowl cream together butter and brown sugar. Stir in eggs and mashed bananas until well blended. Stir banana mixture into flour mixture; stir just to moisten. Pour batter into prepared loaf pan. Bake 60-65 minutes. Allow bread to cool ten minutes in pan and then turn onto wire rack.
Nutritional facts per serving (daily value): Calories 372kcal; Protein 6g (11%); Total Fat 13g (20%)(Sat. 8g (39%)); Chol. 83mg (28%); Carb. 59g (20%); Fiber 3g (10%); Sugars 28g; Calcium 37mg (4%); Iron 2mg (13%)
 The Best Birthday Cupcakes