Archive for the ‘Kids Crafts’ Category

How to Entertain the Kids on Thanksgiving Day

Tuesday, November 20th, 2012

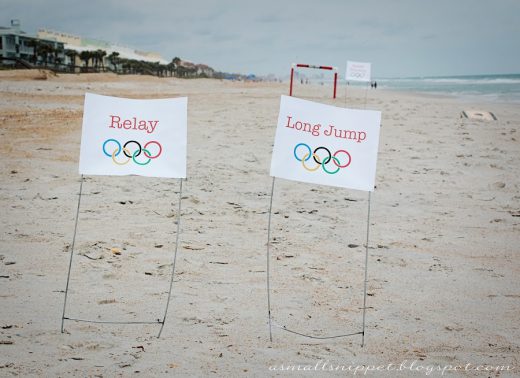
It has been so much fun preparing for the holidays with all of you. Today I am concluding our post series with Pure Charity with some fun ideas for keeping your kids entertained on Thanksgiving morning while you are busy preparing all of that Thanksgiving food…or just preparing for all of that fun with those relatives.

If you haven’t been following along the past three weeks, I have been sharing about a great site called Pure Charity and how your holiday shopping can make an impact on the organizations you are most passionate about. Did I mention signing up for this account is free and easy! I really encourage you to join in!

What is Pure Charity?

Pure Charity is a simple, but awesome concept for giving back to those causes you care most about. Basically, you install a simple toolbar into your web browser and then it alerts you with a small banner at the top when a store you are shopping with has a partnership with Pure Charity. Click on that little button and you are making a percentage deposit into your Giving Fund. Your Giving Fund can then be applied to the charities that are important to you and that you have a desire to support.

The first week we discussed some elegant and simple ways to create the perfect Thanksgiving table. I love that these ideas incorporated elements of nature, along with thoughtfully purchased items to mix into your everyday items, and a thankful chalkboard where the kids can jot down what they are most thankful for in their lives.
Next we created the Perfect Pumpkin Pie for our Thanksgiving dessert. I found beautiful tools to create a detailed crust and serve ware that made the pie look like a little piece of art through the Pure Charity partner sites.
Thanksgiving happens to be one of my favorite holidays and I love to make these holidays special and memorable for my kids. Pure Charity asked me to show everyone what could be done via their partners and gave me a small budget to pick out some items that I would recommend for keeping the whole family entertained on Thanksgiving Day.


Play Classic Board Games- If there is one thing our family loves, it is board games. You will often find our family spending our evenings playing board games together. Thanksgiving is a great time to break out the board games for the young and old alike. Group games like Apples to Apples, Jenga, or an adult round of Taboo can be a great way to keep your family laughing and spending time together. Hungry Hungry Hippos is always a great game to play with the kids and can be a fun way to keep the cousins entertained while the food is being prepared.  (Purchased through Target)


Watch A Classic Thanksgiving Movie– Our family’s favorite Thanksgiving movie is, “A Charlie Brown Thanksgiving.” Of course, any movie with Charlie Brown and the gang in it is always a guaranteed winner in our family.  (Purchase through Best Buy)

 
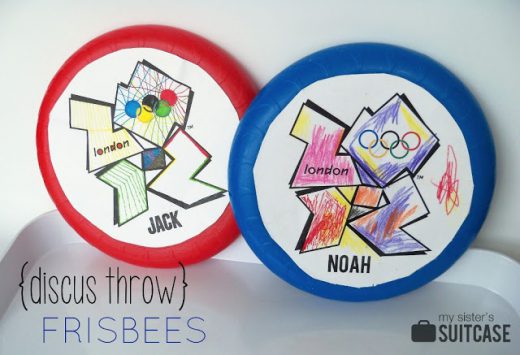
Bring Out Their Inner Artist-
If there is one thing my kids go through quickly it is art supplies. Items like colored pencils, construction paper, coloring and doodle books that inspire creativity in my children, and pre-made art kits can all be fun ways to get those creative juices flowing. I was able to find some amazing coloring books like, “The Fashion Coloring Book,” and “The Coloring Book,” that provide great prompts for your child’s imagination. Even better, I was able to find two Kid Made Modern Comic Book Kits so that each of my kids can create their very own comic books.  (All Purchased Through Target)


Just Dance It Out- A well-known fact about our family is that the Clark family is basically its own dance crew. If there is one thing we love to do it is to dance our troubles away. Just Dance 4 and Just Dance Disney games are two fun ways to get your kids moving after that big Thanksgiving feast and work off that sluggish, “I ate too much turkey,” feeling in a fun way.
If your family is anything like ours though,  you might not let those kids even get a chance to play any of their own games. You will simply be too busy dance battling each other to give anyone else the opportunity to do anything else (*ahem*).  (Purchased through Best Buy).


Play a Round of Thanksgiving Bingo- One thing that I love to do for my kids is to print out a simple Thanksgiving Bingo game to keep them entertained while I am preparing the food. This is a fun and free way to keep them entertained and there are six Bingo cards to print and choose from. Pop a bag of popcorn and let them use the popcorn as their markers to mark their Bingo squares. Once they get tired of that game, print out another round of cards and have them do Thanksgiving Football Bingo instead. (Printable available for free through Spoonful).
 
After these purchases to entertain the kids on Thanksgiving Day, I was able to  bank $5.63 in my Giving Fund for my favorite charities through Pure Charity

I am working with Pure Charity, and Pure Charity has provided me with compensation for these posts. My participation is voluntary and opinions are always my own.

Pin It

How to Set the Perfect Thanksgiving Table

Tuesday, November 6th, 2012

Setting a great Thanksgiving table is something anyone can do with the right tools in their entertaining supplies, a few new additions, and a little bit of thriftiness. Today’s perfect Thanksgiving tables is particularly important to me because today I am sharing with you a way that you can make your table and earn money for your favorite charities in the process.

This month I am partnering with Pure Charity to share about their incredible mission to give back to charities through the holiday shopping that you already happening to be doing. 

What is Pure Charity?

Pure Charity is a simple, but awesome concept for giving back to those causes you care most about. Basically, you install a simple toolbar into your web browser and then it alerts you with a small banner at the top when a store you are shopping with has a partnership with Pure Charity. Click on that little button and you are making a percentage deposit into your Giving Fund. Your Giving Fund can then be applied to the charities that are important to you and that you have a desire to support.

Pure Charity asked me to show everyone what could be done via their partners and gave me a small budget to get started. This month I am sharing ideas for setting the perfect Thanksgiving table, to sharing Thanksgiving recipes with you, and showcasing some fun ideas for keeping the kids entertained. All supplies were ordered through their partners and I have created a Giving Fund for the charities that are most important to our family. At the end of this series, I will share with you just how much I was able to earn through this spending.

How to Set the Perfect Thanksgiving Table

Mix Texture and Color Into Your Basics- I have always had a fondness for my white dishes simply because they match everything that you want to layer on top of them.  (West Elm Napkins)

Spice up your basics with a bold colored napkin in a fresh autumn shade. I love to mix texture in by tying napkins off with scraps of burlap instead of buying napkin holders. If you don’t have any burlap, a piece of twine or yarn would be just as lovely. 

Mix in One New Element to the Tableware- In a perfect world, we would have loads of storage and dishes for every season. Most families just don’t have this type of limitless space in their kitchen. Instead of buying new dishes for each holiday, focus on adding one new element each year to the existing pieces you already have.

My white dinnerware is perfectly paired with these elegant Thanksgiving dessert plates (West Elm Dessert Plates) as a nod to the season and they take up far less room than an entire set of dishes.

Have Your Kids Create the Centerpiece- My kids love helping me in the kitchen and one way they can assist with the Thanksgiving table is to help create the centerpiece.

I have been dying to have a chalkboard in my kitchen and using this as a centerpiece for our table was the perfect excuse for the purchase. Center this chalkboard (Pottery Barn Small Chalkboard) on your table and then give your kids the assignment to fill this with all of the things that they are thankful for.

Once Thanksgiving is over, this will be proudly hanging in our kitchen for all of our family announcements!

Decorate With Nature- Right now there might not be a lot blooming, but if your yard is anything like ours, there are plenty of rustic and beautiful elements that could be added to your table.

I pruned one of my flowering bushes and used the clippings as a filler for three vases.  (West Elm Vases). I love how these branches add dimension to my table and skip the expensive vase fillers.

Add Your Own Personal Touch- Everyone has their own personal touch that they can add to their centerpieces. For you, it might be your mad spray painting skills. For me, it is the ability to knit yarn into leaves and flowers. It might not sound like a very useful skill, but it certainly helps when it comes to fall centerpieces. I relied upon this knitted leaf pattern and these easy garter stitch flowers for knitted embellishments to my sticks.  It will take me awhile to knit all of this, but I promise to share more once it is done!

My husband may or may not have made fun of me when I said the branches needed “whimsical leaves,” but even he agreed that they looked pretty sweet once I finished this project.

After these purchases to dress up my Thanksgiving table, I was able to bank $7.22 in my Giving Fund for my favorite charities through Pure Charity

I hope you love these ideas for setting the perfect Thanksgiving table and I look forward to sharing more about my partnership with Pure Charity in the coming weeks.

I am working with Pure Charity, and Pure Charity has provided me with compensation for these posts. My participation is voluntary and opinions are always my own.

Pin It

Homemade Playdough Recipe

Tuesday, October 23rd, 2012

As the weather turns cooler, I start thinking of indoor activities that our kids can enjoy together and making homemade playdough is always top on our list of activities to do. Homemade playdough lasts forever and can be created in whatever vibrant shades your heart desires. This homemade playdough recipe is an easy one to create from items you already have in your pantry and homemade playdough with a big stack of cookie cutters? Well, that just equals hours of fun in our house.

When my kids were younger and funds were low in our house, I was always whipping up something out of our pantry for them to do. We created everything from Kool-Aid playdough to pudding finger paints to hauling in the snow to a big bin of unpopped popcorn kernels for a sand table. Seriously, when your kids are small, is there anything that you won’t do for a just a few moments of peace?  Even though my kids are older now, many of these items can still keep them pretty busy and one hour of peace is incredibly priceless…no matter what age they are.

This homemade playdough recipe is a surefire winner in our house and I keep our cookie cutters on hand in my lunchbox station just for these moments. The only problem they usually have is keeping me out of them playdough myself since no matter how old I get, there is still something therapeutic about rolling playdough between my hands.

I hope you love this recipe as much as we do and be sure to explore those links below for other fun ways to keep your kids entertained during the cooler months.

Homemade Playdough Recipe
Recipe Type: Kid Craft
Author: The Ultimate Book of Kid Concoctions by John E. Thomas
Prep time: 5 mins
Cook time: 3 mins
Total time: 8 mins
Serves: 2
An easy homemade playdough recipe that you can create from items in your pantry. It is a rainy day, snowy day, too cold to play outside, too lazy to take the kids out in the yard….or whatever your dilemma, surefire recipe winner.
Ingredients
  • 1 cup flour
  • 1/3 cup salt
  • 2 teaspoons cream of tartar
  • 1 cup water
  • 1 tablespoon vegetable or canola oil
  • Food coloring (of your choice)
Instructions
  1. In saucepan mix flour, salt and cream of tartar. Add water, oil and food coloring. Cook about 3 minutes or until mixture draws away from pan. Cool until you are able to handle it. Knead until smooth and place in an airtight container.


Pin It

Easy DIY Halloween Costumes

Friday, October 19th, 2012

Stumped for Halloween costumes ideas this year?

It’s only a couple of short weeks until Halloween, but if you haven’t found a costume yet, have no fear!

Today I want to showcase eight easy DIY Halloween Costumes you can create using items found at Goodwill.

Last year, Americans spent 7 billion dollars on Halloween related expenses!

What was once a time to grab a sheet and be a ghost or peek around your house for easy costumes made from your mom or dad’s wardrobe has escalated into a spending frenzy of decorating, costuming, and trick-or-treat candy madness.

This list of easy DIY Halloween Costumes will hopefully help you gather some great ideas for throwing together a great last minute costume and save you money in the process.


Book Fairy Costume

A couple of hardback books from a local thrift store or garage sale can create a unique and adorable book fairy costume.

Using a hot glue gun, book pages, and the covers of the books to create your fairy wings you can create an entire costume from simply rolling paper for an adorable skirt!

You will love this one (via Lilliedale)


Mary Poppins & Bert Couple Costume

Couple costumes can be challenging, but with few things from your closet, it can be easy to create your look for less.

My husband & I created this costume for less than $20 and absolutely had a blast putting it together. (via MomAdvice)


Homemade Redbox Costume

I had to laugh at this adorable Redbox costume that this family created!

The Redbox costume was created using spray paint, a box, and snagging some of the Redbox images from Google.

I absolutely love this idea and it cost the family less than $5 to create.

The best part is that the whole family can jump in on the creating (Coolest Homemade Costumes)


Baby Cabbage Patch Doll

Looking for a costume that can work around pushing your baby in a stroller?

This Cabbage Patch Doll costume is simply genius and wouldn’t cost a lot to create.

Grab a green fitted sheet to cover your stroller, create the Cabbage Patch box, and then cover your baby in yarn pigtails. (Via Costume Works)


Will Work 4 Candy Costume

The best part about the, “Will Work 4 Candy Costume,” is that you need not buy any supplies at all to create this look.

Paint a beard on your child’s face, dress them in their most tired looking play clothes, mismatch their shoes, and add a cardboard sign from your recycle bin. (via Coolest Homemade Costumes)


Paper Doll Costume

Short on funds for Halloween costumes this year?

This paper doll costume can be created for about $1 using poster board or foam core.

Add your daughter’s laciest socks and a pair of Mary Jane shoes and you have a real-life paper doll to trick-or-treat with.

What little girl wouldn’t love that?  (via slapdashmom)


Baby Aerobics Instructor Costume

Holy cuteness!

This baby aerobics instructor outfit looks like an easy DIY to put together and I promise, it will be a memorable costume.

Create a baby headband from an old t-shirt, cut the bottoms off of a pair of socks to create baby leggings, and use your baby’s onesie and leggings to complete the look.

This mom created an adorable boombox out of felt to complete the look.  (via Primary)


Child’s Superman Costume

Leading a double life can be tough, but it doesn’t need to be expensive.

Grab a tie, shirt, and heavy glasses for Clark Kent, and dress him in a Superman shirt underneath.

This costume is adorable and affordable!


What is the best DIY Halloween costume you have created? Feel free to share your links and ideas below!


This post contains affiliate links.


Don’t miss these other great ideas from MomAdvice.com:


The Best of Fall, Halloween & Thanksgiving-49 Ideas for Decor, Crafts, Recipes, Costumes & More

The Best of Fall, Halloween and Thanksgiving


DIY Thumbtack Pumpkins


Minecraft Costume Ideas


Delicious Drink Mixes: Hot Cocoa and Vanilla Chai 


Sign up for the MomAdvice newsletter


Pin It

How to Make Chalkboard Pumpkins

Monday, October 15th, 2012

If there is one thing you know I love around here it is chalkboard paint. Chalkboard painted pumpkins are a fun way to avoid the pumpkin carving and allow your kids to unleash their inner Picasso. Chalkboard pumpkins are easier to make than you might think and today I wanted to show you how to transform ordinary pumpkins into Chalkboard Pumpkin People that lets your kids be creative while creating a unique accessory to your front step!

Let’s get started with creating your very own Chalkboard Pumpkin People.

Supplies Needed (all found at Walmart):

1 real pumpkin

1 can of chalkboard paint (over in the hardware department)

Masking or electrical tape (this is optional, I ended up not covering my stem)

Wet wipe

White Chalk

1 Skeleton or Witch Body (these are found in the Halloween supplies by the pumpkin carving tools, $7.97 each)

How to Create Your Chalkboard Pumpkin

1. Wipe down your pumpkin well with a wet wipe or damp paper towel to remove any dirt or debris.

2. Hold your can 10-14 inches away from your surface and spray in a sweeping motion side to side with a slight overlap around your entire pumpkin. Follow this pattern horizontally and then vertically. Wait fifteen minutes or so and then apply another coat. You need two coats to create your chalkboard surface.

3. Allow your pumpkin to cure. Do not use any chalk on this for 24 hours! The chalkboard paint will need to harden and will not be ready until then. If you try it before it is ready, it will just scratch the paint through, creating marks and exposing the orange on your pumpkin.
Let your little artists go to work with their chalk. Before giving it to them, make sure to rub down the corners so that they don’t scratch their pumpkin’s surface. I also reminded them to draw gently on these so their paint would remain intact.

Mistakes made? No problem! These can easily be erased and started over again. We had many false starts before deciding on our perfect faces.

Here are our finished faces that the kids drew (the witch’s creator might have had a little help from her Dad). We really loved these cute little faces and couldn’t wait to put them on the pumpkin bodies.

The best part about these though is that you can erase these and use them over and over again through the Thanksgiving holiday with written notes of thankfulness or a countdown to the holidays.

Of course, if you are more of the carving pumpkin type, Walmart has you covered with loads of great carving tools this year!


Don’t know what to do with the rest of that can of chalkboard paint? How about a DIY Lunchbox Creation Station, Chalkboard Food Label Frames, or Conversation Bubble Cookie Jars…just to name a few!


I am a part of the Walmart Moms program, and Walmart has provided me with compensation for these posts. My participation is voluntary and opinions are always my own.

Pin It

How to Make a Duct Tape Pumpkin

Sunday, October 14th, 2012

Carving pumpkins isn’t for everyone and I am so excited to share with you this easy craft for a duct tape pumpkin that you can pull out year after year. You may have never even noticed the patterned duct tape lurking in the craft aisles, but this is one easy & inexpensive craft material with endless possibilities for a customized duct tape pumpkin that can match any room in your home.

Supplies Needed:

1 craft pumpkin

1 roll of patterned duct tape (Duck Brand)- available in the craft section of Walmart

1 roll of solid colored duct tape (Duck Brand)- available in the craft section of Walmart

Hot glue gun & glue sticks

Scissors

To create your chevron pumpkin base:

1. Twist off the pumpkin stem to create an even surface on top for covering your pumpkin with tape.

2. Pull a strip of duct tape off the roll that will cover the entire pumpkin. Attach it to the pumpkin, doing your best to try not to wrinkle it.

3. Continue covering the pumpkin until it is fully covered with the duct tape, doing the best you can to line up the patterns. If you have wrinkles, overlap the duct tape to cover any minor flaws.

4. Place a dab of hot glue on the top and reattach your pumpkin stem, holding it  in place for a couple of minutes to secure it.

To create duct tape rosettes for the top of your pumpkin, you will need to do the following:

1. Measure a 10″ strip of your solid-colored duct tape and cut it off the spool.

2. Fold the duct tape in half (sticky sides in), doing your best to line the tape up evenly. If you don’t get the tape perfectly even, just trim the edge until you don’t see the white anymore.

3. Twist the tape to create a tight center to the rosette.

4. Begin twisting your tape as tightly or as loosely as you would like to create your rosette. Add a dab of hot glue periodically between the twists to secure it all together.

5. Once you have finished your rosette, add a dab of hot glue to the bottom and secure it to the top to create a rosette “leaf.”

6. Repeat this process again and create one more rosette. Secure the second rosette next to or slightly overlapping the first rosette to add your second rosette “leaf.”

Create your own pumpkin with your family and you could win $1,000 in the Stick or Treat Duck Brand Jack O’ Lantern Contest. The company offers over 100 colors, prints and licensed prints such as Hello Kitty and each roll of tape retails for $3.37 at Walmart stores!

Looking for more pumpkin crafts? Be sure to check out my tutorial for my Painted Address Pumpkin Topiary and Decoupaged Pumpkins that you can do with more of these fun faux pumpkins!


I am a part of the Walmart Moms program, and Walmart has provided me with compensation for these posts. My participation is voluntary and opinions are always my own.


Pin It

How to Make Car S’mores

Friday, August 10th, 2012

Did you know that today is National S’mores Day? Who knew? I thought it would be fun to share with you a fun activity we did this summer that my kids absolutely flipped for. Have you ever ate a car s’more? No? Well, in my opinion, you haven’t lived until you have tried this fun food activity together. I guarantee that your kids will flip for this and I am betting that years from now my kids will be talking about that one time when their crazy mom let them make s’mores in the car.

Today Emily is demonstrating for us one of two ways that you can make your car s’mores. We have tried two different versions and both of them turn out wonderfully. With this version, kids can help assemble foil packets to be placed on a cookie sheet. Simply assemble your s’more ingredients (whatever your favorite ingredients might be)  on a small piece of foil. Once your s’more is full assembled, wrap it up in the foil tightly, and place it on a cookie sheet.

For a simpler version, you can simply line a cookie sheet with foil and plop your s’mores right on them (as demonstrated below).

A really hot summer day, like this one, is the perfect place to cook your s’mores. Slide your cookie sheet onto the dash of your car and shut your car. Set your kitchen timer for 15-20 minutes. I highly recommend sipping some lemonade and enjoying the AC while they are cooking.

Retrieve your cookie sheet and show your kids their perfectly cooked s’mores.

Marvel in the fact that you completely blew their minds with your awesomeness. Remember, these are the stories they will tell their kids someday.

Happy S’mores Day, friends!

I am a part of the Walmart Moms program, and Walmart has provided me with compensation for these posts. My participation is voluntary and opinions are always my own.

Pin It

Fun Ways to Celebrate the Olympics

Tuesday, July 24th, 2012

Are you as excited as I am for the Olympic games to start?

In our family, the Olympics is something to watch and celebrate together through fun crafts and activities.

It is an opportunity to learn about other countries, to admire amazing athletes, and a time of celebration for our country.

The Olympic games are fast approaching and I am so excited to share a few fun ideas for craft and activities you can do to celebrate this exciting time.

Today I wanted to share with you seven fun activities you can try together as a family to make the Olympics extra special for your kids.


Olympic Medal Cookies

What could be sweeter than receiving an Olympic medal?

How about an Olympic Medal filled with a cookie?

AlphaMom offers this sweet little Olympic craft to do with your little ones.

Stumped for a cookie idea?

I highly recommend an Oatmeal Chocolate Chip Sea Salt Cookie for your medal filling!


Olympic T-Shirts

With a simple painted ring pattern on an inexpensive thrift store shirt, this is a craft that is easy enough to do with kids of all ages.

Kate’s Creative Space offers this fun craft idea to her readers and we think it pairs perfectly with a great t-shirt your probably already own!


DIY Olympic Torch

What child doesn’t dream of carrying around their very own Olympic torch?

Hoosier Homemade showcases a fun craft that you can do to create your very own Olympic torch made from some commonly found items at your local craft store.


Olympics Party Fun

Why not throw a party for your family or for a group of families to celebrate the Olympics?

A Small Snippet has you covered with everything from patriotic foods to great Olympic game ideas to play together, to fun ideas for decorations that don’t cost a lot.

Before heading to your local superstore, check your favorite thrift store for creative games and prop ideas for your very own mini-Olympics.


Olympic Torches Made From Recyclables

If hitting your craft store for supplies to make an Olympic torch isn’t in your budget, this Olympic Torch from The Idea Room is made from common items you have in your home and recyclables.

These torches are made from a paper plate, a paper towel roll, and red & gold tissue paper.

This is one that even the smallest child can do.

Be sure to lift these high and participate in your own round of fun family Olympic games.


Olympic Rings Necklace

Even moms can jump in on the Olympic excitement with this cute craft, from Remarkably Domestic, for an Olympic Rings Necklace.

This necklace is made from simple rings covered in Chinese knotting cord to create those Olympic rings everyone loves so much.

This would be a fun craft to do while watching your favorite games this year!


Discus Throw Frisbee

Are your kids excited about the Discus Throw?

This craft from My Sister’s Suitcase is a fun one for kids of all ages.

Print a design for the front of your Frisbee and then have your child decorate it to their heart’s delight.

What are some ideas you have for celebrating the Olympic games with your family?


Don’t miss these other great ideas from MomAdvice.com:


S’more Toppings Bar Party


4th of July Block Party Tips


Minecraft Costume Ideas


No-Sew, No-Glue, No-Cut Burlap Wreath


Sign up for the MomAdvice newsletter

Pin It

Shower Curtain Art Canvas

Thursday, June 28th, 2012

A rainy day yielded the perfect opportunity to break out one of my dollar store activities for our kids. I bought a shower liner ($1) and had the kids decorate the shower curtain with whatever their heart’s delight was. A package of army men ($1) and a package of lizards ($1) added a little three dimensional fun to their art work on the canvas.

I don’t know about you, but my children like to go through a million pieces of paper a day so this was the perfect canvas for their artistic souls. Since we were on a trip, it also was the perfect item to travel with and break out when the weather was bad.

Want to create your own canvas? Visit Filth Wizardry for their cute idea for creating cute & even roadways for kids using markers and a recycled bottle. It helped inspire our family’s art canvas for our family’s summer vacation and was one of the great ideas featured in our 100 Days of Summer list.

Gain some summer inspiration on our Pinterest 100 days of summer (’12) edition where you can get another amazing round-up of 100 ideas to inspire your summer bucket list. 

This list has everything from making homemade butterbeer drinks for those Harry Potter enthusiasts, to making homemade shrinky dinks, to getting back to the basics with great dinner discussions with great family conversation starters.

There is something for everyone on here- boys and girls of all ages and craft levels. The best part is that they are ALL budget-friendly and will cost you very little in supplies.

If you are on Instagram, you can join in on the fun by taking pictures and sharing all of your summer adventures through there. Let’s use the hashtag #100summerdays. My username is momadvice and I am happy to have you follow our adventures and follow along with yours!  

By tagging your photos, it will make it easy to find each other in the group and share the projects we are tackling together. You can add the tags to your caption or you can add them as a comment later. In either scenario, the tag will pull it into our summer group.

Happy summer to each of you!

Pin It

Instagram Summer Inspiration: 100 days of summer, week 1

Wednesday, June 13th, 2012

Happy summer to all of our friends on MomAdvice. Our summer officially started on Thursday and we couldn’t wait to get the party started. I met the kids down at the bus stop with silly glasses that I found at the Dollar Store to let them know that the only thing we had our summer agenda was FUN. They giggled all the way home at their mother’s silliness, but it was the perfect way to start our summer.

We kicked off our summer with my husband’s big 5K race. He had been training for months to get ready for it and we wanted to show our support for him and how hard he has worked. We worked hard on signs that we could hold up at the finish line for him. In his words, “I was the only one who had someone holding signs for them.” It was such a fun way to be a part of his big race day with him and the kids were so proud of their dad.

We did swim lessons on our last week of school which was either extremely genius or the worst idea ever since it was the craziest week of our school schedule. At the beginning of the week, Ethan was barely getting in the pool. At the end of the week…well, this happened. He was terrified of the deep end and we had been trying to get him to go off the diving board for years. I was shaking so hard when this moment happened, but he did it.  Then he did it again and again. I still can’t believe it!  It was a fantastic way to kick off the summer.

On the last day of school they happened to have a concert at our local park. We were so proud of both of our kids who both finished the year out with the highest honors and grades this year that we wanted to treat them to an evening of celebration.

We headed to Moe’s Southwest Grill, their favorite taco spot, and loaded our picnic basket with great food and a blanket to sit on. We enjoyed the outdoor concert together and it was such a fun way to finish out their year.

Of course, summer is never complete without our summer list! This was the first year that we let the kids do the whole thing on their own. We made some helpful activity suggestions, but let them take the lead this year.

I am just as excited as them to start tackling all of these fun activities with them.

Each of the kids have also gotten a doodle pad and composition book  to begin documenting their summer. I found these at the dollar store and they already have so much to write about. I loved adding this activity to our summer and can’t wait for them to get to show their teachers next year what a great summer they had!

If you are on Instagram, you can join in on the fun by taking pictures and sharing all of your summer adventures through there. Let’s use the hashtag #100summerdays. My username is momadvice and I am happy to have you follow our adventures and follow along with yours!  

By tagging your photos, it will make it easy to find each other in the group and share the projects we are tackling together. You can add the tags to your caption or you can add them as a comment later. In either scenario, the tag will pull it into our summer group.

Gain some summer inspiration on our Pinterest 100 days of summer (’12) edition where you can get another amazing round-up of 100 ideas to inspire your summer bucket list. 

This list has everything from making homemade butterbeer drinks for those Harry Potter enthusiasts, to making homemade shrinky dinks, to getting back to the basics with great dinner discussions with great family conversation starters.

There is something for everyone on here- boys and girls of all ages and craft levels. The best part is that they are ALL budget-friendly and will cost you very little in supplies.

Happy summer to each of you!

xo,
Amy

Pin It