Archive for the ‘DIY’ Category

St. Patrick’s Day Straw Tags (Free Printable)

Wednesday, March 14th, 2012

St. Patrick’s Day is almost here! Today I wanted to share with you an easy craft that you can do for your kids for a fun St. Patrick’s Day snack. Nothing could be cuter and more festive than these adorable St. Patrick’s Day straw tags that you can add to a twisty straw for the holiday.

This month I have the honor of being the moderator for the new Walmart Crafts Facebook Group. In this group, you can share pictures of the crafts you are working on, ask questions about crafts you might be tackling, and gain inspiration from the other members.  Anyone can join in on the fun and I would love to chat with you over there! Just imagine surrounding yourself with people who are just enthusiastic as you about crafting!

For this week’s project I am sharing with you a way to dress up a St. Patrick’s Day snack for your kids. If you aren’t feeling ambitious enough to tackle my Rainbow Cakes in a Jar, this craft is just as fun and something you can whip up very quickly.

Supplies Needed (Available at Walmart)

Sticko Leprechaun Riches Stickers
Sticko Large Shamrocks
Cardstock (white or green)
Hole Punch
Ribbon (any color)
Twisty Straws

Directions

1. Print out our free St. Patrick’s Day printable (link provided below) on heavy duty cardstock.

2. Cut out your straw tags.

3. Adorn your straw tags with cute shamrocks and/or leprechaun stickers.

4. Slide your gift tag on your straw and tie a little ribbon on top.

5. Place in a glass of milk tinted with green food coloring and serve these up with a big plate of festive cookies.

Grab your FREE St Patrick’s Day Printables here!


I am a part of the Walmart Moms program, and Walmart has provided me with compensation for these posts. My participation is voluntary and opinions are always my own.

Pin It

Rainbow Cake in a Jar with Cloud Frosting

Monday, March 5th, 2012

If there is anything more fun than eating a rainbow in a jar than I don’t know what is. I have seen so many variations of this Rainbow Cake in a Jar floating around, but I was on a mission to make my own version of these to share with you all today for St. Patrick’s Day.

I was looking to create a version of this Rainbow Cake in a Jar combined with this Rainbow Cake in a Jar, but I wanted my jars to be small and I wanted a lighter frosting combination than a heavy and rich buttercream on top. The rainbow cakes that I had seen recipes for were traditionally in a quart or pint jar. While I am sure I could indulge in a quart of cake, these smaller versions are the perfect size for a fun treat to celebrate the holiday.

To begin, you will need to make your cake batter. The cake mix batter that you make from a box can be very runny and create muddy layer. Making your cake batter from scratch only takes a few more minutes, is made from ingredients you already have in your pantry, and will yield a thicker batter that is easier to smooth and create the stacking layers you are going for. No matter how you stack it, this batter will create individual colors for the perfect cake

Since this cake batter is thick, it can easily be scooped with an ice cream scoop. Two big scoops in each bowl of this batter and then add as much food coloring as you like for your rainbow layers. I love the Betty Crocker Neon food coloring, but if I am feeling fancy and professional, I love the Wilton food coloring for rich hues.

These 1/2 pint jars do have a more narrow opening than the wide mouthed jars, but I am not much of a perfectionist when it comes to cake. You will want to just make sure the interiors of your glass jars are sprayed lightly with cooking spray and then spoon in each layer of your rainbow colors (as perfectly or imperfectly as you like).

If you want the striping to be even, you can use a Ziploc bag and just cut the tip off of one corner and pipe each layer in to create perfect stripes. I prefer to be lazy and let the colors lie where they may. Either way should create beautiful rich rainbow colors. Be sure not to fill them higher than about halfway in your jar, otherwise your cupcakes will overflow.

Nestle your jars in a 9×13 baking dish with a rim on it. Pour 1/2 cup of water in the bottom of your baking dish to create a little water bath for your jars.  Wipe up any spills or drips on the edges of the jars before placing them in the oven.

Bake these at 375 degrees for 30-40 minutes.

Here are my rainbow cakes. They are definitely perfectly imperfect with the layers, but I still love them. How could a rainbow cake in a jar not brighten someone’s day?

I topped these sweet treats with my favorite 7 minute frosting. If you have never sampled the infamous 7 minute frosting, it is to die for! I am one of those weird people that prefers the whipped cream frosting over buttercream and I think that is why this recipe is such a favorite of mine. It is light and delicious and tastes like a little bit of marshmallow fluff on top of the cupcake.

The secret ingredient to this perfectly-perfect pantry recipe is just a  little bit of boiling water.  You stir the water into the egg whites, sugar, vanilla, and cream of tartar, then beat the mixture for seven minutes.  With just these few ingredients, something magical happens and you end up with an amazing amount of frosting… four cups to be exact!

The next time you have no ingredients on hand or simply don’t have the energy to make a big batch of frosting, keep this recipe in mind for the most deliciously light and and easy-as-pie frosting you can ever imagine!

This is the perfect “cloud” topper to this vanilla cake. With a few rainbow sprinkles for a finishing touch, you have the perfect snack to celebrate St. Patrick’s Day with your family!

Rainbow Cake in a Jar with Cloud Frosting
Author: Amy Clark
Prep time: 30 mins
Cook time: 35 mins
Total time: 1 hour 5 mins
Serves: 8
Individual rainbow cakes are a festive way to celebrate St. Patrick’s Day. These cupcakes in 1/2 pint jars are topped with a light frosting for a surprisingly light and fun snack!
Ingredients
  • 1 1/2 sticks unsalted butter
  • 1 1/2 cups sugar
  • 2 eggs
  • 2 teaspoons pure vanilla extract
  • 2 1/2 teaspoons baking powder
  • 1/4 teaspoon salt
  • 2 1/2 cups flour
  • 1 1/4 cups milk
  • Betty Crocker Neon Food Coloring or Wilton Food Coloring (for bright rainbow colors)
  • 8-10 ½ Pint Jars
  • Cooking Spray
  • Sprinkles
  • Cloud Frosting: 3/4 cup sugar
  • 1 teaspoon vanilla extract
  • 1/4 cup boiling water
  • 1/4 teaspoon cream of tartar
  • 3 unbeaten egg whites
Instructions
  1. Preheat oven to 375 degrees.
  2. Take off the screw caps on the jars. Spray with nonstick cooking spray. Set aside.
  3. Put butter in mixer and beat at medium speed until somewhat smooth.
  4. Pour in sugar and beat well.
  5. Add 2 eggs.
  6. Mix well.
  7. Add: vanilla, baking powder, salt, flour, and milk.
  8. Beat until it is mixed.
  9. Divide your batter into six separate bowls (approximately two large ice cream scoops of batter into each bowl for even distribution).
  10. Tint your batter the colors of the rainbow- Red, Orange, Yellow, Green, Blue, & Violet.
  11. Using a small spoon, carefully spoon in each color of batter into layers or use a Ziploc bag and cut the tip off one corner of the bag to pipe each layer into the jars.
  12. Place jars in a 9×13″ baking pan (with rim) and fill with a 1/2 cup of water to create a water bath for your cake.
  13. Bake for 25-40 minutes or until your cake springs back and a skewer poked in the center comes out clean. (length of time will depend entirely on how tall you stacked your batter!)
  14. This should yield 8-10 rainbow jars.
  15. Allow to cool and begin preparing your Cloud Frosting.
  16. Cloud Frosting: Mix sugar, cream of tartar, vanilla and egg whites. Add boiling water. Beat on high until the mixture forms peaks, which should be just about seven minutes. Spoon cloud frosting on top of the cakes and finish with Rainbow Sprinkles.

Cake Recipe Adapted from Amy Sedaris’s Vanilla Cupcake Recipe
Inspired by: Off the (Meat) Hook
Submitted: Mouthwatering Mondays at A Southern Fairytale


All supplies for this month’s fun project can be purchased at your local Walmart store and this project is done in conjunction with the Walmart Moms program.

If you are making rainbows with your kids today, I highly recommend this fabulous tune for teaching them the colors of the rainbows. They Might Be Giants sing about a man named Roy G Biv that I happened to be singing in the kitchen while I made these cakes. You will never forget the order of the colors in the rainbow again!

I am a part of the Walmart Moms program, and Walmart has provided me with compensation for these posts. My participation is voluntary and opinions are always my own.

Pin It

How to Make T-Shirt Flowers

Friday, February 17th, 2012

Today’s project is a simple t-shirt flower pin made from a t-shirt in your favorite shade with a clip-on earring center to add a unique flair.

Inspiration came from a bag of clip on earrings that I found when browsing through the jewelry section of my favorite thrift store and the sea of endless t-shirts in every variety of color that you can find on their racks.

Visit my step-by-step tutorial on how to make these sweet little pins for someone in your life!


For this project you will need:
T-shirt (any size)
Spray paint in a contrasting color
Piece of card stock to make your template
One piece of felt


  • To begin, you will need to cut out eleven circles out of your old t-shirt. I used a large circle punch and created my template out of scrap card stock. You could also just trace a lid to a canning jar, if you don’t have a circle punch handy.


  • Grab your piece of felt and cut a heart out for the base of your flower or you can cut a simple felt circle.


  • Let’s make some flower petals. Fold your circle in half as shown.


  • Fold up one side of the circle that has been folded in half.


  • Fold up the other half of the halved circle and have it meet with the other side to form a petal.


  • Now hot glue the seam just a tiny bit together where the petal is gathered and then hot glue the end of the petal to the felt heart.


  • Repeat this with all four ends of the heart.


  • In the spaces left, fill in with three or four more petals.


  • Spray paint your clip on earrings in your favorite color. Allow this to dry.


  • Remove the back of the earring with a pair of pliers. Hot glue the earring to the center


  • On the back of your fabric flower, you can attach a simple jewelry pin that you can find in the jewelry section of your favorite craft store.


  • Wear your thrift store pin proudly!


Happy crafting, sweet friends!


This post contains affiliate links.


Don’t miss these crafty ideas on MomAdvice.com:


10 Unique Ideas for T-shirts


How to Make a Pom Pom Flower Bouquet


DIY Table Runner for All Seasons


DIY No-Sew Reversible Cloth Napkins


Sign up for the MomAdvice newsletter

Pin It

Happy Homemade Valentines & a Valentine Link-Up

Tuesday, February 14th, 2012

Happy Valentine’s Day, everyone! The kids and I had a lot of fun working on our handmade Valentine’s this year and I wanted to show you what we created. In  year’s past, I haven’t been this ambitious, but I am beginning to realize that our days of crafting Valentines are numbered. I really wanted to take advantage of our time together and thought this would be a fun way to spend it.

Emily has been begging me to make fabric flower barrettes for her friends and I thought this would be the perfect time to share them with her friends. I found these fabric quarters at Walmart and used them to create matching hair accessories for all of her friends. The flip side had white felt hearts to pull them together. These are so inexpensive to make, but I hope that her friends have fun sporting their new hair accessories.

I happened to have some Valentine’s Day themed stamps in my craft supplies and I had Emily stamp and sign cards for all of the girls We just clasped the barrettes right on to the cards and they were ready to hand out to all of the girls in her class.

For the boys in her class, we made Superhero Valentines using Zakka Life’s free superhero cape and mask printables. These are the cutest and I love that other than cutting them out, they basically held together by themselves with just a single piece of tape. Thanks, Zakka Life, for helping us create cool Valentine’s for boys this year.

Looking for other fun ways to say, “I love you?” We love these bread machine calzone hearts for a fun dinner, these tasty frozen hot chocolates for a fun Valentine’s Day snack, or our Be Mine Fluffy Cake Donuts for a fun way to start the day.

If you are looking for ideas for celebrating with your significant other may I recommend this sweet & simple steak dinner at home, my linguine with white clam sauce for a frugal dinner option, our tips on choosing a budget-friendly and delicious boxed wine for your celebration, or listen to this great podcast on choosing great wines.

Do you have any fun projects, recipes, or crafts that you did to celebrate Valentine’s Day this year? Feel free to link up your projects below and share them! I would love to see what you created this year!


Pin It

Valentine’s Day Yarn Wreath

Tuesday, January 24th, 2012

Since Valentine’s Day is just around the corner, I thought it would be fun to decorate my little yarn wreath for one of my favorite holidays. Today I wanted to share with you another fun way to decorate that wreath of yours and some fun creations you can make with a simple piece or two of felt.

You may recognize this yarn wreath that I made this Fall to decorate our front door. This wreath was created because of the limited amount of storage in our house. I created this wreath to transition with the seasons and figured out a way to create accessories that could easily be removed and switched out with the holidays. Say goodbye to this old Fall look and let’s brighten things up with some Valentine’s Day fun today!


For this wreath, I wanted to create some loopy flowers in pinks and purples for my wreath.  I found a multi-pack of fun felt colors at Walmart over by the craft supplies with my Valentine’s Day colors in it.  You will also need a hot glue gun, glue sticks, scissors, a tape measure, and your choice of a clip (like I have shown here) or a jewelry pin (you can find those in the jewelry-making supplies).

Taking your felt square (which is roughly the size of a sheet of paper), measure 1 1/2 inches width. You will cut a strip 1 1/2 inches wide along the long edge of your piece of felt. Repeat one more time so that you have two of these strips for your loopy flower.

Dab a little hot glue on each end of the piece of felt and fold in half. I also like to make sure it is a little secure in the middle with one more dab of glue, but you can judge for yourself how secure you like it.

Cut slits down the side that is not glued.  You can make them fat or thin depending on what type of look you are going for. You can cut them straight or cut them on an angle. Basically, anything goes with the cutting!

Now start rolling your little loopy flower up and add a dab of hot glue here and there to make sure it all holds secure.

So pretty! You can leave it like this for a small loopy flower or you can use that other strip of felt you cut and start cutting it up just like the last one.

Once you have that second piece of felt cut, you can start wrapping it around the outside of your loopy flower you started, picking up where you left off with the last piece of felt. You can do two different colors of felt or keep it sweet and simple with the same color. Apologies for switching colors on you, my pictures from the first flower didn’t turn out as good.

Hot glue a small circle of felt to the back of your loopy flower to hold it all together. Add your pin or clip to attach the flowers to your wreath.

If you have any stray strips of felt, you can transform them into bows. I just fashioned this one into a bow shape and then secured it with a little floral wire in the center. Cover your wire with another little scrap of felt and you have another fun element to your wreath.

Here are all of my fun Valentine’s Day accessories on my wreath. I made these felt roses, several of these loopy flowers, and a bow in the middle clipped to the top. You could also add some cute fabric flowers, if you like, in other fun Valentine’s Day shades.

Same exact wreath.

Totally different look.

I saved all of my accessories (that my daughter did not run away to accessorize her room) and I can just reapply those fall accessories next year.

It is much easier to store a box of accessories than a million wreaths in my basement.

What special traditions have you created for your family for Valentine’s Day in your house? Do you have any special crafts you do together or any special food traditions? I would love to hear your ideas!

Pin It

Homemade Peppermint Marshmallows

Tuesday, December 13th, 2011
Photographed by– Kristen at Dine & Dish

 
Homemade marshmallows have been on my cooking bucket list for three years now. Making peppermint flavored marshmallows sounded far more intimidating that the process actually was and after making my first batch with great success, I can’t wait to try a few other flavors in my kitchen.

This year I vowed I would not talk myself out of  marshmallow making. With my big girl set to celebrate her sixth birthday, I thought I would make these for cocoa fun for her birthday party. Once I bought all the supplies, there was no turning back.

I was so nervous that I didn’t take a single picture while I made them.

What if I messed the whole thing up?

What if my marshmallows reached 241 degrees and the whole batch failed?

I followed the God of Cooking (also known as Alton Brown) and did everything exactly as instructed. Surprisingly, my stand mixer did the brunt of the work while I tidied the kitchen. Who knew that marshmallow making was so darn easy?  The taste? Better than any marshmallow I have ever tasted.

Photographed by– Kristen at Dine & Dish

 
I did pretty pink swirls through the marshmallows and added my peppermint extract to the batch to add a fun pink peppermint touch to our marshmallows.

The hardest part was waiting the four hours before I could cut them. With cornstarch and powdered sugar mixed together in a bowl next to my board, I just used my pizza cutter (dusted with the sugar mixture) and cut my marshmallows in squares. Each one was lightly dusted with  more of the sugar mixture and I stored them in a plastic container. You know…for storing….or for eating.

And eating.

And eating.

And eating.

I confess, I think I have a new food addiction.

These are fabulous, easy, and delicious.  They would make a fantastic gift to give this holiday season with a little of my favorite cocoa mix or served up with a fancy little hot cocoa bar like I did for my daughter’s birthday party.


Homemade Peppermint Marshmallows
Recipe Type: Dessert
Author: Alton Brown
Prep time: 10 mins
Cook time: 8 mins
Total time: 18 mins
Serves: 9 dozen
One of the easiest and most impressive gifts to give this holiday season.
Ingredients
  • 3 packages unflavored gelatin
  • 1 cup ice cold water, divided
  • 12 ounces granulated sugar, approximately 1 1/2 cups
  • 1 cup light corn syrup
  • 1/4 tsp kosher salt
  • 3/4 tsp peppermint extract
  • 1/4 cup powdered sugar
  • 1/4 cup cornstarch
  • Nonstick spray
  • 4 drops red food coloring
Instructions
  1. Place the gelatin into the bowl of a stand mixer along with 1/2 cup of the water. Have the whisk attachment standing by.
  2. In a small saucepan combine the remaining 1/2 cup water, granulated sugar, corn syrup and salt. Place over medium high heat, cover and allow to cook for 3 to 4 minutes. Uncover, clip a candy thermometer onto the side of the pan and continue to cook until the mixture reaches 240 degrees F, approximately 7 to 8 minutes. Once the mixture reaches this temperature, immediately remove from the heat.
  3. Turn the mixer on low speed and, while running, slowly pour the sugar syrup down the side of the bowl into the gelatin mixture. Once you have added all of the syrup, increase the speed to high. Continue to whip until the mixture becomes very thick and is lukewarm, approximately 12 to 15 minutes. Add the peppermint extract during the last minute of whipping. While the mixture is whipping prepare the pans as follows.
  4. Combine the confectioners’ sugar and cornstarch in a small bowl. Lightly spray a 13 by 9-inch metal baking pan with nonstick cooking spray. Add the sugar and cornstarch mixture and move around to completely coat the bottom and sides of the pan. Return the remaining mixture to the bowl for later use.
  5. When ready, pour the mixture into the prepared pan, using a lightly oiled spatula for spreading evenly into the pan. Drop red food coloring onto marshmallows and use a toothpick to swirl the food coloring into the marshmallows. Dust the top with enough of the remaining sugar and cornstarch mixture to lightly cover. Reserve the rest for later. Allow the marshmallows to sit uncovered for at least 4 hours and up to overnight.
  6. Turn the marshmallows out onto a cutting board and cut into 1-inch squares using a pizza wheel dusted with the confectioners’ sugar mixture. Once cut, lightly dust all sides of each marshmallow with the remaining mixture, using additional if necessary. Store in an airtight container for up to 3 weeks.

Source: Alton Brown, Good Eats

Special thanks to Kristen at Dine & Dish for sharing her photographs of these marshmallows with MomAdvice! What a wonderful friend!


What is something that you discovered was surprisingly easy to create in the kitchen that you always thought was intimidating? Feel free to share your kitchen adventures!

Pin It

Mustache Mugs & Free Mustache Printables

Tuesday, November 22nd, 2011

Mustache Mugs & Free Mustache Printables from MomAdvice.com

I am so excited to begin sharing some new gift ideas for all the people in your life. Of course, if there is one trend that is hot right now it is mustaches. We wanted to jump on the mustache-loving trend and share with you some free mustache templates that can be used to adorn any mug and a free mustache printable for your favorite teachers.

Mustaches can adorn anything from a fun glass beer mug for a great guy gift, to a cute little shaving set for your favorite dad, to a fun mug for your best friend.

Mustache Mugs & Free Mustache Printables from MomAdvice.com

Mustache Mugs & Free Mustache Printables from MomAdvice.com

To begin, there are many ideas for paint that you can use with your mug. You can buy a fine tipped painter’s marker at the craft store and outline and paint your mustache with this and/or you can buy a porcelain paint set (that requires not heat setting), or a porcelain paint that needs to be baked.

With the type of paints that don’t require heat, you are looking for one that has a conditioner, the black paint, and then the gloss. These do not need to be heat set, but do require ten days to set up.

I used a combination of the two. I applied the conditioner, used the paint marker and filled a bit with the black paint, and then applied the glaze to set the paint. I have had great success with the non-heat setting variety, but you can choose whichever type works best for your budget, is already in your craft supplies, or whichever is on sale.

You will also need a beautiful mug for your project. I found these large white mugs for a little over $2 at Walmart. Feel free to visit the dollar store or thrift shop for an inexpensive mug of your choice!

Mustache Mugs & Free Mustache Printables from MomAdvice.com

Begin by applying the conditioner to your mugs and let them dry. This should only take about ten or fifteen minutes.

Mustache Mugs & Free Mustache Printables from MomAdvice.com

Mustache Mugs & Free Mustache Printables from MomAdvice.com

Mustache Mugs & Free Mustache Printables from MomAdvice.com

Mustache Mugs & Free Mustache Printables from MomAdvice.com

Cut, secure with a little tape underneath, trace with your painter’s pen, and fill in your mustache of choice. We have three different options available so you can choose your favorite for your mug.

Let it dry overnight and then apply the glaze over your piece.

Mustache Mugs & Free Mustache Printables from MomAdvice.com

Of course, what fun is a mustache mug without a great printable go along with it? This mustache printable is the perfect sign to adorn any teachers desk.

“Raise Your Hand If You Must Ask (Mustache) a Question,” is a great motto for class. I placed this fun printable in an inexpensive frame that I spray painted red. The mug is filled with a small denominator Starbucks gift card to round out this budget-friendly gift for your favorite teacher.

Get Printing:

Raise Your Hand if You Moustache a Question Free Printable

Printable Dimensions: 8 1/2 x 11″ (can be trimmed for an 8×10 frame)

Print on Heavy-Duty White Cardstock


Three Free Mustache Templates

Printable Dimensions: These mustaches are 3″ long

Print On Standard Computer Paper for Tracing


Mustache Mugs & Free Mustache Printables from MomAdvice.com

Happy mustache mug making!

What holiday craft projects have you been working on?  Feel free to share any links to what you are working on! Access all of our craft fun on MomAdvice by visiting our Craft Section. Happy crafting, friends!

Pin It

Easy Coffee Filter Flowers

Tuesday, November 8th, 2011

Maybe you were one of those lucky kids chopping up coffee filter flowers in elementary school. I never had a tutorial on this in my art class though, but I have been dying to make coffee filter flowers and wanted to share with you just how easy and inexpensive it is to make these for a fun table centerpiece for the holidays or just a few posies on your nightstand in those cold winter months.  If you made the Coffee Filter Wreath from last week, you should have enough left to make a few of these pretty posies!

To begin our flowers, we will need to dye our coffee filters. The trick with getting these to look like real flowers is to divide the filters into three different bowls with three different shades of dye.

Pour a 1/2 cup of hot water into each dish, two tablespoons of vinegar, and ten drops of food coloring your first bowl. In the next bowl add the hot water and vinegar, but add only eight drops of food coloring. In the last bowl, we will be doing the same thing again, but only six drops of food coloring. Submerge fifteen coffee filters into each bowl and wait ten to fifteen minutes.

I used the Betty Crocker pink neon food coloring for this project (leftover from our marbled egg dying from this past year) so these only required about five minutes in the bowls.  Just keep half an eye on them until you reach the desired color that you are going for.

Once the coffee filters are done, you need to spread them out on an old towel and let them dry.  Ignore comments from your husband like, “Yum, yum! Coffee filters for dinner?” or, “Oh, wow! ANOTHER craft project?”

You are on the fast track to being another Martha Stewart even though the house looks like a bomb exploded and it WILL be coffee filters for dinner tonight. You can’t be good at everything.

If you want to speed up the process a bit, you can blow dry these coffee filters. Again, ignore your husband when he busts in on you hunched over with coffee filters blowing around the bathroom as you blow dry them. Just keep thinking,

“Martha would totally do this…or,ahem, she has PEOPLE who would totally do this. Totally.”

Grab some floral tape and floral wire from your craft supplies (or over in the floral section of the craft supply store. Cut the wire to the length that you desire and twist and wrap the floral wire with the floral tape until the wire is covered. You can also cover a wooden skewer with floral wire if you want a flower that stands straight up. I prefer the wire because you can bend it a bit and make the flowers a little more droopy so they look a little more natural.

Here is a handy chart for what we are going for with these. You need two of the darkest coffee filters cut like this for the center of the flower, two coffee filters in the medium dye for the middle of your flower, and just one coffee filter cut like this for the outer part of the flower.

To make the center, fold your coffee filter in half, in half again, in half again, and then in half again (four folds). Take your scissors and cut it as pictured above. Repeat with another filter in the same shade.

To make the middle of your flower, fold your coffee filter in half, in half again, in half again (three folds). Take your scissors and cut it as pictured above (but better than me since I am not the brightest with my cutting). Repeat with another filter in the same shade.

To make the outside of your flower, fold your coffee filter in half and then in half again (two folds). Take your scissors and cut a scalloped edge to your flower. You just need one of these.

Stack your flowers (still folded) and then trim the tiniest little end off of the bottom of them. This will create a small hole so that we can insert the wire into the center of it.

Slip the first filter over your wire twist it at the base, and then wrap a little floral tape around it to hold it all in place. Repeat with the next dark filter, than the each medium filter, and finish with the exterior of your flower. Finish the flower with a little more floral tape to secure everything in place.

Behold your posy! Isn’t she pretty? Make as many as you like for a fun addition to any room. I saved a stack of coffee filters and plan to make this pretty flowers to adorn my daughter’s birthday presents this year.

These posies have found a home on my daughter’s nightstand in her new big girl room. I found a short glass vase for $3.99 at Meijer Supermarket that was just the perfect size to hold three of these coffee filter flowers.  I think these would make such a fun birthday centerpiece addition though with hanging tissue paper pom poms in the same shades for a birthday party.

Right next to those flowers is this handmade lampshade that I made. I will show you how I did that last week. It is another fun, easy, and inexpensive craft that would be a cute addition to any room.

What craft projects have you been working on? Did you ever make coffee filter flowers when you were a kid?  Feel free to share any links to what you are working on! Access all of our craft fun on MomAdvice by visiting our Craft Section. Happy crafting, friends!

Pin It

How to Make a Monogrammed Coffee Filter Wreath

Tuesday, November 1st, 2011

When my book proposal went out in the literary world, I decided to throw myself wholeheartedly into two bedrooms that were both in need of a serious overhaul, to prevent me from thinking about the big decisions being made. All of that nervous energy turned into fuel into creating my daughter and son’s room into what I had envisioned their new big kid spaces to be.

Over the next few weeks, I wanted to showcase some of the crafts that I created and how I decorated their bedrooms on a budget. The first tutorial I wanted to share was for this easy monogrammed coffee filter wreath for my daughter’s wall.  I am not the first to create a coffee filter wreath and I know I won’t be the last. I read a billion tutorials for making these and then decided to do it my own way with a few tips from each tutorial. When you create yours, I am sure you will do the same on your wreath to create a masterpiece for your home.

These are a beautiful accent to decorate any room in your house. These would also make fantastic holiday gifts for your friends, mothers, daughters, grandmothers, or teachers and cost about $8-10 in supplies.

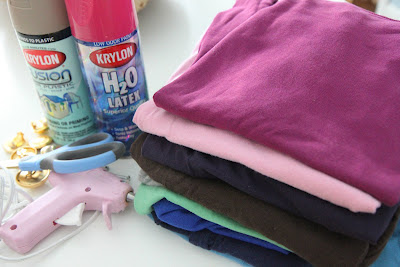
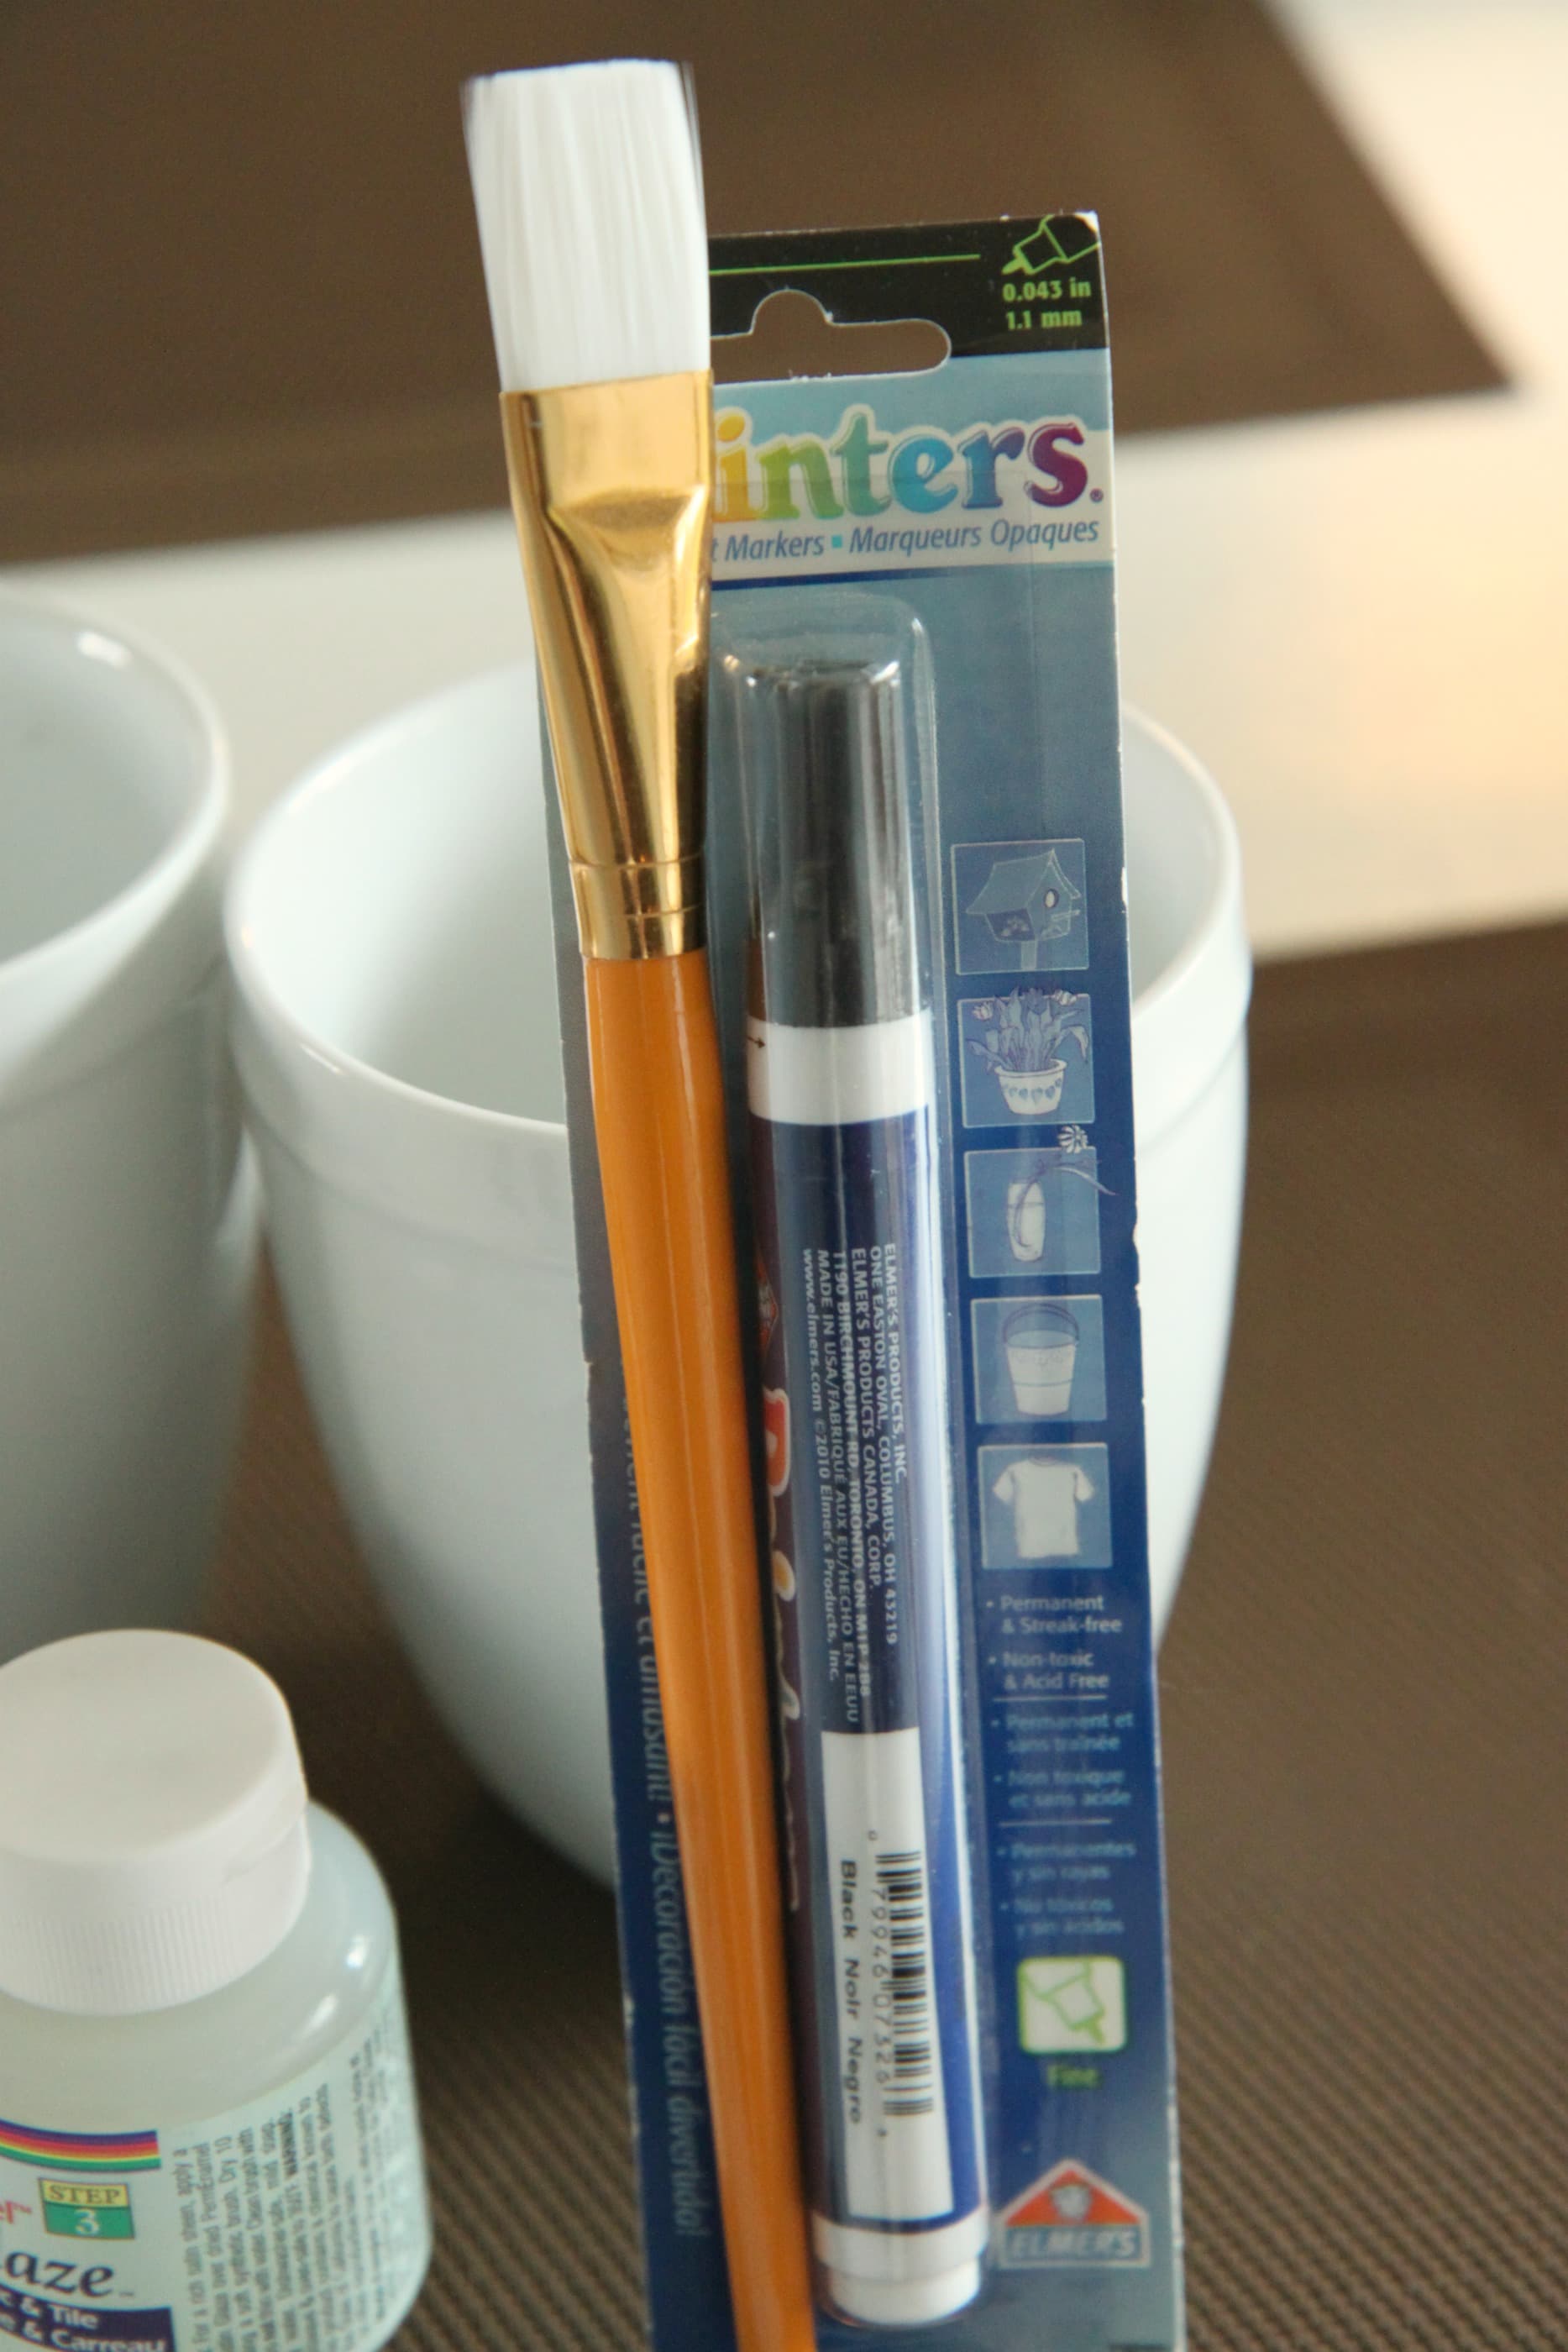
Let’s get started. You need a wreath or wreath form of your your choice (I found this flat Styrofoam wreath at Hobby Lobby), a package of 200 coffee filters, hot glue gun, glue sticks (you will need about six for this project), a screwdriver, a lightweight monogram letter of your choice, and a can of spray paint of your choice.

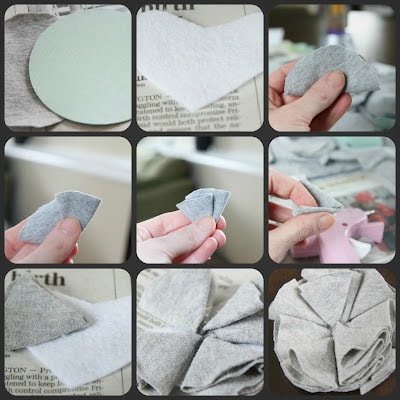
Fold your coffee filter in half as shown here.

Fold your coffee filter in half again as shown here.

On the tip of this you will apply your hot glue and then fold the tip a bit to apply it to the wreath. Secure the glued end to the wreath, flattening it a bit and adjusting as needed.

The top of your filters will look like this. That screwdriver can go into the center to help push the filter into the wreath and save your hands from getting burned. You can risk it and just burn those hands up, but I found the tip of the screwdriver really works to help prevent burns as you add those filters in. I wish I could take pictures of myself doing this as I am doing it, but, unfortunately, I only have two hands and no one to work the camera for me.

Start filling the wreath in with the filters all over. Anywhere that you see that wreath form sticking out should be covered with your filters. You can bend and twist them into the spots, securing these with hot glue. Catch up on all of your favorite shows since you need to do this approximately 150 times.

Please don’t judge me on my favorite show. A girl needs an escape when doing her billions of loads of laundry and other mundane tasks around the house. It makes me feel hip and chic, unlike the 33 year-old woman sitting on her carpet making a coffee filter wreath.

Keep on going around and around and around. Don’t worry if it isn’t even, just do the best you can.  You can trim it all up in the end and no one will ever know.

Once it is all filled in on top, we need to cover the sides of the wreath so we don’t see any of the wreath form peeking out. Fold the coffee filters as I showed you above and this time we will lay them flat against the side to cover the wreath.

Just keep overlapping this final layer to cover up the wreath form as I have pictured here.  This wreath will be very full and the little spots that aren’t covered won’t be seen, so don’t worry!

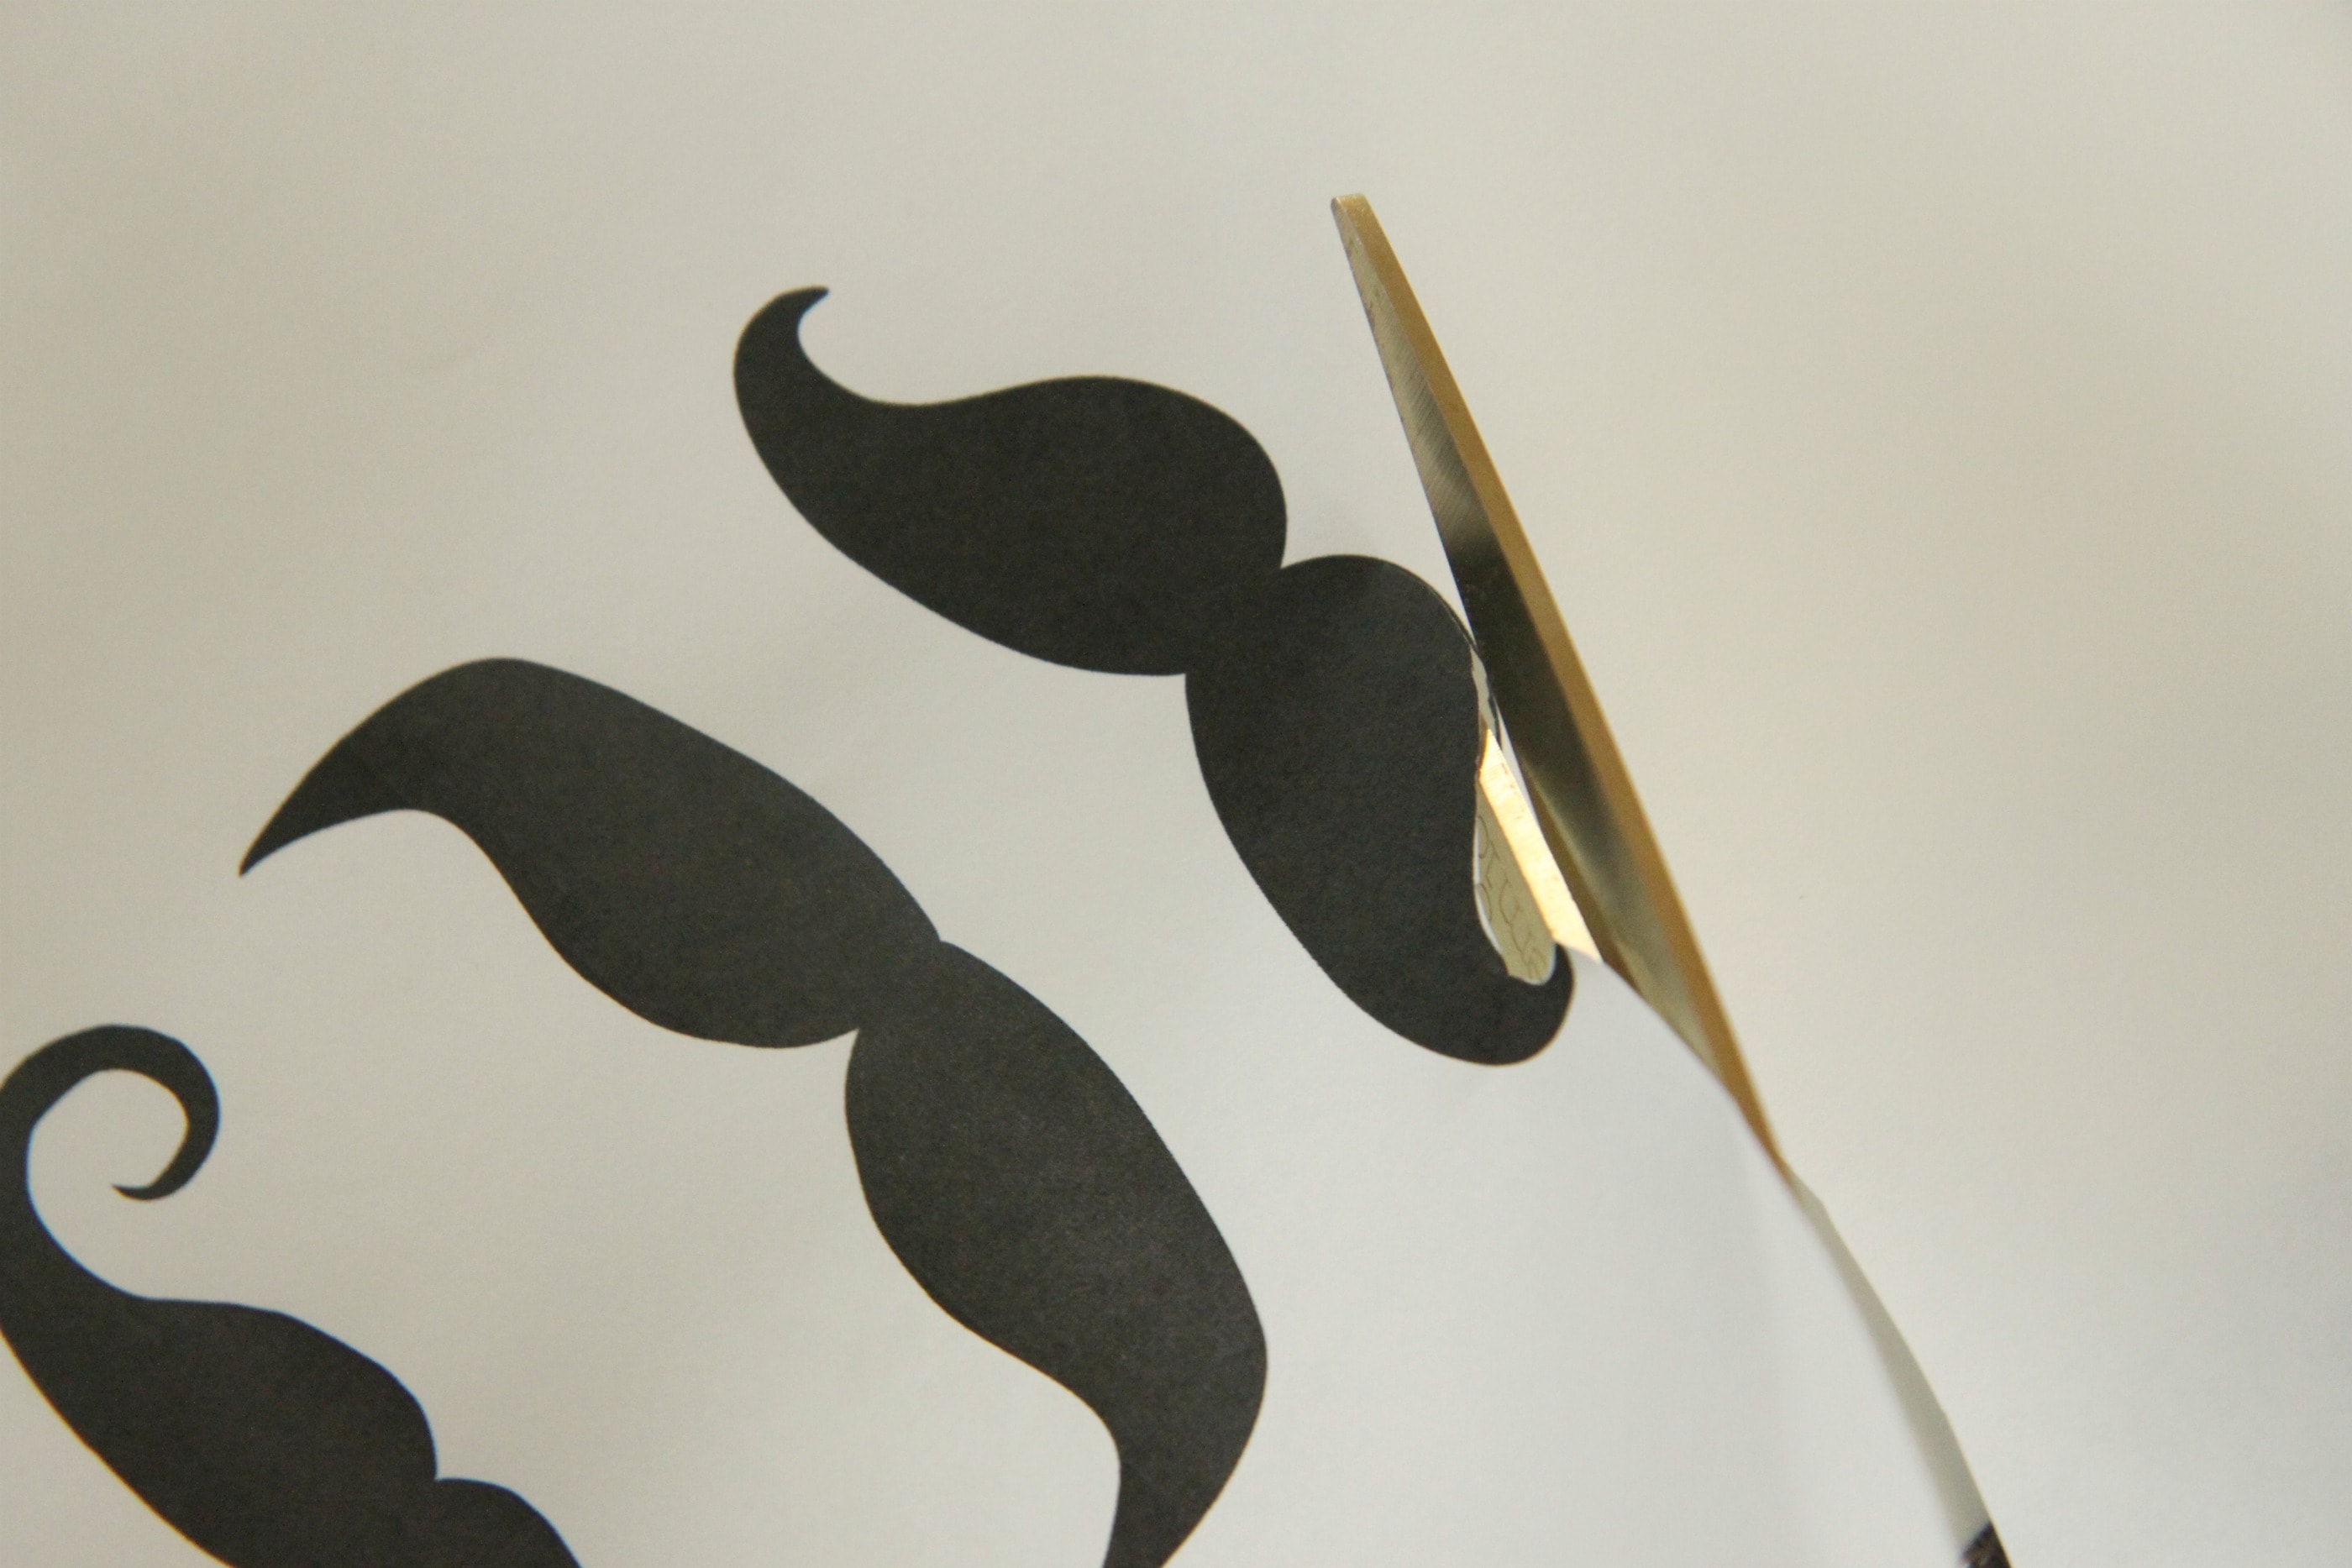
Once you flip it over, you will see that the back layer is a tad longer than the other layers. Trim those up with a pair of sharp scissors and cut them down so they fit in with the other layers on your wreath.

Once the wreath is all trimmed up, you can mount a monogrammed letter of your choice. I spray painted mine green to match my daughter’s room. I found this little letter at Michael’s back by the wooden craft supplies. This letter was just, $1.99. The key to this is to find one that is lightweight so it stays on easily. Hot glue the back of the letter and secure it in place on your wreath. You can then hang your wreath with ribbon or just hang it on a nail, as I did here, to keep things sweet and simple.

This wall in her room is making me very, very happy right now. It is the first thing I see when I walk up the steps and was so inexpensive to do.  I framed three of my favorite pictures of her, all printed in black-and-white.

The, “Will We have Rainbows Day After Day?,” printable was found for free printing on Making It Lovely.  I found a frame for this at Michael’s for half off and printed it on my printer at home.  It is so sweet and fits perfectly with her personality and color scheme.

I could not be happier with how this wreath turned out and definitely recommend making one or two for yourself or someone you love.

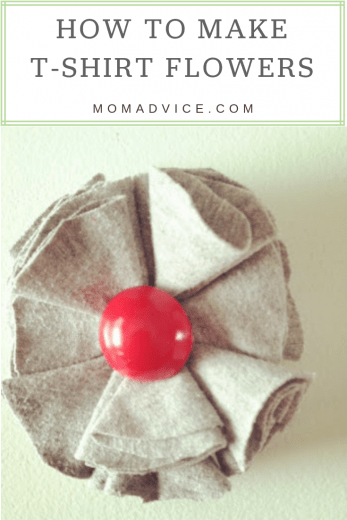
Don’t toss the rest of your coffee filters out after making this wreath. Next week I will show you how I made this bouquet of coffee filter flowers to adorn a nightstand. No one will believe these are made from this household item and it can be a fun craft to decorate any table in your home.

What craft projects have you been working on? Feel free to share any links to what you are working on! Access all of our craft fun on MomAdvice by visiting our Craft Section. Happy crafting, friends!

Pin It

How to Decoupage Pumpkins

Tuesday, October 11th, 2011

I love to create inexpensive decorations for fall and these easy decoupaged pumpkins are a craft that I have been wanting to try for awhile after spotting this technique in an old issue of Better Homes &  Gardens Magazine. You won’t believe how easy it is to decoupage a pumpkin and since they were so easy to create, I made two to adorn each side of my console table.  Today I wanted to share with you how to create your own decoupaged pumpkin that you can do with your kids or as a fun craft after the kids head to bed.

All supplies for this project were purchased at Walmart and each pumpkin cost approximately $7 to create.

Supplies Needed For This Project

Faux Pumpkin

Modge Podge (or make your own for less)

1 package of paper cocktail napkins (in the party supplies section or in the seasonal section of the store)

Foam brush

Hot Glue Gun & Glue Sticks

Yarn (optional)

Size 5 Double-Pointed Needles (optional)

Twist off the stem on your pumpkin. It should come off pretty easily. Set this aside for later.

Grab your stack of cocktail napkins. When choosing these, I would go for a darker color than this if you don’t want to have to do two layers. Another option would be to spray paint your pumpkin white. I just did two layers of napkins on mine, but you can do whichever works best for you.

Unfold the napkin, and then cut it into two long rectangles down the middle where the fold is.

Using your foam brush, spread your Modge Podge on the pumpkin and then cover in one of your paper napkin rectangles.  Apply the napkins very gently and try to smooth out any wrinkles as you go.  No matter what you do, there will be wrinkles and possibly tears because the napkins are so delicate.   I like to think they add a lot of character and texture to the pumpkin though.

Repeat this layer of paper all the way around. Repeat, as needed to cover the pumpkin.

Once the pumpkin is covered in paper to your satisfaction, apply one or two layers of Modge Podge over the entire pumpkin. Allow it to dry for several hours or until the glue has hardened.

Invert your dried pumpkin, and cut a square of napkin  to cover the bottom of the pumpkin. Apply two layers of Modge Podge to the bottom and any missed layers on the bottom of the pumpkin. Let it dry.

You can leave your pumpkin as is and just hot glue the top back on, but I wanted to add one other layer to these pumpkins. I knitted two leaves for each one, out of scrap yarn, to decorate the top of the pumpkin. This is a great time to use any yarn up that your kids claimed was too scratchy or the end of a ball of yarn that you just couldn’t part with.

I used this free knitted leaf pattern (leaf number one) to create these little yarn leafs for the tops of my pumpkin. The picture above shows the back of the leaf, you want the other side of the leaf to show on your pumpkin. Create your leaf stem as long as you like for your pumpkin.

Hot glue the ends of your leaves to the top of your pumpkin. Hot glue underneath the stem, and then secure it to the top of your pumpkin. Hold this all in place for a minute or two to make sure that it is secure.

Enjoy your little pumpkins in a favorite corner of your home, on your kitchen table, or wherever else a pumpkin might look beautiful. I am looking forward to using these all through the fall and I even think this gray and white one might be a perfect one for the winter holidays too!

It matches perfectly with my Yarn Wreath on my door and adds a fun element to my fall decorating.

I am a part of the Walmart Moms program, and Walmart has provided me with compensation for these posts. My participation is voluntary and opinions are always my own.