Archive for the ‘Blogging’ Category

DIY Holiday Mantel Decorating Ideas

Monday, December 8th, 2014

DIY Holiday Mantel Decorating Ideas


I can’t believe that the holidays are upon us and, if you are anything like me, the house is just begging you to decorate it for the season.

I love beautiful holiday decorations, but I prefer simplicity, affordability, and smart investments that can be used over and over again.

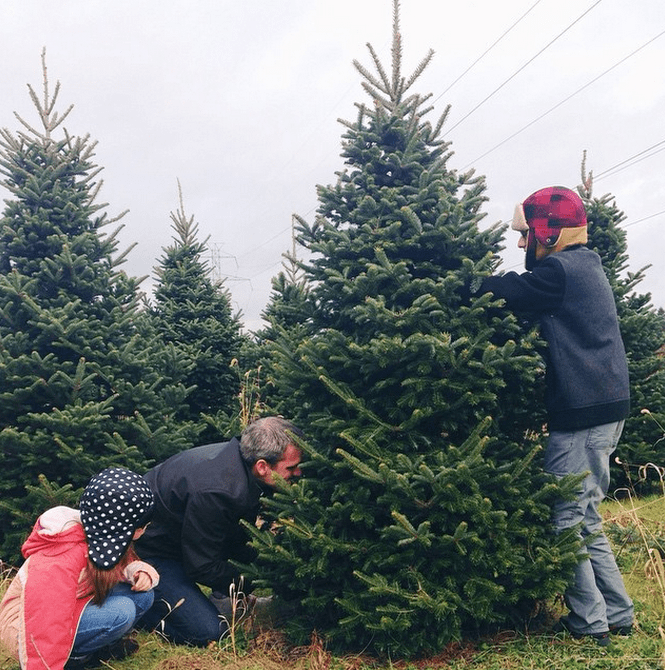
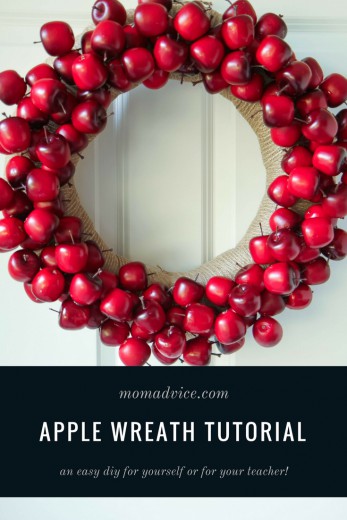
In our house, for example, we are decking it out with my favorite burlap wreath and my handmade yarn trees and we are even buying our first REAL Christmas tree this year (which I am awfully excited about).

I love to make handmade items that we can pull out from year to year so that is why I am excited to showcase some DIY Holiday Mantel Decorating Ideas from some of my favorite DIY bloggers.


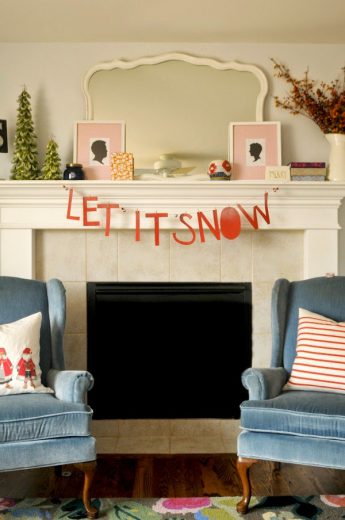
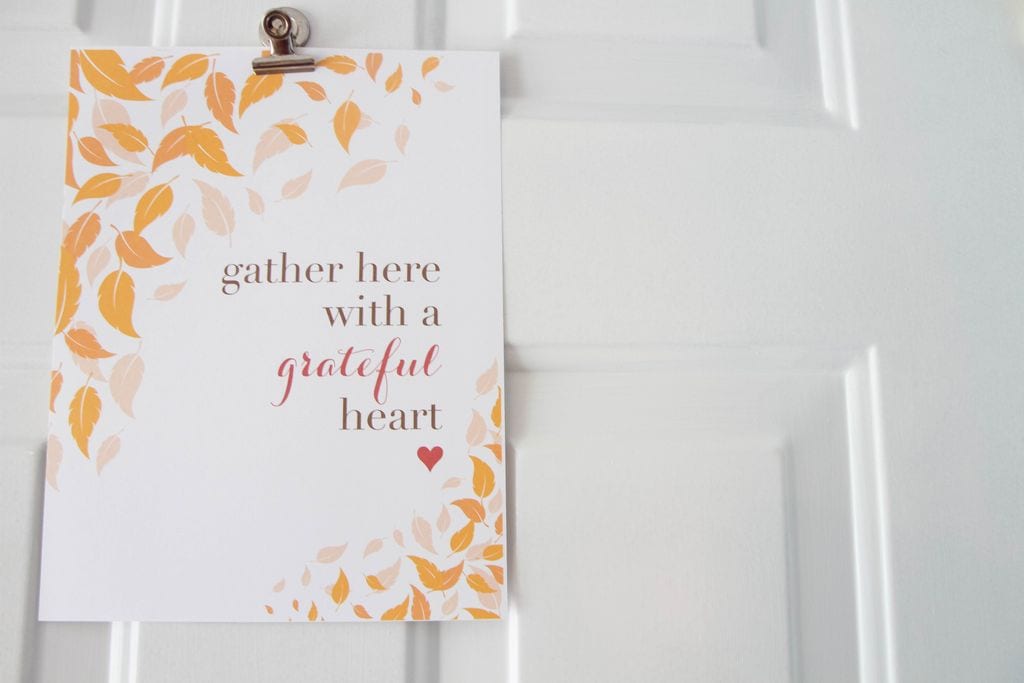
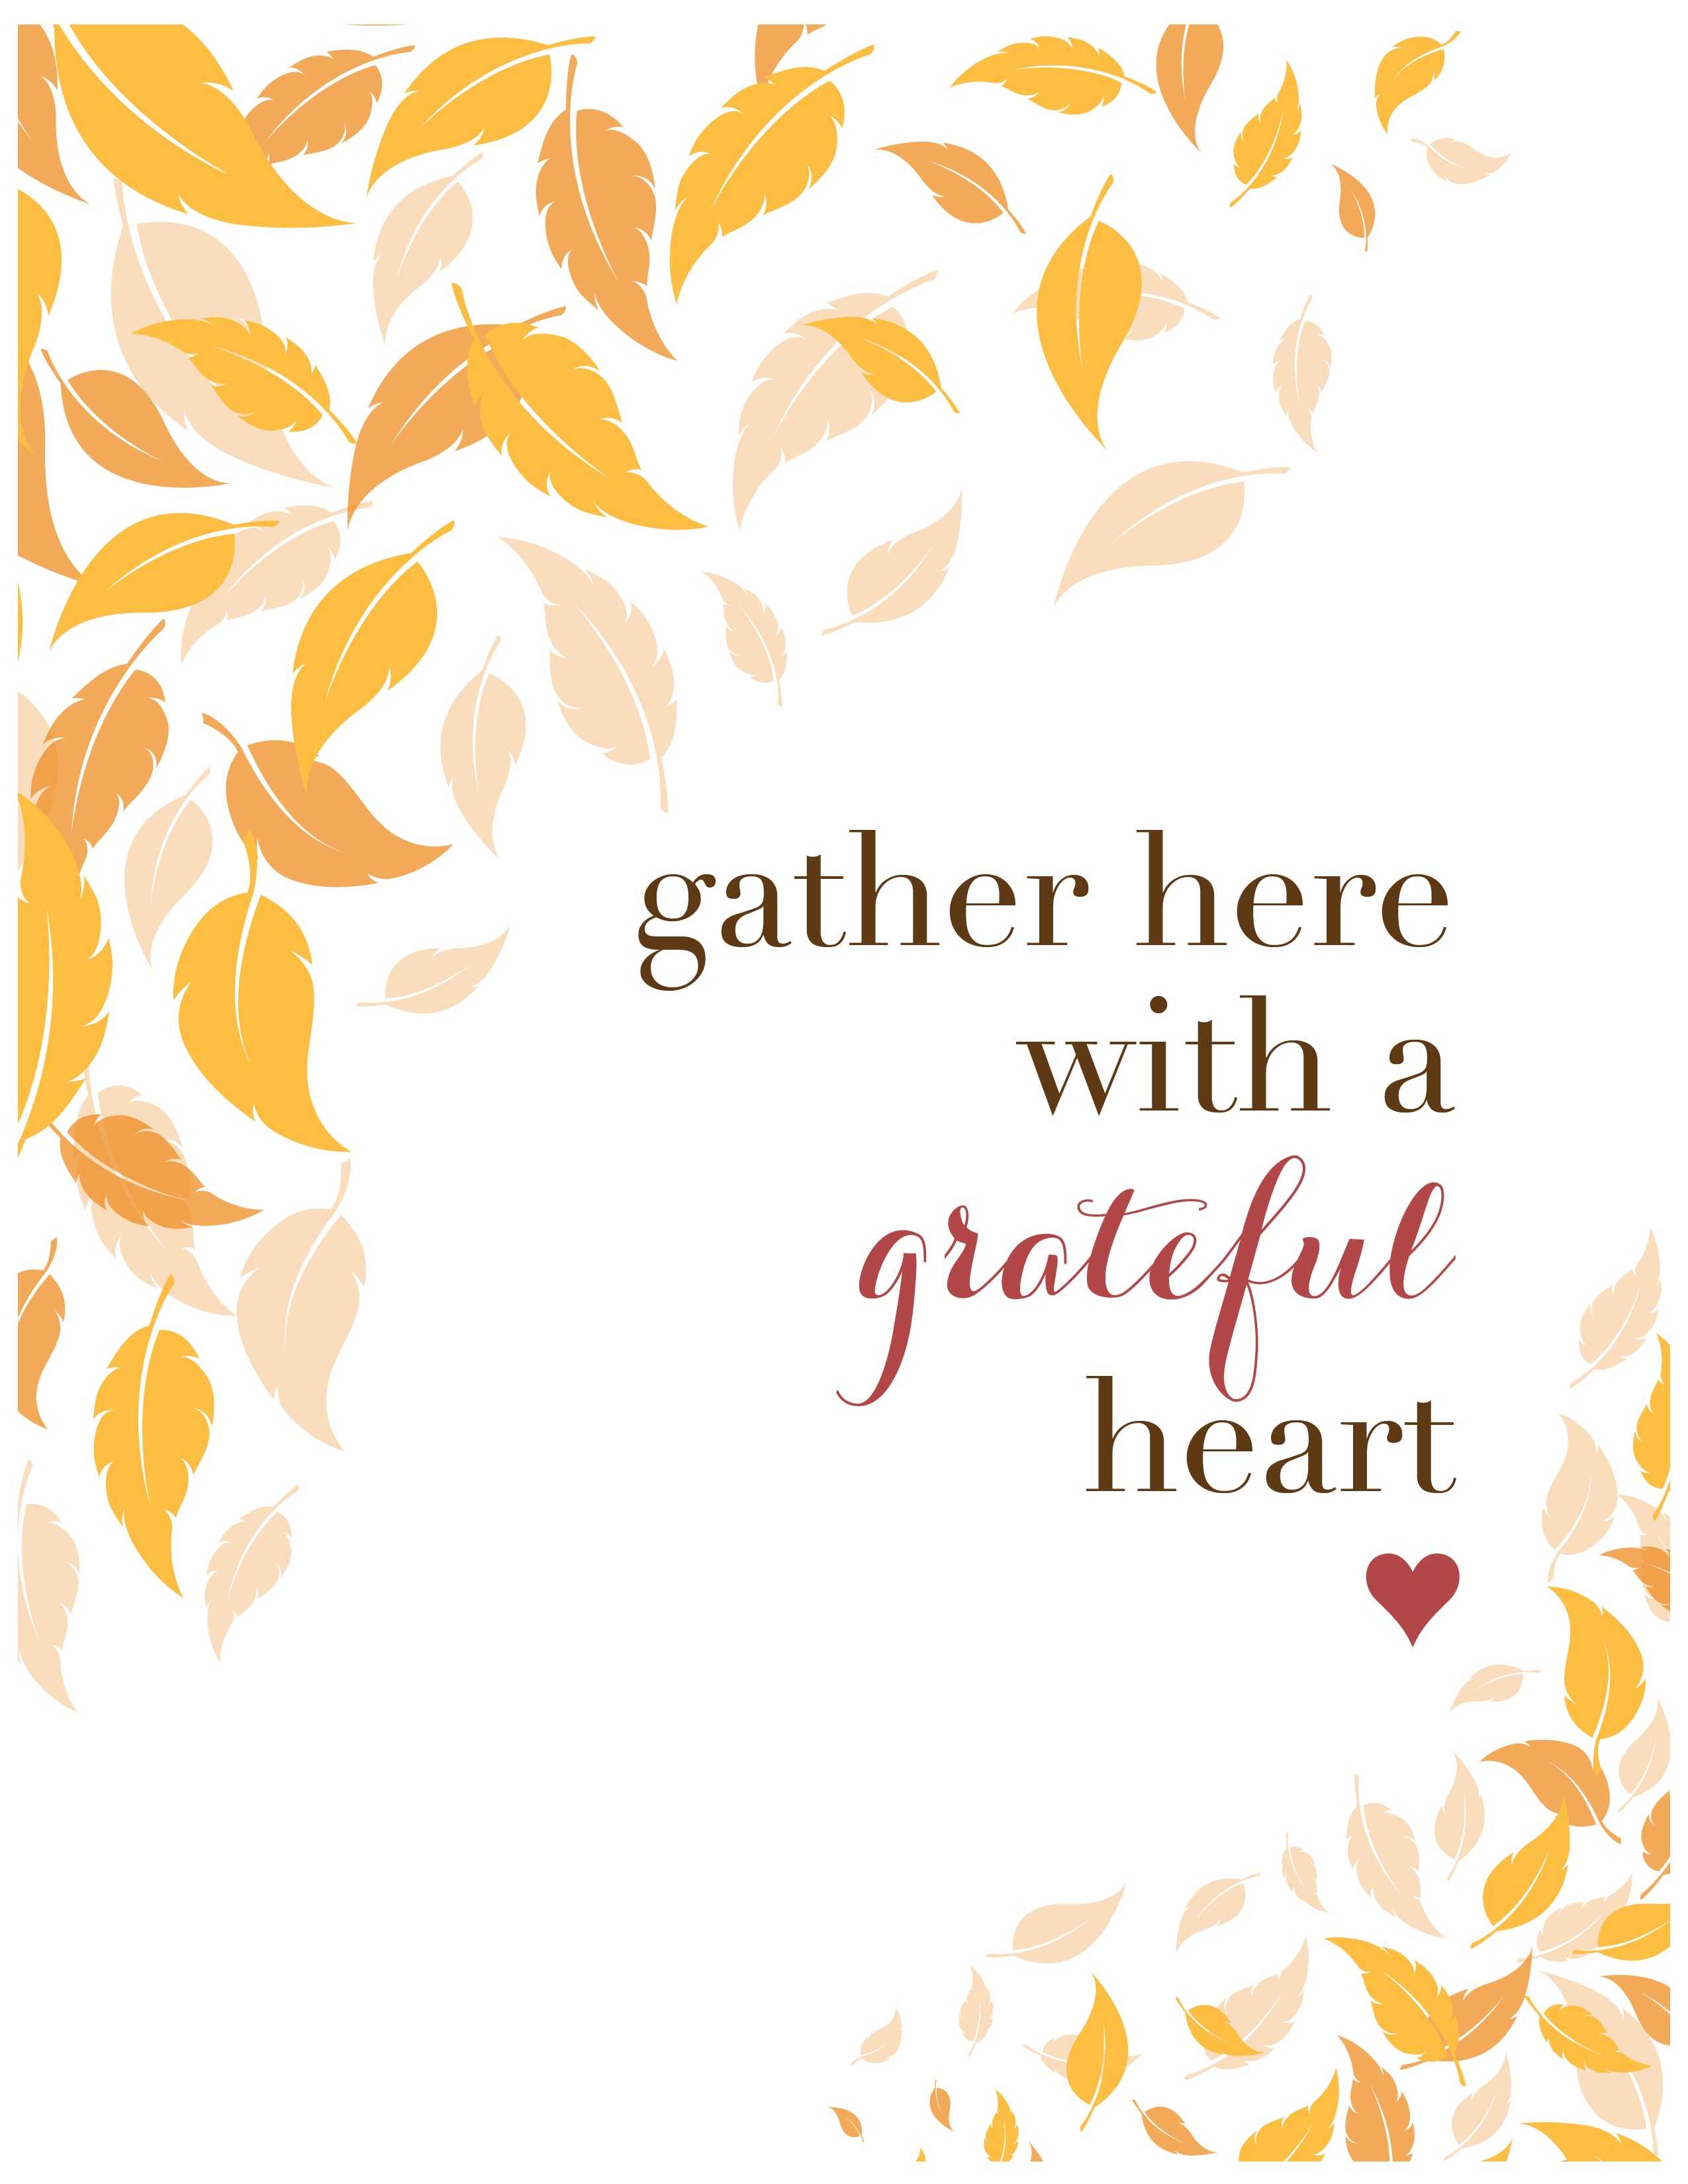
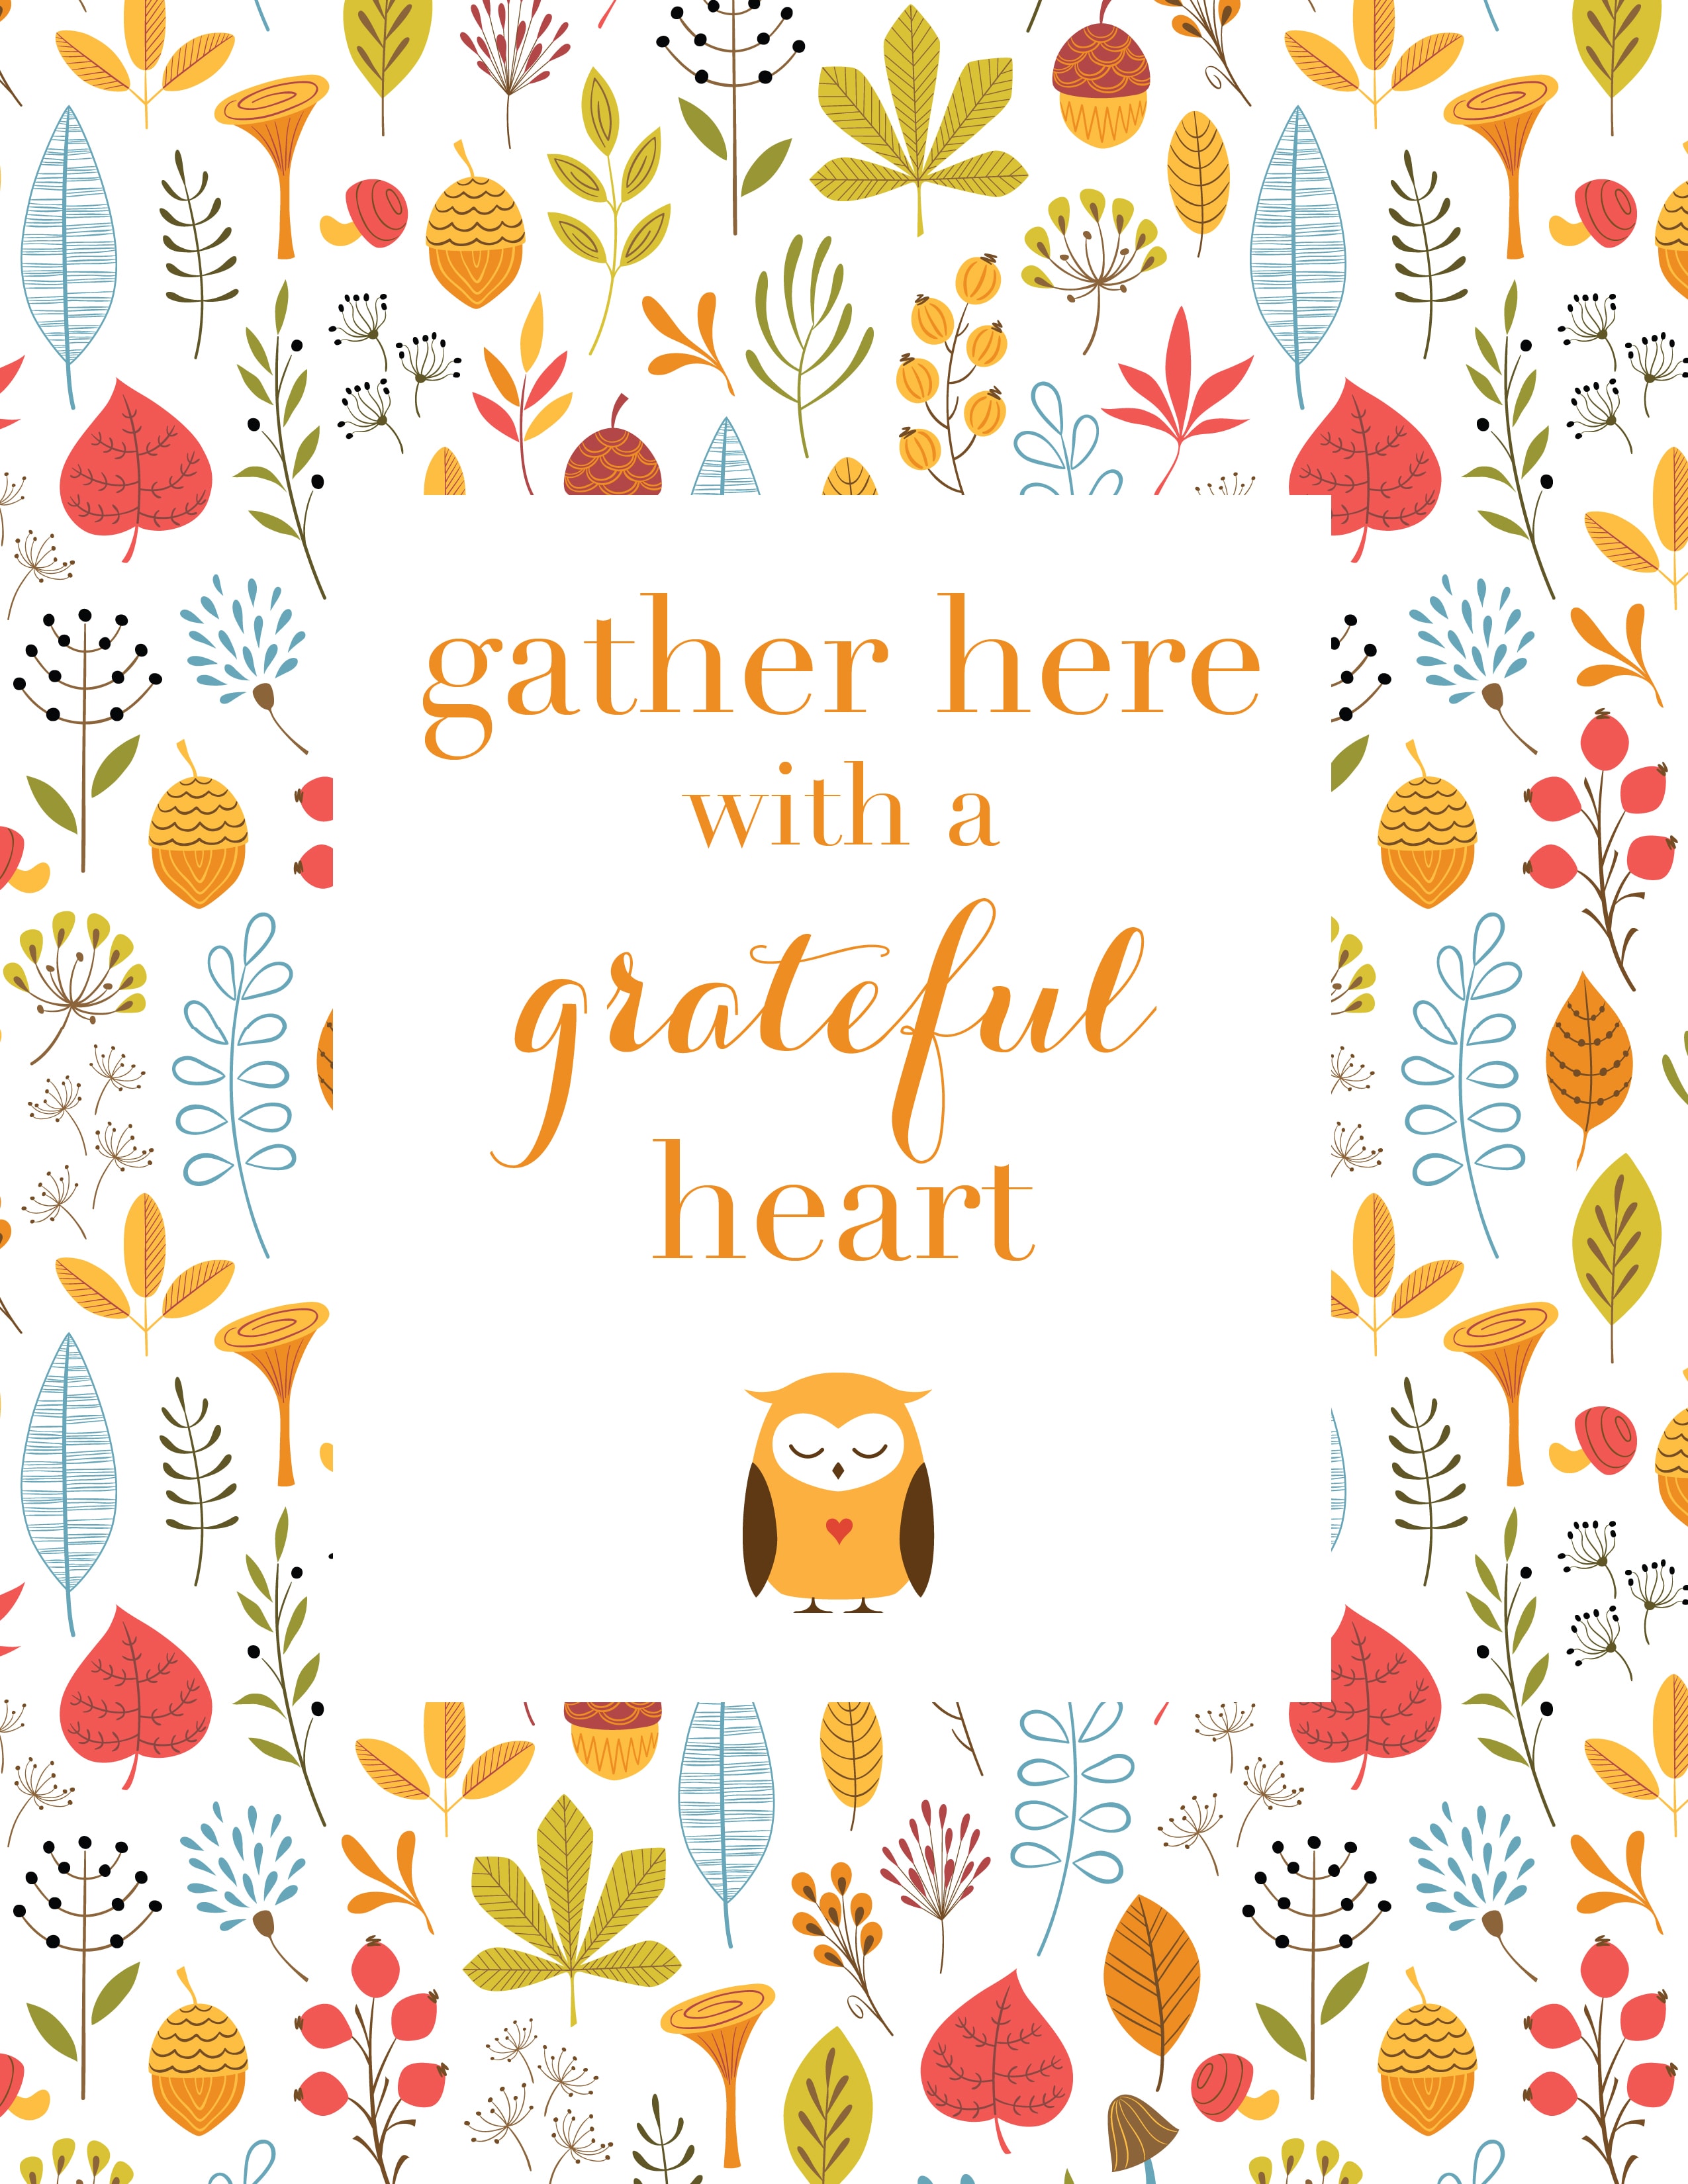
Add a Little Typography

I am a big fan of typography and the roots of that just might come from being married to a web designer.

I love this LET IT SNOW banner from The Proper Pinwheel that you can create with just a little cardstock and some scissors.

To help balance out the piece, consider adding a mirror or scrap paper covered books from your favorite thrift store to round out the mantels.

I happen to love these little silhouettes too that would be beautiful in spray painted white frames to match.


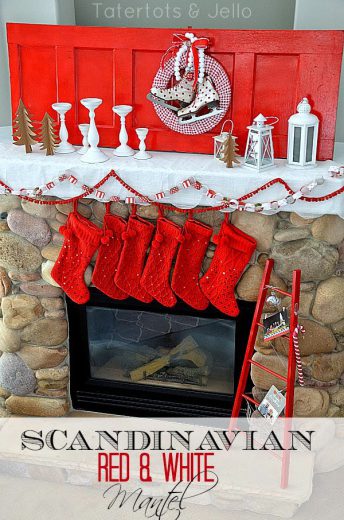
Embrace a Scandinavian Theme

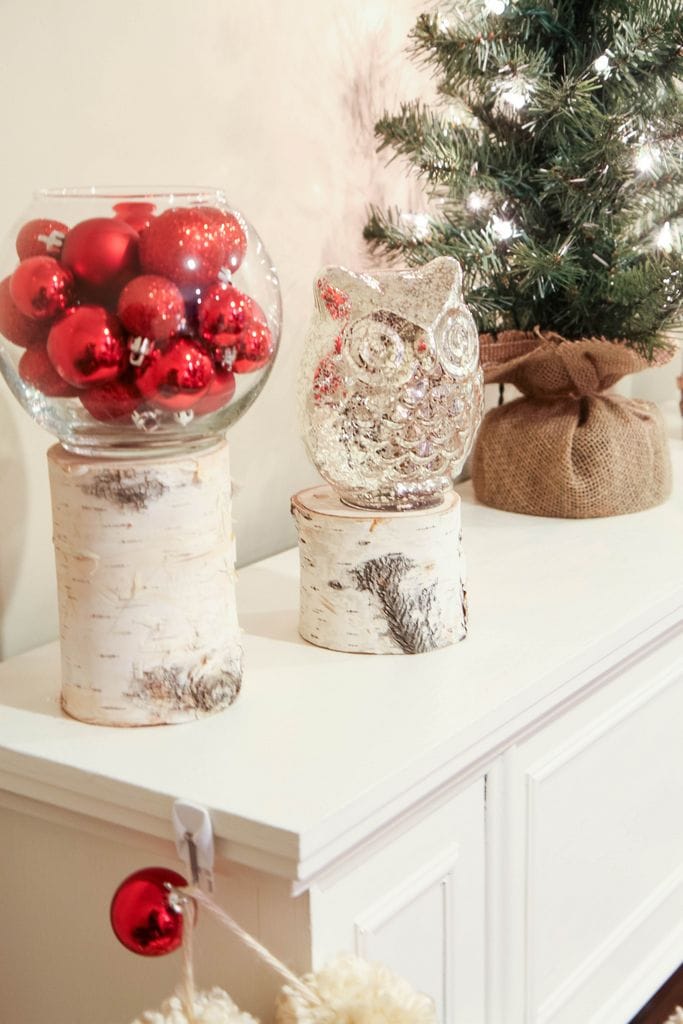
There is something so sweetly simple about red and white paired together and there are so many fun elements that could be added from your local Goodwill store in this Scandinavian Red & White Mantel.

From spray painted candlestick holders and accessories, to vintage ice skates, to a simple red painted door, to stockings made from sweaters…there is just so much to love about this one created by Tatertots & Jello.

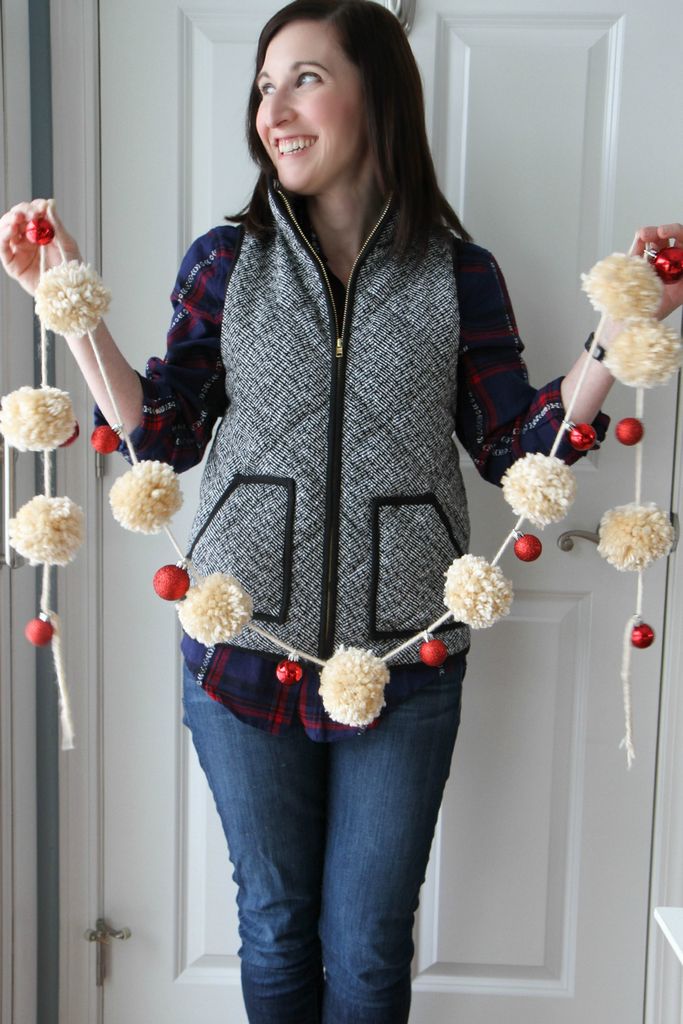
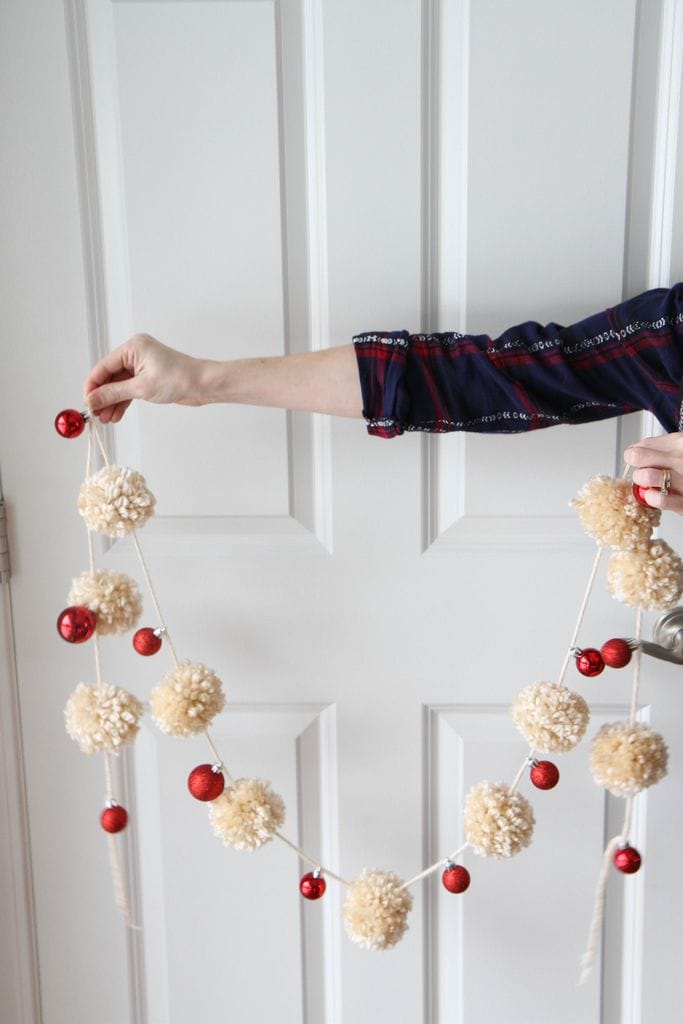
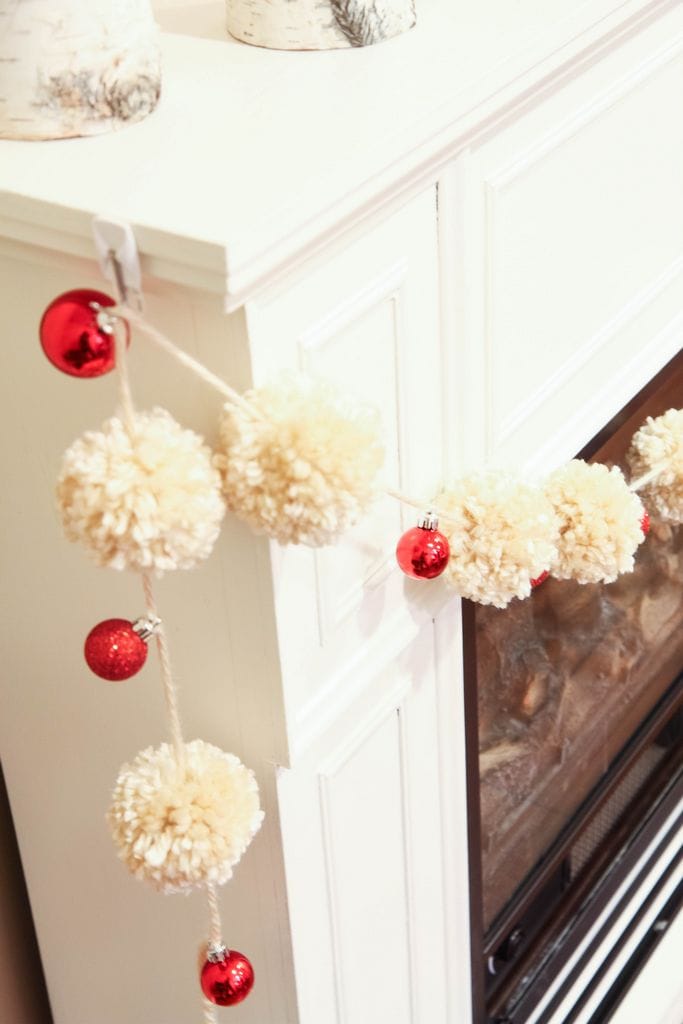
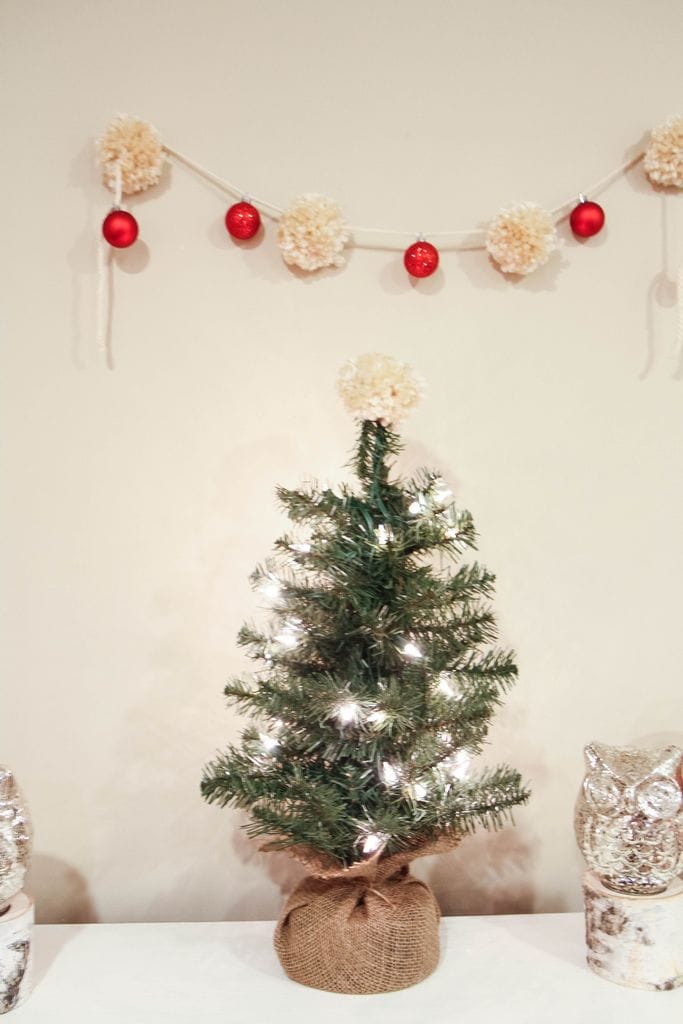
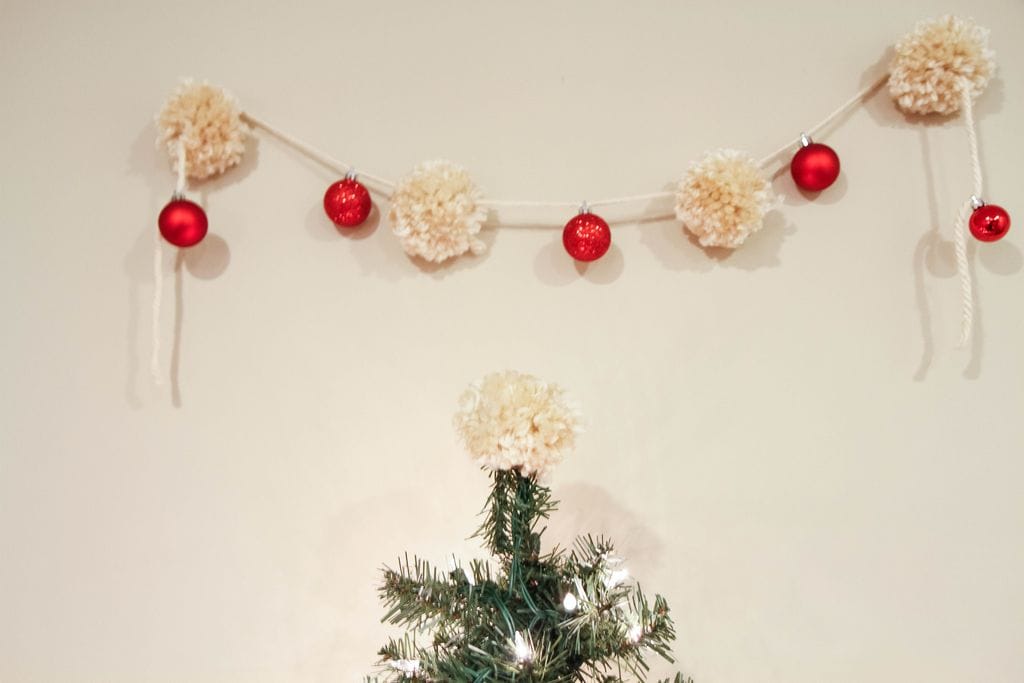
The addition of paper garlands and pom-poms add those perfect homemade touches.


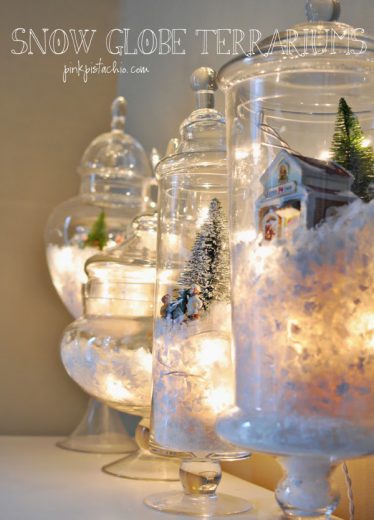
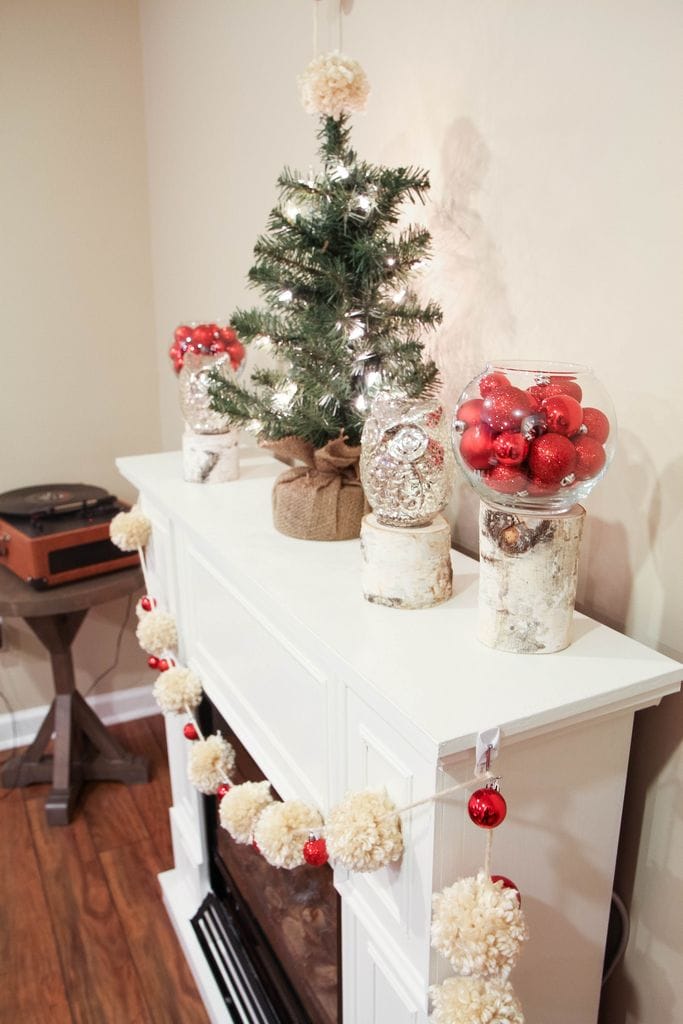
Light It Up With Snow Globes

Even as a grown-up, I find snow globes just as beautiful and magical as I did when I was a kid.

I am also a big fan of terrariums so I really love this idea of pairing the two and creating a Snow Globe Terrarium to light up your mantle.

This inexpensive idea adds a lot of holiday magic and would be a fantastic craft to create with a few of your favorite holiday helpers.

Check Goodwill’s houseware selections for jars to keep it budget-friendly thanks to this fun idea for Pink Pistachio!


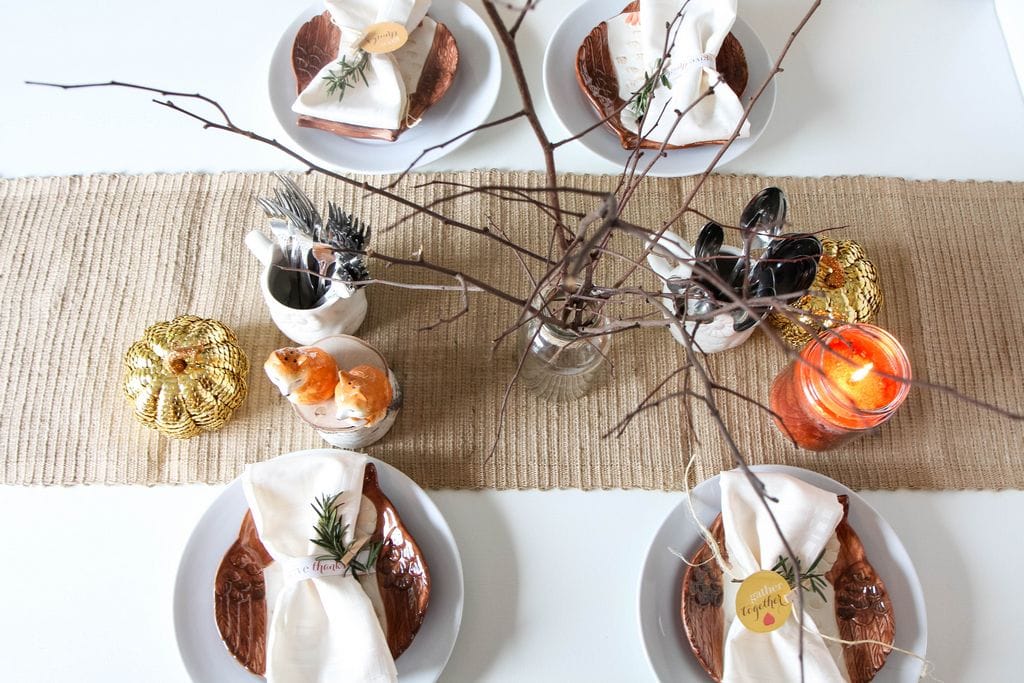
Embrace Mixed Metallics

If there is one thing I love this year it is metallics and mixing them together.

Luckily, it is easy to gussy up a vase or add a touch of paint to sticks from the backyard thanks to the metallic spray paints on the market.

I love this mixed metallic mantel from Centsational Girl because it is so elegant and also looks very easy to achieve with a little spray paint or even glitter tape (as Kate did)  from your craft tool arsenal.

How easy is this?


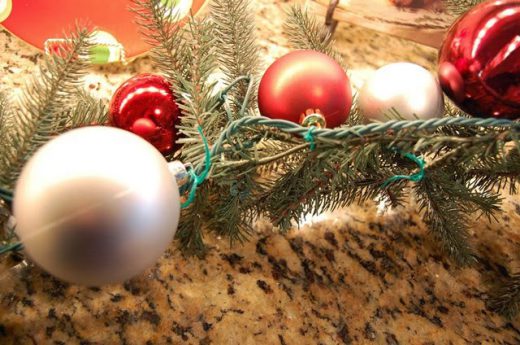
Add a Traditional Garland

Pre-made garlands can be expensive and may not have the color scheme you are after.

I love a traditional mantel with evergreen garland and this tutorial recreates the Pottery Barn style at a fraction of the cost.

Between Naps on the Porch illustrates one struggle that I have had with ordering garlands from PB…the length just isn’t there.

You have to buy many to achieve the length you need for a decorated porch or mantel.

Making these yourself gives you the flexibility to create your own desired length and add in the perfect colors to bring it all together.

The best part is that you can use these year after year!


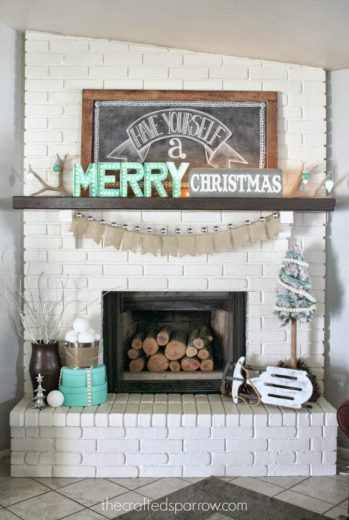
Add Chalkboard & Marquee Details

I am such a big fan of chalkboard paint and almost anything can be transformed into a DIY chalkboard from photo frames to mirrors to cupboard doors.

I love the idea of mixing and matching words in front of your DIY chalkboard for an elegant holiday mantel!

The Crafted Sparrow shows off her style with a handmade MERRY marquee that she whipped up.

Consider hunting for a basket for snowballs and for boxes or luggage to round out a corner.
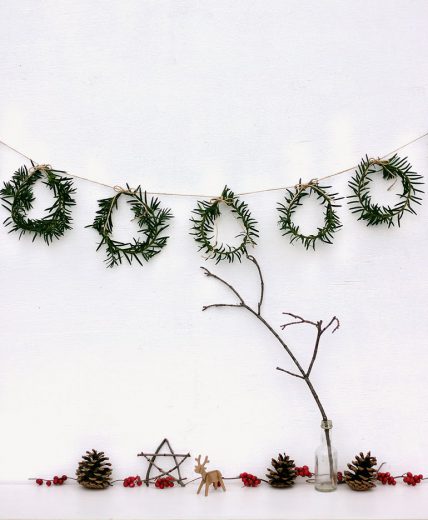
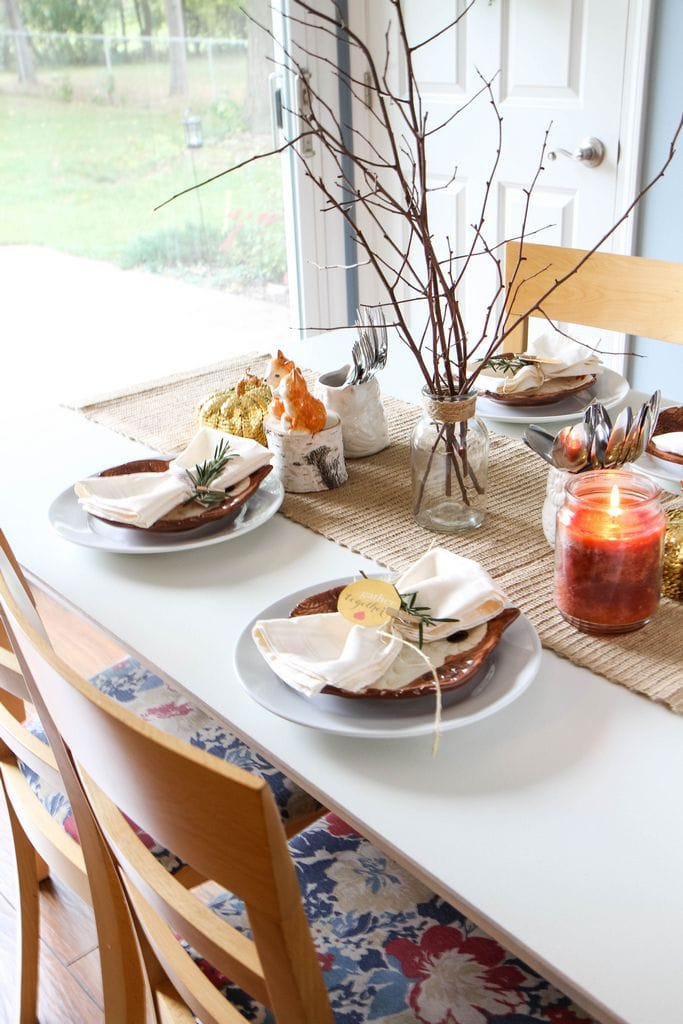
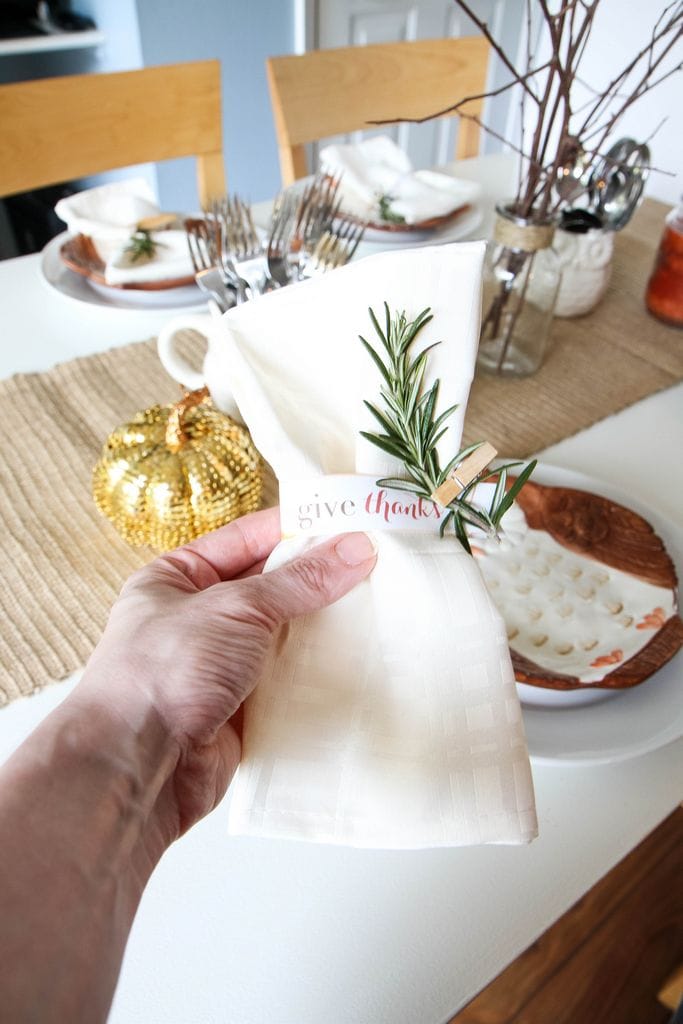
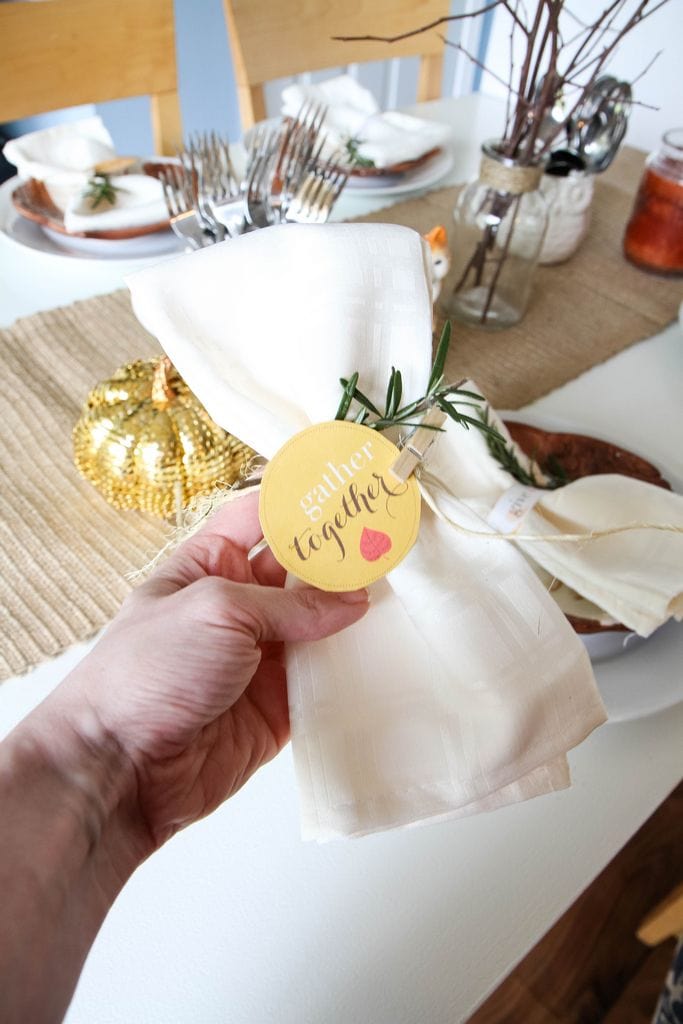
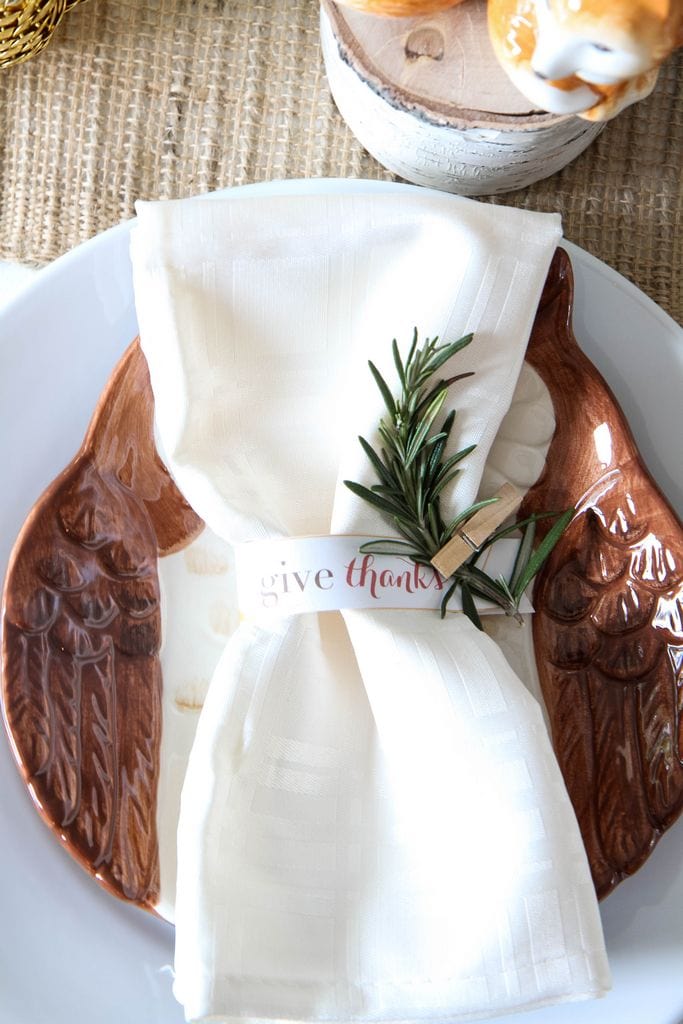
 

Keep It Natural

As I get older, I appreciate more a simple touch provided by nature instead of fake greenery that requires packing and storing for the season.
I love this simple mini wreath garland from the merry thought that you can create to decorate a mantel created from a little pine and adding berries, pine cones, and sticks from your backyard.
This mantel isn’t fussy and relies on all the beautiful things that nature provides to achieve a simple & clean modern look.

What are your favorite ways to decorate your mantel for the holidays?

This post contains affiliate links.

Check out these other ideas from MomAdvice.com:


Snowman in a jar

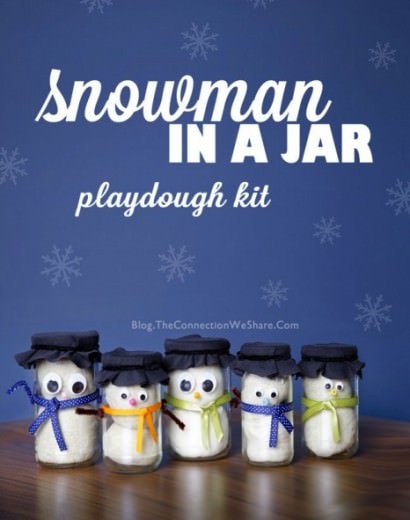
Snowman in a Jar Playdough Kit


Christmas Tree cinnamon Rolls

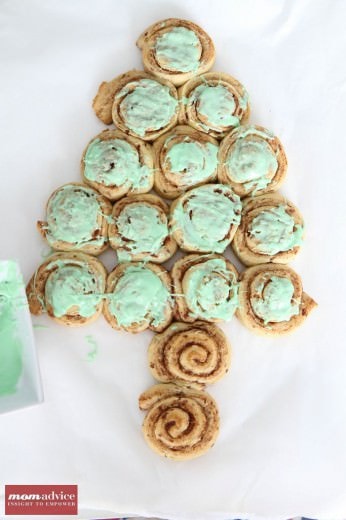
Christmas Tree Cinnamon Rolls


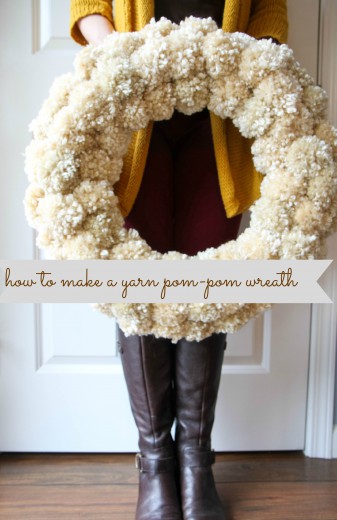
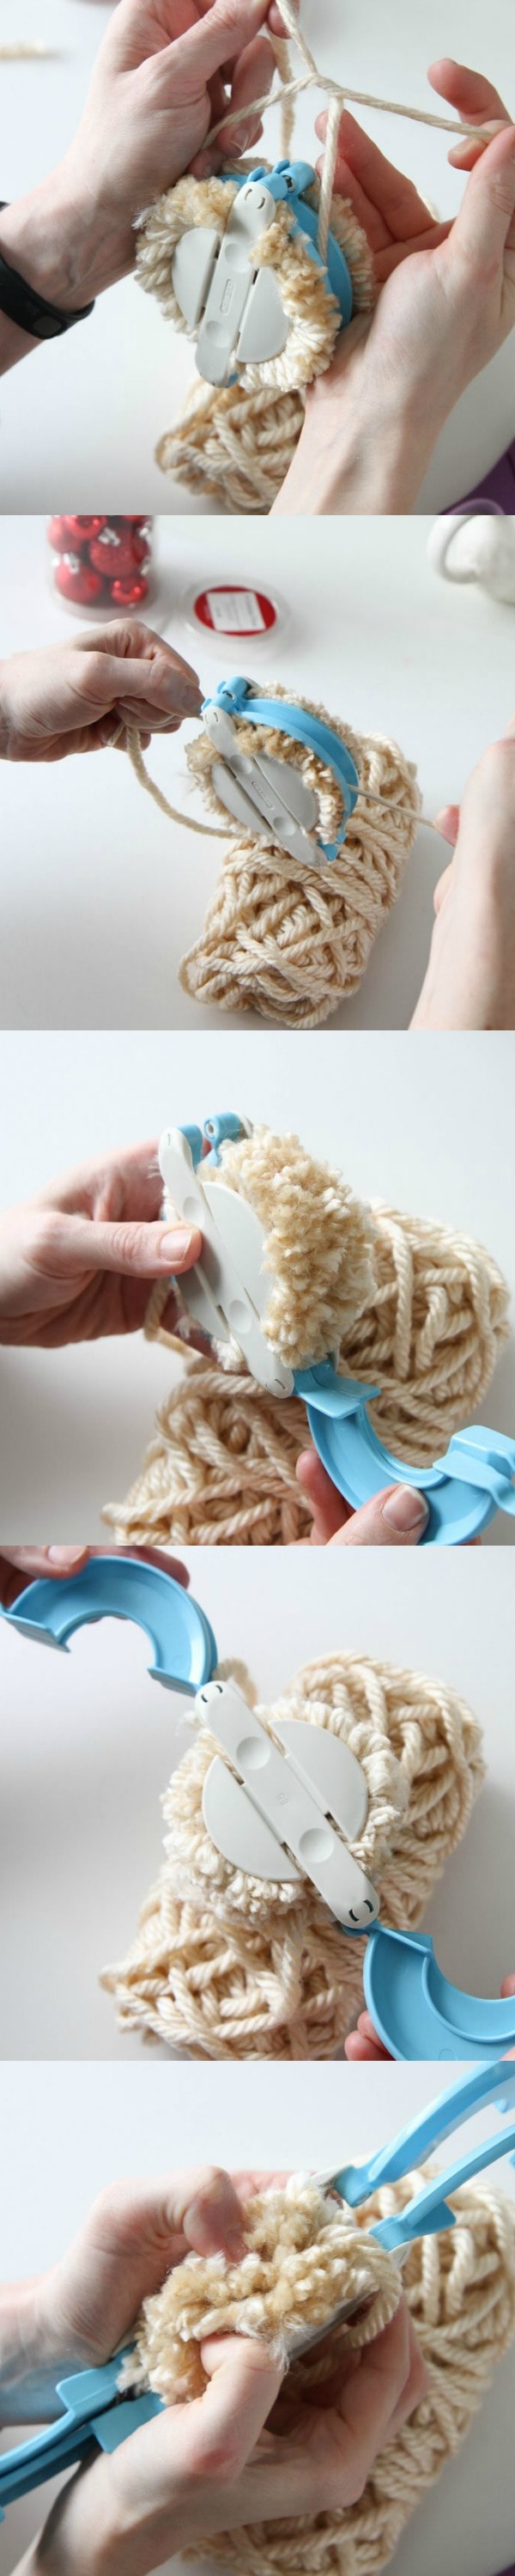
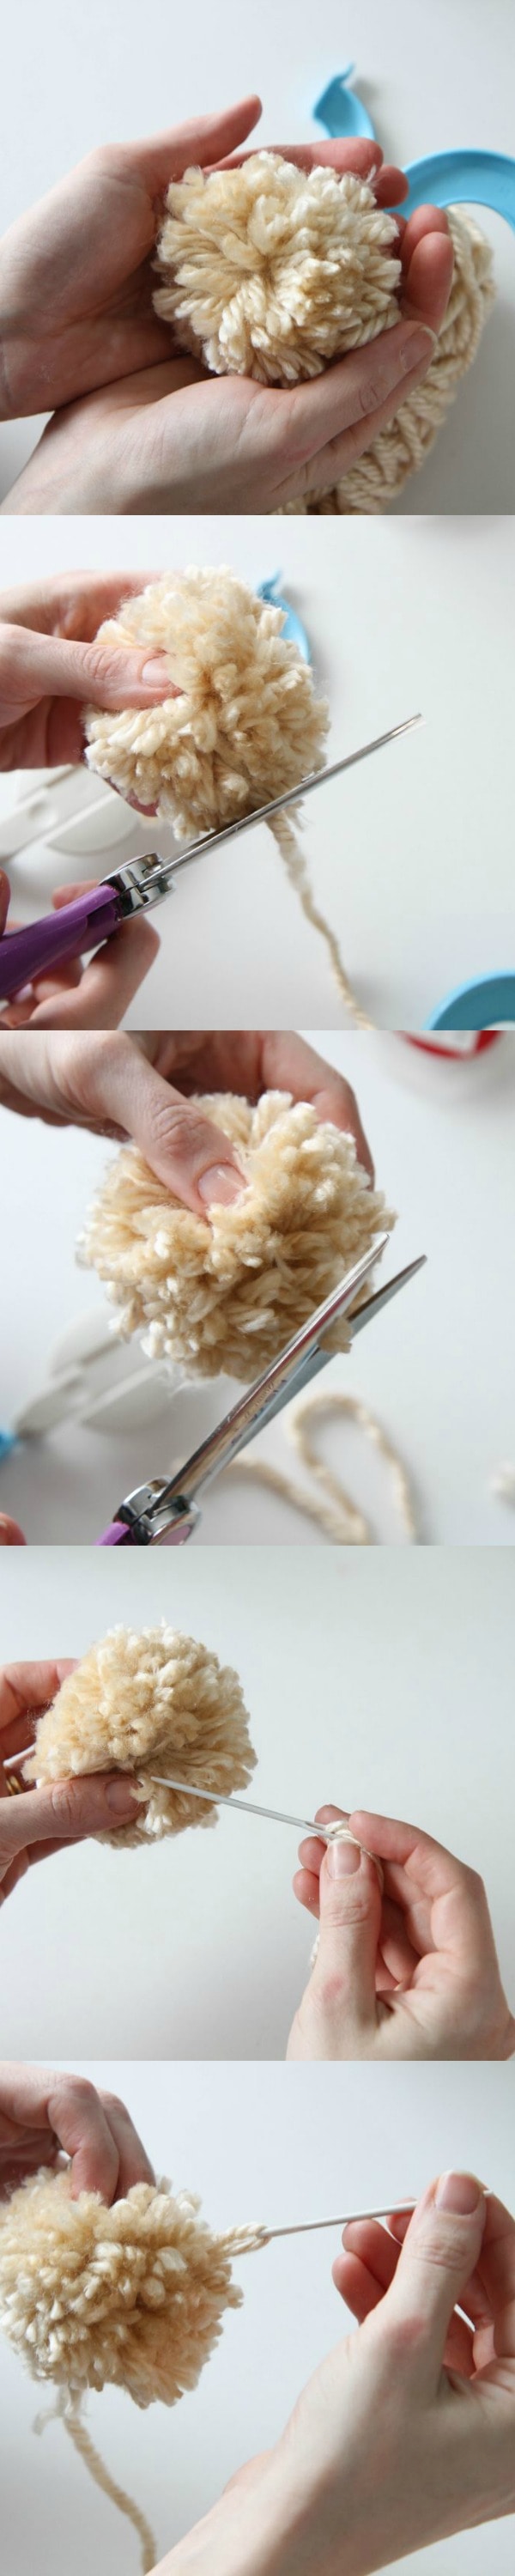
How to Make a Yarn Pom-Pom Wreath


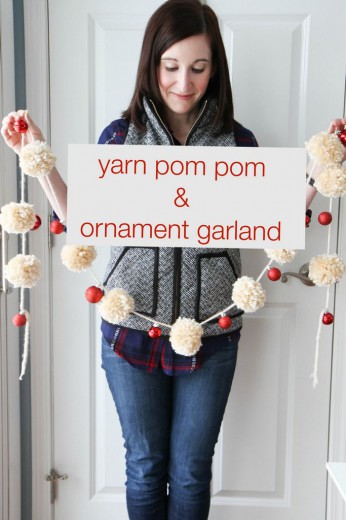
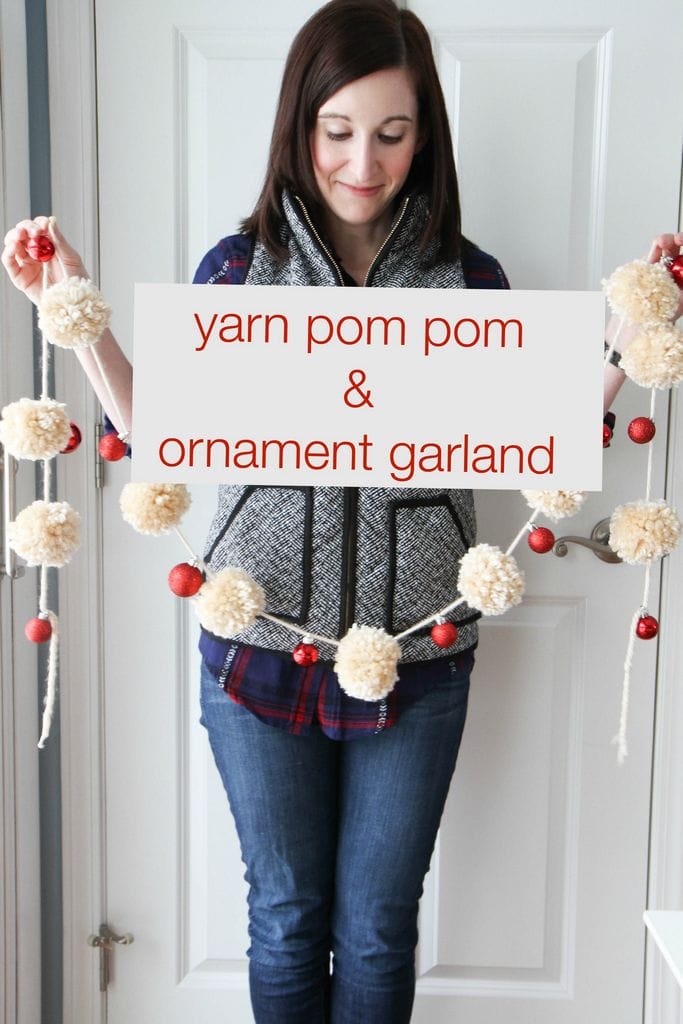
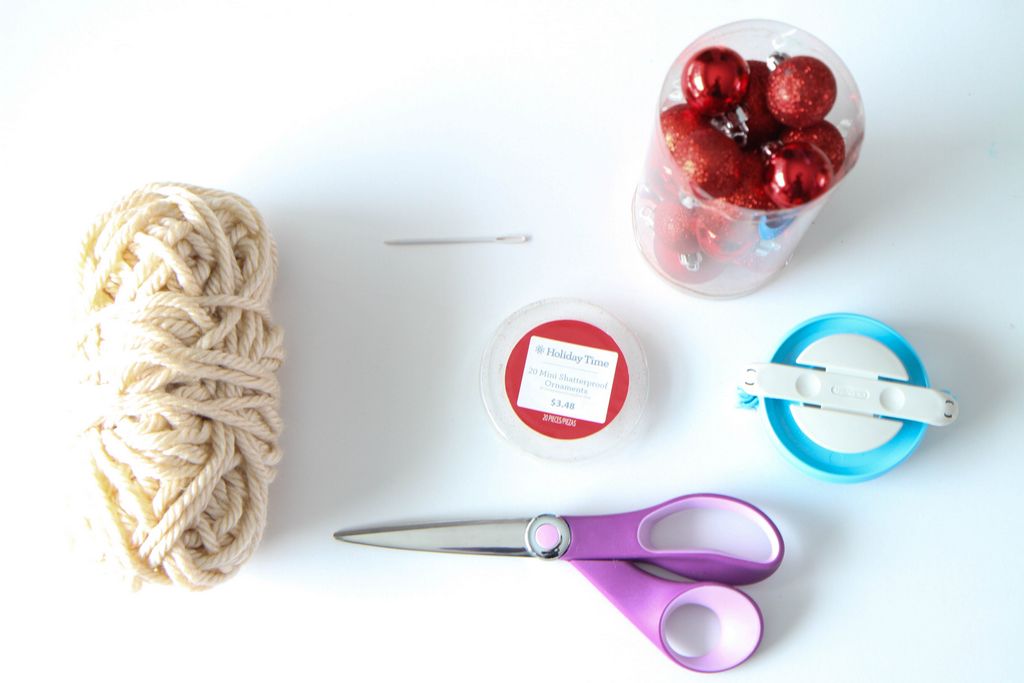
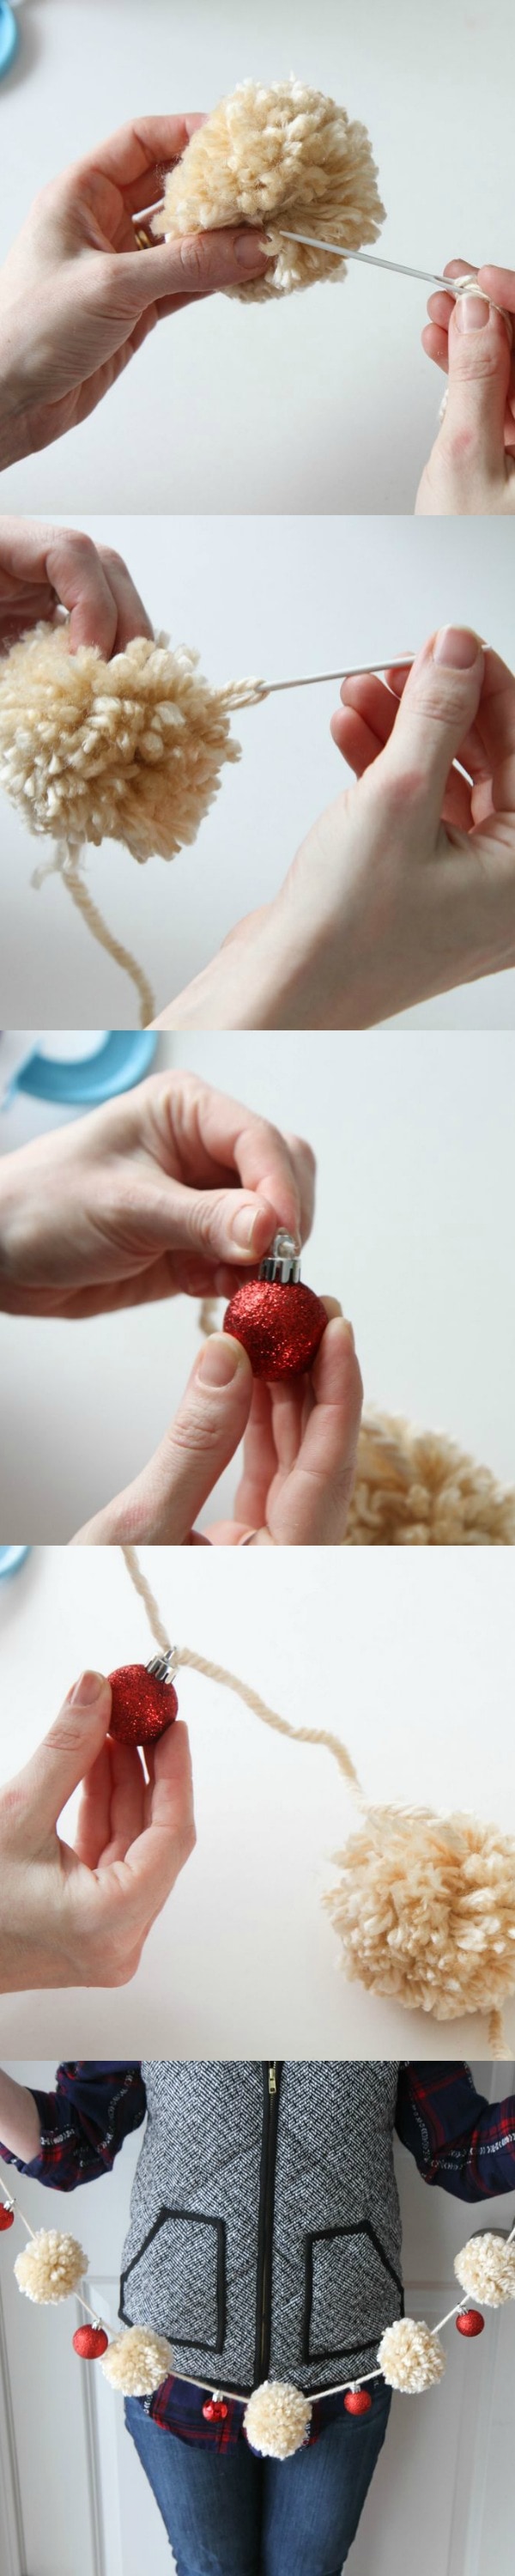
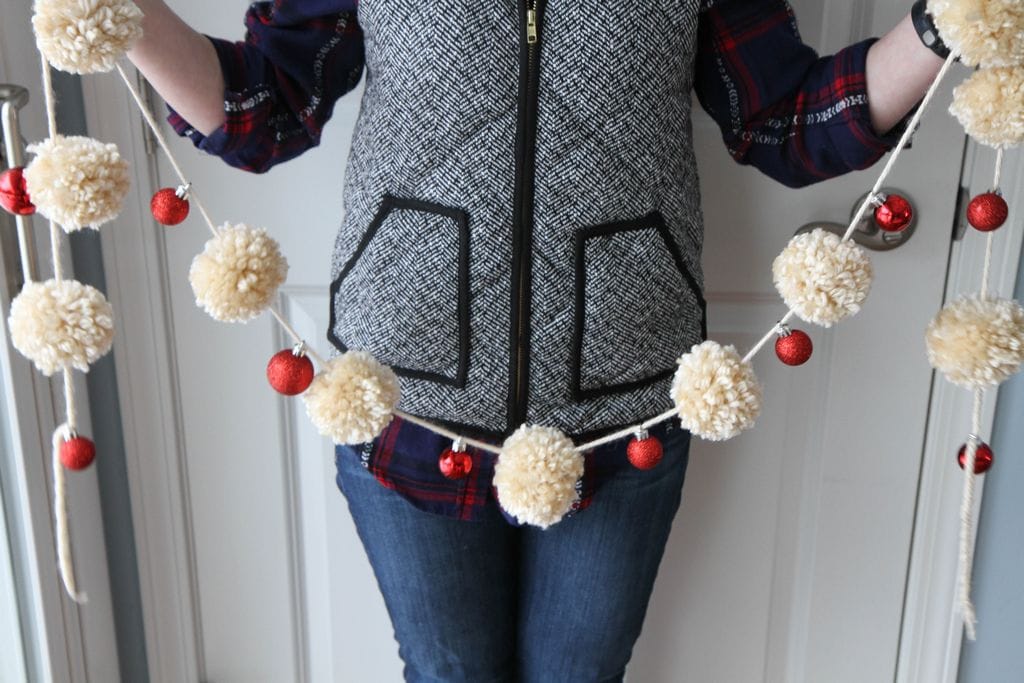
Yarn Pom Pom & Ornament Garland


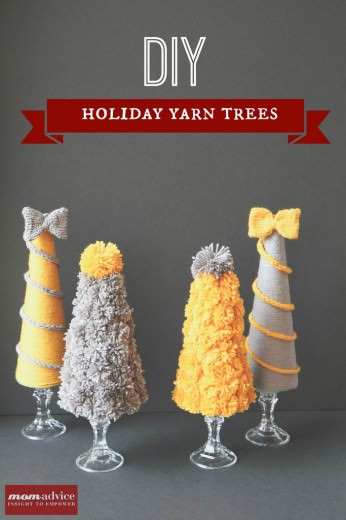
DIY Holiday Yarn Trees


Sign up for the MomAdvice newsletter


Pin It

It’s the 3 Little Things: Easy Bun Makers, Perfectly Airbrushed, & Blueberry Happiness

Friday, December 5th, 2014

It's the 3 Little Things

Happy Friday, friends! It was another busy week of crafting and decking the halls at our house. I also stayed up far too late watching Peter Pan Live last night. I thought the cast and the sets were simply phenomenal. What did you think?

We had new furniture delivered for our kids rooms last night so I am in a frenzy of cleaning out their rooms and drawers to make room for furniture that offers a little more small space function. Drawers are tucked underneath beds and bookcases tucked in headboards- the kind of furniture you really need when your bedrooms are shoebox size. I even cleared out an entire closet in my son’s room and have dreams of how I can make that a smart functional space for him.

Just as a heads up, I want to let you know that I am putting the blog on hiatus from December 13th-28th. I am VERY MUCH looking forward to a little peace and quiet after such a busy year with the site.   I am also putting myself on a social media hiatus and try to get back to center for the holidays and be present with my family.  I know you understand.  

I just snagged an ambitious amount of library books that I plan to read over my time off. I am looking forward to being creative just for the sake of being creative and not documenting anything for awhile. I’m so thankful for my job, but I am very run down.  That said, I have a VERY exciting reveal for 2015 that I am hoping you will love as much as me. Stay tuned for that as we take the site in a new direction!


Let’s talk about the happy  this week. This one is  a few new beauty tools I discovered!

Perfect Bun Maker

Finally a Perfect Bun Maker

I know everyone is crazy about the sock bun, but I have discovered a bun making tool that has saved us many a headache from bobby pins for my daughter’s ballet class. These foam bun makers are amazing and I actually paid $5 for  a single one at Target, but found this set of four for less than $5 on Amazon. All you do is throw your hair up in a ponytail, open the bun maker and slide it up so the end of your pony tail is sticking out, and roll upwards to the top of your ponytail, and bend into a bun shape. We secure it with just a couple of pins and it holds her heavy glossy hair all day long. It was so easy that I think my daughter could even do it herself.

This little tool came in handy this past weekend as she danced in her first Nutcracker which was so incredibly special to see. Here is a little shot I took of her backstage peeking at herself in the mirror at her dress rehearsal.

Nutcracker

Perfect buns and a perfect mom moment all rolled into one- that definitely is at the top of this week’s happy list!

Revlon Photoready Skinlights

Perfectly Airbrushed Skin

I picked up some Revlon Photoready Skinlights this past week. I have heard so many good things about this product and now I can see what the fuss is all about. You can mix this right into your foundation and it adds that airbrushed quality to your face and a little glimmer and dewiness that you see all the celebrities rocking.  As my skin is aging, I find that it gets more and more dry, and this being mixed into my foundation helps add that dewiness that I have been trying to achieve. You can also just add a touch to places you want to highlight like your cheekbones.   You only need a touch of it so a bottle will last a long time. I am really loving this stuff and highly recommend you pick some up to try it!

Yes to Blueberry Wipes

Yes To Blueberries Brightening Facial Wipes

I am big on washing my face every night, but since we have been running around like crazy, I have gotten out of the habit of a good facial routine. I purchased these Yes to Blueberries Brightening Facial Wipes from ePantry last month and I absolutely love them to get my make-up off before I head to bed. I love the smell of these and they do a great job getting my make-up off without drying out my skin. I am not sure if you saw or not, but we are running a deal with ePantry this week giving you $10 to shop, free shipping, a free Method Soap & they are giving $15 for each sign-up to my local food pantry for Giving Tuesday.  You could try this product out for free this week and help a great cause in the process! I hope you like these as much as I do!

Three Things I Wore From My Fashion Capsule. Get inspiration and earn money cleaning out your closet with my tips! You must!  Grab more inspiration on my Fashion Capsule Pin Board and minimize that wardrobe!


camel tunic + burgundy leggings + brown & black accessories

Camel Colored Cowl Tunic Top Sweatshirt (Target)/Burgundy Knit Leggings (Ann Taylor Loft)/Naturalizer Boots- (6PM)/Brown Belt (owned- Maurices)

felt & wool sweater + burgundy tank + skinny jeans + boots

Last minute switch in the capsule because this shipped- pulled my emerald green shirt out. Anthropologie Wool Sweater (purchased second-hand from Thredup)/Burgundy Tank Top (Flourish Boutique)/Seven Skinny Jeans (owned- Flourish Boutique)/Naturalizer Boots- (6PM)

black dress + gray seamless shirt + black boots & tights + red belt + tassel necklace

Sushi Day Date With My Hubby- swoon! I even borrowed that bun maker from my daughter! Seamless Perfection Long Sleeve Tunic in Gray (Flourish Boutique)/ White House Black Market Knit Black Dress  (purchased second-hand on Twice)/ Red Skinny Belt (Target)/ Black Fleece Tights (Walmart)/Naturalizer Boots- (6PM)/Gray Tassel Necklace (Ali Oesch Jewelry)

3 Things YOU Loved This Week (you, lover of MomAdvice things, you!)

How to Make a Blanket Scarf

Make Money Organizing Your Closet

Yarn Pom-Pom & Ornament Garland


Bonus Happy

Christmas Tree

 Our first real Christmas Tree. I’m in love!

*this post may contain affiliate links- I only recommend what I love though. Check out past editions of  It’s the 3 Little Things

Now it’s your turn! What’s making you happy this week?

How to Make a Watermelon Pirate Ship

Monday, December 1st, 2014

Watermelon Pirate Ship from MomAdvice.com


*This post is sponsored by Walmart

I have had my calendar booked forever for Peter Pan Live! ever since I heard it was the next live theater production to hit television.

Did you hear that it is coming to NBC on Thursday, December 4 at 8/7c? The cast includes several of my favorites like Allison Williams, Christopher Walken, Christian Borle and Minnie Driver.

In honor of the film, I have crafted up a watermelon boat that you can share with your kids for your family night together.

This fun food craft can be created together, adding your own personal pirate touches, or you can create it to surprise the kids for your family night.

Not many people know this, but I did theatre for many years and my favorite type of shows to do were musicals.

My love for this started in high school and I took a year off in between high school and college to do more shows.

In fact, I even did a show when I was pregnant with my son.  

Thankfully, it was of an era with empire waists and flowing Victorian clothing.

I miss it a lot and that is, perhaps, why I appreciate the opportunity to catch any production that I can.

I also appreciate any opportunity I can get to expose my children to the arts and it is why I put a big significance on this in our home.

Not everyone can afford a ticket to see a show and I love that this is an affordable way to enjoy the arts as a family.

Let’s create a fun pirate ship for your family night!

Watermelon Pirate Ship from MomAdvice.com

Supplies Needed

1 watermelon

1 pint blueberries

1 pint strawberries

1 pound grapes

1 sharp knife

cutting board

1 piece of cardstock

5 paper straws (I found these in the party supplies aisle)

1 hole punch

1 pair of scissors

How to Make a Watermelon Pirate Ship from MomAdvice.com.


Directions for Watermelon Pirate Ship

1. To help your boat sit upright, slice very thinly the end off of the bottom of the watermelon, making sure not to puncture your watermelon so it can act as a boat for your fruit.

2.  Slice the top half of your watermelon off. Set aside.

3. Using a melon baller, remove the meat of your watermelon. If you do not have a melon baller, you can score the watermelon into chunks and glide your knife all around watermelon to help create the shape of your chunks. Use a spoon to then scoop out the squares of melon. Ideally though, a melon baller makes quick work for your fruit salad.

4. Once the melon is completely hollowed out, slice your fruit and place it inside of your bowl, weaving in your watermelon, to create your fruit salad.


How to Make a Watermelon Pirate Ship from MomAdvice.com.


5. Now we can make our sails for our ship. Cut out five squares from a single piece of cardstock, any size you wish. I just cut out one square and used it as a template to create the rest of my sails. These do not have to be perfect, in fact, if they are imperfect they look like they are waving a bit in the breeze.

6. Using a hole punch, punch out a punch near the top of the square and then near the bottom to create a place for our straws to slide through. I stacked them all together and then punched them all at once so they would look more uniform.

7.  You will then need to cut your straws are varying sizes. I did one long straw, two medium, and then two short.  Slide the straw through making sure that the straw is peeking out of the back and not the front of that pretty white sail.

How to Make a Watermelon Pirate Ship from MomAdvice.com.

We hope you love this craft we created in honor of  Peter Pan Live! and we hope you can catch the show with us!  You can learn more about this amazing production here! We can’t wait and hope this idea inspires you for your family night together!

xo


Watermelon Fruit Salad Pirate Ship from MomAdvice.com


walmart_mom_disclaimer

Love watermelon? Check out this great recipes:


Watermelon Granita

Watermelon Granita


Watermelon Smoothies

Watermelon Coconut Lime Smoothies


Fruit Infused Water

Fruit Infused Waters


Mint Watermelon Berry Fruit Salad from MomAdvice.com

Watermelon Berry Fruit Salad

Pin It

Yarn Pom-Pom & Ornament Garland

Saturday, November 29th, 2014

Yarn Pom-Pom & Ornament Garland from MomAdvice.com

If there is one thing this girl loves it is a good yarn pom-pom project. I have created everything from pom-pom Christmas trees to bouquets of flowers for gift-giving. Today I’m partnering with Walmart to show you a fun winter craft you (or your little ones) can create for the holidays to decorate a window, mantel, or pretty up a ledge in your home. The best part is that it doesn’t cost a lot to create and can be used year after year!

Yarn Pom-Pom & Ornament Garland from MomAdvice.com

Supplies Needed

1 skein (or possibly two depending on your ledge size) Hometown USA Super Bulky Yarn in Los Angeles Tan ($2.97)

Package of 20 Mini Shatterproof Ornaments (in seasonal decor with the mini artificial trees) ($3.48)

Large Clover Pom-Pom Maker (use the blue one) ($6.61)

Scissors

Embroidery Needle

Scissors

Yarn Pom-Pom & Ornament Garland from MomAdvice.com Yarn Pom-Pom & Ornament Garland from MomAdvice.com Yarn Pom-Pom & Ornament Garland from MomAdvice.com how-to-use-a-pom-pom-maker-4 Yarn Pom-Pom & Ornament Garland from MomAdvice.com

Yarn Pom Pom & Mini-Ornament Garland Directions

1. Prepare yarn pom-poms as I have shown you in the step-by-step photo tutorial or follow directions on packaging to create your pom poms. Keep making pom-poms making sure to leave enough yarn to string your pom-pom garland.

2. Once all of your pom poms are made, thread them with the embroidery needle onto your yarn. Take the embroidery needle off (the needle head is too large to feed through the mini-ornaments) and then alternate it with a mini-ornament. Keep doing this until you have filled the entire garland leaving a little on each end to hang down. I ended mine with an ornament since it ends the garland securely without knotting.

Yarn Pom-Pom & Ornament Garland from MomAdvice.com

Yarn Pom-Pom & Ornament Garland from MomAdvice.com

v

Yarn Pom-Pom & Ornament Garland from MomAdvice.com

Yarn Pom-Pom & Ornament Garland from MomAdvice.com

Did you see that I got my first little fireplace? I decided to decorate it with this adorable garland. To tie it all together, I filled glass bowls ($1.97 each) with a package of mini ornaments ($3.48 each) and then stacked them on my little fake logs that I had bought for my fall decorating from the craft store. I found these adorable owls  for $4.98 in the seasonal decor and I love that I can leave these out even when it isn’t Christmas. This mini lighted tree was $9.98 and I finished her with a little pom-pom topper too. Since we took our painting down to decorate, I used the nails I had for hanging another shorter garland above the top to add a little interest to the wall.

This project took me about one hour and I look forward to enjoying it all Winter long and in the years to come.

I hope this frugal idea inspires you in your holiday decorating! Happy Holidays!

xo

walmart_mom_disclaimer

Pin It

Eating Well During the Holidays: Light Cranberry Bar Recipe

Monday, November 24th, 2014

*This post is sponsored by Celestial Seasonings. All thoughts and opinions are my own.

I am very passionate about good nutrition and a healthy lifestyle. You may not know that I actually went to school to study to be a dietician so I could help others eat and live better too. Although I never dreamed this would be my job, I am thankful for that background when putting together recipes for our site. I have come a long way over the years toward living a healthier lifestyle. I actually starting eating better because my body was indicating to me that something just wasn’t right after discovering I have a sensitivity to gluten. The other reason is how much better I feel when I eat well and exercise.

Today I am partnering with Celestial Seasoning Tea to share some ways that I try to stay on track for the holidays. You may not have considered tea a delicious (and healthy!) holiday indulgence, but they actually have 8 holiday offerings that include my new favorite Sweet Harvest Pumpkin Black Tea, Cranberry Vanilla Wonderland Herbal Tea, and Caramel Apple Dream that would all be lovely offerings for a post Thanksgiving feast treat.

Looking to stay on track for the holidays? Try these ideas!

Eating Well During the Holidays

Get in a Good Walk Before or After Your Feast

As you know I am absolutely obsessed with my Fitbit and we even shared a great way you can glam it up for the holidays.  Tracking my steps each day has been a great reminder to keep active and moving throughout the day. Whether you have a Fitbit, a pedometer, or use an app on your cell phone, try making a step goal for the day and get your steps in before or after your holiday feasts.

Many gyms offer a modified schedule for holidays for die-hard exercise enthusiasts (or just those of us who want to indulge in an extra slice or two of pie). Consider tackling a class in the morning, challenging your family to a game of flag football after your feast, or taking a family walk together after your dessert.
Eating Well During the Holidays

Eat Before You Eat

Since I have to be careful about what I eat for dietary reasons, I often eat before I head to a gathering because I know that many of the foods offered will leave me sick and feeling lethargic.  Consider indulging in a healthy meal or snack before heading out to your holiday gatherings that will help fill you up on the good stuff and give your stomach less room to indulge.

I like to keep a bag of spinach and roasted chicken or roasted turkey in my fridge for a quick salad with a few vegetable or fruit additions from the crisper drawer. Having a few items like these on hand during the holiday season will help you to eat healthy between the rush of holiday errands and gatherings. I have never regretted the time spent chopping and preparing my DIY salad bar for busy weeks.

Offer To Bring a Dish

I always offer to bring a dish to family gatherings that I know that I can eat and snack on. Opt for healthy options like a vegetable tray for snacking with a low-calorie dip or a fruit salad that can be a dessert replacement. Consider a lightened up holiday recipe as a dish to bring like these delicious Cranberry-Oatmeal Bars that can be enjoyed without the guilt.

Instead of coffee drowning in creamer opt to enjoy this sweet dessert with a tea that compliments it well. For these bars, I recommend the Cranberry Vanilla Wonderland Herbal Tea or, another one of my personal favorites, Gingerbread Spice.

Light Gluten-Free Cranberry Bars

Indulge Moderately

Even I can’t shy away from the dessert table around the holidays, but there are definitely fun, light desserts you can share in lieu of the calorie-laden pie.  To inspire you, here is a delicious Cranberry-Oatmeal Bar you can make for a sweet treat to enjoy with your cup of tea. May I recommend the Celestial Seasonings Cranberry Vanilla Wonderland Herbal Tea as an accompaniment?  It is a perfect pairing!  The best part, each bar is only 133 calories and has just 4.6 grams of fat.

Light Gluten-Free Cranberry Bars

Eating Well During the Holidays: Light Cranberry Bar Recipe
Author: Adapted from Cooking Light Magazine
Prep time:
Cook time:
Total time:
Serves: 24
A lighter dessert option for the holiday season best paired with a cup of tea.
Ingredients
  • 1 cup gluten-free flour
  • 1 cup gluten-free quick-cooking oats
  • 1/2 cup packed brown sugar $
  • 1/4 teaspoon salt
  • 1/4 teaspoon baking soda
  • 1/4 teaspoon ground cinnamon
  • 6 tablespoons butter, melted
  • 3 tablespoons orange juice
  • Cooking spray
  • FILLING: 1 1/3 cups dried cranberries (about 6 ounces) $
  • 3/4 cup sour cream
  • 1/2 cup granulated sugar
  • 2 tablespoons all-purpose flour
  • 1 teaspoon vanilla extract
  • 1/2 teaspoon grated orange rind
  • 1 large egg white, lightly beaten
Instructions
  1. Preheat oven to 325°.
  2. To prepare crust, weigh or lightly spoon flour into a dry measuring cup; level with a knife. Combine flour and next 5 ingredients (through cinnamon) in a medium bowl, stirring well with a whisk. Drizzle butter and juice over flour mixture, stirring until moistened (mixture will be crumbly). Reserve 1/2 cup oat mixture. Press remaining oat mixture into the bottom of an 11 x 7-inch baking dish coated with cooking spray using the bottom of a measuring cup to create a cohesive crust.
  3. To prepare filling, combine cranberries, sour cream, granulated sugar, and remaining ingredients in a medium bowl, stirring well. Spread cranberry mixture over prepared crust; sprinkle reserved oat mixture evenly over filling.
  4. Bake at 325° for 40 minutes or until edges are golden. Cool completely in pan on a wire rack.


*This post is sponsored by Celestial Seasonings. All thoughts and opinions are my own.

Tracking Pixel

Pin It

Free Woodland Thanksgiving Printables & Decor Ideas

Monday, November 10th, 2014

Free Woodland Thanksgiving Printables & Decor Ideas

This post is sponsored on behalf of BHG at Walmart.

As part of the BHG Live Better Network, I am partnering with them this month to showcase a beautiful way to entertain for the holidays utilizing products from BHG that are available at Walmart.  Have you seen the woodland creatures line of dishes? Swoon- I am IN LOVE. These items are over in the seasonal display section of your store.  As someone who couldn’t be fonder of foxes or owls, I was so excited to see these beautiful dishes at the store and most of these items are under $3 each- what a fun way to dress up your table.

Free Woodland Thanksgiving Printables & Decor Ideas

I used my basic white dishes as I do for every holiday and keep things economical by adding a fun design to my salad plates for the holidays each year. These owl plates are so sweet and add a little pop of color to my table. A natural table runner like this one helps add texture to my table and I used owl mugs to hold our forks and spoons for our dinner. The foxy salt and pepper shakers add a little woodland whimsy to round out the table.

Free Woodland Thanksgiving Printables & Decor Ideas I used driftwood log cuts from our craft store to add different dimensions to the table, added a jar of branches from our backyard, and then added my DIY thumbtack pumpkins to finish the table.

Free Woodland Thanksgiving Printables & Decor Ideas

Free Woodland Thanksgiving Printables & Decor Ideas

Free Woodland Thanksgiving Printables & Decor Ideas

Crisp napkins made of stain resistant fabric are always top on my holiday shopping list for replacing each year. I found these over in the clearance section priced at a mere $1 each. I bought a package of rosemary, which adds a beautiful fragrance and a touch of green to the table, and clipped it with our free printable, “give thanks,” napkin tag and a mini clothespin.

You could also tie these napkins with a little jute twine and then clip the rosemary and, “gather together,” napkin tags to them, placing these on top of your owl plates. Print out all one variety of tag or use them both, alternating them at the place settings.

Free Woodland Thanksgiving Printables & Decor Ideas

Even with my burlap runner, this entire table setting (minus my white dishes) costs just a little over $30 for everything. I love an affordable touch and really love these trendy pieces that BHG is offering this year for the Thanksgiving table. These would also be adorable for a kid’s table for the holidays!

Free Woodland Thanksgiving Printables & Decor Ideas

We also have these beautiful woodland printables that you can print and hang in your kitchen or foyer to welcome your guests to match with the rest of our beautiful printable offerings this year! To help your guest feel warmly welcomed, my amazing designer & contributor, Sarah Milne with sarah m style, has created these amazing printables that you can share with your guests for Thanksgiving Day.

Grab Your FREE Woodland Creature Printables:

Free Woodland Thanksgiving Printables & Decor Ideas

DOWNLOAD HERE

Free Woodland Thanksgiving Printables & Decor Ideas

DOWNLOAD HERE

Free Woodland Thanksgiving Printables & Decor Ideas

DOWNLOAD HERE

Free Woodland Thanksgiving Printables & Decor Ideas

DOWNLOAD HERE

Catch up on my other projects with BHG at Walmart:

Make a Guest Room Welcome Basket (Free Guest Room Printables)

BHG Live Better Style Showcase

BHG Live Better Network

In accordance with the FTC Guidelines, I am disclosing that I received compensation from BHG at Walmart for my time and participation in the BHG Live Better Network. Although we have material connection to BHG, any publicly stated opinions of BHG and their products remain my own.

Fun New Ways to Dress Up Boots For Fall

Thursday, November 6th, 2014

Fun New Ways to Dress Up Boots For Fall

As soon as the temperatures start dipping, I know it is almost my favorite footwear season… boot season, friends!

There is nothing cozier than a warm pair of boots and this season, embellished boots and boot toppers are all the rage for making your boots feel fresh again.

Whether you score your boots at Goodwill or if you find the perfect pair elsewhere, I have some fun and creative ideas for making a tired pair of boots feel like new again with these 7 tutorials for fun ways to dress up your boots.

Add Some Fringe

Fringe boots are quite popular this year, but buying fringe boots might be out of your boot budget.

Instead of buying a bootie for a passing trend, check out these DIY Fringe Shoe Clips from Clones N Clowns made from a simple shoe clip and a little leather or faux leather (depending on your budget).

These look like they are part of the bootie, but are removable.

I love these not only for how customized these look, but also for how much space you can save by not buying multiple pairs of boots for one trend.


Make No-Sew Sweater Boots

If last season’s boots are looking tired or if you find a pair of UGG boots at Goodwill (which I REALLY have, if you can believe it!) adding a beautiful sweater detail can be a great way to refresh them for another season.
Since this blogger does not sew, I really love this fun no-sew sweater cuff that you can create from la vie DIY that can hide any imperfections in your boots.
The button detail could also be created with brooches, pins, or earrings that you find in the store!

Add Embellished Boot socks

If there is one thing that you can find at Goodwill in these Fall & Winter months, it is definitely loads of cozy sweaters.

This fun tutorial from My Sister’s Suitcase showcases adorable embellished boot socks you can create from old sweater sleeves.

The picture highlighted here showcases a fun striped sweater sleeve embellished with a ruffled ribbon detail, perfect for a little trick-or-treat fun for Halloween!

Add a Knitted Detail

I can’t sew, but I can knit so this past Fall, I created these easy knitted boot cuffs out of chunky yarn and big needles.

Thanks to the needle size and yarn, this is a fast and easy two hour knit project.

I highly recommend this project for someone who is just learning to knit in the round or as a first-time cabling project.

I promise that cabling looks far more complex than it really is and this is such a fun project to master the art of cabling since it is so small and quick!

I gave these beauties away to my best friend and have promised a few pairs for myself this year when I get back to knitting again this winter!

Add Faux Fur

Not only is fringe in this season, but faux fur seems to be enjoying its time in the Fall spotlight too.
I love a beautiful fur detail and these faux fur boot cuffs can transform a tired pair of boots into something new and on-trend.
Clones N Clowns strikes again with this adorable faux fur addition to her boots.
Be sure to scroll down all the way through the pictures to see how she adds this same adorable detail to a pair of Converse sneakers.
Say what?!
Awesome!

Add A Legwarmer Layer

Many tutorials showcase how you can use the top of a sweater sleeve to create a boot cuff, but why stop there?
With Indiana winters, I love an extra layer around my legs so consider using that whole sleeve off a second hand sweater as leg warmers to add warmth in these colder temperatures.
I love to look for sweaters with lots of details like striping, as pictured here, polka dots, or ones with interesting cables.
You can get the whole scoop on these DIY legwarmers made from a sweater on Petit Elefant.

Add a Little Lace

My favorite trends are always the very feminine ones and you can’t get more feminine than a little lace.
That is why I absolutely love these boot cuffs made from lace doilies for a fast and fun DIY boot cuff project.
These “pretend frilly socks” from Blah Blah Magazine are fast to create and can be embellished with a beautiful button to finish.

What are some fun ways you dress up your boots for Fall? Feel free to leave your ideas in the comments section below!

Excited for Fall? Check out more Fall crafts on MomAdvice.com:


Apple Wreath Tutorial


Slow Cooker Pumpkin Spice Candles


No-Sew Blanket Scarf


No-Sew Scarf with Hidden Pocket


This post contains affiliate links

SaveSave

SaveSave

SaveSave

SaveSave

Pin It

It’s the 3 Little Things: New Coffeemaker, Hot Coffee To Go, & a Perfect Tote

Friday, October 31st, 2014

It's the 3 Little Things

Happy Halloween, friends. It has been a flurry of parent teacher conferences and Halloween preparations over here. My big plans this weekend only involve indulging in a marathon of Netflix-bingeing with my favorite quilt on our giant couch after our trick-or-treating! What about you?

Let’s talk about what is making me happy this week!

Cuisinart Brew & Grind Coffeemaker

A New Coffeemaker

My coffeemaker died last week. I did everything I could to get that thing to hobble along, lovingly flushing it with vinegar periodically and caring for it. I would have to hit the power button three times to get it to brew, the water never fully went through, but then the coffee just stopped being hot.  You cannot imagine my stress levels. To get up THAT early and have no HOT coffee was a travesty.

I am thankful that I can rectify this so quickly though thanks to our Amazon Prime membership. The next day I had a brand new coffeemaker sitting on my front step and I am happily having the hottest coffee with my favorite Michigan cherry coffee beans. After reading all of the reviews, I settled on this Cuisinart Grind & Brew because my last one held up so well for so long and it was still under $100.

This one is loud when it is grinding so I grind the beans at night and then turn off the grind for my morning when I program it. I no longer have to hit the power button three times to finish a brew and the ratio of beans to water is much smoother thanks to the grinder.  My mornings got oh-so-much better

Diva Vacuum Thermal Cup

HOT Coffee To Go

I started volunteering at school again and I always like to take my coffee with me when I visit there and read with the kiddos.

Confession time.

My husband went to an event for some kind of prize drawing for Lexus because he has a used Lexus and gets the fliers from the dealership. He didn’t win the drawing, but he came home with a thermal mug that he said would be perfect for my coffee. And I hated it. I hate carrying around a mug that advertises a car that we got for less than my Subaru, but seems like we are part of some kind of weird exclusive club.

So I keyed it.

I did.

I know. I have issues.

I scratched the logo off, but I could still see it and I was planning to craft something out of washi tape over it because it bothered me that much.

Instead, when I went to Celestial Seasonings shop I found this amazing carafe and I snagged it for my mornings.  My coffee is brutally hot (just the way I like it- I did admit to keying things!) and it has a lock on the top to doubly insure that your coffee doesn’t escape. Did I mention it vacuum seals? It’s seriously awesome and has made my mornings at school better. And now I don’t have to carry around that awful mug so…winning!

Urban Outfitters Small Vegan Tote

The Perfect Tote for a Petite Girl

I have been eyeing tote bags for awhile now that I could use for travel and for the errand running that I do throughout the day. We popped into Urban Outfitters this weekend because I have been eyeing this bag online forever. When I saw it, we laughed hysterically because it is as big as me. I tried to sling it over my arm, but I could have probably crawled inside it. I love the concept of the reversible vegan leather, but the bag was too big for this petite gal. I was thankful I did not add it to my Christmas list since I was not in the market for a beach tote.

I did spy though this mini tote in the corner and it is just perfect for me. The $49 price tag fits well for me since I am usually a TJ Maxx purse shopper and I plan to use this until the straps fall off.

cape + black leggings + boots + camel purse

It has a crossbody strap too that you can use when you are out running around and it sits upright when rested on a table. I mean, it really is that perfect and a far better price than most bags that look like this.  I am a happy, happy girl! It goes well with my vintage Forever 21 cape I have had since the store opened in our tiny mall. May herringbone capes never go out of style. Amen.

chambray shirt + statement necklace + black skirt + mustard tights + booties

On a personal note, I have been one proud mama this week! My daughter had her first guitar recital and she played her songs beautifully. I have never seen her more scared and then more proud than she was on this day.  We have the best guitar teacher in the world and it was so fun to see all the kids play and sing so beautifully.

I went to conferences this week for both kids who truly rocked their report cards with the best grades a mom could ever hope for.  More than that though, they all remarked on just what good people they are. I want to raise good people. I think the world needs more of those.

Three Things I Wore From My Fashion Capsule. I will unveil the next capsule on November 3rd to hopefully inspire you on your own fashion capsule journey. Did you read what I am learning from this project? You must!  Grab more inspiration on my Fashion Capsule Pin Board and minimize that wardrobe!

black tunic + black leggings + green cardigan + nude booties + long necklace + belt

Seamless Perfection Long Sleeve Tunic Dress in Black (purchased- Flourish Boutique)/The Essential Leggings in Black (owned- Flourish Boutique)/Forest Fairy Cardigan (owned- Flourish Boutique)/Nude Booties (Old Navy)/Black & Gold Necklace (owned- Flourish Boutique)/ Fitbit Bracelet (make it here!)/ Black Belt (one of those ones that came attached to something else! 😉

chambray shirt + statement necklace + black skirt + mustard tights + booties

Chambray Shirt (owned- Flourish Boutique)/Gap Black Skirt (purchased second hand on Twice)/Camel Suede Booties (Madden Girl- DSW Shoes)/Lace Slip Skirt Extender (owned- Flourish Boutique)/ Pearl Statement Necklace (owned- Flourish Boutique)/Fitbit Bracelet (make it here!)/ Leopard Print Belt (owned- Target)

blanket sweater + gray shirt + black leggings  + belt + brown boots

FINAL WARDROBE STEAL- Angora Blanket Sweater (owned- Flourish Boutique)/The Essential Leggings in Black (owned- Flourish Boutique)/Long Sleeve Seamless Layering Piece in Gray  (owned- Flourish Boutique)/ Brown Boots (6PM– Naturalizer/Brown Belt (owned- Maurices)

3 Things YOU Loved This Week (you, lover of MomAdvice things, you!)

3 Benefits of Using Household Subscription Services

How to Make Quinoa in the Rice Cooker

7 Easy Make-Ahead Thanksgiving Appetizers

Bonus Happy! How awesome is this? My kids were simply amazed.

Review & GIVEAWAY: Empowered SAFETY Membership

Thursday, October 30th, 2014

How to Keep Your Family Safe by Monitoring Product Safety Recalls from MomAdvice.com.

*This post is sponsored by the Empowered SAFETY. All thoughts and opinions are my own.

When my children were small, I was absolutely obsessed with tracking recall information. Let’s face it; the sheer amount of equipment needed to keep your baby safe in that first year is astounding.  Back then I subscribed to Parents Magazine and would skim the magazine for the latest recall information. Over the course of those first few years as a mom, there were many recalls, but I was so busy and so tired that I struggled to stay on top of that and keep up with it all.  Thankfully, there are faster and easier ways to stay on top of recalls now.

This week I am partnering with a fantastic site called Empowered SAFETY to share with you all of the great advantages of a membership & how it can help you keep track of legitimate complaints & recalls when it comes to items you use in your home and the food you consume. We are giving everyone one free month to try this service and giving one lucky reader a six month subscription.

  How to Keep Your Family Safe by Monitoring Product Safety Recalls from MomAdvice.com.

What Does Empowered SAFETY Offer?

Did you know that there can be hundreds of complaints made to government agencies about child-specific products before a recall is actually issued?  Instead of waiting for the recall to occur, a subscription to Empowered SAFETY can alert you of the complaints prior to the recall even is issued.

With a premium membership you can simply match the products in your home with the half-million child products in Empowered SAFETY’s database, and you will receive an email notification on that product should complaints be made against it. It is as easy as that!

How to Keep Your Family Safe by Monitoring Product Safety Recalls from MomAdvice.com.

We aren’t just talking car seats and baby equipment though; the service also offers valuable information about food safety which, as we know, can be potentially life-threatening to a child with food allergies. You can receive the food recalls in the area where you live so you can stay on top of potential allergens and safety hazards in your home.

How Can This Help You When Making Purchases?

When I make purchases for my family, I spend hours online trying to decide which item will be the best for us based on the reviews of other shoppers. I hate wasting my money or time on purchase that don’t have longevity in our home. When it comes to purchases that keep our family safe, I really want to know that the items that I am choosing will do their job well and that I won’t find myself needing to replace them later.

Empowered SAFETY can let you know if the product you are thinking of purchasing has had any complaints on it, allowing you to be a more empowered consumer and saving you valuable time.

What Do They Monitor For You?

Complaints can come in many different ways and Empowered SAFETY monitors all the different sources so you don’t have to. Not only do they monitor actual consumer complaints, and product and food recalls and warnings to government agencies, they also follow news reports, legal filings, press releases, blog postings, federal & state agency websites for outbreaks & health alerts, as well as member-reported product issues.

As a busy mom, I certainly don’t have time to monitor all of that so a membership like this can save your family a lot of time, hassle, and unnecessary clutter from items that are potentially unsafe and won’t have longevity in your home.

Everyone is a Winner

Today I am giving EVERY reader a free 28-day promo code to try the Empowered SAFETY site. Just enter code the code ES28DAY93  (Expires 11/30/14) upon sign-up on Empowered SAFETY.

Follow the instructions below in our Rafflecopter widget to enter to win a FREE six-month premium membership to Empowered SAFETY.  Good luck, everyone!

a Rafflecopter giveaway

*This post is sponsored by the Empowered SAFETY. All thoughts and opinions are my own.

Tracking Pixel

Pin It

Miniature Felted Pumpkin Tutorial

Friday, October 17th, 2014

Miniature Felted Pumpkin Tutorial

Some people lean towards the spooky decorating for Halloween. This girl leans towards a more classic look from dressing up my front door for the season to the small nod to autumn through our home decor. I have loved our knitted leaf centerpiece so much that I thought it would be fun to add some knitted pumpkins to the mix this year. Since Walmart challenged me to take on a Halloween craft, I thought it would be the perfect time to try something new. Not only are these a knitted stuffed item (something new for me), but they are also felted.

Before you run away, I was SO scared of felting that I have thought about felting for years and never tried it. Seriously, folks, could NOT be easier.

This project is super fast to create and will get lots of love in your home as a fun addition to a bookcase, a cute centerpiece for a Halloween party, or could even make a place card holder for the Thanksgiving table.

Miniature Felted Pumpkin Tutorial

Supplies List

4- US Size 11 double pointed needles (I prefer bamboo for their gripping ability in this project)

4- US Size 6 double pointed needles

Natural Fiber Yarn (any color) that will shrink (Walmart offers this inexpensive option for wool)

Poly-fill Stuffing (something like this)

Free Miniature Felted Pumpkin Pattern FOR FREE HERE

Miniature Felted Pumpkin Tutorial

Skills Needed to Tackle This Project

You need to be able to knit in the round- This is much easier than knitting a hat and can teach you how to increase and decrease your stitches.  If you have never knitted in the round before, check out this picture tutorial that I created to help you navigate the tricky terrain of 4 needles.  You will need to be able to knit both the body and the stem in the round. I actually find the stem to be more difficult due to its size.

You need to be able to i-cord- The first time I i-corded, I was like…”That’s it?” Seriously, it sounds complex, but it is just moving your stitches back and forth on a double-pointed needle. This is a fantastic video tutorial if you are trying to get the hang of it.

You need to be able to felt– Again, this one was a new one for me, but the pattern I shared offers some great tips for felting. I will note below how I did this in my front-loader.


Miniature Felted Pumpkin Tutorial

Words from a First-Time Felter

As you can see, wool shrinks up beautifully. I wanted to still have a little bit of stitching showing, but you can continue to shrink your piece if you want it to be completely smooth. For these pumpkins, I knitted them loosely (advice given by my wise knitting pal, Deb) so that the stitches would shrink well. For my front-loader, I placed these in the washing machine with two pairs of my jeans to help create agitation and friction on the yarn. I used the Whitest White cycle (which is the hottest cycle on my machine) and let the machine decide the level of water.  For detergent, I just used a small amount of Woolite (or you can use Eucalan Woolwash). To replicate this, I just ran the cycle for ten minutes and then hit cancel.  I then ran a spin & drain cycle just for a few minutes to get rid of the excess water and then stuffed my pumpkins while they were still damp.

You can read more about felting in the pattern above.

Miniature Felted Pumpkin Tutorial

Miniature Felted Pumpkin Tutorial


Miniature Felted Pumpkin Tutorial

Aren’t they adorable? Feel free to friend me on Ravelry and visit the Knitting section of our site for more cute yarn-lovin’ projects!


Looking for more great Halloween ideas? Check out my Knitted Princess Leia Hat, fun ideas for DIY Halloween Costumes, paint up some Chalkboard Pumpkin People, make pumpkins out of duct tape, throw some pumpkin chili in your slow cooker on Halloween night, and whip up some glow-in-the-dark JELL-O for dessert!  Happiest of Halloweens, friends!

walmart_mom_disclaimer

Pin It