Archive for the ‘Desserts’ Category

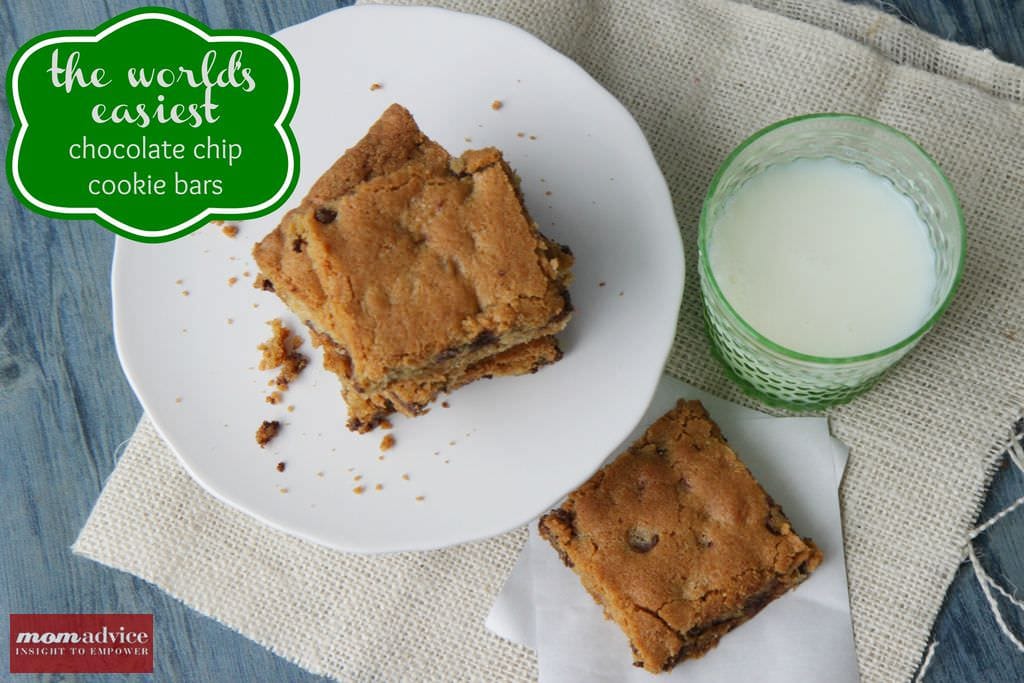
Chocolate Chip Cookie Bars

Monday, February 18th, 2013

Want to make cookies, but don’t have a lot of time? These easy chocolate chip cookie bars are the perfect cookie bar recipe to add to your snack agenda. They offer all of the taste of a chocolate chip cookie, but are made in a chocolate chip cookie bar instead of the more labor-intensive drop cookie.

When I was growing up, my mom made many varieties of bar treats for us. We ate a lot of lemon bars, brownies, and chocolate chip cookie bars as snacks. When I would go to my friend’s houses though, their moms made homemade cookies and I would come home and beg my mom to make cookies instead of bars. I never understood why she always made bars for us…until now! Yes, I consider this the world’s most genius cookie shortcut!

Bars are so much easier than cookies and you dirty up a heck of a lot less pans. There is no cooling on racks that has to be done or switching of cookie sheets. All you have to do to make these cookies is mix and dump. Within minutes you can be snacking on a plate full of cookie bars without the mess or work that regular cookies can be.

Looking to achieve a bar cookie with a crisp edge that holds it shape when cut? Try my trick and keep a plastic knife handy in your utensil drawer. You can cut them into perfect squares without the crumby mess, even when they aren’t fully cool.

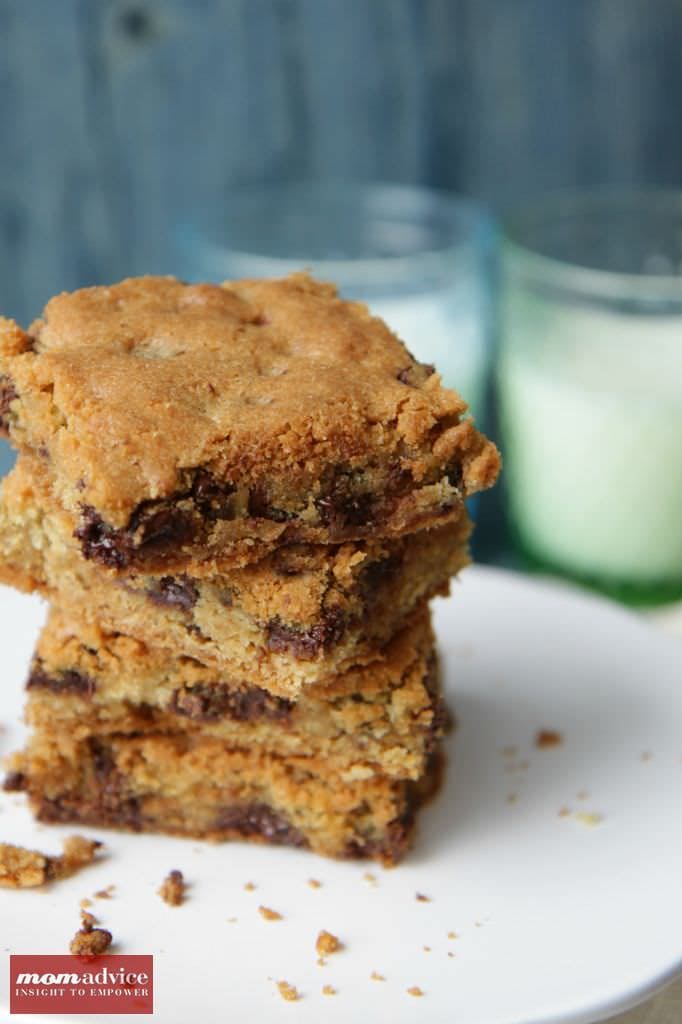
I think the best part about these is the gooey center where all of the chocolate seems to reside. You get all of the crispness on the outside, with the soft gooey center on the inside. You will find the same delicious delight in my easy homemade granola bars, that happen to be another one of our favorite treats!

These have become my favorite cookies to make and to share with others. I know after you try this recipe, they will be a favorite of yours too!

Chocolate Chip Cookie Bars
Recipe Type: Dessert
Prep time: 5 mins
Cook time: 35 mins
Total time: 40 mins
Serves: 10-12
The world’s easiest way to make a big batch of chocolate chip cookies by making them in one big pan. These make the perfect after school treat or a fun weekend surprise for the kids.
Ingredients
  • 2 1/4 cups all-purpose flour
  • 1 teaspoon baking soda
  • 1 teaspoon salt
  • 1 cup butter, softened
  • 3/4 cup granulated sugar
  • 3/4 cup packed brown sugar
  • 1 teaspoon vanilla extract
  • 2 eggs
  • 1 1/2 cups semi-sweet chocolate chips
  • 1 cup chopped nuts (optional)
Instructions
  1. Preheat oven to 375 degrees.
  2. Grease a 9×13″ pan.
  3. Combine flour, baking soda and salt in small bowl. Beat butter, both sugars and vanilla in large mixer bowl.
  4. Add eggs one at a time, beating well after each.
  5. Gradually beat flour mixture into butter mixture.
  6. Stir in chocolate chips and nuts.
  7. Spread into prepared pan. Bake 30-35 minutes or until golden brown.

What is your favorite easy cookie or treat to bake for your kids?

Pin It

Getting To Know Your Bread Machine (Easy Recipes & Tips for Busy Families)

Tuesday, February 12th, 2013

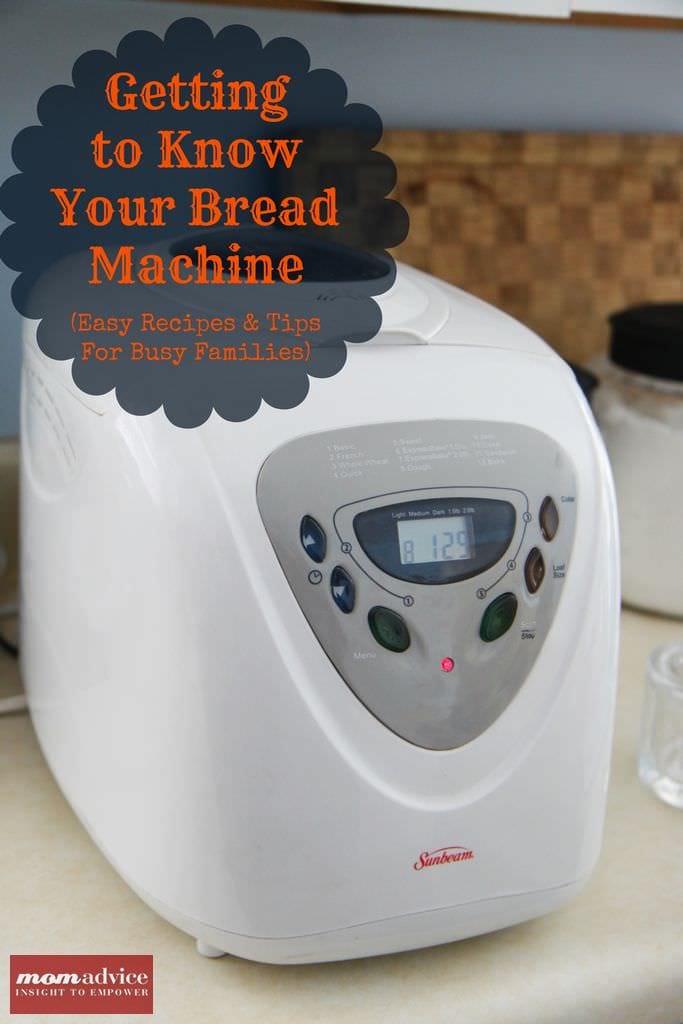
One of the most invaluable appliances in our home is our bread machine and today I wanted to share with you why I think a bread machine is a wise kitchen investment. This tutorial will offer advice on what to look for in a bread machine, how to use your bread machine, and the best bread machine recipes that our family enjoys on a weekly basis.

Perhaps you already have a bread machine that has been gathering dust in your kitchen or basement. Many people buy these appliances and then end up donating them to their local thrift store because they never use them. I think of the bread machine as a modern day convenience, but in a culture where we want everything NOW, waiting for a loaf of bread can seem like an eternity.

Why wait for a hot loaf of fresh bread when you can grab a loaf at your supermarket?

And what exactly is the purpose of that appliance that is taking up space on your shelves? Let’s get to know our bread machines and find a new way to use them.
What is A Bread Machine or Bread Maker?

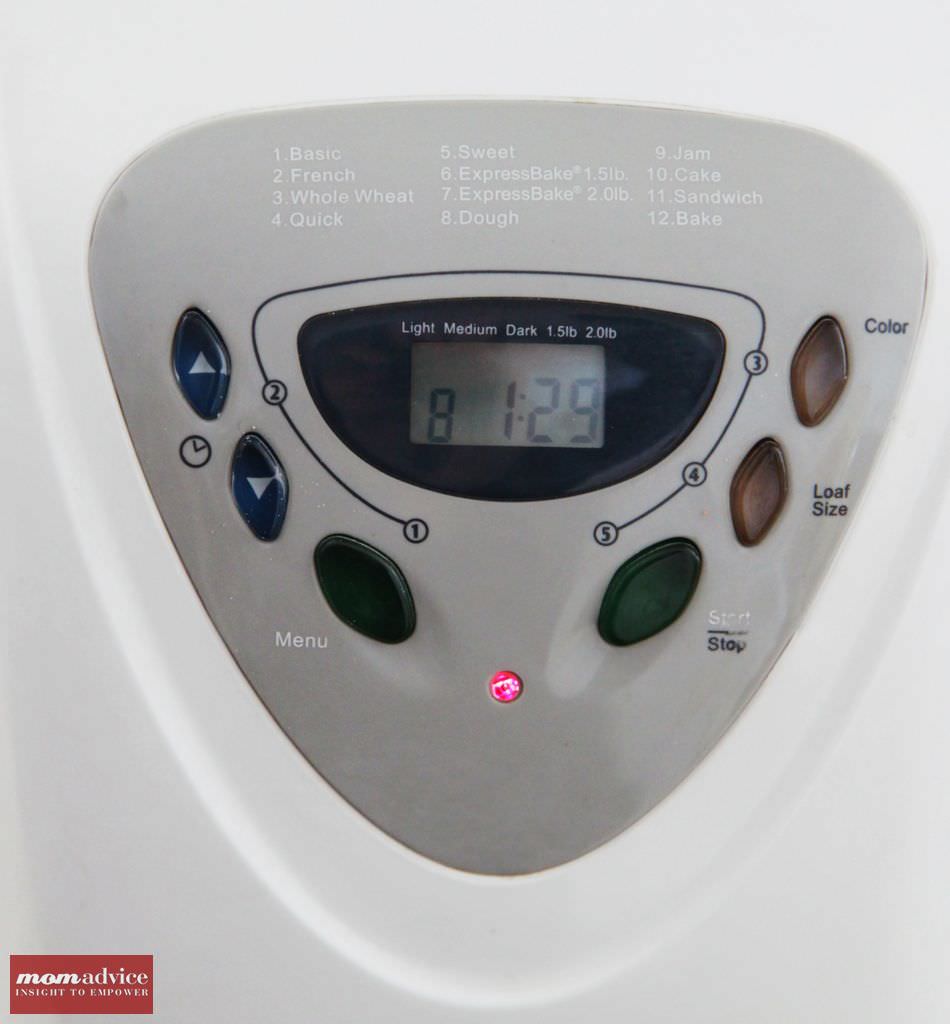
A bread making machine or bread maker is a home appliance for baking bread.The bread machine is simple in its construction and consists of a bread pan (or “tin”), at the bottom of which are one or more built-in paddles, mounted in the center of a small special-purpose oven. This little oven is  controlled by a simple built-in computer, the settings for which are inputted on the control panel. Most bread machines have different cycles for different kinds of dough—including white bread, whole grain, European-style (sometimes labeled “French”), and dough-only (for pizza dough and shaped loaves baked in a conventional oven). Many also have a timer to allow the bread machine to activate without operator attendance, and some high-end models allow the user to program a custom cycle.

Some of the older machines have just a handful of simple settings while newer machines offer more advanced cycles including a cycle to make jam or to bake cakes. To be honest, I don’t use the fancy cycles on my bread machine and rely mostly on the Basic and the Dough cycle, which can be found on every machine. The basic cycle is just the basic setting for making a loaf of bread. The Dough cycle just completes the kneading and rising of the dough. Once the dough cycle is complete, you can take the dough out and shape it into your loaf pan or do fancy braids or rolls out of the dough.

The purpose of a bread machine is simple;  you are able to make fresh bread when you want it. The reasons vary from person to person on why they choose to make their own bread. Many people have concerns about the additives and preservatives that are found in store-bought breads. Another reason that many people choose to make their own bread is because they just enjoy the taste of homemade bread. My reasoning for making our own bread is because I like to save our family money. Making your own bread costs so much less than purchasing a loaf of bread, and the rising grocery costs have only fueled my desire more to make it at home.

How Do You Add Ingredients to a Bread Machine?

Inserting your ingredients into a bread machine is also very straightforward. If you are making the loaf right away, you can insert the ingredients in any way that you want. All of these ingredients will immediately be stirred together and so it will not matter what the order is. If you use a timer delay on your bread machine, delaying the start time of making your loaf, it is imperative that you put the ingredients in the right order or your loaf will not turn out right. The order of ingredients is liquid (liquids include water, oil, milk, eggs, or honey), flour, other dry ingredients (salt, sugar, baking powder, seasonings), and ending the ingredients with your yeast. The most important part of putting the yeast in is to make sure that you make a small indentation into the center of the flour so that the yeast does not react with the other ingredients.

Upon inserting your ingredients, your bread machine will take over the process from there. The machine will knead the ingredients together, give the bread its rising time, and then it will bake the bread. The bread machine will signal when the bread is ready and you can allow the bread to cool inside of the bread bucket.
Do I Need to Buy Bread Machine Mixes For My Bread Machine?

There is no need to spend the money on convenience bread machine mixes; in fact, you can make your own convenient mixes handy for the week. I take plastic storage bags and make an assembly line of the dry ingredients and do my bags once a month. On the outside, just write what liquids you will need to add and you will only have a dirty kitchen once instead of weekly.

What is the difference between Instant Yeast, Bread Machine Yeast and RapidRise Yeast?

Just their names because these are all the same yeast. Nothing like making it EXTRA confusing for a novice bread-maker.

Is There Savings in Making Bread at Home?

A quick glance at grocery store prices and you will wonder how there could be any possible savings with making your bread at home. The key to making this the least expensive on your family is to purchase all of your ingredients at your local wholesale club. With proper storage, you can buy the ingredients in bulk and save your family loads of money.

I don’t use my wholesale club membership very often except for our family’s eye care needs and for the occasional party. I won’t ever let my membership lapse though because with one trip to buy my baking supplies, my wholesale club membership has earned its space in my wallet. I make a trip twice a year to buy all of the necessary supplies for my baking and pizza-making needs.

Don’t believe me? Here is the current prices from my local Sam’s Club:

25 Pounds Bread Flour- $6.59 (needed depending upon the recipe)

25 Pounds All-Purpose Flour- $6.68 (needed depending upon the recipe)

2 Pounds of Yeast- $4.16

Cheese (5 pounds for $10.43) , pepperoni (5 pounds for $11.88), and crushed tomatoes (102 ounces for $2.68) can also be bought at a fraction of the price, but in the past I have lacked the capacity and ambition of storage for all of the ingredients.

As a side note, if you do own a membership to Sam’s Club, they have a wonderful Click ‘N Pull service that you can utilize for your shopping day and they can pull the ingredients right to the front and email you when your order is ready to pick up. This is a fantastic free service for moms with small children or who are short on time!

How Do I Store My Bread Machine Ingredients?

For storage, flour can be stored for up to a year in an airtight container. With bulk storage, a large plastic bin that has been clearly labeled is ideal to keep your flour fresh. Yeast is the easiest ingredient to store and has a very long shelf life. I store my yeast in a mason jar in our refrigerator door. With both of these ingredients, writing an expiration date on the label will also remind you of when the item is going to expire. I have also provided a handy Yeast Freshness Test that you can use to see if your yeast is still working. This will come in handy when buying yeast in bulk.

What Kind of Bread Machine Should I Buy?

If you do not have a bread machine and are looking for one, garage sales and thrift sales are a great place to hunt. I see these machines for $10 or less, and you will definitely get your money back from the savings of making your own bread. When you find one, ask if you can plug it in and make sure it is working. Just check that it actually powers up, that there is a bread bucket inside, and that there is a paddle in the bottom of the bread machine to stir the ingredients. Having a manual with it is handy, but usually can be found by searching online.

Over the past five years, I have been using my Sunbeam Bread Machine with great success. All of my past models have been found at the thrift shops and garage sales, but when our bread machine quit on us, I ran out to our local superstore so we wouldn’t have to miss our weekly pizza night. You know an appliance has become invaluable to you if you can’t imagine a day without it. Our bread machine is that invaluable to us.
What Are Some Foolproof Bread Machine Recipes I Can Try With My Family?

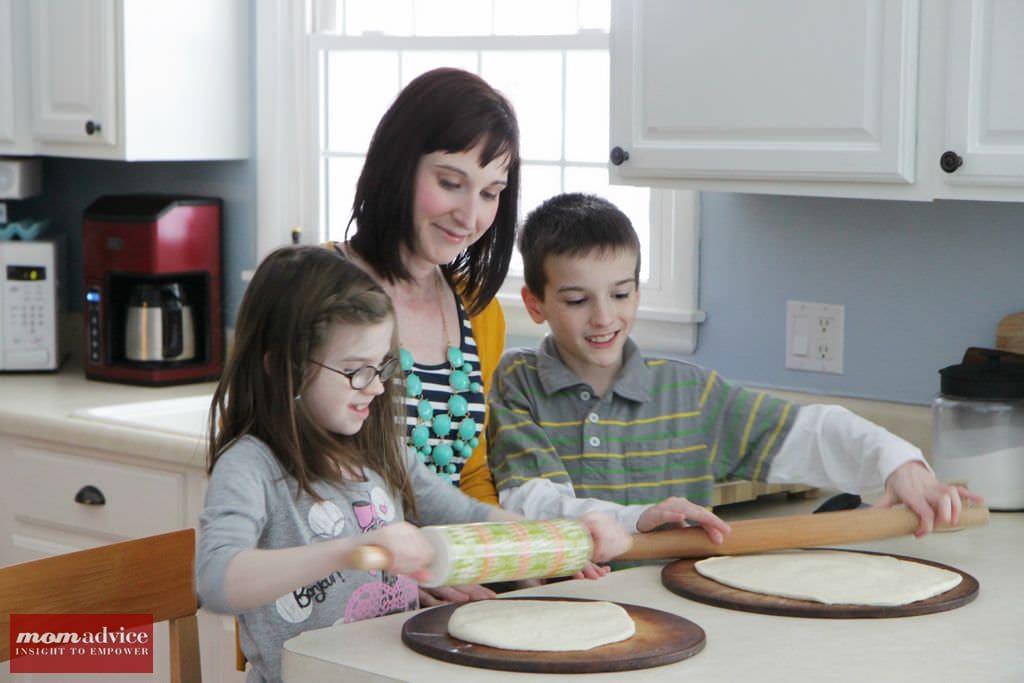
On any given day in our house, you will find our bread machine happily humming along and whipping up fresh dough and bread for us. Not only that, but our bread machine has a regular performance in our house on Friday night for our infamous weekly family pizza night.

Here are a few of our family favorites, but you can learn more in my first book, “The Good Life For Less,” that is available on bookstore shelves now: 

The Perfect Pizza Dough (so easy that your kids can roll this one out on their own!)

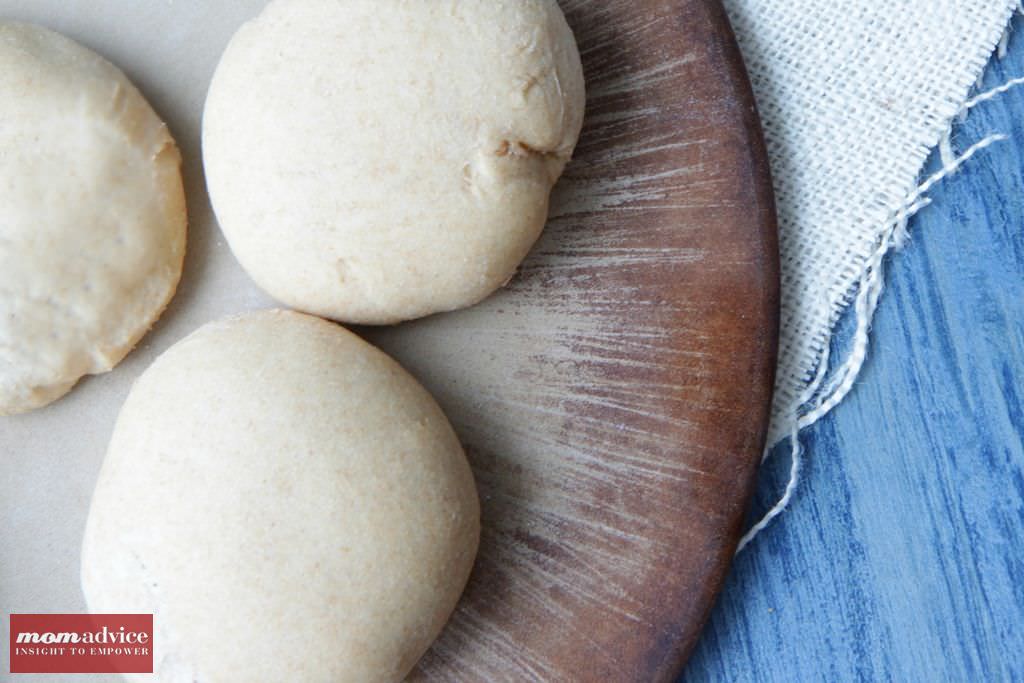
Bread Machine Pita Pockets

Bread Machine Hamburger Buns or Hot Dog Buns

Whole Wheat Bread Machine Hamburger Buns or Hot Dog Buns

Bread Machine Calzones

Bread Machine Portuguese White Bread


Bread Machine Monkey Bread/Bunny Bread

Buttery Bread Machine Rolls

Bread Machine Cinnamon Rolls 


Yeast Freshness Test
Prep time: 2 mins
Cook time: 10 mins
Total time: 12 mins
Not sure if your yeast is still fresh and active? This simple test will help determine if your yeast is still performing!
Ingredients
  • 1 teaspoon granulated sugar
  • 1/2 cup warm tap water (110°F-115°F)
  • 2 1/4 teaspoons dry yeast (make sure it is at room temperature)
Instructions
  1. Using a one-cup liquid measuring cup, dissolve 1 teaspoon of granulated sugar in 1/2 cup warm tap water at 110°F-115°F. Using a thermometer is the most accurate way to determine the correct liquid temperature. Any thermometer will work as long as it measures temperatures between 75°F and 130°F. If you don’t have a thermometer, the tap water should be warm but NOT hot to the touch.
  2. Stir in one 1/4 oz. packet (7g) or 2-1/4 tsp of dry yeast until there are no more dry yeast granules on top.
  3. In three to four minutes, the yeast will have absorbed enough liquid to activate and start to rise.
  4. After ten minutes, the foamy yeast mixture should have risen to the 1-cup mark and have a rounded top.
  5. If this is true, your yeast is very active and should be used in your recipe immediately.
  6. If the yeast did not rise to the 1-cup mark, your yeast has little or no activity. Discard this yeast.

Do you have a bread machine? What is your favorite thing to do with this appliance?


I love helping you cook in the kitchen! If you like this cooking tutorial,  be sure to visit my tutorial on How to Cook A Butternut Squash With the Skin On, How to Roast a Spaghetti Squash, and  How to Make Quinoa in the Rice Cooker.

Pin It
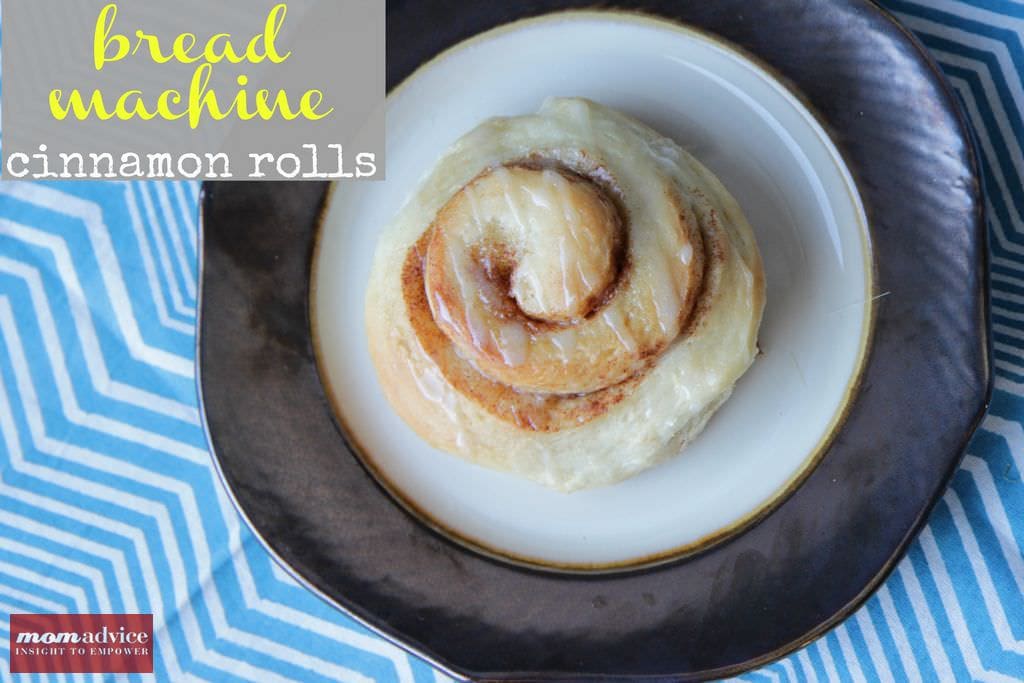
Bread Machine Cinnamon Rolls

Monday, February 11th, 2013

Cinnamon rolls are one of those treats that I always found intimidating to make in the kitchen. Luckily, with my bread machine, these are a cinch to pull together and enjoy on a lazy Saturday morning. Today I want to share with you my bread machine cinnamon roll recipe to create this yummy treat at home in your kitchen.

Growing up, one of my favorite Saturday treats was a Pillsbury Cinnamon Roll. My mom would make these for us on Saturdays and we always fought over the ones that had the most frosting. Sadly, it was such a thrill when my dad worked in the mornings because that meant that there would be two extra rolls for us to fight over. Who could resist those rolls and the simple pleasure of having a sweet treat once a week?

I still love those cinnamon rolls, but at $1.69 a roll, they are an unnecessary addition to the grocery budget. What I do have though is flour and sugar, purchased in bulk, and a bread machine that can turn out cinnamon roll dough like nobody’s business.

The best part about making these cinnamon rolls is that you can vary the sizes and I can make mini-versions of the rolls for the little kids and tuck these in the center of the batch so that they don’t get overdone. The kids love these mini versions and I control the amount of sugar they are getting. Just give them a teeny drizzle of frosting and they will be set!

Of course, I have been know to reheat these in the microwave for a nice snack in the evening or for breakfast the next day. Place one on a microwave-safe plate and zap for about twenty seconds. It make a great snack paired with a hot cup of coffee.

Tomorrow I will be sharing more about our beloved bread machine and what you can do with it! For now, I hope you can enjoy this easy and delicious treat with your family!


Bread Machine Cinnamon Rolls
Recipe Type: Dessert
Author: Adapted from Food.com
Prep time: 5 mins
Cook time: 2 hours
Total time: 2 hours 5 mins
Serves: 10
Homemade cinnamon rolls are a breeze when created in your bread machine. This bread machine cinnamon roll recipe is foolproof and a perfect Saturday morning treat.
Ingredients
  • 1 1/4 cups skim milk
  • 1/3 cup vegetable oil or canola oil
  • 1/3 cup sugar
  • 1 teaspoon salt
  • 3 3/4 cups all-purpose flour
  • 2 1/4 teaspoons bread machine yeast
  • Cinnamon Roll Filling: 1/3 cup butter, softened to room temperature
  • 1/2 cup brown sugar
  • 1 tablespoon cinnamon
  • Cinnamon Roll Glaze: 1/2 cup powdered sugar to 1-2 tablespoons milk
Instructions
  1. Place all ingredients in order recommended by your bread machine manufacturer.
  2. Select DOUGH CYCLE and start machine.
  3. Preheat your oven to 100°F and then turn off.
  4. When dough cycle is complete remove from machine.
  5. Roll out to about 12 x 15″ and spread with butter or margarine. Sprinkle cinnamon-sugar mixture over all and roll up tightly .Roll it tightly and slowly, being careful to keep all the filling inside. At this point you should have a long log that you can cut your rolls from. You can wrap the dough with plastic and store in the fridge overnight or you can slice your rolls and put them on your cookie sheet or pizza stone.
  6. If preparing now, cut into as many rolls as you want. (I usually make ten large rolls).
  7. For the next day or right away: Cover with cloth and put in the warm oven for 45-60 minutes to rise.
  8. When doubled remove from oven.
  9. Turn oven to 400°F and when you put the buns in the oven, reduce temperature immediately to 375° and bake for 12-15 minutes or until done.
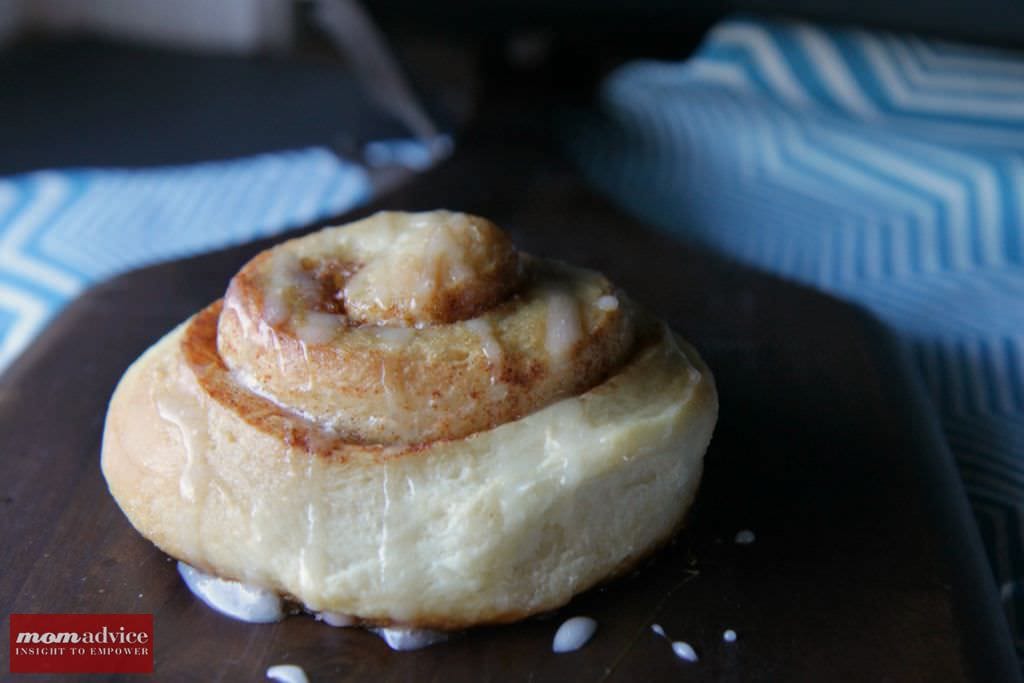
  10. When the rolls are done, drizzle your frosting over the rolls and serve them warm or room temperature (although they are best served warm).


Pin It
Guest Post: Peppermint Candy Cane Ice Cream

Tuesday, January 22nd, 2013

The holidays seem like so long ago already.  The Christmas lights are down, the ornaments packed away, and we’re charging ahead into the new year.  If you’re like us, the only remnants are a handful of candy canes leftover from the too many boxes we bought in a fit of holiday spirit.

In hindsight, the candy cane excess was the best decision ever made because it led to what may be the tastiest homemade treat I’ve made all winter:  Peppermint Candy Cane Ice Cream.

Super minty and winter fresh, this ice cream is the stuff Frosty the Snowman’s dreams are made of.  It is downright delicious.  You may even find yourself clearing out the boxes of candy canes left at the store just to make more batches of this ice cream.  Good move!  They’re probably on sale!  You win at life.

This recipe starts with Jeni’s Splendid Ice Cream Base – a tried and true method that may seem slightly unconventional, but results in creamy dreaminess.  Jeni’s method for making her famous scoop shop ice cream at home uses a bit of cream cheese and cornstarch rather than egg yolks to achieve a wonderfully dense and creamy texture.  Best of all, it doesn’t require the fuss of making a custard base with all that tempering, and careful heating, and straining.  Less time fussing, more time ice cream eating.  Words to live by.

To our sweet cream blank canvas, all that’s left to do is add a few teaspoons of peppermint extract and crushed candy canes, and wait for that ice cream maker to do its thing.

Prepare to be quite pleased with yourself.  This Peppermint Ice Cream will become a perennial favorite.  Here’s what I’m dying to do…are you ready?  I can’t wait to try topping a mug of hot chocolate with a scoop of this stuff!

Full of sweet cream and minty winter freshness, this peppermint ice cream is the perfect way to polish off those candy canes.  It is so good, I guarantee it will become a perennial favorite, holiday season or not.

Peppermint Candy Cane Ice Cream
Recipe Type: Dessert
Author: Adapted from Jeni’s Splendid Ice Creams at Home by Jeni Britton Bauer
Prep time: 5 mins
Cook time: 25 mins
Total time: 30 mins
Serves: 1 quart
Don’t throw out those leftover candy canes after the holidays! Reinvent those candy canes into a fun frozen treat that the whole family will love!
Ingredients
  • 2 cups whole milk
  • 1 tablespoon plus 1 teaspoon cornstarch
  • 1 1/2 ounces cream cheese, softened/room temperature
  • 1/8 teaspoon fine sea salt
  • 1 1/4 cup heavy cream
  • 2/3 cups sugar
  • 2 tablespoons light corn syrup
  • 2 teaspoons peppermint extract
  • 4 crushed candy canes (pulse in a food processor)
Instructions
  1. IMPORTANT NOTE: 24 hours (or more) BEFORE you want to make the ice cream, make sure to wash the canister, dry it well, and place it in the coldest part of the freezer. Do not remove it until you are ready to pour the chilled ice cream mixture into it.
  2. In a small bowl, mix about 2 tablespoons of the milk with the cornstarch to make a smooth slurry.
  3. In a large bowl, add the salt and room-temperature cream cheese and whip until smooth.
  4. Make an ice bath (heavy on the ice) and set aside.
  5. Pour the cream, sugar, corn syrup, and remaining milk into a 4-quart saucepan. Bring to a rolling boil over medium-high heat, set a timer for precisely 4 minutes and boil for exactly 4 minutes—the timing is critical. Remove from the heat and gradually whisk in the cornstarch slurry. Return the mixture to a boil over medium-high heat and cook, stirring until the mixture is slightly thickened, about 1 minute. Remove from the heat.
  6. Gradually whisk the hot milk mixture into the cream cheese until smooth. Do this a little bit at a time so that you can whip out any lumps of cream cheese. Mix in the peppermint extract.
  7. Pour the mixture into a 1-gallon Ziploc freezer bag, seal, and submerge the bag in the ice bath. Let stand, adding more ice as necessary, until very cold, about 30 minutes.
  8. Set up your ice cream maker and pour the chilled base into the frozen canister. About 10 to 15 minutes into the churning process, sprinkle in half of the crushed candy canes. They will mostly dissolve, turning your ice cream a pretty pink color. The ice cream is finished when the machine isn’t freezing the ice cream anymore; the ice cream will begin to pull away cleanly from the sides (about 25 minutes).
  9. Eat right away, sprinkling the remaining candy cane bits on top of your scoop – there are few things better than freshly churned ice cream – or if you’re storing for later, press a piece of parchment paper directly against the surface and seal in an airtight, freezer-safe container. When you remove the ice cream from the freezer, let it sit and relax until it is scoopable. Once you’ve scooped it, be sure to return any remaining ice cream to the freezer. If the ice cream has melted too much at room temperature, refreezing it will result in an ice cream that is too icy.

Adapted from Jeni’s Splendid Ice Creams at Home, by Jeni Britton Bauer

I would like to say thank you to my fabulous guest blogger, Stephanie Hua,  today for sharing this fantastic guest blog entry with our readers! You really must head right over to see Stephanie’s blog.  I am SO darn proud of my friend because she is out there pursuing her dream to start culinary school and kicking butt at it already. Read about her first day at culinary school and visit Lick My Spoon for fresh takes on delicious & healthy dishes. She even has t-shirts!! I wear mine proudly and my husband can attest that this is one of my favorite shirts to wear!

Now hurry over to her blog! 

Stephanie Hua is the creator of Lick My Spoon, a place for all things delicious. So far she has learned that she very much enjoys salted caramel anything, a good soup dumpling is worth a scalded tongue, and a barrel of cheese balls never ends well.  Follow her on Facebook and @lickmyspoon.

Pin It
Red Velvet Cake Batter Ice Cream With DIY Conversation Heart Toppers

Monday, January 21st, 2013

If there is anything better than a beautiful homemade red velvet cake, than it is that same red velvet cake flavor turned red velvet cake ice cream. Red velvet cake batter ice cream is an easy treat to whip up and is a fun one to enjoy for Valentine’s Day.

If you haven’t tried my cake batter ice cream before, this is a recipe worthy of a repeat with all new flavorings. This ice cream recipe is, by far, my favorite recipe for ice cream. There is no cooking of ingredients required, I usually have all of the ingredients on hand in my refrigerator, and the cake mix can be your own favorite variety or a cake mix that you need to use up in your cupboard. It is so rich and creamy and tastes just like your favorite ice cream shop, without the hefty price tag!

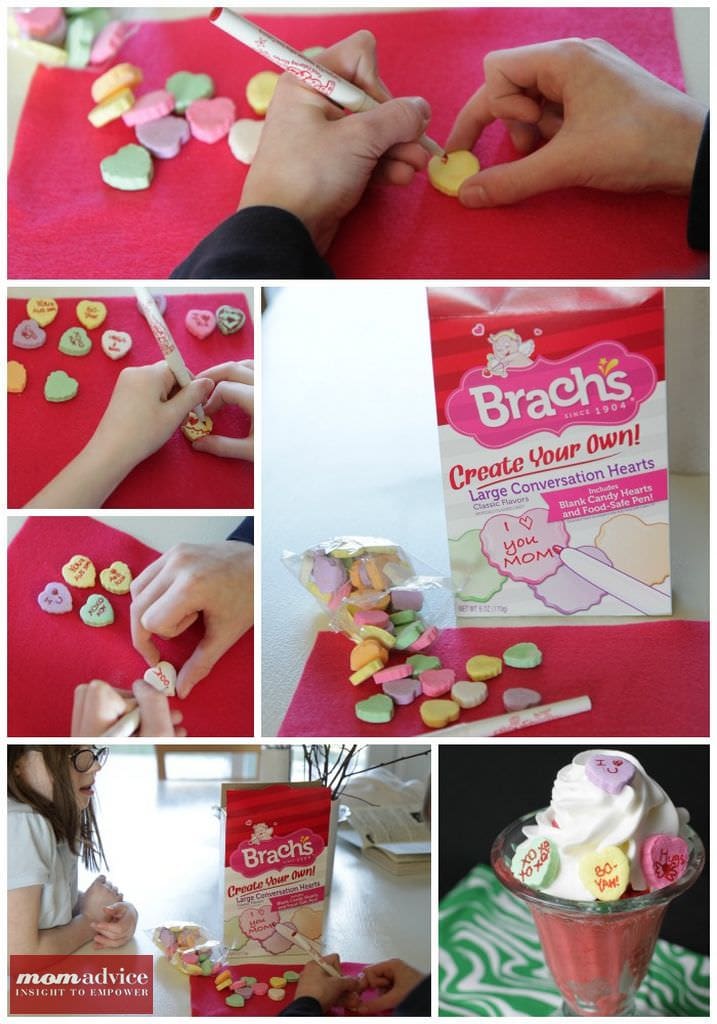
To make this ice cream more festive, we topped it with the new Brach’s Create Your Own Conversation Hearts. If you haven’t seen these, they are absolutely adorable and a fun way for kids to practice their writing. Have you children write their favorite messages on their hearts with a food-safe pen or draw tiny Valentine’s Day pictures to decorate them. They would make a fun addition, not only to a fun ice cream treat, but would be a sweet personalized addition to your valentines for your child’s classmates. These little hearts are sold exclusively at Walmart!

Since I couldn’t partake in the red velvet cake batter ice cream goodness this year, I spent some time browsing the grocery aisles to see if I could find any dairy-free options for a birthday treat at the store. Lucky for me, Walmart does offer several varieties of Häagen Dazs sorbets (I tried the raspberry & melon) as well as So Delicious Dairy-Free Creamy Vanilla. They were all so delicious! With sweet treats like this, I didn’t even miss the ice cream this year for my birthday. I’m looking forward to making sorbets and dairy-free ice cream alternatives in my kitchen this year!

In the meantime, enjoy this easy and delicious Red Velvet Cake Batter Ice Cream for a sweet treat with your favorite little valentines!

Red Velvet Cake Batter Ice Cream With DIY Conversation Heart Toppers
Recipe Type: Dessert
Author: Amy Allen Clark
Prep time: 5 mins
Cook time: 25 mins
Total time: 30 mins
Serves: 5
A rich and decadent ice cream treat perfect to share with your favorite little valentines!
Ingredients
  • 1 cup skim milk, well chilled
  • 3/4 cup granulated sugar
  • 2 cups heavy cream, well chilled
  • 2 teaspoons pure vanilla extract
  • 2/3 cup red velvet cake mix
Instructions
  1. Place freezer bowl of ice cream maker into the freezer. Chill the freezer bowl for a minimum of 24 hours.
  2. In a medium bowl, whisk the milk and granulated sugar until the sugar is dissolved.
  3. Stir in the heavy cream and vanilla.
  4. Whisk in cake mix, making sure there are no lumps.
  5. Pour mixture into the freezer bowl and let mix until it has thickened (about 25-30 minutes). Remove ice cream from freezer bowl and place into a separate freezer-safe container.
  6. Place freezer bowl and the ice cream into the freezer to further harden (at least three hours).
  7. Serve with your favorite sundae toppings.

I am a part of the Walmart Moms program, and Walmart has provided me with compensation for these posts  My participation is voluntary and opinions are always my own.


Pin It
Dressing Up Store-Bought Pies: Cranberry Crunch Pie Topping

Tuesday, November 20th, 2012

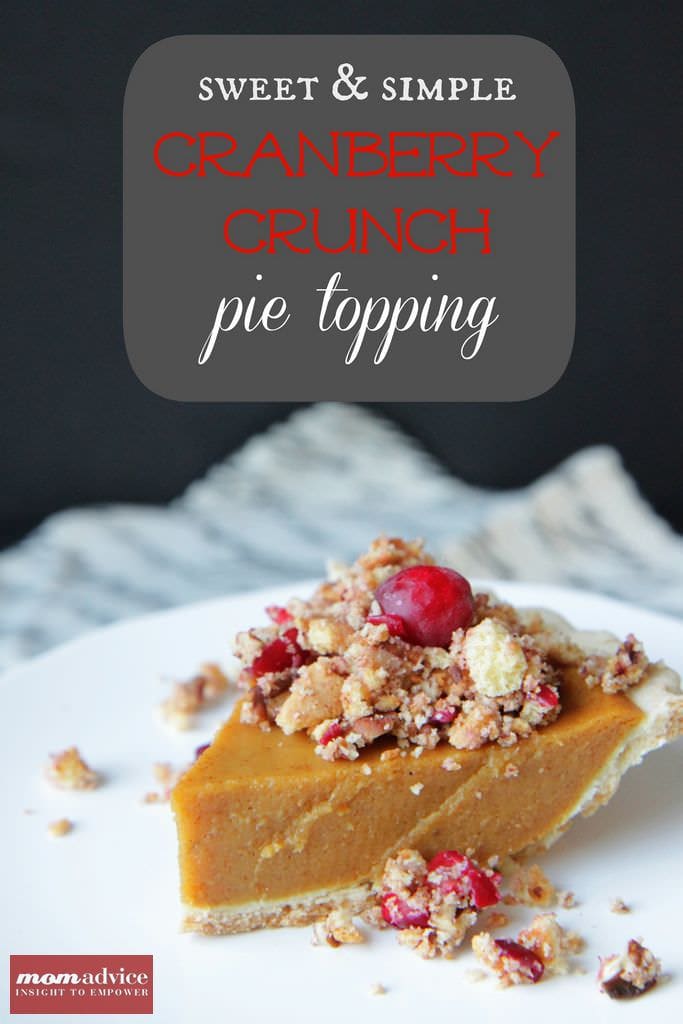
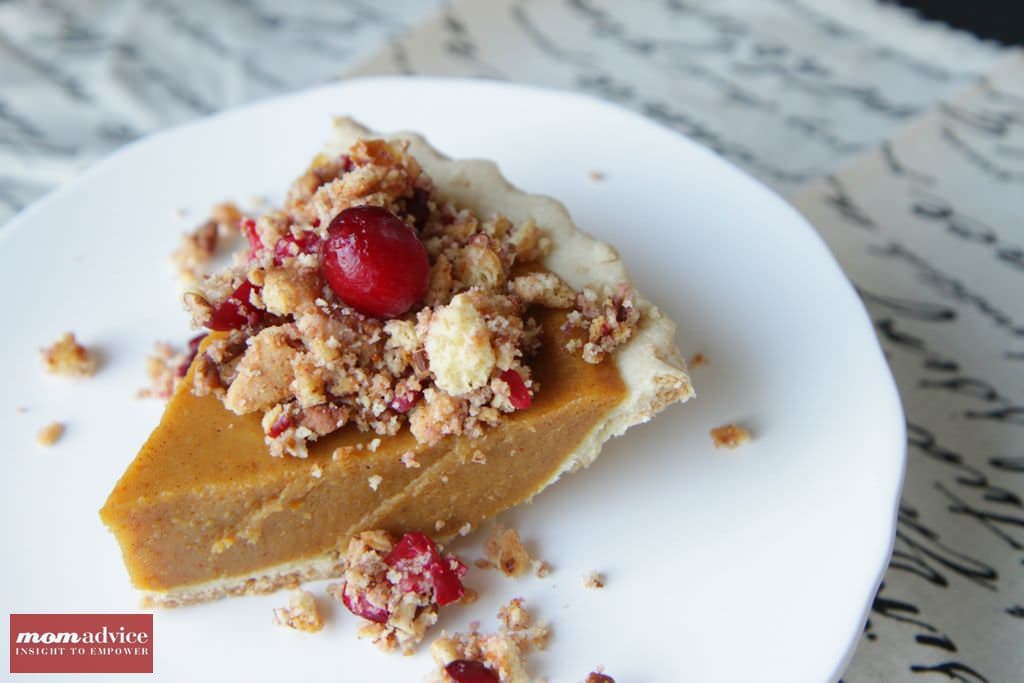
Pumpkin pie rarely needs an adornment more than a little whipped cream on top…that is, until I decided a crunchy cranberry pie topper would be a fun way to ad a little sparkle to a piece of pie. This cranberry crunch topper is the perfect way to add a little sweetness of crushed cookies, adds that tart bite from the cranberries to the top of your pies, and rounds out the crunchy flavor with freshly toasted walnuts.

A quick whirl through your food processor is all these ingredients need to pull together for a quick homemade topper for those store-bought pies. Set out a few of these fun toppings with your favorite store-bought pie or homemade pumpkin pies this year.

Happy Thanksgiving, Friends! I will be offline preparing to host my own family for the Thanksgiving holiday. I hope you all have a wonderful holiday with your own families!

Cranberry Crunch Pie Topping
Recipe Type: Dessert
Author: Adapted from Tyler Florence
Prep time: 5 mins
Cook time: 10 mins
Total time: 15 mins
Serves: 8
A simple pie topping created with toasted almonds, tart cranberries, and your favorite cookie
Ingredients
  • 1/2 cup pecans
  • 4 ounces frozen cranberries
  • 1 (2.3-ounce) package amaretto cookies (about 12) or (if your store doesn’t carry those, like mine) Vanilla Wafers (about 12)
Instructions
  1. Preheat your oven to 375 degrees. Put the pecans on a baking sheet and bake them for 10 minutes to toast them.
  2. Remove them from the oven and let them cool.
  3. Thaw the cranberries in a strainer set over a bowl to catch the liquid.
  4. Put the cookies, pecans, and cranberries into a food processor and pulse them a few times until they are coarsely chopped.
  5. Sprinkle the topping evenly over your pie and serve immediately.
  6. Refrigerate leftovers.

Source: Food Network


Pin It

Dressing Up Store-Bought Pies: Spiced Whipped Cream Recipe

Monday, November 19th, 2012

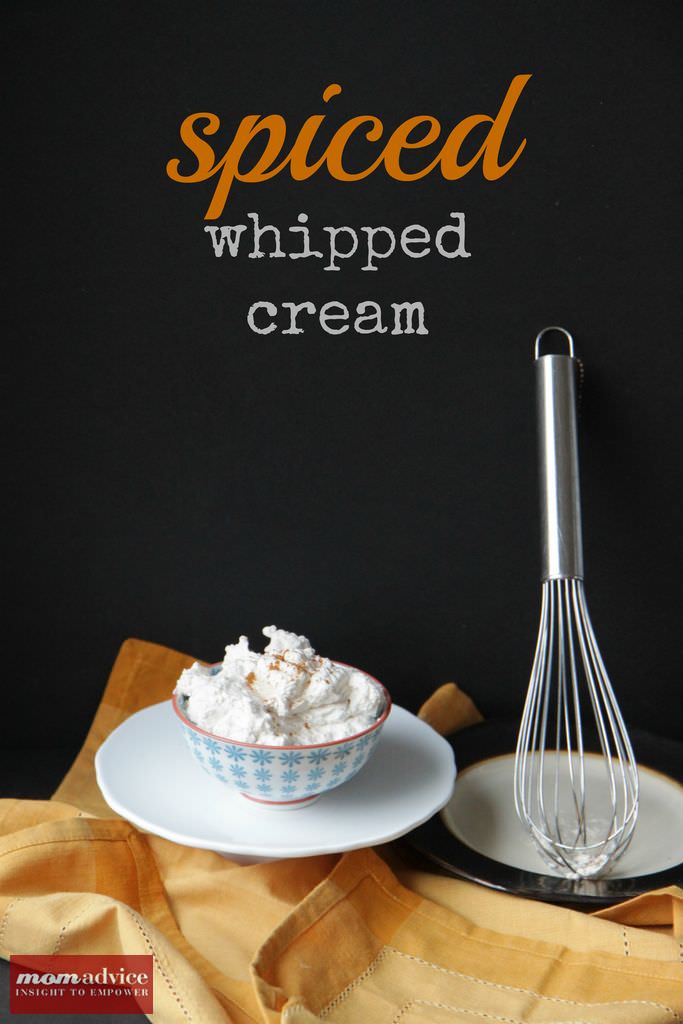
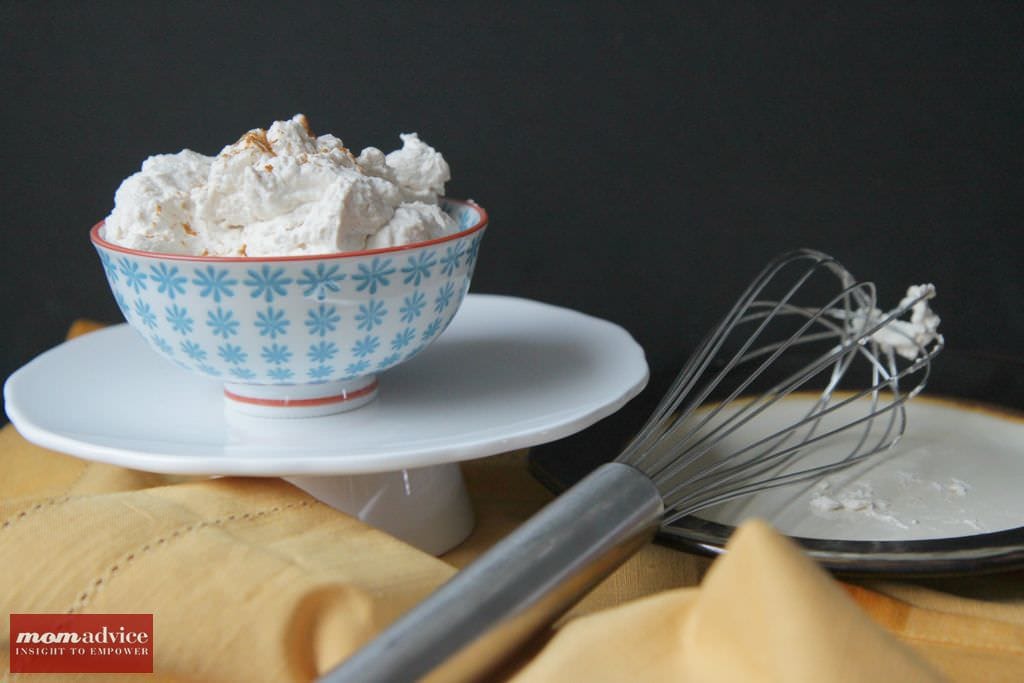
I remember when I thought that making whipped cream was a labor-intensive process. Ah, I have had so much to learn in the kitchen. Whipped cream is simply one of these easiest pie toppings to make and spicing up your whipped cream is an easy way to add a personal touch to a store-bought pie.

This spiced whipped cream recipe will bring an extra layer of spice to your pies that your guests will absolutely love. The best part is that this easy spiced whipped cream topping can be created in under 5 minutes and with a couple of items you probably already have lurking in your pantry.

In a perfect world we would all be making handmade pumpkin pies made with homemade crusts. I thoroughly love baking, but I also know that it isn’t for everyone. For those of my friends who prefer to put their love in other elements of the holiday, I am going to show some easy ways to spice up those store-bought pies that will take those pies to another level.

Before I became acquainted with the kitchen, I really thought whipped cream was just Cool Whip and homemade whipped cream was a powder that you added water to that made whipped cream.

I really did.

Yes.

I.

Did.

Of course, I know a few more things than I did 10 years ago, but it still makes me giggle to know how detached I was from the culinary world. Whipped cream is actually just heavy whipping cream, whipped until it forms peaks and you can add your own spin on sweeteners, spices, and extracts to create your own unique combination of sweet and spicy. It’s perhaps the simplest and most satisfying of pie toppings.

This Spiced Whipped Cream gets its hint of spices from ground cinnamon, ground ginger, and a little sugar. It is the perfect accompaniment to your pumpkin or pecan pies for the holidays.

Tomorrow I will share with you one other fun topping to try on your pies along with some fun ideas for entertaining the kids! 

Spiced Whipped Cream
Author: Epicurious.com
Prep time: 5 mins
Total time: 5 mins
Serves: 4
Spice up your store-bought pies with this easy Spiced Whipped Cream topping!
Ingredients
  • 3/4 cup chilled whipping cream
  • 2 tablespoons sugar
  • 1/2 teaspoon cinnamon
  • 1/4 teaspoon ginger
Instructions
  1. Beat whipping cream, sugar, 1/2 teaspoon cinnamon, and 1/4 teaspoon ginger in bowl until peaks form. Spoon on top of slices of pie.


Pin It

Homemade Pumpkin Pie

Tuesday, November 13th, 2012

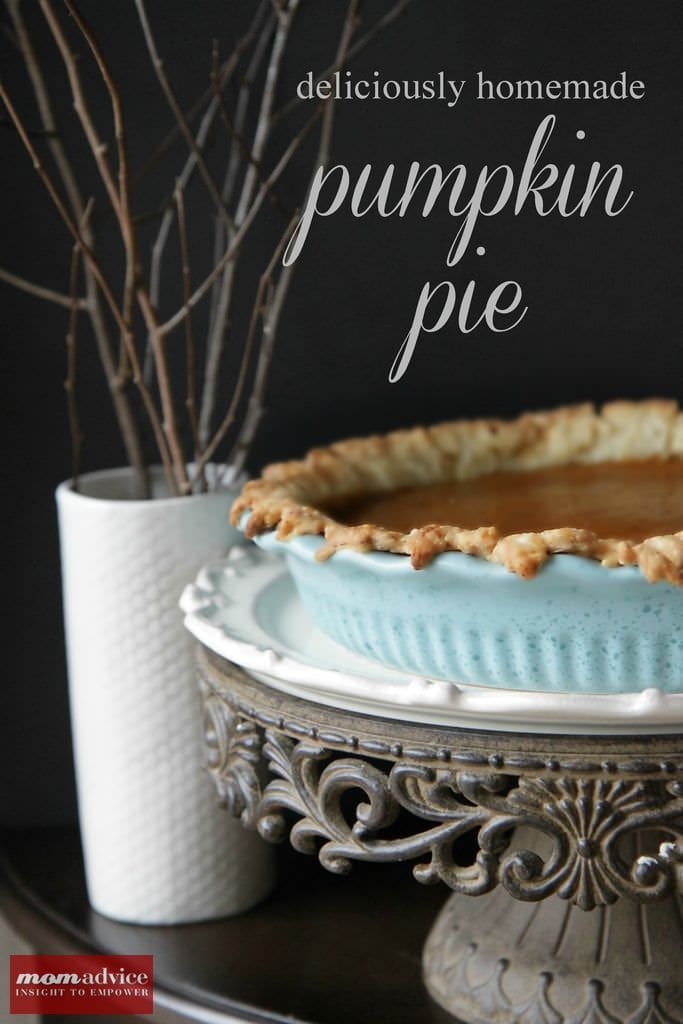
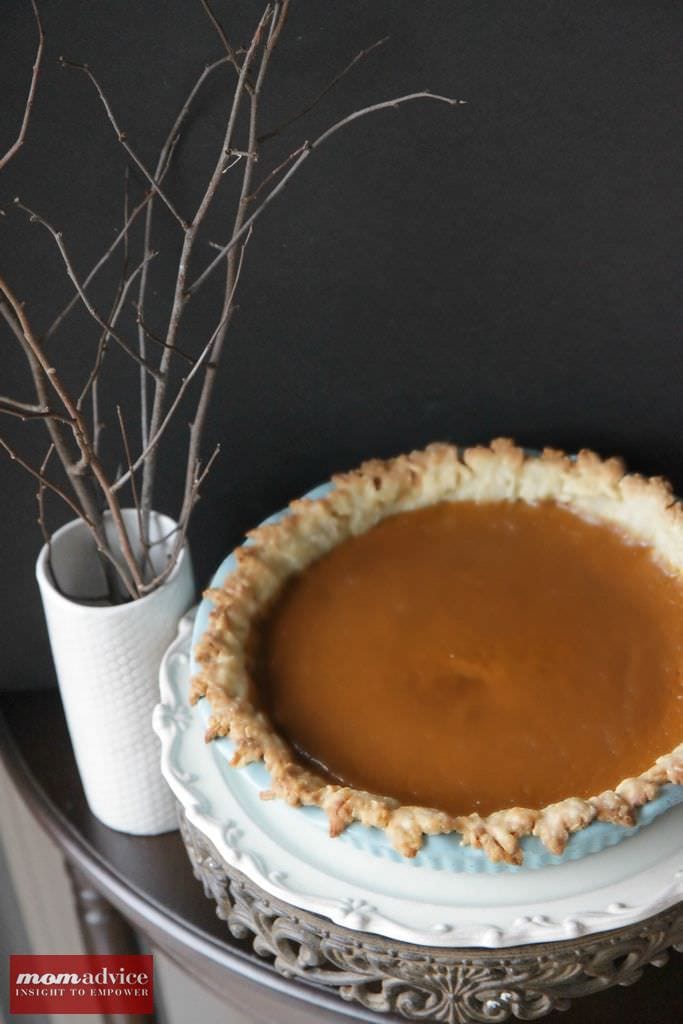
If there is one thing that simply screams Thanksgiving to me, it is the humble pumpkin pie. Today I wanted to share with you my recipe for the best homemade pumpkin pie that can round out your Thanksgiving feasting for the holidays. Not only will I be sharing my recipe for this pie, but I also wanted to share with you some fun tools to add to your baking arsenal.

The first pie I ever made was a Pumpkin Pie. With the ease of canned pumpkin and a few other simple ingredients in my pantry and fridge, it was one of the easiest pies to create and gave me confidence in the kitchen. The crust may have been store-bought and the filling was simple and straightforward, but I truly felt like a rock star in my very own kitchen.

Everyone has their own unique spin on this simple recipe, and today I wanted to share with you a filling that is rich on flavor that is unlike any pumpkin pie I have ever eaten. The richness comes from the well-blended cooked filling,the dark brown sugar, and the delicious combination of spices.


Good tools for pie making certainly make the job more fun and just as I shared with you the fun Thanksgiving centerpiece and table I was able to create through my partnership with Pure Charity, today I am making a beautiful dessert for the holidays using tools purchased through the Pure Charity.

If you have been a longtime reader to our site, you know how important giving back to other is to me. Whether it is the giving done in small ways like “found items,” around our home, to the giving of your talents to those in need, to the bigger projects where you gather your community and really feel like you make a difference.

Shopping through Pure Charity is one of those smaller things you can do that is as effortless as those donations of found items around your home. Holiday shopping will be happening for us over the next couple of months, why not make it shopping AND giving to those who need your support in the process? That sounds like  a win-win!

What is Pure Charity?

Pure Charity is a simple, but awesome concept for giving back to those causes you care most about. Basically, you install a simple toolbar into your web browser and then it alerts you with a small banner at the top when a store you are shopping with has a partnership with Pure Charity. Click on that little button and you are making a percentage deposit into your Giving Fund. Your Giving Fund can then be applied to the charities that are important to you and that you have a desire to support.

Pure Charity asked me to show everyone what could be done via their partners and gave me a small budget to get started. Last week I shared ideas for setting the perfect Thanksgiving table, today I am sharing my delicious Pumpkin Pie recipe, and next week I will showcase some fun ideas for keeping the kids entertained. All supplies were ordered through their partner sites and I have created a Giving Fund for the charities that are most important to our family.
I can honestly say that I have never made a pie from scratch so this was not only a challenge for me, but reminded me that I still have so much to learn in the kitchen. This week I have several fun recipes as we enter the holiday entertaining season and I can’t wait to share them with you!

I found gorgeous pie cutters, brushes, pastry wheels, cookie sheets, and an elegant pie server from Williams Sonoma. My pie dishes are already receiving rave reviews and were just a mere $13 from the Paula Deen collection from Walmart.

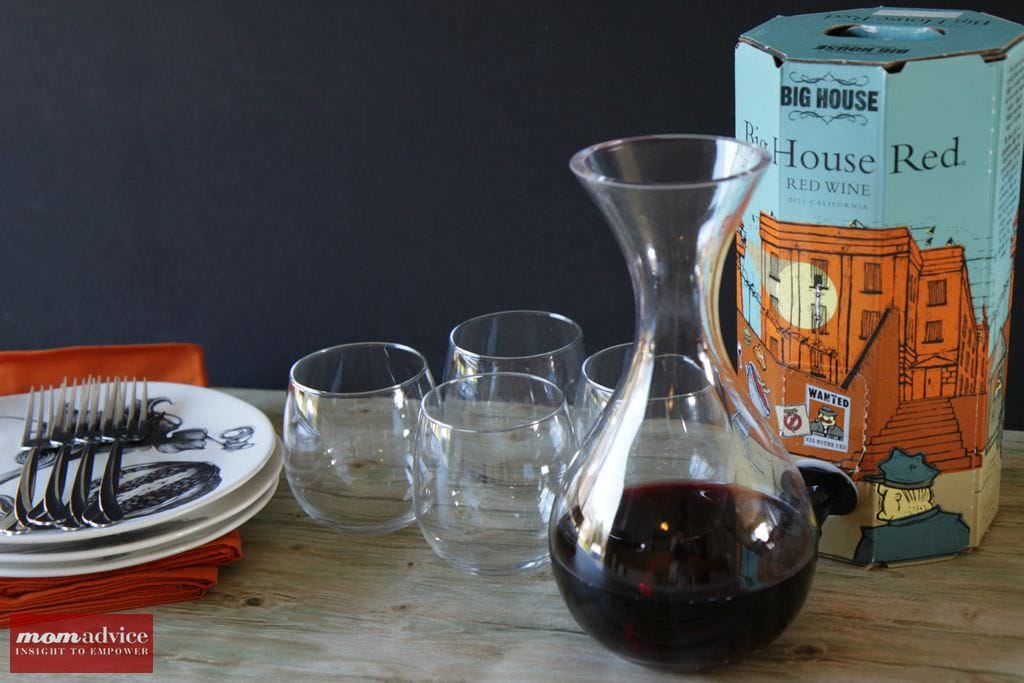
What is dessert without a little wine? I have a desire to look fancy, but don’t always have the fund to really pay for the fancy in my life. One trick that I love to do when entertaining is to disguise boxed wine or less expensive bottles of wine in an elegant wine carafe. These stemless wine glasses (both red and white) plus my wine carafe makes entertaining look elegant while not spending a lot of money. I found these over at Walmart through Pure Charity.

Did you know you can even order a turkey or ham for your holiday entertaining through their partnership with Omaha Steaks? If that doesn’t scream stress-free entertaining than I don’t know what does? I may have ordered one for myself this year..Hey, it’s for charity! 

With all of the items I bought to prepare my beautiful pie and serve my wine elegantly, the true bonus was that I was able to put an additional $7.69 towards my Giving Fund! 

Head on over and create your own account with Pure Charity and find a cause that is important to you to give back to when doing your holiday shopping this year!

Today I am sharing my new favorite Pumpkin Pie recipe with you! Once you try this pumpkin pie, you will quickly discover why it is my new favorite pie recipe. Be sure to visit this week’s All Butter Pie Crust tutorial that can be prepared in your handy food processor! Happy baking, everyone!

Homemade Pumpkin Pie
Recipe Type: Dessert
Author: America’s Test Kitchen Baking Cookbook
Prep time: 15 mins
Cook time: 25 mins
Total time: 40 mins
Serves: 8
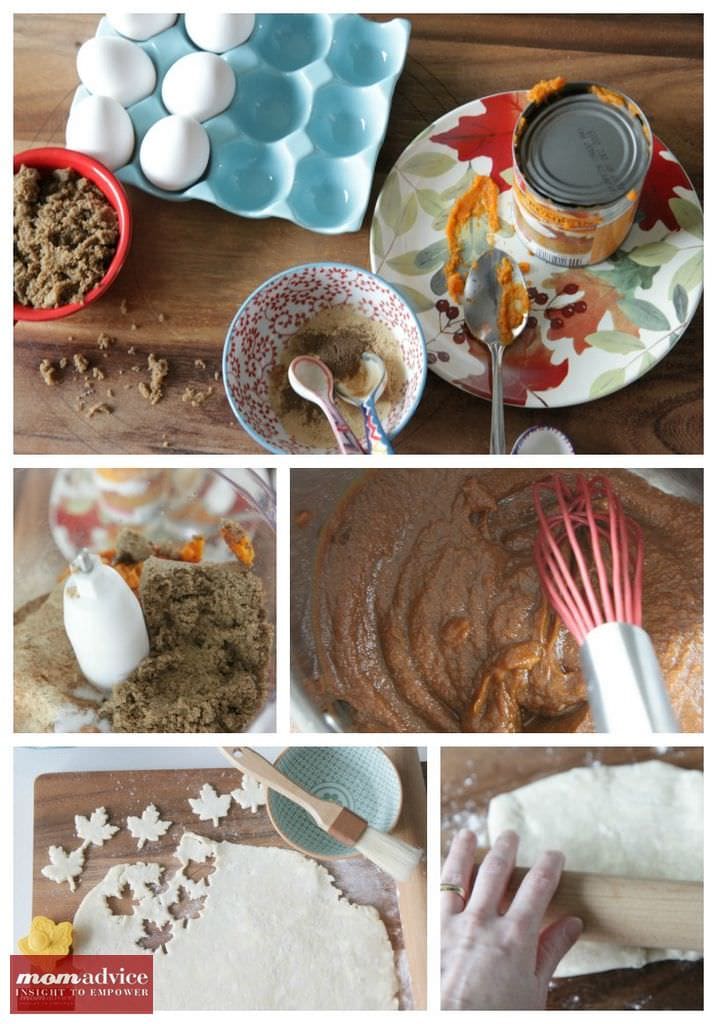
Processing the canned pumpkin yields a smooth and creamy pie texture and cooking the canned pumpkin in the spices & sugar helps take away from the canned pumpkin taste without hassling with fresh pumpkin.
Ingredients
  • 1 recipe for a single-crust pie dough (Be sure to check the link for the All Butter Pie Crust)
  • 1 (15 ounce) can pumpkin puree
  • 1 cup (7 ounces) dark brown sugar
  • 2 teaspoons ginger
  • 2 teaspoons ground cinnamon
  • 1/2 teaspoon ground nutmeg
  • 1/2 teaspoon salt
  • 1/4 teaspoon ground cloves
  • 2/3 cup heavy cream
  • 2/3 cup whole milk
  • 4 large eggs
Instructions
  1. Follow the steps given for the All Butter Pie Crust. Line your chilled crust with a double layer of foil and fill with pie weights (or dried beans). Bake until the pie dough looks dry and is light in color 25-30 minutes.
  2. Increase the oven temperature to 400 degrees.
  3. For filling (while the crust is baking since you want the crust to still be warm when you add the filling), process the pumpkin puree, brown sugar, ginger, cinnamon, nutmeg, salt, and cloves together in a food processor until combined, about 1 minute.
  4. Transfer the mixture to a saucepan and simmer over medium-high heat, stirring constantly, until thick and shiny, about 5 minutes.
  5. Whisk in the cream and milk, return to a simmer briefly, then remove from the heat.
  6. Process the eggs in a food processor until uniform, about five seconds. With the machine running, add about half the hot pumpkin mixture in the feed tube. Stop the machine, add the remaining pumpkin and continue processing until smooth (about 30 seconds)
  7. Immediately pour the warm filling in the warm crust. Bake the pie until the filling is puffed and lightly cracked around the edges and the center jiggles slightly when shaken, about 25 minutes.
  8. Let the pie cool on a wire rack until the filling has set, about two hours. Serve warm or a at room temperature.
  9. To make Pumpkin Pie Ahead- Make your pie dough ahead of time. Once baked and cooled, the pie can be covered loosely with plastic wrap and refrigerated for up to one day. Let the pie come to room temperature before serving or, to serve warm, reheat the pie in a 300 degree oven for about 15 minutes.


Pin It

All-Butter Pie Crust Recipe With Picture Tutorial

Monday, November 12th, 2012

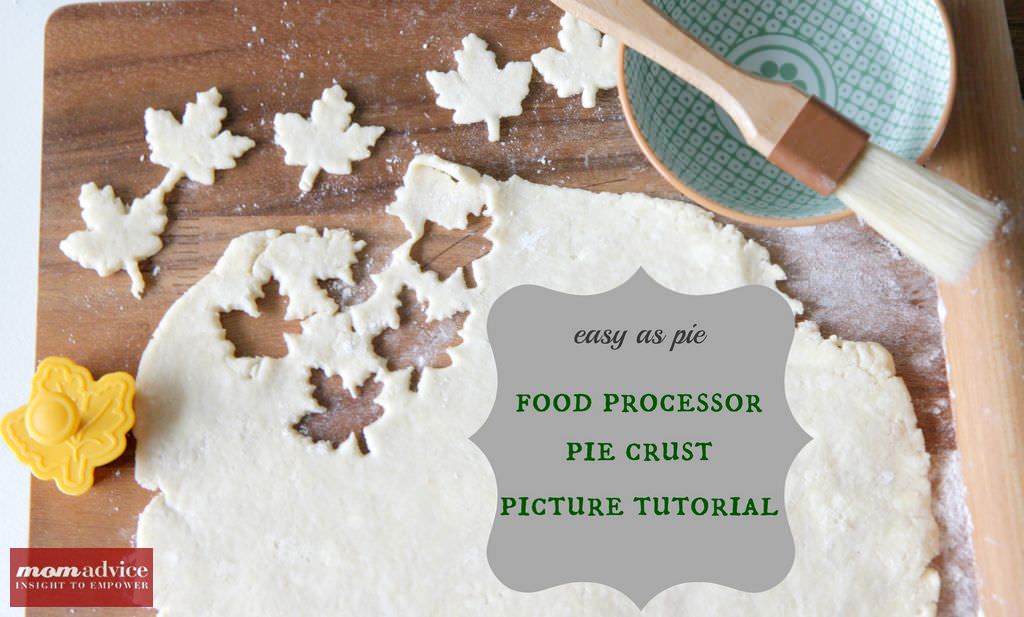
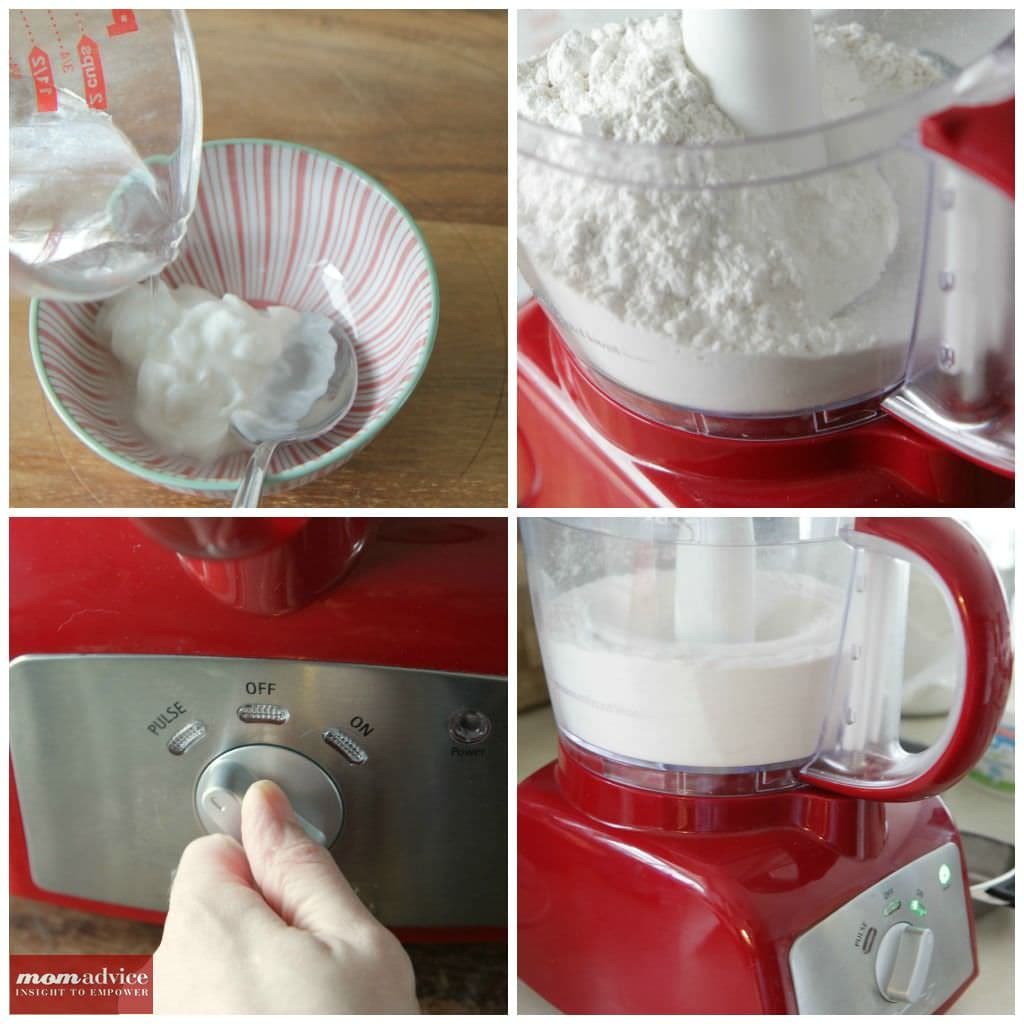
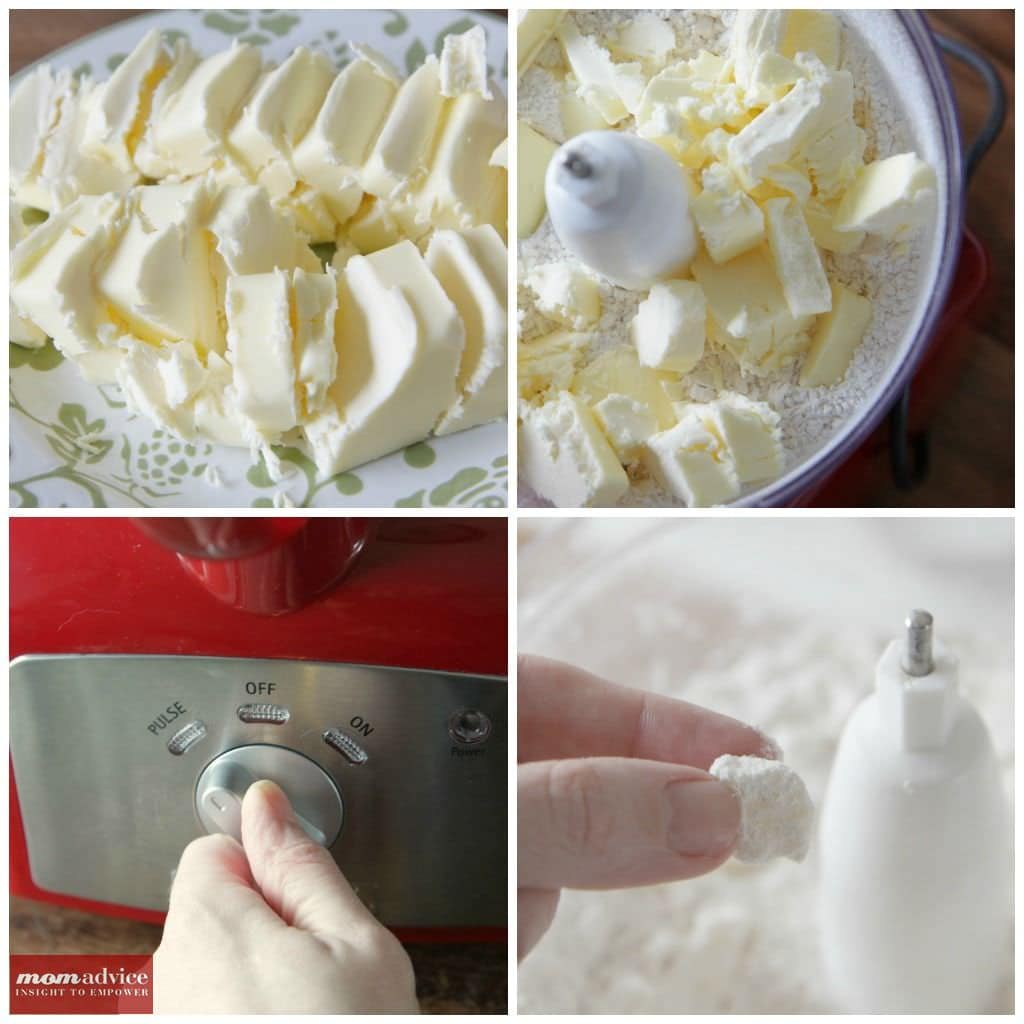
There is nothing like a homemade all-butter pie crust for your pies. Today I wanted to share with you an easy recipe for preparing an all butter pie crust that you can use creating your food processor. I am providing an, “easy as pie,” picture tutorial for pie crust creating and tomorrow I will share my recipe for an absolutely perfect pumpkin pie for your Thanksgiving feasting.

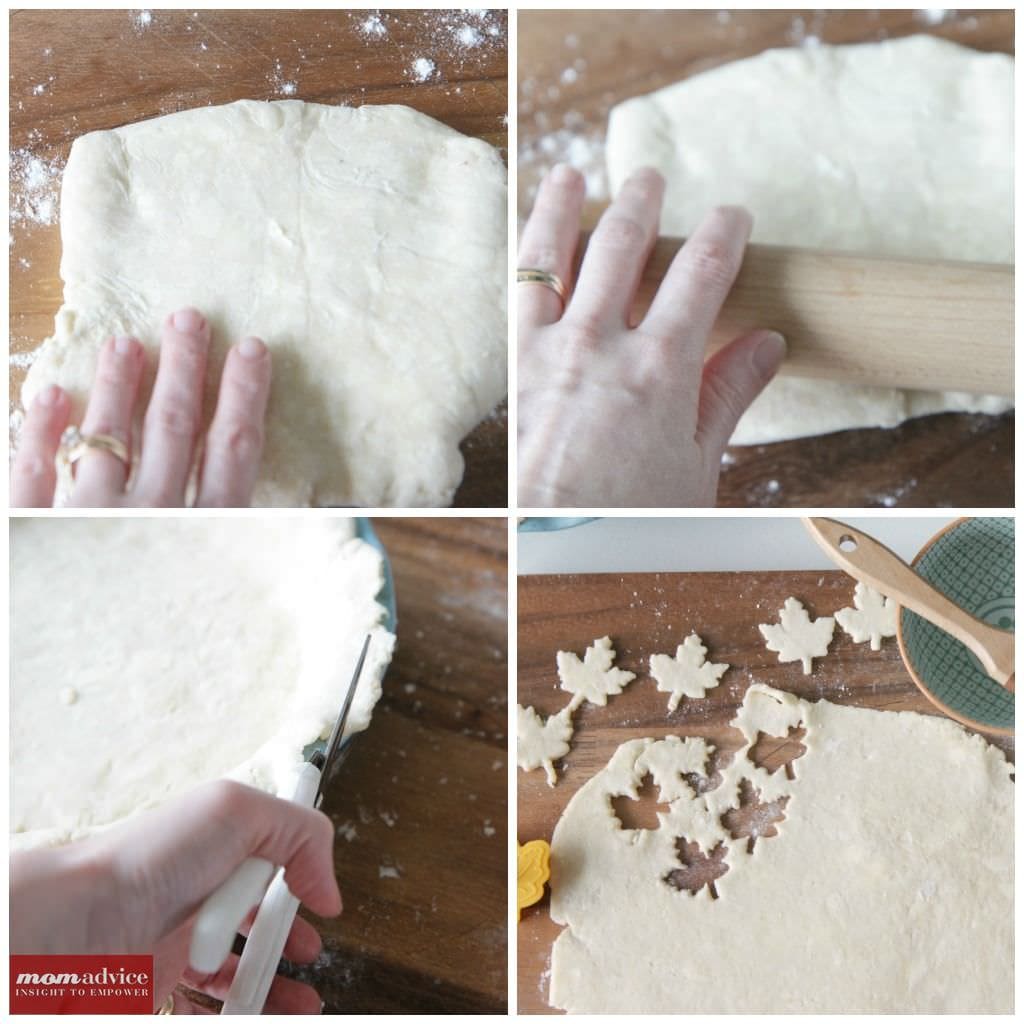
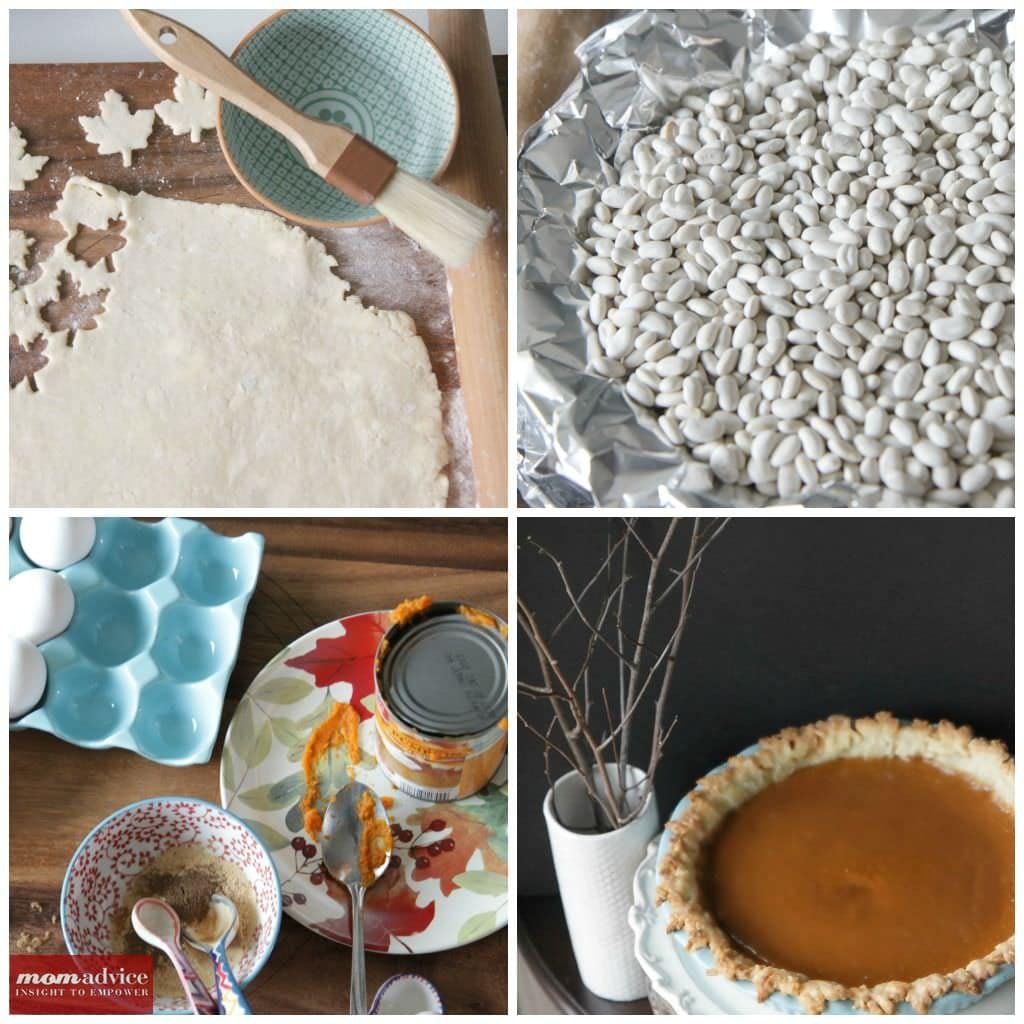
This recipe will yield a double crust which is perfect for those delicious apple pies or you can use your second crust, as shown below, to create cute decorative edges with little pie cutters. I like to call these decorative edges “concealer for the imperfect.”  Let’s be honest, baking isn’t my strongest skill so a girl has to become a whiz at hiding those imperfections. I might do this in a few other areas of my life too…*ahem*.

When it comes to baking, I heavily rely upon my America’s Test Kitchen Family Baking Book. The recipes are reliable and provide consistently great baked goods for our family. I only checked the book out 24 times before I got it for a holiday gift. It really is that good.

Why Sour Cream?

According to the cookbook, the tiny amount of sour cream you add to this dough makes the dough a little easier to work with, more flavorful, and tender. The acid in the sour cream helps to slow down the gluten development which makes for a more tender and flaky crust. Since they probably tested a hundred pie dough recipes to come to these dramatic conclusions, I will take them at face value.

The crust is everything a crust should be- flaky, buttery, crisp, and light. Best of all, it’s easy to roll and comes together in your handy food processor. It really is the perfect crust and I hope these pictures and the recipe will help you with your own pie crust making for the holidays.

How Do You Blind Bake a Pie Crust?

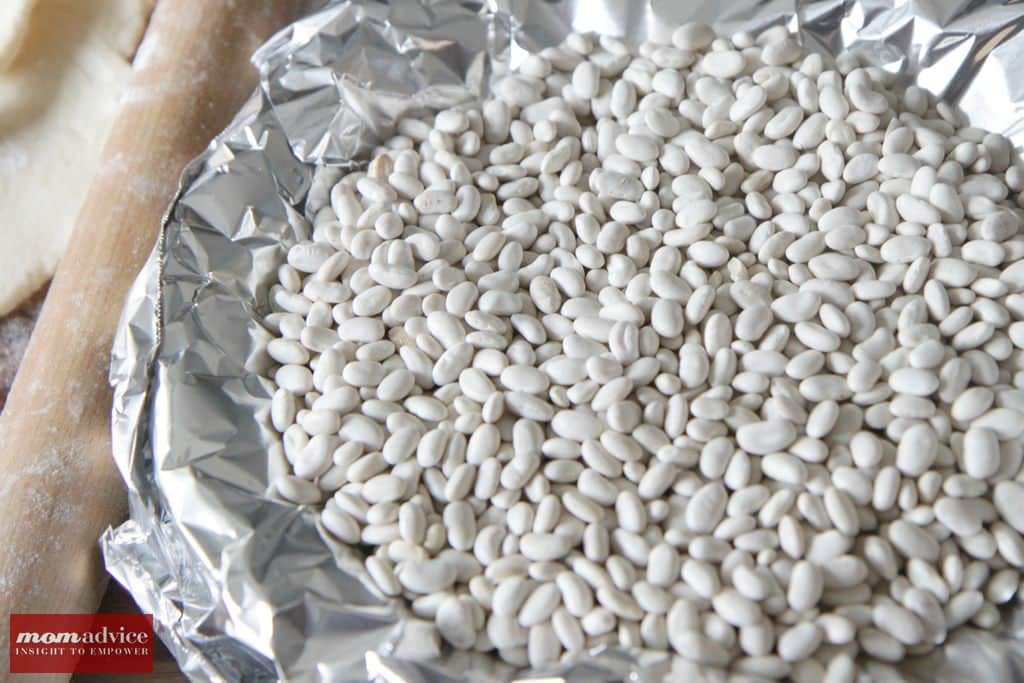
There is nothing worse than a mushy crust on a pie. There is really no sense in going to all of the trouble of making a great crust, if it isn’t cooked correctly.  To blind bake the crust, simply line the crust with a double layer of tin foil and fill it with pie weights. You can buy pie weights, use pennies, or use a bag of dried beans (as I have shown above).   If you use the beans, place them in a zippered bag and label your bag that these are pie weights so you don’t accidentally use them in your recipes.

Bake until the pie dough looks dry and is light in color, 25-30 minutes. Transfer the pie plate to a wire rack and remove the weights and foil.

All-Butter Pie Crust Recipe
Recipe Type: Dessert
Author: America’s Test Kitchen Family Baking Book
Prep time: 15 mins
Cook time: 30 mins
Total time: 45 mins
Serves: 8
“Easy as pie,” pie crust made using all butter and a little secret help from a few tablespoons of sour cream. This dough is a dream to work with and yields a wonderfully flavored and tender crust.
Ingredients
  • 1/3 cup ice water, plus extra as needed
  • 3 tablespoons sour cream
  • 2 1/2 cups all-purpose flour
  • 1 tablespoon sugar
  • 1 teaspoon salt
  • 16 tablespoons (2 sticks) unsalted butter, cut into 1/4 inch pieces and frozen for ten to fifteen minutes
Instructions
  1. Mix 1/3 cup of the ice water and sour cream together in a small bowl until combined.
  2. Process the flour, sugar, and salt together in a food processor until combined.
  3. Scatter the butter pieces over the top and pulse the mixture until the butter is the size of large peas (about ten pulses).
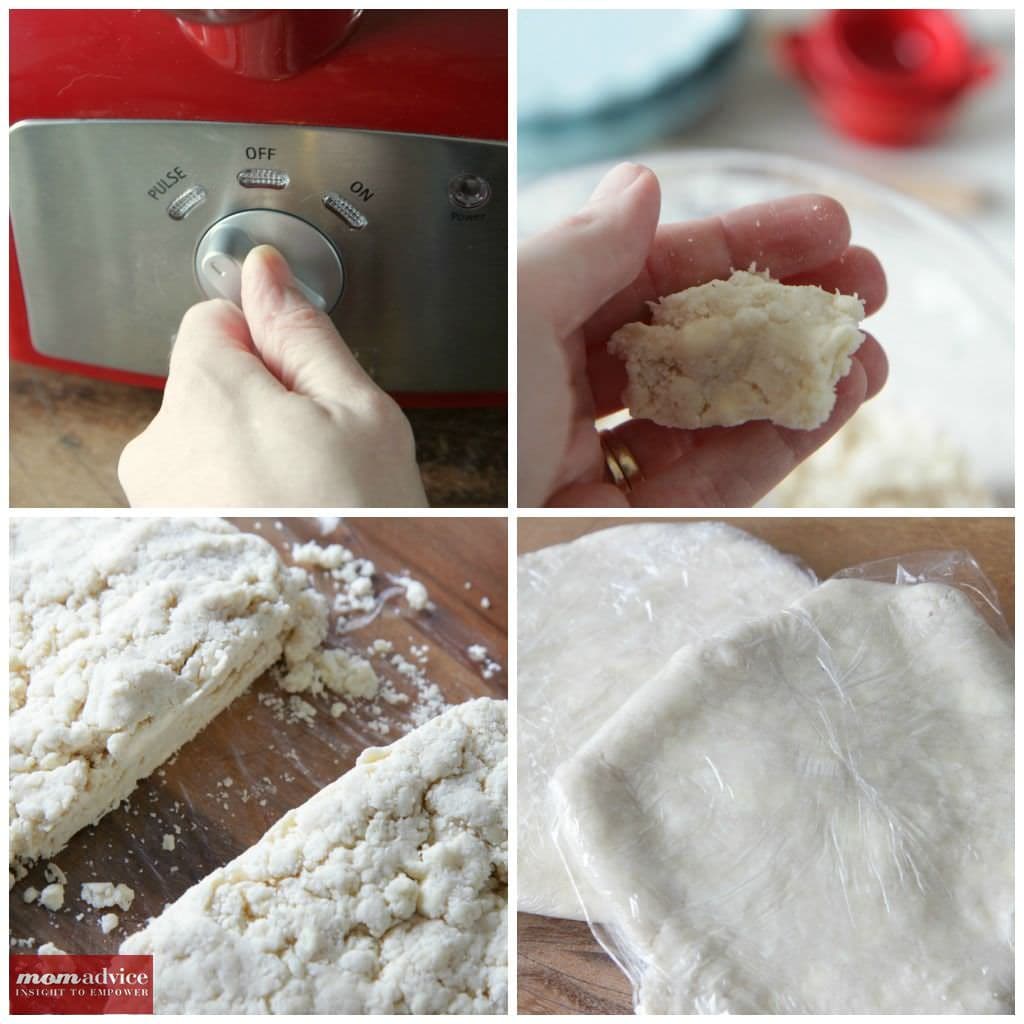
  4. Pour half the sour cream mixture over the flour mixture and pulse until incorporated, about three pulses. Repeat with the remaining sour cream mixture. Pinch the dough with your fingers; if the dough feels dry and doesn’t hold together, sprinkle 1 to 2 tablespoons more ice water over the mixture and pulse just until the dough forms large clumps and no dry flour remains (3-5 pulses).
  5. Divide the dough into 2 even pieces. Turn each piece of dough onto a sheet of plastic wrap and flatten each into a disk. Wrap each piece tightly in plastic wrap and refrigerate for 1 hour. Before rolling the dough out, let it sit on the counter to soften slightly, about ten minutes.
  6. When you are ready to bake it, preheat your oven to 375 degrees. Line the crust with a double layer of tin foil and fill it with pie weights. Bake until the pie dough looks dry and is light in color, 25-30 minutes. Transfer the pie plate to a wire rack and remove the weights and foil.


See you tomorrow with a delicious recipe for Pumpkin Pie that you won’t want to miss! Of course, you can follow all of my shenanigans in the kitchen on Instagram (follow me here). I am quite addicted and love new friends! Be sure to also check out my 7 easy Make-Ahead Thanksgiving Appetizer Recipes and Make-Ahead Thanksgiving Side Dish Recipes (even those mashed potatoes!) Stay tuned for more posts on my pumpkin pie and some fun ways to fancy up those store-bought pies!

Disclosure: The cooking supplies  are an affiliate link and are provided so you can locate what you need quickly and easily!

Pin It

Snickerdoodle Cupcakes

Monday, October 29th, 2012

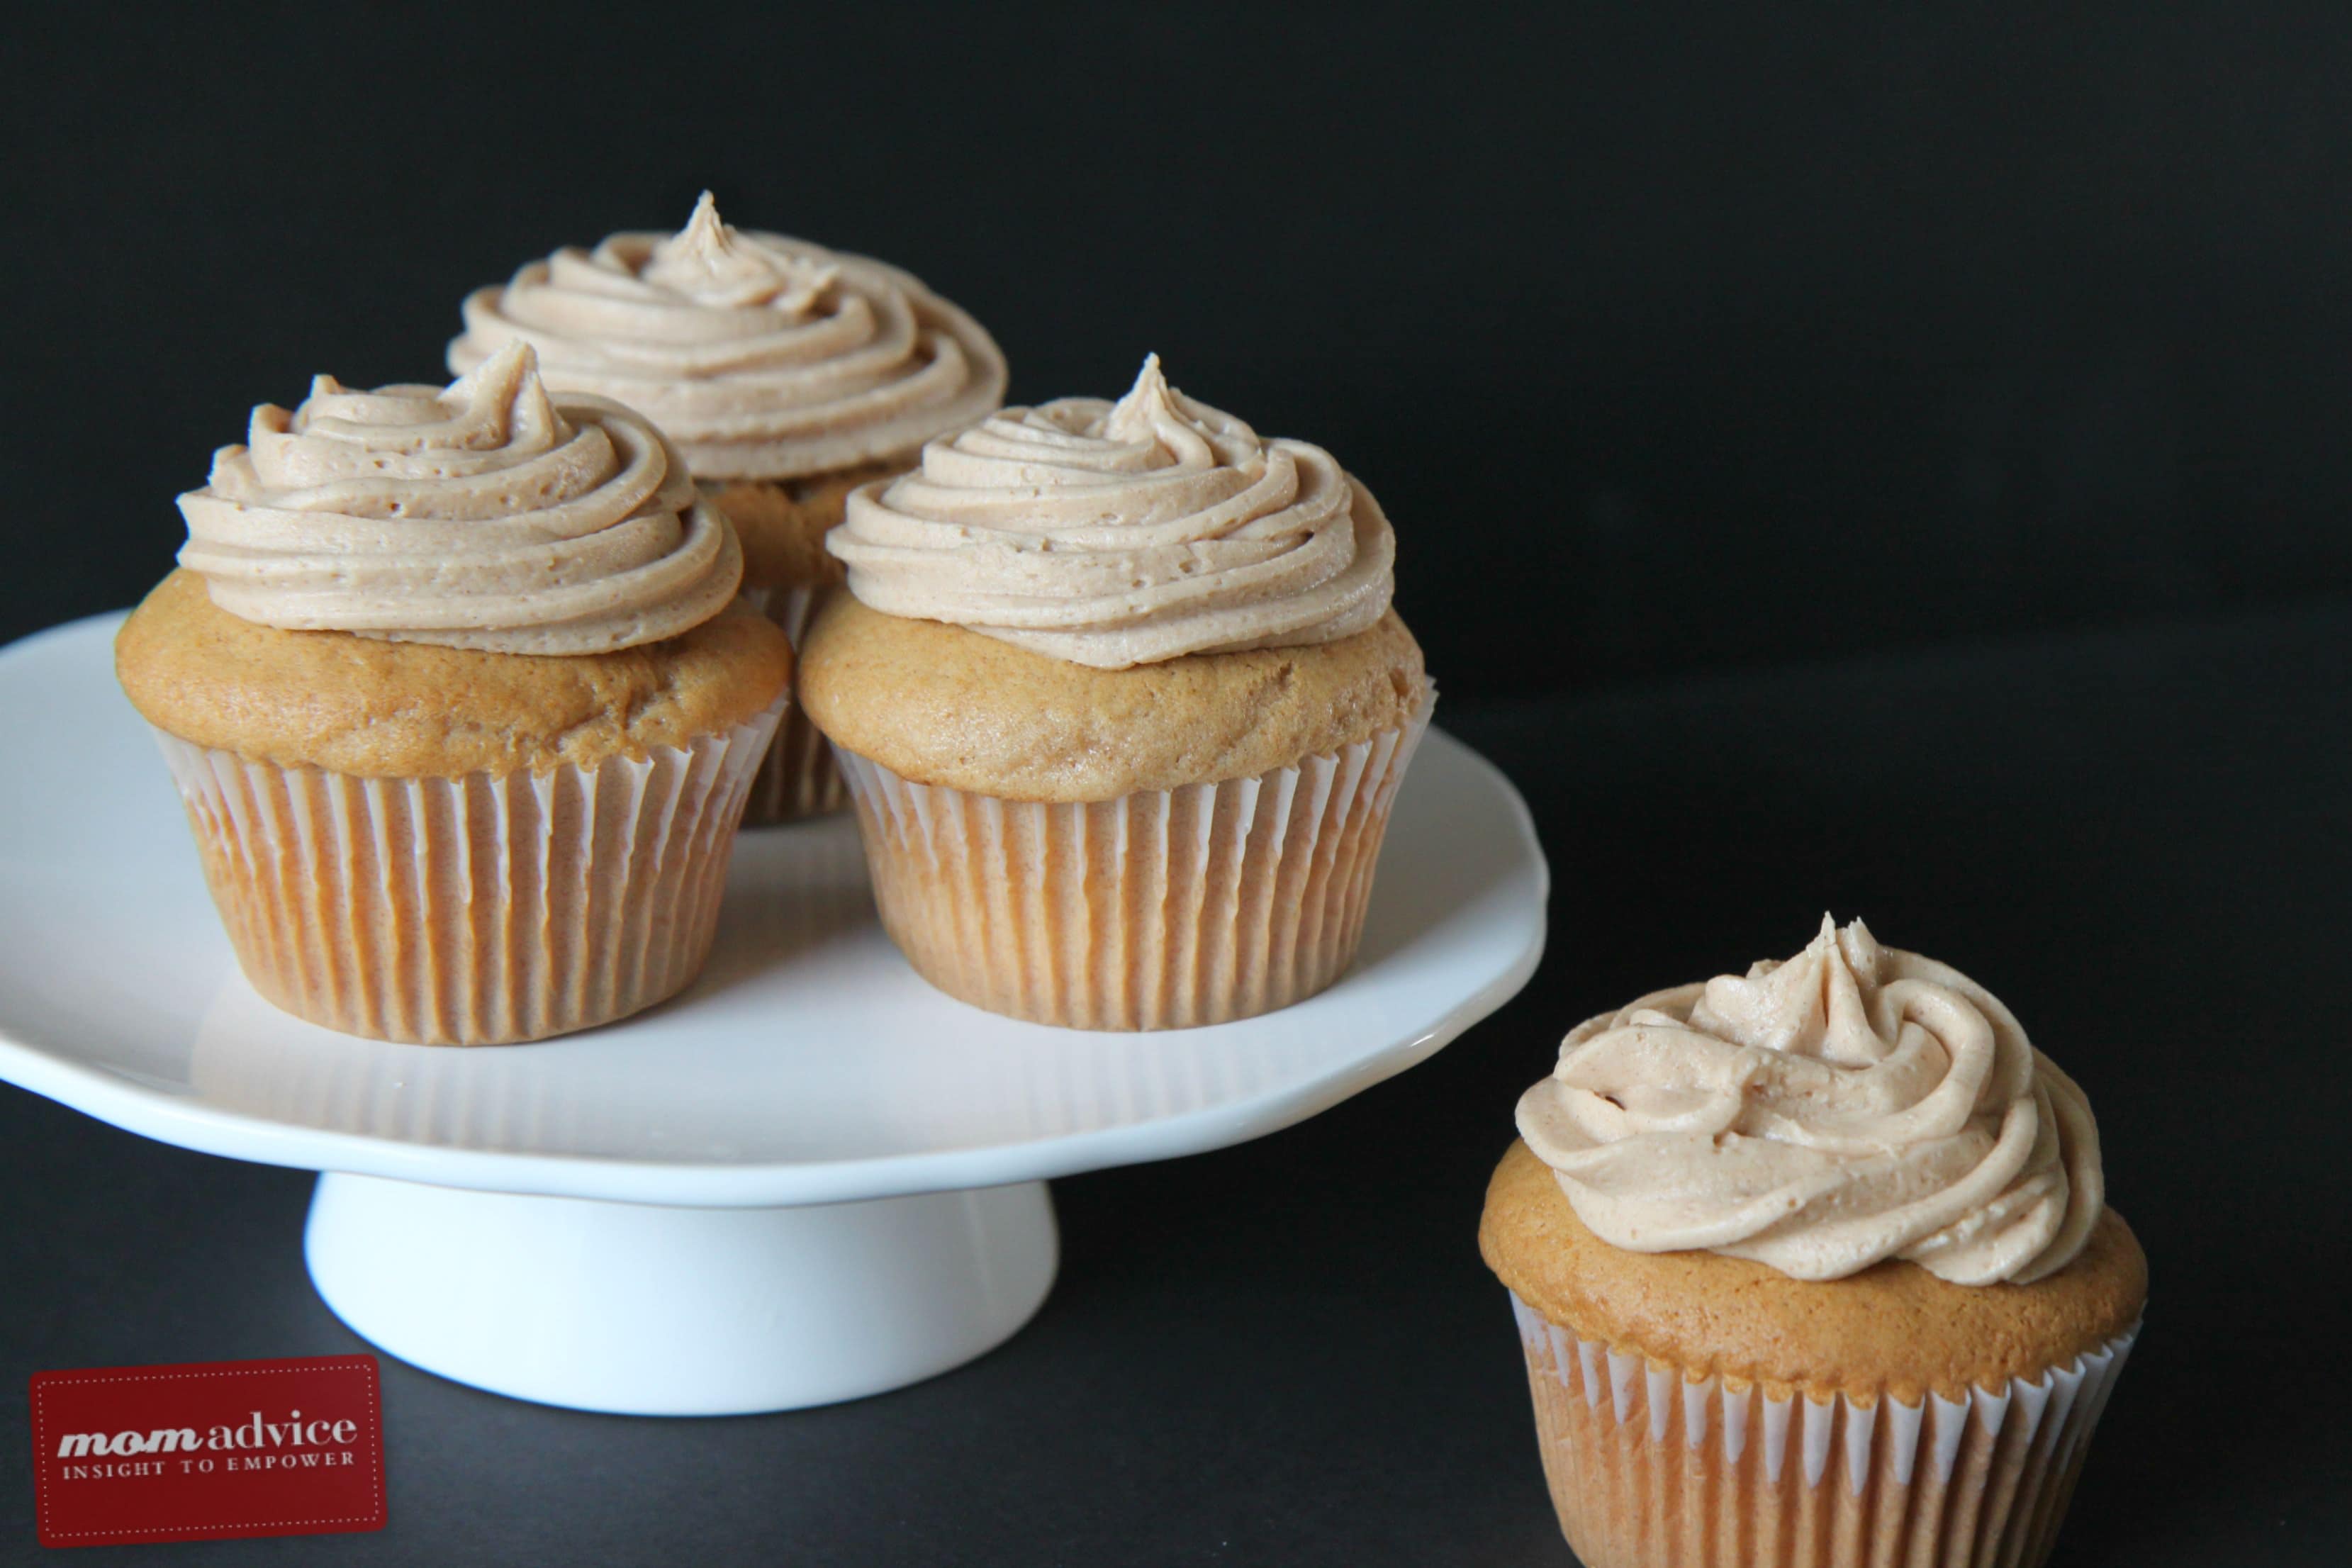
Sometimes old recipes bear a little repeating on MomAdvice. These Snickerdoodle Cupcakes are the type of recipe that deserves its honor on our site over and over again. These Snickerdoodle cupcakes taste just like a fresh baked snickerdoodle cookie and are made from a simple cake mix. If the taste of the snickerdoodle cake isn’t enough for you, these Snickerdoodle Cupcakes are topped with a delicious cinnamon buttercream frosting to round out the cinnamon flavor!

If you haven’t tried this recipe for Snickerdoodle Cupcakes, you must try them because they are the most delicious cupcakes ever. It earns its top spot in my most requested cake category in our family and happens to be my own personal favorite too.  These easy cupcakes are made from a cake mix (you can use white or yellow cake mix) with the addition of a few pantry ingredients that takes the cake to another level.

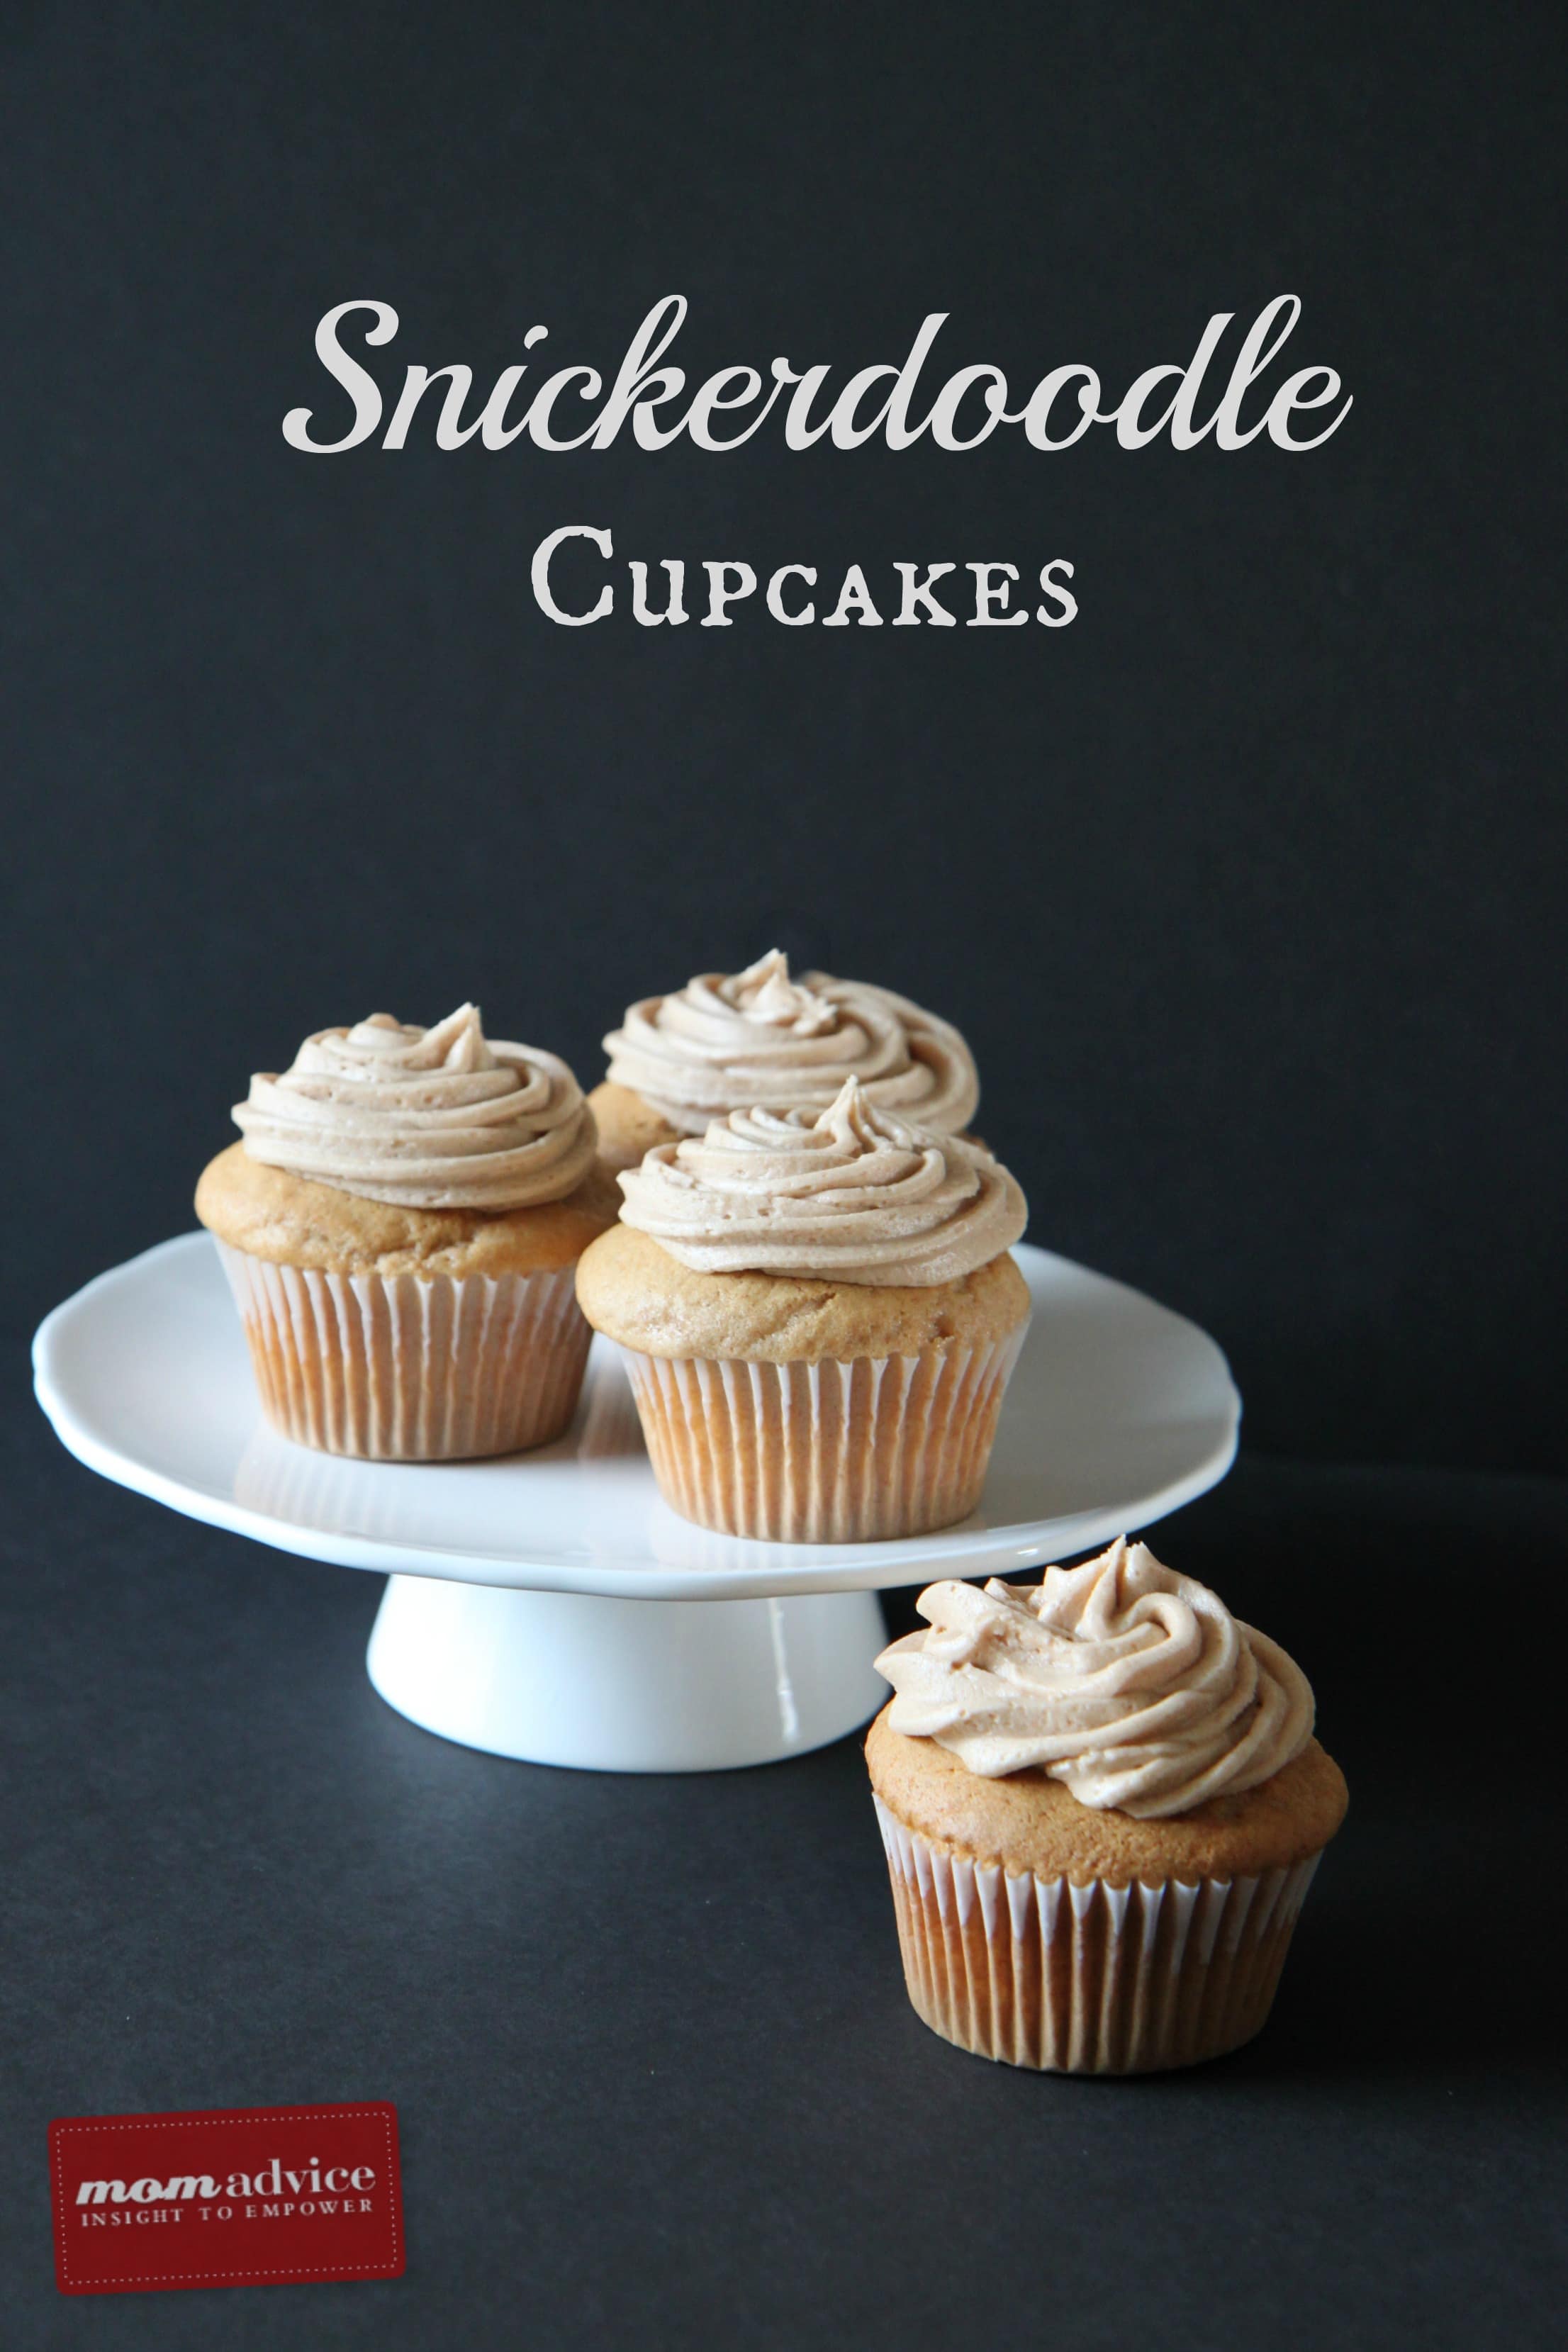
Struggling with frosting decorating? The best arsenal I have in my cake decorating tools is the Wilton 2D tip. It only costs a few dollars and can make your cakes look professional with just one swirl with this tip.  Start at the edge and swirl towards the center for cupcakes that look like the ones above or swirl from the center to the outside for a simple rose effect. I like to  leave the cinnamon cake edges peeking out of the sides so people can see the brown cinnamon color on these. This sweet and simple swirl is all you need to make these cupcakes look professional and still offer the beauty of a homemade treat.

I hope you can give this recipe a spin! Snickerdoodle Cupcakes are the perfect way to celebrate the big or small things in life! Serve them up plain or add an adorable handmade cupcake topper for any of your holiday occasions!

Snickerdoodle Cupcakes
Recipe Type: Dessert
Author: Adapted from The Cake Mix Doctor Cookbook
Prep time: 5 mins
Cook time: 22 mins
Total time: 27 mins
Serves: 16
Snickerdoodle cupcakes are an easy semi-homemade treat you can make for all of life’s occasions. The best part is they taste just like a fresh baked snickerdoodle cookie.
Ingredients
  • 1 package plain white cake mix or yellow cake mix
  • 1 cup whole milk (I used skim milk and it still tasted delicious)
  • 1 stick of butter, melted
  • 3 large eggs
  • 1 teaspoon vanilla extract
  • 2 teaspoons ground cinnamon
  • Frosting:
  • 1 stick butter
  • 3 3/4 cup confectioners sugar
  • 3-4 Tablespoons milk
  • 1 teaspoon vanilla extract
  • 1 Tablespoon ground cinnamon
Instructions
  1. Preheat oven to 350 degrees and flour & grease or line your cupcake tin.
  2. Place cake mix, milk, melted butter, eggs, vanilla, and cinnamon in a large mixing bowl. Blend for three minutes (stop to scrape once).
  3. Using an ice cream scoop, scoop batter into your cupcake tin and then bake for 22-25 minutes.
  4. Allow the cupcakes to cool completely.
  5. For the frosting, beat butter until fluffy.
  6. Add all other ingredients.

Recipe adapted from The Cake Mix Doctor Cookbook.

Pin It