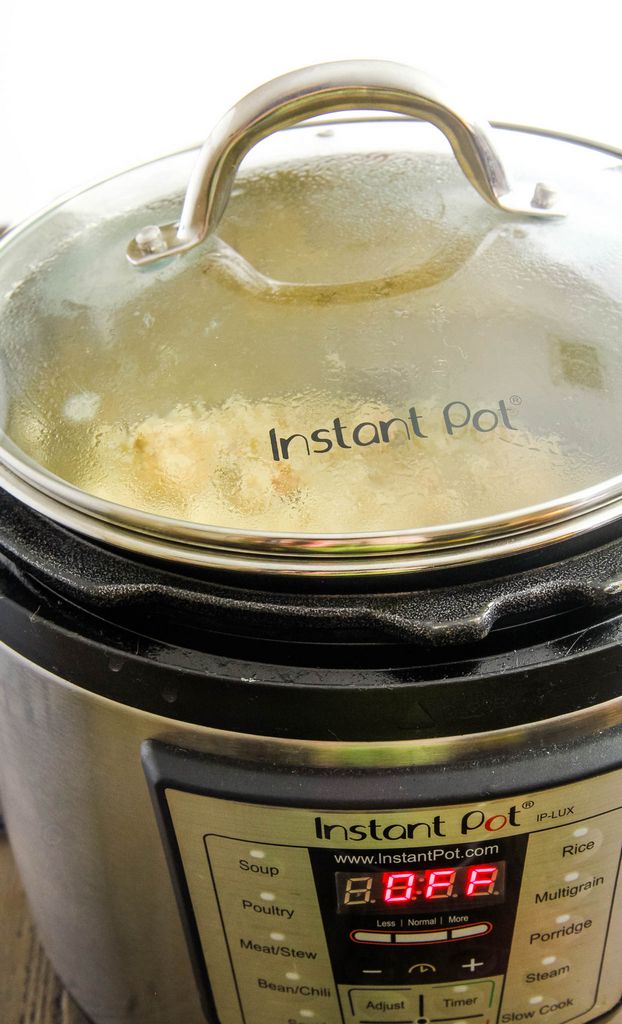
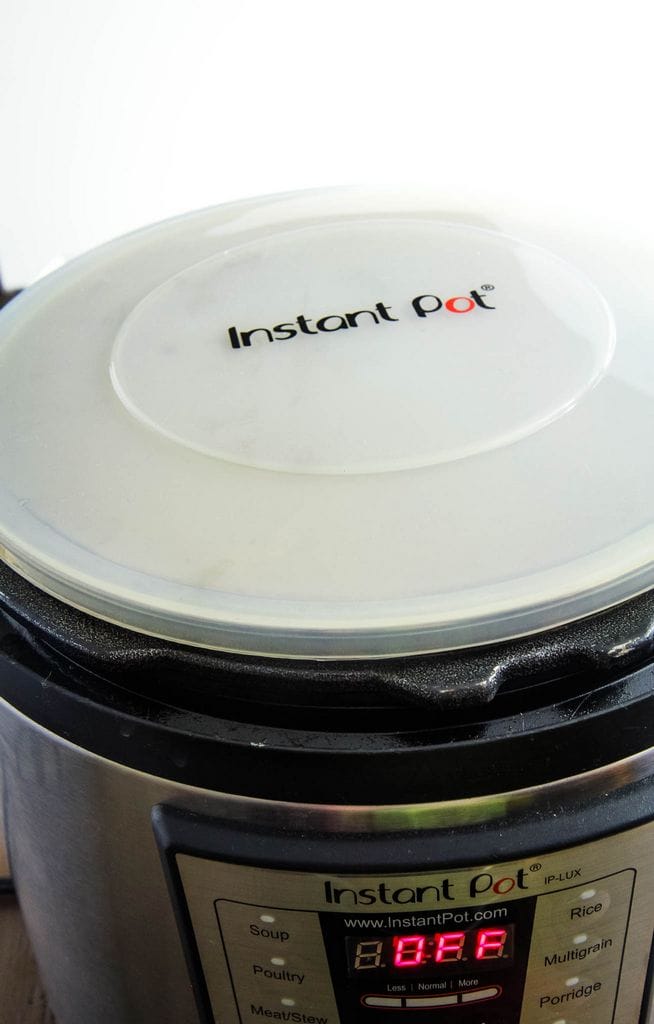
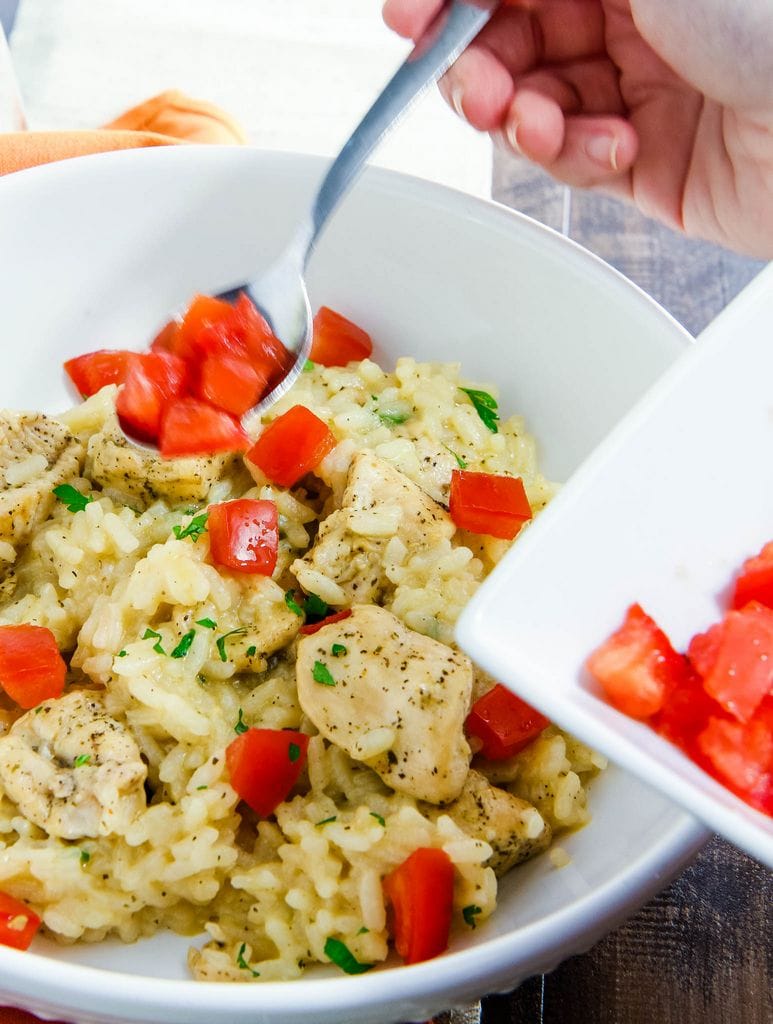
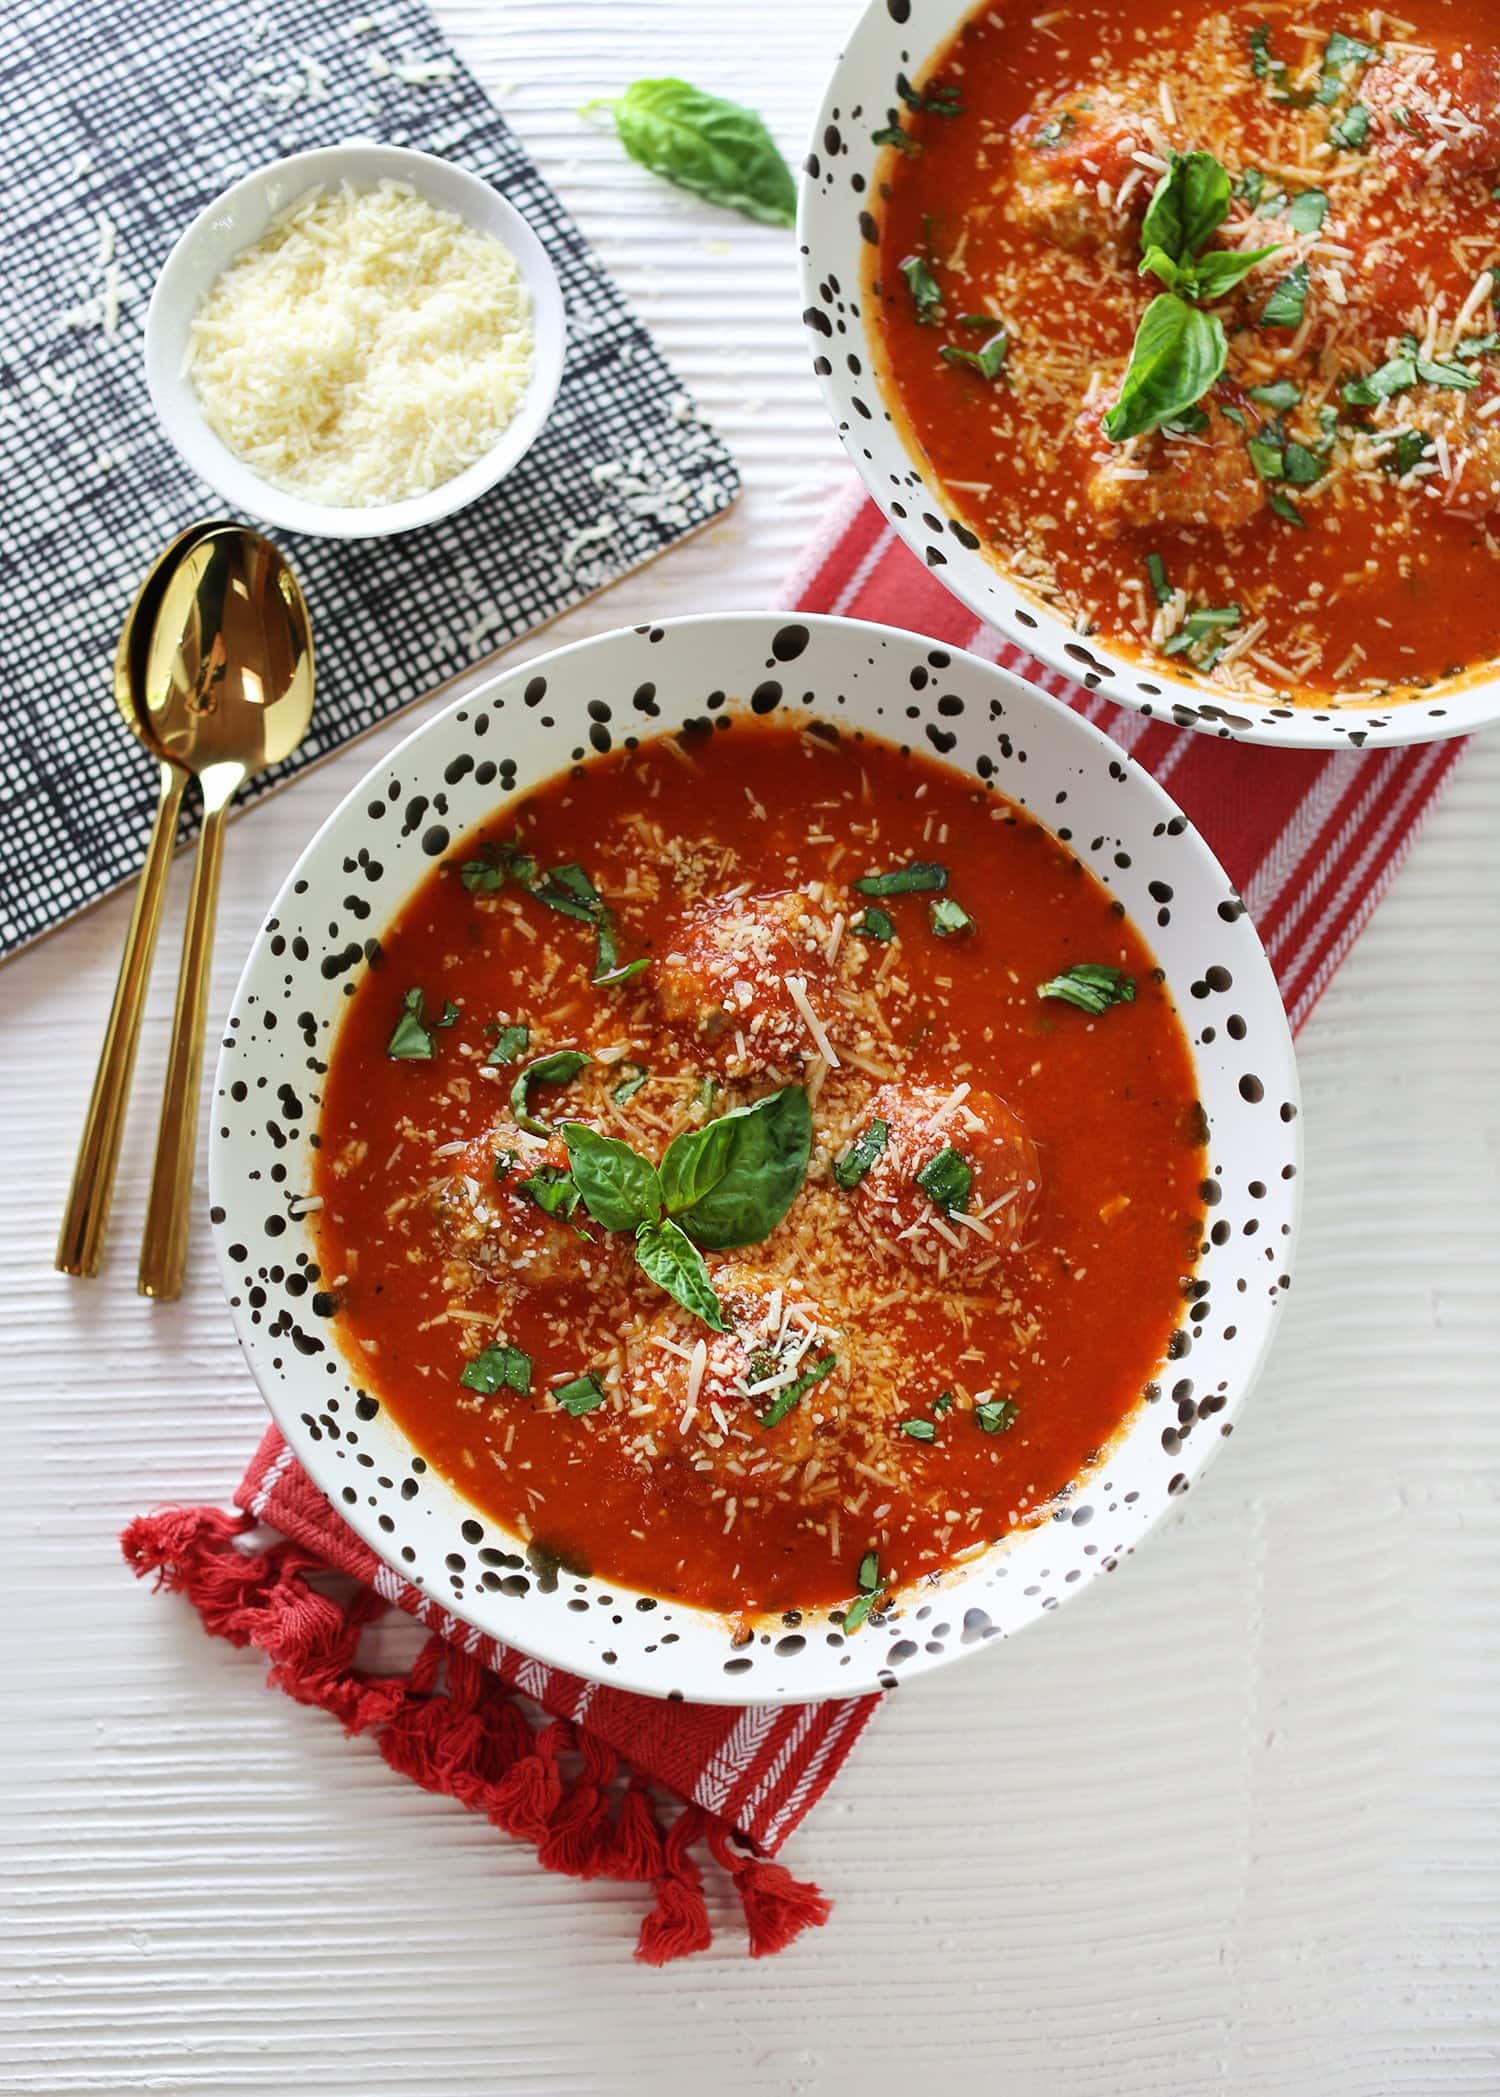
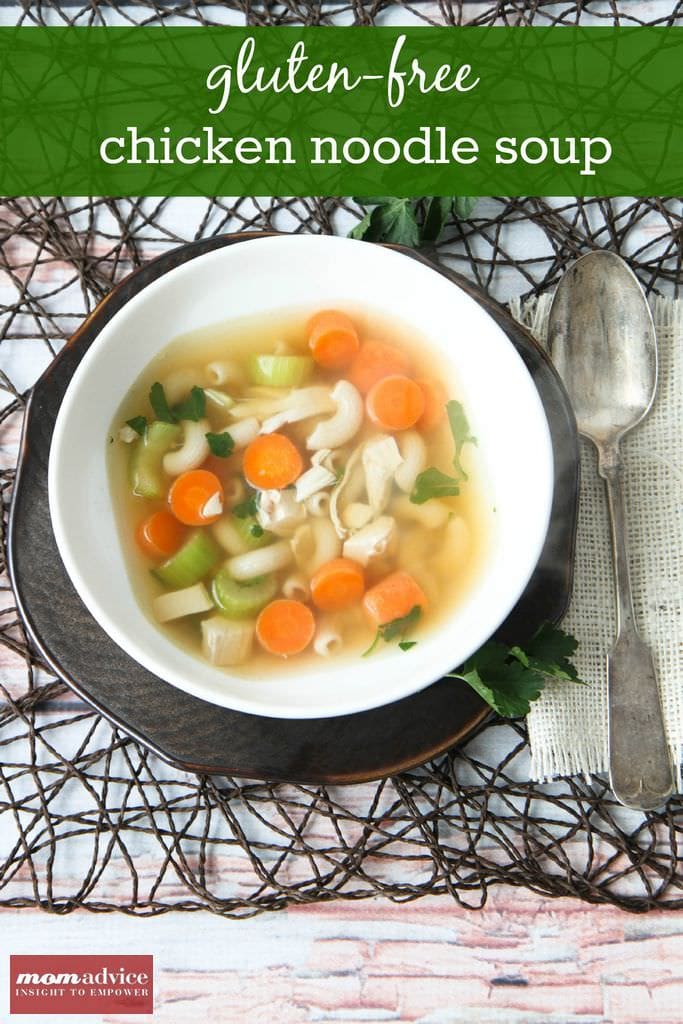
Risotto can be a very labor-intensive dish, but it doesn’t have to be with a pressure cooker. Today I’m sharing my step-by-step tutorial for creamy gluten-free risotto, made in your Instant Pot. Ditch the boxed mac and cheese for this easy weeknight dish.
Have you ever made risotto before? After our trip to Italy, I was so inspired to replicate this dish when we got home. Of course, I had no idea what a gift of love a bowl of risotto is.
One pot holds your warmed broth and the other is where you stand and stir until your arm falls off.
Maybe I’m being dramatic?
It’s not the first time.
This dish really does need a lot of babysitting so that’s why I was thrilled to discover that risotto could be made in your pressure cooker with very little effort and all the reward.
Honestly, I have made this dish almost weekly since we got our pressure cooker. If I am stumped for a good dinner this dish always comes in for the dinner save.
Risotto recipes are a great way to use up produce items, put shellfish to work, add any leftover chicken, or just load it up with parmesan cheese.
After making this for YEARS at our house, it’s time to share my electric pressure cooker secrets.
No more standing over a stove top, friends!
You can present this dish with all the love and almost none of the stirring.
As Ina would say, “How bad could that be?”
Let’s start with a few frequently asked questions on pressure cooking risotto!
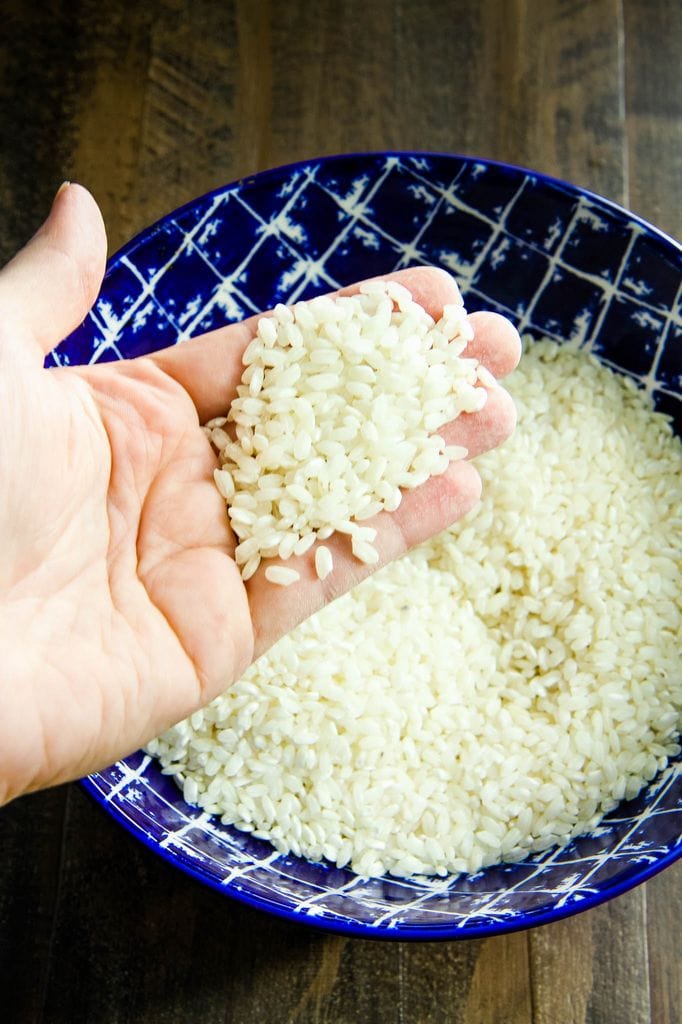
What Type of Rice Is Risotto Rice?
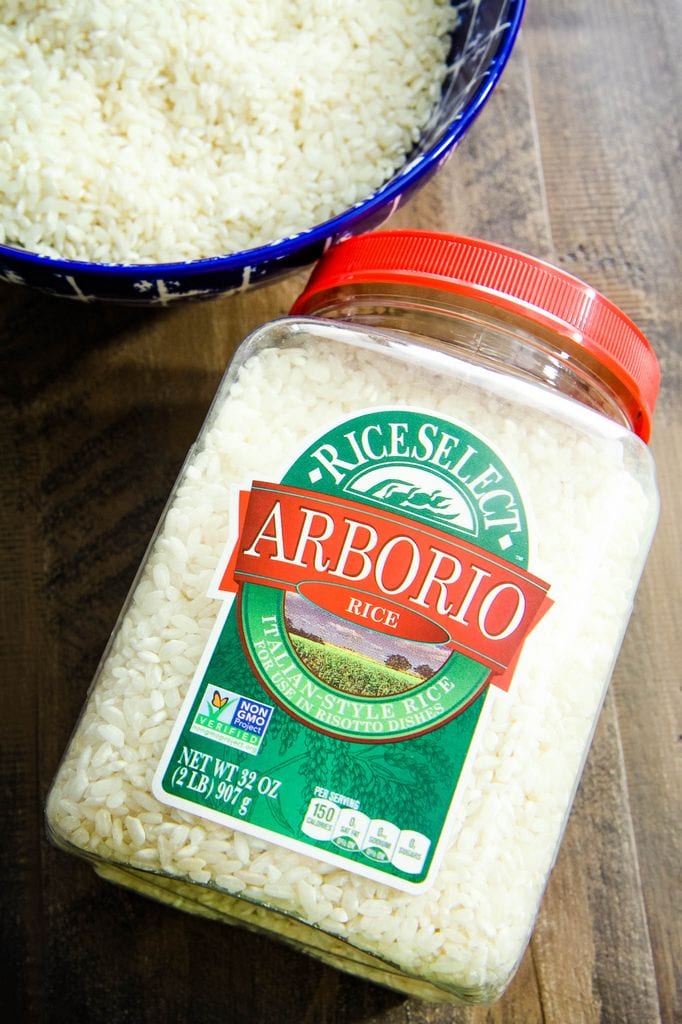
Risotto is made from Arborio rice and can be found, typically, in the same section as the other rice varieties or in the international foods section of your grocery store.
The appearance of arborio is different because it has a shorter, fatter, and more oval-shaped appearance.
Long-grained rice has to go through a lot of milling, but arborio rice isn’t as processed and that’s how it is able to retain its natural starch content.
When this starchy rice is agitated with stirring, it releases those starches and adds to the creamy consistency.
It also draws in liquid, like a sponge, and a pound of this can soak in as much as eight cups of liquid as it is cooking.
Can This Pressure Cooker Risotto Recipe Be Made Without Meat?
Today’s tutorial does have chicken in it, but it is definitely not required.
Personally, I love to roast medium shrimp in my oven (just toss them with a little olive oil, salt, pepper, and Old Bay) and roast them on a baking sheet at 450 for 6-8 minutes. Once they are done, they are perfect for risotto topping.
If you want to keep this dish vegetarian, substitute the chicken stock with vegetable broth and omit the meat.
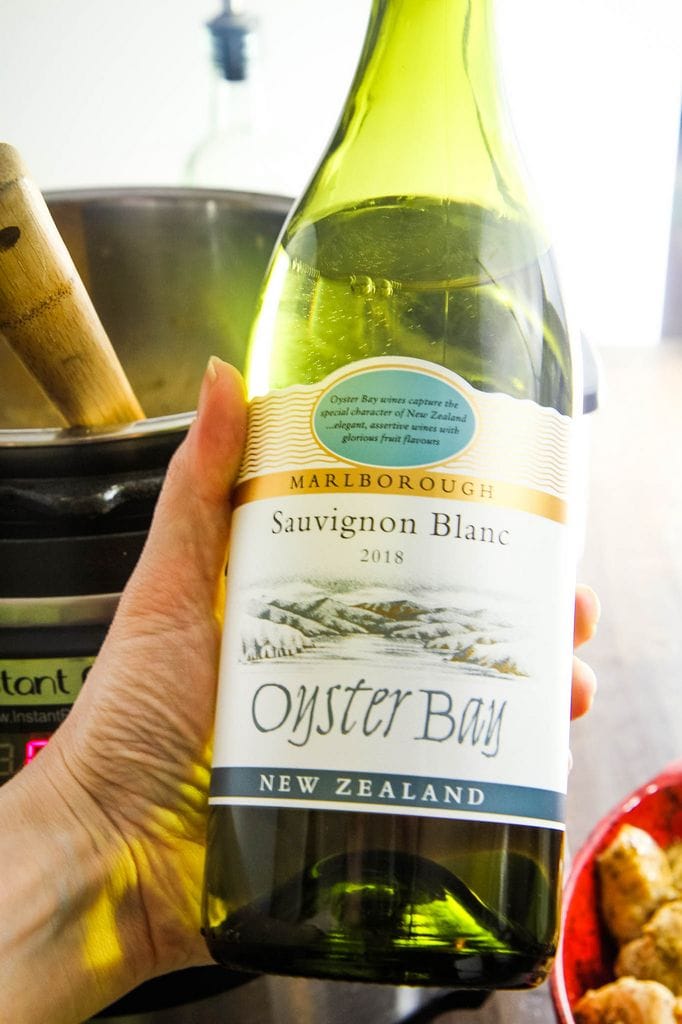
Can I Leave the Wine Out of This Risotto Recipe?
I am loving that they now carry mini bottle or mini boxes of white wine, if you want to save money (and not have to throw out wine).
This has been a great cooking option for a lot of people in my life.
Don’t feel like you have to add this step in, although I do think it makes the flavors more rich and complex.
Personally, if you skip the wine, I would balance it with a little acidity. Hit the broth with a squeeze of lemon or a little red wine vinegar from the pantry.
I also love to add an additional acidic component, to my risotto, with a diced tomato finish.
What Kind of Wine Should I Use for My Instant Pot Risotto?
I am not snobby about wine so I usually rely on a very fine box of Black Box Chardonnay. I love a sauvignon blanc, pinot grigio, or chardonnay in my risotto.
Just steer of any wines that are super sweet. You are looking for one with a dry finish.
How Can I Save Money on Wine for My Dishes?
I’m a huge ALDI wine fan so I *do* recommend you check that out. I can usually find some pretty incredible wine for under $10.
Recently, we placed an order with Wine Insider and used the wine from one of their white wine packages. Here’s a $25 off of a $50 wine order coupon if you want to shop there. I found the price to be more than fair for the value.
What if I Don’t Like Onions?
I hate, hate, hate onions so I completely understand. I am showing you how to prepare this dish with shallots, a very mild onion.
Personally, I skip the onions. I just add the rice to the olive oil and move right on to the next step, once the rice is translucent.
The Best Instant Pot Risotto Tutorial Step-by-Step
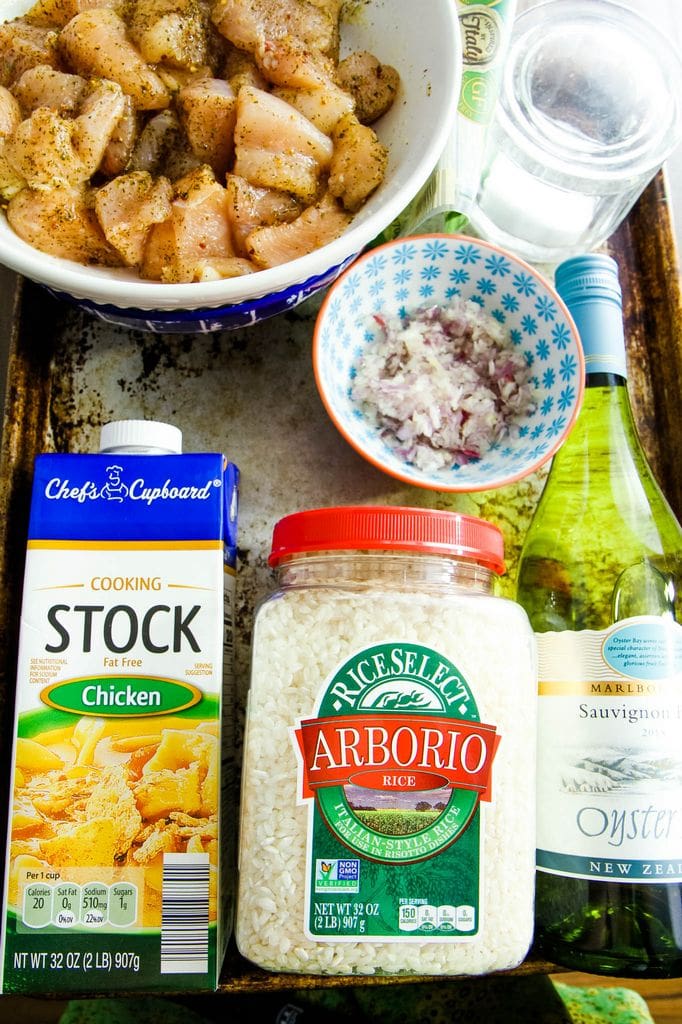
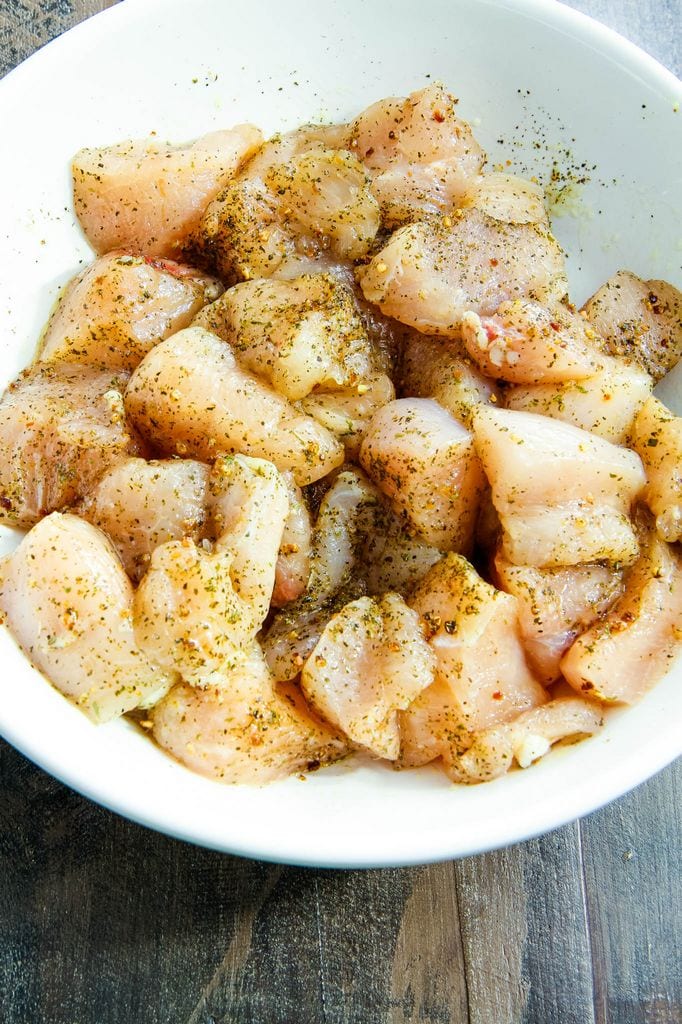
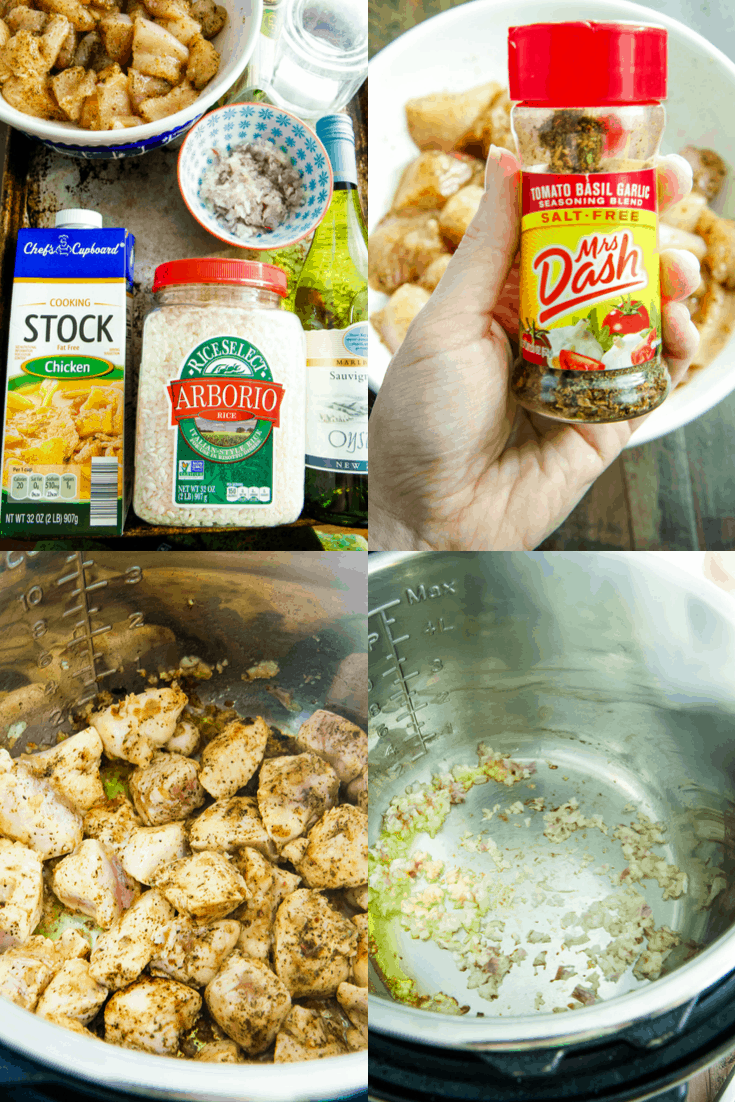
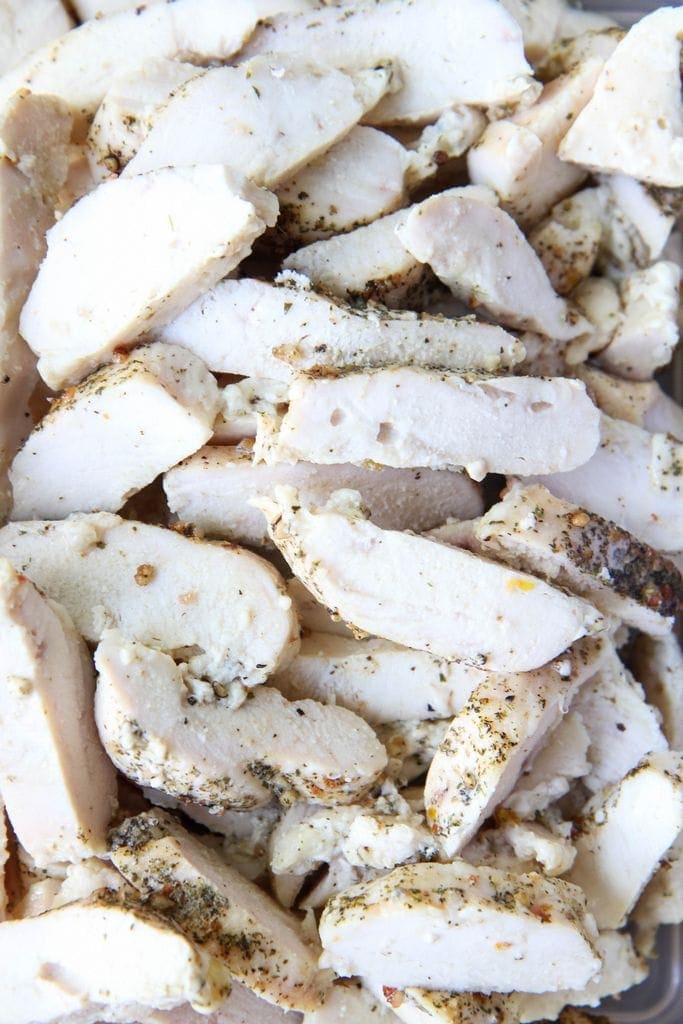
Chop your chicken into bite sized pieces.
Toss with a little olive oil, salt, pepper, and any of your favorite seasonings.
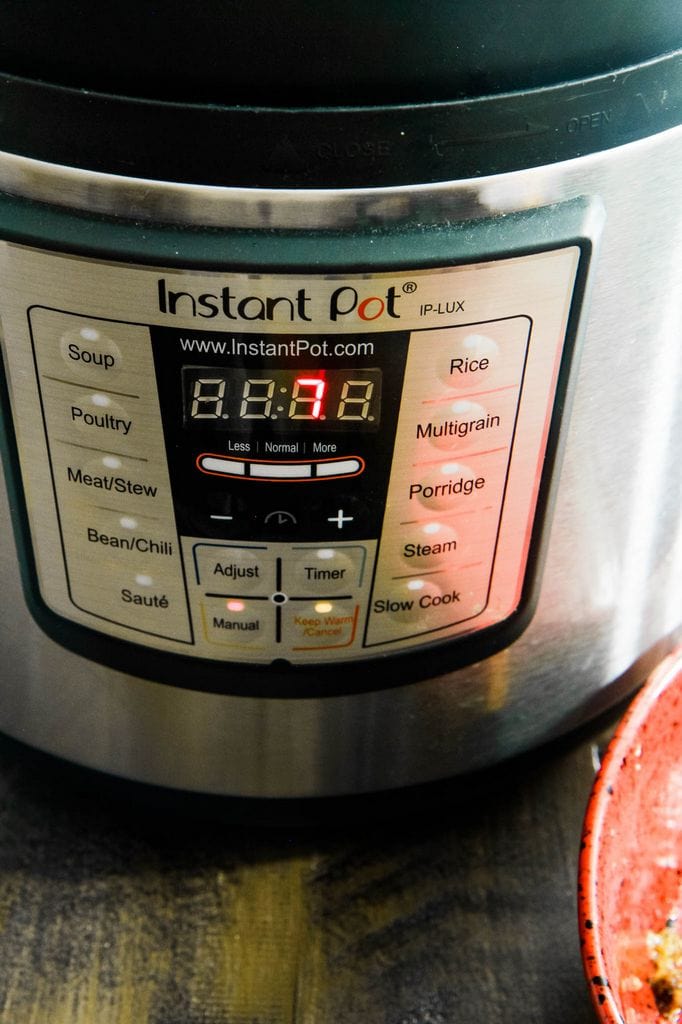
Turn on your pressure cooker and select the SAUTE setting and adjust it to HIGH.
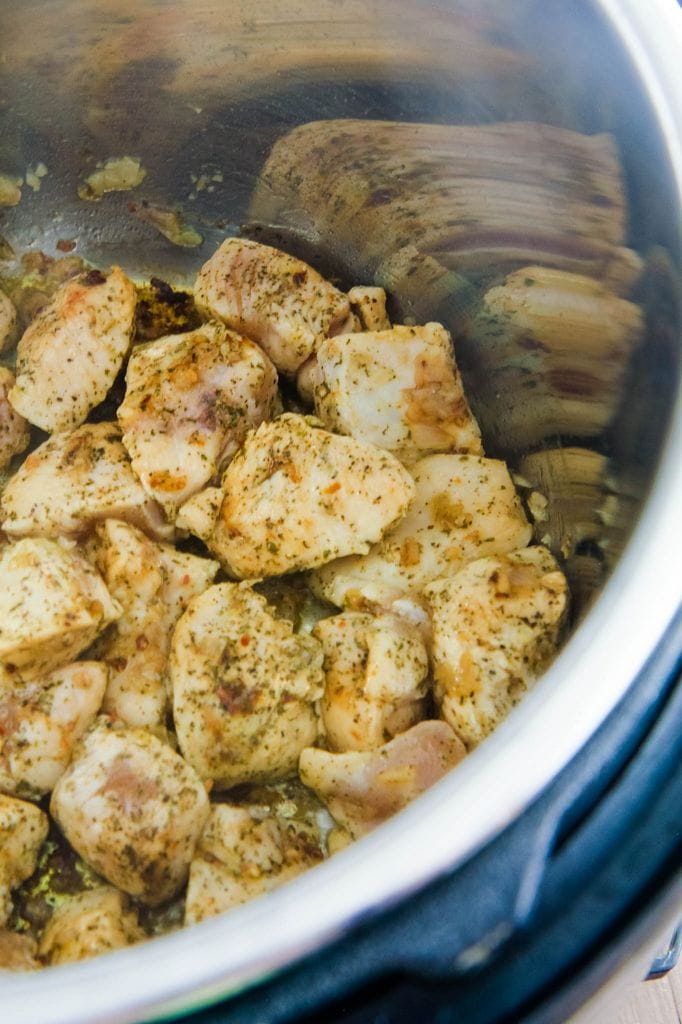
Add your olive oil and brown your chicken on each side (you are not cooking this through). Remove the chicken with a slotted spoon and set it aside.
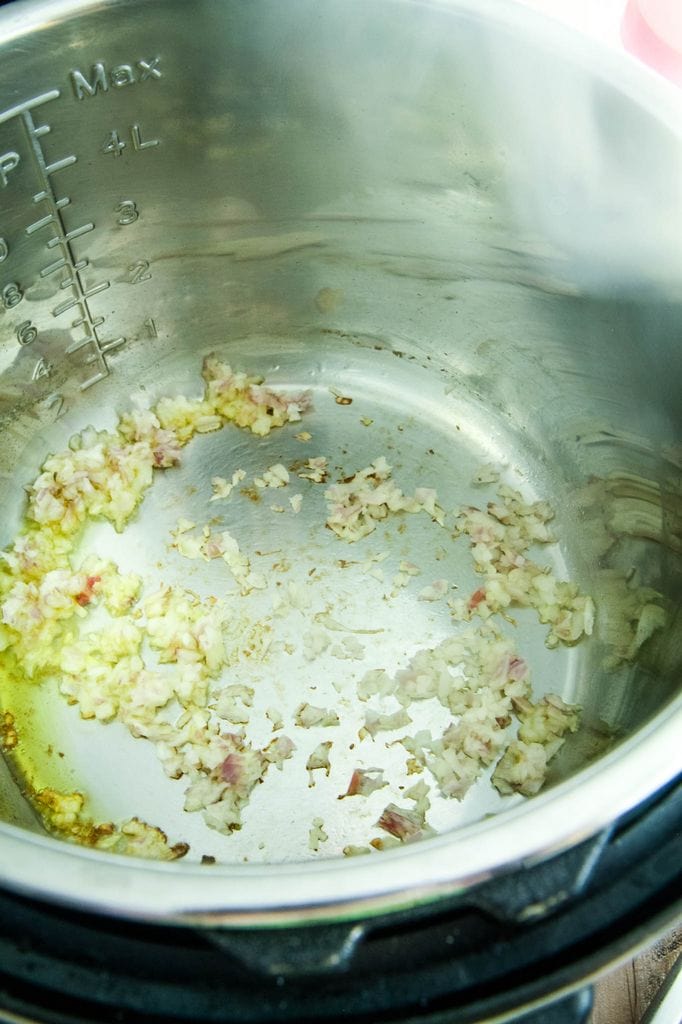
Add a little more oil and saute your onions for a few minutes. Be careful to not let them burn.
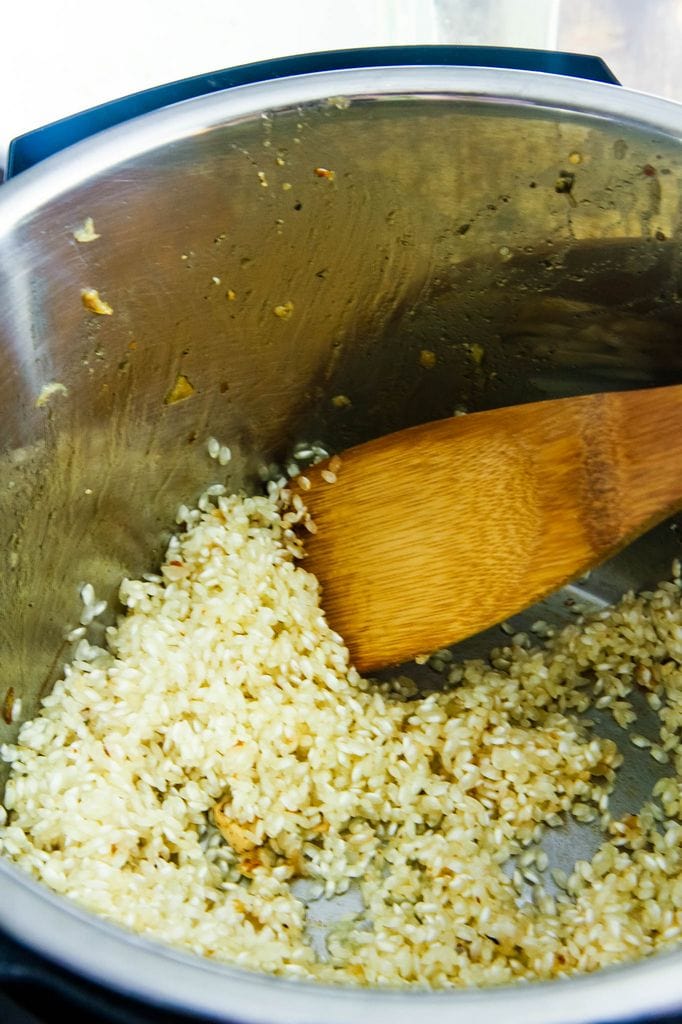
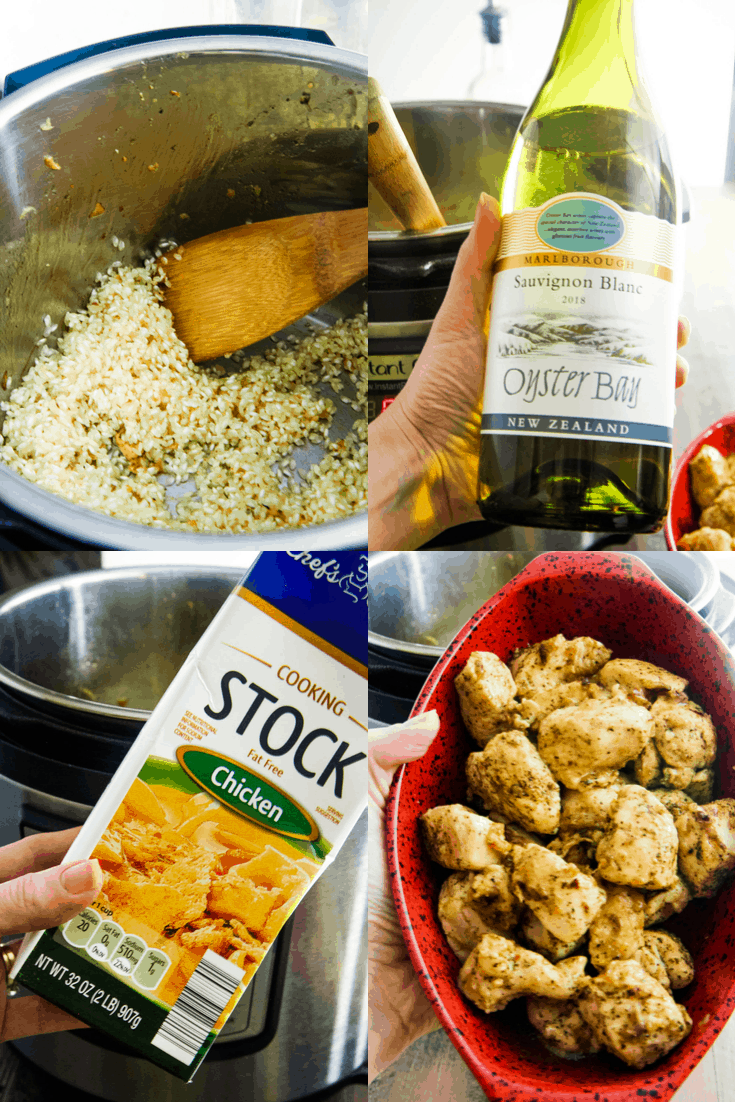
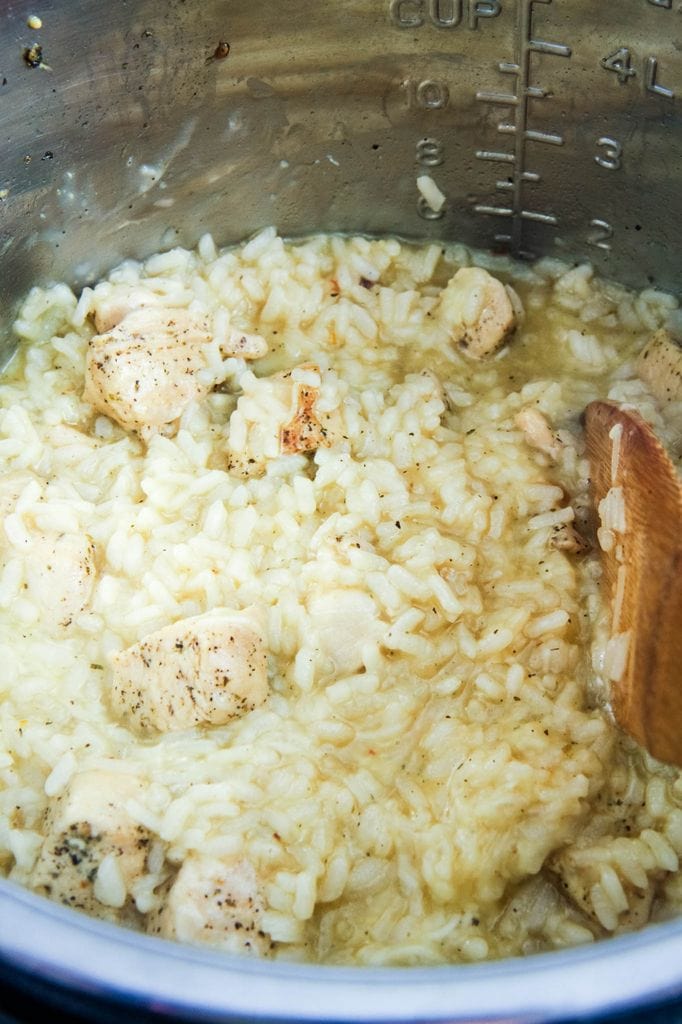
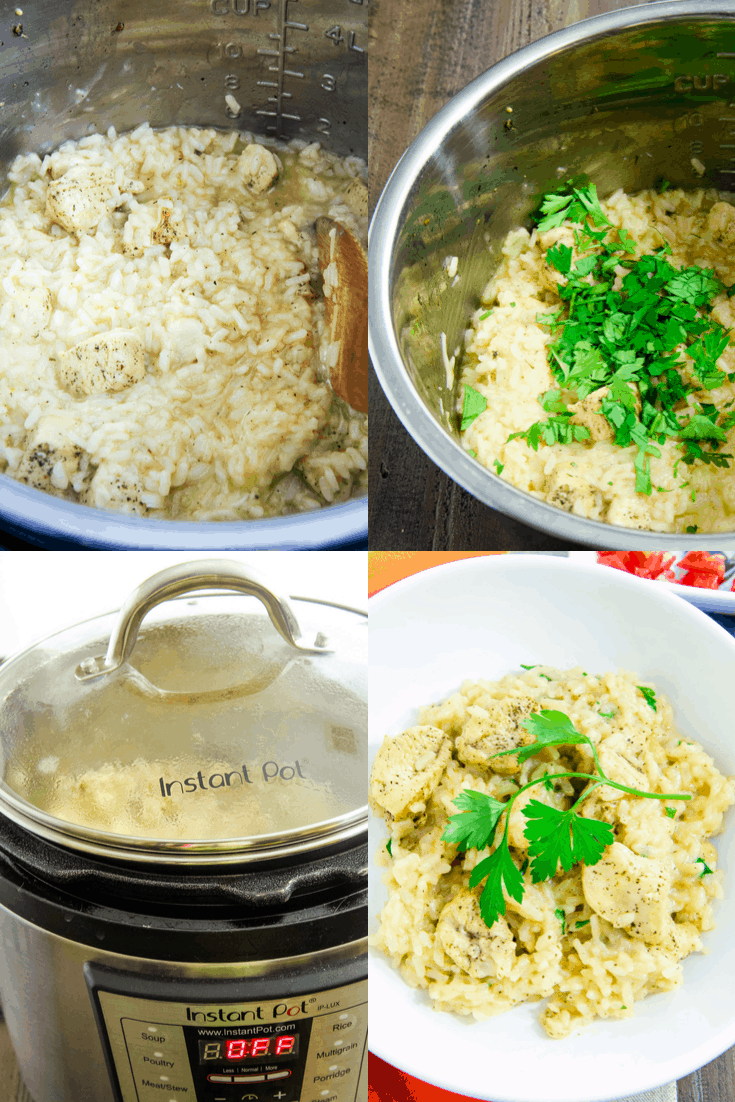
Now, add your rice and stir constantly to help agitate out the starches. It will go from a bright white to a translucent shade. When you see it is starting to look translucent, you can add your wine.
Add the wine and keep stirring like a crazy lady to get it to absorb all of the wine into the rice. Once all of the liquid has been absorbed, turn OFF the pressure cooker.
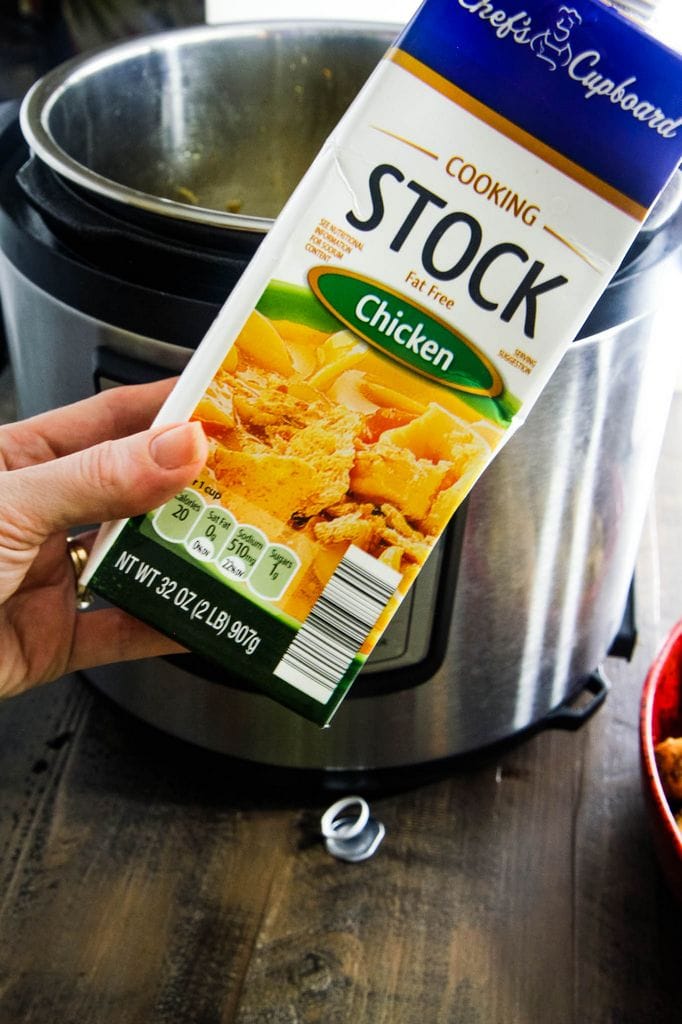
Add four cups of chicken stock, a 1/2 cup of water, salt, and pepper, to the Instant Pot.
If you have issues with your pressure cooker coming to pressure, this is a must replace item. Also, be sure to check that your vent is in the sealed position before setting it.
Press the MANUAL button and set it to 7 minutes high pressure.
Once it is finished, do a QUICK RELEASE and open the lid. You should see that this is not fully absorbed and will look soupy.
This is good.
I promise.
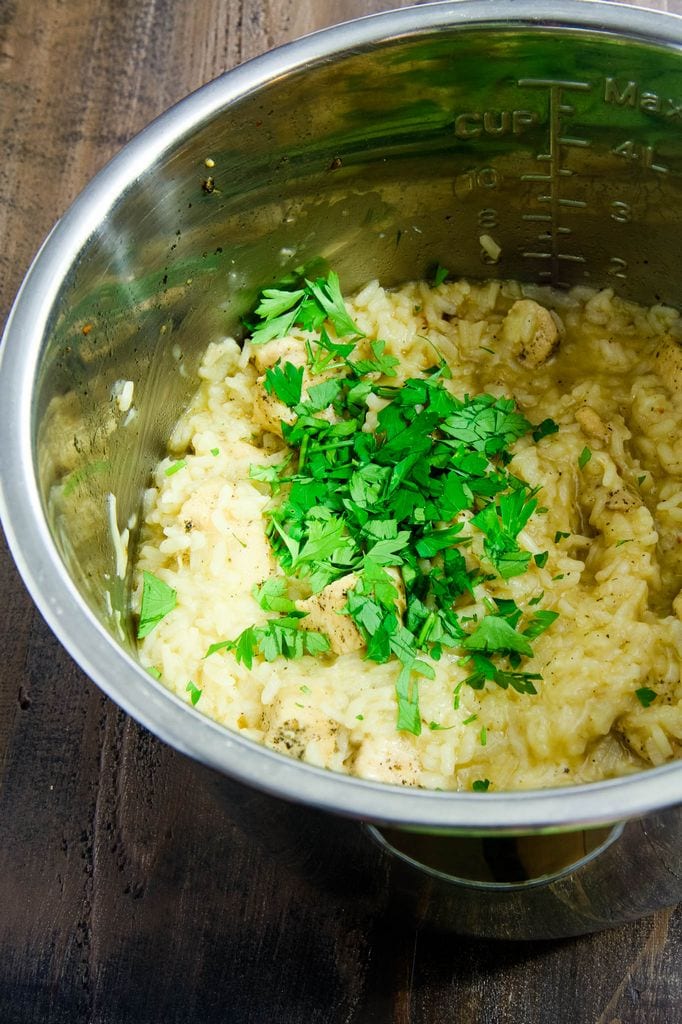
You will just stir in your parmesan cheese and give it a few minutes to set up.
After a few minutes, you should have just the consistency you are after.
Some people love to put a pat of butter in with the cheese.
I haven’t found it to be that necessary after the pressure cooker has done its work.
I hope you love this recipe as much as our family.
Remember, this is just the start of a beautiful risotto relationship.
You can make this your own by switching out the protein, add mushrooms or peas, and try different cheeses.
The Best Instant Pot Risotto (Step By Step)
Recipe Type: Main Dish
Cuisine: Italian
Author: MomAdvice.com
Prep time:
Cook time:
Total time:
Serves: 6 servings
Risotto can be a very labor-intensive dish, but it doesn’t have to be with a pressure cooker. Today I’m sharing my step-by-step tutorial for creamy risotto, made in your Instant Pot. Ditch the boxed mac and cheese for this easy weeknight dish.
Ingredients
4 tablespoons olive oil (divided)
1/2 cup finely chopped shallots (I omit)
1 pound chicken breast (diced and seasoned)
2 cups risotto rice
1/2 cup dry white wine
4 cups chicken stock
1/2 cup water
1/2 cup grated parmesan cheese
salt and pepper to taste
Parsley & Diced Tomatoes (optional- for topping)
Instructions
Finely chop your shallots.
Dice and season your chicken.
Turn on your Instant Pot to the SAUTE function. Adjust to high.
Add two tablespoons of olive oil to the pot (once it is hot) and brown your chicken (do not cook through). Remove the chicken with a slotted spoon.
Add two more tablespoons olive oil to the pot. Toss in your shallots and let them cook for a couple of minutes.
Add your rice, stirring frequently and letting it cook until it is translucent.
Once the rice is translucent, add your white wine and stir vigorously to agitate the rice. Once the wine is fully absorbed, turn off your pressure cooker.
Add 4 cups chicken broth, 1/2 cup water, salt and pepper to taste (don’t get too aggressive with the salt since we are adding cheese).
Cover with lid and lock into position. Press the MANUAL button and do this high pressure cook for seven minutes.
Once it beeps, do a QUICK RELEASE. Give the rice a stir and add in your cheese. Let the rice set for a few minutes to absorb the liquid.
Serve in bowls and enjoy every dang week.
3.4.3177
Looking for more great pressure cooker recipes? Here are a few of our most popular recipes on the site!
A recipe for homemade gluten-free breakfast rolls with cranberries and an orange-infused sugar swirl with icing that drips between the cracks and glazes deep into the seams.
Last winter my mother-in-law was diagnosed with celiac disease.
As she faced uncertainty in feeding herself after a lifetime of from-scratch baking with wheat flour, I wanted to show her how this wheat-free life could taste delicious, too.
My very first step was to hand off a bucket and dough whisk and a collection of gluten-free recipes.
I talked to my friend, Zoe, who was up to her eyeballs in recipe testing for her new gluten-free cookbook, and I tried as much as I could to encourage my mother-in-law, Kathleen, to get back into the habit of baking with new flours and textures.
When visiting for the holidays, Kathleen always had breakfast breads waiting for us as we tumbled out of bed to the table.
These rolls, filled with a citrus-filled sugar and a bit of spice, are for her this holiday season.
A gluten-free breakfast bread that will warm the house and make your tongue sing.
The book makes a wonderful gift this season for any gluten-free family member or friend looking to reclaim a comforting breakfast bread or just to have a baguette to dip into their soup.
Gluten-Free Cranberry Orange Morning Buns
Yield: 6 servings
Prep Time: 20 minutes
Cook Time: 35 minutes
Additional Time: 5 hours
Total Time: 5 hours55 minutes
Gluten-free breakfast rolls with cranberries and an orange-infused sugar swirl with icing
Ingredients
For the Dough
2 cups Gluten-Free All-purpose Flour Mix
4½ cups cornstarch
2 teaspoons xantham gum or psyllium husk
1 tablespoon granulated yeast
1 tablespoon kosher salt
2¼ cups warm milk (100ºF)
4 large eggs
1 cup honey
1½ cups unsalted butter, melted
1 tablespoon vanilla extract
For the Sugar Swirl and Glaze (triple to use all the dough at once):
½ cup granulated sugar
1 orange, juiced and zested
½ teaspoon cardamom
⅓ cup dried cranberries
⅓ cup confectioners' sugar
Instructions
In a stand mixer, whisk together the flour, cornstach, xantham gum, yeast, and salt. Add in the milk, eggs, honey, melted butter, and the vanilla with the paddle attachment. Allow the dough to rise, lightly covered, for two hours.
Place the risen dough in the refrigerator to chill for at least two hours and up to five days.
When ready to make the rolls, remove the dough from the refrigerator and dust with rice flour. Split into thirds. Take one-third of the dough to make rolls. The remaining dough can be held in the refrigerator or frozen for up to 3 weeks until ready to use (or you could make it all into rolls for a party).
Lightly flour your work surface with rice flour. Press the dough into a ¼" thick rectangle. Mix together the ½ cup granulated sugar, orange zest, and the cardamom. Sprinkle evenly over the dough, sprinkle the cranberries on top of the sugar. Roll the dough into a log, pinching the seam closed.
Cut the log into 2" pieces and arrange in a greased baking dish. (I used a 4-quart baking dish.) Loosely cover with plastic wrap and allow to rest for 1 hour.
Preheat oven to 350ºF. Bake for 30-35 minutes, until rolls are golden brown.
To glaze, mix together the confectioners' sugar and 1-2 tablespoons of orange juice until a smooth consistency is reached. Drizzle over the warm buns.
Notes
Brioche dough and flour from Gluten-Free Artisan Bread in 5 Minutes a Day by Jeff Hertzberg, M.D., and Zoe Francois.
Gluten-Free All-Purpose Flour Mix
Yield: 13.5 cups
Prep Time: 5 minutes
Total Time: 5 minutes
Ingredients
6 cups white rice flour
3¼ cups sorghum flour
1¾ cups tapioca flour or starch
1¼ cups potato starch
¼ cup xantham gum or psyllium husk powder
Instructions
Whisk together all the ingredients until thoroughly combined
Don’t miss these other great ideas from MomAdvice.com:
This ghost cake is a fun and spooky Halloween cake that even your kids can make it! Using store-bought ingredients, you can have a Halloween treat in minutes.
If you are anything like me, you are already on the hunt for easy Halloween ideas!
Today’s easy food craft is for a festive Halloween cake that you can whip up quickly to celebrate with your kids, fellow trick-or-treaters or to add to your Halloween party spread.
This can be made for under $20 and NO COOKING is required!
Can I get an AMEN?
What if I Don’t Want to Spend $20 on Halloween Cake?
As you know, I’m pretty darn frugal, so I want to share a tip that might help you at your store.
Be sure to check the rear of your store (over by the dairy section usually) to see if there are any reduced to sell bakery items on a rolling cart.
It is there where I often spy prepared cakes and doughnuts that are perfect for sharing with guests or for rounding out a meal together with friends.
If you check there first, it is possible you might be able to score these treats for a fraction of the price that I paid.
I promise to not be jealous.
How Can I Make This Treat Gluten-free?
Welp, you know that gluten-free cake isn’t going to be an affordable treat.
Oh, the price ding on removing wheat!
Ouch.
Did you know that you can purchase gluten-free donut holes in the freezer section of many supermarkets.
Is it just me or are you scared to pay a million dollars for gluten-free snacks because you got burned on a past purchase?
How Can I Save Money at My Local Gluten-free Bakery?
If you aren’t using Groupons, you are missing out on some free money. Anytime that we eat or do anything local, we check to see if there are any deals on things like this. You just never know when the new up and coming bakery might be looking for a fresh way to promote their business.
What Can I Substitute for Cake if I’m Gluten-Free?
Gluten-free cakes can be expensive though so I recommend you bake a cake yourself. I have some super easy gluten-free cake recipes to share with you that might just make the most perfect cakes.
I promise, these gluten-free cakes are as easy to put together as any other cake because I rely upon cake mixes for their creation.
1 container of powdered sugar doughnut holes (I had enough in an assortment pack)
Roll of white tulle (over by the party/wedding favor supplies)
Black Decorating Icing small pieces cut off a stripe of candy corn, candy eyes, or small Halloween candy (like Mini M&M’s) for your eyes.
1 prepared cake
1 container of powdered sugar donut holes (I had enough in an assortment pack)
Roll of white tulle (over by the party/wedding favor supplies)
Black Decorating Icing (over by the cake decorating supplies/crafts), small pieces cut off a stripe of candy corn, candy eyes, or small Halloween candy (like Mini M&M’s) for your eyes.
Cookie Sticks(over by the cake decorating supplies/crafts)
1. On a rimmed cookie sheet, insert the cookie stick into your doughnut hole.
2. Cut out two squares of tulle, approximately the same size, and angle them slightly. Fold them over your doughnut hole. Secure with a little white twine, making sure to bring the tulle down snugly over the top of the doughnut hole to make a level surface for your piping.
3. Pipe two eyes and a mouth on your doughnut hole. I found that getting the icing a little warm helped make the piping easier so keep that in mind!
4. Stick your ghosts on top of your cake.
Done.
How easy is that?
This cake was such a hit and I loved that it adds a homemade touch to a store-bought treat!
As you know, I’m pretty darn frugal, so I want to share a tip that might help you at your store.
Be sure to check the rear of your store (over by the dairy section usually) to see if there are any reduced to sell bakery items on a rolling cart.
It is there where I often spy prepared cakes and doughnuts that are perfect for sharing with guests or for rounding out a meal together with friends.
If you check there first, it is possible you might be able to score these treats for a fraction of the price that I paid.
I promise to not be jealous.
I look forward to sharing more fun Halloween ideas with you in the upcoming month and hope you love this festive (and easy) treat idea!
Don’t miss these other great ideas from MomAdvice.com:
Blanket scarves are so trendy and an easy no-sew DIY to make for cold weather. Check out this diy blanket scarf tutorial and how to style your plaid blanket scarf with this easy tutorial. One trip to the fabric store for flannel plaid fabric and you will have everything you need to make a blanket scarf of your own…no sewing machine required!
All of these fabulously fashionable women were rocking these gorgeous oversized scarves, but they were out of my price range or lacked the fullness & beauty that was captured online.
I mean, who couldn’t get behind the idea of wearing a blanket and calling it an oversized scarf?
Count Me In!
I decided I wanted to make some for my minimalist wardrobe because it would add so much. Did you know you can make a blanket scarf with no sewing skills required?
Let’s begin by taking a peek at the coveted $44 Zara scarf (that sells out in minutes, not kidding).
I want to zoom on in it so we can take a closer look.
The thing I want you to see is that the edges are frayed on their version too.
Guess what?
You can achieve that with a little flannel and pulling.
The best part is that this version will cost you quite a bit less than $44. I am going to make a big stack of them to show you and then I am going to show you some fun ways to tie them.
The first thing you will need to do is shop for your fabric which is so much fun. I went to a few shops to check out fabric and ended up finding it at Jo-Ann Fabrics.
If not, that same link will provide you a 40% off coupon. You will DEFINITELY want to use this because it makes these scarves budget-friendly. Don’t forget your coupons.
Head over the Fashion Flannel…at least that’s what they call it in Mishawaka (oh-la-la!).
Select your favorite patterns, tell them the amount you need, have them tell you they don’t have that much on a bolt, go grab another one, try again… Be annoyed.
Decide to do two sizes because you want you what you want, that’s why you brought it up there.
Got it?
I am going to show you what a 2 yard scarf looks like and then I am going to show you what a 2.5 yard scarf looks like below.
I love them both for different reasons and what you can do with them. The price (with no sales or coupons) is $8.99 per yard. That’s why it is great to see the two version (for cost-savings) and also really great to bring a coupon to save a bit on the fabric.
I wouldn’t recommend anything more than that or your scarf will choke you and you will die from scarf blanket suffocation.
It will be all over the headlines.
They will be laughing at you in those ridiculous segments on the radio where they try to shock you at the stupidity of Americans. Your family will miss you. It would all be very tragic.
If you would prefer to shop online, I love to check over here for flannel by the yard. SO MANY great choices!!
How to Make a Blanket Scarf
1. Purchase 2-2.5 yards of flannel fabric (make sure the flannel printing is on both sides).
2. Using the patterned flannel edge as a guide (on the edges of the fabric), trim the edges of each side of your scarf with a pair of sewing scissors (these are what I have) to expose the cut edges.
3. Pulling out the vertical threads, on the cut side of the fabric, begin fraying the edges of the scarf.
You will discover that pulling out threads really creates a beautiful finished edge
If you are struggling to grab a thread, don’t be afraid to use a seam ripper.
Keep doing this until there are no loose threads and you have a beautifully frayed edge. Repeat on each side of the scarf. DONE!
This is what TWO YARDS of fabric looks like.
You can see that it has a lot of fullness, but is not as long or as much to tie or knot around.
Do you want to see how to tie it to look like this?
Okay then.
How to Wear a Blanket Scarf
How to Style a Blanket Scarf
How to Tie Your Two Yard Blanket Scarf
1. Fold the scarf in half, lining the edges up evenly. This creates more of a square blanket scarf versus doing it on an angle.
2. Make sure one end is shorter than the other and tuck it up over your shoulder.
3. Loop around once with the long end (or possibly twice depending on your neck size!).
4. Fluff and puff. Fluff and puff.
Here is the same size, just not puffed up so much. Seriously, cute stuff!
How to Tie Your 2.5 Yard Blanket Scarf
No need to reinvent the wheel to tie a blanket scarf…I just headed online to figure out a couple of fun ways to tie these longer blanket scarves.
This poncho style leaves the scarf folded making a smaller poncho version.
I also love draping this scarf just around my shoulders during the cold winter months. It makes the perfect shawl!
Regardless of the way you tie it, I love pairing these scarves with puffy vests, long sleeve shirts, and my favorite fall boots. Flannel blanket scarves are the perfect addition to your fall wardrobe.
I’m Petite & Want to Make a Smaller Version- What Can I Do?
I’m pretty petite, but I know big scarves aren’t for everyone!
Shave 6-7 inches off the width on a 2 yard version to make a more petite version of this scarf with a little less bulk or experiment with your own sizing by creating your own custom version.
Just cut, try on, adjust.
There are no wrong or right lengths- it is what fits YOU or your recipient best!
Wear it a scarf or wear it as a blanket. The possibilities for this cozy project are endless.
Love this scarf tutorial? Here are a few other DIY projects I’m proud of!
I hope you have a blast making these quick scarves for yourself or for holiday gift-giving. Check out this list of 54 handmade gifts you can make for the holiday season to inspire you even more! Happy crafting!
I love this piece on the 5AM club. I’m a big participant in this too!
I hope you enjoyed our notebook, a collection of gathered links to DIY crafts, food projects, thrifty ways to spruce up your home, and thoughtful reads. Nothing brings me more joy than to highlight other fabulous bloggers. Follow me on Pinterest for daily inspiration!
Please note, there are affiliate links in this post- thank you! xoxo
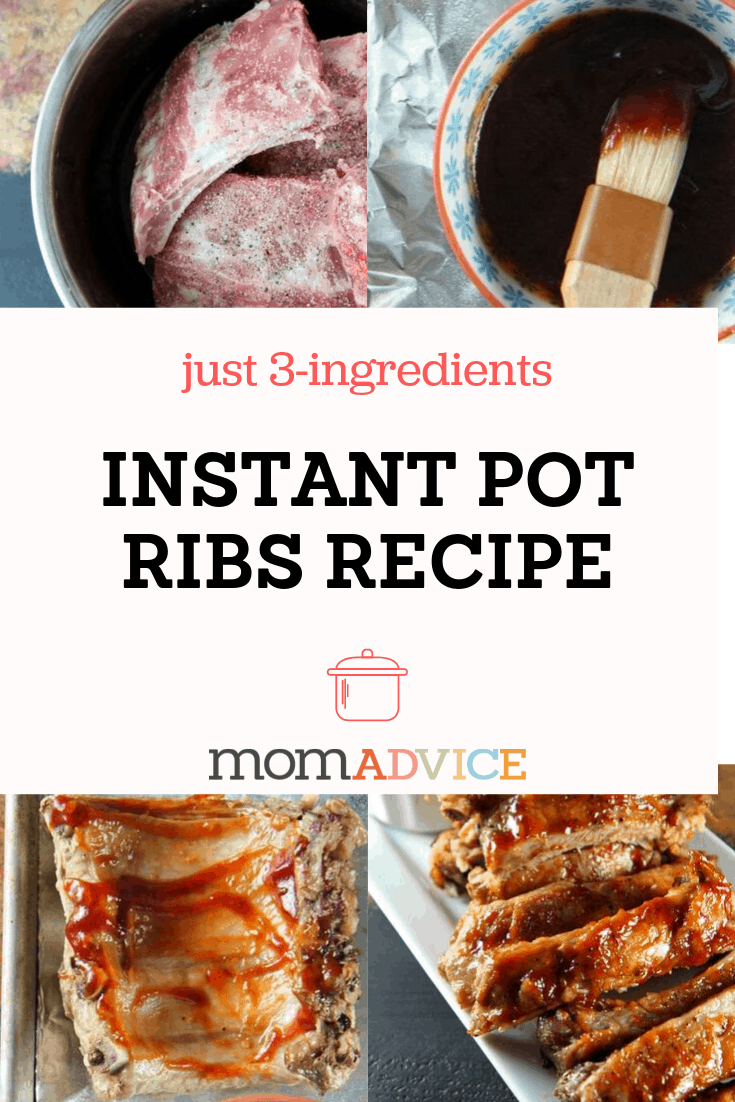
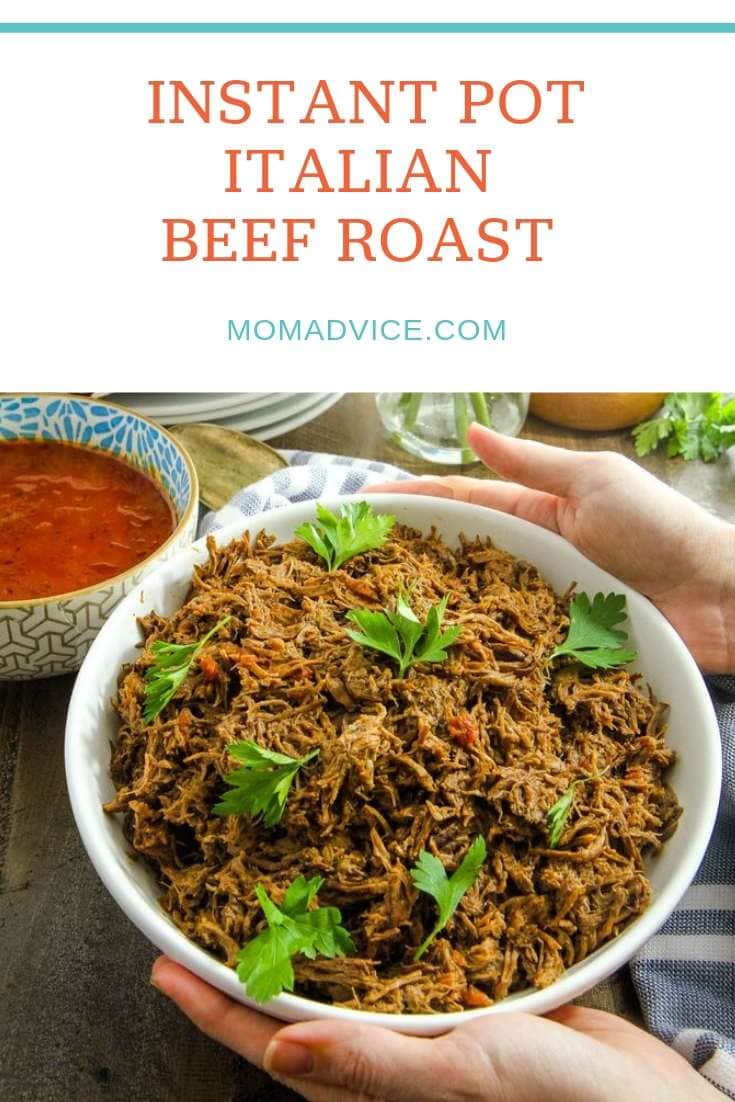
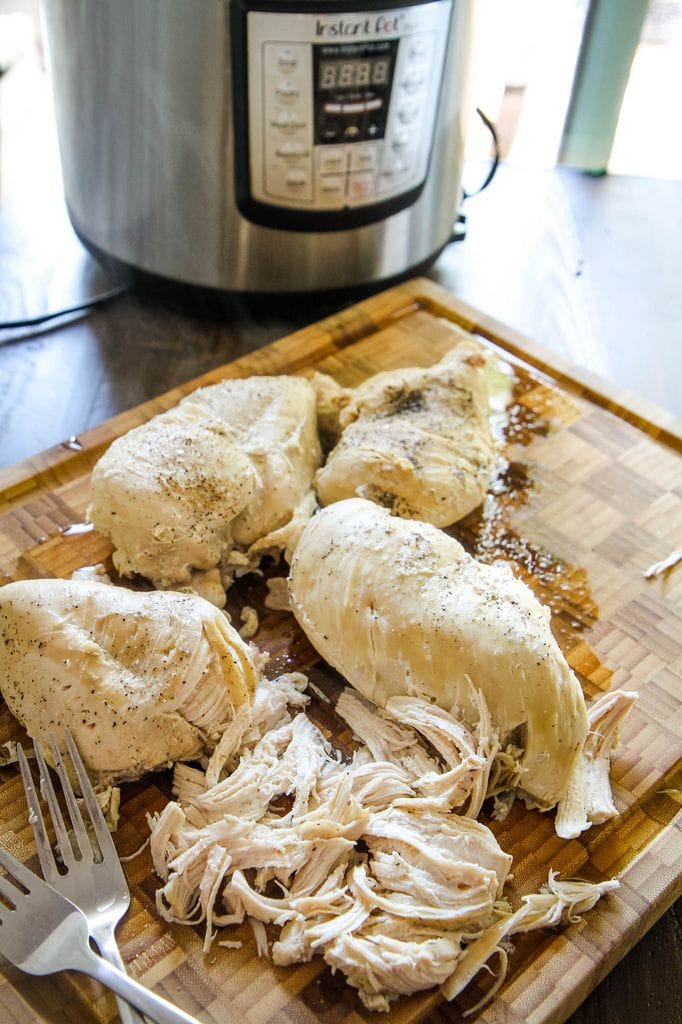
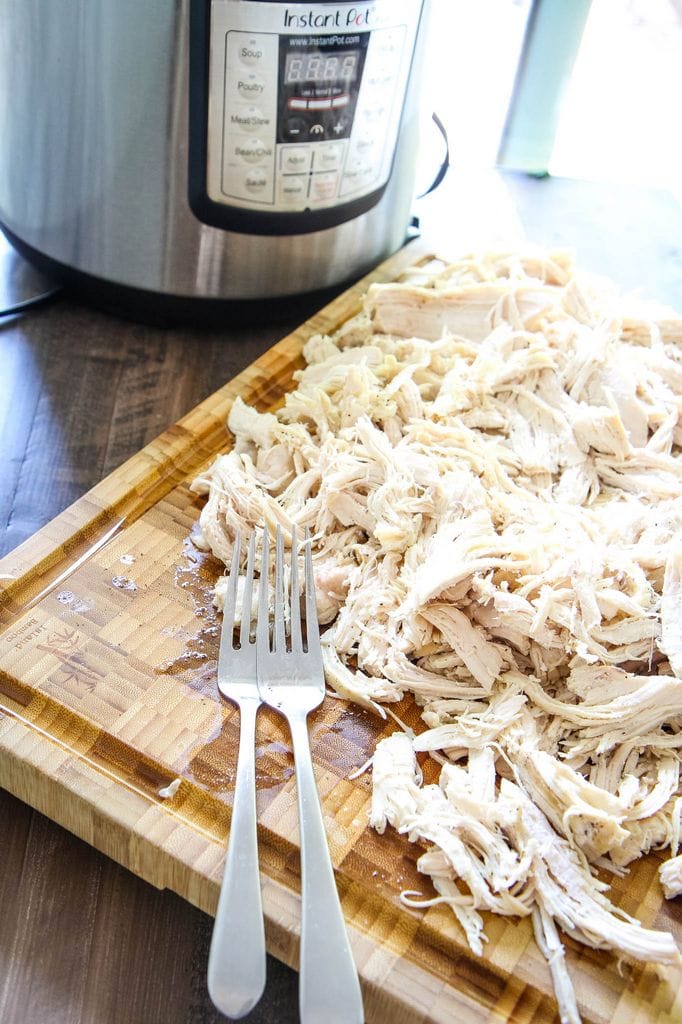
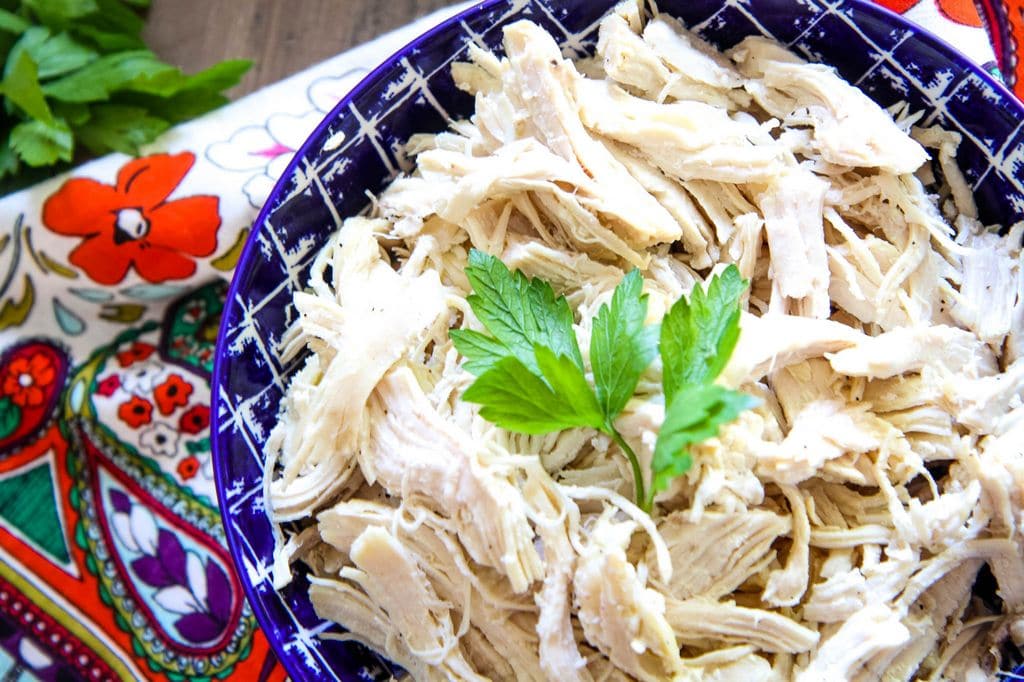
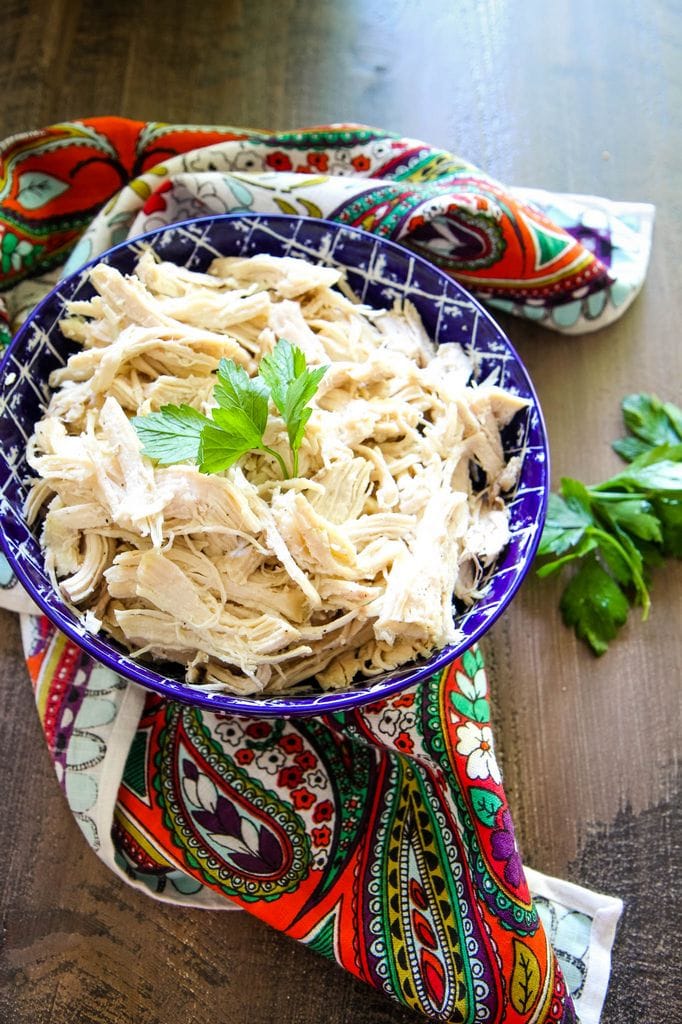
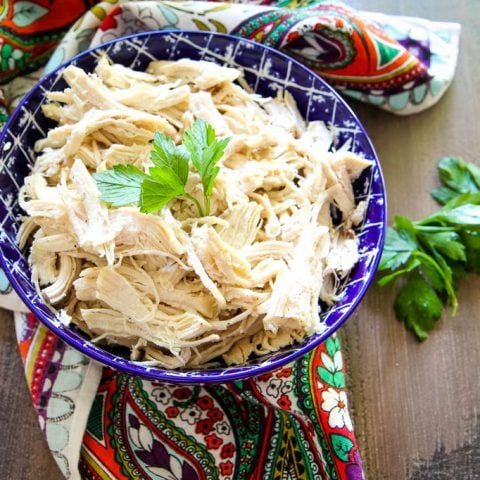
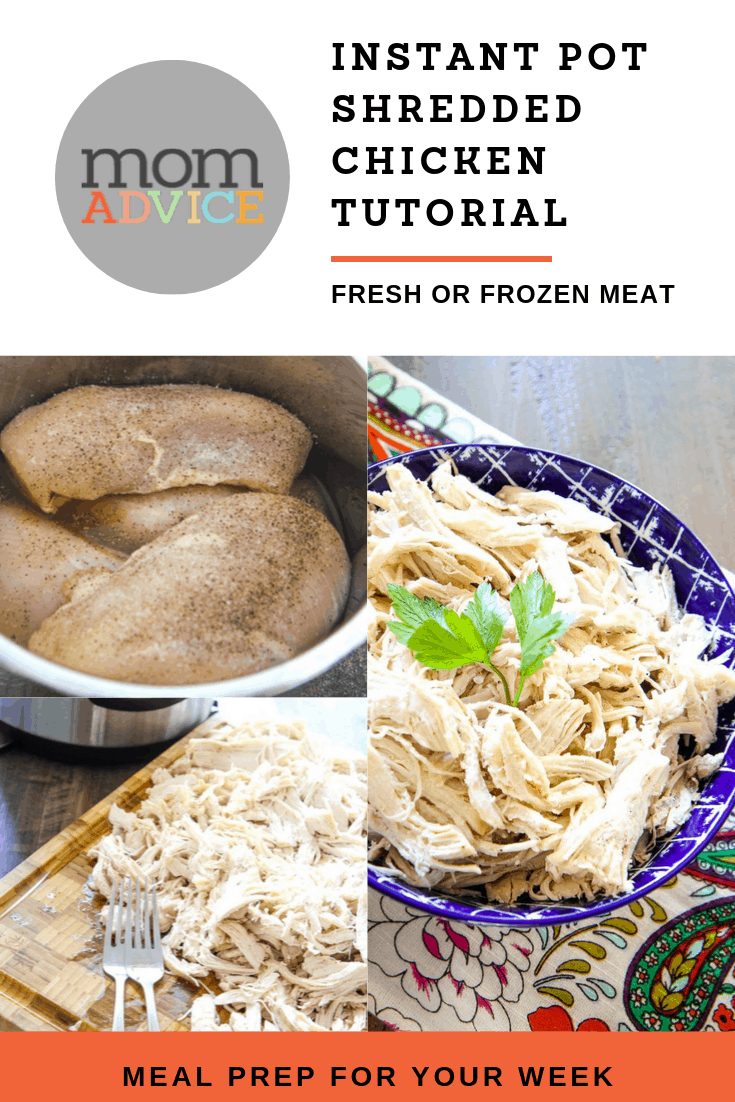
Did you know that you can make enough shredded chicken for a week of recipes with your pressure cooker? This Instant Pot Shredded Chicken recipe can be meal prepped for your week or frozen for future meals. Don’t miss this post filled with ideas for ways to put pressure cooked chicken to work in your kitchen!
I hope you all are as in love with your Instant Pot as much as me. Our pressure cooker continues to be my favorite gadget and I’m excited to share more family recipes with you.
Today I wanted to show you how to meal prep shredded chicken in your Instant Pot.
This technique is super simple and straightforward.
In your pressure cooker, you will add one cup of chicken stock to the bottom of your pressure cooker. Add your chicken breasts and season well with salt and pepper.
Cook your chicken on High Pressure for 10 minutes (for small chicken breasts) or 12 minutes (for large chicken breasts).
These chicken breasts, for example, required fifteen minutes to fully cook.
Allow your pressure to release naturally (instead of quick releasing the valve). A good amount of time is ten minutes!
Once the chicken is cooked, you can shred it with two forks. If you are feeling fancy, break out your hand mixer to make quick work of this task.
Reserve half the liquid in the pot for storage and to reduce the chances of your chicken drying out.
I looked up some frequently asked questions, on pressure cooked chicken, and thought I would share more about my technique here.
Do I need to add more chicken broth (or stock) if I decide to cook more than four chicken breasts?
If I’m meal prepping for my family, I always double our recipes. I have doubled this successfully by doubling the chicken stock and keeping everything else, like cooking time, the same. It will take a bit longer to come to pressure, but the duration you set will remain the same.
Can I use this pressure cooker shredded chicken technique with frozen chicken breasts?
Cooking frozen chicken in the Instant Pot can be a real budget-saver and help you avoid ordering takeout.
Once again, cooking time on frozen chicken varies, based on the size of the breast. If the chicken breasts are small, 12 minutes of high pressure works great. Average size chicken breasts will take about 14 minutes. Large pieces are best at 16 minutes.
Can I Use this Shredded Chicken Recipe for Chicken Thighs Instead of Chicken Breasts?
Personally, I prefer thigh meat over chicken breasts because they don’t easily dry out and get overcooked.
I’ve had great success with cooking chicken thighs for 15 minutes on high pressure.
I love to toss my thigh meat with salsa and a little chicken broth for taco night or burrito bowls.
My Shredded Chicken Didn’t Fully Cook, Can I Restart My Instant Pot?
Do you find that your dishes seem inconsistent with cooking times? I discovered a really important solution…getting a new Instant Pot seal. If the seal is stretched out, it will take much longer to come to pressure.
For chicken to be fully cooked, you want to make sure it has come to 165 degrees. Since the size of the breasts is so different, it is hard to always nail the length of time.
If you find that your chicken is not fully cooked, simply cook it for 2 more minutes of High Pressure.
Since the liquid is already hot, it won’t take that long to come to pressure again.
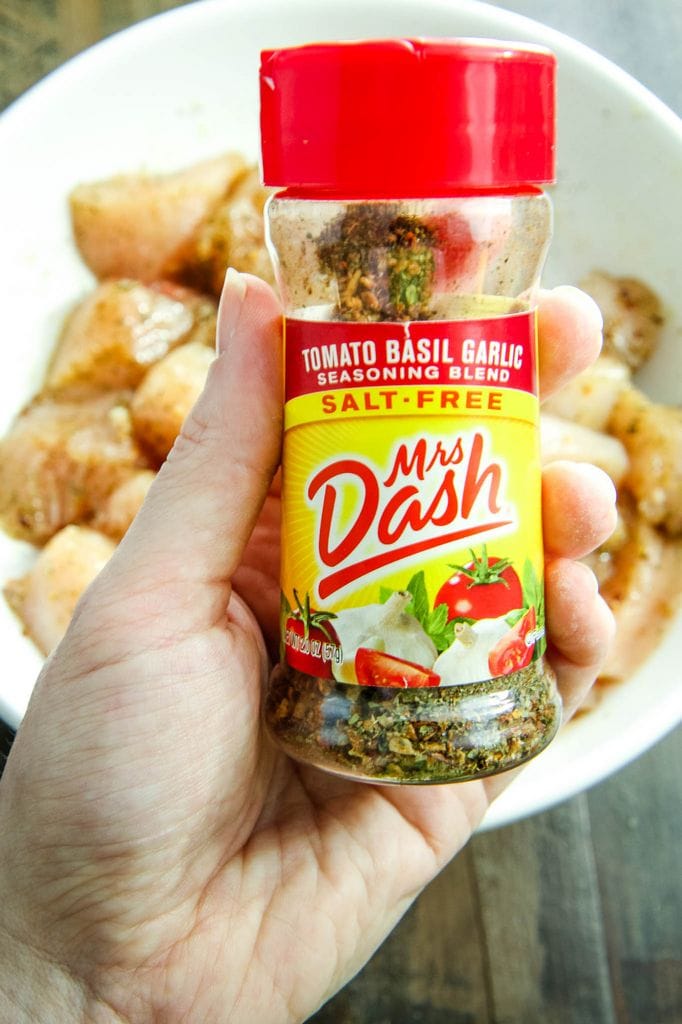
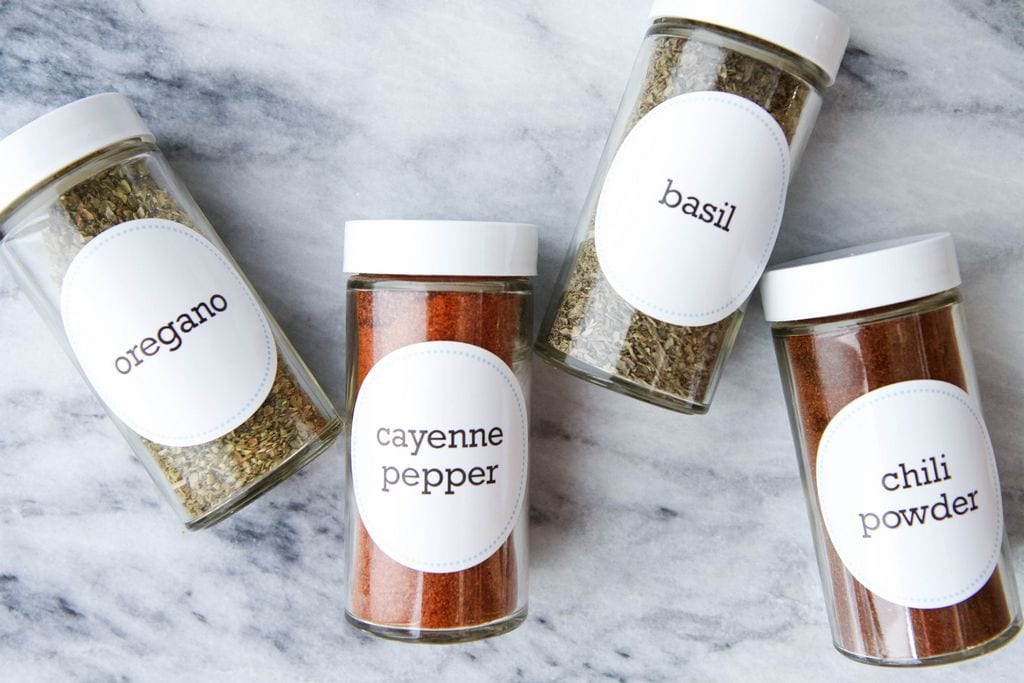
What Other Seasoning Can I Use on My Shredded Chicken?
I try to really map out what I’m making with it before deciding on seasoning. This basic idea of just salt & pepper is always appealing to me though because it can be used in any recipe.
That said, you can always make your own flavor combo! This Mrs. Dash seasoning, for example, is a family favorite. I also love to season my chicken with oregano, garlic powder, onion powder, or dried rosemary.
Feeling inspired to get your pantry organized? Here are some free printable pantry labels to get you started.
I Don’t Have a Pressure Cooker. How Do I Make This Shredded Chicken In My Slow Cooker Instead?
For many years, I just did the shredded chicken in my slow cooker. You will follow the exact same recipe, but you will cook the chicken in your slow cooker for six hours instead.
I hate dry chicken though so I usually do the six hours of cooking time with frozen breasts instead.
I find today’s slow cookers are so much faster than they used to be.
For me, six hours is as long as I’m willing to let my chicken cook in one of those.
If you are on the hunt for a new slow cooker, I can’t recommend this model enough. I use it weekly and love that I can brown our meat before slow cooking it.
Are There Any Other Ways to Prepare Chicken For My Week?
There is SO much you can do with this. Just think of how you can use shredded chicken in your favorite casseroles, pasta dishes, or rice bowls.
What if I Can’t Eat All This Shredded Chicken?
One of the best things about having this prepared is that you can freeze it. Freeze your pressure cooked chicken in freezer bags, with a little of the reserved broth. Make sure to take out as much air as possible and label. This should keep for 3-6 months in your freezer.
Instant Pot Shredded Chicken (meal prep)
Instant Pot Shredded Chicken (meal prep)
Yield: 4-6 servings
Prep Time: 5 minutes
Cook Time: 12 minutes
Additional Time: 10 minutes
Total Time: 27 minutes
Did you know that you can make enough shredded chicken for a week of recipes with your pressure cooker? This Instant Pot Shredded Chicken recipe can be meal prepped for your week or frozen for future meals. Don’t miss this post filled with ideas for ways to put pressure cooked chicken to work in your kitchen!
Ingredients
4 Chicken Breasts
1 cup chicken broth or stock
Salt and pepper
Instructions
Pour one cup of chicken broth or stock in the bottom of your Instant Pot.
Add fresh chicken breasts to Instant Pot, seasoned with salt and pepper.
Put the lid on your Instant Pot and cook your chicken on High Pressure for 10 minutes (for small chicken breasts) or 12 minutes (for large chicken breasts).
Once the Instant Pot beeps, make sure your instant pot turns off (and doesn't start the, "keep warm," setting. Allow it to naturally release for ten minutes.
Remove the chicken from the pressure cooker and shred with two forks or a hand mixer.
Add half the liquid from the pot to your shredded chicken and toss to make sure it is fully incorporated.
Use the chicken right away for your recipes (see post for fun ways to put this to work in your kitchen) or freeze for 3-6 months in an airtight freezer bag with a little additional liquid.
Notes
Doubling the chicken? I have doubled this successfully by doubling the chicken stock and keeping everything else, like cooking time, the same. It will take a bit longer to come to pressure, but the duration you set will remain the same.
Using frozen chicken breasts? Cooking time on frozen chicken varies, based on the size of the breast. If the chicken breasts are small, 12 minutes of high pressure works great. Average size chicken breasts will take about 14 minutes. Large pieces are best at 16 minutes. Still follow the steps above for natural releasing the pressure.
This post contains affiliate links
Love this recipe? Here are three other great pressure cooker recipes to check out!
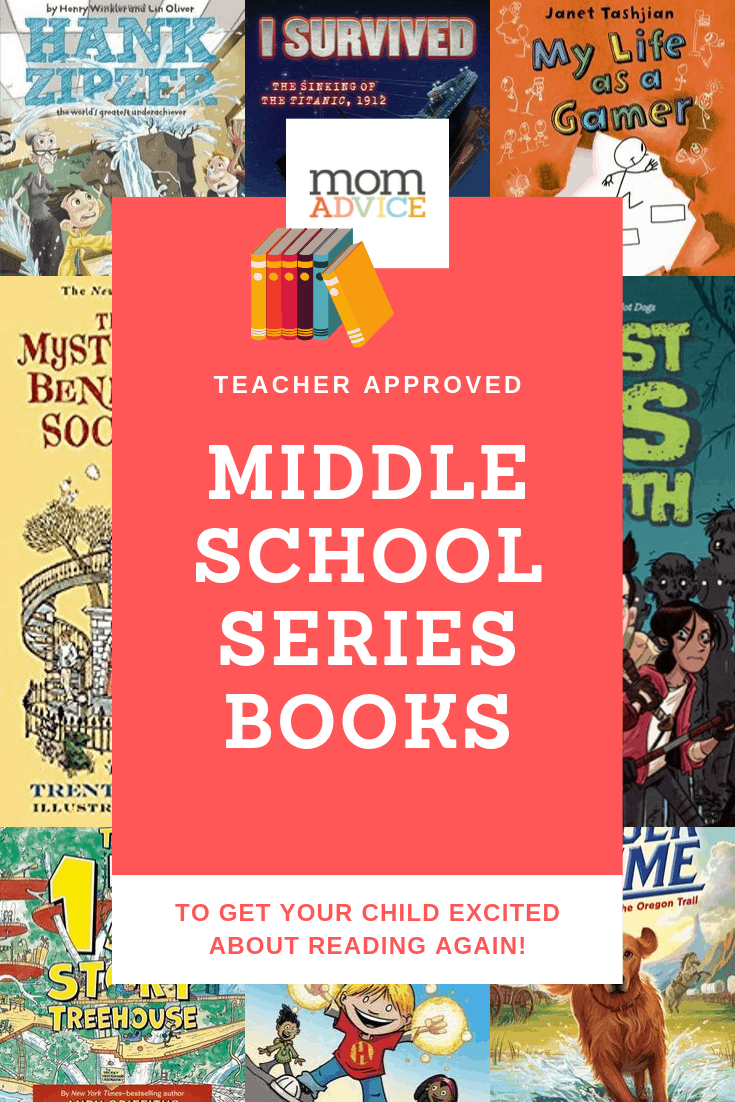
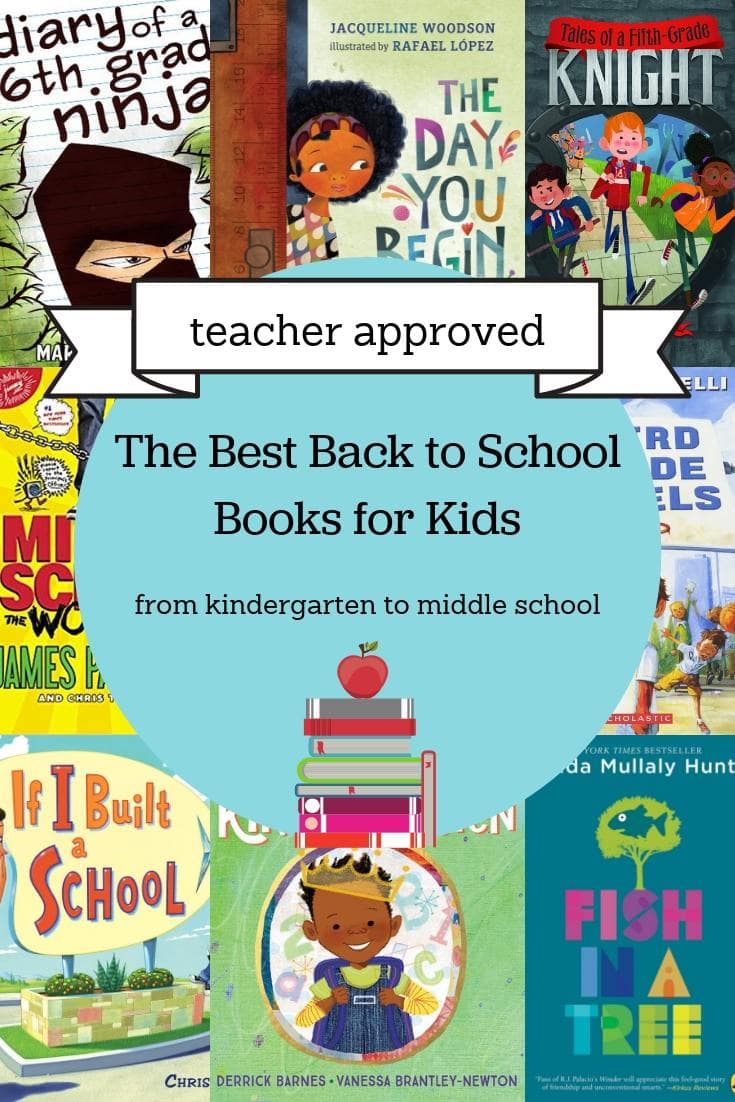
Are you looking for the next great middle school book series? Check out these incredible middle school reading series recommendations from a teacher. These great books will get your middle grade child reading again. I can’t wait to check out these books for my own daughter from this teacher-approved book list for young readers.
One of the things I love about reading is getting to know a character and then following along with their lives. In my years of teaching I have noticed that kids are exactly the same! Once kids connect with a character, or group of characters, they want to keep on reading all about their favorite new fictional friend. After talking with many of my students I have put together a list of eight high interest series that will help your middle grade child get excited about reading.
Hank Zipzer– Written by Henry Winkler, this hilarious series is inspired by his experiences growing up with dyslexia. Since Hank has learning differences, this series can be a great one for students who struggle in school. As a bonus, if your younger kids want to join in on Hank’s adventures, they can start with the Here’s Hank< prequel series.
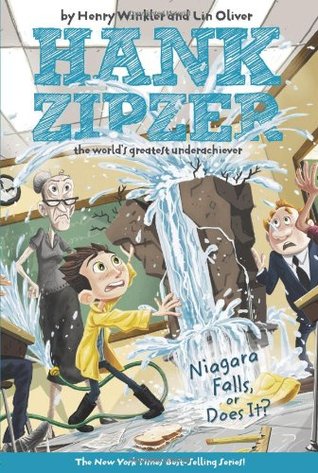
My Life– Encourage kids to put down their devices and pick up a book that lets kids experience the chance of a lifetime to be a stunt double, gamer, ninja, meme and more. Derek, the main character, has been labeled a “reluctant reader” so this is another great series for struggling readers.
Graphic Novels
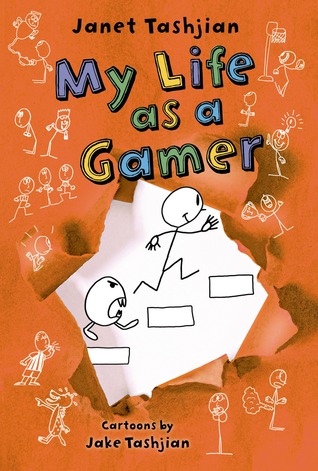
HiLo– Fun series about friendship and adventure with a few wacky robot-fighting escapades. This series will hook kids from book one!
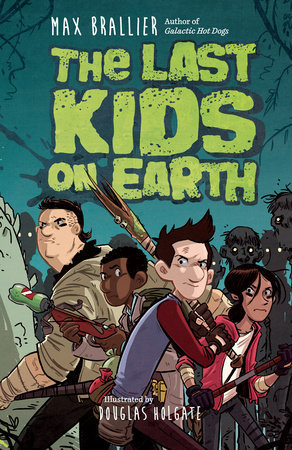
The Last Kids on Earth– There’s zombies. And monsters. And epic adventures. Need I say more?!?
Historical Fiction
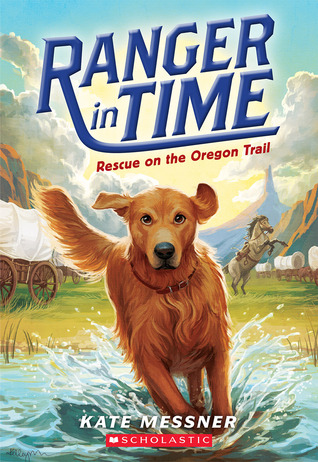
Ranger in Time– For kids that love animals, this series is perfect. Ranger is a time-traveling golden retriever who travels to the Oregon Trail, Ancient Rome, the South Pole, the beaches of Normandy, and many more important places in history.
I Survived– Another series that takes kids to important events in history to let them vividly experience these events. With books dedicated to the sinking of the Titanic, Pearl Harbor, Gettysburg, Pompeii and more, this series brings terrifying historical events to life.
Fiction
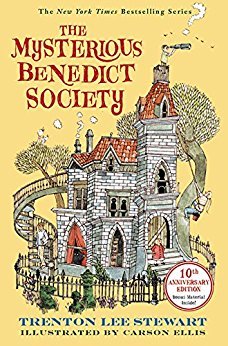
Mysterious Benedict Society– Join four children on a secret, undercover mission at the Learning Institute for the Very Enlightened. Filled with lots of puzzles and mysteries this is the perfect series for a higher-level middle-grade reader.
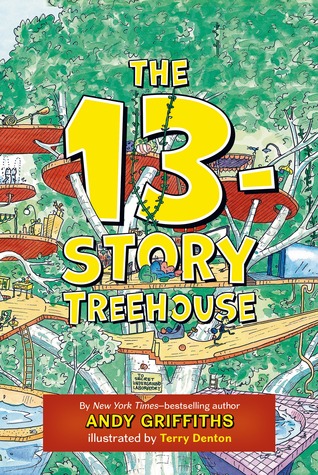
Treehouse– Who wouldn’t want to live in a 13-storey, or 26-storey, or even 117-storey treehouse?!? Follow along with Andy and Terry as they write stories and live in a treehouse with a bowling alley, secret rooms, swinging vines and more.
About Julie
Having taught in both California and Pennsylvania and everything from 3rd to 8th grade, this year Julie is teaching 3rd grade at an elementary school in Southern California. She enjoys helping her students fall in love with reading and reading during the school day is a big priority. Julie loves traveling in her free time and always makes time to pop into local bookshops when she travels. When she’s not reading or teaching, she loves running, cupcakes and Christmas. You can find her blogging too over on her blog, Girl On the Move.
Note from Amy:
Isn’t this middle school series list amazing? My kids have loved so many of these along with their favorite Harry Potter novels and the oh-so-reliable James Patterson series books.
Recently, my daughter was lucky enough to hear Kwame Alexander speak and she was SO inspired by his visit that she couldn’t stop talking about him (or his writing).
In many ways, middle school is the worst, but there are also still those amazing little glimmers that I love to catch, especially when we are talking about middle schoolers reading books. I hope you can check out these middle grade books for your child and I’m really grateful to have Julie guiding us through her real life experience with teaching and teaching kids to love reading. Now I will have to patiently wait for her high school recommendation list!
This post contains affiliate links
Looking for more great parenting reads? Here are three others that I think you will love!
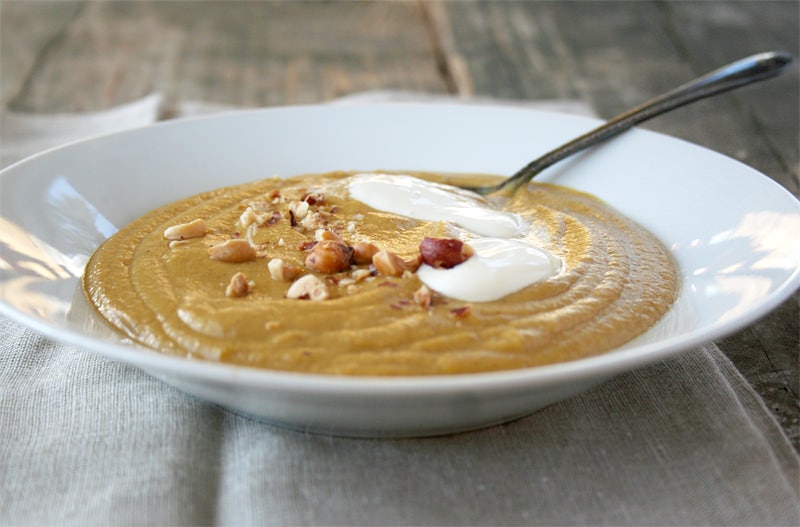
This is a rustic hazelnut soup made with parsnips and roasted hazelnuts. It is a quick weeknight soup and the recipe can easily be made vegetarian. Make a batch today and have a taste of Autumn in a bowl for dinner!
Whenever I think of hazelnut soup, I’m reminded of one of my favorite Disney movies about a beautiful princess and her long silky hair.
Along with a dreamy guy, a cast iron skillet, and parsnips… what’s not to love?
Honestly, the first time I saw this movie I was more intrigued with the mention of hazelnut soup than the rest of the movie.
Rapunzel’s fake mother brought home parsnips after a trip to town in order to make her hazelnut soup.
I happen to love parsnips and hazelnuts so I knew this was a soup I had to recreate… animated or not.
Parsnips are carrot-like root vegetables that contain vitamins, minerals and nutrients, most notably fiber, folate, potassium and vitamin C.
They’re in season during the late fall and winter.
They’re sweet, yet can have a bit of bite to them.
Large parsnips can have a bitter center which is best removed before cooking.
They taste great mixed into stews, soups, and any other way you would normally use a potato or other root vegetable.
I tell you what, when I saw one of my favorite vendors at my farmers market selling freshly harvested parsnips in the fall, I stocked up and purchased about 15lbs of them to carry me through the winter.
They keep wonderfully in the crisper and actually get sweeter over time.
When I purchased them, I knew right away that I was going to be using some of them to make a comforting batch of hazelnut soup.
I usually make this rustic hazelnut soup once or twice during the winter season – thick and silky, just the way I like it.
In order to create complexity, I start by sautéing onions in a cast iron dutch oven until they’re caramelized, deep and sweet.
While the onions are caramelized, I roast the hazelnuts to deepen their flavor.
Once the onions are caramelized, I deglaze the pot by adding a bit of homemade beef broth.
To the pot, I then add the parsnips, carrots, a potato, some of the roasted hazelnuts, seasonings, and a fair share of more broth.
If you decide to use store bought organic broth, be aware that it won’t have as much depth and character as one made over a stovetop and simmered for 24 hours.
If something like this intimidates you, I promise, you’ll be surprised at how simple it is to make and the nutrients inside will be unlike anything that can be purchased at a store.
Once the additional broth has been added, the vegetables are covered and simmered until tender.
Once tender, a bit of milk or cream is added to the soup and is then ready to be served with a dollop of sour cream and sprinkled with roasted hazelnuts.
This soup serves beautifully with a green salad and a hunk of crusty bread (or not… if you’re gluten free).
Hazelnut Soup Recipe
Recipe Type: Vegetarian Soup
Author: Diane Bauman
Prep time:
Cook time:
Total time:
Serves: 4-6 servings
This is a rustic hazelnut soup made with parsnips and roasted hazelnuts. It is a quick weeknight soup and the recipe can easily be made vegetarian. Make a batch today and have a taste of Autumn in a bowl for dinner!
In a large pot or dutch oven, over medium heat, melt the 3 tbls butter and add the onions. Stir the onions into the butter and allow to gently cook for 20-25 minutes or until the onions caramelize to a deep golden brown, stirring them along the way.
Once Caramelized add ¼ cup beef broth to deglaze the pan.
Once deglazed, mix in the parsnips, potato, carrots, ¾ cup hazelnuts, the rest of the broth, salt, pepper, and thyme leaves. Bring to a boil, lower the heat, and then cover and simmer for 20-25 minutes or until the vegetables are tender.
Once tender, with an immersion blender or working in batches using a blender, puree the contents of the pot. If using a blender, return the puree to the pot over medium heat.
Add 1 cup milk and stir through. Simmer for an additional 5 minutes.
Serve with a dollop of sour cream and sprinkled with roasted hazelnuts
3.4.3177
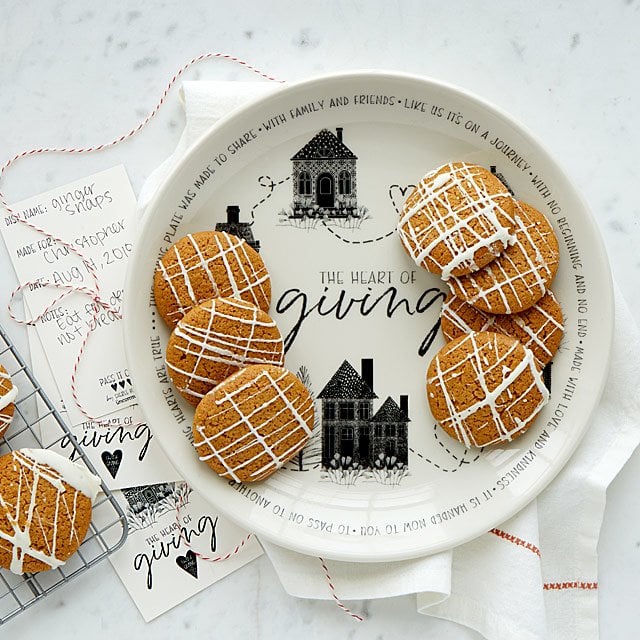
Love this recipe? Don’t miss these other great posts from MomAdvice.com:

 vintage floral luggage (so many cute prints!)
 satin pillowcases (so many colors! 2 for $9.99!!)
 bookish tee
 scream and sugar coffee mug (only $5)
 drawstring crossbody (three colors)
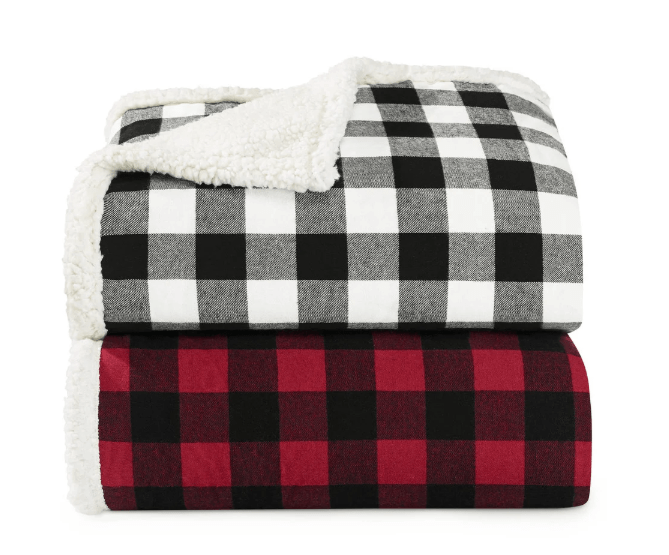 cabin sherpa blankets
 house mugs
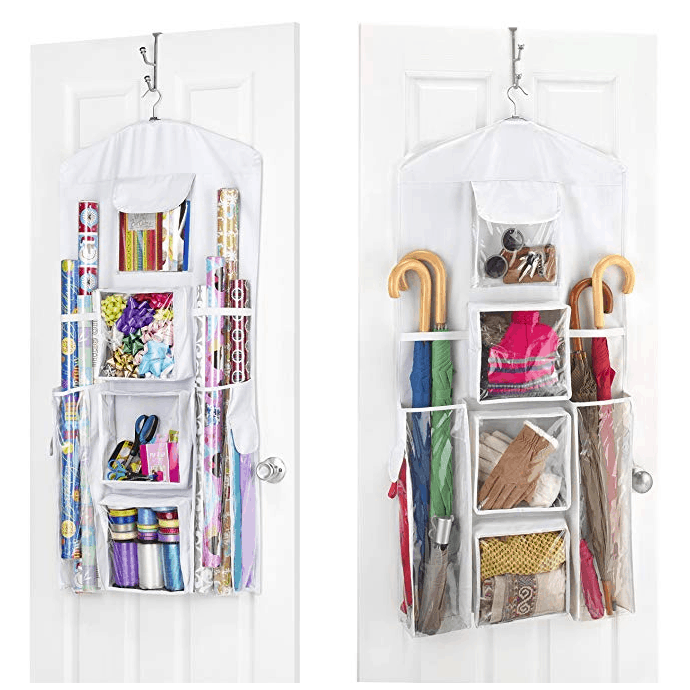 gift wrap organizer (how perfect is this for cold weather accessories??)
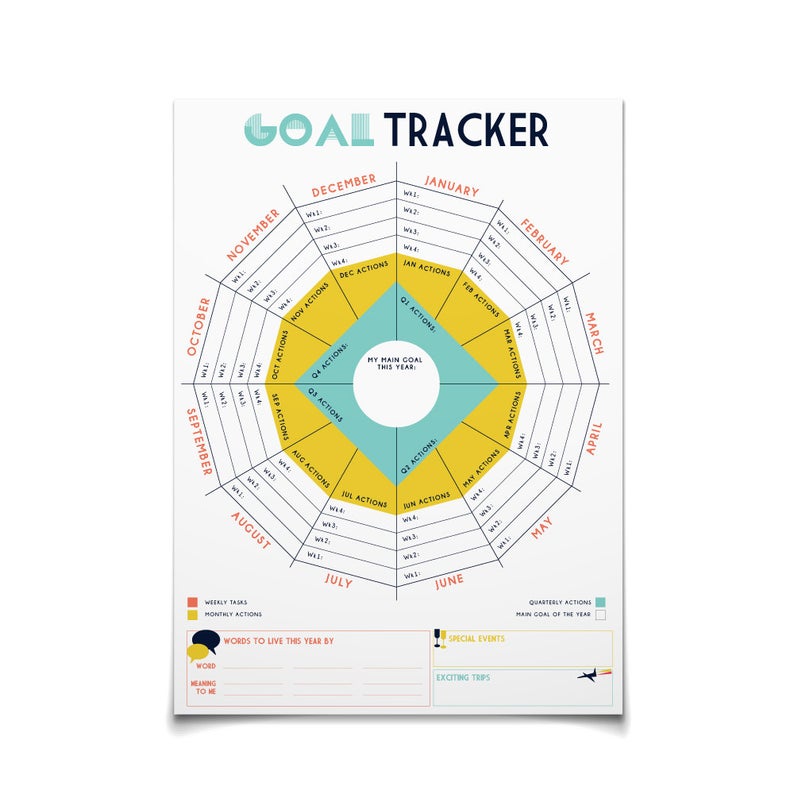 goal tracker
 3D Skull Ice Mold
 puff sleeve crewneck pullover
 books are my world enamel pin
 geometric print dress (half price!!)
 acrylic resin earrings (so many gorgeous colors)
 cozy cowl sweater
 prison mike air freshener (hahaha! omg. best stocking stuff ever)
 oversized sweater (three colors)
 the watch print (gah- I love Janet Hill so much!)
 oversized cardigan
 oversized flannel scarf (so many gorgeous prints)
 hand lettering 101 book (what a great holiday gift!)
 turn back time flats (so many gorgeous colors!)
 long sleeve button front shirt (so many cute patterns)
 rainbow purse


