Overnight Slow Cooker Apple Cinnamon Steel Cut Oatmeal

November 21st, 2019

Overnight Slow Cooker Apple Cinnamon Steel Cut Oatmeal from MomAdvice.com

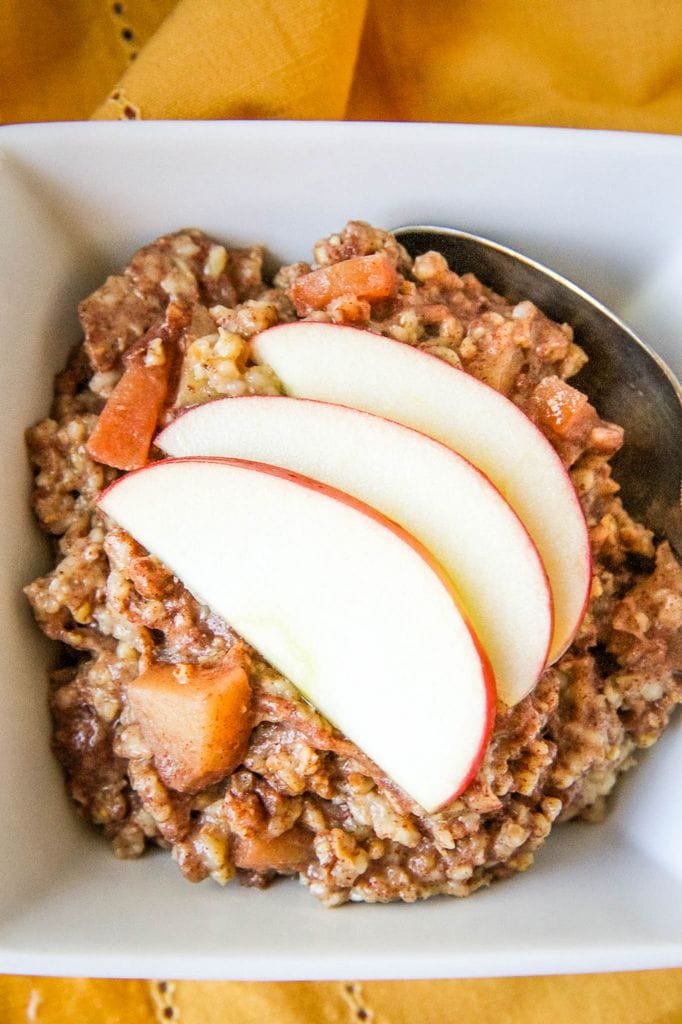
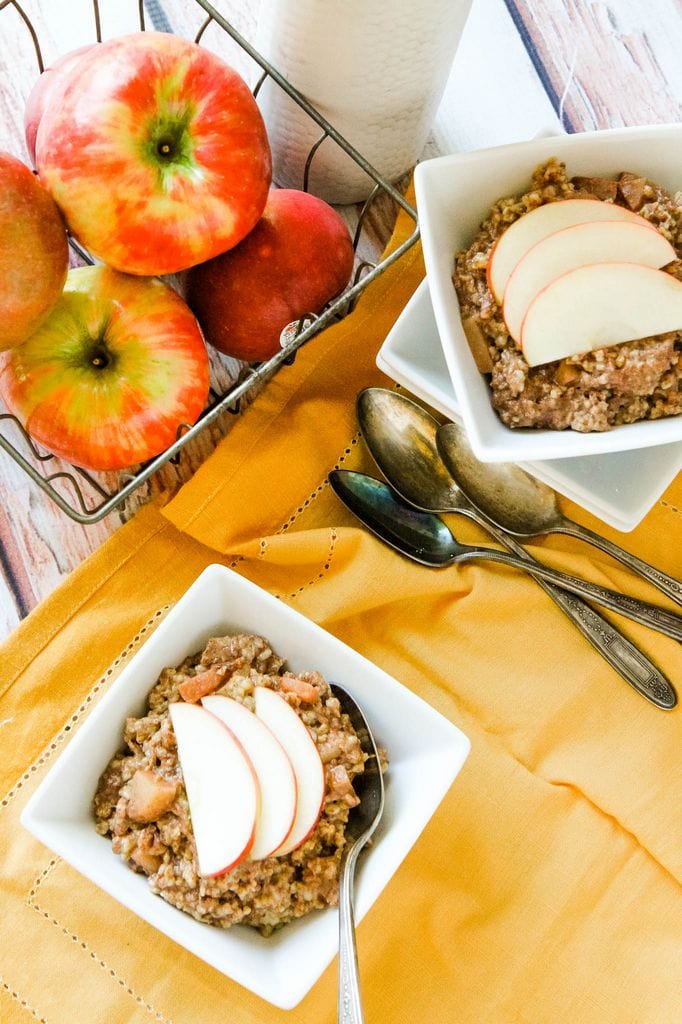
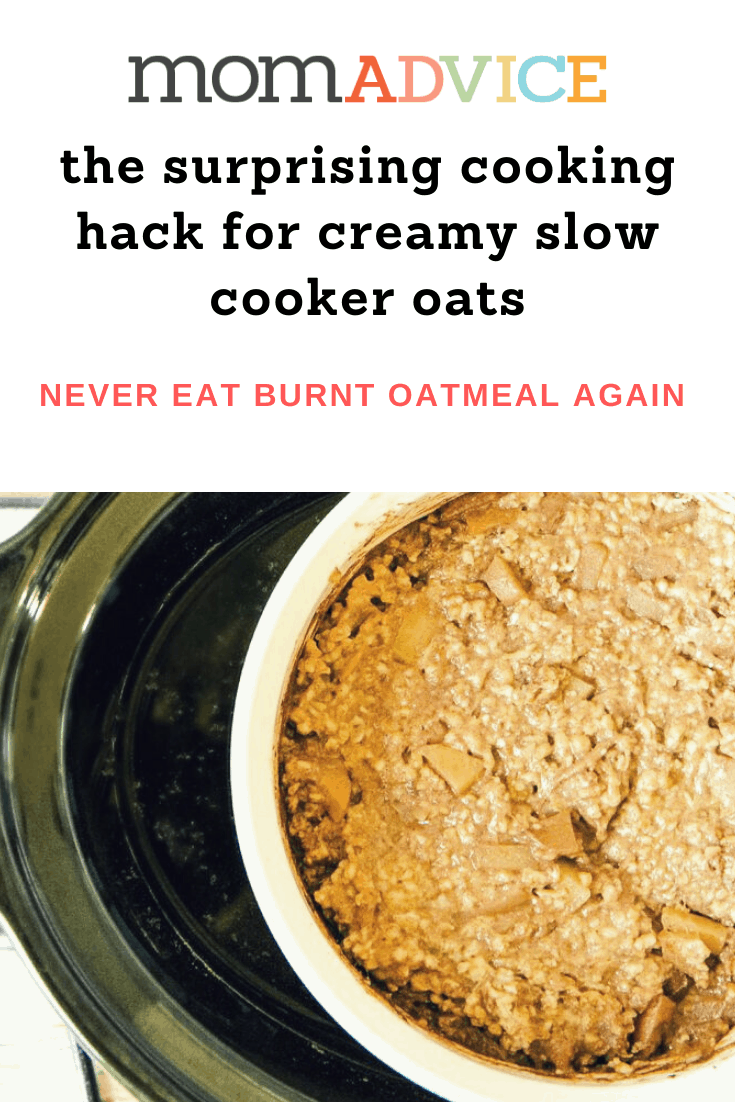
Apple season is one of my favorite produce seasons and one of my favorite snacks. Try this slow cooked honeycrisp apple oatmeal that you are going to love for a warm and satisfying breakfast on chilly fall mornings. The best part about all of this though, is my incredible tip for getting creamy oats that won’t burn or stick to your slow cooker.

Have you tried cooking steel cut oats in your slow cooker yet?

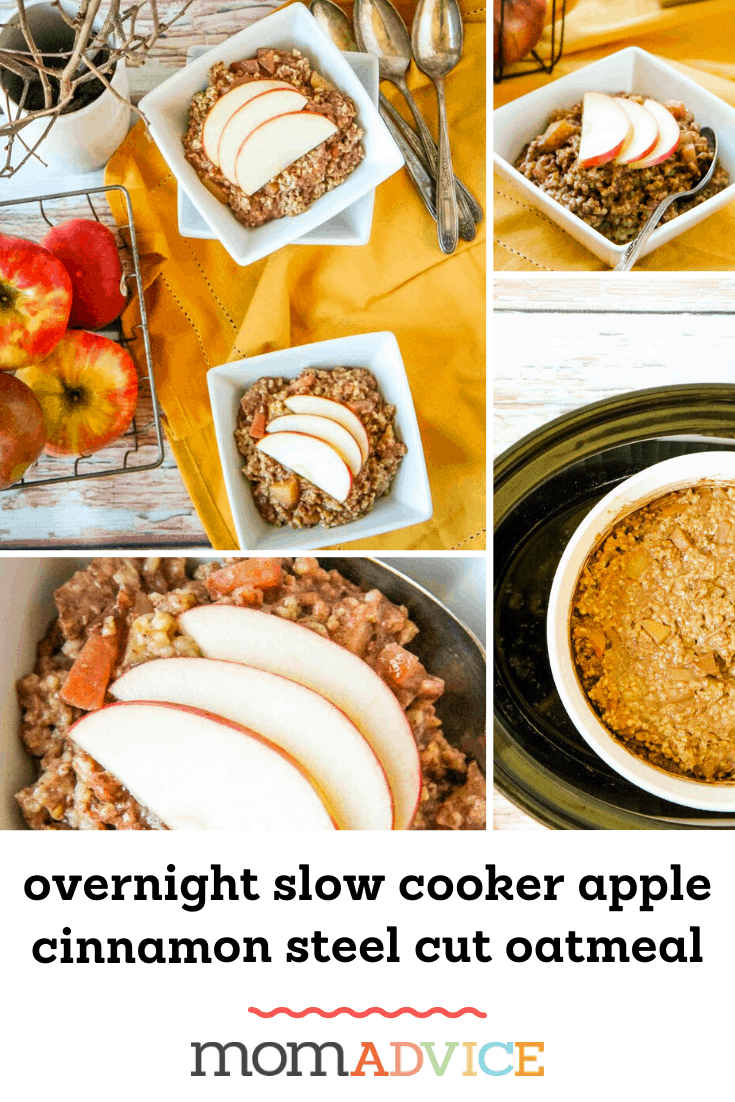
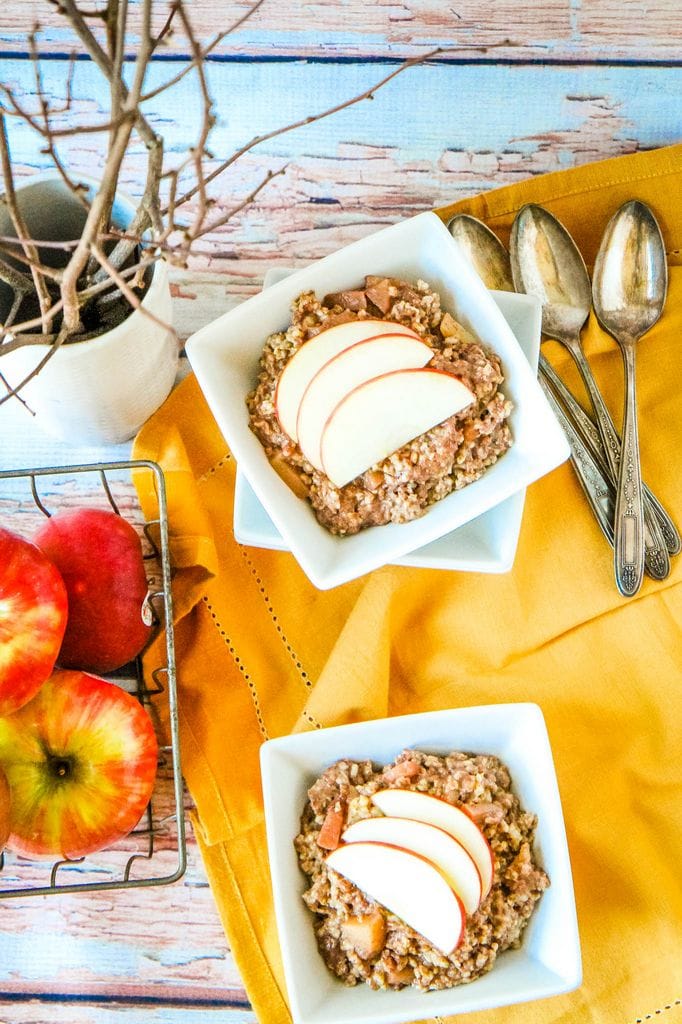
Today I wanted to share some tips for making the perfect overnight crock pot apple cinnamon oatmeal for the perfect fall breakfast for entertaining or just for a healthy way to start your day.

I love steel cut oatmeal, but it takes a LONG time to create steel cut oats. Not only that, oatmeal requires constant stirring over medium heat to achieve their best flavor and have a tendency to burn when not monitored.

Today I wanted to share some tips for making steel cut oatmeal in your slow cooker and the one SHOCKING tip for creamier slow cooked oats.

I promise, it’s a game changer.

How to Make Overnight Slow Cooker Apple Cinnamon Steel Cut Oatmeal

Overnight Slow Cooker Apple Cinnamon Steel Cut Oatmeal With Sliced Apples On Top

What’s the Difference Between Steel Cut Oats and Rolled Oats?

Rolled oats and steel cut oats come from the exact same whole cereal grain. The difference is really in how they are processed.

In whole form, they are known as “groats” and both types of oats are separated from their hard outer “hull” for our store shelves.

Here’s where those differences between the two types of oats really come into play. The rolled oats are steamed, to prevent cracking, and then they are rolled through the mill to be flattened.

Steel cut oats are, basically, chopped into pieces rather than going through that process of being flattened.

Overnight Slow Cooker Apple Cinnamon Steel Cut Oatmeal from MomAdvice.com

Are Steel Cut Oats Gluten-Free?

Many of our readers are pursuing that gluten-free life so I’m thrilled to tell you that steel cut oats ARE gluten-free…well, pretty much!

If you are celiac, oats can be processed in factories that are also processing wheat, barley, and rye.

If you are celiac, look for steel cut oatmeal that clearly discloses that on the label to be sure that you are not exposed to any of these allergy triggering ingredients.

Overnight Slow Cooker Apple Cinnamon Steel Cut Oatmeal from MomAdvice.com

Overnight Slow Cooker Apple Cinnamon Steel Cut Oatmeal from MomAdvice.com

Do Steel Cut Oats and Rolled Oats Have the Same Nutritional Value?

Did you guys know that I went to school for dietetics?

Questions like this are my love language.

Often, when it comes to discussing processed foods, we immediately have a knee-jerk reaction that it isn’t good for you.

Can we all blame the Whole30 and Paleo movement for this? Hahaha!

Seriously, in MOST cases, processing means that the food has lost its nutritional value, but that is not the case when it comes to steel cut oats and rolled oats.

In fact, steel cut oats, rolled oats, and quick oats all have the SAME nutritional value.

I do find that steel cut holds up better in an overnight dish, but am thankful quick oats offers the same benefits if I need a nutritious breakfast or lunch.

Honeycrisp Apples

What Types of Apples Should I Use For Overnight Oatmeal?

Often when it comes to baking, I reach for a Granny Smith apple.

When researching different varieties of apples that are best to bake with, I discovered that the Honeycrisp Apple and the McIntosh apple were both great varieties to choose when baking.

Overnight Slow Cooker Apple Cinnamon Steel Cut Oatmeal double-boiler method in slow cooker

How Do I Prevent My Slow Cooker Oatmeal From Getting Burnt or Overcooked?

I admit that I have never had good success with overnight oats.

The oats were usually burnt or overcooked and I always had a hard time getting my slow cooker clean after a batch.

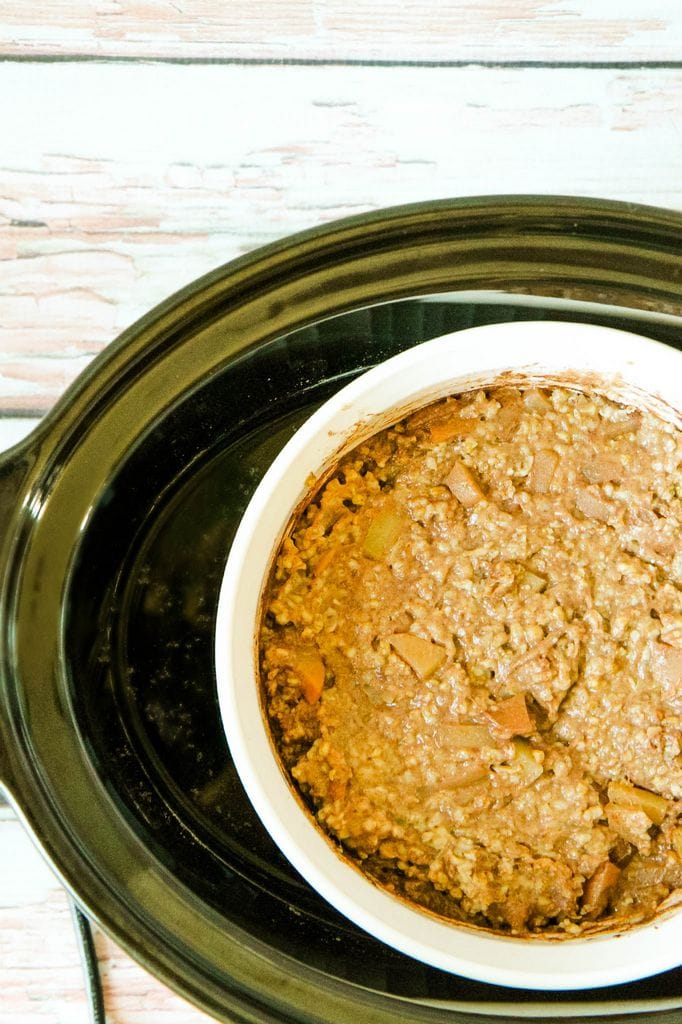
That is why I am so excited to share with you this easy technique to create a double boiler right in your slow cooker:

  • Find a oven-proof dish that you can place inside of your slow cooker and spray it well with a little cooking spray.
  • Place your oatmeal ingredients right inside of the dish and then, using a liquid measuring cup, pour water around the dish to create a water bath. It doesn’t need to be really full, just an inch or so.
  • Set your slow cooker to LOW and you will have perfectly creamy oatmeal with no burnt spots every single time.

Overnight Slow Cooker Apple Cinnamon Steel Cut Oatmeal from MomAdvice.com

Once you try this tip, you won’t make your oatmeal ANY OTHER WAY.

I promise you that you will will yield a creamy pot of oats every time.

How Can I Prepare This Apple Cinnamon Steel Cut Oatmeal in My Instant Pot Instead?

I would recommend going to this recipe for details on making steel cut oats in your pressure cooker. I haven’t tested this one out yet, but I’m looking forward to giving it a try!

Slow Cooked Honey Crisp Apple Oatmeal
 
Author: MomAdvice.com
Prep time:
Cook time:
Total time:
Serves: 4
This recipe can be personalized according to your family’s dietary needs or what variety of apple is on sale at the grocery store. I loved preparing this one with almond milk! Try my technique for creating your own double-boiler to get a creamier oatmeal!
Ingredients
  • 1 cup steel cut oats (NO substitutions)
  • 3 1/2 cups milk (or milk substitute)
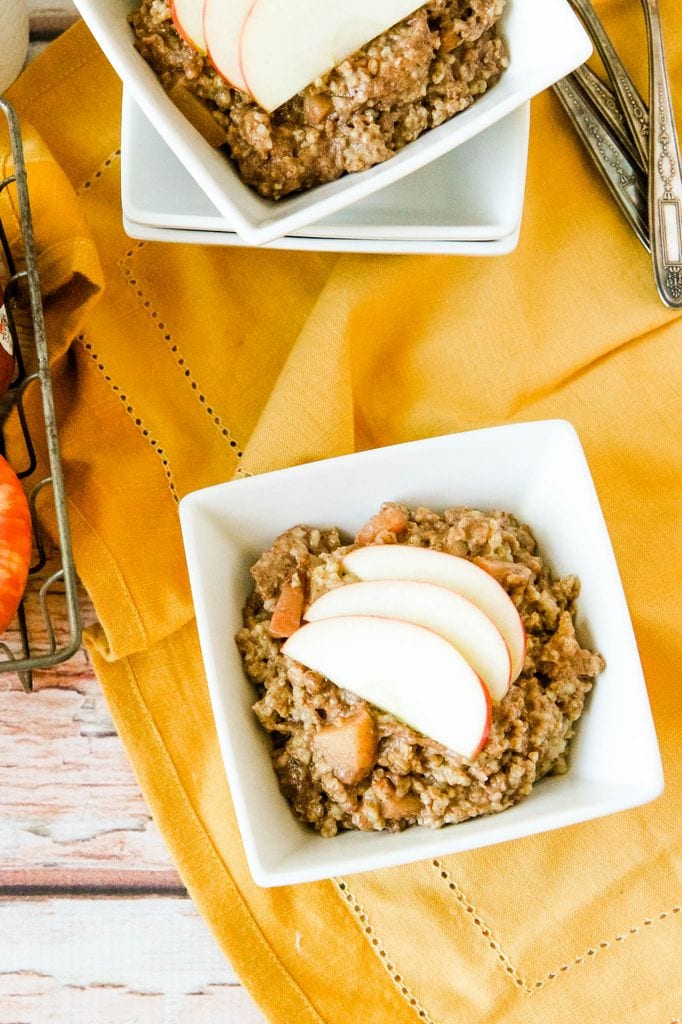
  • 1 Honeycrisp apple, diced
  • 2 tablespoons butter
  • 1 tablespoon ground cinnamon
  • 2 tablespoons brown sugar
  • 2 teaspoons vanilla extract
Instructions
  1. Spray your slow cooker with cooking spray or brush with melted coconut oil.
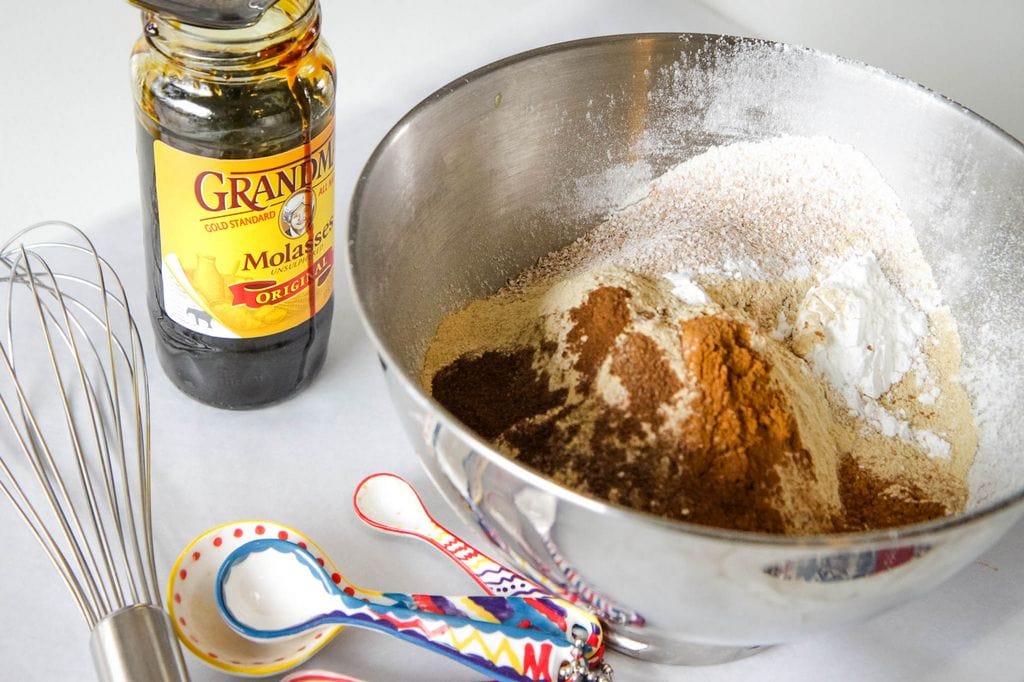
  2. Place the steel cut oats, milk, honeycrisp apple, butter, cinnamon, brown sugar, and vanilla extract into a slow cooker, and stir to combine and dissolve the sugar.
  3. Cover the cooker, set to Low, and allow to cook 6 to 7 hours (for firm oats) or 8 hours (for softer texture).
  4. Top with a little extra brown sugar, milk, or a drizzle of maple syrup.


As an Amazon Associate I earn from qualifying purchases.

This post contains affiliate links.

Looking for more great breakfast ideas? Check out these recipes to inspire your next morning meal!

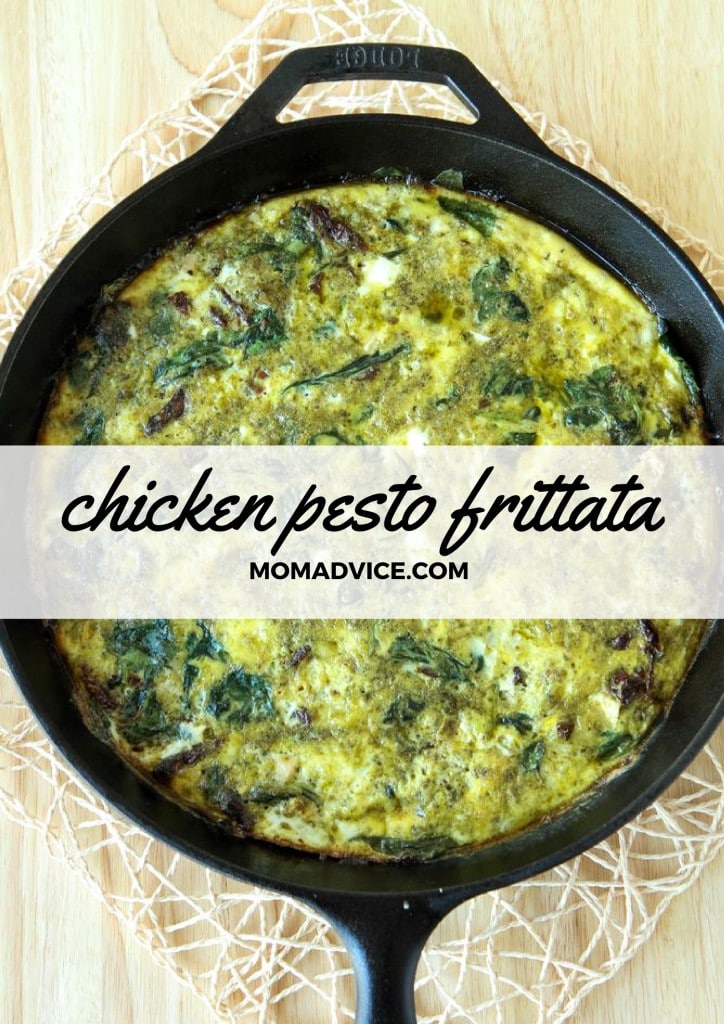
chicken pesto frittata recipe (so good to make ahead for a big crowd)

sausage & vegetable frittata( great for anyone on a more restricted diet) Easy Sausage & Vegetable Frittata-3

Meal Prep: Breakfast Sandwiches Recipe from MomAdvice.com meal prep these freezer breakfast sandwiches

Make-Ahead Smoothie Packets from MomAdvice.com make these make-ahead smoothie packets for your freezer

Make-Ahead Breakfast Burritos from MomAdvice.com make these breakfast burritos for your freezer

How to Make a Breakfast Bar from MomAdvice.com 
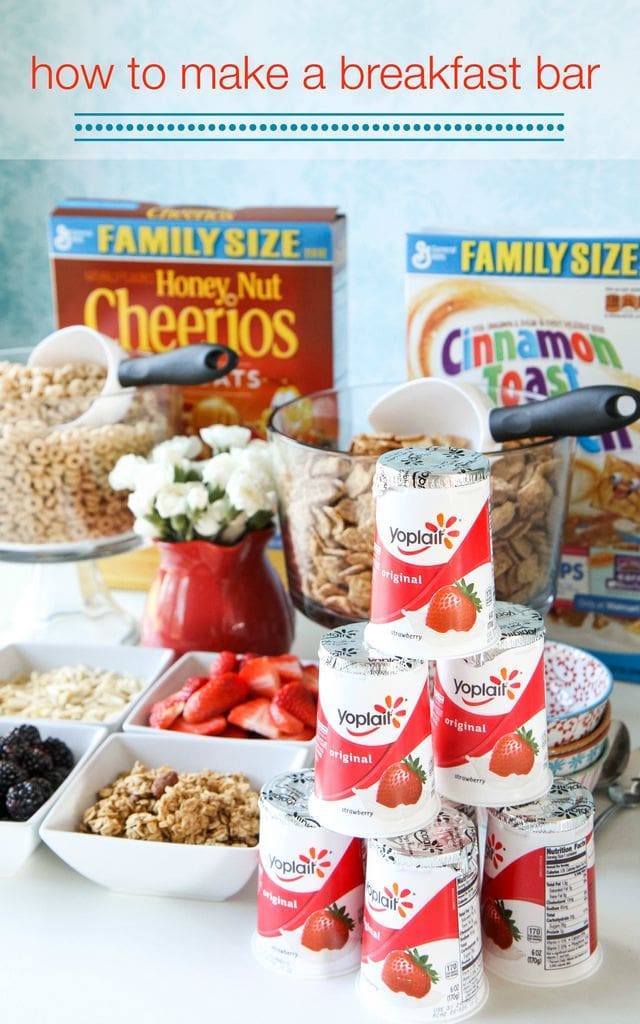
don’t want a cook? no biggie! try this hack for an easy breakfast bar

Christmas Tree Cinnamon Rolls or just bake a roll of cinnamon rolls and shape into a christmas tree. done.

What are your favorite holiday breakfasts to share with loved ones?

Overnight Slow Cooker Apple Cinnamon Steel Cut Oatmeal from MomAdvice.com

Overnight Slow Cooker Apple Cinnamon Steel Cut Oatmeal from MomAdvice.com

Pin It

DIY Holiday Yarn Trees

November 20th, 2019

DIY Holiday Yarn Trees from MomAdvice.com.

Bring the holidays to your mantle with these simple DIY Christmas trees! This holiday craft is so easy and inexpensive that you can make a few and display them together or give them as gorgeous hostess gifts. Make the DIY holiday yarn trees in Christmas colors or your favorites to add a festive touch to your Christmas decor!


What could be more fun than decorating for the holiday season?

For this month’s holiday decor project, I wanted to share with you a fun DIY project for creating festive yarn trees that you can create to decorate a ledge, table, or mantle in your home. 

You will only need a few affordable supplies from your craft shop to create this craft.

Don’t think of these as only a decoration for Christmas.

These are beautiful to display all holiday season long, especially in a nice warm neutral yarn!


DIY Holiday Yarn Trees

Supplies List

2-    3-7/8 x 8-7/8  inch  Styrofoam floral cones

2- 3-7/8 x 11-7/8 inch  Styrofoam floral cones

4 glass candlestick holders (optional)

2 skeins of inexpensive yarn (in your favorite yarn color)

Small & Large Clover Pom-Pom Makers (unless making pom-poms by hand)

Hot glue gun

Glue Sticks

Straight Pins

Scissors

3.75 mm straight yarn needles

2-4.00 mm double-pointed needles


DIY Holiday Yarn Trees


Instructions for Making Your Yarn Trees

1. For each of the smaller trees, you will need approximately 73-75 small pom poms. I am in love with my pom-pom maker for making these and have provided a picture tutorial above, if you would like to use these too.  Make sure to give your pom-poms a nice trim, to even up any uneven spots.


DIY Holiday Yarn Trees


2. Once you have made all of your pom-poms, it is time to assemble them to your tree-form. Grab your hot glue gun and apply a dab of glue in the center of the pom-pom (where you have tied the string to gather everything.  Apply the pom-poms to the tree, starting at the bottom of the cone and working your way around the tree. Try not to line these up all evenly, but stagger them in each row to make it look more like a real tree!


3. Continue adding pom-poms until you get to the top of the tree, making sure all of the tree-form is completely covered.


4. Make a large pom-pom in a contrasting color and secure it with hot glue, in the center again, and add it to the top of the tree as your star.


5. Finish by giving your tree a trim, especially at the top, to trim all of the yarn down to make it look more like a tree.


DIY Holiday Yarn Trees


6. For an easy yarn-wrapped tree, begin by adding a dab of hot glue to the top of your taller tree-forms. Begin by applying your yarn in a swirled motion at the top. Add one more dab of glue at the top and start wrapping your tree-form all the way around it until you are about a half-inch from the bottom.


7. Add one more dab of glue and then finish adding the yarn until you reach the bottom of the form. Clip the yarn and secure the end with a little hot glue.


8. Decorate this tree-form any way that you would like. If you are not a knitter, there are many varieties of ways you can decorate these yarn trees. You can top with a pom-pom in an alternating color, create a multi-colored pom-pom for topping, braid yarn to create a garland, or create some garland out of a contrasting color.


9. If you are a knitter, knit a 3-stitch i-cord using two 4.0 mm double-pointed needles  for a total of 32.5 inches. Using straight pins, secure the i-cord to the top of the tree and then wrap around and around, securing occasionally with pins, until the tree is completely wrapped in garland.


10. Top your tree with a simple knitted bow, if knitting an adornment. Using your 3.75 mm straight needles, cast on ten stitches. Knit the first row, then purl the next row. Repeat this pattern until it measures 6.5 inches in length. Cast the stitches off and then seam them in the center. Using more yarn, simply wrap the center of the bow and then knot the yarn behind. Secure the bow at the top with hot glue.


11. Attach all of the trees to inexpensive dollar-store candlestick holders. If you desire, you can spray paint these in your favorite color or just leave them plain, as I have shown.


DIY Holiday Yarn Trees from MomAdvice.com.


DIY Holiday Yarn Trees from MomAdvice.com.


DIY Holiday Yarn Trees from MomAdvice.com.


I hope you love these little yarn trees as much as I do! It is definitely an inexpensive and fun way to dress up a corner of your home for the holidays!


Sign up for the MomAdvice newsletter!


As an Amazon Associate I earn from qualifying purchases. This post contains affiliate links. I only recommend what I love!


DIY yarn holiday trees MomAdvice.com


Don’t miss these other great Holiday ideas from MomAdvice:


How to Make a Yarn Pom Pom Wreath from MomAdvice.com

How to Make Pom Pom Wreath 


The Easiest Burlap Wreath You Will Ever Make from MomAdvice.com

Easy Burlap Wreath


how to make a pom-pom and ornament garland MomAdvice

Ornament & Pom Pom Garland


Christmas at Mom Advice-Traditions Decor and Food

Christmas at MomAdvice


20 Easy DIY Stocking Stuffers - MomAdvice.com

DIY Stocking Stuffers


54 Handmade Gifts from MomAdvice

Homemade Gift Ideas


DIY Holiday yarn trees MomAdvice.com

Pin It

5 Ways to Decorate Store-Bought Pies

November 19th, 2019

5 Ways to Decorate Store-Bought Pies from MomAdvice.com.

Need a quick and easy dessert for your holiday dinner? Just pick up a store-bought pie and dress it up with these great and simple ideas! These small hacks will make your pie look and taste homemade!


The holiday preparation continues this week on the blog.

Today I want to showcase 5 easy ways to decorate store-bought pies for the holidays.

Supermarket pies can still look beautiful and will taste even better with my ideas for some fun toppings and additions.

Although we have a fantastic pumpkin pie recipe on here and even a step-by-step picture tutorial for making the perfect pie crust, I know that many of us just don’t have the desire to tackle pie baking.

This post is especially for you and I hope you can create a swoon-worthy dessert table that will leave people guessing if you made those pies or not.


Spiced Whipped Cream


Add a Delicious Homemade Topping

Although your pie may not be homemade, your toppings can really stand out with just a few simple ingredients that will add a lot of flavor to your pie.

One of my favorite toppings is a Spiced Whipped Cream that gets its hint of spices from ground cinnamon, ground ginger, and a little sugar. It is the perfect accompaniment to your store-bought pumpkin or pecan pies for the holidays.


Cranberry Crunch Pie Topping


Another idea for layering on the flavors is to add texture through a fun crunchy pie topping.

One of our favorites that I created for our pies last year was an easy Cranberry Crunch Pie Topping made from amaretto cookies and fresh cranberries.


5 Ways to Decorate Store-Bought Pies from MomAdvice.com.


Add Unique Details

One of the greatest tools that I got for my holiday baking this past year was a set of piecrust cutters that I found on Williams Sonoma.

Not only are these great tools to keep handy for masking any flaws on your homemade crusts, but they can double as a great detail to adorn store-bought pies.


5 Ways to Decorate Store-Bought Pies from MomAdvice.com.


Purchase pie crust from the refrigerated section of the store and then roll out on a lightly floured surface.

Dip your cutters in a little flour and then push down and press these cutters to create your shape.

Bake these adorable details in a 400 degree oven for 6-8 minutes on a parchment lined cookie sheet.

Allow these to cool and then decorate the tops of your pies with these.

These little details are also so pretty to sprinkle on your dessert table and add that extra festive touch.


5 Ways to Decorate Store-Bought Pies from MomAdvice.com.


5 Ways to Decorate Store-Bought Pies from MomAdvice.com.


Make a Mini Pie Spread

When I spotted these adorable mini pies in the bakery section of our local Walmart, I knew this would be another fun spin on pies to try for the holidays.

These mini pies are less than $1 each and come in a variety of flavors year-round.

For smaller families, these store-bought pies offer the perfect serving size and give everyone exactly what they love the most.

Adorn these with the smaller size pastry cutouts and add a bowl of spiced whipped cream in the center so that everyone can create their own pie experience.


5 Ways to Decorate Store-Bought Pies from MomAdvice.com.


5 Ways to Decorate Store-Bought Pies from MomAdvice.com.


5 Ways to Decorate Store-Bought Pies from MomAdvice.com.


Give the Gift of Pie

One of my favorite things to give as a hostess gift is a sweet treat for their hospitality.

Nothing is sweeter than a little individual treat just for me after entertaining, at least that is my opinion, and one of my favorite gifts to give happens to be my little peppermint cheesecakes in a jar.

If you are short on time though, consider purchasing these mini pies as hostess gifts for the holidays.

Dress it simply in some festive ribbon and tie a bow around it to create a sweet little gift to give for the holidays.

At less than $1 each, these are a sweet way to say thank you without spending a lot.


5 Ways to Decorate Store-Bought Pies from MomAdvice.com.


Create a Beautiful Display

I love that when I posted a picture of this pie display on Instagram & Facebook that people were asking if this was even real.

I think it really goes to show that with a few easy details and staging, you can take store-bought pies to another level.

With this display I used mismatched cake stands in varying heights to create a display.

Don’t be afraid to drape a cloth napkin over a stand to make it cohesive or even create a stand out of a teacup and plate and cover it with the cloth napkin, if you are short on serving pieces.

If you have multiple dishes out, consider adding these cute chalkboard label frames to help people navigate the dessert table.

Sprinkle pastry cutouts along the tablecloth to decorate the display and pull in leaves, bare branches, or create a unique centerpiece like I did this year to add some color to the table.

I hope these ideas are inspiring and that you will find a new way to love store-bought pies this year with these creative details!

 Oh, and enjoy all that free time you have now that you aren’t baking this year.

Winning!


Don’t miss this series on how to make your Thanksgiving dinner ahead of time and freeze the meal!:


make-ahead mashed potatoes from MomAdvice.com

Make-Ahead Mashed Potatoes


Ultimate Make-Ahead Gravy Recipe from MomAdvice.com

Make-Ahead Gravy Recipe


Make-Ahead Cranberry Sauce from MomAdvice.com

Make-Ahead Brandied Orange Cranberry Sauce


Make-Ahead Green Bean Casserole from MomAdvice.com

Make-Ahead Gluten Free Green Bean Casserole


Bacon, Apple, and Cornbread Stuffing from MomAdvice.com

Make-Ahead Gluten Free Bacon & Apple Cornbread Stuffing


Buttery Dinner Rolls in the Bread Machine from MomAdvice.com

Buttery Bread Machine Dinner Rolls


Sign up for the MomAdvice Newsletter!


As an Amazon Associate I earn from qualifying purchases.

Dress Up Store Bought Pies MomAdvice.com


Other great Thanksgiving ideas from MomAdvice:


Centerpiece for all seasons MomAdvice.com

DIY Table Runner for All Seasons


Thanksgiving TV Episodes MomAdvice.com

6 Sitcoms that Make Us Give Thanks


How to Make a Pumpkin Spice Latte from MomAdvice.com

How to Make a Pumpkin Spiced Latte


5 Ways to Date Your Husband in the Fall MomAdvice.com

5 Ways to Date Your Husband in the Fall


Dress up Store Bought Pies MomAdvice.com

Pin It

Gingerbread Biscotti Step-By-Step Tutorial

November 18th, 2019

Gingerbread Biscotti Recipe Step By Step Header

Did you know how easy it is to make biscotti? This great recipe shows you how to make this gingerbread biscotti treat that is perfect for dunking in a cup of coffee or hot chocolate. Get the step-by-step tutorial and printable recipe on the blog today!

One of my favorite gifts to give is homemade biscotti.

This gingerbread biscotti is the perfect gift to give for the holidays or to share in this year’s cookie exchange.

Biscotti seems like a really difficult treat to make, but it is just as easy as making a regular batch of cookies.

The biggest difference is that you bake these treats twice to get a cookie with crunch.

Gingerbread Biscotti with a Cup of Coffee

What Are Biscotti?

Biscotti are an Italian twice-baked cookie.

You begin by baking these tasty treats in a loaf, then slicing with a serrated knife, and finish them with a second round of baking.

This yields a dry, crunchy oblong cookie that is perfect for dunking!

Are Biscotti Gluten-Free?

Many of our readers need to eat gluten-free so this is one of our most commonly asked questions. Biscotti are made with flour (this recipe is made with all-purpose and wheat flour) so biscotti are NOT gluten-free.

How Can I Make Biscotti Gluten- Free?

Substitutions for all-purpose flour in this recipe can be made by using oat flour instead. Here is a recipe for gluten-free gingerbread biscotti that may cater to your dietary needs more.

where to find molasses for gingerbread biscotti

Where Do I Find Molasses In My Grocery Store?

I can admit, the first time I started making gingerbread-flavored items, I had NO CLUE where to find molasses in my grocery store.

Is molasses in the cereal aisle with the pancake mixes or is it in the baking supplies aisle?

If you are lost too, I would suggest you check both aisles. While I have found it in my baking supplies aisle, some stores do carry it in their breakfast aisle.

Don’t think of it as only being stocked near the sugar either. This can be found randomly down by spices or even near the puddings.

Don’t want to hit your grocery store? Check here and order online instead.

How to Make Gingerbread Biscotti


This Gingerbread Biscotti is filled with all of the gingerbread flavors you love.

To achieve this flavor, we mix molasses, brown sugar, ginger, nutmeg, and cinnamon into our batter.

patting the gingerbread biscotti dough

Splitting Gingerbread Biscotti Dough for a Second Bake

split gingerbread dough patted down

Gingerbread Biscotti Dough After First Bake

Cutting Biscotti for a Second Bake

The most important thing with this biscotti, I have found, it to keep an eye on it because it will go from done to burnt rather quickly!

Start checking these after twenty minutes (on your first bake time) and don’t leave them neglected after that point or you may have some burnt biscotti on your hands!

After baking these, for the first time, you will slice them with a sharp knife (serrated is a great option).

You should note that you start with a higher temperature, on the first baking, and then you reduce the oven temperature for the second round of baking.

Gingerbread Biscotti Baked a Second Time

Once they are sliced, you will spread them out on a parchment paper lined cookie sheet. 

Bake them again.

Gingerbread Biscotti Glaze

Drizzling Glaze on Gingerbread Biscotti

After finishing the second round of baking, allow these to cool completely on a wire rack before drizzling with glaze.

Packaged Gingerbread Biscotti

Close Up of Homemade Gingerbread Biscotti With Glaze

These can be packaged in festive treat bags with a little ribbon and would make a cute accompaniment to a favorite homemade drink mix, coffee, or the makings of a coffee gift basket with my homemade peppermint syrup or gingerbread syrup for easy homemade lattes.

However you package it, solo or in a basket, I guarantee that this recipe will be a hit for your holiday giving and baking!

Gingerbread Biscotti  
Recipe Type: Dessert
Author: Adapted from AlRecipes.com
Prep time: 25 mins
Cook time: 40 mins
Total time: 1 hour 5 mins
Serves: 4 dozen
A sweet and simple gingerbread biscotti recipe that is perfect for your holiday gift-giving!
Ingredients
  • 1/3 cup vegetable oil
  • 1 cup white sugar
  • 3 eggs
  • 1/4 cup molasses
  • 2 1/4 cups all-purpose flour
  • 1 cup whole wheat flour
  • 1 tablespoon baking powder
  • 1 1/2 tablespoons ground ginger
  • 3/4 tablespoon ground cinnamon
  • 1/2 tablespoon ground cloves
  • 1/4 teaspoon ground nutmeg
  • For Glaze: 1/2 cup confectioners sugar (icing or powdered sugar), sifted
  • 1/4 teaspoon pure vanilla extract
  • 2 – 3 tablespoons milk or light cream
Instructions
  1. Preheat your oven to 375 degrees F (190 degrees C). Line a cookie sheet with parchment paper.
  2. In a large bowl, mix together oil, sugar, eggs, and molasses. In another bowl, combine flours, baking powder, ginger, cinnamon, cloves, and nutmeg; mix into egg mixture to form a stiff dough (depending on your humidity, the dough may be sticky).
  3. Divide dough in half, and shape each half into a roll the length of the cookie.
  4. Place rolls on lined cookie sheet, and pat down to flatten the dough to ½ inch wide thickness.
  5. Bake in a preheated oven for 20-25 minutes. KEEP A VERY CLOSE EYE ON IT as it will go from done to burnt quickly.
  6. Remove from oven, and set aside to cool.
  7. When cool enough to touch, move over to a cutting board and cut into 1/2 inch thick diagonal slices.
  8. Place sliced biscotti on cookie sheet, and bake an additional 5 to 7 minutes on each side, or until toasted and crispy. If the biscotti already looks a little “too” crispy, you can decrease your oven temperature to 275 degrees and bake for 7-10 minutes instead.
  9. Let cool.
  10. In a small bowl mix together the confectioners sugar, vanilla extract and milk until it is incorporated. Using a small spoon, drizzle back and forth your glaze over the biscotti. Allow the icing to harden before packaging.

As an Amazon Associate I earn from qualifying purchases.

Looking for more great holiday hostess gift? Here are 3 other projects to check out!

Chocolate Coffee Spoons from MomAdvice.com make some chocolate coffee spoons to pair with the biscotti

No-Bake Peppermint Cheesecake Jars from MomAdvice.com

no bake peppermint cheesecakes in a jar

Slow Cooker Pumpkin Spice Candles slow cooker pumpkin spice candles (SO fun and easy!)

What fun treats are you baking this holiday season? Any great big batch recipes you might like to share?

Gingerbread Biscotti Recipe Step By Step Header

Pin It

Last Minute Thanksgiving Tablescape Ideas

November 16th, 2019

Last Minute Thanksgiving Tablescape Ideas from MomAdvice.com I can’t believe that Thanksgiving is upon us!

This year I get to host both sides of my family at my home for the Thanksgiving holiday so I have been in full planning mode over the last couple of weeks.
 
As a hostess, I know that often our time is more focused on the food than the decorations, but you need not spend oodles of your time crafting or purchasing a lot to make your table beautiful.
 
In fact, this post shows you that that by shopping your very own home and adding a few inexpensive items from Goodwill, you are just minutes away from the perfect Thanksgiving table.
 
Here are six great last minute Thanksgiving ideas to pull together a beautiful time for your holiday feast.
 
Thanksgiving tablescape
 

Add Thoughtful Layering

I am seeing so many beautiful layers this year for Thanksgiving decor.


Holly Mathis Interiors shows you a beautiful table that you can achieve easily by layering items from around your house or from Goodwill.

A couple of items to note in this shot, you can add backyard leaf branches in glass jars to add a rustic element, flannel throws add warmth to the table without a more formal tablecloth, pumpkins add another natural element, and you can mix and match your chairs or mix in chairs found from the store to create that homey detail that I love.

 
How pretty is that?
 
Thanksgiving tablescape
 

Add Unexpected Textures

Once again, I am seeing that people are pulling away from the traditional tablecloth and going for the unexpected texture on table.

 
In Home Stories A to Z, she has used a beautiful cabled throw to add warmth and texture to the table.
 

White linens can be stamped with gold (I love my friend Michael’s easy gold foil napkins tutorial for this!)

Check your favorite thrift store for pretty knit blanket throws or white linens for stamping.


You never know what treasures you can find in housewares until you go browse!

Additional details like pretty ribbon, personalized tags, and a few well-placed feathers never hurt either, do they?

 
Thanksgiving tablescape
 

Make Your Guests Feel Cozy


If I was going to design my perfect Thanksgiving table, it would look just like this.
 
 
Gatherings of friends in the crisp fall air with cozy blankets are such a beautiful and lovely way to celebrate the season.
 
 
Once again, we see how cozy the mismatched look can be.
 
 
From mismatched pillows to blankets to chairs, it all comes together beautifully when placed around a table.
 
 
A glass vase can hold a rustic bouquet from the backyard and pumpkins offer a beautiful detail leading up to the barn.
 
 
This is definitely my dream tablescape and can be achieved just by bringing a few of the items you have from inside your house to the great outdoors. (image source: Lexington Company)


Thanksgiving Monogram plates


Personalize It

When something has my name on it, it immediately feels special to me.
 
I love this idea for taking a simple Plexiglas circle and adding a little calligraphy to it to personalize each table setting for your guests.
 
Is your handwriting as terrible as mine?
 
I sure hope not!
 
If it is though, Almost Makes Perfect provides the template you need to create your names and simply trace them, making this a beautiful and painless craft for the table.


Thanksgiving tablescape


Add a 5-Minute Detail

Centerpieces can be pricey and feel tricky to pull together especially if you lack that designer instinct.
 
I have found that the simpler the centerpiece though, the easier it is to see and chat with my dinner guests.
 
My sweet friend, Julie Blanner, is the queen of beautiful and simple decor and she shares her easy 5-minute centerpiece for the holidays on her blog.
 
With a quick trip to the grocery store and a platter, you can add a little natural beauty in no time flat!
 
I also love these give thanks printables to tuck in your cutlery from Craftaholics Anonymous.
 
That is another 5-minute detail I feel confident that I could execute!


Thanksgiving utensils


Dress up your Utensils

 
Julie over at The Craft Patch has these adorable utensil pouches that will make any table a little more fun!
 
Wrap around the napkin with the knives and forks and your table is set and beautiful!


Herb centerpiece
 

Put the Leftover Herbs to Work

 
My kitchen is filled with sage for our favorite stuffing and herbed turkey that I have loved to serve over the years.
 
If you have any leftover, it can add a beautiful detail to your table.
 
Simply place the herbs in a glass jar and tie with a simple satin ribbon to finish.
 
Not only is this pretty to look at, but it also smells so good too! (image source: Buzzfeed)
 

Happy Thanksgiving to you and your family and I hope these easy last minute ideas inspire you for your holiday meal!


Sign up for the MomAdvice newsletter


Last Minute Thanksgiving Tablescape Ideas MomAdvice.com


As an Amazon Associate I earn from qualifying purchases. This post contains affiliate links.


Here are some more great Thanksgiving ideas from MomAdvice.com:

The Best of Fall, Halloween & Thanksgiving-49 Ideas for Decor, Crafts, Recipes, Costumes & More

Best of Fall, Halloween & Thanksgiving


Make Ahead & Freeze Thanksgiving Dinner MomAdvice.com

Make-Ahead & Freeze Your Thanksgiving Meal


DIY Thanksgiving Centerpiece MomAdvice.com

DIY Thanksgiving Centerpiece


DIY Thumbtack Pumpkins MomAdvice.com

DIY Thumbtack Pumpkins


DIY Tablerunner for all seasons MomAdvice.com

DIY Table Runner for All Seasons


Last minute Thanksgiving tablescape ideas from MomAdvice.com

No-Bake Peppermint Cheesecake Jars

November 15th, 2019

No-Bake Peppermint Cheesecake Jars from MomAdvice.com

These no-bake peppermint cheesecakes in a jar are a perfect gift to give and full of that peppermint flavor we crave around the holidays. The best part about these isn’t the jar though, it is the, “no baking required,” feature that I happen to love the most. Print this recipe today for an adorable individual-sized dessert.

These mini peppermint cheesecake jars are a fun holiday party dessert or could be a fantastic hostess gift to share with someone. This no-bake cheesecake recipe is quick and easy and perfect for stashing in the freezer for the unexpected guest.

I have a theory that any gift in a jar is more special when decorated and created in a portion size for one.

In the past, I have made only salads in a jar. Although I do love a good jarred salad, I have to say that cheesecake is a heck of a lot more fun.

This year I wanted to create holiday hostess gifts that would long be remembered, but quickly be used.

What could be more memorable or useful than a tiny cheesecake in a jar?

The thing is, I am NOT a great baker.

Why let my skill set stop me from delivering a delicious dessert though? 

That is why I thought it would be fun to make a no-bake treat instead that even a beginning cook could pull together.

These no-bake peppermint cheesecakes in a jar are a perfect gift to give. Nothing says the holidays to me more than that minty flavor and festive crushed candy canes.

Is it just me or are chocolate and peppermint the most perfect of pairs? With this dessert, I used crushed cookies instead of the traditional graham cracker crust (made from graham cracker crumbs) for my cheesecake.

I just love bringing those peppermint and chocolate flavors together.

I also love a rich cheesecake filling so I skipped a lower calorie filling substitution (like greek yogurt or sour cream) and opted for full-fat cream cheese for my filling.

YOLO, amiright?

The best part about these isn’t the jar though, it is the, “no baking required,” feature that I happen to love the most.

Here’s how to make these delicious no-bake peppermint cheesecakes.

No-Bake Peppermint Cheesecake Jars

The cookie crust, for these adorable jarred cheesecakes,  can be created by crushing the cookies with a rolling pin or pulsing them through your food processor.

Gluten-free?

No problem!

They make delicious gluten-free cookie sandwiches or I have even used a gluten-free chocolate granola as a fun substitution for my curst.

No-Bake Peppermint Cheesecake Jars from MomAdvice.com

No-Bake Peppermint Cheesecake Jars from MomAdvice.com

After laying down your cookie base you can blend up your cream cheese mixture for your cheesecake filling.

I like to use a handheld electric mixer and blend this cheesecake filling in a mixing bowl.

Folding in the whipped cream, at the end, allows helps this cheesecake filling to be light and airy.

No-Bake Peppermint Cheesecake Jars from MomAdvice.com

To get that holiday peppermint flavor, we just substitute a traditional vanilla extract with a peppermint extract instead.

No-Bake Peppermint Cheesecake Jars from MomAdvice.com

No-Bake Peppermint Cheesecake Jars from MomAdvice.com

No-Bake Peppermint Cheesecake Jars from MomAdvice.com

No-Bake Peppermint Cheesecake Jars from MomAdvice.com

The possibilities with this fun food craft are endless.

Convert your favorite no-bake cheesecake into a sweet gift. I love to decorate jars with spray paint or a scrap of pretty fabric.

These gifts can easily be personalized and will be a fun treat for whoever you might share them with.

I guarantee if you made me one of these, as a hostess gift, I would have you over and over again…

No-Bake Peppermint Cheesecake Jars from MomAdvice.com

How To Decorate Yours No-Bake Peppermint Cheesecake Jars


Supplies Needed

10 Half-Pint Ball Jars

Red Spray Paint (I REALLY recommend getting one of these to help with paint application)

Hot Glue and Glue Sticks

Green Grosgrain Ribbon

No-Bake Peppermint Cheesecake Jars from MomAdvice.com

Directions

Remove the bands from the jars and set aside. Outside or in a well-ventilated area, spread your jar lids out on newspaper.

Shake your spray paint well.

Slowly and evenly, spray your spray paint back and forth until all of the lids are covered with the spray paint.

Allow these to dry for at least thirty minutes.

Plug in your glue gun and allow it to heat up.

Tie grosgrain ribbon (any width you desire) into a small bow. 

Place your spray-painted lids on top of your jars and screw the bands into place.

Squirt a tiny dot of hot glue on the back of your bow and place it on top in the center of your lid.  Hold it in place for a minute. Sit back and bask in your crafting glory.


No-Bake Peppermint Cheesecake Jars from MomAdvice.com

No-Bake Peppermint Cheesecake Jars from MomAdvice.com

No-Bake Peppermint Cheesecakes In A Jar
 
Author: Amy Allen Clark
Prep time:
Total time:
Serves: 10
A sweet & simple no-bake cheesecake in a jar that you can give to someone special for the holidays. This is the perfect little hostess gift, teacher gift, or neighbor gift to share!
Ingredients
  • 10 Half Pint Ball Jars
  • Cooking Spray
  • 2 cups of chocolate sandwich cookies (approximately 17 cookies)
  • 1/4 cup granulated sugar
  • 1/4 cup unsalted butter, melted
  • 1 (8 ounce) package cream cheese, softened
  • 1 (14 ounce) can sweetened condensed milk
  • 2 teaspoons peppermint extract
  • 2 cups whipping cream, whipped
  • Red food coloring
  • 20 peppermint candies
  • 3 freezer bags
  • 1 rolling pin
  • For decorating jars (optional): Red Spray Paint, Green Grosgrain Ribbon, and Hot Glue
Instructions
  1. Place your chocolate sandwich cookies in a freezer bag and use a rolling pin to smash them until they become cookie crumbs.
  2. Add your melted butter and sugar to a bag and mix until the three ingredients pull together. You just want to make sure that your crust is well incorporated so it holds well together.
  3. Take the lids off of your glass jars and place them on a cookie sheet to contain the mess.
  4. Spray each of the jars with cooking spray. Put two spoonfuls of cookie crumbs into each jar and use the back of the spoon or your hands to press the crust into each jar.
  5. Slide the cookie sheet of jars back into the freezer to chill while you prepare the filling.
  6. In a large bowl, beat your cream cheese until light and fluffy. Gradually pour in a can of sweetened condensed milk until it is smooth.
  7. Stir in your peppermint extract and red food coloring, approximately three drops, to achieve a pale pink color. Mix all of these ingredients well.
  8. Fold in your whipped cream.
  9. Remove your tray of jars from the freezer. Using a standard ice cream scoop, add one scoop of filling to each of your jars. Use the back of a small spoon to smooth the filling on top until it is level and smooth.
  10. Remove the wrappers from your peppermint candies. Place the peppermint candies into a double-bagged freezer bag and use your rolling pin to smash these into small pieces to garnish your cheesecakes. Sprinkle the broken peppermints on top of each one.
  11. Screw the lids back on your jars and put these back into the freezer. Freeze for two hours or until firm.
 

Make a batch of these and keep them on hand for those unexpected occasions where a gift is needed!
It also could be a lovely reward for yourself after all of that hard holiday preparation you have been doing. You deserve it.

As an Amazon Associate I earn from qualifying purchases.

Looking for more great holiday hostess gift? Here are 3 other projects to check out!

How to Make Knitted Wine Toppers from MomAdvice.com knitted wine bottle hats and scarves

slow cooker pumpkin candles

DIY Vanilla Chai Tea Mix from MomAdvice.com diy vanilla chai tea mix in a jar

What are some of your favorite hostess gifts to give? 

No-Bake Peppermint Cheesecake Jars from MomAdvice.com

No-Bake Peppermint Cheesecake Jars from MomAdvice.com


Pin It

6 Sitcoms That Make Us Give Thanks

November 12th, 2019

6 Sitcoms That Make Us Give Thanks from MomAdvice.com

Here’s a list of everything you need to stream on television for Thanksgiving! These 6 tv shows, with hilarious and heartwarming Thanksgiving episodes, prove that this season really is all about family. Be sure to pin this post so you can remember this list of Thanksgiving episodes, for your family, every year.

From our marriage & parenting contributor, Mary Carver.

Apparently this is the year the internet decided we should get all up in arms about “skipping Thanksgiving.”

Because if I had a nickel for every meme, GIF, and comment I’ve seen about how we are just starting Christmas too soon and Hallmark and Hobby Lobby need to slow their roll and take time for Thanksgiving, I’d have a whole lot more money for Christmas shopping. 

Okay, look.

Nobody is skipping Thanksgiving.

For one thing, Friends is such a big deal this year that in the last week of November, you can go to the theater and watch all 8 Friends Thanksgiving episodes.

Calm down, Karen! Fathom Events and Friends is going to make sure we don’t skip Thanksgiving! (All those details are here.)

But also, news flash!, we can be extra grateful even while preparing for Christmas.

We can eat turkey while watching Lifetime Christmas movies.

We can hang leaves on our gratitude trees and play touch football that turns into fighting football and go around the table and talk about what we’re most thankful for even if the lights are already on the house.

It’s going to be okay.

And, if we take a little time to enjoy Thanksgiving with our favorite TV episodes devoted to the supposedly overlooked but not really holiday, it will be way better than okay.

Because something about forcing people together for a meal on which we place sky-high expectations brings out the most outrageous, laughable situations — at least on TV!

While those ingredients might make for tension and drama in real life, something about watching fictional holiday dysfunction played for laughs alleviates our actual stress.

After all, Uncle Larry might be making the rounds again with awkward hugs and offensive jokes, but at least nobody is going to end up with a turkey on her head.

Perspective, people.

Several of our favorite shows will air brand-new Thanksgiving episodes this year.

But in case you want to start celebrating early (gasp! can you imagine?!), here’s a list of shows with rich and ridiculous Thanksgiving traditions.

6 Sitcoms That Make Us Give Thanks

6 Sitcoms That Make Us Give Thanks from MomAdvice.com


Modern Family

One of the things I love most about this family is their insane competitive nature.

And for some reason, that comes out most brilliantly at Thanksgiving.

Tired of hearing humble brags about kids who play more sports and getter better grades than yours?

Join the Pritchetts as they try to prove who’s best. Stream on Hulu.

  • Punkin Chunkin – season 3, episode 9
  • Three Turkeys – season 6, episode 8
  • Thanksgiving Jamboree – season 8, episode 7
  • Winner Winner Turkey Dinner – season 9, episode 7 

6 Sitcoms That Make Us Give Thanks from MomAdvice.com

How I Met Your Mother

What do I love more than a bit that lasts multiple seasons?

NOTHING.

Not a thing.

So Slapsgiving is right up my alley, and my husband and I quote it to this day! Stream on Hulu.

  • Belly Full of Turkey – season 1, episode 9
  • Slapsgiving – season 3, episode 9
  • Slapsgiving 2: Revenge of the Slap – season 5, episode 2
  • Blitzgiving – season 6, episode 10
  • The Rebound Girl – season 7, episode 11

6 Sitcoms That Make Us Give Thanks from MomAdvice.com

Will & Grace

The Thanksgiving episodes for Will & Grace are so epic, they require more than one episode per season!

Secrets (and so much more) come out, and it makes me laugh every time! Stream on Hulu.

  • Homo for the Holidays – season 2, episode 7
  • Lows in the Mid-Eighties – season 3, episodes 8-9
  • Moveable Feast – season 4, episodes 9-10
  • Queens for a Day – season 7, episodes 10-11

6 Sitcoms That Make Us Give Thanks from MomAdvice.com

New Girl

Anyone who attempts to defrost a turkey in the dryer is clearly a Thanksgiving pro.

If by “Thanksgiving pro,” I mean someone who will make me laugh so hard I cry and also make me feel better about my own domestic abilities.

Thank you, New Girl. Stream on Netflix.

  • Thanksgiving – season 1, episode 6
  • Parents – season 2, episode 8
  • Thanksgiving III – season 3, episode 10
  • Thanksgiving IV – season 4, episode 9
  • Last Thanksgiving – season 6, episode 7

6 Sitcoms That Make Us Give Thanks from MomAdvice.com

The Goldbergs

I have been slowly watching this show over the past year.

Slowly because I love it SO MUCH and I don’t ever want it to end.

And what do I consistently love most of all?

The Thanksgiving episodes.

Because who loses her mind more at the holidays than a smother mother?

Nobody, that’s who. Stream on Hulu.

  • Stop Arguing & Start Thanking – season 1, episode 9
  • A Goldberg Thanksgiving – season 2, episode 7
  • In Conclusion, Thanksgiving – season 3, episode 8
  • Ho-ly K.I.T.T. – season 4, episode 7
  • A Wall Street Thanksgiving – season 5, episode 7

6 Sitcoms That Make Us Give Thanks from MomAdvice.com

Friends


Back in the early days of blogging, I wrote about Friends Thanksgiving episodes multiple times.

I’m not even the biggest Friends fan in the world, but could its holiday episodes BE any more iconic? Stream on Netflix.

  • The One Where the Underdog Gets Away – season 1, episode 9
  • The One with the List – season 2, episode 8
  • The One with the Football – season 3, episode 9
  • The One with All the Thanksgivings – season 5, episode 8
  • The One Where Ross Got High – season 6, episode 9
  • The One Where Chandler Doesn’t Like Dogs – season 7, episode 8
  • The One with Rachel’s Other Sister – season 9, episode 8
  • The One with the Late Thanksgiving – season 10, episode 8

Lots of other TV shows have fantastic Thanksgiving episodes (Fresh Off the Boat, Master of None, West Wing, This is Us, Parenthood, and Gilmore Girls to name just a few.) I’d love to hear about which ones are your favorites!

For a helpful guide for surviving Thanksgiving like the Gilmore Girls, click here.

Mary Carver is a writer, speaker, and recovering perfectionist. She lives for good books, spicy queso, and television marathons, but she lives because of God’s grace. Mary writes with humor and honesty about giving up on perfect and finding truth in unexpected places on her blog,MaryCarver.com. She is the author of Fast Talk & Faith: A 22-Day Devotional Inspired by Gilmore Girls and co-author of Choose Joy: Finding Hope & Purpose When Life Hurts. She is also a regular contributor to incourage.me and MothersofDaughters.com. Mary and her husband live in Kansas City with their two daughters.

What are your favorite Thanksgiving TV episodes?

This post contains affiliate links.

Love this post? Here are some other Thanksgiving posts you might enjoy!

How to Organize Board Games from MomAdvice.com planning a few rounds of board games for Thanksgiving? Check out this post on getting them all organized for family time

How to Make Homeless Care Packages from MomAdvice.com looking for an activity to do together? These homeless care packages would be a great family activity.

Printable Travel Games from MomAdvice.com hitting the road for the holiday? print out these free travel games to keep the kids busy!

Make Ahead Thanksgiving Meal Ideas from MomAdvice.com make and freeze this year’s thanksgiving meal, ahead of time, with this fun menu plan

Pin It

Easy Peppermint Mocha: Starbucks Copycat Recipe

November 11th, 2019

Easy Peppermint Mocha: Starbucks Copycat Recipe Header

Nothing says the holidays like a Peppermint Mocha. Today I’m sharing how you can make this super easy recipe right at home. There is no need to spend a lot this holiday season, with this copycat Starbucks Peppermint Mocha recipe.

With the holidays just around the corner, the one treat I love to indulge in while doing my holiday shopping is a delicious Peppermint Mocha.

What screams holiday more than a minty cup of coffee topped with whipped cream and crushed candy canes?

I was ordering these year round until they came out with the Salted Caramel Mocha, which seemed to satisfy my out-of-season mocha cravings.

Of course, wouldn’t it be lovely to be able to make these at home and save your money for your Christmas presents this year?

I hit the kitchen to try and whip up a batch of these at home.

Once I had my basic mocha recipe down from my DIY Pumpkin Spice Latte & my DIY Salted Caramel Mocha, it was just a matter of figuring out how to create the peppermint flavor at home out of ingredients I had in my pantry.

Close-Up of a Peppermint Mocha

Easy Peppermint Mocha Tutorial

Here are a few commonly asked questions about making your Peppermint Mochas at home!

What Supplies Do I Need to Make a Peppermint Mocha at Home?

The tools I would recommend are an immersion blender (or small individual blender for drinks or a simple whisk), a saucepan, and a french press or espresso pot (depending on how strong you like to make it).

I like to use a French Press for my lattes, but I also embrace my little stovetop espresso maker when I need that extra bit of caffeine.

How Can I Make a Peppermint Mocha At Home if I Have a Keurig?

I don’t, personally, have a Keurig, but two of my amazing readers shared their tricks to get that coffee shop taste at home with your Keurig.

Lora shared this idea for K-Cups-

“Try one of the dark, strong coffee K-Cups they offer! Jet fuel is one. They do make some nice strong ones you just have to look!”

What a great idea! Take a peek at some of the k-cup options for a diy latte at home.

Another reader, Kim, shared this super smart idea to brew coffee with a completely different type of k-cup.

“If you buy the iced coffee blends for Keurig (I have Nantucket Iced Coffee) and just brew it like a normal cup (not over ice) – it is super strong and works great for these type recipes!”

Another fantastic suggestion! You can shop for iced coffee k-cup options here.

Vertical Image: Easy Peppermint Mocha: Starbucks Copycat Recipe

How Do I Make My Own Peppermint Syrup?

You don’t have to create the peppermint syrup yourself, although it is really easy to do and made from pantry ingredients. 

Simple syrups are just as simple as their name to create.

It is just a matter of dissolving sugar into water, reducing it a bit, and then adding your flavoring of choice for your favorite beverages.

To make this peppermint simple syrup you will need 1 cup sugar, 1 cup water, and 2 teaspoons peppermint extract.

In a small saucepan, bring sugar and water to a boil.

Reduce the heat to medium and stir constantly until sugar is dissolved.

Stir in the peppermint extract.

Cool to room temperature and store in a glass jar in the refrigerator for up to three months.

Once you get this technique down, you can create a variety of coffee drinks and cocktails for the holiday season. This recipe yields enough syrup for 5-7 peppermint mochas at home.

Do You Have Any Peppermint Mocha Topping Suggestions?

I don’t usually top mine, to save on calories, but I do have some ideas on how you can make this festive. A drizzle of dark chocolate, white chocolate, or a simple chocolate syrup is a great to pour over a little whipped cream.

If you are feeling extra festive, try adding some fun holiday sprinkles to really make it festive

How Can I Make This Into a Peppermint Mocha Gift for the Holidays?

How fun would it be to make Peppermint Syrup in a jar as a fun holiday gift with all the supplies?

In a basket add your syrup, a good quality coffee, cocoa powder, a festive mug, and candy canes to stir, along with this recipe.

So easy and a great way to start anyone’s day.

I Don’t Have Time to Make a Homemade Peppermint Syrup. Can I Buy Peppermint Syrup from Starbucks?

Simply call ahead to your favorite Starbucks joint and ask if they have a spare bottle of Peppermint Syrup that you can buy or if they can order it for you, if they happen to be running low.

A bottle runs less than $10 or approximately the cost of two of those coffee drinks that you would buy.

Remember, you can split a bottle with a friend if you don’t picture yourself drinking one all winter long or save it for those Peppermint Mocha Frappes, in the summer months.

If you don’t care if the syrup is from Starbucks, here are some more affordable options!

How Can I Enjoy This If I Don’t Like Coffee?

First of all, how dare you.

Secondly, I have a really simple peppermint hot cocoa recipe that would still satisfy those minty cravings you might be having!

These are every bit as good as Starbucks, but costs a lot less than your coffee shop ones. I hope you will enjoy this recipe as much as you have enjoyed the other coffee creations from our kitchen!

What Our Readers Said About This Peppermint Mocha Recipe:

This is fabulous! Thank you so much for sharing. The first cup I made, I gave to my husband with the disclaimer “I’ve never made this. Don’t expect it to taste just like Starbucks.” (We are obsessed with their peppermint mocha lattes but can’t afford them). Still, his eyes lit up like I had just given him the best gift ever! It’s so delicious. 🙂- Sarah

Fabulous! I used twice as much sugar for the syrup, and twice as much peppermint extract just because i have a sweet tooth and I love a lot of mint flavor. Tried adding it to coffee without the cream, that’s just not the same, not a step i recommend skipping, but whole milk works wonders too. Thank you so much for this recipe. You saved me so much money buying my coffee out or the creamers. You definitely helped make my holiday more festive this year. So happy to read your blog. Merry Christmas!- Liz

Aren’t they the best? I hope you love this recipe as much as they did!

toppings for a peppermint mocha at home

Homemade Peppermint Mocha
 
Recipe Type: Drinks
Author: MomAdvice.com
Prep time:
Cook time:
Total time:
Serves: 1 Peppermint Mocha
Nothing says the holidays like a Peppermint Mocha. Today I’m sharing how you can make this super easy recipe right at home. NO need to spend a lot this holiday season, with this copycat Starbucks Peppermint Mocha recipe.
Ingredients
  • 1 cup milk, steamed
  • 1 cup very strong coffee (4 tablespoons coffee grounds to 1 cup of hot water, I prepared this in my French Press, but you can brew a strong drip pot if you prefer)
  • 1 tablespoon cocoa powder
  • 2 tablespoons of sugar
  • 2-3 tablespoons peppermint syrup (read the post for the directions on how to make this)
  • Whipped cream (optional)
  • Chocolate Syrup (optional)
  • Crushed Peppermints (optional)
Instructions
  1. Directions:
  2. Prepare your hot water in your tea kettle.
  3. Add four tablespoons of your favorite coffee grounds to your French Press.
  4. Pour 1 cup of hot water over them and allow the coffee to steep for four minutes while you prepare the other ingredients.
  5. In a pot, heat up one cup of milk until it is steaming.
  6. Froth the milk with a wire whisk or an immersion blender until it is nice and foamy.
  7. In your coffee cup, mix together the prepared coffee, cocoa powder, sugar, and peppermint coffee syrup until the sugar and cocoa powder are dissolved and there are no lumps.
  8. Pour the milk foam over the top of the coffee/mocha mixture and stir to incorporate.
  9. Top with whipped cream, a generous drizzle of chocolate syrup, and crushed peppermints.


Love this recipe? Here are a few others you might like!

Salted Caramel Mocha Latte Recipe from MomAdvice.com salted caramel mocha latte recipe

As an Amazon Associate I earn from qualifying purchases.

Looking for more great drink recipes? Here are a few others we think you will love this fall!

How to Make a Pumpkin Spice Latte from MomAdvice.com homemade pumpkin spice latte

DIY Your Own Chai Tea Mix from MomAdvice.com homemade vanilla chai mix recipe (an easy diy for the pantry!)

How to Make a Gingerbread Latte from MomAdvice.com how to make a gingerbread latte

How to Cold Brew Coffee from MomAdvice.com how to cold brew coffee at home

Amy's Famous Cocoa Mix Amy’s Famous Hot Cocoa Mix

Peppermint Cocoa Recipe from MomAdvice.com peppermint cocoa recipe

Homemade Peppermint Marshmallows from MomAdvice.com homemade peppermint marshmallows

Chocolate Coffee Spoons from MomAdvice.com chocolate coffee spoons (perfect for upping that mocha taste with a chocolate sauce!!)

Do you have any suggestions to improve on this DIY Peppermint Mocha?

Be sure to leave them in the comments below!

Easy Peppermint Mocha: Starbucks Copycat Recipe


Pin It

10 Genius Ways to Make Your Kids Love Reading

November 7th, 2019

10 Genius Ways to Make Your Kids Love Reading from MomAdvice.com


Do you have a reluctant reader? Julie joins the blog today to help our children develop into kids that, truly, enjoy reading.

Helping your kids develop reading skills is important, but encouraging your children to be the kind of kids that CHOOSE to read is even more important..

These creative solutions will help you choose books your child will never want to stop reading, help them pick the right reading materials that they will be excited about, help you learn to model that behavior, and (of course) make reading to your child a priority.

Be sure to scroll down for all of our suggestions on how to teach your children to read, picture book suggestions, and even more tips on books to add to your home library.


From our monthly contributor, Julie!

Over the course of my teaching career I’ve given a lot of thought to helping kids become better readers.

I’ve tried to figure out what helps some kids love reading and what leaves some kids dreading books.

This list of 10 ways to encourage your child to read at home is the result of my experiences with teaching reading and talking to hundreds of teachers, parents and students.

When we can provide ways for kids to see the benefits and excitement of reading, we can create lifelong readers.

10 Genius Ways to Make Your Kids Love Reading from MomAdvice.com

10 Genius Ways to Make Your Kids Love Reading

Pick Up Your Own Book

I interviewed a couple hundred parents as I put together this list and one thing really stood out to me: Parents who read, raise children who read. Oftentimes, when kids see parents make reading a priority, they are more inclined to make it a priority. I could give you quite a few cliches about this, but it really comes down to making sure you practice what you preach.

Listen to a podcast.

I listen to a lot of podcasts. When I listen, I get excited about new trends, products, and people in the industries that interest me. The great news is that there are also great podcasts for kids about reading designed to get them excited about new books, introduce them to authors and discover new genres. Here are some of my favorite recommendations.

Be creative about what they can read

This year I had a student who was determined to beat his brother at Minecraft. So he decided to check out a Minecraft book at the library, but stopped himself because he wasn’t sure if the book would count as reading since it didn’t seem like a real book. I assured him that this book very much counts because one of the reasons people read is to learn new information and this book looked like the perfect way for him to do just that. Just like adults have varied reading interests, we should encourage kids to read a variety of texts as well…books, magazines, blogs, graphic novels.

Go to a Children’s Book Festival

One way to help build excitement is to head out to a Children’s Book Festival. Meeting authors, seeing other kids who love reading, finding new books to read and experiencing a fun reading atmosphere can help kids see reading as an enjoyable experience rather than as a dreaded chore.

Put reading on the schedule…and protect it.

One parent I interviewed said they schedule in family reading time just like they would a sports practice. The family often reads for more than the scheduled time, but they have found that having that dedicated time on the calendar helps them make reading a priority instead of just giving it leftover time.

Put down the devices

It can be difficult to focus on reading when the tv is on, the gaming systems are fired up, and various other devices are in our hands. Set aside time in the day for some tech free time and pick up a book instead. I’m always amazed how much kids enjoy device free time…even if they don’t think they will!

Read aloud to your kids

I once had a 4th grader boy tell me how much he missed having his mom read a chapter each night to him from a book. When I let his mom know she excitedly selected a new book and started the habit back up. Many kids love being read to and reading a book aloud together can be a great way to encourage the love of literacy and bond between caregiver and child.

Choose a family book and have everyone read it

How fun for kids when they know they aren’t reading a book alone, but can call up grandma, an uncle, or a cousin to talk about the book they are reading. This is another opportunity to make reading more fun instead of something kids feel obligated to check off the list.

YA Book of the Month Club

Book subscription boxes

Do a quick online search and you’ll find loads of book-themed subscription boxes for every age. Building excitement and anticipation for books helps kids think of books as less of a chore and more as something exciting.

Did you know that Book of the Month now has a YA Club? This would make such a fun holiday gift for a reader in your life.

Join now and get your first box for $9.99 (or $5 off) when you use the code BFF5 at checkout!
 

Join a book club for kids…or start one!

Many adults find it helpful to have accountability by reading in a book club.

This means someone is going to check to see if they finished the book and they’ll have someone to discuss the book with if they have questions or thoughts.

Kids also like being able to talk about the books they are reading and a book club for kids is the perfect place to do that.

If you can’t find any book clubs near you, consider starting one of your own.

Have your child pick out a book, invite a few friends to read the book with them and then gather together with snacks to talk about the book they read.

About Julie-

Having taught in both California and Pennsylvania and everything from 3rd to 8th grade, this year Julie is teaching 3rd grade at an elementary school in Southern California. She enjoys helping her students fall in love with reading and reading during the school day is a big priority. Julie loves traveling in her free time and always makes time to pop into local bookshops when she travels. When she’s not reading or teaching, she loves running, cupcakes and Christmas. You can find her blogging too over on her blog, Girl On the Move.

This post contains affiliate links

Love this article? Here are some other great articles on getting kids to love reading!

Book Series for Kids Who Love Harry Potter book series for kids who love harry potter

The Best Back to School Books for Kids the best back to school books for kids (from kindergarten to middle school)

How to Homeschool Child with Special Needs from MomAdvice.com homeschooling a child with special needs

8 Middle School Series Books to Get Your Child Excited About Reading from MomAdvice.com teacher-approved middle series books to get your child excited about reading again

Do you have any genius tips to make your kids excited to read? We would love to hear them!

10 Genius Ways to Make Your Kids Love Reading from MomAdvice.com

Buttery Dinner Rolls in the Bread Machine

November 6th, 2019

Buttery Dinner Rolls in the Bread Machine from MomAdvice.com

You won’t believe how easy it is to make these buttery bread machine rolls in your bread machine. This is our favorite holiday roll, served up with melted butter and garnished with dried herbs. Add this super easy bread machine roll to your menu today.

Today I am sharing a foolproof bread machine roll that is perfect to make and freeze for the holiday season.

If you are looking for the perfect dinner roll, I have the perfect recipe for you.

These buttery bread machine rolls are my go-to bread recipe for all of our holiday meals.

I also love that you can switch out the toppings on the rolls to make them savory or sweet.

Just take a peek in your cupboard or fridge to dream up your own flavor combo.

Buttery Dinner Rolls in the Bread Machine from MomAdvice.com

The bread machine became my most relied upon tool when whipping up pizzas, cinnamon rolls, and fancy bread for my family.

Be sure to read read this Bread Machine 101 article for some background information on the purpose of this appliance.

If you don’t have a bread machine, check at yard sales or at your local thrift shop. My last three bread machines have all been found in places like these. They are often priced at around $15-20 used!

Be sure to check there when doing your shopping!

Buttery Dinner Rolls in the Bread Machine from MomAdvice.com

Buttery Dinner Rolls in the Bread Machine from MomAdvice.com

Buttery Dinner Rolls in the Bread Machine from MomAdvice.com

Buttery Dinner Rolls in the Bread Machine from MomAdvice.com

There is just so much to love about this roll recipe.

First of all, it isn’t sticky or hard to work with at all.

Secondly, it is quick to shape.

Third, it rises like a dream.

And fourth, you can customize the rolls to your heart’s delight.

One year I added cinnamon butter on the side or have brushed the rolls with butter and a generous shake of cinnamon & sugar.

The rolls I baked tonight, for example, accompanied our weeknight chicken noodle soup. For this flavor combination, I brushed them with a little butter, salt, and dried rosemary for a yummy finish.

If you have never made rolls before, try making a practice batch for your Thanksgiving feast, like I have shown here.

One batch of rolls will yield about 15 rolls.

Freeze the rolls after shaping. The dinner rolls can be frozen for a month, and then pulled from the freezer the night before your big day.

Allow them to rise overnight then bake as directed.

Buttery Dinner Rolls in the Bread Machine from MomAdvice.com

Buttery Dinner Rolls in the Bread Machine from MomAdvice.com

Buttery Dinner Rolls in the Bread Machine from MomAdvice.com

Here are a couple of commonly asked questions on this Buttery Dinner Rolls Bread Machine recipe!

What is a Bread Machine?

A bread making machine or bread maker is a home appliance for baking bread.

The bread machine is simple in its construction and consists of a bread pan (or “tin”), at the bottom. At the bottom of the tin are built-in paddles, mounted in the center of a small of the tin.

This little oven is controlled by a simple built-in computer, the settings for which are inputted on the control panel.

Most bread machines have different cycles for different kinds of dough. Typically, cycles include the following cycles: white bread, whole grain, French, and dough-only.

Many also have a timer to allow the bread machine to activate without you even being present.

How awesome is that?

Some of the older bread machines have just a handful of simple settings while newer models offer more advanced cycles like making jam or cake baking settings.

To be honest, I don’t use the fancy bread machine cycles and mostly use the Basic and Dough setting, which can be found on every machine.

The basic cycle is just the basic setting for making a loaf of bread.

The Dough cycle (that we are using here) just completes the kneading and rising of the dough. Once the dough cycle is complete, you can take the dough out and shape it into these simple dinner rolls.

What is the Difference Between Bread Flour and All- Purpose Flour?

The biggest difference is just protein content. Bread flour has more protein content than all-purpose, which helps with gluten development. Recipes, like this dinner roll, call for it when an especially chewy and elastic crumb is desired.

Since we want these to be more elastic in nature, we are using bread flour in this recipe.

If you don’t have bread flour on hand, you can substitute with all-purpose flour in a pinch. Honestly, I do think it makes a difference in the texture of the roll when you substitute with all-purpose flour. Bread flour yields less crumbs and has a more elastic texture, both qualities I love in a good roll.

Make Ahead Buttery Bread Machine Rolls
 
Recipe Type: Side
Author: Amy Clark
Prep time:
Cook time:
Total time:
Serves: 15
A foolproof bread machine roll recipe that can be customized with whatever compliments your meal- sweet toppings, savory toppings, or flavored butters. Freeze these for the holidays and bask in the compliments when hosting your holiday feasts!
Ingredients
  • 1 cup milk (110 degrees F.)
  • 1/2 cup butter, room temperature
  • 1/4 cup granulated sugar
  • 2 eggs, room temperature and lightly beaten
  • 3/4 teaspoon salt
  • 4 cups bread flour (you can substitute with all-purpose flour if needed)
  • 3 teaspoons instant yeast
Instructions
  1. Place all ingredients in (in order given) in bread pan of your bread machine.
  2. Select DOUGH setting and press start
  3. When dough cycle has finished, remove dough from pan and turn out onto a lightly-floured surface.
  4. Shape into balls of dough and place in a greased baking pan to make the rolls.
  5. Cover and let rise in a warm place for an hour.
  6. If freezing, freeze now (for up to one month).
  7. Before baking, allow rolls to thaw completely and rise overnight.
  8. Preheat oven to 375 degrees F. Bake in a regular oven approximately 20 to 25 minutes or until they are a light golden brown. Remove from oven and let cool slightly. Serve warm or at room temperature.
  9. Brush with butter and favorite blend of seasonings or herbs (optional)
 

These are so beautiful and so delicious. Don’t be surprised if they are the only thing everyone talks about at dinner!


Looking for more Thanksgiving Make-Ahead Dishes? Here are a few of my favorites!


Ultimate Make-Ahead Gravy Recipe from MomAdvice.com make-ahead gravy recipe

Make-Ahead Cranberry Sauce from MomAdvice.com make ahead cranberry sauce

Make-Ahead Green Bean Casserole make-ahead green bean casserole make-ahead mashed potatoes make-ahead mashed potatoes

make-ahead apple, sausage, and sage sourdough stuffing

Bacon, Apple, and Cornbread Stuffing from MomAdvice.com make-ahead bacon, apple, and cornbread gluten-free stuffing

How to Decorate Store-Bought Pies from MomAdvice.com how to decorate store-bought pies for the big day

As an Amazon Associate I earn from qualifying purchases.

This post contains affiliate links.

Buttery Dinner Rolls in the Bread Machine from MomAdvice.com


Pin It