
Are you looking for easy ways to earn extra cash for your family? Today I’m sharing budgeting apps that can help you reset for your financial future. This tutorial shares all about the Mint app and a creative robo tool option to reduce your recurring expenses.
This is the third challenge in our Passive Income for Busy Moms series because SAVED money is EARNED money. Be sure to visit our Passive Income Ideas for Moms Series all year long as I challenge myself to find new ways to earn money for our family.
Now that the holidays are over, I am sure that many of us have made resolutions to restore the order in our financial life.
Here is the honest truth. I am an incredible saver of money, but I am terrible about tracking our family expenses.
As a busy mom, this is just one more ball that I have to keep in the air.
While some might not consider analyzing the budget a passive income builder, I am here to beg to differ.
One deep dive into your finances, should indicate hidden leaks in the budgeting boat, that often drain your account month after month.
While I have been terrible about tracking, my husband has done a great job keeping up with our complete financial picture and alerts me when he sees questionable charges on our account.
It shouldn’t be just his job to save money though, especially since I handle the majority of our day-to-day expenses.
After reviewing loads of apps and trying them out, we are still keeping our feet firmly planted in Mint.com, to track our expenses.
Not only is this a program that I trust to help me be my best financial self, it is also a free app that becomes an effortless money manager once your accounts are connected.
Mint.com: Find the Hidden Leaks in Your Budget
What is Mint And How Can It Help Me?
Mint is an app (available on Android or Apple devices) that you can use to manage your family finances. Mint is currently owned by Intuit that makes many of the financial products that we use for our family and business. You may be more familiar with their other products like TurboTax & QuickBooks.
All that is to say is that it is a familiar company which helps me feel more secure.
While tracking your expenses is an important element of the app, you will also discover lots of other benefits.
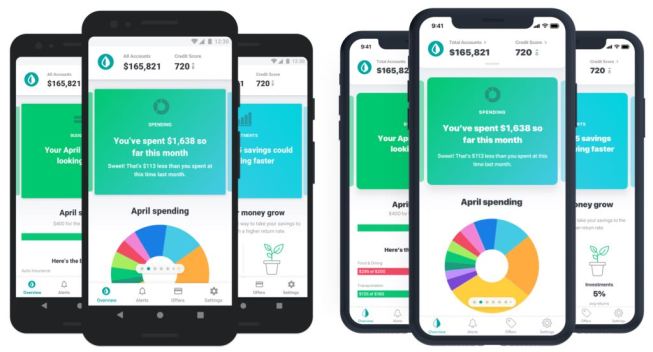
Some of my favorites are free access to your credit score (at all times with no penalties), tools to help you establish a budget (that becomes more intuitive with your spending habits), pie charts that illustrate where the heck your money is going, an up-to-date property estimate (through past sales in your area on Zillow), your total net worth, and it easily monitors your investments.
With all of our accounts linked, we now know EXACTLY what we have and where we stand with our retirement.
How many people can say that they know their exact dollar worth down to the cent?
Why is Mint Free?
Mint works just like most online businesses, including the site you are visiting right now.
Mint partners with different companies to offer you additional ways to save. When scanning through the product offers, the majority of these are credit card offers. Additionally, if you want to explore investing, they have partnerships with brokerages that can help you.
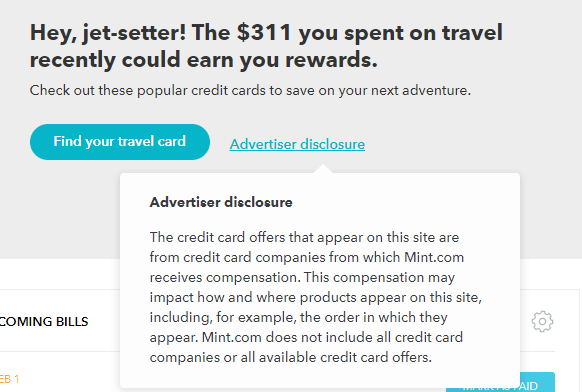
Here is an example of a credit card offer that is displayed on my page.
You can see the exact disclosure statements that are attached to the offer.
In an online world where transparency isn’t always given, I think they do a great job letting you know that they are benefiting from the exploration of the services they offer.
With over 20 million users, I am sure that many take advantage of these offers and that is what allows your account to be free. Each transaction yields a compensation that pays the company.
Is Mint Safe?
There are tons of budgeting apps (paid and free) and you can’t always know if your information will be safe. I did a lot of research on the security of Mint and found that this article was really helpful in explaining how Mint keeps your data safe.
Most of the top financial gurus would back that Mint is a really secure option for anyone who does not want to go the spreadsheet route.
They do use a multi factor authentication that is explained well in their terms of service.
Will I Be Penalized for Accessing My Credit Report on Mint?
Having access to a free credit score is amazing, but will there be a penalty to have this information readily available to you?
The good news is NO.
According to the Mint site, when you check your credit score, you are performing what is called a soft credit check. This credit inquiry won’t impact your credit, no matter how frequently you view your credit score.
This means you can check your credit score as many times as you like without a penalty.
They also offer you the option to be alerted, via push notification, when your credit score drops.
How Can I Get Started With Mint?
It only takes about ten to fifteen minutes to link your Mint account to your financial institution.
Once you have your bank account linked, you can begin plugging in additional information like any other bank accounts, credit cards, debit cards, investments you have made and more.
Once everything is plugged in, you can see EXACTLY where your money is going and your account balances. Mint will do its best to set up the proper category for you, but it will require you to review each of the transactions to make sure it is in the proper category.
This clear snapshot allows you to form a budget for your family.
Mint observes your spending habits and provides an approximate on the cap of each category that you should spend.
Ideally, you can set your own budget and try to narrow down expenses.
Good news! You, absolutely, can connect your Ellevest account to Mint so you can monitor your investment.
Also, can I just say how proud I am of you if you started your own investment account. #girlboss
To view your Ellevest Digital/Premium goals on your account aggregator (like Mint.com)- read it all here:
- You must be an Ellevest Client – You need to have eSigned on the Ellevest Dashboard to get this process started.
- Find your Folio login and create a password. To find your Folio username, log into your Ellevest Dashboard, click the user icon in the top right-hand corner, and select Login from the dropdown menu – you will see your Folio login at the bottom of the page. You’ll also see a link to instructions on how to create your Folio password – if you’re having issues, send us a note.
- Look up Folio Investing. Folio is the broker/dealer and custodian for your Ellevest account, and Folio Investing will be the company name you’ll need to search for.
I’ve Got Everything Plugged In, But How Can I Reduce My Expenses With Mint?
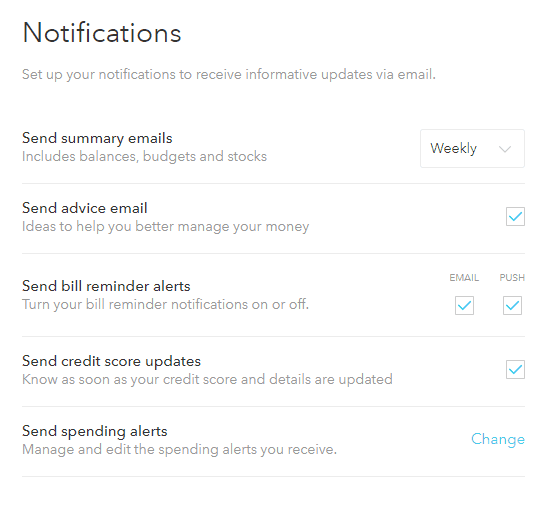
Once Mint has all your financial information, it can use this financial data to send you notifications when potentially problematic issues arise.
This is done through push notifications that you check that you would like to receive. These notifications include spending alerts, credit score updates, bill reminders, and a quick summary of how you are doing.
Should you need financial advice, it can offer that too.
You can adjust how many and how often you receive these push notifications in your Settings panel.
Utilizing tools like these will help you stay in tune to your spending habits and reduce late fees on potential bills.
I plan to take this a step further though to find all of the hidden leaks in our budget:
Recurring charges- Have you ever signed up for a 30-day trial of something, only to realize that you never cancelled it? Do you have any recurring charges for services or apps that you don’t ever use? I plan to find any hidden leaks and cancel these accounts.
Reduce grocery spending- Holy heck, we have been spending A LOT of money on groceries. I plan to try to reduce this expense immediately by being more intentional about what we are eating and cooking from scratch more.
Reduce the dining out- We are a bit snobby about food and that has not helped our budget AT ALL. Fortunately, I can cook and plan to master a few of our restaurant faves so we can reduce this expense more by eating at home.
Analyze our standard household expenses- Are we *really* getting the best deals on home insurance, auto insurance, internet, and our mobile services? I, honestly, don’t know, but this month I plan to investigate.
One Last Option To Try- Robo Tools for Adjusting Your Bills For You…With Some Disclaimers
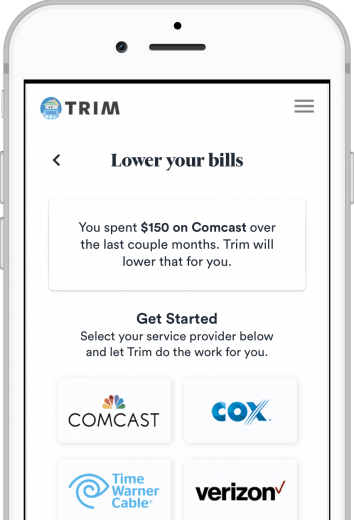
As I was researching for our Passive Income for Busy Moms series, I stumbled upon a service called Trim.
Trim is, basically, a bot service that negotiates rates, on your behalf, to lower your payments. You, basically, give them permission to act on your behalf and see if they can secure your family savings.
I set them to work on our expenses so I could give you a personal review of their services.
Our Comcast internet bill was $80 a month.
Trim sent me a text that they were able to get a fee refund (of $2.32) and they also applied for a promotion for $9.95 off for 12 months.
That is a savings of $119.40 over the course of the year.
What’s in it for Trim? Well, they take 33% of the savings they get on the bill. We were immediately charged $40.17, but we still ended up saving $79 for the year.
They also were able to flag a few things that were monthly charges that we may not want to continue spending money on.
The best part was that they also sent cancellation requests for you so you don’t have to add it to your to-do list.
If you have a lot of personal debt, it also can negotiate credit card rates and they offer premium services, to utilize a financial coach, to reduce your debt and get you on a better path.
You Saved Money with Trim. Why The Disclaimers Then?
I went through a lot of reviews and complaints on BBB, which is why I did not dedicate a separate post to this.
Many people were disheartened about the charges after the bill negotiation (which I think they are pretty clear about) and some people felt that their established services rose in cost in the months that followed.
There were also complaints filed that they could not discontinue services when signing up for premium membership plans.
For that reason, I also signed up with their premium membership, waited a month, and then canceled it.
The cancellation went through with no hitches at all.
I have not had any bills raised since I used the service and I was really happy with the savings of almost $80.
That said, if you are nervous about a bot negotiating for you, start investigating the current deals and contact the cable, phone, and internet company to see if you can get your bills lowered.
After all, the worst they can say is no.
Sign up for a Mint account (or similar budgeting app platform) and link your accounts.
Once you have your expenses categorized, reflect on your past expenses and habits.
Decide what your new 2020 budget will look like and check in daily to see how you are doing.
Consider canceling any recurring expenses that aren’t benefiting your family anymore. Do this by contacting companies directly or utilize a bot tool to reduce some of your basic expenses. Be sure to ask about loyalty plans, if there are plans that make more sense for your family (based on usage), or see if you can get discounts if you are requesting to cancel services.
I can’t wait to see what you are able to save with your new habits!
Think of this as this month’s paycheck for all your hard work!
Love this post? Here are a few others you might love!
Don’t forget to follow along on our Passive Income Challenge series. You can head here to see all the posts in one place. Have you used Mint for your budget before or do you use another budget app service? I’d love to hear your experience with budgeting apps today!

Pin It

clever fox budget planner
bibliophile book puzzle
the words you speak print (powerful!!)
library of congress card catalog
rbg paint by numbers set
textured button front coat
the good place stemless wine glass (why does my favorite show have to end??)
happy sweater
heart earrings
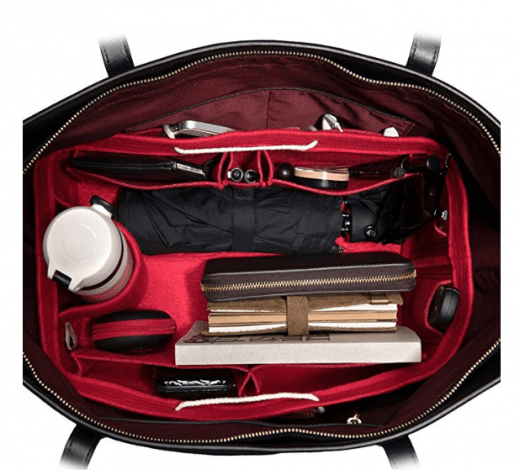 felt purse organizer (comes in several colors)
 illustrated state print (choose your own!)
 three bulb bud vase
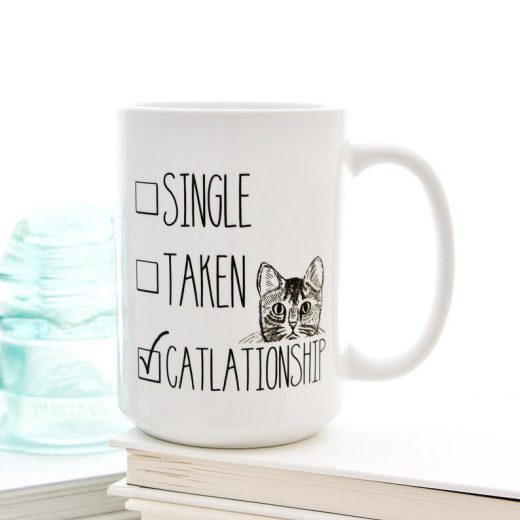 catlationship mug
 unique cutlery organizer
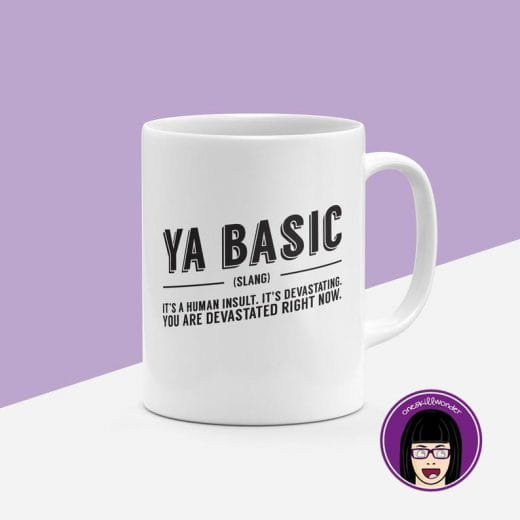 ya basic mug (one more cheer for the good place!)
 golf equipment organizer


