Amy’s Notebook 04.07.10

April 7th, 2010

These plastered jars are spectacular (@ Daily Danny)

I need to try my hand at decorating with royal icing using this tutorial for making it (@ Prudent Baby)

These homemade graham crackers look delicious (@ angry chicken)

These kitchen cabinet doors that are turned into a headboard are so pretty (@ Remodelaholic)

I love the idea of photographing a week in the life for my family (@ {A})

This pom pom tulle skirt would be so cute for birthday parties (@ Happy Together)

I want to try this French Lentil Soup recipe (@ zakka life)

I want to try Julia Child’s Best Ever Brownies (@ This Week for Dinner)

I love these ideas for making blown egg dying easier (@ Wisdom of the Moon)

This spring table setting is so pretty and makes me so happy (@ Thrifty Decor Chick)

This homemade gardener’s hand scrub looks like a great project to complete before I start playing in the dirt (@ house on hill road)

These egg on a plate cookies are adorable! (@ The Farm Chicks)

My daughter would just love making a fairy garden (@ Pepper Paints)

These homemade oatmeal creme pies look so yummy (@ Teresa Sheeley)

This spa cupcake party would be thrifty and special for tweens (@ kara’s party ideas)

This gluten-free orange poppyseed cake looks so yummy (@ Domestic Fluff)

This Lego donut birthday party is so precious (@ Under the Sycamore)

For Easter Next Year…

I love these ideas for dying eggs naturally (@ Serious Eats)

These little egg vases are absolutely beautiful (@ design sponge)

This framed book page egg wreath is stunning (@ Lemon Tree Creations)

This Easter table setting was jaw-droppingly beautiful (@ Centsational Girl)

These cake eggs would be such a hit with my kids (@ Dabbled)

An Orlando Treasure: GatorLand

April 6th, 2010

Ethan and I had a fantastic time in Orlando and I am looking forward to sharing about some of the attractions that we visited and ways you can save on enjoying many things in Orlando while you are there. We truly enjoyed our visit to Orlando and the experiences and memories we created together were just priceless.

To start this series, I wanted to share with you my absolute favorite place that we visited and some ideas for ways that you can save on your ticket to this attraction and many others that you might be visiting. You might be surprised to hear that it wasn’t Disney that holds a special place in my heart. In fact, it wasn’t anything that I thought would be that exciting, but I was quickly proven wrong by an amazing little theme park called, “GatorLand.”

GatorLand definitely is not a new attraction to Orlando residents, but we had never heard of it before and my little guy was so excited to see a few Florida gators for himself. GatorLand might sound  like a quaint touristy spot to visit, but it is, in fact, a 110-acre theme park and a nature conservatory for the city of Orlando.

When I say theme park though,  it isn’t the kind of theme park that you might think of when heading to Orlando. They have no big relationships with corporate companies, real animals (not mechanical ones) are located there, real people are guiding you and sharing about the animals, and kids are gobbling up every minute of these beautiful animals and their stories.
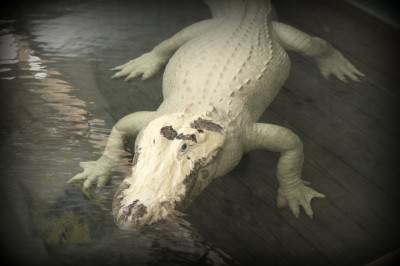
Upon entering, we were introduced to the four very rare white alligators that are currently residing in the White Alligator Swamp. These are not Albino alligators, but a very rare breed that actually have blue eyes and the white pigmentation to their skin. It is thought that there are only a dozen of their kind in the world, and four of them have happily made their home there. Technically, they are named leucistic (loo-SIS-tic), which is basically a genetic defect which produces their white pigment and the bright blue eyes that make them so unique.


While there were many alligators there, there were perhaps a few hundred more birds that are located on the property. They had everything from herons, to wood storks, to vultures that were happily residing near the alligators that were lazily swimming in the water. Our tour guide informed us that the birds love to make their nests and be near the alligators because the alligators protect them (and their eggs) from other predators. The alligators have no interest in bothering the birds and the birds know that they can make a home there.

The spot is a hot one for photographers and people come from all over the world to photograph the birds there. Photographers can buy a  pass and come in the early morning hours to sneak a peek at the birds. It was quite unbelievable all of the varieties of birds that were on the property. It would be a great place to bring a trusty bird guide and discover birds with your children!


Kids can get a closer look at the alligators in their “Gator Wrestlin’ ” arena. No worries, there was no wrestling other than the wrestling required to get the animal out of the water and give kids the opportunity to learn more about these fascinating creatures. They offer survival tips on what to do if you are ever in the path of a gator and share facts about what makes alligators so unique. Stunts, like the ones pictured above, showcase the strength of the alligator’s jaw.

For an additional $5, they offer the chance to pose with a real alligator, in the arena, which my son was very eager to do. The extra five dollars goes towards the care and food for the animals. This was all done under the watchful care of their trainers.

If your children love the creepy crawlers, then they won’t want to miss the Up Close Encounters Show. You never know what kind of animal you might be introduced to next as they unveil a variety of different snakes and spiders from behind the crated boxes. Volunteers are brought up from the audience for the great unveiling which the kids will definitely get a kick out of… especially if their mom is the one that gets selected!

There is so much more to do that we didn’t even get a chance to see while we visited. They offer a train ride around the property, a water park that the kids can play in to keep cool, and you can even sit down and have lunch or a latte there.

The price of admission is as follows:

Adult- $22.99 (if purchased online, $19.99)

Child- $14.99 (if purchased online, $11.99)

To save a little more on your visit to GatorLand, head over to print out a free 2010 Orlando Magicard which provides year-round savings at more than 75 area establishments including attractions, accommodations, restaurants, dinner theaters, ground transportation, golf courses, and cultural arts.

The Orlando Magicard is free and can be downloaded at VisitOrlando.com/deals, requested for mail delivery by calling 1-800-551-0181, or picked up at The Official Visitors Center in Orlando. The 2010 version of the card provides expanded offers including theme park deals and other significant savings options such as free nights plus additional free amenities at area accommodations; buy one ticket, get one free offers at attractions; or straight discounts up to 50% off.

If you use the Orlando Magicard at GatorLand, you can score a free train ride for each paid admission.

As a parting gift, on our way out each child got to hold a baby alligator.  The kids were so excited and were all amazed at just how tiny these alligators start out.
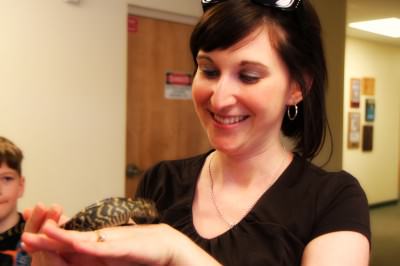
I was so taken into the moment that I even took the opportunity to hold the baby alligator myself. If you know me at all, you know that this is so not like me. I will say that my son couldn’t have been more proud of his mommy and I am so proud of myself for stepping out of my comfort zone a little!

We would like to thank GatorLand for giving us the opportunity to explore and learn more about what they offer and to experience a place in Orlando that we would have never known about. It is a hidden gem that I highly recommend if you are ever in the Orlando area.

Disclaimer: We were invited by the Orland/Orange County Convention & Visitors Bureau for an all-expenses paid trip to experience Orlando and share with our readers about our experience. All-expenses paid means that our travel, hotel stay, visits to area attractions, and food were covered by the company. We will receive no other additional compensation for the project and are asked for our honest opinions without any further obligation. To find out more about how things work here at MomAdvice, please feel free to visit our official Disclaimer page!

Do you have any hidden gems that you have found in your state or in another that you highly recommend visiting for a family vacation? Please feel free to share cool things about your own town or links to past entries on great places to travel!

An Apron Full of Giveaways 04.06.10

April 6th, 2010

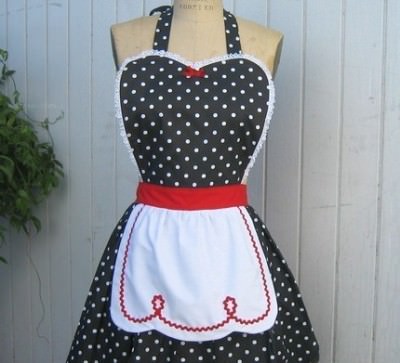
Photo Credit: Lover Dovers, $30.00

Welcome to our Apron Full of Giveaways, where we round up all of the best giveaways on the web. This is the spot where you can share your blog contests or where you can find fantastic stuff to enter.

Today we are hosting a fantastic giveaway, perfect for a date night out! We are giving away two $50 gift cards to Bonefish Grill this week to two lucky winners! I can think of no better date night then one that has no dishes and doesn’t cost a cent. I hope you will head over to The MotherLoot to get your entry in! Follow the links below to access the current contest- NO ENTRIES HERE, PLEASE!

Below are the contest links-if you are hosting a contest please link it up below. Sorry, we aren’t giving away the aprons just showcasing them! Please put your site name and then what type of contest you are hosting. For example, “MomAdvice (Children’s Movies).”

Please let me know if you have any questions and good luck to each of you!

Kool-Aid Easter Egg Dying & Deliciously Deviled Eggs

April 5th, 2010

The week was a whirlwind filled with new menu planning, Easter shopping. mountains of laundry, and trying to create a white tornado through our house, while two tiny tornadoes following behind me creating new projects for mommy! I had spent the first half of the week in Florida and the second half of my week was spent playing catch-up on life and preparing for an Easter brunch for the family. It was one of those years where Easter sneaked up on me, but it all still came together beautifully.

For our Easter brunch, we dined on our favorite breakfast casserole, a beautiful batch of bunny bread, coffee, orange juice, and fresh fruit.  If you haven’t tried those recipes, I would highly recommend them because they are always a hit in our house.

One new activity we did try this year was the Kool-Aid (or in our case the Mixade) dying technique that was highlighted in our notebook. I had an egg dying kit, leftover from last year, that I thought I might pull out if the eggs did not turn out. Lucky for us, every single color looked gloriously bright and I was so surprised how quickly the colors took to the shell, literally seconds after being dropped into the colored mixture.

We did do one cup of cold water to one packet of color and experimented with blue, green, purple, and red. We also broke out the rubber bands to create the pretty striping on the eggs. They all turned out beautifully! They were so beautiful, in fact, that I plan to do it this way every year and save myself the hassle of buying egg kits. After all, there is always a rainbow of drink packets on hand in our house for our favorite summertime treat… homemade slushies. Yum!

After the eggs have been dyed, I put them in the fridge to make deviled eggs for our Easter dinner. It is one of those little things I love to do and  I love to break out my little egg plate for this occasion.

My little egg plate was a $.50 find at our local Goodwill. I look forward to using it every year and this year was no exception. It is one of those little things that is worth the bit of pantry space that it takes to store every year.

Deviled Eggs (Courtesy of The America’s Test Kitchen Family Cookbook)

7 large eggs, cold
3 tablespoons mayonnaise
1 1/2 teaspoons cider vinegar
3/4 teaspoon grainy mustard (I used some Dijon Mustard instead)
1/4 teaspoon Worcestershire
Salt & Pepper

Place the eggs in a medium saucepan, cover with water, and bring to a boil over high heat. Remove from the heat immediately, cover, and let stand for ten minutes. Transfer the eggs to a bowl of ice water and cool for five minutes. Peel the eggs and slice each in half lengthwise (I did mine in half to make them more of an appetizer-style). With a small spoon scoop the yolks into a bowl, add the mayo, vinegar, mustard, and Worcestershire and mash with a rubber spatula until smooth. Season with salt and pepper. Arrange the egg white halves on a serving platter, discarding the two worst looking ones (if you have any that look bad). Using a pastry bag fitted with a large star tip or a plastic bag, pipe the yolk mixture attractively into the whites. Serve at room temperature.  I then sprinkled with a tiny bit of flat leaf parsley and a little paprika to top!

Freebie Friday: April 2, 2010

April 2nd, 2010

Happy Freebie Friday!! We are thankful to have Freebies 4 Mom share their list of the best freebies of the week with our readers. This week Heather is giving away a $300 Apple gift card! Make sure to enter to win for that and visit our link list for over a hundred additional giveaways happening right now.

This week on MomAdvice you can find out how to make a tray of healthy and delicious granola bars, create the best iced coffee ever, make some homemade bunny bread, and get a whole slew of inspiration for the Easter season.

Happy Easter!

Health & Beauty
Dr. Scholls for Her Insole (Facebook)
Dove Men+Care Body Wash (Walmart)
Pantene (Vocalpoint)

Food
Butterfinger
Emergen-C Recipe Kit
Kashi Cereal
Special K Protein Bar

Entertainment
iTunes Indie Spotlight sampler (Facebook)
Free MP3 downloads (Walmart)

Upcoming Freebie Events:
Please call your local store or restaurant to confirm they are participating in these freebie events

APRIL
Sur La Table Free Knife Sharpening
3 – Lakeshore Learning Craft make a silly bunny puppet 11-3
3 – Michaels Free Family Easter Event 10-1
8 – Lego Store Mini Model Build make a chick 4pm
10 – Lowe’s Build and Grow Clinic make a mini baseball game 10-11
15 – Maggie Moo’s Free Ice Cream Pizza Slice 3-7
15 – The Home Depot Do-It-Herself Workshop “Interior Painting” 7-8:30
24 – Michaels Free Family Event make a puffy clay magnet 10-1
29 – Carvel Free Ice Cream & Flavor Shotz

Retro MomAdvice 04.01.10

April 1st, 2010

One Year Ago:

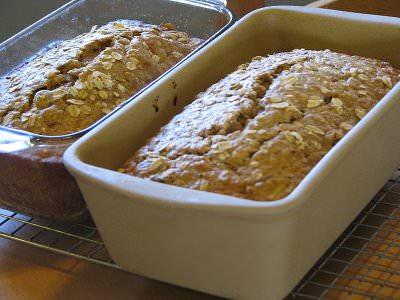
Deliciously Light Banana Oat Bread

At-Home Hair Color Savings

Notebook Experiments: Will We Like Wheat Pizza Crust?

Two Years Ago:

Cute Jewelry Holder & Homemade Jewelry Cleaner Recipe

Family Night Activity: Earth Hour

Who is the Old Lady Now?

Three Years Ago:

What a Difference a Day Makes

Finding a Mom’s Group

Being a Crafty Parent… When You Just Aren’t

MomAdvice Monthly Recap: March ’10 Edition

April 1st, 2010


I just want to say a special thank you to each of you for visiting my website and sharing it with your friends, family, and your own readers. This month was a big move for us over to a new WordPress blog and we hope that you are able to find everything easier, that you are enjoying the new full feed, and that the site is continuing to be a fun and inspirational destination.

If there is anything you would like to see on here, please contact me (amy@momadvice.com) and let me know what you would like to see in the upcoming year.

Are you on Facebook? Please be sure to Fan our MomAdvice.com Page. We would love to continue to share and interact with you! If you are on Twitter, you can find me there too sharing about our daily life and what is happening on our site. There are so many ways to connect regularly with the site and I would love to interact with you daily!

Don’t forget, you can subscribe to my feeds and never miss another thing on our site again! We have a landing page where it makes it easy to subscribe to our blogs and you can even subscribe to my article feed. Everything is right at your fingertips and we want the site to be a daily destination for you and your family!

This month’s top referrers were:

1. Freebies 4 Mom
2. Like Merchant Ships
3. Tip Nut
4. Facebook
5.  Swagbucks
6.  Organizing Your Way
7. Lifehacker
8.  Feels Like Home
9. Nest Files
10. Kingdom First Mom

Please take some time this month to check out each of their sites. They are amazing at what they do and we are thankful that we have such great supporters!

This month’s top articles & entries were:

1. Throwing a Baby Shower on a Budget
2. Delicious & Easy Cereal Bars
3. Eating Healthy at Aldi Supermarket? Yes You Can!
4. Great Reads for Moms: February ’10 Edition
5. Mistreating My Windows the Type-A Way
6. Welcome to Our New to Us House
7. The Best Steakhouse Experience on a Poor House Budget
8. Chicken, Broccoli, & Fusilli in Garlic Cream Sauce
9. Iron Chef Moms Challenge: Day One
10. Weekly Meal Planner Download

Homemade Bunny Bread

March 31st, 2010


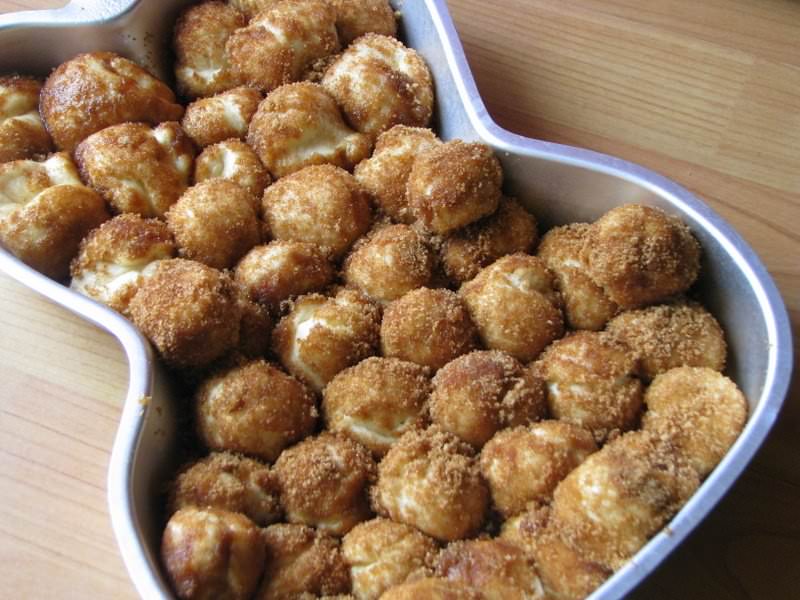
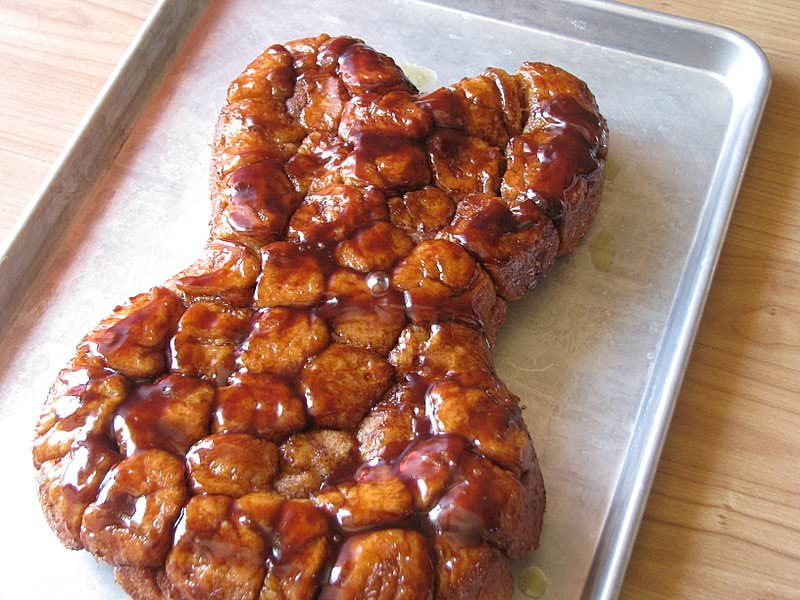
When I see cake pans at the thrift store, I can’t resist picking them up, even if I have nothing in mind to do with them. This bunny-shaped pan was $2 at Goodwill and has been gathering dust in my basement. I decided to break it out to make the kids a special Easter treat.

Our Easter tradition usually consists of my homemade cinnamon rolls, but I thought it would be fun to do something a little different this year. I remembered this great little recipe for homemade monkey bread and also know that it happens to be one of my husband’s favorite childhood treats so I thought I would give this recipe a spin.

I opt for the lazy version though and prefer making things in my handy little bread machine, so I modified the recipe to put my little appliance to work and thought I would share my version here.

Homemade Bunny Bread or Bread Machine Monkey Bread
Author: Adapted from Baking Bites
Prep time: 10 mins
Cook time: 2 hours
Total time: 2 hours 10 mins
Serves: 6
Ingredients
  • 1/4 cup water, warm (100-110F)
  • 2 tbsp butter, melted
  • 3/4 cup milk, warm (100-110F)
  • 1/2 tsp vanilla extract
  • 1 large egg (beaten)
  • 3 – 3 1/2 cups all purpose flour
  • 1 tsp salt
  • 3 tbsp sugar
  • 2 1/2 tsp active dry yeast (.25-oz)
  • Sugar Mixture:
  • 2 cups brown sugar
  • 1 1/2 tbsp ground cinnamon
  • 1/2 tsp ground allspice
  • 1/2 cup butter, melted
Instructions
  1. Lightly grease a standard 10-in bundt pan with vegetable oil or any cake-shaped pan. Set aside.
  2. In a microwavable bowl, combine the water, milk, and butter and microwave it for one minute (or just until warm). Pour this into the bottom of your bread machine. Add the egg and vanilla next. Add the flour, salt, sugar, and then finally the yeast. Run the Dough cycle on your bread machine and let it run through the entire cycle until it beeps.
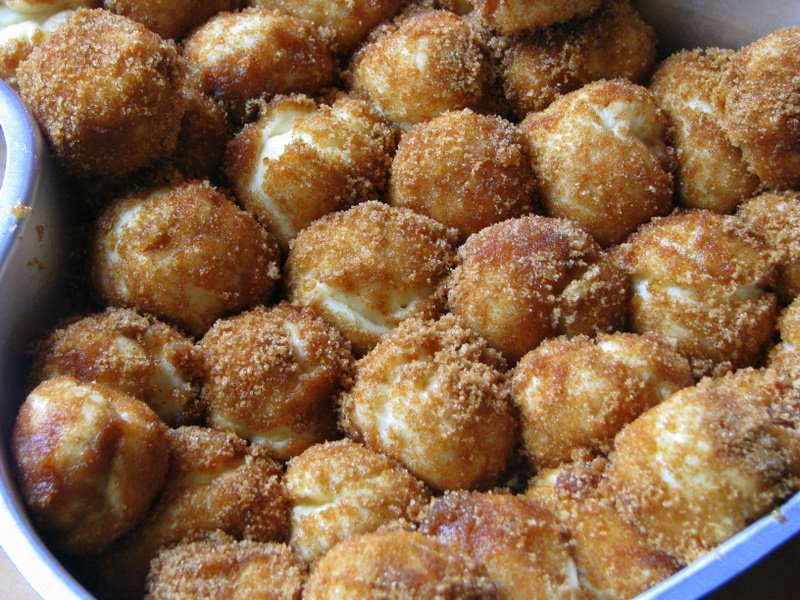
  3. Turn dough out onto a very lightly floured surface and gently deflate so that dough is relatively flat (maybe 1/2-3/4 inch thick) Using a knife or a bench scraper, cut off small pieces of dough to form 1/2 to 1-inch balls. As you cut each piece of dough, roll it into a ball in the palms of your hands. Dunk each ball in butter, use the fork to remove it and transfer it to the sugar mixture to be thoroughly coated. Place all coated dough balls into prepared bundt pan.
  4. Once all balls have been coated and places in the pan, cover the pan lightly with plastic wrap and let bread rise for 60 minutes, until almost doubled in size. I covered this with plastic wrap and then popped it in the fridge overnight.
  5. Preheat the oven to 350F when you are ready to bake it.
  6. If it is in the refrigerator, pull it out a half hour before and let it rise on the kitchen counter before baking. Bake for 30-35 minutes. Bread will spring back when lightly pressed. Let bread cool in pan for 10 minutes, then turn out onto a serving platter.
  7. Eat immediately (or reheat leftovers), as the bread is best served warm and gooey.
Pin It

Amy’s Notebook 03.31.10

March 31st, 2010

I want to make a terrarium centerpiece for my kitchen (@ Nesting Place)

I love these eggs dyed with the painter’s tape and freezer paper technique (@ LollyChops)

This door shelf is a great way to dress up a corner in your home and I love this wreath frame too (@ The Idea Room)

This baby sophisticate knitted baby cardigan pattern is beautiful (@ Sew Nancy)

Making homemade chocolate bunnies seems ambitious, but I will admit that I am intrigued (@ Epicurious)

This interchangeable tiered cake stand is adorable (@ giver’s log)

I want to make (and eat) this Peep wreath (@ tried and true)

This quick fix grocery bag is so smart and eco-friendly (@ Between the lines)

This Peep bunting is so festive and fun (@ V and Co.)

This spicy bean dip looks like a great side to bring to the next potluck dinner (@ Rookie Cookie)

I love these simple Easter cupcakes (@ simple bites)

These chocolate coconut Easter cupcakes are adorable too! (@ Baking Bites)

Iced Coffee the Cold Brew Way

March 30th, 2010

I have a few weaknesses in my life- pretty yarn, delicious books, lovely shoes…and coffee, coffee, coffee!  In the winter, I crave a hot drink to warm my hands. In the summer, it is an entirely different story and I want a delicious iced coffee  to keep me cool while I dream of exotic vacations and escaping the reality of my mountains of laundry and cranky children. Does coffee let you escape too?

As the Indiana weather has begun to make it’s way towards Spring, I was anxious to finally give the cold brewed coffee technique a try from the New York Times.  This winter, I saved my Swagbucks and decided to buy myself a treat… a French Press that I could use in the evening for my decaf coffee. When Rachel highlighted her own cold brew technique using a French Press on Small Notebook (and then featured here), I had to put my little gadget to work and see what all of the fuss was about.

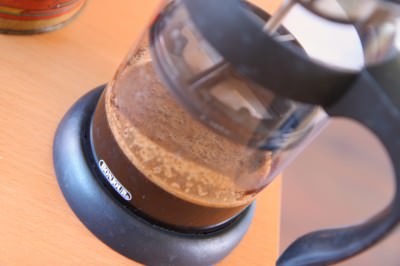
Traditionally, when I use my French press, I heat the water in my teapot and then add it to the grounds, steep it for about four minutes, and then plunge it to push the grounds down. With the cold brew technique, you just do everything wrong. You put in the grounds, add cold water, don’t plunge it for an entire night, add more water, and then finally plunge it for your iced brew. To be honest, it looks like really watery coffee sludge and you wonder if you just wasted your coffee and a moment of effort to pull it together.

I then poured it and mixed mine up with almost half skim milk and a generous little shake of caramel coffee syrup and excitedly went in for a taste. The taste? Coffee perfection! There is no bitterness and no coffee edge at all.  It just tastes like a delicious coffee that you would get at the fancy coffee joints, but only costs pennies versus dollars!

After I made a coffee for myself, the next day I made one for my grandmother. If you don’t believe me that it was good, perhaps seeing the two of us ladies rushing over to Target that-very-instant to buy a French press so she could easily replicate the coffee at home, our fun discussion dissecting the recipe and what could be done with it, and then talking about how delicious it was for an hour just might convince you.

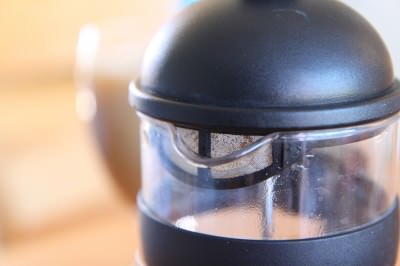
Really though, a French press is not required for this technique, in fact, you could just use a coffee filter and a jar, if you don’t want to make the purchase. If you are in the market to buy one, I recommend one that has a second mesh filter around the lip (as pictured above) to give your coffee an extra strain. Should you use the medium grind coffee, as recommended by the manufacturer, you might not need this additional strainer as much. If you are like me though and choose to use the coffee you already use every other day of the week (which is most definitely not always freshly ground) then that extra little strainer might come in handy. The one pictured here is the BonJour Hugo ($19.12).

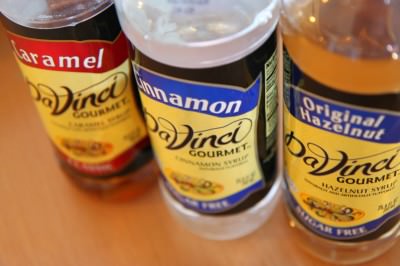
As an aside, I have made my own coffee syrups and also have bought them. It really depends on how motivated you are, but I love to have a variety of them when I have my girlfriends over for coffee. I am all about the coffee shop experience on a pauper’s budget, and syrups are one of those things that make my coffee brewed at home feel a little more special.

The best deal I have found on them has been at the wholesale club. Our local Sam’s Club (our area does not offer a variety of wholesale clubs, unfortunately for price comparison purposes) offers a 25.4 ounce container of gourmet coffee syrups for $4.42. Basically, for the price of one of those expensive caramel coffees, you can make a few dozen of them. The prices in the grocery store typically are much higher so if you are going to buy them, definitely put your membership card to work on this purchase and peruse the aisles for affordable coffee too!

**********************

Cold-Brewed Iced Coffee (Recipe Courtesy of The New York Times)

1/3 cup ground coffee (medium-coarse grind is best)

Milk (optional).

In a jar, stir together coffee and 1 1/2 cups water. Cover and let rest at room temperature overnight or 12 hours. Strain twice through a coffee filter, a fine-mesh sieve or a sieve lined with cheesecloth. In a tall glass filled with ice, mix equal parts coffee concentrate and water, or to taste. If desired, add milk.

For the French press: Place 1/3 cup of ground coffee in the bottom and add 1 1/2 cups water. Allow to sit overnight without pushing down the plunger. The next morning, add 1 more cup of water. Add milk as desired and coffee syrup as desired. Stir and serve.

For more great coffee tips and tricks for savings, be sure to visit, “A Frugal Mom’s Guide to Good Coffee.”  I told you, I am so passionate about this topic!

**********************

To clean your French press– Keeping your French press clean is quick and easy. First, dump the grounds in your trash can and not down your sink. You may want to trust me on this, but even with the best garbage disposals it can create a big mess and clog your drain. I use a spoon and scoop as much as I can out of the bottom before giving it a wash.

Most French presses can be placed into the dishwasher for easy cleaning on the top rack. If you are worried though, don’t hesitate to give it a quick wash by hand (using just a tiny bit of dish soap). For the unbreakable plastic variety, a little shake of baking soda and water is an ideal way to get it clean. Allow it to air dry or gently towel dry it, if you are trying to avoid the spotting. However you clean it, put it to good use and make it earn its keep in your cupboards!

What are some ways that you save on your coffee experience? Any tips or tricks for cutting the cost on your daily brew?