MomAdvice On the Move: Family Reunions, Vacation Planning,Outdoor Parties, & BlogHer Food

May 18th, 2011

Photo Credit: Simple Tess

Craving some afternoon reading today? MomAdvice is on the move and I am sharing on a few other sites this week some fun seasonal advice for the summer season!

This week on Goodwill Tips, I am sharing all about the great finds you can grab at your local Goodwill store before heading off on your next vacation. Certainly, thrift store shopping might not come to mind when buying items for your next vacation, but if there is anything I have learned when it comes to saving money, Goodwill is my first stop when I need to do a little shopping for a trip. Swing on over to Goodwill Tips for a list of great items to stock up on for your next vacation.

Over at Kenmore, you will find me dishing about ways I save on outdoor entertaining. Creating an elegant spread on a budget can be challenging, so I’m offering a few tips for making the most of your entertaining budget in the summer months. I am also sharing a fun recipe that can be made in your slow cooker for the big day so you can enjoy time with your friends instead of hovered over a stove all evening.  Get the scoop over at Kenmore on genius ideas for making entertaining easier for your family.

Are you planning a family reunion this year? Be sure to visit my article on Snackpicks to streamline the process of entertaining such a large group.  This article will have you covered from creative invites, to easy recipes, to games that the whole family can do together. Planning a great family reunion does take effort, but it will create a lifetime of memories that your family will long remember. Visit my article for just a few tips to help you plan a successful and memorable family reunion.

I am also on the move, literally,  as I head to Atlanta tomorrow for BlogHer Food. I am so grateful to Walmart for sponsoring my ticket, travel, and accommodations for this conference.  This will be my first BlogHer Food and I am very excited to learn how I can make the Recipe section of our site better for our readers and learn more about food photography, vlogging, and writing. Thank you again to Walmart for making this trip possible for me so I can make this site a better resource.

Amy’s Notebook 05.18.11

May 18th, 2011

I want to make one of these pie tin organizers from thrift shop finds (@ MaryJanes & Galoshes)

This vintage trophy coat rack would be a cute way to decorate a little boy’s room (@ design sponge)

This vintage book made into an expanding file folder would be a great way to tidy up paper clutter (@ Just Something I Made)

I want to try this recipe for Chicken Caesar Salad with an egg-free dressing (@ gimmie some oven)

This chicken florentine pesto pasta looks like a fun weeknight dinner (@ Simply Recipes)

My daughter would flip for this cotton candy tulle skirt (@ Simple Simon & Co)

These DIY coasters in spring colors would be a fun craft to try (@ A Little Hut)

These raspberry struesel bars look like a delicious little snack (@ Brown-Eyed Baker)

This sunny cardigan would be a great layering piece to add to my wardrobe (@ Pickles)

This crocheted circle necklace is such a fun accessory (@ happy together)

Have you tried anything from our featured notebook entries? We would love to hear what projects you tried and how they worked out for your family!

Oh, Baby: Sweet Knitted Baby Hats

May 17th, 2011
Photo Credit: Nancy Lary Studios

Baby hats are my latest knitted obsession since they are so easy to create and to give. I admit, I used to lovingly knit baby blanket after baby blanket for my friends. Those, unfortunately, require a lot of sweet love and endless amounts of free time. I decided I wanted gifts that could be knit in a couple evenings worth of television shows and that their mommies could actually use instead of storing them away. Hats really seem to fit the bill and their are endless patterns for adorable baby patterns out there.

Once you get the hang of knitting in the round, baby hats are a piece of cake! I will share with you my new favorite patterns and a few tools that can help you achieve baby hat success when knitting!  I usually try to highlight only free patterns, but these were a few that I did pay for. I do promise that the patterns are well-written and are the type that can be  made over and over again for gifts. I hope that this post will still inspire and give you a fun new gift to knit for a special little one in your life.

If you are a knitter, I would love for you to be my friend on Ravelry. My username is momadvice and I try to keep my little notebook updated with the current projects.
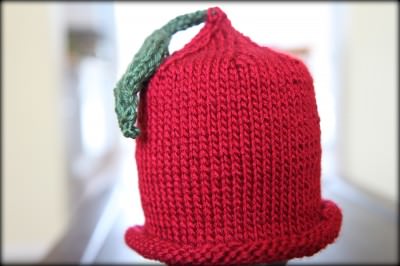
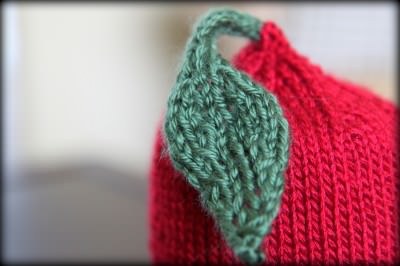
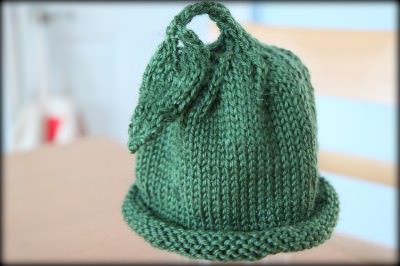
Photo Credit: Nancy Lary Studios

cherry tomato hat (in red) & sprout hat (in green)

Pattern: Greenleaf Baby Hat by Evelyn Uyemura (available for $1.00 as a Ravelry Download- join Ravelry.com to access the pattern)

Needle Size: US 8 (I purchased this set of 12″ circulars for these hats)

Yarn: Naturally Caron Country (Claret) & Caron Simply Soft in Dark Sage for stem. The green hat is done only in Caron Simply Soft in Dark Sage

Notes: If you are looking for a great beginner pattern for making hats then this is the perfect pattern for you. This simple roll brim hat is simply knit in the round until you get to the top and then you create a basic i-cord to create the stem of the flower.  An easy set of increases and then decreases creates the leaf at the tip of the hat.

I did the roll brim pattern and made the i-cord about a 1/2” longer than the pattern specified. I also knit this hat on size 8 needles (for a 0-6 month size versus the newborn size).

This pattern could be knit into a variety of cute fruits and vegetables or in a solid color as I did for the second hat pictured above. Fall hats could be created into pumpkins, red and green would look adorable for a Christmas baby, and I can’t wait to try other fun additions to this adorable pattern.

The beautiful model in these photos is my sweet friend Andrea’s beautiful baby girl, Evey. She was so kind to let me share her photos on the blog. I could not have asked for a prettier model to model them!
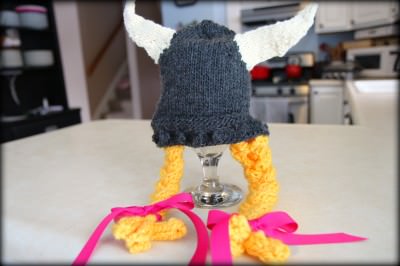
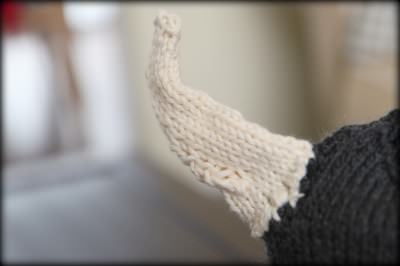
Photo Credit: Nancy Lary Studios

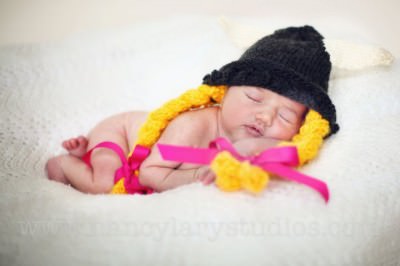
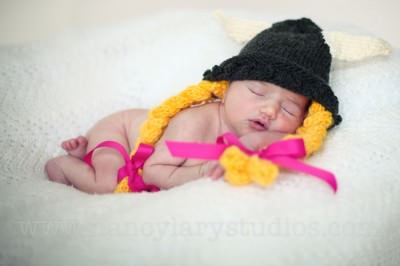
brunhilde hat

Pattern: Viking Girl Hat by Sara Fama; Pattern is $7.50, but you can use a coupon code (“Ravelry10”) to receive 10% off the pattern. Pattern kits can also be ordered with the yarn used in the pattern, but I was able to find similar colors of yarn at our local craft shop.  The pattern included the pattern for the boy hat as well as the hat in different sizes.

Needle Size: US 6 (I purchased this set of 12″ circulars for these hats)

Yarn: (Charcoal), Loops & Threads Charisma (Yellow), Hobby Lobby I Love This Cotton! (Ivory)

Notes: Ever since I learned how to knit, I have been dying to make this hat. This has literally been bookmarked for over a year, in hopes that one day I would feel brave enough to knit it. A baby shower gift was the perfect opportunity to splurge on the pattern and give it a try. I can’t begin to tell you how much pride I had making this hat.

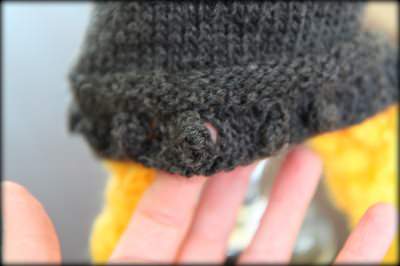
This hat really taught me a lot of new techniques, but the piecing of it was a little tedious. Beginning knitters will need to know how to knit bobbles (brief description is available in the pattern), create i-cords, knit on dpn’s, and knit in the round. Luckily, YouTube offers great video tutorials on these techniques to make creating this a little easier.

I made the Brunhilde pattern, but once I made the little wings for the hat, I did not think they looked like a Viking hat. It may have been to the stretch and give of the cotton yarn, but they just did not stand to attention like I had hoped. I opted to make the boy version of the horns and liked them much better. These were whip stitched in the same cream color).

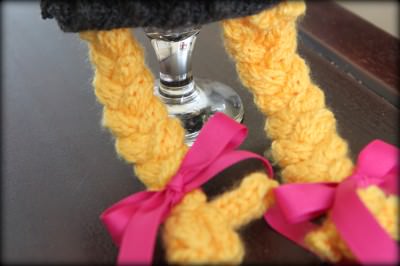
The braids were really fun to knit and are knitted in three separate i-cords (attached by two rows of knitting at the top). I finished them with tightly knotted yarn and then grosgrain hot pink ribbon bows from my craft suppplies.

There is a lot of freedom with this pattern and it was written well, with a lot of comedic style and fun mixed into it. I am really proud of how this hat turned out and still can’t believe I actually made it!
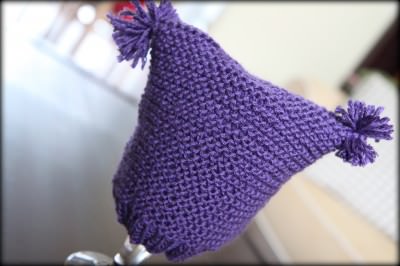
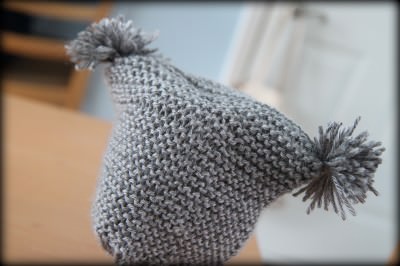
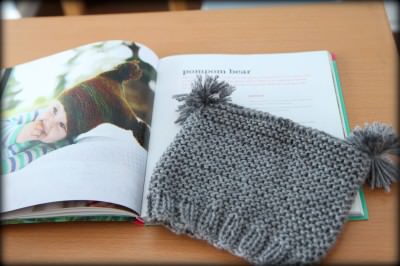
purple pom pom hat & pom pom gray baby bear hat

Pattern: Pompom Bear by Amanda Keeys; I purchased this Baby Beanies Book to get the pattern. This is one of only three knitting books I own- I promise, it was a worthy investment if you are looking for easy hats to knit for baby gifts.  I have already knitted four hats from it and plan to knit many more patterns in this one.

Needle Size: US 8 (I purchased this set of 12″ circulars for these hats)

Yarn: Caron Simply Soft in Heather Gray (for the boy version) & Naturally Caron Country in Dark Purple (for the girl version)

Notes: This hat is so fun to knit and is as cute as could be. In fact, each time I make this hat, I get an order request from another friend who wants one for her own little one. The hat has an easy ribbed edge and then is made into a garter stitch from there by just alternating rows of knitting and purling in the round.

It really is the most perfect hat for a beginning knitter because you don’t have to ever decrease this hat or use double-pointed needles to finish it. It is made even easier with a three needle bind off….which has changed my knitting world. I will link to a tutorial on this to help explain it, but if there is ever an opportunity for a three needle bind off in any of my projects, I am doing this. I used the circulars as though they were two straight needles and then used a DPN to knit them together and then bind of the stitches.

**************************************

If you are just beginning the world of hats, these are the three things that really helped me have success getting comfortable with double-pointed needles and knitting in the round.

3 Things That Helped Me With Making Wee Baby Hats

1.Bamboo 12″ circulars– Here is the honest truth. If you are super coordinated with double pointed needles, you can skip buying these and knit the wee baby hats in the round. I have found that knitting baby hats in the round was more of a challenge than I expected, and my mother-in-law recommended purchasing 12″ circulars so the hats do not have to be started on the DPN’s. These were a lifesaver and I will always use these for starting my hats. They do require a bit of coordination since they are shorter & smaller than your normal circulars, but they are worth the effort.  I applied my Swagbucks towards Amazon gift cards to help reduce the cost on these.

2. Bamboo 9″ Double Pointed Needles– Again, these are an off-brand needle and they were extremely rough so they held my stitches really well. As a beginner on these, these rough double pointed needles were key for me to get the hang of it without dropping stitches. It was a lot cheaper to buy these as a set and I did apply my Swagbucks towards the Amazon gift cards so I didn’t have to dip in my pocket to pay for them. You could go with a different length on these, but I opted for these 9″ ones and they still work great for the baby hats as well as the adult hats I knit.

3. A Good Ring Marker- I was using the kind that you just slipped over the needles and was finding that I was losing my starting stitch marker for knitting in the round. Look for ones that will slip onto the yarn and put that at the beginning of my round. It will really help you not lose your pace and keep you on track with your knitting.

*******************

Disclosure: The links to books and supplies are affiliate links and are provided so you can locate what you need quickly and easily. Feel free to order a book, but we encourage utilizing the library system and buying me some yarn instead.  Wouldn’t that just be so much more lovely?

What craft projects have you been working on? Feel free to share any links to what you are working on and be sure to friend me on Ravelry if you happen to be a knitter too! Access all of our craft fun on MomAdvice by visiting our Craft Section. Happy crafting, friends!

An Apron Full of Giveaways 05.17.11

May 17th, 2011

ImaginAprons, $36

Welcome to our Apron Full of Giveaways! I hope everyone is having a great week this week! As we do each week,  here is our round-up of giveaways for our readers. We hope that this is beneficial to you and your family! Please let us know if you guys win anything- I love to hear the success stories!

Below are the contest links-if you are hosting a contest please link it up below. Sorry, we aren’t giving away the aprons just showcasing them! Please put your site name and then what type of contest you are hosting. For example, “MomAdvice (Kid’s Movies).”

Please let me know if you have any questions and good luck to each of you!

Lighter Whole Wheat Chocolate Chip Pancakes

May 16th, 2011

When people ask me what I am most proud of that I have done for my family, I will answer you with two words… creating traditions.  I think what makes our family unique is not only our commitment to live within our means, but to have fun doing it along the way by creating family traditions that I hope my children will someday remember fondly. Perhaps one of my most favorite traditions is our Jazzy Sunday tradition of delicious waffles and jazz music. Those two are the perfect merriment for our family and no Sunday would be complete without this special time together.

It is nice to switch up the traditions though, and this particular Sunday felt like the perfect pancake kind of morning.  In the fall months my Light & Fluffy Pumpkin Pancakes are a family favorite, in the summer my Fresh Blueberry Pancakes are a fun breakfast treat, and Piggy Pancakes happen to be a year-round way to cheer up my kids when they have had a rough day.

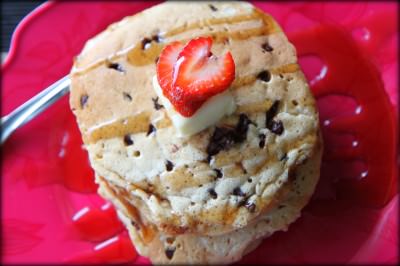
Chocolate chip pancakes are my daughter’s new favorite thing after a school field trip to a local restaurant served a plate of these up to her.  I prefer a hearty pancake that will stick to their ribs especially when heading for a jam-packed day of school. I decided to whip up a batch of these whole wheat chocolate chip pancakes to satisfy her pancake cravings that just happen to be filled with wheat flour, wheat germ, and mini chips for a good balance of sweetness to round them out. I promise you won’t miss that white flour at all and neither will your kids!

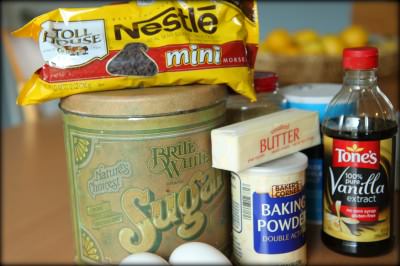
Let’s gather up our ingredients for this fun recipe. You will need whole wheat white flour (or you can substitute with half white and half wheat flour), wheat germ, baking powder, salt, butter, skim milk, eggs, vanilla extract, sugar (just a tiny bit), and mini chocolate chips.

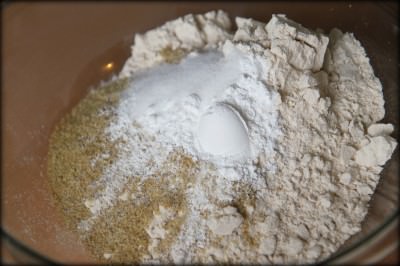
In a large bowl mix together your whole wheat white flour, wheat germ, baking powder, salt, and sugar. I like to break up the lumps with a whisk.

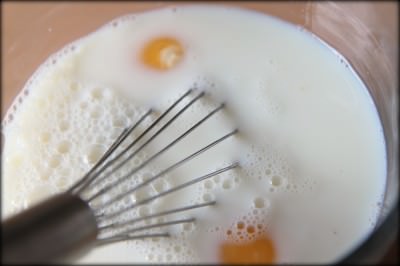
In a separate bowl whisk together your skim milk, eggs, vanilla, and melted butter.

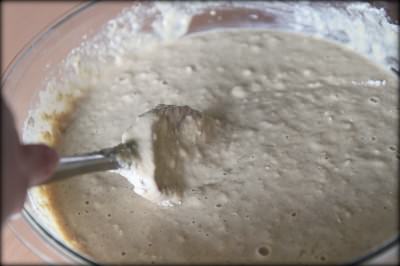
Now mix the wet and dry ingredients together, just until they are incorporated. It’s okay if the batter is lumpy, I promise!

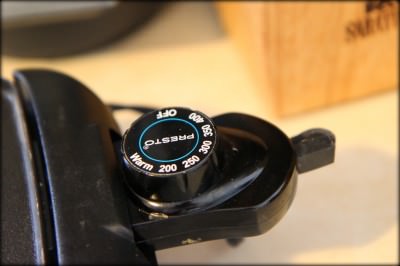
Preheat your nonstick griddle to 350 degrees or spray a skillet with nonstick cooking spray and heat on medium heat.

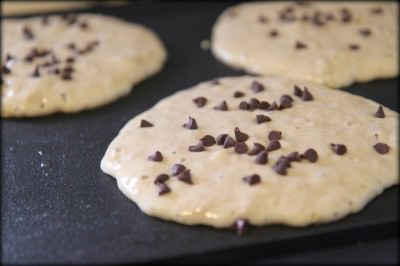
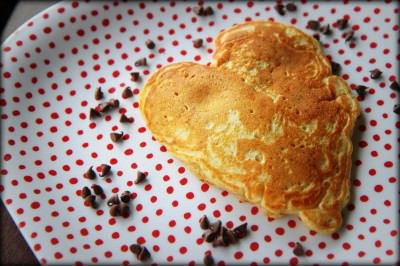
Ladle 1/4 cupfuls of batter onto your griddle and then sprinkle with a tablespoon or so of mini chocolate chips (if desired). Let the pancakes cook until they begin to bubble, then flip. Cook until golden on the other side. Serve with a little syrup and fresh strawberries. Yum!

Lighter Chocolate Chip Pancakes

1 3/4 cups white whole wheat flour
1/4 cup wheat germ
2 teaspoons baking powder
1 teaspoon salt
1 3/4 cups skim milk
1/4 cup margarine, melted
2 eggs, beaten
2 teaspoons vanilla
3 tablespoons sugar
Mini chocolate chips (optional)
Cooking spray

Combine flour, wheat germ, baking powder, and salt in a large bowl. Set bowl aside. In a separate bowl, whisk together the skim milk, melted margarine, eggs, vanilla, and sugar. Make a well in the center of the dry ingredients; stir in the wet ingredients, being careful not to over mix the batter.  Heat a large skillet over medium heat, and coat with cooking spray. Pour 1/4 cupfuls of batter onto the skillet & sprinkle each pancake with mini chocolate chips (if desired). Cook until bubbles appear on the surface. Flip with a spatula, and cook until golden brown on the other side.

Recipe Source: Adapted from AllRecipes.com

I put a shout-out on our Facebook Fan Page asking for any recipe requests for these upcoming summer months. What recipes are you looking for?  I would love to hear what you want to see so can create recipes that your family will really enjoy! Thanks so much for your help, friends!

Amy’s Notebook 05.11.11

May 11th, 2011

I love this scarf made from vintage handkerchiefs (@ Skip to My Lou)

I am so inspired by these gorgeous flowers made from napkins (@ Made)

I want to try these lemon blueberry cupcakes because they are two of my favorite flavors (@ Annie’s Eats)

This flip flop strap is the perfect solution for little feet (@ make it and love it)

This tissue flower wreath is a sunny addition to a front door (@ MaryJanes and Galoshes)

These knitted tube sock leg warmers are adorably retro (@ the purl bee)

I am making these peanut butter & chocolate bars for a fun after school snack (@ The Farm Chicks)

This handmade bow ties are too cute for words (@ Blue Cricket Design)

These daffodil cake pops would make a really beautiful and delicious gift (@ Bake at 350)

Sweet & Simple Mother’s Day Gift

May 10th, 2011

I hope everyone had a wonderful Mother’s Day. We really celebrated simply this year and it was still just as perfect. This year I decided to drop the Mother’s Day gifts the day before Mother’s Day so I could really enjoy a day to myself too this year. I don’t know about you, but there is nothing like a fresh bouquet of flowers bought just for me. I know our moms love them just as much so I headed over to the store to pick up a pretty  bouquet for each of them.

Supermarket bouquets can sometimes not feel as special as the fancy florist so I love to add my own little touches to the bouquets to make them a little more special. You can find rolls of tulle over in the craft section of your superstores or in the wedding section of large craft stores. Cut off a long strip of it to tie an elegant bow on your bouquet.

This bouquet was wrapped in pink and I thought this bow matched it perfectly.  Sometimes the smaller bouquets are wrapped in plain plastic. I love to fill the plastic out with colored tissue paper on the outside or have the floral department wrap the flowers for me.  Don’t forget to take those price tag stickers off the outside. After all, don’t we prefer if people don’t know how cheap we really are?

We made little personalized cards that we printed on 4×6 photo paper. I slipped these between the plastic layers and I am sure the little cards were saved as refrigerator mementos, as all personalized cards are. Just like the teacher cards that I made last week, start by uploading your photo to Picnik. Under the CREATE tab,  select EFFECTS, then select the BLACK & WHITE option to change your picture to a black & white image. While still under the CREATE tab, select the option for TEXT. Once you are in text, put in your message for your mother. Make sure not to put your text all of the way to the edge of the photo because it may cut it off when you print it. It is better to get it a little further in to assure that you don’t waste ink, paper, or your time!  The font I choose for these images was Pupcat. You can do all of this with a free membership to Picnik.

We also framed our favorite picture from Easter and then tied it with another tulle bow. I found inexpensive frames for each of our grandmas and I printed out the photos on my photo printer. We knew these would be a real hit with our grandmas. After all, what kind of grandmas would we have if she didn’t love our pictures?

Then we shocked them with our elegant flower deliveries. I don’t know who enjoyed that part more.

Happy Mother’s Day to our moms. We love you both!

I had a fantastic Mother’s Day. We went to church, I mixed up the waffle batter, then climbed back into my bed to be served. The kids loved serving breakfast to me in my bed and were very professional about checking on me often to see if anything else might be needed. I finished a library book, climbed out of bed for a half price frappe at Starbucks, and then climbed back in bed for the rest of the day. I got lots of hugs, kisses, storytelling, and tickles in with my children. I did not cook anything all day. I did not do one chore. I did not move from my bed hardly at all. It was perfect. It cost $2.22 for the whole day. It was just what I needed.


What did you do for Mother’s Day? Tell me what you did to celebrate YOUR day and Mother’s Day for your family & friends?


An Apron Full of Giveaways 05.10.11

May 10th, 2011

Sunday Afternoon, $18

Welcome to our Apron Full of Giveaways! I hope everyone is having a great week this week! As we do each week,  here is our round-up of giveaways for our readers. We hope that this is beneficial to you and your family! Please let us know if you guys win anything- I love to hear the success stories!

Below are the contest links-if you are hosting a contest please link it up below. Sorry, we aren’t giving away the aprons just showcasing them! Please put your site name and then what type of contest you are hosting. For example, “MomAdvice (Kid’s Movies).”

Please let me know if you have any questions and good luck to each of you!

Penne With Spicy Vodka Cream Sauce

May 9th, 2011

Pasta is the ultimate indulgence food for me and I happened to be in charge of hosting my Bunco group this month. My theme was Guilty Pleasures and nothing says guilty pleasures to me like a big bowl of creamy pasta, decadent dessert treats, and stretchy yoga pants. My girlfriends didn’t seem to mind indulging in my theme this year and I had a blast planning this evening.

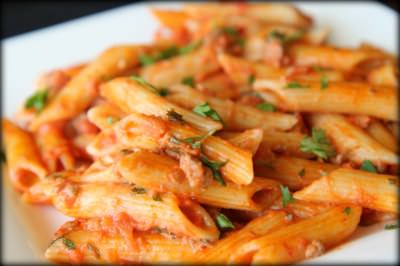
This Penne with Spicy Vodka Cream Sauce was an amazingly easy and delicious dish that would be perfect for entertaining or just a midweek luxury meal for a cheap date night at home.  Almost as easy as just opening a jar of sauce and a fraction of the jarred vodka sauces on the shelves, it is a recipe that is a surefire winner. It is creamy, hits you with a little hint of heat from a little red pepper flake, and a sauce that really does a great job hugging the noodles perfectly.

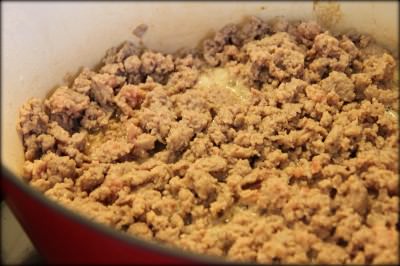
In a large pot, heat a little olive oil and then brown half a pound of  Sweet Italian Turkey Sausage. If you purchase the sausage in the links, you will just want to pull the meat out of the sausage casings and then use a wooden spoon to break the meat apart. If you like your dish spicier, feel free to substitute with the hot sausage variety. We like it mild in our house!

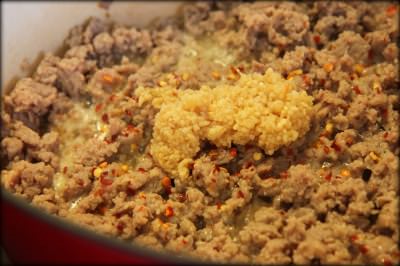
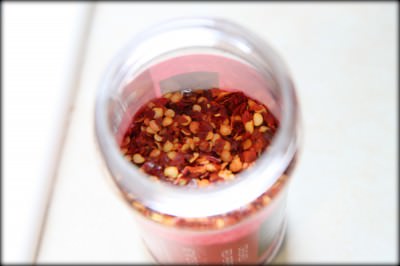
To your browned sausage, add four cloves of minced garlic and a 1/4 teaspoon of red hot pepper flake to your sausage and let it cook for one minute. I love to add a little red hot pepper flake into almost all of my sauces. You can find it at the dollar store or very inexpensively at the supermarket over in the spice aisle. If you like a lot of heat, increase this to 1/2 teaspoon to give the sauce more of a kick.

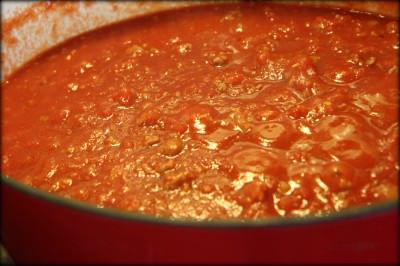
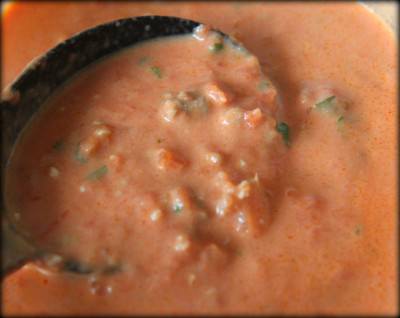
Add a can of crushed tomatoes to the pot and stir to incorporate. Season to taste. Bring your sauce to a boil and then turn the heat down to a low simmer and let it cook for fifteen minutes.

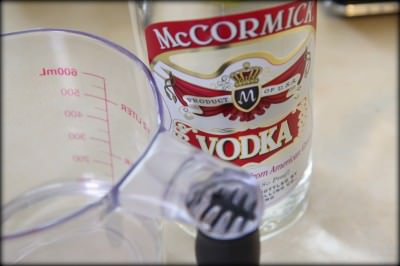
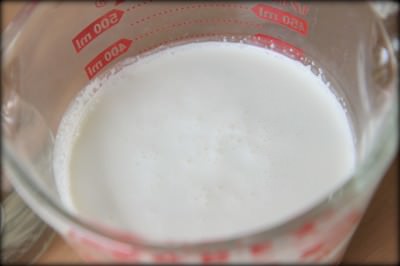
To your sauce add 3/4 of a cup of heavy cream and 1/4 cup vodka to the sauce. I bought the least expensive vodka that they had at the supermarket and it worked perfectly.  Mix these two ingredients into your sauce and bring it to a boil.

Turn off the heat and add a handful of freshly chopped parsley to the sauce.  Toss this sauce with your favorite pasta noodle.  Simple and delicious!

Serve with an elegant Strawberry Salad and a platter of  Dark Chocolate & Sea Salt Brownies, for a guilty pleasures night of your own!

Enjoy!

Penne With Spicy Vodka Cream Sauce

1 pound uncooked penne pasta

2 tablespoons olive oil

4 cloves garlic, minced

1/2 teaspoon crushed red pepper flakes

1 (28 ounce) can crushed tomatoes

1 teaspoon salt

1/4 cup vodka

3/4 cup heavy whipping cream

1/4 cup chopped fresh parsley

1/2 pound  sweet Italian sausage

Bring a large pot of lightly salted water to a boil. Add pasta and cook for 8 to 10 minutes or until al dente; drain.  In large skillet, heat oil over moderate heat. Remove casing from sausage and add to skillet. Cook, breaking up the meat, until brown. Add garlic and red pepper and cook, stirring until garlic is golden brown (approximately one minute). Add tomatoes and salt; bring to boil. Reduce heat and simmer 15 minutes. Add vodka and cream and bring to boil. Reduce heat to low and add pasta, toss for 1 minute. Stir in fresh parsley and serve!

Side Note: When reheating this dish, rewarm in a skillet and add a little milk to the sauce to restore the creamy consistency of it.

Recipe Source: Adapted from AllRecipes.com

Amy’s Notebook 05.04.11

May 4th, 2011

This teacher appreciation subway art is a fast & fun way to say thank you (@ eighteen25)

Using leftover egg dye to create a pastel wreath is genius! (@ Dollar Store Mom)

I love this round-up of delicious pasta recipes (@ The Pioneer Woman)

My kids would love to have these pretzel rolls for a fun snack (@ Cooking With My Kid)

I can finally enjoy foldable  slices of pizza at home with this cutting technique (@ Serious Eats)

My children would love doodling on their birthday cakes (@ Sweetapolita)

I am so excited about this idea for salads in a jar and can’t wait to try it this summer (@ Salad in a Jar– hat tip to Not Martha)

I want to try this technique for flat roasting a chicken (@ shutterbean)

My family would flip for this cinnamon toast ice cream (@ Tracey’s Culinary Adventures)

These felt flower cupcake toppers would be a fun way to dress up a cupcake (@ the decorated cookie)

This olive oil & Meyer lemon ice cream looks like a delicious treat (@ confection’s of a foodie bride)

Have you tried anything from our featured notebook entries? We would love to hear what projects you tried and how they worked out for your family!