Archive for the ‘Celebrations’ Category

Shrimp Boil Recipe

Monday, August 3rd, 2015

Shrimp Boil Recipe Header

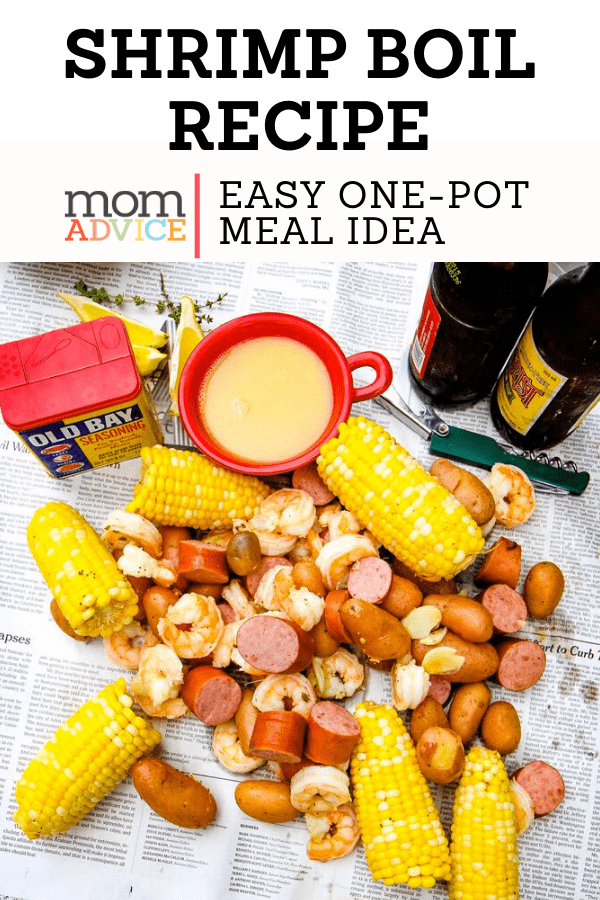
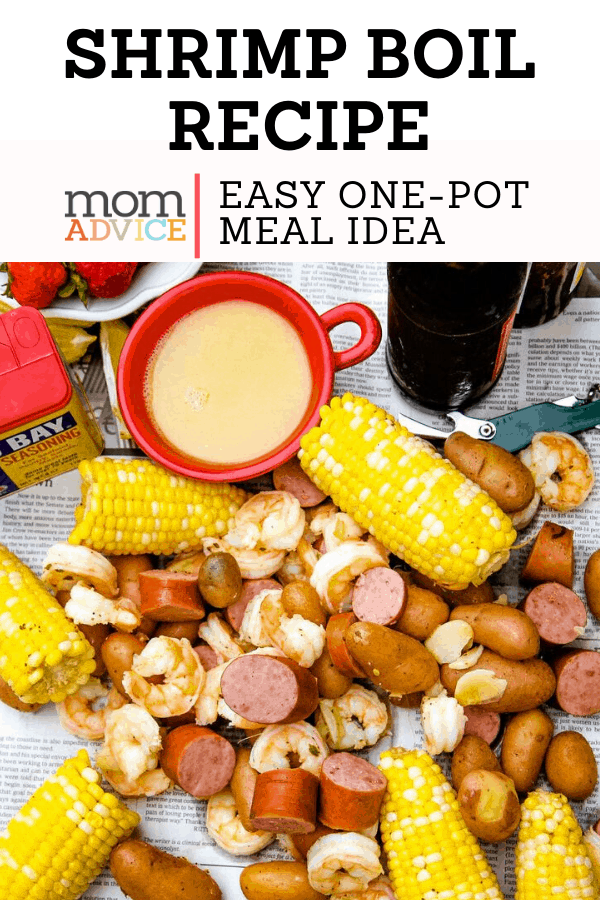
This easy one-pot dish feeds a large family, with leftovers to spare. Learn how to make this fast and easy shrimp boil with these clever cooking techniques. The best part? No dishes!

I love a good summer dinner outside and one without a lot of dishes, is always a winner.

We started a new dinner tradition this summer doing a weekly shrimp boil.

Have you ever done a shrimp boil?

Call it a shrimp boil or call it a Lowcountry Boil, this is a dish that is easy to entertain with.

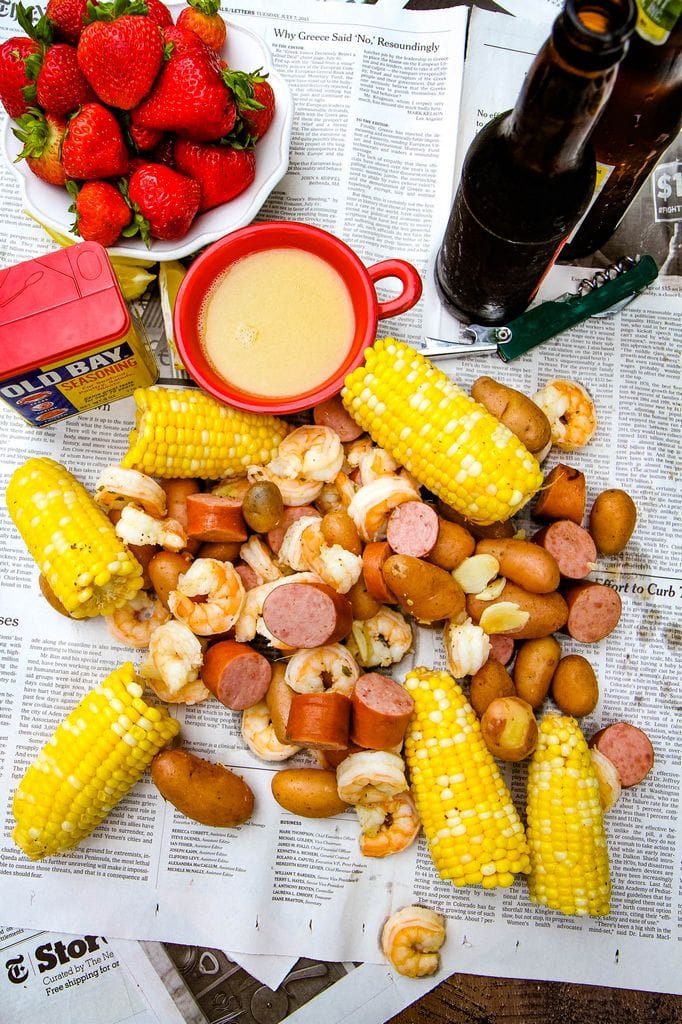
This is one of those one-pot wonders and the simplicity of serving this dish right on a pile of newspapers in the center of your picnic table.

The history of the Lowcountry Boil is a pretty interesting one.

Coastal Living Magazine shares, in this article, that this dish was once called Frogmore Stew. The dish was created by a National Guardsman when he needed to cook a meal for 100 soldiers.

If you can feed a hundred soldiers, you can feed a few extra friends around your dinner table with this fun dish, which is why I wanted to share it with you today.

Shrimp Boil Recipe

Do you entertain? I started putting myself on a weekly dinner schedule with friends & family. This recipe calls for a gathering of at least a few friends, doesn’t it?

Entertaining weekly has held me accountable to keeping up a bit around the house. It also has created so many beautiful memories with people we love around our dinner table.

My standards of what a perfect meal are also starting to relax a bit. My housekeeping has relaxed a bit in the process too. I don’t know if that’s a good thing or a bad thing, but it’s an honest thing.

I began to notice that real friends don’t care what kind of condition your home is in if you share a meal with them.

They just love being with you.

I have also found a little sangria also helps to relax your guest’s standards too. Ahem.

Dipping Shrimp Boil In Butter

Shrimp Boil On Newspaper

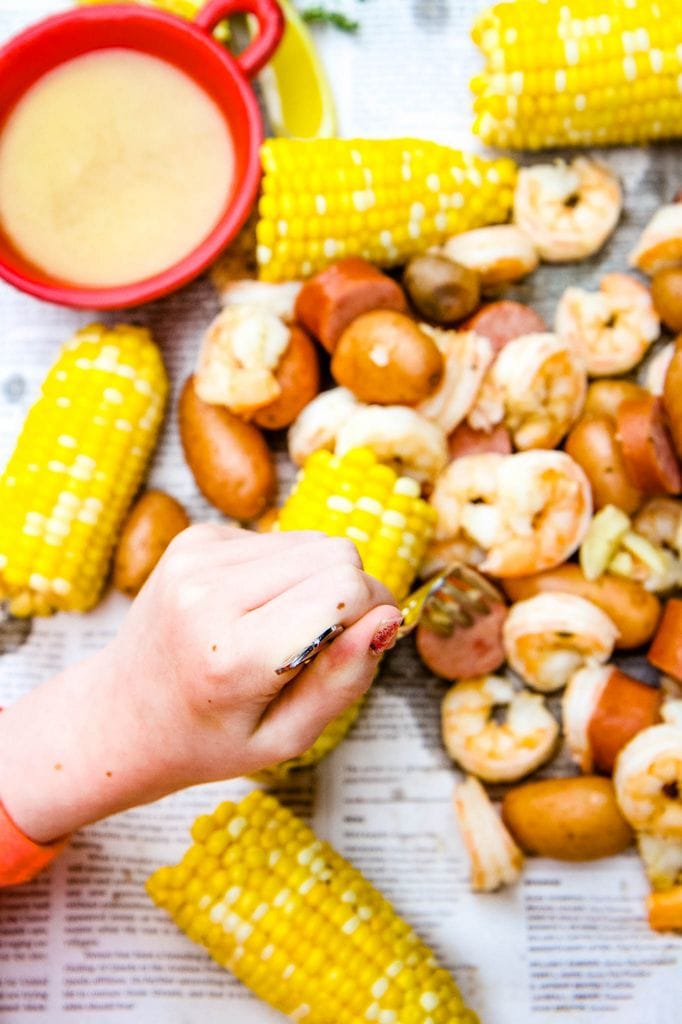
My children have come to really love this dish too. There is just something so fun about grabbing a fork, dipping, and spicing to your heart’s delight.

Shrimp Boil Recipe

When the humidity gets to be too much, I just nestle this feast on a cookie sheet lined with newspaper on our kitchen table. We also love to throw on a really good record that fits the mood of the evening (this was last night’s selection)!

Since we live in the Midwest, our seafood is pretty limited to frozen offerings. You can certainly build upon this dish depending upon your location and grocery budget.

I hope this dish inspires you to open up your table to others and try something new. As a reluctant hostess, I have found the experience of opening up our table weekly to be really incredible for our entire family!

 
Shrimp Boil Recipe
 
Recipe Type: Main Dish
Author: MomAdvice.com
Prep time:
Cook time:
Total time:
Serves: 6 servings
Call it a Shrimp Boil call it a Lowcountry Boil…whatever its name you decide upon, bask in the glory of this easy one-pot wonder! This recipe can easily be doubled for a large crowd!
Ingredients
  • 2 lemons, halved, plus wedges for serving
  • 1/2 cup Old Bay Seasoning
  • 8 cloves garlic, smashed
  • 1 large red onion, quartered
  • 6 sprigs fresh thyme
  • 1 pound baby red potatoes
  • 4 ears corn on the cob cut in half
  • 2 pounds large shrimp, (cleaned & shells removed)
  • 13 ounces kielbasa or smoked sausage (we use a turkey kielbasa in this), cut into slices
  • 2 tablespoons unsalted melted butter
  • Hot sauce, for serving (optional)
Instructions
  1. Fill a large pot with 4 quarts of water.
  2. Squeeze the lemon juice into the water and add the squeezed lemon halves.
  3. Add the Old Bay, garlic and onion.
  4. Tie the thyme sprigs together with kitchen twine and add to the pot.
  5. Cover and bring to a boil over high heat, then reduce to a simmer and cook about 5 minutes.
  6. Add the potatoes to the pot and cook until just tender, about 10 minutes.
  7. Add the corn and continue to cook 5 more minutes (for your total of 15 minutes)
  8. Add the shrimp & kielbasa the pot, cover and cook until the shrimp curl and are just opaque, 2 to 3 minutes.
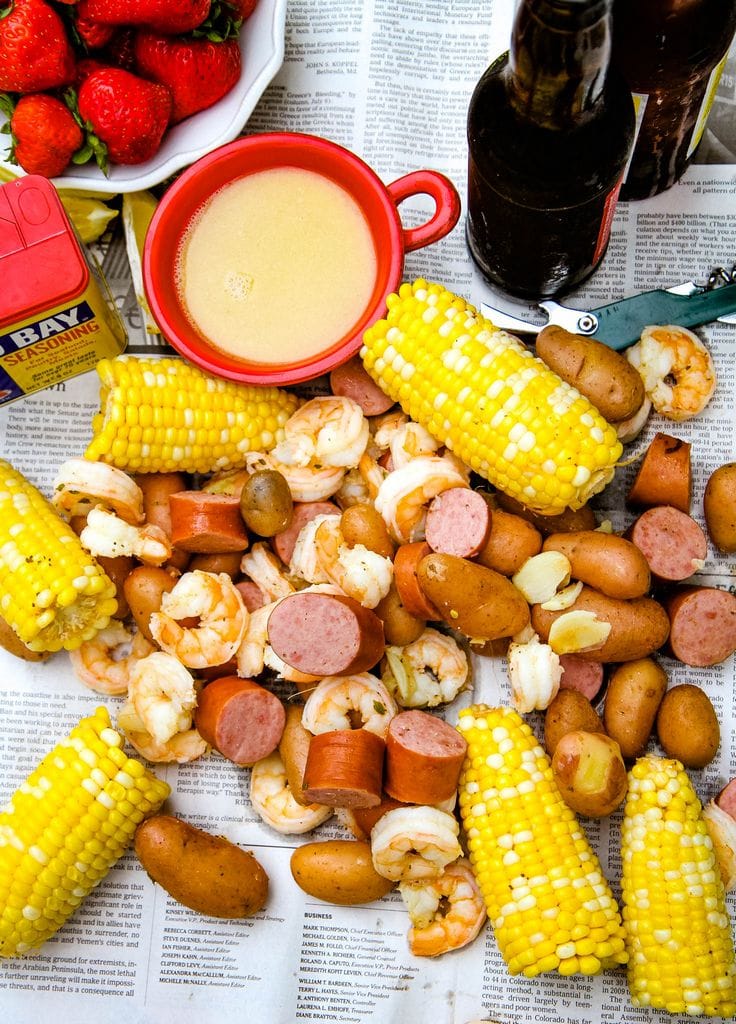
  9. Transfer the shrimp and vegetables with a slotted spoon or skimmer to a large bowl.
  10. Add the butter and about 1 cup broth to the bowl and toss until the butter is melted. Transfer the shrimp and vegetables to a pile of newspapers. Serve with the remaining broth, lemon wedges and hot sauce, if desired.
 

Love this recipe? Here are 3 other crowd-pleaser dinners!

Gluten-Free Orange Chicken 
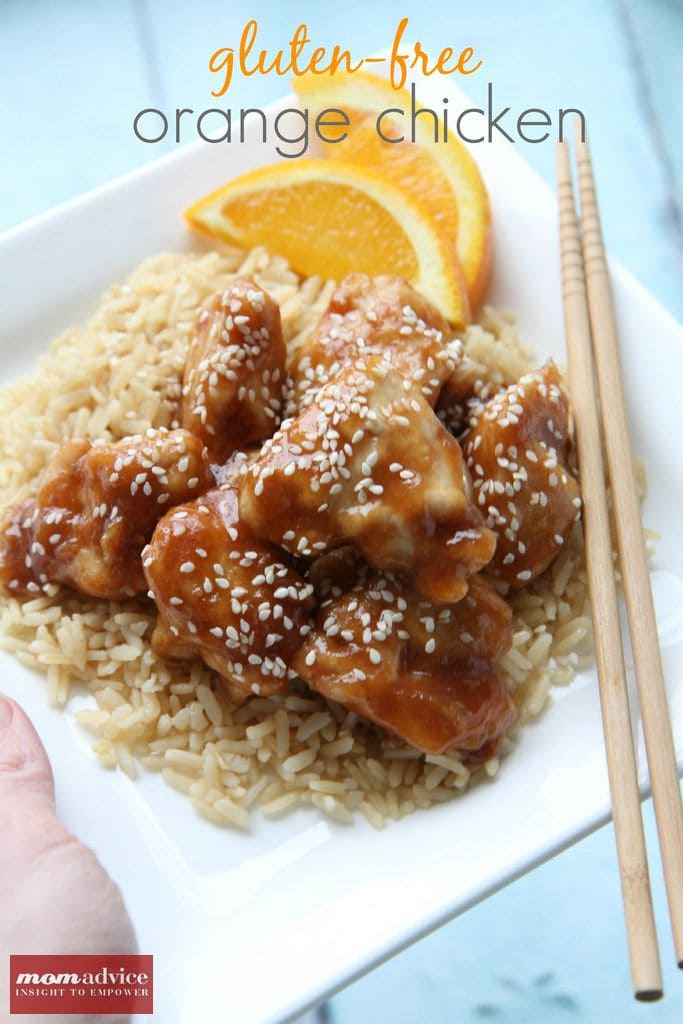
gluten-free orange chicken recipe

Balsamic Pork Loin Recipe from MomAdvice.com 
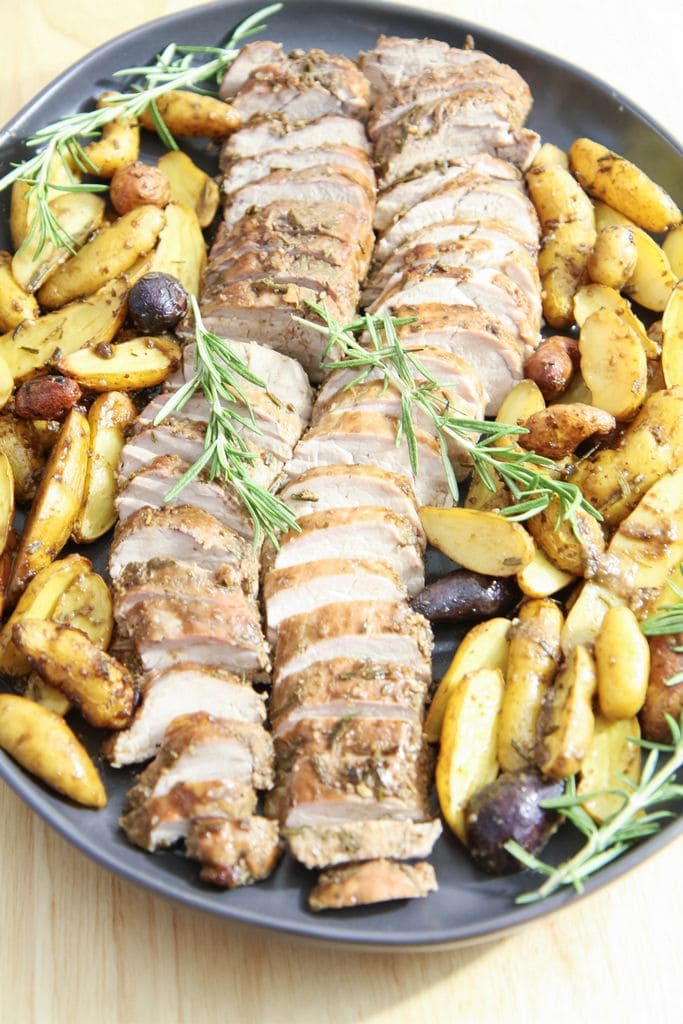
balsamic pork tenderloin sheet pan meal

Shrimp Fried Rice Recipe from MomAdvice.com 
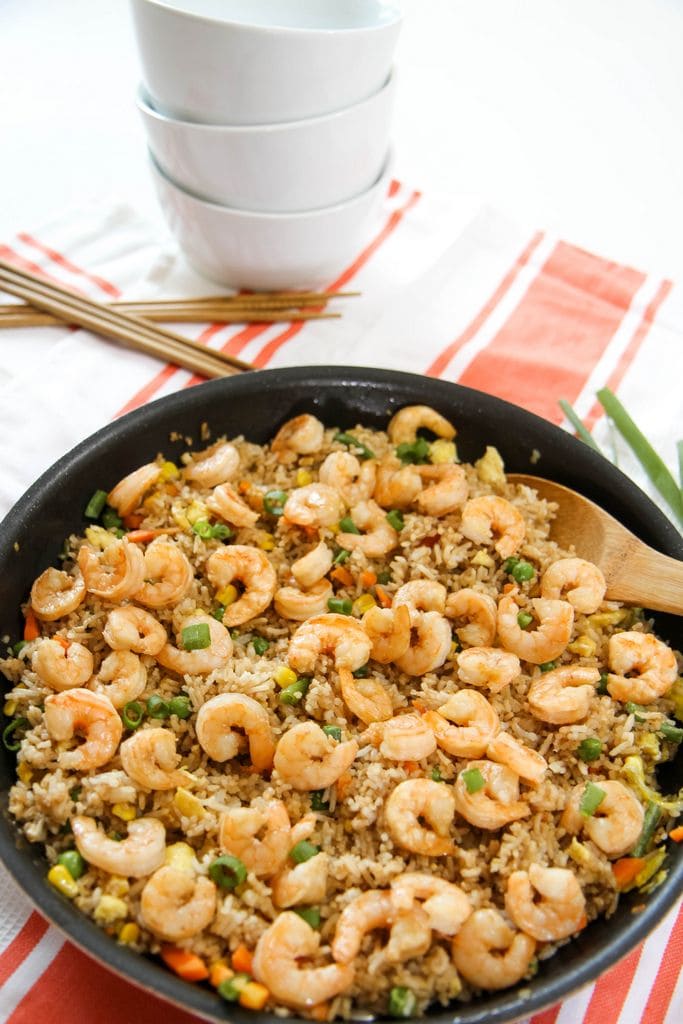
shrimp fried rice recipe

Happy Cooking!

Shrimp Boil Recipe Header


Pin It

Raise A Hand for Teachers (Felted Flower Dry Eraser Marker Bouquets)

Wednesday, July 15th, 2015

Raise A Hand for Teachers With thredUP (Felted Flower Dry Eraser Marker Bouquets) from MomAdvice.com


To support this fun campaign (and help with the school supplies problem that teachers face), we have crafted up the cutest Felted Flower Dry Erase Marker Bouquet that you can share with a teacher in your life. These felt flowers are so easy to create that even your child can make these (with a little assistance with the hot glue gun).

*This post is sponsored by thredUP. Thank you for supporting the companies that support this site!

As you know, since starting my fashion capsule project, I have become a huge fan of thredUP.

I buy everything there from stuff for my kids (especially those one-time use special occasion outfits), to my workout gear for the gym, to our outerwear, and beautiful clothing for a fraction of retail prices.

Nine times out of ten, if you see us wearing something… it is now from thredUP thanks to the affordability and how great it feels to get a pretty polka dotted box on our step filled with secondhand goodness.

That is why it was such an honor that they thought of me for an exciting campaign they are launching to support teachers and their classrooms for the back-to-school season.

In honor of the Raise a Hand for Teachers Program,  I wanted to share with you our nomination for a deserving teacher and also show you a fun craft you can create for back-to-school for a special teacher in YOUR life.

Raise A Hand for Teachers With thredUP (Felted Flower Dry Eraser Marker Bouquets) from MomAdvice.com

My daughter had a phenomenal school year this year and it was all thanks to Mr. Domonkos!

I got to come in weekly to volunteer in her classroom and be a quiet observer firsthand at the kind of teacher he was and how he ran his classroom which is always a treat as a mom.

I can tell you that if I had a teacher half that fun, the learning would have never felt like work.

His goals were to not only teach our children the basics, but to teach them LIFE SKILLS.

Instead of just showing them math problems on a white board, he actually gave each child different roles in the classroom (like the classroom librarian or the banker) and then they would receive a salary for their jobs.

They paid rent on their desks or they could save to buy their “home” and receive a deed for paying off their space.  Each week they were given the opportunity to save their money or spend it on trinkets in the classroom.

They weren’t just talking about math… they were learning to use math like they will when they become an adult.

When I asked my daughter what she said that he taught her, she said it was how to manage her money.

As a frugal blogger and author of my own personal finance book, this is MUSIC TO MY EARS.

Raise A Hand for Teachers With thredUP (Felted Flower Dry Eraser Marker Bouquets) from MomAdvice.com

The joy on my daughter’s face when she purchased her desk is the indescribable joy I hope to feel one day when we pay our own house off. 

From getting our kids signed up with Google accounts and having them design web pages to Sponge Bob theme music while writing about the sea to showing the kids YouTube segments to learn new math tricks, his classroom was filled with new and interactive ways to get our kids excited about learning.

I know there are many moments I didn’t get the opportunity to witness as well.

The countless hours past his job spent preparing for class as well as those moments needed to stay after to help kids who are struggling.

I am sure there were many moments sacrificed from his own family to teach our children…and we are so grateful.

The hiccuping sobs as she got off her bus on the last day of school were also indescribable as a mom.

They were because of the absence of her amazing teacher and seeing him each day. 

That has never happened before. The adoration was very real.

Do you want to put a vote in for Mr. Domonkos? We would love your support of this phenomenal teacher!

Raise A Hand for Teachers With thredUP (Felted Flower Dry Eraser Marker Bouquets) from MomAdvice.com

Do you have a special teacher in your life? You can nominate them for a cash prize through their Raise a Hand for Teachers Program (#raiseahand) today!

thredUP.com has partnered with AdoptAClassroom.org to recognize and thank teachers for their hard work and the positive impact they make each day on our children’s lives.
Why is thredUP thanking teachers? For starters, they know schools are super important to their customers.
And, they discovered that 1 in 3 teachers are actually buying clothes for students (along with  school supplies) with money from their own pockets
.
 I have no doubt our favorite teacher has been doing this too which is why we want to nominate him for this prize today!
You can nominate your favorite teacher anytime between July 15 – August 23.
Three teachers each win $2,500 for classroom supplies and $500 to thredUP. 50 runner-up winners receive $100 to thredUP.  
How incredible is this?
Today we nominate Mr. Domonkos for this award and we want you to help him win as well as nominate a worthy teacher of your own!  
Winners will be announced on Tuesday, September 8 (following Labor Day weekend)! 
Be sure to check out thredUP for ALL your back-to-school needs.
It’s a goldmine for families on a budget especially if your children have become brand-conscious or if you look for brands with longevity and that can handle your kid’s daily abuse.
They have all my favorite brands including GapKids, Janie and Jack, Lilly Pulitzer, Mini Boden, Zara Kids and more!
The best part is that the you save up to 90% off retail, so you don’t have to wait for the back-to-school sales to start to save a ton of money.

To support this fun campaign (and help with the school supplies problem that teachers face), we have crafted up the cutest Felted Flower Dry Erase Marker Bouquet that you can share with a teacher in your life. These felt flowers are so easy to create that even your child can make these (with a little assistance with the hot glue gun). Let’s get started!

Raise A Hand for Teachers With thredUP (Felted Flower Dry Eraser Marker Bouquets) from MomAdvice.com

Supplies Needed

Package of Dry Erase Markers
Felt (can match the colors in your dry erase markers)
Hot Glue Gun & Glue Sticks
Scissors
Jar for Storage (optional)
Raise A Hand for Teachers With thredUP (Felted Flower Dry Eraser Marker Bouquets) from MomAdvice.com

Directions to Make Felted Flowers

Begin by cutting a wavy circle out of your felt.
The bigger the circle, the bigger the flower, the smaller the circle, the smaller the flower.
If you want them all the same size, use the first one as your template for your other flowers.
Start cutting into the circle in a spiral motion.
Around and around you go with your scissors until you get to the center.
Leave the little circle at the end of your spiral intact.
It should look like this long piece of twirly felt (as we have pictured above).
It will not be perfect.
Just remember that you can trim and angle everything the way you want it when you start creating your flower.
It will look beautiful!
Starting with the end where you begin cutting, roll the felt back up.
Keep wrapping and wrapping until you get to that little circle at the end.
You can hot glue the felt as you go, but I found that the felt flower holds together well if you wrap it tightly enough.
Feel free to trim if you have any bits of felt sticking out or not laying as nicely as you like.
Raise A Hand for Teachers With thredUP (Felted Flower Dry Eraser Marker Bouquets) from MomAdvice.com
After you have wrapped your rose up, dab hot glue on the back and secure the little end flap of the flower to the base.
Apply hot glue around the end of the dry erase marker (make sure you are getting around the exterior and not into the base of the marker.
Secure your felt flower to the dry erase marker, holding it into place until it feels secure.
Repeat the process with the other dry erase markers until you have a bouquet!
Place into a jar or tie a few with twine and give your teacher a bouquet they can use for back-to-school!
Don’t forget to Raise a Hand for a Teachers today with thredUP!
We hope we have inspired you to nominate someone special and to create a fun gift for them as a thank you for all their hard work!
Felt-Flower-Dry-Erase-Markers-1

Looking for more great teacher gifts? Check out this round-up of 19 Awesome Ways to Show Teacher Appreciation! Yay!

*This post is sponsored by thredUP. Thank you for supporting the companies that support this site!
Pin It

MINIONS Backyard Bash & Easy Cupcake Minion Tutorial

Tuesday, July 7th, 2015

MINIONS Backyard Bash & Easy Cupcake Minion Tutorial from MomAdvice.com #MinionsParty

*This post is sponsored by Universal Pictures. Thank you for supporting the companies that support this site!

We have had so much fun preparing and hosting our MINIONS Backyard Bash in honor of the film’s launch on July 10th! Today we want to show you how we decorated for our party, the fun goodie bags we got to share with our friends, and an easy cupcake minion you can create for your very own party (no decorating skills required!).

In the new film, you get to go back to where the story of the Minions all began! Starting as single-celled yellow organisms, the Minions evolve through the ages, perpetually serving the most despicable of masters. Continuously unsuccessful at keeping these masters-from T. rex to Napoleon-the Minions find themselves without someone to serve and fall into a terrible depression. Kevin, Stuart, and Bob decide to seek a new boss to follow and decide to make a journey to find their new master. This is where they meet their new potential master, Scarlet Overkill (voiced by Sandra Bullock- yay!), the world’s first-ever female super-villain.   They travel from Antarctica to 1960s New York City, ending in London. It is here that they must face their biggest challenge to date: saving all of Minionkind…from annihilation.

We can’t wait to see this family-friendly film together and were selected to help throw a party in honor of this film’s launch. #luckyducks

MINIONS Backyard Bash & Easy Cupcake Minion Tutorial from MomAdvice.com #MinionsParty

We got an incredible package in the mail that included all the party supplies we would need to execute our backyard bash as well as fantastic party favors that included adorable beach towels, beach balls, and PlayDoh sets for all of our guests.

The only thing we really needed was Mother Nature to cooperate with our plans.

Unfortunately, it has rained for two straight weeks in Indiana so we had to move this party indoors and enjoy the fun inside instead!

Thanks, Indiana!

MINIONS Backyard Bash & Easy Cupcake Minion Tutorial from MomAdvice.com #MinionsParty

MINIONS Backyard Bash & Easy Cupcake Minion Tutorial from MomAdvice.com #MinionsParty

MINIONS Backyard Bash & Easy Cupcake Minion Tutorial from MomAdvice.com #MinionsParty

MINIONS Backyard Bash & Easy Cupcake Minion Tutorial from MomAdvice.com #MinionsParty

MINIONS Backyard Bash & Easy Cupcake Minion Tutorial from MomAdvice.com #MinionsParty

MINIONS Backyard Bash & Easy Cupcake Minion Tutorial from MomAdvice.com #MinionsParty

We weren’t going to let a little rain ruin our party though! We outfitted our table in blue and yellow to go with our theme. I let my kids do the decorating while I prepared our snacks.  The goggles, of course take center stage in this set-up. We secured a set of adorable goggles to each of the chairs with a little washi tape for each person to take home. Our centerpiece was also adorned with goggles and we even stapled some together to make a goggle banner over our table.

Lemonade, popcorn, and cupcakes were served for a little rainy day magic together.

MINIONS Backyard Bash & Easy Cupcake Minion Tutorial from MomAdvice.com #MinionsParty

The Minions are a hit with kids of all ages so we invited our friends and cousins to join us for the afternoon. We loved sharing our Cupcake Minion with them and everyone can’t wait to catch the movie this summer!

MINIONS Backyard Bash & Easy Cupcake Minion Tutorial from MomAdvice.com #MinionsParty

In honor of the film, I’d love to show you how to create this cupcake minion for your party table!  Before we begin, I want to encourage you to make this as easy on yourself as possible! If you want to make this party treat REALLY fast, call your local bakery and ask for two dozen white cupcakes with the frosting on the side. This is what we did to save some time and our local grocer only charged $14.99. 

Supplies Needed

Two Dozen White Cupcakes

Frosting, tint half of it yellow and then other half blue (I recommend these Wilton food colorings to achieve this bold shade)

1 canning jar ring

Black licorice (if you aren’t a fan of black licorice, we tried a new chocolate Twizzler variety that worked perfectly)

1 Hershey Kiss

Scissors

Cookie Sheet

MINIONS Backyard Bash & Easy Cupcake Minion Tutorial from MomAdvice.com #MinionsParty

1. Tint over half your frosting in yellow and the other portion in blue. Set one cupcake aside for your eye.

MINIONS Backyard Bash & Easy Cupcake Minion Tutorial from MomAdvice.com #MinionsParty

2. Ice as I have shown here (15 Yellow, 4 Blue, 4 Half Yellow & Half Blue, 1 Left Without Icing!!). You can pipe the icing on, if you prefer a more polished look, or you can just spread the icing on with an icing spatula, as we have shown here.

3. Cut your black licorice up in random smaller pieces and apply to the top of your Minion head to create the hair.

MINIONS Backyard Bash & Easy Cupcake Minion Tutorial from MomAdvice.com #MinionsParty

4. Trim the top off of your cupcake to expose the white cake of your cupcake for the eye (pardon our picture, we decided to do that one last minute!). Make sure to not trim it too deep, so that your canning ring will fit around on the outside of it. Place your canning ring around the cupcake top to create your goggle.

5. Invert a Hershey Kiss into the center for your eye. Place the cupcake on top of your other cupcakes in the center. Finish by tucking two pieces of licorice underneath the eye to create the glasses. Trim the licorice to fit across the cupcakes on the end. Finish by bending your licorice into a smiley face! How easy was that?

MINIONS Backyard Bash & Easy Cupcake Minion Tutorial from MomAdvice.com #MinionsParty

MINIONS Backyard Bash & Easy Cupcake Minion Tutorial from MomAdvice.com #MinionsParty

We hope these ideas inspired you for a MINION’S Backyard Bash of your own! Remember to catch the film on July 10th! We can’t wait to hear what you think about it!

Get connected with the film!

Follow on Twitter, Instagram, Pinterest, Google+

Like ‘MINIONS’ on Facebook

Visit the Official Site

Minions-Poster1


Check out the trailer below and enjoy a fun movie night out with the whole family this month! Yay!

*This post is sponsored by Universal Pictures. Thank you for supporting the companies that support this site!

Pin It

4th of July Flag Fruit Dessert Tray

Thursday, June 18th, 2015

4th of July Flag Fruit Dessert Tray

*This post is sponsored by Walmart. Thank you for supporting the companies that support this site!

One of my favorite celebrations is 4th of July and today I wanted to share with you a fast & easy 4th of July fruit dessert platter you or your kids can make into a flag to celebrate the holiday.  

This is an easy and festive 4th dish and I have to say that this delivers on the red, white, & blue.


4th of July Flag Fruit Dessert Tray

4th of July Flag Fruit Dessert Tray

Since I am gluten-free, I often have to bypass the dessert trays.

As an adult, it is not a big a deal.

As a child, the dessert table is EVERYTHING, especially when it comes to holiday feasting.

I wanted to create this cute tray just for them and I found these glutino gluten-free yogurt covered pretzels are not only a fantastic way to add the white we needed for our stripes, but they also are highly addictive and delicious.

You can certainly make your own white chocolate covered pretzels, if you are feeling ambitious, but these cut down on the time invested in creating our cute tray!


4th of July Flag Fruit Dessert Tray


Flag cupcake picks can be a great way to festively pick up a berry (or ten).

 I found these at a local party supplies store and they are an adorable touch to a festive spread.


4th of July Flag Fruit Dessert Tray


I think the best part about this tray is that it is not only relatively healthy, but it is also a tray that you can confidently create and know it will get eaten.

After a big cookout, light desserts are a wonderful addition to the table for snacking on.

Have too many desserts on your table?

Save this to serve up during the fireworks.

It will be gone before it even gets dark enough to see them!

Check out the instructions below on how many supplies you need to put this tray together!

4th of July Dessert Tray /MomAdvice.com

4th of July Flag Fruit Dessert Tray
 
Prep time:
Total time:
Serves: 8 servings
A fast & festive gluten-free fruit dessert tray your guests will flip for.
Ingredients
  • 2 pints strawberries trimmed, rinsed, and dried
  • 1 pint blueberries, rinsed
  • 2 packages of glutino yogurt-covered pretzels (or white chocolate regular pretzels, if not going gluten-free on this tray)
Instructions
  1. On a 9×13 cookie sheet, place a small clear plastic (or glass) square container of berries to create your blue flag corner.
  2. Now alternate the red berries and white pretzels in stripes until you have filled your tray.


While you are here, these are a few more of my favorite 4th of July ideas on MomAdvice! xo


Cupcake Pick 4th of July Wreath

Make a 4th of July wreath out of cupcake picks (world’s easiest festive touch!)


Celebrating 4th of July Heroes With Your Kids

Teach your kids about the REAL 4th of July Heroes (the reason we all celebrate!)


Diy Family-Friendly Bar Cart

Turn a tool cart into a bar cart for the 4th (adorable girl not included!)


DIY slow Cooker Citronella Candles

Keep the bugs away with DIY Citronella Candles (made in your slow cooker!)


Red, White, & Blueberry Trifle

Make a Red, White, & Blueberry Trifle (another light & easy dessert!)


3-ingredient Watermelon Granita

Wow your guests with this Watermelon Granita (just 3-ingredients!)


Watermelon Coconut Lime Smoothies #recipe via momadvice.com

Or blend up leftover watermelon into this Watermelon Lime & Coconut Ice (I love leftovers!)


Blueberry Sangria Lemonade

Make a festive Blueberry Sangria Lemonade for toasting the holiday (cheers and cheers again!)


Berry Quinoa Parfaits

Leftover berries? Turn them into a protein-packed Berry Quinoa Parfait.


Greek Quinoa Salad

Everyone loves a good salad! Greek Quinoa Salad is yummy and gluten-free (winning!)


Lemony Spinach & Tomato Quinoa Salad

Why have one salad when you can have two? Lemony Spinach & Tomato Quinoa Salad is delicious (even at room temperature!)


Caprese Pasta Salad #recipe via MomAdvice.com

I am all about the caprese so this Pasta Caprese Salad really fits the 4th of July bill! (can be made gluten-free with a pasta substitute)


5-ingredient Caprese Pork Chops

Did someone say caprese? These 5-ingredient Caprese Chops would be delicious on the grill.


The World's Best Steak Marinade

Feeling Fancy? Try the World’s Best Steak Marinade (it makes cheap cuts taste gourmet!)


Restaurant-Style Steak Recipe

Rained out? Restaurant-Worthy Steak on the stove. In your face, rain!


4th of July Dessert Tray from MomAdvice


walmart_mom_disclaimer

Pin It

Choose Your Own Adventure Travel Idea

Thursday, June 4th, 2015

Choose Your Own Adventure Travel Idea from MomAdvice.com

As my kids get older, we have found that they need and want less and less.  We have also found that we desire less clutter and more moments with our kids so my husband and I hatched up a Choose Your Own Adventure gift for the holidays this year that we gave them in lieu of gifts.

Do you remember the Choose Your Own Adventure books? They were my favorite when I was a kid because each time you read a book, you could make a choice that would take you down a different path. I think I reread this one a million times, returning the well-worn pages back to the library, only to to check it out again.

That idea of choosing your own adventures still lives on and I decided that this year, our family would make travel a top priority. I want my children to have big adventures and see the world so at Christmas, we gave them the unique opportunity to, truly, choose their own summer adventure with us as a family.

I tell you this now instead of in the winter because this one requires a chat with your kids about gift expectations and it also requires saving money for your adventure. 

Choose Your Own Adventure Travel Idea from MomAdvice.com

We asked our kids if they would like to do a vacation instead of gifts this past Christmas and they were so excited to do this which thrilled us to no end.

Since my husband is a web designer, he came up with the genius idea to create a retro travel brochure (complete with a typewriter smear) that would make it look like this package was designed just for them that they could open on Christmas morning. Since there would be no gifts under the tree, we really wanted to give them something to enjoy on Christmas morning and to create a new tradition of gift-giving in our family!

The Mom & Dad Travel Agency (making dreams come true since a few minutes ago- ha!) cover sheet was designed with their names on it and placed on top of the gift.

Choose Your Own Adventure Travel Idea from MomAdvice.com

The first package they opened outlined the rules of the adventure.  If you decide to do something similar, you can create your own rules, but these were the rules we set up to make sure that things went smoothly. 

Found below are the rules we gave our kids! 

Rules for Our Choose Your Own Adventure Travel Package

ONE- You must agree TOGETHER on the trip. We know that this will be tough, but it is also a great opportunity to work on your teamwork skills. Take your time coming to your decision and read through each of the files carefully. In it, we have outlined how you will get to your destination, where and who you might visit, as well as the exclusive adventure you will get to take.

TWO- Although we will do our best to book the places we have outlined for you, these will also be subject to availability. Do you know what that means? It just means, it depends on if the places or owners have space for us. For example, if the place we show you ends up not being available when we are able to go, we promise to find something as close as possible to what we have shared with you. That is the MOM & DAD TRAVEL AGENCY guarantee.

THREE- We will book the destination of your choosing as soon as possible, but the trip will be taken in the SPRING (sometime between the months of MARCH-MAY). Again, all of this will hinge on the availability and the ideal weather for wherever you select.

FOUR- HAVE FUN! Again, the MOM & DAD TRAVEL AGENCY is so pleased that you want to do something with… well…, your MOM & DAD as a gift. How many parents get to say that? We are so proud to take this trip with you and look forward to serving all of your travel needs.

Choose Your Own Adventure Travel Idea from MomAdvice.com

Choose Your Own Adventure Travel Idea from MomAdvice.com

Choose Your Own Adventure Travel Idea from MomAdvice.com

Choose Your Own Adventure Travel Idea from MomAdvice.com

I designated one file folder for each package idea and my husband created retro cover sheets for each package. For our family, the three destinations were to Florida (Universal and our Mimi), Boston (renting a houseboat and seeing where my son was born), and California (to see the Redwood Forest). Each package was wrapped individually so they had three files to open in the morning.

Choose Your Own Adventure Travel Idea from MomAdvice.com

Choose Your Own Adventure Travel Idea from MomAdvice.com

Choose Your Own Adventure Travel Idea from MomAdvice.com

I then typed up travel itineraries that we hoped the kids would love reading together in the morning. We really wanted to make each of these special and a true gift in the morning.

Upon opening all three, they had a little conference session on their own to decide the trip that they wanted to do.  As outlined in the rules above, they had to decide together.  We knew this might be tough, but there was also the option of one picking one year and the other picking the next year.  

In fact, we are planning to recycle one that wasn’t chosen (that seemed to get a lot of buzz) and add a couple of new options.

Choose Your Own Adventure Travel Idea from MomAdvice.com

Over our annual Christmas Tree Cinnamon Rolls, they shared that Universal was the chosen holiday for the year. I am proud to say it wasn’t really about seeing the Harry Potter world at all… it was, in fact, getting to see their amazing Mimi that really sold our Mom & Dad Agency package.

Choose Your Own Adventure Travel Idea from MomAdvice.com

Choose Your Own Adventure Travel Idea from MomAdvice.com

I hope this idea is inspiring to your family! We are so excited to take adventures with our kids this year and in the years to come and are so happy they enjoyed this gift as much as we enjoyed creating it for them!

*This post contains affiliate links!
Pin It

DIY Graduation Party Ideas

Wednesday, May 6th, 2015

DIY Graduation Party Ideas from MomAdvice.com


It’s hard to believe that graduation season is upon us!

Congratulations to the proud parents of those amazing grads this year!

To help you celebrate (and keep that bash affordable), here are a few fun DIY graduation party ideas to try this year with items you can find at your local thrift store!


Serve Up Drinks in a Fun Way

I love to share drinks with my friends in unique ways.
Look at items at Goodwill in  new ways and consider using an item from the store as a unique drink display.
Old dressers can be made into a fun drink station, a rusty wheelbarrow is just perfect for putting your drinks on ice, a tool cart can be made into a family-friendly bar cart, or an old wagon can be the perfect spot for making your drinks perfectly portable on the patio.
In fact, here are 82 ideas that BuzzFeed has gathered up for your drink displays for the perfect party!

Use Old Suitcases for Table Displays

Old suitcases can be the perfect addition to any party whether it is adding height to a table or for smart displays and storage.
With a theme like, “Oh, the Places You’ll Go,” for your graduation party, you can easily pull together a beautiful display with old maps, suitcases, and a pretty table banner honoring this easy travel theme.
Hunt around your house for suitcases or picnic baskets that can be used for your table display and round it out with a few fun finds from Goodwill.
The bonus?
Transporting items from the table to indoors couldn’t be easier!
Check out LoveFeast Table for lots of fun party displays for this easy-to-execute theme!

Serve Up Treats in Fancy Glasses

Balancing treats while mingling is always a challenge as a party guest so consider hunting for fun glassware like champagne or wine glasses that can be used for plating your treats.
I love when party displays feel more homey and eclectic so, in this case, mixing and matching of glasses can be a fun way to create a beautiful food display for your party without spending a lot of money!
Consider these glasses a cute way to create these summer berry cheesecakes from The Cozy Apron, mini fruit salads, individual trifles, or a pretty way to serve yogurt parfaits for a brunch-themed event.
The possibilities are endless with this one!

Use Upcycled Frames

Centerpieces can be expensive, but can be made affordable and easily with vintage frames, a commonly donated item.
Shutterfly showcases an easy frame idea that you can create with a little wire, paint, a glue gun, and a few beautiful photos.

Create a DIY Photo Booth

Nothing is a hit at a party quite like a photo booth and what graduate wouldn’t want to have this available to take pictures with all of their friends with them on this special day?
This photo booth set up from Little Leopard Book is such a cute idea and so budget-friendly.
Visit your favorite thrift store for loads of props and create a photo booth for your favorite graduate and their pals with this fantastic tutorial!

We hope these ideas offer loads of inspiration as you honor a special graduate in your life.

Have any tips for parents preparing for their first party?

Leave them below in the comments section!

Don’t miss these other great posts on MomAdvice.com:


S’mores Toppings Bar


DIY Outdoor Movie


DIY Succulent Terrarium


Book Page Money Posies


Sign up for the MomAdvice newsletter


DIY Money Book Page Posies

Wednesday, May 6th, 2015

DIY Money Book Page Posies from MomAdvice.com


Graduation season is here and that means being prepared with lots of great gifts for the amazing grads in our life.

It probably goes without saying that one of the most useful gifts to a poor college student is money.

Of course, giving just money can sometimes feel less personal than I would like.

So, I crafted up some adorable money book page posies that you can create out of a few supplies you probably already have on hand, to make one beautiful posy or a bouquet for the graduate in your life.


DIY Money Book Page Posies from MomAdvice.com


I created this adorable, “What’s blooming? BOOK MONEY!” gift tag that you can attach to one of these simple paper flowers!

How cute is that?

To snag this tutorial and my free printables to make these Book Page Posies, head on over to the Kenmore blog today!

While you are there, be sure to check out their handy list of easy Mother’s Day DIY gifts that you can make for a special mama in your life!

Pin It

Easter Surprise Peeps Cupcakes

Sunday, March 15th, 2015

Easter Surprise Peeps Cupcakes from MomAdvice.com

*This post is sponsored by Walmart. Thank you for supporting the companies that support this site!

Easter is one of my favorite holidays and I love crafting, decorating, and especially the eating for this holiday.  Longtime readers know that I have a love affair with Peeps that have included a wreath made out of Peeps and I have even found a way to make Peep Martinis that taste divine.  Let’s just continue the mad love affair with Peeps and make a hilarious Easter surprise cupcake for your kids!

Supplies:

1 box gluten-free cake yellow cake mix
Water, vegetable oil and eggs called for on cake mix box
1 cup assorted mini candy-coated chocolate candies, jimmies or confetti candy sprinkles
¾ cup sugar
1 teaspoon vanilla extract
¼ cup boiling water
¼ teaspoon cream of tartar
3 unbeaten egg whites
12 Peeps (any color)
Melon Baller

Easter Surprise Peeps Cupcakes from MomAdvice.com


Directions

Heat oven to 350°F (325°F for dark or nonstick pans). Place paper baking cup in each of 12 regular-size muffin tins.

Make cake batter as directed on box. Divide batter evenly among muffin cups (about two-thirds full). Bake as directed on box for cupcakes. Cool in pans 10 minutes; remove from pans to cooling rack. Cool completely, about 30 minutes.

Using melon baller, scoop out center of each cupcake, about 1 inch deep. Fill each with 1 heaping teaspoonful candies.

Mix sugar, cream of tartar, vanilla and egg whites in your stand mixer bowl. Add boiling water. Beat on high until the mixture forms peaks, which should be just about seven minutes. Spoon or pipe frosting on top of the cupcaks and finish with sprinkles and a Peep on top.

Easter Surprise Peeps Cupcakes from MomAdvice.com

Easter Surprise Peeps Cupcakes from MomAdvice.com

easter-surprise-peep-cupcakes-17

Don’t you hate it when your Peeps lay their eggs in your cupcakes? Ha! What a funny surprise for you kids and a fun food craft to do together as a family! I hope you love this idea and remember that you can pick up all the supplies at your local Walmart store! Happy Easter, everyone!

Easter Surprise Peeps Cupcakes
Prep time:
Cook time:
Total time:
Serves: 12
A fun Easter surprise cupcake that you just so happens to be gluten-free. Fill it with your favorite egg candy and top with a marshmallow Peep!
Ingredients
  • 1 box gluten-free cake yellow cake mix
  • Water, vegetable oil and eggs called for on cake mix box
  • 1 cup assorted mini candy-coated chocolate candies, jimmies or confetti candy sprinkles
  • ¾ cup sugar
  • 1 teaspoon vanilla extract
  • ¼ cup boiling water
  • ¼ teaspoon cream of tartar
  • 3 unbeaten egg whites
  • 12 Peeps (any color)
  • Melon Baller
Instructions
  1. Heat oven to 350°F (325°F for dark or nonstick pans). Place paper baking cup in each of 12 regular-size muffin tins.
  2. Make cake batter as directed on box. Divide batter evenly among muffin cups (about two-thirds full). Bake as directed on box for cupcakes. Cool in pans 10 minutes; remove from pans to cooling rack. Cool completely, about 30 minutes.
  3. Using melon baller, scoop out center of each cupcake, about 1 inch deep. Fill each with 1 heaping teaspoonful candies.
  4. Mix sugar, cream of tartar, vanilla and egg whites in your stand mixer bowl. Add boiling water. Beat on high until the mixture forms peaks, which should be just about seven minutes. Spoon or pipe frosting on top of the cupcakes and finish with sprinkles and a Peep on top.
Recipe adapted from tablespoon
walmart_mom_disclaimer
Pin It

How to Make a Breakfast Bar

Thursday, January 1st, 2015

How to Make a Breakfast Bar from MomAdvice.com

We have come to the age of slumber parties and epic sleepovers in our home. If you were anything like me when I was a child, you just couldn’t wait to wake up and find out what would be for breakfast.  Making a breakfast bar can be a fun way to serve a large group whether it is your child’s birthday or simply an easy way to entertain guests for the morning. I am partnering with Walmart today to show off a cute display for creating a breakfast bar in your home.

My favorite sleepover when I was a kid involved a huge display of toppings for our waffles and pancakes. I remember as a child delighting in all of the options and I still have that delight even as an adult.  Now as mom, I love creating a self-service bar of choices for our meals where everyone can customize their own meals to their own tastes.

Breakfast, in particular, as a buffet is a great idea so that guests can sleep in and then come and create their breakfast whenever they are ready, eliminating the need for you to all be around the table at the same exact time.

Even on busy school mornings, I find that this option would work beautifully since we all arrive at the table at different times. By prepping the toppings ahead, you can save time in the morning and really enjoy that cup of coffee.

Here are some of my suggestions for creating a beautiful and easy breakfast bar spread!

How to Make a Breakfast Bar from MomAdvice.com

Make Serving Easy With Scoops & Trifle Bowls

Ditch the cereal boxes for an elegant display utilizing clear glass trifle bowls and an inexpensive all-purpose scoop. Give your guests choices by providing more than one selection of cereal.


How to Make a Breakfast Bar from MomAdvice.com

Create a Simple Toppings Bar

I love to provide a variety of toppings so everyone can make their bowl their own. Fresh strawberries, blackberries, or blueberries can be a wonderful fresh topper. Dried fruits, slivered almonds, or crunchy walnuts can also add variety to your toppings bar. Make an easy batch of granola (I love this vanilla-scented granola or this easy honey nut granola) and add this to the mix for another crunchy layer. Remember to take advantage of what fruits are in-season to make sure you get the most bang for your buck.

How to Make a Breakfast Bar from MomAdvice.com

Add a Gluten-Free Option

As someone who is gluten-free, I love when there are options for me. Yogurt can be a delicious option and give your guests a chance to also create their own bowl utilizing the delicious toppings you have provided for your breakfast buffet. I like to keep small bowls handy to pour the yogurt out into and giving me room to really layer on the fruit, nut, and granola toppings, just as I would do with cereal. Make sure that you are using gluten-free oats if making your own granola or purchase gluten-free prepared granola if purchasing them.

How to Make a Breakfast Bar from MomAdvice.com

Make a Pretty Display

If there is one investment that I am glad I have made over the years, it has been in classic white dishes. Display your toppings in pretty bowls and add an inexpensive bouquet of flowers to the center of your breakfast bar. Even if the ingredients are not all homemade, you can still make things feel pretty and upscale with a few inexpensive additions and beautiful plating.

How to Make a Breakfast Bar from MomAdvice.com

I hope these ideas inspired you for your breakfast. Whether it is a weekday rush or a leisurely morning with out-of-town guests, the breakfast bar can be an easy way to serve a meal!

walmart_mom_disclaimer

Pin It

DIY Holiday Mantel Decorating Ideas

Monday, December 8th, 2014

DIY Holiday Mantel Decorating Ideas


I can’t believe that the holidays are upon us and, if you are anything like me, the house is just begging you to decorate it for the season.

I love beautiful holiday decorations, but I prefer simplicity, affordability, and smart investments that can be used over and over again.

In our house, for example, we are decking it out with my favorite burlap wreath and my handmade yarn trees and we are even buying our first REAL Christmas tree this year (which I am awfully excited about).

I love to make handmade items that we can pull out from year to year so that is why I am excited to showcase some DIY Holiday Mantel Decorating Ideas from some of my favorite DIY bloggers.


Add a Little Typography

I am a big fan of typography and the roots of that just might come from being married to a web designer.

I love this LET IT SNOW banner from The Proper Pinwheel that you can create with just a little cardstock and some scissors.

To help balance out the piece, consider adding a mirror or scrap paper covered books from your favorite thrift store to round out the mantels.

I happen to love these little silhouettes too that would be beautiful in spray painted white frames to match.


Embrace a Scandinavian Theme

There is something so sweetly simple about red and white paired together and there are so many fun elements that could be added from your local Goodwill store in this Scandinavian Red & White Mantel.

From spray painted candlestick holders and accessories, to vintage ice skates, to a simple red painted door, to stockings made from sweaters…there is just so much to love about this one created by Tatertots & Jello.

The addition of paper garlands and pom-poms add those perfect homemade touches.


Light It Up With Snow Globes

Even as a grown-up, I find snow globes just as beautiful and magical as I did when I was a kid.

I am also a big fan of terrariums so I really love this idea of pairing the two and creating a Snow Globe Terrarium to light up your mantle.

This inexpensive idea adds a lot of holiday magic and would be a fantastic craft to create with a few of your favorite holiday helpers.

Check Goodwill’s houseware selections for jars to keep it budget-friendly thanks to this fun idea for Pink Pistachio!


Embrace Mixed Metallics

If there is one thing I love this year it is metallics and mixing them together.

Luckily, it is easy to gussy up a vase or add a touch of paint to sticks from the backyard thanks to the metallic spray paints on the market.

I love this mixed metallic mantel from Centsational Girl because it is so elegant and also looks very easy to achieve with a little spray paint or even glitter tape (as Kate did)  from your craft tool arsenal.

How easy is this?


Add a Traditional Garland

Pre-made garlands can be expensive and may not have the color scheme you are after.

I love a traditional mantel with evergreen garland and this tutorial recreates the Pottery Barn style at a fraction of the cost.

Between Naps on the Porch illustrates one struggle that I have had with ordering garlands from PB…the length just isn’t there.

You have to buy many to achieve the length you need for a decorated porch or mantel.

Making these yourself gives you the flexibility to create your own desired length and add in the perfect colors to bring it all together.

The best part is that you can use these year after year!


Add Chalkboard & Marquee Details

I am such a big fan of chalkboard paint and almost anything can be transformed into a DIY chalkboard from photo frames to mirrors to cupboard doors.

I love the idea of mixing and matching words in front of your DIY chalkboard for an elegant holiday mantel!

The Crafted Sparrow shows off her style with a handmade MERRY marquee that she whipped up.

Consider hunting for a basket for snowballs and for boxes or luggage to round out a corner.


Keep It Natural

As I get older, I appreciate more a simple touch provided by nature instead of fake greenery that requires packing and storing for the season.
I love this simple mini wreath garland from the merry thought that you can create to decorate a mantel created from a little pine and adding berries, pine cones, and sticks from your backyard.
This mantel isn’t fussy and relies on all the beautiful things that nature provides to achieve a simple & clean modern look.

What are your favorite ways to decorate your mantel for the holidays?

This post contains affiliate links.

Check out these other ideas from MomAdvice.com:


Snowman in a jar

Snowman in a Jar Playdough Kit


Christmas Tree cinnamon Rolls

Christmas Tree Cinnamon Rolls


How to Make a Yarn Pom-Pom Wreath


Yarn Pom Pom & Ornament Garland


DIY Holiday Yarn Trees


Sign up for the MomAdvice newsletter


Pin It