Archive for the ‘Sides’ Category

Greek Quinoa Salad

Monday, August 26th, 2013

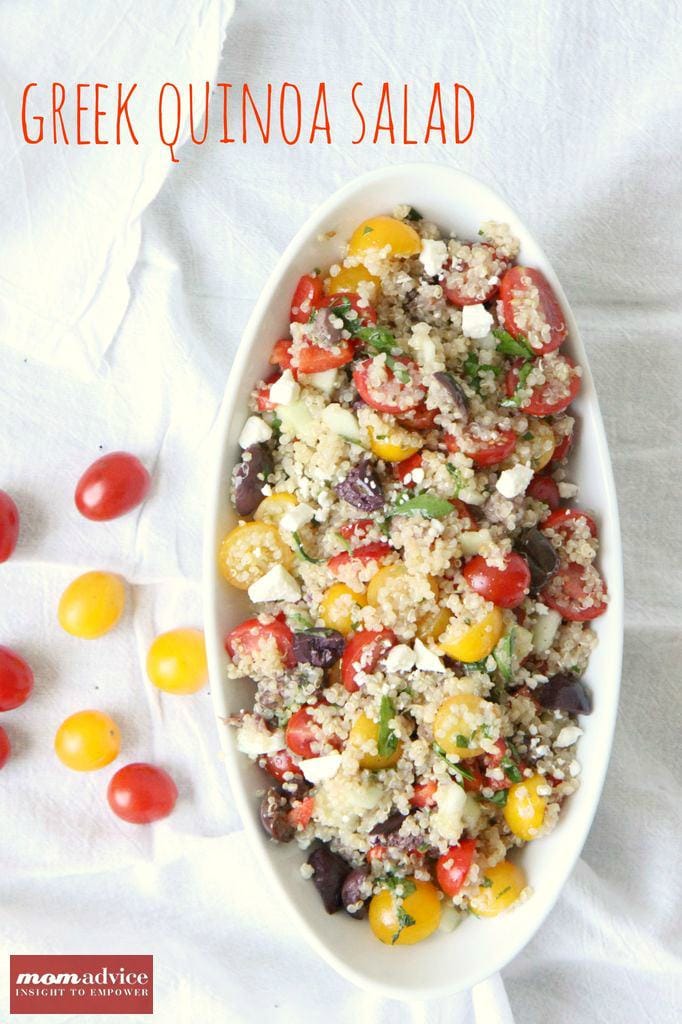
Greek Quinoa Salad from MomAdvice.com.

Labor Day festivities are just around the corner and with that comes the fun with grilling out and sharing dishes with friends. Today I wanted to share a delicious Greek Quinoa Salad that can be made with many of the veggies lurking in that backyard garden and that easily pairs with a few items you just might have in your pantry.

Walmart challenged me to create a unique dish for Labor Day and I couldn’t wait to share this one. You see, I have been going through a bit of an identity crisis since my visit with my allergist. I was advised to limit my pasta intake and it has been a hard sacrifice for me because I happen to love my pasta…and, sadly, my pasta salads are my claim to fame in the cookout world.

I’m thankful that I discovered quinoa last year because it has helped me so much with my pasta hurdle. I hope you caught my Mexican Quinoa Stuffed Bell Peppers I made last week and that handy tutorial for preparing your quinoa in the rice cooker! I have been continuing to experiment with this delicious and protein-packed ingredient for my summer cooking and couldn’t wait to pair it with some of my favorite Greek flavors. This quinoa salad proves that there are certainly some fun ways around that pasta hurdle and I doubt you will even miss your pasta after you try this!

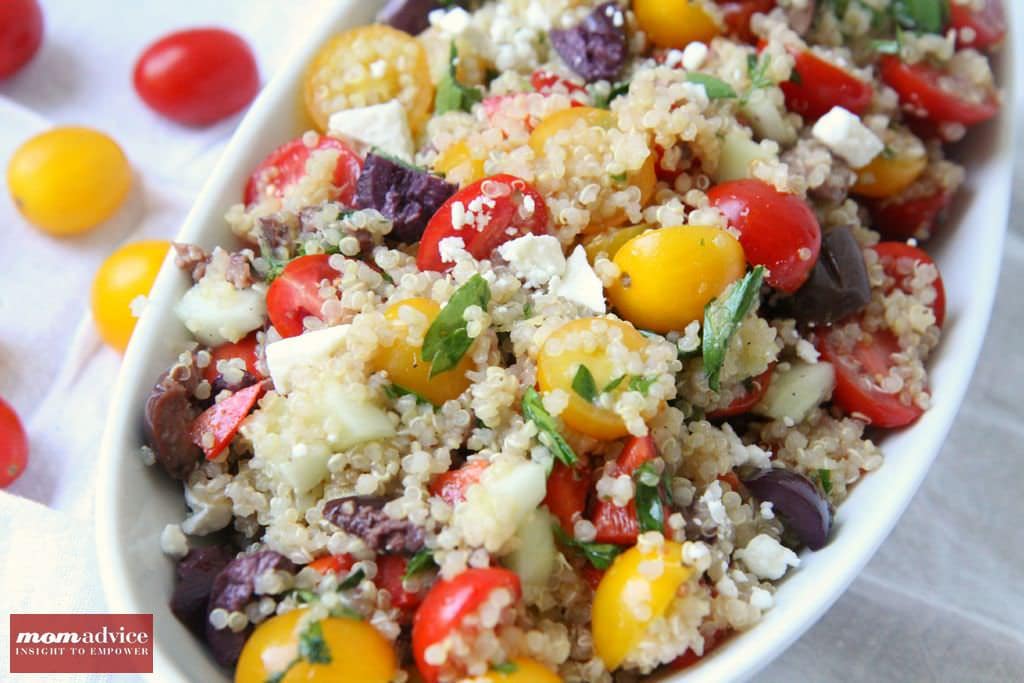
Greek Quinoa Salad from MomAdvice.com.

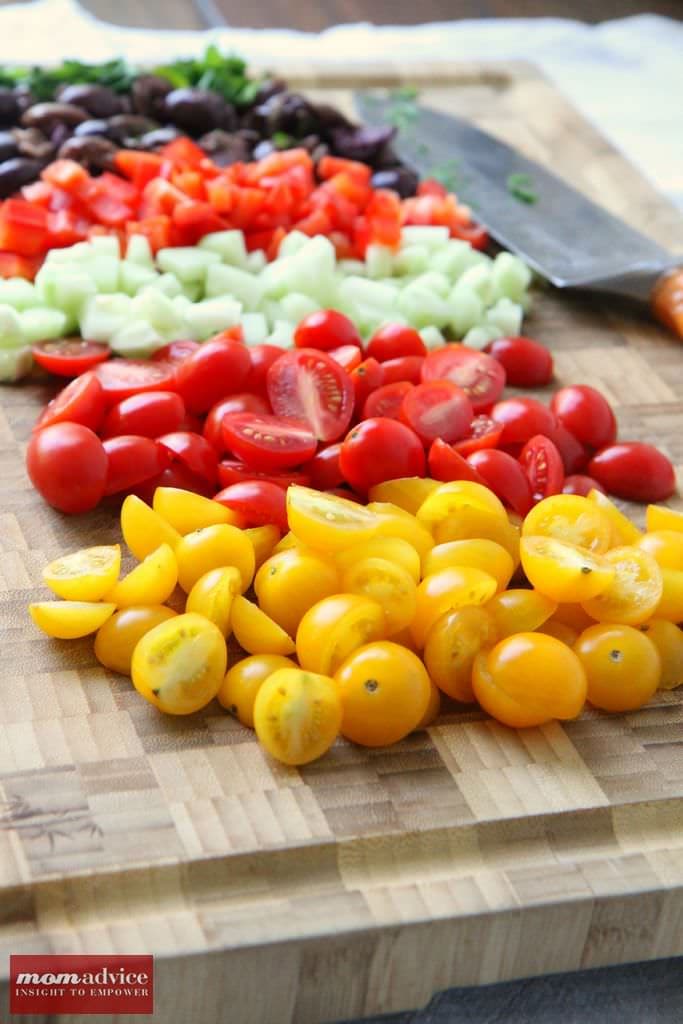
The most labor-intensive part of this recipe (no pun intended!) is the chopping. It is an awful lot of chopping, but the flavors are so worth it. This Greek Quinoa Salad is filled with fresh vegetables like cucumbers, tomatoes, red peppers, and fresh parsley. The salty bites come from the Greek olives and the bites of feta cheese (optional, should you be dairy-free). The whole salad is tied together with a delicious red wine vinaigrette made even more flavorful the longer that it sits.

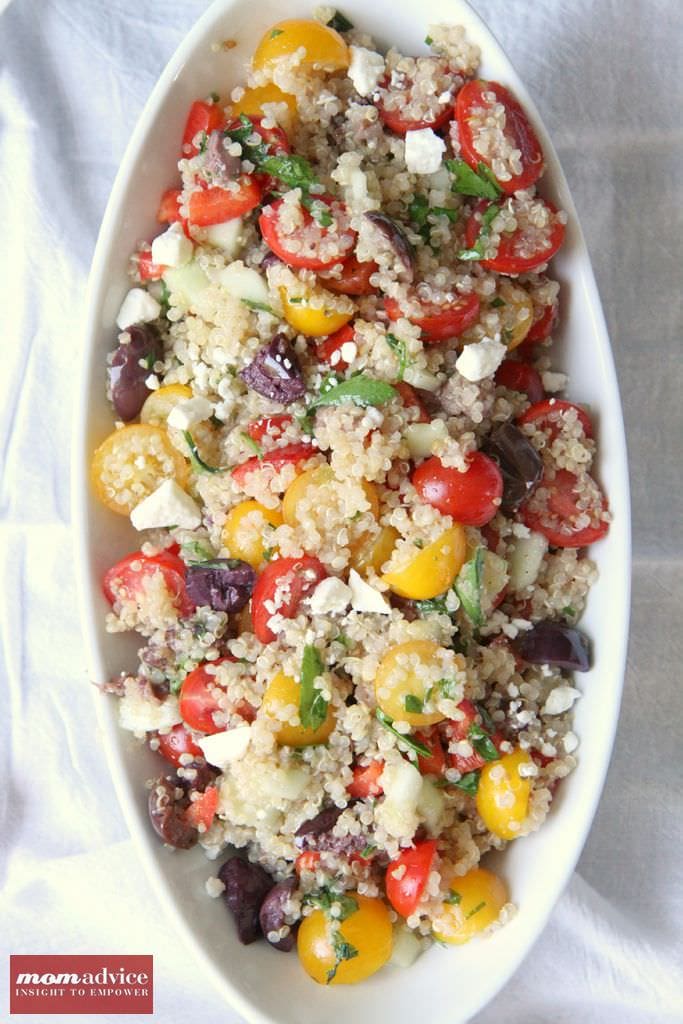
Greek Quinoa Salad from MomAdvice.com.This is one of those recipes that you can customize depending on what you have growing in your garden or what is on sale that week in your store. If you are shopping Walmart, be sure to bring the competing store fliers in and have them price match those produce prices for you!

I hope you enjoy this recipe and I hope it can be your very own, “claim to fame,” at your next cookout! Happy Labor Day, friends! Greek Quinoa Salad from MomAdvice.com.


Greek Quinoa Salad
Recipe Type: Side
Author: Adapted From Bobby Flay Fit
Prep time:
Cook time:
Total time:
Serves: 4
This Greek Quinoa Salad has all the right flavors, colors, and textures with a light vinaigrette dressing to round it all out.
Ingredients
  • 1 lemon, zest and juice
  • 1 tablespoon red wine vinegar
  • 1/4 teaspoon dried oregano
  • 1 clove garlic, smashed and finely chopped to a paste
  • 1/4 cup extra-virgin olive oil
  • 1 cup vegetable or chicken broth
  • 1 cup quinoa
  • Kosher salt and pepper
  • 2 cups red and yellow grape tomatoes, halved
  • 1 cup pitted Greek olives
  • 1 red bell pepper, diced
  • 1/2 cucumber, diced and seeds removed
  • Feta for sprinkling on salad (optional)
Instructions
  1. In a bowl whisk together the lemon juice, vinegar, oregano, garlic, salt, pepper, and zest from one lemon. Slowly whisk in the oil until emulsified. Let sit at room temperature while you prepare the salad to allow the flavors to meld.
  2. Rinse the quinoa in a strainer until the water runs clear.
  3. Prepare quinoa as directed above in a rice cooker or according to package directions.
  4. Transfer the cooked quinoa into a bowl, fluff with a fork and let sit for 5 minutes to cool slightly.
  5. Add the tomatoes, olives, chopped red bell pepper, chopped cucumbers and dressing and toss to coat.
  6. Cover and refrigerate for at least 1 hour and up to 8 hours before serving. The longer it sits the better the flavor.
  7. Just before serving, transfer to a platter and sprinkle feta on top.
Adapted from Bobby Flay Fit

Looking for more fun cookout dishes? Be sure to check out the Best Steak Marinade in Existence, my Corn Grilled in the Husks, my Three Cheese Grilled Potatoes, and my delicious Grilled Portobello Burgers to tempt your tummy!


walmart_mom_disclaimer

Pin It

Mexican Quinoa Stuffed Bell Peppers

Wednesday, August 14th, 2013

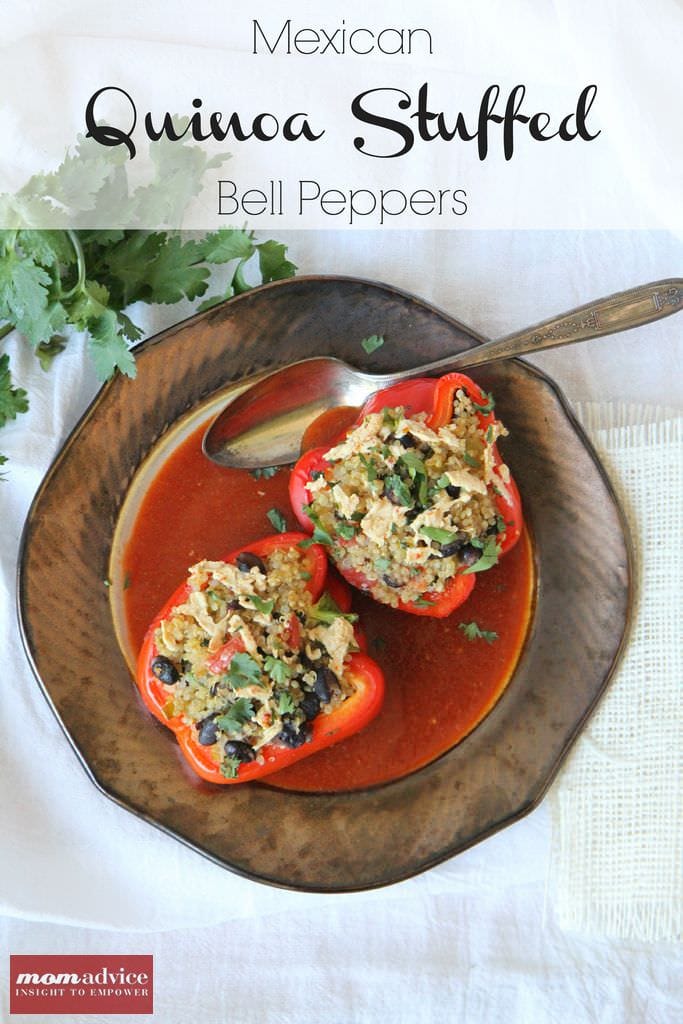
Mexican Quinoa Stuffed Bell Peppers

Looking for an easy recipe that is gluten-free, dairy-free, and vegan? Look no further than these Mexican Quinoa Stuffed Bell Peppers for a fun weeknight meal. You will love these bell peppers for a meatless dish that is packed with protein and very filling with just the right balance of sweetness, from the peppers, and spice from the enchilada sauce,  in this recipe.

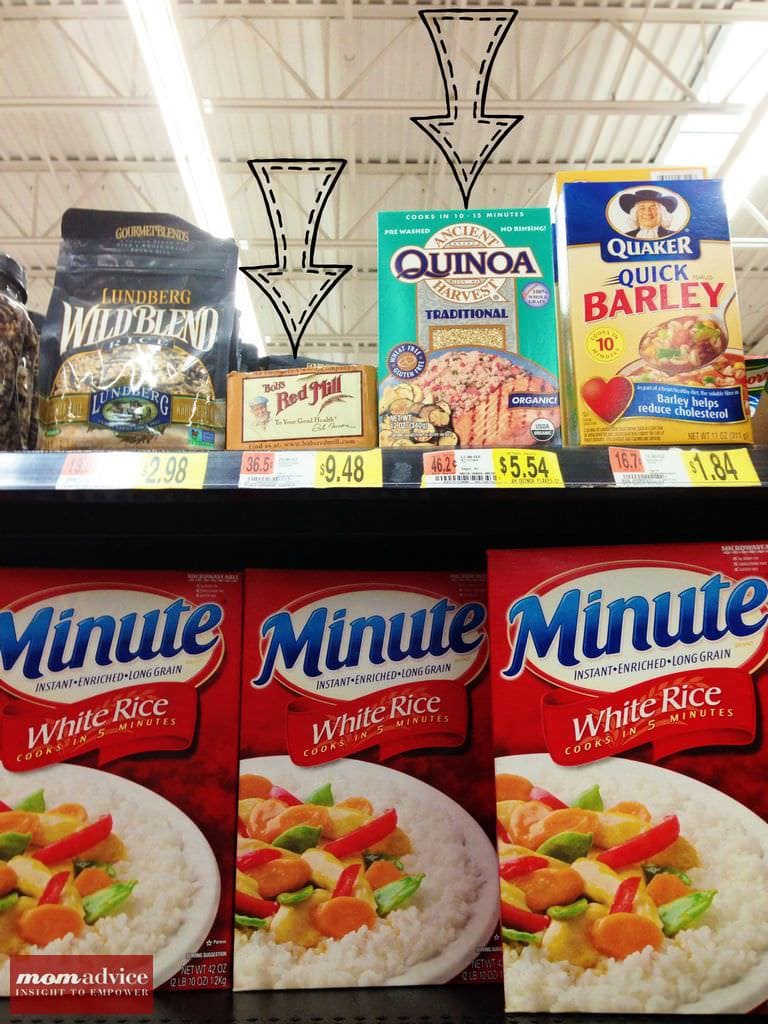
Walmart challenged me to come up with a gluten-free dish made from their grocery aisles of ingredients. Quinoa may sound like an ingredient that you can’t find at your store, but Walmart not only sells quinoa, but they now sell a couple of varieties of quinoa on their store shelves. No need to run to a specialty market to find this ingredient anymore!

Mexican Quinoa Stuffed Bell Peppers

If you haven’t bought or prepared quinoa before, then be sure to check out my tutorial on preparing quinoa in an inexpensive rice cooker or on your stove-top. If you decide you love it as much as I do, a rice cooker makes making batches of quinoa for recipes simple.

You will find quinoa over in the rice aisle right at the top. I took a picture in our aisle to help you locate it.

Mexican Quinoa Stuffed Bell Peppers

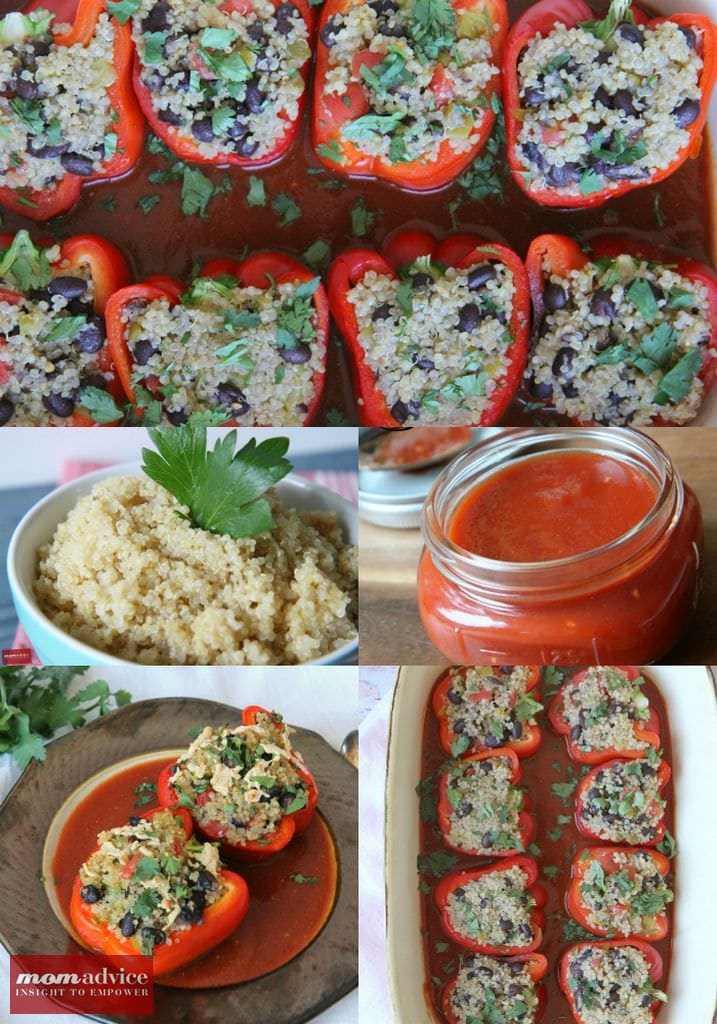
To make these extra special, I mixed up a batch of my favorite homemade enchilda sauce for these to swim in. I love to make my own sauce because it gives me control over the amount of salt and spice in my dish. You can certainly use a jarred gluten-free enchilda sauce though If you are wanting to keep this gluten-free, be sure to read the back of the tomato sauce label or enchilada sauce label’s ingredients thoroughly before purchasing or eating. 

Unfortunately, Walmart doesn’t offer a lot of dairy-free cheese options (yet!), but you could definitely make these without cheese or head to a specialty market to pick up my favorite dairy-free shreds, Daiya Pepperjack Shreds, for an extra kick. I have been dairy-free for a year now and those happen to be my personal favorite. These peppers really don’t need the cheese though, thanks to the flavorful sauce on the bottom!

Mexican Quinoa Stuffed Bell Peppers

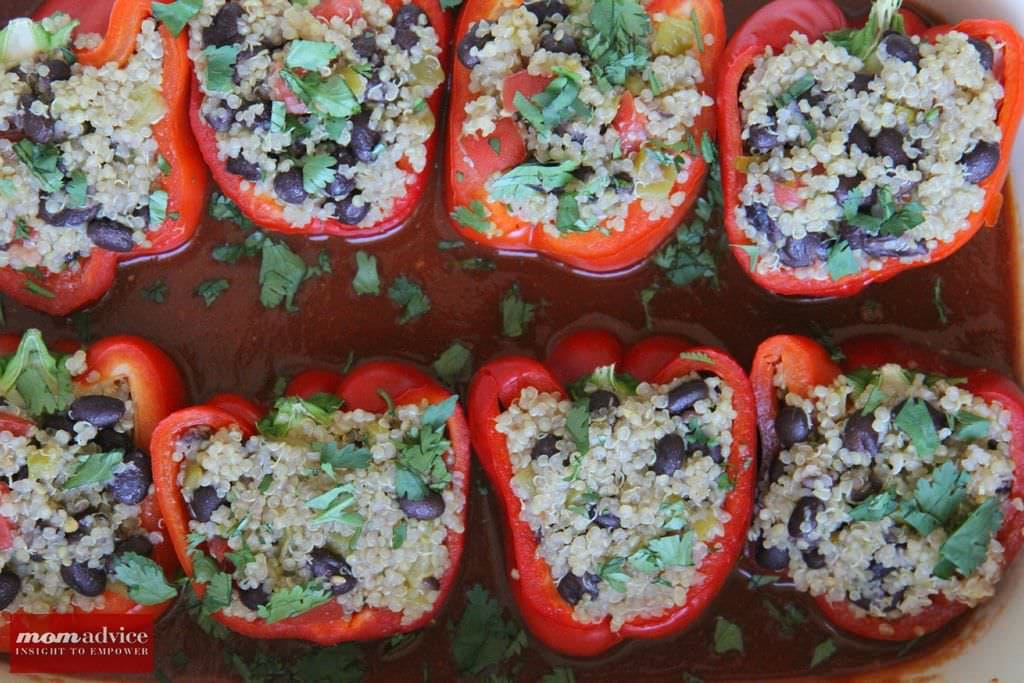
These peppers get a double protein punch thanks to the quinoa and the black beans in this recipe.  Roma tomatoes add a little tomato flavor and the green chilies add a little kick to to the dish. Sprinkled with a little fresh cilantro and a saucy bottom, I promise you won’t miss the meat or cheese or gluten at all!

I prepared mine with red peppers because I love their sweetness, but you can do this same preparation with any variety of pepper you love!

I hope you love these as much as me and I hope you won’t judge that I made a 9×13″ dish just for myself.

Because it is HARD being dairy-free so I have to treat myself all the time…and I do all.the.time.

You know, to get through it.

Mexican Quinoa Stuffed Bell Peppers
Recipe Type: Main
Cuisine: Mexican
Prep time:
Cook time:
Total time:
Serves: 5
A gluten-free, dairy-free, & vegan Mexican-inspired quinoa stuffed pepper that is delicious, filling, and protein-packed.
Ingredients
  • 5 bell peppers (any color), sliced in half stem-to-tip, seeds removed
  • 1c quinoa, uncooked
  • 2 cups water or vegetable broth
  • 1 (15oz) can black beans, drained and rinsed
  • 1 small tomato, seeded and diced
  • 1 (4oz) can diced green chiles, undrained
  • Handful of chopped cilantro
  • 1/2 teaspoon salt
  • Pepper, to taste
  • 1/2-1 cup dairy-free shreds (optional)
  • 28-ounce jar of enchilada sauce (or a double batch of my homemade version, linked above)
Instructions
  1. Prepare quinoa as instructed on the box or using the method linked above for cooking in your choice of vegetable broth or water.
  2. Prepare enchilada sauce recipe (linked to above) or omit this step if using prepared enchilada sauce.
  3. Slice the peppers in half and remove the seeds. Microwave pepper halves 3-4 minutes to soften slightly.
  4. Once quinoa is cooked, add it to a mixing bowl. Stir in the rinsed black beans, tomato, green chiles and their juices, cilantro, salt and pepper (to taste).
  5. Pour enchilada sauce into a 9×13″ baking dish.
  6. Fill the peppers with the filling and then rest them in the enchilada sauce. Sprinkle with cheese if desired.
  7. Cover the pan with foil and bake at 375 degrees 30 minutes.. Remove foil and cook about 5 minutes longer. If cheese isn’t melted still, turn broiler on high and cook for an additional 2 minutes.
  8. Serve peppers drizzled with enchilada sauce.
Recipe Adapted from One Lovely Life.


walmart_mom_disclaimer

Pin It

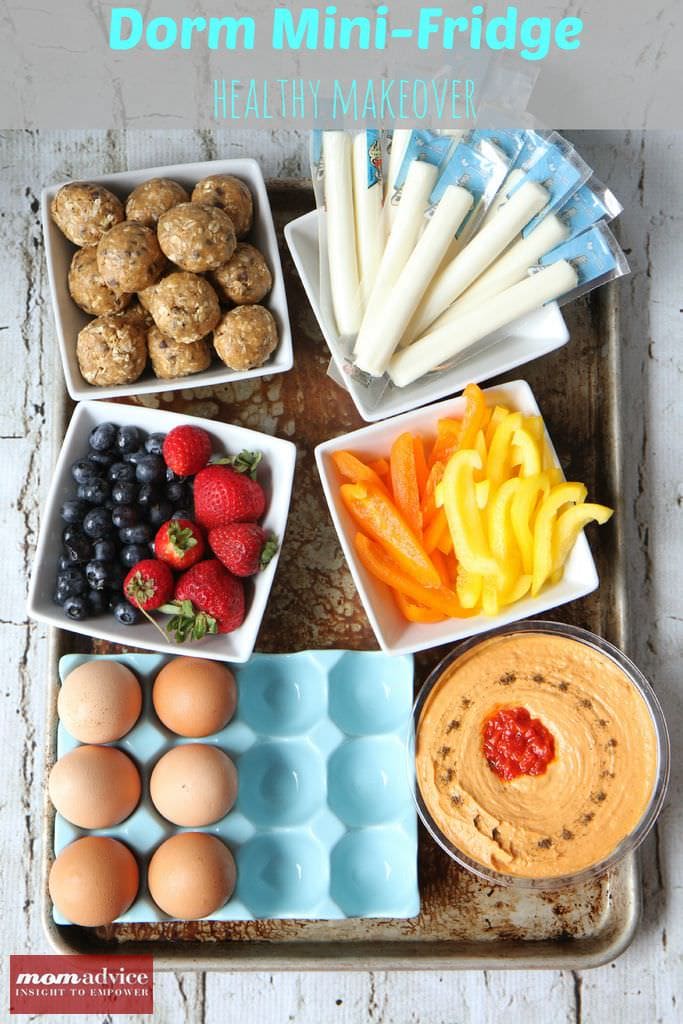
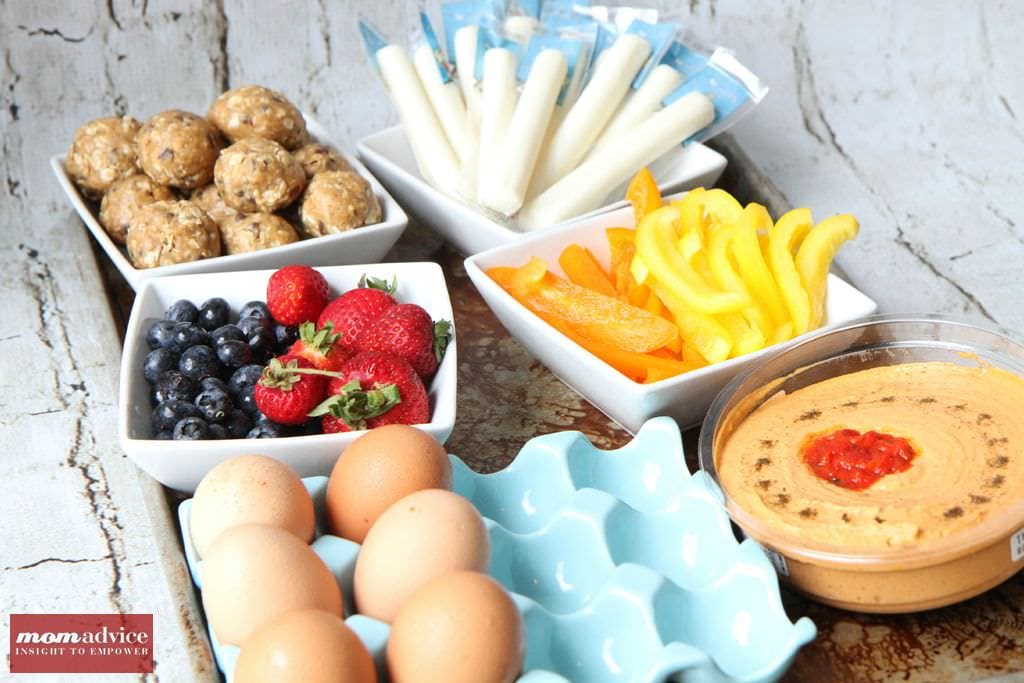
Dorm Mini-Fridge Healthy Makeover

Wednesday, August 7th, 2013

Dorm Mini-Fridge Healthy Makeover

When I attended college, I lived on junk & convenience food and I had the inevitable, “Freshman 15,” to prove from my bad eating habits throughout the year. I only wish I knew how great I would have felt and how much better I would have performed if I had stocked my dorm fridge with healthy options.

Today I wanted to share with you some healthy ideas for stocking your dorm mini-fridge for the school year along with an easy no-bake energy bite that you can mix up in a bowl for easy snacks on-the-go when heading to your classes.

Dorm Mini-Fridge Healthy MakeoverHead on over to the Kenmore Blog today to read my ideas for smart back-to-school snacking and grab  my easy no-bake recipe for smart snacking on-the-go!

Pin It

Homemade Blueberry Pancake Syrup

Tuesday, August 6th, 2013

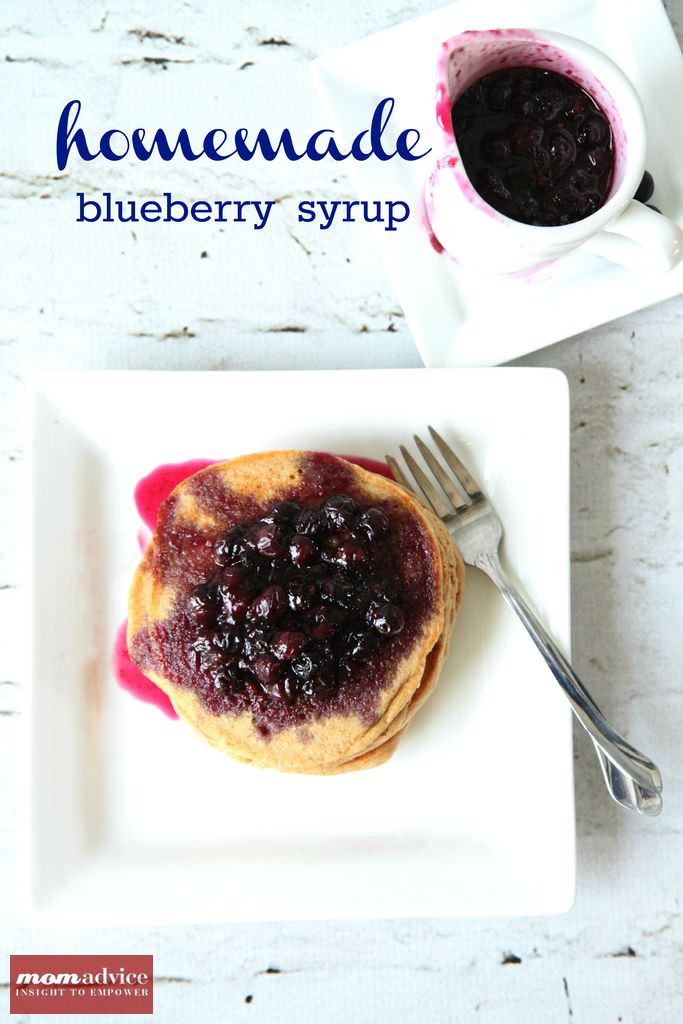
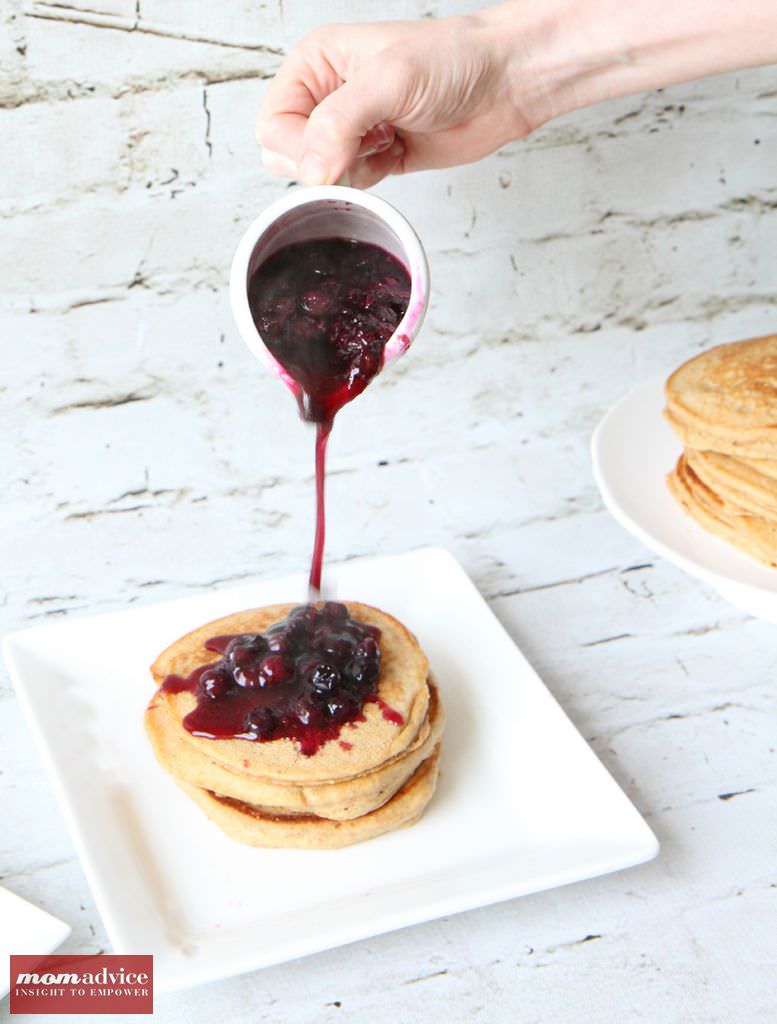
Homemade Blueberry Pancake Syrup from MomAdvice.com.With blueberry season in full swing, I am always looking for fun ways to use my blueberries. This blueberry pancake syrup couldn’t be easier to whip up or to eat and is a fun way to put those blueberries to work in your kitchen.

It is amazing how sugar, water, a little vanilla, and fresh berries make such an incredible difference on a plain old waffle, but this blueberry pancake syrup proves that simple ingredients can create something outstanding.

The burst of flavor, the happy dance in my mouth, and the smacking of lips at the table make me so incredibly joyful when we eat this syrup over our waffles. The berries coat the waffle perfectly and add a little sweetness to my waffles without a sugary overkill.

This is really and truly a fantastic indulgence that takes about the same amount of time to cook as it does to make up a batch of waffles. Fast and delicious!

blueberry_picking Each year we make an annual trip out to the Blueberry Ranch to pick our berries. This year was extra special because my best friend of 25 years came in town to pick with us. I am the luckiest girl in the world to still have her in my life. It was such a special day doing that with our kids!

8_Recipes_For_Blueberry_Season_1

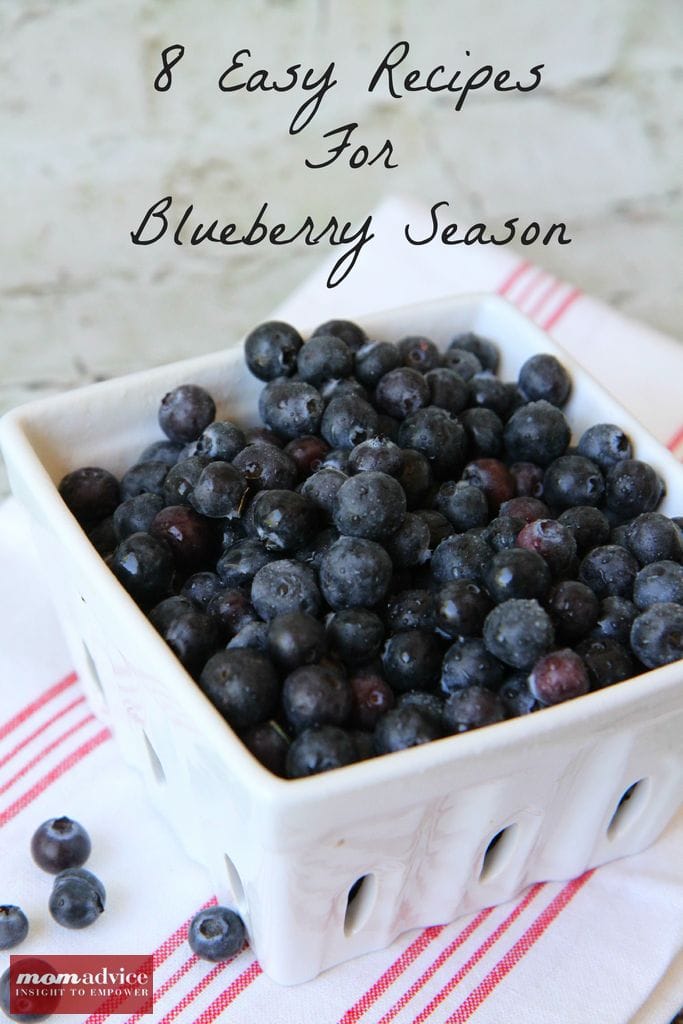
If you have been picking like me, you might be hunting for some ideas for what to do with those berries! Be sure to check out this post for 8 easy recipe for the blueberry season, including a new way to freeze those berries!

blueberry_pancake_syrup_1

Homemade Blueberry Pancake Syrup
Recipe Type: Condiment
Author: Amy Allen Clark
Prep time:
Cook time:
Total time:
Serves: 6
An easy blueberry pancake syrup for topping your favorite pancakes or waffles!
Ingredients
  • 1 pint (or two cups) fresh blueberries
  • 1 cup sugar
  • 1 teaspoon vanilla
  • 1/4 cup water
Instructions
  1. Place all ingredients in a saucepan.
  2. Cook over medium heat and stir to dissolve the sugar.
  3. Allow it to cook for 12-15 minutes and give the berries a little smash with your wooden spoon to break them up into the syrup.
  4. This syrup can be served warm or you can serve the syrup cooled.
Pin It

Chicken Caesar Pasta Salad

Monday, April 22nd, 2013

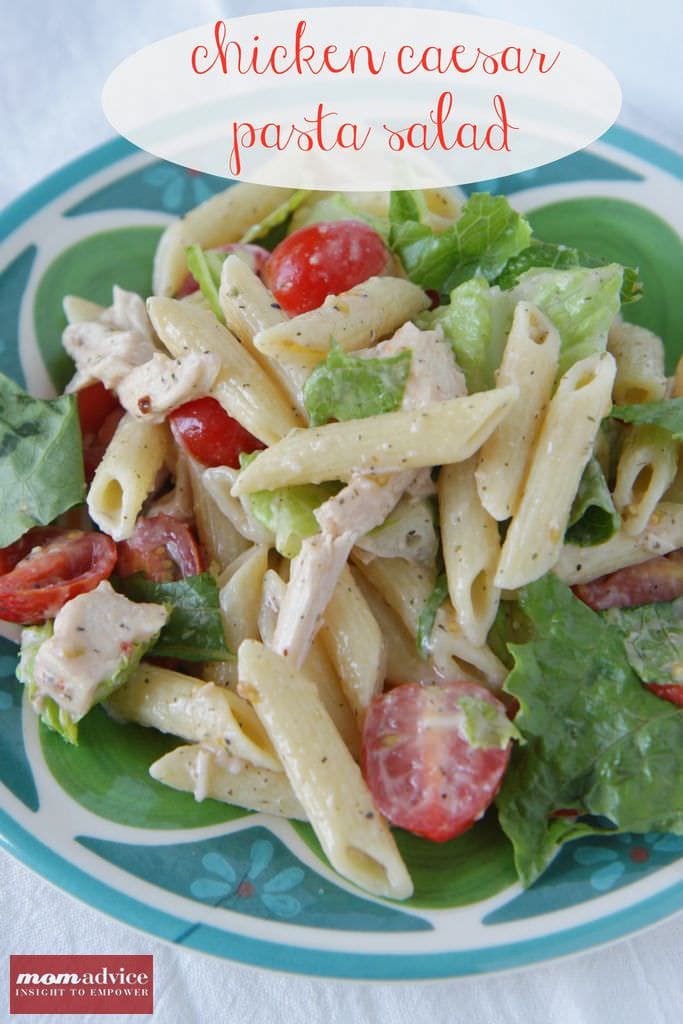
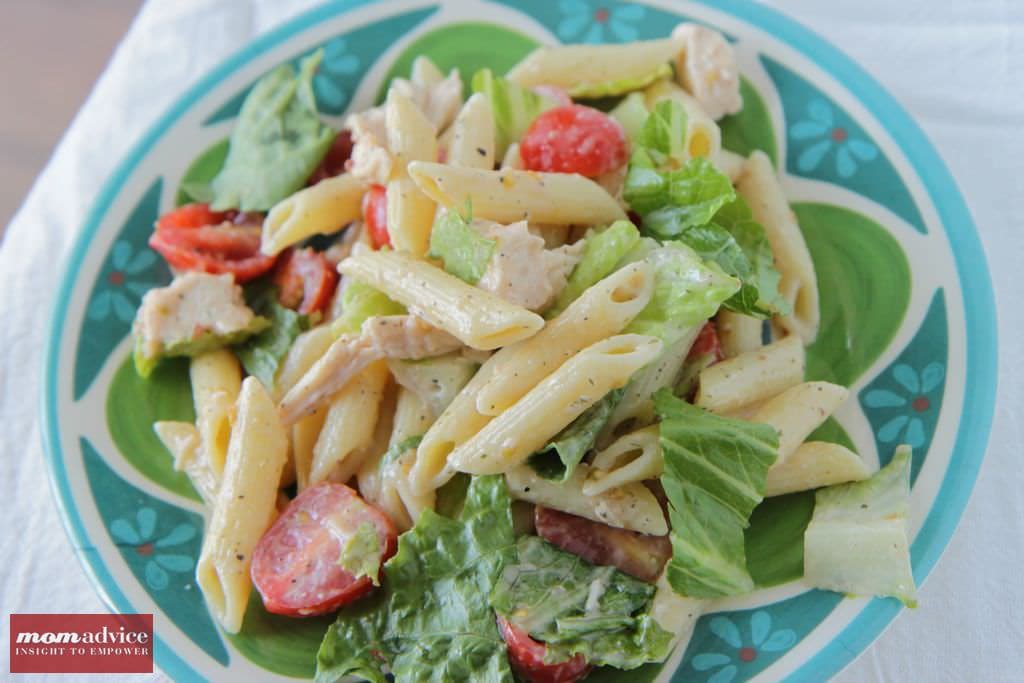
Pasta salad is one of my favorite dishes to make when the weather turns warmer,  thanks to it’s simplicity and ease in preparation. My favorite pasta salad is my Chicken Caesar Pasta Salad because it incorporates all of my favorite salad flavors into one dish. This Chicken Caesar Pasta Salad is a crowd-pleaser, a fun picnic dish to share, and an easy weeknight meal.

I have been making this salad for years and recently made some new additions to it to incorporate more flavors. I roasted my chicken, but coated it in Mrs. Dash Tomato Basil Garlic seasoning (along with the olive oil, salt, and pepper that I traditionally do) that I found at our grocery store to add spice to it, added more of this fun seasoning to the dressing mixture itself, and thinned the dressing with red wine vinegar so it coated the noodles better.

The fresh additions of romaine and tomatoes add brightness and freshness to this dish. You can, of course layer on the Caesar salad flavorings by adding parmesan cheese and croutons, but it is delicious with or without these additions.

I have yet to meet a person that didn’t love this pasta salad as much as I did. If you intend to eat this one all week long, I recommend storing the romaine separately and adding it when dishing it up so you don’t have soggy lettuce in your dish.

I hope you can give this dish a try!

Chicken Caesar Pasta Salad
Recipe Type: Main
Author: Amy Allen Clark
Prep time: 15 mins
Cook time: 12 mins
Total time: 27 mins
Serves: 6
To make this dish quicker, use a rotisserie chicken instead of roasting your own!
Ingredients
  • 1 pound dry penne pasta
  • 4 boneless chicken breasts, roasted & seasoned with Mrs. Dash Tomato Basil Garlic seasoning (see link above for preparation technique)
  • 1/2 teaspoon ground black pepper
  • 1/4 teaspoon salt
  • 1-2 teaspoons Mrs. Dash Tomato Basil Garlic seasoning
  • 1 (8 ounce) bottle Caesar salad dressing
  • 1/4 cup red wine vinegar
  • 1 head romaine lettuce – rinsed, dried and
  • shredded
  • 1 pint cherry tomatoes, halved
  • 1/2 cup grated Parmesan cheese (optional)
Instructions
  1. Prepare chicken as directed above. Allow the meat to rest ten minutes and then dice or shred for your pasta salad.
  2. Prepare your lettuce and tomatoes and toss them into a large bowl with the cooled chicken.
  3. Bring a large pot of lightly salted water to a boil. Add penne pasta and cook for 8 to 10 minutes or until al dente; drain.
  4. In a bowl, mix together salad dressing, vinegar, and seasonings. Toss together pasta, chicken, lettuce, tomatoes, and dressing mixture.
  5. Garnish with croutons and Parmesan cheese, if desired.


Pin It

Homemade Whole Wheat Toasted Tarts

Tuesday, March 19th, 2013

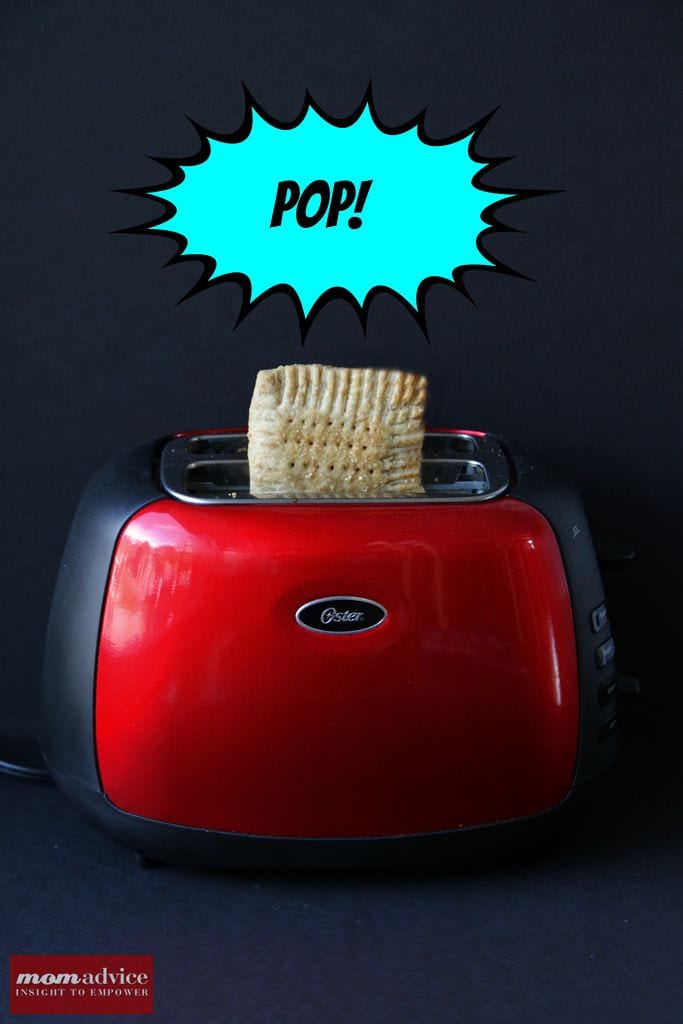
I love, love, love breakfast tarts and today I wanted to share with you a cute homemade whole wheat toasted tart version of this delicious treat that you can make right in your own kitchen. This recipe for whole wheat toasted tarts is so delicious that you won’t believe how much yum can be packed into one little treat.

These whole wheat toasted tarts incorporate a little whole wheat flour and in lieu of a frosting topping, I have mixed raw sugar & wheat germ for a sweet and toasty combination of deliciousness that is a little bit healthier than sprinkles and frosting (although we do love sprinkles and frosting around here too!).

I had never eaten a homemade toasted tart before and can I say…holy yum?! These are flaky, sweet-but-not-too-sweet, and just the right balance of filling and crust.

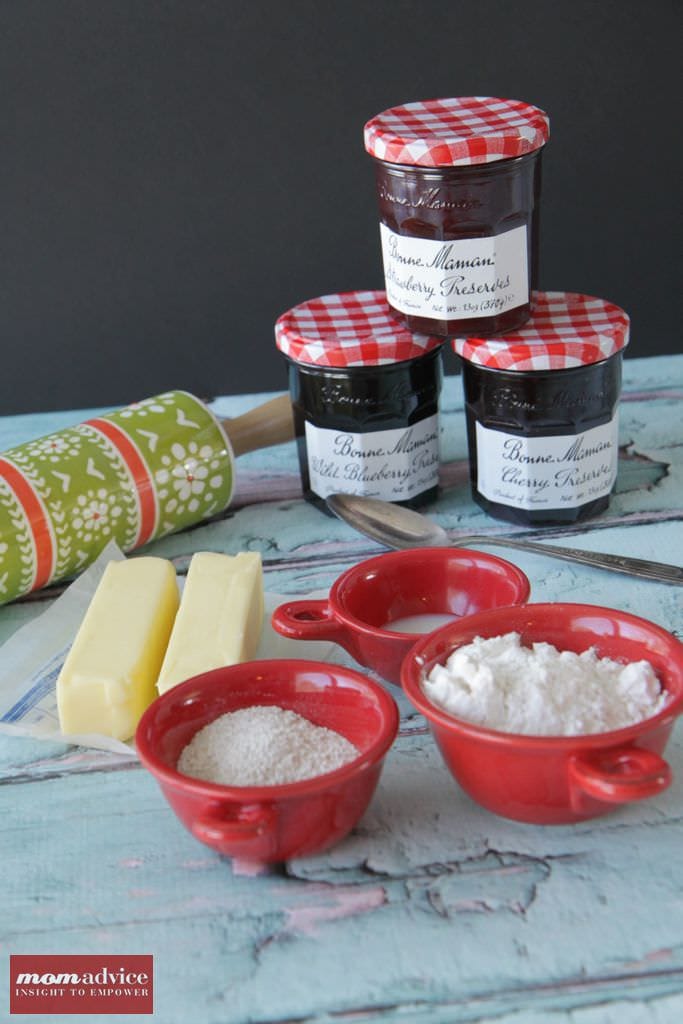
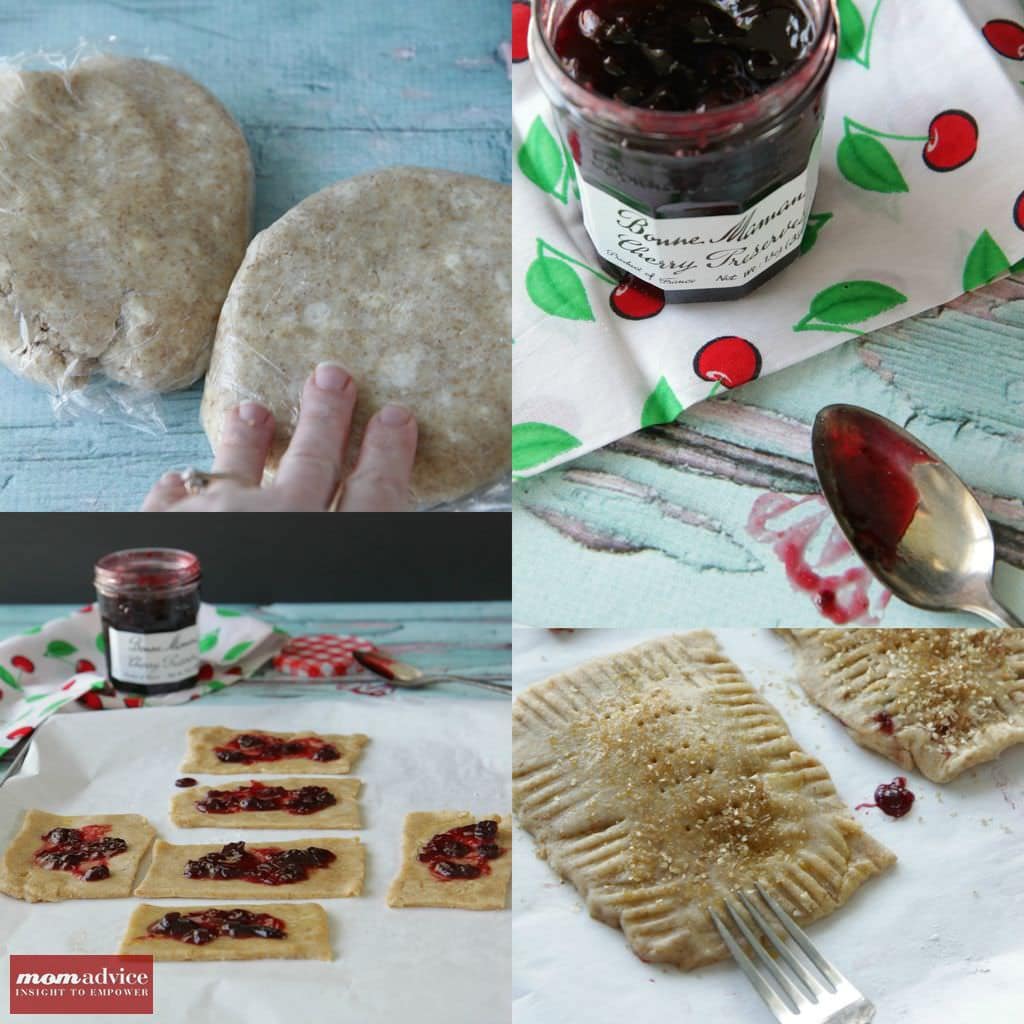
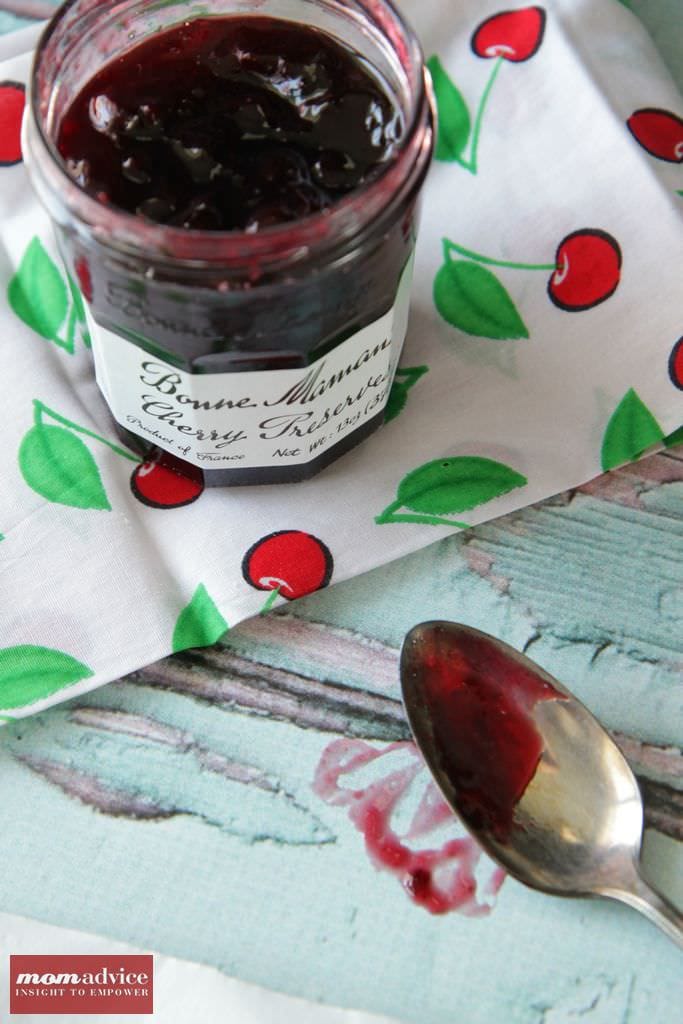
I hit my local Walmart store to grab supplies for this yummy treat. They offer absolutely delicious gourmet Bonne Maman fruit preserves that have become a special treat in our house for everything from waffle topping to my kid’s peanut butter & jellies. They retail for $3.95 each and come in delicious berry combinations, strawberry, cherry, and wild blueberry. One of these days I will get the hang of canning, but for now, these are my go-to preserves and make a delicious filling for homemade toasted tarts.

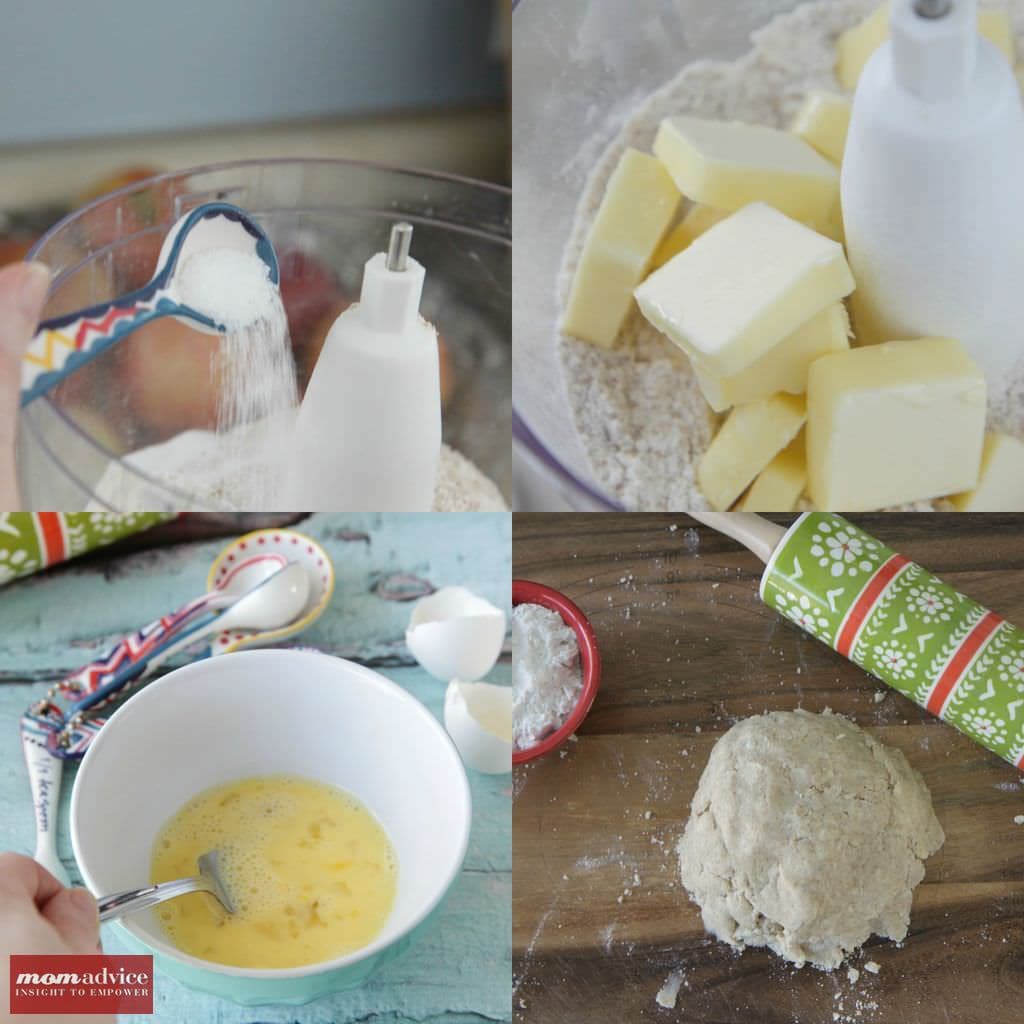
Just like my all butter pie crust (you can check out a picture tutorial over there),  I employ the use of my food processor to create an easy crust without the kneading. To make sure I don’t overwork the dough, I only use the Pulse on my food processor so I can make sure that I have a very tender dough. This is really essential for a flaky crust especially since we are creating this dough with whole wheat flour incorporated in it.

You can roll your dough out on a well-floured surface or roll it between two pieces of parchment paper. I highly recommend the parchment paper since this dough is a sticky one!

Did I mention sticky? This dough is a tricky little beast for a novice chef. Refrigeration of your crust is really essential for nice crisp edges and workable dough. The experts advise chilling your dough before using it and then chilling your tarts before you bake them to retain their shape. I do the same tactic with my sugar cookies and it yields crisp results. This will be doubly important if you live somewhere with a humid climate or are working in a hot kitchen.

My advice, chill out!

Seriously, just chill out for as long as you can!

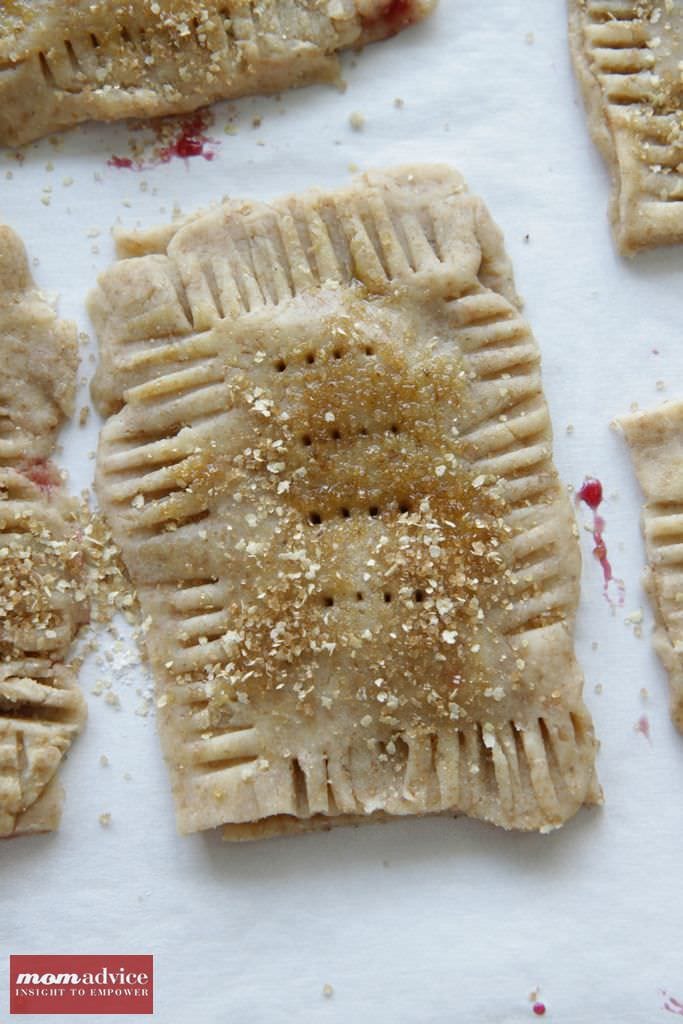
My crunchy & sweet topping is raw sugar mixed with wheat germ. A generous sprinkle of this adds another layer of deliciousness. Although the dough is chock-full of butter (as all good crusts are!), there is very little sugar in the dough itself and the raw sugar adds a crunchy texture as well as a little sweetness to this homemade delight.

These little toasty tarts were meant to be cut in perfect measurements with crisp corners.

I am no baker though, so these are imperfect…

Just like me!

The kids never noticed the difference and busy moms don’t have time for perfection when it comes to snacks.

Can I get an, “Amen?”

Toasted Tart Filling Ideas

Fruit Preserve Filling: 3/4 cup (8 ounces) jam, 1 tablespoon cornstarch mixed with 1 tablespoon cold water. Mix the jam with the cornstarch/water in a small saucepan. Bring the mixture to a boil, and simmer, stirring, for 2 minutes. Remove from the heat, and set aside to cool. Use to fill the pastry tarts.

Cinnamon & Brown Sugar Filling: 1/2 cup brown sugar, 1 to 1 1/2 teaspoons ground cinnamon, & 4 teaspoons flour. Whisk together.

Chocolate Filling: 9 tablespoons mini chocolate chips or 9 tablespoons Nutella. Spread or sprinkle chocolate filling.

Homemade Whole Wheat Toasted Tarts
Recipe Type: Dessert
Author: Adapted from King Author Flour
Prep time: 15 mins
Cook time: 1 hour 30 mins
Total time: 1 hour 45 mins
Serves: 9
Surprise the kids with a homemade version of this favorite breakfast treat. Be sure to visit the post for filling ideas for your homemade whole wheat toasted tarts.
Ingredients
  • 1 1/2 cups all-purpose flour
  • 1/2 cup whole wheat flour
  • 1 tablespoon sugar
  • 1 teaspoon salt
  • 1 cup (2 quarter-pound sticks, 8 ounces) unsalted butter, cut into pats
  • 1 large egg
  • 2 tablespoons (1 ounce) milk
  • 1 additional large egg (for brushing on the pastry)
  • 1 tablespoon raw sugar
  • 1 tablespoon wheat germ
Instructions
  1. Process flour, sugar, and salt together until combined.
  2. Add butter and pulse until the mixture holds together when you squeeze it, with pecan-sized lumps of butter still visible.
  3. Mix the egg and milk, and add it to the dough, mixing just until everything is cohesive.
  4. Divide the dough in half. Wrap in plastic, and refrigerate for up to 2 days or for 30 minutes.
  5. Remove the chilled dough from the refrigerator and allow it to soften and become workable, about 15 to 30 minutes.
  6. Place one piece on a lightly floured work surface, and roll it into a rectangle about 1/8″ thick, large enough that you can trim it to an even 9″ x 12″. Laying a 9″ x 13″ pan atop the dough will give you an idea if you’ve rolled it large enough. Trim off the edges; place the scraps on a baking sheet, and set them aside, along with the 9″ x 12″ rectangle of dough.
  7. Roll the second piece of dough just as you did the first. Press the edge of a ruler into the dough you’ve just rolled, to gently score it in thirds lengthwise and widthwise; you’ll see nine 3″ x 4″ rectangles.
  8. Beat the egg, and brush it over the entire surface of the dough. Place a heaping tablespoon of filling into the center of each marked rectangle.
  9. Place the second sheet of dough atop the first, using your fingertips to press firmly around each pocket of jam, sealing the dough well on all sides.
  10. Brush the tops of the pastry with the remainder of the egg and then sprinkle the wheat germ and raw sugar topping on top of your tart.
  11. Press the tines of a fork all around the edge of the rectangle. Cut the dough evenly in between the filling mounds to make nine tarts. Press the cut edges with your fingers to seal, then press with a fork, to seal again.
  12. Gently place the tarts on a lightly greased or parchment-lined baking sheet. Prick the top of each tart multiple times with a fork; you want to make sure steam can escape, or the tarts will become billowy pillows rather than flat toaster pastries. Refrigerate the tarts (they don’t need to be covered) for 30 minutes, while you preheat your oven to 350°F.
  13. Remove the tarts form the fridge, and bake them for 25-28 minutes, until they’re a light golden brown. Remove them from the oven, and allow them to cool on the pan.

Recipe Adapted from King Author Flour.


Afraid to tackle a homemade crust? I get it! You can find an easy DIY Pop Tart made from store-bought crust over here!


Pin It

Getting To Know Your Bread Machine (Easy Recipes & Tips for Busy Families)

Tuesday, February 12th, 2013

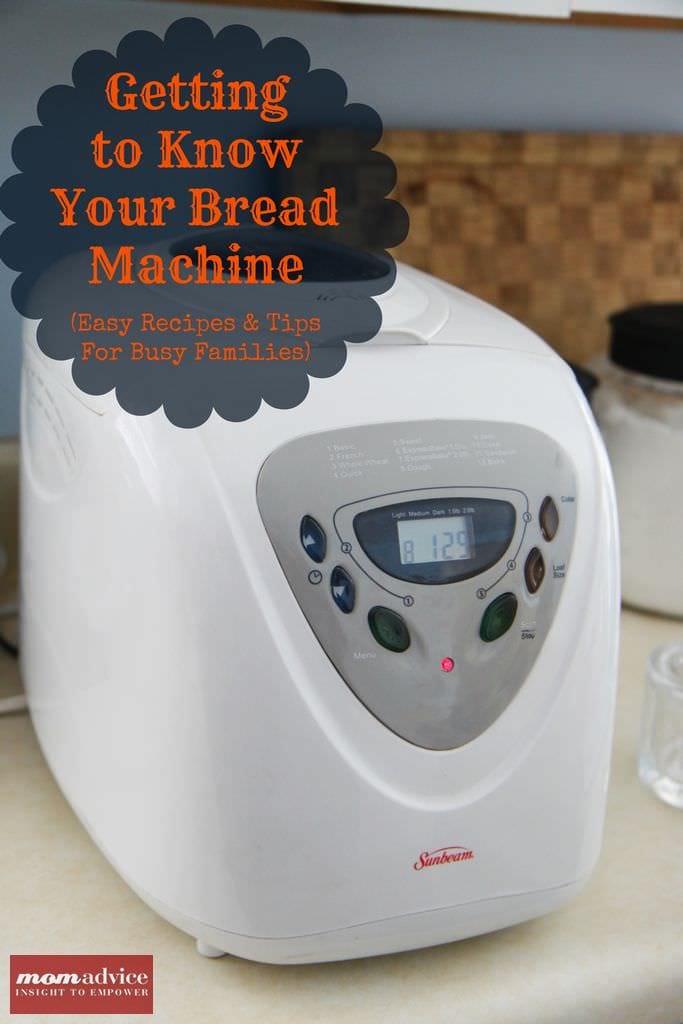
One of the most invaluable appliances in our home is our bread machine and today I wanted to share with you why I think a bread machine is a wise kitchen investment. This tutorial will offer advice on what to look for in a bread machine, how to use your bread machine, and the best bread machine recipes that our family enjoys on a weekly basis.

Perhaps you already have a bread machine that has been gathering dust in your kitchen or basement. Many people buy these appliances and then end up donating them to their local thrift store because they never use them. I think of the bread machine as a modern day convenience, but in a culture where we want everything NOW, waiting for a loaf of bread can seem like an eternity.

Why wait for a hot loaf of fresh bread when you can grab a loaf at your supermarket?

And what exactly is the purpose of that appliance that is taking up space on your shelves? Let’s get to know our bread machines and find a new way to use them.
What is A Bread Machine or Bread Maker?

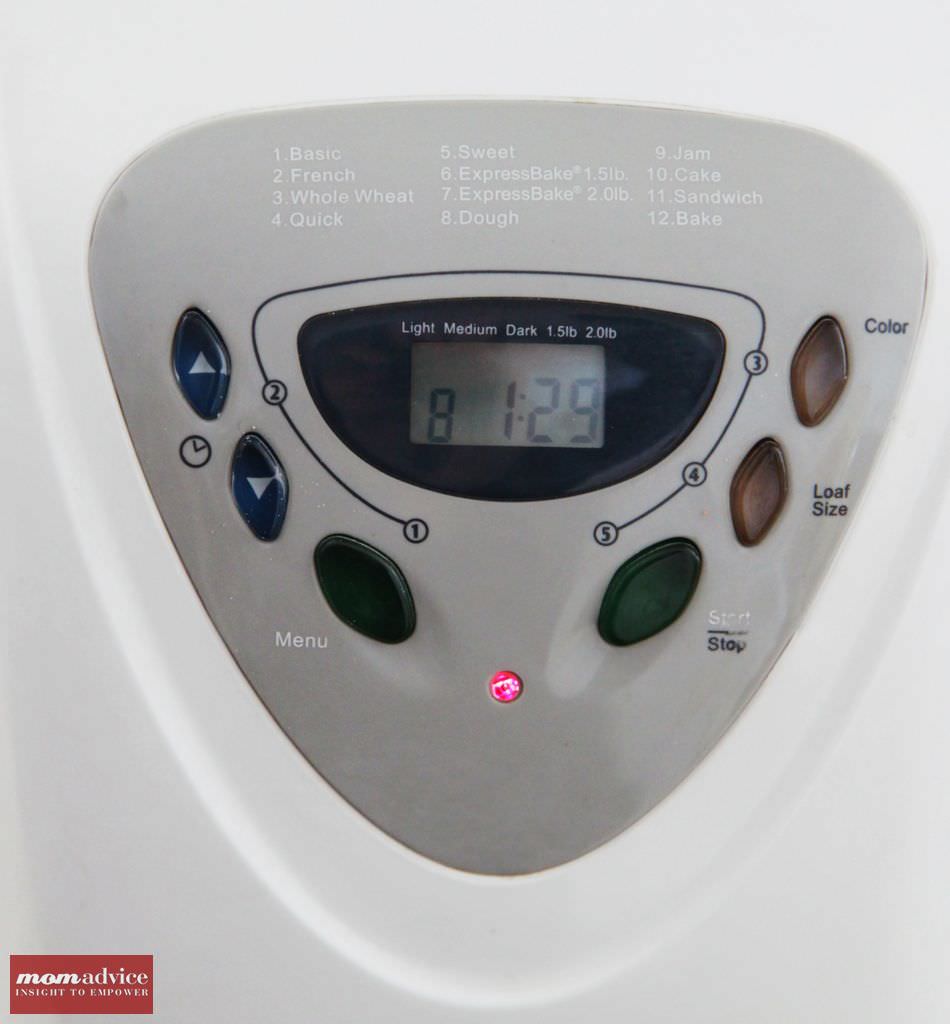
A bread making machine or bread maker is a home appliance for baking bread.The bread machine is simple in its construction and consists of a bread pan (or “tin”), at the bottom of which are one or more built-in paddles, mounted in the center of a small special-purpose oven. This little oven is  controlled by a simple built-in computer, the settings for which are inputted on the control panel. Most bread machines have different cycles for different kinds of dough—including white bread, whole grain, European-style (sometimes labeled “French”), and dough-only (for pizza dough and shaped loaves baked in a conventional oven). Many also have a timer to allow the bread machine to activate without operator attendance, and some high-end models allow the user to program a custom cycle.

Some of the older machines have just a handful of simple settings while newer machines offer more advanced cycles including a cycle to make jam or to bake cakes. To be honest, I don’t use the fancy cycles on my bread machine and rely mostly on the Basic and the Dough cycle, which can be found on every machine. The basic cycle is just the basic setting for making a loaf of bread. The Dough cycle just completes the kneading and rising of the dough. Once the dough cycle is complete, you can take the dough out and shape it into your loaf pan or do fancy braids or rolls out of the dough.

The purpose of a bread machine is simple;  you are able to make fresh bread when you want it. The reasons vary from person to person on why they choose to make their own bread. Many people have concerns about the additives and preservatives that are found in store-bought breads. Another reason that many people choose to make their own bread is because they just enjoy the taste of homemade bread. My reasoning for making our own bread is because I like to save our family money. Making your own bread costs so much less than purchasing a loaf of bread, and the rising grocery costs have only fueled my desire more to make it at home.

How Do You Add Ingredients to a Bread Machine?

Inserting your ingredients into a bread machine is also very straightforward. If you are making the loaf right away, you can insert the ingredients in any way that you want. All of these ingredients will immediately be stirred together and so it will not matter what the order is. If you use a timer delay on your bread machine, delaying the start time of making your loaf, it is imperative that you put the ingredients in the right order or your loaf will not turn out right. The order of ingredients is liquid (liquids include water, oil, milk, eggs, or honey), flour, other dry ingredients (salt, sugar, baking powder, seasonings), and ending the ingredients with your yeast. The most important part of putting the yeast in is to make sure that you make a small indentation into the center of the flour so that the yeast does not react with the other ingredients.

Upon inserting your ingredients, your bread machine will take over the process from there. The machine will knead the ingredients together, give the bread its rising time, and then it will bake the bread. The bread machine will signal when the bread is ready and you can allow the bread to cool inside of the bread bucket.
Do I Need to Buy Bread Machine Mixes For My Bread Machine?

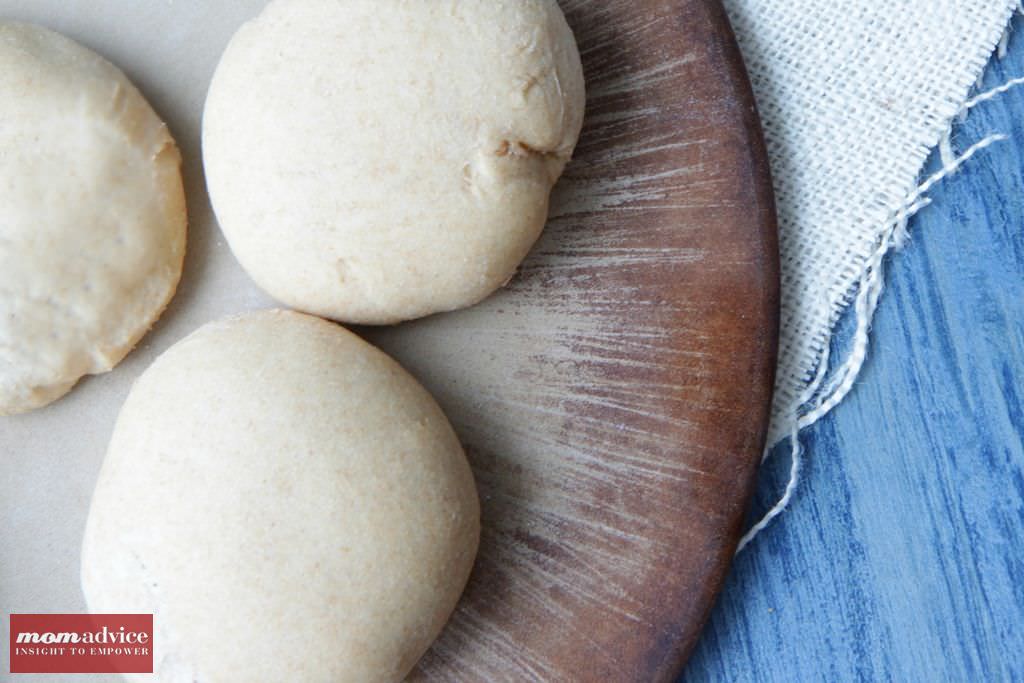
There is no need to spend the money on convenience bread machine mixes; in fact, you can make your own convenient mixes handy for the week. I take plastic storage bags and make an assembly line of the dry ingredients and do my bags once a month. On the outside, just write what liquids you will need to add and you will only have a dirty kitchen once instead of weekly.

What is the difference between Instant Yeast, Bread Machine Yeast and RapidRise Yeast?

Just their names because these are all the same yeast. Nothing like making it EXTRA confusing for a novice bread-maker.

Is There Savings in Making Bread at Home?

A quick glance at grocery store prices and you will wonder how there could be any possible savings with making your bread at home. The key to making this the least expensive on your family is to purchase all of your ingredients at your local wholesale club. With proper storage, you can buy the ingredients in bulk and save your family loads of money.

I don’t use my wholesale club membership very often except for our family’s eye care needs and for the occasional party. I won’t ever let my membership lapse though because with one trip to buy my baking supplies, my wholesale club membership has earned its space in my wallet. I make a trip twice a year to buy all of the necessary supplies for my baking and pizza-making needs.

Don’t believe me? Here is the current prices from my local Sam’s Club:

25 Pounds Bread Flour- $6.59 (needed depending upon the recipe)

25 Pounds All-Purpose Flour- $6.68 (needed depending upon the recipe)

2 Pounds of Yeast- $4.16

Cheese (5 pounds for $10.43) , pepperoni (5 pounds for $11.88), and crushed tomatoes (102 ounces for $2.68) can also be bought at a fraction of the price, but in the past I have lacked the capacity and ambition of storage for all of the ingredients.

As a side note, if you do own a membership to Sam’s Club, they have a wonderful Click ‘N Pull service that you can utilize for your shopping day and they can pull the ingredients right to the front and email you when your order is ready to pick up. This is a fantastic free service for moms with small children or who are short on time!

How Do I Store My Bread Machine Ingredients?

For storage, flour can be stored for up to a year in an airtight container. With bulk storage, a large plastic bin that has been clearly labeled is ideal to keep your flour fresh. Yeast is the easiest ingredient to store and has a very long shelf life. I store my yeast in a mason jar in our refrigerator door. With both of these ingredients, writing an expiration date on the label will also remind you of when the item is going to expire. I have also provided a handy Yeast Freshness Test that you can use to see if your yeast is still working. This will come in handy when buying yeast in bulk.

What Kind of Bread Machine Should I Buy?

If you do not have a bread machine and are looking for one, garage sales and thrift sales are a great place to hunt. I see these machines for $10 or less, and you will definitely get your money back from the savings of making your own bread. When you find one, ask if you can plug it in and make sure it is working. Just check that it actually powers up, that there is a bread bucket inside, and that there is a paddle in the bottom of the bread machine to stir the ingredients. Having a manual with it is handy, but usually can be found by searching online.

Over the past five years, I have been using my Sunbeam Bread Machine with great success. All of my past models have been found at the thrift shops and garage sales, but when our bread machine quit on us, I ran out to our local superstore so we wouldn’t have to miss our weekly pizza night. You know an appliance has become invaluable to you if you can’t imagine a day without it. Our bread machine is that invaluable to us.
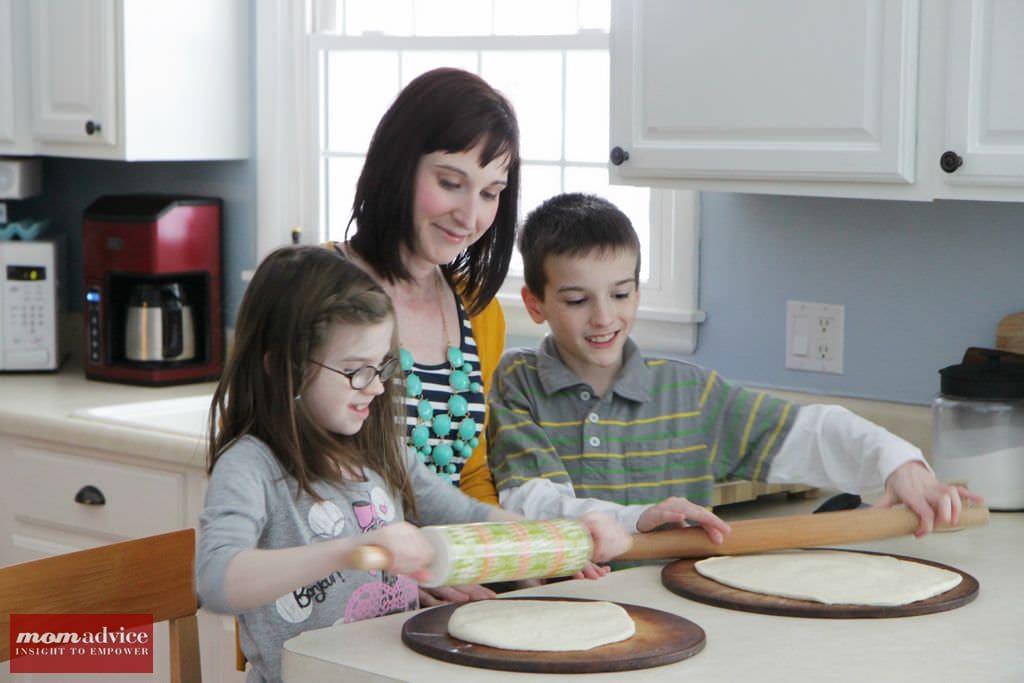
What Are Some Foolproof Bread Machine Recipes I Can Try With My Family?

On any given day in our house, you will find our bread machine happily humming along and whipping up fresh dough and bread for us. Not only that, but our bread machine has a regular performance in our house on Friday night for our infamous weekly family pizza night.

Here are a few of our family favorites, but you can learn more in my first book, “The Good Life For Less,” that is available on bookstore shelves now: 

The Perfect Pizza Dough (so easy that your kids can roll this one out on their own!)

Bread Machine Pita Pockets

Bread Machine Hamburger Buns or Hot Dog Buns

Whole Wheat Bread Machine Hamburger Buns or Hot Dog Buns

Bread Machine Calzones

Bread Machine Portuguese White Bread


Bread Machine Monkey Bread/Bunny Bread

Buttery Bread Machine Rolls

Bread Machine Cinnamon Rolls 


Yeast Freshness Test
Prep time: 2 mins
Cook time: 10 mins
Total time: 12 mins
Not sure if your yeast is still fresh and active? This simple test will help determine if your yeast is still performing!
Ingredients
  • 1 teaspoon granulated sugar
  • 1/2 cup warm tap water (110°F-115°F)
  • 2 1/4 teaspoons dry yeast (make sure it is at room temperature)
Instructions
  1. Using a one-cup liquid measuring cup, dissolve 1 teaspoon of granulated sugar in 1/2 cup warm tap water at 110°F-115°F. Using a thermometer is the most accurate way to determine the correct liquid temperature. Any thermometer will work as long as it measures temperatures between 75°F and 130°F. If you don’t have a thermometer, the tap water should be warm but NOT hot to the touch.
  2. Stir in one 1/4 oz. packet (7g) or 2-1/4 tsp of dry yeast until there are no more dry yeast granules on top.
  3. In three to four minutes, the yeast will have absorbed enough liquid to activate and start to rise.
  4. After ten minutes, the foamy yeast mixture should have risen to the 1-cup mark and have a rounded top.
  5. If this is true, your yeast is very active and should be used in your recipe immediately.
  6. If the yeast did not rise to the 1-cup mark, your yeast has little or no activity. Discard this yeast.

Do you have a bread machine? What is your favorite thing to do with this appliance?


I love helping you cook in the kitchen! If you like this cooking tutorial,  be sure to visit my tutorial on How to Cook A Butternut Squash With the Skin On, How to Roast a Spaghetti Squash, and  How to Make Quinoa in the Rice Cooker.

Pin It

Bread Machine Cinnamon Rolls

Monday, February 11th, 2013

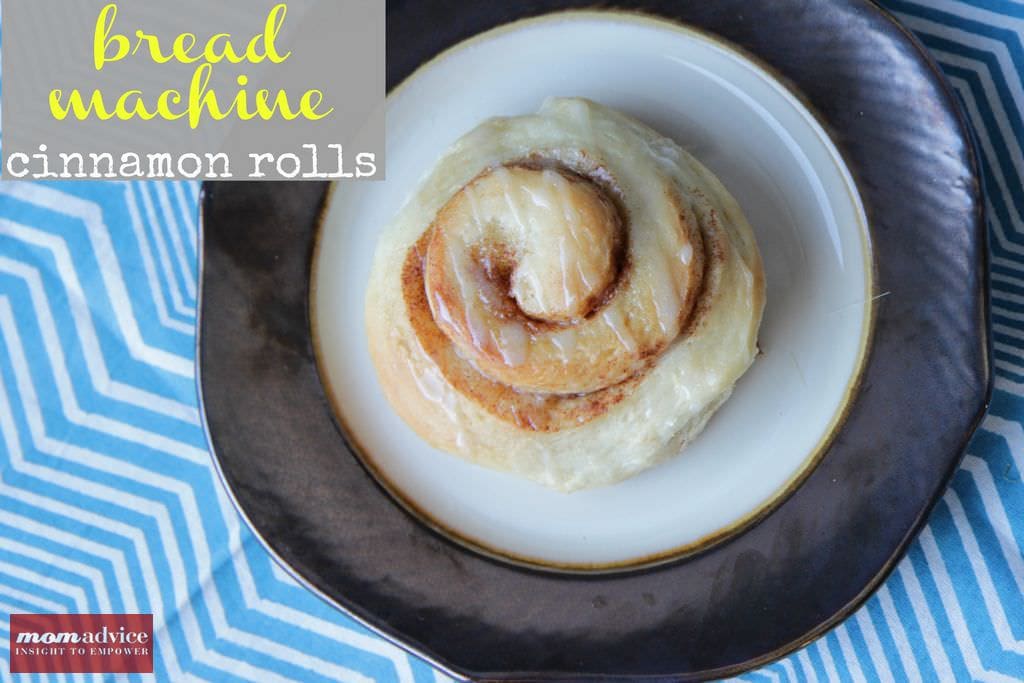
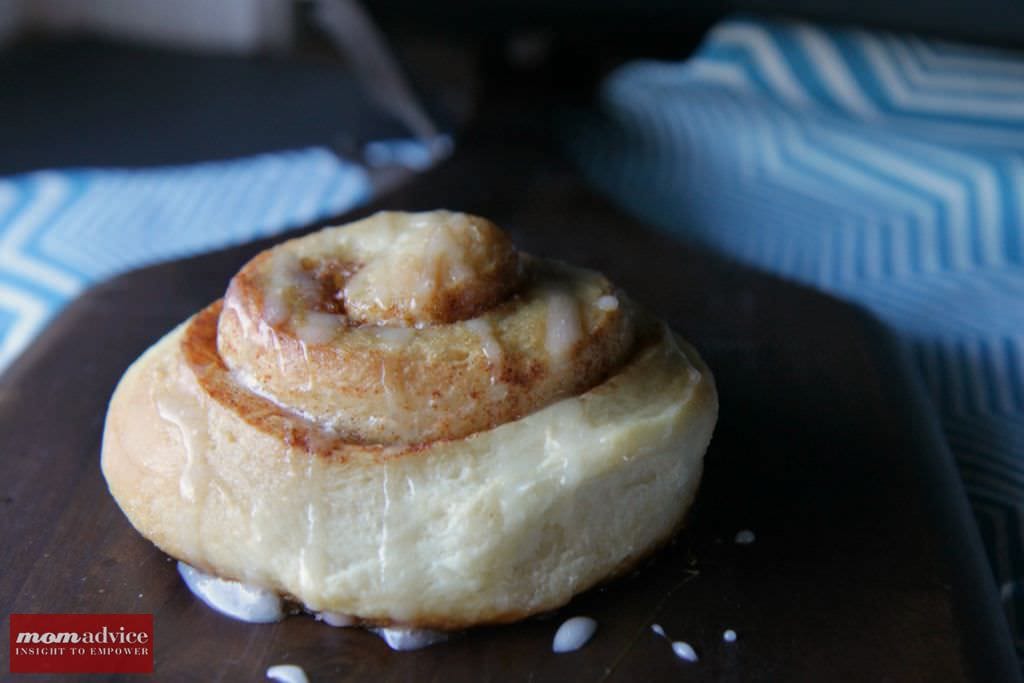
Cinnamon rolls are one of those treats that I always found intimidating to make in the kitchen. Luckily, with my bread machine, these are a cinch to pull together and enjoy on a lazy Saturday morning. Today I want to share with you my bread machine cinnamon roll recipe to create this yummy treat at home in your kitchen.
Growing up, one of my favorite Saturday treats was a Pillsbury Cinnamon Roll. My mom would make these for us on Saturdays and we always fought over the ones that had the most frosting. Sadly, it was such a thrill when my dad worked in the mornings because that meant that there would be two extra rolls for us to fight over. Who could resist those rolls and the simple pleasure of having a sweet treat once a week?

I still love those cinnamon rolls, but at $1.69 a roll, they are an unnecessary addition to the grocery budget. What I do have though is flour and sugar, purchased in bulk, and a bread machine that can turn out cinnamon roll dough like nobody’s business.

The best part about making these cinnamon rolls is that you can vary the sizes and I can make mini-versions of the rolls for the little kids and tuck these in the center of the batch so that they don’t get overdone. The kids love these mini versions and I control the amount of sugar they are getting. Just give them a teeny drizzle of frosting and they will be set!

Of course, I have been know to reheat these in the microwave for a nice snack in the evening or for breakfast the next day. Place one on a microwave-safe plate and zap for about twenty seconds. It make a great snack paired with a hot cup of coffee.

Tomorrow I will be sharing more about our beloved bread machine and what you can do with it! For now, I hope you can enjoy this easy and delicious treat with your family!


Bread Machine Cinnamon Rolls
Recipe Type: Dessert
Author: Adapted from Food.com
Prep time: 5 mins
Cook time: 2 hours
Total time: 2 hours 5 mins
Serves: 10
Homemade cinnamon rolls are a breeze when created in your bread machine. This bread machine cinnamon roll recipe is foolproof and a perfect Saturday morning treat.
Ingredients
  • 1 1/4 cups skim milk
  • 1/3 cup vegetable oil or canola oil
  • 1/3 cup sugar
  • 1 teaspoon salt
  • 3 3/4 cups all-purpose flour
  • 2 1/4 teaspoons bread machine yeast
  • Cinnamon Roll Filling: 1/3 cup butter, softened to room temperature
  • 1/2 cup brown sugar
  • 1 tablespoon cinnamon
  • Cinnamon Roll Glaze: 1/2 cup powdered sugar to 1-2 tablespoons milk
Instructions
  1. Place all ingredients in order recommended by your bread machine manufacturer.
  2. Select DOUGH CYCLE and start machine.
  3. Preheat your oven to 100°F and then turn off.
  4. When dough cycle is complete remove from machine.
  5. Roll out to about 12 x 15″ and spread with butter or margarine. Sprinkle cinnamon-sugar mixture over all and roll up tightly .Roll it tightly and slowly, being careful to keep all the filling inside. At this point you should have a long log that you can cut your rolls from. You can wrap the dough with plastic and store in the fridge overnight or you can slice your rolls and put them on your cookie sheet or pizza stone.
  6. If preparing now, cut into as many rolls as you want. (I usually make ten large rolls).
  7. For the next day or right away: Cover with cloth and put in the warm oven for 45-60 minutes to rise.
  8. When doubled remove from oven.
  9. Turn oven to 400°F and when you put the buns in the oven, reduce temperature immediately to 375° and bake for 12-15 minutes or until done.
  10. When the rolls are done, drizzle your frosting over the rolls and serve them warm or room temperature (although they are best served warm).


Pin It

How to Roast a Spaghetti Squash

Monday, February 4th, 2013

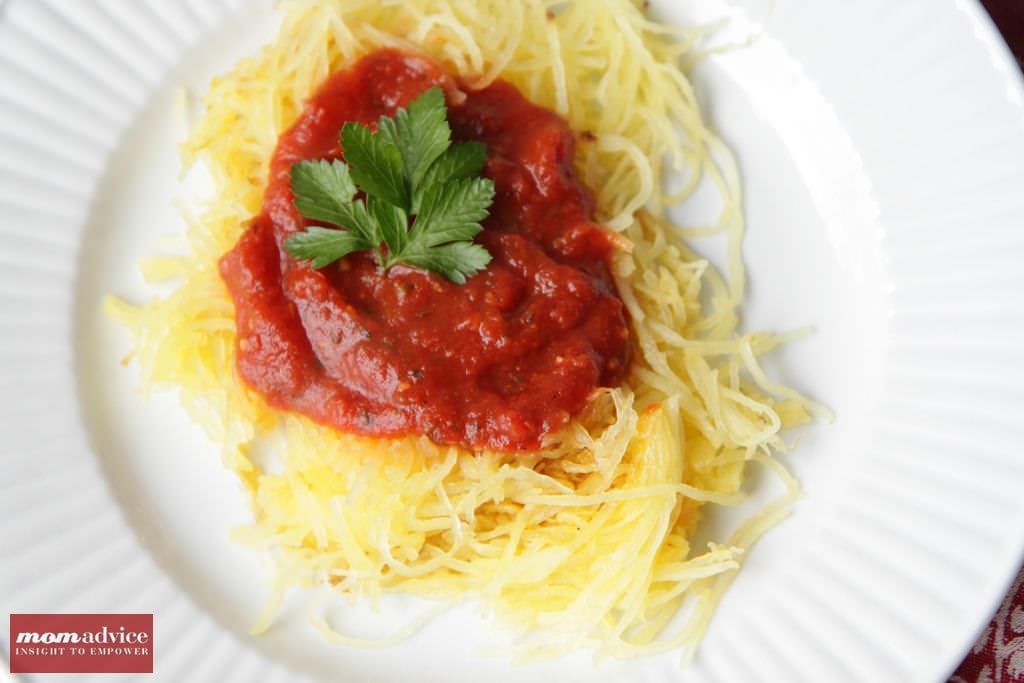
Thanks to some of my own dietary hurdles this year, I have been trying to make modifications to my diet that include limiting my carb intake. Spaghetti squash is my new favorite food to eat that offers a healthy and nutritious lunch option that makes me feel like I am indulging in a big bowl of pasta without the heavy carbs that I am trying to avoid.

Today I wanted to share a little background on this vegetable, some ideas for preparation, how to store this veggie, and even how to freeze it.

What Is Spaghetti Squash?

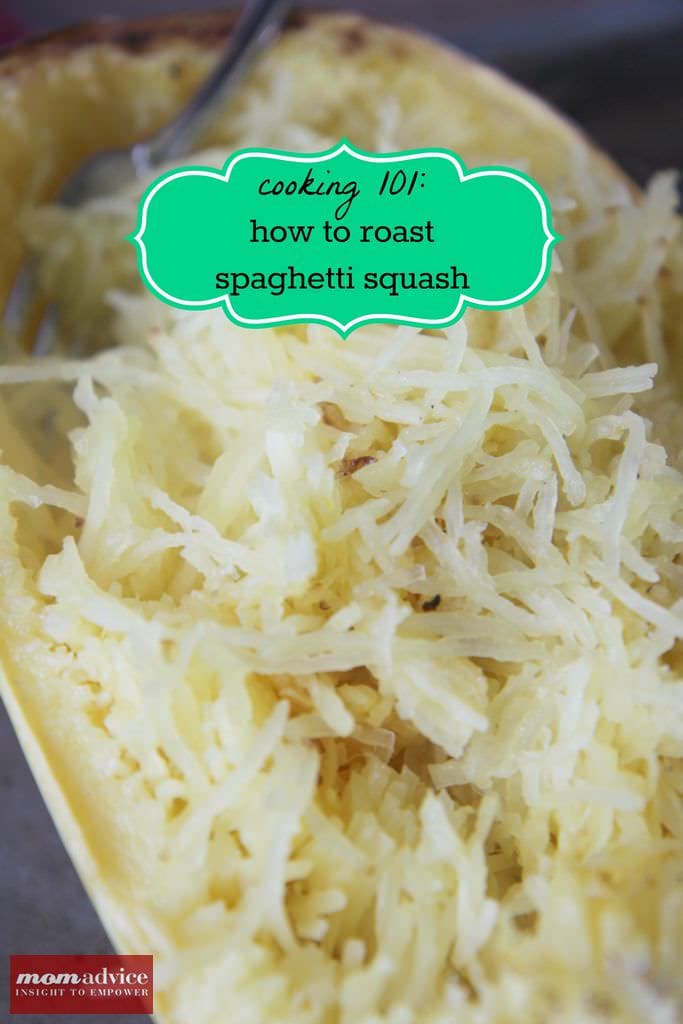
Spaghetti squash is a favorite vegetable for people seeking a low carb, vegetarian, or vegan diet. The spaghetti squash is an oblong seed-bearing variety of winter squash. The fruit can range either from ivory to yellow or orange in color.  Its center contains many large seeds. When raw, the flesh is solid and similar to other raw squash; when cooked, the flesh falls away from the fruit in ribbons or in strands that resemble spaghetti.

What Does Spaghetti Squash Taste Like?

Spaghetti squash, sadly, does not taste anything like spaghetti. Although its appearance resembles the pasta, it has a crunchy bite that reminds me of the crunchy exterior of a pile of hash brown potatoes. The flavor is mild and pleasing, making it a great pairing for bold and robust flavors like bright sauces, lemons, capers, and pestos. Despite, it just being a vegetable, I find it to be as filling as spaghetti. A quarter of a squash provides plenty of food food for one person and when paired with a big dinner salad, it will leave you feeling full until dinnertime.

What Are My Options for Preparation?

Spaghetti squash can be prepared in your microwave, roasted on a cookie sheet, or even prepared in your slow cooker. It can be cooked whole, eliminating the need to heave your body into a cutting board to cut through this thick vegetable, or it can be sliced in half, drizzled with olive oil, and spiced according to your dishes. I have only roasted this vegetable, so far, and the recipe for that can be found below. If you would like other options for preparation, here are a couple of other ideas for preparing the vegetable.

Microwave Method: Carefully cut the spaghetti squash in half and scoop out the seeds. Season each half with salt and pepper. In a microwave safe dish add about 1/2 inch water to the bottom of the container. Add the spaghetti squash halves with flesh facing down. Microwave for 4-5 minutes until the flesh comes out easily with a fork.

Slow Cooker Method: Select a spaghetti squash that will fit in your slow cooker. Poke the squash several times using a fork. Place two cups of water in the slow cooker, then place the spaghetti squash in the cooker.  Cook the spaghetti squash on low heat for eight to 10 hours, or until the squash is tender. Allow the squash to cool for 15 to 20 minutes, then remove the squash from the slow cooker. Cut the cooked squash in half. Remove the seeds and serve.

Roasting Method: This is my preferred method for seasoning and flavor. You can grab the recipe below.

Boiling Method:  Cut the spaghetti squash lengthwise. Remove the seeds. Bring salted water to a boil in a saucepan. Place the spaghetti squash in the saucepan with its skin side up. Bring to a boil once again. Bring down the heat to medium heat. Boil 10-15 minutes. You can check the spaghetti squash with a fork to see if the strands are pulling away. If not, keep boiling until you reach your desired results.

How Long Can I Store a Spaghetti Squash?

There is no need to take up any refrigerator space with this squash! I think one of the best parts about the spaghetti squash is that they are relatively inexpensive and can keep for one to two months in a cool dark place, making it a great frugal ingredient to rely upon when times are more lean or the pantry is bare. Stock up on this ingredient when it goes on sale and roast it for an easy main dish for yourself or your whole family The possibilities with this ingredient are truly endless since it can be transformed into a pasta-inspired dish to a simple dessert with a little butter, cinnamon, and sugar.

Refrigerate cooked spaghetti squash or other types of winter squash in an airtight container or covered in plastic wrap for up to 3 to 5 days. The squash should be refrigerated within 2 hours of cooking to prevent bacteria growth and spoilage.

Can I Freeze Spaghetti Squash?

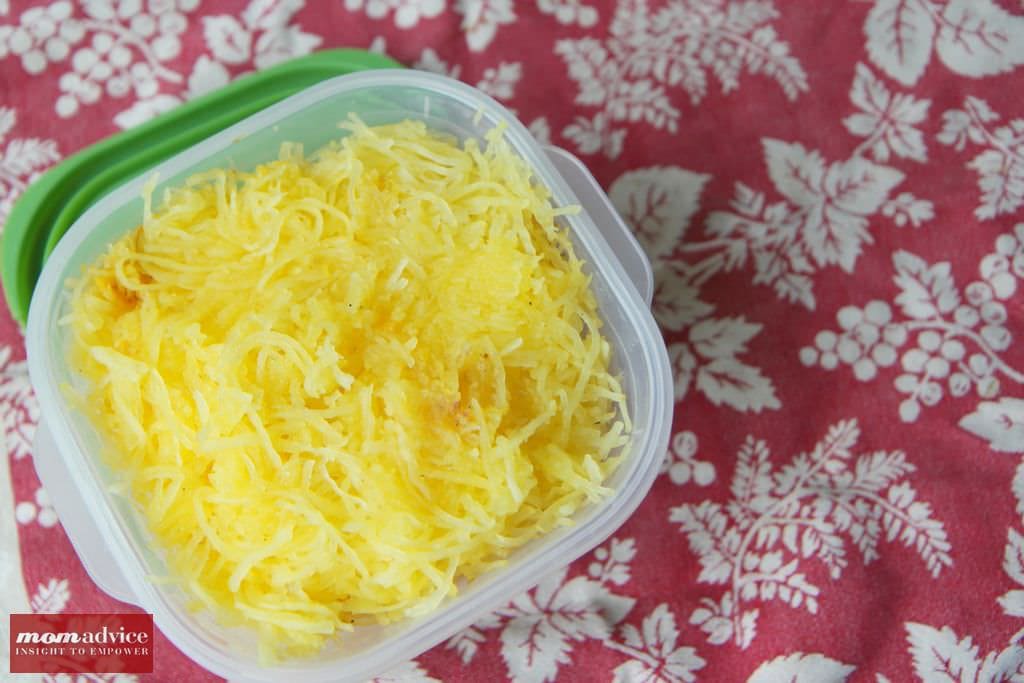
The best part about this vegetable is that you can prepare it in large batches, if desired, and freeze it for your future meals. Freeze batches of spaghetti squash in airtight freezer containers or in freezer bags, making sure all of the air is out of them. Once your spaghetti squash is frozen it will last for several months. When you are ready to use it pull it out of the freezer and take it out of the container. You can heat it up in a microwave or in a pan of water, then simply use it for your recipes.

How to Roast a Spaghetti Squash
Recipe Type: Main
Author: Amy Allen Clark
Prep time: 5 mins
Cook time: 40 mins
Total time: 45 mins
Serves: 4
Spaghetti squash is a delicious substitution for pasta in many dishes. This recipe offers advice on how to roast a spaghetti squash to be used as an ingredient with your favorite toppings.
Ingredients
  • 1 spaghetti squash
  • Olive Oil
  • Salt
  • Pepper
Instructions
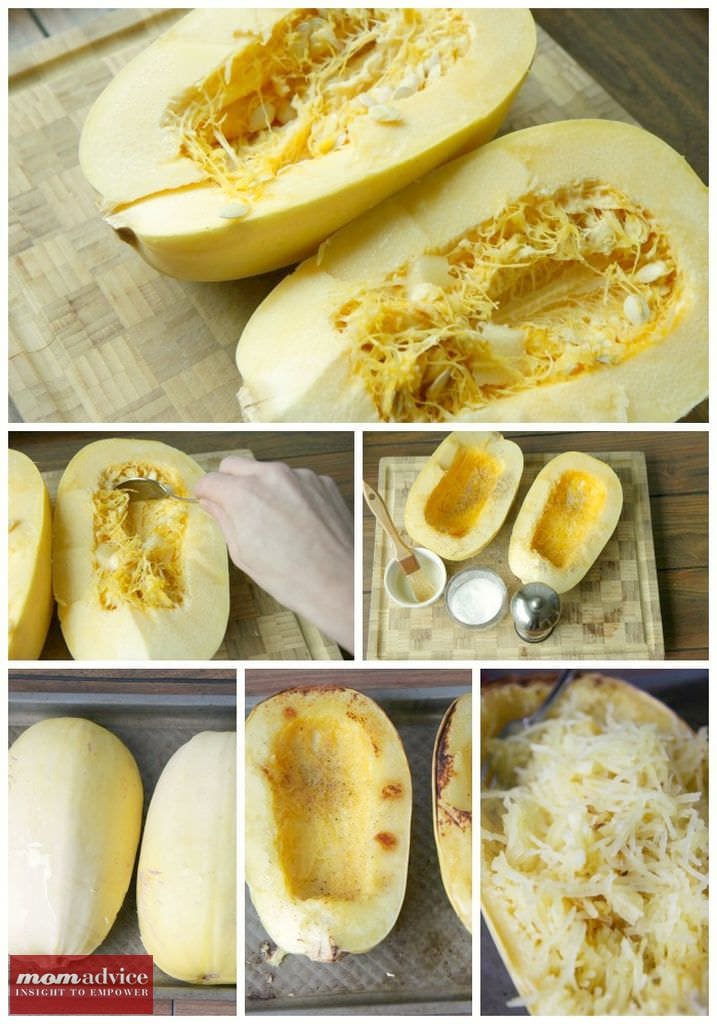
  1. Preheat your oven to 425 degrees.
  2. Slice your spaghetti squash in half lengthwise. Be sure to exercise caution and use a sharpened chef’s knife for the task since this vegetable is a tough one to slice.
  3. Scoop out and discard the seeds from the squash.
  4. Brush the flesh with olive oil and season with salt and pepper.
  5. Invert your squash on the cooking sheet, flesh side down.
  6. Bake for 30 minutes.
  7. Pull the squash out and carefully flip your squash so that the flesh is now upright. Bake again for ten more minutes.
  8. Pull the squash out and let it rest for 10-20 minutes. The resting is very important so that the strings of flesh pull out and look like noodles.
  9. Taking a fork gently glide it inside the flesh of the squash and pull the fork down lengthwise, separating the flesh from the skin.
  10. Top the spaghetti squash strands with your favorite pasta toppings or incorporate it in your recipes. See notes above for freezer storage.

If you like this cooking tutorial,  be sure to visit my tutorial on How to Cook A Butternut Squash With the Skin On, How to Make Quinoa in the Rice Cooker, & grab my recipe for Butternut Squash Soup with Toasted Pecans for a delicious weeknight meal!


What are your favorite ways to serve up Spaghetti Squash? I would love to hear your recipes and topping ideas!

Pin It

Dressing Up Store-Bought Pies: Spiced Whipped Cream Recipe

Monday, November 19th, 2012

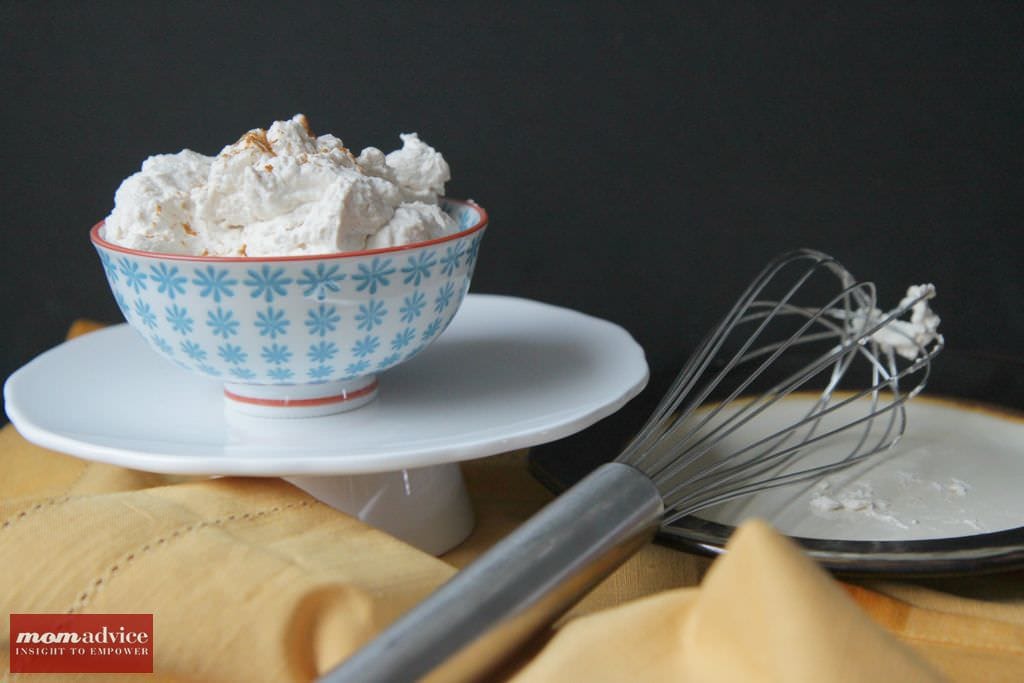
I remember when I thought that making whipped cream was a labor-intensive process. Ah, I have had so much to learn in the kitchen. Whipped cream is simply one of these easiest pie toppings to make and spicing up your whipped cream is an easy way to add a personal touch to a store-bought pie.

This spiced whipped cream recipe will bring an extra layer of spice to your pies that your guests will absolutely love. The best part is that this easy spiced whipped cream topping can be created in under 5 minutes and with a couple of items you probably already have lurking in your pantry.

In a perfect world we would all be making handmade pumpkin pies made with homemade crusts. I thoroughly love baking, but I also know that it isn’t for everyone. For those of my friends who prefer to put their love in other elements of the holiday, I am going to show some easy ways to spice up those store-bought pies that will take those pies to another level.

Before I became acquainted with the kitchen, I really thought whipped cream was just Cool Whip and homemade whipped cream was a powder that you added water to that made whipped cream.

I really did.

Yes.

I.

Did.

Of course, I know a few more things than I did 10 years ago, but it still makes me giggle to know how detached I was from the culinary world. Whipped cream is actually just heavy whipping cream, whipped until it forms peaks and you can add your own spin on sweeteners, spices, and extracts to create your own unique combination of sweet and spicy. It’s perhaps the simplest and most satisfying of pie toppings.

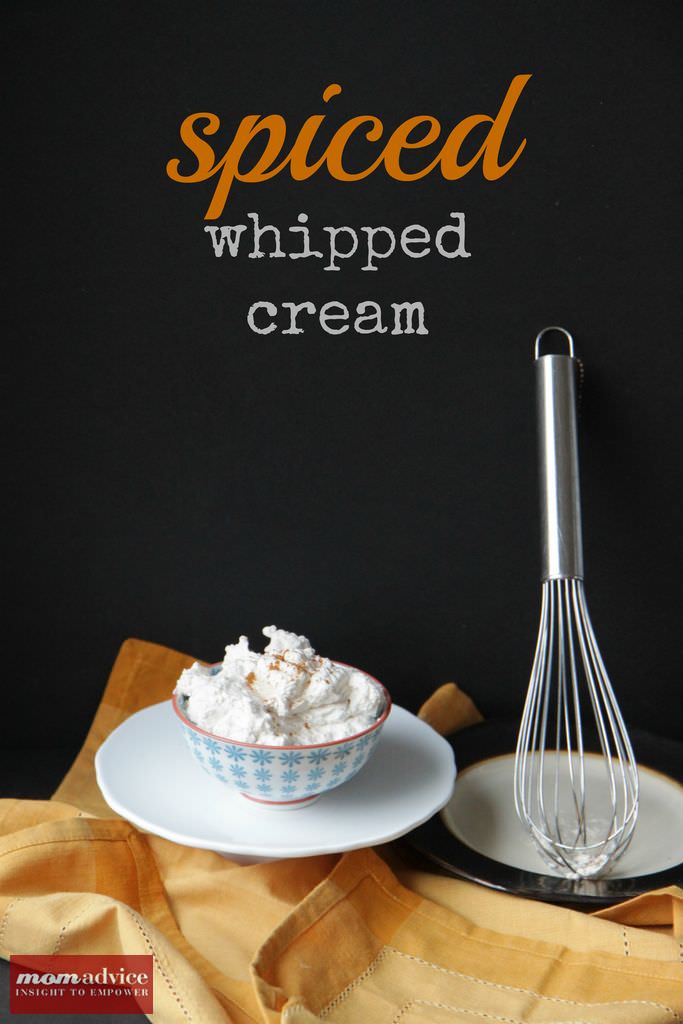
This Spiced Whipped Cream gets its hint of spices from ground cinnamon, ground ginger, and a little sugar. It is the perfect accompaniment to your pumpkin or pecan pies for the holidays.

Tomorrow I will share with you one other fun topping to try on your pies along with some fun ideas for entertaining the kids! 

Spiced Whipped Cream
Author: Epicurious.com
Prep time: 5 mins
Total time: 5 mins
Serves: 4
Spice up your store-bought pies with this easy Spiced Whipped Cream topping!
Ingredients
  • 3/4 cup chilled whipping cream
  • 2 tablespoons sugar
  • 1/2 teaspoon cinnamon
  • 1/4 teaspoon ginger
Instructions
  1. Beat whipping cream, sugar, 1/2 teaspoon cinnamon, and 1/4 teaspoon ginger in bowl until peaks form. Spoon on top of slices of pie.


Pin It