Archive for the ‘Food & Recipes’ Category

Gluten-Free Orange Creamsicle Pancakes (Plus FUN Contest!!)

Thursday, May 4th, 2017

gluten-free-orange-creamsicle-pancakes

I am so excited to be partnering this year with the Florida Department of Citrus to celebrate National OJ Day today. You may recall that we celebrated last year with these super cute cup printables! Today I am sharing a delicious gluten-free Orange Creamsicle Pancake recipe for a fun breakfast treat and sharing about a fun contest you can enter in TODAY ONLY to celebrate National OJ Day.

gluten-free-orange-dreamsicle-pancakes-4

First up, let’s just talk about these pancakes for a minute!

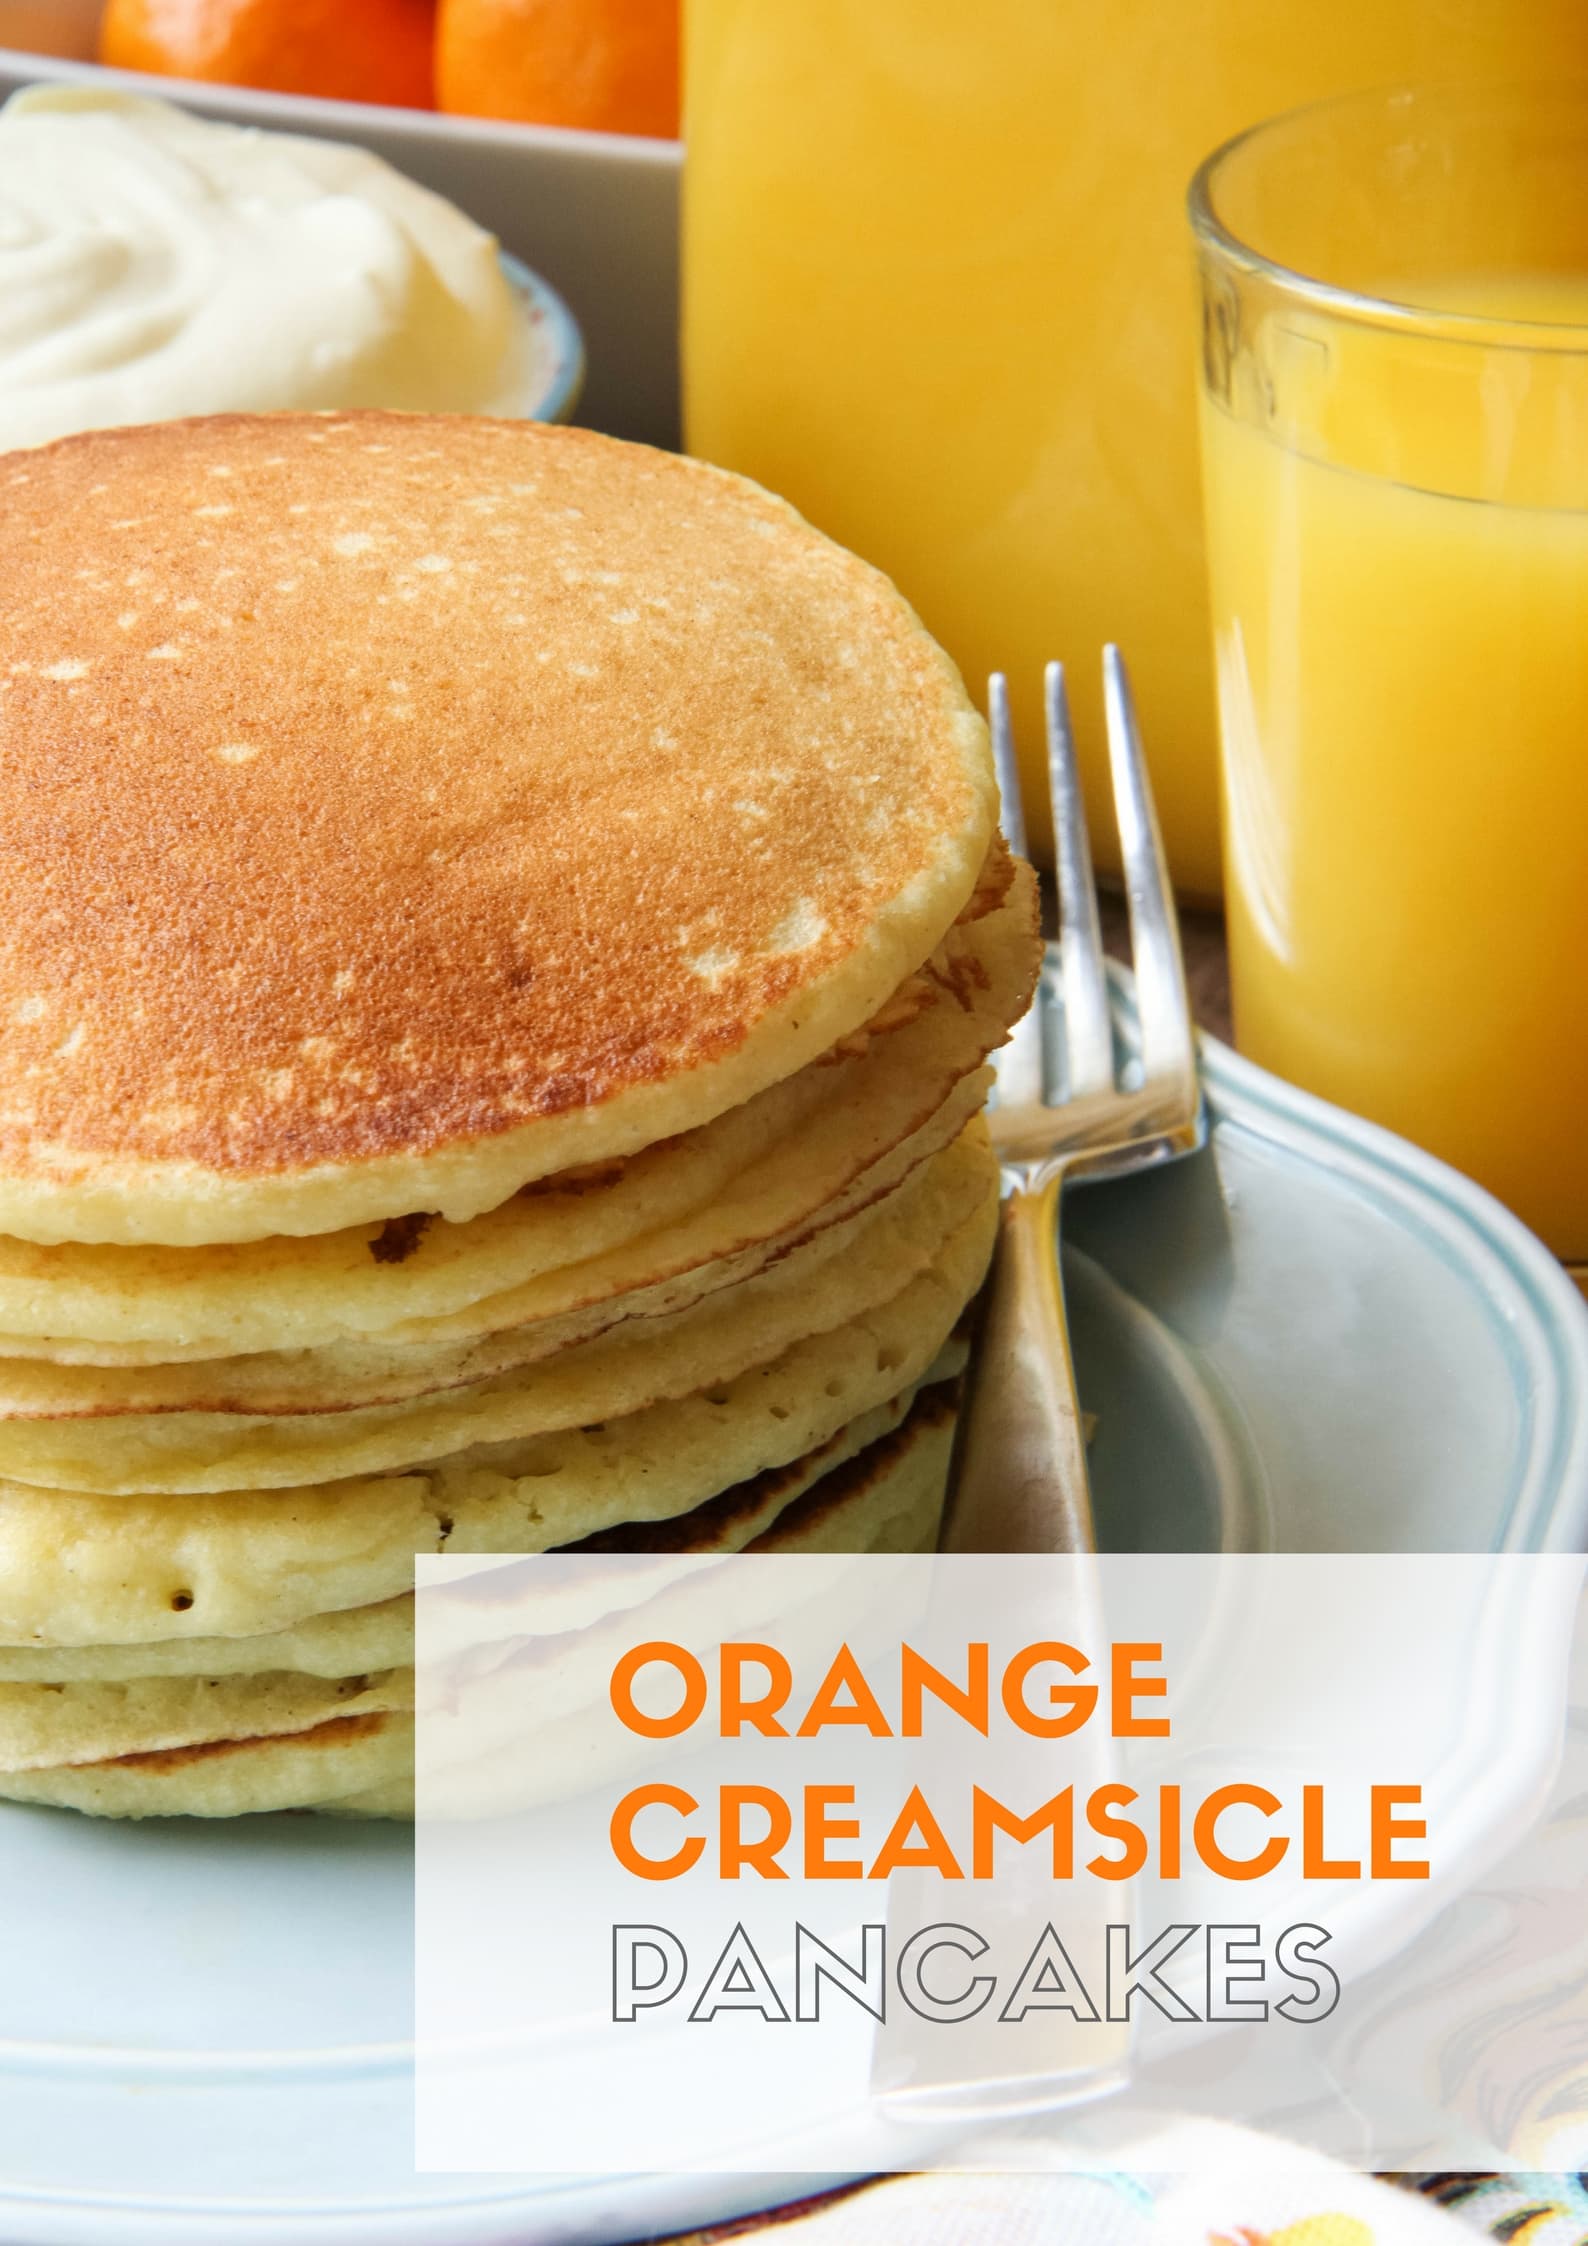
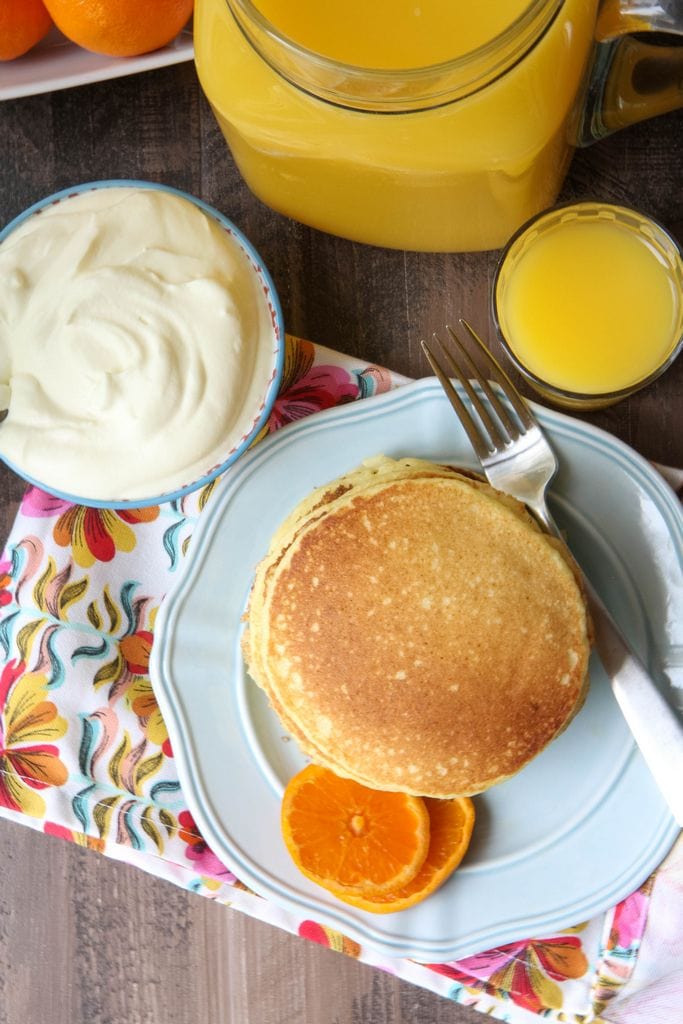
We are big fans of pancakes around here and gluten-free pancakes are surprisingly easy to create when you start with a good premade pancake mix. What makes these special is that we are replacing the milk in these with Florida Orange Juice. I love how small switches like these can yield a completely different pancake flavor, don’t you?

gluten-free-orange-dreamsicle-pancakes-7

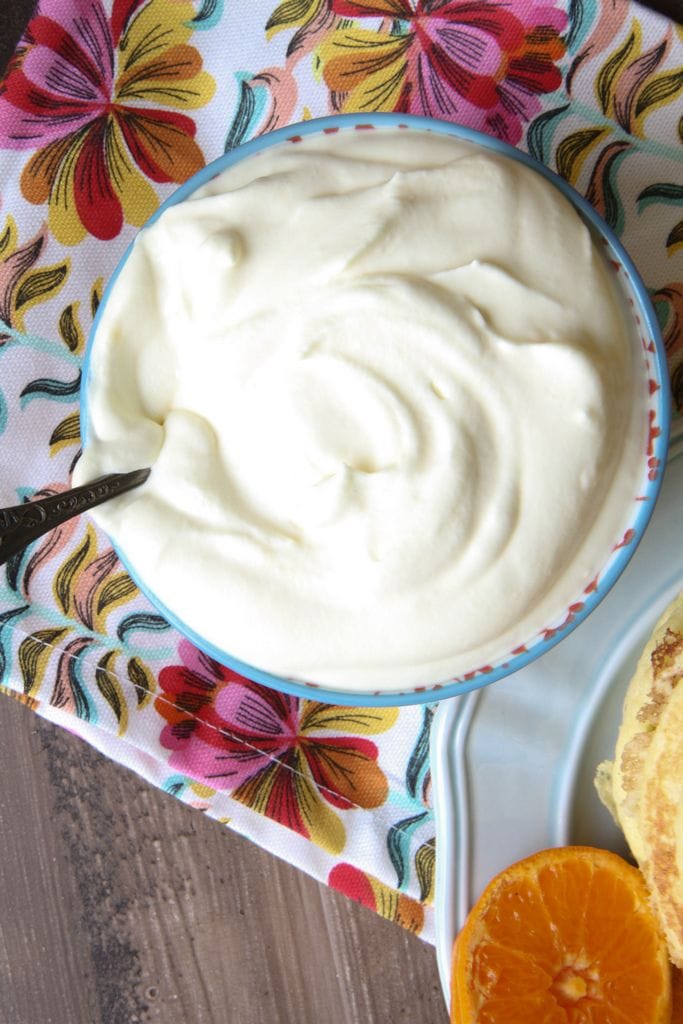
We can’t stop there though! Layered between the pancakes, I have a delicious whipped cream made with heavy cream and vanilla pudding. If you have never mixed a vanilla pudding mix into your whipped cream, you are in for such a delicious treat. The pudding mix elevates these pancake layers and creates that creamy flavoring that we are after.  If you end up having extra cream filling left, it is so good to layer between layers of your favorite fruits for a dessert on another day.

gluten-free-orange-dreamsicle-pancakes-2

gluten-free-orange-dreamsicle-pancakes-3

gluten-free-orange-dreamsicle-pancakes-5

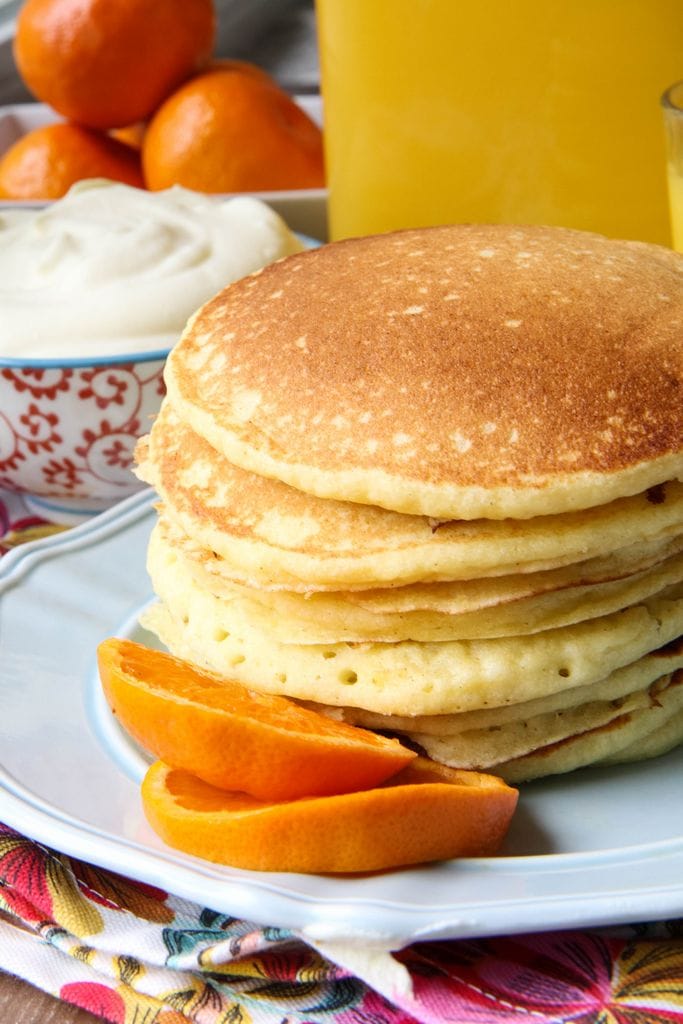
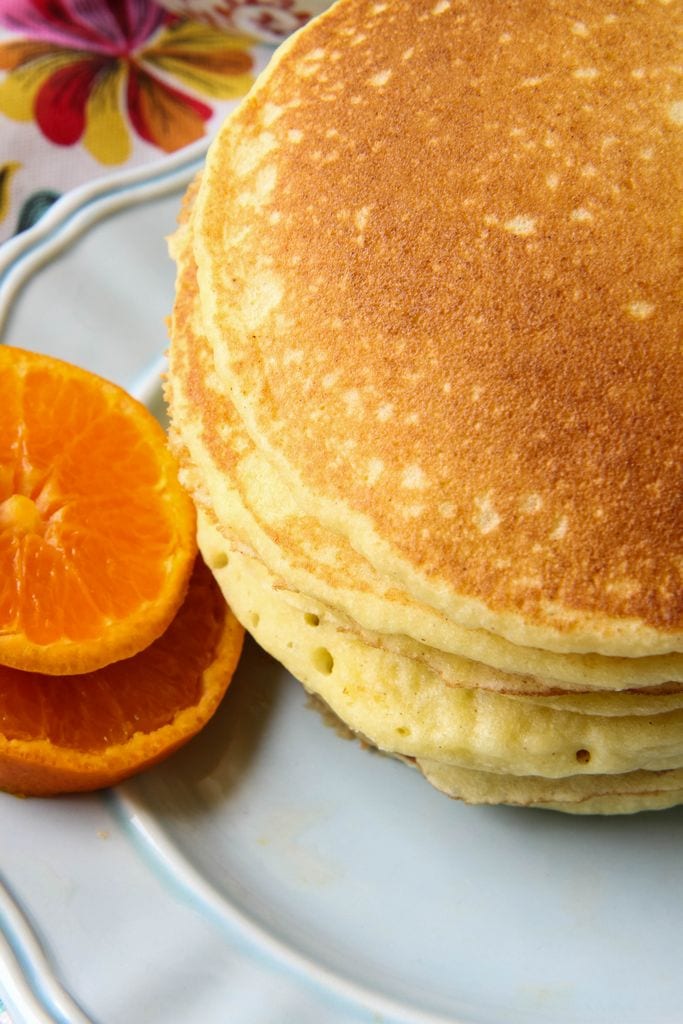
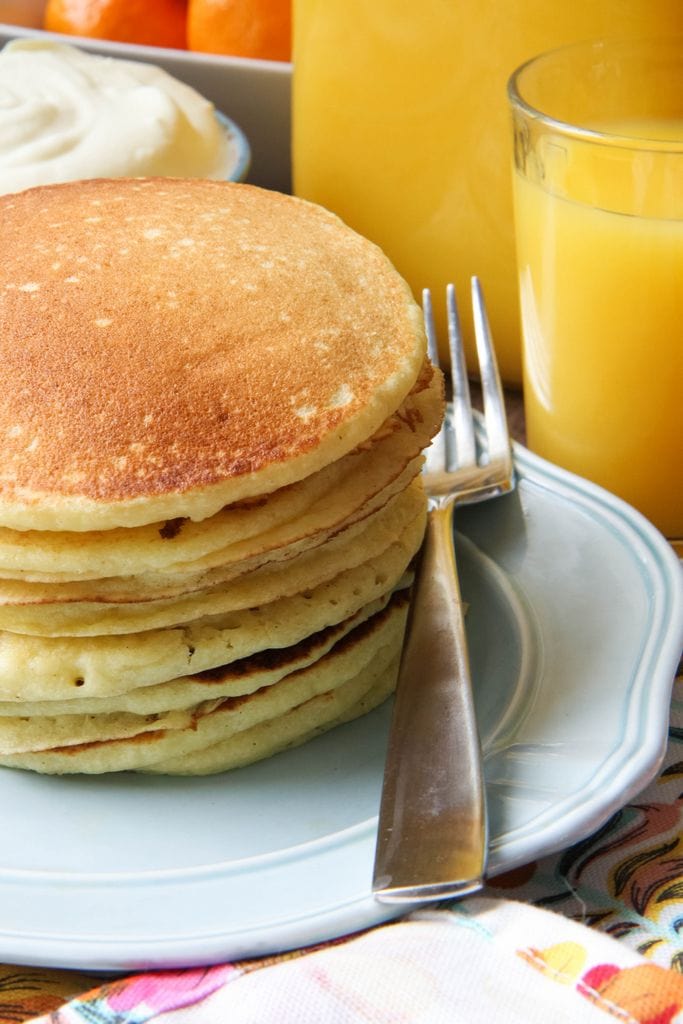
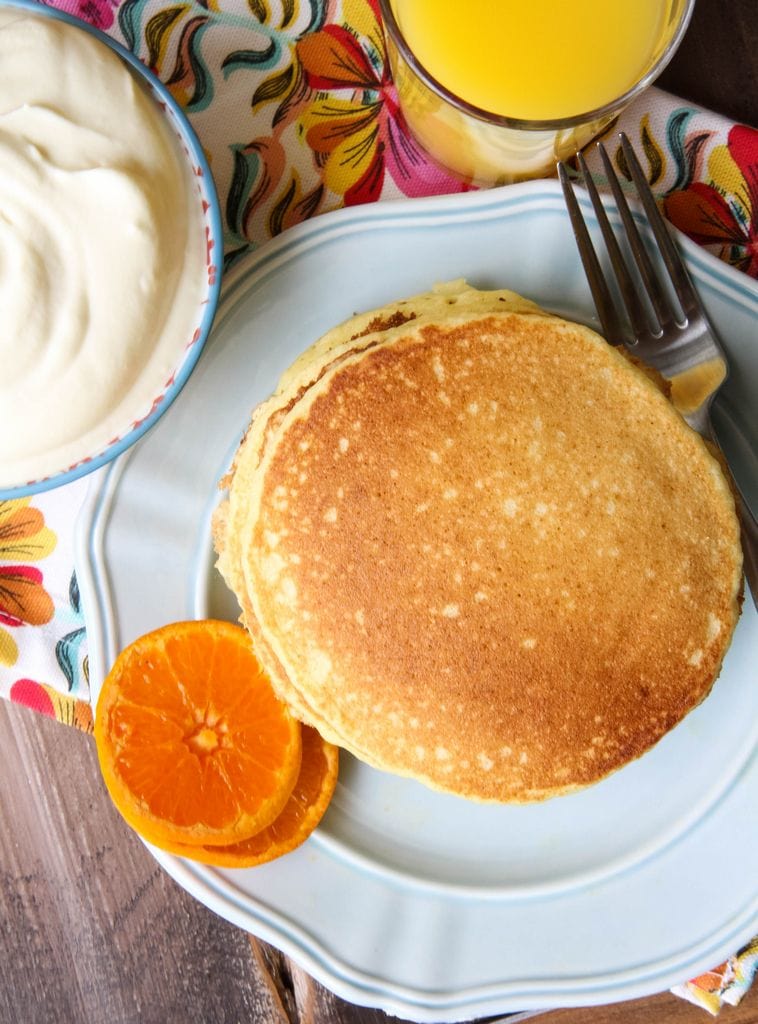
Serve these pancakes sandwich-style for all that Orange Creamsicle flavor. Aren’t these gorgeous? These pancakes only require a little syrup since they are such a sweet treat!

How to Freeze Your Orange Creamsicle Pancakes

If you have extra pancakes, you can freeze the leftovers for your week. If you have the time, you can place your extra pancakes on a cookie sheet (make sure they aren’t touching!) and place them in your freezer for 30 minutes. Once they are frozen, you can place them in a freezer bag for easy grabbing.

Don’t have space in your freezer for a whole cookie sheet? No worries! You can just stack them with wax paper or parchment paper in between them instead and then place them into a freezer bag.

I love to have things like this in my freezer for those chaotic school mornings. I just grab a couple for each kid with a couple of breakfast sausages and zap them in the microwave for 1 minute.

gluten-free-orange-dreamsicle-pancakes-6

gluten-free-orange-dreamsicle-pancakes-8

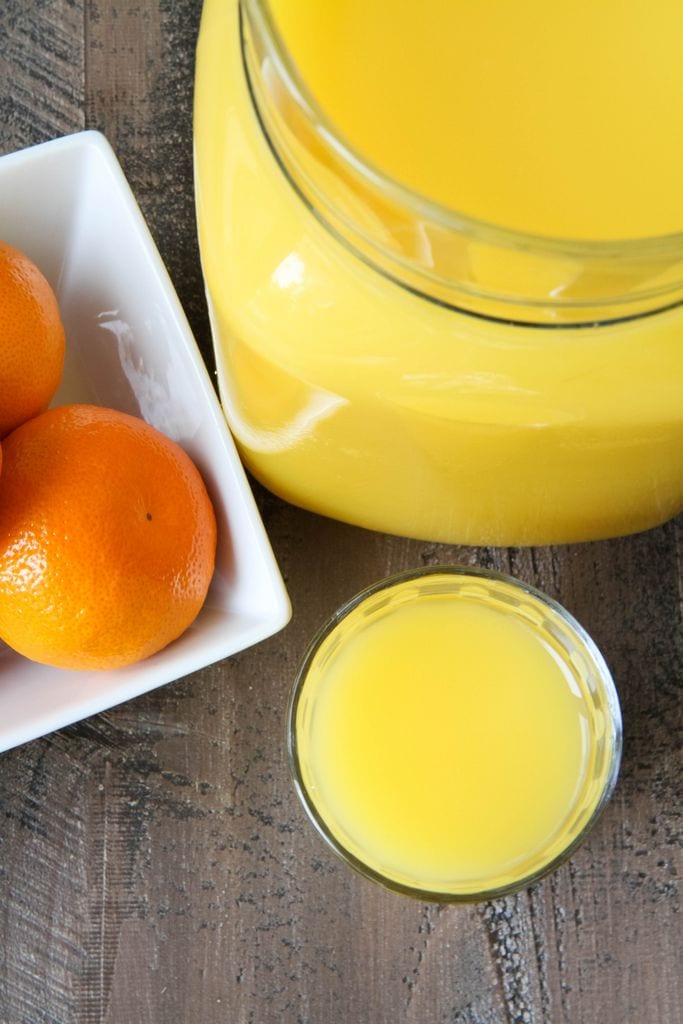
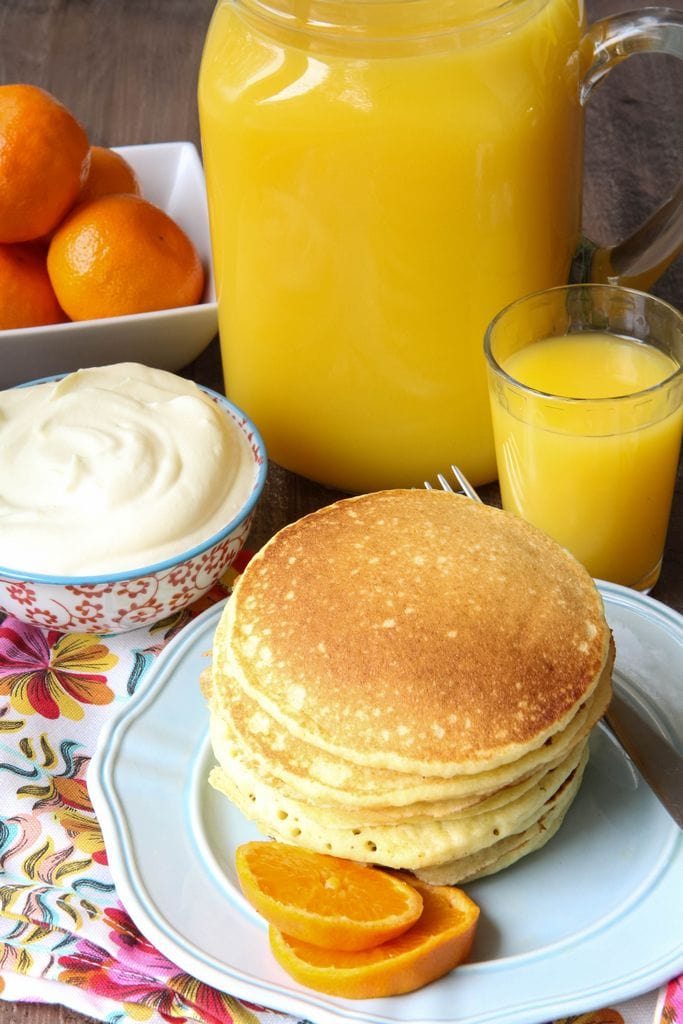
These can be served with a glass of Florida Orange juice to round it all out. The recommended daily intake of Florida OJ is eight ounces for adults and four to six ounces for kids!

Did you know that one glass of Florida Orange Juice provides a total of 5 amazing nutrients in every glass? In just one glass you have Taste, Vitamin C, Folate, Potassium and No Added Sugar! Pretty darn cool!

gluten-free-orange-dreamsicle-pancakes-1

Enter the National OJ Day Contest TODAY!

I don’t want to just talk about National OJ Day though- how about a fun contest you could enter instead?

To celebrate National OJ Day, you can enter a sweepstakes to win 1 of 5 six-month meal delivery subscriptions! What mom couldn’t use that? To enter, share a picture of your family enjoying Florida Orange Juice on Facebook and Instagram TODAY between 8AM (EST) and 5PM (EST) and be sure to hashtag your picture with #HOWDOYOUFLOJ. If you enter via Instagram, be sure to also use the hashtag #sweepstakes. Just by submitting a picture, you are entered to win one of these six-month delivery subscriptions! For the official contest rules, you can read more here!

Gluten-Free Orange Creamsicle Pancakes (Plus FUN Contest!!)
Author: MomAdvice.com
Prep time:
Cook time:
Total time:
Serves: 4 servings
These gluten-free pancakes taste just like an orange creamsicle! Be sure to read the post for freezing instructions so you can enjoy these all week long!
Ingredients
  • 1 cup Florida Orange Juice
  • 2 eggs
  • 2 tablespoons melted butter
  • 1 ½ cups gluten-free pancake mix (I’m using Bob’s Red Mill mix, other mixes may not require the same liquid ratio so follow the instructions on the back of your mix)
  • 1 pint heavy whipping cream
  • 1 (3 ounce) package instant vanilla pudding
  • 2 tablespoons milk
Instructions
  1. Make your cream filling by beating your heavy cream with your mixer until stiff peaks form. Fold in the vanilla pudding mix and milk. Set aside.
  2. Preheat skillet to medium-high heat.
  3. In a bowl, whisk together Florida Orange Juice, eggs, and melted butter. Add pancake mix and whisk until smooth.
  4. For each pancake, pour ¼ cup batter onto a hot skillet. Cook until the top is bubbly (approximately three minutes). Flip and cook two more minutes.
  5. Place one pancake on each plate, add a dollop of your cream filling and then finish with another pancake on top. Serve with warmed syrup.

gluten-free-orange-dreamsicle-pancakes-4

This blog was sponsored by Florida Department of Citrus. Thank you for supporting the companies that support our site!

Pin It

Ground Turkey Gyro Burgers

Thursday, April 13th, 2017

Ground Turkey Gyro Burgers from MomAdvice.com

This post is sponsored by Honeysuckle White. All thoughts and opinions are my own! 

With the hope of warmer weather on the horizon in the Midwest, I am looking forward to breaking out the grill and making dinner time simple again. In our house, I’m the grill master and I love the ability to cook in bulk on the grill for our week with a lot fewer dishes.

Today’s recipe is inspired by one of my absolute favorite foods… GYROS.  Before I went gluten-free, my favorite treat to indulge in at the airport was one of these. Now I appreciate making this dish just right for my own diet needs at home. I wanted to make a healthier version of of this and am partnering up with Honeysuckle White turkey because they offer a variety of products from turkeys (raised without growth promoting antibiotics!!)  perfect for upcoming barbecue parties and family nights around the grill.

Ground Turkey Gyro Burgers from MomAdvice.com

Ground Turkey Gyro Burgers from MomAdvice.com

When making turkey burgers, I like the 93% lean option because it helps yield a more juicy burger. To lighten up the texture even more, I folded in some cooked quinoa (here are my tips for making quinoa in your rice cooker) along with the traditional gyro flavorings of oregano, garlic, and onion from my spice cabinet.

Ground Turkey Gyro Burgers from MomAdvice.com

Ground Turkey Gyro Burgers from MomAdvice.com

Ground Turkey Gyro Burgers from MomAdvice.com

Ground Turkey Gyro Burgers from MomAdvice.com

I have found that many people are avoiding the hamburger bun these days so I’m showing off this burger piled on a bed of quinoa with sliced cucumbers and tomatoes and drizzled with our star ingredient, tzatziki sauce that I’ve blended up in my food processor.

I’ve managed to convert my ground beef loving family almost exclusively over to turkey burgers, but it took a little experimenting on the grill to figure out how to get a burger that retained it’s juices. For me, before I heat up the grill, I like to spread out foil on the grill and lightly spray it with nonstick spray. Turkey patties can be more delicate than ground beef and I find resting them that way yields a better burger. Always cook turkey to an internal temperature of 165 degrees Fahrenheit and treat yourself to a really good grilling thermometer to help make it easier, especially if you and the grill are just getting acquainted!

The second requirement is making sure to add lots of spices to them to build the level of flavor on these. Now is a great time to make sure your spices are fresh and to reorganize that spice cabinet. You can even download some beautiful free printable labels on our site to help get you motivated.

Honeysuckle White certainly makes it easy to host like a grill master! Test new flavor combinations with wholesome, flavorful turkey products, including turkey breast cutlets, ground turkey and turkey brats, perfect for tossing on the grill!

I hope you love this recipe as much as our family. Now get out there and grill!

Ground Turkey Gyro Burgers from MomAdvice.com

Ground Turkey Gyro Burgers
Recipe Type: Main
Author: MomAdvice.com
Prep time:
Cook time:
Total time:
Serves: 4 servings
All the flavors of your favorite gyro in a healthy turkey burger. These gyro burgers can be served on top of a bed of quinoa or on your favorite gluten-free bun!
Ingredients
  • 1 (8 ounce) container plain yogurt
  • ⅓ cup chopped seeded cucumber
  • 2 tablespoons finely chopped onions (I did omit since we don’t like onions)
  • 1 garlic clove, minced
  • 1 teaspoon sugar
  • Filling: 1 pound Honeysuckle White 93% lean ground turkey
  • 1/4 cup cooled [url href=”http://www.momadvice.com/post/how-to-make-quinoa-in-the-rice-cooker” target=”_blank”]cooked quinoa[/url] (plus more for serving)
  • 1½ teaspoons dried oregano
  • 1 teaspoon garlic powder
  • 1 teaspoon onion powder
  • 1 teaspoon salt
  • ¾ teaspoon pepper
Instructions
  1. n a bowl or your food processor, combine first 5 ingredients.
  2. Cover and refrigerate. In separate bowl, combine ground turkey and seasonings. Mix well.
  3. Shape into 4 patties.
  4. Grill, covered, over medium to high heat for 10 to 12 minutes or until meat is no longer pink, turning once. Allow burgers to rest for five minutes before cutting.
  5. On a plate, pile your cooked quinoa, tomatoes,and lettuce. You can cut the patties into thin slices and serve over the quinoa or just serve the burger whole with knives and forks. Serve with the sauce.


Honeysuckle White turkey products are available in select states. For those on the East Coast (CT, DE, ME, MD, MA, NH, NJ, NY, NC, RI, SC, VT, VA, WV), look for Honeysuckle White’s sister brand, Shady Brook Farms!

This post is sponsored by Honeysuckle White. All thoughts and opinions are my own! 

Pin It

Gluten-Free Cookies and Cream Cake

Tuesday, March 14th, 2017

Tracking Pixel
Gluten-Free Cookies and Cream Cake from MomAdvice.com

This post was created in partnership with Bob’s Red Mill. Thank you for supporting the companies that support our site! 

Gluten-free baking has always been very intimidating to me and I did my best for a long time to avoid it all costs. Unfortunately, with three people in our house advised to eating gluten-free, I was pushed into the gluten-free baking trenches for our family. I’m not ambitious enough to spend time mixing up my own mixes and that is why I’m excited to share with you about Bob’s Red Mill Gluten Free 1-1 Baking Flour.  Today I’m sharing this easy recipe for a Gluten-Free Cookies and Cream Cake with all the flavor minus the gluten.

Did I mention no tricky mixing of flours or trying to perfect recipes that are already in your recipe box? Yup, Bob’s Gluten-Free 1-to-1 Baking Flour is perfectly formulated for baked goods with terrific taste and texture with no additional modifications on your part.

Gluten-Free Cookies and Cream Cake from MomAdvice.com Gluten-Free Cookies and Cream Cake from MomAdvice.com

Gluten-Free Cookies and Cream Cake from MomAdvice.com

In our family, it is a tradition to make the birthday boy or girl a homemade cake to celebrate their day. My husband’s birthday was the perfect excuse to mix up a yummy cake with Bob’s Gluten-Free Flour. This rich batter is filled not only with a healthy dose of cocoa powder, but it gets a double chocolate whammy from the crushed gluten-free cookies and cream cookies that are folded right into it.

My secret weapon in any chocolate dessert is a little bit of coffee to enhance those rich chocolate flavors. I had my daughter taste the batter before the addition of coffee and after and we both agreed that it makes a really big difference in the smoothness of the flavor.

I know I don’t have to tell busy moms this, but coffee is certainly magic.

Gluten-Free Cookies and Cream Cake from MomAdvice.com

I’ve played around with a lot of gluten-free flour mixes in our kitchen, since our family’s diagnosis, and I can confidently say that this is the first blend that I’ve tried that I can taste no difference between the all-purpose flour and this gluten-free mix. There is no mealy texture or that sense that something is just off about the mix. The cake baked up as light and puffy as any cake prepared with all-purpose flour would.

For someone who lacks gluten-free baking confidence, this blend has given me the urge to bake again and I’m already dreaming of how else I can put this blend to work for our special treats. Have no doubts that you will see many of them on the site in the upcoming months!

Gluten-Free Cookies and Cream Cake from MomAdvice.com

Gluten-Free Cookies and Cream Cake from MomAdvice.com

Gluten-Free Cookies and Cream Cake from MomAdvice.com

Can we talk about the frosting for just one minute? MORE cookies are folded into this whipped cream cheese frosting and adds the jazz hands to this chocolate cake. Ths homemade frosting elevates and lightens the cake with it’s tangy flavor. Also, because there are not enough cookies in this, I added more cookies on top for decorating so you can have a snack in between bites.

We toted this cake to the restaurant to celebrate my husband’s birthday this year, in all her shining glory.

As we sat there eating, he leaned into me to say, “I keep thinking people are looking at me because it’s my birthday. I just realized that they are looking at your cake.”

Yup, it’s a showstopper.

A rousing song of happy birthday and slices shared with all at our table (and a few not at our table because CAKE), and we still had half a cake left once it had all been distributed. We offered the other half to the kitchen staff and it made me so happy to see it being sliced and enjoyed by everyone.

For several years, I worked as a waitress and I remember those long days worked for tips. It’s why we always try to go the extra mile when we dine out and this was just one more way we could show our appreciation for those who care for us.

Homemade cakes really do bring people together and I couldn’t stop the goofy grin on my face from seeing everyone enjoy this sweet treat, as I carried my empty cake stand home. My husband also left with the same grin, after a great meal shared with family and our new friends. He really felt celebrated this year.

Please add this cake and Bob’s Gluten Free 1-1 Baking Flour to your menu planner and grocery list. I promise, you won’t ever miss the gluten in this rich and delicious cookies and cream cake. This is a cake that’s meant to be shared so find a way to make that happen too. I bet you’ll gain a few new friends in the process!

Gluten-Free Cookies and Cream Cake
Recipe Type: Dessert
Prep time:
Cook time:
Total time:
Serves: 8
A gluten-free cookies and cream cake perfect for celebrating all of life’s occasions!
Ingredients
  • 2 cups [url href=”http://bit.ly/2kkxTgB” target=”_blank”]Bob’s Red Mill Gluten Free 1-to-1 Baking Flour[/url]
  • 3/4 cup unsweetened cocoa
  • 2 cups granulated sugar
  • 1 1/2 teaspoons baking powder
  • 1/2 teaspoon baking soda
  • 1 teaspoon kosher salt
  • 3 large eggs, plus 1 egg yolk
  • 1 cup unsalted butter, melted
  • 1 cup buttermilk
  • 2 tablespoons strong brewed coffee
  • 1 1/2 cups finely crumbled gluten-free chocolate sandwich cookies
  • 1 stick butter, softened
  • 2 (8-ounce) packages cream cheese, softened
  • 1 pinch salt
  • 1 teaspoon vanilla extract
  • 3 3/4 cups confectioners’ sugar
  • 1 1/2 cups finely crumbled gluten-free chocolate sandwich cookies
Instructions
  1. Preheat the oven to 350 degrees F. Spray two (9-inch) cake pans with cooking spray and dust with gluten-free flour.
  2. In a large bowl, using a hand-held mixer combine the flour, cocoa, sugar, baking powder, baking soda, and salt. Add the eggs and egg yolk, 1 at a time, and beat until well mixed, then add in the melted butter. Mix well to combine. Next, add the buttermilk and coffee and beat until smooth. Fold in the crumbled cookies with a wooden spoon.
  3. Pour the batter evenly into the cake pans and bake until a toothpick inserted in the center of the cake comes out clean, approximately 30-33 minutes. Remove from the oven and cool, on a rack, in the pans for 5 minutes. Turn the cakes out onto a rack and let cool completely.
  4. In a large bowl with an electric mixer, blend the butter and cream cheese until smooth, about 3 minutes. Add the salt and vanilla. Add in the confectioners’ sugar, 1/2 cup at a time, until smooth. Beat in the crumbled cookies.
  5. Once the cake has fully cooled, add a layer of frosting on the top of one cake layer and then stack the second one on top. Finish with more frosting on top. This recipe yields enough to also frost the sides of the cake, if you desire. Finish with more cookies (whole or crushed) to add decoration to the top of your cake.

Gluten-Free Cookies and Cream Cake from MomAdvice.com

This post was created in partnership with Bob’s Red Mill. Thank you for supporting the companies that support our site! 

Pin It

5 Minute Treat: Shamrock Pretzel Pops

Friday, March 3rd, 2017

5 Minute Treat: Shamrock Pretzel Pops from MomAdvice.com


St. Patrick’s Day is just around the corner and today I wanted to share with you a sweet little treat idea that is no-bake, made in just five minutes, and can be customized to your child’s own dietary needs.

Do you know why we celebrate St. Patrick’s Day? Every year on March 17, the Irish and those of us that are Irish-at-heart across the world observe this day together, but many don’t know the origin of the holiday. What began as a religious feast day for the patron saint of Ireland has become an international festival celebrating Irish culture with parades, dancing, special foods and a lot of green food.

Each year I try to come up with a sweet treat for my kids to celebrate the holiday. We have celebrated with homemade Shamrock Shakes and ate a delicious Rainbow Cake in a Jar complete with Cloud Frosting.

As my kids get older, we seem to get busier so I wanted to share a treat that any busy mom could prepare or that your older children could prepare with a little supervision from you. The best part about these is that this is a treat that you can create for your gluten-free child by utilizing you favorite gluten-free mini pretzel. Rolos and plain M&M’s are also gluten-free treats, but always make sure that you check the back of the bag since seasonal candies can affect the factory line and introduce allergens that are not typically present.

5 Minute Treat: Shamrock Pretzel Pops from MomAdvice.com

How to Make Shamrock Pretzel Pops

5 Minute Treat: Shamrock Pretzel Pops from MomAdvice.com

Supplies Needed

1 bag of plain M&M’s (have your child help you sort all the green ones out for this treat)

1 bag of mini pretzels (regular or gluten-free)

1 bag of Rolos

Wilton Lollipop Sticks

Parchment Paper

5 Minute Treat: Shamrock Pretzel Pops from MomAdvice.com

Directions

1. Preheat your oven for 350 degrees. Line a baking sheet with parchment paper and assemble your pretzels into a clover shape as shown above.

2. Add a Rolo in the center of each of your clovers. Gently take your cookie sheet over to your oven and slide your cookie sheet into the oven. Bake for 3 minutes, or until the Rolo has just begun to melt.

3. Pull out the cookie sheet and carefully insert a lollipop stick in through the Rolo while carefully placing an M&M in the center. Repeat until finished. It’s important to do this step while they are still warm, as these harden quickly once they cool.

4. Allow them to cool fully before removing from the cookie sheet and carefully peel them off of the parchment paper. Ta-da! Treats for everyone!

5 Minute Treat: Shamrock Pretzel Pops from MomAdvice.com


5 Minute Treat: Shamrock Pretzel Pops from MomAdvice.com

5 Minute Treat: Shamrock Pretzel Pops from MomAdvice.com

I just love the simplicity and festivity of this adorable treat. My kids loved it too and it was a fun way for this Irish-at-heart family to celebrate this fun holiday!

Pin It

Chicken Pesto Frittata

Tuesday, February 28th, 2017

Chicken Pesto Frittata from MomAdvice.com

One of my favorite panini flavor combinations happened to be a roasted chicken pesto sandwich that I used to snag at my local supermarket for a special treat. Filled with pesto and rotisserie chicken with a little spinach and tomato, it was one of my favorite supermarket splurges after a day of errand running. I wanted to capture those chicken pesto flavors in a frittata recipe and dreamed up this gluten-free version of my favorite panini that I can enjoy for breakfast or as a filling lunch.

Chicken Pesto Frittata from MomAdvice.com

If you have never made a frittata before, welcome to the world’s easiest breakfast that can serve a crowd.  All you need is an oiled cast iron skillet for this easy one-pot dish. Years ago I got this one for less than $15 and it has served a million frittatas over the years. If you take great care of it, this small investment can last you a lifetime and be handed down to your kiddos. I have so many fond memories of the good things that we ate out of these skillets when I went to my grandma’s house.

To make a frittata in this, you just heat up the toppings and then pour the beaten eggs on top. Using a wooden spoon, I just shift the fillings around until they are covering the entire pan, heat for a few minutes on medium heat to develop the crust on the bottom, and then transfer it into the oven to finish. Within minutes, you have a frittata that can be divvied up into portions for a busy week or an impressive dish to serve a crowd.

How to Roast Chicken in Bulk

Chicken Pesto Frittata from MomAdvice.com

I rely up on my favorite big batch roasted chicken recipe, that I make for our wraps for the week, to add even more protein to this dish. This seasoning mix never fails me for rotisserie flavor on a small budget. Bursts of flavor from sun dried tomatoes really brighten the flavoring in this base. Of course, you can’t add those without a healthy amount of spinach and pesto, in my humble opinion!

Chicken Pesto Frittata from MomAdvice.com

Chicken Pesto Frittata from MomAdvice.com

I hope you love this yummy frittata as much as I do! I had a couple of gatherings that I took this to and it was a huge hit with everyone, even the egg haters. The pesto mellows the strong egg flavor in this so it’s a great one to give a spin if people in your family don’t always embrace eggs.

Enjoy!

Chicken Pesto Frittata
Recipe Type: Brunch
Cuisine: Italian
Author: MomAdvice.com
Prep time:
Cook time:
Total time:
Serves: 8
A chicken pesto frittata that is bursting with flavors from sun dried tomatoes, spinach, pesto, and deliciously seasoned chicken. It’s a great dish to share with friends or to package up for a busy week ahead! Did I mention gluten-free? Yay!
Ingredients
  • 2 tablespoons olive oil
  • 1- 8 ounce bag spinach
  • 1 1/2 cups roasted chicken, diced or shredded (see above for my recipe)
  • 1/2 cup prepared pesto
  • 3-ounce bag [url href=”http://rstyle.me/n/cgkdmswky6″ target=”_blank”]julienne-cut sun dried tomatoes[/url]
  • 10 eggs, beaten and seasoned
  • 1/4 cup milk
Instructions
  1. Preheat oven to 375 F. In a large mixing bowl, whisk eggs, milk and sea salt until fully incorporated.
  2. Heat a large cast-iron to medium-high heat. Add olive oil and spinach and then lower to medium heat and allow spinach to wilt.
  3. When spinach has wilted, add pesto, sun dried tomatoes, and roasted chicken. Stir to incorporate. Add egg mixture and use your spoon to spread the fillings out evenly in the skillet. Heat for a few minutes to create the crust on the bottom of the eggs.
  4. Place skillet in the oven, uncovered, and bake for 25-28 minutes or until the top is set and the edges are golden brown. Remove and allow to cool 10 minutes before slicing and serving. Finish with a sprinkle of flat-leaf Italian parsley.

 Looking for more fun frittata flavors? Try this easy Dairy-Free Sausage & Vegetable Frittata for another fun spin!

This post contains affiliate links that help our site! Thank you for supporting me! xoxo 


One-Pot Gluten-Free Macaroni and Cheese

Monday, January 23rd, 2017

One-Pot Gluten-Free Macaroni and Cheese from MomAdvice.com

If there is one thing my children love and would eat daily it is macaroni and cheese. It has been a challenge to match that creamy macaroni and cheese we loved without paying an arm and a leg for a really good gluten-free version.

That is why I am SO EXCITED to share that we finally mastered an incredible one pot gluten-free macaroni and cheese recipe after MUCH trial and error in my kitchen. If you are looking for easy, affordable, minimal dishes, and a recipe that yields a lot than I have an incredible recipe for you!

One-Pot Gluten-Free Macaroni and Cheese from MomAdvice.com

As you can see, the pasta holds up to this recipe well, BUT this has been a lot of trial and error in my kitchen with many different pasta brands and types. It is VERY important that if you are attempting to make this dish that you choose the right pasta for the job.

No, this is not a sponsored post.

This is just a poor mom who has had many failed one-pot attempts before I was able to achieve the consistency that I was after.

THIS is the pasta– do not substitute. I have tried the elbows with the best results and the second best results are their rotini noodles.

One-Pot Gluten-Free Macaroni and Cheese from MomAdvice.com

You will find a video tutorial below to walk you through each of these steps (let me know what you think- feedback is always appreciated!) and the first step is to rinse the starches from your pasta before you cook it. It sounds strange, but you are doing exactly what you would do if you made rice to rinse those starches away and to create a fluffier consistency. After that, you add your milk and spices, then start stirring and YOU NEVER STOP.

You know how Dory has to keep swimming? Yeah, you have to KEEP STIRRING while you make this because the pasta will release those starches and it will create the thickening agent needed to make that milk thick and creamy. I used skim milk and still had a plenty thick enough sauce for our macaroni and cheese.

The finishing touch is, of course, the cheese! If you feel inclined, freshly shredded is lovely. Let’s just say, I’m not inclined on a busy weeknight so packaged stuff it is.

I hope you love this recipe as much as my family and I can’t wait to hear what you think. Since I have made this, we have it in our weekly rotation for a satisfying bowl of comfort food.

Check Out My One-Pot Gluten-Free Video Tutorial Below!

One-Pot Gluten-Free Macaroni and Cheese
Prep time:
Cook time:
Total time:
Serves: 6
This easy one-pot gluten-free macaroni needs to go on your weekly rotation for an easy comfort food dish that has all the flavor without the gluten. You won’t believe how easy this is to do!
Ingredients
  • One Pot Gluten-Free Macaroni & Cheese
  • 3 cups gluten-free elbow macaroni (see my tips above for best brands and types)
  • 3 cups milk
  • 1 1/2 teaspoons salt
  • 1 teaspoon dried mustard
  • Pinch of Cayenne Pepper
  • 1 1/2 cups freshly shredded cheddar cheese
Instructions
  1. Pour uncooked dried pasta into colander and rinse the pasta well to remove some of the starches. Place the drained pasta in a pot with milk and seasonings. Turn heat on medium-high and stir, just as you would a risotto, until the pasta mixture comes to a simmer. Once it is simmering, turn the heat to low and continue stirring and cooking for another 10-12 minutes or until the pasta is fully cooked. You may need to add a small amount of additional milk during this process if it absorbs too quickly. Finish by folding in your freshly shredded cheese until it is fully incorporated. You can also add additional milk, if needed, to thin out the sauce. Serve immediately.


Asian Turkey and Green Bean Sauté

Tuesday, January 10th, 2017

Asian Turkey and Green Bean Sauté from MomAdvice.com

This post was created in partnership with Honeysuckle White. Thank you for supporting the companies that support our site! 

One of my favorite dishes is a delicious green bean sauté spooned over a big platter of rice that I had discovered at my favorite Chinese restaurant. The crunchy green beans adds a fresh flavor and texture to contrast with the heartiness of the meat in this dish. You would think it would be bland, but the layers of salt and spice make it a flavorful dish that I crave often.

I can also admit that this highly addictive dish is usually ate in record time and I am always left wanting more.

Did anyone witness me slamming this dish in three seconds flat?

I hope not.

It has been on my cooking bucket list to create this dish at home to save some money and to indulge in it a little more regularly with wild abandon. What could be healthier than a big dose of veggies and protein to start your new year of cooking out right?

My partnership with Honeysuckle White seemed the perfect excuse to add this meal to our planner to share with you.

Riverhill Farms in Virginia

Riverhill Farms in Virginia

Riverhill Farms in Virginia

It has been a unique experience to now feel a deeper connection with our food this year, thanks to this fun partnership. I was invited out to Virginia to tour the River Hill Farms, one of the 700 independent family farmers that works with Honeysuckle White. Not only did we discover they are well-trained in animal handling practices, but they also happen to exceed the standards and they wanted to share that experience with us.

Glenn & Sheri Rhodes were so gracious to open up their farm to us and the pride they feel for the land and their animals was felt by all of us as we visited their gorgeous property.

I had absolutely no idea what to expect when I received the invitation and was so pleasantly surprised when we arrived at the beauty all around us. The farm was beautifully kept, the spaces were generous for the animals, and it is so good to know that the farm is committed to raising their turkeys without any growth-promoting antibiotics, hormones, or steroids.

As if that wasn’t lovely enough, Glenn made us all some good old-fashioned kettle corn that we shared over snacks and discussed his life’s work and the pride he has felt for his farm.

My great-grandfather was one of the hardest working farmers that I had ever known and I felt that same sense of warmth, family, and commitment to good work in both Glenn & Sheri. It felt a little like the summers that were spent on my grandparent’s porch after their long day of hard work and good food.

Asian Turkey and Green Bean Sauté from MomAdvice.com

As the new year begins, I know many are making resolutions like eating at home more and eating better food for your health. If you are trying to reach a weight-loss goal this year, it’s good to know that turkey has more protein, fewer calories, and less total fat and cholesterol than chicken. When mixed with this delicious combination of sauces and spices, you will also find that it increases the flavor and you may even forget that you are eating such a lean and smart protein.

This dish has A LOT of kick, thanks to the chili garlic sauce, but you can crank it down with less or add more for some FIRE in your tummy!

Asian Turkey and Green Bean Sauté from MomAdvice.com

Asian Turkey and Green Bean Sauté from MomAdvice.com

Asian Turkey and Green Bean Sauté from MomAdvice.com

I was looking forward to binging on these leftovers with a Netflix marathon, but once my kids dug into this, they seemed to be overcome by the same shovel-it-all-up-in-your-face-in-three-seconds struggle that I have.

No green bean was left behind which is an awesome rarity in our house.

How can I complain about that?

You must give this recipe a try and save your family loads of money on this delicious and healthy takeout dish made at home!  I have already added it to our menu planner again for this week and hope you enjoy this one half as much as we did! A huge thank you to Honeysuckle White for sharing a little behind-the-scenes on how their products are made and their commitment to delivering the best quality at the lowest price.

Asian Turkey and Green Bean Sauté
Prep time:
Cook time:
Total time:
Serves: 4 servings
Green beans and ground turkey are loaded up with delicious Asian flavors and served over rice for a healthy and delicious way to start your new year!
Ingredients
  • 2 cups medium-grain rice, uncooked
  • 1 tablespoon sesame oil
  • 3 cloves garlic, minced or crushed
  • 1 pound Honeysuckle White ground turkey
  • 1/2 tablespoon chili garlic sauce (this is spicy for us, increase or decrease to your own personal taste)
  • 2 tablespoons hoisin sauce
  • 1 teaspoon crushed ginger
  • 1 pound washed and trimmed green beans
  • 2 tablespoons soy sauce
  • 1 tablespoon rice vinegar
Instructions
  1. Prepare rice as directed on packaging.
  2. Place a separate skillet over medium heat. Add sesame oil, and sauté garlic for one minute. Remove from the pan and set aside.
  3. Add ground turkey to the skillet and sauté 3-5 minutes, until meat is mostly cooked, breaking the meat up with your spoon.
  4. In a small bowl mix together chili garlic sauce, hoisin sauce, ginger, and soy sauce and stir to coat. Pour this sauce over the ground beef and add back in the green beans, stirring to coat everything fully.
  5. Continue cooking over high heat for 7-9 minutes longer, stirring frequently, until beans are slightly tender.
  6. Stir in rice vinegar, and cook one minute longer. Serve over cooked rice.

This post was created in partnership with Honeysuckle White. Thank you for supporting the companies that support our site! 


Pin It

Spinach and Turkey Bacon Skillet Dish

Monday, November 21st, 2016

Spinach and Turkey Bacon Skillet Dish from MomAdvice.com

This post is sponsored by Honeysuckle White. All thoughts and opinions are my own! 

“I could eat breakfast for every meal,” is a common phrase spoken in our house. For us, breakfast is a feast that should be enjoyed anytime of the day and a sweet luxury when indulged in at our favorite restaurants. Simple ingredients like eggs, potatoes, and bacon all feel elevated though when combined into an elegant skillet dish and these are dishes I choose most often when we go out for a family brunch.

Why do I feel I have to go out to eat to enjoy a skillet dish?

Well, I don’t feel that way anymore!

There is no need to spend a fortune dining out when you can enjoy this breakfast treat at home! Today’s recipe is created in partnership with with Honeysuckle White as we put their delicious Smoked Turkey Bacon to work in this beautiful Spinach & Turkey Bacon Skillet Dish. Thanks to their commitment to keep their products affordable for their consumers, all while retaining the highest quality meats, this entire skillet dish will cost you less than one meal out.

Spinach and Turkey Bacon Skillet Dish from MomAdvice.com

One of the reasons I really love these skillet dishes is that this can be a great way to put leftover ingredients to work in your kitchen. Thanksgiving season, as we have discovered, is when our fridge is loaded with odds and ends that need to be used. Last night’s roasted potatoes, for example, can be used as the base in your skillet. Odds and ends from your produce drawer, like mushrooms or spinach, can be woven into your potato base. Goat, parmesan, cheddar, or blue cheese can also be added for a creamy element.

One thing that I bet you not to sacrifice  though is the salty addition of the bacon for a perfect finishing touch on your dish.

Turkey bacon is a great way to get that salty addition, but with 50% less fat in your dish, giving you all the flavor without all the guilt.

If you are gluten-free, you’ll be happy to know that this bacon is a gluten-free product. It also contains no added hormones or steroids and no growth-promoting hormones. They even let you virtually meet the farmers on their products so you can get to know exactly where your meat is coming from.

Spinach and Turkey Bacon Skillet Dish from MomAdvice.com

One of my favorite food combos is spinach and sun-dried tomatoes and I thought the addition of these would compliment this dish perfectly. To save time, look for bags of already julienned sun-dried tomatoes to save you some chopping time in the kitchen.

To save even more time on this dish, I’ve discovered that my Instant Pot is an incredible gift for making quick work of cooking potatoes for the week. Simply add a cup of water to the bottom of the pot, pierce your potatoes (I put in as many as I can fit!), lock the lid, and cook on manual pressure for 10 minutes. I then quick release the pressure and dice up the potatoes for our dishes or  make delicious baked potatoes out of them by finishing them in the oven for 15-20 minutes at 450 degrees, slathered in olive oil and rolled in kosher salt!

If you don’t have a pressure cooker, you can still make quicker work by starting those potatoes in the microwave, a technique that we have used often in our house. Once again, just prick the potatoes and then microwave on high for five minutes. Give them a few minutes to cool, and then you can start chopping them into cubes for your skillet.

I hope this dish inspires you to create your own skillet dish in the kitchen and, perhaps, put a few of those delicious Thanksgiving leftovers to work in a skillet of your own.

For more great turkey inspiration, be sure to check out my Slow Cooker Thanksgiving Turkey that I also created this month!


Spinach and Turkey Bacon Skillet Dish from MomAdvice.com

Spinach and Turkey Bacon Skillet Dish
Recipe Type: Breakfast
Prep time:
Cook time:
Total time:
Serves: 4 servings
Serve this healthy skillet dish packed with veggies and protein for your next brunch with any combination of odds and ends in your refrigerator. This recipe is a gluten-free crowd pleaser!
Ingredients
  • 2 russet potatoes, scrubbed (skin left on)
  • 3 slices Honeysuckle White Smoked Turkey Bacon
  • 1 tablespoon extra-virgin olive oil
  • 3 cups baby spinach
  • 1/2 cup sun-dried tomatoes, julienned
  • 1/8 teaspoon salt
  • 4 large eggs
  • Freshly ground pepper
Instructions
  1. Prick potato in several spots in a fork; microwave on High for 4 minutes. Let cool for 5 minutes, then chop into 1/2-inch cubes.
  2. Meanwhile, cook bacon over medium-high heat in a skillet until crisp (following directions on packaging for timing). Remove the bacon from the skillet, but leave the bacon drippings in the pan. Add oil, diced potatoes, and sun-dried tomatoes and cook, stirring frequently, until the potatoes are browned, about 5 minutes. Add spinach; stir to combine and just wilt, about 1 minute. Season with salt.
  3. Make 4 wells in the center of the hash and crack one egg into each well. Reduce the heat to medium and cook until the eggs are partially set, 2 to 3 minutes. Cover with a lid and cook until the eggs whites are completely set, 1 to 2 minutes. Chop the bacon and sprinkle on top. Garnish with a generous grinding of pepper.

This post is sponsored by Honeysuckle White. All thoughts and opinions are my own!


Pin It

Slow Cooker Thanksgiving Turkey

Monday, November 7th, 2016

Slow Cooker Thanksgiving Turkey from MomAdvice.com

This post is sponsored by Honeysuckle White. All thoughts and opinions are my own! 

For many years I have been dreaming about creating a Thanksgiving turkey that could be prepared in the slow cooker. I have a small kitchen and my oven doesn’t offer a lot of room for multiple dishes so my frustrations often mount when it is time to figure out timing of the bird and all the sides. If you are struggling too, I have come up with a slow cooker Thanksgiving turkey that looks beautiful AND saves you some space in the oven.

I’m partnering this year with Honeysuckle White and, believe me, it isn’t a stretch at all. Our bird every year has been from their company because it always cooks up beautifully. I was so excited to give my dream of slow cooking a bird a spin and wanted to share with you how I did that.

Slow Cooker Thanksgiving Turkey from MomAdvice.com

Slow Cooker Thanksgiving Turkey from MomAdvice.com

As you can see from these early morning shots, I got this started first thing in the morning so that it would be ready for our dinner hour. You are going to want to aim for an eight to nine pound bird to make sure that it can fit into your slow cooker. The slow cooker that I have is called the Ninja Cooker. Since we are finishing the bird in the oven to give it a golden skin, I love that I can just pop this insert right into the oven without transferring the bird.

One year I did a beautiful turkey using Ina Garten’s herb roasted turkey breast recipe and our family absolutely loved it. I wanted to recreate that delicious flavoring, packed with fresh herbs while swimming in wine, and make it using the slow cooker method.

Slow Cooker Thanksgiving Turkey from MomAdvice.com   Slow Cooker Thanksgiving Turkey from MomAdvice.com   Slow Cooker Thanksgiving Turkey from MomAdvice.com

I am not flashy with my turkey and usually have it already sliced before our guests arrive, but I know that many love to have a beautiful golden bird to carve right by the table. Maybe I saw National Lampoon’s turkey scene too many times and that may be why I am so scared.

Anyone else?

Rest assured, a slow cooker bird can still be beautifully displayed and you can even achieve a golden skin. As I’ve gotten more familiar with pressure cooking, it has opened my eyes that it is possible to start something in your gadgets and finish it somewhere else. The slow cooker turkey can be started in the slow cooker and finished under your broiler, but WATCH CAREFULLY. I found that it needed to be moved around quite a bit as it broiled to achieve an even color and to avoid burning the skin.

Slow Cooker Thanksgiving Turkey from MomAdvice.com

Although I have always loved the flavor of the Honeysuckle White Bird, I am ashamed to say that I did not know very much about their company until I had the opportunity to work with them.  I know that knowing where our food comes from is such an important thing and that’s why it’s good to know some of their business practices better. Honeysuckle White turkeys are raised on 700 independent family farms by farmers trained on animal handling practices that meet or exceed industry standards.  They even have a spot on their site where you can virtually meet the farmers– how cool is that?

They also realize that good quality food shouldn’t cost a fortune and believe everyone should be able to access it. They try to offer their products at a price point that would be comparable to other products, but with higher quality standards.

I hope this post inspires you to give slow cooking your Thanksgiving turkey a try this year and to look for a Honeysuckle White turkey (available in most states) or for the Shady Brook Farms turkeys, Honeysuckle White’s sister brand, available over on the East coast.

Don’t forget to visit this post to find out how to make ALL your side dishes ahead for your Thanksgiving feast

Slow Cooker Thanksgiving Turkey from MomAdvice.com

Slow Cooker Thanksgiving Turkey from MomAdvice.com
Slow Cooker Thanksgiving Turkey
Prep time:
Cook time:
Total time:
Serves: 6 servings
Ingredients
  • 1 Honeysuckle White whole bone-in turkey, 8-9 pounds
  • 2 tablespoons minced garlic (5 cloves)
  • 4 teaspoons dry mustard
  • 2 tablespoons chopped fresh rosemary leaves
  • 2 tablespoons chopped fresh sage leaves
  • 2 teaspoons chopped fresh thyme leaves
  • 3 teaspoons kosher salt
  • 1 teaspoon freshly ground black pepper
  • 3 tablespoons good olive oil
  • 3 tablespoons freshly squeezed lemon juice
  • 1 cup dry white wine
Instructions
  1. In a small bowl, combine the garlic, mustard, herbs, salt, pepper, olive oil, and lemon juice to make a paste. Loosen the skin from the meat gently with your fingers and smear half of the paste directly on the meat. Spread the remaining paste evenly on the skin. Pour the wine into the bottom of your slow cooker.
  2. Place the turkey carefully over the wine and cook on LOW for 5-7 hours. The turkey has a pop-up timer on it that you can watch for gauging when the turkey is done. Turkey is done when breast meat is 165˚ F and dark meat is 175˚ F.
  3. Once the turkey is done, remove and put in an oven-safe dish (unless your slow cooker insert is oven-safe). Broil under your broiler for 3-5 minutes, watching the turkey carefully to make sure not to burn the skin.
  4. When the turkey is done, cover with foil and allow it to rest at room temperature for 15 minutes. Slice and serve with the pan juices spooned over the turkey.

This post is sponsored by Honeysuckle White. All thoughts and opinions are my own!

Pin It

Gluten-Free Dark Chocolate Sea Salt Brownies

Tuesday, October 18th, 2016

Gluten-Free Dark Chocolate Sea Salt Brownies from MomAdvice.com

Thank you, Dunkin’ At Home, for sponsoring today’s post! 

When I lived in Massachusetts, I had a daily run over to my local Dunkin’ Donuts® to grab my morning cup of coffee. I became such a regular at it, the guy behind the corner would look up and say, “Skim Milk, two sugars?”


You know me so well, Sir.

Oh, those were THE DAYS when I sipped a cup of coffee on my walk from the shop to work and where I felt important because someone remembered my coffee just like I liked it.

Mornings look a heck of a lot different now and are often spent in a frantic state of panic over making sure everyone gets out the door on time with lunches packed and backpacks stuffed with everything they need. Someone making me coffee now is a rarity so I thoughtfully program a pot the night before for myself.

You deserve the best, Madam.

And since I deserve the best and still love that quiet cup, I wait until the house is empty and indulge fully in those first morning sips.

Gluten-Free Dark Chocolate Sea Salt Brownies from MomAdvice.com

Each morning I treat myself to an hour of reading with my hot coffee and then I repeat this same little treat in the afternoon the hour before they come back.  I consider it my two favorite indulgences during the day and gives me a chance to get in some really great books.

Gluten-Free Dark Chocolate Sea Salt Brownies from MomAdvice.com

I, honestly, rarely go out for coffee anymore and instead I invested in a great coffeemaker and make it at home. Since I drink my coffee black, I love flavored coffees and Dunkin’ (TRULY) makes some of my absolute favorites. If you haven’t tried their Bakery Series ® Coffee, you are in for a delicious treat. A couple of my favorites are Cinnamon Coffee Roll and Caramel Coffeecake that I was able to find at my local grocery store. If you happen to be a K-Cup user, you can also score a delicious Chocolate Glazed Donut flavor. You can find all of these delicious options where you buy your groceries! Check out their website for the scoop!

Gluten-Free Dark Chocolate Sea Salt Brownies from MomAdvice.com

Gluten-Free Dark Chocolate Sea Salt Brownies from MomAdvice.com

For my afternoon indulgence, I wanted to recreate one of my favorite treats, Dark Chocolate Sea Salt Brownies, into a gluten-free version that our whole family could enjoy. My biggest concern with modifying this recipe was that I would have a dense and dry cake when replacing the flour. I remembered though that coffee has the ability to enhance and really bring out chocolate flavoring without adding a noticeable coffee taste. To keep these brownies fudgy, I added four tablespoons of coffee to my standard recipe and replaced the regular flour with this gluten-free version.

Dare I say that these brownies are actually LIGHTER than the originals? In fact, my husband kept saying, “Are you SURE these are gluten-free? I mean, are you REALLY sure?” Yes, after our fair share of terrible gluten-free baking experiences, I couldn’t believe how much the coffee added to the flavoring and the lightness of this recipe. It is so fluffy, in fact, that you might mistake it for cake!

Gluten-Free Dark Chocolate Sea Salt Brownies from MomAdvice.com

The other struggle I have with gluten-free brownies is getting them to hold their shape, but the coffee really made a difference in how these held together. These were a breeze to cut into squares, especially when using my favorite brownie cutting trick…a plastic knife! I always keep one in our utensil drawer to get clean (not crumbly) brownies. Lining the brownie pan with parchment paper also helps the brownies to hold their shape and cuts down on clean-up.

Gluten-Free Dark Chocolate Sea Salt Brownies from MomAdvice.com

I hope you can give the Dunkin’ Donuts® coffee a try at home and I hope you can mix up a quick batch of these Dark Chocolate Sea Salt Brownies for the perfect treat to accompany it. I have found that if there is leftover coffee (does this even happen?), that adding it to my brownies always enhances their flavoring.

Treat yo’self!

Gluten-Free Dark Chocolate Sea Salt Brownies
Recipe Type: Dessert
Prep time:
Cook time:
Total time:
Serves: 12
Get ready for fame because these brownies will make you FAMOUS with your friends. This is a perfect treat to indulge in or to share with someone you love! You won’t believe these are gluten-free!
Ingredients
  • 1½ sticks unsalted butter
  • 2 ounces unsweetened chocolate, finely chopped
  • ¼ cup plus 2 tablespoons unsweetened dark cocoa
  • 2 cups sugar
  • 3 large eggs
  • 4 tablespoons coffee (I used Dunkin’ Donuts Caramel Coffeecake)
  • 2 teaspoons pure vanilla extract
  • 1 cup gluten-free flour (see above for recommended suggestion)
  • ¾ teaspoon sea salt
Instructions
  1. Preheat the oven to 350°. Line a 9-inch square metal cake pan with parchment paper, draping the parchment paper over the edges.
  2. In a saucepan, melt the butter with the unsweetened chocolate over very low heat, stirring occasionally. Remove from the heat.
  3. In a mixing bowl begin whisking together the dry ingredients. In this bowl you will mix your dark cocoa, flour, and sugar. Once your dry ingredients are mixed together, we can begin incorporating the wet ingredients. Add your eggs, cooled coffee, and vanilla extract to the dry ingredients and mix them in with a spatula or use your stand mixer to mix these. Once these are incorporated, you can slowly add in your cooled chocolate and then incorporate that into your batter.
  4. Pour the batter into the prepared pan and smooth the surface.
  5. Sprinkle the salt evenly over the batter. Using a butter knife, swirl the salt into the batter.
  6. Bake the brownies in the center of the oven for about 33-35 minutes, until the edge is set but the center is still a bit soft and a toothpick inserted into the center comes out coated with a little of the batter.
  7. Let the brownies cool to room temperature. Lift the brownies from the pan and peel back the parchment paper. Cut the brownies into bite-sized squares.
  8. Serve at room temperature.
  9. Side note: The salted fudge brownies can be refrigerated for up to 3 days, and frozen for up to 1 month.

Thank you, Dunkin’ At Home, for sponsoring today’s post! 


Pin It