Archive for the ‘Food & Recipes’ Category

Company is Coming: Fast Peanut Butter Cookies

Monday, September 22nd, 2008

There are very few nights where we don’t have a guest sitting at our dinner table. Although I put a lot of thought into our main dishes, I have to say, dessert sometimes gets the short end of the stick when I am entertaining.

I happened upon this recipe for peanut butter cookies that will make a regular appearance for busy weeknight invitations though! The recipe yields between two to three dozen (depending on the size of your scoops) and is made from items out of your pantry. Best of all, you can get all the ingredients at Aldi, which is a bonus in my book!

Be sure to keep the cooking time to the ten to twelve minutes and don’t let the lighter color fool you. I had some burnt cookies in my first batch because I left them in the oven too long. Let them cool as instructed and then place them on a pretty plate for serving. Then you need to complete the most difficult step of all…Try to graciously accept the compliments without giving away your cooking secrets (which I never can do myself!).

I piled these on one of my trays with a carafe of decaf coffee, mugs, creamers, and and special coffee syrups. It was the perfect way to end an evening and I look forward to serving these again and again!

Elaine’s Peanut Butter Cookies (Courtesy of AllRecipes.com)

1 (18.25 ounce) package yellow cake mix
1 cup creamy peanut butter
1/2 cup vegetable oil
2 eggs
2 tablespoons water

1. Preheat oven to 350 degrees F (175 degrees C).

2. Pour the cake mix into a large bowl. Make a well in the center, and add peanut butter, oil, eggs, and water. Mix until well blended. Drop by teaspoonfuls onto ungreased cookie sheets. Flatten slightly using a fork dipped in water.

3. Bake for 10 to 12 minutes in the preheated oven. Let cookies set on cookie sheet for 2 to 3 minutes before carefully removing from the cookie sheet to cool on wire racks.

I am curious, what is your go-to dessert dish when you are having company? I would love some new desserts to add to our dinner table!

Notebook Experiments: Can I Make Homemade Breadsticks?

Thursday, September 18th, 2008


Experiment: Can I whip up a batch of homemade breadsticks?

Experiment Taken From: Notebook Entry 08.21.08

Materials Needed: Please see Chocolate On My Cranium for the full instructions on ideas for completing this task. I followed her instructions and just used my stand mixer for this project. I also added my own additions of a 1/4 tsp garlic powder, a 1/4 tsp of Italian seasoning mix, and a handful of Parmesan cheese for sprinkling on top. For a fast dipping sauce, I used a jar of Aldi’s spaghetti sauce.

Results: This is the first time that I have ever tried to make homemade breadsticks, but I really needed some type of bread for dinner and this recipe looked fast and easy. I was doubly inspired to try this because Heather, from Freebies 4 Mom, had attempted making these and I read through all of the suggestions on her comment thread before making them.

I added 1/4 cup of extra flour to make sure that the dough was sticky, but not too sticky. I let the stand mixer do all the work for me and plopped all of the ingredients in the mixer after the yeast, sugar, and water had proofed. Within five minutes, the dough was nicely incorporated.

I poured the butter onto a rimmed cookie sheet and then scooped the dough with a spatula onto the sheet. I flipped it, covering both sides in butter and then sprinkled my addition of Parmesan cheese.

I covered the whole cookie sheet with plastic wrap and popped it in my fridge until our dinner hour. About a half hour before our dinner, I pulled it out of the fridge and let it rest on the counter while our oven preheated.

I slid a big tray of my favorite baked ziti into the oven and then popped in the breadsticks for the last twenty minutes at 350 degrees. It needed a few extra minutes more than the required cooking time, but I think that was because they had been refrigerated.

Conclusion: These breadsticks were amazing and a great way to get a large batch of bread on the table while being creative with your pantry ingredients. Next time I will add a little bit more salt to add more flavor, but other than that, I thought they were perfect. I can see us making these over and over again in our house and I want to thank Chocolate On My Cranium for a wonderful new side dish we can add to our table!
********************

I am so excited to open our Notebook Experiments up to everyone and I hope that you will be able to participate this week or in weeks to come! I will be posting this each Thursday so please mark your calendars if you plan to participate. You can post your entries at any time throughout the week and then leave your entry in the links below.

We have this handy banner that you are more than welcome to use, but it is not a requirement! It is just something you can add to add a little sparkle to your entry.

Rules for Participation:

1. Choose anything from any of our notebook entries (past or present) to do with your family. We have hundreds of bookmarked links of crafts, ways to save money, and organizing ideas.
2. Complete an experiment from the notebook and share about it on your blog or website. We would love to see pictures of what you accomplished or a detailed description of how your projects turned out. Please include a link to this entry, a link to the original posting of the entry (at the original crafster’s blog), and (to help us relocate the project) the date or link of the notebook entry where you found it. You can use the same formatting as our entries or you can just include that information in your post in your own unique way!
3. Post a link below. Please include your name or blog name & a fast description of your project. Example- MomAdvice (WHO bread)

I can’t wait to see what you create and what you find inspiring!

Play It Again, Momma: Vanilla Scented Granola

Wednesday, September 17th, 2008

Just in time for the busy school year, here is a snack that is healthy and can be used for breakfast or for snacks. Watch out though, this stuff is highly addictive!

I am easing my family into eating granola and I found this recipe that I thought would fit the bill perfectly. The only item that they could consider “weird” are the slivered almonds. No dried fruits, no coconut, no weird foods…no reason to complain!

I will gradually be adding some other elements into this recipe, but if you have a picky family, this granola recipe might be a great place to start. I bought a large container of vanilla yogurt and made little yogurt cups for the kids with this homemade granola sprinkled on top. They gobbled it up and I found them both licking their bowls. I would say this one was a hit!

Vanilla Scented Granola Courtesy of Bon Appetit Magazine

Cooking spray
4 cups rolled oats
1 cup sliced almonds
1/2 cup brown sugar
1/4 teaspoon salt
1/8 teaspoon ground cinnamon
1/3 cup vegetable oil
1/4 cup honey
2 tablespoons sugar
4 teaspoons vanilla extract

Position rack to middle of oven and preheat to 300 degrees. Lightly spray large baking sheet with nonstick spray. Mix next 5 ingredients in large bowl. Combine oil, honey and sugar in small saucepan; bring to simmer over medium heat. Remove from heat; stir in vanilla. Pour hot liquid over oat mixture; stir well. Using hands, toss mixture until thoroughly mixed. Spread granola on prepared baking sheet. Bake until golden brown, stirring occasionally, about 30 minutes (but check after 20). Transfer sheet to rack; cool granola completely. (Can be made two weeks ahead. Store in airtight container at room temperature.) Makes approximately 8 cups.

Side Note:
If you prefer granola clumps, do not stir during baking and allow the granola to cool. You can then break the granola apart into pieces.

Skillet Ziti With Chicken & Broccoli

Monday, September 15th, 2008


I had several new recipes for this month’s planner that I was trying and wanted to review for you guys. This first recipe comes from the America’s Test Kitchen Family Cookbook, a favorite cookbook in my collection. The cookbook includes really great reviews on the best products and rates common cooking tools for chefs. There has not been a recipe yet that I have tried and not enjoyed!

I am a big fan of skillet dinners because you only have to dirty one pan and they come together quickly. Two of my favorites are the Skillet Penne & Sausage Supper (also from the America’s Test Kitchen Family Cookbook) and the Cheeseburger Pasta Skillet Dish. These dishes are great for busy weeknights and make great leftovers for the next day’s lunches.

Skillet Ziti With Chicken & Broccoli

1 pound boneless, skinless chicken breast, sliced into 1″ pieces
Salt and pepper
3 Tablespoons unsalted butter
1 onion, minced (we omitted this due to personal tastes)
1/4 teaspoon red pepper flakes
1/4 teaspoon dried oregano
3 garlic cloves, minced
8 ounces ziti (2 1/2 cups)
2 1/2 cups low-sodium chicken broth
1/2 cup heavy cream (I substituted this with half & half)
1 bunch broccoli (1 1/2 pounds)
1 cup jarred roasted red peppers, rinsed and sliced 1/4″ thick (we omitted these due to personal taste)
1 ounce Parmesan cheese, grated (1/2 cup)
2 tablespoons fresh lemon juice (optional)

Pat the chicken dry, then season with salt and pepper. Melt 1 tablespoon of the butter in a 12″ skillet over medium heat. Add the chicken and cook until it is lightly browned, but not fully cooked, about four minutes. Transfer chicken to a bowl. Add 1 more tablespoon of the butter, onion, red pepper flakes, oregano, & 1/2 teaspoon salt to the skillet. Cook until the onion is softened, about five minutes. Stir in the garlic and cook until fragrant, about 15 seconds. Sprinkle the ziti evenly into the skillet. Pour the broth and cream over the ziti. Cover and bring to a boil, about five minutes. Reduce the heat to medium-low and stir in the broccoli and roasted red peppers. Cover and continue to simmer, stirring occasionally, until the pasta begins to soften and the broccoli turns bright green (approximately eight minutes). Stir in the chicken and any accumulated juice. Cover and simmer until the chicken is cooked through, about three minutes longer. Stir in the remaining 1 tablespoon butter, the Parmesan, and lemon juice (if using). Season with salt and pepper to taste.

  • This dish made about six servings for our family. I diced fresh tomatoes to sprinkle on top of the pasta, which added a really nice fresh burst of flavor and sprinkled it with a shaving of Parmesan cheese.
  • When I packaged our leftovers, I added a drizzle of chicken broth to each container to keep the pasta moist for reheating.This definitely helped it to not dry out when it was reheated and added a little additional flavor to the leftovers.
  • If you want to make this an Aldi-friendly recipe, just substitute the ziti with elbow macaroni or penne pasta and adjust the cooking time accordingly. You would have to omit the red peppers and replace heavy cream with half & half (which substituted beautifully).
  • Don’t be afraid to add a little extra liquid to the dish- I added an extra 1/4 cup of chicken broth and an extra 1/4 cup of half & half to keep the pasta nice and moist. You don’t want the pasta to dry out and it should have a very thin sauce that helps to coat the pasta.
  • To make this dish vegetarian, just omit the chicken and up the veggies. The sprinkle of tomatoes or a handful of sundried tomatoes and spinach could make this a veggie packed dish worth repeating!

This dish was a huge hit with everyone except with Ethan, who has firm beliefs that no food should ever touch. He liked all the foods separately, but not mixed together. The rest of us absolutely loved it and I plan to make this again and again!

Play it Again, Momma: Pumpkin Spice Lattes

Wednesday, September 10th, 2008

With the Pumpkin Spice Latte season upon me, I thought it would be great to bring this little entry back for your viewing pleasure! After all, I can’t be the only one with a Pumpkin Spice Latte addiction!

My absolute favorite drink at Starbucks is their Pumpkin Spice Latte. Each year, I look forward to them adding this onto their menu and this year was no exception. Unfortunately, my wallet can’t handle the frequent trips to get coffee so I have had to get creative this year.

My girlfriend, Christina, had this amazing little gadget called the Cocomotion. If you haven’t seen one of these, check it out and put it on your Christmas list. I decided to go with the Back to Basics Cocoa-Latte Maker (similar, but it has a dispenser to dispense the drink) and I have yet to be disappointed with it. It is so nice because it stirs and heats everything up, just like a blender. When it is hot, it will stop stirring and you can hit the Dispense button. As it comes out, it will come out with a beautiful froth on top, just like the coffee shops. I think the best part about it is no cocoa or coffee goes to waste. I hate when you get the bottom of your glass and there is all this cocoa that fell to the bottom and didn’t get mixed properly. With this machine, you don’t have that problem.

We have had our little cocoa machine humming every single night. As soon as I flip it on, it is like I have Pavlov’s dog in our house. Everyone runs up the stairs to wait impatiently for the cocoa to be ready.

Well, my handy little gadget makes the absolute BEST Pumpkin Spice Lattes and after trying several combinations, I finally have a recipe that I am happy with. This recipe will make two large lattes and I hope you can enjoy it as much as we have.

To save on cost, store your morning’s coffee in the fridge to be used for the lattes. You can also save on the cost of these by making a batch of powdered milk for your drinks.

If you want to splurge a bit, make sure to have whipped cream on hand to top with a dusting of cinnamon.

Let me know if you get a chance to try this recipe! Adjustments can be made according to your own taste! This is the perfect post-Thanksgiving Day treat!

Amy’s Version of Starbuck’s Pumpkin Spice Latte

2 cups milk
1 cup very strong coffee
2 teaspoons vanilla
2 teaspoons sugar (or one packet of Splenda)
1 teaspoon cinnamon (plus extra for dusting)
2 heaping spoonfuls of pumpkin

Pour all of the ingredients into a pot and heat over medium-high heat until the coffee is steaming hot. Pour into mugs and top with whipped cream & cinnamon. Enjoy!

If you are interested in purchasing a Cocoa-Latte Machine, check out Ebates and order from there. They have the Cocoa-Latte Machine (just go under Search in the left hand corner) for $30 with four percent cash back through the Ebates program.

Not an Ebates member? You can sign up today. You get five bucks in your account and so do I for referring you. It is THE place to Christmas shop! Please be sure the use the link provided so that we get credit for our referral & thank you so much! (Originally Aired: November 13, 2006)

(Photo Source:Dalboz17)

September ’08 Menu Planner

Monday, September 8th, 2008

Since last month’s menu planner was such a hit, I wanted to be sure to share our current month’s menu plan for some inspiration for the month. I am trying some new recipes from my cookbooks so I will be sure to post our reviews of those when I complete them as well as the reipes. Anything that I have shared before or that I have found online will be highlighted so you can make the dish in your house! Please be sure to visit I’m An Organizing Junkie for a whole list of participants to help inspire your menu plans each and every week!

Meal Plan:

1. Chicken Enchiladas with Homemade Enchilada Sauce (from my America’s Test Kitchen Cookbook) with tortilla chips & Idiot Margaritas

2. Classic Baked Ziti with homemade bread & tossed salad

3. Salmon Patties (from my America’s Test Kitchen Cookbook) with Seasoned Baked Potato Wedges

4. Poppy Seed Chicken Casserole (scroll down to view) over Egg Noodles & Baby Peas

5. Homemade Pizza Night

6. Skillet Ziti With Chicken & Broccoli (from America’s Test Kitchen Cookbook- bake or prepare extra chicken for chicken tetrazzini later in the week) with Homemade Bread

7. Leftover Night

8. Best Waffles with Orange Juice

9. Herb Baked Tilapia, Rice, & Corn

10. Creamy Chicken Tetrazzini with Tossed Salad

11. Meatball Subs with Baked Potato Wedges

12. Ranch Pork Chops, Rice, & Corn

13. Appetizer Night- Honey BBQ Chicken Wings, Cheese Quesidillas, Carrot Sticks & Tortilla Chips

14. Leftover Night

15. Pumpkin Pancakes with Orange Juice

16. Homemade Pizza Night

17. Roast Turkey Sandwiches (Scroll to Meal #7) & Panera Bread Broccoli Cheese Soup

18. Funky Chicken with Sesame Noodles

19. Turkey Salad Sandwiches (from leftover turkey) With Pretzels & Carrot Sticks

20. Lemon Roasted Chicken (scroll down to Meal #16 & save leftover chicken for later), Buttered Noodles, and Corn

21. Homemade Pizza Night

22. Leftover night

23. Chicken Salad Sandwiches (made from leftover lemon chicken)

Making for the Freezer: Butter Baked Rice (to be used throughout the month)

Snacks: Apple Pie Muffins, Pumpkin Streusel Muffins, Cinnamon Muffins

Ask the Frugal Momma: Getting to Know the Bread Machine

Monday, September 1st, 2008

You have been talking about bread machines and making bread. I am interested in doing this since I am home all the time and I love fresh bread.

I was at the Goodwill and saw many of them and they were kind of cheap, like 20.00 or less. I am dumb so help me out. Does the machine knead the dough and bake it and everything in the bread machine?

If I would purchase one at the Goodwill how would I know if it works or not?

I am interested. Please help me find a way in a new venture.

Signed,

Future Bread Maker

First of all, thank you for your question! The Ask Frugal Momma column can’t happen without your questions, so please keep sending them my way. You can email any and all questions to amy@momadvice.com. We have had some fun topics and I am very excited to share with everyone!

Do any of you have bread machine gathering dust in your house? A lot of people buy these appliances and then end up donating them at their local thrift store because they never use them. I think of the bread machine as a modern day convenience, but in a culture where we want everything NOW, waiting for a loaf of bread can seem like an eternity. Why wait for a hot loaf of fresh bread when you can grab a loaf at your supermarket? And what exactly is the purpose of that appliance that is taking up space on your shelves?

On any given day in our house, you will find our bread machine happily humming along and whipping up fresh dough and bread for us. We use our bread machine almost daily, and spare ourselves the expense of fancy bakery breads. Not only that, but our bread machine has a regular performance in our house on Friday nights. This appliance makes our favorite pizza dough for our official “family night” together.

The purpose of a bread machine is to be able to make fresh bread when you want it. The reasons vary from person to person on why they choose to make their own bread. Many people have concerns about the additives and preservatives that are found in store-bought breads. Another reason that many people choose to make their own bread is because they just enjoy the taste of homemade bread. My reasoning for making our own bread is because I like to save our family money. Making your own bread costs so much less than purchasing a loaf of bread, and the rising grocery costs have only fueled my desire more to make it at home.

I am not a baker though and our days seem to be jam-packed with activities for our family. Taking the time to knead, rise, and bake bread…well, that hasn’t seemed to top the priority list at this point in my life. Lucky for me, there is an appliance that can do all the work for me and all I have to do is pull the finished loaf or ball of dough out.

To begin, all you have to do is put the ingredients in and select your setting. Some of the older machines have just a handful of simple settings. I find that the settings we use most on our machine are Basic and the Dough cycle, which can be found on every machine. The basic cycle is just the basic setting for making a loaf of bread. The Dough cycle just completes the kneading and rising of the dough. Once the dough cycle is complete, you can take the dough out and shape it into your loaf pan or do fancy braids or rolls out of the dough.

Inserting your ingredients into a bread machine is also very straightforward. If you are making the loaf right away, you can insert the ingredients in any way that you want. All of these ingredients will immediately be stirred together and so it will not matter what the order is. If you use a timer delay on your bread machine, delaying the start time of making your loaf, it is imperative that you put the ingredients in the right order or your loaf will not turn out right. The order of ingredients is liquid (liquids include water, oil, milk, eggs, or honey), flour, other dry ingredients (salt, sugar, baking powder, seasonings), and ending the ingredients with your yeast. The most important part of putting the yeast in is to make sure that you make a small indentation into the center of the flour so that the yeast does not react with the other ingredients.

Upon inserting your ingredients, your bread machine will take over the process from there. The machine will knead the ingredients together, give the bread its rising time, and then it will bake the bread. The bread machine will signal when the bread is ready and you can allow the bread to cool inside of the bread bucket.

There is no need to spend the money on convenience bread machine mixes; in fact, you can make your own convenient mixes handy for the week. I take plastic storage bags and make an assembly line of the dry ingredients and do my bags once a month. On the outside, just write what liquids you will need to add and you will only have a dirty kitchen once.

A quick glance at grocery store prices though and you will wonder how there could be any possible savings with making your bread at home. The key to making this the least expensive on your family is to purchase all of your ingredients at your local wholesale club. With proper storage, you can buy the ingredients in bulk and save your family loads of money. For example, our wholesale club has twenty-five pounds of bread & all-purpose flour for under $6 each. Two pounds of yeast will run you just under $4. What a difference compared to the prices in your regular supermarket!

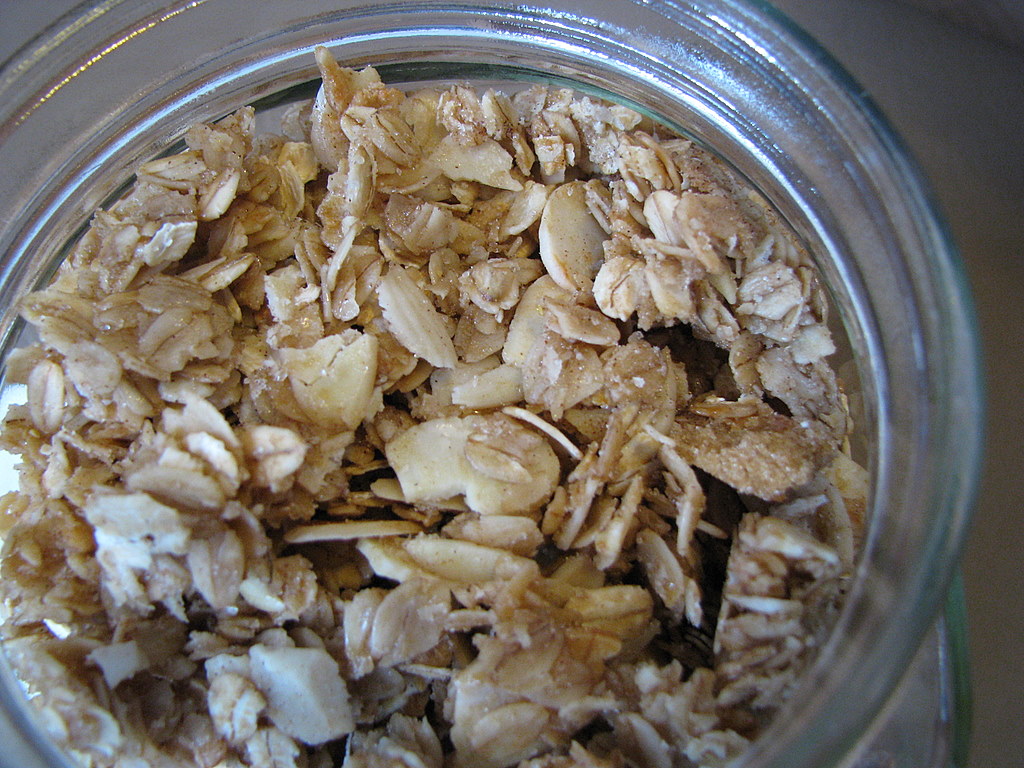
For storage, flour can be stored for up to a year in an airtight container. With bulk storage, a large plastic bin that has been clearly labeled is ideal to keep your flour fresh. Yeast is the easiest ingredient to store and has a very long shelf life. I store my yeast in a clear jar in our refrigerator door. With both of these ingredients, writing an expiration date on the label will also remind you of when the item is going to expire.

If you do not have a bread machine and are looking for one, garage sales and thrift sales are a great place to hunt. I see these machines for $10 or less, and you will definitely get your money back from the savings of making your own bread. When you find one, ask if you can plug it in and make sure it is working. Just check that it actually powers up, that there is a bread bucket inside, and that there is a paddle in the bottom of the bread machine to stir the ingredients. Having a manual with it is handy, but usually can be found by searching online.

Good luck in your quest to find a bread machine and I hope it is a well-loved appliance in your home!

Related & Helpful Information:

Hillbilly Houswife’s Bread Machine Basics

Buttery Bread Machine Rolls

My Favorite Pizza Dough (after much trial & error)

Storing Homemade Bread & Bread Ingredients

Homemade Croutons

Dinner is in the Bag

* This post originally aired on June 28, 2007*

Best Birthday Cupcakes In the World

Monday, September 1st, 2008
My sister-in-law’s boyfriend celebrated his birthday Friday night. To help out with the evening’s festivities, I offered to make the cupcakes for his special day. I found a recipe in my favorite cupcake book, “Cupcakes from the Cake Doctor” and picked her “Best Birthday Cupcakes” recipe.

These cupcakes are as close to a bakery cupcake as I will probably ever make. They are light and sweet, but not too sweet. They have a great consistency and are perfectly moist and sturdy enough to hold up to a good dose of yummy frosting.

I will probably never search for the perfect birthday cupcake again after sampling these. I paired the cupcake with her Chocolate Syrup Frosting which was the perfect way to top this delicious cake.

No more searching, ladies! This is THE cupcake for every celebration. Enjoy!!

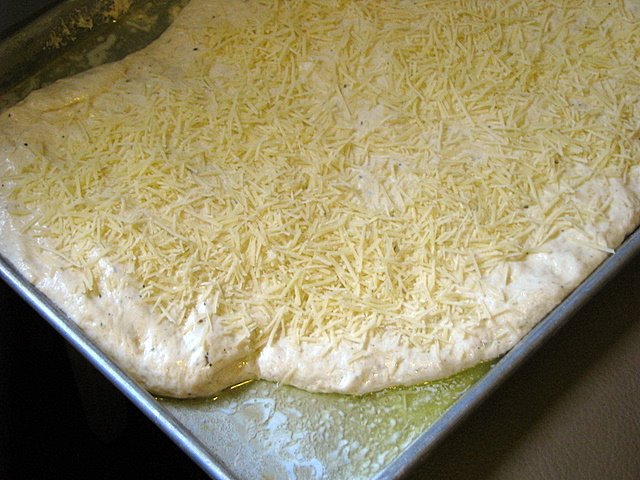
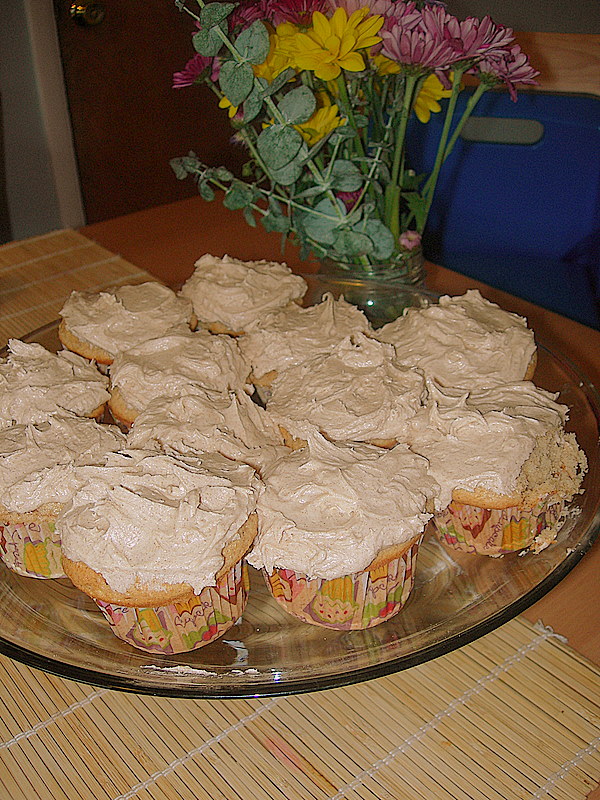
The Best Birthday Cupcakes

24 paper liners

1 package plain butter recipe golden cake mix (I subbed with white and loved it!)

1 package (8 ounces) reduced-fat cream cheese, at room temperature

1/2 cup sugar

1/2 cup water

1/2 cup vegetable oil

4 large eggs

1 tablespoon pure vanilla extract

Chocolate Syrup Frosting (recipe to follow)

Colored sprinkles or candy cake decorations for garnish

Place a rack in the center of the oven and preheat to 350 degrees. Line cupcake cups with liners. Set the pans aside. Place the cake mix, cream cheese, sugar, water, oil, eggs, and vanilla in a large mixing bowl. Blend on low speed with an electric mixer for 30 seconds, until the ingredients are well blended then stop the machine and scrape down the sides. Increase the mixer to medium speed and beat for 1 1/2 minutes to 2 minutes more, scraping down the sides again if needed. The batter should be smooth and thickened. Spoon or scoop 1/4 cup batter into each lined cupcake cup, filling it two thirds of the way full (You should get between 22-24 cupcakes). Place the pans in the oven. Bake the cupcakes until they are golden and spring back when lightly pressed with your finger, 24-27 minutes. Remove pans from oven and place them on wire racks to cool for five minutes. Run a dinner knife around the edges of the cupcake liners, lift the cupcakes up from the bottoms of the cups using the end of the knife, and pick them out of the cups carefully with your fingertips. Place them on a wire rack to cool fifteen minutes before frosting. Meanwhile prepare your frosting…
Chocolate Syrup Frosting

1 stick butter, at room temperature

1/2 cup unsweetened cocoa powder

1/2 cup chocolate syrup

3 cups confectioner’s sugar, sifted

1 tablespoon milk

1 teaspoon vanilla extract

Place the butter, cocoa powder, and chocolate syrup in a large mixing bowl. Blend with an electric mixer on low speed until just combined (about 30 seconds). Stop the machine and add the sugar, milk, and vanilla. Blend with the mixer on low speed until the sugar is incorporated, 1 minute. Increase the speed to medium and beat until light and fluffy, 1 minute more. Use to frost your cupcakes.

*This post originally aired on October 8, 2007*

Snickerdoodle Cupcakes

Monday, September 1st, 2008

Welcome to a Play It Again, Momma week! This week we will be highlighting some of our favorite entries and today we kick off the week with three great recipes. I hope you will join me this week as I highlight some oldies, but goodies!


We had a reason to celebrate this week because my husband started a new job. We are so grateful that he has been given this opportunity and that he will be able to start a new adventure on his career path.

We wanted to do something to celebrate his first day of work so we made him one of his favorite treats…Snickerdoodle Cupcakes!

These are so delicious and I got the recipe from one of the Cake Doctor books. It has been a favorite in our house for several years and a frequent request for family birthdays.

The cake has just the right blending of flavors and the cake mix make these easy to whip up for unexpected company. It is the cinnamon frosting that pushes it over the top though so take the time to make the icing from scratch since you are saving time on the cake by using the mix!

I hope you can try these in your house- let me know what you think!

Snickerdoodle Cupcakes (these can be made into a cake too- whichever you prefer)

1 package plain white cake mix
1 cup whole milk
1 stick of butter, melted
3 large eggs
1 teaspoon vanilla extract
2 teaspoons ground cinnamon

Frosting:
1 stick butter
3 3/4 cup confectioners sugar
3-4 Tablespoons milk
1 teaspoon vanilla extract
1 Tablespoon ground cinnamon

Preheat oven to 350 degrees and flour & grease 2 9″ pans (for cakes) or line your cupcake tin. Place cake mix, milk, melted butter, eggs, vanilla, and cinnamon in a large mixing bowl. Blend for three minutes (stop to scrape once). Pour into pans and bake for 27-29 minutes (for cake) or 22-25 minutes (for cupcakes). Allow the cakes to cool completely.

Beat butter until fluffy for frosting. Add all other ingredients.

Note: I froze half of these (without frosting) to keep in our freezer for another occasion. They freeze very nicely!

Piggy Pancakes

Tuesday, August 19th, 2008

I made piggy pancakes for the kids and they were a huge hit! I wasn’t sure if they would be able to figure out what they were so I let them guess. They decided these were cow pancakes instead so who knows what animal your own kids might pick?

I made a batch of this pancake batter. It is my absolute favorite because it doesn’t require any fancy ingredients and can be made out of everything in your pantry. The pancakes remind me of the McDonald’s pancakes and I absolutely could devour a few stacks of those in one sitting.

To save a little bit more money, I make a batch of powdered milk to mix into the pancakes. It isn’t a huge savings, but it saves me from making multiple trips for milk throughout the week.

You will want to make one large pancake and two silver dollar sized pancakes. When you see the bubbles bubbling up on top, give them a flip and cook until they are cooked through.

I used kitchen scissors and cut one of the small pancakes in half and slipped it under the large pancake, to make the ears. Plop a small pancake on top for the snout and use blueberries or chocolate chips for the eyes.

For preschoolers, you could tie in any good barnyard book or my personal favorite…”If You Give a Pig a Pancake.”