Archive for the ‘Food & Recipes’ Category

Gluten-Free Snickerdoodle Cake

Tuesday, March 18th, 2014

Gluten-Free Snickerdoodle Cake from MomAdvice.com.Semi homemade cakes have become a speciality of mine for birthdays. Today’s gluten-free snickerdoodle cake offered the perfect celebration cake for my husband’s birthday this year and I loved that it tastes just as heavenly as our usual snickerdoodle cake and our chocolate snickerdoodle cake that I had made before going gluten-free.

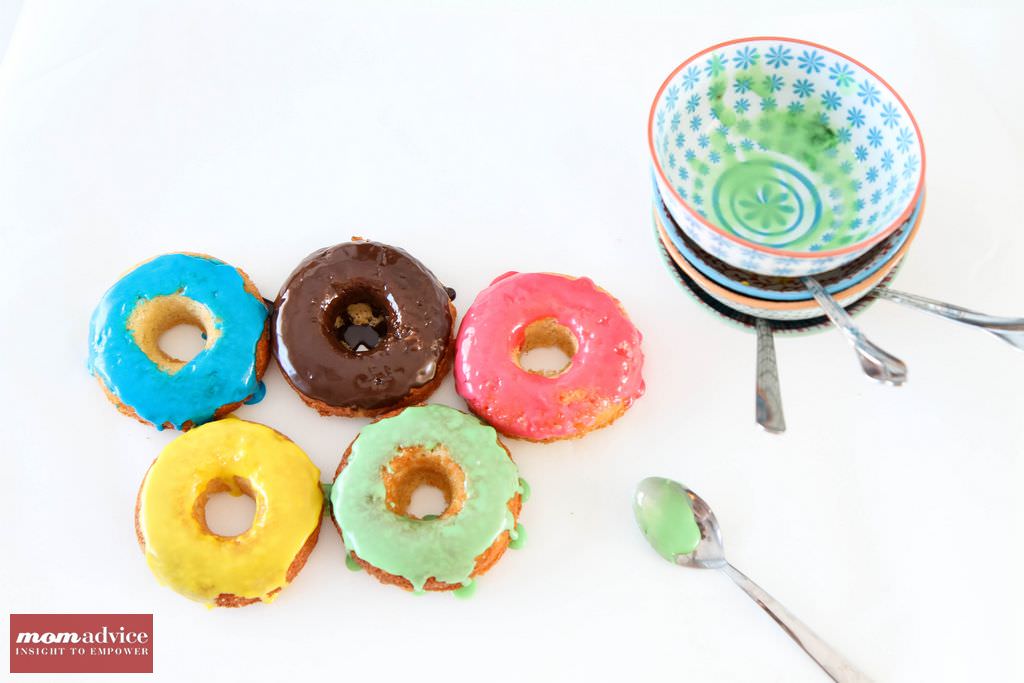
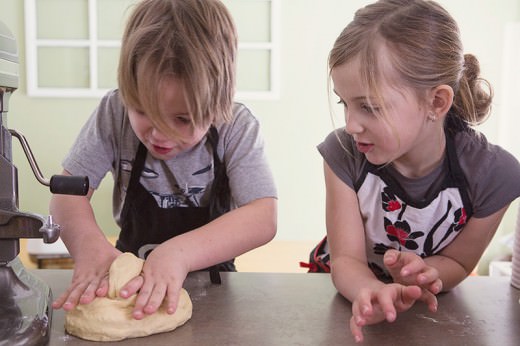
Before going gluten-free I relied heavily on cake mixes for making all of our cakes (something that I mention as a pantry necessity in my book), and that ease of pre-mixed ingredients is exactly the tradition that I have continued as I have started baking cakes that are gluten-free. As we demonstrated, cooking with cake mixes is easy enough that your child can bake it for you, the cake mix can be transformed into delicious sugar cookies, and you can even put a rainbow in the center, if you want.

Ed Emberley drawing books Ed Emberley drawing books Ed Emberley drawing books

As we have gotten older, we need less and less. Frankly, if we really want something, we usually just go and buy it for ourselves. Special & thoughtful gifts seem harder to come by, but I was determined to make this guy’s day special.

His favorite books as a child were Ed Emberley’s drawing books. While these books have been reissued, my husband more than anything wanted the original books that he had loved as a kid. I found the three of his favorites and wrapped them in ribbon to give him for his birthday. I could not wait to see his face.

Unbeknownst to me,one of the books contained Ed Emberley’s autograph, which my husband said was the best gift he had ever received. What a happy surprise that was.

If your spouse had a series of books or a book that was their childhood favorite, imagine what a joy it is to see that original again.

Gluten-Free Snickerdoodle Cake from MomAdvice.com

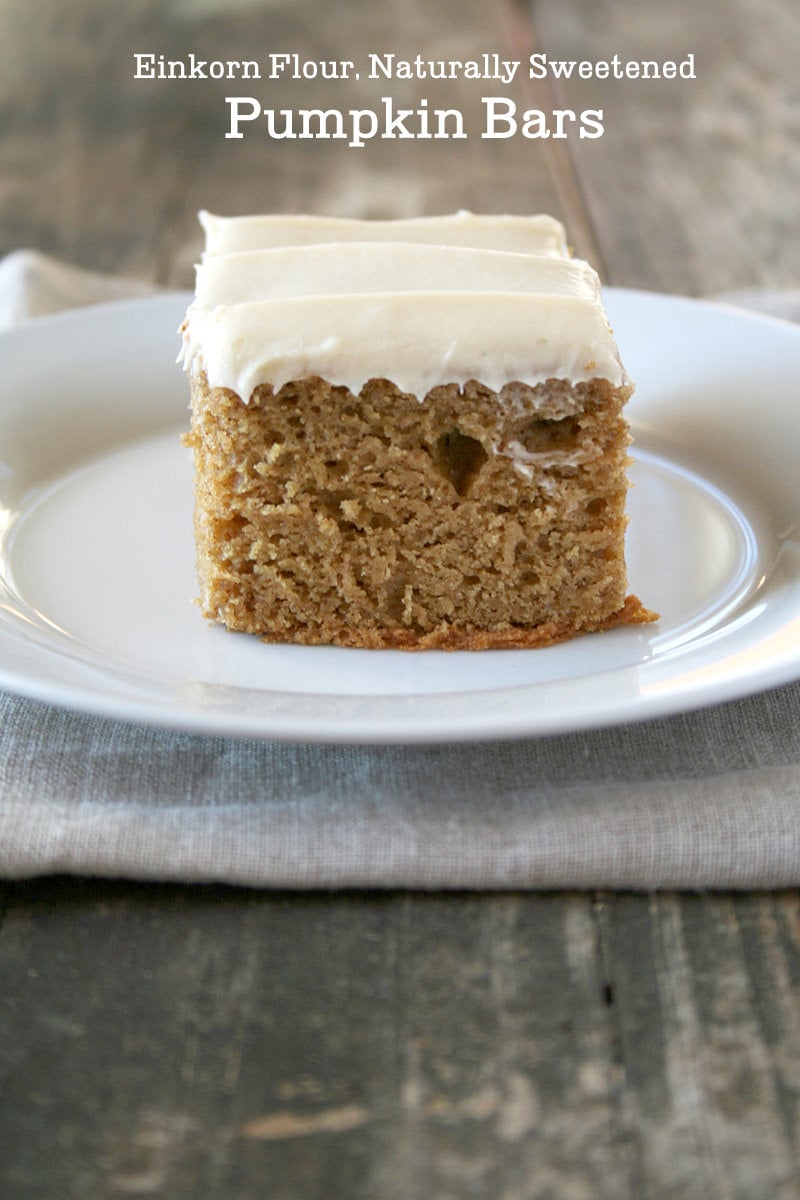
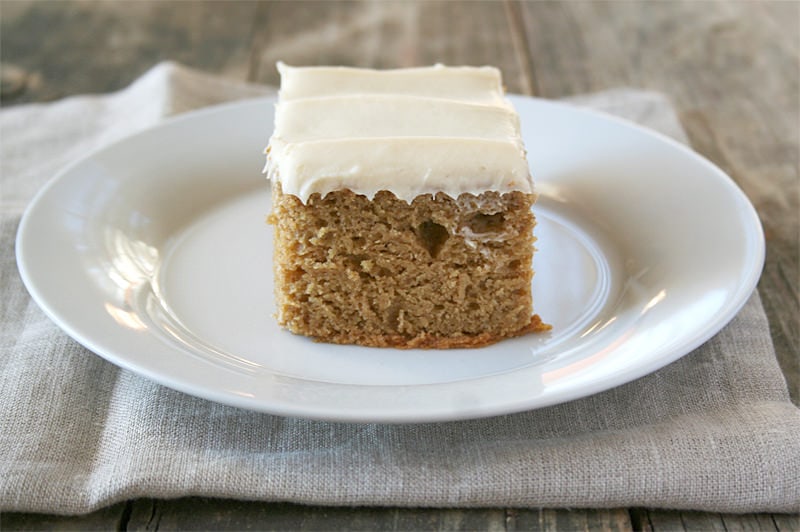
To top the night off, we celebrated with a slice of this cake. While I find gluten-free cakes to be a little on the dry side, we have found that a little pudding mix really helps this cake… and a thick layer of homemade cinnamon buttercream doesn’t hurt either.

The cake is laced with cinnamon, as is the frosting, and the base is made from a simply yellow cake mix. Any gluten-free brand should work beautifully in this cake.

Happiest of birthdays to the love of my life. I still shake my head that I have been present for his birthday since he was just sixteen. A million moments shared, and I pray for millions more with my best friend!

Gluten-Free Snickerdoodle Cake
Author: Amy Clark
Prep time:
Cook time:
Total time:
Serves: 8
An easy gluten-free cake made from a packaged yellow cake mix. It’s the perfect cake to celebrate with!
Ingredients
  • 1 package (15 ounces) yellow gluten-free cake mix
  • 1/4 cup (half of a 3.4 ounce package) vanilla instant pudding
  • 2 teaspoons ground cinnamon
  • 3/4 cup milk
  • 8 tablespoons (1 stick) unsalted butter, melted
  • 3 large eggs
  • 2 teaspoons pure vanilla extract
  • For frosting: 1 stick butter, softened
  • 3¾ cup confectioners sugar
  • 3-4 Tablespoons milk
  • 1 teaspoon vanilla extract
  • 1 Tablespoon ground cinnamon
Instructions
  1. Preheat oven to 350 degrees and lightly grease two 9-inch round cake pans.
  2. Place the cake mix, pudding mix, cinnamon, milk, melted butter, eggs, and vanilla in an electric mixer and beat until incorporated.
  3. Divide batter evenly between two pans and place in oven side-by-side.
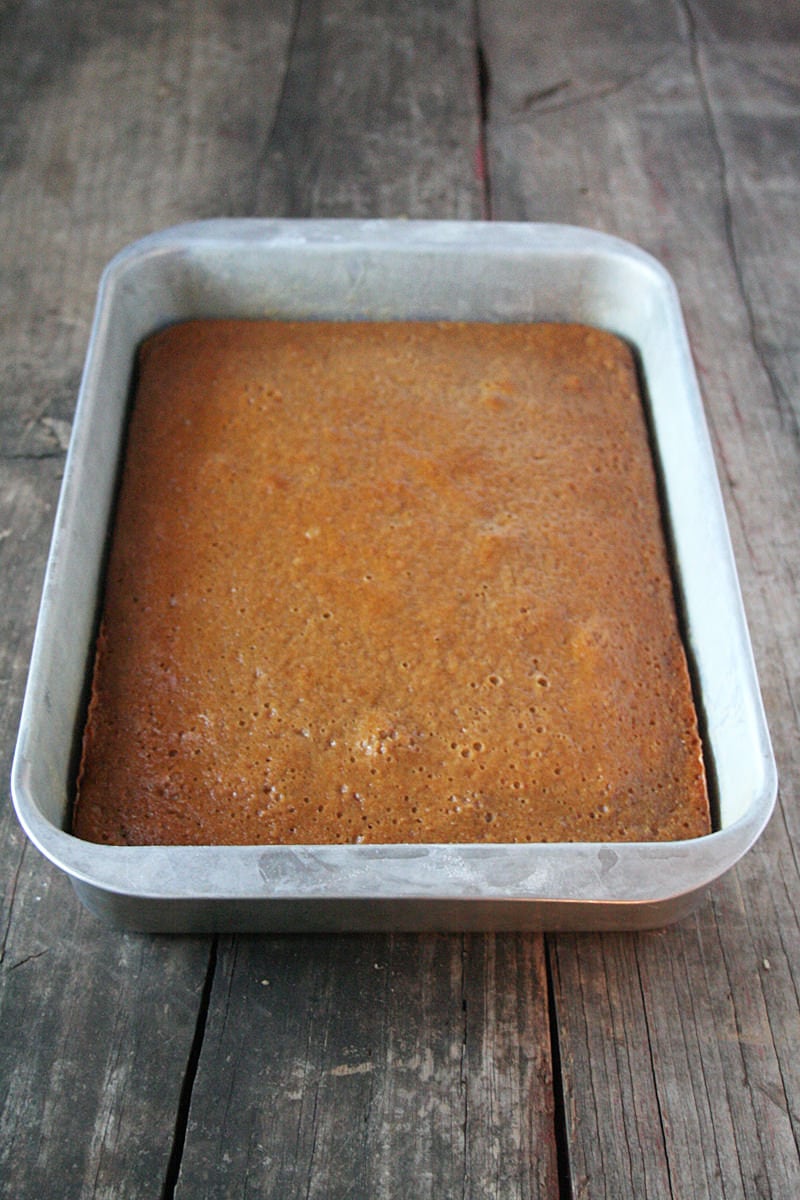
  4. Bake for 18-22 minutes. Allow to cool.
  5. For the icing, beat butter until fluffy. Add all other ingredients.
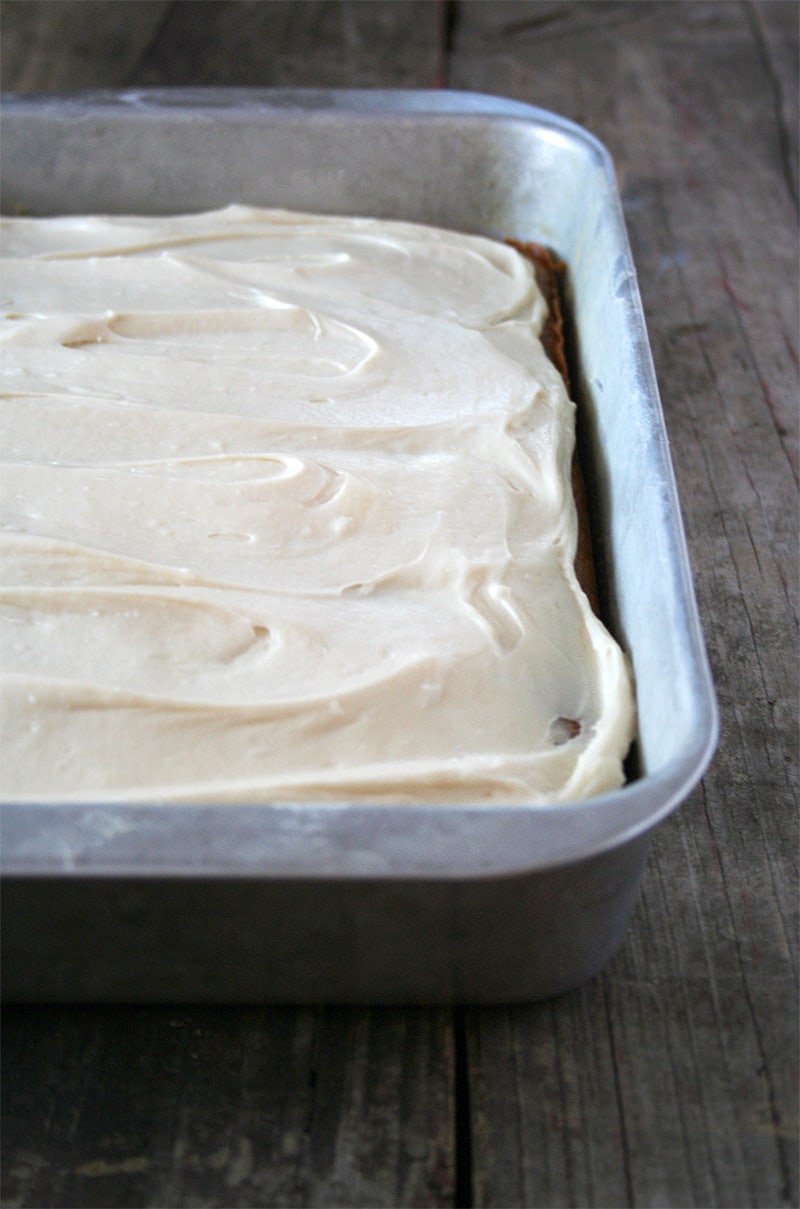
  6. To assemble cake, place one layer on your cake stand. Spread the top with the cinnamon frosting.
  7. Place the next layer on top and cover the top and sides with frosting.

*this post contains affiliate links.

What is one of your favorite birthday gifts you have ever received?

Pin It

Gluten-Free Rainbow Bundt Cake

Thursday, March 6th, 2014

Gluten-Free Rainbow Bundt Cake from MomAdvice.com.

I am so excited to share a delicious Gluten-Free Rainbow Bundt Cake recipe that you can make using a simple boxed mix, a little food coloring, and a few odds & ends from your pantry. This Rainbow Cake is made in a tube pan, versus a layered cake, and is a fun addition to your St. Patrick’s Day spread.

Walmart challenged me to share a St. Patrick’s Day project that you could create out of items from their store. You may remember my rainbow cakes in a jar that I created a couple of years ago. Now that I am eating gluten-free, I wanted to replicate the idea of a rainbow cake, but I wanted to do it in one pan and I wanted to make it a quicker process by using a cake mix.

Gluten-Free Rainbow Bundt Cake from MomAdvice.com. Gluten-Free Rainbow Bundt Cake from MomAdvice.com.

To make a vibrantly colored cake, I want to point out that it is really important to use good icing colors to achieve your rainbow cake colors. Over by the party supplies, you will find professional cake decorating supplies at Walmart. You want to purchase the Wilton Icing Colors. These concentrated gels offer a much brighter color than what you will find over in the baking section of the grocery section. I just use a toothpick to dip in the gel and then swirl it through my cake batter. You may need to do this a couple of times to achieve this level of brightness, but it still will take a lot less than the other brands of food coloring.

Gluten-Free Rainbow Bundt Cake from MomAdvice.com. Gluten-Free Rainbow Bundt Cake from MomAdvice.com.

When I decided I wanted to make this cake, I went through tons of tons of cake recipes to figure out how to layer the batter. My inspiration for creating my rainbow arch was from not martha and her Leprechaun Trap Cake that she created a few years ago. Her arch is so much more beautiful than mine. I highly encourage you to read her tutorial for a perfect arch and read mine for a just meh arch. That being said, do prepare this in a tube pan versus a bundt pan to achieve the best arch. 

Do you have a digital scale? I highly recommend purchasing one because it will make projects like this a million times easier. I have had mine for many years and I use it for both weighing packages and as a food scale! Be sure to tare it with the bowl on top to begin your measurements each time.

I used the measurements outlined by not martha for measurements for my batter:

  • 6 ounces – red
  • 5 ounces – orange
  • 4 ounces – yellow
  • 3 ounces – green
  • 2 ounces – blue
  • 1 ounce – purple
  • The remainder of the rest of the batter, leave it white.

To scoop batter into the bowls, I relied upon an ice cream scoop to scoop it into the bowls on the scale. To make pouring the batter easier, place the cake batter in a baggie in a tall glass and hang the opening over the sides of your glass. Pour your batter in and then seal the baggie. Just snip a corner of the baggie to begin pouring your batter into the pan.

Gluten-Free Rainbow Bundt Cake from MomAdvice.com.

Gluten-free cakes tend to be more delicate so you definitely want to let this fully cool before trying to work with it. The side that has all the beautiful vibrant colors is not the top of the cake. It is the bottom of the cake. I accidentally iced this side so don’t make my mistake. If you find that your cake is puffy on the bottom, use a serrated knife to even it up a bit so your cake is not lopsided.

Gluten-Free Rainbow Bundt Cake from MomAdvice.com. Gluten-Free Rainbow Bundt Cake from MomAdvice.com. Gluten-Free Rainbow Bundt Cake from MomAdvice.com.

I posted a picture of this cake as I was glazing it on Instagram. To quote myself, “I never go easy on the sprinkles. I consider them the jazz hands on my desserts.”

Who quotes themselves? Sorry about that!

Glaze and sprinkle this cake liberally!

Gluten-Free Rainbow Bundt Cake from MomAdvice.com. Gluten-Free Rainbow Bundt Cake from MomAdvice.com.

I was disappointed that I had iced the wrong side and that my purple didn’t get perfectly centered. I think it is one of those cakes that might take a little more practice. My friends didn’t seem to notice or mind my errors though because this was one yummy cake! I doubt your kids would notice or care either. It might be a fun one to try together!

I hope you love it as much as we did and I hope this tutorial helps you while you make your own gluten-free rainbow cake!

Gluten-Free Rainbow Bundt Cake
Author: Adapted from Not Martha
Prep time:
Cook time:
Total time:
Serves: 8
A gluten-free rainbow cake perfect for celebrating St. Patrick’s Day
Ingredients
  • 1 Hodgson Mill Gluten-Free Yellow Cake Mix (over by the gluten-free ingredients in the candy aisle of your store, not in the baking aisle)
  • 1/2 cup butter softened
  • 2 large eggs, room temperature
  • 1 cup buttermilk
  • 2 teaspoons vanilla extract
  • 1 package of Wilton Gel Food Colorings
  • 1 1/2 cups confectioners’ sugar
  • 2 1/2 teaspoons milk (or milk substitute)
  • 1/8 teaspoon salt
  • 1/4 teaspoon vanilla extract
  • 1 teaspoon butter
  • Rainbow Sprinkles
Instructions
  1. Preheat oven to 350 degrees. Grease a tube pan liberally with cooking spray.
  2. In a mixing bowl, cream butter until soft. Add cake mix and blend completely.
  3. Add eggs, buttermilk, and vanilla extract and beat until completely blended. The batter will be thick.
  4. Divide your batter into eight bowls using the measurements in this post and tint accordingly.
  5. First pour the larger amount of white batter into the pan. Then pour the red batter in, making it a wide ring of batter. Then pour the orange over that, keeping it inside the red. Pour in each color, creating smaller and smaller rings.
  6. Bake at 350 degrees for 40-50 minutes, testing with a toothpick to check when the cake is done.
  7. Once the cake is cooled, prepare your icing.
  8. Melt the butter and add to rest of ingredients. Mix until creamy.
  9. Spoon the glaze over your cake and finish with rainbow sprinkles.

Enjoy this tasty treat with a DIY Shamrock Shake and our free St. Patrick’s Day straw printable!

walmart_mom_disclaimer


Pin It

Gluten-Free Pancakes (With A Better Batter Coupon Code)

Tuesday, March 4th, 2014

Gluten-Free Pancakes from MomAdvice.com.

If there is one thing this girl loves, it is pancakes. Today I am sharing a recipe for gluten-free pancakes that taste as light and fluffy as our gluten-filled variety, but are perfect for creating for those who cannot tolerate gluten.

Gluten-Free Pancakes from MomAdvice.com.

Fluffy gluten-free pancakes are easier to create than you might think, it just requires the right measurements, a good flour, and a little milk on hand if your batter gets too thick. Before we made the switch to gluten-free, I loved to throw wheat germ into our hearty wheat-filled pancake. No wonder I felt so awful after our Sunday brunches!

Now we have substituted our wheat love-fest with flax seed in our pantry for our pancakes and energy bites, a deliciously healthy addition to just about anything, and still get that taste and texture that I love.  As with all my favorite pancake recipes, it is laced with cinnamon and vanilla while these pancakes get their sweetness from a little honey.

Gluten-Free Pancakes from MomAdvice.com.When I first discovered that I had to go gluten-free, my best friend recommended a book called, “Gluten-Free on a Shoestring.” (affiliate link) I treated myself to the cookbook for Christmas and loved that the author relied upon one all-purpose mix to make almost all of her recipes.

I placed my first order for Better Batter after reading it and started testing recipes with this cup-for-cup substitute shortly after buying it. None of us could believe how good everything had tasted and with very little adjustments in our favorite family recipes.

I immediately wrote the company and asked if they might be interested in a partnership. I truly believe in their product and how it can help beginner gluten-free chefs overcome their difficulties with baking. Not only did they send me some products for our recipes, but they also are offering valuable coupon codes for our readers to try their flour too.

Not only does the flour perform well, but it is much more affordable than other flours on the market. You can even buy their product in bulk to snag additional savings.

What are the Ingredients In This Flour?

The flour I have featured today is an an all-purpose flour substitute that you can use as a cup-for-cup substitute in your recipes. The packaging states that it contains: Rice flour, brown rice flour, tapioca starch, potato starch, potato flour, xanthan gum, and pectin (lemon derivative). It is the blend of these flours that makes it such a great performer in baking recipes. I hope that helps!

How Can I Save Money On This Flour?

I truly believe you will love this flour and am so excited that Better Batter is sharing some coupon codes with our readers to help them save even more. This month you can use the coupon code XNF6EBYK4JRT for $8 off ANY SIZE ORDER.

That’s right, I said ANY SIZE! 

I hope you can take advantage of the savings and can enjoy a stack of these delicious pancakes in your home!

Gluten-Free Pancakes from MomAdvice.com.

Gluten-Free Pancakes
Recipe Type: Breakfast
Author: Amy Clark
Prep time:
Cook time:
Total time:
Serves: 4
You won’t even miss the gluten with this delicious pancake recipe. Be sure to double your recipe so you can enjoy these all week long!
Ingredients
  • 2 cups Better Batter All-Purpose Flour
  • 1 teaspoon baking powder
  • 1 teaspoon baking soda
  • 2 tablespoons flax (optional)
  • 1 teaspoon cinnamon
  • 1 teaspoon salt
  • 2 teaspoons vanilla extract
  • 2 tablespoons honey
  • 2 eggs, lightly beaten & at room temperature
  • 6 tablespoons unsalted butter, melted and cooled
  • 2½ cups milk (or milk substitute)
Instructions
  1. Heat your griddle or nonstick pan and coat generously with butter.
  2. In a large bowl, place the flour, baking powder, baking soda, flax, cinnamon, and salt in and whisk to combine.
  3. Create a well in the center of the dry ingredients, and add the eggs, butter and milk, one at a time, blending well after each addition. Add vanilla and honey and continue to mix until the batter comes together and there are no lumps.
  4. Working quickly, ladle the pancake batter on the griddle surface, and allow to sit until bubbles begin to appear on the surface (2 to 3 minutes). Flip and continue cooking for another 1 to 2 minutes, or until the underside is browned.
  5. Remember that your batter thickens as it stands and may require more milk to keep your batter in a pourable consistency.
  6. Serve with fresh fruit and maple syrup.


Pin It

Nearly Classic Shrimp and Grits Recipe

Monday, March 3rd, 2014

From our food contributor, Shaina Olmanson.

Classic Shrimp and Grits #recipe via MomAdvice.com
I feel under qualified to be talking about grits. Coming from the Midwest, grits are not exactly an everyday food. In fact, an upbringing and solidified love for farina and creamed wheat cereals is what led me to believe I would love a bowl of grits equally, and so when the opportunity arose to order them on a road trip well into my teen years, I did just that.

I’ll leave it at this: Truck stop grits are not the type you fall in love with. Still, there was something to that bowl of white and creamy food with a big pat of butter melting on top. I was not to be thrown off course in my desire to adopt grits as my new “it” food. It had all the same promises as my breakfast favorites, but with expanded possibilities for my palate. At the top of the savory list: shrimp and grits.

Creamy, cheesy grits get topped with vibrant shrimp and crisp green onions. What’s not to love about this? The idea of adding butter and cheddar and plump shellfish to a bowl of warm comfort food seemed to me like a decision that was already made in the affirmative. So I set out to learn as much as I could about grits.
Classic Shrimp and Grits #recipe via MomAdvice.com
The first issue was obtaining them. Outside of the generic “quick-cooking grits” on the market shelf, there weren’t many options at first in the urban Midwestern area I lived in. I finally settled on making grits with white cornmeal to begin my experiments and then ordering online. Traditional grits are made from hominy, alkali-treated corn, and were stone ground in a rough, coarse texture. You’ll find both white corn and hominy when looking, so determine which you want to go for.

Once you have the grits in hand (or nearly grits), the rest of the preparation is satisfyingly simple, and the payoff is pure comfort food. It’s the kind of meal that leaves you satisfied at the end, the type of dish that begs to be made again and again.

Nearly Classic Shrimp and Grits
Recipe Type: main dish
Cuisine: southern
Author: Shaina Olmanson
Serves: 4
Ingredients
  • 4 cups water
  • 1 teaspoon salt
  • 1 cup stone ground white grits
  • 2 tablespoons butter
  • 1 cup shredded white cheddar cheese (I used Kerrygold Dubliner)
  • 3 slices thick-cut bacon
  • 1 medium yellow onion, diced
  • 2 garlic cloves, minced
  • 1 pound shrimp, peeled and deveined with tails removed (if desired)
  • 1/2 cup chopped scallions
  • 2 tablespoons minced fresh parsley
  • 1 tablespoon lemon juice
Instructions
  1. Bring the water and salt to a boil in a large saucepan. Slowly whisk in the grits. When all the grits have been added, reduce the heat to low and simmer, stirring frequently, for 25 minutes. Keep the butter and cheddar cheese ready off to the side.
  2. While the grits are cooking, in a large skillet cook the bacon until crisp. Remove the bacon pieces, leaving the grease in the pan and add in the garlic and the shrimp. Cook the shrimp over medium heat just until pink.
  3. Add in the scallions, parsley, and the lemon juice. Cook for 3 minutes to combine the flavors and then remove from the heat and stir in the bacon pieces.
  4. Stir in the butter and shredded cheese at the end of the cooking time for the grits. Immediately spoon into a bowl and top with shrimp and bacon to serve.


Pin It

DIY Shamrock Shake Recipe (And Free Straw Printables)

Thursday, February 27th, 2014

DIY Shamrock Shake Recipe (And Free Straw Printables)

DIY Shamrock Shake Recipe (And Free Straw Printables)

DIY Shamrock Shake Recipe (And Free Straw Printables)

St. Patrick’s Day is just around the corner!  This holiday makes me want to indulge in one of my all-time favorite treats… the oh-so-delicious Shamrock Shake. You don’t have to swing by your local fast food joint to indulge though because I have the recipe to this one and you can indulge in it for a fun family night treat any night of the week.

To grab the recipe for these easy DIY Shamrock Shakes, head on over to the Kenmore Blog to read all about these delicious treat.

Don’t forget to grab your free St. Patrick’s Day straw printables! Happy St. Patrick’s Day, friends!

Pin It

Einkorn Flour Naturally Sweetened Pumpkin Bars

Monday, February 24th, 2014

From our food contributor, Diana Bauman.

Can I just say that I am humbled that Diana, from My Humble Kitchen, agreed to share her voice on our site? Diana’s food background is so much more diverse than my own and she knows about foods I have never even heard of. Not only that, but her recipes are so very nourishing to our bodies. I cannot wait to learn more about food from her.

Naturally Sweetened, Einkorn Pumpkin Bars | momadvice.com

Hello – what a blessing to be here as part of the MomAdvice contributing team! I’m excited to get to know you all a bit better and feel privileged to be able to share my food recipes with you.

I’m a real foodie at heart… built on grace.  As much as I enjoy serving up my family savory meals using vegetables from my gardens, I also enjoy baking sweet treats made with nourishing ingredients and natural sweeteners.

Naturally Sweetened, Einkorn Pumpkin Bars | momadvice.com

I know Amy has turned to a gluten-free lifestyle, so I thought I’d introduce all of you to an ancient grain that has 3 times less gluten than our modern hybridized wheat of today.

It’s called einkorn. It’s the first grain to have been domesticated from the wild. Its never been hybridized so it was fascinating to me when I found out that many people with a gluten intolerance can tolerate this ancient grain. It still has gluten so if you have celiacs disease, then this is still off limits.

In my research, I’ve also found out that einkorn is more nutritious than modern varieties of wheat. It’s high in thiamin, protein, fiber, and a number of b vitamins. It also contains a significant amount of the the powerful antioxidant, lutein. As compared to modern varieties of wheat, it’s higher in protein and has a lower percentage of nutrient loss during processing.

Since einkorn has a lot less gluten, baking with it can be a bit tricky if grinding your own wheat berries at home; however, I’ve found incredible success using organic high extraction einkorn flour that’s already been milled.

In using einkorn flour, so far, I’ve had great success – all of my baked goods have turned out lovely. I’ve also enjoyed that I’ve been able to substitute it 1:1.

Naturally Sweetened, Einkorn Pumpkin Bars | momadvice.com

To share with all of you, I decided to roast the last of my pumpkins I had stored in my basement and make a batch of naturally sweetened pumpkin bars.

Who says pumpkin bars are just for the fall, right?

No pumpkin? No worries… if you don’t have any pumpkins in your basement or can’t find any at your local grocery store, feel free to use an organic canned variety.

My husband loves it when I surprise him with a batch of pumpkin bars. I sweeten them with honey. The flavors are gently sweetened and allow the flavor of the roasted pumpkin to shine through. The use of the honey makes this an incredibly moist bar that your family will love.

For the cream cheese icing, I add 3 tbls of maple syrup allowing me to cut down on the organic powdered sugar. You’ll never notice the difference.

Naturally Sweetened, Einkorn Pumpkin Bars | momadvice.com

Now, let me ask you, what can be better than a nourishing dessert?

Naturally Sweetened, Einkorn Pumpkin Bars
Recipe Type: Dessert
Cuisine: American
Author: Diana Bauman
Serves: 8-10
Einkorn pumpkin bars are a completely nourishing dessert make with the ancient grain einkorn and gently sweetened with honey.
Ingredients
  • For the Pumpkin Bars
  • 2 cups einkorn flour
  • 2 tsp baking powder
  • 2 tsp ground cinnamon
  • 1 tsp ground all spice
  • 1 tsp baking soda
  • 4 eggs
  • 1 cup honey
  • 1 cup butter, melted
  • 1 1/2 cups pumpkin puree
  • For the Cream Cheese Frosting
  • 8-ounce package cream cheese, softened
  • 1/2 cup butter, softened
  • 1 tsp pure vanilla extract
  • 3 tbls pure maple syrup
  • 1 cup organic powdered sugar
Instructions
Pumpkin Bars
  1. Preheat the oven to 350F.
  2. Butter and flour a 9″ x 13″ baking pan.
  3. In a large bowl, whisk together the einkorn flour, baking powder, cinnamon, all spice, and baking soda; set aside.
  4. In the bowl of a stand mixer fitted with the paddle attachment, mix together the eggs, honey, butter, and pumpkin puree over low speed. A 3 on my KitchenAid.
  5. /4 cup at a time, add the dry ingredients until just combined. Do not overmix.
  6. Pour the batter into the prepared 9″ x 13″ pan and bake for 22-25 minutes or until a toothpick inserted into the middle comes out clean.
  7. Transfer to a wire rack and allow to cool completely.
Cream Cheese Frosting
  1. In the bowl of a stand mixer fitted with the paddle attachment, add the cream cheese and butter. Mix together over medium speed until smooth.
  2. Add the vanilla extract, maple syrup, and powdered sugar. Mix on low until mixed through then raise the speed to medium to cream together.
  3. Spread on cooled pumpkin bars.
3.2.2265

I’m sure that once you try your hand at baking with einkorn or natural sweeteners, you’ll feel great serving your family some sweet treats every now and then.

So, what are your favorite sweet treats to eat during this time of year?

Gluten-Free Chicken Noodle Soup

Friday, February 7th, 2014

Gluten-Free Chicken Noodle Soup from MomAdvice.com

Going gluten-free is proving to be a fun adventure for me in the kitchen. This gluten-free chicken noodle soup recipe is just one example of an old family favorite that has been transformed into a delicious gluten-free version.

This week Walmart challenged me to create a great cold weather dish that you could create from items they have at their store. One of my favorite things to create with their ingredients is a weekly batch of soup. Not only is it the perfect cold weather dish, but it is the perfect “convenience food,” that I love to have on hand for nights when I don’t feel like cooking.

Gluten-Free Chicken Noodle Soup from MomAdvice.com

One item that I buy frequently there is their rotisserie chickens for all of my chicken-filled soups. It saves me some cooking time and I find that they bring a lot of flavor to my easy weeknight soups. They are priced at $4.98, which is about the same price as buying a whole chicken and cooking it from scratch, so I find it to be a good soup investment.

Gluten-Free Chicken Noodle Soup from MomAdvice.com

My biggest challenge has been finding a pasta that tastes like my old familiar white-floured starchy friend. We have sampled every variety of noodles under the son from corn blends to quinoa blends to rice blends. When I posted on Instagram that I was still on the hunt, Tinkyada was the brand that fellow gluten-free friends recommended. Friends, let me tell you, this was the closest pasta I have ever tasted to the real deal. The best part is that it is strongly made so it can withstand being reheated, unlike the other blends that fell apart in my soup.

I had been hunting for this in the pasta aisle at our store, but it is not in the pasta aisle. This pasta is over with the other gluten-free specialty foods, on the end of one of the candy aisles in our store. A pound of this was $2.87, while the fancier and not as appetizing pastas, were costing me over $4 and did not contain a pound.

For a pasta-filled soup, you only need half the bag (or approximately two cups of pasta). Since everything seems to cost an arm and leg if it is marked gluten-free, this is a pasta we all loved AND didn’t cost a fortune! Winning, I say!

Gluten-Free Chicken Noodle Soup from MomAdvice.com Gluten-Free Chicken Noodle Soup from MomAdvice.com Gluten-Free Chicken Noodle Soup from MomAdvice.com

To me, this looks like the perfect bowl of soup. I thought I would never have a good chicken noodle soup again after this gluten-free debacle of mine, but I am mourning the loss of my soup no more.

It is the ultimate cold weather comfort food dish! I hope you enjoy this one as much as we have!

Gluten-Free Chicken Noodle Soup
Author: Amy Clark
Prep time:
Cook time:
Total time:
Serves: 8
A gluten-free chicken noodle soup that is the ultimate cold weather comfort food dish. One pot serves many, so share this with someone in need!
Ingredients
  • 2 cups Tinkyada Rice Pasta Elbows
  • 2 tablespoons of olive oil
  • 2 stalks chopped celery
  • 3 chopped carrots
  • 3 tablespoons chopped garlic
  • 12 cups low-sodium chicken broth
  • 1 rotisserie chicken
  • Salt & pepper to taste
  • fresh parsley
Instructions
  1. Bring a large pot of lightly salted water to a boil.
  2. Add gluten-free elbows and cook 12-14 minutes. Drain and rinse with water. Set aside.
  3. Meanwhile, in a large saucepan or Dutch oven, saute the carrots and celery in two tablespoons of olive oil for five minutes to start your soup base. Add garlic at the end (to prevent burning)
  4. Add your rotisserie chicken and any drippings form the chicken to the pot, directly on top of your vegetables. Pour your chicken broth directly over the chicken to incorporate all of the good flavors.
  5. Heat up broth and bring it to a simmer.
  6. Reduce heat, cover, and simmer 15 minutes.
  7. Pull out your chicken and set aside to dice.
  8. Stir in noodles and diced rotisserie chicken, and heat through.
  9. Toss in a handful of fresh chopped parsley and ladle into bowls.

walmart_mom_disclaimer


Pin It

Gluten-Free Olympic Doughnuts

Thursday, February 6th, 2014

Gluten-Free Olympic Doughnuts from MomAdvice.com.

If there is one thing you know our family loves it is doughnuts. In honor of the upcoming Olympics, I am sharing a delicious gluten-free baked doughnut recipe that you can bake up as a treat for those opening ceremonies. This gluten-free doughnut recipe is as easy to put together as our other wonderful doughnut recipes and are so fun to decorate for the holiday.

Today’s project is sponsored by Walmart. Almost everything you need for this project can be found at their store!

Gluten-Free Olympic Doughnuts from MomAdvice.com.

One thing you will need to create these doughnuts is a doughnut pan. When I first started baking doughnuts, you had to order an item like this online and through specialty shops. Now you can find it right on the shelves at Walmart, in the same aisle as your cookie sheets & baking pans. The price on their Wilton doughnut pans is $7.19.  I have two of them because most recipes yield 10-12 doughnuts and it saves me time in the kitchen. These two pans have paid for themselves over and over again for our occasional sweet weekend treat!

Because I am new to gluten-free baking, I am using a gluten-free all-purpose mix to save me time in the kitchen. I bought a batch of Better Batter for my pantry and I have found that it is yielding impressive results for all of my baking needs. Buying it online from the company in bulk has saved me some money and storage in my pantry, thanks to not needing to buy multiple flours to blend. The bonus is that this mix does contain the Xanthan gum right in it. If your mix does not contain this, you will need to add that ingredient separately.

These doughnuts are light, fluffy, & sweet. The first things my kids remarked on was the spice in them. Although there is just a pinch of nutmeg, this ingredient really pulls through in the doughnut. For non-Olympic doughnut events, a sprinkle of powdered sugar on these is a delightful morning treat.

Gluten_Free_Baked_Olympic_Doughnuts-5

To make your Olympic-themed glazes, I simply made one batch of my favorite glaze and then added food coloring to each dish to reach the desired color. To achieve your black, if you are just working with a standard set of food colorings, equal portions of blue, yellow, and red will help achieve the color you are after.

Gluten_Free_Baked_Olympic_Doughnuts-4 Looking For More Fun Ideas to Celebrate the Olympics? Let’s take a peek at some more fun (and frugal!) ideas!

Fun Ways to Celebrate the Olympics

Olympic Medal Cookies

What could be sweeter than receiving an Olympic medal? How about an Olympic Medal filled with a cookie? AlphaMom offers this sweet little Olympic craft to do with your little ones. Stumped for a cookie idea?  I highly recommend an Oatmeal Chocolate Chip Sea Salt Cookie for your medal filling!

Olympic T-Shirts

Dress up a white t-shirt to dress up for the Olympic games. with a simple painted ring pattern on an inexpensive thrift store shirt, this is a craft that is easy enough to do with kids of all ages. Kate’s Creative Space offers this fun craft idea to her readers to celebrate the games.

DIY Olympic Torch

What child doesn’t dream of carrying around their very own Olympic torch. Hoosier Homemade showcases a fun craft that you can do to create your very own Olympic torch made from some commonly found items at your local craft store.

Olympics Party Fun

Why not throw a party for your family or for a group of families to celebrate the Olympics? A Small Snippet has you covered with everything from patriotic foods to great Olympic game ideas to play together, to fun ideas for decorations that don’t cost a lot.

 Olympic Torches Made From Recyclables

If hitting your craft store for supplies to make an Olympic torch isn’t in your budget, this Olympic Torch from The Idea Room is made from common items you have in your home and recyclables. These torches are made from a paper plate, a paper towel roll, and red & gold tissue paper. This is one that even the smallest child can do. Be sure to lift these high and participate in your own round of fun family Olympic games.

Olympic Rings Necklace

Even moms can jump in on the Olympic excitement with this cute craft, from Remarkably Domestic, for an Olympic Rings Necklace. This necklace is made from simple rings covered in Chinese knotting cord to create those Olympic rings everyone loves so much. This would be a fun craft to do while watching your favorite games this year!

However you celebrate the Olympic games this year, I hope this post inspires you for your Olympic game watching!

Gluten-Free Olympic Doughnuts
Recipe Type: Breakfast
Author: Adapted from Food & Wine Magazine
Prep time:
Cook time:
Total time:
Serves: 10
These gluten-free doughnuts are so easy to make and can be a fun snack to share while watching the opening ceremony this year!
Ingredients
  • 1 1/2 cups all-purpose gluten-free powder (I recommend Better Batter Flour)
  • 1 cup sugar (next time I may adjust to 3/4 cup sugar)
  • 2 teaspoons baking powder
  • 1/4 teaspoon nutmeg
  • 1/2 teaspoon salt
  • 2 large eggs, at room temperature
  • 1/4 cup canola oil
  • 1/2 cup whole milk
  • 1 teaspoon vanilla
  • 1 cup confectioners sugar
  • 2 tablespoons hot water
  • 1/2 teaspoon vanilla, butter, or almond extract
  • Betty Crocker Food Coloring Set (over in the baking aisle)
Instructions
  1. Preheat the oven to 350º and spray two nonstick 6-cavity doughnut pans with nonstick cooking spray.
  2. In a large bowl, whisk the flour with the sugar, baking powder, nutmeg and salt
  3. In a medium bowl, whisk the eggs with the oil and milk until smooth; add to the flour mixture and whisk until combined.
  4. Spoon the batter into 10 cavities of the prepared doughnut pans until about three-quarters full. Bake for 18 to 20 minutes, until a toothpick inserted in the center of a doughnut comes out clean.
  5. Let the doughnuts cool.
  6. In a bowl, mix together the confectioners sugar, hot water, and flavoring. Divide the glaze into five bowls and create your colors for the doughnuts. Dip or spoon the glaze over the doughnuts and allow the glaze to harden.


Pin It

Coconut Lime Raised Doughnut Recipe

Monday, February 3rd, 2014

From our food contributor, Shaina Olmanson.

Can I say that you are in for one of the biggest treats ever? Shaina, from Food For My Family, is one of my foodie idols and I cannot believe she is going to be sharing her voice here on MomAdvice as a regular contributor! Her photos are always a delight for the eyes and her whole foods philosophy on a budget is just why I selected her to share with you.  

Coconut Lime Raised Doughnut #recipe via MomAdvice.com

I can count on one hand the number of times we’ve gone out for doughnuts in any given year. It’s a once-in-a-while treat, a special outing. There’s something about walking into a doughnut shop, the bell on the door tinkling after you. In a case behind the glass you find soft fried dough rolled in sugar crystals or glazed with a sparkling gleam, the warm air carried under your nose with the distinct softness of melting sugar and browning dough.

Doughnuts are winter foods, best consumed when frosty air is blowing outside. A doughnut and a cup of coffee or cocoa somehow makes the world feel warmer, the walls lean in a bit tighter to hug you in the center of this pocket of comfort you’ve created.

It was this idea, this contentedness that I chased on a day off school with my kids. Doughnuts are all about waiting and patience, but the payoff at the end is worth every second it takes to get there.

Coconut Lime Raised Doughnut #recipe via MomAdvice.com

We gathered in the kitchen, all arms and hands and bodies huddled around the mixer, each measuring and dumping one ingredient after another to form the dough, soft and supple. In our hands we worked it before tucking it away as they went to play. Soon it was time for the shaping, and with a special cutter in hand, they each formed the rings and placed them on a baking sheet so we could again wait as they puffed in their warmed-oven home.

When the time came, in a bit of oil we fried each one to a golden perfection, our home instantly mirroring that doughnut shop smell. Small fingers ran through sugar as doughnut holes were rolled until coated. We stirred together glazes and dipped them in before sprinkling them with all manner of pantry goodies, licking the drips from fingertips.

Tips for doughnuts with your kids:

  • Have them measure and mix.
  • Teach little arms how to knead.
  • Rolling balls and cutting doughnuts is a fun and exciting job.
  • Leave the frying to the big kids and the adults.
  • Decorating is definitely a kid-approved job.
  • Eating is a family affair.

Coconut Lime Raised Doughnut #recipe via MomAdvice.com

These doughnuts are dipped in a lime-kissed glaze and covered in crisp coconut flakes. You can simply roll slightly cooled doughnuts in granulated sugar for a more classic take, or you could get fancy and make filled doughnuts and long johns with this same dough recipe.

Coconut Lime Raised Doughnut Recipe
Recipe Type: breakfast, dessert
Author: Shaina Olmanson
Serves: 10
Raised doughnuts with a lime-kissed glaze, sprinkled with coconut flakes.
Ingredients
  • 5 tablespoons water
  • 1/3 cup buttermilk, room temperature
  • 1 egg, room temperature
  • 5 tablespoons melted butter
  • 1 teaspoon vanilla extract
  • 4 cups all-purpose or einkorn flour
  • 1/4 cup granulated sugar
  • 1 teaspoon salt
  • 2 1/4 teaspoons yeast
  • 16 ounces organic palm oil or other oil for frying
  • 1 cup powdered sugar
  • 2-3 teaspoons lime juice
  • 1/2 cup unsweetened coconut flakes
Instructions
  1. In a large bowl or the bowl of a stand mixer, combine the water, buttermilk, egg, melted butter, and the vanilla. Beat until well mixed.
  2. Add in the flour, sugar, salt, and yeast, and mix with your hands or using a dough hook on the stand mixer until a soft dough forms. Remove the dough from the bowl and knead 10 – 11 times for the dough to come together.
  3. Return the dough in the bowl and cover with a towel or piece of plastic wrap. Place the bowl in a warm place to rise until the dough is doubled. Cut 20 or so 4-5″ squares of parchment paper while you wait.
  4. Once the dough has doubled, remove it from the bowl and roll it to about 1 1/2″ thick. Cut 3-4″ rings from the dough. Place each ring on a small square of parchment. Place the dough rings on baking sheets and cover loosely. Place doughnuts holes 3-4 on each piece of parchment.
  5. Once all the doughnuts have been cut and covered, let them rise for at least one hour until they have puffed considerably.
  6. In a high-sided, heavy-bottomed pan heat the oil to 350º F. Once the oil is hot, add in the doughnuts, about four at a time. Fry for 2-3 minutes per side, until golden brown.
  7. Remove the doughnuts to a baking rack to drain and cool slightly.
  8. In a shallow bowl, mix together the powdered sugar and the lime juice, starting with 2 teaspoons until a thick but still fluid consistency is reached. Dip the top of each doughnut into the glaze. Immediately sprinkle with coconut flakes and allow to set.

Coconut Lime Raised Doughnut #recipe via MomAdvice.com

Pin It

Chinese New Year Family Tradition: We Are a Fortunate Family Felt Fortune Cookies

Monday, January 27th, 2014

Chinese New Year Family Tradition: We Are a Fortunate Family Felt Fortune Cookies from MomAdvice.com.

I love to create new holiday traditions with my family and today’s project is in honor of the Chinese New Year!  To celebrate, I am sharing a tutorial on how to make felt fortune cookies and a free printable that can be placed on a jar for a special Chinese New Year tradition.

I have partnered with Walmart on this project to showcase a fun project that you can do in honor of the holiday. All supplies for this project can be found at their store!

What is Chinese New Year?

Chinese New Year is the longest and most important celebration in the Chinese calendar.  The Chinese year 4712 begins on Jan. 31, 2014. A fun fact for this year is that this is the year of the horse.

New Year festivities traditionally start on the first day of the month and continue until the fifteenth, when the moon is brightest. In China, people may take weeks of holiday from work to prepare for and celebrate the New Year. Can you just imagine?

According to the Chinese legend,  Buddha arranged a meeting and asked all the animals to meet him on Chinese New Year. Twelve animals came and Buddha named a year after each one. If you were born in certain years, your personality is supposedly aligned with your animal. Those born in horse years are cheerful, skillful with money, perceptive, witty, talented and good with their hands. Since this is the year of the horse, if you have a child born this year, it sounds like you will have quite a talented and delightful child.

There are many great traditions around this holiday that include wearing red clothes which symbolizes fire and drives away bad luck, and a lantern festival, and one thing that Americans really seem to get behind is…

The  FEASTING.

Chinese New Year Family Tradition: We Are a Fortunate Family Felt Fortune Cookies from MomAdvice.com.

We are a Fortunate Family

Since the Chinese New Year is about feasting and family, I wanted to create a craft that would work for these two elements of the holiday. I love that many elements of this holiday focus on luck & good fortune. Incorporating this element, today we are making felt fortune cookies, but instead of filling them with predicted fortunes, we are going to fill them with all we are so fortunate for.

Because we are a FORTUNATE family. 

I love gratitude projects and thankfulness for all we have around the dinner table is definitely a tradition that I want my family to embrace.

Chinese New Year Family Tradition: We Are a Fortunate Family Felt Fortune Cookies from MomAdvice.com.

Supplies Needed

(All Available at Walmart)

Felt Sheets (any color)

3/8″ grosgrain ribbon

Floral Wire

Wire Clippers

Large Mason Jar

Scissors

Hot Glue Gun & Glue Sticks

1 piece of heavy cardstock

1 piece of white paper & pencil

Chinese New Year Family Tradition: We Are a Fortunate Family Felt Fortune Cookies from MomAdvice.com.

How to Make Felt Fortune Cookies

1. Using your ribbon spool or the bottom of your mason jar, trace a circle with a pencil or marker. Cut out your circle.

2. Snip a piece of floral wire, approximately the length of your circle, with your wire cutters. Add a line of hot glue, and place the wire in the center of the glue.

3. Snip grosgrain ribbon the approximate length of your circle and then secure over the wire with a little additional glue.

Felt_Fortune_Cookies_Tutorial-12

4. Fold your circle in half and then bend like a fortune cookie. Repeat the process until you have a jar full of fortune cookies.

Chinese New Year Family Tradition: We Are a Fortunate Family Felt Fortune Cookies from MomAdvice.com.

You can enlist your helpers to help make your fortune cookies. Since we have had UNLIMITED SNOW DAYS THAT NEVER END, I have many helping hands. Ahem.

The best part though, is involving them in the gratitude portion of this project. Using the writing prompt,

“I’m Fortunate For…”

Have children write down all the things that make their family special.

Chinese New Year Family Tradition: We Are a Fortunate Family Felt Fortune Cookies from MomAdvice.com.

Emily said, “I’m Fortunate For…that my family are GRATE dancers.”

What can I say? She comes from a long lineage of family members that just BRING IT on the dance floor!

Chinese New Year Family Tradition: We Are a Fortunate Family Felt Fortune Cookies from MomAdvice.com.

Mom & Dad can get in on the fortune cookie writing prompt too. Hopefully your husband doesn’t read this aloud and then ELABORATE endlessly on his AMAZINGNESS.

Awkward.

Chinese New Year Family Tradition: We Are a Fortunate Family Felt Fortune Cookies from MomAdvice.com.

Chinese New Year Family Tradition: We Are a Fortunate Family Felt Fortune Cookies from MomAdvice.com. Chinese New Year Family Tradition: We Are a Fortunate Family Felt Fortune Cookies from MomAdvice.com.

My husband designed this fantastic printable that you can attach to a jar. I just dabbed a little glue on my jar and attached this side. You could also print this on label paper or attach with a little double-sided tape to finish your project. (Grab the printable at the bottom of this post!)

If you are looking for dinner options, here are couple of great ones that I can recommend!

Gluten-Free Orange Chicken

This delicious gluten-free orange chicken would make a fantastic meal!

Peanut Ginger Chicken Noodles

These Peanut Ginger Chicken Noodles are always a big hit!

Weeknight Chicken Lo Mein

And this Weeknight Chicken Lo Mein is fast & easy to prepare!

However you celebrate this holiday, I hope this post offers some inspiration for fun ways to celebrate with your family.

Chinese New Year Family Tradition: We Are a Fortunate Family Felt Fortune Cookies from MomAdvice.com.

Grab Our FREE “We Are a Fortunate Family,” printable.

walmart_mom_disclaimer

Pin It