This is a sponsored post written by me on behalf of ALDI.
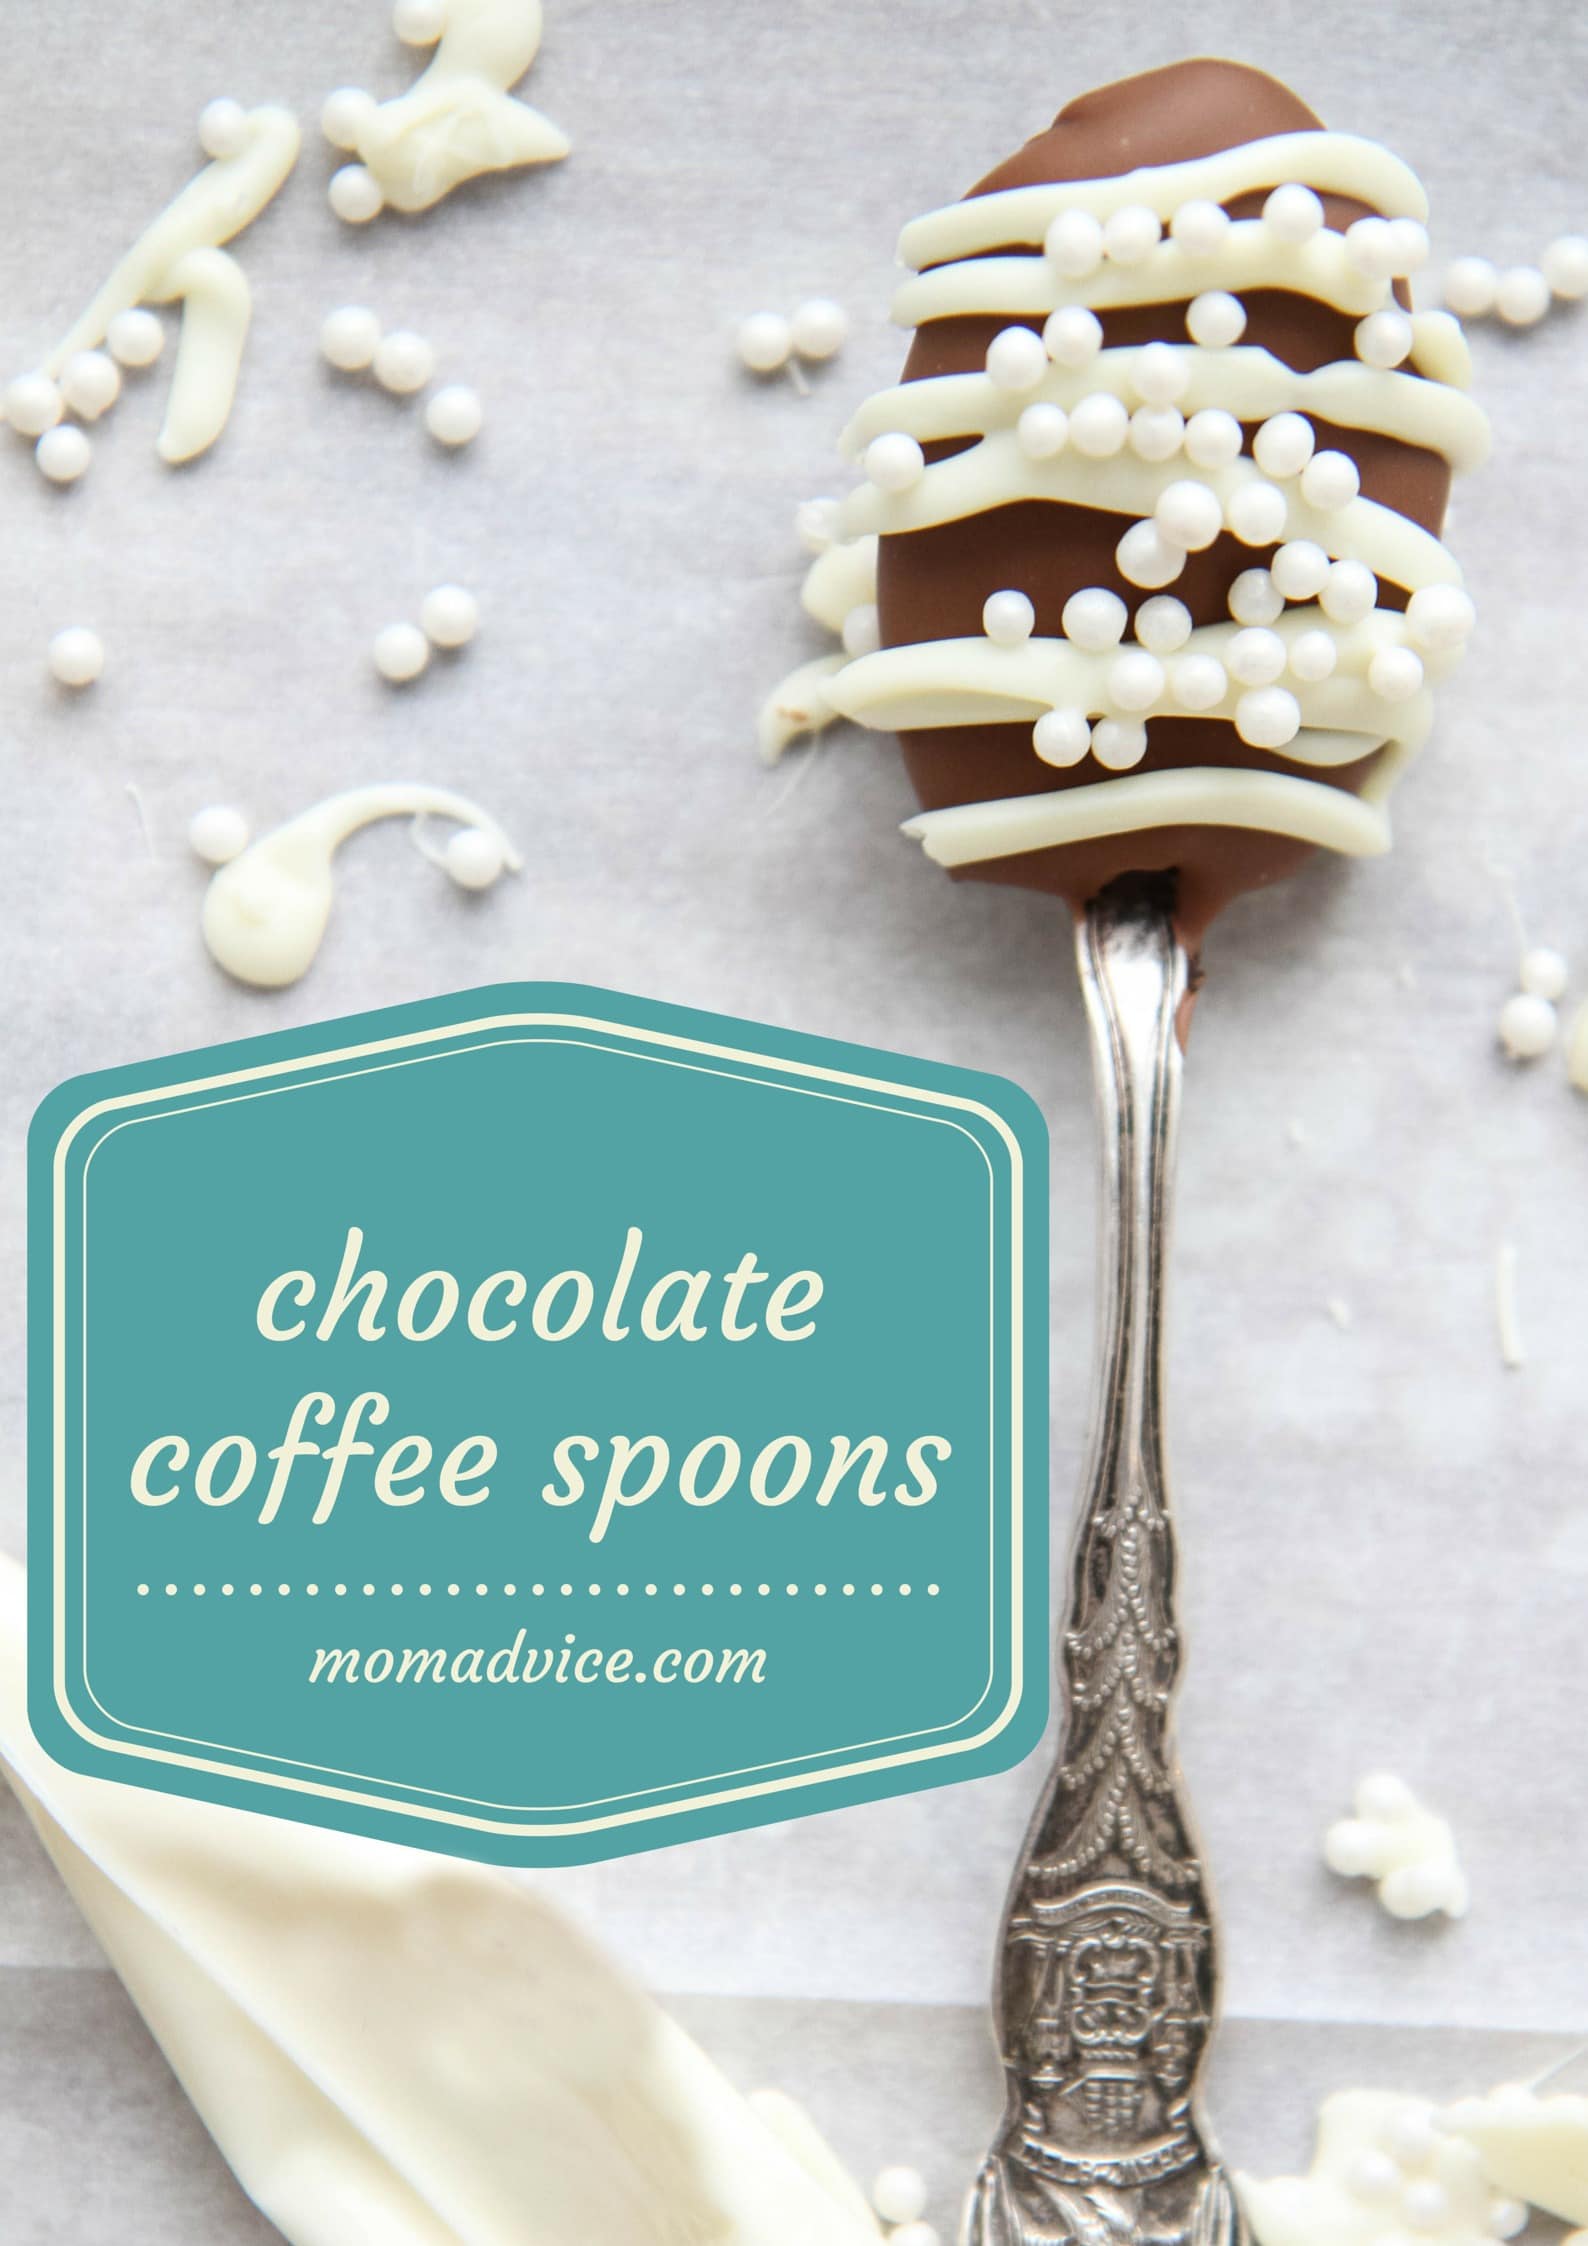
Today I wanted to share an adorable gift idea for someone special in your life. Today’s tutorial is how to make beautiful chocolate coffee spoons that you can pair with a big basket of coffee for gift-giving. This gift is perfect for any occasion and can be made in less than 30 minutes. The inspiration for this project came along with the opportunity to try the new Barissimo line of premium coffee products that are available at your local ALDI store. I’m so excited to be partnering with them again on this project.
In case you missed my Maple Coffee Bacon post from last week, I had the opportunity to try out all of the new coffees from ALDI and create some fun projects using this newly launched line at their store.
This line features nine bagged and single serve coffee items, along with additional seasonal and Special Buy items that will be available for a limited time. Pictured below are a few of the ones that I found on my store shelves this month.
Nothing pictured here is over $5 (even the Fair Trade coffee) which means it is quite the steal. In the past, I have relied on these bags of coffee for easy hostess gifts and breakfast baskets for new homeowners. It is an excellent gift to give especially to a tired new mom or a new college student. I thought it would be fun to dress these baskets up a bit with beautiful chocolate coffee covered spoons that you could package in your basket.
Let’s get started!
Supplies Needed
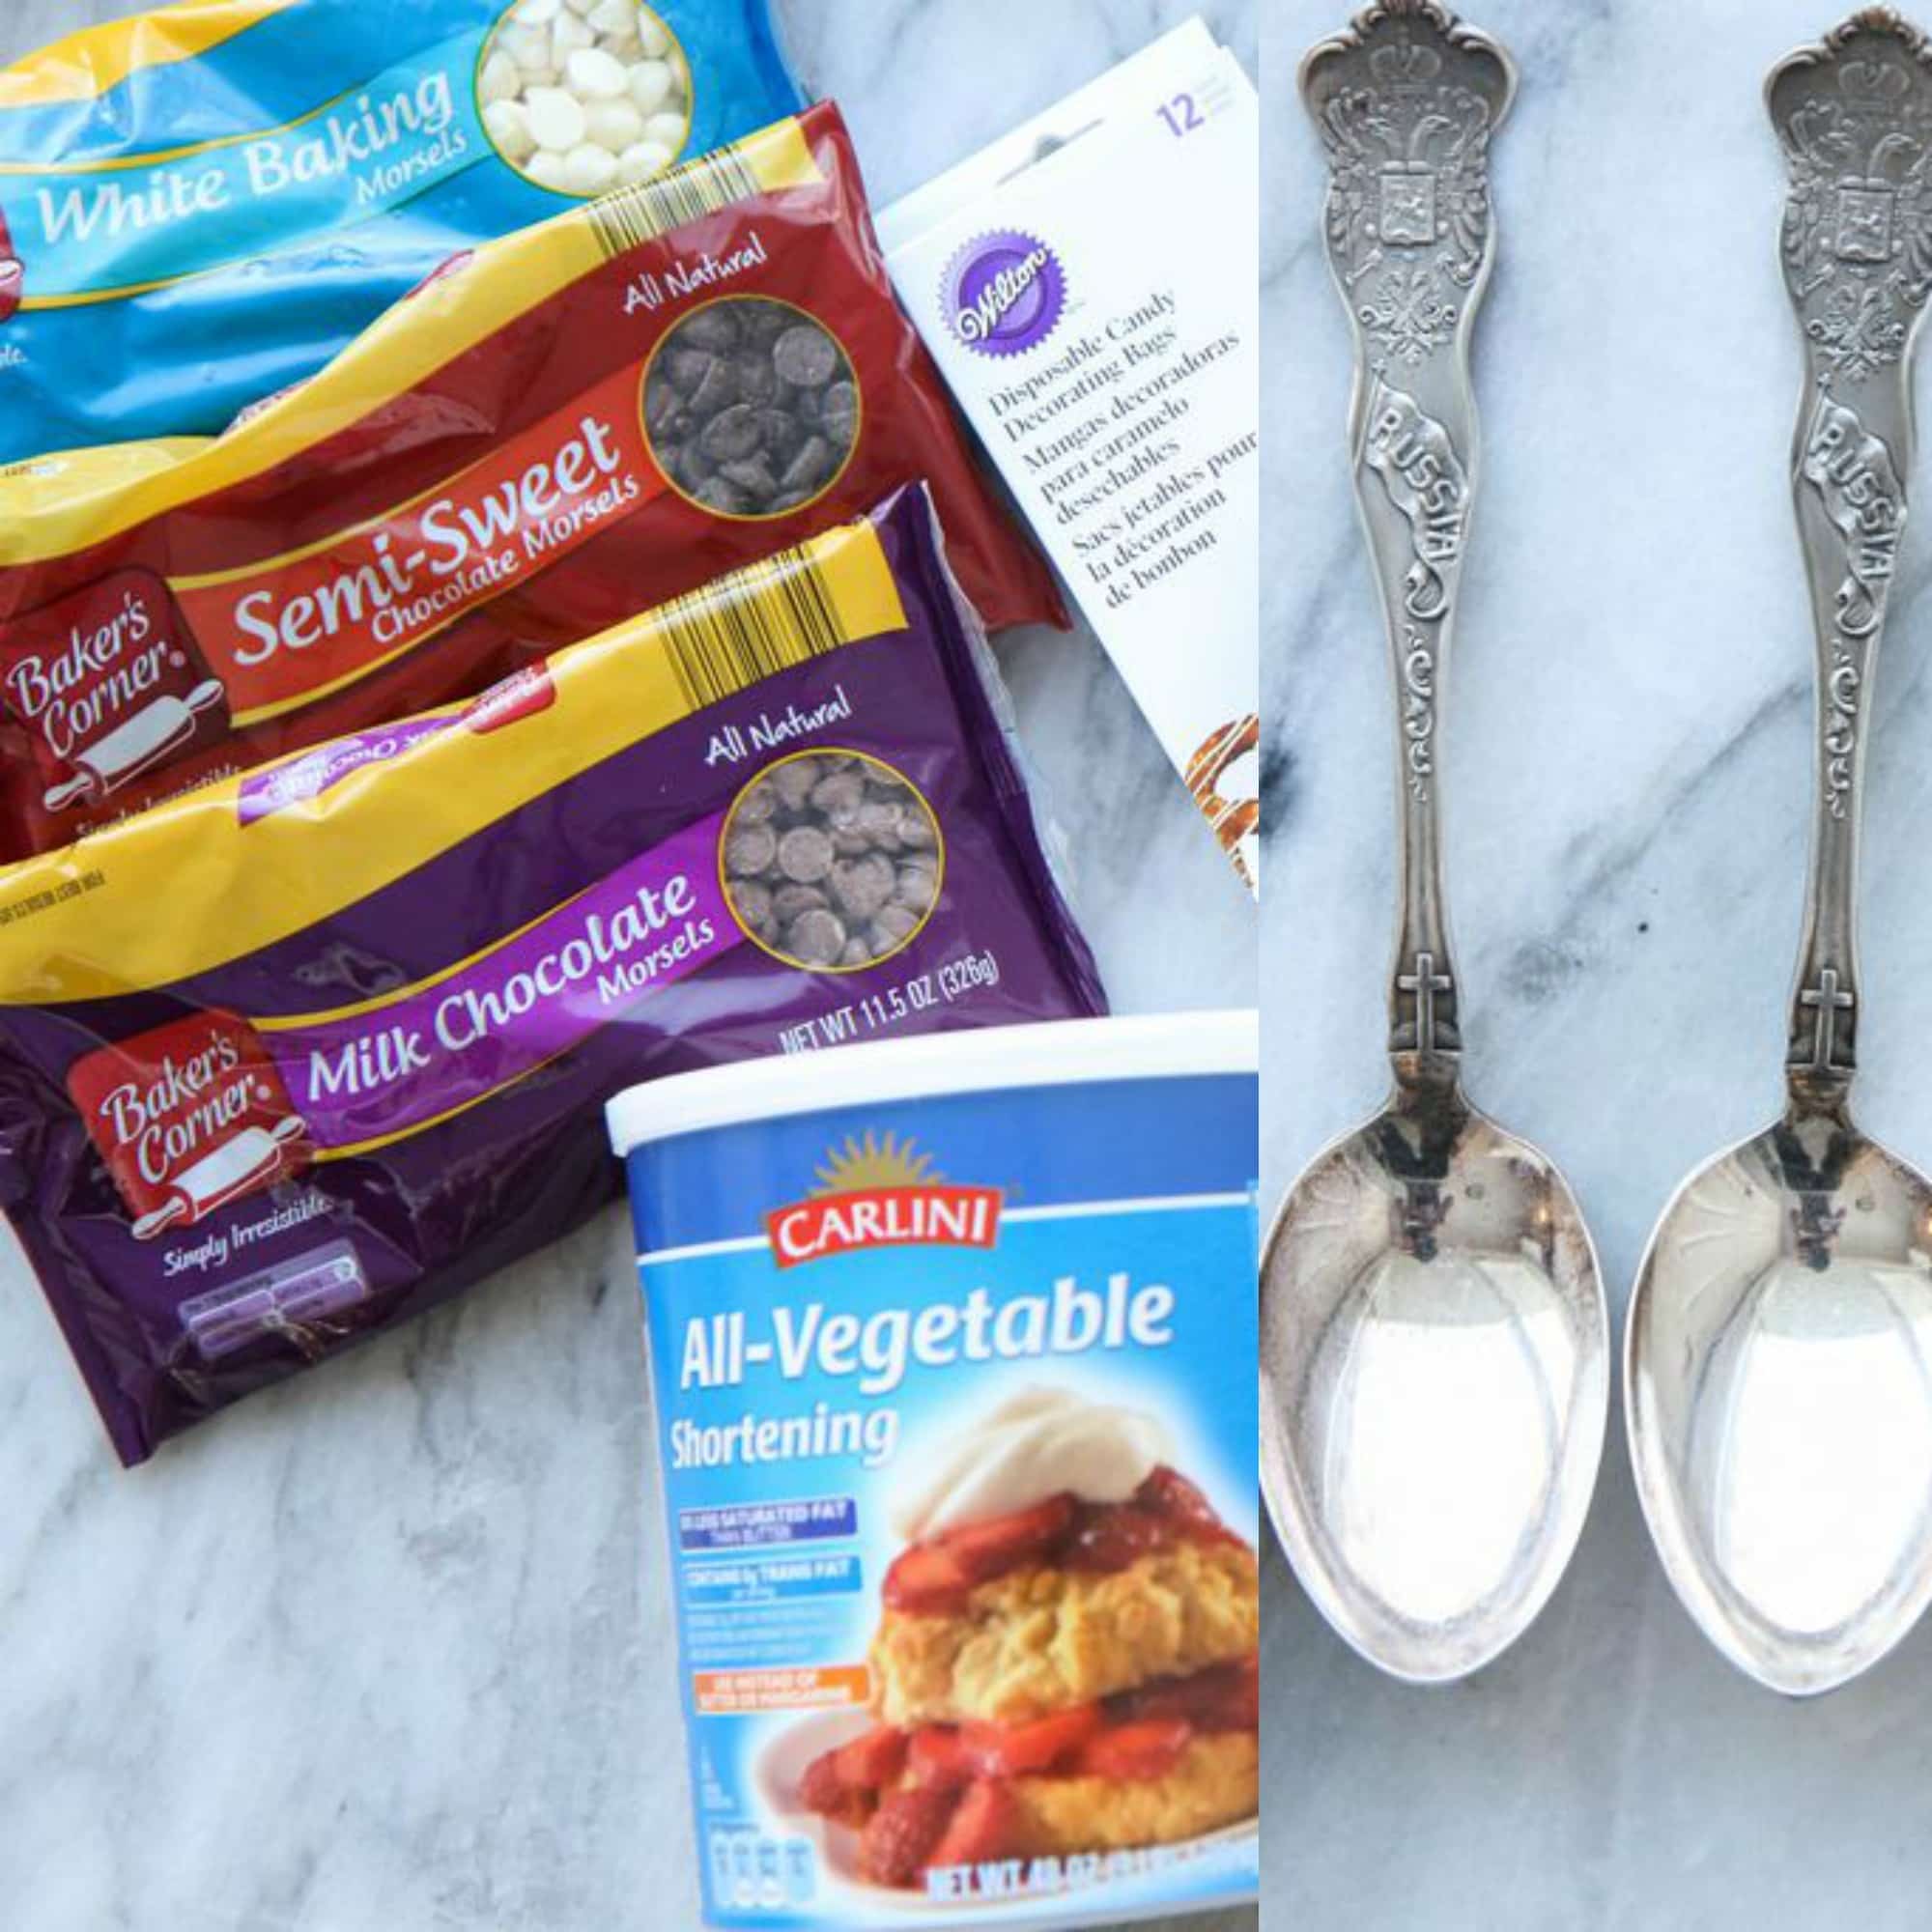
1 bag Baker’s Corner Real Semi-Sweet Chocolate Baking Morsels
1 bag Baker’s Corner Milk Chocolate Baking Morsels
1 cup Baker’s Corner White Chocolate Baking Morsels
½ teaspoon Carlini Pure Vegetable Shortening (or more, if needed)
Edible sprinkles of your choice
Ribbon
Pastry/candy decorating bags
Candy wrappers
Antique spoons or plastic spoons (I got these six for $5 an antique store)
*Some of these items are Special Buy or Seasonal items that are only in stores for a limited time and may no longer be available.
Directions
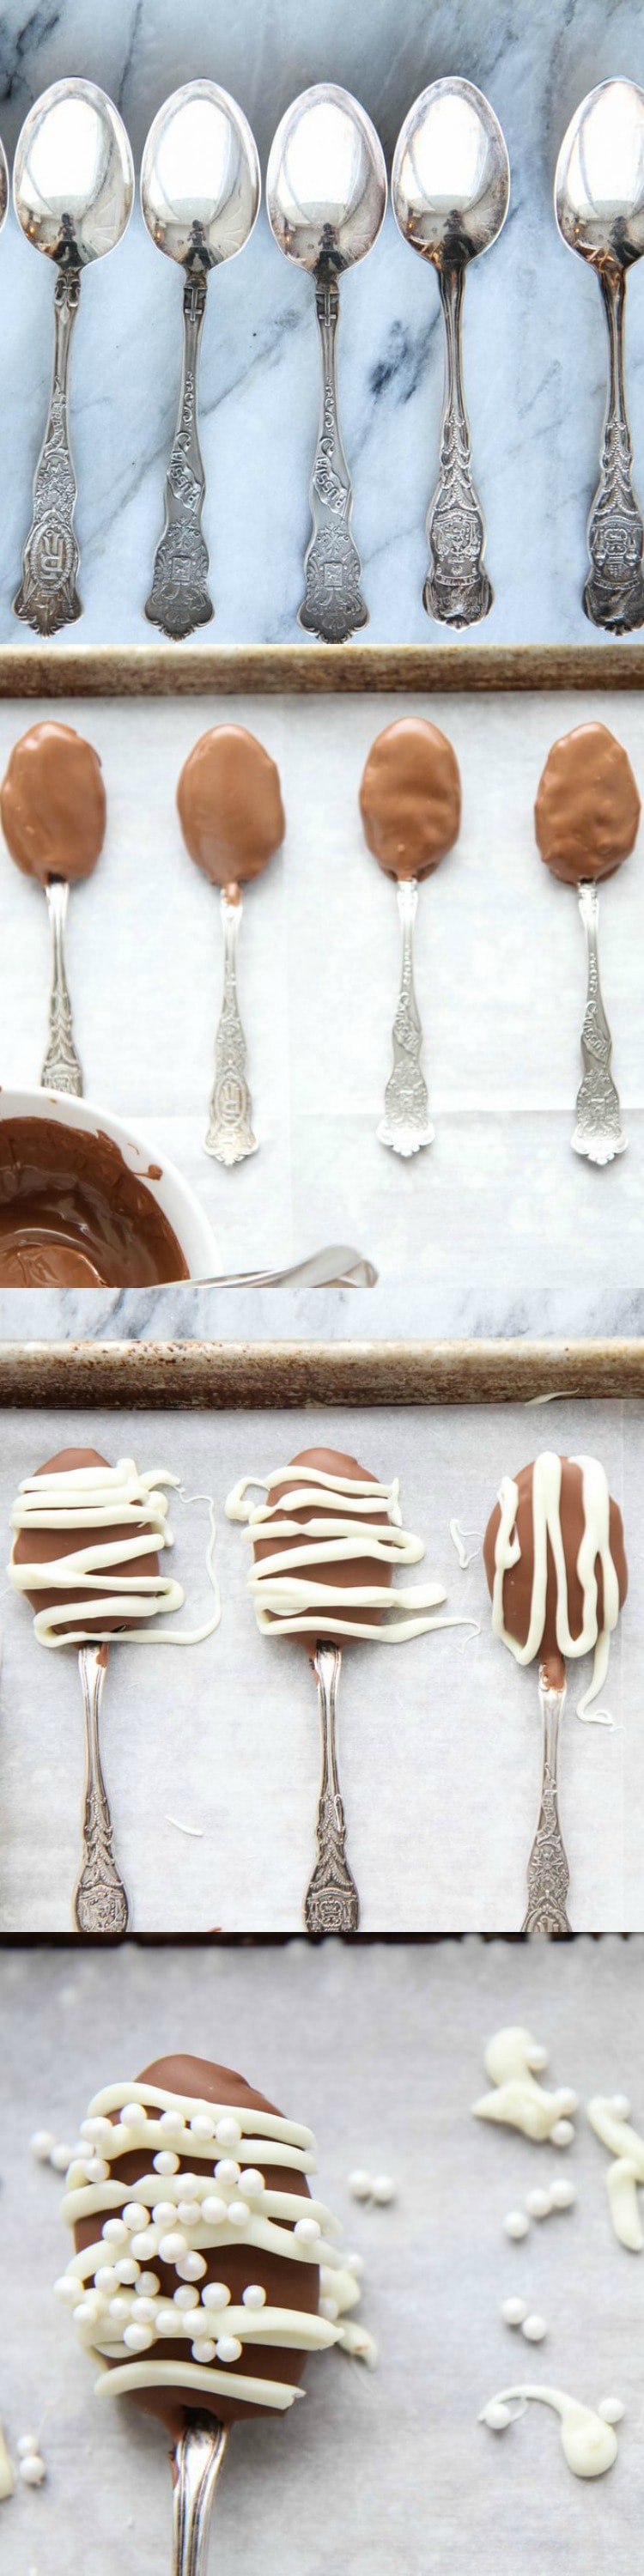
Melt your semi-sweet chocolate chips (the whole bag) over a steam bath or in microwave. Melt chocolate slowing, stirring frequently. If chocolate clumps or doesn’t melt smoothly, add 1/2 teaspoon of shortening to help smooth it out.
Dip your spoons into the chocolate and then rest them on a cookie sheet covered with parchment paper.
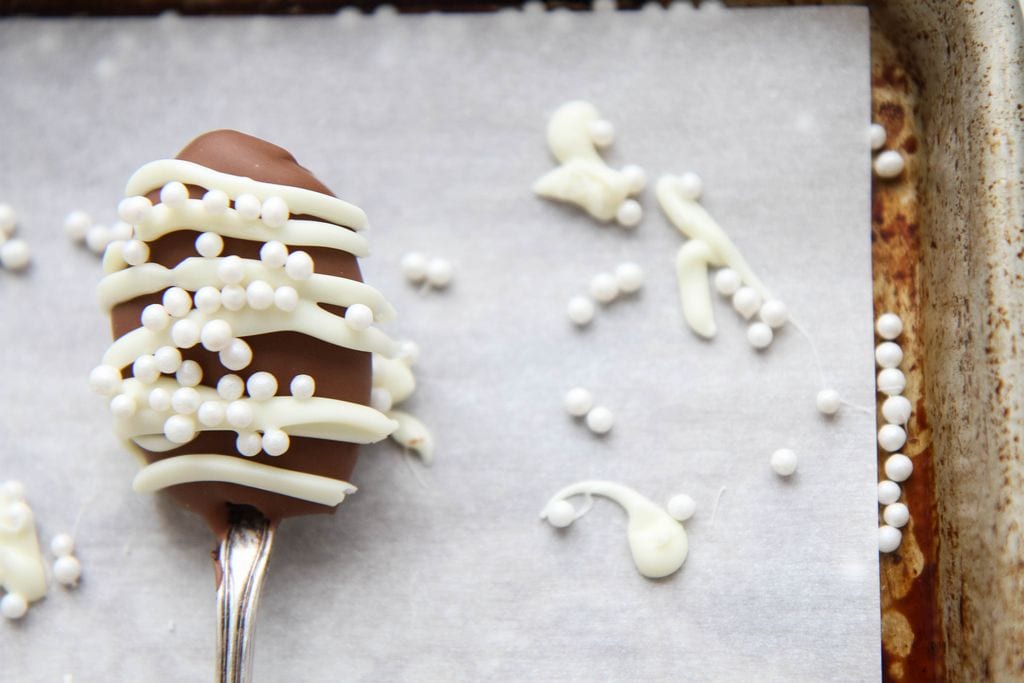
3. Decorate with your choice of milk chocolate, white chocolate and/or various garnishes. Drizzle with melted white chocolate (using my pastry bag) and then shake on some edible pearls so they would stick. Let these set completely before placing into decorative bags and tying with beautiful ribbon.
We placed these beauties into a basket with a variety of our favorite Barissimo coffees, exclusively from ALDI. A pretty dishtowel on bottom pulls it all together and acts as bonus gift.
These spoons add another level of richness to your coffee giving you a rich chocolate flavor. These also would make a fun addition to your cocoa.
I hope you enjoyed our fun series with ALDI this month and that these ideas have inspired you to give their new coffee line-up a try! I promise that you won’t be disappointed, not just in the incredible taste, but the incredible amount of savings to be had for your family!
This is a sponsored post written by me on behalf of ALDI.
This is a sponsored post written by me on behalf of ALDI.
If there is one thing I have learned over my years of surfing on Pinterest it’s that anything bacon and anything coffee is always a hit (and not just with me!).
Today I wanted to pair these two flavors together in a Maple Coffee Bacon that your whole family will love. The inspiration for this project came along with the opportunity to try the new Barissimo line of premium coffee products that are available at your local ALDI store.
Since you know I am a regular shopper, I had noticed the new line on the store shelves and was intrigued. The packaging is beautiful and the product feels very high-end, but a whole bag of ground coffee is a mere $3.99. It is, seriously, a steal!
This line features nine bagged and single serve coffee items, along with additional seasonal and Special Buy items that will be available for a limited time. Pictured below are a few of the ones that I found on my store shelves this week.
The Barissimo line, available exclusively at ALDI, includes the following (and here are the prices on these items too) for my fellow frugal shoppers:
Ready-to-drink Iced Coffees (French Vanilla, Mocha and Coffee) – $1.19
Whole Bean Coffee (Morning Roast and Donut Store) – $3.99
Fair Trade Coffee (Medium and Dark Roast) – $3.99
Donut Store Ground Coffee – $3.99
12 oz. Bag Coffee (Breakfast Blend, House Blend, and French Roast) – $3.99
Assorted Flavored Coffee (French Vanilla and Hazelnut) – $4.99
Flavored Coffee Cups (French Vanilla and Hazelnut) – $4.79
Regular Roast Coffee Cups (Breakfast and Donut) – $4.79
Specialty Roast Coffee Cups (Fair Trade Colombian and Dark Roast) – $4.79
Ever since a trip last year to NOLA, I have been thinking about the embarrassing pile of praline bacon I ate in one of the local restaurants that my brother took me too. Bacon that tastes like candy? How could that be bad?
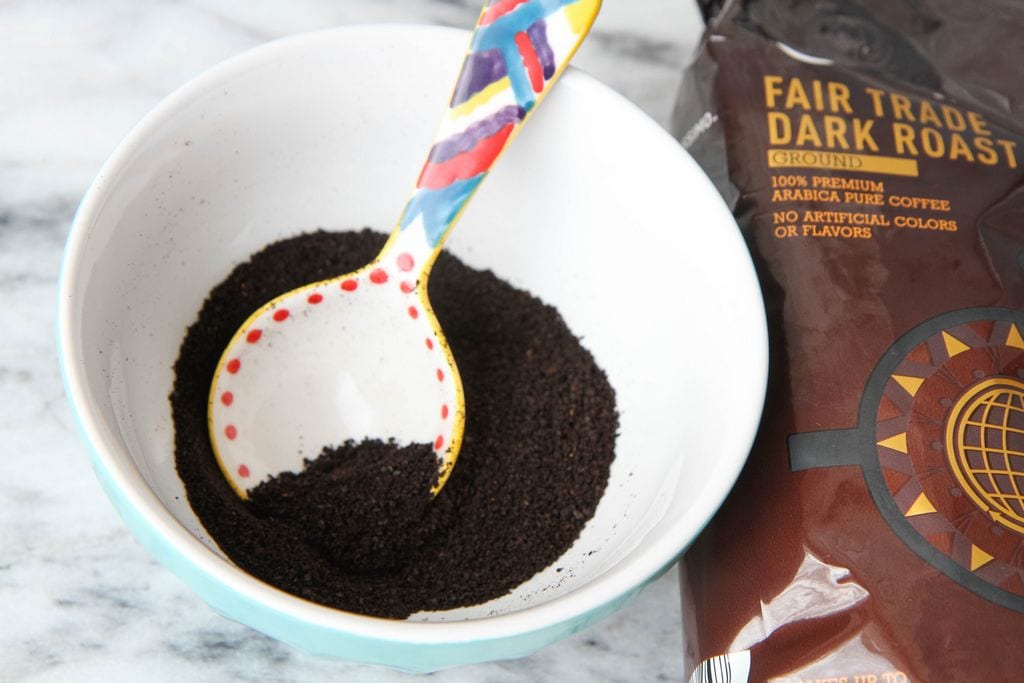
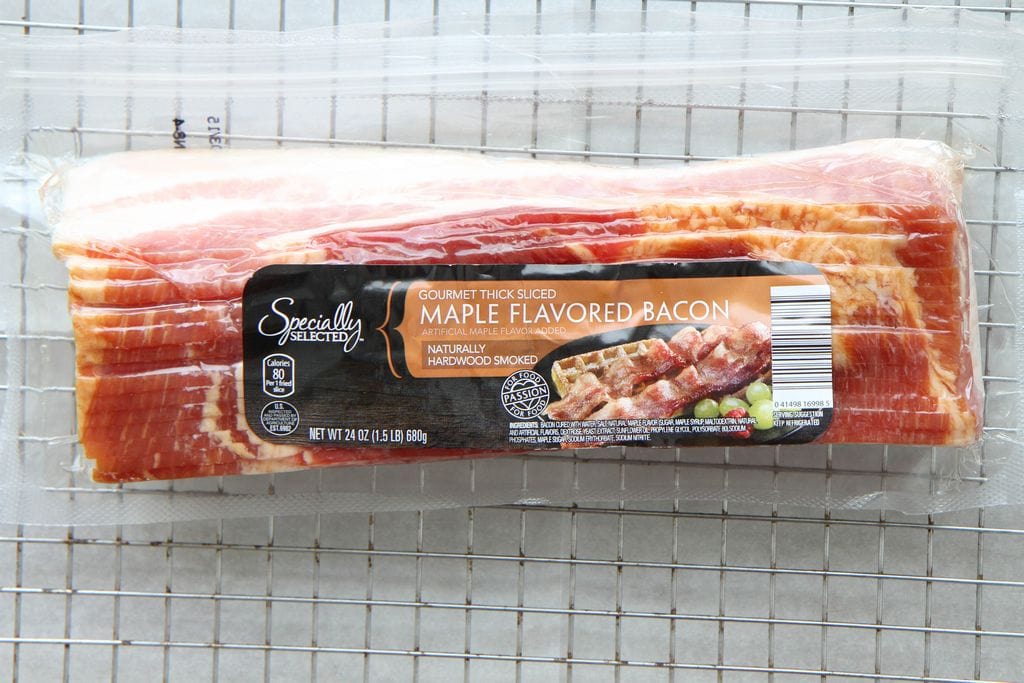
I loved the candied sweetness of the bacon, but I love to add on to that layer of flavor with something to cut the sweet and I decided the Fair Trade Dark Roast Coffee paired with the thick sliced Maple Flavored Bacon would be a delightful combination.
If you haven’t tried the coffee itself, the dark roast is delightfully full-bodied and strong. It’s the kind of coffee that a mom who has to get her kids on the bus in the morning can really embrace.
As I had suspected, this delicious dark roast coffee was just what this sweet bacon needed to balance it out. The coarseness of the ground coffee adds an element of texture and the brown sugar glaze made from freshly brewed coffee and brown sugar is brushed on to each side of the bacon to create that delightful layering of flavors.
Since this bacon is so sweet, you don’t want to pair this one with another sweet breakfast item. I recommend an easy frittata for balance, a little fresh fruit, and a big mug of coffee (of course!).
Now run over to your local ALDI and snag a bag of this delicious coffee for yourself- at a price like that, you have nothing to lose!
Maple Bacon Coffee
Prep time:
Cook time:
Total time:
Serves: 10 servings
This is a sponsored post written by me on behalf of ALDI.
Ingredients
1 pound Specially Selected Maple Thick Sliced Bacon
1 tablespoon Barrisimo Fair Trade Dark Roast Ground Coffee
Note- *Some of these items are Special Buy or Seasonal items that are only in stores for a limited time and may no longer be available.
Instructions
Preheat oven to 375°. Line a rimmed baking pan with parchment or waxed paper and set a flat rack on top. Lay bacon strips on rack, overlapping slightly if needed. Sprinkle top of strips evenly with ground coffee. In a small bowl, combine brown sugar and brewed coffee, stirring just to blend to a paste. Brush top of strips with half of sugar mixture. Bake 15 minutes. Turn bacon over and brush with remaining sugar glaze. Bake until crispy, 10-15 minutes more.
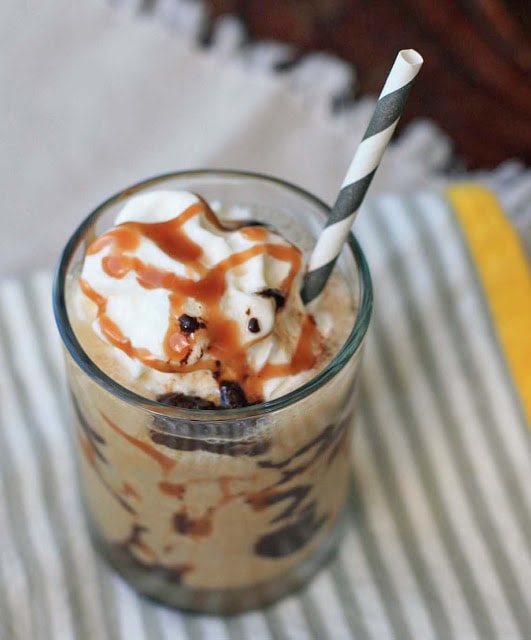
It’s no secret around here that I love a good coffee drink and you all know I love a good way to save – especially when it’s easy. Making your own versions of coffee shop drinks gives a particularly good return since most DIY drink recipes take only a few minutes to make and are only a fraction of the cost of buying. And the no-guilt feeling while you’re enjoying your beverage? That’s right – priceless.
So I’ve rounded up some of the best copy-cat Starbucks drinks recipes for you from our own Mom Advice archives and other fabulous blogs so you can save some of your hard-earned money and enjoy a coffee (or non-coffee!) break at the same time. Here are 33 copy-cat Starbucks drinks categorized into four sections for your convenience – Hot Coffee Drinks, Hot Non-Coffee Drinks, Iced Coffee Drinks, and Iced Non-Coffee Drinks (as always, please pin individual pictures from the original source):
Make your own cold brew concentrate at home with this easy recipe. This coffee recipe is, guaranteed, to save you tons of money. Make a copycat Starbucks cold brew at home.
Are you a year-round iced coffee drinker too? In my house, I try to keep a pitcher of cold brewed coffee in the refrigerator at all times.
To me, there is no season for cold coffee. Cold coffee season is 365 days a week.
Have you tried the cold brew method before?
It couldn’t be easier (or more affordable).
If you have been relying on your drip coffee maker, as a coffee base, you are missing out on the rich flavor of a true cold brew.
My recipe shares the perfect water ratio and can be ready in, as short as, 24 hours. Personally, the stronger the better though so I recommend giving this a full 48 hours to set up.
Today I’m partnering up with Wild Oats Organic to show you just how easy it is to create a batch of cold brewed coffee for all of your summertime coffee needs!
DIY Cold Brew Coffee Recipe
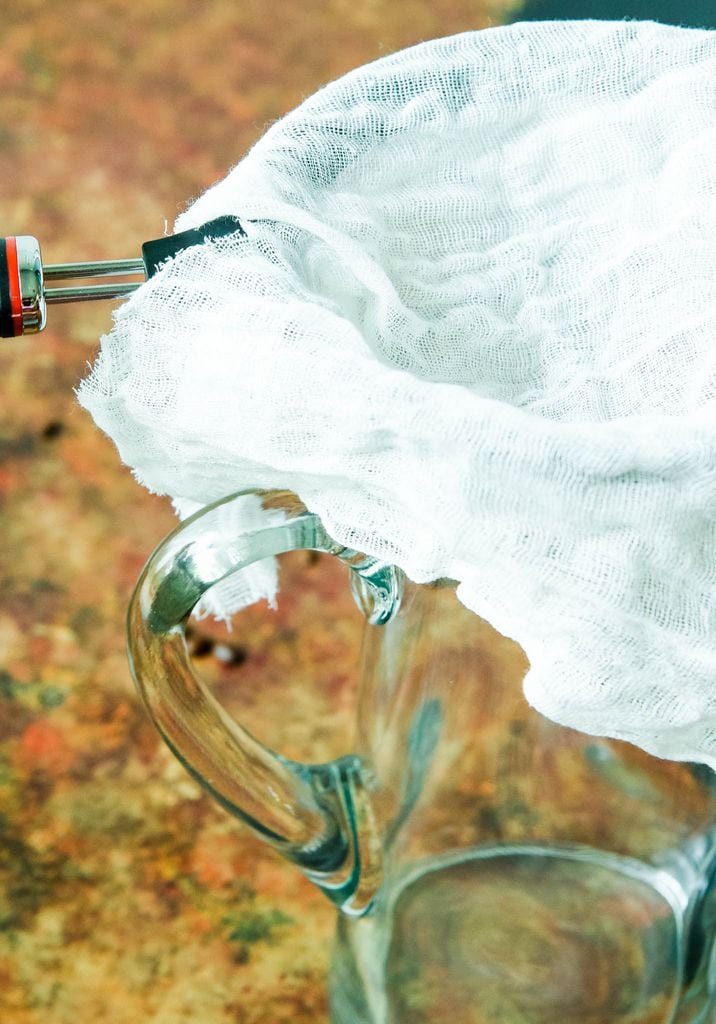
This recipe doesn’t require any special equipment except a pitcher, cheesecloth, and filtered water, and coffee.
If you would prefer to use a cold brew gadget, I’ll share my favorite with you below.
What is Cold Brewed Coffee?
Cold brew, also known as cold press coffee, refers to the process of steeping grounds in room temperature or cold water for an extended period.
Once you strain the coffee grounds, you are left with a coffee concentrate to mix with water or milk. You can also add in flavors or sweeteners (if desired) to create your own perfect cup of coffee.
It’s easy and affordable to make your cold brew coffee at home, but what about the flavor? Cold brewed coffee naturally seems sweeter due to its lower acidity.
The coffee beans in cold-press coffee never come into contact with heated water. This ends up producing a completely different chemical profile from conventional brewing methods.
There is also high levels of caffeine in a cup of cold brewed coffee compared to hot brewed coffee.
More caffeine means it’s far superior to hot coffee too because now you can do ALL THE THINGS.
I consider this my summertime superpower.
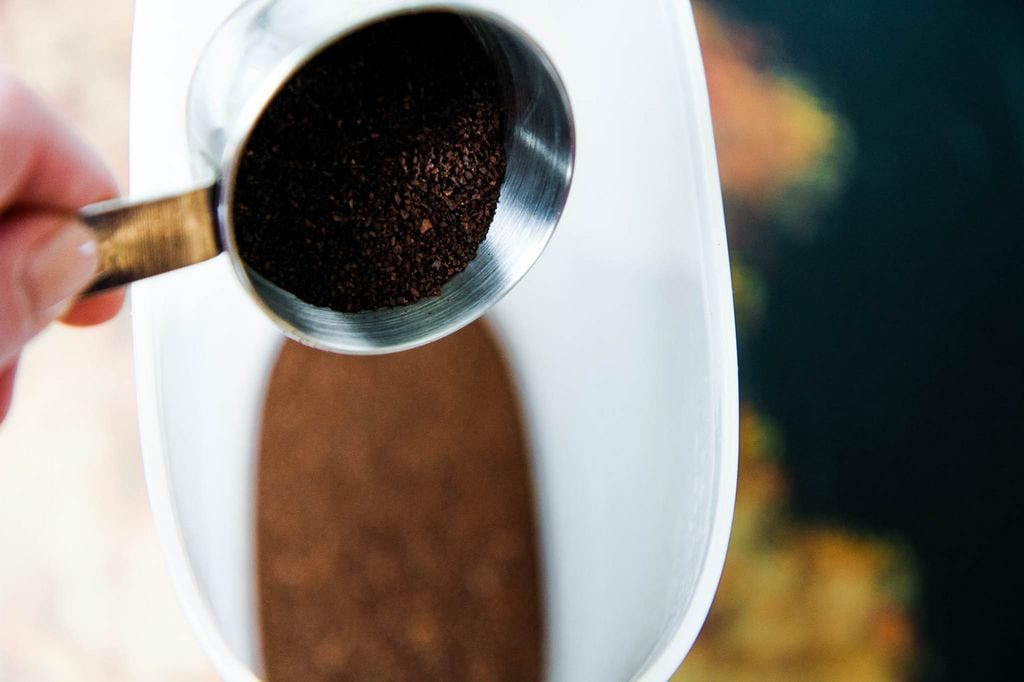
As you can see in my picture tutorial this is the easiest method. Best of all, you can make a big or small batch of coffee with this method.
While coarsely ground coffee is ideal, I tend to make things easy on myself and just purchase ground coffee. I usually have pretty good results with it.
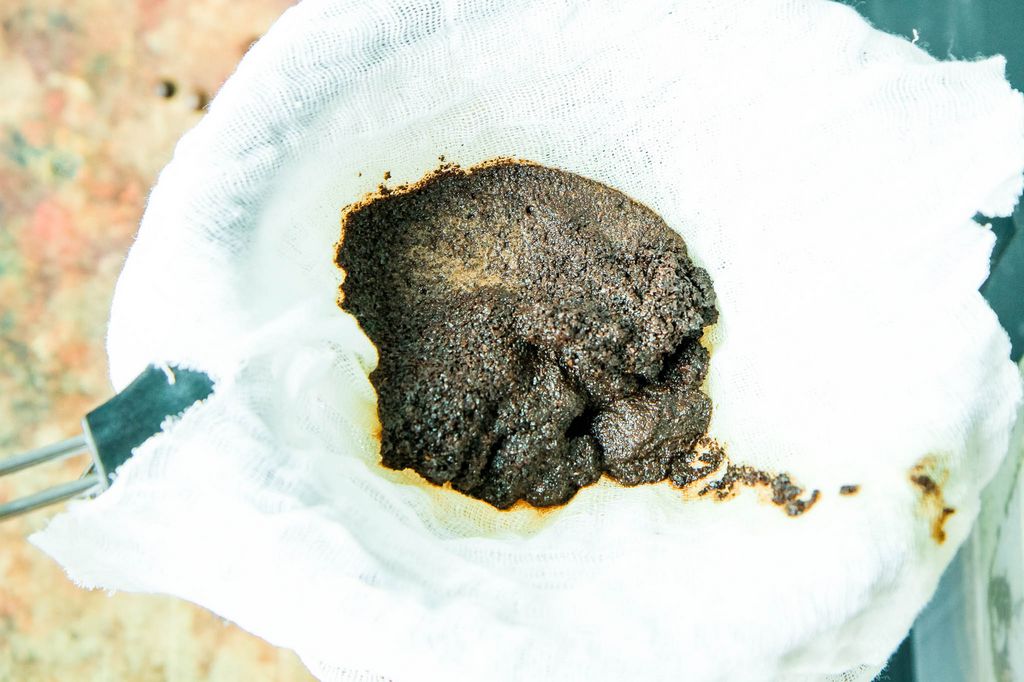
I find that cheesecloth over my mesh strainer helps to keep the grounds out. You definitely want a coffee without the grounds at the bottom.
Here are a few commonly asked questions!
How much milk should I put in my cold brew coffee?
The biggest struggle for me when purchasing my coffee out is the milk substitute offerings.
Almond milk is my favorite addition to iced coffee, but most coffee shops don’t offer this as an option.
Thankfully, I can make my own at home now.
Experiment with different milk types like almond milk, soy milk, coconut milk, half-and-half.
Consider trying a delicious Vietnamese coffee by adding some sweetened condensed milk for a decadent treat.
I prefer a half to half ratio on coffee to milk especially. Remember, the cold brew concentrate is very strong.
What are some ways I can flavor my iced coffee?
Have you ever made your own simple syrups? It really could not be easier. Not only is this concentrate nice to have on hand for your morning coffee, but also for fresh summer cocktails.
The process of creating these is a simple one.
Simply mix equal parts sugar and water in a saucepan.
Heat this liquid until your sugar dissolves. Finish by adding your favorite flavorings to create your syrup.
I store these cooled syrups in my fridge in mason jars for whenever the iced coffee mood strikes me.
diy coffee syrup recipes:
Vanilla Coffee Syrup
1 cup water
1 cup sugar
1 vanilla bean, split lengthwise
1 teaspoon vanilla extract
Combine the sugar and water in a small saucepan.
Scrape the seeds from the vanilla bean into the pan and throw in the pod.
Heat the mixture over medium-high, stirring occasionally, until the sugar has dissolved. Reduce the heat to low and let simmer, about 10-15 minutes.
Remove from the heat, discard the vanilla bean pod and stir in the vanilla extract. Let cool. Store in the refrigerator.
Caramel Syrup
¾ cup sugar
½ cup water
¼ cups caramel sauce
Combine the sugar, water and caramel sauce in a small saucepan. Heat the mixture over medium-high, stirring occasionally, until the sugar has dissolved and the mixture is smooth. Remove from the heat and let cool. Store in the refrigerator.
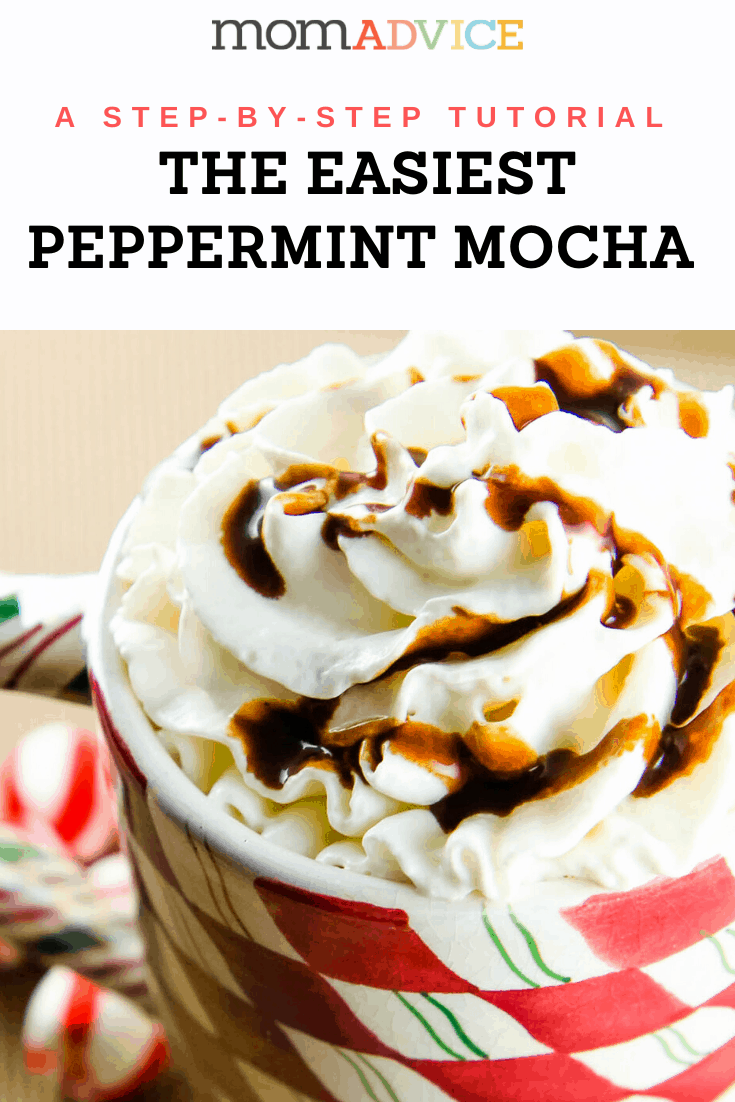
Peppermint Syrup
1 cup sugar
1 cup water
2 teaspoons peppermint extract
In a small saucepan, bring sugar and water to a boil. Reduce heat to medium and stir constantly until sugar is dissolved. Stir in the peppermint extract. Cool to room temperature and store in a glass jar in the refrigerator.
Don’t Want to Strain Your Coffee? What Are My Other Options?
In the past, I have found that my French Press works great to help strain the grounds.
Speaking of the environment, make sure you are using a reusable straw and mason jar for your coffee.
DIY Cold Brew Coffee Recipe
Recipe Type: Drinks
Prep time:
Cook time:
Total time:
Serves: 2 cups
Make your own cold brew concentrate at home with this easy recipe. This coffee recipe is, guaranteed, to save you tons of money. Make a copycat Starbucks cold brew at home.
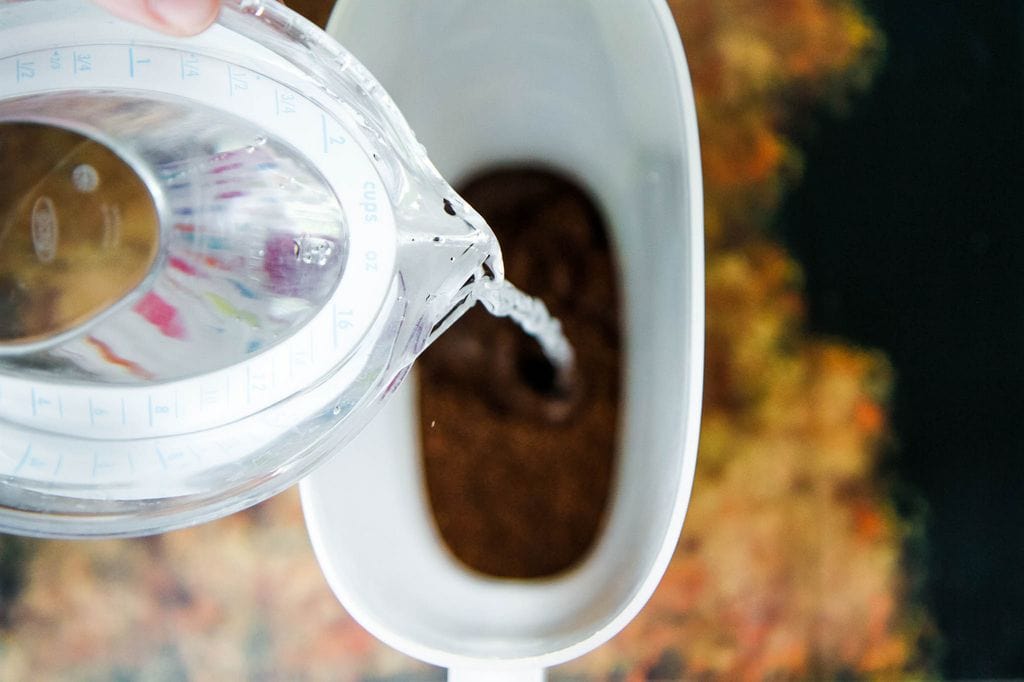
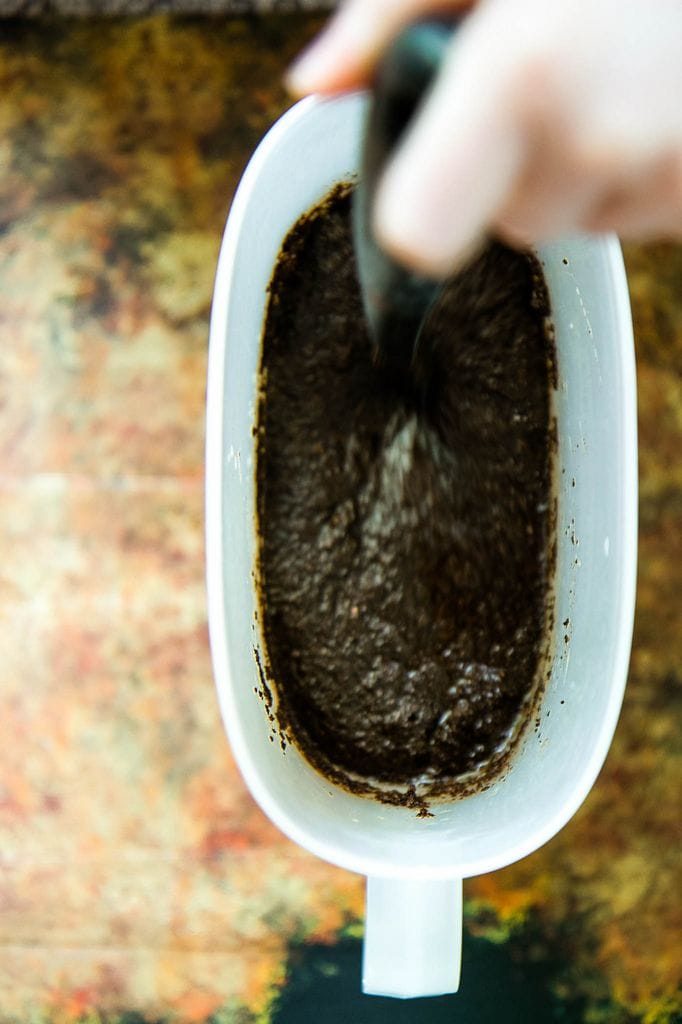
Place the coffee grounds in a 2-quart pitcher, add the water, and stir to combine.
Cover with a lid or plastic wrap and let steep at room temperature. The steeping should be at least 12 hours or up to 1 day.
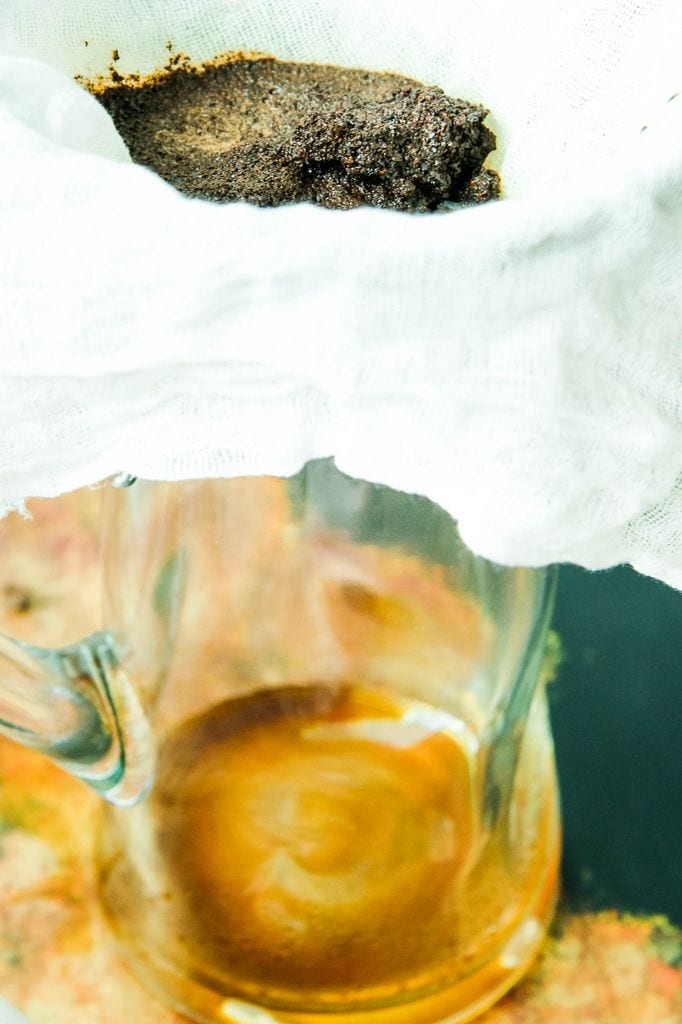
Line a fine-mesh strainer with a standard coffee filter and fit it over a medium bowl. Working in batches, slowly pour the coffee into the filter until all of the liquid has passed through the strainer. Do not rush the process and stop when you reach the solids at the bottom of the pitcher. Do not pour the grounds in.
Discard the grounds and the contents of the strainer.
Transfer the strained coffee into a clean pitcher.
Cover and refrigerate until completely chilled, at least 2 hours or up to 5 days.
For each cup of iced coffee, dilute the concentrate with an equal portion of milk, half-and-half, or water.
Sweeten with simple syrup if desired and top with ice. Finish with a dusting of cinnamon.
3.4.3177
As an Amazon Associate I earn from qualifying purchases.
Love this recipe? Check out these fun coffee drinks on MomAdvice!
Don’t forget to finish your coffee treat with a little Wild Oats Cinnamon for the perfect finishing touch! Do you cold brew coffee? What are your tried and true methods for a great iced coffee? I’d love to hear them!
* This post is sponsored by Wild Oats. Thank you for supporting the companies that support this site!
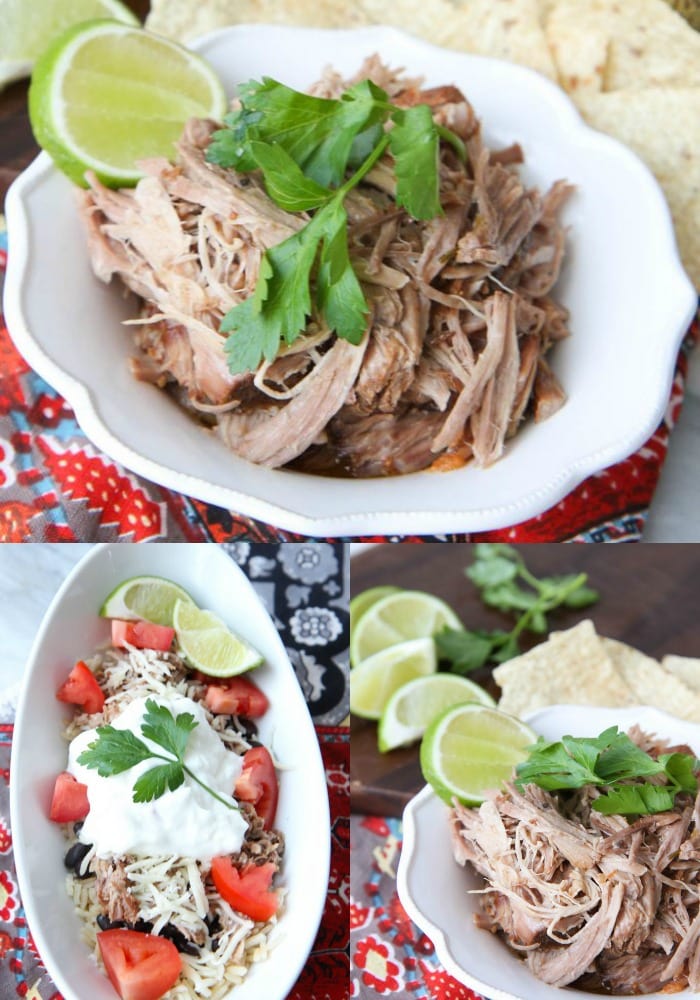
When you go gluten-free, there are only a handful of fast food restaurants that you can eat at and really enjoy without feeling rotten. Chipotle is one of my favorite places and has been our go-to spot for a quick to-go dinner on busy weeknights for delicious gluten-free dishes. As I went to plug in our usual order this week though, I discovered there was a supplier issue of our family favorite…carnita meat isn’t at our location.
To be honest, I had a sneaking suspicion that this was eating away at our budget (thanks to its delicious convenience & a handsome Chipotle runner at my disposal) so I had been thinking of recreating this dish at home to save our family some money.
Necessity birthed creativity as I went on the hunt for a yummy replacement.
It seems fitting since our focus is money management this month for the m challenge that I could break a fast food habit with this yummy homemade alternative. Money. In. The. Bank.
This meat couldn’t be easier to create and the best part is that once you rub in the spices, this is a completely hands-off recipe. What isn’t easier is how freaking good it smells in your slow cooker all day which drove us absolutely crazy until dinnertime. The combination of spices is delicious, complex, and comprised mostly of ingredients I already had in my pantry. Garlic, red chili pepper, cinnamon, cumin, oregano, orange juice, lime juice, and beer.
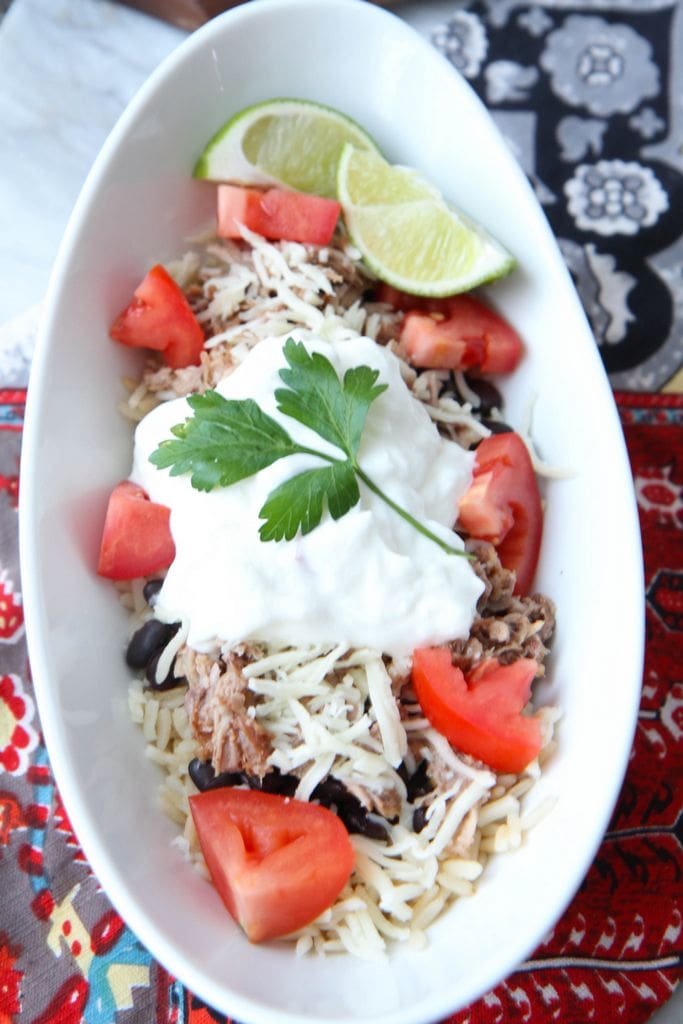
I love the burrito bowl and making it couldn’t be easier. I just did a layer of brown rice made in my rice cooker (world’s best invention- here is the one I use for less than $25), a layer of black beans (canned or slow cooker homemade Mexican Black Beans), carnita meat, mozzarella cheese, diced tomatoes, and I do a mean scoop of plain greek yogurt with a dash of salt, and a squeeze of lime. Serve this giant bowl up with tortilla chips for scooping and you are done.
Since this makes such a large amount of meat, I divided and freezed it for our month. No more Chipotle runs (averaging $22 per pop) and leftovers for a week of meals? Um. WINNING.
What was even better was that everyone in our family thought these were better than Chipotle. I was hoping to just have a nice substitution on days where we need to save a little, but now carnitas at home are better than the ones we bought out and we save a lot of money in the process.
I hope you can give these a try too!
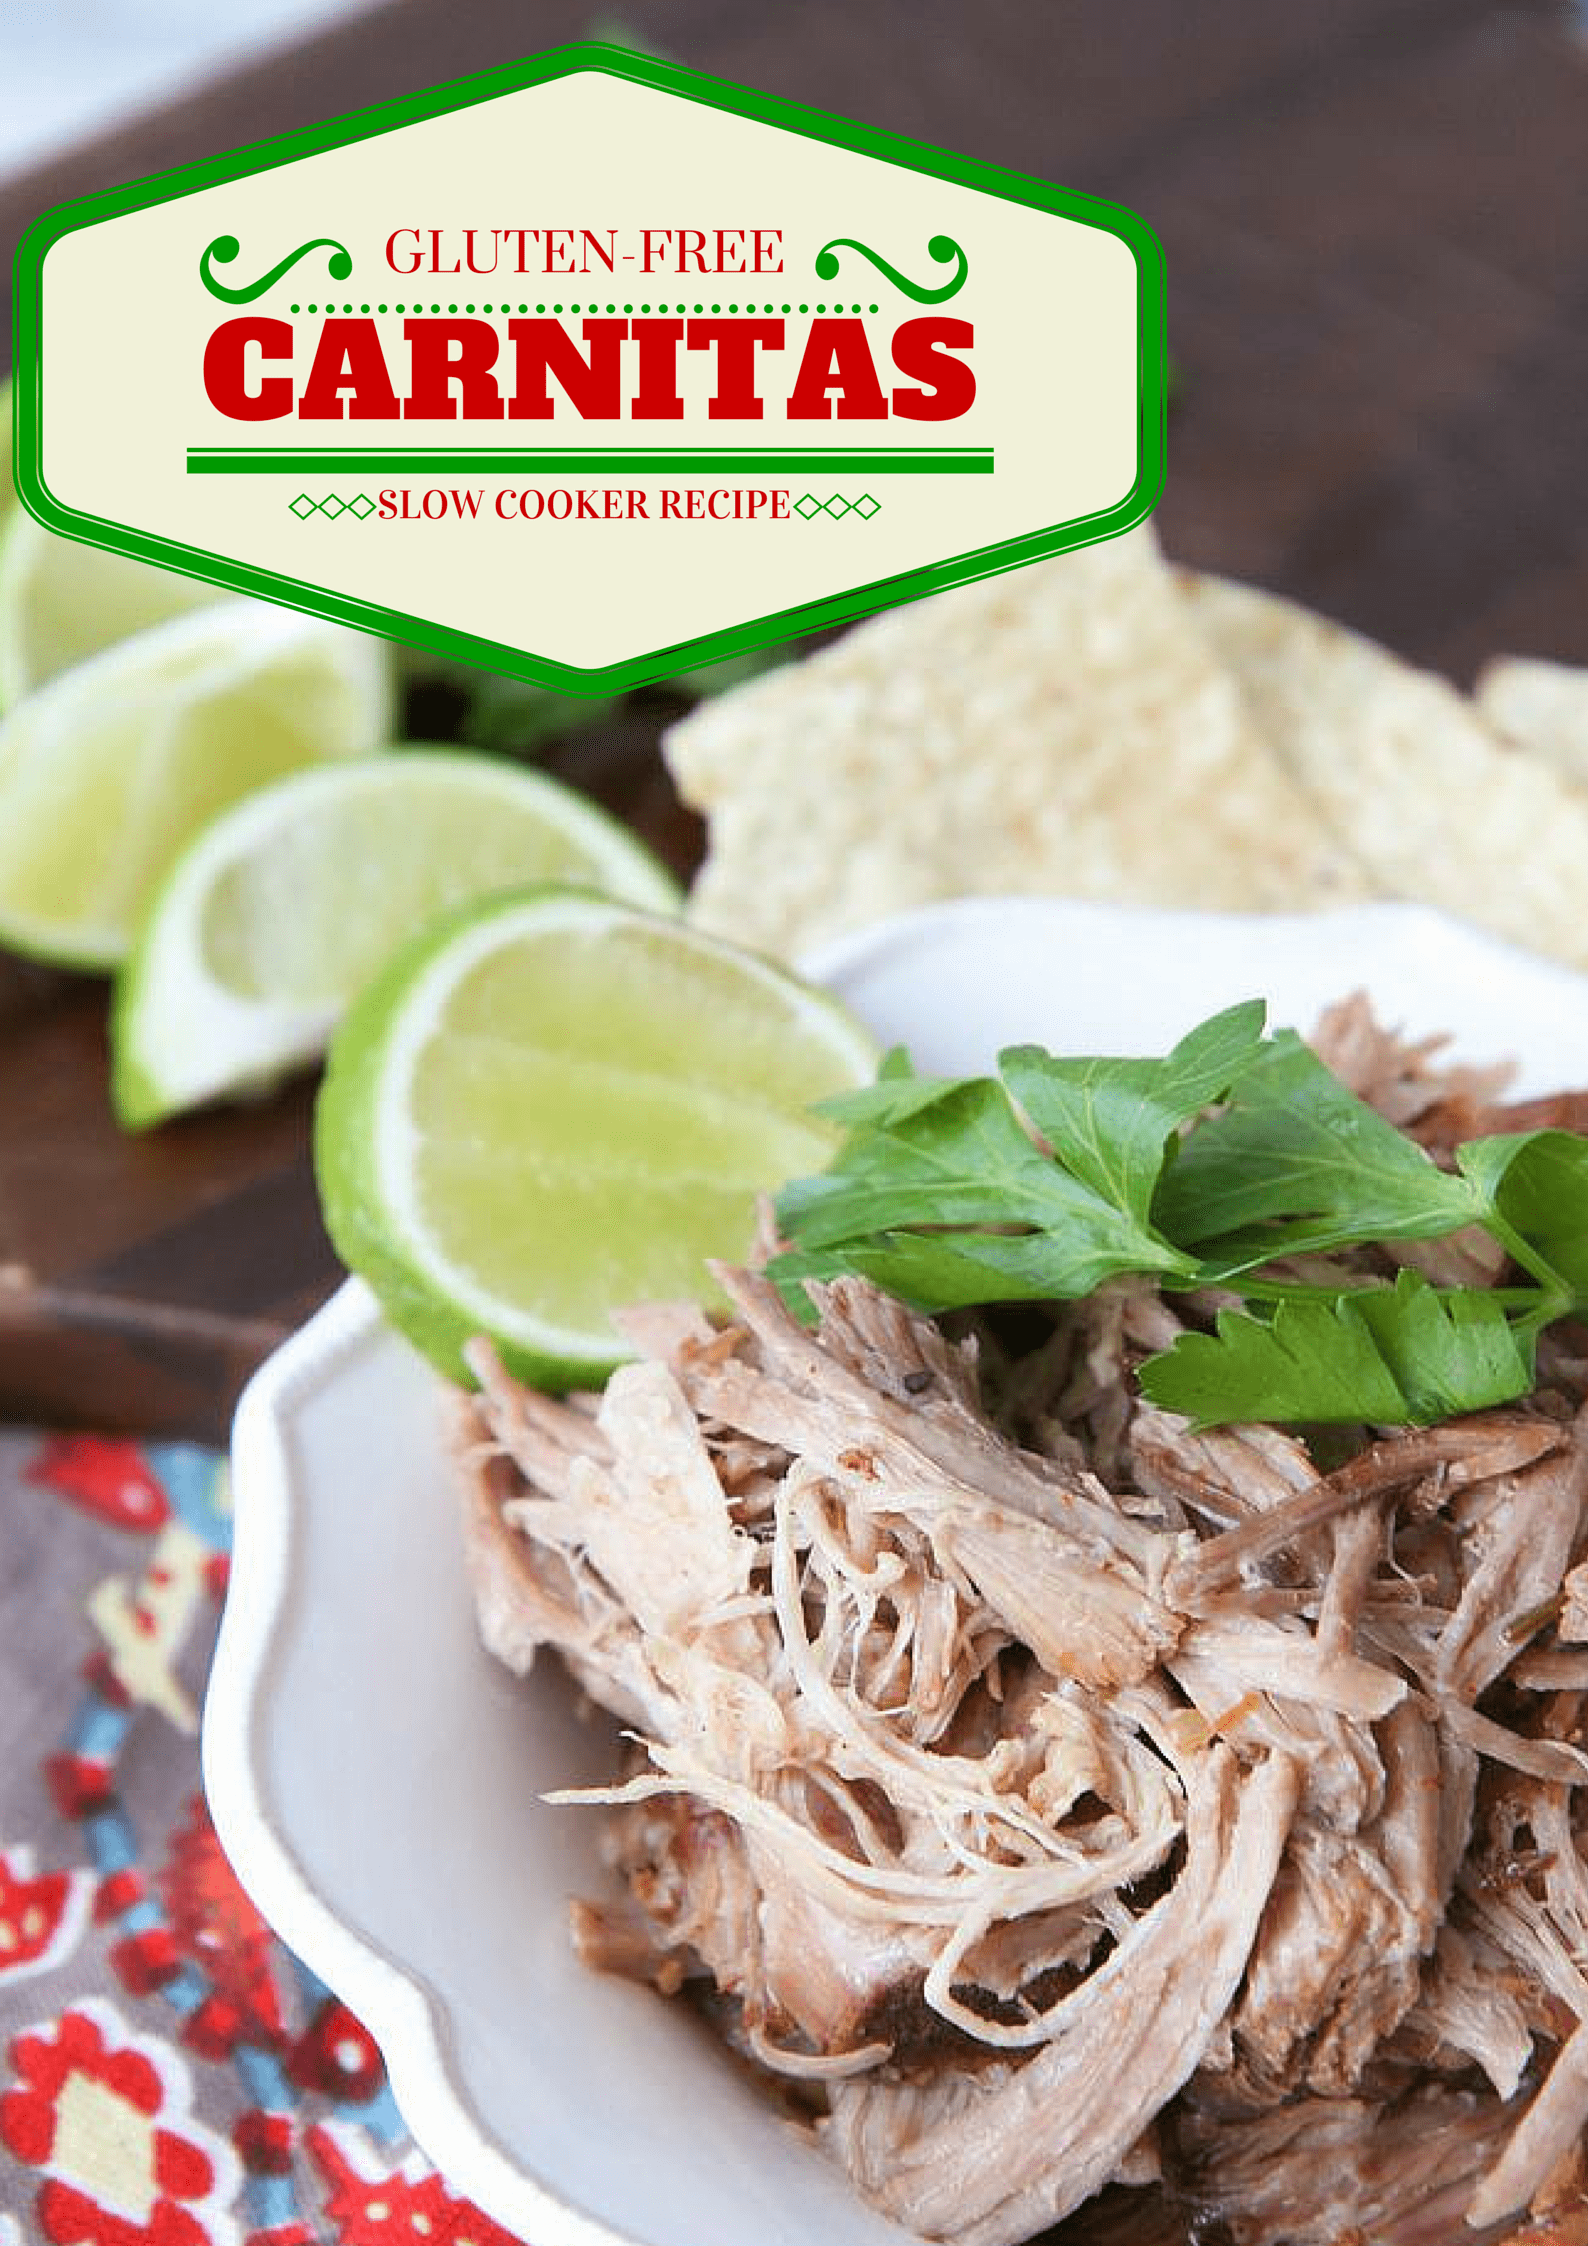
Gluten-Free Slow Cooker Carnitas
Recipe Type: Slow Cooker
Cuisine: Mexican
Author: Slightly Adapted from Pinch of Yum
Prep time:
Cook time:
Total time:
Serves: 10-12
Carnitas just like Chipotle for a fraction of the price. Serve as a burrito or bowl and enjoy the savings!
Ingredients
4-5 lbs. pork shoulder
5 cloves garlic
1 tablespoon salt
1 teaspoon cumin
1 teaspoon chili powder
1 teaspoon black pepper
1 teaspoon oregano
¼ teaspoon cinnamon
½ teaspoon cayenne pepper
1 tablespoon chipotle hot sauce (optional- we left it out because we are wimps)
juice of 2 limes
½ cup orange juice
12 ounces gluten-free beer
½ cup salsa (I used a garlic salsa from ALDI- feel free to experiment with your flavors)
Instructions
Place the pork shoulder in the slow cooker. Roughly chop the garlic and rub it all over the pork (top and bottom)
Sprinkle the meat with salt, cumin, chili powder, black pepper, oregano, cinnamon, and cayenne. Rub seasonings onto the pork until they are well incorporated.
Add lime juice, orange juice, beer, and salsa. Cover and cook on low for 8 hours.
Shred meat with two forks directly in the slow cooker (or take out, shred, and replace in sauce). It should fall apart easily.
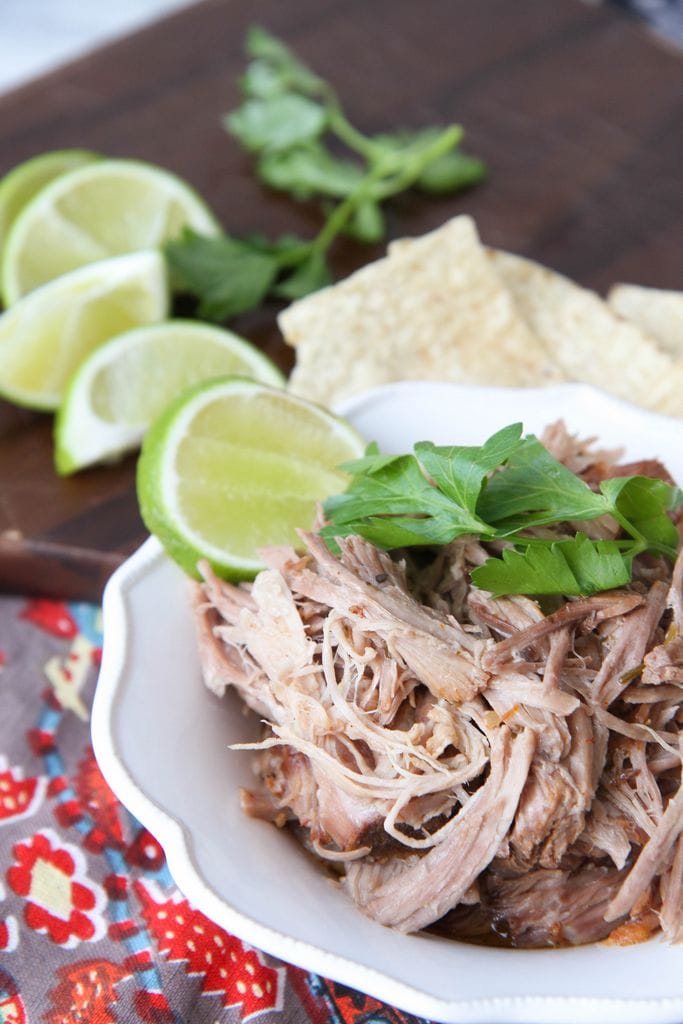
Remove the meat and put into a serving bowl, pouring some of the drippings over the top to moisten the meat.
Serve with tortillas, tortilla chips, or as a rice bowl (instructions above)
A recipe for the Northern French frangipane tart version of Kings’ Cake. Often eaten at Epiphany in January, Kings’ Cake is also closely associated with pre-Lenten festivities surrounding Carnival/Mardi Gras.
We spent our holidays with family, bundling up and piling in the car again and again, a jumble of hats and mittens and frosty noses hidden underneath. We carried silver trays piled high with cookies, slow cookers filled with simmering produce, and stacks of Christmas cards to be hand delivered to doorsteps up and down the state. In the end, all the family members had their fill of children laughing and squealing in delight over even the smallest of festivities. With five family holiday meals, one groom’s dinner, and one New Year’s Eve wedding behind us, we all but collapsed on the couch at home. Just in time for school to start up.
With all the running, we didn’t seem to get time to do what we do best as a family, so on Epiphany, we huddled around our kitchen together, rolling dough, mixing fillings, slicing and chopping, and getting back to what makes us tick.
Sitting down around the table piled high with roast, brussels sprouts, salads, and with a timely cake waiting on the sidelines for dessert, it finally felt like we were starting a new year, just as it should begin, with us coming together and doing the things that keep us together like family dinners around the table. I do believe we started a new Epiphany tradition for us. We’ll see you here next year. Same date. Same place. Same tart.
I hid an almond in my galette des rois, rather than a small trinket or la fève. Tradition says you cut this tart into the number of people present plus one, the remaining slice being reserved for God, the Virgin Mary, or the poor. The one who has the trinket in their slice of tart becomes king or queen for the day…or they are responsible for bringing the tart next year. Either or. Regardless, I’ll be on the lookout for small trinkets to bake inside for my kids to find next year.
In a medium mixing bowl, combine the alond flour, sugar, arrowroot flour, and salt. cut in the butter until incorporated. Stir in the egg and cognac. Chill.
Preheat the oven to 375ºF.
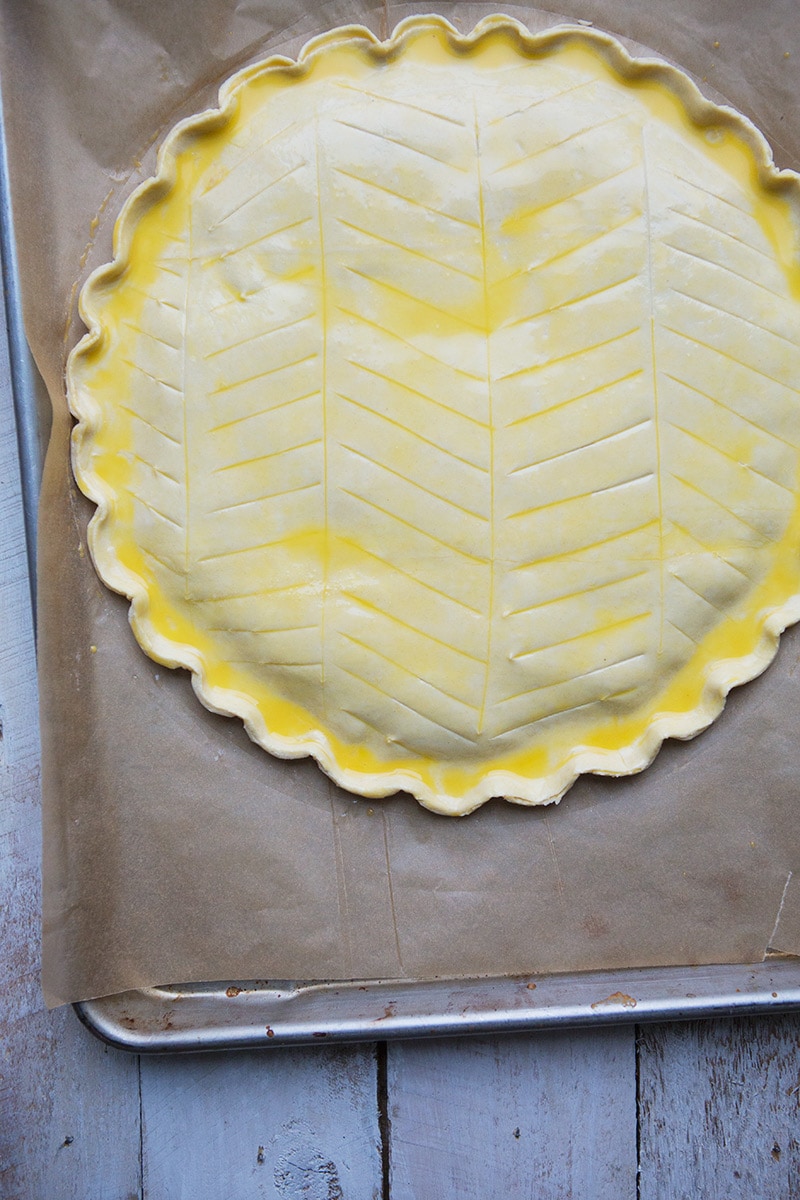
Roll the two pastry sheets to 10″ squares. Using a pie plate or other round object, cut 2 10″ circles.
Place one circle on your lined baking sheet. Spread the apricot jam in the center, leaving a 2″ edge. Top with the chilled almond filling. Place the almond in the filling.
Brush water over the edge of the bottom circle. Top with the second pastry circle and pinch along the edge to seal.
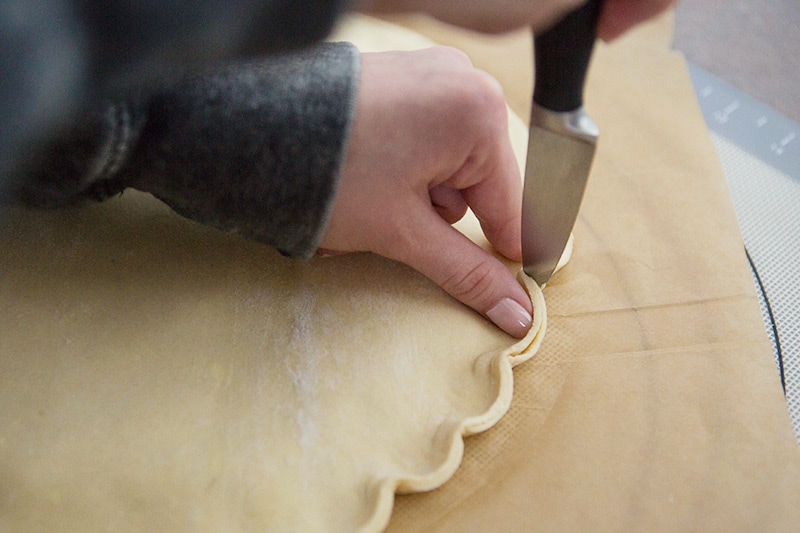
To crimp, use your thumb and pointer finger together, pressing the back of a paring knife into the edge to create the crease. Continue around the entire tart.
Whisk together the egg yolk and cream. Brush over the entire tart. Decorate the tart by scoring the tart with a pairing knife to leave an indentation.
Bake for 30-35 minutes, until golden brown. Allow to cool slightly before cutting.
As I shared with you, when I attended college I lived on junk & convenience food and I had the inevitable “Freshman 15,” to prove it from my bad eating habits throughout the year. I only wish I knew how great I would have felt and how much better I would have performed if I had stocked my fridge with healthy options.
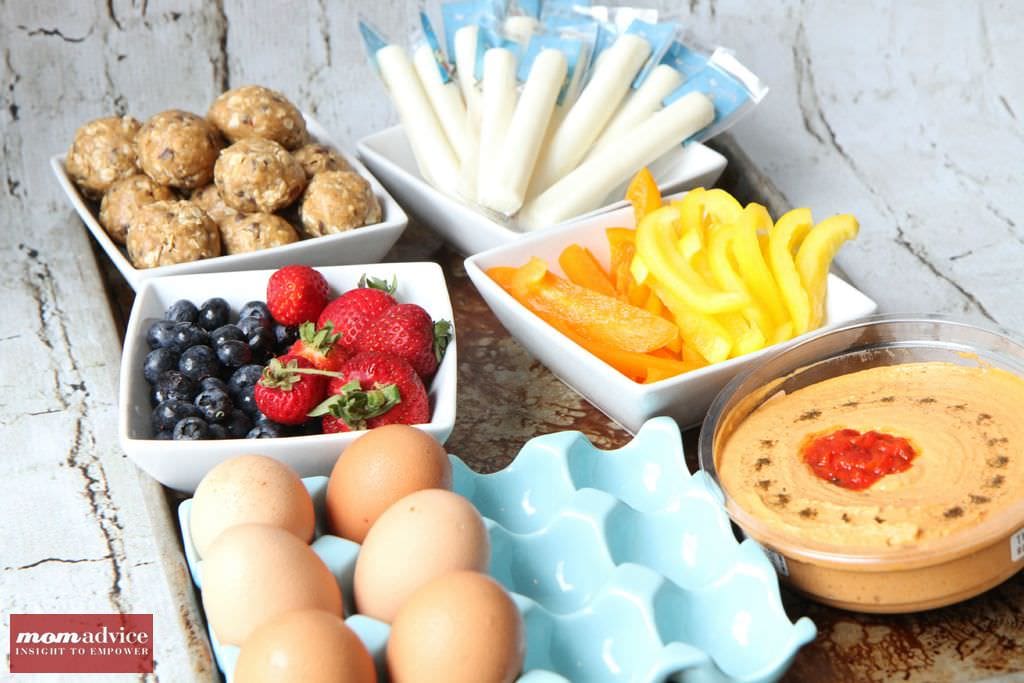
Now I know that there are healthy ideas for stocking your refrigerator – whether it’s a dorm sized mini-fridge, your first apartment fridge, or the huge family-sized fridge many of us graduate to – and I’m making sure that my kids do know that the foods that are good for your body are easy to keep on hand, too. In this healthy fridge makeover, I’m sharing easy ways to keep good-for-you foods within reach along with a recipe for a quick to make no-bake energy bite that you can mix up in a bowl for easy snacks on-the-go that both kids and adults love.
Eggs- Eggs are the perfect food for starting your day out right or for a healthy late night snack. Did you know that you can prepare an egg easily in the microwave with no special equipment at all? Simply spray or grease a bowl to prepare it and crack two eggs in it with a tablespoon of milk and whisk well with a fork. Place your bowl of eggs in the microwave and cook for one minute. Give it another little scramble with your fork and then cook for thirty second intervals, until your eggs reach the desired consistency. That’s it! Don’t forget that you can add your own fun add-ins to this versatile food like chopped up veggies, cheeses, or meats.
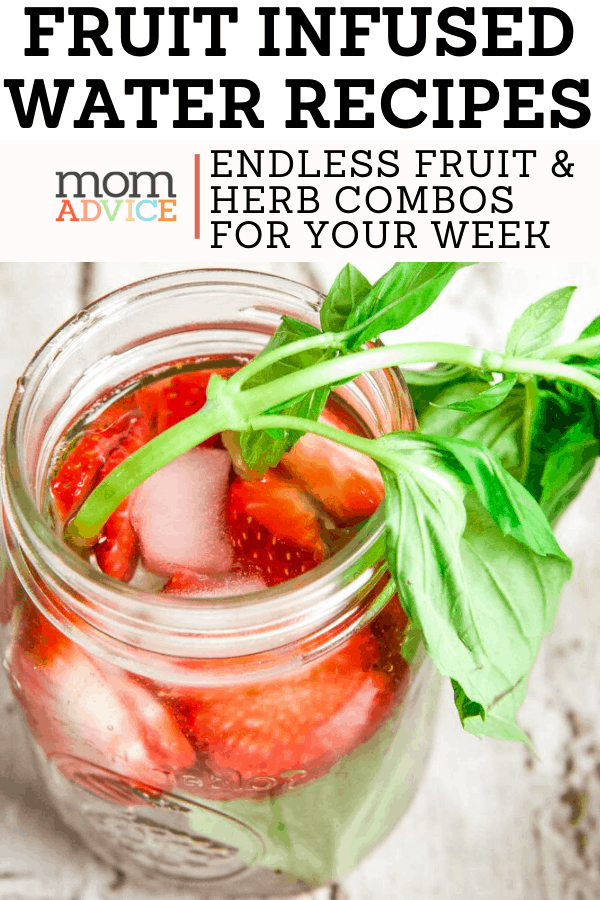
Berries- Berries are a great item to keep on hand to eat as a side, to grab by the handful for a quick snack, mixed in with a cup of Greek yogurt, or as a topper to a bowl of instant oatmeal in the morning. Cut berries can also be added to a water bottle and then allowed to steep overnight to create a healthy & inexpensive infused water.
Veggies- Cut veggies are the perfect item to have on hand for a quick and healthy snack. Some of my favorites for snacking are peppers (in every color), carrot sticks, celery sticks, & cauliflower. Pair these veggies with your favorite dips like a nut butter with celery or dip them in hummus for an easy snack.
Nut Butters & Nuts- Nothing is quicker or easier than keeping a package of nuts on hand for snacking. Did you know that you can even freeze nuts? Grab an extra package and store it in your freezer, up to six months, to make sure they don’t go rancid. Try a new variety like almonds, pistachios, walnuts, hazelnuts, peanuts, or cashews for a little variety. These can also be added to bowls of instant oatmeal in the morning or mixed into a salad for a crunch topping.
Nut butters are great for an accompaniment to celery or cut apples. My own favorite nighttime snack is peanut butter on a slice of whole grain toast with a glass of almond milk before I go to bed. It’s a satisfying and inexpensive snack!
Hummus- There are many different flavors and varities now of hummus and it is the perfect snack or spread to add to pitas or even smeared as a topping for your favorite sandwich. My favorite variety is the Red Pepper Hummus with sliced cucumbers or pita for an effortless snack.
String Cheese- String cheese is one of those grab-and-go snacks that I love to keep on hand in our fridge. Chop these up to add to your eggs to add a little cheesiness to your egg dishes without investing in bags of shredded cheese or wrap cheese with whole grain bread and a little deli meat into a “sushi” roll for a quick sandwich that can make lunches special.
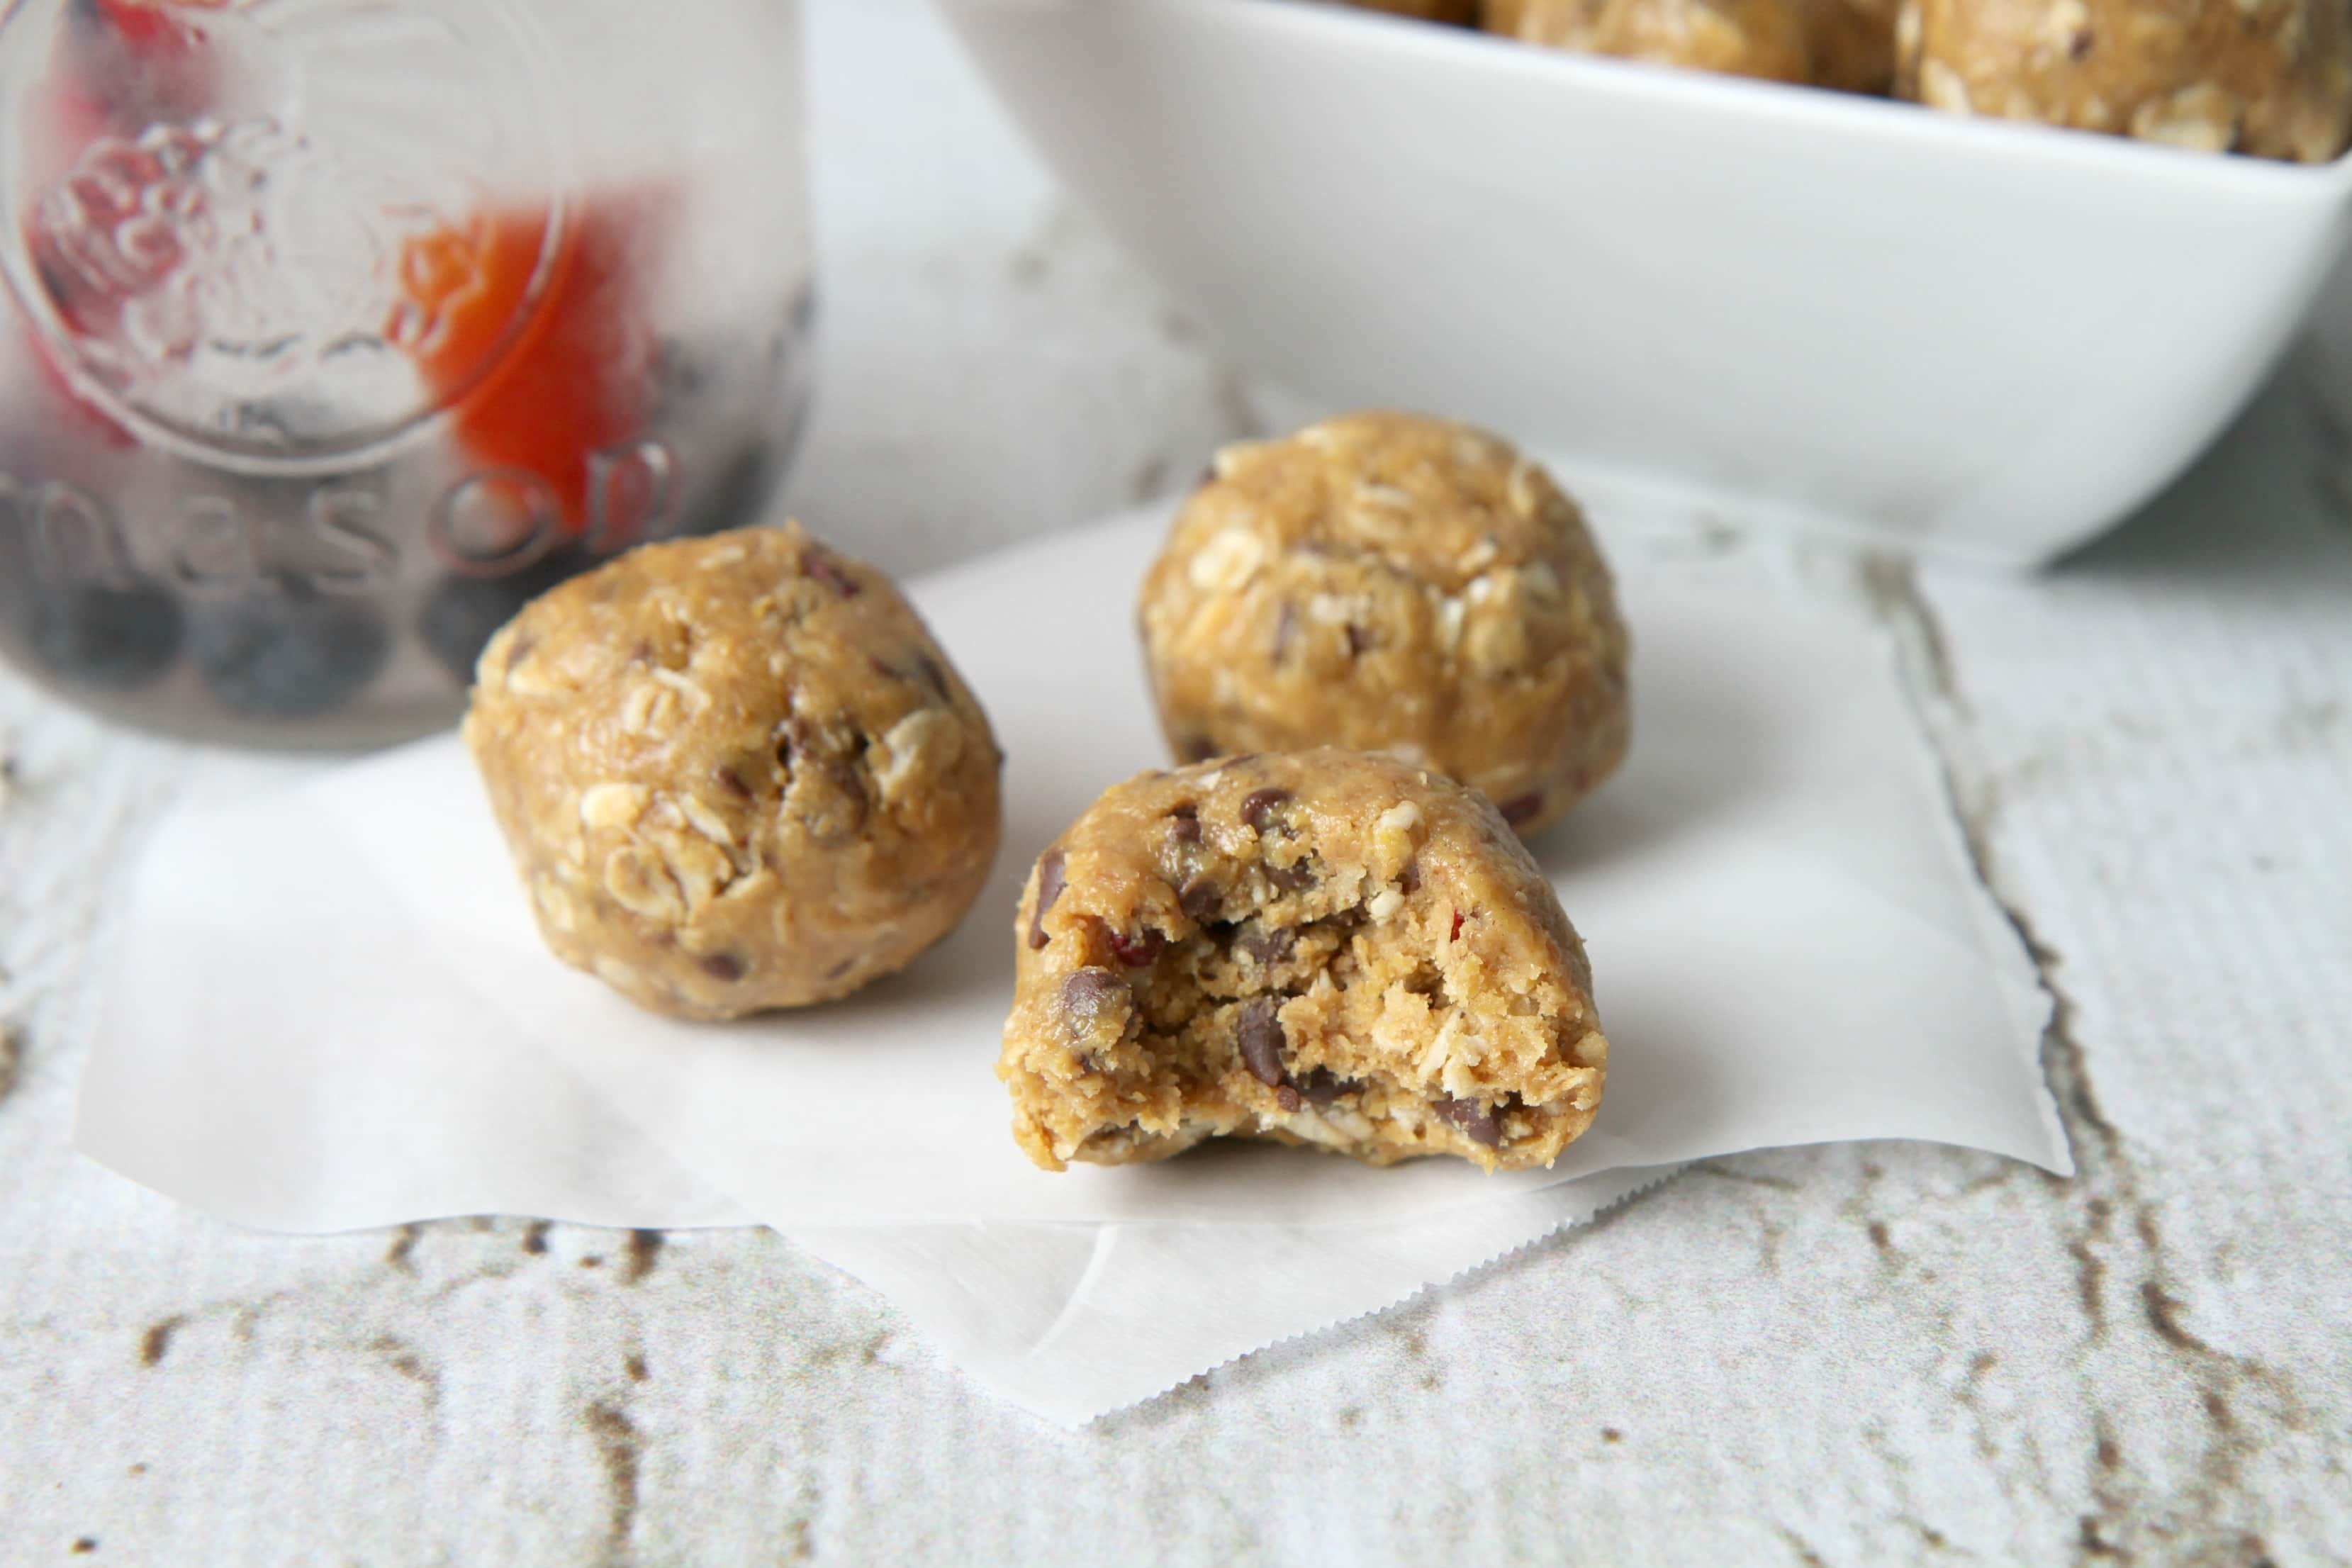
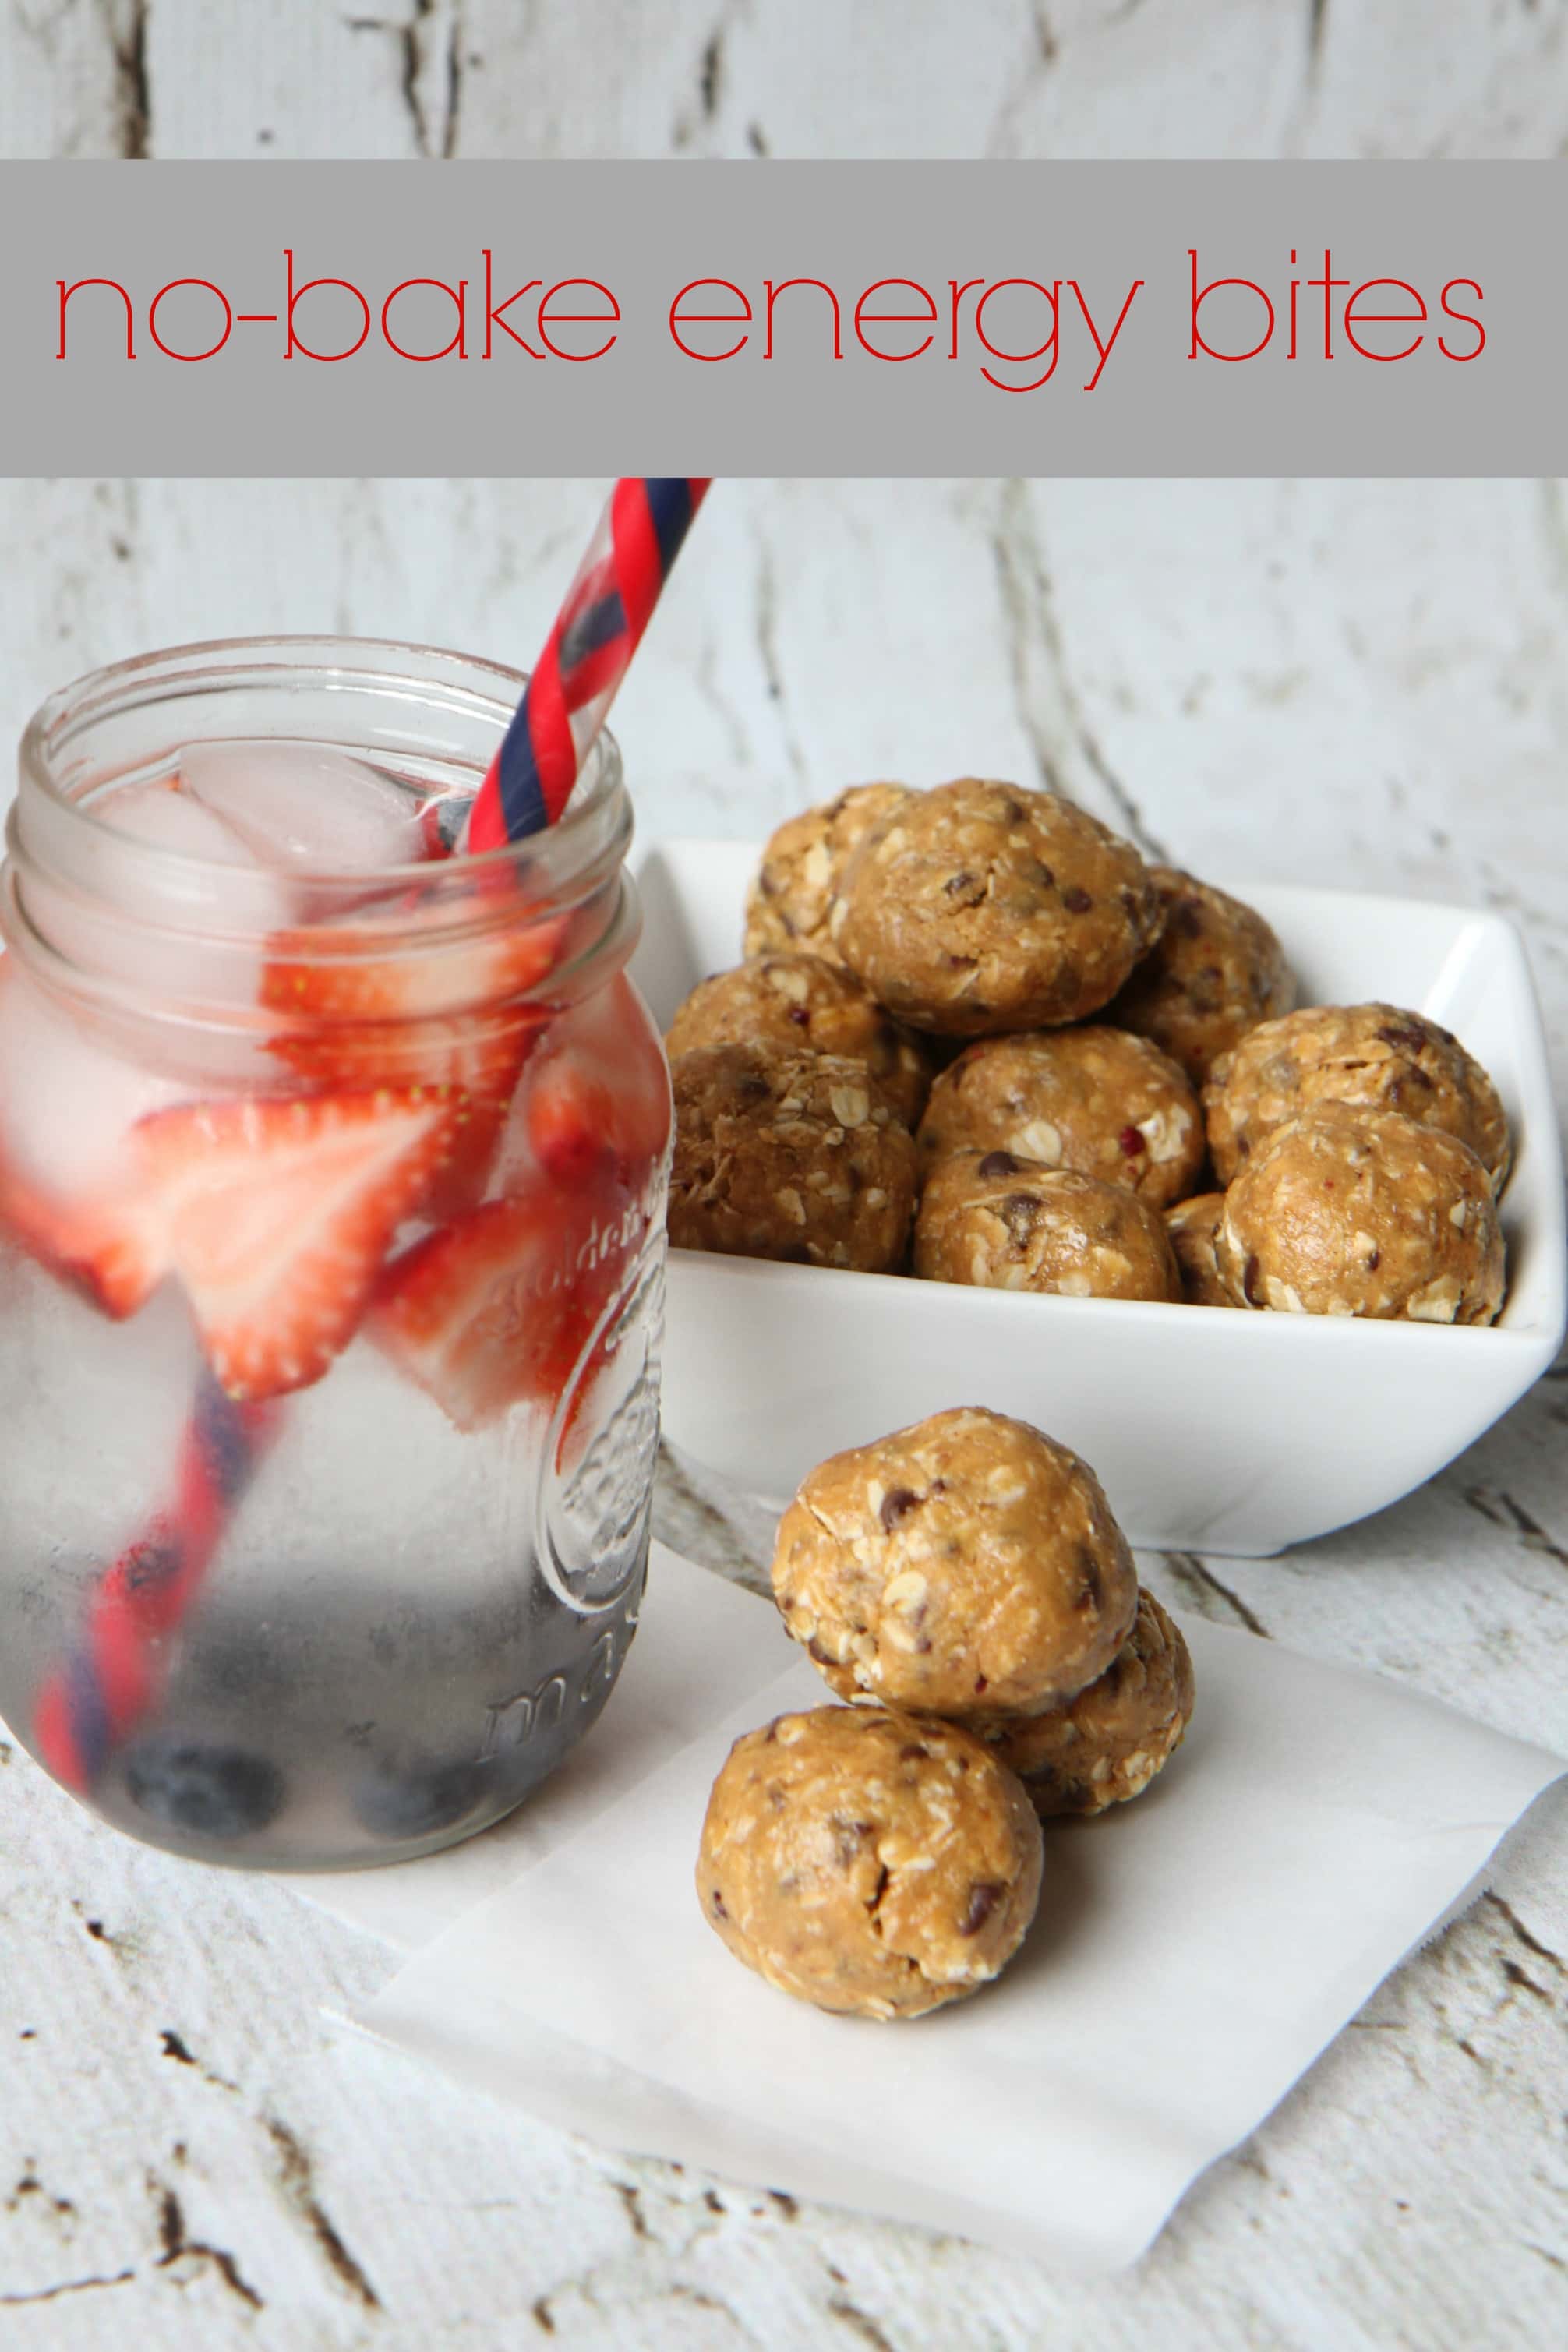
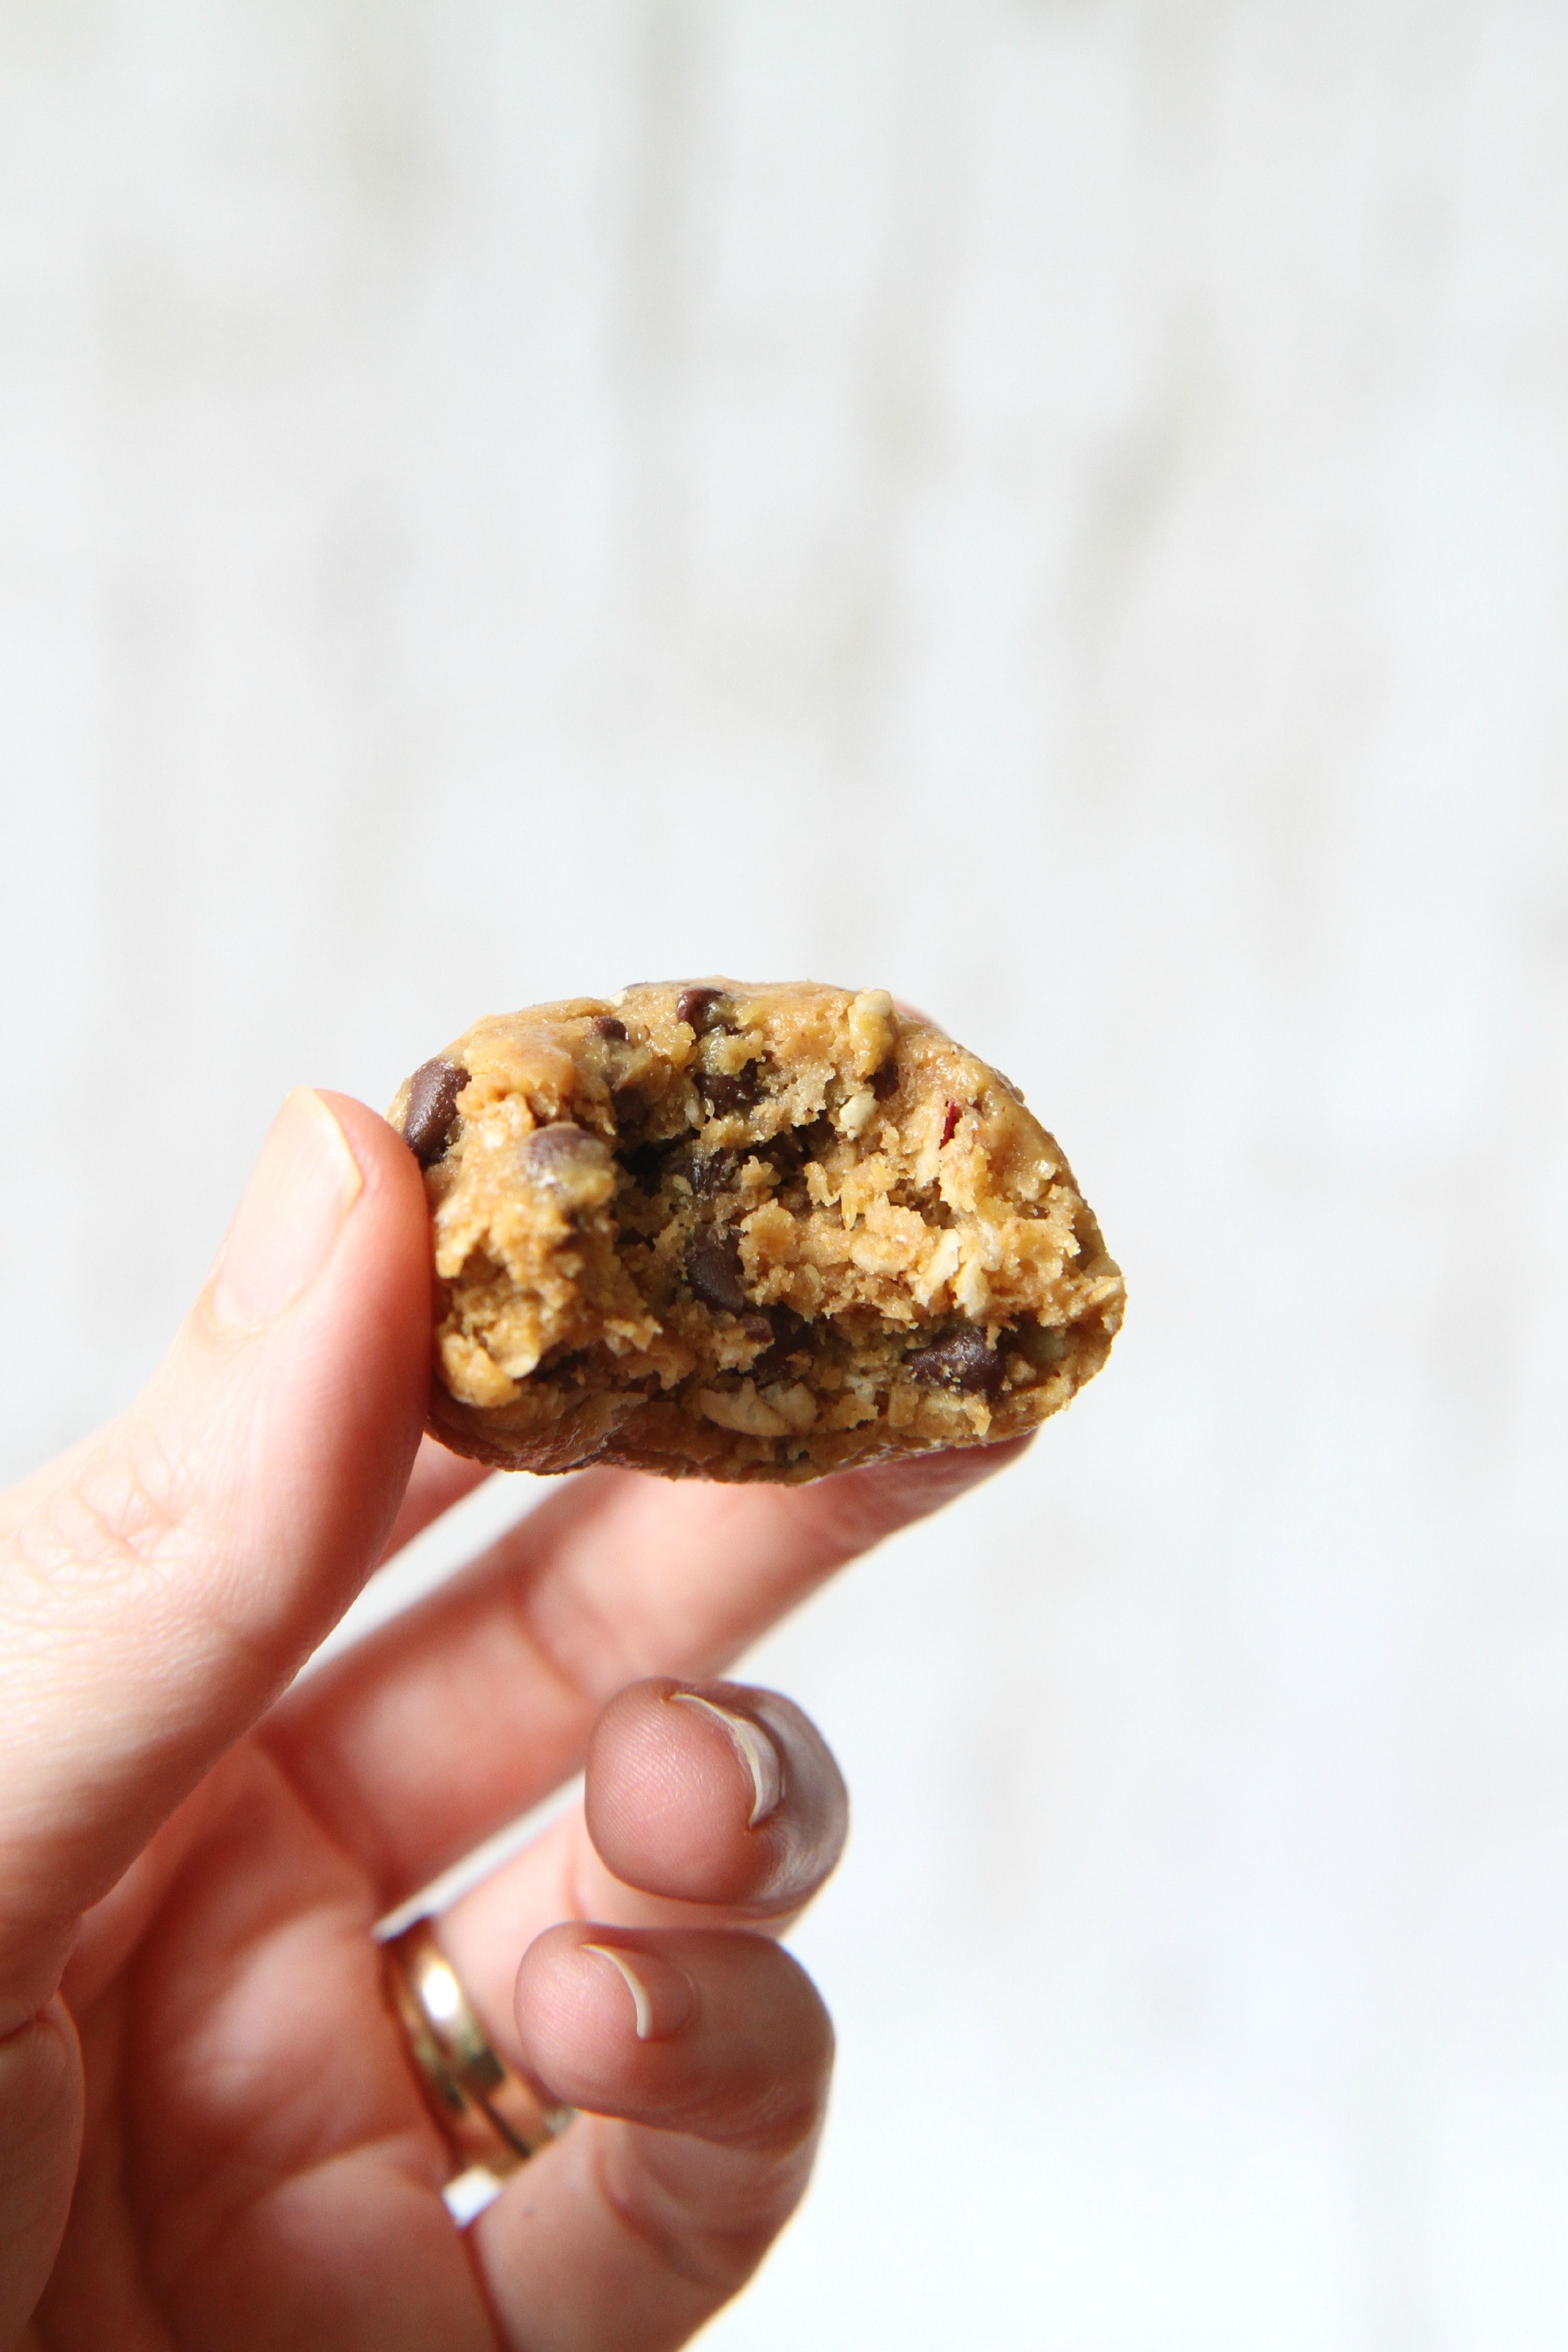
Energy Bites- No-bake energy bites are a fun snack to have on hand when you are craving a treat with a little sweetness. We all adore these at my house! The best part is that they don’t require an oven or mixer, making these an easy treat to make…and to eat! Did I mention it tastes an awful like cookie dough too? Yum!
No-Bake Energy Bites
Recipe Type: Snack
Author: Amy Clark
Prep time:
Total time:
Serves: 12-16 bites
Ingredients
1 cup oatmeal
1/2 cup peanut butter (or other nut butter)
1/3 cup honey
1 cup wheat germ
1/2 cup ground flaxseed
1/2 cup mini chocolate chips
1 teaspoon vanilla
Pinch of salt
Instructions
Mix everything above in a medium bowl until thoroughly incorporated.
Let chill in the refrigerator for half an hour.
Once chilled, simply roll into balls.
Store these in an airtight container and keep refrigerated for up to one week.
This was originally published in March of 2013 and goes so well with our focus on health that I thought you’d enjoy it again – it’s one of my favorite ways to start the day!
I’m always looking for filling & satisfying breakfast recipes and these quinoa-berry breakfast bowls fit the bill perfectly. A mixture of quinoa and steel cut oats offer a hearty combination for a breakfast that will fill you up and give you the energy you need to tackle your day.
If you are not familiar with quinoa, you are missing out on a filling and satisfying protein-packed food. Quinoa, pronounced (KEEN-wah) is a very nutritious gluten-free seed that originates from the Andean region of South America. Quinoa is a fantastic source of protein, contains all eight amino acids, is a good source of dietary fiber, contains B Vitamins, and iron. Though it is smaller than rice, barley, farro and bulgur, quinoa looks like a grain, thanks to its neutral coloring and hard exterior. In reality, it is actually a seed that originates from the cousin of the spinach plant. When cooked, these seeds expand rapidly and significantly, become tender but chewy and expel spirals that boast the slightest crunch. My favorite preparation of this delicious food can be found in my tutorial on how to cook quionoa in your rice cooker.
Steel-cut oats are essential grains which are full of nutritional value, rich in B-vitamins, calcium, protein and fiber while low in sodium and unsaturated fat. In fact, just one cup of steel-cut oats contains 8g of fiber. Steel-cut oats are whole grain groats, the inner portion of the oat kernel, which have been cut into two or three pieces rather than flattened.
With quinoa and steel cut oats in one bowl, you have a winning combination for a great way to start your morning.
Top your quinoa-oat bowls with any of your favorite oatmeal toppings. I love the combination of berries and toasted slivered almonds, but if the pantry is lean that day, I rely on walnuts and dried berries.
I prepared my oats with almond milk, giving it a great calcium boost and it adds even more protein to my breakfast bowl. You can prepare this with whatever your favorite milk is or whatever your family typically drinks.
This makes enough for two large bowls or four smaller bowls. Store leftovers shortly after preparing. The leftovers can be reheated in your microwave and thinned with a little milk.
If you make a double batch, you will have enough for all week long. I prepare these on Saturday mornings when I have a little more time and reap the rewards of my labor throughout the week.
You know the phrase, “a watched pot never boils.” Really, not the case with these. Keep an eye on these all the time and make sure you have a generous pot to prepare them in because these bubble up and boil over pretty easily.
Quinoa-Berry Breakfast Bowls
Recipe Type: Main
Author: Adapted from Camille Styles
Prep time: 5 mins
Cook time: 35 mins
Total time: 40 mins
Serves: 4
A protein packed breakfast bowl made from quinoa and steel cut oats and topped with fresh berries and nuts.
Ingredients
3/4 cup steel cut oats
pinch of salt
1/4 cup quinoa
3 cups water
3/4 cup milk of your choice
1/2 teaspoon vanilla extract
2 tbsp maple syrup
Toppings (whatever you favorite topping combination is)
Instructions
In a large saucepan, combine steel-cut oats, salt and water. Bring to a boil, then reduce heat and simmer, partially covered, for 15 minutes without stirring.
Rinse quinoa well in a fine-mesh sieve.
Drain and add quinoa to the oats, give it a quick stir, then partially cover and simmer for 10 more minutes.
Add 1/2 cup milk and add vanilla to your saucepan. Stir gently to combine and cook for an additional 10 minutes.
Spoon into a serving bowl and top with remaining milk, maple syrup and toppings.
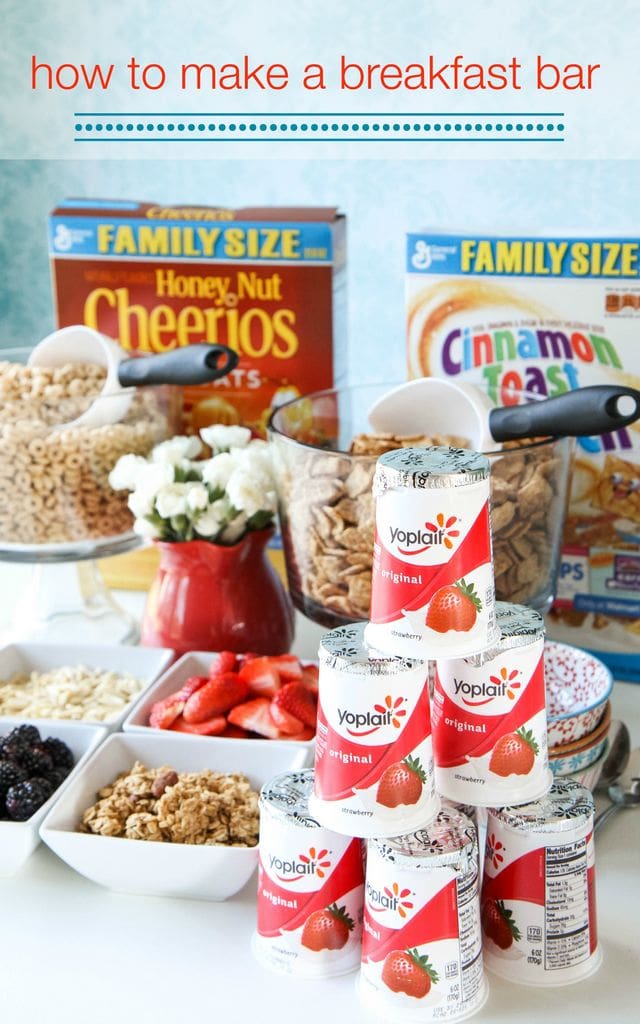
We have come to the age of slumber parties and epic sleepovers in our home. If you were anything like me when I was a child, you just couldn’t wait to wake up and find out what would be for breakfast. Making a breakfast bar can be a fun way to serve a large group whether it is your child’s birthday or simply an easy way to entertain guests for the morning. I am partnering with Walmart today to show off a cute display for creating a breakfast bar in your home.
My favorite sleepover when I was a kid involved a huge display of toppings for our waffles and pancakes. I remember as a child delighting in all of the options and I still have that delight even as an adult. Now as mom, I love creating a self-service bar of choices for our meals where everyone can customize their own meals to their own tastes.
Breakfast, in particular, as a buffet is a great idea so that guests can sleep in and then come and create their breakfast whenever they are ready, eliminating the need for you to all be around the table at the same exact time.
Even on busy school mornings, I find that this option would work beautifully since we all arrive at the table at different times. By prepping the toppings ahead, you can save time in the morning and really enjoy that cup of coffee.
Here are some of my suggestions for creating a beautiful and easy breakfast bar spread!
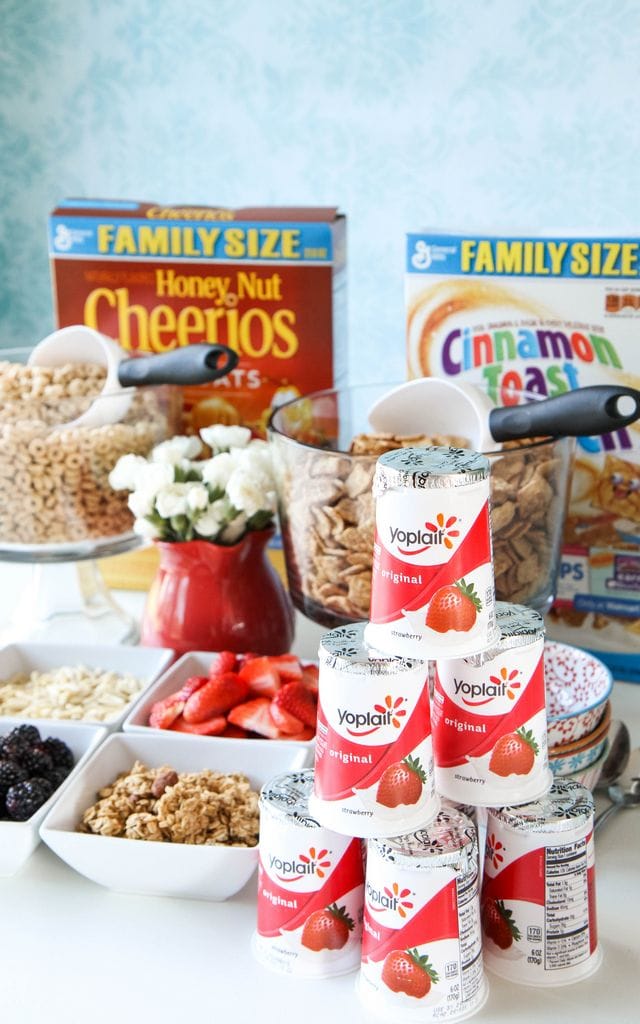
Make Serving Easy With Scoops & Trifle Bowls
Ditch the cereal boxes for an elegant display utilizing clear glass trifle bowls and an inexpensive all-purpose scoop. Give your guests choices by providing more than one selection of cereal.
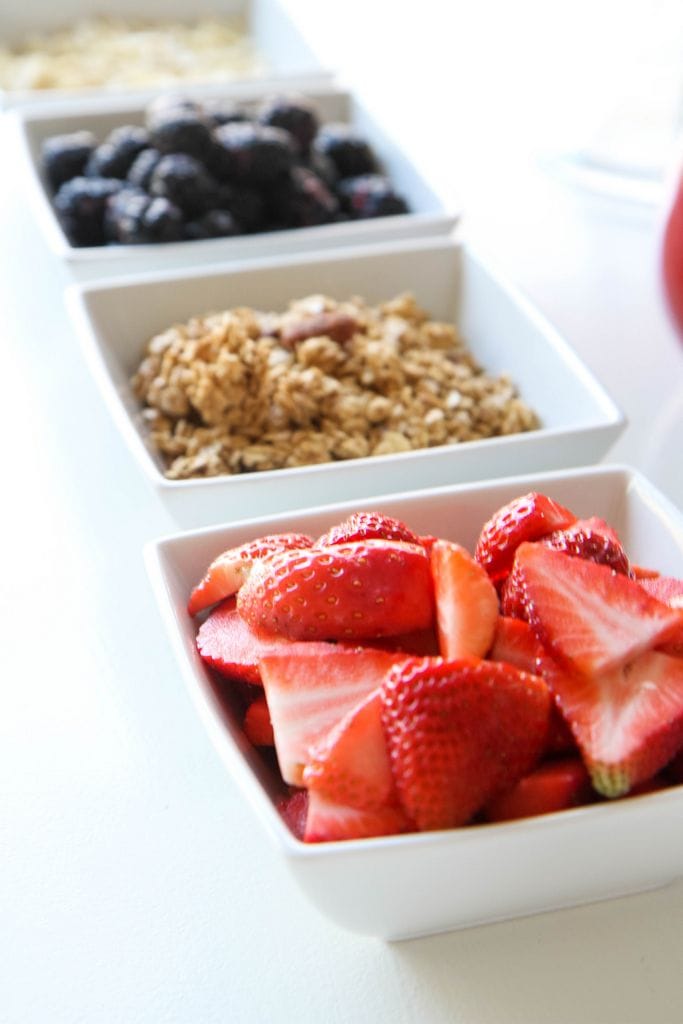
Create a Simple Toppings Bar
I love to provide a variety of toppings so everyone can make their bowl their own. Fresh strawberries, blackberries, or blueberries can be a wonderful fresh topper. Dried fruits, slivered almonds, or crunchy walnuts can also add variety to your toppings bar. Make an easy batch of granola (I love this vanilla-scented granola or this easy honey nut granola) and add this to the mix for another crunchy layer. Remember to take advantage of what fruits are in-season to make sure you get the most bang for your buck.
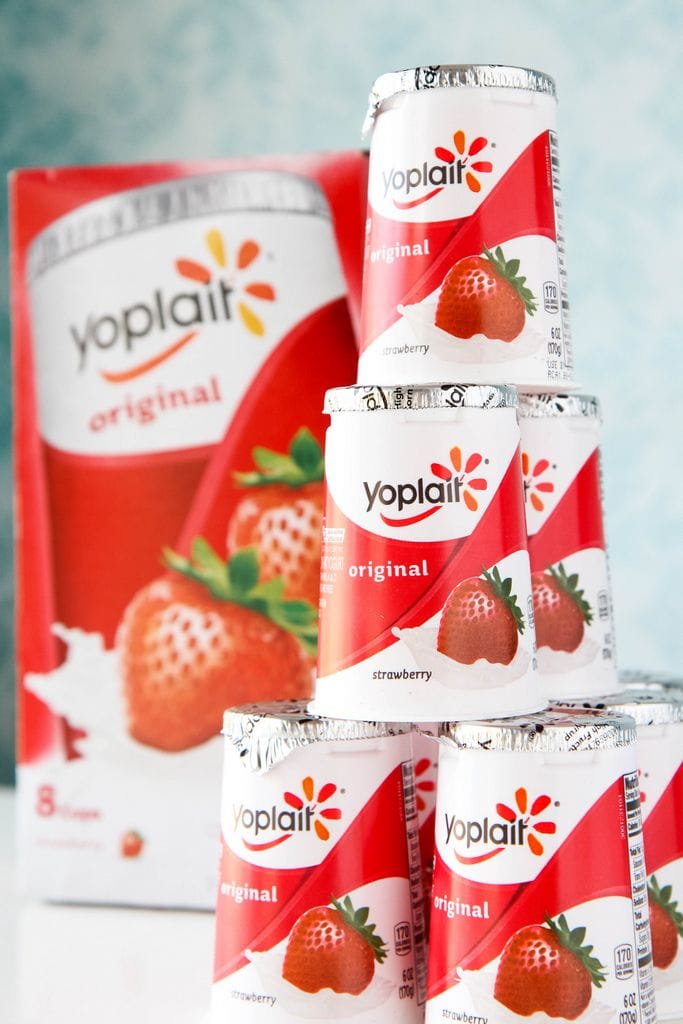
Add a Gluten-Free Option
As someone who is gluten-free, I love when there are options for me. Yogurt can be a delicious option and give your guests a chance to also create their own bowl utilizing the delicious toppings you have provided for your breakfast buffet. I like to keep small bowls handy to pour the yogurt out into and giving me room to really layer on the fruit, nut, and granola toppings, just as I would do with cereal. Make sure that you are using gluten-free oats if making your own granola or purchase gluten-free prepared granola if purchasing them.
Make a Pretty Display
If there is one investment that I am glad I have made over the years, it has been in classic white dishes. Display your toppings in pretty bowls and add an inexpensive bouquet of flowers to the center of your breakfast bar. Even if the ingredients are not all homemade, you can still make things feel pretty and upscale with a few inexpensive additions and beautiful plating.
I hope these ideas inspired you for your breakfast. Whether it is a weekday rush or a leisurely morning with out-of-town guests, the breakfast bar can be an easy way to serve a meal!
I have had my calendar booked forever for Peter Pan Live! ever since I heard it was the next live theater production to hit television.
Did you hear that it is coming to NBC on Thursday, December 4 at 8/7c? The cast includes several of my favorites like Allison Williams, Christopher Walken, Christian Borle and Minnie Driver.
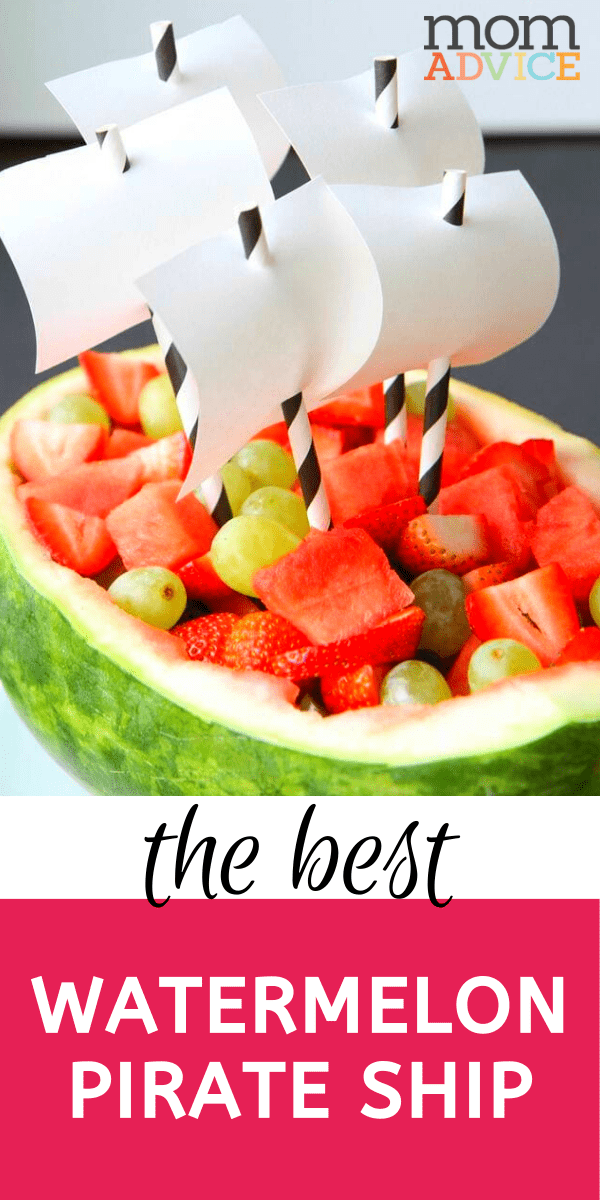
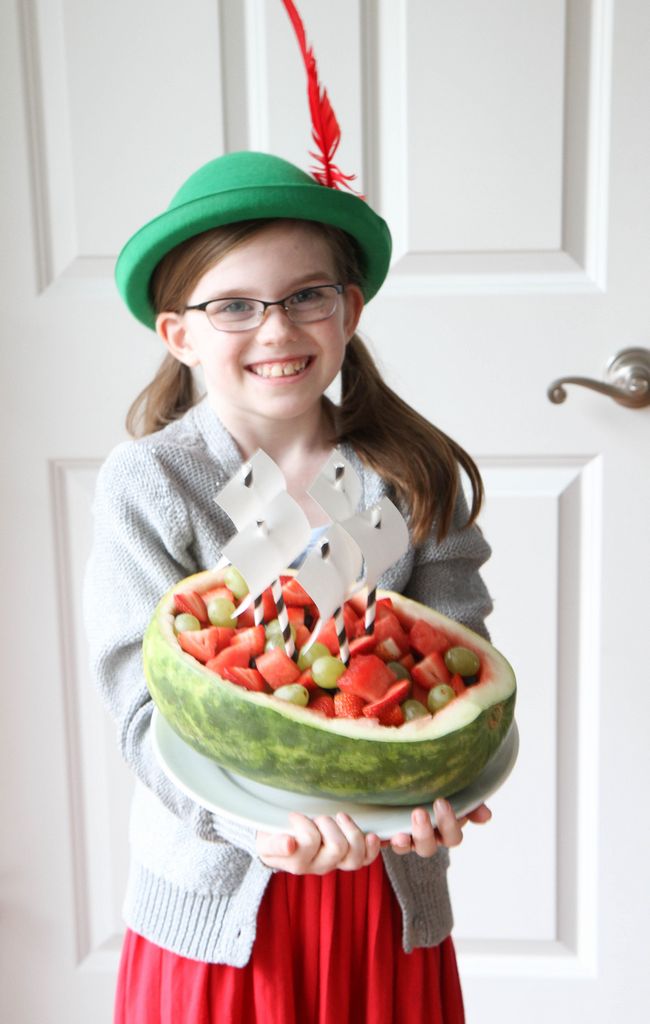
In honor of the film, I have crafted up a watermelon boat that you can share with your kids for your family night together.
This fun food craft can be created together, adding your own personal pirate touches, or you can create it to surprise the kids for your family night.
Not many people know this, but I did theatre for many years and my favorite type of shows to do were musicals.
My love for this started in high school and I took a year off in between high school and college to do more shows.
In fact, I even did a show when I was pregnant with my son.
Thankfully, it was of an era with empire waists and flowing Victorian clothing.
I miss it a lot and that is, perhaps, why I appreciate the opportunity to catch any production that I can.
I also appreciate any opportunity I can get to expose my children to the arts and it is why I put a big significance on this in our home.
Not everyone can afford a ticket to see a show and I love that this is an affordable way to enjoy the arts as a family.
Let’s create a fun pirate ship for your family night!
Supplies Needed
1 watermelon
1 pint blueberries
1 pint strawberries
1 pound grapes
1 sharp knife
cutting board
1 piece of cardstock
5 paper straws (I found these in the party supplies aisle)
1 hole punch
1 pair of scissors
Directions for Watermelon Pirate Ship
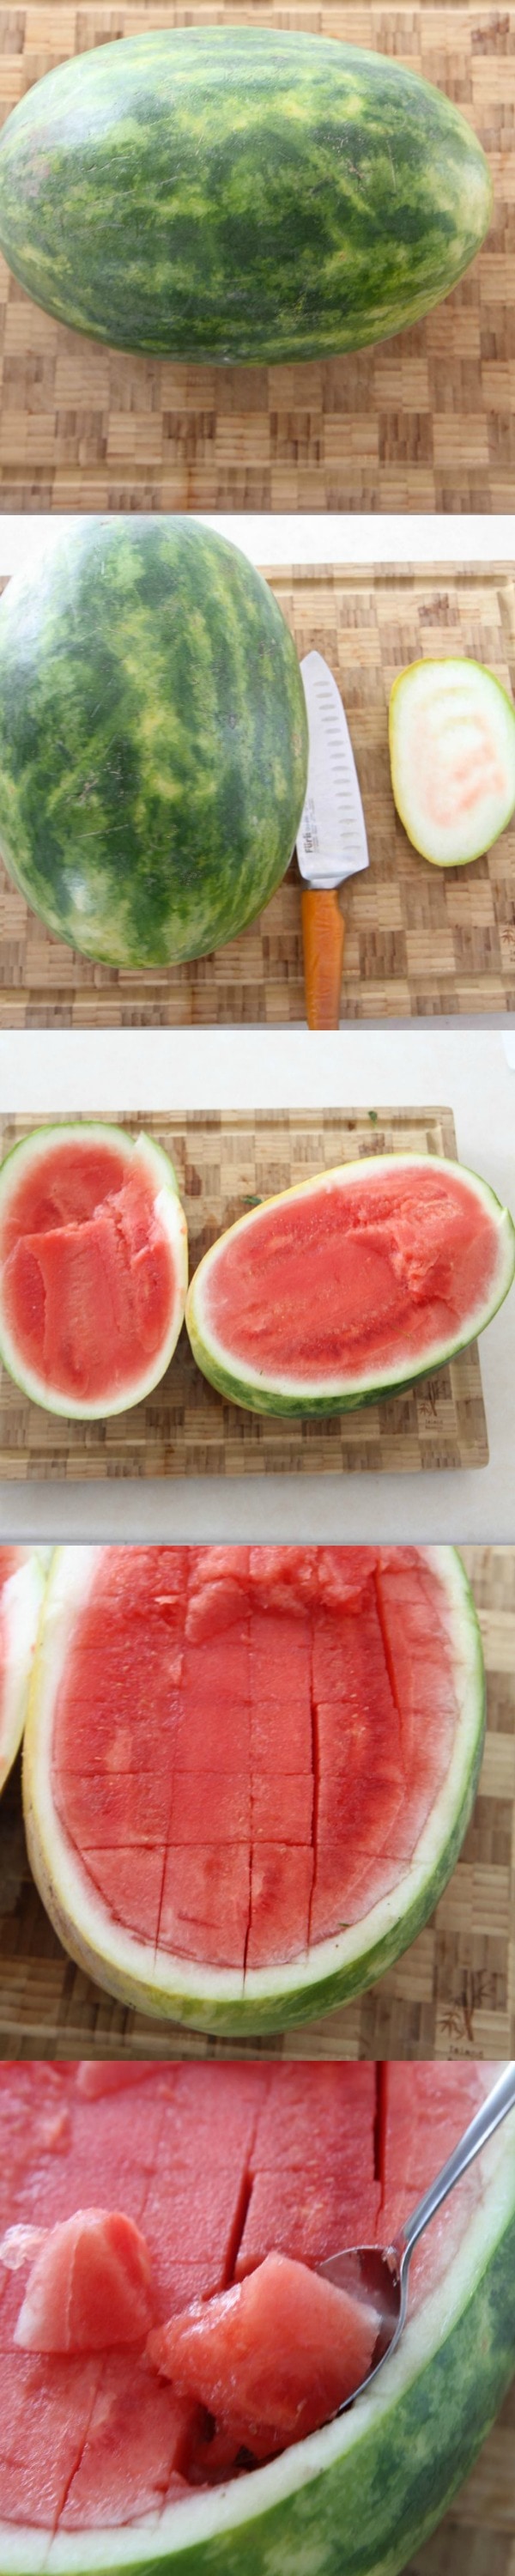
1. To help your boat sit upright, slice very thinly the end off of the bottom of the watermelon, making sure not to puncture your watermelon so it can act as a boat for your fruit.
2. Slice the top half of your watermelon off. Set aside.
3. Using a melon baller, remove the meat of your watermelon. If you do not have a melon baller, you can score the watermelon into chunks and glide your knife all around watermelon to help create the shape of your chunks. Use a spoon to then scoop out the squares of melon. Ideally though, a melon baller makes quick work for your fruit salad.
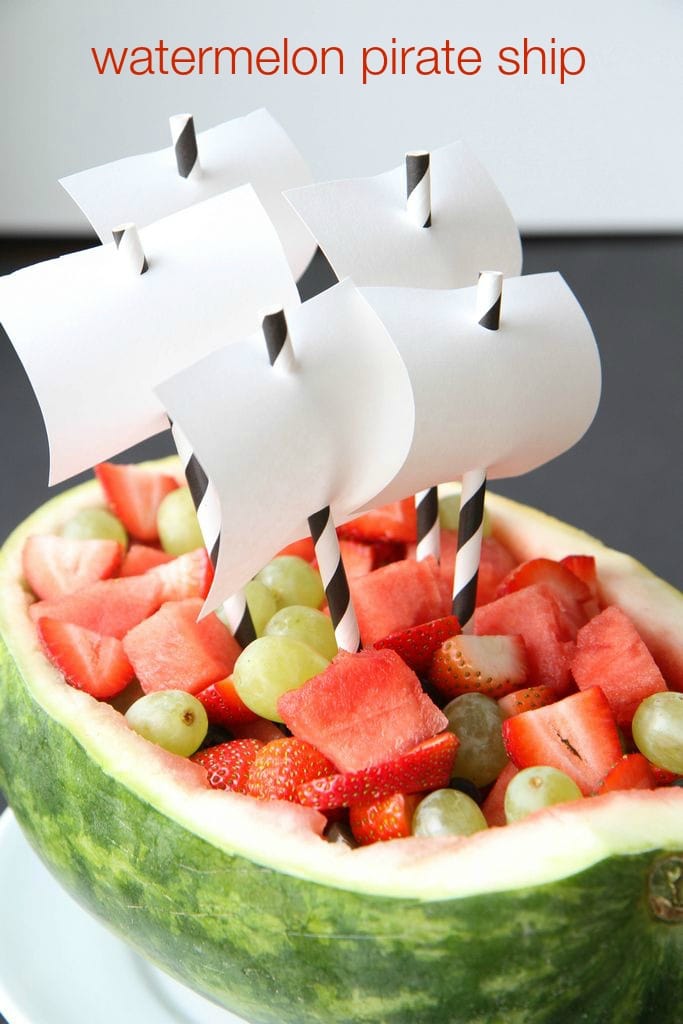
4. Once the melon is completely hollowed out, slice your fruit and place it inside of your bowl, weaving in your watermelon, to create your fruit salad.
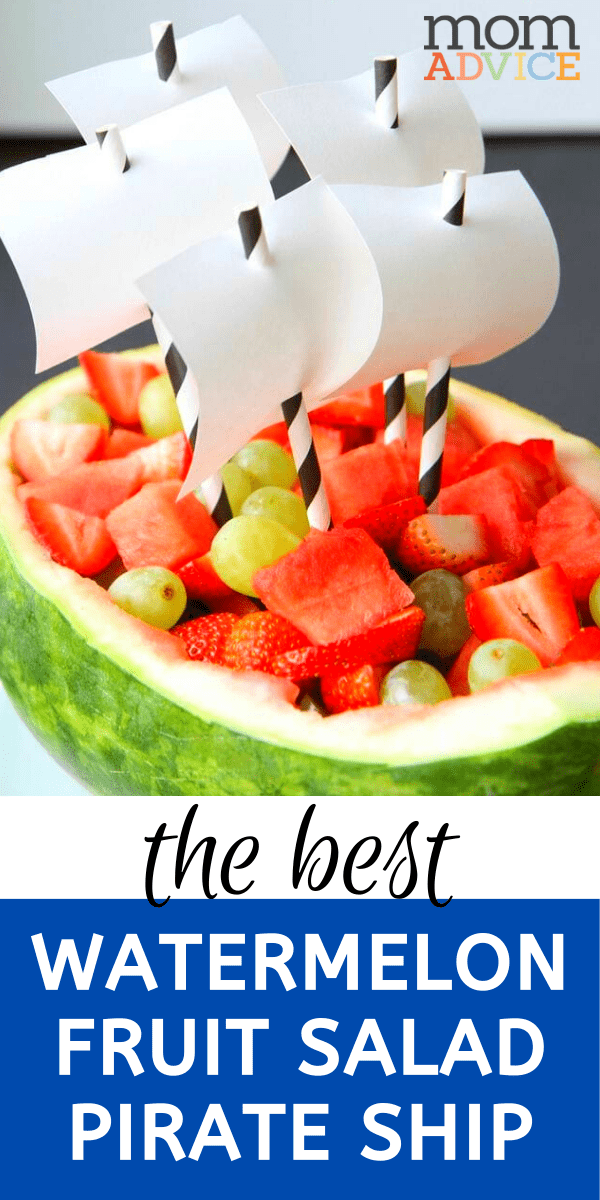
5. Now we can make our sails for our ship. Cut out five squares from a single piece of cardstock, any size you wish. I just cut out one square and used it as a template to create the rest of my sails. These do not have to be perfect, in fact, if they are imperfect they look like they are waving a bit in the breeze.
6. Using a hole punch, punch out a punch near the top of the square and then near the bottom to create a place for our straws to slide through. I stacked them all together and then punched them all at once so they would look more uniform.
7. You will then need to cut your straws are varying sizes. I did one long straw, two medium, and then two short. Slide the straw through making sure that the straw is peeking out of the back and not the front of that pretty white sail.
We hope you love this craft we created in honor of Peter Pan Live! and we hope you can catch the show with us! You can learn more about this amazing production here! We can’t wait and hope this idea inspires you for your family night together!

 3. Decorate with your choice of milk chocolate, white chocolate and/or various garnishes. Drizzle with melted white chocolate (using my pastry bag) and then shake on some edible pearls so they would stick. Let these set completely before placing into decorative bags and tying with beautiful ribbon.
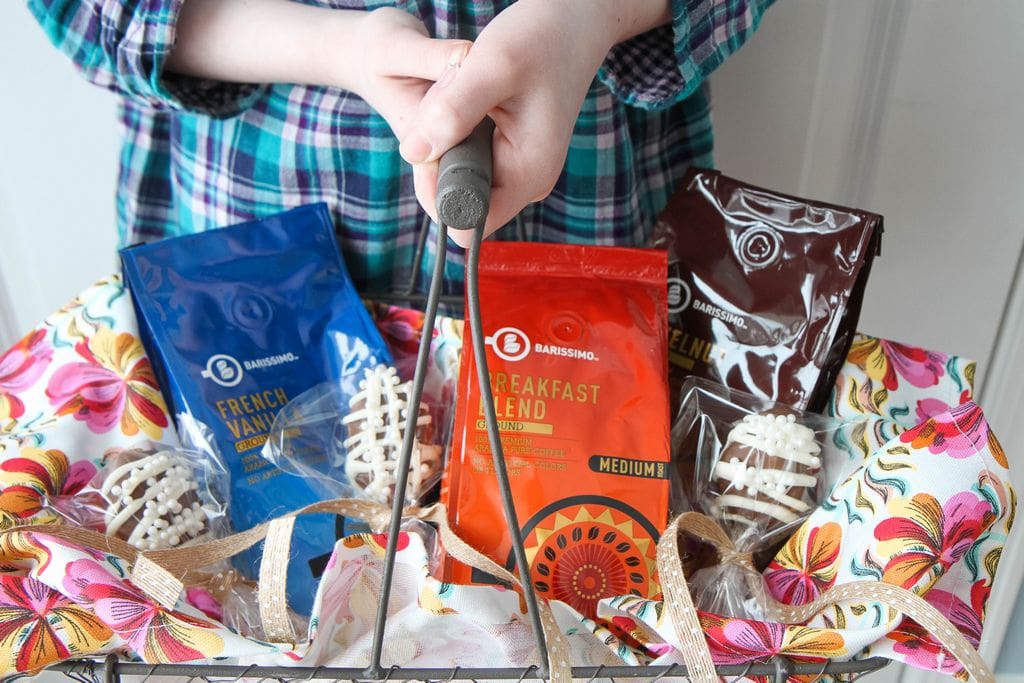


