Archive for the ‘Desserts’ Category

Favorite Coffee Snack: Light Snickerdoodle Biscotti

Tuesday, March 15th, 2011

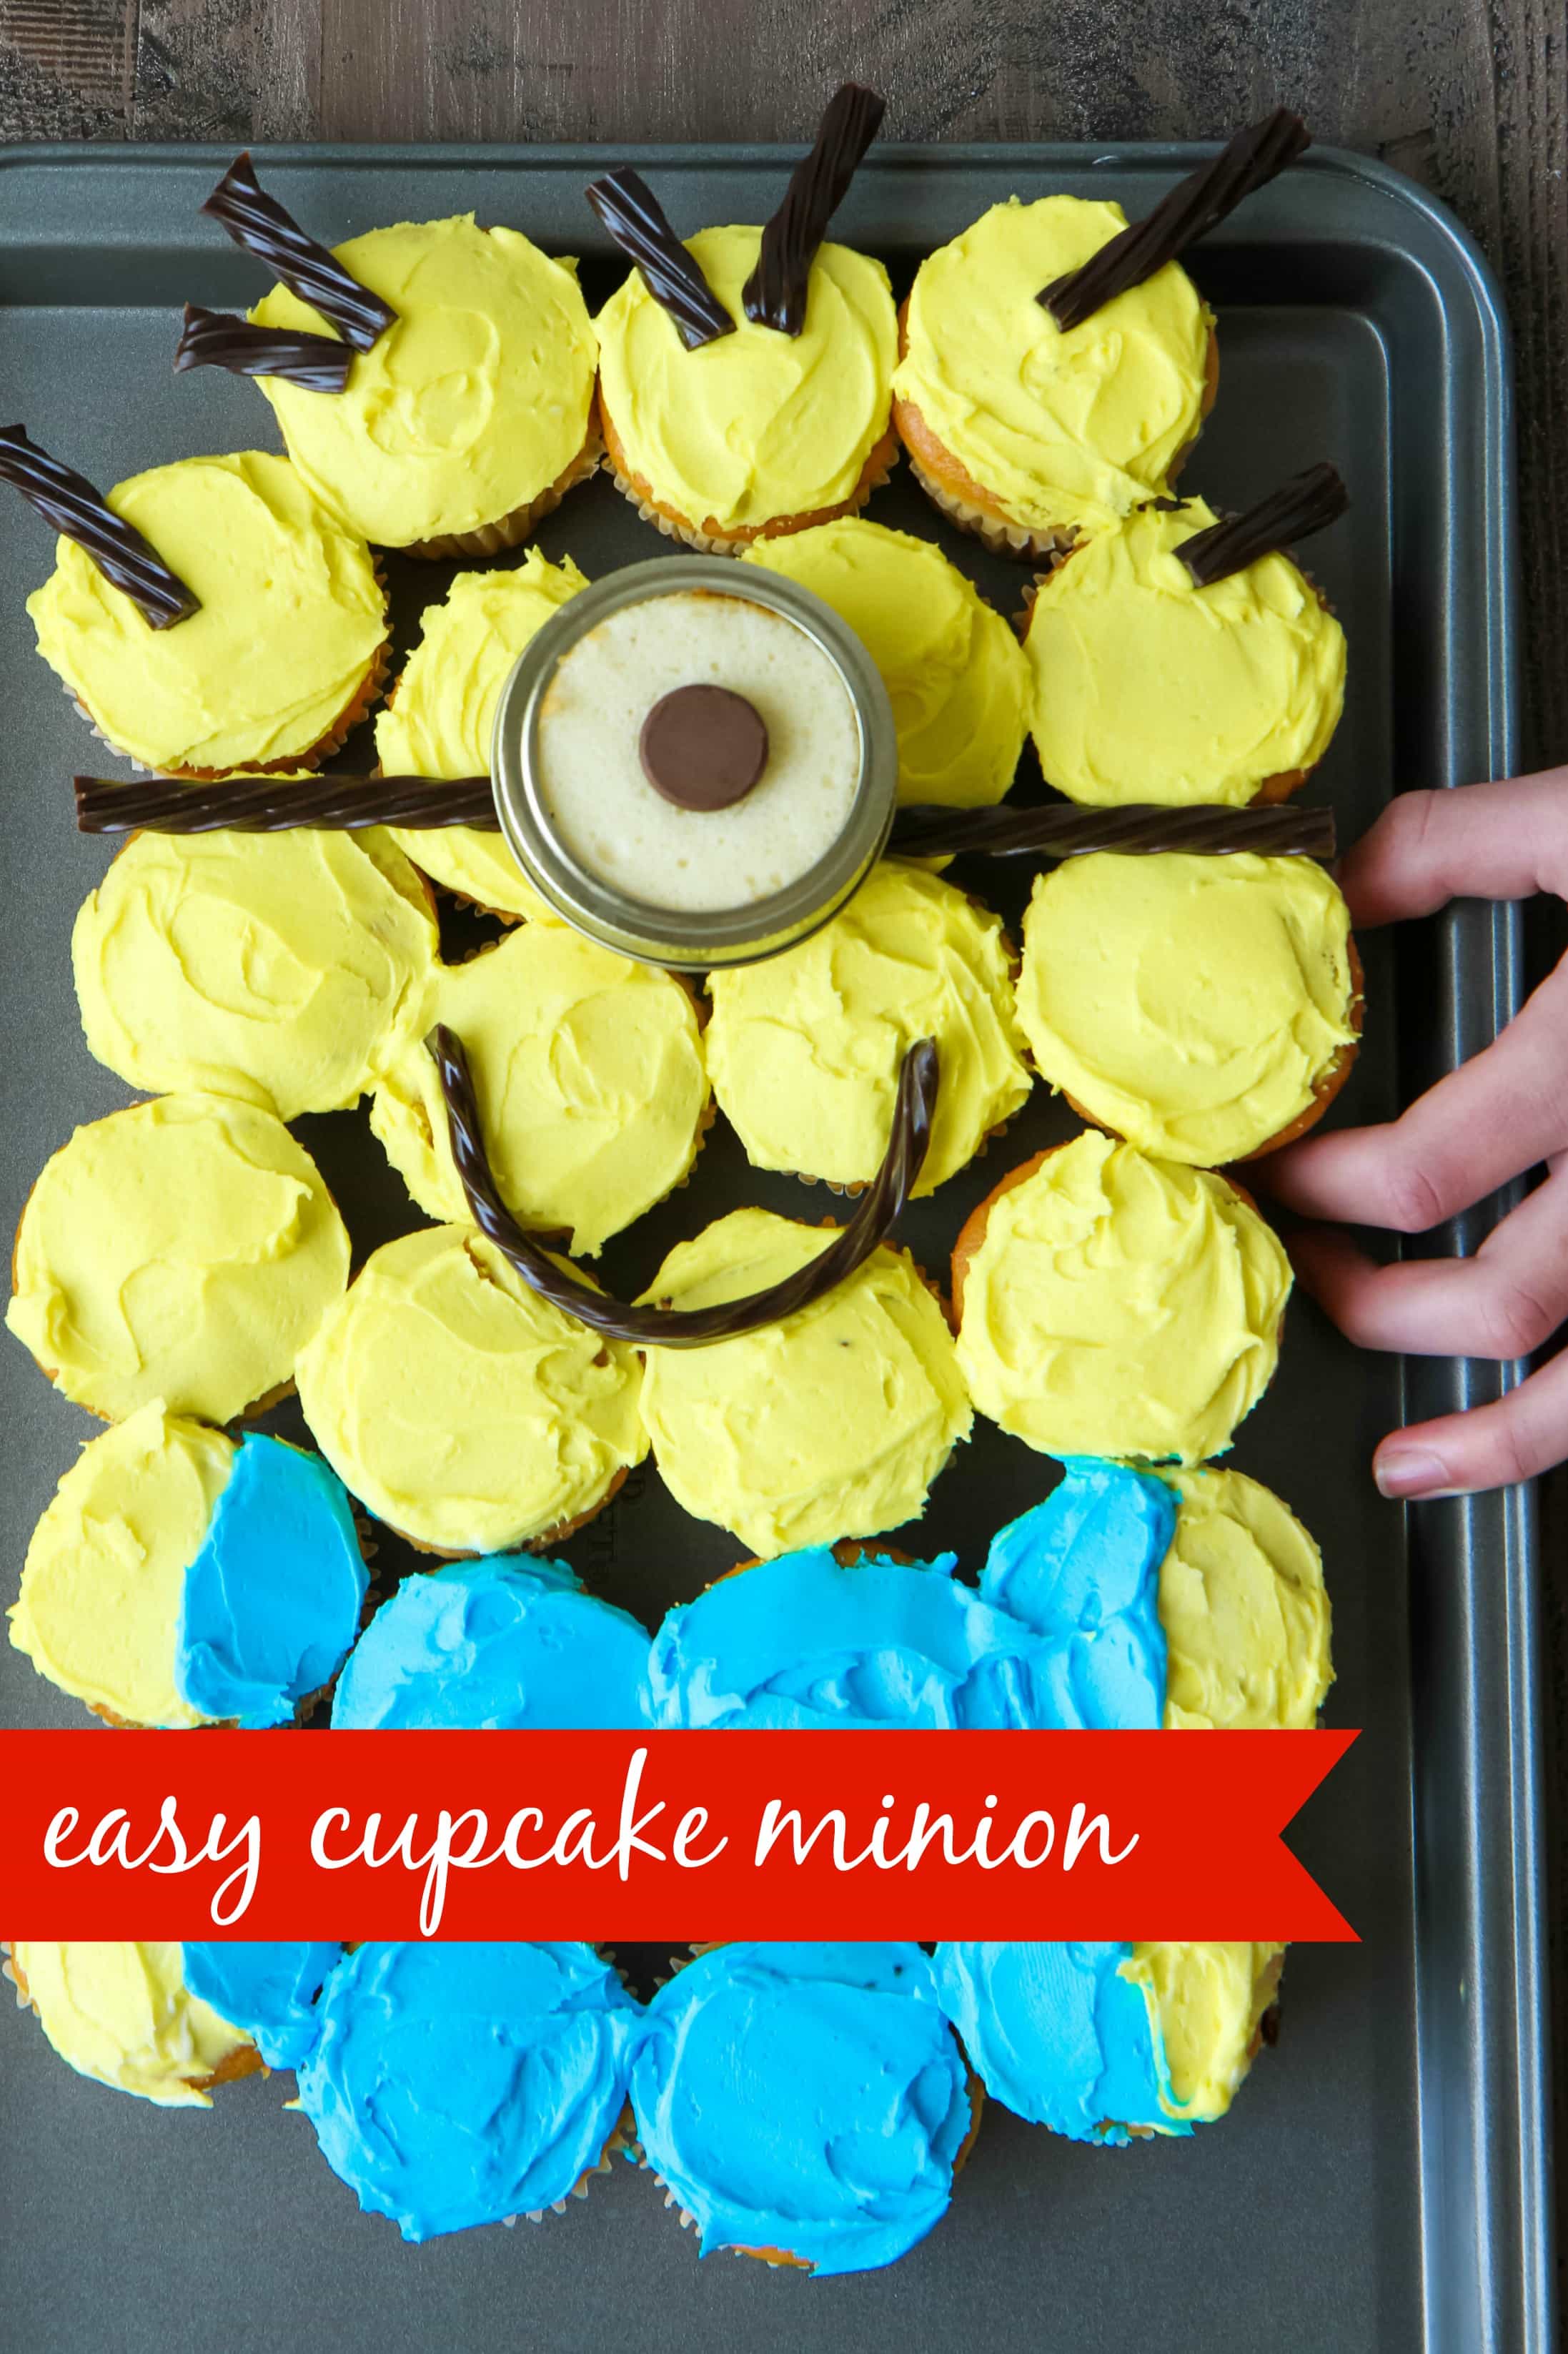
If you have been a reader here for awhile, you will have no doubt that coffee is my ultimate weakness. Coffee plus coffee treats…well, where do I sign up for that? After having such a blast participating in the Better Homes & Gardens cook-off, I was asked if I would like to participate in another fun contest where our readers could vote on their favorite coffee snack. Better Homes & Gardens sent me their new Stand Mixer ($129) , a Grind & Brew Coffeemaker($99), and a 5 Piece Nonstick Bakeware Set ($34.97), (all exclusively available at Walmart) to create my snack.

Considering I severely burnt the bottom of my cookie sheet, I am a coffee addict, and my stand mixer chose that week to kick the can…I couldn’t wait to create some treats with some fresh new kitchen accessories.

If you can make cookies, you can make biscotti! Biscotti is basically a twice baked cookie that is perfect for coffee dunking. In your mixing bowl, whisk or stir on low your flour, sugar, cream of tarter, cinnamon, baking powder, and salt.

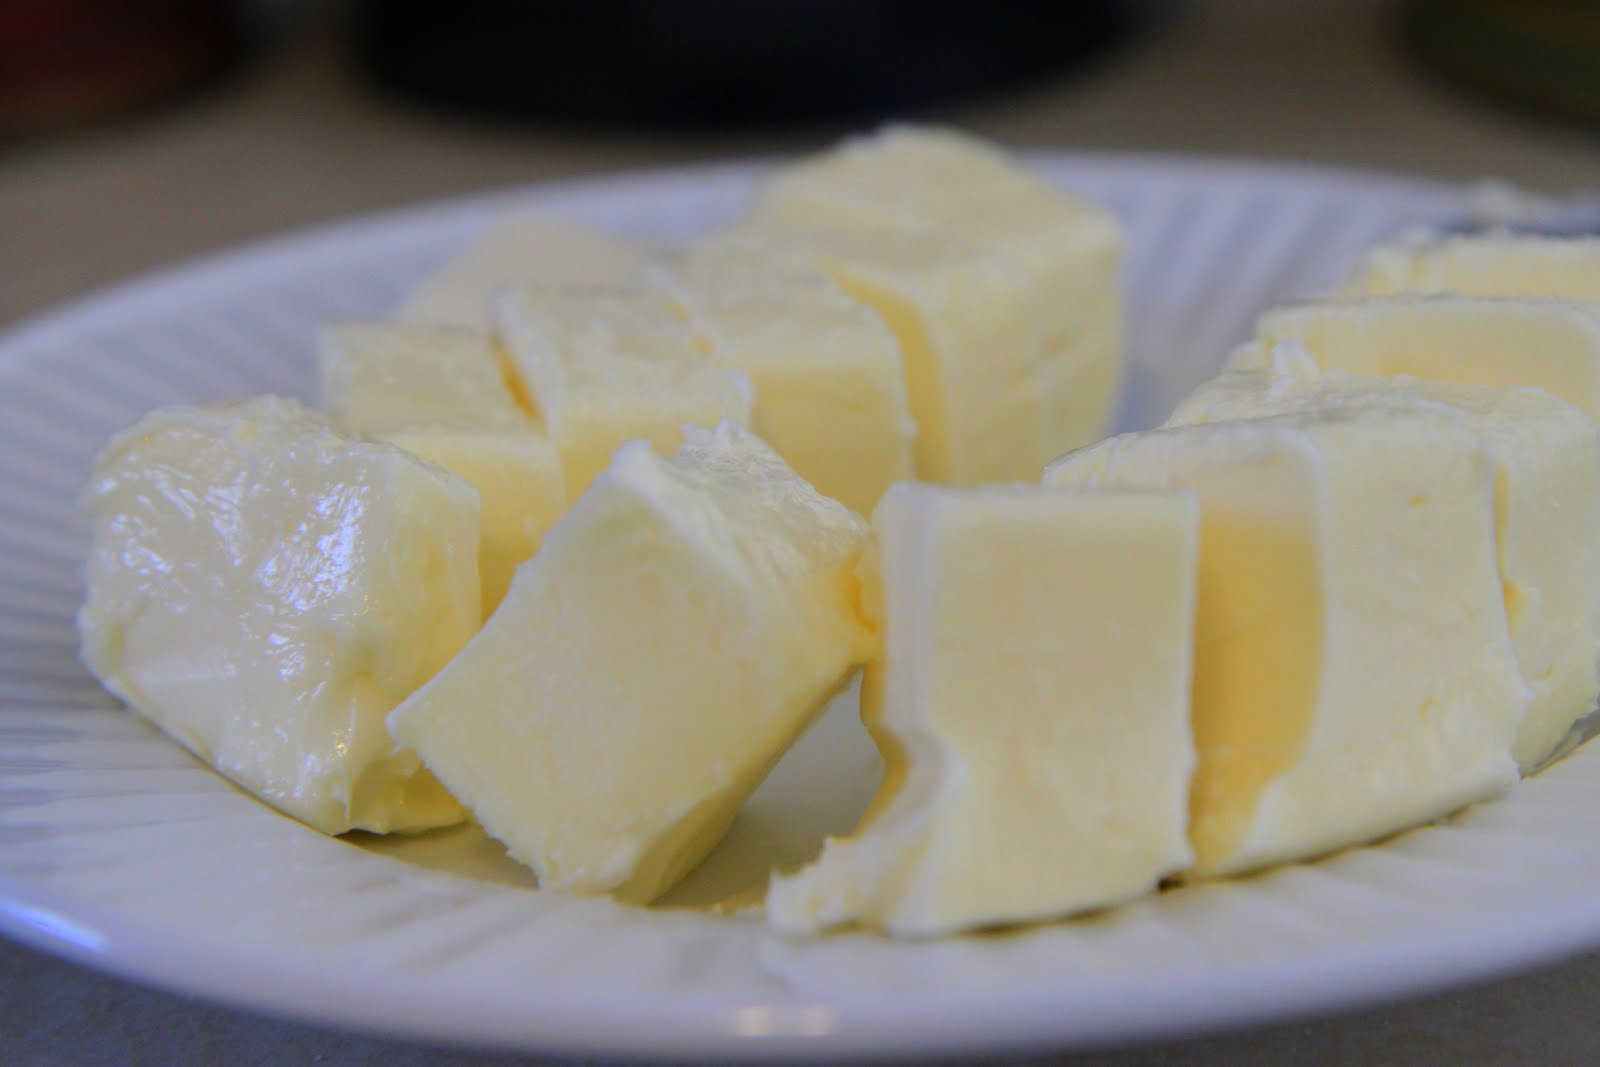
In a second bowl you will mix together your wet ingredients. In this bowl will be your egg, vegetable oil (only two tablespoons), and vanilla extract.

Turn on your mixer to low and add your wet ingredients to the dry ingredients. Here is the new BHG stand mixer that they sent. As someone who bakes a lot, I really love how quiet this mixer is, the thoughtful attachments that are included, and the rubber suction cups on the bottom so your mixer doesn’t hop around. I am sure it is going to get a lot of love in our kitchen! I am also doubly impressed that it is a mere $129, which is a steal in the stand mixer world.

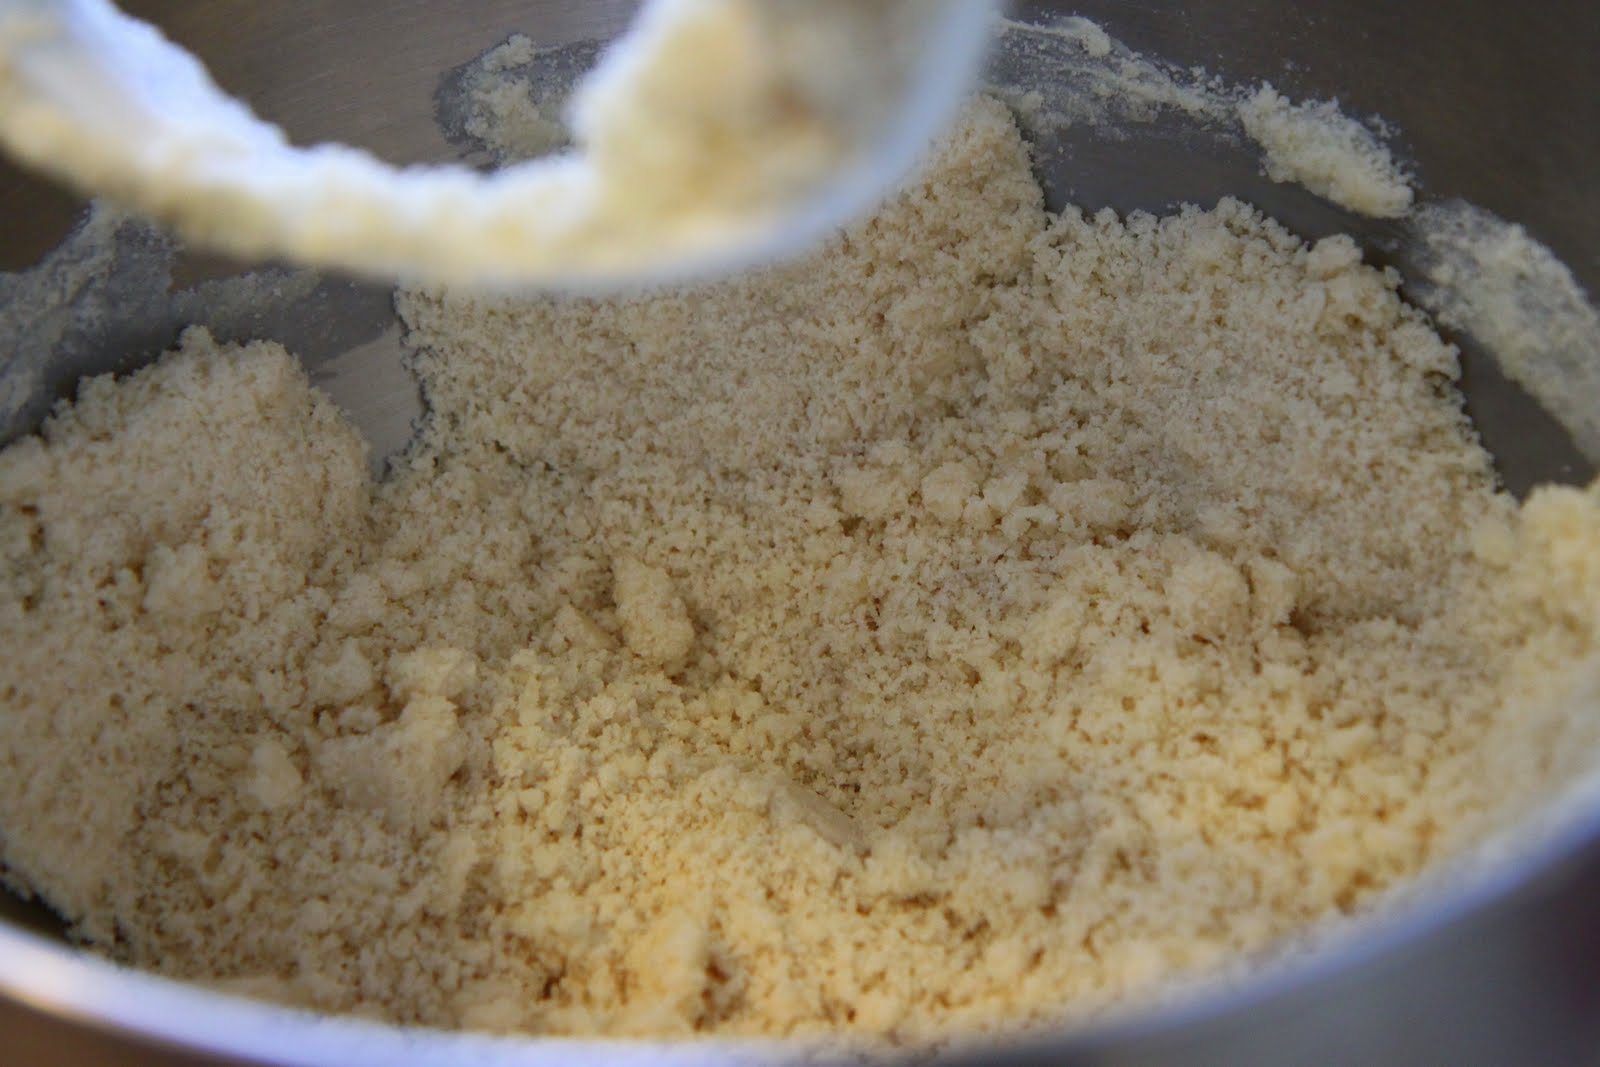
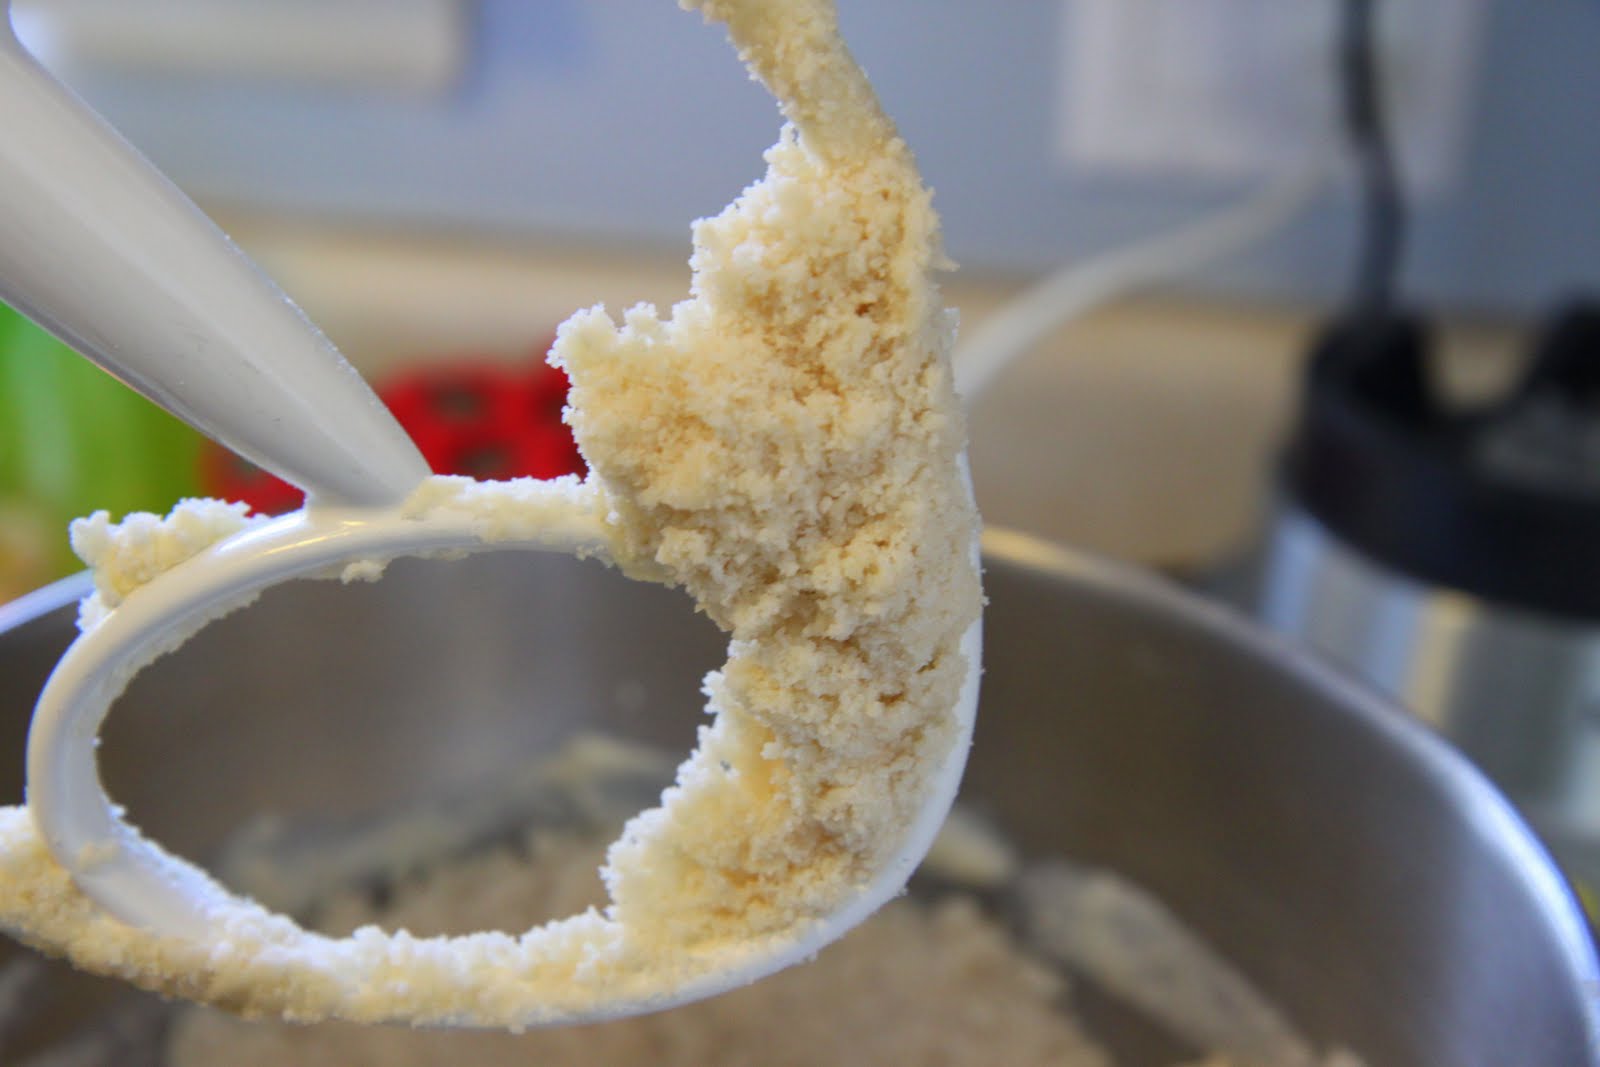
After it is done mixing, it will look like this… a big crumbly mess. You are going to be scratching your head wondering if you did something wrong. I promise you didn’t, it will all pull together.

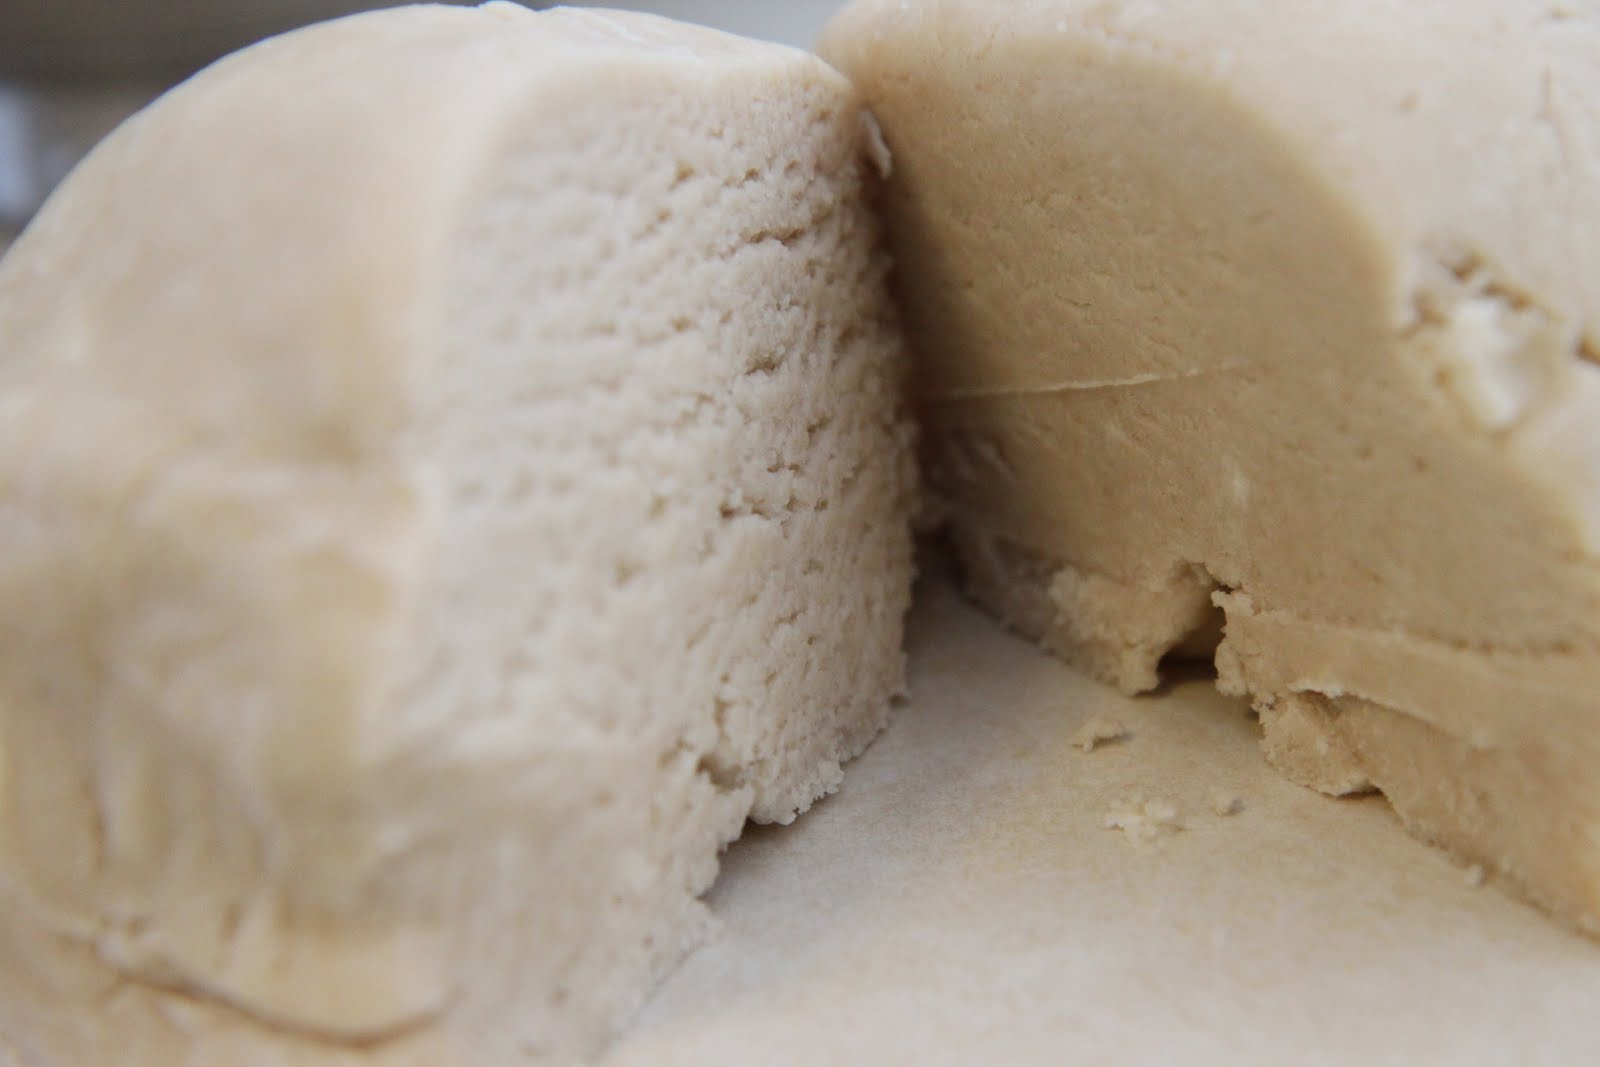
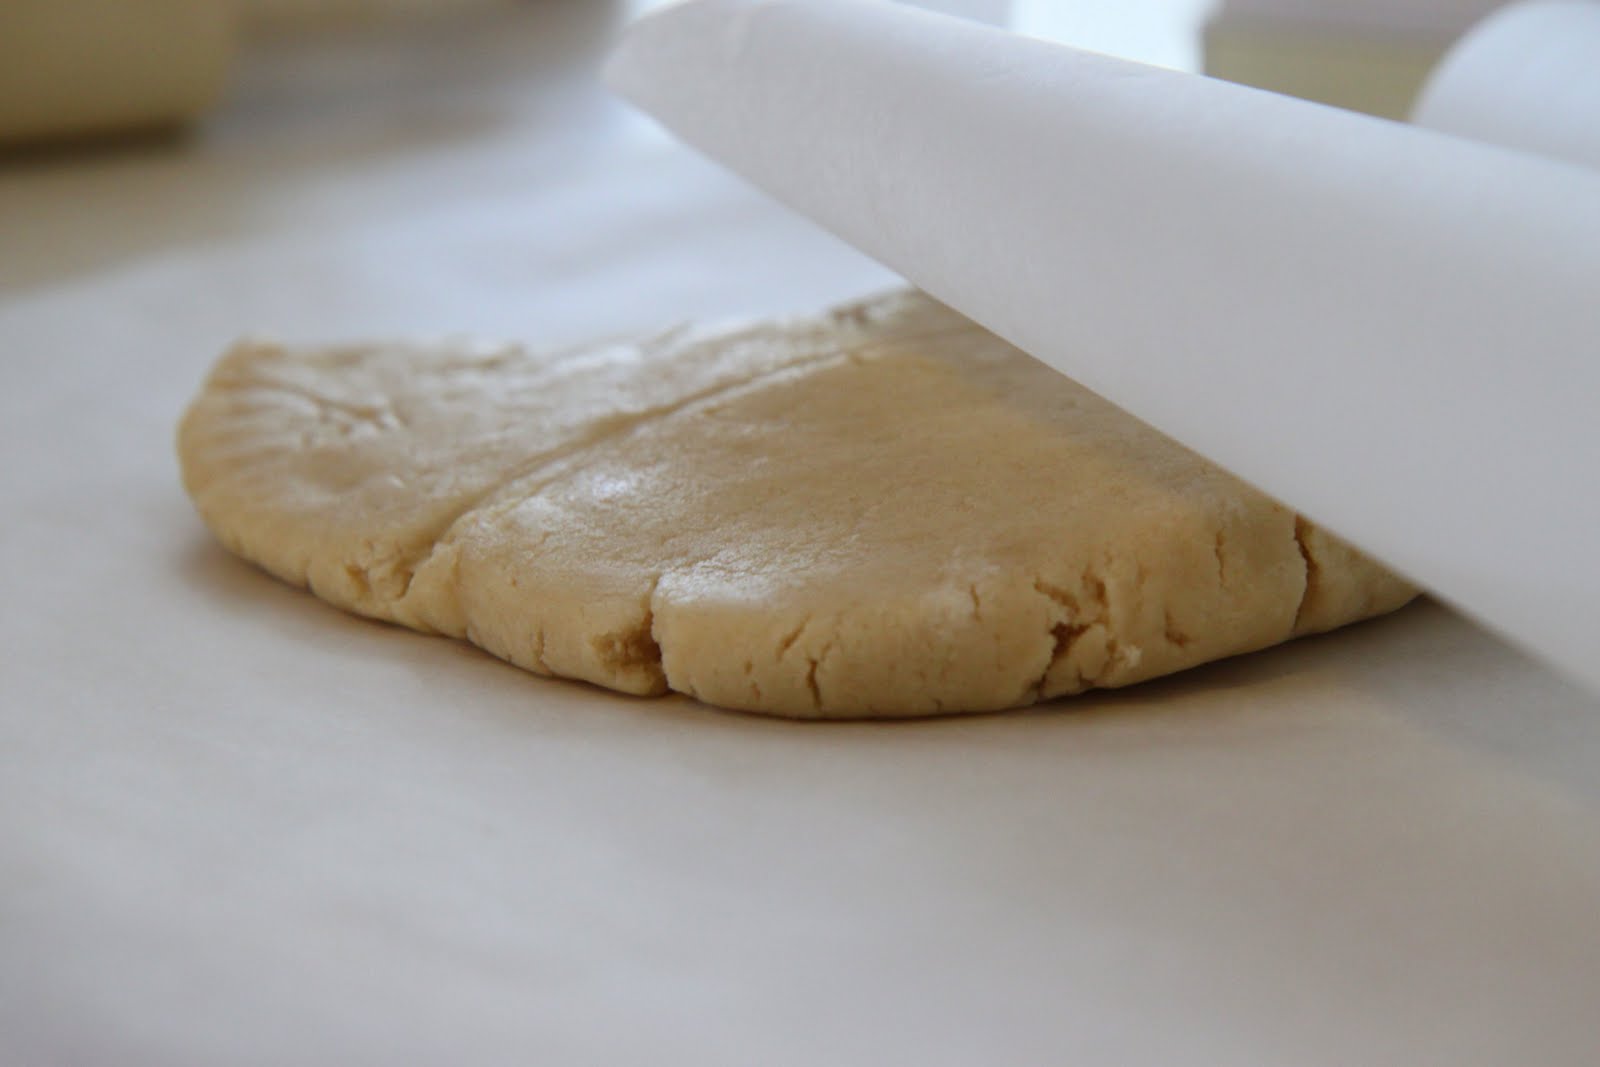
Grab a small bowl and fill it with water. You are going to want to dip your hands in the water and then with wet hands, start kneading the dough and pulling it together.  It will take a bit of work, but eventually it will look just like that dough ball pictured above.

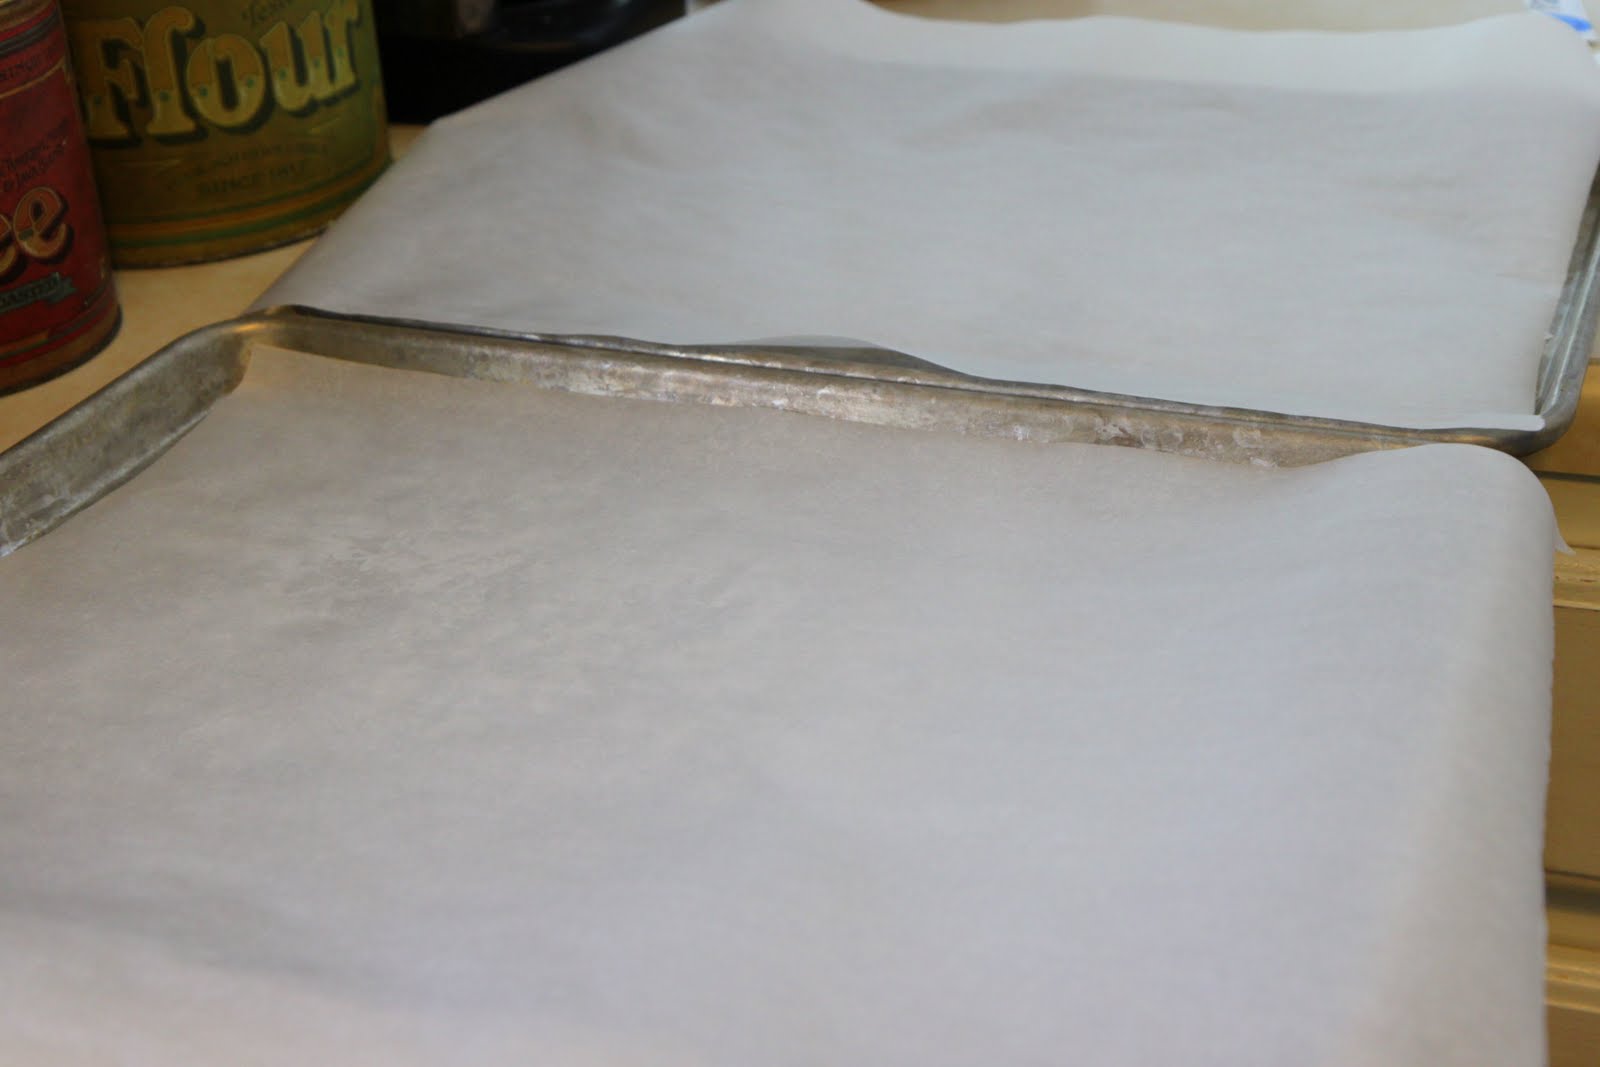
Line your cookie sheets with some parchment paper. This will make clean-up a breeze! I love the silicone handles on these cookie sheets and how easily they do come clean. I am not much of a cookie baker, I will admit, so if my cookies fly off a cookie sheet and turn out looking like a cookie…I am super impressed.

Divide your dough into two equal parts and then flatten the dough until it is roughly 8 inches in length, with about a 1 inch thickness. Make sure that the two balls have enough space to grow when they are baking. In two small bowls, you will have the final ingredients to dress the biscotti. In one bowl, mix cinnamon & sugar, in the other add one egg white. Brush the biscotti with the egg white and then shake on cinnamon & sugar (very liberally) to the top. Slide in a 350 degree oven for a half hour.

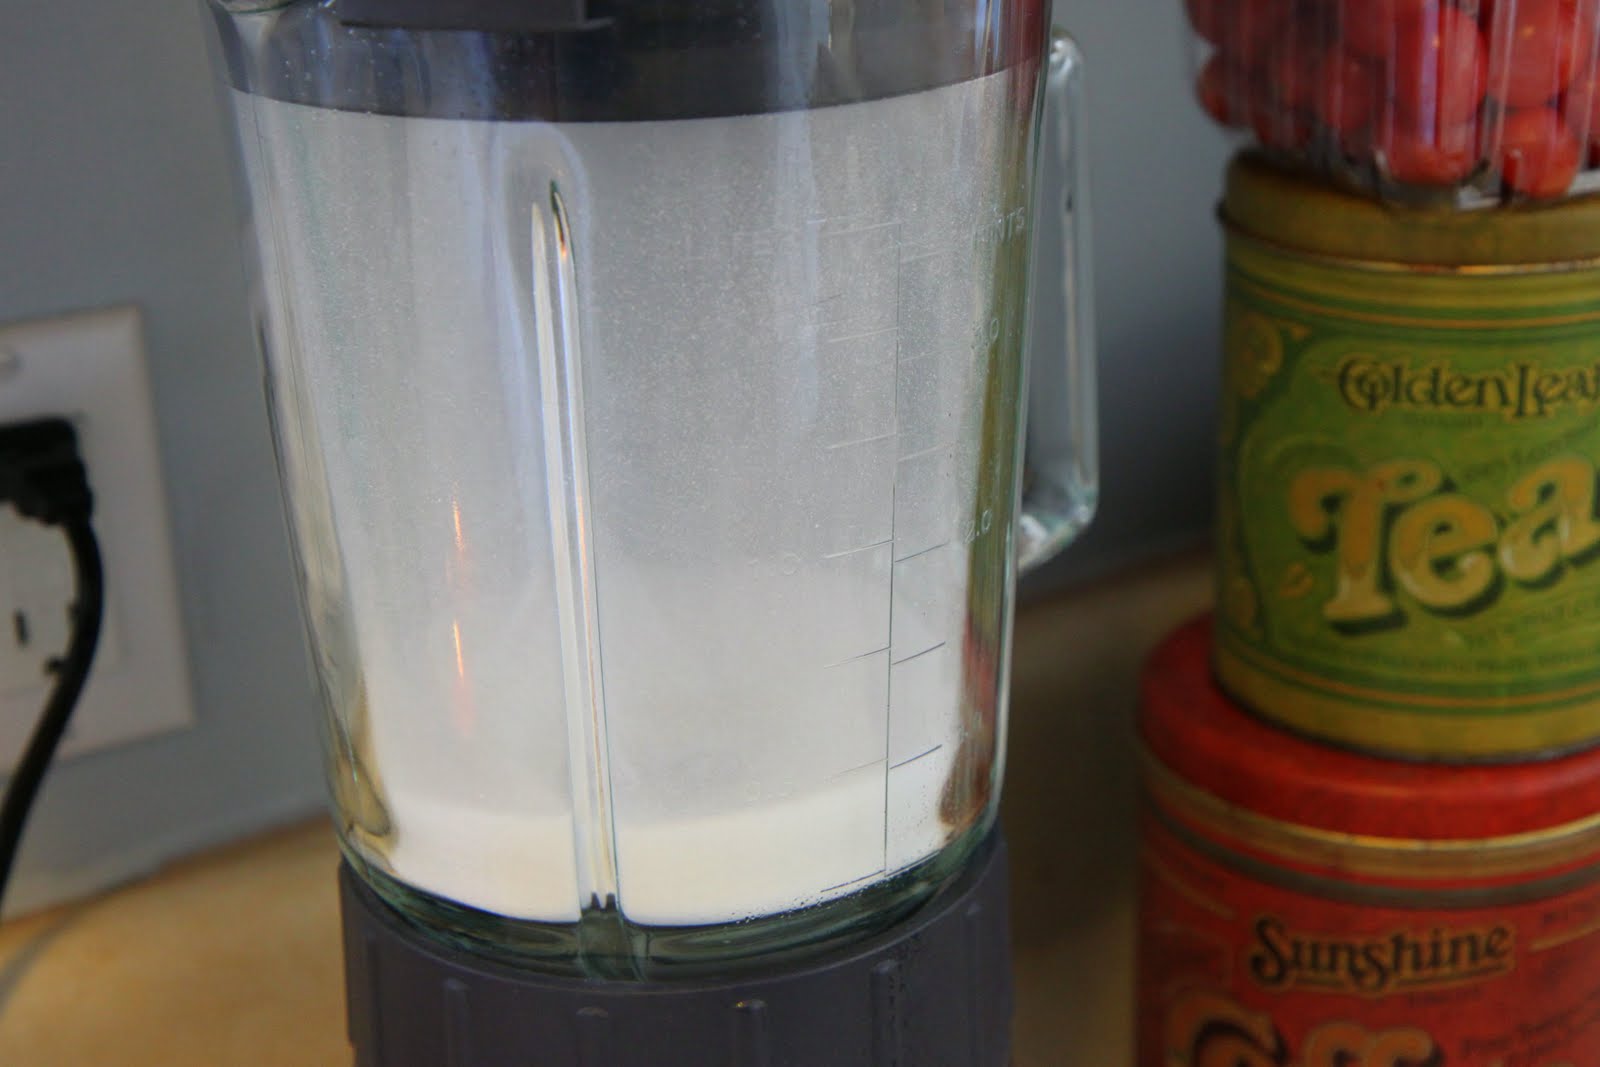
Now you will have a half an hour to do whatever suits you best…coffee happens to suit me best. Please ignore my travesty of a look this morning. Daylight Savings Time could nearly kill a mom. I was very happy to wake up to freshly ground and brewed coffee. I have never had fresh coffee beans or had coffee that was freshly ground.  This coffeemaker is unbelievable- you can program it to grind & brew before you even wake up.

Remind me to tell you about my embarassing story about buying coffee beans. Apparently, I didn’t understand what buying in bulk was and couldn’t understand what idiot wouldn’t fill the bag all the way to the top when it had little markings on the bag. I figured I would get all the beans I was paying for and filled that bag until it was practically bursting.

Costly mistake, my friends, costly mistake. Wow, I really feel like we are sharing over coffee together today.

Pull the delicious biscotti from the oven. Now patiently wait and drink more coffee for ten more minutes before slicing it.

With a very sharp knife, cut your biscotti on a slight angle, into roughly fifteen pieces for each dough ball. Lay them flat and slide them back into an oven that has been lowered to 325 degrees for ten minutes. Drink more coffee while you wait and eat all the crumbs that fell off. Purposely break and crumble a few because you can’t stand how good they smell and you are impatient. And you had to get up an hour early. And your kids have no mercy on you because you are tired.

For the final step, flip the biscotti and then bake the flipped side for ten more minutes. Allow them to cool and then store in an airtight container.

Eat or share with a friend! Packaged with pretty ribbon and in a clear bag, these would make a wonderful gift for someone you love. I hope you will love them as much as I do! It really is the ultimate little coffee treat!

Snickerdoodle Biscotti (adapted from Cooking Light Magazine)

2 3/4 cups all-purpose flour

1 cup sugar

2 teaspoons baking powder

1/4 teaspoon salt

1 teaspoon cream of tartar

1 teaspoon cinnamon

1 tablespoon vegetable oil

1 teaspoon vanilla extract

3 large eggs

2 tablespoons sugar

1 teaspoon cinnamon

1 large egg white

Preheat Oven to 350. Measure flour, sugar, baking powder, salt, cinnamon, and cream of tartar in a large mixing bow bowl. Mix Oil Vanilla and whole eggs in a small bowl and add to the large bowl, your dough will be dry and quite crumbly. Turn dough out onto a floured surface and knead until it pulls together into a ball. Divide in half. Shape each portion into a roll about 8 inches long, and place them six or so inches apart on a cookie sheet lined with parchment. Flatten each roll to 1 inch thick. Combine the 2 tablespoons Sugar and cinnamon, then gently brush the tops of the rolls with the egg white and sprinkle with cinnamon sugar. Bake at 350 for 30 minutes. Remove from the sheet and cool for 15 minutes. Cut diagonally into 1/2 inch slices and lay them cut sides down on the cookie sheet again. Reduce oven temp to 325 and then bake 10 more minutes, turn over and bake 10 more. They’ll be soft in the middle but will harden as they cool. Cool completely on a wire rack and store in an airtight container.
**************************
This recipe is a contest submission for Better Homes & Gardens Favorite Coffee Snack contest. The contest will go live tomorrow and you can vote for your favorite snack between now and March 30th. The person with the most votes will get three sets of bakeware and a $100 Walmart gift card to giveaway to their readers. Check tomorrow and throw in a vote if you love my biscotti! I was provided the bakeware sets, stand mixer, and coffeemaker to complete my submission. All thoughts and opinions are my own.

What is your favorite coffee snack at your  house? Do you have any fun tips for a coffee experience at home? We would love to hear them!

Pretty In Pink Strawberry Cupcakes

Monday, January 17th, 2011

Valentine’s Day is just around the corner and these Pretty in Pink Cupcakes would be the perfect accompaniment to a romantic dinner or a fun school treat for your children to share.  As I have been doing the last few weeks, I wanted to share with you all of the recipes and ideas we used for my daughter’s birthday party. In case you missed the earlier posts, I have a step-by-step picture tutorial for a beautiful Barbie Cake, directions for making elegant tissue paper pom poms, some easy tips & recipes for a fun winter party, and now today I am showcasing  these Pretty In Pink cupcakes that were made for the adults. Tomorrow I will share with you a few of our favorite gifts and that will conclude the never-ending posting schedule of birthday posts.

These delicious cupcakes are made from the same batter as the Barbie cake that I showcased from her party. I wanted a fun treat for the adults and so I created a batch of these cupcakes with a strawberry cream cheese frosting and a fresh berry garnish topper. The cupcakes were displayed in cupcake stands for easy grabbing throughout the evening.

This cake is very moist and flavorful and the vivid pink hue comes from the addition of the strawberry gelatin dessert. While fresh strawberries are not in season this time of year, one package of berries is plenty for your garnish and to be whipped in the cupcake batter & frosting. Although they are more expensive, it is a worthy investment for such a fun and unexpected treat out of our normal berry season.  The cream cheese frosting adds a hint of sweetness with even more delicious strawberry taste that takes this cupcake to the grown-up level.

I hope you will enjoy these delightful cupcakes as much as we have and consider adding them to your Valentine’s menu this year!

Pretty in Pink Cupcakes (adapted from “Cupcakes from the Cake Mix Doctor“)

1 package (18.25 ounces) plain white cake mix

1 package (3 ounces) strawberry gelatin

1 cup finely chopped fresh strawberries with juice (approximately 1 1/2 cups whole berries)

3/4 cup milk

3/4 cup canola oil

4 large eggs

Place your oven rack into the center of the oven and preheat the oven to 350 degrees. Prepare a 2 quart oven-safe batter bowl by greasing heavily with cooking spray. Place the cake mix, gelatin strawberries and their juice,  milk, oil, and eggs in a large mixing bowl. Blend with an electric mixer on low speed for thirty seconds. Stop the machine and scrape down the sides of the bowl with a rubber spatula. Increase the mixer speed to medium and beat two more minutes. Pour batter carefully into your prepared batter bowl. Bake the cupcakes until they are lightly golden and spring back when lightly pressed with your finger, 20-25 minutes. Remove the pans from the oven and place them on wire racks to cool for five minutes. Run a dinner knife around the edges of the cupcake liners, lift the cupcakes up from the bottoms of the cups using the end of the knife, and pick them out of the cups carefully with your fingertips. Place them on a wire rack to cool for fifteen minutes before frosting.   Meanwhile prepare the frosting.  (This recipe makes approximately 22-24 cupcakes)

Strawberry Cream Cheese Frosting

This frosting is VERY thin compared to a traditional frosting. You can thicken it up with a little extra confectioners sugar (1/2 cup at a time) if it is too thin to ice your cupcakes with.  I also put the frosting in the fridge overnight and then puddle it on top of the cupcakes and then let it up set up in the fridge again. If you prefer a frosting that you can decorate with or that is thicker, may I recommend my favorite buttercream frosting?

1 package (8 ounces) reduced-fat cream cheese, at room temperature

4 tablespoons (1/2 stick) butter, at room temperature

3 to 3 1/2 cups confectioners’ sugar, sifted

1/2 cup mashed (and drained of the juice from the mashing) fresh strawberries

Place the cream cheese and butter in a large mixing bowl. Blend with an electric mixer on low speed until combined, 30 seconds. Stop the machine. Add three cups of the confectioners’ sugar and the drained, mashed strawberries. Blend the frosting on low until the sugar is incorporated, 1 minute. Increase the mixer speed to medium and blend the frosting until fluffy, 30 to 45 seconds longer, adding up to a 1/2 cup more sugar if needed to make a spreadable consistency.

Place a heaping tablespoon of frosting on each cupcake and swirl to spread it out with a short metal spatula or a spoon, taking care to cover the tops completely. Place in the refrigerator, uncovered, and chill until the frosting sets, 20 minutes. Sprinkle the cupcakes with sprinkles (if desired) and garnish right before serving with a sliced strawberry (Side Note– Do wait until right before serving as the berries will release their juices and cause your frosting to be runny, as mine were shortly after taking this photo!)

Do you have any special Valentine’s Day food traditions? I would love to hear what your favorite foods are!

The Perfect Pink Barbie Cake Tutorial

Monday, January 3rd, 2011


Make the birthday cake of your daughter’s dreams with this DIY Barbie Doll Cake Tutorial. This simple bowl cake is the base of the Barbie dress to make a perfect princess cake.

Over the month of December we celebrated Emily’s 5th birthday.  This was the year of the Barbie which thrilled me to no end as I had envisioned a DIY Barbie Cake for my little girl long before she was even a twinkle in our eye.  Barbie birthday cakes are a true labor of love by the mothers who create them and this cake was a testament to my undying love for my daughter.

Today I wanted to share with you how we created our Barbie cake and some tips for creating this cake for your own little princess! The week will be filled with oodles of tutorials and ideas for making your Barbie party special and I hope to add a little inspiration to your own Barbie-inspired party!

For this cake you will need a white cake mix, strawberry gelatin dessert, eggs, milk, canola oil, a package of fresh strawberries, and your doll.


The doll that is pictured in this tutorial ended up not being used because the cake was not tall enough to form her dress and stand her upright. Doll toppers can be purchased specifically for your cake or you can ask your bakery if they will sell you a doll that you can use for roughly the same amount. My girlfriend also found a shorter generic one that could be found at the dollar store because the generic ones are not as tall as the real Barbies.

My best friend broke the legs of her Barbie for my cake.  May you all have a super awesome mafia friend like me who is willing to donate her legless Barbie for your project.

This cake recipe is an easy mix and dump cake, but you will need to finely chop your strawberries to mix into the cake. I used my food chopper to chop these up evenly and fine for the cake. Once you have done that, you have the brunt of the cake mixing portion done.

Dump all of the ingredients into your mixer, including those finely chopped berries, and give it a good mix.  I let it run for a good minute or two while my oven was preheating to 350 degrees.

Pour your batter into a greased mixing bowl. The mixing bowl I used for this project is a two-quart Batter Bowl that I had in my kitchen, a long ago purchase that I made with Pampered Chef. Many years ago when I bought it, the consultant had shared with me that it would make the perfect Barbie cake.

It doesn’t have to be a Pampered Chef bowl though, any two quart ovenproof  glass mixing bowl should do the job!

Now let Barbie sit back and take a little nap while her dress bakes.

Because of the depth of the cake, this cake will take roughly an hour and ten minutes to bake.

You want to make sure that the rack is not too high on your oven or it will really brown the top of your cake.

You will also want to keep an eye on it and test the center after an hour to see how it is doing. Mine took the full hour and ten minutes for this cake though.

Once the cake is done baking, you can pull it out and let it rest for at least fifteen minutes. Invert your cake on a cooling rack and let it cool for three hours before decorating.

I prefer to make my cakes in a two day process so I went ahead and wrapped the cooled Barbie cake in plastic wrap and rested it on top of a dish, then covered the whole thing in foil.  Make sure that your cake is completely cool before wrapping it for freezing. I tucked this in our freezer in a cake pan for support.

When the cake is frozen it is much easier to decorate and I have a lot less crumbs to have to work around.  That little tip came courtesy of a Michael’s cake decorating course I took and has served me well over the years of making and decorating special occasion cakes.

Now it is time to make the frosting.

You can definitely skip this step and just use two 16 ounce containers of vanilla frosting (tinted to your favorite cake dress color), but the jarred frosting won’t give you the stiffness you need if you want to decorate and embellish the dress.

This buttercream decorator’s frosting uses the confectioner’s sugar, shortening, milk, clear butter flavor (pictured above and purchased at Michael’s) and a little Meringue Powder that gives it a yummy whipped and buttered taste without adding any off-colors to your frosting.

Making frosting is a messy, messy job and is one of my least favorite parts about cake decorating. One way you can really cut down on the mess is to dampen a kitchen towel and drape it over your mixer while you are whipping up your frosting. This will cut down on the confectioner’s sugar dust clouds that you will find all over the kitchen and you can wipe down your mixer when you are all done.

Really try hard to resist eating this frosting. You really will need all of it to decorate your cake.

Doesn’t it look delicious though?

Tint the frosting, with food coloring, in your desired color. In our case it was Emily’s two favorites…pink and dark pink.

Now it is time to frost your cake. I frost my cakes frozen and they turn out beautifully. You just want to give your decorated cake a few hours to thaw before the guests arrive, but frozen cake frosting is so darn easy that you will never go back. It, basically, eliminates the need to do a crumb coat entirely. Frost it the best you can and remember that you can add as many details as you need to and that will cover up any of the imperfect parts.

To get the surface even smoother, dip your clean spatula in hot water and run it across the surface of the cake in long strokes. This will melt the frosting slightly to help remove stroke marks. Wipe the spatula clean and dip it in the hot water before each stroke.

Once your cake is smooth (ish), you are ready to add your embellishments to decorate your dress. Assemble your pastry bag with some of your extra frosting.  I used Wilton Tips #2D to make swirl flowers and my zigzag border, tip 3 to make the centers of the flowers and added dots to her dresses, and tip 21 for the shell borders and little loops on her dress.

You can add whatever details you prefer on your cake, that is the beauty of making your own Barbie cake. Embrace your inner-fashionista and have a blast making Barbie’s party dress!

Here is our finished diy barbie cake.

I left the top of Barbie’s dress on and tried to incorporate the lower half into looking like a continuation of her top.

Her hair was tied with a little leftover grosgrain ribbon.

If your Barbie has legs, you can wrap her in plastic before inserting her.

There is no need to cut a circle, she should wedge pretty easily without the extra step.  

After Barbie was done with this party, I put her dress top in the dishwasher and it came out clean and perfect. Barbie just got a good wash in the sink and I put her away…just in case we might need her next year.

The Perfect Pink Barbie Cake With Buttercream Frosting
Recipe Type: Dessert
Author: Adapted from The Cake Doctor Cookbook
Prep time:
Cook time:
Total time:
Serves: 10
This cake is so moist and full of strawberry flavor. The color from the gelatin adds a vivid pink hue and the flecks of fresh berry take these pantry ingredients to another level. If a Barbie cake isn’t your thing, wait for your post next week where these are transformed into a grown-up cupcake complete with a Strawberry Cream Cheese Frosting. While buttercream icing is not my favorite tasting frosting, this frosting is ideal for decorating and piping beautiful decorations on your Barbie cake. The butter flavor really adds a lot of richness to this frosting. This recipe creates a batch and a half (or approximately five cups of frosting). This will likely be more than you need, but I would rather have extra frosting than not enough and make it all over again. Extra frosting can also be used to decorate a batch of cupcakes for the adults!
Ingredients
  • 1 package (18.25 ounces) plain white cake mix
  • 1 package (3 ounces) strawberry gelatin
  • 1 cup finely chopped fresh strawberries with juice (approximately 1 1/2 cups whole berries)
  • 3/4 cup milk
  • 3/4 cup canola oil
  • 4 large eggs
  • For Buttercream Icing (Medium Consistency): 1 1/2 cups solid white shortening
  • 1 1/2 teaspoons [url href=”https://amzn.to/2HYXsjs” target=”_blank”]Wilton Butter Flavor[/url]
  • 4-5 tablespoons milk
  • 6 cups confectioners sugar
  • 1 1/2 tablespoon [url href=”https://amzn.to/2Wu2Rmu” target=”_blank”]Wilton Meringue Powder[/url]
  • Pinch of Salt (optional)
  • [url href=”https://amzn.to/2V0n2bf” target=”_blank”]2 quart oven-safe batter bowl[/url]
Instructions
  1. Place your oven rack into the center of the oven and preheat the oven to 350 degrees.
  2. Prepare a 2 quart oven-safe batter bowl by greasing heavily with cooking spray.
  3. Place the cake mix, gelatin strawberries and their juice, milk, oil, and eggs in a large mixing bowl.
  4. Blend with an electric mixer on low speed for thirty seconds. Stop the machine and scrape down the sides of the bowl with a rubber spatula. Increase the mixer speed to medium and beat two more minutes.
  5. Pour batter carefully into your prepared batter bowl.
  6. Bake for 1 hour and ten minutes or until the cake springs back when pressed with your finger and a cake tester comes out clean.
  7. Cool for fifteen minutes and then invert your cake on a cooling rack. Allow the cake to cool for a minimum of three hours before decorating. For more tips see the post above.
  8. For icing: Cream shortening flavoring, and water.
  9. Add dry ingredients and mix on medium speed until all ingredients have been thoroughly mixed together. Blend an additional minute or so until creamy.
  10. Tint as desired.

Love this tutorial? Here are a few of our other favorite family birthday cake recipes!

easy cupcake minion cake

gluten-free rainbow bundt cake

gluten-free cookies & cream cake

gluten-free snickerdoodle cake


this post contains affiliate links.

Have any cake decorating tips? What was your proudest birthday cake moment? Feel free to share them here!

Pin It

Big Batch Soft Gingerbread Cookies

Monday, December 20th, 2010

It has been a busy week over at the Clark house as we finished our last minute holiday preparations.  I am so glad to finally have all of the knitted gifts done for everyone, the presents all wrapped, and am looking forward to being able to enjoy another holiday season with my family.  We even managed to squeeze in a birthday party this weekend for our Emily and had every single family member there, which is no small feat! I will share more about her party after the holidays! After all, who wants to talk about birthday parties with the chaos of the holidays going on?

Today I wanted to share a fun recipe for big batch cookies that are perfect for toting to your next holiday get together. These are a soft drop cookie that incorporate all of the delicious flavors of gingerbread without the labor of cutting cookies out. Of course, we offer a great tutorial on how to create those perfect cut-out cookies if that is what you are into…Me? I love to keep it as simple as possible and these are just the ticket!

Whether you are enjoying these cookies, serving a batch of warm gingerbread waffles for a special Christmas treat, or even baking a few gingerbread donuts for a fun morning snack, I hope you can find a way to sneak a little gingerbread into your lives!

Soft Gingerbread Cookies

1 cup butter, softened
1 1/2 cups brown sugar, packed
2 eggs beaten
1 tablespoon ground ginger
1/2 cup molasses
1 1/2 cups boiling water
1 1/2 teaspoon baking soda
5 cups all-purpose flour
2 teaspoons baking powder
1 1/2 teaspoons salt
1 tablespoon cinnamon
1 cup chopped walnuts (optional)

Cream butter and sugar in a large mixing bowl; blend in eggs. Mix in ginger and molasses; stir in boiling water. Set aside. Combine remaining ingredients, except the nuts. Add these to your sugar mixture. Fold in walnuts (if desired) and then cover & refrigerate the dough for at least two hours. Drop by teaspoonfuls onto baking sheets (do not grease). Bake at 425 degrees for 10 to 12 minutes. This recipe makes approximately six dozen cookies.

Enjoy with a big glass of milk or a little homemade cocoa for a fun winter treat!

A Few Hidden Secrets to the Perfect Sugar Cookie

Tuesday, December 7th, 2010

I wanted to dust off this entry from last year for your holiday baking! Last year I experimented with this fabulous recipe for the perfect sugar cookie and I learned a thing or two along the way. This recipe is going to be made in my kitchen again this year and I can’t wait to share more of these cookies with our family and friends.

I love, love, love to cook. Baking bread, whipping up fancy dinners, making stacks of gourmet waffles…those are my favorite thing to do! Baking cookies? Total fail. I don’t know what it is, but making great cookies is not something I am good at. To be honest, I just don’t think I have the patience for it. More than that, I haven’t had the time. I rely on bar cookies, quick breads, and other easy snacks to get us by.

Of all of the fails, cut-out sugar cookies have been the biggest fail for me. They are misshapen, taste like cardboard, and are far too time-consuming. I have tried a half dozen recipes with the same results and had determined that I was destined to be a cut-out cookie failure.

I decided this year though that I would find a good recipe that would look nice and yield a tasty result. Where do I turn when I don’t have time to run a full-fledged test kitchen out of my home? My America’s Test Kitchen Family Cookbook. The recipe was entirely unique and promised fantastic results. Crisp cookies, full flavor, and step-by-step tutorials that would be worth eating and sharing.

The first step towards a great sugar cookie was to use superfine sugar. According to the cookbook, superfine sugar gives the cookies a finer crumb and crisper texture. You can buy this in the store or do what I did which was to process the granulated sugar in a food processor or blender for thirty seconds and then measure out 3/4 cup of the sugar for the recipe. You know me, I chose the cheaper option for this recipe and put my blender to work.

The second step to their perfect cookie was a “reverse” mixing method. Instead of the traditional creaming of the sugar with the butter they took a different approach to create a cookie that would be sturdy enough to decorate. With this method, you mix together all of the dry ingredients and then add butter tablespoon by tablespoon to create the dough. The dough is finished with cream cheese, to pull everything together and make the dough workable, and you finish the mixing with a vanilla finish.

The dough looked like this. It looked crumbly and not very wet. You were instructed to pull the dough together with your hands and form it into a ball. I wasn’t too sure how this was going to work out. It just did not seem sticky enough to me.

After a couple of minutes of kneading, this is what my dough looked like. I don’t think my dough has ever looked this good.

You were to divide the dough and pop these in the refrigerator, flattened into two 4″ disks, and leave them in the fridge for 20-30 minutes.


While the dough is chilling, you can tidy up the kitchen and then get everything else ready to go. Line your cookie sheets with parchment paper, break out those cookie cutters, and tear off two sheets of parchment paper per dough disk to roll out your cookies. That’s right, no floured counters which will save on clean-up time!

Put your disk between the parchment paper and roll the dough out. I secured one set of corners between me and the counter to hold the paper in place. Let me know if you know a better way to do this, but that seemed to keep everything secure without any special tools. Now pop the dough back in the refrigerator for ten more minutes or until the dough is firm for cutting. I know it is a total pain and feels like a waste of time, but it will yield a cookie with sharp edges and one that will hold its shape. I figured if I was already going to all of this trouble, it would be worth the extra effort to do it right.


At this point, I was already patting myself on the back. Aren’t you glad you weren’t in the kitchen with me for this annoying moment? The cookies cut out beautifully and were firm enough that I could easily transfer them over to the parchment paper without losing feet and snowman arms and wings off of birds. I bet you are glad you never saw my past cookies!

Into the oven they will go while you stand watching them through the glass and continuing to annoyingly pat yourself on the back. Instead of letting one rack stay doughy and one rack get burnt, they have you rotate the cookie sheets halfway through. What a novel idea!

These are my cookies after baking! I KNOW! One thing I want to note about my cookie experience is that the ten minutes is all that is really needed to bake them. They didn’t look done to me, but they were so don’t overcook them. I had one batch that got out in the nick of time after I added two minutes to the cooking time. They will harden up for you without any additional cooking.


They recommend decorating with glaze. I am not a fan of how the glaze tastes. I stick to a traditional frosting recipe that requires a little more time to harden, but has a thicker tasting frosting.

Since our cookie sheets were lined with parchment paper, I took the paper off and gave each kid one to use to decorate their cookies. This caught any runaway sprinkles or the sprinkle dumping that seems to occur every year (see above for examples).


The cookies looked good, but the real question is did they taste good? I asked our very official taste-testing and decorating crew to give me their honest opinions.

Sometimes a picture is all you need! They were perfect, not crumbly, sturdy, but not thick, tangy, but buttery. Basically, perfection!

Perfect Cut-Out Sugar Cookies (Recipe from America’s Test Kitchen Family Cookbook)

Recipe says it will yield approximately 3 dozen cookies. I doubled the recipe & got 32 cookies with my cookie cutters. The amount of cookies will definitely depend on your cookie cutter sizes!

2 1/2 cups flour
3/4 cup superfine sugar (just whipped 1 cup sugar in the food processor until it was blended and then measured out 3/4 cup)
1/4 teaspoon salt
16 tablespoons (2 sticks) unsalted butter, cut into 1/2″ pieces & softened
2 tablespoons cream cheese, softened
2 teaspoons vanilla extract

Whisk the flour, sugar, & salt together in a large bowl. Beat the butter into the flour mixture, one piece at a time using an electric mixer on medium-low speed, then continue to beat until the mixture looks crumbly and slightly wet, 1 to 2 minutes. Beat in the cream cheese & vanilla until he dough just begins to form large clumps, about thirty seconds.

Knead the dough in the large bowl by hand a few times until it forms a large, cohesive mass. Turn the dough out onto a clean counter, divide it in half, and apt into a two four inch disks. Wrap the disks tightly in plastic wrap and refrigerate until they begin to firm up, 20 to 30 minutes.

Adjust an oven rack to the middle position and heat the oven to 375. Work with one disk at a time, roll out the dough to a 1/8″ thickness between two sheets of parchment paper. Slide the rolled dough and parchment onto a baking sheet & refrigerate again until firm.

Working with one
sheet of dough at a time cut out shapes using cookie cutters and lay on two parchment-lined baking sheets, spaced about 1″ apart. Bake the cookies until light golden brown, about ten minutes, rotating the baking sheet halfway through baking.

Let the cookies cool on the baking sheet for two minutes before transferring them to a wire rack to cool completely, about thirty minutes. When cooled, the cookies can be decorated as desired.

****************

Sugar Cookie Frosting

4 cups confectioners sugar
1/2 cup shortening
5 tablespoons milk
1 teaspoon vanilla extract
Food coloring

In a large bowl, cream together confectioners sugar and shortening until smooth. Gradually mix in milk and vanilla with an electric mixer until smooth and stiff, about five minutes. Color with food coloring if desired.

****************

I would highly recommend adding this cookbook to your holiday wish list. That same recipe can be adapted for many different types of cookies! It has definitely earned its keep on my bookshelf.

Do you have a favorite holiday cookie recipe? Please share your recipes or links here!

7 Easy Make-Ahead Appetizers for Thanksgiving Day Lingering

Monday, November 15th, 2010

Many times the Thanksgiving Day lunch gets turned into hosting a lunch, dinner, and after-dinner company.  That is why it can be fun to have a few appetizers to keep on hand for pre-Thanksgiving dinner munching and post-Thanksgiving dinner munching. Just like the delicious make-ahead dishes for Thanksgiving that I featured last week, it is nice to have a few extras in your fridge to keep on hand when people aren’t ready to dig into round two of the Thanksgiving food or to pair with an evening of board game playing and visiting.

Today I am showcasing a few of my favorite appetizers and how you can prep them ahead of time for just this sort of occasion! These are a few of my own tried and trues that have been brought to many a family feast and have been enjoyed by all!

This fast little appetizer is perfect to keep on hand in your fridge for a fun savory snack that is sure to satisfy!  These are created using a store-bought stuffing mix and a few ingredients that  you might already have on hand in your kitchen. Even if you are not a spinach lover, the stuffing mix takes away from the spinach flavor making this more of a meatier dish than you might expect!  These are the perfect popper to serve while enjoying a few board games around the old kitchen table!

Spinach Balls

2- 10 oz packages frozen spinach
1 package chicken-flavored stuffing mix
1 cup grated Parmesan cheese
6 eggs, lightly beaten
3/4 cup butter, melted
Salt & pepper to taste

Cook spinach according to instructions, drain in a sieve, use back of a wooden spoon to press the spinach against the sieve to get as much moisture as possible out In a bowl combine the spinach, stuffing mix,cheese, eggs, butter, salt& pepper Mix thoroughly& roll into small balls 3/4 to 1″ size. Place on a cookie sheet and freeze.

Thanksgiving Day: To serve place frozen balls on a cookie sheet and bake at 350F 10-15 minutes or until lightly browned If you are doing them fresh or thawed only bake for 7-10 minutes. Serve hot.

*****************************

This spread is unbelievably addictive and so festive on your holiday table. Just try and eat one cracker and don’t be surprised if you are scraping the bottom of the bowl by the end of the day. This was a hit with everyone in our family and a nice change from the traditional cheese ball.

Cranberry Spread

16 oz. cream cheese, softened
1 cup dried cranberries
1/4 c. orange juice

Mix all of the ingredients together and mold into a ball or leave loose as a spread. Wrap in plastic wrap, then wrap in foil, and store in a freezer bag. Make sure to label your bag so that you can find it again.

Thanksgiving Day: Let the spread thaw in the refrigerator 1-2 days before Thanksgiving. Place dip in a bowl (or on a platter if it has been molded into a ball) and serve with gingersnaps or crackers.

*****************************

You can never go wrong with a good spinach dip and this one is my absolute favorite because of the unexpected flavor that the salsa adds to the dish. You can make it as mild or as spicy as you like! I opt for a mild salsa and serve it with pita chips, tortilla chips, or fresh veggies for a little lighter fare!

Spunky Spinach Dip

2 cups salsa (approximately one standard size jar)
2 cups Monterey Jack cheese
8 oz low-fat or fat-free cream cheese, softened and cubed
10 oz frozen chopped spinach (thawed and drained)

Mix ingredients together in a mixing bowl. Place in an oven-safe bowl and tuck in the fridge for Thanksgiving Day.

Thanksgiving Day: Cook at 350 for 20-25 minutes (double your cooking time for a double batch) in an oven-safe bowl (covered). Serve with your favorite dipper! I served this with fresh celery sticks and fresh carrots to balance out the heaviness of your Thanksgiving dinner.

*****************************

These cheese ball is so embarrassingly easy, but is always a showstopper when I bring it to holiday get togethers. Put the ingredients for this recipe on your grocery list and relish the joy in ease of the preparation and the compliments that come from it!

Bacon & Ranch Cheese Ball

2 (8 ounce) packages of low-fat cream cheese, softened
1 package of Ranch dressing mix
1 cup cheddar cheese
5-7 strips of bacon cooked and crumbled (or buy prepackaged crumbled bacon)

Mix all of the ingredients together with a mixer until they are incorporated. Mold into a ball  and wrap in plastic wrap, then wrap in foil, and store in a freezer bag. Make sure to label your bag so that you can find it again.

Thanksgiving Day: Let the cheese ball thaw in the refrigerator 1-2 days before Thanksgiving. Roll in a plate of shredded cheese. Serve with assorted crackers.

*****************************

This dip was nicknamed “Crack Dip” after the bowl was scraped clean when I brought it for Thanksgiving one year. I love to bring a sweet dessert dip that can be an unexpected surprise among the pies and holiday cookies. If you can’t find mini chocolate chips at your store, I have employed my hand held chopper to chop up regular size chocolate chips for this recipe before with great results!

Chocolate Chip Cookie Dough Dip

8 ounces cream cheese, softened
1/2 cup unsalted butter, softened
1/4 teaspoon vanilla extract
3/4 cup powdered sugar
2 tablespoons brown sugar
3/4 cup miniature semisweet chocolate chips
More chocolate chips (optional) or chopped nuts, to roll the ball in

Make Ahead: In a mixing bowl, beat cream cheese, butter, and vanilla until fluffy. Gradually add sugars and beat until just combined. Stir in chocolate chips.

Mix all of the ingredients together and mold into a ball or leave loose as a spread. Wrap in plastic wrap, then wrap in foil, and store in a freezer bag. Make sure to label your bag so that you can find it again.

Thanksgiving Day: Let the spread thaw in the refrigerator 1-2 days before Thanksgiving. Place dip in a bowl (or on a platter if it has been molded into a ball) and serve with gingersnaps or crackers. Optional- just before serving, roll in additional chocolate chips or nuts of your choice. Serve with graham crackers.

*****************************

Hit the thrift stores for vintage tins and fill them up with holiday goodies for a unique display of yummy treats! This Chex Mix was cooked up in the slow cooker. If your slow cooker runs hot, I would just keep it on LOW instead of the HIGH that the recipe calls for. Mine about burnt up without keeping a careful eye on it. Putting it in the slow cooker while cooking up the rest of the food is a great way to make the house smell yummy and free up your stove in the process! This recipe can easily be doubled in your slow cooker!

Slow Cooker Chex Mix

1 cup Cheerios toasted oat cereal
1 1/2 cups Rice Chex
1 cup Wheat Chex
1/2 cup peanuts
1/2 cup pretzel stick
1/4 cup butter, melted
2 tablespoons Worcestershire sauce
1/4 teaspoon seasoning salt
1/4 teaspoon garlic powder
1/4 teaspoon onion salt

Combine first 5 ingredients in your slow cooker. Mix remaining ingredients and pour over cereal mixture; toss to coat. Cook on HIGH, uncovered, for 2 hours (I would recommend cooking on low if your slow cooker runs really hot like mine!) Stir mixture well every 30 minutes. Turn slow cooker to LOW and cook for 2-4 hours. Store in air tight container. Makes 5 cups.

Thanksgiving Day: Open container. Eat.

*****************************

Homemade Italian Meatballs

1 pound lean ground turkey
1 cup bread crumbs
1 tablespoon dried parsley
1/4 cup grated Parmesan cheese
1/8 teaspoon garlic powder
1 egg beaten

In a large bowl, combine ground beef, bread crumbs, parsley, Parmesan, garlic powder and beaten egg. Shape into small meatballs and place on a cookie sheet. Bake in a 400 degree oven for fifteen to twenty minutes. Allow them to completely cool and then place meatballs in a labeled freezer bag.

Thanksgiving Day: Allow meatballs to thaw overnight. In the morning, throw meatballs in your slow cooker and dump a jar of spaghetti sauce on top. Cook on low for two to four hours, or until the meatballs are warmed through.

Bonus: Make a double batch and add to my homemade spaghetti sauce and you won’t have to worry about dinner one night as a reward for all of your hard work this holiday season!

*****************************

What is your favorite appetizer or snack to prepare for Thanksgiving Day? Do you have any techniques for getting the feast on the table easier? Please feel free to share those recipes & links!

Delicious Make-Ahead Dishes To Add to Your Thanksgiving Feast

Monday, November 8th, 2010

It is that time of year again where we are all dusting off our favorite dishes to grace the Thanksgiving table. I get to help host Thanksgiving dinner every other year and this year we will have both sides of our family joining us at our table. With seventeen people coming for dinner, I decided this year that I could concentrate on the turkey, mashed potatoes, & beverages and give everyone a dish idea for something that they could bring to the feast. With everyone contributing, this year should be fun & relatively easy… at least that is always the game plan!

I wanted to round-up a few great recipe ideas that I have used in years past  for Thanksgiving.  Most of these recipes can be made ahead for the big day so that you can actually relax and enjoy being together as a family!

Just as in years past, these make-ahead mashed potatoes are going to be created this week for the big day. This is perhaps my most impressive make-ahead dish because it is always a dilemma on how to get those mashed potatoes on the table, keep them hot, and not make a complete disaster in the kitchen while your guests are arriving.

These mashed potatoes not only freeze beautifully, but they also can be reheated on low in the slow cooker. Both of these qualities make them a winner because I can keep the oven freed up for the other dishes and I can make them early.

Here is my recipe, adapted to our personal taste, perfect for any holiday get together! These are creamy and have a hint of tang to them from the sour cream. Sprinkle with a little paprika, if you so desire, and enjoy the convenience of pulling these out of your freezer for this holiday season.

Make-Ahead Mashed Potatoes
Serves 15

5 pounds of potatoes
1 block (8 oz) of low-fat cream cheese, softened
3/4 cup low fat sour cream
4 tablespoons butter
3/4 cup milk (or more if desired)
1 1/2 teaspoons salt

Peel potatoes and cut into small cubes. Throw the potatoes in a large pot filled with cold water. Cook for 25 minutes or until fork-tender. Drain the potatoes and put them back into the hot pot. Add cream cheese, butter, milk, and salt. Mash with a potato masher or use a hand mixer to whip the potatoes. Spoon mixture into a freezer-safe container and label.

Thanksgiving Day: Put potatoes in the fridge 1-2 days before to allow them to completely thaw. Spray slow cooker with cooking spray and put potatoes in the slow cooker. Brush the top of the potatoes with a tablespoon of butter and sprinkle with paprika. Cook on low for two to four hours.

If you would rather bake these, bake the potatoes at 350 degrees for thirty to forty minutes or until completely hot.

*****************************

I know green bean casserole is a family tradition, but if you are opting for a healthier tradition, I have the perfect green bean dish! While these can’t be made ahead, necessarily, they are quick cooking and could be thrown in the oven while you are carving the turkey. Within just a short time, you have an elegant side dish that will be elegantly plated with your turkey and mashed potatoes this year.

The original recipe did call for fresh green beans, but I use the fancy frozen ones and they are a little cheaper than the fresh variety. I added an extra ten-fifteen minutes cooking time for these and they were perfect for our taste. You can roast them longer, if you like, but this amount of time seemed to fit well for me.

Roasted Green Beans

2 pounds fresh green beans (or a bag of frozen fancy green beans)
1-2 tablespoons olive oil
2 tablespoons minced garlic (I use the bottled garlic to save a little time)
Salt & Pepper
Zest from one or two lemons (save the juice for later)

Thanksgiving Day: Preheat your oven to 400 degrees. Grab a jelly roll pan and dump green beans on the pan. Sprinkle seasonings, lemon zest, and garlic over the green beans. Drizzle the olive oil over the green beans and then toss with your hands until they are all coated with the seasonings and zest. Spread out in a single layer and slide your cookie sheet into the oven. Roast fresh green beans for 20-25 minutes and roast frozen green beans for an additional 10-minutes. When they are done, pull from the oven and put them on a serving platter. Squeeze the lemon juice over the top (from the lemon you zested) and serve.

*****************************

If you are looking for an easy and fool-proof homemade roll recipe, then I highly recommend this one. These can be made the night before and waiting in the fridge for you for the big Thanksgiving Day feast. These are the most delicious rolls and the only thing that make them even more glamorous is serving these with a little homemade pumpkin butter.

Buttery Bread Machine Rolls Recipe

1 cup warm milk (70 to 80 degrees F.)
1/2 cup butter or margarine, softened
1/4 cup sugar
2 eggs
1 1/2 teaspoons salt
4 cups bread flour
2 1/4 teaspoons active dry yeast

In bread machine pan, put all ingredients in order suggested by manufacturer. Select dough setting. When cycle is completed, turn dough onto a lightly floured surface. 4. Divide dough into 24 portions. Shape dough into balls. Place in a greased 13 inch by 9 inch baking pan. Cover and let rise in a warm place for 15 minutes. Tuck into your fridge for Thanksgiving Day.

Thanksgiving Day: Pull the rolls from the fridge and allow them a half hour to an hour to rise on your counter. Bake at 350 degrees for 13-16 minutes or until golden brown.

*****************************

When my kids grow up and leave the house, I hope that it is mom’s pumpkin cornbread muffins that they talk about and how much they loved me for them. Everyone should have at least one dish that is their “famous dish” and these cornbread muffins are my claim to fame at my table.

To have fresh baked cornbread muffins at your table, make this batter the night before and tuck it in your fridge in a covered bowl. In the morning, you can bake these and have them in a basket, ready for your dinner guests. These are best served at room temperature so it makes them the perfect bread accompaniment to make ahead!

Pumpkin Cornbread Muffins

1 1/4 cups flour
3/4 cup cornmeal
2/3 cup light brown sugar
1 tablespoon baking powder
1/2 teaspoon salt
1/2 teaspoon nutmeg
1/2 teaspoon cinnamon
3/4 cup canned pumpkin puree
3/4 cup buttermilk (I substituted with regular milk and a teaspoon of vinegar to sour)
1/4 cup butter, melted
2 eggs, room
2 tablespoons honey
Sugar for sprinkling (I used the raw sugar)

Preheat oven to 350 degrees. Line a muffin tin with muffin liners. In a bowl, toss together flour, cornmeal, sugar, baking powder, salt, nutmeg and cinnamon. In another mixing bowl, mix with a wooden spoon, the pumpkin puree, sour cream or buttermilk , butter, eggs and honey, until well combined. Add the pumpkin mixture to the flour mixture just until combined. Store batter in a covered bowl in the fridge.

Thanksgiving Day: Transfer to the prepared muffin tin. Sprinkle with a little sugar (I used raw sugar) on top. Bake for about 20-25 minutes, or until edges just begin to color (Note: If you pull the batter right from the fridge that it may require an extra five minutes, but keep one eye on it!) . Cool to room temperature. Makes approximately 12-13 muffins.

*****************************

No get together in our family is complete without a big punch bowl that is overflowing. This punch is always a hit and it can be ready when everyone arrives. It is loved by kids and adults alike. The night before you can prepare an easy ice ring to keep it cold so you can eliminate the need for a bucket of ice and keep it nice & cold for your guests.

Thanksgiving Day Party Punch

2 liter bottle strawberry-flavored soda (I found this at Walmart)
2 liter (half a bottle) Cherry 7-Up
1 (12 ounce) can frozen pink lemonade concentrate
1 can pineapple juice

Mix all the ingredients together for the punch. This will fill one large punch bowl or two smaller ones.

Ice Ring
Orange slices
Lemon slices
Lime slices
Maraschino cherries
Cherry juice or red food coloring
Water
Metal ring mold (I use my bundt pan for this one)

Create your ice ring by throwing in the citrus fruit slices and then pouring in the jar of cherries (juice and all) Top the bundt pan off with water and then freeze overnight. To serve, unmold ice ring into punch bowl and then add your party punch ingredients.

*****************************

Next week I will be doing a round-up of great appetizers and board games that can be enjoyed after the big feast! If you are anything like my family, this is an all day event, and it is fun to have a few snacks on hand and activities to be enjoyed once the feast concludes!

In the meantime, be sure to visit my tips for Easy Thanksgiving Entertaining Ideas on the Snackpicks site! Check out the fun recipes for stuffing and a snack mix to keep the little ones quiet while you are working hard to get that turkey on the table

What is your favorite dish for Thanksgiving Day? Do you have any techniques for getting the feast on the table easier? Please feel free to share those recipes & links!


Herb-Buttered Grilled Corn, Grilled Veggies, & More Grilling Tips & Ideas

Monday, September 6th, 2010

This year we have been using our grill almost every day and have been trying lots of new recipes that we had never attempted before on the grill. One new thing that we have really been enjoying this year is grilled vegetables.

Our favorite summertime food has always been corn on the cob, but our new favorite summertime food is this herb-buttered grilled corn on the cob that you must try. Considering it is almost the end of the summer season, this corn is a great way to use up whatever you have left in your herb garden and to put it to good use. The finished product is delicious, buttery, and so fresh-tasting with the addition of the herbs.

Begin by pulling some of those weedy herbs from your garden and give them a good chop. If you have kids that are scared of big green hunks, like mine, I love to use my little hand chopper to make sure that they are minced up really good. Mix these chopped herbs into your slightly softened butter to create the coating for your corn. To make sure that the sugar dissolves into the butter, reserve a tablespoon to melt and mix your sugar and salt into that for that salty-sweet exterior.

Rest your corn on a little tin foil and spread and massage the herb buttered mixture into your corn. Then wrap the corn with the tin foil. You can put these back in the fridge until it is time to cook or go ahead and put them right on the grill!

Place the corn on a grill on medium heat. Cook on the grill for fifteen minutes, turning every few minutes to cook the corn through. Put these on the grill first because they will stay nice and hot for a half hour or more while wrapped in the foil, making it the perfect little party food!

Herb-Buttered Grilled Corn (adapted from Food.com)

6 ears fresh corn, cleaned
6 tablespoons sweet butter, softened (I reserved 1 tablespoon to melt and dissolved the sugar and salt into that, then add to the butter mixture)
1 teaspoon salt
1 teaspoon sugar
1 teaspoon fresh basil
1 teaspoon fresh thyme
1 teaspoon fresh parsley
1 teaspoon fresh rosemary
6 pieces aluminum foil, big enough to wrap corn

Place one corn on each foil. Mix remaining ingredient together and rub into each cob. Wrap foil up around the corn and grill 15 minutes turning often.

If grilled corn isn’t your thing, you will have to give the grilled vegetables a try that were featured in our notebook from gimmie some oven. I was so excited to try this recipe that I ran right out and got some veggies from the store to create this side dish. If you have a bounty left still in your garden, you could incorporate what you have on hand to make this side. My little cast iron grill pan that I got from Goodwill got put to good use on my grill- it’s not just for my steaks anymore! Paired with a little baked brown rice and these marinated shrimp skewers, it was the perfect summertime meal.

And if you are ready to get those grill grates clean, be sure to read my favorite tip for getting the grill tidy that you can actually do while you are sleeping! In my opinion, it is the one of my most genius moments ever!

Need some more inspiration for the grill? Be sure to check out some of these delicious recipes:

Yummy Honey Chicken Kabobs

Rosemary Ranch Chicken Kabobs

Balsamic & Rosemary Grilled Salmon

Zesty Chicken Marinade

Do you have a favorite way to grill your veggies? Please share your tips and recipes here!

A Darn Good Chocolate Cake

Monday, August 9th, 2010

This year for Ethan’s birthday, I gave him all of my cookbooks and let him pick out the cake for his special birthday BBQ bash. I realize I took a real gamble on this one, but thankfully he chose a cake that was a breeze to pull together and that required very little effort on my part. To be honest, I think this cake was chosen because “darn” is a word that he isn’t typically allowed to use a lot. When asked what kind of cake he was having for his birthday, an eruption of giggles would ensue and he would say, ” A DARN good chocolate cake. ” I love the innocence of youth!

Thanks to this cake being such a breeze to pull together, we did two cakes this year for the family members that weren’t craving a rich chocolate cake.  A blueberry muffin cake was also added to the dessert table and everyone was really happy to have two options to choose from. We saved on time and decorating, by incorporating a Mario figurine set around the cake that would double as a birthday gift. I found these at Toys R’ Us and we used some of the money that his grandparents had sent to put towards the figurine set.

This chocolate cake is rich, but not the sickeningly sweet rich that makes you clutch the sides of your stomach. It contains a devil’s food cake mix, a little sour cream, a chocolate pudding mix, and  a generous handful of semisweet chips. I dusted it with confectioner’s sugar, but the moisture in the cake kept absorbing it. If you are dusting this one, just wait until the last minute and then sift a generous amount on the top.

This is the perfect cake to tote to your next potluck dinner, to share with good friends, or just as a special treat for yourself. Serve it with a big glass of ice cold milk and you will feel like a child again as you indulge in this delicious cake!

Darn Good Chocolate Cake (Courtesy of  “The Cake Mix Doctor“)

1 package (18.25 ounces) plain devil’s food or dark chocolate fudge cake mix (I bought a devil’s food cake mix from Aldi)
1 package (3.9 ounces) chocolate instant pudding mix
4 large eggs
1 cup sour cream
1/2 cup warm water
1/2 cup canola oil
1 1/2 cups semisweet chocolate chips

Place a rack in the center of the oven and preheat the oven to 350 degrees. Lightly mist a Bundt pan with cooking spray and then dust with flour. Set the pan aside. Place the cake mix, pudding mix, eggs, sour cream, warm water, and oil in a large mixing bowl. Blend with an electric mixer on low speed for one minute. Stop the machine and scrape down the sides of the bowl with a rubber spatula. Increase the mixer speed to medium and beat two to three minutes more, scraping the sides down again if needed. The batter should look thick and well combined. Fold in the chocolate chips, making sure they are distributed throughout the batter. Pour the batter in the pan and place the pan in the oven. Bake until the cake springs back when lightly pressed with your fingers and just starts to pull away from the pan. 45 to 50 minutes. Remove the pan from the oven and place it on a wire rack to cool for 20 minutes. Run a long sharp knife around the edge of the cake and invert it onto the rack to cool completely, 20 minutes or more. Dust lightly with confectioner’s sugar (if desired).

Blueberry Cobbler With a Beautiful Read

Monday, July 26th, 2010

Despite all of our blueberry freezing, I have a feeling that we are going to be going through our blueberries a lot faster than I had originally intended.   This past week I wanted to bring a blueberry treat to an evening book club meeting and to share it with my friends. Blueberry cobbler was something that I had never made before, but this recipe pulled together so easily that I shared it that evening and then later, as a special birthday treat for my mom. With all of the ingredients coming straight from the pantry, it was a fun and frugal dish to share and everyone I shared it with really seemed to enjoy it.

The book we read was, “Still Alice,” by Lisa Genova which is a fantastic read that I read way back in January and finally got a chance to discuss it with everyone. If you haven’t read it, it is a wonderful read that will really make you appreciate the abilities of your own mind and how difficult it would be if you lost the gift of memory.

My great-grandmother suffered from Alzheimer’s so I was very familiar with the topic and the emotional toll that it can take on one’s family members when they suffer from this disease. What I did not know was that over a half million people in the United States alone suffer from early-onset Alzheimer’s and that it is possible to suffer from this disease at a much earlier stage in your life than I had ever imagined.

In the story, Alice Howland is a cognitive psychology professor at Harvard and is known for her great intellect. She is admired not only by the other faculty members, but by her students for her amazing ability to captivate an audience when speaking about what it is she is most passionate about. Her husband is a scientist, and together they have collaborated on book projects and have a mutual love for each other and the intelligent and scientific dialogue that they can have together.

When Alice starts becoming confused and begins losing her words, forgetting what she is supposed to teach on, and even forgetting where she lives when she goes for a run, she blames it on menopause and decides to contact her doctor about her memory loss.

After going through screening, it is determined that Alice, at the age of fifty, is suffering from early-onset Alzheimer’s.

Alice’s quick spiral into memory loss is heartbreaking and her story is especially poignant because she is the chosen narrator of the story. At times, as the reader, you can even become confused along with Alice as scenes are repeated and her family member’s begin to lose their names, or she believes she is talking to strangers when they are well-known characters throughout the book.

The book sheds light on a very real disease in a way that can only be told through the narration of Alice. Although Alice is slipping, she is “still Alice,” even when her family feels her mind is very far away.

This book pulled at my heartstrings in a way that I can’t describe and has made me thankful for the beautiful memories that my mind can retain. It is a wonderful reminder how essential memory is in our daily lives and how important it is to love and respect those who are suffering from Alzheimer’s.

I hope you can get a chance to check out the book and why not bake a little blueberry cobbler to go with it? It is sweet and satisfying..the perfect way to end any good meal or to share with a book club of your own!

Fresh Blueberry Cobbler (Adapted from Food.com)

1 1/4 cups all-purpose flour
1/2 cup sugar
1/4 teaspoon salt
1 1/2 teaspoons baking powder
3/4 cup whole milk
1/2 cup butter, melted
2 cups fresh blueberries
1/4 cup brown sugar
1 teaspoon vanilla extract

Add flour, 1/2 cup sugar, salt, and baking powder to a mixing bowl; stir to combine. Add in milk and butter; stir to combine. Spread batter into a greased 8-inch square baking pan. Sprinkle blueberries evenly over batter. Sprinkle with 1/4 cup brown sugar and drizzle with vanilla. Bake at 350° for 40-45 minutes or until a pick comes out clean.

*****************************

Not enough blueberry recipes for you?  Be sure to check out our blueberry muffin cake, blueberry pancake syrup, blueberry syrup for iced tea or coffee, lemony blueberry muffins, and many more to come!