Archive for the ‘Crafts & Celebrations’ Category

14 FREE Home Management Binder Printables

Tuesday, August 26th, 2014

14 FREE Home Management Binder Printables

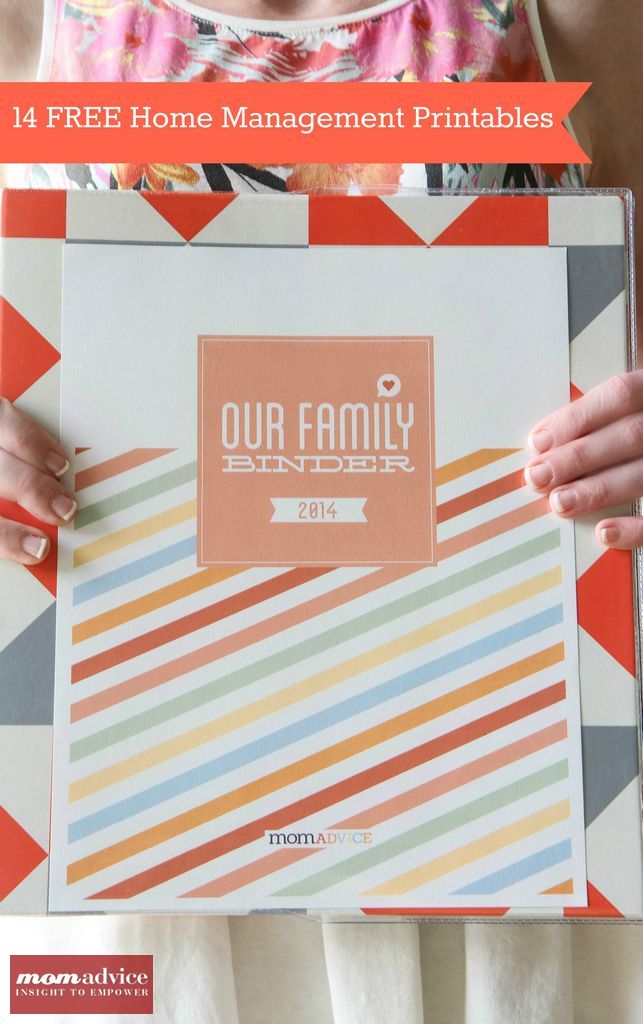
When I first began managing my household, I happened upon a home management binder that really worked for our family. The binder became our family Bible and each year I would order a new set of sheets to keep the same binder going for our family for the next year. Last year when I went to order my sheets, the company no longer existed and I felt lost without my trusty home management binder system. I talked with our amazingly talented craft contributor, Sarah Milne, to see if she could help me execute a binder with the same principles, but a fresh design that would make managing a home fun.  She created the most beautiful set of printables ever and I am so excited to share these with you today.

14 FREE Home Management Binder Printables

What Is a Home Management Binder?

When I say that a home management binder can be a Bible for a family, I really do mean that. A well-designed binder, which I really think we offer with these printables, helps you manage everything in your household in one place.  This binder is housed typically in a central location in your home and contains everything your family needs to have on-hand from your family calendar, your to-do list, important contact information that you want to have at a moment’s notice (particularly for someone who might babysit), the meal plan for the week, grocery lists, a price sheet, and all you need to run your family’s finances smoothly.

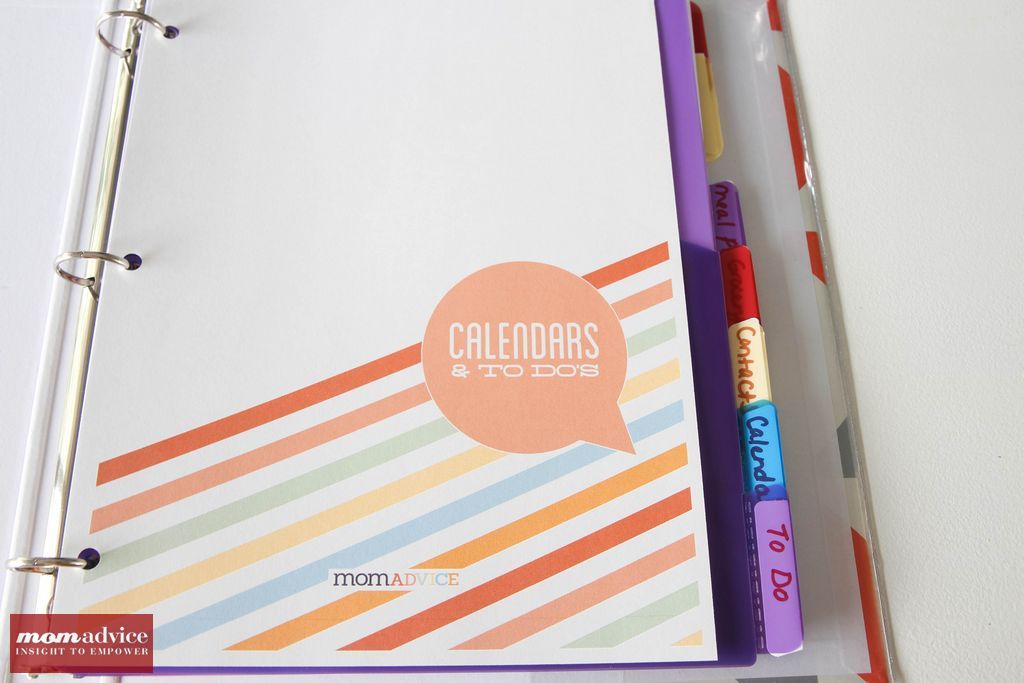
I recommend storing this binder  and then purchasing a set of pocketed dividers where you can tuck important information that you might need to refer to. I took a picture of my pockets for you and then realized that it is all pretty personal so you will have to take my word for it that this is where you put the good stuff. When school starts, in particular, you will find your mailbox filled with fliers for events, important forms that need to be filled out, appointment reminders, and invitations. Instead of piling them on a desk or tacking them on the fridge, use the pockets so you always know where to find these items when you need them. I also like to keep an extra pocket or two in the back for the randomness in my life- consider it another junk drawer, if you will.  I have also found that a good spot in the home for daily reference is in your family’s command center.

We have created header pages for each section and I do recommend printing these on heavy-duty cardstock so that they can hold up to the abuse of being referenced daily!

14 FREE Home Management Binder Printables

What is Included In Our Home Management Binder Packet?

First, I just want to say that this is the just the beginning. I plan to come up with more sheets that you can use for all of your home management needs and this will be an ongoing project for MomAdvice.com. I want this to be useful to you so please, please let me know in the comments if there is anything you would like to see that we are missing in our packet. It will help us when we design the next round of sheets for you!

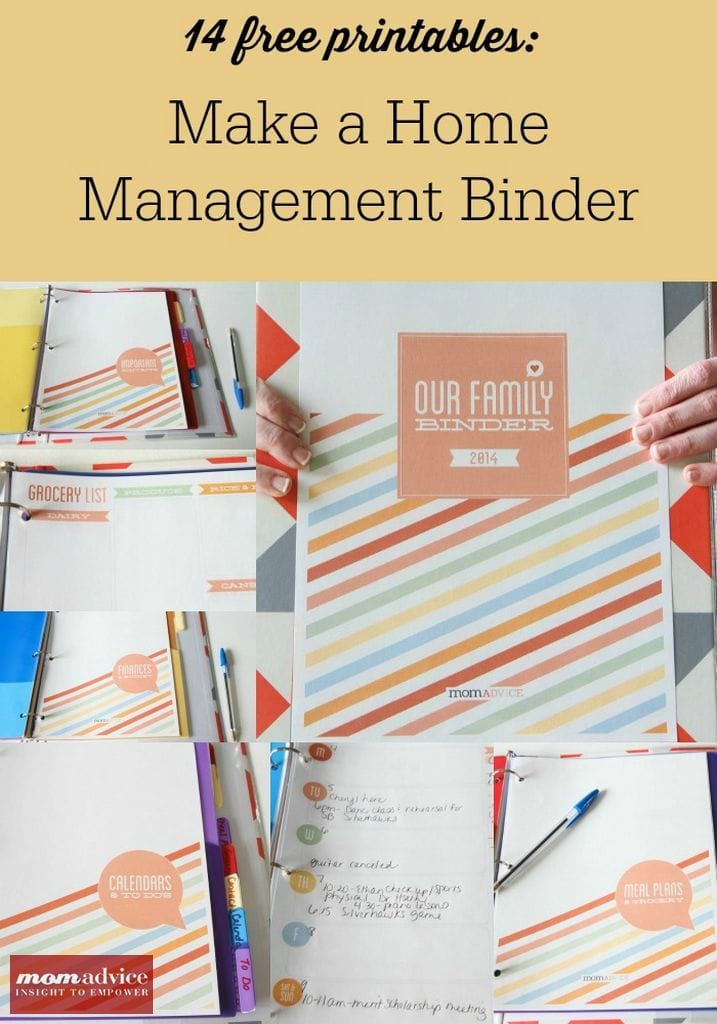
In our packet you will find:

Family Budget Pages

Grocery Price Sheet (for comparison shopping)

Grocery List Sheet

Menu Planner Sheet

Family Calendar

To-Do List

Contact Sheet

Header Pages for Each Section (to print on cardstock)

MomAdvice Newsletter


What is the Catch to These “Free” Printables?

Honestly, I paid a lot of money each year to update my binder with new sheets, but I didn’t want to charge for these.

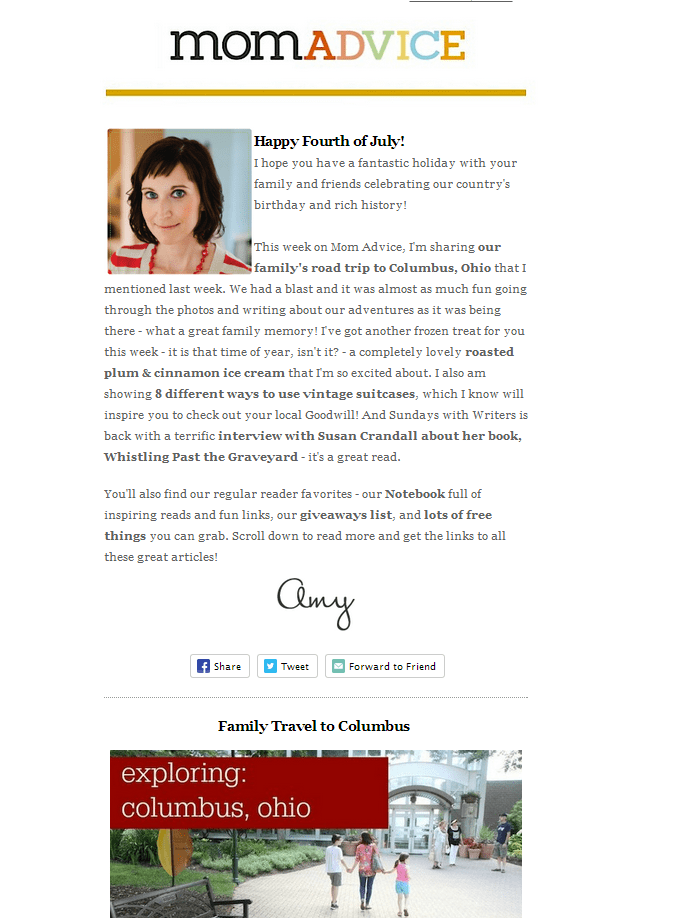
We realize that there is so much happening on MomAdvice each week that it can be difficult to keep up with. I hired another designer to create a beautiful weekly newsletter for our readers that I would love for you to subscribe to. This email newsletter only is sent once a week to our readers (unless we have a special announcement/giveaway) and I promise to never, never spam you. In this newsletter, we feature everything that is happening for the week and this is where our subscribers can access the free printables and additional freebies that we offer ONLY TO NEWSLETTER SUBSCRIBERS.  It is beautiful, simple, mobile-friendly, and fast to scroll through.  I promise, I will never send you junk. I know your time is valuable and so is mine- I am committed to a very useful newsletter.

Honestly though, I realized that we needed to offer some type of incentive to get you to join my newsletter and this is our thank you for letting me come in your inbox once a week.  That is the only catch with getting free printables from MomAdvice.com.

If you are interested in receiving 14 free home management printables, just input your email below or in the sidebar and we will send you the link to your packet as our thank you for being a subscriber (look for it in the final welcome email). Subscribers will have access to our additional printables as they become available. Note: if you already subscribe to the Mom Advice Newsletter, be sure to look in your inbox for a special email that contains the link for your set of these printables! If you can’t seem to get the form to work with your browser, just look over to your right in the sidebar. You will see a handy form there too that works with all browsers! We appreciate you so much! Thank you! 

##NEWSLETTERFORM##


 This post contains affiliate links.


Pin It

Gluten-Free Lemon Chiffon Cake

Tuesday, July 29th, 2014

Gluten-Free Lemon Chiffon Cake

For our family, birthdays are all about the cake and my son’s 12th birthday was just the reason to try out a new recipe. After browsing through the cookbooks, which is the birthday child’s honorary ritual and right, he decided to repeat his choice last year with another chocolate snickerdoodle cake. I rounded out our birthday dessert table with a gluten-free lemon chiffon cake so that I could enjoy a slice of cake with the family too. I would say that this cake was just as much of a hit as the the chocolate cake and tempted me everytime I opened the fridge.

“Just one more slice,” it screamed.

I would grab a fork and nip off a bit and eat it while still standing at the fridge.

Don’t judge.

I am not much of a sweets gal, but this cake was so light and lovely that I couldn’t stop eating it.

Gluten-Free Lemon Chiffon Cake Chiffon cakes are my favorite cakes because they are so light. Much like an angel food cake, they are created with egg whites which really helps with the density of the gluten-free cakes. The cake is so delicate though that I ended up wrapping the cooled cakes in saran wrap and a layer of foil and freezing them overnight so they would not tear or fall apart when I frosted the cake. I highly recommend doing that too.  I still rely upon these two 8″ Wilton pans (affiliate)  (instead of those 9″ pans that produced flat layers for me) and a good spatula (affiliate) for all my cakes. With this cake, in particular, you want to make sure you don’t produce thin cake layers that crumble when pulled from the pan.

Smoothed between the layers is a delicious lemon curd (I used this recipe!) which sounds wildly impressive, but is so easy to make that you will wonder why you never tried making it before. My children fought over who could enjoy the last of the lemon curd that was in the jar.

I broke it up by telling them that since they were going to fight about it, I was going to eat it.

That’s the kind of mom I am, a true problem-solver.

Gluten-Free Lemon Chiffon Cake

The cake is then frosted with a whipped cream frosting that has the lemon curd whipped through it.

I mean, seriously. It’s as if this cake fulfilled all my food dreams.

12

Happy 12th birthday to my beautiful boy. I think this is the happiest of his birthdays and it was because there was no fuss and no elaborate themes. We had just got back from vacation, I had a millionty projects for work, and our shed was in the process of being finished.  There was no time for an elaborate birthday. It ended up being the best birthday yet.

Just friends, a takeout pizza, and some cake.

Why have I been stressing about this birthday party every year?

The smile says it all- simple is better.

I hope you can give this recipe a try. If you gluten-free cakes aren’t your thing, definitely try this Cream Cheese Pound Cake With Homemade Lemon Curd– it’s a winner too!

Gluten-Free Lemon Chiffon Cake
Recipe Type: Dessert
Prep time:
Cook time:
Total time:
Serves: 8
A beautiful lemon chiffon cake with lemon curd between the layers topped with a whipped topping laced with more lemon curd. It is the perfect summer dessert!
Ingredients
  • Vegetable oil spray, for misting the pans
  • 2 teaspoons rice flour, for dusting the pans
  • 1 extra large or 2 small lemons
  • 3 large eggs (room temperature)
  • 1 package (15 ounces) yellow gluten-free cake mix
  • 1/4 cup granulated sugar
  • 2/3 cup orange juice (fresh or from a carton)
  • 1/2 cup vegetable oil
  • For the filling and lemon whipped cream frosting: 1 jar (10 ounces) gluten-free lemon curd (or prepare the homemade version- link above)
  • 1 cup heavy (whipping) cream, chilled
  • 1 tablespoon confectioners’ sugar
Instructions
  1. Preheat the oven to 350°F. Lightly mist two 9-inch round cake pans with vegetable oil spray, then dust with the rice flour. Shake out the excess rice flour and set the pans aside.
  2. Zest a lemon and measure out two teaspoons for the cake batter and place it in a large mixing bowl. Cut the lemon in half and squeeze the juice through a fine sieve, discarding the seeds. Measure 1/4 cup of lemon juice, pour it into the mixing bowl with the zest, and set the bowl aside.
  3. Separate the eggs, placing the whites in another large mixing bowl and the yolks in the mixing bowl with the lemon zest and juice. Beat the whites with an electric mixer on high speed until stiff peaks form, 3 to 4 minutes. Set the beaten egg whites aside.
  4. Place the cake mix, sugar, orange juice, and oil in the bowl with the egg yolks and lemon and beat with an electric mixer and beat until mixed.
  5. Using a rubber spatula, gently fold the egg whites into the batter until no traces of whites remain and the batter has lightened.
  6. Divide the batter evenly between the 2 prepared cake pans, smoothing the tops with the rubber spatula. Place the pans in the oven side by side. Place a large mixing bowl and electric mixer beaters in the refrigerator to chill.
  7. Bake the cake layers until they are golden brown and the tops spring back when lightly pressed with a finger, 18-22 minutes. Allow them to cool on a wire rack.
  8. Freeze the layers wrapped in saran wrap & foil overnight to produce a sturdy base for icing.
  9. Meanwhile, make the filling and frosting. Measure 2/3 cup of lemon curd for the filling and set it aside in a small microwave-safe glass bowl. Pour the cream into the chilled mixing bowl. Using the refrigerated mixer beaters, beat the cream with an electric mixer on high speed until stiff peaks form, 3 minutes. Fold in the confectioners’ sugar and 1/4 cup lemon curd. Beat again at low speed until the lemon curd is incorporated, 30 seconds. Refrigerate the frosting until ready to use.
  10. Remove the layers from the freezer. To assemble the cake, place the glass bowl with the lemon curd for the filling into the microwave on high power for 10 seconds to warm it. Transfer one cake layer, right side up, to a serving plate. Spread the top with the warmed lemon curd. Place the second layer, right side up, on top of the first and frost the top and side of the cake with the lemon whipped cream frosting. Refrigerate the cake until time to serve.

Adapted from The Cake Mix Doctor Bakes Gluten-Free (affiliate)

Pin It

8 Fun Dresser Makeovers

Tuesday, July 22nd, 2014

8 Fun Dresser Makeovers


I have so much fun gathering up ideas for repurposing items and look forward to showcasing these ideas for you each month.

Today’s post is all about a furniture staple…the dresser.

I have gathered 8 fun ways you can you can makeover a dresser that I know you will want to run right out and find this thrift store gem to create a new fun piece in your home.

In fact, I can’t wait to snag a dresser myself so I can implement these ideas in my own home.


Create a Unique Kitchen Island

Kitchen islands can be quite pricey, but they don’t need to be.
A dresser can be made over into the perfect kitchen island for your home with a fresh coat of paint.
A kitchen island made from a dresser offers ample storage for table linens and silverware as well as a generous top for a cutting board, fruit bowl, or cake stand.
I love this beautiful mint green kitchen island made from a dresser by You’re So Martha.

Make a Cute Dog Bed from a Drawer

As we showed off last month in our suitcase makeover piece, cute dog and kitty beds are all the rage and can be styled to match the interior of your home.
DIY Show Off takes it to another level with an adorable detachable parasol that offers your pooch shade in the summer months.
If you spy a dresser that isn’t in the best of shape at Goodwill or a garage sale, don’t dismiss the piece.
Dresser drawers are just as valuable for fun DIY projects.
Dare I say, in fact, sometimes even more fun than finishing an entire dresser piece?
 I adore this DIY dog bed and the adorable details for your fashionable 4-legged friends.

Make a DIY Costume Closet

Who knew girls came with so many costumes? When my daughter was small, our dress-up clothes resided in a drawer in her room that often exploded all over her floor.

I love the idea of creating a space just for these outfits and Rambling Renovators made a DIY Costume Closet out of an old dresser that is just too adorable for words.
I particularly love that there is a mirror on the side for a quick costume check and that there is storage for jewels and footwear.
The floral wrapping paper interior also adds a special girly touch that any little girl would flip for. This is a DIY-must for moms of girls!

Create a Planting Station

Although I was not blessed with a green thumb, I do have an appreciation for beautiful pieces that add beauty & function to our outdoor living.
Although I couldn’t find the source for this image, I just had to share this fun idea for a way you could transform a mirrored dresser into a planting station.
By adding peg board to the mirror stand, you now have the perfect storage for your gardening tools.
The top is the perfect stop for planting, or even for decorating outdoors.
The drawers make ideal storage for items like seed packets, small pots, gardening gloves, and your gardening cushion.

Turn It Into a Vanity

As we have found with our sixties home, bathroom renovations can be expensive even with the most basic of remodels.
Have you ever considered a dresser the perfect source for a vanity?
I know I hadn’t until I saw this incredible DIY Vanity made from a thrift store dresser from An Oregon Cottage.
The best part is that you can customize this to the size of your home, add a splash of color (or not), and a scratched-up tabletop basically disappears once you insert your sink.
How fabulous is that?

Create Unique Storage

Storage is always something I am thinking about and I love the idea of using dresser drawers for storage particularly in a guest room.
Liz Marie shows off her two beautiful drawers that have been stenciled with numbers as storage underneath the bed.
I can picture spare linens in here, a few basic toiletries, or even reading material for a rainy day.
Again, look at the bones of the pieces and find what is in the best condition and most valuable to you for your project needs.
This is a perfect example of an element you can use from a furniture piece.

Put a Number On It

Numbering things continues to be a trend and one simple addition that you can add to a dresser is numbering whether it is stenciled, applying house numbers, or getting creative with paint.
I love this modern dresser makeover with fresh paint and modern numbers on each drawer from HGTV.
Speaking of numbers, I am also madly in love with this numbered dresser that your child’s date of birth on it.
I found this adorable idea on To London With Love and it makes me want to do this adorable idea on a dresser for my kids.
What kid wouldn’t love to see his birthday everyday and what mom wouldn’t feel nostalgic every time she went into her child’s room.
I adore this!

Add Unique Hardware

For today’s final idea, I love the idea of looking for unique hardware made from other items you might find at Goodwill.
merrythought showcases a beautiful masculine detail on this dresser makeover utilizing leather belts for drawer pulls.
The same idea could be used with leather pieces from purses or purse straps too.
I love that this is such a simple detail, but can transform a dresser into a real showpiece.

Have you ever made over a dresser? We’d love to hear about it!


Don’t miss these other great ideas from MomAdvice.com:


Make a Closet Office Space


7 Fresh Furniture Painting Ideas


How to Spray Paint Furniture


7 Easy Chalkboard Paint Crafts


Sign up for the MomAdvice newsletter

Pin It

DIY Library Tote Bags with Free Printable Designs

Monday, July 21st, 2014

From our diy/craft contributor, Sarah Milne.

DIY Book Tote with free printable designs

DIY Book Tote with free printable designs

Our summer holidays are in full swing. We haven’t any big trips planned, but a few little adventures here and there, along with days filled with a good balance of relaxation and local outings.

One of our weekly summer activities includes a trip to the library. During the summer, it’s so important to keep those little brains stimulated. Also, my oldest is in a French Immersion school and the library is a great resource for her to brush up on her reading and language, en francais.

DIY Book Tote with free printable designs

DIY Book Tote with free printable designs
A good book bag is essential, especially when my girls seem to collect a giant stack of books each visit. I designed some awesome library totes for each of us to take along using a set of canvas tote bags from Michaels (bought with a coupon, of course), and I’ve prepared a set of printables for all of you to print and iron on your own canvas tote bags! These make for such a great gift for the book lovers in your life – there’s a grown-up quote, a floral heart and an adorable gal or guy fox to choose from.

DIY Book Tote with free printable designs

The supplies.

  • Canvas tote bag
  • Ink jet iron on transfer for light fabric
  • Free printable tote bag designs
  • Scissors
  • Iron
  • Towel
  • Hard surface for ironing

DIY Book Tote with free printable designs

DIY Book Tote with free printable designs

DIY Book Tote with free printable designs

The how-to.

  1. Download the free printable book tote designs (links to individual designs below).
  2. Following the instructions on your ink jet iron on transfer pack, print your desired design.
  3. Trim the design around it’s edges.  For the quote, trim each phrase separately.
  4. Diligently iron your canvas totes before applying the transfer to make for the smoothest surface.
  5. Place your transfer in its place and iron.  Follow the instructions on your transfer pack as each varies.  I ironed my transfer repeatedly over the course of 2 minutes.
  6. Let your transfers cool completely before removing the backing.
  7. Off to the library you go!

More ideas.

  • Embellish your totes by adding ribbon ties on the handles or sewing ribbon to the handle.
  • Have your child add their own personal touch by painting or drawing on the back of their totes using fabric paint or markers.
  • Roll up your tote and tie with a ribbon and tag and gift to the book lover in your life!


DOWNLOAD free printable tote bag designs.

she reads books quote tote bag design

floral heart tote bag design

gal fox books are cool tote bag design

guy fox books are cool tote bag design

DIY Book Tote with free printable designs


Pin It

8 DIY Vintage Suitcase Projects

Monday, June 30th, 2014

DIY-Vintage-Suitcase-Projects-Collage


Suitcases are one item that you can always find at Goodwill.

With that in mind, today’s post showcases 8 ideas for ways you can use vintage suitcases for your home.

Whether you are upcycling the suitcases into new pieces or simply adding them to an empty corner in your home, suitcases can offer both beauty and storage to your home.

When my kids were small, I made a rainy day suitcase that was filled with items from Goodwill, craft supplies, and fun dollar store items that they used to look forward to when we were cooped indoors.

I have long been a lover of this sweet item l and after you see these ideas, I know you will too!


Add Vintage Details to a Food Table

I do a lot of entertaining and I am always looking for pretty additions to our tables when entertaining.
Not only does it make for a beautiful display with the addition of a few fresh flowers, but it also gives you the chance to stack dishes at different heights and maximize your table while adding an interesting detail.

Create a Suitcase Side Table

One of my favorite things that I see suitcases being used for is as a furniture piece.
Not only does it add a beautiful detail to a room, but it also offers hidden storage within to house random items that might not have a designated space in your home.
Goodwill can be a wonderful resource both for the base, the suitcase, and any vintage items you might like to display on top.
Check out this fun tutorial for a diy vintage side table from A Diamond in the Stuff.

Add Detail to an Empty Corner

Although I am not a big fan of collecting things for my home, one collection I can get behind is one that both adds beautiful detail to a room and also offers storage for my home.

You know that corner where you usually put the Christmas tree during the holiday season?
That just might be the perfect corner to begin collecting interesting suitcases to stack.
I can totally picture these being filled with off-season items like ornaments and holiday decorations that would save us time hunting for items in our basement.
Try this fun suitcase collection inspired by Joys of Home in a corner in your house.

Create Unique Shelving in Small Spaces

One thing I am always looking for is shelving because our home did not come equipped with a lot of closet space.
This is the perfect spot to also tuck away any items you might want to keep on hand for your guests without cluttering up your space and is a fantastic way to use smaller suitcases in your home.

Add Whimsy to a Bar

This adorable guest room mini bar can be customized for each of your guests!

The Painted Home shows you how to take a small vintage case and turn it into the cutest idea for spoiling your overnight visitors.
Who wouldn’t love this for their guest room?

Create Creative Craft Storage

If your craft room is anything like my own, you are always looking for ways to store your oodles of craft supplies.

What a fun and chic solution for your creative space.

Make a Coordinating Set

The possibilities for decorating a suitcase abound and I browsed through millions of options before I happened upon this adorable set from A Beautiful Mess.

I love the idea of applying coordinating fabrics vintage suitcases to create an adorable matching set.
Wouldn’t these be so cute in a nursery for tucking away baby toys, spare diaper supplies, or spare bedding?

Make a Cozy Pet Bed

Pet beds on the market are pretty ugly, but a vintage suitcase can be transformed into a perfectly coordinated space for your furry friend with just a few supplies.

I love the idea of a cozy home out of an old suitcase and since my cat loves to climb in my suitcase when I am packing to leave for my trips, I have a feeling that this project would be a big hit at our house.
Get the full diy suitcase pet bed tutorial on The Everyday Aesthetic.

Now hurry and snag a suitcase for one of these fun projects today!

What are your favorite ways to use old suitcases?

Don’t miss these other great ideas from MomAdvice:


Crafting with Vinyl


DIY Bar Cart


No-Sew DIY Blanket Scarves


Rose Strawberry Wine Pops


Sign up for the MomAdvice newsletter


Pin It

Celebrating 4th of July Heroes With Kids

Monday, June 23rd, 2014

Celebrating 4th of July Heroes With Kids

As my children grow older, I strive to find more meaningful ways to celebrate holidays.

The 4th of July has always been a burst of red, white, & blue through our home, but I can’t say that we have ever spent time together discussing the importance of this day and getting to know the heroes behind what makes the 4th of July so special.

Today I want to share with you a fun way you can share about the 4th of July Heroes in your home and a fun way to incorporate their images in your home to make the day more meaningful and festive.

I partnered with Walmart on this project and all the materials you need for this can be found at their store.

To begin, you can select your 4th of July Heroes that you want to talk about.

I found this great list for kids that I used to select our heroes to focus upon.

I then headed to Wikipedia and found images of each of our heroes and converted them to black & white and saved them on my computer.

If you would like to use the same heroes as us, here are the heroes we selected for our project.

George Washington

George Washington

Thomas Jefferson

Thomas Jefferson

Benjamin Franklin

Benjamin Franklin

John Hancock

John Hancock

Crispus Attucks

Crispus Attucks

John Adams

John Adams

Abigail Adams

Abigail Adams

Celebrating 4th of July Heroes With Kids

Once you have your heroes selected, head to the Walmart Photo Site and upload the images there.

In addition to having 1 of each image printed in 4×6, also add 1 set of wallets for each person.

 If you send these to the one-hour lab, it will be less than $6 for all of them.

While you are there, you can also pick up a package of mini-clothespins, a set of notecards for your kids to write on, supplies for this easy flag bunting, and this burlap wreath to decorate with.

Since I already had these things in our home, it helps cut down on cost and storage for us this year.

Celebrating 4th of July Heroes With Kids

Once you have your images, have kids select which person they are interested in discovering and have them find information about their 4th of July heroes.

I challenged my kids to find one or two facts about each hero.

We also read about the first 4th of July and how different is from how we celebrate today.

I am embarrassed to say that I was learning right along with my children and soaking it all in as much as they were.

Abigail Adams, for example, was one of our favorite people we learned about. Did you know that she had five kids that she cared for and homeschooled while her husband was away serving his country?

 Not only was she passionate about women’s rights, but she was also passionate about equality for all people, whether they were black or white.

She helped care for the soldiers in her home (feeding them and treating their injuries), and she even learned how to make her own gunpowder.

Emily and I are big fans of Abigail Adams now and all she did for our country.

Celebrating 4th of July Heroes With Kids

Likewise, my son loved John Adams and his fun fact was that he thought his teachers, “held him back.”

Despite being held back from his true potential in grade school, he passed his entrance exams to Harvard and his parents, who were farmers, gave up several acres of their own farm land to pay for John’s schooling.

And, boy, did that pay off!

John Adams strongly supported independence from Britain, signed the Declaration of Independence, and negotiated the treaty ending the Revolutionary War.

He later became the nation’s first vice president and second president.

This led to a great discussion about recognizing our true potential when sometimes others do not.

Did you know that Dr. Martin Luther King referenced Crispus Attucks in one of his speeches?

He held him up as an example of black patriotism at the beginning of our nation’s history.

Yet, we never knew anything about what he did for our country. I’m so glad we know now.

Celebrating 4th of July Heroes With Kids

If you have smaller kids, you can share simple facts and have them draw pictures.

Clearly, the fact that Abigail Adams rocked it as a mom and had five kids was worthy of a picture.

Make this time fun for your kids while acknowledging the sacrifices that so many gave up for our freedom.

Celebrating 4th of July Heroes With Kids

Once we were done discussing our heroes, I incorporated these pictures into our holiday decor.

I pulled some of the flags off of our bunting and switched them with pictures of our heroes.

 I took the items off of my burlap wreath and clipped the wallet images with mini clothespins on the wreath.

I hung this in the center of our mirror and added the flag & hero bunting around the frame of the mirror.

Celebrating 4th of July Heroes With Kids

I love these touches to our 4th of July decorating, but I love even more that my kids know about these patriotic heroes.

 I hope this idea inspires you to learn more about this holiday and the heroes who made this day possible for all of us.

Happy 4th of July, friends!

walmart_mom_disclaimer


Look at these other great ideas from MomAdvice.com:


How to Make Fluffy Slime


Pin It

DIY Herb Garden and Garden Markers

Monday, June 16th, 2014

From our diy/craft contributor, Sarah Milne.

DIY Herb Garden with DIY Herb Markers
After a very long, cold winter here in Calgary, we’ve been graced with beautiful sunshine. I think we actually skipped Spring and went straight to Summer here. My children use every ounce of warm sun outside in the backyard jumping on the trampoline and blowing bubbles. And our yard work and landscaping projects are in full swing.

DIY Herb Garden Markers 2 ways
This past week, while my husband worked on building a bench and planter for our deck, the girls and I worked on our herb garden. The IKEA Socker plant stand is the perfect addition to our outdoor space, home to 10 potted herbs and 3 marigolds for each of my children. I purchased the full grown herbs because frankly, I’m impatient. The Socker was easy to build, stands next to our back door, and the base tucks under our vinyl siding for added support so it won’t topple over in a strong wind.

Above the stand, I spray painted some little letters I found on clearance at Michaels. They’re attached using some heavy duty outdoor double sided tape and so far, they’ve survived the heat and a handful of thundershowers.

IKEA socker herb wall

herbswall-5

DIY Herb Garden Markers Supplies
We crafted two sets of fun, DIY herb markers – one for keeps and one to gift. Here are the steps to create your own diy herb markers:

1. Herb Garden Markers : Monogram Popsicle Sticks

What you need:

Jumbo wooden popsicle sticks
Spray paint: we used bubble gum pink from our garage
Wooden letters: Michaels scrapbook section
Gorilla glue

What you do:

1. Spray paint the popsicle sticks. I only painted one side.
2. Let dry.
3. Glue monogram letters to the popsicle sticks to represent each herb. Luckily I hadn’t any duplicates with the same letter. Let dry.
4. You can also jot down what the herb’s full name is on the back of the stick using a sharpie.
5. Stick the garden markers in your herb pots.

DIY Herb Garden Markers 2 ways

2. Herb Garden Markers : Vinyl Flags

What you need:

Vinyl fabric
Wooden coffee stir sticks : dollar store
Spray paint: we used cream white from our garage
Ruler, paper, scissors, or fabric cutter
Sharpie
Gorilla glue or hot glue

What you do:

1. Spray paint the stir sticks. I only painted one side.
2. Let dry.
3. Create a triangle template for your flag from the paper.
4. Cut your triangles from your vinyl fabric using your template.
5. Write your herb names on each flag with sharpie. Let dry.
6. Adhere the flags to the stir sticks using gorilla glue or hot glue. Let dry.
7. Stick the garden markers in your herb pots.

DIY Chalkboard pot and DIY herb garden markers
We made this set with intentions of gifting them along with a potted herb. I painted a terracotta pot using chalkboard paint and doodled with a chalk marker. Such a sweet, reusable gift for the end of the school year or just because…

Gardening is a hobby I love sharing with my children. My oldest absolutely LOVES to help. The herbs are small and easy for her to take care of. She especially loves to trim a little off for dinners. My 3 year old checks our giant strawberry plant each morning to see if there’s any red ones to pick.

Happy Summer!

kids and gardening


DIY IKEA herb garden

Pin It

Brown Bag It! The Gift of a Meal (With a Free Printable!)

Monday, May 19th, 2014

free printable tag for meal gifting

“No act of kindness no matter how small is ever wasted.” ~Aesop

Sometimes the greatest gifts are the littlest of things. And random acts of kindness are beautiful and heart warming, not only as a recipient, but more so, when you give.

This post is inspired by a really great friend of mine whom I met at our kid’s kindergarten drop-off. I can definitely say that without her in my life these past 2 years, it would have been lacking tremendously. She is the kindest of souls.

Out of the blue, on a random day of the week, she made an extra meal for our family because she had enough ingredients. She popped by with dish and a little note that said “Bake at 350 for an hour. Enjoy!” I was overwhelmed with gratitude. Being a mom of 3, some days, I don’t even want to think about the next meal or dig through my pantry to see what I could possibly make! Of course, she didn’t think it was a big deal at all… but honestly, it made my week.

I returned the act of kindess last week when I popped by with a roast chicken meal from our grocery store. It wasn’t homemade, but it was a warm cooked meal that I know they certainly enjoyed. Even next day’s leftovers!

This back and forth got me thinking that I want to do this more often to unsuspecting mom friends who deserve a little mid-week break or pick me up. Hopefully this post will inspire you to do the same.

I’ve designed this fresh modern printable with a cute little poem to attach to your yums. Simply print a stack of them and have them handy when your eager kindness strikes. You can customize the printable with meal details, whether it’s homemade or store bought… and don’t dare forget dessert!

Download the Brown Bag It Meal Gifting tag here.


free printable bag tag for meal gifting

free printable tag for meal gifting
brownbagit-4

Download the Brown Bag It Meal Gifting tag here.

Oh, and we’d love to hear how you used these and the response you got!

Pin It

How to Make a Succulent Centerpiece

Saturday, May 3rd, 2014

How to Make a Succulent Centerpiece from MomAdvice.com

You may think, “Who am I reading? I thought she couldn’t take care of anything (even herself?)!  Well, surprise, SURPRISE, I am showing you an easy DIY succulent centerpiece today and wanted to share with you a few tips on caring for succulents. I think I got my confidence back this year after creating that terrarium for you all and now I think I am some kind of green-thumb-ish-person and I want to take you along on my journey. In all honesty, I worked many a summer in a greenhouse, but I had lost my love of plants when I started changing diapers, cleaning a house, and feeding a family. Maybe you felt the same way?   Today’s project was sponsored by Walmart and they asked me to showcase a fun creation you can make for your own backyard from their gardening department and I thought I would highlight a plant I am kind of crazy about right now…the succulent.

Painted Succulent Pictures

Have you seen a painted succulent before?  True green thumbs may cringe at the painted plants, but (as I illustrated above) I am a newbie to the houseplant world and I love anything that is painted. These succulents have been painted which I think can add a pop of color to your home or as an outdoor centerpiece for your outdoor table, as I am showing off today.

How to Care For Your Succulents

Succulents don’t need a lot to survive, but they do have some small requirements- a lot of light, thoughtful watering, and a little plant food every couple of weeks.

A  succulent is any plant with thick, fleshy (succulent) water storage organs. Succulents store water in their leaves, their stems or their roots. These plants have adapted to survive arid conditions throughout the world, from Africa to the deserts of North America.These plants can take many different leaf forms and plant shapes, including paddle leaves, tight rosettes, and bushy or trailing columns of teardrop leaves.

Light- 

The one requirement I worry about in my home is the lighting conditions because my house doesn’t get a ton of light in it. If you have a home with bright sunny windows, succulents are a perfect houseplant option.

Succulents prefer bright light, such as found on a south-facing window. Succulents will let you know if you are not putting them in an ideal location. Some species will scorch if suddenly exposed to direct sunlight. Their leaves will turn brown or white as the plant bleaches out and the soft tissues are destroyed. If the plant is not getting enough light, succulents will begin to stretch, with an elongated stem and widely spaced leaves. Many varieties of succulents will thrive outdoors in the summer and, depending upon your weather, this might be a better option.

Water-

Most people think that they don’t need to water their succulents very often, but in the Spring & Summer months, succulents actually need more water than they do in the Winter & Fall. Make sure to water your succulents often in the summer.  Allow the potting mix to dry between waterings, but do not underwater. During the winter, when the plants go dormant, cut watering back to once every other month. Really, the watering is probably the most tricky part about succulents!

Fertilize-

Make sure that you purchase some houseplant fertilizer while you are at the store. In the Spring & Summer months, fertilize your plant every two weeks.  Just make sure you stop fertilizing in the winter months.

How to Make a Succulent Centerpiece from MomAdvice.com

Now that we know all about succulents, let’s make a cute centerpiece for our outdoor table!

Supplies Needed

3-4 Succulents (painted or not)- these are priced at $6.88 each

Gold Spray Paint

White Spray Paint

Inexpensive Pizza Pan (this was just $.92)

Painters Tape

How to Make a Succulent Centerpiece from MomAdvice.com

Directions

1. Remove plant in plastic pot from the clay pot. Remove stickers. Hold your can 8 inches away from your surface and spray in a sweeping motion side to side with a slight overlap. It has always been my experience to go thin with the paint, allow it to dry, and then to add another layer for the best results and minimal drip. Allow the paint to dry for one hour.

2. Using your painters tape, tape off anywhere you would like to have some gold peeking through. You can do a paint dipped pot and do the bottoms, trim the top in gold, or create your own unique paint effect with geometric taping. Spray paint those parts gold and allow your pots to dry.

3. Finally, spray paint your pizza pan gold.

4. Once it is dry, pull everything together and display it on your outdoor table for a unique centerpiece.

How to Make a Succulent Centerpiece from MomAdvice.com

How to Make a Succulent Centerpiece from MomAdvice.com

How to Make a Succulent Centerpiece from MomAdvice.com

How to Make a Succulent Centerpiece from MomAdvice.com

Have any tips for succulent care or selection? Feel free to leave them here- I’d love to hear about your experience with these plants!

walmart_mom_disclaimer

Pin It

How To Print Waterlogue Pictures

Thursday, May 1st, 2014

How To Print Waterlogue Pictures from MomAdvice.com.

I am so excited to share with you today’s tutorial on how to print Waterlogue images for easy and beautiful gifts for someone special in your life. With Mother’s Day just around the corner, the Waterlogue app is a great way to make beautiful watercolor prints for a favorite mama in your life.

Walmart challenged me to showcase a budget-friendly gift to give for Mother’s Day and I just knew that I had to show you how to do this so you can make beautiful images for a special lady in your life or as a gift to yourself. To get started, you will need to download the Waterlogue App ($1.99). The app is compatible with the iPhone, iPad, or iTouch. Once you have downloaded it, we can begin creating our art.

How To Print Waterlogue Pictures from MomAdvice.com.

How To Print Waterlogue Pictures from MomAdvice.com.

I took my kids in the backyard and had them pose for me. I wanted to get one of the back of them or a side angle. Although sometimes the app looks amazing with faces directly to the camera, I find that it can be a little tricky picking the right filter and I wanted to insure we had good success. I suggest trying a couple of different angles so you can play with the filters until you find the perfect one.

This is the picture that I took with my DSLR, but I did not make any edits to the image. I just wanted to make sure that it was nice and crisp for the app, but you can definitely just shoot with your iPhone too!

How To Print Waterlogue Pictures from MomAdvice.com.

To begin, tap on the camera to take a picture or import from your library. Since I took my photo with my DSLR, I emailed the photo to myself and then saved it to my phone to use for this. Next, you will want to select a filter. Each of the filters offers a different feel to your photos so have fun playing around with all the different options- there are twelve in all!

How To Print Waterlogue Pictures from MomAdvice.com.

As you scroll through the film strip at the bottom, you will have a couple of other options for making your picture. One is how dark or how light the brushstrokes are in your photo. Try out the different options before finalizing your picture.

How To Print Waterlogue Pictures from MomAdvice.com.

As you continue to scroll through the film strip, you will also see the option to select the size of the brushstrokes.  This is not the file size, this is just the size of the brushstrokes which can be a little confusing.

The final selection you can make on the film strip is if you would like a border or not on your image. I decided to leave the border off.

Click the HEART (above the filmstrip) to head to SETTINGS (you will need to scroll all the way to the other end of the options on the bottom row.  Click SETTINGS and then change your file size to LARGE.  From this menu you can SAVE TO PHOTOS or just click MAIL to email the file to yourself. 

How To Print Waterlogue Pictures from MomAdvice.com.

Once you have emailed the file to yourself you can open and print it just like a regular picture since it is in JPEG format.  Click the size of picture you want to print and simply print it on heavy-duty cardstock. You can find this over by the printer paper in the office supplies section of the store.

How To Print Waterlogue Pictures from MomAdvice.com.

Now that you have your picture,  you can place it in an inexpensive frame. I found these Better Homes & Gardens frames for a little less than $10 in the housewares. You will need to trim your image a bit, and you can use your removable mat to help figure out how to center and trim it. Place the picture inside and tie it with a little grosgrain ribbon for mom with an inexpensive bouquet of flowers.

How To Print Waterlogue Pictures from MomAdvice.com.

I hope you guys have the best time creating your own artwork and I hope this idea inspires you for an easy gift for someone special in your life!

For more great Mother’s Day gift ideas, check out these easy DIY Mother’s Day Gift Ideas!

Have you used the Waterlogue App before? What are you doing with this fun app?

walmart_mom_disclaimer

Pin It