Archive for the ‘DIY’ Category

DIY Money Book Page Posies

Wednesday, May 6th, 2015

DIY Money Book Page Posies from MomAdvice.com


Graduation season is here and that means being prepared with lots of great gifts for the amazing grads in our life.

It probably goes without saying that one of the most useful gifts to a poor college student is money.

Of course, giving just money can sometimes feel less personal than I would like.

So, I crafted up some adorable money book page posies that you can create out of a few supplies you probably already have on hand, to make one beautiful posy or a bouquet for the graduate in your life.


DIY Money Book Page Posies from MomAdvice.com


I created this adorable, “What’s blooming? BOOK MONEY!” gift tag that you can attach to one of these simple paper flowers!

How cute is that?

To snag this tutorial and my free printables to make these Book Page Posies, head on over to the Kenmore blog today!

While you are there, be sure to check out their handy list of easy Mother’s Day DIY gifts that you can make for a special mama in your life!

Pin It

The DIY Laundry: Detergent & Fabric Softener Sheets

Thursday, April 16th, 2015

The DIY Laundry-Detergent and Softener Sheets

Have you ever thought about making your own laundry detergent and dryer sheets? While it’s not specifically around our M Challenge of Loving Your Home, thinking about our home made me think about the DIY projects that have helped to create a better environment for my family – one of which is our DIY Laundry! I love the control and confidence I have in making our own laundry essentials – it’s better for the environment and results in major savings with minimal time invested.

Ready to make your own? Here’s a little more on each project with a link to the original full article where you’ll find complete tutorials with photos and recipes:

DIY Fabric Softener Sheets

DIY Fabric Softener Sheets

I have been making my own DIY fabric softener sheets for years – it’s an easy process that will stretch your softener further with nothing to throw away! Plus, they actually perform better than putting fabric softener in your washer compartment and you don’t have to worry about any staining on your fabrics.

They are also reusable – you can use each sheet about 20 times before they lose their effectiveness. But then it’s an easy step to repeat the process!

Go here for the steps to make your own fabric softener sheets – plus tips on other options if you don’t want to use commercial fabric softener:

DIY Fabric Softener Sheets

Homemade Laundry Detergent

Homemade Laundry Detergent

Making homemade detergent is easier than you might think and the cost comparison makes it worth the small amount of effort required. It’s naturally low-sudsing, making it perfect for using with HE washing machines and because it contains zero phosphates or fillers, it’s septic-friendly as well.

This homemade detergent is made up of three ingredients: Fels-Naptha (or Ivory Soap), Washing Soda, and Borax, which can be bought for around $8.00 total. Dividing the total materials required to make one batch of soap (the soap bar and 1 c. each of the remaining ingredients) equals a cost of $1.80-$1.90 for a batch. At one to two tablespoons per load, it comes in at around $.05, compared to $0.17-.0.21 per load of name brand detergents.

It also takes less time than you may think: I was able to make a triple batch of this soap in about fifteen minutes (and that is along with taking pictures for this tutorial). The real time-consuming process of it is grating the soap, but if you have a food processor, that can be accomplished in no time at all!

Go here for a picture tutorial of how to make your own laundry detergent, including photos of all the ingredients (and where to find them):

Homemade Laundry Detergent

Do you make any laundry items for your home? Have you made either of these after the original postings?


Pin It

DIY Lampshade Ideas

Tuesday, April 14th, 2015

DIY Lampshade Ideas from MomAdvice.com

One of the quickest ways to update a room is to spruce up a lamp in your home and today I wanted to show you some easy and affordable ways to transform a lampshade from Goodwill.

I love these ideas so much, in fact, that I have plans to add a new lamp or two to our space now for Spring!

I hope you will be as inspired as I am by these bloggers and their incredible lampshade makeovers.


Add a Fun Print With Leggings

You can find a pair of leggings in just about any pattern or color combination right now at just about any store.
Consider snagging a pair of inexpensive leggings and using this material to stretch over a lampshade in your house to add a trendy color or pattern to your home without a big financial commitment.

Add an Adorable Ping Pong Detail

I am a big fan of ping pong craft ideas and love this detail on a lampshade.

You can use fabric paints to match a room in your home and then glue on this three dimensional detail for a fun look for any game room.

Get the scoop on this DIY Ping Pong Lampshade from I Love to Create here.

Go Industrial

Your local thrift store is the perfect place to hunt for lampshades that have beautiful bones underneath their fabric exterior.
A simple removal of the fabric can create a beautiful industrial lampshade and the edition of an Edison bulb really completes the look on this easy DIY project.
Check out this industrial lampshade makeover on Bless’er House.

Add a Fabric Detail

If you aren’t a fan of the industrial look, but have a great lampshade base to work with, consider adding your own unique touches with scraps of fabric.
If you are a sewer, you may have a mystery bag of materials to work with to create this adorable scrappy fabric lampshade for a corner in your craft room like Pen’s Nook!

Add a Feminine Touch

Nothing says Spring like floral and that is why I love this fabric flower lampshade.
With simple fabric circles, glue, and a little shaping, this is the perfect craft to work on while binge-watching all of your favorite shows on television.
Since you are covering the entire lampshade in flowers, it can really breathe life into a lampshade that may have seen better days thanks to a camouflaging of rosettes.


Add a Unique Embroidered Touch

I love, love, love the look of embroidery and this DIY Constellation Lampshade from Martha Stewart is jaw-droppingly awesome.

I have been seeing constellation projects popping up on table runners and wall murals, but have fallen in love with this lampshade for my small home.

If you can’t find a navy lampshade for your project, consider covering it in navy leggings (as I showed you in our first project listed here) or hunt through the t-shirt section of a thrift shop for the perfect navy shirt to use!

What are some ways you have transformed a lampshade?

Feel free to leave a comment below!

We love hearing your ideas!


Don’t miss these other great ideas from MomAdvice.com:


Spice Up a Goodwill Lamp


How to Dye Your Jeans


DIY Roll-Up Puzzle Mat


9 Unique Ideas for Frugal Date Nights


Sign up for the MomAdvice newsletter


Pin It

15 Easy DIYs That Will Help You Love Your Home

Thursday, April 9th, 2015

15 Easy DIY Updates To Help You Love Your Home

It’s no secret around here that we’re not living in my dream house. But in the last few years, thinking about all we have and our many blessings, this house has become our little-home-that-could. We love it more and more. That’s one of the reasons I am so excited to be focusing on Love Your Home for our April M Challenge – it’s been a life-changer for us!

Besides the change in mindset, one of the biggest ways we’ve increased our contentment with the home we have is by tackling small DIY projects that have had a big impact in our life in this home. Do it yourself projects always come with a great sense of accomplishment, but when that feeling also helps you love your space more? That’s a win-win.

So I’ve collected 15 easy DIYs that will help you love your home more from our archives and inexpensive ideas from other great blogs – let’s all find a way to love the home we have! (note: I’d love for you to pin the title image for this page, but for each project, please pin from the original sources – thanks!)

Easy Home Updates from Mom Advice:

Transforming-Corners-In-Your-Home

Simple updates to refresh corners – or any spaces!

Shed-Makeover-Ideas

Turn an unused shed into a hideaway, guest room, office, or anything you need!

How_To_Style_Bookshelves

Refresh your space by styling (and decluttering!) your bookshelves.

Craft_Room_Organization

Make your craft/office space work better with these organizing solutions.

Fabric_Lined_Bookcase_Makeover

Change up standard bookcases with an inexpensive fabric makeover.

Make-A-Guest-Room-Welcome-Basket

Make guests feel welcomed to your home with a sweet basket (& free printables!).

 Other Easy Home Updates

Spray Paint Door-Knobs via Handle The Heat

Spray paint knobs & pulls @ Handle The Heat

Painting Tile via Live Love DIY

Paint your dated tile @ Live Love DIY

DIYBudgetBathReno-via Beautiful Matters

Redo your bathroom inexpensively @ Beautiful Matters

DIY Framed Bathroom Mirror via Liz Marie Blog

Or just frame out a builder mirror for a big impact @ Liz Marie Blog

$1200 Farmhouse Kitchen Remodel via An Oregon Cottage

Paint, add counters, sink and accessories to remodel a kitchen for under $1200 @ An Oregon Cottage

Peel-Stick Backsplash Tiles via Thrifty Crafty Girl

Or simply update your backsplash with peel-and-stick tile @ Thrifty Crafty Girl

DIY-Plank-Wall-with-Fence-Boards via Fox Hollow Cottage

Create an inexpensive plank accent wall @ Fox Hollow Cottage

Install a new light fixure via Sawdust and Embryos

Easily change out your light fixtures (this makes a huge change for low $ !) @ Sawdust & Embryos

Painting vinyl floors via Designer Trapped in a Lawyer's Body

Paint right over ugly vinyl or linoleum @ Designer Trapped in a Lawyer’s Body

So many great ideas! How are you learning to love the home you have?

Pin It

7 Fresh Furniture Painting Ideas

Tuesday, March 17th, 2015

7 Fresh Furniture Painting Ideas from MomAdvice.com

I am a big fan of painting furniture and when the Spring temperature arrive, I start dreaming of all the pieces I can redo.

Does anyone else refer to Spring as spray paint season?

Maybe that’s just me.

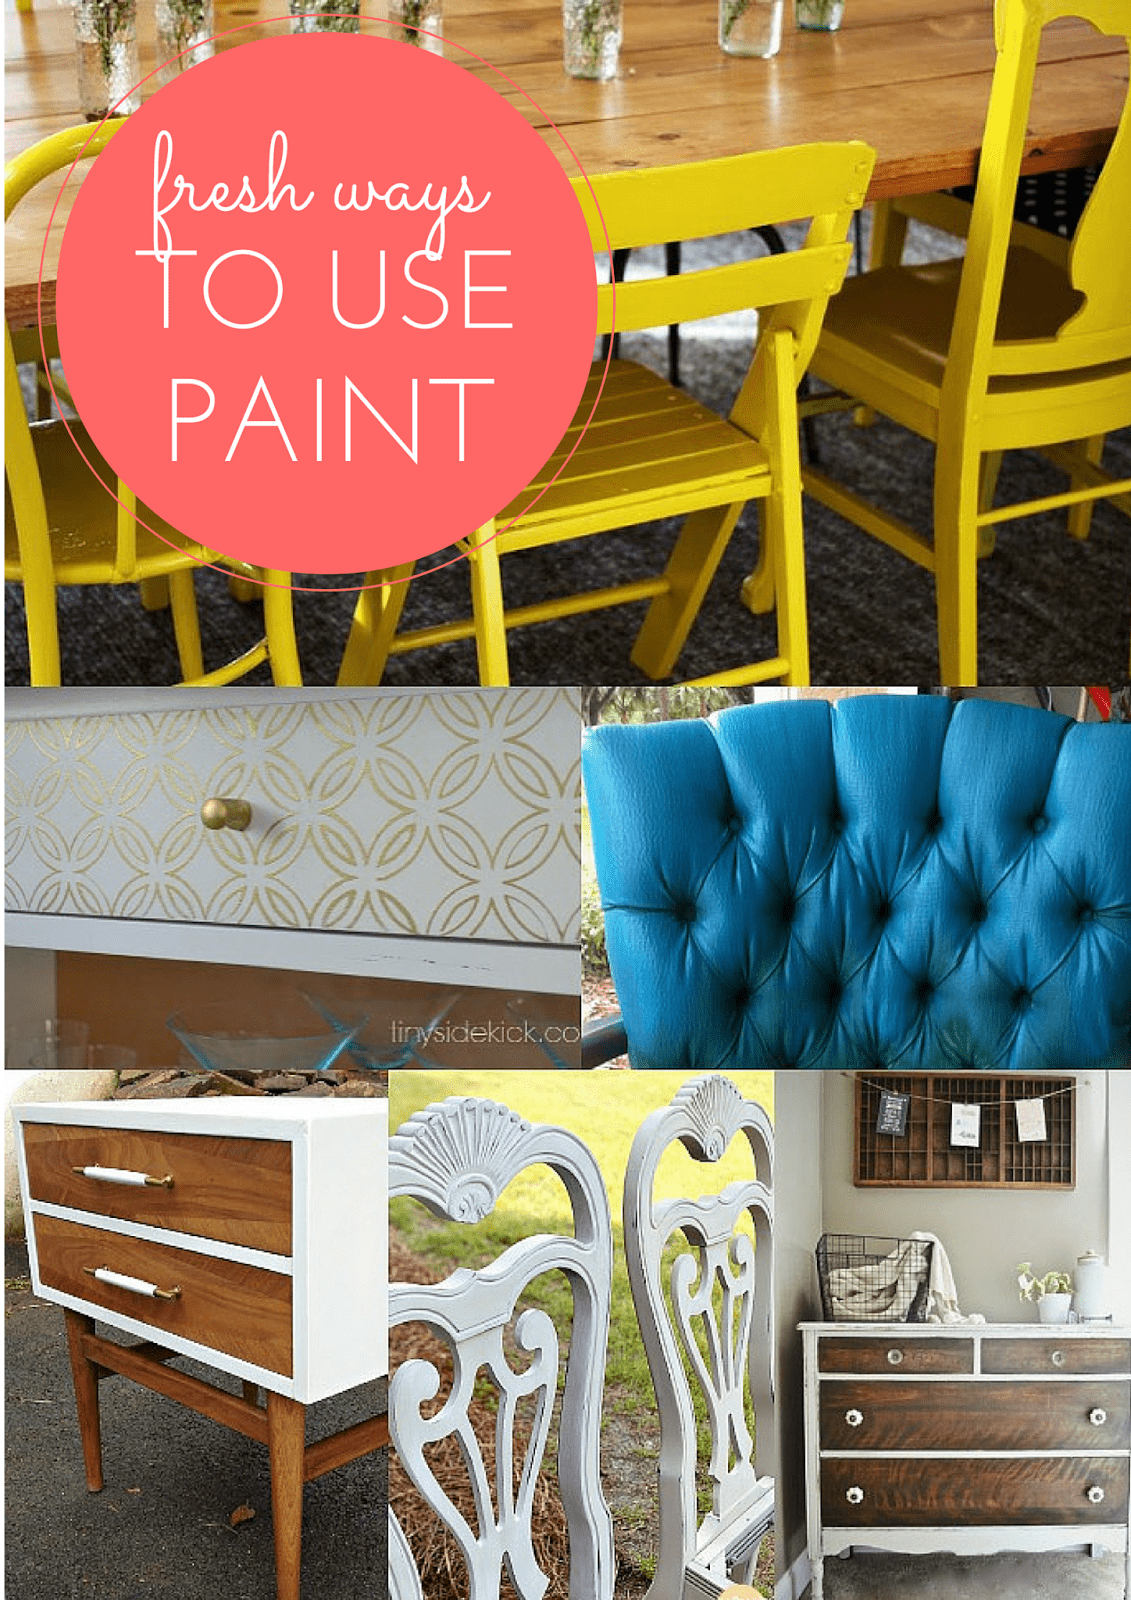
Today I wanted to share some ways that you can add a fresh new look on a furniture piece from your favorite thrift store.

Often when we see pieces, we can’t see the true potential in them if they are dated, mismatched, or distressed.

It can be challenging to look at each piece as something full of possibilities.

Here are some great ways to bring tired furniture to life, to create the optical illusion of sets of furniture, and some really great new ways I have found to experiment with new painting techniques.

Over the years I have painted more pieces of furniture than I ever dreamed I would.

In fact, if you come to my house on any given day, I am sure you will find something being painted at our house.

Paint is such an inexpensive way to add new life to furniture!


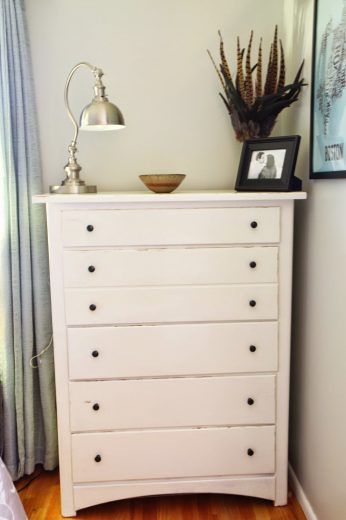
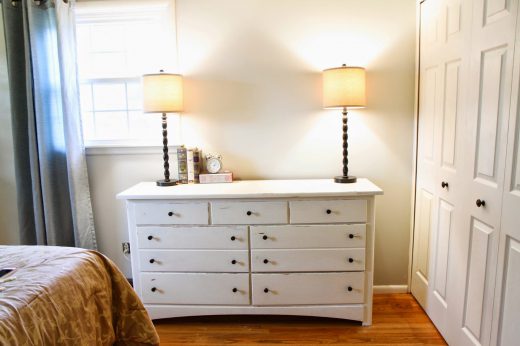
Just to illustrate my point, above are two pieces that I just did for our bedroom.
I loved the bones of these dressers, but hated the light pine color.
I painted these white, slightly distressed them, spray painted the hardware, and and then sealed them.
Isn’t it amazing how even a simple can of white paint can do so much for an old piece?

Create a Set with Paint

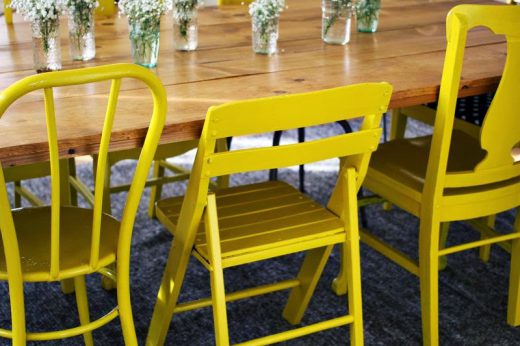
When you visit the store you may find that you can only find one or two of an item which can be a challenge when you are looking for multiples of something, like seating.

Consider painting all of the items in one color to create the illusion of a set that is both unique and whimsical.

I love this set of beautiful yellow chairs that were showcased on A Beautiful Mess as a perfect example of mismatched fun brought cohesively together with one paint color.


Try Painting Upholstery

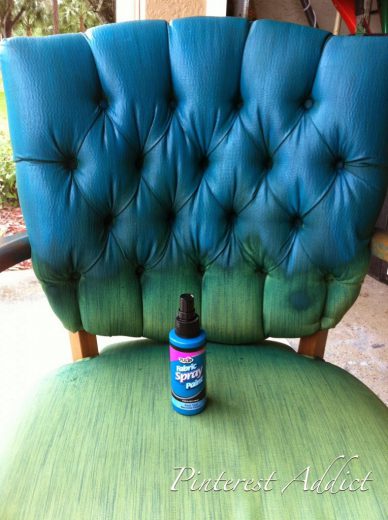
Did you know that you can even paint an upholstered chair with fabric paint?

Over on Pinterest Addict you can see how Tulip Spray Paint can transform an upholstered chair.

Although this project cost $35 in supplies, the cost is far less than it would be to have the chair reupholstered and you can update the arms and legs of the chair with a couple of coats of fresh & shiny paint.

I absolutely love this fabulous teal chair and wish I could put it in my house!


Dip Them in Metallics

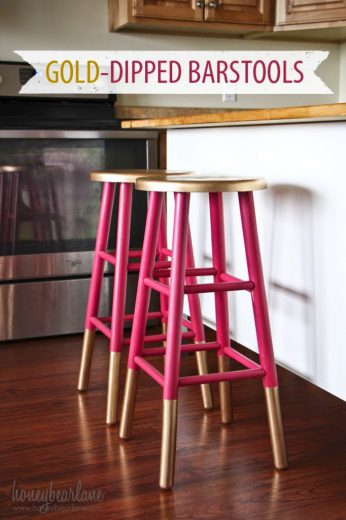
If there is one trend I am really loving it is the mix of metallics and the effect of paint dipped legs on chairs and tables.

Honeybear Lane shows how she combined these two trends and refreshed a pair of tired barstools into a thing of beauty with a bright raspberry paint & beautiful gold spray paint.

Those before pictures really show how much paint can bring an old or dated piece to life.

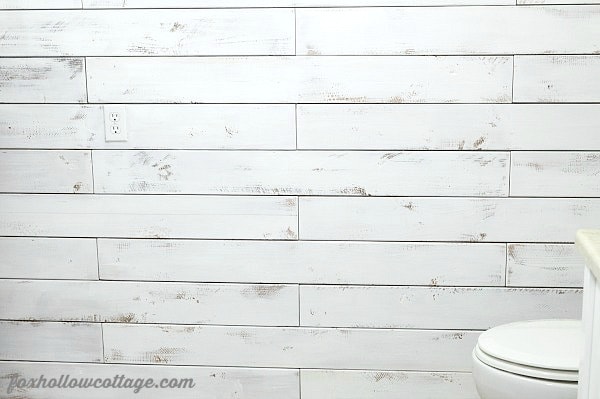
Try Stripping Your Furniture

Stripping furniture can be a time-consuming process, but worth it if you want that beautiful natural wood to pull through on a design.

Liz Marie shows off a beautiful piece (you must peek at her before pictures) that she wanted to create by painting just the outline of the dresser and leaving those drawers in their natural wood state.

The deep rich stain makes this a very show worthy piece!

Add an Embossed Detail

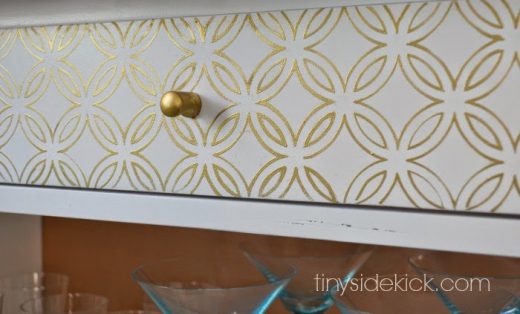
Stenciling is back and better than ever with modern and edgy designs.

Embossing is a technique that I have tried with paper crafts, but never knew that you could do the same thing on a piece of furniture.

As Tiny Sidekick illustrates in her embossing furniture tutorial, the trick is to keep moving that heat to help keep the paint job underneath intact.

I am so inspired by this that I can’t wait to give it a try in our house!


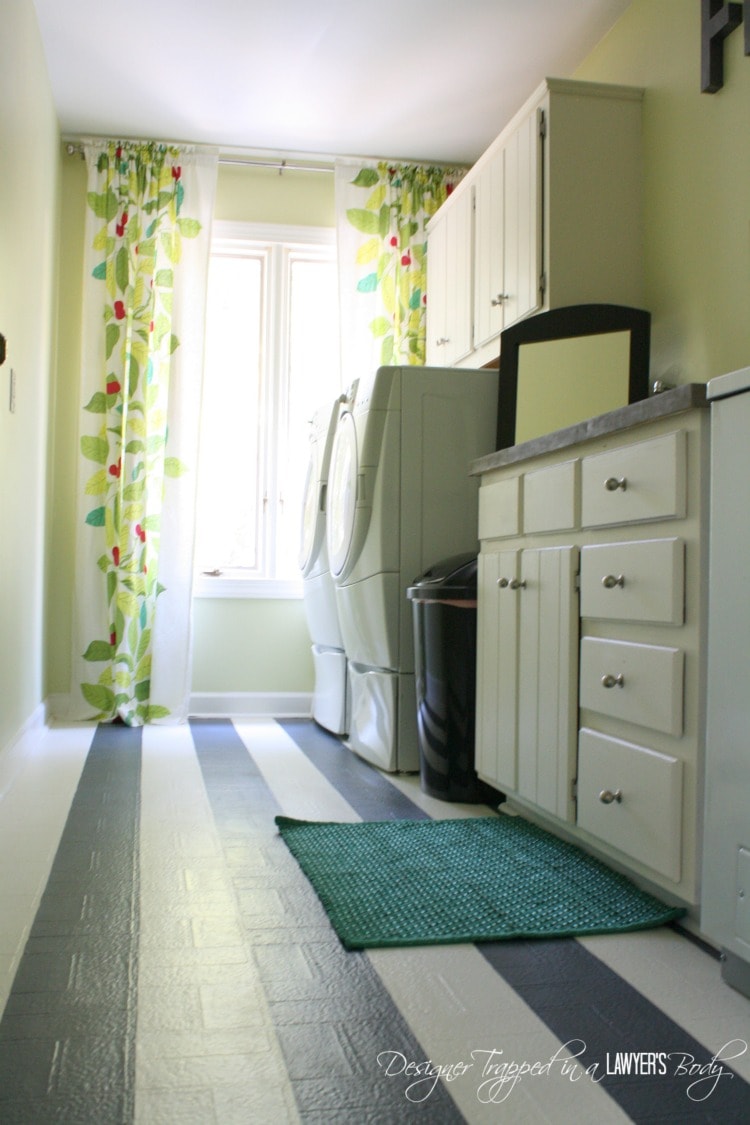
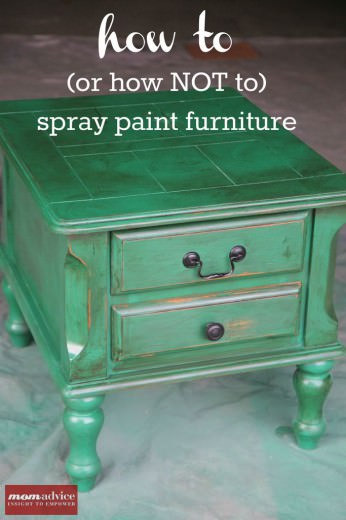
Try A Fresh Coat of Spray Paint

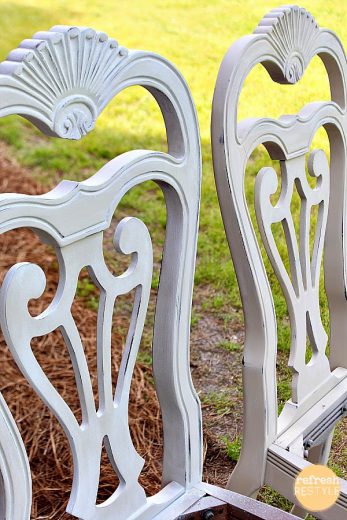
Spray painting furniture can be intimidating, but it doesn’t have to be.

The nice thing about spray paint is the quick coverage you can do with it and the distressing that can be done after so that you don’t have a one-dimensional finish.

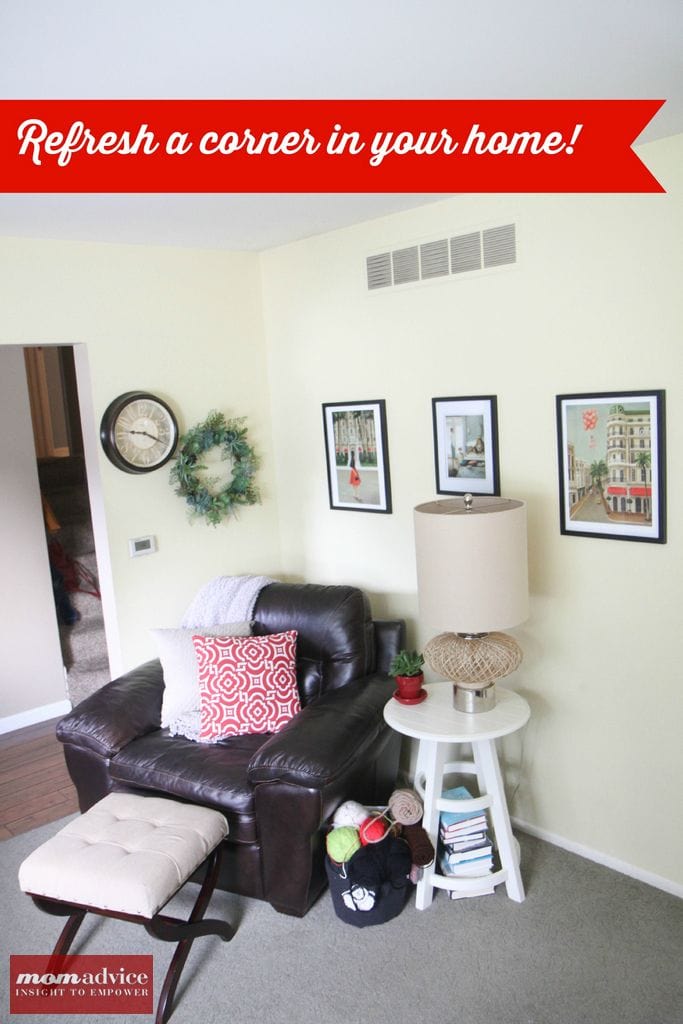
I experimented with spray paint and a dark stain on a side table and loved the results. With a little distressing, no one would ever guess how you painted it.

Refresh Restyle shows you how to apply paint with a sprayer and then adds a little distressing to her dining chairs.

The speed of this project really appeals to me!


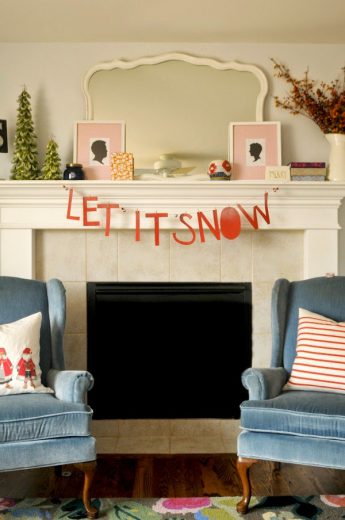
See the Potential in Everything

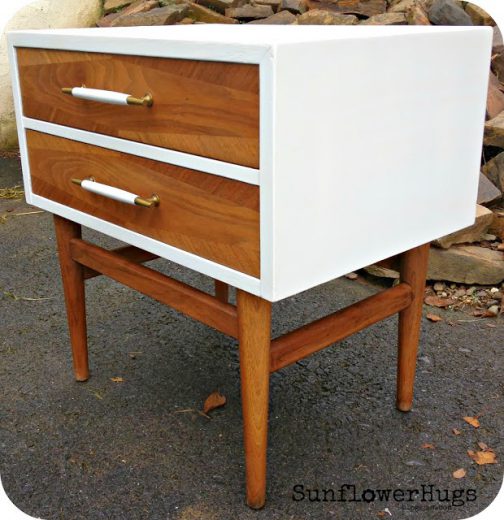
Sometimes it is hard to see the potential in pieces and we give them away or pass on them when we see them in the store.
This beautiful mid century modern dresser on Sunflower Hugs showcases a piece that had been kicked to the curb that she was able to make brand new again with a little paint and hardware updating.
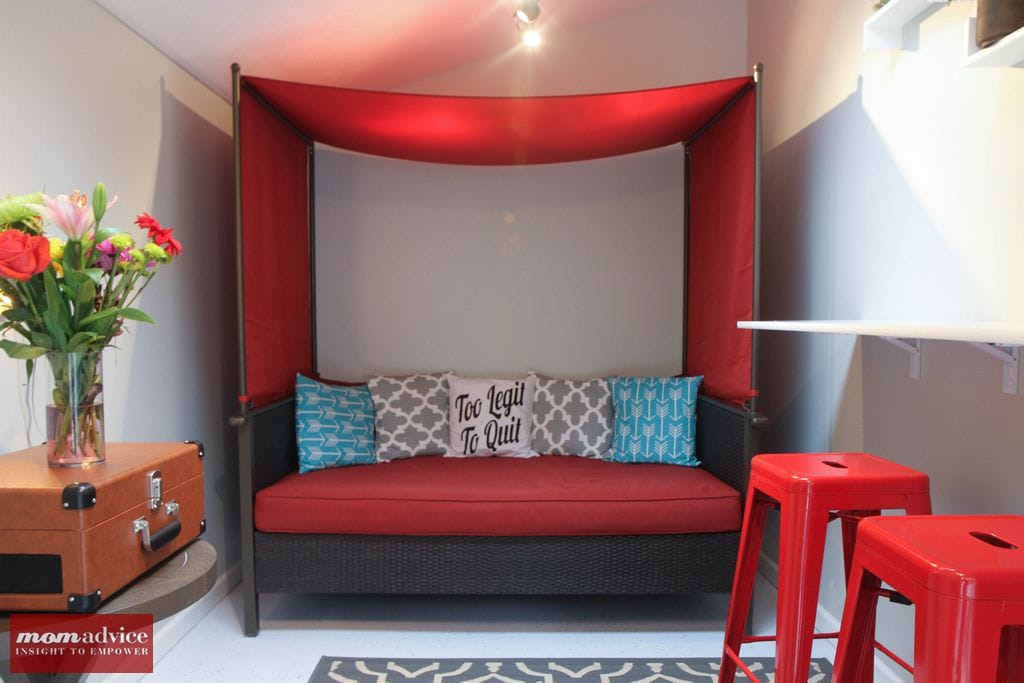
Now this looks like a piece that you purchase from the West Elm catalog with just a little elbow-grease and a vision for what to do with something no one else wanted.
Love these paint ideas? Check out these other MomAdvice furniture projects:

How to Spray Paint Furniture


How to Paint a Kitchen Table

How To Paint a Kitchen Table


How to Paint a Laminate Fireplace

I hope that this article inspires you to start hunting for new pieces for your space and that you can begin seeing the potential in things you have never noticed before!

For more inspiration, sign up for the MomAdvice.com newsletter!

Pin It

How to Make Chocolate Coffee Spoons

Monday, March 2nd, 2015

How to Make Chocolate Coffee Spoons from MomAdvice.com

Tracking Pixel

This is a sponsored post written by me on behalf of ALDI.

Today I wanted to share an adorable gift idea for someone special in your life. Today’s tutorial is how to make beautiful chocolate coffee spoons that you can pair with a big basket of coffee for gift-giving. This gift is perfect for any occasion and can be made in less than 30 minutes. The inspiration for this project came along with the opportunity to try the new Barissimo line of premium coffee products that are available at your local ALDI store.  I’m so excited to be partnering with them again on this project.

In case you missed my Maple Coffee Bacon post from last week, I had the opportunity to try out all of the new coffees from ALDI and create some fun projects using this newly launched line at their store.

This line features nine bagged and single serve coffee items, along with additional seasonal and Special Buy items that will be available for a limited time. Pictured below are a few of the ones that I found on my store shelves this month.

How to Make Chocolate Coffee Spoons from MomAdvice.com

Nothing pictured here is over $5 (even the Fair Trade coffee) which means it is quite the steal. In the past, I have relied on these bags of coffee for easy hostess gifts and breakfast baskets for new homeowners. It is an excellent gift to give especially to a tired new mom or a new college student.  I thought it would be fun to dress these baskets up a bit with beautiful chocolate coffee covered spoons that you could package in your basket.

Let’s get started!

How to Make Chocolate Coffee Spoons from MomAdvice.com

Supplies Needed

1 bag Baker’s Corner Real Semi-Sweet Chocolate Baking Morsels

1 bag Baker’s Corner Milk Chocolate Baking Morsels

1 cup Baker’s Corner White Chocolate Baking Morsels

½ teaspoon Carlini Pure Vegetable Shortening (or more, if needed)

Edible sprinkles of your choice

Ribbon

Pastry/candy decorating bags

Candy wrappers

Antique spoons or plastic spoons (I got these six for $5 an antique store)

*Some of these items are Special Buy or Seasonal items that are only in stores for a limited time and may no longer be available.

How to Make Chocolate Coffee Spoons from MomAdvice.com

Directions

  1. Melt your semi-sweet chocolate chips (the whole bag) over a steam bath or in microwave. Melt chocolate slowing, stirring frequently. If chocolate clumps or doesn’t melt smoothly, add 1/2 teaspoon of shortening to help smooth it out.
  2. Dip your spoons into the chocolate and then rest them on a cookie sheet covered with parchment paper.


How to Make Chocolate Coffee Spoons from MomAdvice.com 3. Decorate with your choice of milk chocolate, white chocolate and/or various garnishes. Drizzle with melted white chocolate (using my pastry bag) and then shake on some edible pearls so they would stick. Let these set completely before placing into decorative bags and tying with beautiful ribbon.

How to Make Chocolate Coffee Spoons from MomAdvice.com

How to Make Chocolate Coffee Spoons from MomAdvice.com

We placed these beauties into a basket with a variety of our favorite Barissimo coffees, exclusively from ALDI. A pretty dishtowel on bottom pulls it all together and acts as bonus gift.

These spoons add another level of richness to your coffee giving you a rich chocolate flavor. These also would make a fun addition to your cocoa.

I hope you enjoyed our fun series with ALDI this month and that these ideas have inspired you to give their new coffee line-up a try! I promise that you won’t be disappointed, not just in the incredible taste, but the incredible amount of savings to be had for your family!

This is a sponsored post written by me on behalf of ALDI.

Pin It

Amy’s Notebook 01.21.15

Wednesday, January 21st, 2015

Lace Containers via Design Mom

Source: Design Mom


Gorgeous DIY containers with lace imprints.

Slow cooker enchilada quinoa bake– get in my belly.

No sew blanket cape– I feel inspired!

I was addicted to Serial- now what?

I like this secret trick!

10 things I have learned by downsizing my life– I love this and the commitment to smaller space living.

Thankfulness via A View From The Fridge

Source: A View From the Fridge


A great reminder to give thanks.

Bright & easy rope coaster DIY.

10 ways to cuff your jeans.

Potterhood. Made me laugh especially after just seeing Boyhood this week!

Lined faux fur infinity scarf– get in my closet.

Knuffle Bunny– Oh, snap!

amys_notebook

I hope you enjoyed our notebook, a collection of gathered links to DIY crafts, food projects, thrifty ways to spruce up your home, and thoughtful reads. Nothing brings me more joy then to highlight other fabulous bloggers. Follow me on Pinterest for daily inspiration!

DIY Holiday Mantel Decorating Ideas

Monday, December 8th, 2014

DIY Holiday Mantel Decorating Ideas


I can’t believe that the holidays are upon us and, if you are anything like me, the house is just begging you to decorate it for the season.

I love beautiful holiday decorations, but I prefer simplicity, affordability, and smart investments that can be used over and over again.

In our house, for example, we are decking it out with my favorite burlap wreath and my handmade yarn trees and we are even buying our first REAL Christmas tree this year (which I am awfully excited about).

I love to make handmade items that we can pull out from year to year so that is why I am excited to showcase some DIY Holiday Mantel Decorating Ideas from some of my favorite DIY bloggers.


Add a Little Typography

I am a big fan of typography and the roots of that just might come from being married to a web designer.

I love this LET IT SNOW banner from The Proper Pinwheel that you can create with just a little cardstock and some scissors.

To help balance out the piece, consider adding a mirror or scrap paper covered books from your favorite thrift store to round out the mantels.

I happen to love these little silhouettes too that would be beautiful in spray painted white frames to match.


Embrace a Scandinavian Theme

There is something so sweetly simple about red and white paired together and there are so many fun elements that could be added from your local Goodwill store in this Scandinavian Red & White Mantel.

From spray painted candlestick holders and accessories, to vintage ice skates, to a simple red painted door, to stockings made from sweaters…there is just so much to love about this one created by Tatertots & Jello.

The addition of paper garlands and pom-poms add those perfect homemade touches.


Light It Up With Snow Globes

Even as a grown-up, I find snow globes just as beautiful and magical as I did when I was a kid.

I am also a big fan of terrariums so I really love this idea of pairing the two and creating a Snow Globe Terrarium to light up your mantle.

This inexpensive idea adds a lot of holiday magic and would be a fantastic craft to create with a few of your favorite holiday helpers.

Check Goodwill’s houseware selections for jars to keep it budget-friendly thanks to this fun idea for Pink Pistachio!


Embrace Mixed Metallics

If there is one thing I love this year it is metallics and mixing them together.

Luckily, it is easy to gussy up a vase or add a touch of paint to sticks from the backyard thanks to the metallic spray paints on the market.

I love this mixed metallic mantel from Centsational Girl because it is so elegant and also looks very easy to achieve with a little spray paint or even glitter tape (as Kate did)  from your craft tool arsenal.

How easy is this?


Add a Traditional Garland

Pre-made garlands can be expensive and may not have the color scheme you are after.

I love a traditional mantel with evergreen garland and this tutorial recreates the Pottery Barn style at a fraction of the cost.

Between Naps on the Porch illustrates one struggle that I have had with ordering garlands from PB…the length just isn’t there.

You have to buy many to achieve the length you need for a decorated porch or mantel.

Making these yourself gives you the flexibility to create your own desired length and add in the perfect colors to bring it all together.

The best part is that you can use these year after year!


Add Chalkboard & Marquee Details

I am such a big fan of chalkboard paint and almost anything can be transformed into a DIY chalkboard from photo frames to mirrors to cupboard doors.

I love the idea of mixing and matching words in front of your DIY chalkboard for an elegant holiday mantel!

The Crafted Sparrow shows off her style with a handmade MERRY marquee that she whipped up.

Consider hunting for a basket for snowballs and for boxes or luggage to round out a corner.


Keep It Natural

As I get older, I appreciate more a simple touch provided by nature instead of fake greenery that requires packing and storing for the season.
I love this simple mini wreath garland from the merry thought that you can create to decorate a mantel created from a little pine and adding berries, pine cones, and sticks from your backyard.
This mantel isn’t fussy and relies on all the beautiful things that nature provides to achieve a simple & clean modern look.

What are your favorite ways to decorate your mantel for the holidays?

This post contains affiliate links.

Check out these other ideas from MomAdvice.com:


Snowman in a jar

Snowman in a Jar Playdough Kit


Christmas Tree cinnamon Rolls

Christmas Tree Cinnamon Rolls


How to Make a Yarn Pom-Pom Wreath


Yarn Pom Pom & Ornament Garland


DIY Holiday Yarn Trees


Sign up for the MomAdvice newsletter


Pin It

Yarn Pom-Pom & Ornament Garland

Saturday, November 29th, 2014

Yarn Pom-Pom & Ornament Garland from MomAdvice.com

If there is one thing this girl loves it is a good yarn pom-pom project. I have created everything from pom-pom Christmas trees to bouquets of flowers for gift-giving. Today I’m partnering with Walmart to show you a fun winter craft you (or your little ones) can create for the holidays to decorate a window, mantel, or pretty up a ledge in your home. The best part is that it doesn’t cost a lot to create and can be used year after year!

Yarn Pom-Pom & Ornament Garland from MomAdvice.com

Supplies Needed

1 skein (or possibly two depending on your ledge size) Hometown USA Super Bulky Yarn in Los Angeles Tan ($2.97)

Package of 20 Mini Shatterproof Ornaments (in seasonal decor with the mini artificial trees) ($3.48)

Large Clover Pom-Pom Maker (use the blue one) ($6.61)

Scissors

Embroidery Needle

Scissors

Yarn Pom-Pom & Ornament Garland from MomAdvice.com Yarn Pom-Pom & Ornament Garland from MomAdvice.com Yarn Pom-Pom & Ornament Garland from MomAdvice.com how-to-use-a-pom-pom-maker-4 Yarn Pom-Pom & Ornament Garland from MomAdvice.com

Yarn Pom Pom & Mini-Ornament Garland Directions

1. Prepare yarn pom-poms as I have shown you in the step-by-step photo tutorial or follow directions on packaging to create your pom poms. Keep making pom-poms making sure to leave enough yarn to string your pom-pom garland.

2. Once all of your pom poms are made, thread them with the embroidery needle onto your yarn. Take the embroidery needle off (the needle head is too large to feed through the mini-ornaments) and then alternate it with a mini-ornament. Keep doing this until you have filled the entire garland leaving a little on each end to hang down. I ended mine with an ornament since it ends the garland securely without knotting.

Yarn Pom-Pom & Ornament Garland from MomAdvice.com

Yarn Pom-Pom & Ornament Garland from MomAdvice.com

v

Yarn Pom-Pom & Ornament Garland from MomAdvice.com

Yarn Pom-Pom & Ornament Garland from MomAdvice.com

Did you see that I got my first little fireplace? I decided to decorate it with this adorable garland. To tie it all together, I filled glass bowls ($1.97 each) with a package of mini ornaments ($3.48 each) and then stacked them on my little fake logs that I had bought for my fall decorating from the craft store. I found these adorable owls  for $4.98 in the seasonal decor and I love that I can leave these out even when it isn’t Christmas. This mini lighted tree was $9.98 and I finished her with a little pom-pom topper too. Since we took our painting down to decorate, I used the nails I had for hanging another shorter garland above the top to add a little interest to the wall.

This project took me about one hour and I look forward to enjoying it all Winter long and in the years to come.

I hope this frugal idea inspires you in your holiday decorating! Happy Holidays!

xo

walmart_mom_disclaimer

Pin It

Fun New Ways to Dress Up Boots For Fall

Thursday, November 6th, 2014

Fun New Ways to Dress Up Boots For Fall

As soon as the temperatures start dipping, I know it is almost my favorite footwear season… boot season, friends!

There is nothing cozier than a warm pair of boots and this season, embellished boots and boot toppers are all the rage for making your boots feel fresh again.

Whether you score your boots at Goodwill or if you find the perfect pair elsewhere, I have some fun and creative ideas for making a tired pair of boots feel like new again with these 7 tutorials for fun ways to dress up your boots.

Add Some Fringe

Fringe boots are quite popular this year, but buying fringe boots might be out of your boot budget.

Instead of buying a bootie for a passing trend, check out these DIY Fringe Shoe Clips from Clones N Clowns made from a simple shoe clip and a little leather or faux leather (depending on your budget).

These look like they are part of the bootie, but are removable.

I love these not only for how customized these look, but also for how much space you can save by not buying multiple pairs of boots for one trend.


Make No-Sew Sweater Boots

If last season’s boots are looking tired or if you find a pair of UGG boots at Goodwill (which I REALLY have, if you can believe it!) adding a beautiful sweater detail can be a great way to refresh them for another season.
Since this blogger does not sew, I really love this fun no-sew sweater cuff that you can create from la vie DIY that can hide any imperfections in your boots.
The button detail could also be created with brooches, pins, or earrings that you find in the store!

Add Embellished Boot socks

If there is one thing that you can find at Goodwill in these Fall & Winter months, it is definitely loads of cozy sweaters.

This fun tutorial from My Sister’s Suitcase showcases adorable embellished boot socks you can create from old sweater sleeves.

The picture highlighted here showcases a fun striped sweater sleeve embellished with a ruffled ribbon detail, perfect for a little trick-or-treat fun for Halloween!

Add a Knitted Detail

I can’t sew, but I can knit so this past Fall, I created these easy knitted boot cuffs out of chunky yarn and big needles.

Thanks to the needle size and yarn, this is a fast and easy two hour knit project.

I highly recommend this project for someone who is just learning to knit in the round or as a first-time cabling project.

I promise that cabling looks far more complex than it really is and this is such a fun project to master the art of cabling since it is so small and quick!

I gave these beauties away to my best friend and have promised a few pairs for myself this year when I get back to knitting again this winter!

Add Faux Fur

Not only is fringe in this season, but faux fur seems to be enjoying its time in the Fall spotlight too.
I love a beautiful fur detail and these faux fur boot cuffs can transform a tired pair of boots into something new and on-trend.
Clones N Clowns strikes again with this adorable faux fur addition to her boots.
Be sure to scroll down all the way through the pictures to see how she adds this same adorable detail to a pair of Converse sneakers.
Say what?!
Awesome!

Add A Legwarmer Layer

Many tutorials showcase how you can use the top of a sweater sleeve to create a boot cuff, but why stop there?
With Indiana winters, I love an extra layer around my legs so consider using that whole sleeve off a second hand sweater as leg warmers to add warmth in these colder temperatures.
I love to look for sweaters with lots of details like striping, as pictured here, polka dots, or ones with interesting cables.
You can get the whole scoop on these DIY legwarmers made from a sweater on Petit Elefant.

Add a Little Lace

My favorite trends are always the very feminine ones and you can’t get more feminine than a little lace.
That is why I absolutely love these boot cuffs made from lace doilies for a fast and fun DIY boot cuff project.
These “pretend frilly socks” from Blah Blah Magazine are fast to create and can be embellished with a beautiful button to finish.

What are some fun ways you dress up your boots for Fall? Feel free to leave your ideas in the comments section below!

Excited for Fall? Check out more Fall crafts on MomAdvice.com:


Apple Wreath Tutorial


Slow Cooker Pumpkin Spice Candles


No-Sew Blanket Scarf


No-Sew Scarf with Hidden Pocket


This post contains affiliate links

SaveSave

SaveSave

SaveSave

SaveSave

Pin It