Archive for the ‘Celebrations’ Category

Gluten-Free Rainbow Bundt Cake

Thursday, March 6th, 2014

Gluten-Free Rainbow Bundt Cake from MomAdvice.com.

I am so excited to share a delicious Gluten-Free Rainbow Bundt Cake recipe that you can make using a simple boxed mix, a little food coloring, and a few odds & ends from your pantry. This Rainbow Cake is made in a tube pan, versus a layered cake, and is a fun addition to your St. Patrick’s Day spread.

Walmart challenged me to share a St. Patrick’s Day project that you could create out of items from their store. You may remember my rainbow cakes in a jar that I created a couple of years ago. Now that I am eating gluten-free, I wanted to replicate the idea of a rainbow cake, but I wanted to do it in one pan and I wanted to make it a quicker process by using a cake mix.

Gluten-Free Rainbow Bundt Cake from MomAdvice.com. Gluten-Free Rainbow Bundt Cake from MomAdvice.com.

To make a vibrantly colored cake, I want to point out that it is really important to use good icing colors to achieve your rainbow cake colors. Over by the party supplies, you will find professional cake decorating supplies at Walmart. You want to purchase the Wilton Icing Colors. These concentrated gels offer a much brighter color than what you will find over in the baking section of the grocery section. I just use a toothpick to dip in the gel and then swirl it through my cake batter. You may need to do this a couple of times to achieve this level of brightness, but it still will take a lot less than the other brands of food coloring.

Gluten-Free Rainbow Bundt Cake from MomAdvice.com. Gluten-Free Rainbow Bundt Cake from MomAdvice.com.

When I decided I wanted to make this cake, I went through tons of tons of cake recipes to figure out how to layer the batter. My inspiration for creating my rainbow arch was from not martha and her Leprechaun Trap Cake that she created a few years ago. Her arch is so much more beautiful than mine. I highly encourage you to read her tutorial for a perfect arch and read mine for a just meh arch. That being said, do prepare this in a tube pan versus a bundt pan to achieve the best arch. 

Do you have a digital scale? I highly recommend purchasing one because it will make projects like this a million times easier. I have had mine for many years and I use it for both weighing packages and as a food scale! Be sure to tare it with the bowl on top to begin your measurements each time.

I used the measurements outlined by not martha for measurements for my batter:

  • 6 ounces – red
  • 5 ounces – orange
  • 4 ounces – yellow
  • 3 ounces – green
  • 2 ounces – blue
  • 1 ounce – purple
  • The remainder of the rest of the batter, leave it white.

To scoop batter into the bowls, I relied upon an ice cream scoop to scoop it into the bowls on the scale. To make pouring the batter easier, place the cake batter in a baggie in a tall glass and hang the opening over the sides of your glass. Pour your batter in and then seal the baggie. Just snip a corner of the baggie to begin pouring your batter into the pan.

Gluten-Free Rainbow Bundt Cake from MomAdvice.com.

Gluten-free cakes tend to be more delicate so you definitely want to let this fully cool before trying to work with it. The side that has all the beautiful vibrant colors is not the top of the cake. It is the bottom of the cake. I accidentally iced this side so don’t make my mistake. If you find that your cake is puffy on the bottom, use a serrated knife to even it up a bit so your cake is not lopsided.

Gluten-Free Rainbow Bundt Cake from MomAdvice.com. Gluten-Free Rainbow Bundt Cake from MomAdvice.com. Gluten-Free Rainbow Bundt Cake from MomAdvice.com.

I posted a picture of this cake as I was glazing it on Instagram. To quote myself, “I never go easy on the sprinkles. I consider them the jazz hands on my desserts.”

Who quotes themselves? Sorry about that!

Glaze and sprinkle this cake liberally!

Gluten-Free Rainbow Bundt Cake from MomAdvice.com. Gluten-Free Rainbow Bundt Cake from MomAdvice.com.

I was disappointed that I had iced the wrong side and that my purple didn’t get perfectly centered. I think it is one of those cakes that might take a little more practice. My friends didn’t seem to notice or mind my errors though because this was one yummy cake! I doubt your kids would notice or care either. It might be a fun one to try together!

I hope you love it as much as we did and I hope this tutorial helps you while you make your own gluten-free rainbow cake!

Gluten-Free Rainbow Bundt Cake
Author: Adapted from Not Martha
Prep time:
Cook time:
Total time:
Serves: 8
A gluten-free rainbow cake perfect for celebrating St. Patrick’s Day
Ingredients
  • 1 Hodgson Mill Gluten-Free Yellow Cake Mix (over by the gluten-free ingredients in the candy aisle of your store, not in the baking aisle)
  • 1/2 cup butter softened
  • 2 large eggs, room temperature
  • 1 cup buttermilk
  • 2 teaspoons vanilla extract
  • 1 package of Wilton Gel Food Colorings
  • 1 1/2 cups confectioners’ sugar
  • 2 1/2 teaspoons milk (or milk substitute)
  • 1/8 teaspoon salt
  • 1/4 teaspoon vanilla extract
  • 1 teaspoon butter
  • Rainbow Sprinkles
Instructions
  1. Preheat oven to 350 degrees. Grease a tube pan liberally with cooking spray.
  2. In a mixing bowl, cream butter until soft. Add cake mix and blend completely.
  3. Add eggs, buttermilk, and vanilla extract and beat until completely blended. The batter will be thick.
  4. Divide your batter into eight bowls using the measurements in this post and tint accordingly.
  5. First pour the larger amount of white batter into the pan. Then pour the red batter in, making it a wide ring of batter. Then pour the orange over that, keeping it inside the red. Pour in each color, creating smaller and smaller rings.
  6. Bake at 350 degrees for 40-50 minutes, testing with a toothpick to check when the cake is done.
  7. Once the cake is cooled, prepare your icing.
  8. Melt the butter and add to rest of ingredients. Mix until creamy.
  9. Spoon the glaze over your cake and finish with rainbow sprinkles.

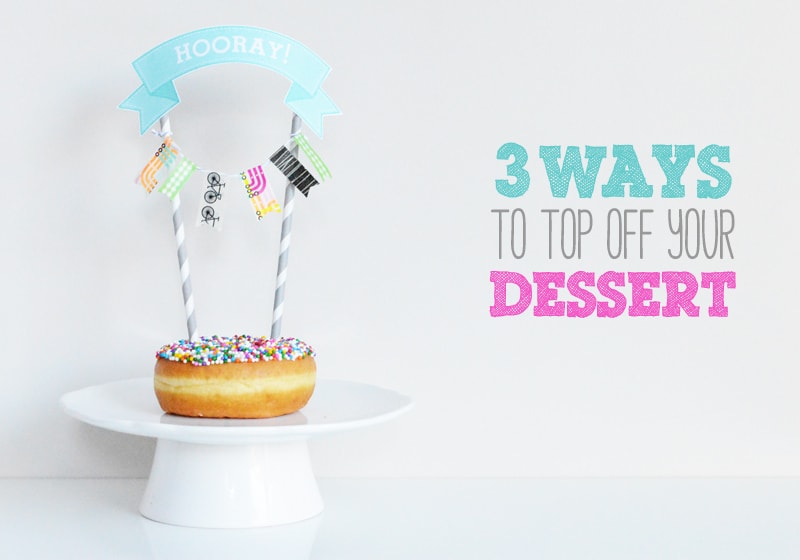
Enjoy this tasty treat with a DIY Shamrock Shake and our free St. Patrick’s Day straw printable!

walmart_mom_disclaimer


Pin It

DIY Shamrock Shake Recipe (And Free Straw Printables)

Thursday, February 27th, 2014

DIY Shamrock Shake Recipe (And Free Straw Printables)

DIY Shamrock Shake Recipe (And Free Straw Printables)

DIY Shamrock Shake Recipe (And Free Straw Printables)

St. Patrick’s Day is just around the corner!  This holiday makes me want to indulge in one of my all-time favorite treats… the oh-so-delicious Shamrock Shake. You don’t have to swing by your local fast food joint to indulge though because I have the recipe to this one and you can indulge in it for a fun family night treat any night of the week.

To grab the recipe for these easy DIY Shamrock Shakes, head on over to the Kenmore Blog to read all about these delicious treat.

Don’t forget to grab your free St. Patrick’s Day straw printables! Happy St. Patrick’s Day, friends!

Pin It

3 Favorite Ways to Top Off Your Dessert (Free Printables!)

Monday, February 17th, 2014

From our diy/craft contributor, Sarah.

Oh, my! You are in for a big treat today because Sarah Milne, from Sarah M Style, is an amazing crafting and design genius and she is joining us each month to share her knowledge. I am so thrilled to introduce you to her today and I know that she has many fun printables and ideas for our homes and crafts that you are going to be looking forward to her featured post each month! 

3 favorite ways to top off your dessert

February and March are birthday months for the boys in my life. In February, my little guy turns two, and in March, my husband, well, let’s just say he’ll be much closer to 40 than 35.  Whether it’s a homemade waffle birthday breakfast or a donut cake, we love our desserts around here! In my very first DIY and crafting post for MomAdvice.com, I’d like to show you three of my favorite ways to top off our sweet treats.


POM POM GARLAND

pom pom garland dessert topper

First, and my most fave, is this simple fuzzy and fluffy pom pom garland. Colourful and playful, it adds so much fun to your dessert. You could make this garland with tiny to large fuzzy pom poms or even craft your own poms out of yarn.

What you need.

Pom poms. Size and color of choice.
(I purchased an assorted bag from Michaels with my trusty weekly coupon.)
Twine or thread
Large needle
Scissors
Skewers, straws, small dowels

diy pom pom garland supplies

diy pom pom garland instructions

The how to.

  1. On your crafting surface, arrange your pom poms in your desired order.
  2. Thread your needle. Begin to thread the first pom onto the twine. Be sure to leave at least 5 inches excess on the end.
  3. Thread each pom onto the twine. Space the poms a desired distance apart.
  4. Once you’ve completed adding your poms, tightly secure the twine to your stick using a double knot. Trim your twine.
  5. Tightly secure the other end to your second stick and trim.
  6. Insert into your sweet treat.
  7. Dig in!


CHALKBOARD TOPPERS

diy chalkboard dessert toppers

I love that these toppers can be reused throughout the year and for all types of celebrations from birthday breakfasts to report card day! I found these small wooden shapes for less than 50 cents at Michaels and gave them a triple coat of chalkboard paint.

What you need.

Wooden shapes
Straws, popsicle sticks, or small dowels
Chalkboard paint
Foam brush
Paper towel or newspaper
Hot glue gun and glue
Chalk

diy chalkboard dessert toppers

The how to.

  1. Protect your crafting surface with paper towel or newspaper.
  2. Paint your wooden shapes using the chalkboard paint. When using chalkboard paint for crafts, I use a minimum of 3 coats. Allow for drying time in between coats. It seems to dry quickly.
  3. Attach your wooden shapes to your stick using a dab of hot glue.
  4. Draw or decorate your chalkboard topper for your occasion.
  5. Insert into your sweet treat.
  6. Dig in!


PAPER BANNER WITH WASHI GARLAND + FREE PRINTABLE

diy paper printable and washi garland dessert topper

Washi tape is a huge trend right now – and there are limitless crafts you can muster with it! My go-to topper are washi garlands. Paired with a paper banner, it makes a super sweet addition to your treat. I’ve designed two free printable paper banners in 3 colors for your next occasion.

What you need.

A collection of favorite washi tapes
Twine
Skewers, straws or small dowels
Free printable paper banner: {Click to download} HOORAY! or HAPPY BIRTHDAY

diy paper and washi garland dessert topper and free printable

The how to.

  1. Cut a 18 inch length of twine
  2. Cut your washi tape in equal or varied lengths and fold evenly over the twine, leaving 5 inches of vacant twine on each end.
  3. Print the free printable paper banner and trim.
  4. Secure your paper banner to the top of your sticks using a piece of washi or hot glue
  5. Below the paper banner, tightly secure your washi tape garland using a double knot or bow to each stick.
  6. Insert into your sweet treat.
  7. Dig in!

 Grab Your Free Printables HERE:

DIY Happy Birthday Dessert Topper

DIY HOORAY! Dessert Topper

Pin It

8 Beautifully Frugal Valentine’s Day Projects

Tuesday, February 4th, 2014

8 Beautifully Frugal Valentine's Day Projects from MomAdvice.com.

Valentine’s Day is just around the corner and one of my favorite things to share here are frugal ways to celebrate the holidays using easy to find and inexpensive items.

You may have thought last year’s DIY Valentine’s Day Projects post couldn’t be topped, but I think today’s projects are going to rival all that I shared last year.

The best part is that they are both beautiful AND frugal – a total win for my wallet and my home!

Let’s get started with this year’s featured projects!


DIY Valentines Day Bow Tie

I am a total girly-girl so I am absolutely dying over this adorable Valentine’s Day bow tie on Plan B.

You only need a few craft supplies and a men’s necktie to create this look.

If a pink tie hasn’t been donated to your favorite thrift store, look for a red tie or anything in those festive red & pink colors.

Pair this with a lacy blouse and your best boyfriend blazer for a cute night on the town.

If you can’t locate a bow tie, hunt for a red, pink, or white blouse and try my frugal DIY Rosette Necklace for an adorable addition to your favorite jewelry pieces.


DIY Coffee Cup Wrappers

I love a good free printable and am madly in love for these Valentine’s Day cup wrappers.

Travel mugs are something that I often see in abundance at our local Goodwill.

How sweet would this thrifted gift be with a little lovable printable on the outside and filled with their favorite coffee for someone you love, heading off their morning commute?

In my mind, the ultimate sign of love is a cup of coffee, don’t you agree?

Grab this free coffee sleeve printable from Eat Drink Chic today!


DIY Sequined Heart Shoe Accents

Last month we talked about how easy it is to make your own sparkled set of shoes from a pair of Goodwill shoes.

To take this a step further towards Valentine’s Day festivity, check out this easy sequined heart shoe accent you can make from At The Picket Fence.

I know I have one adorable little girl who would absolutely love this heart accent and it would be a fun & inexpensive craft we could do together too!


DIY Coloring Page Valentine’s Day Printables

I am all about free printables for celebrating the holidays and am madly in love with this, “I Love Everything About You,” printable from Tried & True for a couple of different reasons.

Besides this printable being free, it is actually a coloring page that you can fill in with your own favorite colors or you can have your kids do for a fun Valentine’s Day activity.

Just pick up a frame or clipboard for displaying these and you will have something beautiful to decorate a wall, mantle, or nightstand.


DIY Big Bow Pillowcases

Although I don’t sew, I know many of you do, and I truly admire you!
For those of our readers that do have the sewing gene (you, lucky people, you!) here is a fun tutorial from raegun ramblings for how to create your very own DIY Big Bow Pillowcases to add a little festivity to your home.
To create these, visit your local resale store and purchase linens, sheets, or the largest shirts you can find in your favorite festive colors.
Use this material to create your own pillowcase covers for Valentine’s Day.

DIY Valentine’s Day Centerpiece

If you are looking to add a little festivity to your dinner table or mantle, you will love this easy project created from a little vinyl and any type of glass item/jar that you can find at your local thrift store.
One Artsy Mama offers this free downloadable heart image that you can use to create your own vinyl masterpiece for your table.
Fill your jar with festive conversation hearts and you have a fun & frugal centerpiece that you can use every year!

DIY Heart Sleeve Detail

I have been known to wear my heart on my sleeve so this project is perfect for a girl like me!

Just find a shirt, cardigan, or sweater you can add your heartfelt detail on and use these easy directions from hey love designs for creating an easy felt detail to your sweater.

This would be a fun one for a little girl in your life too and takes minimal sewing skills (yay, for those of us that dropped out of sewing school!) to make this sweet little project!

Happy Valentine’s Day, everyone!

Yarn Wrapped Letters Tutorial


Red Velvet Cake Batter Ice Cream


DIY Table Runner for All Seasons


Easy DIY Fabric Flower Wreath


Sign up for the MomAdvice newsletter


Pin It

Chinese New Year Family Tradition: We Are a Fortunate Family Felt Fortune Cookies

Monday, January 27th, 2014

Chinese New Year Family Tradition: We Are a Fortunate Family Felt Fortune Cookies from MomAdvice.com.

I love to create new holiday traditions with my family and today’s project is in honor of the Chinese New Year!  To celebrate, I am sharing a tutorial on how to make felt fortune cookies and a free printable that can be placed on a jar for a special Chinese New Year tradition.

I have partnered with Walmart on this project to showcase a fun project that you can do in honor of the holiday. All supplies for this project can be found at their store!

What is Chinese New Year?

Chinese New Year is the longest and most important celebration in the Chinese calendar.  The Chinese year 4712 begins on Jan. 31, 2014. A fun fact for this year is that this is the year of the horse.

New Year festivities traditionally start on the first day of the month and continue until the fifteenth, when the moon is brightest. In China, people may take weeks of holiday from work to prepare for and celebrate the New Year. Can you just imagine?

According to the Chinese legend,  Buddha arranged a meeting and asked all the animals to meet him on Chinese New Year. Twelve animals came and Buddha named a year after each one. If you were born in certain years, your personality is supposedly aligned with your animal. Those born in horse years are cheerful, skillful with money, perceptive, witty, talented and good with their hands. Since this is the year of the horse, if you have a child born this year, it sounds like you will have quite a talented and delightful child.

There are many great traditions around this holiday that include wearing red clothes which symbolizes fire and drives away bad luck, and a lantern festival, and one thing that Americans really seem to get behind is…

The  FEASTING.

Chinese New Year Family Tradition: We Are a Fortunate Family Felt Fortune Cookies from MomAdvice.com.

We are a Fortunate Family

Since the Chinese New Year is about feasting and family, I wanted to create a craft that would work for these two elements of the holiday. I love that many elements of this holiday focus on luck & good fortune. Incorporating this element, today we are making felt fortune cookies, but instead of filling them with predicted fortunes, we are going to fill them with all we are so fortunate for.

Because we are a FORTUNATE family. 

I love gratitude projects and thankfulness for all we have around the dinner table is definitely a tradition that I want my family to embrace.

Chinese New Year Family Tradition: We Are a Fortunate Family Felt Fortune Cookies from MomAdvice.com.

Supplies Needed

(All Available at Walmart)

Felt Sheets (any color)

3/8″ grosgrain ribbon

Floral Wire

Wire Clippers

Large Mason Jar

Scissors

Hot Glue Gun & Glue Sticks

1 piece of heavy cardstock

1 piece of white paper & pencil

Chinese New Year Family Tradition: We Are a Fortunate Family Felt Fortune Cookies from MomAdvice.com.

How to Make Felt Fortune Cookies

1. Using your ribbon spool or the bottom of your mason jar, trace a circle with a pencil or marker. Cut out your circle.

2. Snip a piece of floral wire, approximately the length of your circle, with your wire cutters. Add a line of hot glue, and place the wire in the center of the glue.

3. Snip grosgrain ribbon the approximate length of your circle and then secure over the wire with a little additional glue.

Felt_Fortune_Cookies_Tutorial-12

4. Fold your circle in half and then bend like a fortune cookie. Repeat the process until you have a jar full of fortune cookies.

Chinese New Year Family Tradition: We Are a Fortunate Family Felt Fortune Cookies from MomAdvice.com.

You can enlist your helpers to help make your fortune cookies. Since we have had UNLIMITED SNOW DAYS THAT NEVER END, I have many helping hands. Ahem.

The best part though, is involving them in the gratitude portion of this project. Using the writing prompt,

“I’m Fortunate For…”

Have children write down all the things that make their family special.

Chinese New Year Family Tradition: We Are a Fortunate Family Felt Fortune Cookies from MomAdvice.com.

Emily said, “I’m Fortunate For…that my family are GRATE dancers.”

What can I say? She comes from a long lineage of family members that just BRING IT on the dance floor!

Chinese New Year Family Tradition: We Are a Fortunate Family Felt Fortune Cookies from MomAdvice.com.

Mom & Dad can get in on the fortune cookie writing prompt too. Hopefully your husband doesn’t read this aloud and then ELABORATE endlessly on his AMAZINGNESS.

Awkward.

Chinese New Year Family Tradition: We Are a Fortunate Family Felt Fortune Cookies from MomAdvice.com.

Chinese New Year Family Tradition: We Are a Fortunate Family Felt Fortune Cookies from MomAdvice.com. Chinese New Year Family Tradition: We Are a Fortunate Family Felt Fortune Cookies from MomAdvice.com.

My husband designed this fantastic printable that you can attach to a jar. I just dabbed a little glue on my jar and attached this side. You could also print this on label paper or attach with a little double-sided tape to finish your project. (Grab the printable at the bottom of this post!)

If you are looking for dinner options, here are couple of great ones that I can recommend!

Gluten-Free Orange Chicken

This delicious gluten-free orange chicken would make a fantastic meal!

Peanut Ginger Chicken Noodles

These Peanut Ginger Chicken Noodles are always a big hit!

Weeknight Chicken Lo Mein

And this Weeknight Chicken Lo Mein is fast & easy to prepare!

However you celebrate this holiday, I hope this post offers some inspiration for fun ways to celebrate with your family.

Chinese New Year Family Tradition: We Are a Fortunate Family Felt Fortune Cookies from MomAdvice.com.

Grab Our FREE “We Are a Fortunate Family,” printable.

walmart_mom_disclaimer

Pin It

Chocolate Chiffon Cake with Peppermint Frosting

Monday, January 13th, 2014

Chocolate Chiffon Cake with Peppermint Frosting

In honor of MomAdvice.com’s tenth birthday, I wanted to share this recipe for an easy chocolate chiffon cake made with peppermint buttercream frosting, perfect for celebrating our special day with you. This chocolate chiffon cake is made from a cake mix and the homemade peppermint buttercream frosting is the perfect use of any leftover holiday candy canes you might have in your home.

10 Year Celebration

Since this is my own birthday week, we decided to devote this week towards celebrating this incredible milestone. Tomorrow I will be revealing our best giveaway yet and I will be calling upon you to help me fulfill our site’s birthday wish. I can’t even believe that the site has now been around a decade! Someone pinch me please!

In the meantime, let’s talk about making a birthday cake for our celebration.

Chocolate Chiffon Cake with Peppermint Frosting

Truth be told, this is my sweet little girl’s birthday pick this year. It is a family tradition that the birthday child gets to pick their birthday cake each year from my big stack of cookbooks. She had her heart set on a chocolate chiffon cake, but the one that was featured in the cookbook was a bundt cake and I knew she was looking for that traditional layered cake that makes all parties special.

I did some web searching and figured out how to make this into a layered cake and then frosted it with a beautiful peppermint buttercream frosting to finish it off. We had to tint it pink though…this is after all, Emily’s birthday.

Chocolate Chiffon Cake with Peppermint Frosting

I am a very humble cake decorator so I relied upon a few yarn pom poms on skewers to create a little cake banner over her cake. Peppermint candies crushed on top also act as a great eye distractor from my sad frosting skills.

Hey, a mom can’t be great at everything


Chocolate Chiffon Cake with Peppermint Frosting Chocolate Chiffon Cake with Peppermint Frosting Chocolate Chiffon Cake with Peppermint Frosting Chocolate Chiffon Cake with Peppermint Frosting

We popped our cake in a cake carrier and transported it to Grand Rapids, Michigan where we took a family holiday in lieu of gifts this year. We got to celebrate Emily (just the four of us) and enjoyed several days of seeing the sites while enjoying a cozy cabin away from it all. I made my daughter’s birthday dinner request (a giant helping of Weeknight Chicken Lo Mein) and a  delicious slice of birthday cake was enjoyed by all. And I do mean ALL.

My husband, who seems to hate cake for some reason, wanted a second slice and the whole family agreed that this was the perfect birthday cake. The cake tastes so light and airy and the buttercream had just a hint of mint that added a creamy finish to the top of the slice.  It was the perfect ending to a perfect evening celebrating.

Now that we have covered the cake, tomorrow we will be covering the GIFTS.

Please come back tomorrow to see our big surprise!

Here’s a hint… this gift will help a thousand people! ONE THOUSAND PEOPLE.  Have I grabbed your interest yet?

See you tomorrow for the big reveal! 

Chocolate Chiffon Cake with Peppermint Frosting
Recipe Type: Dessert
Author: Adapted from Chocolate from the Cake Mix Doctor
Prep time:
Cook time:
Total time:
Serves: 16
A beautiful chiffon cake made from a boxed cake mix and laced with peppermint icing for the perfect duo of chocolate & mint.
Ingredients
  • 5 large egg whites
  • 1/2 teaspoon cream of tartar
  • 1 package (18.25 ounces) devil’s food cake mix
  • 3/4 cup water
  • 1/2 cup canola oil
  • 3 large egg yolks
  • 2 teaspoons pure vanilla extract
  • 8 tablespoons (1 stick) butter, at room temperature
  • 1/2 teaspoon pure peppermint extract
  • 3 1/2 cups sifted confectioner’s sugar
  • 3-4 tablespoons milk
  • 1/2 cup crushed peppermint candies
Instructions
  1. Preheat oven to 325 degrees. Set aside two greased 8″ cake pans.
  2. Place the egg whites & cream of tartar in a mixing bowl. Beat with your mixer on high speed until stiff peaks form (approximately 2-3 minutes). Set aside.
  3. Place the cake mix, water, oil, egg yolks, and vanilla in a large mixing bowl. Beat these until incorporated.
  4. Turn the egg whites out on top of the batter and fold it in until the mixture is light, but well combined.
  5. Bake the cakes until they spring back when lightly touched with your fingers, approximately 45-50 minutes.
  6. Invert them immediately and allow the cakes to cool for one hour upside down.
  7. Remove them from the cake pan and place them right side up again.
  8. Place the butter, peppermint extract, and 1 cup of the confectioners’ sugar in a large mixing bowl.
  9. Blend to incorporate and slowly add in the remaining sugar and remaining milk. If the frosting seems too stiff, add in an additional tablespoon of milk.
  10. Decorate with crushed peppermint candies on top.


Pin It

DIY New Year’s Eve Craft Ideas

Thursday, December 19th, 2013

DIY New Year's Eve Crafts

I can’t believe that December is already here and we are dreaming up great New Year’s projects for you!

Of course, I am featuring glittered projects and upcycle projects that could be enjoyed any time of the year.

The best part is that you can find many of the materials for these projects at your local thrift store for a fraction of the price compared to other retail stores.

Let’s find some thrifty ways to ring in the New Year!


Create Glittered Ballet Flats

If there is one thing I love, it is glitter!

I am always looking for festive additions to add to my wardrobe and these glittered flats couldn’t be easier to create and, according to We Are Not Martha, making these is less messy than you think.

For this craft, head to Goodwill to pick up a basic flat and then create a glittered layer with a little Modge Podge and glitter.

How festive would these be for the holidays?

Or your birthday?

Or everyday?


Make Confetti Surprise Jars

Sometimes the simplest of things bring us the most joy and this craft from diy studio is a joyful & frugal one.

My children would adore these Confetti Surprise Jars for a fun family NYE tradition.

Pick up a jar at Goodwill and spray paint the lid a dazzling shade of gold or silver, fill it with confetti, and add a special surprise inside for the recipient.

For your surprise choices, check out the jewelry section or locate small toys or game pieces that you can add as their surprise.

Don’t be afraid to spray paint those treasures in the same shade of gold or silver for the holiday.


Add A Little Sparkle to Your Wardrobe

If there is one thing that thrift stores have an overabundance of, it is sweaters and cardigans for the Winter season.
Don’t worry if you don’t sew (like me!), this is a project that can be done in minutes with just a little fabric glue.
Sincerely Kinsey offers this fantastic DIY that will add just a hint of sparkle to your wardrobe with this easy sequin cardigan.

Add A Little Sparkle To Your Home

There is always an abundance of vases and jars at Goodwill so I love that I can shop their store for this project.
These easy glittered vases are pulled together much like the glittered flat that I shared about earlier.
You simply need a vase or jar, Mode Podge, glitter, and a sponge brush to create these fun vases.
I think these would make the cutest NYE centerpiece or they could be a fun craft to do with your kids for the holiday season.
Check out this tutorial from the sweetest occasion.

Add Sparkle to Your Wine Glasses

I am no stranger to adding sparkle to stemware and last year I created these monogrammed wine glasses for my girlfriends.

If you are having a small NYE party, consider making these as a fun favor for your guests.
If you lack the ambition to monogram them, keep it simple and just add a glittered stem to your glasses.

Give a Cozy Hostess Gift 

As the resident craft expert for the Goodwill Tips blog, I can tell you that sweater crafts are one of our favorite projects to share about on here.
Yet again, the ever-versatile-and-available sweater makes its appearance in another craft post.
Warm Hot Chocolate shares an easy no-sew tutorial for creating a cozy sweater that can dress up a bottle of wine or champagne.
She adds an adorable pom-pom embellishment with a tag to complete this beautiful gift.

Wine hats and scarves

Wishing you the hap-hap-happiest of New Year’s from MomAdvice.com!! May your holiday be beautiful and thrifty this year!

This post contains affiliate links.
Here are a few more wonderful crafts from MomAdvice.com:

Scrappy Fabric Trees


No-Sew DIY Blanket Scarf


Valentine’s Day Cupcake Liner Trees


Paint-Dipped Spoon Set


Sign up for the MomAdvice newsletter


Simplifying the Holiday Parade of Activities

Wednesday, December 18th, 2013

*This post is sponsored by Ritz Crackers

Each year, I find myself coming to the topic of simplifying the holidays.  Don’t we just all wish this time of year was a little easier?  Despite my best efforts to simplify, it can feel impossible in the midst of the kid’s holiday programs, get togethers, shopping, wrapping, sending of cards, gift-giving, & holiday baking.

I don’t want to brag, but this year we really did achieve that simple holiday we have been longing for and I am partnering with Ritz to share how you can avoid the parade of endless holiday to-do’s and instead embrace a simpler holiday.

 Simplifying the Holiday Parade of Activities

Simplify the Giving of Holiday Cards


I love, love, love having pictures that I am in and having someone else take them for me, but we lost track of time and weren’t able to book our usual family session. Instead of not sending cards, I set my camera up on a tripod and we took our family shot by setting the timer on our camera and having me jump into the family picture.   By getting everything set up in advance before my family came outside, we were able to get our picture in a mere five minutes.  Before everyone had their coats off, I had our photos edited and cards in the mail. The best part is that we have moved our family session to the Spring, a time of year we decided was much less chaotic, and will really enjoy it all a little bit more.

I will admit that I was also was more laid back about how we did our cards this year and enlisted one of my favorite helpers to assist me in this year’s mailing. Not only was she excellent at adding our stamps and sealing the envelopes, but she also kept me on track because she was waiting for me to get those addresses on so she could do her part with them.  It gave us time to chat while we were doing them and ended up being fun instead of a holiday chore this year.

 Easy No-Bake Mint Thin Recipe from MomAdvice.com.

Simplify the Holiday Baking


This year we decided to skip the big baking day and make easy treats instead. Although I usually love holiday baking, this year I focused more on creating knitted gifts than my typical holiday treat box. Fortunately, we found a fun holiday treat that we could make that didn’t require a bit of baking, but was just as delicious. On the Ritz Holiday Parade site, we found an easy recipe for Mint Thins to create together that tasted just like one of our favorite cookie treats, but were made with Ritz Crackers, chocolate, and crushed candy canes.

 Easy No-Bake Mint Thin Recipe from MomAdvice.com.

Easy No-Bake Mint Thin Recipe from MomAdvice.com.

It just goes to show that making holiday treats doesn’t have to be an elaborate baking day. My kids loved helping to crush (and eat!) the candy canes for our cookies and we enjoyed eating these while watching, “A Christmas Story,” this year. Yet another simple and easy tradition is born!

 Simplifying the Holiday Parade of Activities

Simplify the Gift Giving


I often talk about our commitment to do the Four Gift Rule, but this year we took it a step further and asked the kids if they would like to skip the presents and just take a family adventure together. We gave them lots of options for places we could take a mini-vacation to and they chose a trip to Grand Rapids, Michigan for our holiday getaway. We are so excited to take in all of the museums, holiday lights, ice skating, and see the sites of the city.

If your kids are struggling to come up with gifts this year or your home is overrun with just too much stuff, consider creating your very own, “Choose Your Own Adventure,” vacation in lieu of gifts. Not only did I have a lot less to buy this year, but I also get to spend four days with my family making incredible memories that I hope they will remember forever.

Start planning and dreaming ahead for next year though because those vacation rentals do go quickly!

 Ritz Parade Float

Focus On the Fun


Ritz wants to bring back the fun for the holidays and this year they have created a fun interactive Ritz Parade where you can visit the site and build your very own float. You can add up to twelve items on your float from toys, characters, celebrations, and banners. The pieces can be scaled to your desired size and placed anywhere on your float. Once it is complete, you can share your holiday float with others. It’s a fun little interactive tool that you can use to keep the kids busy while you are putting those last minute touches on those holiday festivities. Since we adopted a cat this year, we loved making a float of her for our holiday parade. I am sure this illustrates just how special she has become to all of us!

In addition, the Ritz parade allows consumers to unlock deals to help decrease the stress of gift buying! You can check out all the deals here!

For a little added holiday fun, check out how Ritz surprised shoppers with a fun rap. Get it? Rapping Wrappers!!


Happy Holidays, friends!

 Easy No-Bake Mint Thin Recipe from MomAdvice.com.

Easy Mint Thin Cookies
Recipe Type: Dessert
Author: Amy Clark
Prep time:
Total time:
Serves: 12
Looking for a quick holiday treat to share that doesn’t require any baking? You must try these delicious Mint Thin “Cookies.” You won’t believe how good or easy these are to make (and eat!)
Ingredients
  • 2 pkg. (4 oz. each) semi-sweet baking chocolate, melted, slightly cooled
  • 1/4 tsp. peppermint extract
  • 36 RITZ Crackers
  • 1 candy cane (6 inch), crushed
Instructions
  1. Mix chocolate and extract.
  2. Dip crackers in chocolate mixture, turning to completely coat each cracker. Carefully scrape off excess chocolate.
  3. Place crackers in single layer on waxed paper-covered baking sheets; sprinkle with crushed candy.
  4. Refrigerate thirty minutes or until chocolate is firm.


This post is sponsored by Ritz Crackers. I’ve received compensation for my time and effort in creating this post. All thoughts and opinions are my own.

Pin It

Knitted Wine Bottle Hat and Scarf

Monday, December 16th, 2013

Knitted Wine Bottle Hat and Scarf from MomAdvice.com

I love sharing ideas for cute hostess gifts and today’s gift idea is a free pattern for a wine hat and scarf that you can use to adorn bottles of wine or champagne for your favorite hostess over the holiday season.

Walmart challenged me to create a New Year’s Eve craft and I immediately thought of a fun way to decorate a bottle of bubbly or wine for the holidays. I love this project so much because these are so fun to create and can be decorated in any combination of yarn colors and you can even experiment with stitches and hat toppers.

Knitted Wine Bottle Hat and Scarf from MomAdvice.com

Knitted Wine Bottle Hat and Scarf from MomAdvice.com Knitted Wine Bottle Hat and Scarf from MomAdvice.com

You may recall that I made knitted sweater coffee cozies for our teacher & bus driver gifts this year? I used the Red Heart Super Savers yarn and I still had some left despite wrapping all my holiday gifts in the yarn, knitting hair bows for gifts (coming soon!) and even making my yarn ball ornaments. I can’t believe how many projects you can create with just $2.47 of yarn!

I wanted to create a festive gift I could share with others when I attend our holiday gatherings this year. What is more festive than tiny hats and scarves for your wine bottles?

Knitted Wine Bottle Hat and Scarf from MomAdvice.com

Modifications Were Made to The Featured Pattern. Please Read Carefully!

I tried a few different needle sizes since the pattern said you could use a few different sizes, I recommend going with the largest size (US 8) recommended because it created the fullest scarf (the red one in the back was done on US 8 needles). There were also some interesting stitches in the pattern for the scarf and I tried it three different ways (recommended, my own way, and then a simple stockinette). I loved just simply doing a simple stockinette (knit one row, purl one row- repeating) with the US 8 needles. The scarf will curl in a bit, but I think it added more texture to the top of the bottle. You can, of course, experiment with what you think looks best though.

These tiny hats are knitted on double-pointed needles. If you haven’t tried using double-pointed needles before, this is a perfect project to try them on. You can find a few tips from me over here on needle recommendations and getting started! Don’t be scared, it is easier than you think!

Knitted Wine Bottle Hat and Scarf from MomAdvice.com Knitted Wine Bottle Hat and Scarf from MomAdvice.com

I know I keep talking about my pom-pom makers, but they seriously have made me so happy this year. I bought them when we made pom-pom bouquets for our grandma (you can read my tutorial on how to use them there)  and then I completed a pom-pom marathon when I made my DIY Pom Pom Trees. I used the smallest Clover Pom-Pom maker for these tiny hats.

While you are buying it, you might as well as buy the larger size because you will be just as addicted to me as pom-pom making!

Knitted Wine Bottle Hat and Scarf from MomAdvice.com Knitted Wine Bottle Hat and Scarf from MomAdvice.com

I hope you all have the best holiday season and that a few of the projects I have shared on MomAdvice have helped with your gift-giving this year! Cheers to you, friends!

Grab the Pattern HERE on Ravelry (FREE!).  Don’t forget to friend me while you are there! I love new knitting buddies! Oh, and here are 54 MORE Handmade Gift Ideas to get you thinking about crafting this holiday season!

walmart_mom_disclaimer

Pin It

Easy Christmas Tree Cinnamon Rolls

Tuesday, December 3rd, 2013

Easy Christmas Tree Cinnamon Rolls from MomAdvice.com.

Ever since my children were small we have had a tradition of making a Cinnamon Roll Christmas Tree. The best part about this tradition is that it is fast to create, can be decorated by your kids, and it is something they will look forward to every year.

Easy Christmas Tree Cinnamon Rolls from MomAdvice.com. Easy Christmas Tree Cinnamon Rolls from MomAdvice.com.

There is no recipe to this one unless you are feeling ambitious and want to create some easy bread machine cinnamon rolls to make this with, which is something I love to do on Christmas morning!

Shape these into a Christmas tree shape on a parchment-lined cookie sheet. Bake as directed on the packaging. Tint the icing green with a few drops of food coloring and let them decorate the rolls themselves.

I slide the rolls off of the hot cookie sheet and let them decorate while they are still hot, reducing the risk of burn elbows and arms by removing that hot sheet.

Easy Christmas Tree Cinnamon Rolls from MomAdvice.com. Easy Christmas Tree Cinnamon Rolls from MomAdvice.com. Easy Christmas Tree Cinnamon Rolls from MomAdvice.com.

This recipe is practically fool-proof, unless you were up with a screaming baby one night and on Christmas morning grabbed blue instead of green.

And maybe you declared it the year of the retro Christmas tree.

Maybe.

I hope you can embrace this as part of your annual holiday traditions. Be sure to check out my other ideas for Great Family Traditions to Celebrate the Holidays in a MEANINGFUL way. If you didn’t get around to creating an advent calendar yet, don’t worry! Check out my Use What You Have Advent Calendar!


Pin It