Archive for the ‘Blogging’ Category

Gluten-Free Pancakes (With A Better Batter Coupon Code)

Tuesday, March 4th, 2014

Gluten-Free Pancakes from MomAdvice.com.

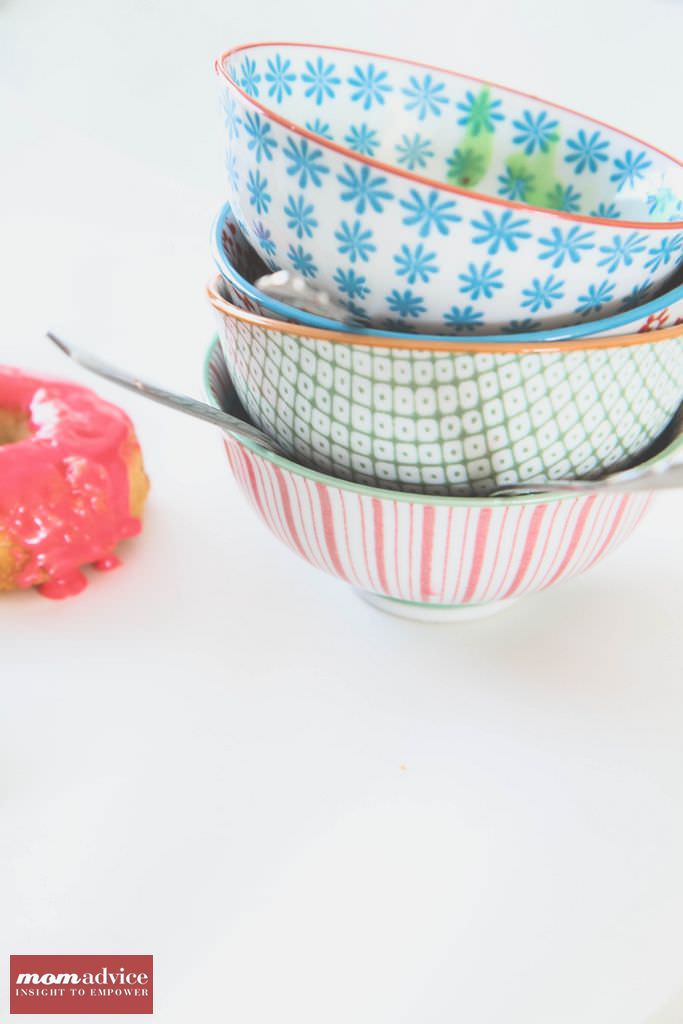
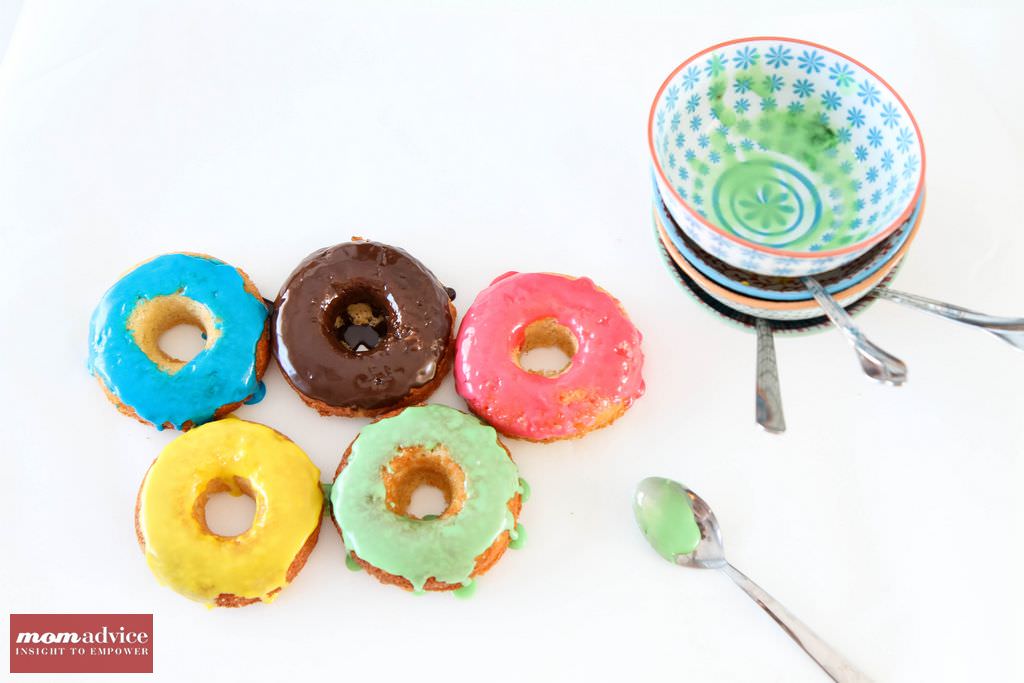
If there is one thing this girl loves, it is pancakes. Today I am sharing a recipe for gluten-free pancakes that taste as light and fluffy as our gluten-filled variety, but are perfect for creating for those who cannot tolerate gluten.

Gluten-Free Pancakes from MomAdvice.com.

Fluffy gluten-free pancakes are easier to create than you might think, it just requires the right measurements, a good flour, and a little milk on hand if your batter gets too thick. Before we made the switch to gluten-free, I loved to throw wheat germ into our hearty wheat-filled pancake. No wonder I felt so awful after our Sunday brunches!

Now we have substituted our wheat love-fest with flax seed in our pantry for our pancakes and energy bites, a deliciously healthy addition to just about anything, and still get that taste and texture that I love.  As with all my favorite pancake recipes, it is laced with cinnamon and vanilla while these pancakes get their sweetness from a little honey.

Gluten-Free Pancakes from MomAdvice.com.When I first discovered that I had to go gluten-free, my best friend recommended a book called, “Gluten-Free on a Shoestring.” (affiliate link) I treated myself to the cookbook for Christmas and loved that the author relied upon one all-purpose mix to make almost all of her recipes.

I placed my first order for Better Batter after reading it and started testing recipes with this cup-for-cup substitute shortly after buying it. None of us could believe how good everything had tasted and with very little adjustments in our favorite family recipes.

I immediately wrote the company and asked if they might be interested in a partnership. I truly believe in their product and how it can help beginner gluten-free chefs overcome their difficulties with baking. Not only did they send me some products for our recipes, but they also are offering valuable coupon codes for our readers to try their flour too.

Not only does the flour perform well, but it is much more affordable than other flours on the market. You can even buy their product in bulk to snag additional savings.

What are the Ingredients In This Flour?

The flour I have featured today is an an all-purpose flour substitute that you can use as a cup-for-cup substitute in your recipes. The packaging states that it contains: Rice flour, brown rice flour, tapioca starch, potato starch, potato flour, xanthan gum, and pectin (lemon derivative). It is the blend of these flours that makes it such a great performer in baking recipes. I hope that helps!

How Can I Save Money On This Flour?

I truly believe you will love this flour and am so excited that Better Batter is sharing some coupon codes with our readers to help them save even more. This month you can use the coupon code XNF6EBYK4JRT for $8 off ANY SIZE ORDER.

That’s right, I said ANY SIZE! 

I hope you can take advantage of the savings and can enjoy a stack of these delicious pancakes in your home!

Gluten-Free Pancakes from MomAdvice.com.

Gluten-Free Pancakes
Recipe Type: Breakfast
Author: Amy Clark
Prep time:
Cook time:
Total time:
Serves: 4
You won’t even miss the gluten with this delicious pancake recipe. Be sure to double your recipe so you can enjoy these all week long!
Ingredients
  • 2 cups Better Batter All-Purpose Flour
  • 1 teaspoon baking powder
  • 1 teaspoon baking soda
  • 2 tablespoons flax (optional)
  • 1 teaspoon cinnamon
  • 1 teaspoon salt
  • 2 teaspoons vanilla extract
  • 2 tablespoons honey
  • 2 eggs, lightly beaten & at room temperature
  • 6 tablespoons unsalted butter, melted and cooled
  • 2½ cups milk (or milk substitute)
Instructions
  1. Heat your griddle or nonstick pan and coat generously with butter.
  2. In a large bowl, place the flour, baking powder, baking soda, flax, cinnamon, and salt in and whisk to combine.
  3. Create a well in the center of the dry ingredients, and add the eggs, butter and milk, one at a time, blending well after each addition. Add vanilla and honey and continue to mix until the batter comes together and there are no lumps.
  4. Working quickly, ladle the pancake batter on the griddle surface, and allow to sit until bubbles begin to appear on the surface (2 to 3 minutes). Flip and continue cooking for another 1 to 2 minutes, or until the underside is browned.
  5. Remember that your batter thickens as it stands and may require more milk to keep your batter in a pourable consistency.
  6. Serve with fresh fruit and maple syrup.


Pin It

How to Find & Write Pen Pals

Tuesday, March 4th, 2014

How to Find & Write Pen Pals

Pen Pals are a beautiful thing in a digital age where pen, paper, the process of writing, and waiting are so hard in our fast moving culture. Today I wanted to share about our experience with finding and writing pen pals that I hope will inspire you to find a pen pal of your own for your child after hearing about our experience.

How to Find & Write Pen Pals How to Find & Write Pen Pals How to Find & Write Pen Pals

Walmart challenged me to come up with a fun Spring Break activity for kids and finding a pen pal for my children is something that I have thought a lot about doing. We found items in their office supplies section like writing tablets (for big and small children), pretty note cards, and freshly sharpened pencils. With these arsenal of tools, we are now ready to begin a new adventure for our kids.

How Do You Find a Pen Pal?

Finding a pen pal is oh-so-easy thanks to social networks like Facebook, Instagram, and Twitter. I posted on my Facebook page that we were looking for children in our child’s age range that did not live in the United States to be pen pals with. Within minutes, we had many people replying about friends and family that lived in other countries with kids just around our age.

Of course, if finding someone living out of the states is harder to come by in your inner circle, consider just finding families that live in other parts of the United States. A child shivering in the polar vortex of Indiana, for example, might find a child’s life in Florida or California quite inspiring!

How to Find & Write Pen Pals How to Find & Write Pen Pals How to Find & Write Pen Pals How to Find & Write Pen Pals How to Find & Write Pen Pals How to Find & Write Pen Pals

Encourage Your Child to Craft a Great Letter

Writing letters not only improves our vocabulary and spelling, but it also helps teach children about the give and take of conversation.

Talk with your child about crafting a great introduction about themselves and how to weave in questions to find out more about their new pen pal. When my daughter asked me if her pen pal had glasses, I told her that this would be a great question to ask her so she could look forward to her response.

How to Find & Write Pen Pals How to Find & Write Pen Pals

Have Your Child Explore Their Pen Pal’s Town

It is easier than ever to learn more about where someone else lives thanks to Google’s Street View and Wikipedia. Although there was no street view for our pen pal, who resides in Greece, we were able to take a peek at pictures of landmark items in her country and read facts about where she lived.

Knowing information like this helps to build those initial letters as you get to know more about each other.

How to Find & Write Pen Pals How to Find & Write Pen Pals How to Find & Write Pen Pals How to Find & Write Pen Pals How to Find & Write Pen Pals

Send Your Letters Off

Once we were done writing our letter, we got to practice addressing an envelope and then added a few decorative touches to the back of our envelope for our new friend.

Although we ran our letter out to our mailbox at home, a great Spring Break activity might be to take that letter to the post office and make it feel even more, “official,” when sending it.

Now we must wait patiently for our response from our new friend and when she writes back, it will be a happy day, indeed!

How to Find & Write Pen Pals

I hope this inspires you to find a few pen pals of your own. And as double inspiration, here is my childhood pen pal. We met at church camp and became best friends through our letters back and forth. I remember that sweet anticipation of the mail dropping through the mail slot of our home and ripping them open to read, then reread, then reread again the precious words from my friend. 25 whopping years later, she is still my best friend for life.

I already told Emily to save her money and hopefully she will have a friend like that in her pen pal who she can visit someday! You just never know- we certainly never did! I shall be very jealous of her trips to Greece, should that happen!

Here’s a little video we put together of Emily’s first pen pal letter! I hope you enjoy it and I would love to hear if you had a pen pal and what they meant to you?


walmart_mom_disclaimer

Pin It

DIY Shamrock Shake Recipe (And Free Straw Printables)

Thursday, February 27th, 2014

DIY Shamrock Shake Recipe (And Free Straw Printables)

DIY Shamrock Shake Recipe (And Free Straw Printables)

DIY Shamrock Shake Recipe (And Free Straw Printables)

St. Patrick’s Day is just around the corner!  This holiday makes me want to indulge in one of my all-time favorite treats… the oh-so-delicious Shamrock Shake. You don’t have to swing by your local fast food joint to indulge though because I have the recipe to this one and you can indulge in it for a fun family night treat any night of the week.

To grab the recipe for these easy DIY Shamrock Shakes, head on over to the Kenmore Blog to read all about these delicious treat.

Don’t forget to grab your free St. Patrick’s Day straw printables! Happy St. Patrick’s Day, friends!

Pin It

Gluten-Free Chicken Noodle Soup

Friday, February 7th, 2014

Gluten-Free Chicken Noodle Soup from MomAdvice.com

Going gluten-free is proving to be a fun adventure for me in the kitchen. This gluten-free chicken noodle soup recipe is just one example of an old family favorite that has been transformed into a delicious gluten-free version.

This week Walmart challenged me to create a great cold weather dish that you could create from items they have at their store. One of my favorite things to create with their ingredients is a weekly batch of soup. Not only is it the perfect cold weather dish, but it is the perfect “convenience food,” that I love to have on hand for nights when I don’t feel like cooking.

Gluten-Free Chicken Noodle Soup from MomAdvice.com

One item that I buy frequently there is their rotisserie chickens for all of my chicken-filled soups. It saves me some cooking time and I find that they bring a lot of flavor to my easy weeknight soups. They are priced at $4.98, which is about the same price as buying a whole chicken and cooking it from scratch, so I find it to be a good soup investment.

Gluten-Free Chicken Noodle Soup from MomAdvice.com

My biggest challenge has been finding a pasta that tastes like my old familiar white-floured starchy friend. We have sampled every variety of noodles under the son from corn blends to quinoa blends to rice blends. When I posted on Instagram that I was still on the hunt, Tinkyada was the brand that fellow gluten-free friends recommended. Friends, let me tell you, this was the closest pasta I have ever tasted to the real deal. The best part is that it is strongly made so it can withstand being reheated, unlike the other blends that fell apart in my soup.

I had been hunting for this in the pasta aisle at our store, but it is not in the pasta aisle. This pasta is over with the other gluten-free specialty foods, on the end of one of the candy aisles in our store. A pound of this was $2.87, while the fancier and not as appetizing pastas, were costing me over $4 and did not contain a pound.

For a pasta-filled soup, you only need half the bag (or approximately two cups of pasta). Since everything seems to cost an arm and leg if it is marked gluten-free, this is a pasta we all loved AND didn’t cost a fortune! Winning, I say!

Gluten-Free Chicken Noodle Soup from MomAdvice.com Gluten-Free Chicken Noodle Soup from MomAdvice.com Gluten-Free Chicken Noodle Soup from MomAdvice.com

To me, this looks like the perfect bowl of soup. I thought I would never have a good chicken noodle soup again after this gluten-free debacle of mine, but I am mourning the loss of my soup no more.

It is the ultimate cold weather comfort food dish! I hope you enjoy this one as much as we have!

Gluten-Free Chicken Noodle Soup
Author: Amy Clark
Prep time:
Cook time:
Total time:
Serves: 8
A gluten-free chicken noodle soup that is the ultimate cold weather comfort food dish. One pot serves many, so share this with someone in need!
Ingredients
  • 2 cups Tinkyada Rice Pasta Elbows
  • 2 tablespoons of olive oil
  • 2 stalks chopped celery
  • 3 chopped carrots
  • 3 tablespoons chopped garlic
  • 12 cups low-sodium chicken broth
  • 1 rotisserie chicken
  • Salt & pepper to taste
  • fresh parsley
Instructions
  1. Bring a large pot of lightly salted water to a boil.
  2. Add gluten-free elbows and cook 12-14 minutes. Drain and rinse with water. Set aside.
  3. Meanwhile, in a large saucepan or Dutch oven, saute the carrots and celery in two tablespoons of olive oil for five minutes to start your soup base. Add garlic at the end (to prevent burning)
  4. Add your rotisserie chicken and any drippings form the chicken to the pot, directly on top of your vegetables. Pour your chicken broth directly over the chicken to incorporate all of the good flavors.
  5. Heat up broth and bring it to a simmer.
  6. Reduce heat, cover, and simmer 15 minutes.
  7. Pull out your chicken and set aside to dice.
  8. Stir in noodles and diced rotisserie chicken, and heat through.
  9. Toss in a handful of fresh chopped parsley and ladle into bowls.

walmart_mom_disclaimer


Pin It

Gluten-Free Olympic Doughnuts

Thursday, February 6th, 2014

Gluten-Free Olympic Doughnuts from MomAdvice.com.

If there is one thing you know our family loves it is doughnuts. In honor of the upcoming Olympics, I am sharing a delicious gluten-free baked doughnut recipe that you can bake up as a treat for those opening ceremonies. This gluten-free doughnut recipe is as easy to put together as our other wonderful doughnut recipes and are so fun to decorate for the holiday.

Today’s project is sponsored by Walmart. Almost everything you need for this project can be found at their store!

Gluten-Free Olympic Doughnuts from MomAdvice.com.

One thing you will need to create these doughnuts is a doughnut pan. When I first started baking doughnuts, you had to order an item like this online and through specialty shops. Now you can find it right on the shelves at Walmart, in the same aisle as your cookie sheets & baking pans. The price on their Wilton doughnut pans is $7.19.  I have two of them because most recipes yield 10-12 doughnuts and it saves me time in the kitchen. These two pans have paid for themselves over and over again for our occasional sweet weekend treat!

Because I am new to gluten-free baking, I am using a gluten-free all-purpose mix to save me time in the kitchen. I bought a batch of Better Batter for my pantry and I have found that it is yielding impressive results for all of my baking needs. Buying it online from the company in bulk has saved me some money and storage in my pantry, thanks to not needing to buy multiple flours to blend. The bonus is that this mix does contain the Xanthan gum right in it. If your mix does not contain this, you will need to add that ingredient separately.

These doughnuts are light, fluffy, & sweet. The first things my kids remarked on was the spice in them. Although there is just a pinch of nutmeg, this ingredient really pulls through in the doughnut. For non-Olympic doughnut events, a sprinkle of powdered sugar on these is a delightful morning treat.

Gluten_Free_Baked_Olympic_Doughnuts-5

To make your Olympic-themed glazes, I simply made one batch of my favorite glaze and then added food coloring to each dish to reach the desired color. To achieve your black, if you are just working with a standard set of food colorings, equal portions of blue, yellow, and red will help achieve the color you are after.

Gluten_Free_Baked_Olympic_Doughnuts-4 Looking For More Fun Ideas to Celebrate the Olympics? Let’s take a peek at some more fun (and frugal!) ideas!

Fun Ways to Celebrate the Olympics

Olympic Medal Cookies

What could be sweeter than receiving an Olympic medal? How about an Olympic Medal filled with a cookie? AlphaMom offers this sweet little Olympic craft to do with your little ones. Stumped for a cookie idea?  I highly recommend an Oatmeal Chocolate Chip Sea Salt Cookie for your medal filling!

Olympic T-Shirts

Dress up a white t-shirt to dress up for the Olympic games. with a simple painted ring pattern on an inexpensive thrift store shirt, this is a craft that is easy enough to do with kids of all ages. Kate’s Creative Space offers this fun craft idea to her readers to celebrate the games.

DIY Olympic Torch

What child doesn’t dream of carrying around their very own Olympic torch. Hoosier Homemade showcases a fun craft that you can do to create your very own Olympic torch made from some commonly found items at your local craft store.

Olympics Party Fun

Why not throw a party for your family or for a group of families to celebrate the Olympics? A Small Snippet has you covered with everything from patriotic foods to great Olympic game ideas to play together, to fun ideas for decorations that don’t cost a lot.

 Olympic Torches Made From Recyclables

If hitting your craft store for supplies to make an Olympic torch isn’t in your budget, this Olympic Torch from The Idea Room is made from common items you have in your home and recyclables. These torches are made from a paper plate, a paper towel roll, and red & gold tissue paper. This is one that even the smallest child can do. Be sure to lift these high and participate in your own round of fun family Olympic games.

Olympic Rings Necklace

Even moms can jump in on the Olympic excitement with this cute craft, from Remarkably Domestic, for an Olympic Rings Necklace. This necklace is made from simple rings covered in Chinese knotting cord to create those Olympic rings everyone loves so much. This would be a fun craft to do while watching your favorite games this year!

However you celebrate the Olympic games this year, I hope this post inspires you for your Olympic game watching!

Gluten-Free Olympic Doughnuts
Recipe Type: Breakfast
Author: Adapted from Food & Wine Magazine
Prep time:
Cook time:
Total time:
Serves: 10
These gluten-free doughnuts are so easy to make and can be a fun snack to share while watching the opening ceremony this year!
Ingredients
  • 1 1/2 cups all-purpose gluten-free powder (I recommend Better Batter Flour)
  • 1 cup sugar (next time I may adjust to 3/4 cup sugar)
  • 2 teaspoons baking powder
  • 1/4 teaspoon nutmeg
  • 1/2 teaspoon salt
  • 2 large eggs, at room temperature
  • 1/4 cup canola oil
  • 1/2 cup whole milk
  • 1 teaspoon vanilla
  • 1 cup confectioners sugar
  • 2 tablespoons hot water
  • 1/2 teaspoon vanilla, butter, or almond extract
  • Betty Crocker Food Coloring Set (over in the baking aisle)
Instructions
  1. Preheat the oven to 350º and spray two nonstick 6-cavity doughnut pans with nonstick cooking spray.
  2. In a large bowl, whisk the flour with the sugar, baking powder, nutmeg and salt
  3. In a medium bowl, whisk the eggs with the oil and milk until smooth; add to the flour mixture and whisk until combined.
  4. Spoon the batter into 10 cavities of the prepared doughnut pans until about three-quarters full. Bake for 18 to 20 minutes, until a toothpick inserted in the center of a doughnut comes out clean.
  5. Let the doughnuts cool.
  6. In a bowl, mix together the confectioners sugar, hot water, and flavoring. Divide the glaze into five bowls and create your colors for the doughnuts. Dip or spoon the glaze over the doughnuts and allow the glaze to harden.


Pin It

Smart Solutions for Craft Room Organization

Wednesday, February 5th, 2014

Smart Solutions for Craft Room Organization from MomAdvice.com

It’s been a long time since I have shared some pictures of our home. I have been in the thick of organizing my craft room and today I wanted to share with you some ideas for organizing your own craft space in your home.

For my part on the Walmart craft team, they requested that I tackle a craft project. I made a special request that I could share with you today my organized craft space and see if I could find any fun additions to my space at their store and they agreed. So today instead of crafting it up, I am showing off what I have been up to in my space.

Smart Solutions for Craft Room Organization from MomAdvice.com

Let’s start from the very beginning. Three years ago, this was our space that I envisioned turning into our office space. We have a tri-level home, now lovingly called a quad now that we finished this fourth level, and this was what we started with. This space was where we threw our stuff that we didn’t know what to deal with. We had to majorly declutter and we had to save enough cash to make the updates to our home. We were able to accomplish both (loan free!) and create the space I had been dreaming of.

I am starting with this picture to show you that maybe there is an area in your home that could be your special space and you just don’t know it. Maybe it just requires a fresh eye, a bit of decluttering, and a few smart craft solutions to carve a space just for you.

Smart Solutions for Craft Room Organization from MomAdvice.com Smart Solutions for Craft Room Organization from MomAdvice.com Smart Solutions for Craft Room Organization from MomAdvice.com Smart Solutions for Craft Room Organization from MomAdvice.com Smart Solutions for Craft Room Organization from MomAdvice.com

Smart Solutions for Craft Room Organization from MomAdvice.com Smart Solutions for Craft Room Organization from MomAdvice.com

Here is my craft and office space today. When I post these types of pictures, people ask me where I found certain things. Here are some of the things you will find in my space.

Floral Chairs- Found at a local Value City (no longer available-sadness)!

Green Side Table- A side table we owned, but spray painted & distressed

Owl Lamp & Burlap Lamp Shade–  Walmart

Record Table- Thrift Shop Find Stained & Painted

Swivel Metal Stool- Home Decorators

Knitted Leaf Centerpiece- Handmade

Everyday I’m Hustling Pillow- Michelle Dwight Designs

Record Frames- H&M

Smart Solutions for Craft Room Organization from MomAdvice.com Smart Solutions for Craft Room Organization from MomAdvice.com Smart Solutions for Craft Room Organization from MomAdvice.com Smart Solutions for Craft Room Organization from MomAdvice.com Smart Solutions for Craft Room Organization from MomAdvice.com

Crafting and organization do not go hand in hand for me.  I spent a good month getting this room organized and trying to figure out the best solutions for my space. Here are some of the solutions I found inexpensively at Walmart.

Glass Jars– I had all of my craft supplies tucked away in baskets. This meant I spent a lot of time digging through baskets and trying to figure out where I tucked all my crafting odds & ends. Glass jars truly helps me visualize what I have and where it is. I found the smaller jars for just $4.97 and my giant 2 gallon glass jar is the perfect home for my ribbon collection (priced at $9.97).

Clear Clipboards– As a craft blogger, I always have a running to-do list for my site and craft projects. I utilized this to-do list printable (previously featured in our DIY Homework stations) and mounted them on these clear clipboards ($3.88)  with 3M hooks ($3.67) on my wall. I also have my favorite Mead Wall Calendar I buy every year to keep track of when all my projects are due ($7.97).

Metal Bins- Over in the closet solutions, I found a metal tub that I could use to organize my knitting needles. When you start really building up your knitting needle collection, you may have four or more different sizes of the same size needle. I was constantly digging through baskets to find the right needles. I decided to use manilla envelopes and label them #0-15 and then put my needles for each size in these envelopes. This saves me tons of time hunting for the right needles and makes it easy to see what I might need to buy. I put all of these in this metal tub ($9.74) and it is on top of my newly organized craft cart.

Smart Solutions for Craft Room Organization from MomAdvice.com Smart Solutions for Craft Room Organization from MomAdvice.com Smart Solutions for Craft Room Organization from MomAdvice.com Smart Solutions for Craft Room Organization from MomAdvice.com Smart Solutions for Craft Room Organization from MomAdvice.com Smart Solutions for Craft Room Organization from MomAdvice.com Smart Solutions for Craft Room Organization from MomAdvice.com Smart Solutions for Craft Room Organization from MomAdvice.com

Two things we purchased to finish out my crafting space was a crafting table and a crafting cart that I could roll out into the middle of our office when I needed to do my crafting. We found this Martha Stewart Collapsible Crafting Table & Crafting Cart on Home Decorators. If you are struggling with a small space, this is a dream come true. You can fold down one side if your space is small or open it all the way out if you need a large surface to work on.

This space also doubles as an indoor photography studio when the weather isn’t cooperating. I have my photography backdrops stored in the gift wrap center and can really spread my work out, if I need to on this space.

I spent an entire weekend whittling down my craft supplies to what I truly needed in my craft cart. I now everything I need right at my fingertips. I had to keep reassuring myself that it was okay to part with some of my craft supplies. If it hadn’t been used in the last year, it was definitely something that could be donated to free up precious space in my craft cart.

Smart Solutions for Craft Room Organization from MomAdvice.com Smart Solutions for Craft Room Organization from MomAdvice.comAs you can see, I can wheel them over to corners in our office so they don’t get in the way. I am so thankful for these smart solutions for our space. I am also thankful that I finally feel organized in this space.

Smart Solutions for Craft Room Organization from MomAdvice.com

And as a good old-fashioned reminder that all good things should be enjoyed in moderation, I found this old-fashioned closed sign over in the office supplies at Walmart ($1.97). I mounted a 3M clip upside down and hooked it on the back of my computer. This now offers an in-my-face reminder of how I should be spending my evenings.

I hope you enjoyed the tour of my craft space! Feel free to ask me any questions and I promise to try to help!

walmart_mom_disclaimer

Pin It

8 Beautifully Frugal Valentine’s Day Projects

Tuesday, February 4th, 2014

8 Beautifully Frugal Valentine's Day Projects from MomAdvice.com.

Valentine’s Day is just around the corner and one of my favorite things to share here are frugal ways to celebrate the holidays using easy to find and inexpensive items.

You may have thought last year’s DIY Valentine’s Day Projects post couldn’t be topped, but I think today’s projects are going to rival all that I shared last year.

The best part is that they are both beautiful AND frugal – a total win for my wallet and my home!

Let’s get started with this year’s featured projects!


DIY Valentines Day Bow Tie

I am a total girly-girl so I am absolutely dying over this adorable Valentine’s Day bow tie on Plan B.

You only need a few craft supplies and a men’s necktie to create this look.

If a pink tie hasn’t been donated to your favorite thrift store, look for a red tie or anything in those festive red & pink colors.

Pair this with a lacy blouse and your best boyfriend blazer for a cute night on the town.

If you can’t locate a bow tie, hunt for a red, pink, or white blouse and try my frugal DIY Rosette Necklace for an adorable addition to your favorite jewelry pieces.


DIY Coffee Cup Wrappers

I love a good free printable and am madly in love for these Valentine’s Day cup wrappers.

Travel mugs are something that I often see in abundance at our local Goodwill.

How sweet would this thrifted gift be with a little lovable printable on the outside and filled with their favorite coffee for someone you love, heading off their morning commute?

In my mind, the ultimate sign of love is a cup of coffee, don’t you agree?

Grab this free coffee sleeve printable from Eat Drink Chic today!


DIY Sequined Heart Shoe Accents

Last month we talked about how easy it is to make your own sparkled set of shoes from a pair of Goodwill shoes.

To take this a step further towards Valentine’s Day festivity, check out this easy sequined heart shoe accent you can make from At The Picket Fence.

I know I have one adorable little girl who would absolutely love this heart accent and it would be a fun & inexpensive craft we could do together too!


DIY Coloring Page Valentine’s Day Printables

I am all about free printables for celebrating the holidays and am madly in love with this, “I Love Everything About You,” printable from Tried & True for a couple of different reasons.

Besides this printable being free, it is actually a coloring page that you can fill in with your own favorite colors or you can have your kids do for a fun Valentine’s Day activity.

Just pick up a frame or clipboard for displaying these and you will have something beautiful to decorate a wall, mantle, or nightstand.


DIY Big Bow Pillowcases

Although I don’t sew, I know many of you do, and I truly admire you!
For those of our readers that do have the sewing gene (you, lucky people, you!) here is a fun tutorial from raegun ramblings for how to create your very own DIY Big Bow Pillowcases to add a little festivity to your home.
To create these, visit your local resale store and purchase linens, sheets, or the largest shirts you can find in your favorite festive colors.
Use this material to create your own pillowcase covers for Valentine’s Day.

DIY Valentine’s Day Centerpiece

If you are looking to add a little festivity to your dinner table or mantle, you will love this easy project created from a little vinyl and any type of glass item/jar that you can find at your local thrift store.
One Artsy Mama offers this free downloadable heart image that you can use to create your own vinyl masterpiece for your table.
Fill your jar with festive conversation hearts and you have a fun & frugal centerpiece that you can use every year!

DIY Heart Sleeve Detail

I have been known to wear my heart on my sleeve so this project is perfect for a girl like me!

Just find a shirt, cardigan, or sweater you can add your heartfelt detail on and use these easy directions from hey love designs for creating an easy felt detail to your sweater.

This would be a fun one for a little girl in your life too and takes minimal sewing skills (yay, for those of us that dropped out of sewing school!) to make this sweet little project!

Happy Valentine’s Day, everyone!

Yarn Wrapped Letters Tutorial


Red Velvet Cake Batter Ice Cream


DIY Table Runner for All Seasons


Easy DIY Fabric Flower Wreath


Sign up for the MomAdvice newsletter


Pin It

Chinese New Year Family Tradition: We Are a Fortunate Family Felt Fortune Cookies

Monday, January 27th, 2014

Chinese New Year Family Tradition: We Are a Fortunate Family Felt Fortune Cookies from MomAdvice.com.

I love to create new holiday traditions with my family and today’s project is in honor of the Chinese New Year!  To celebrate, I am sharing a tutorial on how to make felt fortune cookies and a free printable that can be placed on a jar for a special Chinese New Year tradition.

I have partnered with Walmart on this project to showcase a fun project that you can do in honor of the holiday. All supplies for this project can be found at their store!

What is Chinese New Year?

Chinese New Year is the longest and most important celebration in the Chinese calendar.  The Chinese year 4712 begins on Jan. 31, 2014. A fun fact for this year is that this is the year of the horse.

New Year festivities traditionally start on the first day of the month and continue until the fifteenth, when the moon is brightest. In China, people may take weeks of holiday from work to prepare for and celebrate the New Year. Can you just imagine?

According to the Chinese legend,  Buddha arranged a meeting and asked all the animals to meet him on Chinese New Year. Twelve animals came and Buddha named a year after each one. If you were born in certain years, your personality is supposedly aligned with your animal. Those born in horse years are cheerful, skillful with money, perceptive, witty, talented and good with their hands. Since this is the year of the horse, if you have a child born this year, it sounds like you will have quite a talented and delightful child.

There are many great traditions around this holiday that include wearing red clothes which symbolizes fire and drives away bad luck, and a lantern festival, and one thing that Americans really seem to get behind is…

The  FEASTING.

Chinese New Year Family Tradition: We Are a Fortunate Family Felt Fortune Cookies from MomAdvice.com.

We are a Fortunate Family

Since the Chinese New Year is about feasting and family, I wanted to create a craft that would work for these two elements of the holiday. I love that many elements of this holiday focus on luck & good fortune. Incorporating this element, today we are making felt fortune cookies, but instead of filling them with predicted fortunes, we are going to fill them with all we are so fortunate for.

Because we are a FORTUNATE family. 

I love gratitude projects and thankfulness for all we have around the dinner table is definitely a tradition that I want my family to embrace.

Chinese New Year Family Tradition: We Are a Fortunate Family Felt Fortune Cookies from MomAdvice.com.

Supplies Needed

(All Available at Walmart)

Felt Sheets (any color)

3/8″ grosgrain ribbon

Floral Wire

Wire Clippers

Large Mason Jar

Scissors

Hot Glue Gun & Glue Sticks

1 piece of heavy cardstock

1 piece of white paper & pencil

Chinese New Year Family Tradition: We Are a Fortunate Family Felt Fortune Cookies from MomAdvice.com.

How to Make Felt Fortune Cookies

1. Using your ribbon spool or the bottom of your mason jar, trace a circle with a pencil or marker. Cut out your circle.

2. Snip a piece of floral wire, approximately the length of your circle, with your wire cutters. Add a line of hot glue, and place the wire in the center of the glue.

3. Snip grosgrain ribbon the approximate length of your circle and then secure over the wire with a little additional glue.

Felt_Fortune_Cookies_Tutorial-12

4. Fold your circle in half and then bend like a fortune cookie. Repeat the process until you have a jar full of fortune cookies.

Chinese New Year Family Tradition: We Are a Fortunate Family Felt Fortune Cookies from MomAdvice.com.

You can enlist your helpers to help make your fortune cookies. Since we have had UNLIMITED SNOW DAYS THAT NEVER END, I have many helping hands. Ahem.

The best part though, is involving them in the gratitude portion of this project. Using the writing prompt,

“I’m Fortunate For…”

Have children write down all the things that make their family special.

Chinese New Year Family Tradition: We Are a Fortunate Family Felt Fortune Cookies from MomAdvice.com.

Emily said, “I’m Fortunate For…that my family are GRATE dancers.”

What can I say? She comes from a long lineage of family members that just BRING IT on the dance floor!

Chinese New Year Family Tradition: We Are a Fortunate Family Felt Fortune Cookies from MomAdvice.com.

Mom & Dad can get in on the fortune cookie writing prompt too. Hopefully your husband doesn’t read this aloud and then ELABORATE endlessly on his AMAZINGNESS.

Awkward.

Chinese New Year Family Tradition: We Are a Fortunate Family Felt Fortune Cookies from MomAdvice.com.

Chinese New Year Family Tradition: We Are a Fortunate Family Felt Fortune Cookies from MomAdvice.com. Chinese New Year Family Tradition: We Are a Fortunate Family Felt Fortune Cookies from MomAdvice.com.

My husband designed this fantastic printable that you can attach to a jar. I just dabbed a little glue on my jar and attached this side. You could also print this on label paper or attach with a little double-sided tape to finish your project. (Grab the printable at the bottom of this post!)

If you are looking for dinner options, here are couple of great ones that I can recommend!

Gluten-Free Orange Chicken

This delicious gluten-free orange chicken would make a fantastic meal!

Peanut Ginger Chicken Noodles

These Peanut Ginger Chicken Noodles are always a big hit!

Weeknight Chicken Lo Mein

And this Weeknight Chicken Lo Mein is fast & easy to prepare!

However you celebrate this holiday, I hope this post offers some inspiration for fun ways to celebrate with your family.

Chinese New Year Family Tradition: We Are a Fortunate Family Felt Fortune Cookies from MomAdvice.com.

Grab Our FREE “We Are a Fortunate Family,” printable.

walmart_mom_disclaimer

Pin It

Pulled Pork Stuffed Sweet Potatoes

Monday, January 27th, 2014

Pulled Pork Stuffed Sweet Potatoes

As Super Bowl Sunday quickly approaches, I wanted to share with you a gluten-free Super Bowl dish you can share for your game day eating.

This month Walmart asked me to share a fun Super Bowl dish that you can create from items in their grocery section. I will admit, that coming up with a dish that was both dairy-free AND gluten-free for my game day feast was a challenge to me. I am the girl that hovers over the creamy dips and loves a sub sandwich for my game day feasting.

When I thought about recipes I could share (and eat!) though, I settled upon my favorite pulled pork recipe that can be created in your slow cooker. This pulled pork is so easy to make because you simply put your pork butt or shoulder in your slow cooker with a little root beer and let it cook all day. And that is pretty much it!

I told you it was easy!

Gluten-Free Sweet Baby Ray's

My favorite sauce has (and always will be) the super delicious Sweet Baby Ray’s. Since going gluten-free, I have become insane about label reading especially when it comes to my condiments. I was so happy to discover that all of the Sweet Baby Ray’s sauces are gluten-free and you can, of course, find them at Walmart in the condiment aisle.

One of the things people warned me about when I started this journey was to always label-read especially when it comes to my condiments. I have found I don’t need to go to my specialty markets if I do the proper research on the items I need before I leave. For example, here are 7 condiments you may be surprised to find are gluten-free!

As we discovered when Emily baked my birthday cake, the offerings for gluten-free items are becoming more mainstream at our Walmart store!

Pulled Pork Stuffed Sweet Potatoes

I don’t know why I had not thought to pair pulled pork and a sweet potato together before, but it is the absolute best flavor combination EVER. Using my technique for perfect baked potatoes, I like to coat mine in olive oil and to sprinkle them liberally with kosher salt.

Once they have cooked, I split them and pile in sweetly seasoned pulled pork. You can hollow out a bit of the potato, if you need to, but I just stack the meat as high as it will go. Stick a fork in it, and you are ready to enjoy the game with your favorite beverage and a filling dinner!

If you are entertaining, pile these on a long platter with forks as a fun game day dish! I promise this will be a dish that is loved by ALL, not just your gluten-free friends!

Pulled Pork Stuffed Sweet Potatoes

Pulled Pork Stuffed Sweet Potatoes
 
Recipe Type: Main Dish
Author: Amy Clark
Prep time:
Cook time:
Total time:
Serves: 8
An easy gluten-free & dairy-free game day dish you can share with friends, made easily in your slow cooker.
Ingredients
  • 6-8 sweet potatoes, scrubbed & pricked with a fork
  • Olive Oil
  • Kosher Salt
  • 1 (4 pound) Boston butt (or pork shoulder)
  • 1 (12 fluid ounce) can or bottle root beer
  • 1 (18 ounce) bottle your favorite barbecue sauce (we love Sweet Baby Ray’s)
Instructions
  1. Place the pork meat in a slow cooker; pour the root beer over the meat. Cover and cook on low until well cooked and the pork shreds easily (approximately 8-10 hours).
  2. Shred the meat and drain the root beer from the slow cooker. Stir in barbecue sauce and toss gently.
  3. Preheat your oven for 400 degrees.
  4. Rub your cleaned sweet potatoes with olive oil and sprinkle liberally with kosher salt. Do not wrap in foil, so you can get a crisp skin.
  5. Bake for 45 minutes to 1 hour, depending upon the size of your potatoes.
  6. Let potatoes rest for five minutes. Cut a slit in the top and stuff with the pulled pork.


Looking for more great game day food, check out these Slow Cooker Honey Bourbon Chicken Wings & these 12 Great Tailgating Recipes for your game day feasting!


walmart_mom_disclaimer

Pin It

Knitted Princess Leia Hat

Tuesday, January 21st, 2014

Knitted Princess Leia Hat from MomAdvice.com.

Oh, you know I love a good knitting project! Today I am showing off my Knitted Princess Leia baby hat that I made. Not only that, but I am going to walk you through how to knit in the round for my favorite beginning knitters.

Knitted Princess Leia Hat from MomAdvice.com. Knitted Princess Leia Hat from MomAdvice.com.

Walmart let me choose any craft project I wanted this month and since I am in knitting mode this winter, I have been dying to make this cute little hat ever since I saw it on Ravelry.

Supplies Needed

  • 1 Skein Red Heart With Love in Chocolate ($3.84)
  • US 10.5 Straight needles (for knitting flat option)
  • US 10.5 Circular needles and set of 4 US 10.5 DPNs (for knitting in the round option)
  • Measuring Tape
  • Clipboard
  • Stitch Marker
  • Tapestry Needle
  • Scissors

Although, this hat can be knitted flat, I would love to challenge you to give knitting in the round a try. For a long time, I completely avoided projects that you had to knit in the round.

Four needles?

NO THANKS!

Unfortunately, if you never knit in the round you miss out on a lot of amazing patterns, particularly hand-crampingly tiny knits that would be stretched out when placed upon circulars.

Knitted Princess Leia Hat from MomAdvice.com.

I decided to create a picture tutorial for you to help guide you through your first knit. A quick search on YouTube should also yield great video tutorials. Let’s begin with this easy diagram.

1. Cast all of the stitches onto one double pointed needle.

2. Using your strong math skills (ahem) divide the cast on number by three and begin knitting that number on to your second needle. Be sure that you are beginning your stitches as the pattern states and not just knitting them. For this pattern, for example, you are doing a K2 P2 rib. You will want to be sure you are staying on pattern with your stitches. Place a marker on that second needle (at the end of the stitches) so it marks the beginning of your round.

3. Knit, in pattern, onto the next needle. You should now have three needles with stitches! Yay!

4. You will now be scooting and joining stitches on your needles, like in the triangle of needles above. You will use a FOURTH needle though, to begin knitting in the round. Just begin where you have placed your marker and begin knitting. Because I only have two hands, I am just showing how to set it up. You will use that fourth needle to begin. Continue knitting and scooting things, making sure your stitches are all facing in the same direction, particularly in those first two rows.

Knitted Princess Leia Hat from MomAdvice.com.

I love that these Princess Leia braids are not knitted. In fact, all we are doing is gathering yarn and braiding it like hair. I used a clipboard to clip the my hair to the top so that I could get nice and even braids.

Although the pattern says to measure these at 36″ long, I will admit that I am terrible measurer. If you are terrible like me, be sure to make both the braids and then trim them to be approximately the same length, otherwise Princess Leia is going to look a little lopsided!

Once I had the braid all gathered up, I trimmed all those loose pieces down and then secured it to the hat. These braids double as delightful little ear warmers.

Knitted Princess Leia Hat from MomAdvice.com. Knitted Princess Leia Hat from MomAdvice.com. Knitted Princess Leia Hat from MomAdvice.com. Knitted Princess Leia Hat from MomAdvice.com.

The pattern gives you the options to make it for a Preemie all the way up to an Adult. I admit, after I made this tiny hat, I felt the impulse to make one for myself. I mean, who doesn’t dream of being Princess Leia?

With this large amount of yarn, I can easily make three to four hats for less than $4! Score!

Thank you to Fiber Flux… Adventures in Stitching for sharing her pattern with the Ravelry community! Be sure to friend me over there- I love sharing & seeing your projects!

Grab the Pattern HERE.

walmart_mom_disclaimer

Pin It