Archive for the ‘Blogging’ Category

Roasted Garlic Hummus

Monday, April 20th, 2015

Roasted Garlic Hummus from MomAdvice.com

*This post is sponsored by Wild Oats.  Thank you for supporting the companies that support this site!

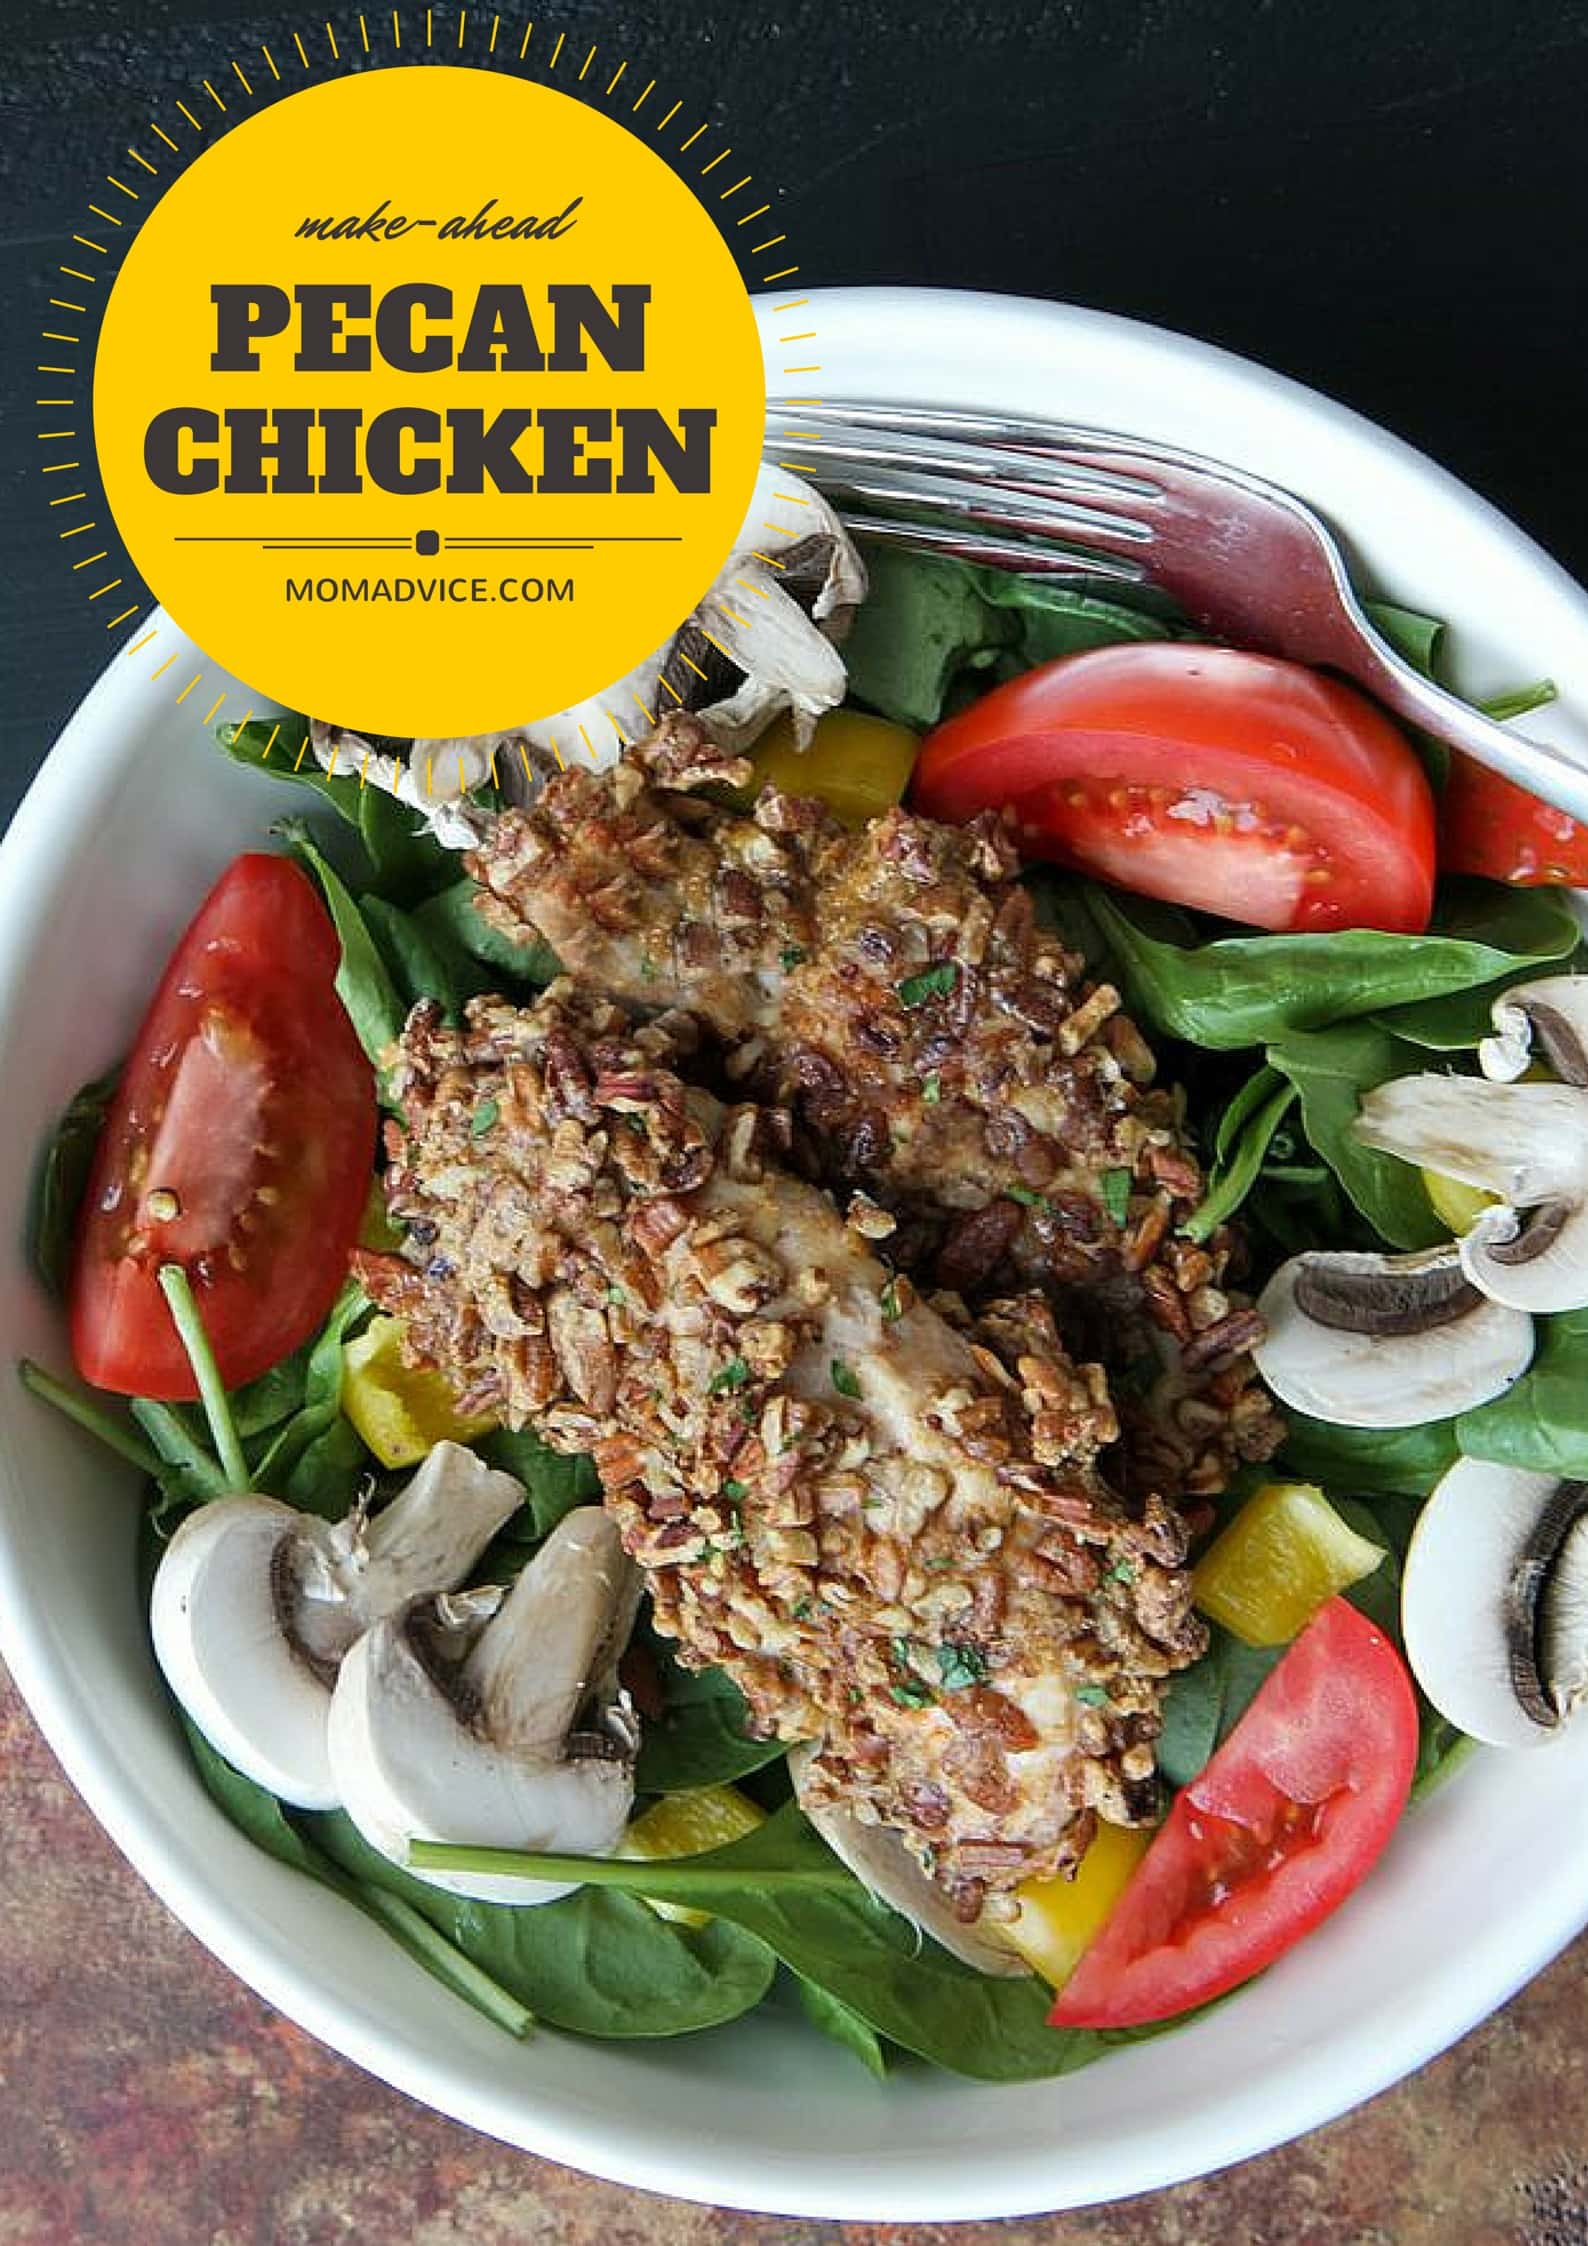
I am so excited to be joining in as a contributor with Wild Oats this year and to get the opportunity to share with you about this company as an affordable organic offering at Walmart stores. I will be sharing ideas each month over on their blog as well as sharing a monthly offering here showcasing a fresh dish that you can create in your own kitchen that is delicious and gluten-free! Be sure to check out my first post on their blog sharing my delicious Baked Pecan Chicken Tenders recipe that is my new favorite salad topper.

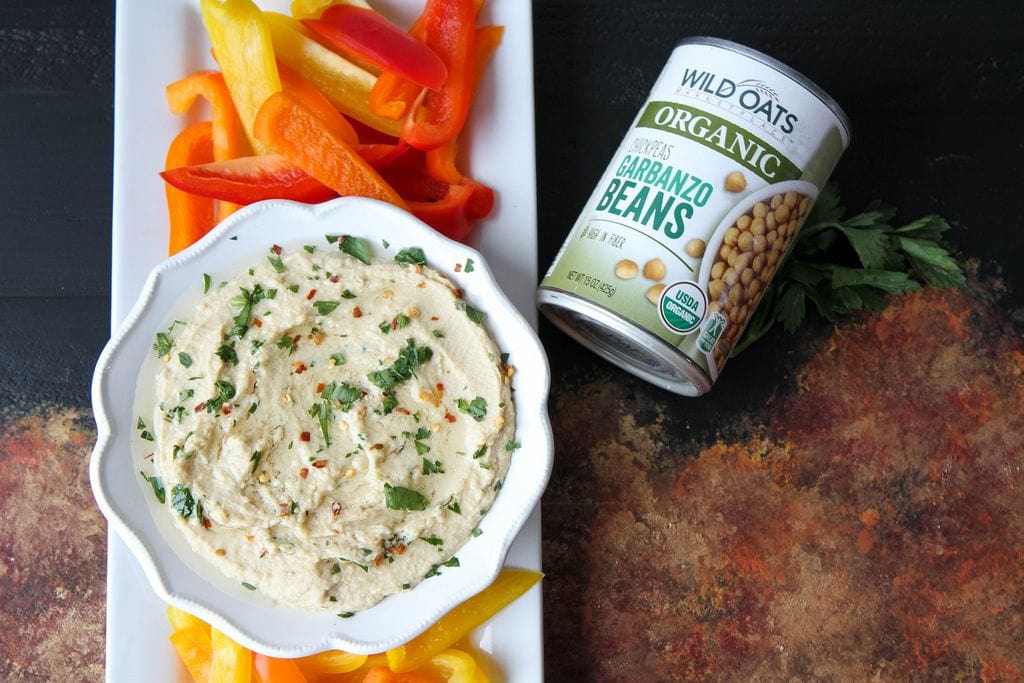
I am sure everyone has a bucket list of things they would love to learn to create in their kitchen. Hummus has been one of those things that I usually buy pre-packaged that I have always thought to myself, “I bet you could make that…and cheaper too!” Inspired by the Wild Oats Chickpeas on my store shelves, I knew that this was a sign that I should attempt this dish in my kitchen.

Roasted Garlic Hummus from MomAdvice.com

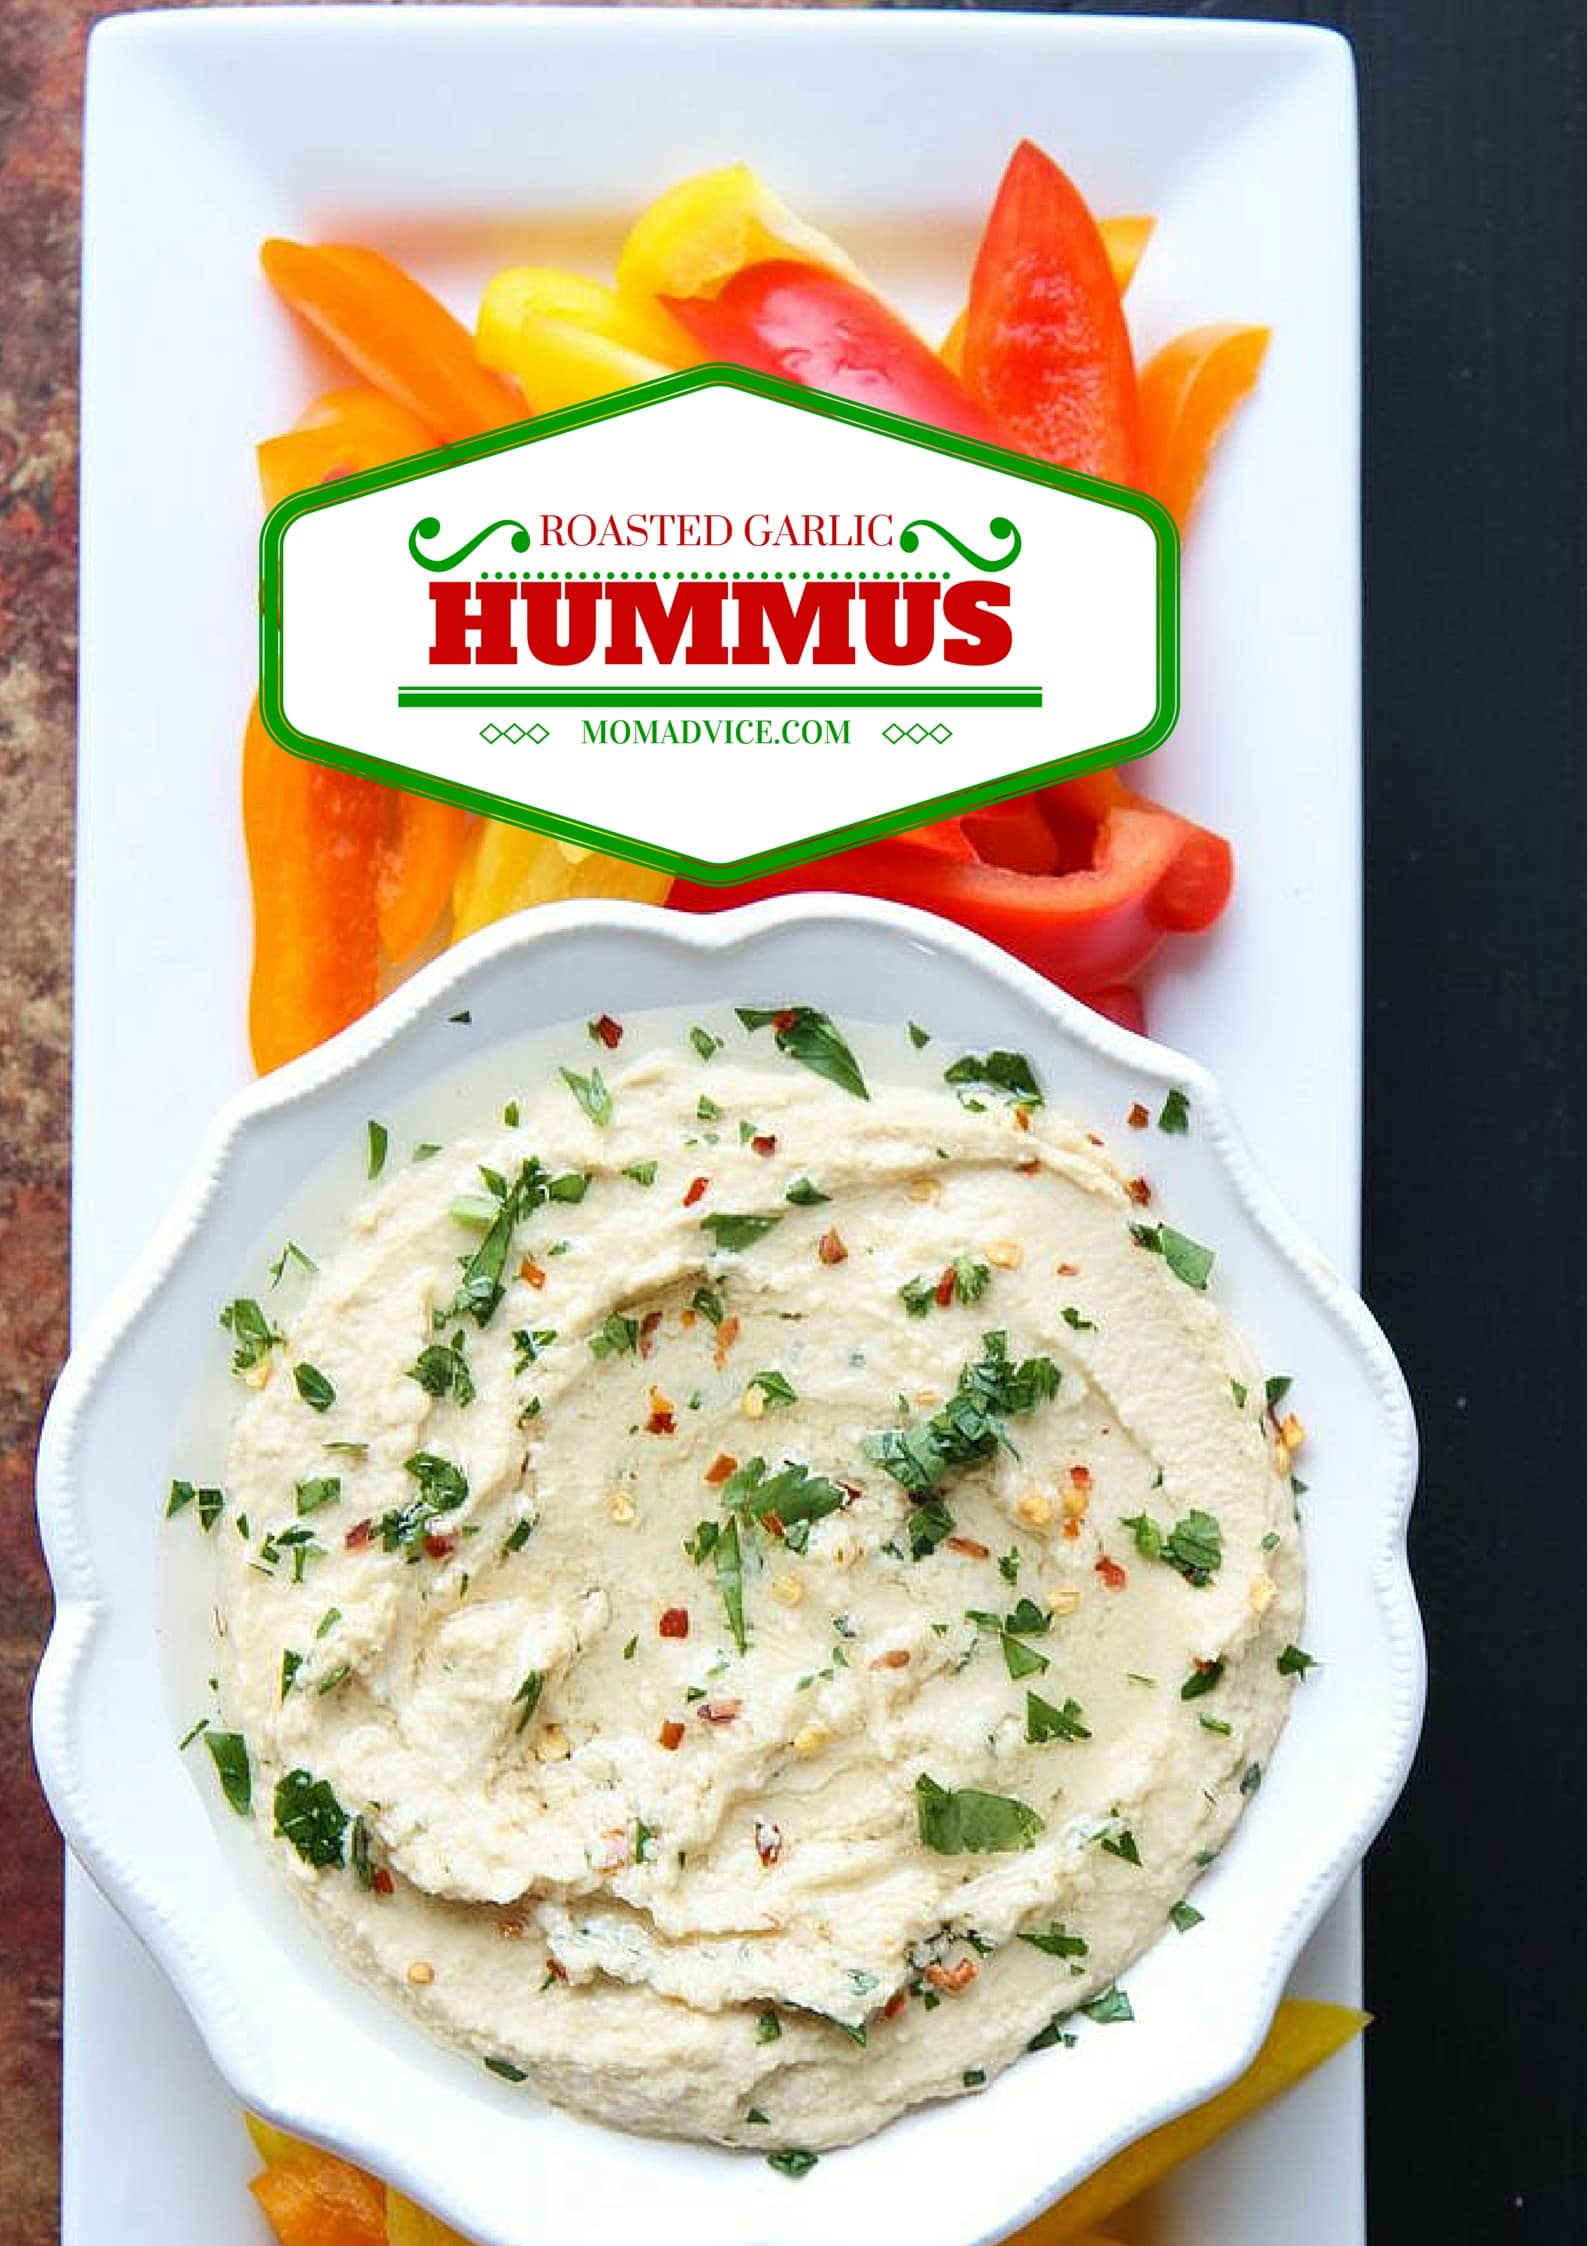
Making homemade hummus is so ridiculously easy that I am embarrassed it took me years to finally attempt this in my kitchen. Hummus can be made in a variety of flavors, but one of the flavors I love the most is the garlic hummus. To take this pantry staple to another level though, I roasted it in my oven with a little olive oil to create a deeper, richer flavor. Once the garlic is roasted, it is just a matter of whirling these chickpeas in your food processor along with spices, tahini, lemon juice, and a little water until you get the consistency you are after.

Where the heck is tahini in the grocery aisle? Good question (says the girl who visited many aisles where tahini was not). It is typically in the international foods aisles of stores or can be found at international markets, but can also be found in weird and random places like next to the olives in you standard grocery store.  Really, ask your grocer if you aren’t sure and don’t let a little thing like I don’t know how to say tahini or I don’t know what tahini looks like stop you from making this amazing dish. The best part is how long tahini lasts in your fridge so you can buy this and enjoy hummus all summer long. And you will. Because once you try this recipe, you will realize that homemade hummus really IS the best hummus to eat and you will be stockpiling those cans of chickpeas so you can enjoy this easy appetizer anytime you get the craving for it. Amen.

Roasted Garlic Hummus from MomAdvice.com

Roasted Garlic Hummus
Cuisine: Side
Author: Adapted from Cooking Classy
Prep time:
Cook time:
Total time:
Serves: 4
Once you try homemade hummus, you will never go back. Make this easy dish with canned chickpeas from Wild Oats.
Ingredients
  • 1 large head garlic
  • 2 1/2 Tbsp olive oil, divided
  • 1 (15 oz) can Wild Oats chickpeas, drained
  • 3 Tbsp fresh lemon juice
  • 3 Tbsp tahini
  • 1/2 tsp salt, or to taste
  • 1/4 tsp ground cumin
  • 2 – 3 Tbsp water
  • Chopped fresh parsley and red pepper flakes, for garnish
Instructions
  1. Preheat oven to 400 degrees. Cut about 1/4-inch from top of garlic to expose tops of cloves for roasting.
  2. Place garlic head on a sheet of foil and drizzle 1 1/2 tsp olive oil evenly over top of garlic. Wrap foil up around garlic and roast 35 – 45 minutes until golden brown on a cookie sheet. Remove from oven and allow to cool.
  3. To your food processor add chick peas, lemon juice, tahini, salt and cumin then pulse mixture 2 minutes. Scrape down sides and bottom of food processor, add remaining 2 Tbsp olive oil, set aside 3 – 4 cloves of the garlic and add remaining (about 10 – 11) to food processor. Pulse 1 minute, then add water and pulse 1-2 minutes longer.
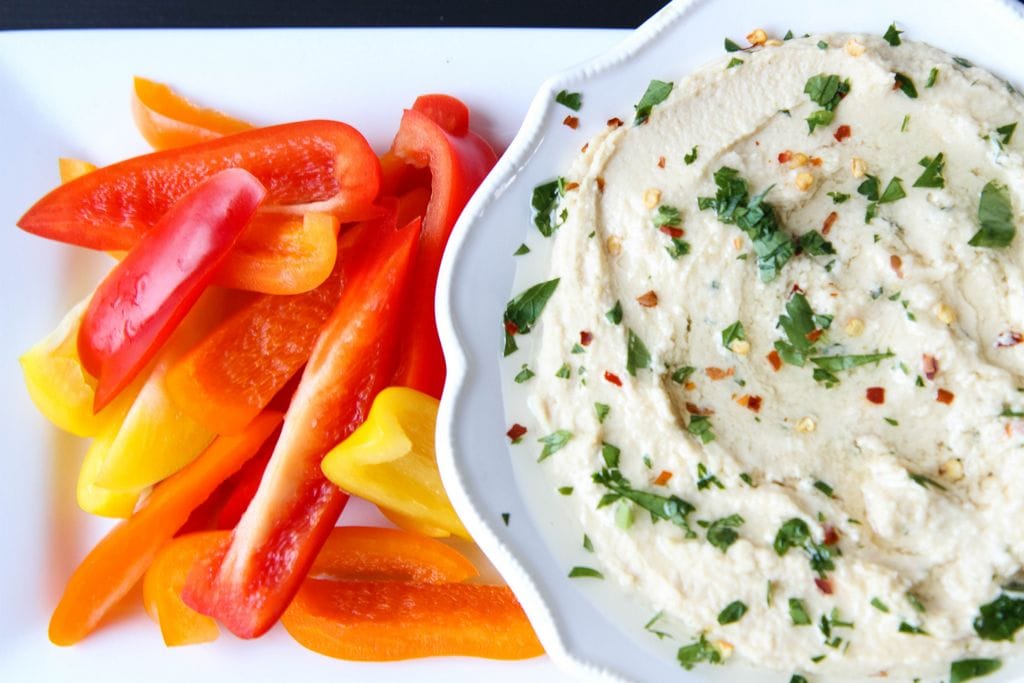
  4. Plate hummus, make indentation in center and add 1 – 2 Tbsp more olive oil to taste (optional), then chop remaining roasted garlic cloves and sprinkle over top, sprinkle with parsley and red pepper flakes.
  5. Serve with fresh veggies or gluten-free crackers. Store in refrigerator in an airtight container.

Slightly adapted from Cooking Classy 

What is one dish that has been on your cooking bucket list? Anything you have tried with success that you were surprised about! Feel free to share here!

*This post is sponsored by Wild Oats.  Thank you for supporting the companies that support this site!


Pin It

DIY Lampshade Ideas

Tuesday, April 14th, 2015

DIY Lampshade Ideas from MomAdvice.com

One of the quickest ways to update a room is to spruce up a lamp in your home and today I wanted to show you some easy and affordable ways to transform a lampshade from Goodwill.

I love these ideas so much, in fact, that I have plans to add a new lamp or two to our space now for Spring!

I hope you will be as inspired as I am by these bloggers and their incredible lampshade makeovers.


Add a Fun Print With Leggings

You can find a pair of leggings in just about any pattern or color combination right now at just about any store.
Consider snagging a pair of inexpensive leggings and using this material to stretch over a lampshade in your house to add a trendy color or pattern to your home without a big financial commitment.

Add an Adorable Ping Pong Detail

I am a big fan of ping pong craft ideas and love this detail on a lampshade.

You can use fabric paints to match a room in your home and then glue on this three dimensional detail for a fun look for any game room.

Get the scoop on this DIY Ping Pong Lampshade from I Love to Create here.

Go Industrial

Your local thrift store is the perfect place to hunt for lampshades that have beautiful bones underneath their fabric exterior.
A simple removal of the fabric can create a beautiful industrial lampshade and the edition of an Edison bulb really completes the look on this easy DIY project.
Check out this industrial lampshade makeover on Bless’er House.

Add a Fabric Detail

If you aren’t a fan of the industrial look, but have a great lampshade base to work with, consider adding your own unique touches with scraps of fabric.
If you are a sewer, you may have a mystery bag of materials to work with to create this adorable scrappy fabric lampshade for a corner in your craft room like Pen’s Nook!

Add a Feminine Touch

Nothing says Spring like floral and that is why I love this fabric flower lampshade.
With simple fabric circles, glue, and a little shaping, this is the perfect craft to work on while binge-watching all of your favorite shows on television.
Since you are covering the entire lampshade in flowers, it can really breathe life into a lampshade that may have seen better days thanks to a camouflaging of rosettes.


Add a Unique Embroidered Touch

I love, love, love the look of embroidery and this DIY Constellation Lampshade from Martha Stewart is jaw-droppingly awesome.

I have been seeing constellation projects popping up on table runners and wall murals, but have fallen in love with this lampshade for my small home.

If you can’t find a navy lampshade for your project, consider covering it in navy leggings (as I showed you in our first project listed here) or hunt through the t-shirt section of a thrift shop for the perfect navy shirt to use!

What are some ways you have transformed a lampshade?

Feel free to leave a comment below!

We love hearing your ideas!


Don’t miss these other great ideas from MomAdvice.com:


Spice Up a Goodwill Lamp


How to Dye Your Jeans


DIY Roll-Up Puzzle Mat


9 Unique Ideas for Frugal Date Nights


Sign up for the MomAdvice newsletter


Pin It

Baked Pecan Chicken Tenders

Monday, April 13th, 2015

Pecan-Chicken-Tenders.Header

Looking for a fresh new idea for topping those summer salads? Today I am sharing an easy recipe for Baked Pecan Chicken Tenders that you can even make-ahead and freeze for your busy week over at the Wild Oats blog!

I’m so excited to be joining as a contributor at the Wild Oats blog this year to share fresh & fun dishes for busy families. I’m not sure if you have heard of the product line before, but it is the new organic line available at your local Walmart store. I agreed to the partnership because I know that organic food is important to many of you, but I also understand how difficult it can be to eat organic on a budget. It is the two things that our family struggles with too. When Wild Oats presented at a meeting that I attended for Walmart, their enthusiasm for their products and the pride they took in them was, frankly, contagious. When they reached out to me, I knew it would be a great partnership to encourage healthy eating.  I also think you will be pleased with the price point on these products when you browse the grocery aisles and I want to show you ways to use these affordable pantry staples in a new way you might not have thought of before!

I will be sharing an idea on their blog once a month and one idea on my blog! I hope you will love these recipe creations as much as I do. The bonus is that each of these dishes will also be gluten-free! Yay!

Now that you have heard why I am so excited about this, be sure to head over this delicious Baked Pecan Chicken Tenders recipe!


Pin It

The Ultimate DIY Bundle Flash Sale!

Monday, March 30th, 2015

*This Sale Has Ended!*

Remember this opportunity from last January to own an incredible DIY library, full of eBooks, eCourses, and bonuses? I’m happy to announce that for those of you who weren’t sure about it or who missed the buying window, the Ultimate Bundle team is bringing the DIY bundle back for a 2-day flash sale, today until Wednesday morning!

Crafts_HomeDecor_DIY Bundle

Why DIY? If you look at that bare wall in the living room or that blah tablecloth on the kitchen table and just wish you had a few hours to do something about them, I promise you will find inspiration in this bundle. If you browse through Pinterest and think to yourself that “one day” you’ll have a few more minutes to yourself so that you too can create something incredible, well you’re not alone – there’s a huge community of people out there who are feeling just as frustrated as you are!

This is where The Ultimate DIY Bundle comes in – a collection of carefully curated DIY and crafting eBooks and eCourses from the world’s leading authors and bloggers in the industry to help you quickly and easily get into (or back into) the creative projects you’ve been longing for.

Home-Garden_Holiday_eCourses-DIY Bundle

For the low price of just $34.95, you get access to a carefully curated library of over 69 eBooks and eCourses. And let me reassure you that this really is great value: the Ultimate Bundles team (who produced the resource) have spent MONTHS seeking out the most respected experts in the industry and asking them to contribute their premium-quality eBooks and eCourses. These really are the best of the best when it comes to DIY and crafting advice and information.

Topics in the bundle include:

  • Home decor
  • Furniture painting
  • Photography
  • Chalk pastels
  • Handmade gifts
  • Homemade skincare products
  • Cake decorating
  • Photography and photo-editing
  • Paint colors and interior design
  • …and a whole lot more (69 eBooks and eCourses in total) – to help you be inspired or get started with your next DIY or crafting project!

There’s no need to worry about information overload though: The Ultimate DIY Bundle comes with a complete guide to getting started, so that you can know exactly which resource to use for your specific crafting or DIY project and jump straight into it with confidence!

Hurry though! The Ultimate DIY Bundle will only be on sale for 2 daysfrom 9am EST on Monday, March 31 until 9am EST on Wednesday, April 1.

You can buy with complete confidence because you’re covered by the Ultimate Bundles 30-day money-back guarantee. That means you have a full 30 days to enjoy all the eBooks and eCourses in the bundle, and if you don’t think they provided enough value, you’ll get a full refund.

Not only that, but The Ultimate DIY Bundle comes with 4 awesome bonuses, worth over $150. That’s 4x the price of the bundle alone! So, don’t miss your chance to grab The Ultimate DIY Bundle, and get 69 incredible eBooks and eCourses for just $34.95. All you need to do is take action by 9am EST on Wednesday, April 1!

Disclosure: I have included affiliate links in this post. Read the fine print about this bundle and read the answers to frequently asked questions about the bundle.

Scrapbook_Photog_Sewing_Business-DIY Bundle

Mini Cannoli Cream Pastry Cups (For Annie the Movie)

Tuesday, March 17th, 2015

Mini Cannoli Cream Pastry Cups from MomAdvice.com

*This post is sponsored by Walmart. Thank you for supporting the companies that support this site!

It’s no secret that this girl loves musical theater and one of the productions I did in high school was ANNIE.  It was one of my favorite movies growing up and Carol Burnett was someone I hoped to model a theater career after. To say that the musical is special to me would be an understatement.  I think it is important to admit that I had low expectations for the new ANNIE movie.

How could anything ever live up to the original?

Imagine my surprise that this movie was as charming as the first.   This movie really DID deliver, even for an original Annie-lover,  and in honor of the film’s DVD release today, I wanted to share a special treat you can share while watching the movie!

If you haven’t seen the film yet, it really does honor the classic songs that we all love, but adds its own unique spin often involving fun sound effects, hand clapping, and a more hip hop beat to the music. There are original pieces that are worked into the music that really flow seamlessly into the original music and the film has been updated with current themes, while embracing the sweetness and wholesomeness of the original ANNIE.

Mini Cannoli Cream Pastry Cups from MomAdvice.com

In this film, Annie believes that she will be reunited with her parents,  at an Italian restaurant where they left a note on a receipt with the heart-shaped locket that any wears. Each Friday she visits the restaurant that serves the homemade cannoli that the couple shared on that night, waiting and hoping that they will finally come to retrieve her.  As she sits upon the curb, the owner comes out and tells her that they haven’t come and hands her a little to-go box of cannolis to take home. It is a ritual that is repeated in the movie and a truly sweet scene.

Mini Cannoli Cream Pastry Cups from MomAdvice.com

Mini Cannoli Cream Pastry Cups from MomAdvice.com

In honor of this moment in the film, I am sharing a fun recipe that you can make with a prepared pie crust and a homemade cannoli filling that is perfect to share while watching the film together.  This would also make an adorable treat for a birthday party or as a party favor in little to-go boxes tied with butcher twine.

I’d like to say a huge thank you to Bowl of Pho today for providing the to-go box and note to make this pretty photo for my cannoli display.  If you are a local, it’s a must in our town to head there and get a bowl-as-big-as-your-head of chicken noodle soup.

Mini Cannoli Cream Pastry Cups from MomAdvice.com

Walmart is sharing this adorable exclusive DVD set that comes with a mini plush Sandy that would be a perfect little Easter treat to share with your Annie-lover this year. The price on this set is $29.96. Wouldn’t this be the sweetest gift? Sandy even made it out of for show-and-share this week!

I hope you enjoy this sweet treat and can pick up this film! I guarantee that it is one that the whole family will love!

Mini Cannoli Cream Pastry Cups (For Annie the Movie)
Prep time:
Cook time:
Total time:
Serves: 48 servings
A sweet treat to share while watching Annie! These can be made gluten-free with a simple substitution of a gluten-free pie crust!
Ingredients
  • 1 container (15 oz) whole-milk ricotta cheese
  • 1/2 cup powdered sugar
  • 2 tablespoons granulated sugar
  • 1/2 teaspoon vanilla
  • 1 box refrigerated pie crusts, softened as directed on box (you can also substitute with gluten free pie crust)
  • 3 tablespoons turbinado sugar (raw sugar)
  • 1 teaspoon ground cinnamon
  • 1/4 cup miniature semisweet chocolate chips
  • Additional powdered sugar
Instructions
  1. In large bowl, beat all filling ingredients with electric mixer on medium speed until creamy. Place filling in 1-gallon resealable food-storage plastic bag; refrigerate while making cups.
  2. Heat oven to 425°F. On lightly floured work surface, unroll pie crusts. Sprinkle each crust with turbinado sugar and cinnamon. Lightly roll rolling pin over sugar and cinnamon to press into pastry. With 2 1/2- to 3-inch round cutter, cut out pastry rounds. Lightly press each pastry round into ungreased mini muffin cup.
  3. Bake about 10 minutes or until pastry cups are golden brown. Cool completely in pans, about 15 minutes. Remove from muffin cups to cooling racks.
  4. Just before serving, remove filling from refrigerator. Cut 1 bottom corner off bag; pipe scant tablespoon filling into cooled pastry cups. Sprinkle with chocolate chips and powdered sugar. Serve immediately. Store any remaining pastry cups at room temperature and filling in refrigerator.
Source: Pillsbury
walmart_mom_disclaimer


Pin It

7 Fresh Furniture Painting Ideas

Tuesday, March 17th, 2015

7 Fresh Furniture Painting Ideas from MomAdvice.com

I am a big fan of painting furniture and when the Spring temperature arrive, I start dreaming of all the pieces I can redo.

Does anyone else refer to Spring as spray paint season?

Maybe that’s just me.

Today I wanted to share some ways that you can add a fresh new look on a furniture piece from your favorite thrift store.

Often when we see pieces, we can’t see the true potential in them if they are dated, mismatched, or distressed.

It can be challenging to look at each piece as something full of possibilities.

Here are some great ways to bring tired furniture to life, to create the optical illusion of sets of furniture, and some really great new ways I have found to experiment with new painting techniques.

Over the years I have painted more pieces of furniture than I ever dreamed I would.

In fact, if you come to my house on any given day, I am sure you will find something being painted at our house.

Paint is such an inexpensive way to add new life to furniture!


Just to illustrate my point, above are two pieces that I just did for our bedroom.
I loved the bones of these dressers, but hated the light pine color.
I painted these white, slightly distressed them, spray painted the hardware, and and then sealed them.
Isn’t it amazing how even a simple can of white paint can do so much for an old piece?

Create a Set with Paint

When you visit the store you may find that you can only find one or two of an item which can be a challenge when you are looking for multiples of something, like seating.

Consider painting all of the items in one color to create the illusion of a set that is both unique and whimsical.

I love this set of beautiful yellow chairs that were showcased on A Beautiful Mess as a perfect example of mismatched fun brought cohesively together with one paint color.


Try Painting Upholstery

Did you know that you can even paint an upholstered chair with fabric paint?

Over on Pinterest Addict you can see how Tulip Spray Paint can transform an upholstered chair.

Although this project cost $35 in supplies, the cost is far less than it would be to have the chair reupholstered and you can update the arms and legs of the chair with a couple of coats of fresh & shiny paint.

I absolutely love this fabulous teal chair and wish I could put it in my house!


Dip Them in Metallics

If there is one trend I am really loving it is the mix of metallics and the effect of paint dipped legs on chairs and tables.

Honeybear Lane shows how she combined these two trends and refreshed a pair of tired barstools into a thing of beauty with a bright raspberry paint & beautiful gold spray paint.

Those before pictures really show how much paint can bring an old or dated piece to life.

Try Stripping Your Furniture

Stripping furniture can be a time-consuming process, but worth it if you want that beautiful natural wood to pull through on a design.

Liz Marie shows off a beautiful piece (you must peek at her before pictures) that she wanted to create by painting just the outline of the dresser and leaving those drawers in their natural wood state.

The deep rich stain makes this a very show worthy piece!

Add an Embossed Detail

Stenciling is back and better than ever with modern and edgy designs.

Embossing is a technique that I have tried with paper crafts, but never knew that you could do the same thing on a piece of furniture.

As Tiny Sidekick illustrates in her embossing furniture tutorial, the trick is to keep moving that heat to help keep the paint job underneath intact.

I am so inspired by this that I can’t wait to give it a try in our house!


Try A Fresh Coat of Spray Paint

Spray painting furniture can be intimidating, but it doesn’t have to be.

The nice thing about spray paint is the quick coverage you can do with it and the distressing that can be done after so that you don’t have a one-dimensional finish.

I experimented with spray paint and a dark stain on a side table and loved the results. With a little distressing, no one would ever guess how you painted it.

Refresh Restyle shows you how to apply paint with a sprayer and then adds a little distressing to her dining chairs.

The speed of this project really appeals to me!


See the Potential in Everything

Sometimes it is hard to see the potential in pieces and we give them away or pass on them when we see them in the store.
This beautiful mid century modern dresser on Sunflower Hugs showcases a piece that had been kicked to the curb that she was able to make brand new again with a little paint and hardware updating.
Now this looks like a piece that you purchase from the West Elm catalog with just a little elbow-grease and a vision for what to do with something no one else wanted.
Love these paint ideas? Check out these other MomAdvice furniture projects:

How to Spray Paint Furniture


How to Paint a Kitchen Table

How To Paint a Kitchen Table


How to Paint a Laminate Fireplace

I hope that this article inspires you to start hunting for new pieces for your space and that you can begin seeing the potential in things you have never noticed before!

For more inspiration, sign up for the MomAdvice.com newsletter!

Pin It

Easter Surprise Peeps Cupcakes

Sunday, March 15th, 2015

Easter Surprise Peeps Cupcakes from MomAdvice.com

*This post is sponsored by Walmart. Thank you for supporting the companies that support this site!

Easter is one of my favorite holidays and I love crafting, decorating, and especially the eating for this holiday.  Longtime readers know that I have a love affair with Peeps that have included a wreath made out of Peeps and I have even found a way to make Peep Martinis that taste divine.  Let’s just continue the mad love affair with Peeps and make a hilarious Easter surprise cupcake for your kids!

Supplies:

1 box gluten-free cake yellow cake mix
Water, vegetable oil and eggs called for on cake mix box
1 cup assorted mini candy-coated chocolate candies, jimmies or confetti candy sprinkles
¾ cup sugar
1 teaspoon vanilla extract
¼ cup boiling water
¼ teaspoon cream of tartar
3 unbeaten egg whites
12 Peeps (any color)
Melon Baller

Easter Surprise Peeps Cupcakes from MomAdvice.com


Directions

Heat oven to 350°F (325°F for dark or nonstick pans). Place paper baking cup in each of 12 regular-size muffin tins.

Make cake batter as directed on box. Divide batter evenly among muffin cups (about two-thirds full). Bake as directed on box for cupcakes. Cool in pans 10 minutes; remove from pans to cooling rack. Cool completely, about 30 minutes.

Using melon baller, scoop out center of each cupcake, about 1 inch deep. Fill each with 1 heaping teaspoonful candies.

Mix sugar, cream of tartar, vanilla and egg whites in your stand mixer bowl. Add boiling water. Beat on high until the mixture forms peaks, which should be just about seven minutes. Spoon or pipe frosting on top of the cupcaks and finish with sprinkles and a Peep on top.

Easter Surprise Peeps Cupcakes from MomAdvice.com

Easter Surprise Peeps Cupcakes from MomAdvice.com

easter-surprise-peep-cupcakes-17

Don’t you hate it when your Peeps lay their eggs in your cupcakes? Ha! What a funny surprise for you kids and a fun food craft to do together as a family! I hope you love this idea and remember that you can pick up all the supplies at your local Walmart store! Happy Easter, everyone!

Easter Surprise Peeps Cupcakes
Prep time:
Cook time:
Total time:
Serves: 12
A fun Easter surprise cupcake that you just so happens to be gluten-free. Fill it with your favorite egg candy and top with a marshmallow Peep!
Ingredients
  • 1 box gluten-free cake yellow cake mix
  • Water, vegetable oil and eggs called for on cake mix box
  • 1 cup assorted mini candy-coated chocolate candies, jimmies or confetti candy sprinkles
  • ¾ cup sugar
  • 1 teaspoon vanilla extract
  • ¼ cup boiling water
  • ¼ teaspoon cream of tartar
  • 3 unbeaten egg whites
  • 12 Peeps (any color)
  • Melon Baller
Instructions
  1. Heat oven to 350°F (325°F for dark or nonstick pans). Place paper baking cup in each of 12 regular-size muffin tins.
  2. Make cake batter as directed on box. Divide batter evenly among muffin cups (about two-thirds full). Bake as directed on box for cupcakes. Cool in pans 10 minutes; remove from pans to cooling rack. Cool completely, about 30 minutes.
  3. Using melon baller, scoop out center of each cupcake, about 1 inch deep. Fill each with 1 heaping teaspoonful candies.
  4. Mix sugar, cream of tartar, vanilla and egg whites in your stand mixer bowl. Add boiling water. Beat on high until the mixture forms peaks, which should be just about seven minutes. Spoon or pipe frosting on top of the cupcakes and finish with sprinkles and a Peep on top.
Recipe adapted from tablespoon
walmart_mom_disclaimer
Pin It

Our Bathroom Makeover Reveal

Monday, March 9th, 2015

Bathroom Makeover Reveal from MomAdvice.com.

This post is sponsored on behalf of BHG at Walmart.

Spring is in the air and with it comes my urge to continue creating a beautiful space in our home that we will love for many years. Today I wanted to show off a space that we recently renovated and how we brought our ideas to life  in this space.  As part of the BHG Live Better Network, I am partnering with them this month to showcase how you can add a new color into your home utilizing the products from BHG that are available at Walmart.  For me, the color that we are working to add into our home happens to be gray and so this month’s feature is all about that beautiful hue and how I was able to accessorize my new space with their help. Before we accessorize though, let’s take a look at some before and after pictures of our space.

Bathroom Makeover Reveal from MomAdvice.com.

Bathroom Makeover Reveal from MomAdvice.com.

Bathroom Makeover Reveal from MomAdvice.com.

Bathroom Makeover Reveal from MomAdvice.com.

Here are a few before pictures of our basement bathroom that we planned to renovate. This was actually the first room that we did ourselves when we moved into our home eleven years ago. When we purchased the home the original room actually had about four layers of wallpaper on it that we attempted to remove and then discovered mildew had been residing between the layers making all of that drywall unusable. The previous owners had used it as a laundry room,  but it lacked the ventilation needed to keep mildew at bay. We had one of my husband’s uncles and his father help us rip all of the walls and put in new ones which was a really big job for these newbie homeowners. We were on a tight budget so we added sticky tile flooring and my husband added this wainscoting detail on the wall with a ledge. With a coat of paint, we were satisfied with this space.

As our kids get older (and the sticky tiles began to shift beneath our feet), I started dreaming about how we could transform this half bath into a full bath so that we could have two showers in our home instead of one. I have never had two showers in one space in my entire existence so entertaining this idea was, seriously, exciting for me. I began to put together my vision boards for this space. After all, if we can turn our old storage shed into the bonus room of my dreams, why couldn’t we do the same in this little space? If there is one thing I have learned about renovating our tri-level home, it is that every corner must be looked at with potential. Why shouldn’t this empty bathroom corner become a fully functional shower for our family?

My inspiration came from this photo on Houzz. After putting together a million idea for my husband, we sat down one night and both agreed that this is the style of the bathroom we wanted. The best part was that the Hilton Head Island Architects & Building Designers took the time to answer everyone’s questions about the materials that were used in this room. I jotted down some notes and took these ideas to All Pro Renovations to see if we could make something like this happen in our space.
Bathroom Makeover Reveal from MomAdvice.com.


Here were the original ideas that I wanted for this space. You will see that I rethought some of this (even frantic texts as close to midnight on the paint color). The initial ideas though of a ceiling with a 1×8 v-groove pine with fresh trim were painted in Benjamin Moore White Dove, the standard (3×6) subway tile on the walls, additional lighting was added, and the standard hex tile with a gray grout all ended up being implemented in our space.

To save on cost, we ended up just using a shower purchased from our local hardware store, ditched the sconce lighting (since we added additional lighting in our fan), and gave up the idea of raising the ceiling since it was going to be another $1,500 or so just to reroute some of the heating & ventilation that were all funneling through this room.

In an effort to interject a little color, I ended up painting the walls in Benjamin Moore Gray Owl which kept things fresh and modern, without looking unfinished or the fear of a dirty white walls and white flooring/tile.


Bathroom Makeover Reveal from MomAdvice.com.

Bathroom Makeover Reveal from MomAdvice.com.

Bathroom Makeover Reveal from MomAdvice.com.

Can you believe this corner was just sitting there unused and now houses a pretty generous stand-up shower? Although we had talked about making this a custom unit, I am so happy with this unit we purchased that was all ready to go from our hardware store.


Bathroom Makeover Reveal from MomAdvice.com.

Bathroom Makeover Reveal from MomAdvice.com.

Bathroom Makeover Reveal from MomAdvice.com.

Bathroom Makeover Reveal from MomAdvice.com.

Bathroom Makeover Reveal from MomAdvice.com.

How gorgeous is this new space? Would you ever guess that this is in the lower level of our home? Although the ceiling is slightly lower with the addition of the pine planks, you really don’t feel closed in due to the lines of the boards and the fresh white paint. We left our existing fixtures and lighting in, but did add a light that looked almost identical to our original that added a fan in the space. We had a medicine cabinet installed that helped add additional storage and also provided extra mirrors for getting ready in the morning.

Bathroom Makeover Reveal from MomAdvice.com.

Bathroom Makeover Reveal from MomAdvice.com.

Bathroom Makeover Reveal from MomAdvice.com.

Bathroom Makeover Reveal from MomAdvice.com.

Bathroom Makeover Reveal from MomAdvice.com.

To add more pops of gray and to organize our space, I headed to Walmart to snag some new additions to the space. These included some beautiful plush towels in gray flannel,  some modern chevron print towels for our hand towels,  new jars to organize the odds & ends in our storage unit, and the perfect cushy chevron bath mat for our feet. This brought more of the gray in and added those modern touches that I wanted for our space.

Bathroom Makeover Reveal from MomAdvice.com.

I’m so proud of our new space and love the fresh new colors that we are bringing in to our home! Thank you to All Pro Renovations for the beautiful workmanship they did in this space!


In accordance with the FTC Guidelines, I am disclosing that I received compensation from BHG at Walmart for my time and participation in the BHG Live Better Network. Although we have material connection to BHG, any publicly stated opinions of BHG and their products remain my own.


How to Make Chocolate Coffee Spoons

Monday, March 2nd, 2015

How to Make Chocolate Coffee Spoons from MomAdvice.com

Tracking Pixel

This is a sponsored post written by me on behalf of ALDI.

Today I wanted to share an adorable gift idea for someone special in your life. Today’s tutorial is how to make beautiful chocolate coffee spoons that you can pair with a big basket of coffee for gift-giving. This gift is perfect for any occasion and can be made in less than 30 minutes. The inspiration for this project came along with the opportunity to try the new Barissimo line of premium coffee products that are available at your local ALDI store.  I’m so excited to be partnering with them again on this project.

In case you missed my Maple Coffee Bacon post from last week, I had the opportunity to try out all of the new coffees from ALDI and create some fun projects using this newly launched line at their store.

This line features nine bagged and single serve coffee items, along with additional seasonal and Special Buy items that will be available for a limited time. Pictured below are a few of the ones that I found on my store shelves this month.

How to Make Chocolate Coffee Spoons from MomAdvice.com

Nothing pictured here is over $5 (even the Fair Trade coffee) which means it is quite the steal. In the past, I have relied on these bags of coffee for easy hostess gifts and breakfast baskets for new homeowners. It is an excellent gift to give especially to a tired new mom or a new college student.  I thought it would be fun to dress these baskets up a bit with beautiful chocolate coffee covered spoons that you could package in your basket.

Let’s get started!

How to Make Chocolate Coffee Spoons from MomAdvice.com

Supplies Needed

1 bag Baker’s Corner Real Semi-Sweet Chocolate Baking Morsels

1 bag Baker’s Corner Milk Chocolate Baking Morsels

1 cup Baker’s Corner White Chocolate Baking Morsels

½ teaspoon Carlini Pure Vegetable Shortening (or more, if needed)

Edible sprinkles of your choice

Ribbon

Pastry/candy decorating bags

Candy wrappers

Antique spoons or plastic spoons (I got these six for $5 an antique store)

*Some of these items are Special Buy or Seasonal items that are only in stores for a limited time and may no longer be available.

How to Make Chocolate Coffee Spoons from MomAdvice.com

Directions

  1. Melt your semi-sweet chocolate chips (the whole bag) over a steam bath or in microwave. Melt chocolate slowing, stirring frequently. If chocolate clumps or doesn’t melt smoothly, add 1/2 teaspoon of shortening to help smooth it out.
  2. Dip your spoons into the chocolate and then rest them on a cookie sheet covered with parchment paper.


How to Make Chocolate Coffee Spoons from MomAdvice.com 3. Decorate with your choice of milk chocolate, white chocolate and/or various garnishes. Drizzle with melted white chocolate (using my pastry bag) and then shake on some edible pearls so they would stick. Let these set completely before placing into decorative bags and tying with beautiful ribbon.

How to Make Chocolate Coffee Spoons from MomAdvice.com

How to Make Chocolate Coffee Spoons from MomAdvice.com

We placed these beauties into a basket with a variety of our favorite Barissimo coffees, exclusively from ALDI. A pretty dishtowel on bottom pulls it all together and acts as bonus gift.

These spoons add another level of richness to your coffee giving you a rich chocolate flavor. These also would make a fun addition to your cocoa.

I hope you enjoyed our fun series with ALDI this month and that these ideas have inspired you to give their new coffee line-up a try! I promise that you won’t be disappointed, not just in the incredible taste, but the incredible amount of savings to be had for your family!

This is a sponsored post written by me on behalf of ALDI.

Pin It

Maple Coffee Bacon Recipe & a NEW Coffee Line from ALDI!

Thursday, February 26th, 2015

Maple Coffee Bacon Recipe
Tracking Pixel
This is a sponsored post written by me on behalf of ALDI.

If there is one thing I have learned over my years of surfing on Pinterest it’s that anything bacon and anything coffee is always a hit (and not just with me!).

Today I wanted to pair these two flavors together in a Maple Coffee Bacon that your whole family will love. The inspiration for this project came along with the opportunity to try the new Barissimo line of premium coffee products that are available at your local ALDI store.

Since you know I am a regular shopper, I had noticed the new line on the store shelves and was intrigued. The packaging is beautiful and the product feels very high-end, but a whole bag of ground coffee is a mere $3.99.  It is, seriously, a steal!

This line features nine bagged and single serve coffee items, along with additional seasonal and Special Buy items that will be available for a limited time. Pictured below are a few of the ones that I found on my store shelves this week.

Barrisimo Coffee Line from Aldi

The Barissimo line, available exclusively at ALDI, includes the following (and here are the prices on these items too) for my fellow frugal shoppers:

Ready-to-drink Iced Coffees (French Vanilla, Mocha and Coffee) – $1.19

Whole Bean Coffee (Morning Roast and Donut Store) – $3.99

Fair Trade Coffee (Medium and Dark Roast) – $3.99

Donut Store Ground Coffee – $3.99

12 oz. Bag Coffee (Breakfast Blend, House Blend, and French Roast) – $3.99

Assorted Flavored Coffee (French Vanilla and Hazelnut) – $4.99

Flavored Coffee Cups (French Vanilla and Hazelnut) – $4.79

Regular Roast Coffee Cups (Breakfast and Donut) – $4.79

Specialty Roast Coffee Cups (Fair Trade Colombian and Dark Roast) – $4.79

Maple Coffee Bacon Recipe

Maple Coffee Bacon Recipe

Ever since a trip last year to NOLA, I have been thinking about the embarrassing pile of praline bacon I ate in one of the local restaurants that my brother took me too. Bacon that tastes like candy? How could that be bad?

I loved the candied sweetness of the bacon, but I love to add on to that layer of flavor with something to cut the sweet and I decided the Fair Trade Dark Roast Coffee paired with the thick sliced Maple Flavored Bacon would be a delightful combination.

If you haven’t tried the coffee itself, the dark roast is delightfully full-bodied and strong.  It’s the kind of coffee that a mom who has to get her kids on the bus in the morning can really embrace.

As I had suspected, this delicious dark roast coffee was just what this sweet bacon needed to balance it out. The coarseness of the ground coffee adds an element of texture and the brown sugar glaze made from freshly brewed coffee and brown sugar is brushed on to each side of the bacon to create that delightful layering of flavors.

Maple Coffee Bacon Recipe

Since this bacon is so sweet, you don’t want to pair this one with another sweet breakfast item.  I recommend an easy frittata for balance, a little fresh fruit, and a big mug of coffee (of course!).

Now run over to your local ALDI and snag a bag of this delicious coffee for yourself- at a price like that, you have nothing to lose!

Maple Bacon Coffee Tutorial

Maple Coffee Bacon Recipe

Maple Bacon Coffee
Prep time:
Cook time:
Total time:
Serves: 10 servings
This is a sponsored post written by me on behalf of ALDI.
Ingredients
  • 1 pound Specially Selected Maple Thick Sliced Bacon
  • 1 tablespoon Barrisimo Fair Trade Dark Roast Ground Coffee
  • 1/2 cup packed Baker’s Corner Brown Sugar
  • 2 tablespoons freshly brewed Barrisimo Fair Trade Dark Roast Ground Coffee
  • Note- *Some of these items are Special Buy or Seasonal items that are only in stores for a limited time and may no longer be available.
Instructions
  1. Preheat oven to 375°. Line a rimmed baking pan with parchment or waxed paper and set a flat rack on top. Lay bacon strips on rack, overlapping slightly if needed. Sprinkle top of strips evenly with ground coffee. In a small bowl, combine brown sugar and brewed coffee, stirring just to blend to a paste. Brush top of strips with half of sugar mixture. Bake 15 minutes. Turn bacon over and brush with remaining sugar glaze. Bake until crispy, 10-15 minutes more.
Pin It