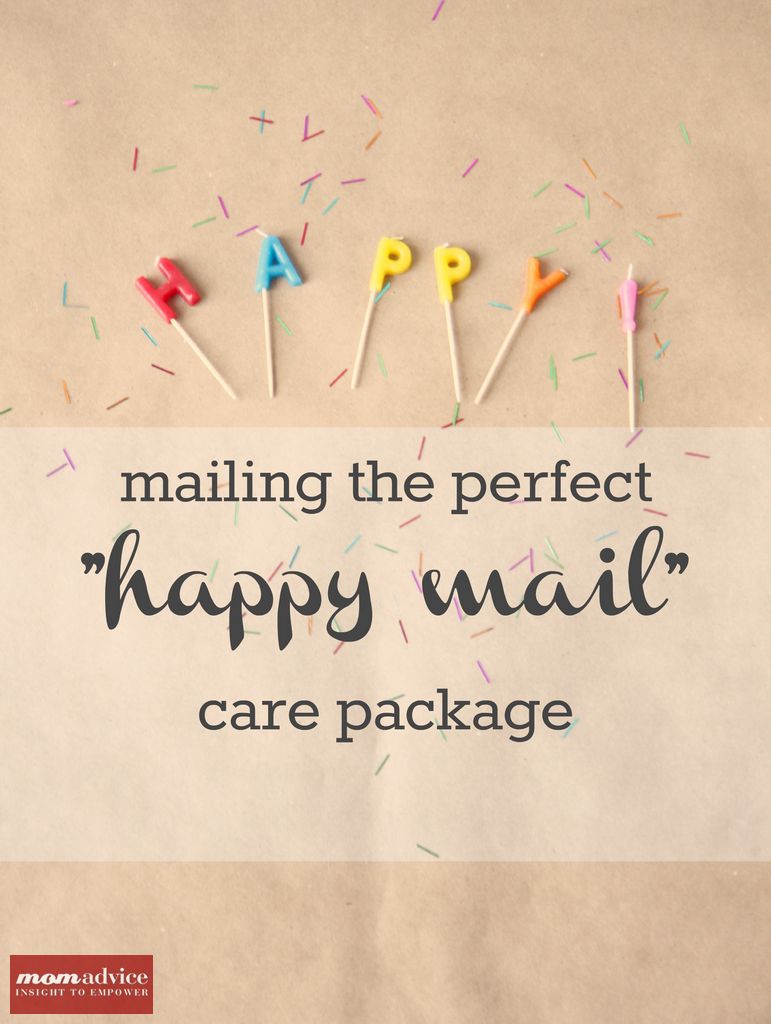
 Have you ever received or sent a care package? There is so much joy in the giving and the getting of unexpected mail anymore. Today I want to share how to mail the perfect happy mail care package.
We talk a lot about caring for others whether it is making care packages for the homeless, embracing the scraps of life giving philosophy, knitting chemo caps for others, or how we teach our children compassion and gratitude for what they have.
There are millions of ways to give and we try to live our lives in the “pay it forwardness” philosophy.

It is no secret that our family endured almost a year of unemployment and a mountain of credit card debt that came along with it. I often look back on that time in our lives and wonder how we ever did it.
How did we make that situation work?
How did our marriage survive it?
How did we manage to keep our home and our car?
Do you know someone that is struggling? Sometimes the littlest things can mean the most and today I wanted to show I wanted to share with you some ways you can make a difference in the life of someone who is undergoing financial struggle or unemployment.
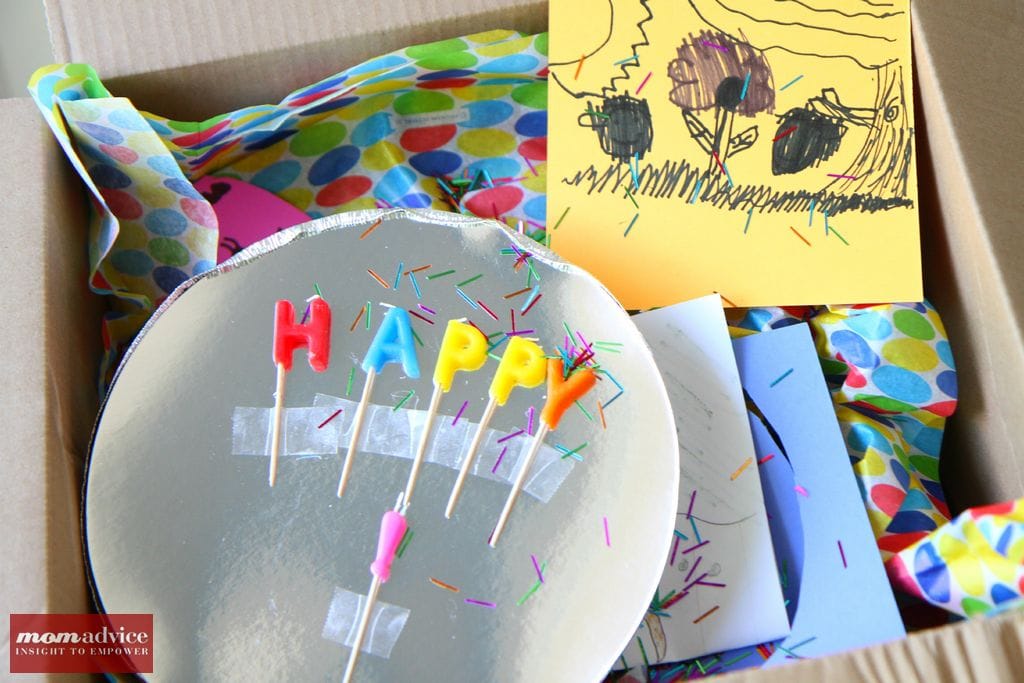
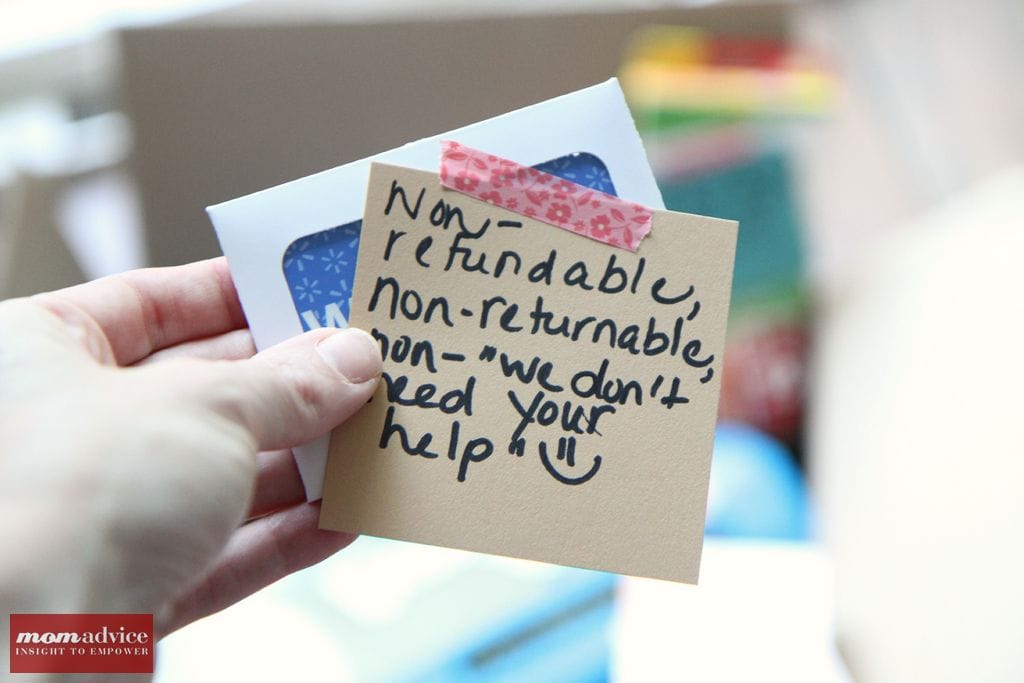
Walmart gave me the chance to showcase a project that I was passionate about and I wanted to think of a way we could bless someone else in our life. We decided to make the ultimate care package for someone we love and wanted to show you some ideas of things you could add to a care package for someone YOU love!
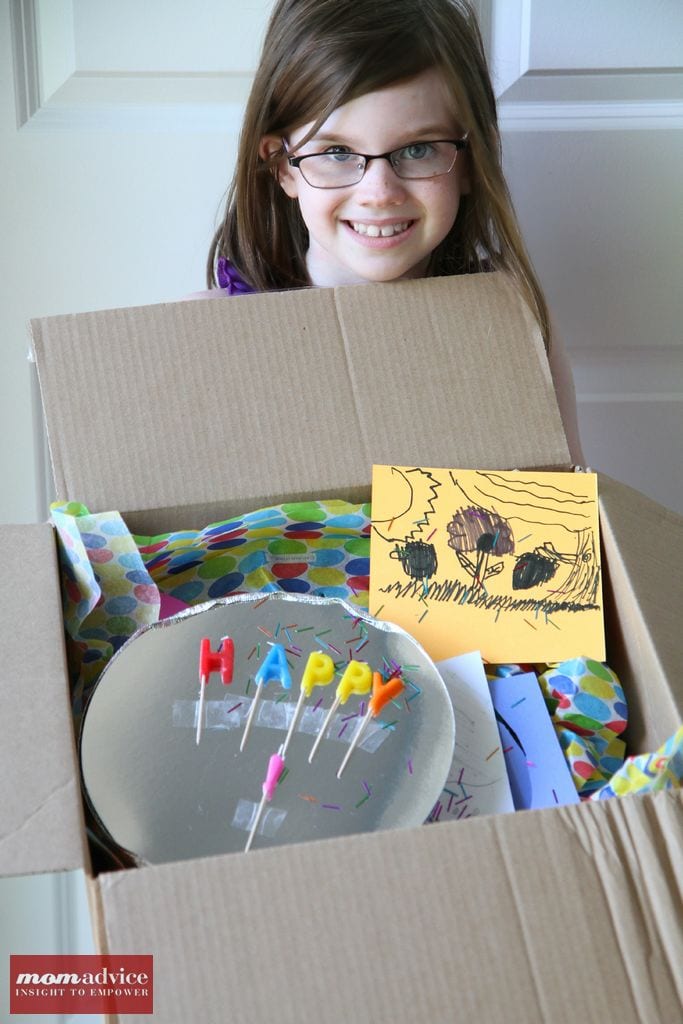
Pack Something Fun
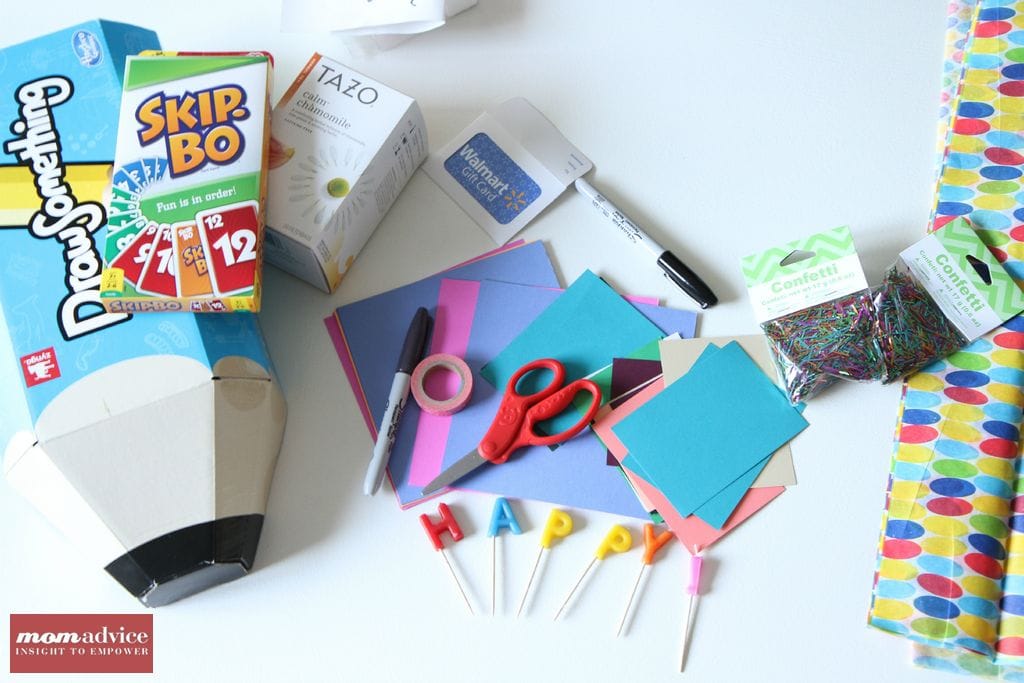
What fun would a care package be without a few fun things in them. When we were struggling financially, one of our our favorite things we would indulge in was board games in the evenings. Board games, puzzles, a gift card to Amazon or Netflix, or a month of Hulu could all be fun things to share in your care packages.
Make your gift even more fun with personal notes, pictures, party confetti, and fun tissue paper. I found birthday candles that spelled, “Happy,” to decorate the top of our gift. These fun additions really make it feel like a real present.

Pack Something Delicious
If there is one thing that I truly love to share, it is my passion for food. Food gifts are the ultimate in surprises and can be inexpensive to create. In this package, we mailed off my favorite Dark Chocolate & Sea Salt Brownies and paired it with some Tazo Chamomile Stress-Free tea.
Other fun food gifts that would be easy to mail are my Sugar & Spice Nut Mix, Honey Nut Granola, Peppermint Marshmallows, Oreo Biscotti, Hot Cocoa or Vanilla Chai Tea Mix, Snickerdoodle Biscotti, Monster Cookie Bars, Chocolate Chip Cookie Bars, Microwave Peanut Brittle, or Oatmeal Chocolate Chip Sea Salt Cookies…just for a few options to start with!
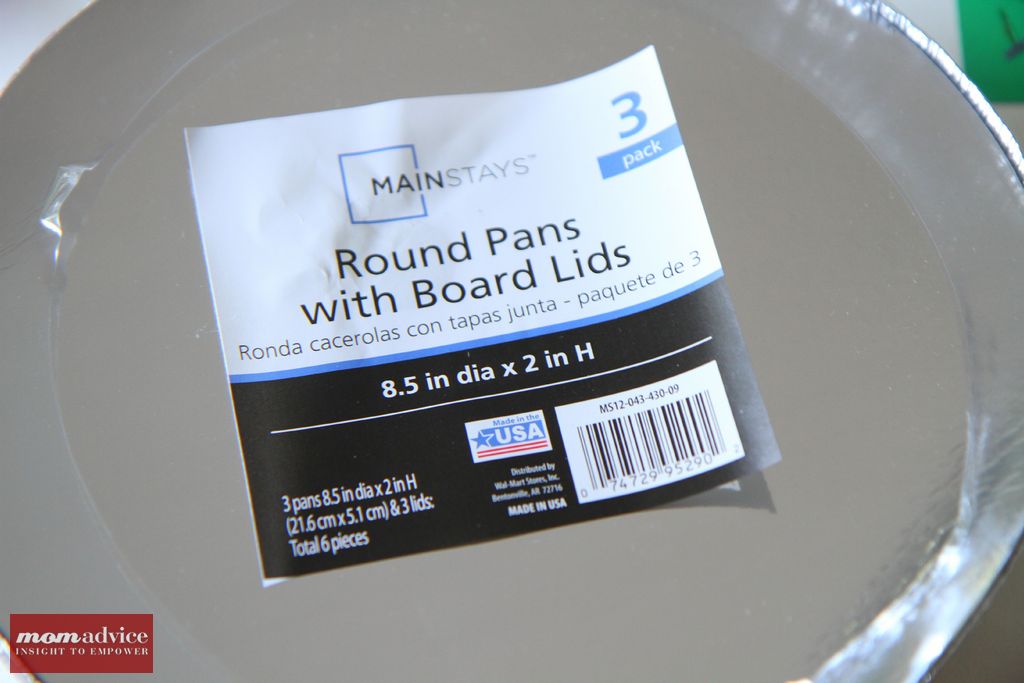
Be sure to pack them snugly so that they can withstand their travels. I found these smart round foil pans with a sturdy cardboard lid in the baking supplies section of Walmart. I wrapped our brownies snugly in parchment paper and placed our, “happy,” label on the outside.
Although, I understand despite my best efforts, things got damaged in route. If I was doing it all over again, I would secure the entire tin with a good wrap of packing tape around the outside!
If you are mailing these treats to a college student, be sure to snag our cute free printable college coupons for future deliveries!
Send Something Practical
Gift cards are a wonderful gift to send in your care package. If you have their address, you can look up what stores are nearby to the area, or ask them where their favorite place is to shop. Choosing a gift card to a superstore is always a nice option because it can be put towards any of their immediate needs around the house or what they might need in their fridge.
Don’t focus on how little or how much you can give on the gift card. ANY amount is always appreciated and will put to good use.
ANY.
You can make an incredible difference in the life of someone who is struggling financially or unemployed and, in most cases, it won’t even cost you a dime!
Here are some other ideas of how you can help whether you are near OR far!
Lend an Ear
The most important thing you can do for someone who is having a hard time financially is to just sit and let them talk. Let them share with you the anger that they have over their situation, let them cry tears of grief over the struggles they are enduring, and celebrate with them when those times turn around.
Let them talk about what they feel like talking about and try not to push them to tell more than they feel comfortable with. It is a very brave thing to do to open up and tell someone that you are struggling and it takes time and trust for them to want to share this private information with you.
Offer To Babysit
The #1 cause for divorce is money problems. When a spouse is unemployed, particularly the male in the family, it is such a difficult time in a marriage because so much of one’s pride and self-esteem comes from being able to contribute financially to the family.
The best thing you can do to keep that marriage growing strong is offer to support them by babysitting for them. Give the family the time they need to have a date night or just to have time to quietly do some job searching.
If you have the finances to offer a gift card for a night out, that is a wonderful and thoughtful touch. Think of fun budget-friendly things they could do like going bowling, or a gift card to Barnes & Noble for books or coffee, or a gift certificate to the movie theater.
Better yet, supply a gift that they could use for several nights in like a new board game, an electronic game, a Netflix membership, or ingredients for a fun meal that they could make at home. These are simple gifts that could supply many nights of fun for them during a difficult patch in their marriage.
Meals on Wheels
One of my favorite things to do for people during these times is to just drop off a dinner to them or to bring a meal when I come over to spend time with them. Try to make a big batch of food that could get them through one or two nights when money is tight.
If you lack the cooking gene, head over to the supermarket and pick up a take-and-bake pizza, popcorn, and some break-and-bake cookies. These are likely fun food that have been removed from the grocery budget and will be just as much appreciated as a home cooked meal.
Hire the Unemployed
Check around at your own place of unemployment, contact your friends through social media sites like Facebook or Twitter, and tap into as many people in your network as you can to find a job for your loved one. Do your part to get their resume out there!
If you aren’t able to find them a job, consider hiring them for some odds and ends jobs around your house. When one of our family members lost their job, we offered to hire him to remove wallpaper and paint our bathroom. It was a job in our house that we were not looking forward to doing and he was looking for a way to make some extra money. We both felt really good about the project and, in the end, it was the money that helped put the Christmas gifts under their tree. In my opinion, that is a total win-win situation!
Be an Anonymous Giver
Pride gets in the way of sometimes getting the help that someone might need. No one wants to say, “I don’t have money for groceries this month. Can you give me some?”
I have some very prideful people in my life who would never tell me when they were struggling. I have learned that anonymous gifts are sometimes the best kinds of gifts to give in these situations. Mail them a gift card or leave pantry ingredients on their doorstep.
Little Things are Sometimes the Best Things
There are so many little ways that you can help those that are struggling that can add up in big ways. Clean out your pantry and bring over the extra food to someone who is struggling, pick up a movie for them, stock them up on diapers for the baby, buy them detergent or paper products that can typically drain the grocery budget, offer to babysit while they run resumes, pass on your old magazines or books for a sweet little pick-me-up, weed through your children’s clothes and share those hand-me-downs, send them a card that you are thinking of them, pray for them daily, and cheer them up when you talk on the phone.
Even though I don’t like to focus on the negative, here is a little advice on things not to do-
- Don’t harass them every day to ask if they have found a job yet. Know that you are likely going to be one of the first people that would be contacted and let them talk about their successes when they occur.
- Don’t criticize their unemployed spouse. As I have said before, marriage is hard when a spouse is unemployed and it is important that you do your best not to contribute to the negativity. Allow them to vent, but don’t fuel the fire.
- Do your best not to chastise them if they are angry or hurt over what is happening in their lives. Many well-meaning people try to correct anger instead of letting them work through it. Simply saying, “I know this must be tough!” will go a lot further in these situations then correcting their feelings.
As someone who has been on both sides of the fence, you will never know what it will mean to that person to be a steady rock for them to lean on. Try to think beyond yourself and do one nice thing for someone who is struggling (health-wise, financial, job loss, etc..) today. It will mean more than you will ever know!
I am a part of the Walmart Moms program, and Walmart has provided me with compensation for these posts. For this project, all compensation was invested in our care package. My participation is voluntary and opinions are always my own.
Pin It
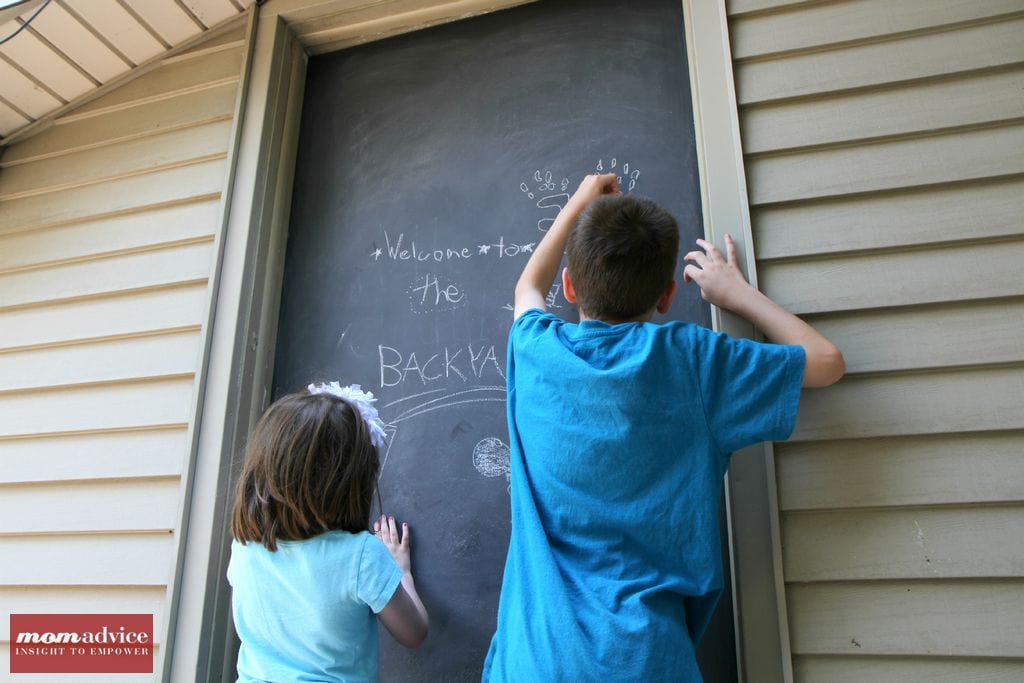
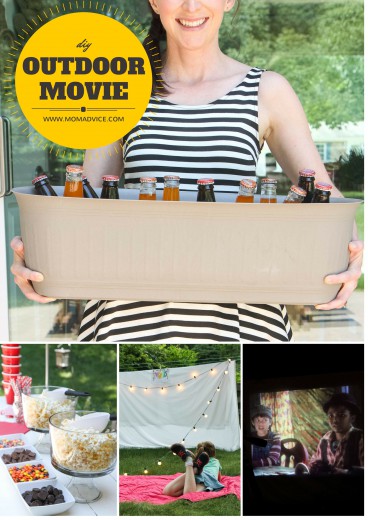
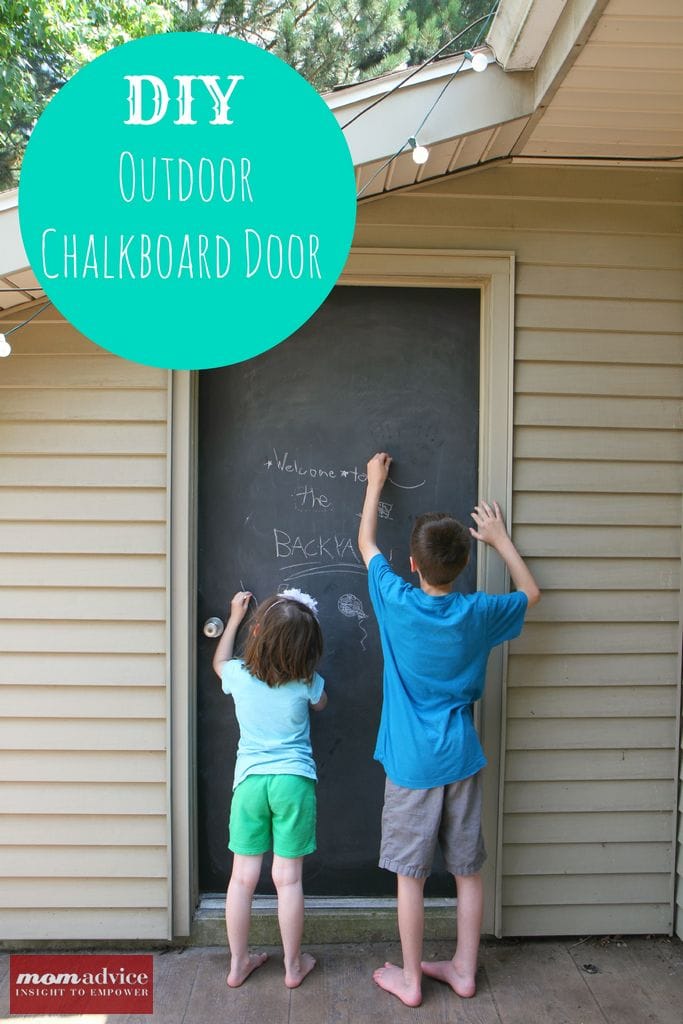 What could be better than a fun summertime outdoor project? Today I want to showcase an easy DIY Outdoor Chalkboard Door that I created to entertain my kids in the summer months. This DIY chalkboard project that we created is one of my new favorite things in our backyard. This project featured is in conjunction with my job as a Walmart Mom and all of the supplies can be found at your local Walmart store.
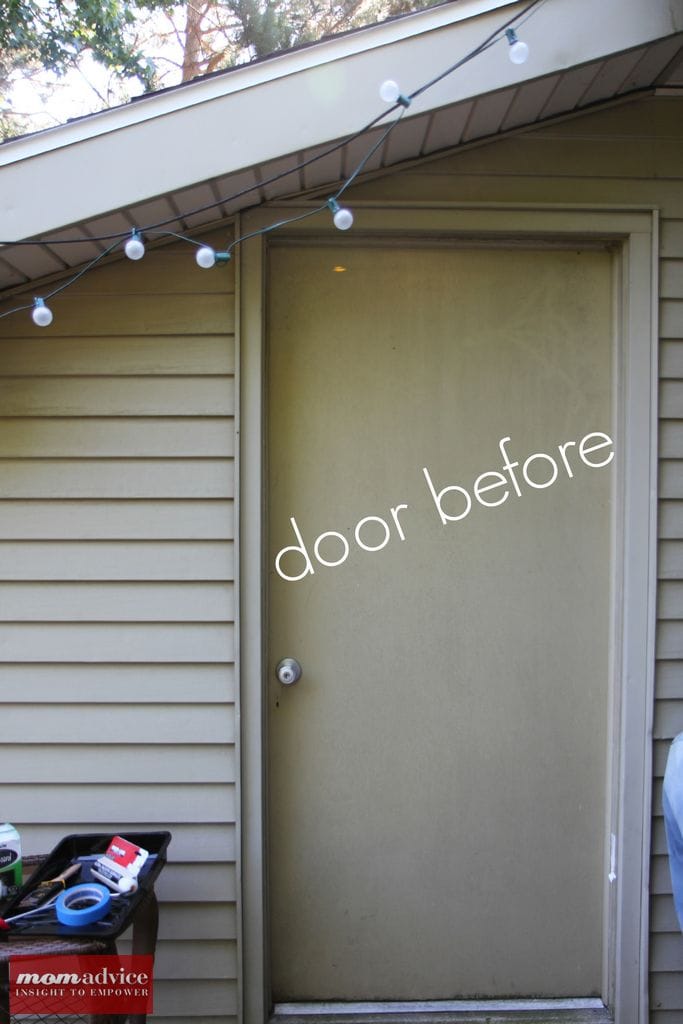
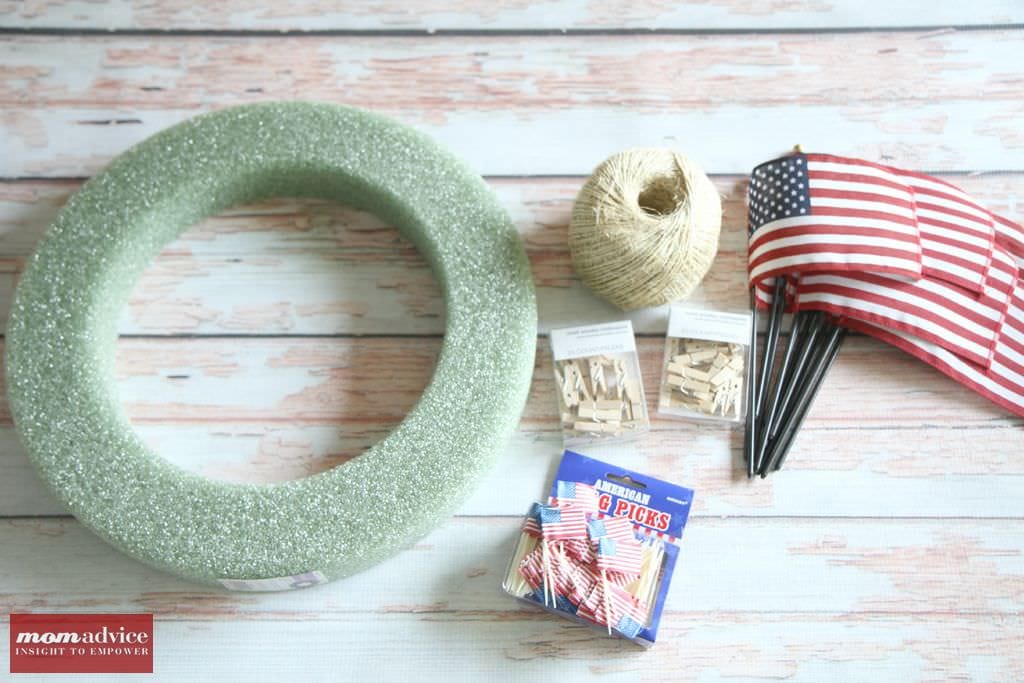
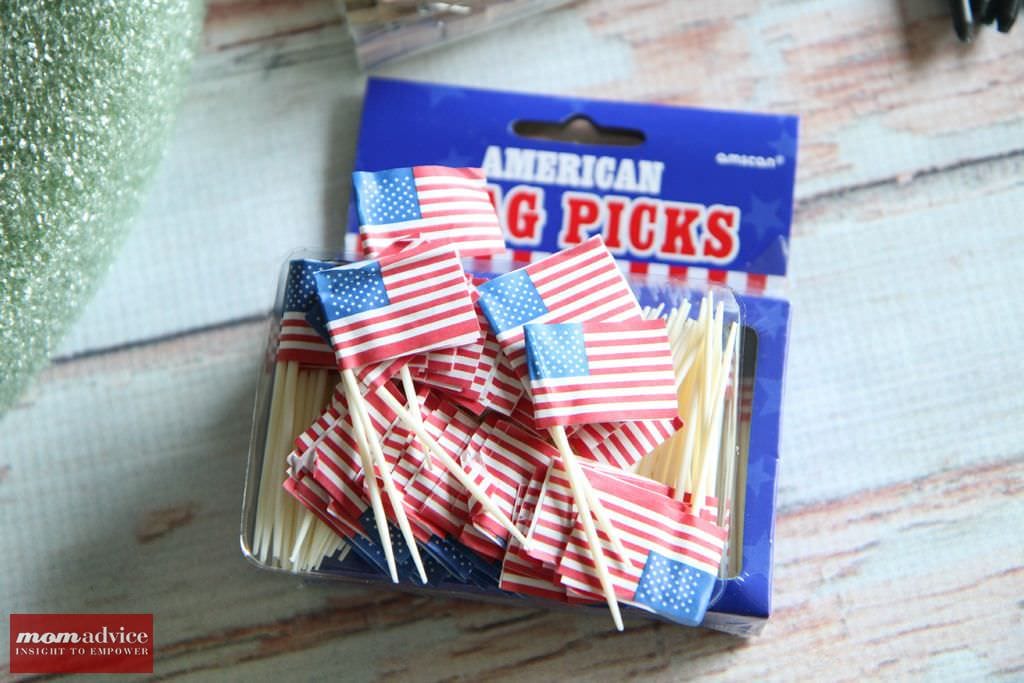
 Supplies List (if you buy everything it will be less than $25 in supplies!)
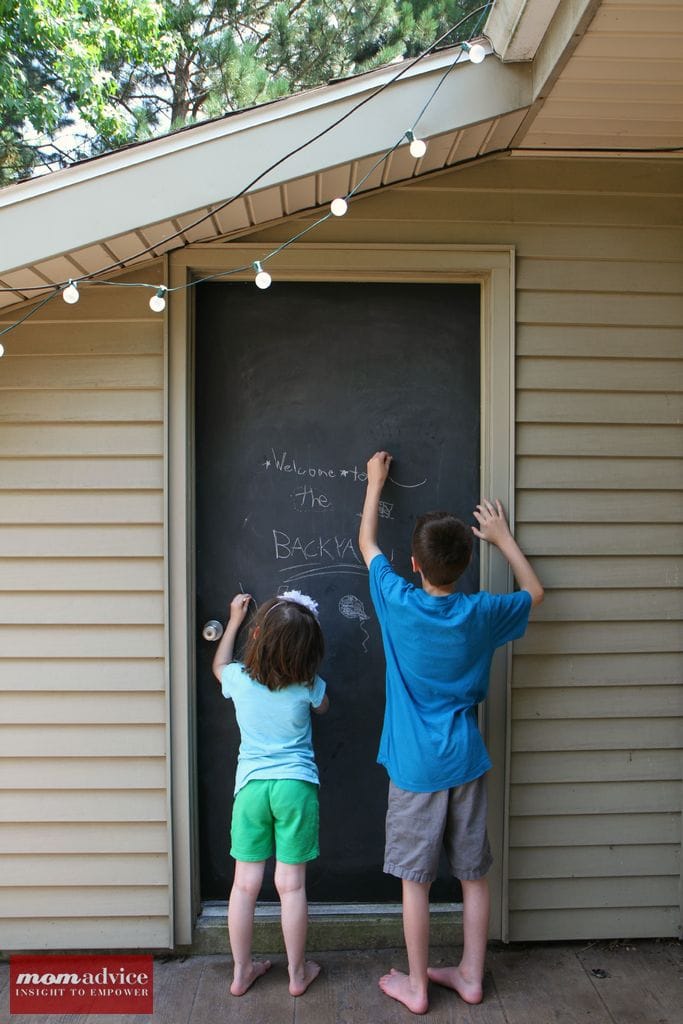


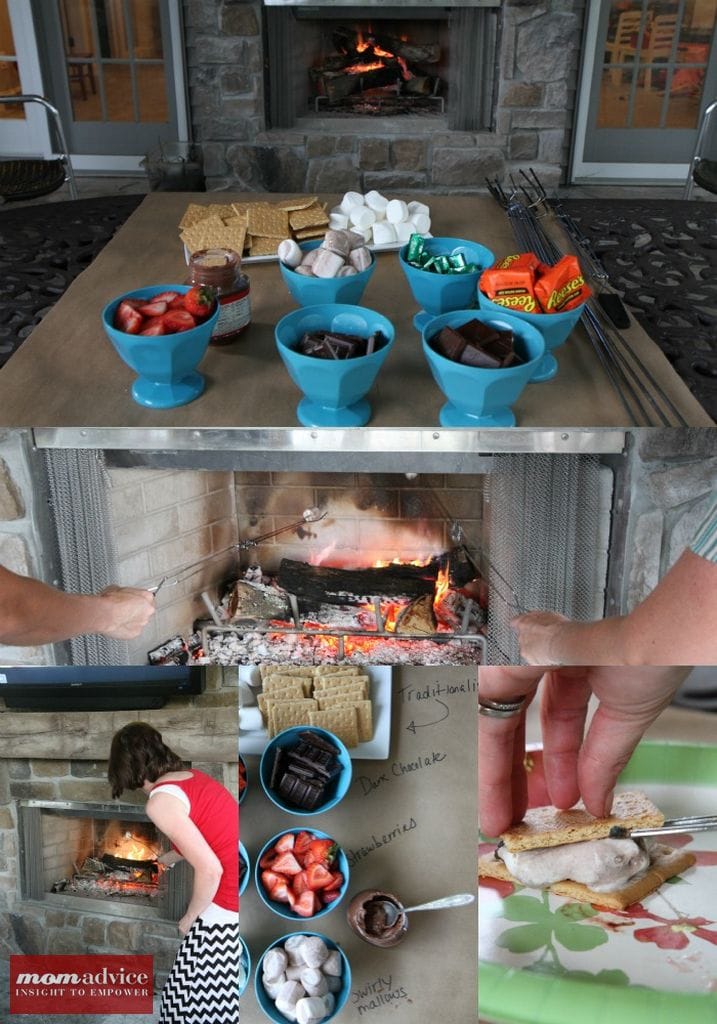
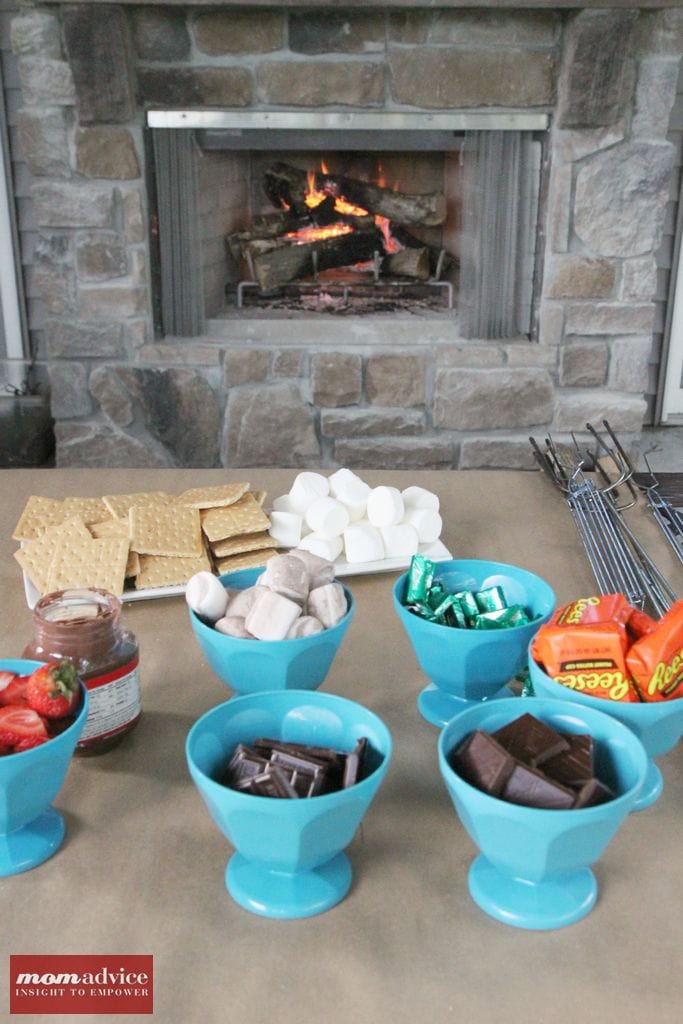

 I had planned to host this at my own home, but a powerful gust of storms moved in and left us without power for several days. My dear friend graciously stepped up to the plate to host the evening and allowed me to setup my s’more topping bar at her house.


 Walmart wanted to give us the chance to share about the


 Finish by tossing all of the ingredients together in a large bowl and add fresh Garden Gourmet basil in the dish and lightly toss until everything is incorporated.

 Father’s Day is almost here and we have been stocking you with