Author Archive

DIY: Tissue Paper Pom Poms Tutorial

Tuesday, January 4th, 2011

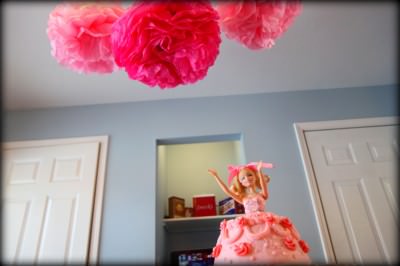
Decorating for birthday parties can be expensive and it is one area that I am always searching for cute ideas that don’t cost a lot. My girlfriend had a birthday party recently and made the Martha Stewart Tissue Paper Pom Poms to decorate above her daughter’s party table. I loved it so much that I promptly stole it for Emily’s Barbie birthday party.

These pom poms are so easy to make, but add a lot of impact to the party decorations. Each one took about ten minutes and I was so proud when my husband came home and asked me where I bought them. We loved them so much that they have been moved to her room to hang above her dollhouse. The best part is that they only cost $1-2 to make (depending on how full you make these) so they will fit easily into your party budget.

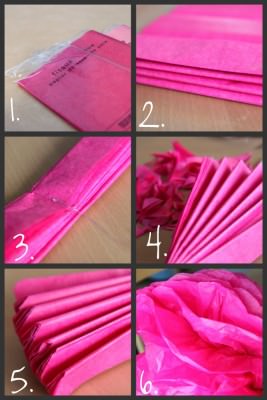
To make the tissue paper pom poms:

1. Purchase tissue paper in your desired colors to match your party scheme. You can use one package (ideally 7-9 sheets) or you can use two packs, depending on how full you would like your flowers to be. The dark pink flower that I created used two packs of tissue paper, while the lighter pink ones only used one package of tissue paper.

2. Stack your paper and fold it accordion style (1 1/2″ wide). The crisper your folds the better the look of your flower so fold it as best as you can.

3. Secure the center of your flower with a little floral wire.

4. With your scissors, trim the corners either into rounded corners (as I did) or into points (for a star shape).

5. Do the same on the opposite end.

6. Very gently and carefully, separate the layers of tissue paper from one another and begin pulling them apart and shaping them. The fuller your flower, the longer this will take. Once your flower has been properly poofed (a highly technical term, I am sure), you can hang them with yarn, ribbon, or whatever else you might have on hand.

For more detailed instructions or other creative ideas for your pom poms, visit this tutorial from Martha Stewart.

Pin It

The Perfect Pink Barbie Cake Tutorial

Monday, January 3rd, 2011


Make the birthday cake of your daughter’s dreams with this DIY Barbie Doll Cake Tutorial. This simple bowl cake is the base of the Barbie dress to make a perfect princess cake.

Over the month of December we celebrated Emily’s 5th birthday.  This was the year of the Barbie which thrilled me to no end as I had envisioned a DIY Barbie Cake for my little girl long before she was even a twinkle in our eye.  Barbie birthday cakes are a true labor of love by the mothers who create them and this cake was a testament to my undying love for my daughter.

Today I wanted to share with you how we created our Barbie cake and some tips for creating this cake for your own little princess! The week will be filled with oodles of tutorials and ideas for making your Barbie party special and I hope to add a little inspiration to your own Barbie-inspired party!

For this cake you will need a white cake mix, strawberry gelatin dessert, eggs, milk, canola oil, a package of fresh strawberries, and your doll.


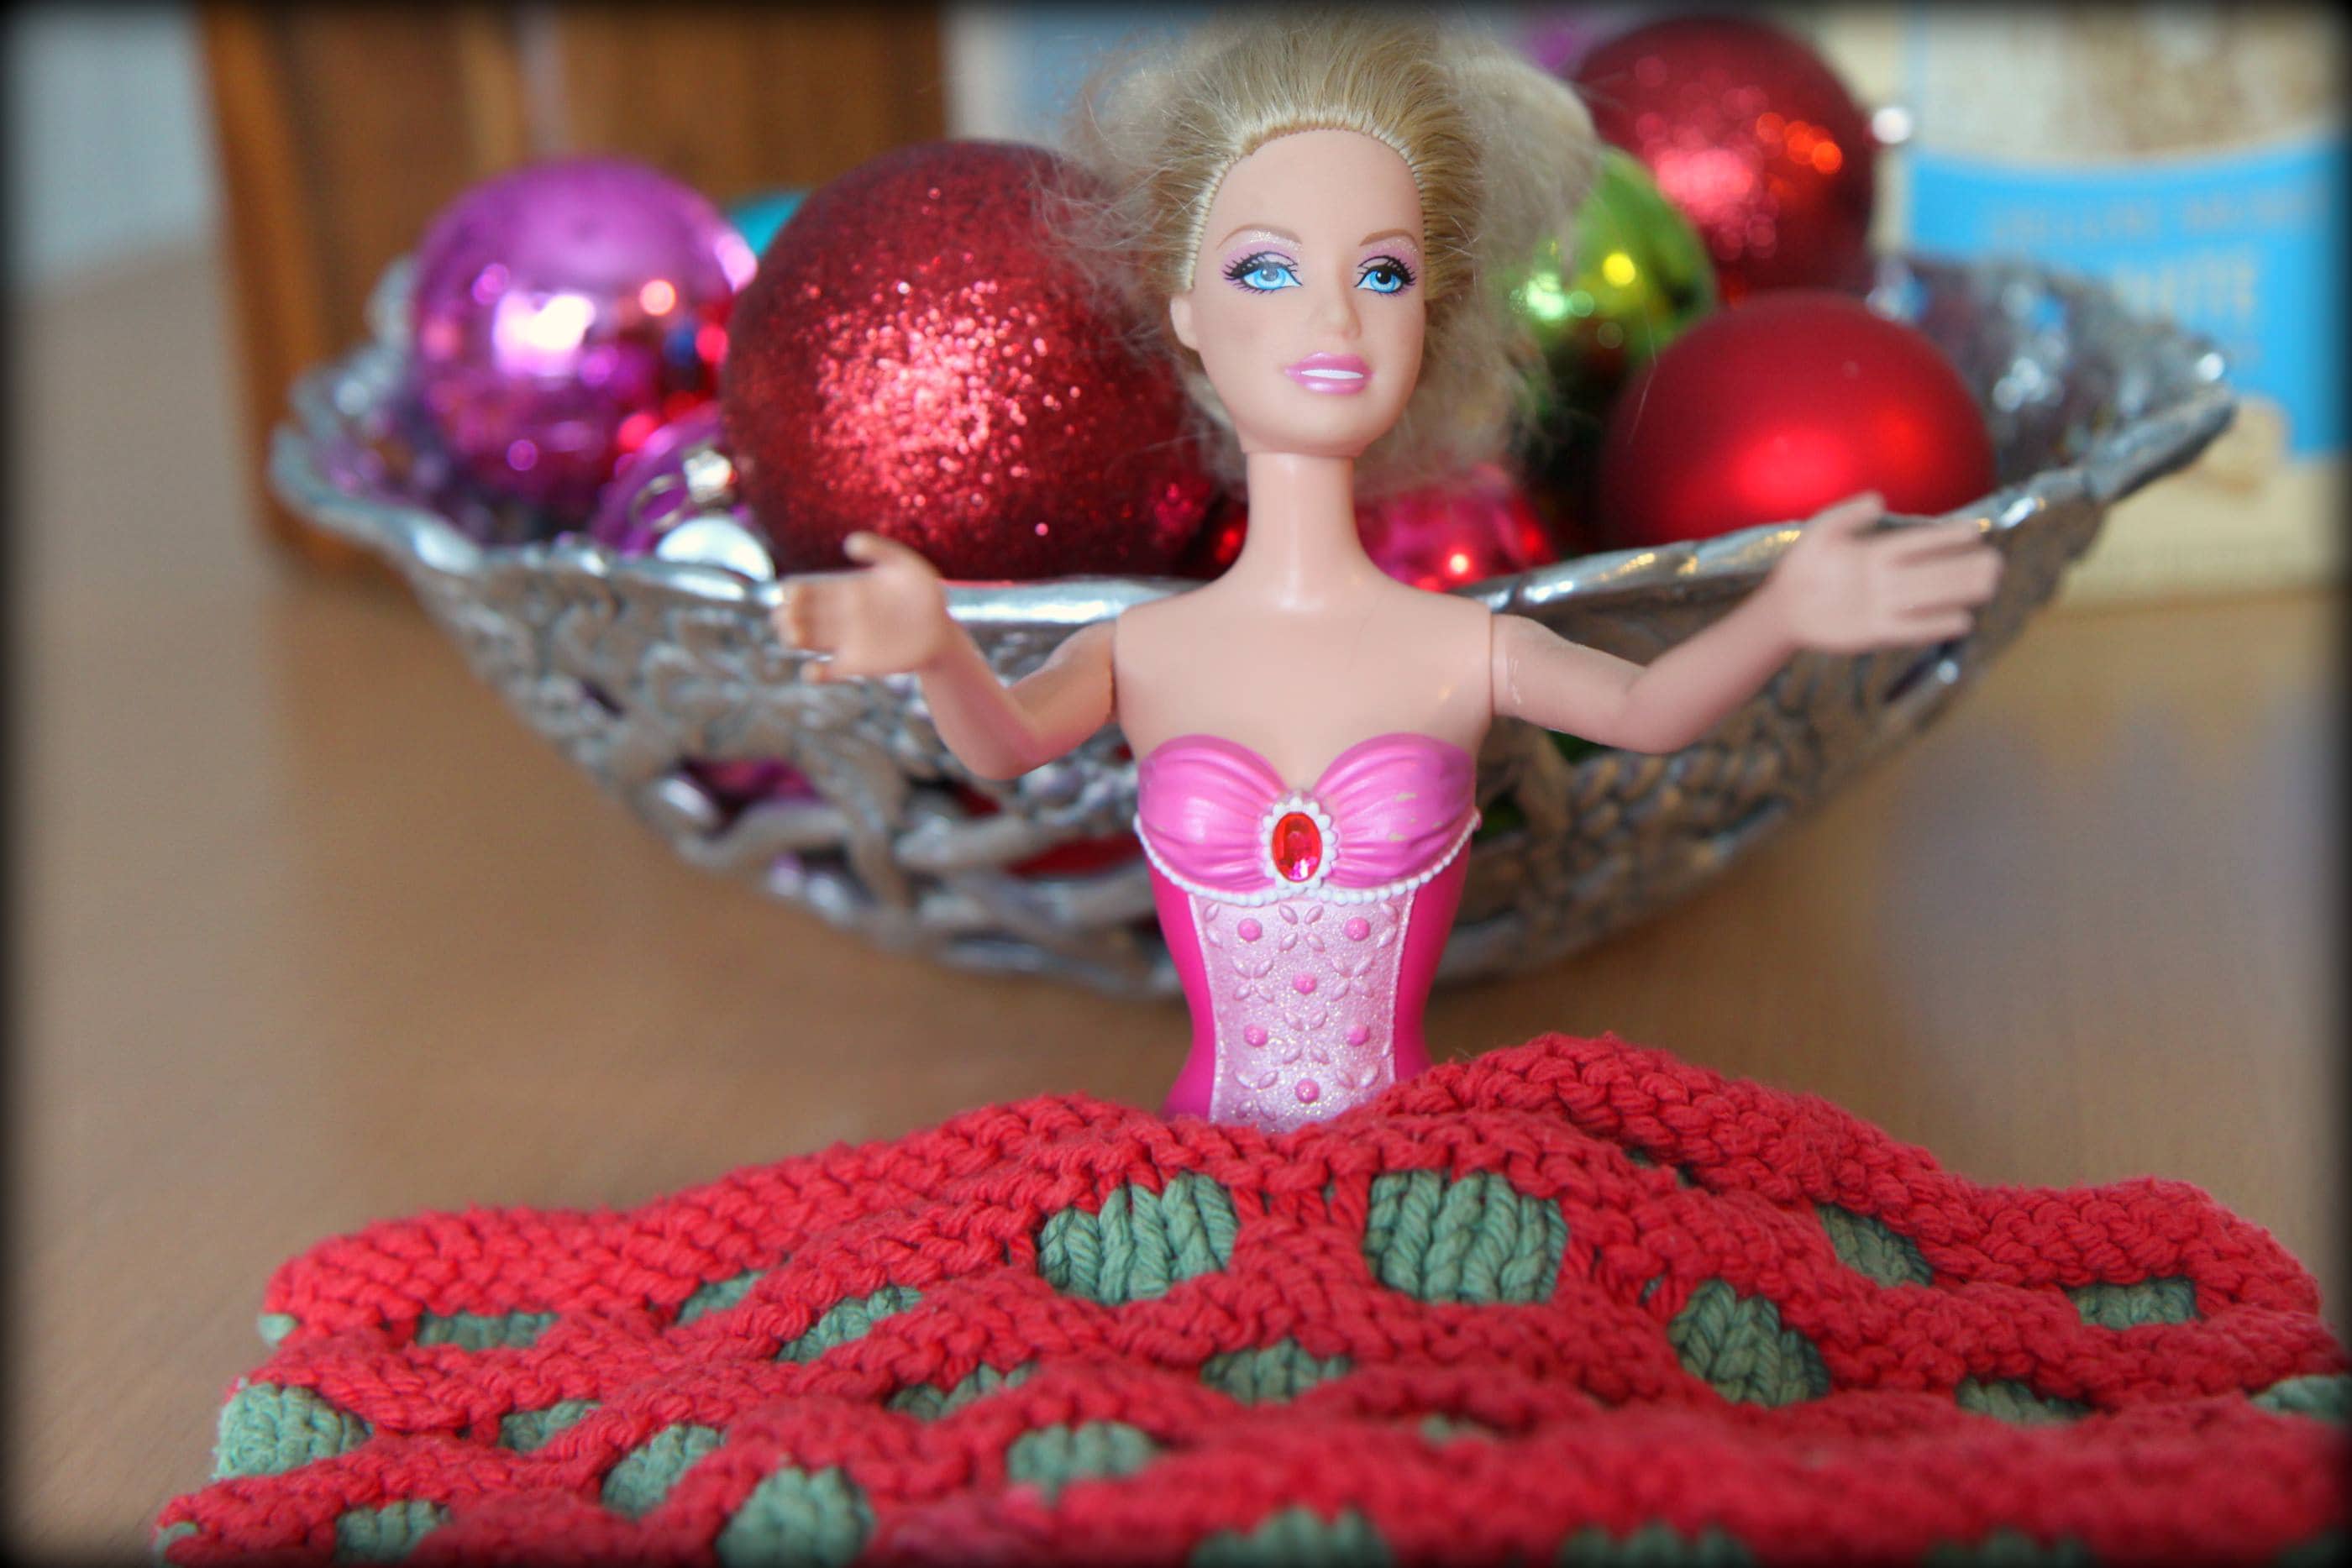
The doll that is pictured in this tutorial ended up not being used because the cake was not tall enough to form her dress and stand her upright. Doll toppers can be purchased specifically for your cake or you can ask your bakery if they will sell you a doll that you can use for roughly the same amount. My girlfriend also found a shorter generic one that could be found at the dollar store because the generic ones are not as tall as the real Barbies.

My best friend broke the legs of her Barbie for my cake.  May you all have a super awesome mafia friend like me who is willing to donate her legless Barbie for your project.

This cake recipe is an easy mix and dump cake, but you will need to finely chop your strawberries to mix into the cake. I used my food chopper to chop these up evenly and fine for the cake. Once you have done that, you have the brunt of the cake mixing portion done.

Dump all of the ingredients into your mixer, including those finely chopped berries, and give it a good mix.  I let it run for a good minute or two while my oven was preheating to 350 degrees.

Pour your batter into a greased mixing bowl. The mixing bowl I used for this project is a two-quart Batter Bowl that I had in my kitchen, a long ago purchase that I made with Pampered Chef. Many years ago when I bought it, the consultant had shared with me that it would make the perfect Barbie cake.

It doesn’t have to be a Pampered Chef bowl though, any two quart ovenproof  glass mixing bowl should do the job!

Now let Barbie sit back and take a little nap while her dress bakes.

Because of the depth of the cake, this cake will take roughly an hour and ten minutes to bake.

You want to make sure that the rack is not too high on your oven or it will really brown the top of your cake.

You will also want to keep an eye on it and test the center after an hour to see how it is doing. Mine took the full hour and ten minutes for this cake though.

Once the cake is done baking, you can pull it out and let it rest for at least fifteen minutes. Invert your cake on a cooling rack and let it cool for three hours before decorating.

I prefer to make my cakes in a two day process so I went ahead and wrapped the cooled Barbie cake in plastic wrap and rested it on top of a dish, then covered the whole thing in foil.  Make sure that your cake is completely cool before wrapping it for freezing. I tucked this in our freezer in a cake pan for support.

When the cake is frozen it is much easier to decorate and I have a lot less crumbs to have to work around.  That little tip came courtesy of a Michael’s cake decorating course I took and has served me well over the years of making and decorating special occasion cakes.

Now it is time to make the frosting.

You can definitely skip this step and just use two 16 ounce containers of vanilla frosting (tinted to your favorite cake dress color), but the jarred frosting won’t give you the stiffness you need if you want to decorate and embellish the dress.

This buttercream decorator’s frosting uses the confectioner’s sugar, shortening, milk, clear butter flavor (pictured above and purchased at Michael’s) and a little Meringue Powder that gives it a yummy whipped and buttered taste without adding any off-colors to your frosting.

Making frosting is a messy, messy job and is one of my least favorite parts about cake decorating. One way you can really cut down on the mess is to dampen a kitchen towel and drape it over your mixer while you are whipping up your frosting. This will cut down on the confectioner’s sugar dust clouds that you will find all over the kitchen and you can wipe down your mixer when you are all done.

Really try hard to resist eating this frosting. You really will need all of it to decorate your cake.

Doesn’t it look delicious though?

Tint the frosting, with food coloring, in your desired color. In our case it was Emily’s two favorites…pink and dark pink.

Now it is time to frost your cake. I frost my cakes frozen and they turn out beautifully. You just want to give your decorated cake a few hours to thaw before the guests arrive, but frozen cake frosting is so darn easy that you will never go back. It, basically, eliminates the need to do a crumb coat entirely. Frost it the best you can and remember that you can add as many details as you need to and that will cover up any of the imperfect parts.

To get the surface even smoother, dip your clean spatula in hot water and run it across the surface of the cake in long strokes. This will melt the frosting slightly to help remove stroke marks. Wipe the spatula clean and dip it in the hot water before each stroke.

Once your cake is smooth (ish), you are ready to add your embellishments to decorate your dress. Assemble your pastry bag with some of your extra frosting.  I used Wilton Tips #2D to make swirl flowers and my zigzag border, tip 3 to make the centers of the flowers and added dots to her dresses, and tip 21 for the shell borders and little loops on her dress.

You can add whatever details you prefer on your cake, that is the beauty of making your own Barbie cake. Embrace your inner-fashionista and have a blast making Barbie’s party dress!

Here is our finished diy barbie cake.

I left the top of Barbie’s dress on and tried to incorporate the lower half into looking like a continuation of her top.

Her hair was tied with a little leftover grosgrain ribbon.

If your Barbie has legs, you can wrap her in plastic before inserting her.

There is no need to cut a circle, she should wedge pretty easily without the extra step.  

After Barbie was done with this party, I put her dress top in the dishwasher and it came out clean and perfect. Barbie just got a good wash in the sink and I put her away…just in case we might need her next year.

The Perfect Pink Barbie Cake With Buttercream Frosting
Recipe Type: Dessert
Author: Adapted from The Cake Doctor Cookbook
Prep time:
Cook time:
Total time:
Serves: 10
This cake is so moist and full of strawberry flavor. The color from the gelatin adds a vivid pink hue and the flecks of fresh berry take these pantry ingredients to another level. If a Barbie cake isn’t your thing, wait for your post next week where these are transformed into a grown-up cupcake complete with a Strawberry Cream Cheese Frosting. While buttercream icing is not my favorite tasting frosting, this frosting is ideal for decorating and piping beautiful decorations on your Barbie cake. The butter flavor really adds a lot of richness to this frosting. This recipe creates a batch and a half (or approximately five cups of frosting). This will likely be more than you need, but I would rather have extra frosting than not enough and make it all over again. Extra frosting can also be used to decorate a batch of cupcakes for the adults!
Ingredients
  • 1 package (18.25 ounces) plain white cake mix
  • 1 package (3 ounces) strawberry gelatin
  • 1 cup finely chopped fresh strawberries with juice (approximately 1 1/2 cups whole berries)
  • 3/4 cup milk
  • 3/4 cup canola oil
  • 4 large eggs
  • For Buttercream Icing (Medium Consistency): 1 1/2 cups solid white shortening
  • 1 1/2 teaspoons [url href=”https://amzn.to/2HYXsjs” target=”_blank”]Wilton Butter Flavor[/url]
  • 4-5 tablespoons milk
  • 6 cups confectioners sugar
  • 1 1/2 tablespoon [url href=”https://amzn.to/2Wu2Rmu” target=”_blank”]Wilton Meringue Powder[/url]
  • Pinch of Salt (optional)
  • [url href=”https://amzn.to/2V0n2bf” target=”_blank”]2 quart oven-safe batter bowl[/url]
Instructions
  1. Place your oven rack into the center of the oven and preheat the oven to 350 degrees.
  2. Prepare a 2 quart oven-safe batter bowl by greasing heavily with cooking spray.
  3. Place the cake mix, gelatin strawberries and their juice, milk, oil, and eggs in a large mixing bowl.
  4. Blend with an electric mixer on low speed for thirty seconds. Stop the machine and scrape down the sides of the bowl with a rubber spatula. Increase the mixer speed to medium and beat two more minutes.
  5. Pour batter carefully into your prepared batter bowl.
  6. Bake for 1 hour and ten minutes or until the cake springs back when pressed with your finger and a cake tester comes out clean.
  7. Cool for fifteen minutes and then invert your cake on a cooling rack. Allow the cake to cool for a minimum of three hours before decorating. For more tips see the post above.
  8. For icing: Cream shortening flavoring, and water.
  9. Add dry ingredients and mix on medium speed until all ingredients have been thoroughly mixed together. Blend an additional minute or so until creamy.
  10. Tint as desired.

Love this tutorial? Here are a few of our other favorite family birthday cake recipes!

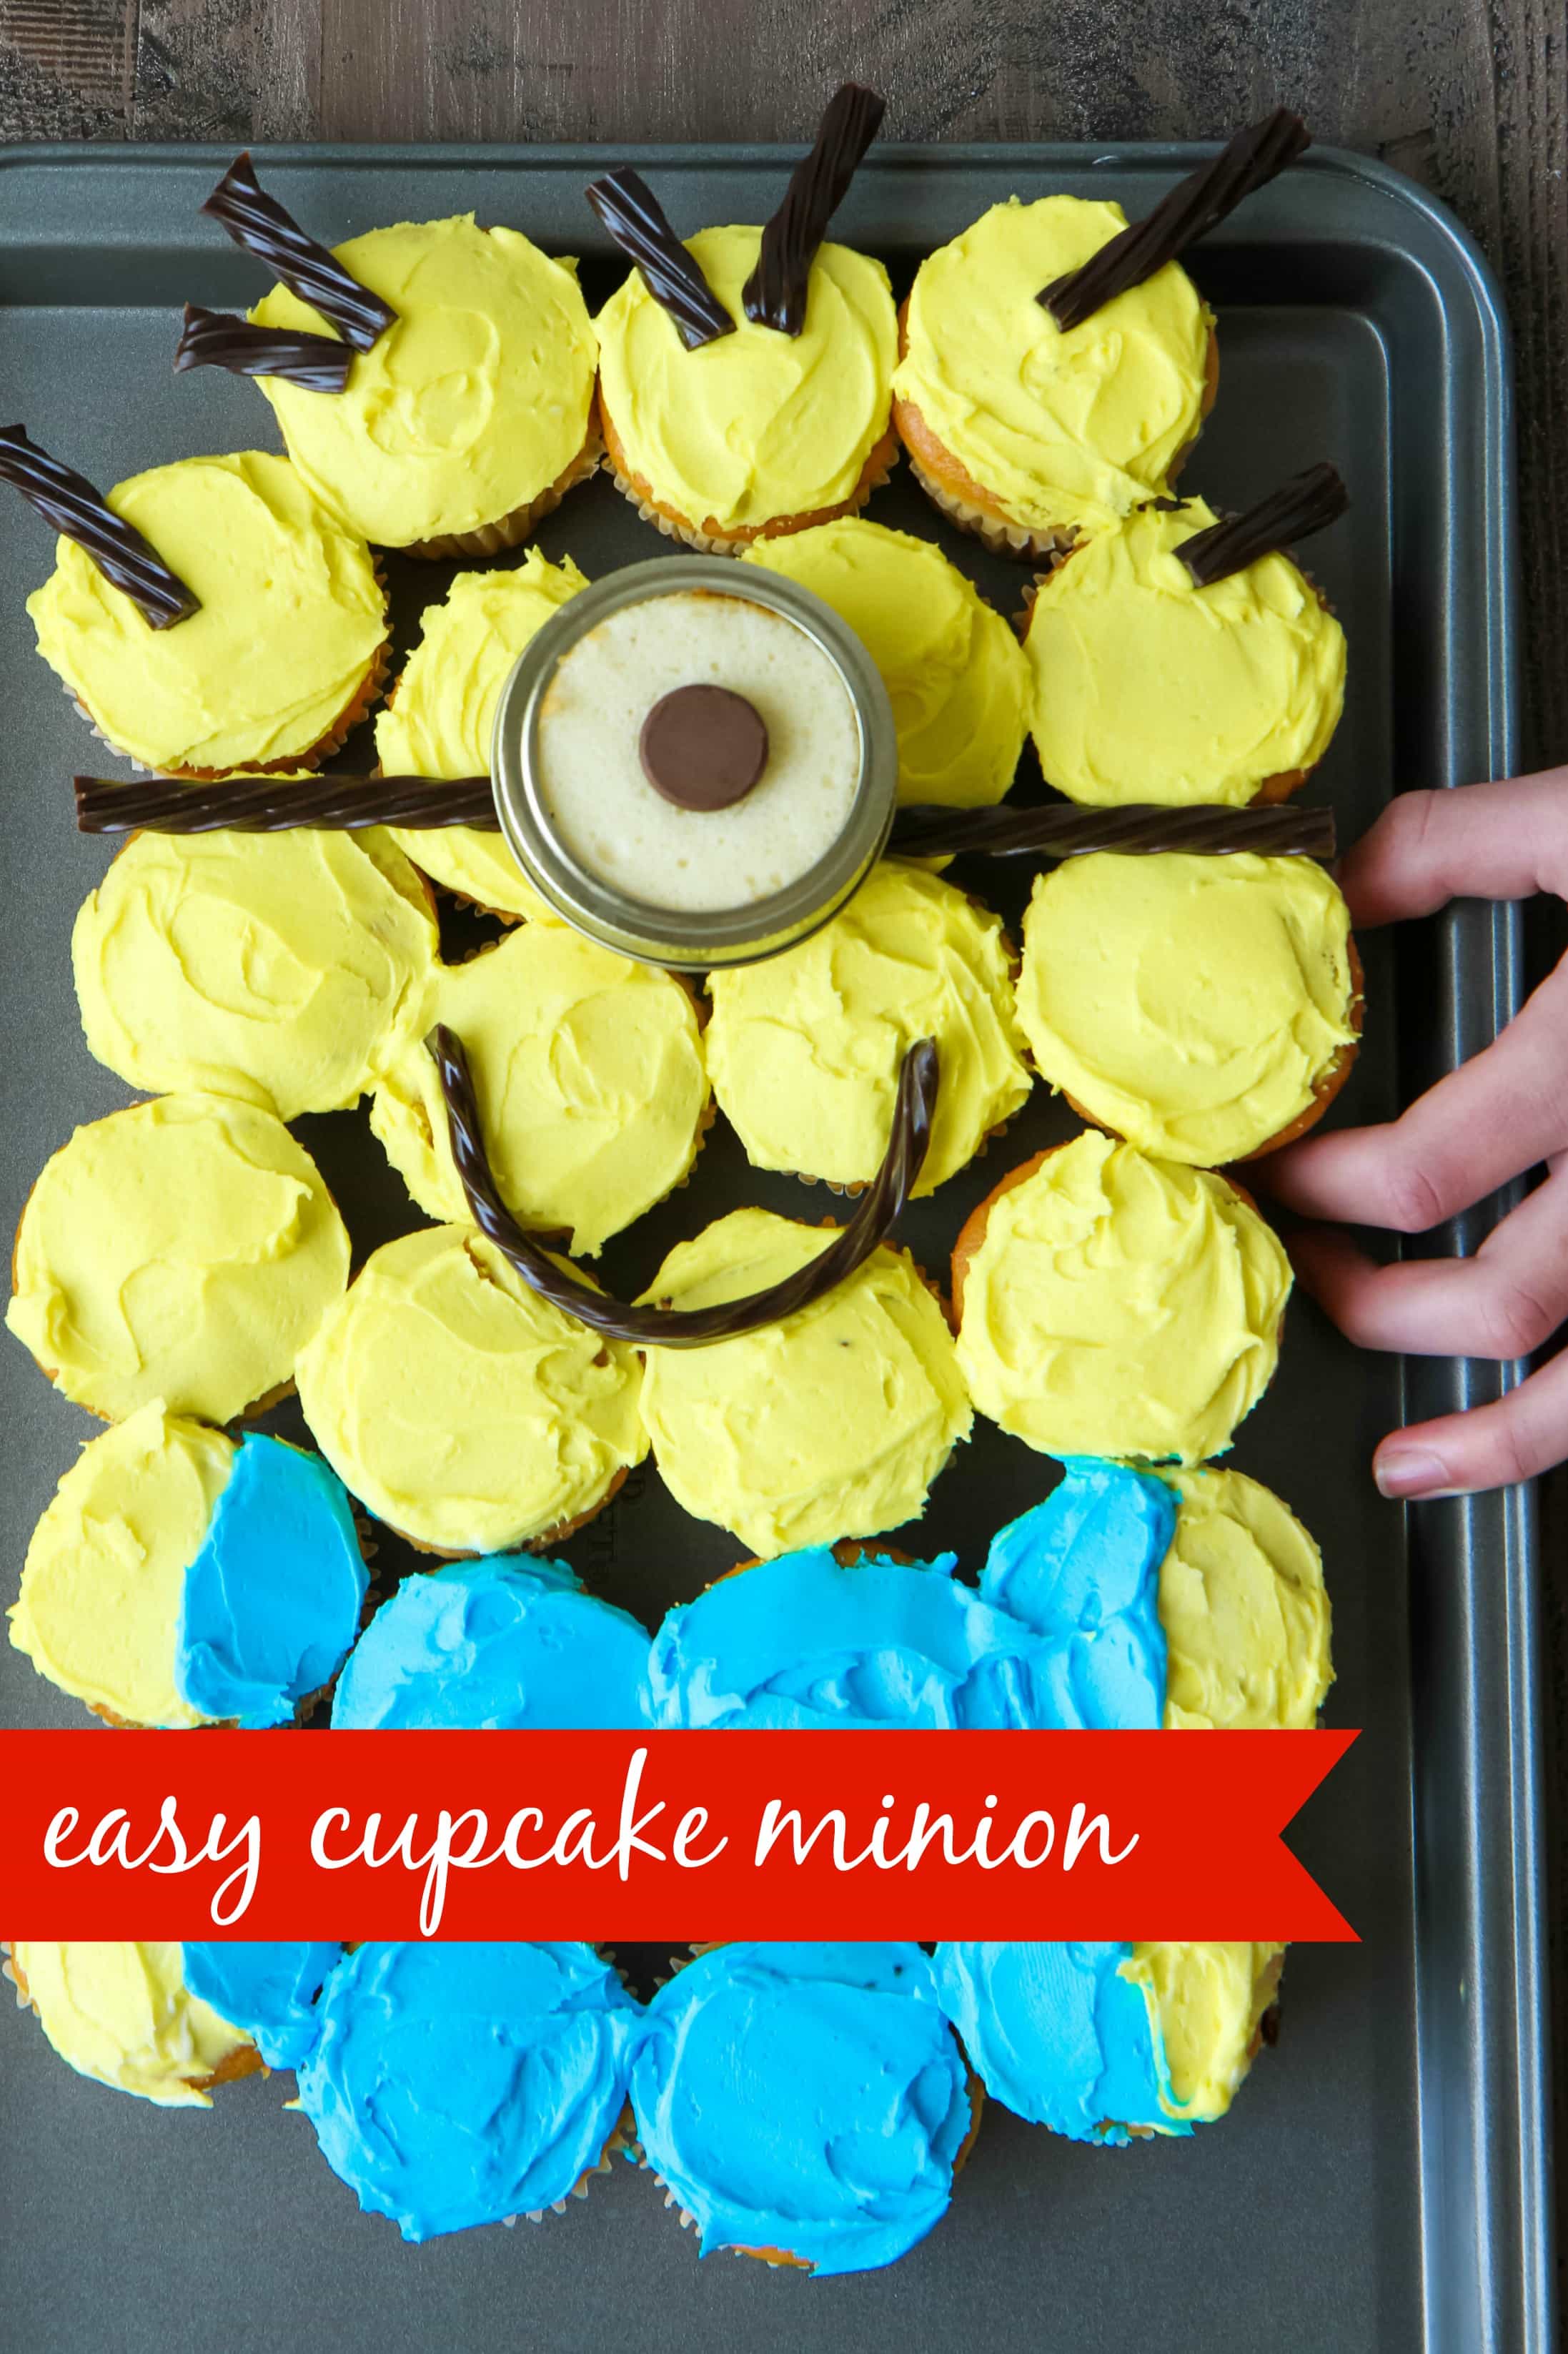
easy cupcake minion cake

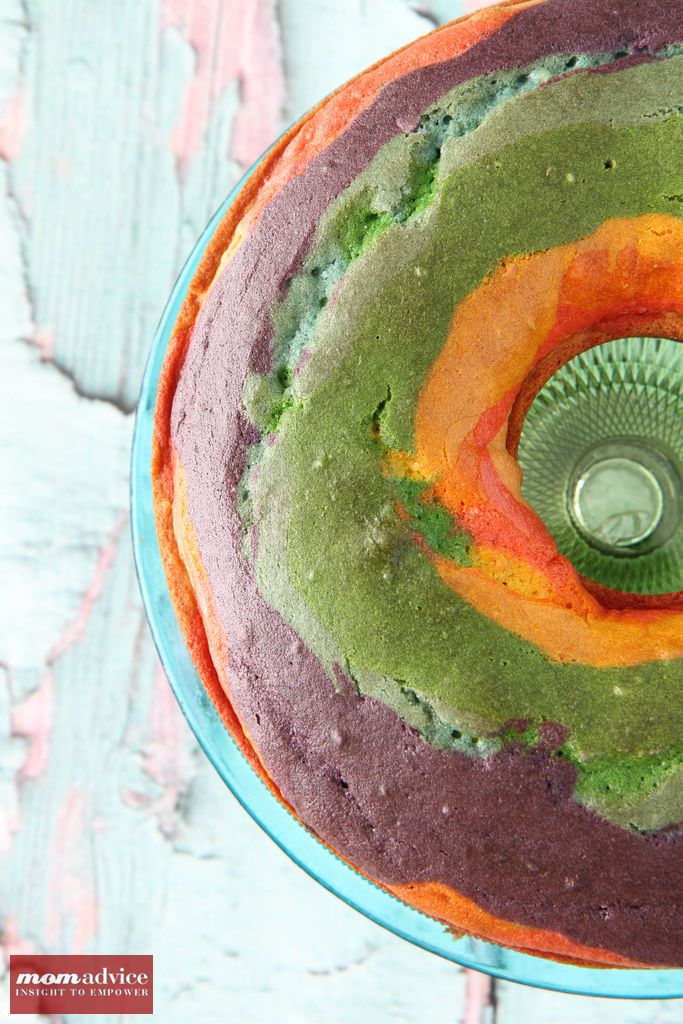
gluten-free rainbow bundt cake

gluten-free cookies & cream cake

gluten-free snickerdoodle cake


this post contains affiliate links.

Have any cake decorating tips? What was your proudest birthday cake moment? Feel free to share them here!

Pin It

On a Little Winter Break

Thursday, December 23rd, 2010

The winter has already been so wonderful for our family! We have made snow angels, indulged in a thousand batches of gingerbread waffles, warmed our hands with mugs of cocoa, took a trip to the theater to catch a movie, saw the amazing Santa and put in our gift requests, visited the neighborhood of holiday lights, and got to see The Nutcracker that was performed at our theater downtown. We will be doing lots more of that while the children are on Winter Break.

MomAdvice will be back in the New Year with many more ideas for simple family celebrations, great dishes to share around your kitchen table, craft ideas to keep your family under budget, and ways to manage your home simply and easily!

Many blessings to you and your family this Christmas and I hope you have a happy and safe New Year!

Amy’s Notebook 12.22.10

Wednesday, December 22nd, 2010

These peppermint fudge cupcake jars would make great hostess gifts (@ our best bites)

These gluten-free pumpkin pancakes look delicious (@ design sponge)

These melted snowman cookies are hilarious (@ Crazy Domestic)

These ideas for stress-free entertaining are just in time for the holidays (@ Reluctant Entertainer)

These gingerbread eggnog ice-cream sandwiches look festive and delicious for a holiday treat (@ The Farm Chicks)

I am in awe of this beautiful ruffled tree skirt (@ Prudent Baby)

I may have to try and make these homemade holiday soaps for gifts next year (@ Disney)

I want to make these Anthropologie-inspired bib necklaces (@ tatertots & jello)

These homemade pancake mix jars would be great for last minute giving (@ goodLife{eats})

Is there anything cuter than these chocolate snowman bowls? (@ one charming party)

I am in love with these newspaper wrapped gifts (@ allora handmade)

I love these stitched gift wrap and tags (@ alisa burke)

These butterscotch rolled cookies look like a fun new holiday cookie tradition (@ Clover Lane)

I am in love with these ideas for dressing up your stairs for the holidays (@ Thrifty Decor Chick)

These tiny crocheted ornament bookmarks are the perfect last minute holiday gift (@ julie-k)

This is a fantastic round-up of felted foods (@ ohdeedoh)

This framed holiday plans list is a cute reminder of all the fun things to do this holiday season (@ eighteen25)

I am loving these little alphabet block elves for dressing up the mantle (@ Let’s Explore)

Holiday Crafting Inspiration or the Amy Clark Craft Factory of 2010

Tuesday, December 21st, 2010

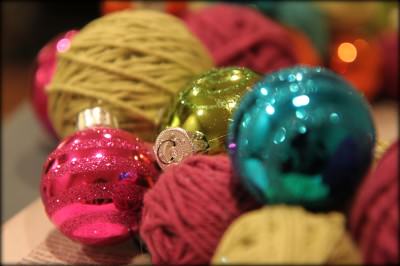
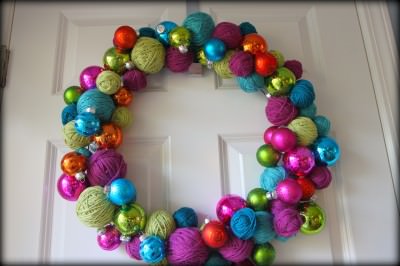
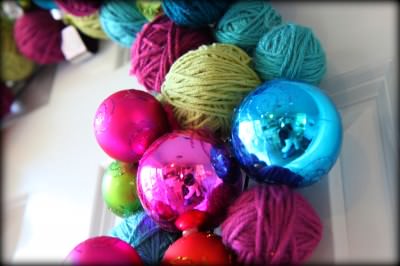
There has been a lot of holiday crafting happening this year and I can’t wait to show you some of the things I have been working on! First up, is this beautiful yarn ball wreath! Does anybody remember seeing this one in our notebook? I thought this would be the perfect craft to do a little stash busting in my yarn collection and a great wreath that would look cute even after the holidays.
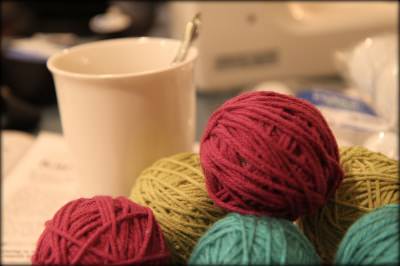
day one

four hours later, off to bed with glitter in my hair and third degree burns.
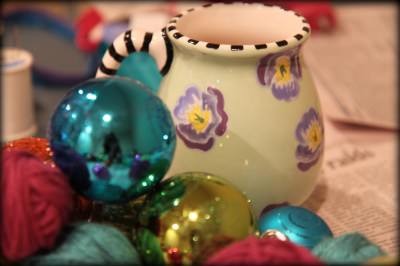
the next day, three more hours of gluing to go!

I did not anticipate how long this wreath would take, the amount of supplies that I would need, or the cost of all those ornaments and Styrofoam balls.  It took about seven hours of hot gluing with lots of time spent making the little yarn balls.  It also took about twice the amount of supplies that I had anticipated. That said, isn’t it stunning and worth every ounce of effort?

Looking for more holiday wreath ideas? I have hung my beautiful Kimba-inspired wreaths for the holidays again. When spring comes my little sugared lemon drop wreath will be hung again for another year on my front door. What can I say? Handmade wreaths make me so happy!

I am so proud of how the wreath turned out and a huge thank you to life through the lens for the crafting inspiration.
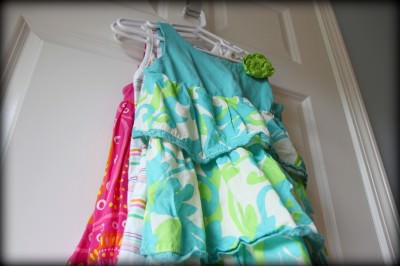
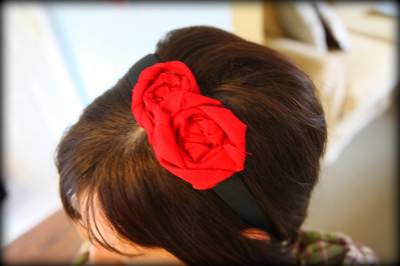
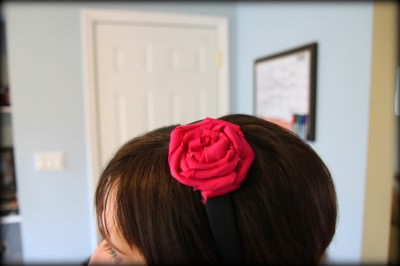
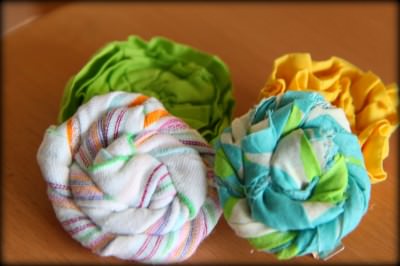
I had my best friend over for a holiday craft night and we cranked out dozens of these rolled rosette hair accessories and felted loopy flowers that were featured in our notebook. I bought a little fabric for these, but also decided to use fabric from Emily’s worn out and stained summer dresses from last year. The same idea could be applied with fabric from thrift store finds that don’t fit your child, but would be the perfect material for a cute embellishment in her hair.

I made her a few headbands, but we soon found out that headbands and glasses don’t go together so good, especially the wide headbands I bought for her hair.  They are cute enough though that I just might have to wear the headbands for myself. I decided to use some of the clips I had leftover from my hair bow making days and apply them to those instead. They worked out beautifully. I was able to make a few of these to go with her holiday dresses this year.

Thanks to Happy Together for helping us look a little fancier this holiday season!
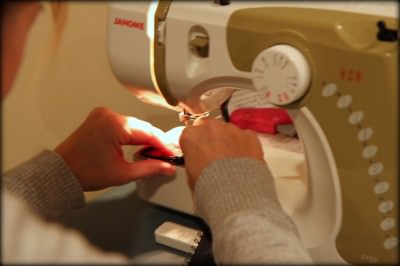
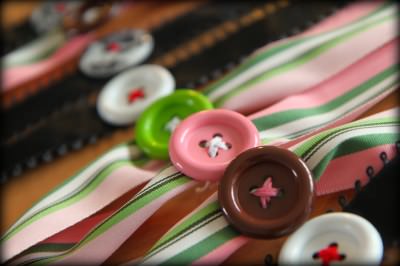
We also cranked out tons of these easy No-Slip Bookmarks for gift-giving this year that were also featured in the notebook. I use my bookmark daily and I have to say that it truly holds the pages of my book well without wrinkling my books.  It helps to have a friend that can operate a sewing machine too since I am a sewing school drop-out.

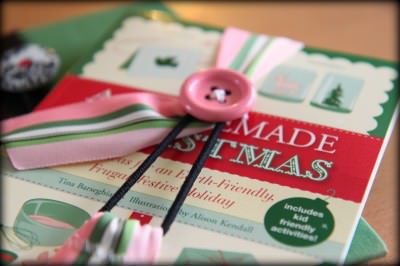
These would make beautiful stocking stuffers or are a perfect gift to keep on hand for last minute giving. I gave these to the kids I read to each week with a book for the holidays. These are so fast to make and are a great way to use up any leftover ribbon you might have laying around.  The most expensive part are the cute buttons, but they are a fun way to personalize these bookmarks.

Thanks to Maryjanes and Galoshes for this easy craft that has added a little something special to my gift-giving this year!
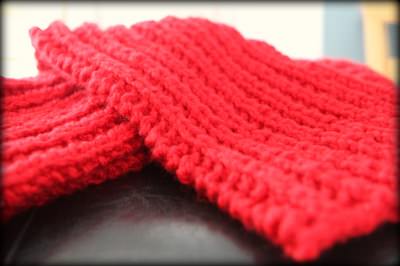

I made this beautiful red scarf for my brother who had gotten a new gray winter coat this year. I am going to have to cast another one on the knitting needles for my husband who was so kind to model it for me.  For more pattern inspiration, be sure to check out my Knitting Trendy Gifts of Warmth.

Merci Scarf

Pattern: Merci Scarf by Susan Rainey

Needle Size: US 8 Needles (I used size US 9 needles, which created a little bit wider scarf, but you could use the US 8’s that are recommended)

Yarn: Premier Yarns Serenity Chunky Weight in Molten Lava (2.5 skeins)

Notes: This scarf is so simple and fast to whip up that it would make the perfect gift to give to any man in your life. The pattern is one that you can complete while watching your favorite shows on television and is almost impossible to get off track.  This yarn was also perfect for creating a really warm scarf, perfect for our Midwest winters.  This pattern is perfect for a beginning knitter or for a last minute gift for someone special in your life!
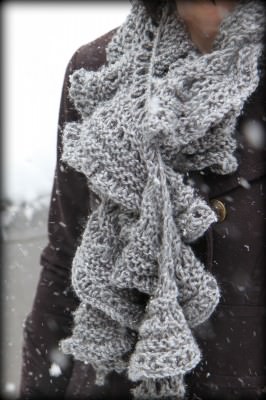

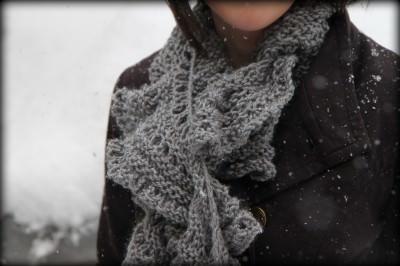
I knitted two more ruffled scarves and another Republic Hat for gift-giving. I forgot to take a picture of the hat and other ruffled scarf, but they did turn out so pretty! These ruffled scarves are definitely a statement piece, meant to add a punch of femininity to your winter coat! I made one in this light gray for my best friend and then one in a charcoal gray for my sister.  Now I want to make one in a couple other colors for myself!

Beautifully Ruffled Lace Scarves

Pattern: Ruffle Lace Scarf by Suzie Blackman

Needle Size: US 10 Needles (40″ circulars)

Yarn: Caron Simply Soft in Heather Gray

Notes: If you want a scarf that is wildly impressive, can be created with a single ball of yarn, and looks like a million bucks than this would be the perfect gift to give this holiday season. It is a very mindless knit, but is an INSANE amount of stitches, especially in the last two rows (over one thousand stitches!). The beauty of this scarf though is that you only need to know how to knit, purl, and yarn over to create it.

The twisting is created by knitting the scarf length-wise, rather than width-wise and through the series of yarn overs. As pictures above, you can see that it is really hard to see your stitches, let alone if it is actually going to twist. The good news is, as you cast off, you will see that scarf naturally twists, making that beautiful ruffled twist.

This one is definitely a statement piece and is also a statement of your absolute love for whoever you might make it for!

I followed the pattern that is linked above, but added four more rows to give the scarf a fuller appearance. I repeated rows 11-14 two times before I started rows 15-16. I am really glad I did and love the lush fullness of this scarf.
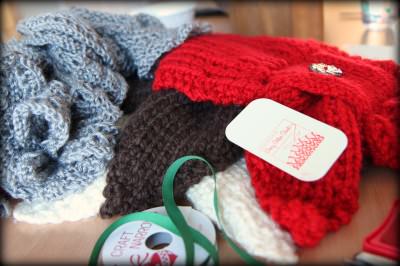
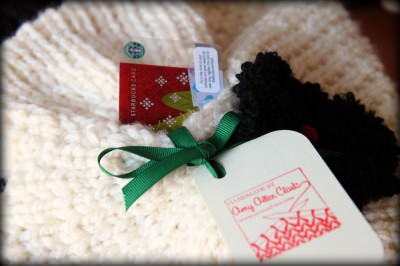
Here are the finished teacher scarves that I made! Each one had a $5 Starbucks gift card tucked into the pocket that was created in the scarflet. Next time I make this, I will have to write on the label though that these were scarfs. The teachers thought they might be hats…which I guess you could do too!  Regardless, I got such wonderful compliments and tried to make each of them unique with flower embellishments or different unique buttons and colored embroidery threads on each one. We also made one for our babysitter who has been a true Godsend to my family and helped me manage the day-to-day of my site by caring for Emily one afternoon a week. She is my secret weapon of productivity on the site. I wish you all could have a Miss Janie for Christmas!

Anthropologie-Inspired Scarflets

Pattern: Anthro-Inspired Scarflet (available as a free Ravelry download with your free Ravelry membership) by Kim Seio & Lydia Flowers (optional, for embellishment) or cute buttons.

Needle Size: US 8 Needles (straight) for both the flowers and the scarflet

Yarn: Premier Yarns Chunky Weight in Pristine (scarf) & Yarn Bee Boucle Traditions in Black

Notes: I followed the sizing and increases that ilikecookies(another Ravelry member)  had shared in her pattern. She said, “Increased until 30 stitches, worked 15 rows even until ribbed section and knit 15 rows of ribbing to make a slightly larger scarflet.”

I added a black Lydia Flower (size small) with a red button center to finish it or colorful buttons with contrasting embroidery thread to finish! For more pictures of these, please visit this post.
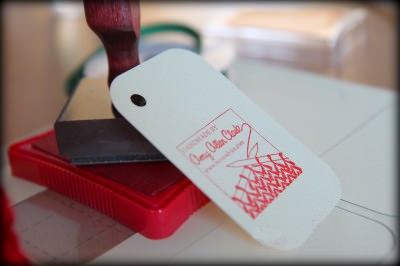
I finished all of my knitted gifts with these homemade gift tags. I used my Silhouette Craft Cutter and used the rounded rectangle template to make these simple tags out of ivory cardstock that I had leftover from our treasure boxes we made this year. As a holiday treat to myself, I bought myself a personalized stamp from Babyjewels (an Etsy seller) and I have to say, it really added that professional touch to my gifts!  They have one for knitters and one for crocheters too. She is on holiday vacation, but you can be emailed when she comes back.
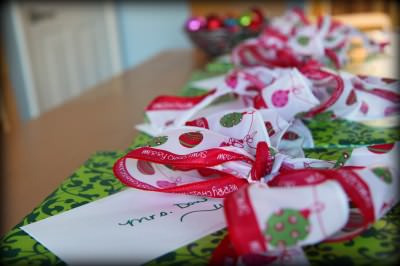
Here the gifts are all lined up. Next year I will have to do a video tutorial on my signature bow. Every gift should have signature bow on them and I have perfected my signature bow over the years. When I ran out of ribbon this year my husband proclaimed a “state of emergency.” He sure is a funny guy.

The gift factory is closed until next season!  I hope you have had great success crafting your own gifts and are continuing to get lots of handmade inspiration on MomAdvice for your holiday giving needs!
An Apron Full of Giveaways: The Giving Away the MotherLoad Edition

Tuesday, December 21st, 2010

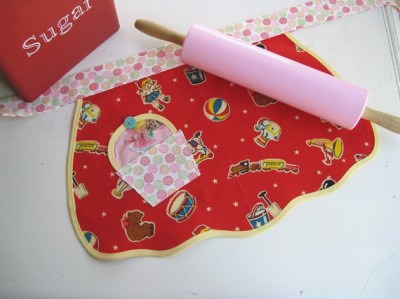
Gagie Pagie Pudding Pie, $16.95

Welcome to our Apron Full of Giveaways! I hope everyone is having a great week this week! As we do each week,  here is our round-up of giveaways for our readers. We hope that this is beneficial to you and your family! Please let us know if you guys win anything- I love to hear the success stories!

Tonight ends our $1,300 Prize Pack from The Talk at 8PM EST tonight! The giveaway includes a camcorder, an ink-jet printer, an Oreck vacuum, & an e-reader. Yeah…I wouldn’t miss putting an entry in for that one!

We also are running a giveaway for a Nintendo Wii & Family Game Night 3, a $50 Walmart Gift Card giveaways (5 winners), & our  Cheer brightCLEAN Detergent for One Year giveaway. I hope you will take a moment to enter all of the great giveaways we are sharing this week with our readers to thank you for all you have done for our family.

Below are the contest links-if you are hosting a contest please link it up below. Sorry, we aren’t giving away the aprons just showcasing them! Please put your site name and then what type of contest you are hosting. For example, “MomAdvice (Kid’s Movies).”

Please let me know if you have any questions and good luck to each of you!

Big Batch Soft Gingerbread Cookies

Monday, December 20th, 2010

It has been a busy week over at the Clark house as we finished our last minute holiday preparations.  I am so glad to finally have all of the knitted gifts done for everyone, the presents all wrapped, and am looking forward to being able to enjoy another holiday season with my family.  We even managed to squeeze in a birthday party this weekend for our Emily and had every single family member there, which is no small feat! I will share more about her party after the holidays! After all, who wants to talk about birthday parties with the chaos of the holidays going on?

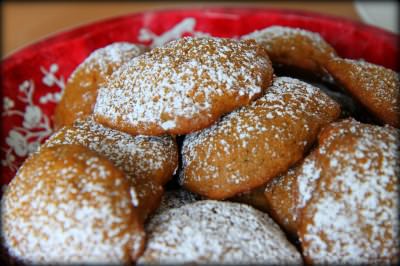
Today I wanted to share a fun recipe for big batch cookies that are perfect for toting to your next holiday get together. These are a soft drop cookie that incorporate all of the delicious flavors of gingerbread without the labor of cutting cookies out. Of course, we offer a great tutorial on how to create those perfect cut-out cookies if that is what you are into…Me? I love to keep it as simple as possible and these are just the ticket!

Whether you are enjoying these cookies, serving a batch of warm gingerbread waffles for a special Christmas treat, or even baking a few gingerbread donuts for a fun morning snack, I hope you can find a way to sneak a little gingerbread into your lives!

Soft Gingerbread Cookies

1 cup butter, softened
1 1/2 cups brown sugar, packed
2 eggs beaten
1 tablespoon ground ginger
1/2 cup molasses
1 1/2 cups boiling water
1 1/2 teaspoon baking soda
5 cups all-purpose flour
2 teaspoons baking powder
1 1/2 teaspoons salt
1 tablespoon cinnamon
1 cup chopped walnuts (optional)

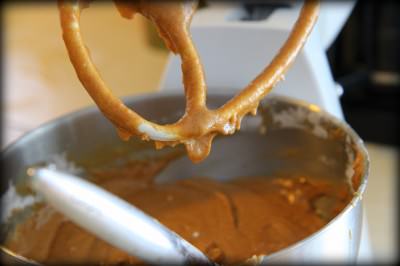
Cream butter and sugar in a large mixing bowl; blend in eggs. Mix in ginger and molasses; stir in boiling water. Set aside. Combine remaining ingredients, except the nuts. Add these to your sugar mixture. Fold in walnuts (if desired) and then cover & refrigerate the dough for at least two hours. Drop by teaspoonfuls onto baking sheets (do not grease). Bake at 425 degrees for 10 to 12 minutes. This recipe makes approximately six dozen cookies.

Enjoy with a big glass of milk or a little homemade cocoa for a fun winter treat!

Freebie Friday: December 17, 2010

Friday, December 17th, 2010

Happy Freebie Friday, everyone! We would like to thank Stephanie from Couponing 101 for assisting us with our freebies each week. Stephanie is running another great giveaway this week. She is giving away a chance to win a $50 Walmart Gift Card. Be sure to head to her site for the latest deals, freebies, and contests!

This week I am sharing many giveaways to thank you for being such loyal readers to our site. Be sure to enter our Tassimo T20 Coffeemaker Giveaway from Monday (valued at $139),  our $1,300 Prize Pack from The Talk, our Nintendo Wii & Family Game Night 3 giveaway, our $50 Walmart Gift Card giveaways (5 winners), & our  Cheer brightCLEAN Detergent for One Year. Phew! I am tired just thinking about how many winner names I will have to draw…tired, but also feeling a little bit like Santa this year!

I hope everyone has a wonderful weekend!

Health & Beauty
Aveda Sample Pack Coupon
Pampers UnderJams
StayFree UltraThins
Vaseline Intensive Rescue Lotion

Entertainment
Holiday Song Sampler

Home
Shout Color Catcher

This Week’s Freebie Events

December 18 – 24

Whataburger: 12 days of Freebies!

Santa’s Wonderland at Bass Pro Shops

18 – Michaels Craft Store Create a Button Ring, 10 am – 12 pm.

18 – Lakeshore Learning Craft: Create a New Years Popper, 11 am – 3 pm.

18 – Lowes Build and Grow Clinic Make a Train Engine, 10 am – 11am

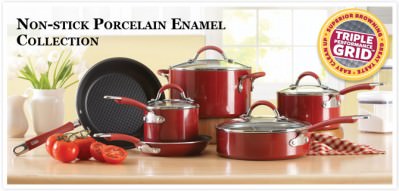
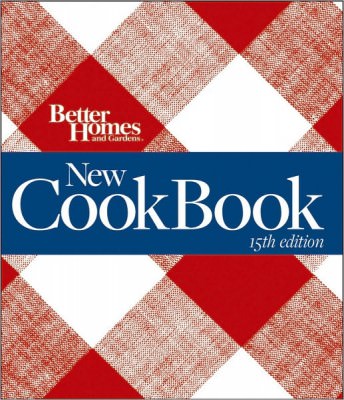
Giveaway Results: BHG Non-Stick Porcelain Pans Set ($159 Value) & BHG Cookbooks

Friday, December 17th, 2010


Thank you all for your entries! We would like to congratulate Karla (Commenter #64) on winning the pots & pans set. We would also like to congratulate Liddy (Commenter #274), Gypsy (Commenter #295), and Joanna (Commenter #42) on winning the Better Homes & Gardens Cookbooks. Happy Holidays, everyone!

Today wraps up my marathon of gift-giving this week. I hope you have had as much fun as I have! Today I am finishing out my giveaways with a final giveaway from my participation in the Better Homes & Gardens cook-off.  The set of pots I am giving away was actually from an unclaimed winner who never answered my emails when we did our huge pots & pans giveaways. Make sure you check your email inboxes this week so you don’t miss out on fabulous prizes, my friends! It breaks my heart when people miss out on free prizing!

Today’s giveaway to one lucky winner is a 10 piece set of Non-Stick Porcelain Pots & Pans. Priced at $159, this 1-piece set includes: 6 QT Covered Dutch Oven, 3 QT Covered Deep Skillet, 2.5 Qt Covered Sauce Pan, 1.5 Covered Sauce Pan, 10″ Skillet, & 8.5″ Skillet. Imagine the possibilities of what you could do with a set like this in your kitchen!  The grand prize winner will also receive their very own copy of the new & fabulous Better Homes & Gardens Cookbook.

I also have three additional Better Homes & Gardens cookbooks that I will be giving away in second place on this giveaway. As someone who owns the cookbook, I can tell you that it is worth every inch of space on your shelves. There are lots of fun and easy ideas for getting a meal on the table for your family.

To enter to win a set of Better Homes & Gardens Non-Stick Porcelain Pans & a copy of Better Homes & Gardens New Cookbook…

Leave one comment for each item that you complete to enter:

  • First Entry: Tell me one way you make the family dinner hour fun or easy for your own family.
  • Additional Entry: Let us know you are a fan of MomAdvice and join the MomAdvice.com Fan Club today on Facebook.
  • Additonal Entry: Follow me on Twitter and get an early scoop on all of our giveaways and articles that we are formulating for the year!
  • Additional Entries: Subscribe to my feeds and never miss another thing on our site again! We have a landing page where it makes it easy to subscribe to our blogs. For each one you subscribe to, leave one additional comment.

One winner will receive a 10 piece set of Better Homes & Gardens Non-Stick Porcelain Cookware with a copy of the Better Homes & Gardens cookbook . Three additional winners will receive a copy of the new Better Homes & Gardens Cookbooks. Please submit your entries by Friday (12/24) at 8PM EST.  Our winner will be drawn at random. Good luck, everyone!

MomAdvice Giveaway Guidelines: Want to know more about how things are handled here at MomAdvice? Be sure to read our Disclaimer which clearly states how things work and know that we will always offer only the best reviews and giveaways to our readers. In full disclosure, the email addresses that are collected for this giveaway will only be used for the purpose of contacting the winner(s), and will never be sold or given to anyone. This giveaway is only open to residents of the United States who are 18 years of age or older. Entries that do not follow the above criterion will automatically be disqualified. This giveaway will close Friday, December 24 at 8PM (EST). I’ll announce the first name of the winner(s) that will be added to the top of this current giveaway post and contact the winner(s) by email. I will draw the names of the winner(s) by using the random number generator at Random.org from the eligible entries received. If a winner does not contact me within 72 hours by email, I will draw a new winner. The winner(s) will receive their prize from the PR agency/company  responsible for this giveaway. The above link(s)  are an affiliate link and provided for reference for our readers. There is no guarantee that this item will be received by Christmas.

Giveaway Results: $50 Walmart Gift Cards (5 Winners)

Thursday, December 16th, 2010

Thank you all so much for your entries. We would like to congratulate Linda (Commenter #176), Kristen, (Commenter #169), Nicole (Commenter #209), Mary (Commenter #357), and Catherine (Commenter #517) on winning these $50 Walmart gift cards. Happy Holidays, everyone!

Editor’s Note– Don’t forget to enter our Tassimo T20 Coffeemaker Giveaway from Monday (valued at $139),  our $1,300 Prize Pack from The Talk, our Nintendo Wii & Family Game Night 3 giveaway, &  Cheer brightCLEAN Detergent for One Year. Check back tomorrow for more!!

The giveaways this week continue and I know that nothing is more important than making ends meet around the holidays.  Longtime readers may remember that I participated in a little cooking competition for Better Homes & Gardens awhile back. Thanks to all of your generous votes, I placed third in the competition with my Presto Pesto Pasta Con Pollo. Because of my placement in this competition, I was given ten $25 gift cards to giveaway to our readers as a thank you for my participation in the contest.

$25 is nice, but wouldn’t $50 be so much better? So instead of drawing ten people, I am drawing five lucky winners to win $50 to go spend at your local Walmart! Just think what you can do with that $50 to help after the accounts have been drained from the holidays! Luckily, Walmart offers some fabulous deals at very low prices so I know that the $50 will go far, especially if you shop those rollbacks!


To enter to win $50 in Walmart Gift Cards (5 winners will be chosen)…

Leave one comment for each item that you complete to enter:

  • First Entry: Tell me one way that MomAdvice has made your life better. Did you change a spending habit? Learn a new cooking technique? Organize your life? We are dying to hear how we have helped you live a richer life for less!
  • Additional Entry: Let us know you are a fan of MomAdvice and join the MomAdvice.com Fan Club today on Facebook.
  • Additonal Entry: Follow me on Twitter and get an early scoop on all of our giveaways and articles that we are formulating for the year!
  • Additional Entries: Subscribe to my feeds and never miss another thing on our site again! We have a landing page where it makes it easy to subscribe to our blogs. For each one you subscribe to, leave one additional comment.

Five winners, chosen at random, will receive $50 in Walmart Gift Cards. Please submit your entries by Thursday (12/23) at 8PM EST.  Our winner will be drawn at random. Good luck, everyone!

MomAdvice Giveaway Guidelines: Want to know more about how things are handled here at MomAdvice? Be sure to read our Disclaimer which clearly states how things work and know that we will always offer only the best reviews and giveaways to our readers. In full disclosure, the email addresses that are collected for this giveaway will only be used for the purpose of contacting the winner(s), and will never be sold or given to anyone. This giveaway is only open to residents of the United States who are 18 years of age or older. Entries that do not follow the above criterion will automatically be disqualified. This giveaway will close Thursday, December 23 at 8PM (EST). I’ll announce the first name of the winner(s) that will be added to the top of this current giveaway post and contact the winner(s) by email. I will draw the names of the winner(s) by using the random number generator at Random.org from the eligible entries received. If a winner does not contact me within 72 hours by email, I will draw a new winner. The winner(s) will receive their prize from the PR agency/company  responsible for this giveaway. The above link(s)  are an affiliate link and provided for reference for our readers. There is no guarantee that this item will be received by Christmas.