Archive for the ‘Organizing’ Category

How To Use A Home Management Binder

Thursday, April 23rd, 2015

How To Use a Home Management Binder

Have you been using our free home management binder printables yet? I thought it would be good during this m challenge month of Loving Your Home to revisit the home binder that I lovingly call our family “Bible” for the way that it has become indispensable for keeping us organized (and me sane!). It’s hard to love where you’re at if nothing seems to be working right and I’ve found that keeping a list of to-dos (both what we have to do and wish to do) can help you feel like you’re moving in the right direction – creating a place that truly feels like ‘home’ for your family.

A well-designed binder helps you manage everything in your household in one place. After a number of years using a home management binder, here’s the way that I’ve found it works best:

How to Use a Home Management Binder

~ Keep the binder in a central location in your home where everyone can access it

~ Include your family calendar and keep it up-to-date

~ Add important contact information that you want to have at a moment’s notice (particularly for someone who might babysit)

~ Use it as a meal-planner with weekly meal plans, grocery lists and a price sheet, as well as a list of family favorites (when the family’s raving about the meal, easily jot it down in the binder and you’ll have your family’s favorite dishes at your fingertips to make future meal planning easier!)

~ Add sheets that you need to run your family’s finances smoothly, like budgeting and planning for large purchases.

~ Use it as a central To-Do list for your home, both routine maintenance and any plans for updates. I’ve loved being able to see how far we’ve come and all the improvements we’ve made to help make our house into a home we love!


How to Set Up a Home Management Binder

~ I recommend this binder, both for it’s size and the view pockets for the outside.

~ Then purchase a set of pocketed dividers where you can tuck important information that you might need to easily find. When school starts, in particular, you will find your mailbox filled with fliers for events, important forms that need to be filled out, appointment reminders, and invitations. Instead of piling them on a desk or tacking them on the fridge, use the pockets so you always know where to find these items when you need them.

~ Keep an extra pocket or two in the back for the randomness in life- consider it another junk drawer, if you will.

~ I have also found that a good spot in the home for daily reference is in your family’s command center.

~ Print out any header pages for sections on heavy-duty cardstock so that they can hold up to the abuse of being referenced daily.

Family-Management-Binder-Collage

Of course, you can use any printables you want, but we are pretty attached to ours! Our set of binder printables is free to all who subscribe to our weekly newsletter simply by entering your email below or in the sidebar. We will then send you the link to your packet as our thank you for being a subscriber (look for it in the final welcome email). The binder set includes the following pages:

  • Family Budget Pages
  • Grocery Price Sheet
  • Grocery List Sheet
  • Menu Planner Sheet
  • Family Calendar
  • To-Do List
  • Contact Sheet
  • Header Pages for Each Section

Wondering about our newsletter? The Mom Advice newsletters are a recap of all the happenings for the week and will make sure you never miss a post. It’s also where our subscribers can access the free printables and any additional freebies that we may offer ONLY TO NEWSLETTER SUBSCRIBERS.  It is beautiful, simple, mobile-friendly, and fast to scroll through.  I promise, I will never send you junk. I know your time is valuable and so is mine- I am committed to a very useful newsletter!

Note: If you can’t seem to get the form below to work with your browser, just look over to your right in the sidebar. You will see a handy form there too that works with all browsers! We appreciate you so much! Thank you! 

##NEWSLETTERFORM##


 This post contains affiliate links.


Pin It

Our Bathroom Makeover Reveal

Monday, March 9th, 2015

Bathroom Makeover Reveal from MomAdvice.com.

This post is sponsored on behalf of BHG at Walmart.

Spring is in the air and with it comes my urge to continue creating a beautiful space in our home that we will love for many years. Today I wanted to show off a space that we recently renovated and how we brought our ideas to life  in this space.  As part of the BHG Live Better Network, I am partnering with them this month to showcase how you can add a new color into your home utilizing the products from BHG that are available at Walmart.  For me, the color that we are working to add into our home happens to be gray and so this month’s feature is all about that beautiful hue and how I was able to accessorize my new space with their help. Before we accessorize though, let’s take a look at some before and after pictures of our space.

Bathroom Makeover Reveal from MomAdvice.com.

Bathroom Makeover Reveal from MomAdvice.com.

Bathroom Makeover Reveal from MomAdvice.com.

Bathroom Makeover Reveal from MomAdvice.com.

Here are a few before pictures of our basement bathroom that we planned to renovate. This was actually the first room that we did ourselves when we moved into our home eleven years ago. When we purchased the home the original room actually had about four layers of wallpaper on it that we attempted to remove and then discovered mildew had been residing between the layers making all of that drywall unusable. The previous owners had used it as a laundry room,  but it lacked the ventilation needed to keep mildew at bay. We had one of my husband’s uncles and his father help us rip all of the walls and put in new ones which was a really big job for these newbie homeowners. We were on a tight budget so we added sticky tile flooring and my husband added this wainscoting detail on the wall with a ledge. With a coat of paint, we were satisfied with this space.

As our kids get older (and the sticky tiles began to shift beneath our feet), I started dreaming about how we could transform this half bath into a full bath so that we could have two showers in our home instead of one. I have never had two showers in one space in my entire existence so entertaining this idea was, seriously, exciting for me. I began to put together my vision boards for this space. After all, if we can turn our old storage shed into the bonus room of my dreams, why couldn’t we do the same in this little space? If there is one thing I have learned about renovating our tri-level home, it is that every corner must be looked at with potential. Why shouldn’t this empty bathroom corner become a fully functional shower for our family?

My inspiration came from this photo on Houzz. After putting together a million idea for my husband, we sat down one night and both agreed that this is the style of the bathroom we wanted. The best part was that the Hilton Head Island Architects & Building Designers took the time to answer everyone’s questions about the materials that were used in this room. I jotted down some notes and took these ideas to All Pro Renovations to see if we could make something like this happen in our space.
Bathroom Makeover Reveal from MomAdvice.com.


Here were the original ideas that I wanted for this space. You will see that I rethought some of this (even frantic texts as close to midnight on the paint color). The initial ideas though of a ceiling with a 1×8 v-groove pine with fresh trim were painted in Benjamin Moore White Dove, the standard (3×6) subway tile on the walls, additional lighting was added, and the standard hex tile with a gray grout all ended up being implemented in our space.

To save on cost, we ended up just using a shower purchased from our local hardware store, ditched the sconce lighting (since we added additional lighting in our fan), and gave up the idea of raising the ceiling since it was going to be another $1,500 or so just to reroute some of the heating & ventilation that were all funneling through this room.

In an effort to interject a little color, I ended up painting the walls in Benjamin Moore Gray Owl which kept things fresh and modern, without looking unfinished or the fear of a dirty white walls and white flooring/tile.


Bathroom Makeover Reveal from MomAdvice.com.

Bathroom Makeover Reveal from MomAdvice.com.

Bathroom Makeover Reveal from MomAdvice.com.

Can you believe this corner was just sitting there unused and now houses a pretty generous stand-up shower? Although we had talked about making this a custom unit, I am so happy with this unit we purchased that was all ready to go from our hardware store.


Bathroom Makeover Reveal from MomAdvice.com.

Bathroom Makeover Reveal from MomAdvice.com.

Bathroom Makeover Reveal from MomAdvice.com.

Bathroom Makeover Reveal from MomAdvice.com.

Bathroom Makeover Reveal from MomAdvice.com.

How gorgeous is this new space? Would you ever guess that this is in the lower level of our home? Although the ceiling is slightly lower with the addition of the pine planks, you really don’t feel closed in due to the lines of the boards and the fresh white paint. We left our existing fixtures and lighting in, but did add a light that looked almost identical to our original that added a fan in the space. We had a medicine cabinet installed that helped add additional storage and also provided extra mirrors for getting ready in the morning.

Bathroom Makeover Reveal from MomAdvice.com.

Bathroom Makeover Reveal from MomAdvice.com.

Bathroom Makeover Reveal from MomAdvice.com.

Bathroom Makeover Reveal from MomAdvice.com.

Bathroom Makeover Reveal from MomAdvice.com.

To add more pops of gray and to organize our space, I headed to Walmart to snag some new additions to the space. These included some beautiful plush towels in gray flannel,  some modern chevron print towels for our hand towels,  new jars to organize the odds & ends in our storage unit, and the perfect cushy chevron bath mat for our feet. This brought more of the gray in and added those modern touches that I wanted for our space.

Bathroom Makeover Reveal from MomAdvice.com.

I’m so proud of our new space and love the fresh new colors that we are bringing in to our home! Thank you to All Pro Renovations for the beautiful workmanship they did in this space!


In accordance with the FTC Guidelines, I am disclosing that I received compensation from BHG at Walmart for my time and participation in the BHG Live Better Network. Although we have material connection to BHG, any publicly stated opinions of BHG and their products remain my own.


The Power of Living Small

Thursday, February 5th, 2015

The Power of Living Small from MomAdvice.com

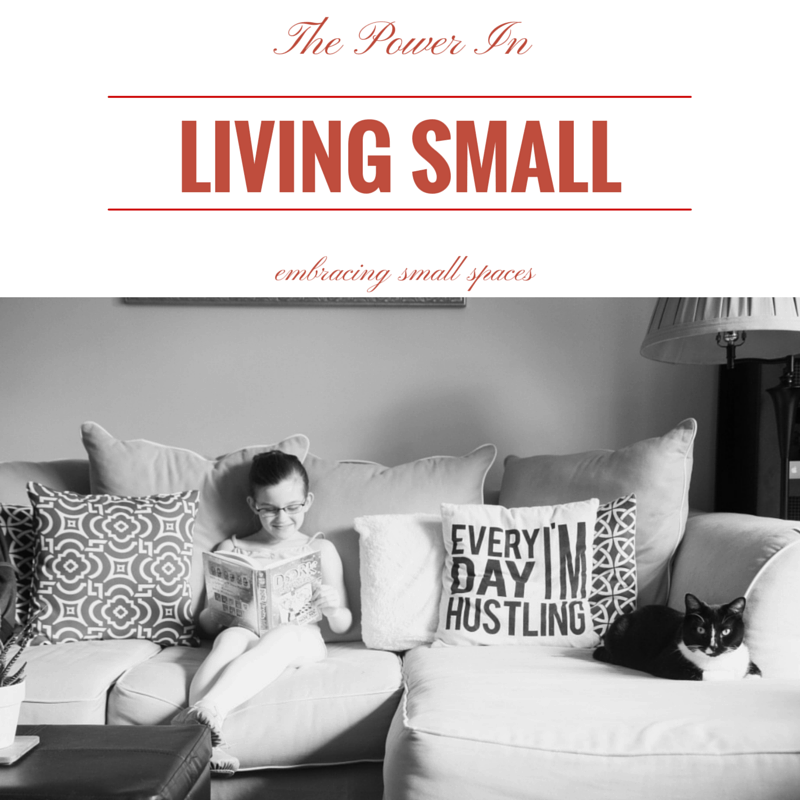
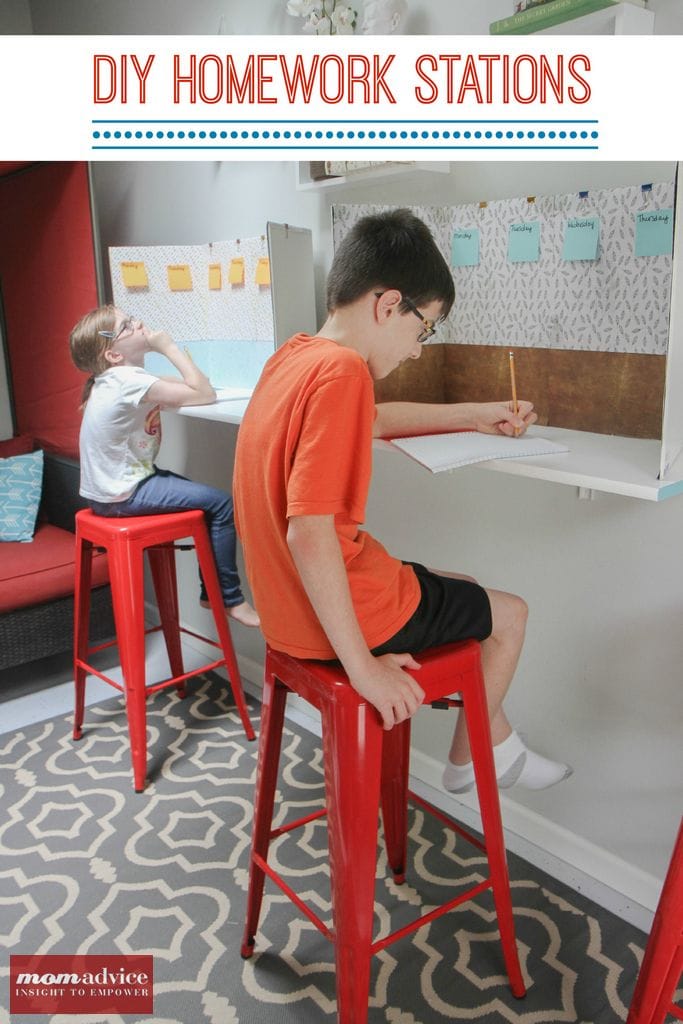
Small space living comes with many challenges, but the rewards for a family on a budget are great. For a long time I considered our smaller home a temporary means to get us by until we could afford more.  As the years have gone by though, I have truly discovered the power of living in a smaller house and making the most of what we have been given. I can fully admit though, that it is all about our approach towards making our space our own, more than it is about the amount of square footage in our house.

Small space is all relative, of course, isn’t it? In full discretion, our home is 1,500 square feet for our family of four. While that may sound like a lot or a little, the space is made smaller and more challenging with a tri-level floor plan. If it was spread on one or two levels, I am sure it would feel much larger. I think it has been the floor plan that is more of a challenge than the square footage of our home. Regardless, spatial challenges have existed and we have learned a lot from working through them.

One thing that people remark on though is how our home doesn’t feel small at all and I recently had a visitor who said she was so impressed with how efficient our home was (world’s best compliment- by the way!). I attribute it to one part renovation, one part smarter selections for our home, and one part major clutter-busting. The investments that we have made have given us a new appreciation for our space and have helped us fall in love with this house.

Now if we moved, I know I would never be as happy as I am right here.

That’s a good feeling to have.

Regardless of your square footage though, I wanted to share with you a few ideas for learning to embrace the power of living in the space you are in right now. There is so much that I have learned over the years about making our home the best that we can and I wanted to share with you some ideas on how to make the most of the space you are in right now.

Transforming-Corners-In-Your-Home-15

Reconsider Your Furniture

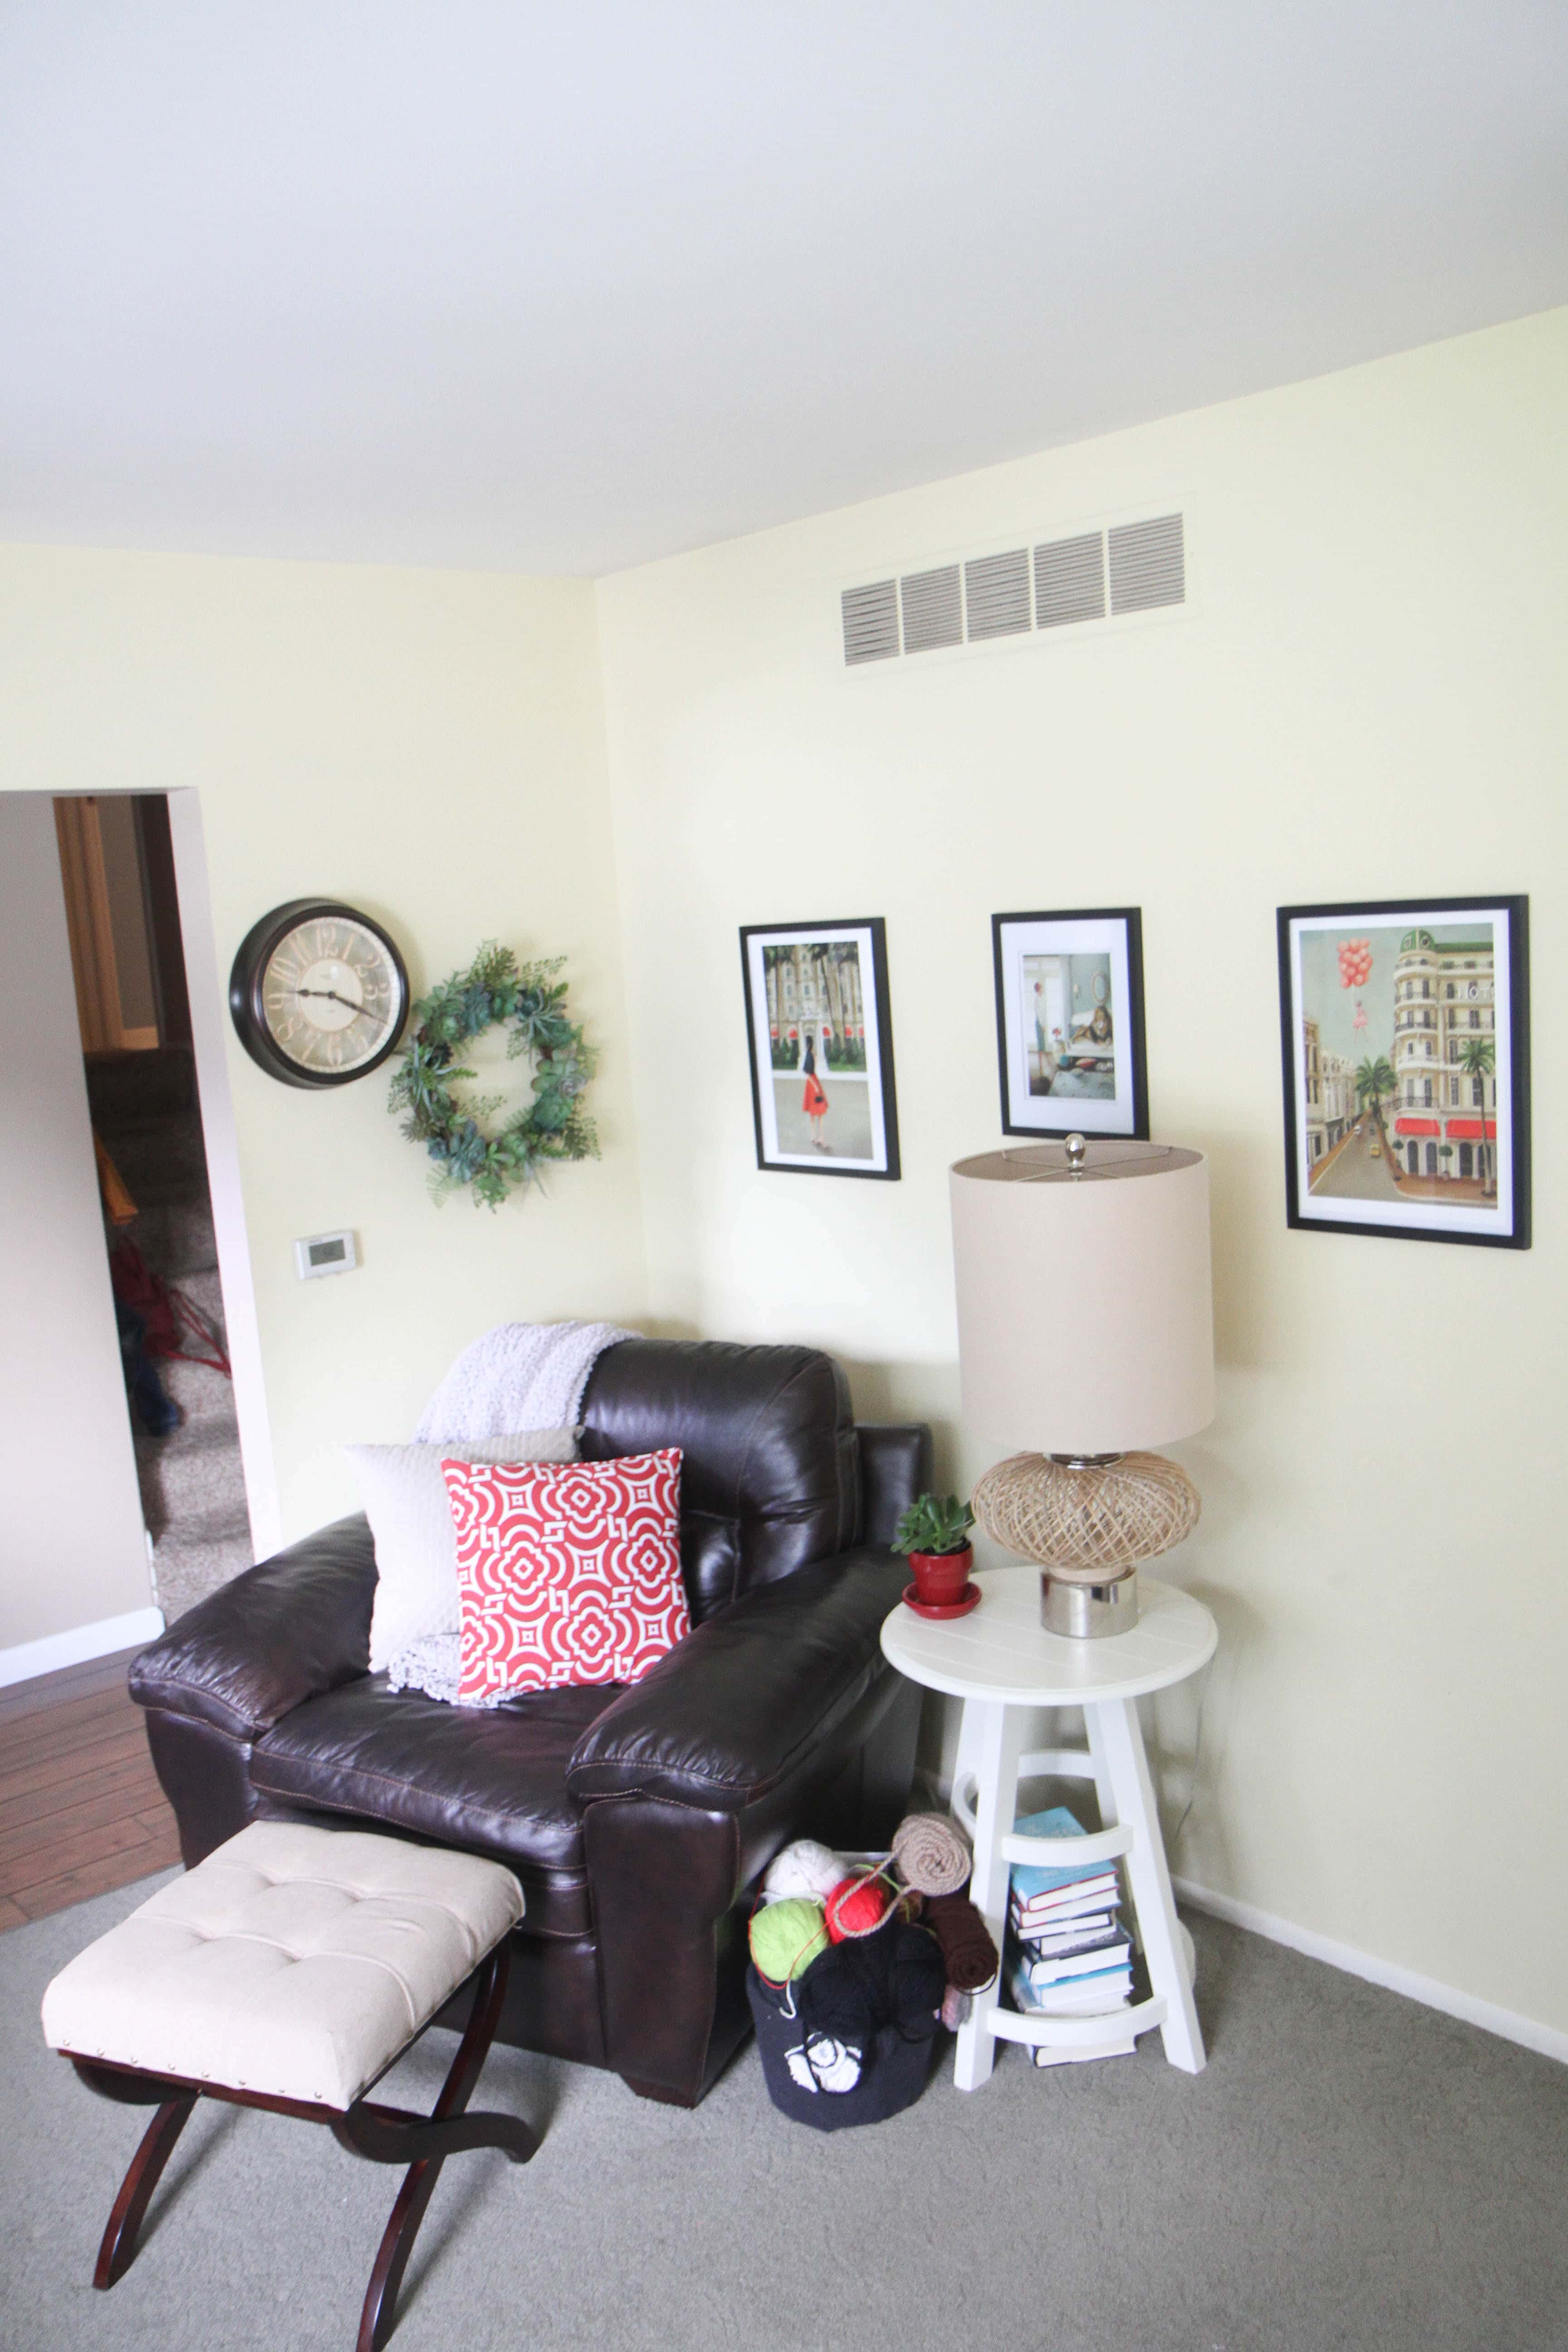
Furniture can truly make a room feel larger or smaller depending on the size of it and the purpose it serves in your home. Our larger furniture that we purchased for our previous home was not well-suited for the home we had now, but replacing it was not a cost that we could really afford.

Instead, consider scaling back on the amount of furniture you have in your rooms. Do you truly use the side tables in your home? Is the coffee table really needed or would your space benefit from an ottoman that could serve as dual storage? Try removing pieces of furniture from the room and see if they make the flow of the space feel bigger.

The Power of Living Small from MomAdvice.com

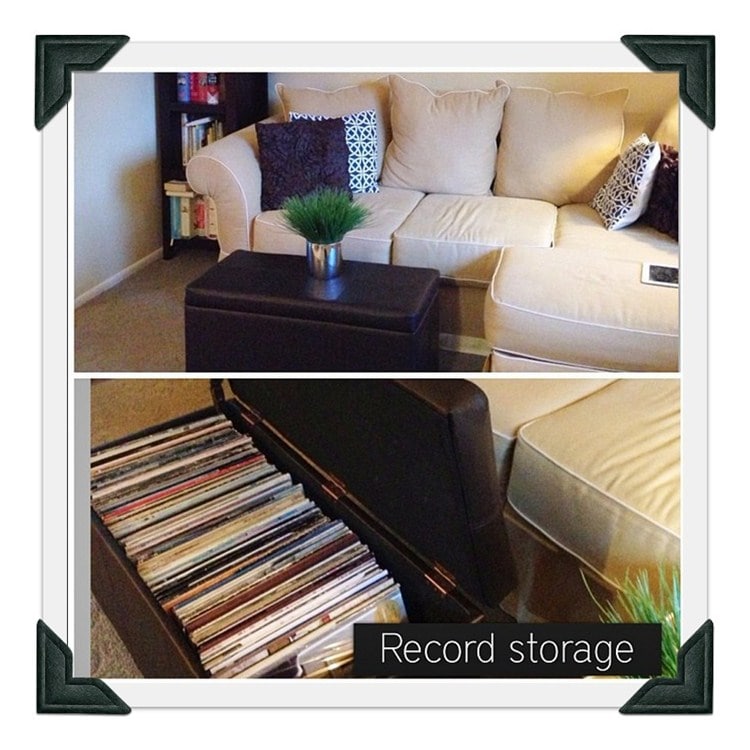
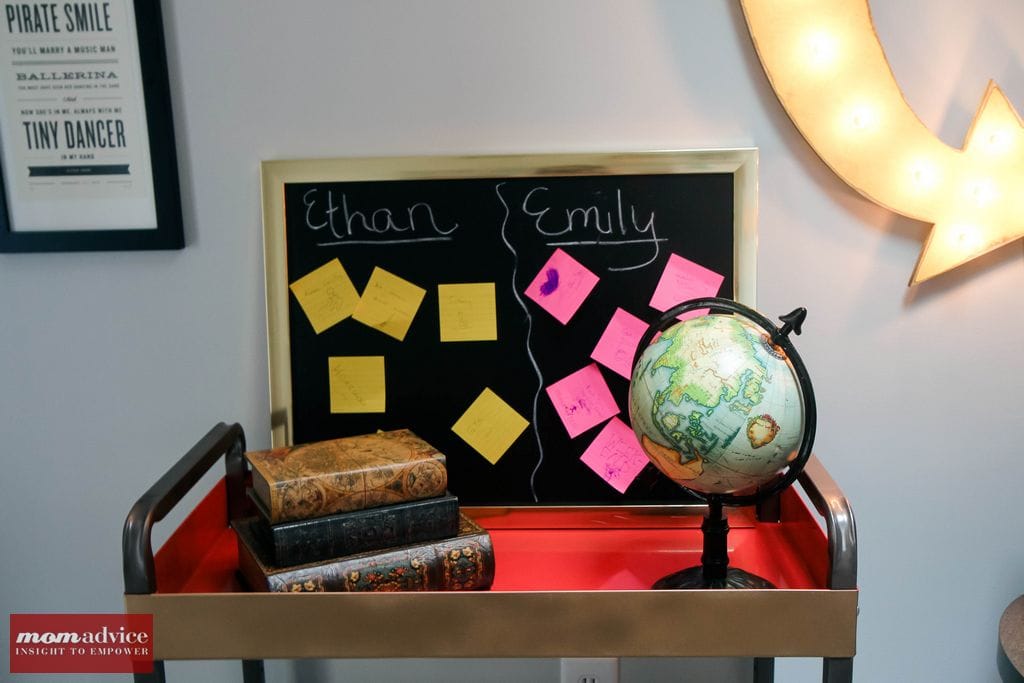
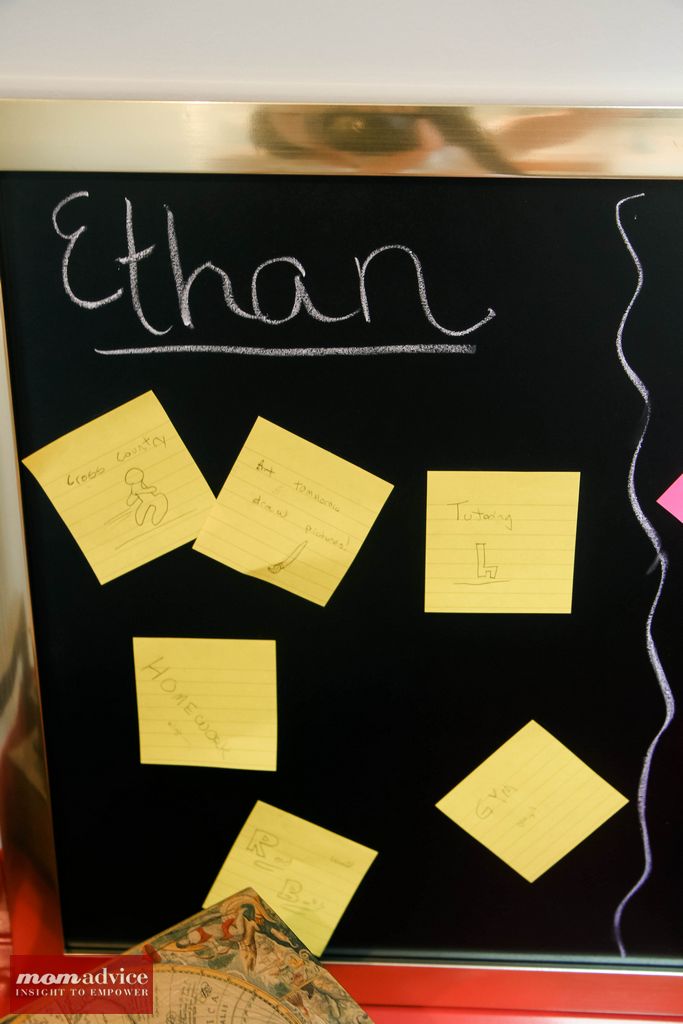
When you do replace furniture, try buying items that could serve as a dual purpose or could maximize your smaller rooms. Our ottoman in our family room is the perfect place to tuck our record collection in our home, for example. One piece, but two functions to everything helps to make the most of the corners in our home.  The furniture, as we have begun to replace it, serves multipurposes like beds with bookcase and drawer storage.

Basement Before 2

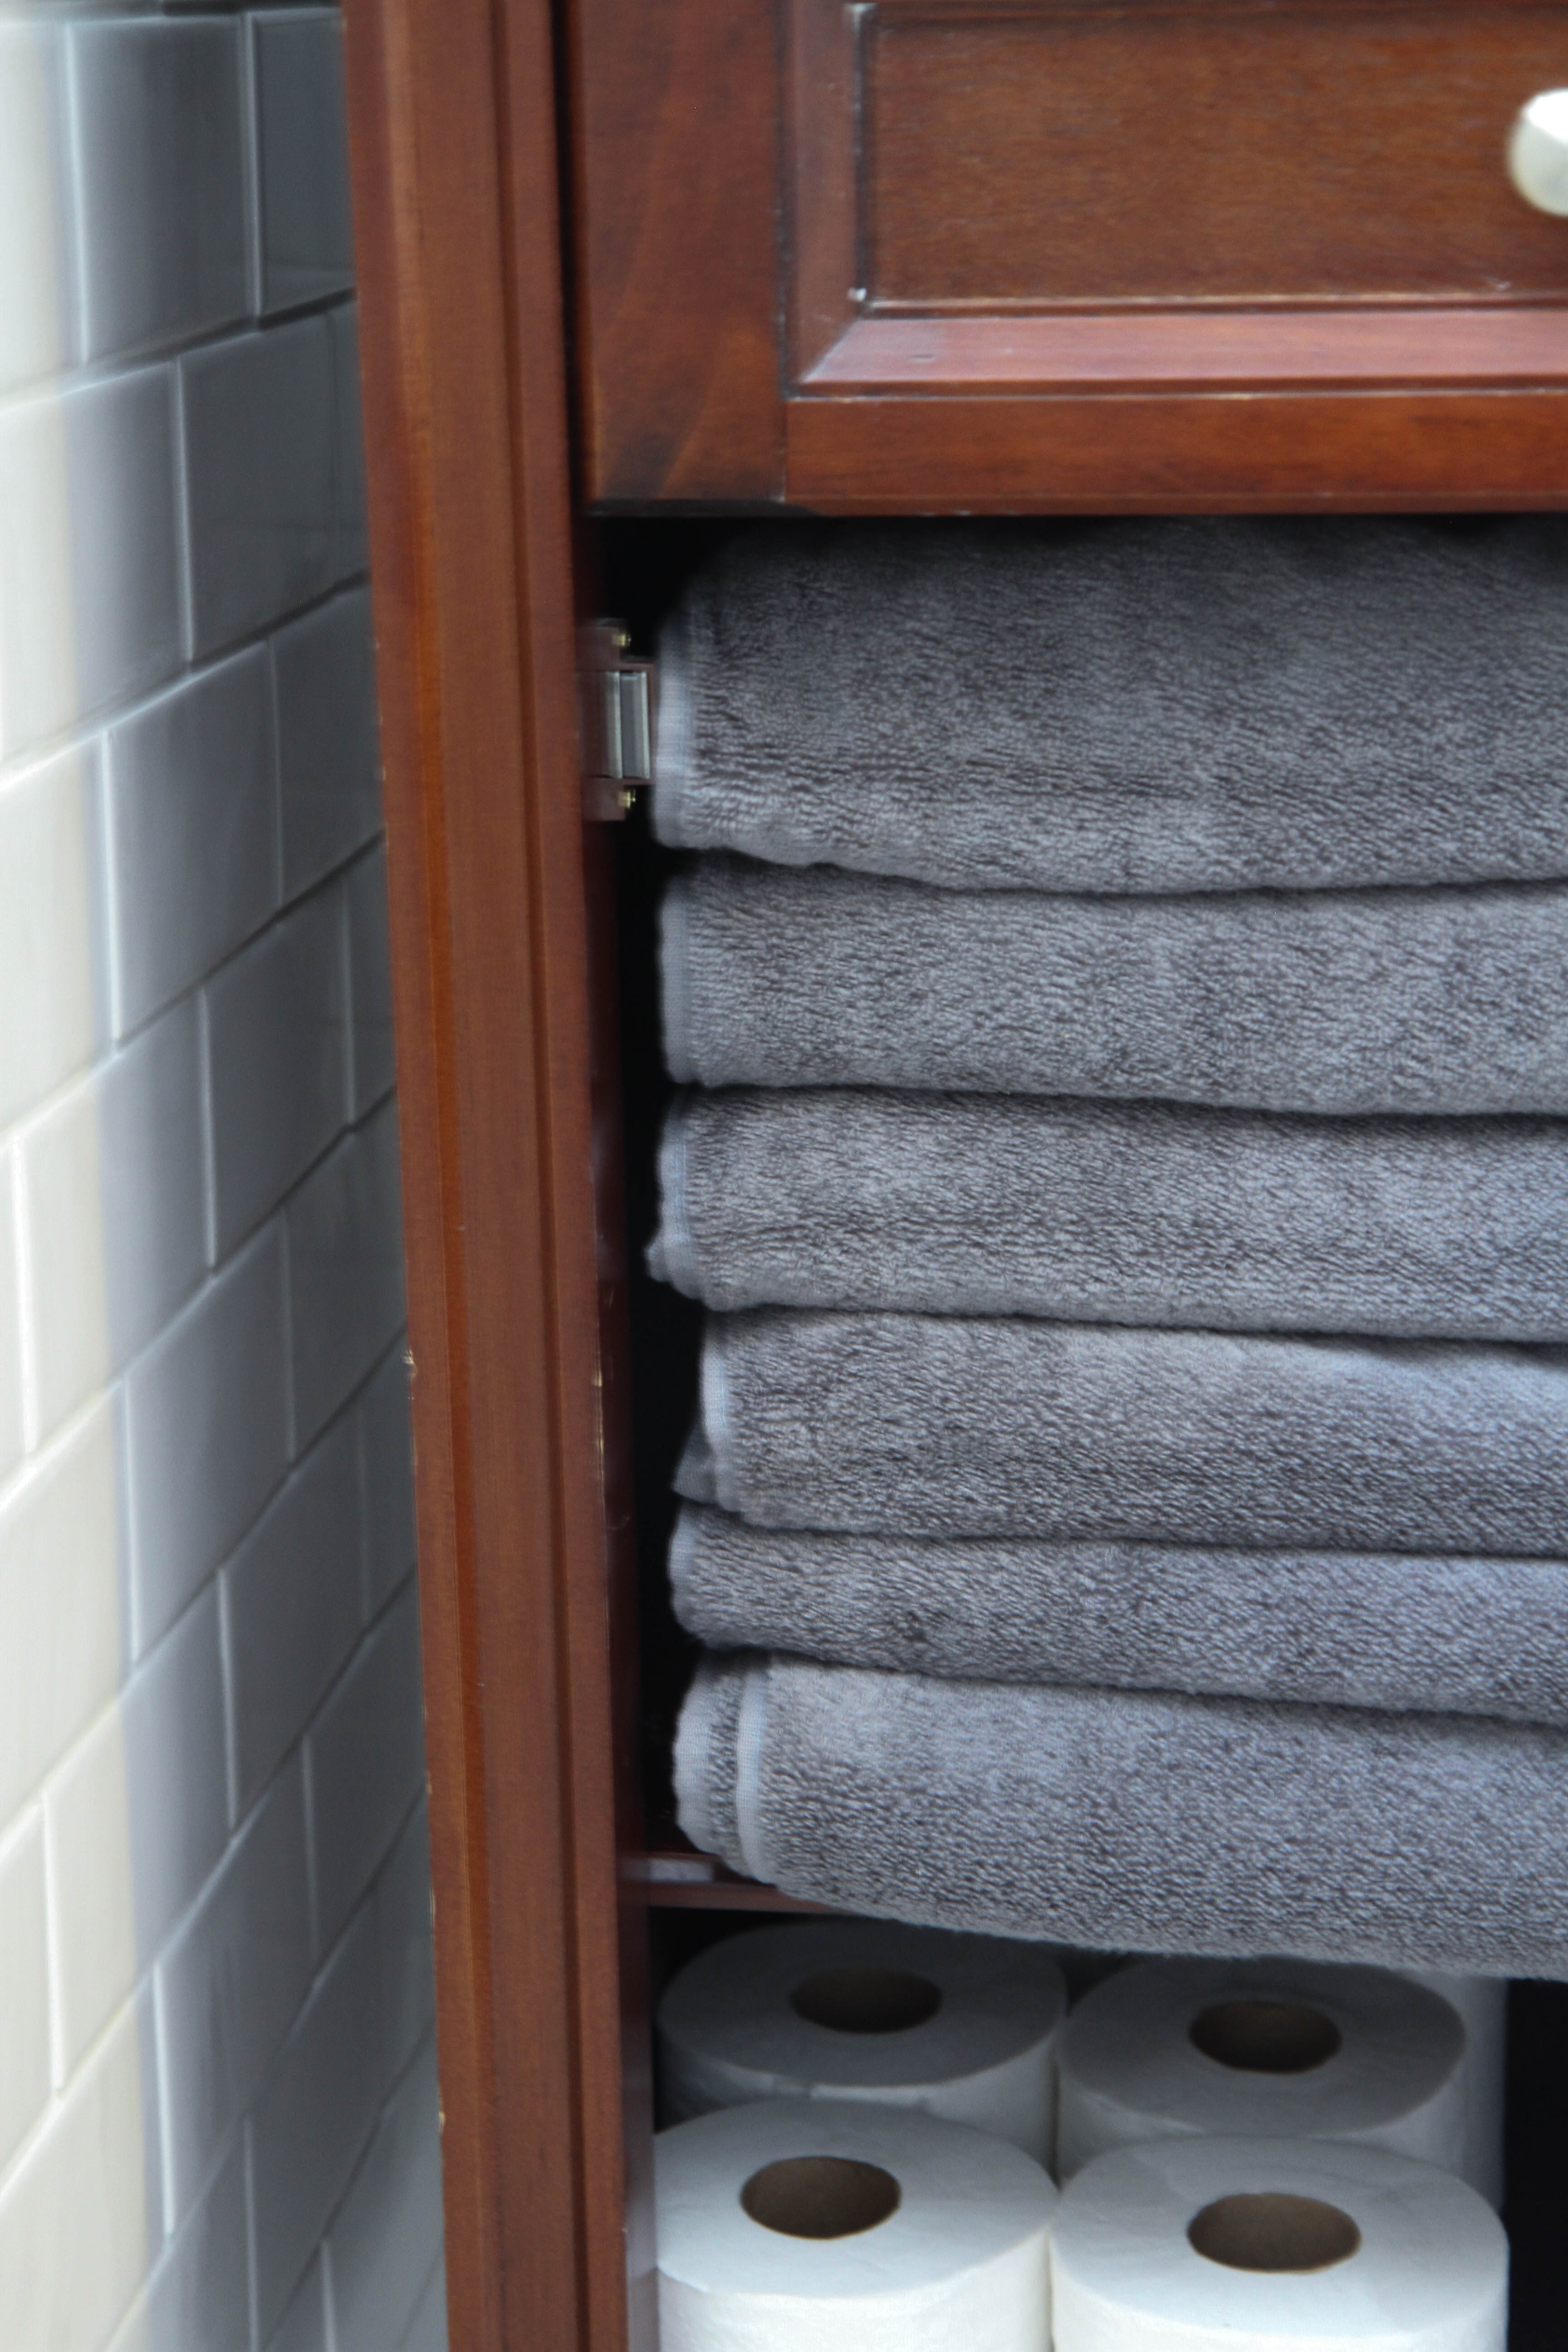
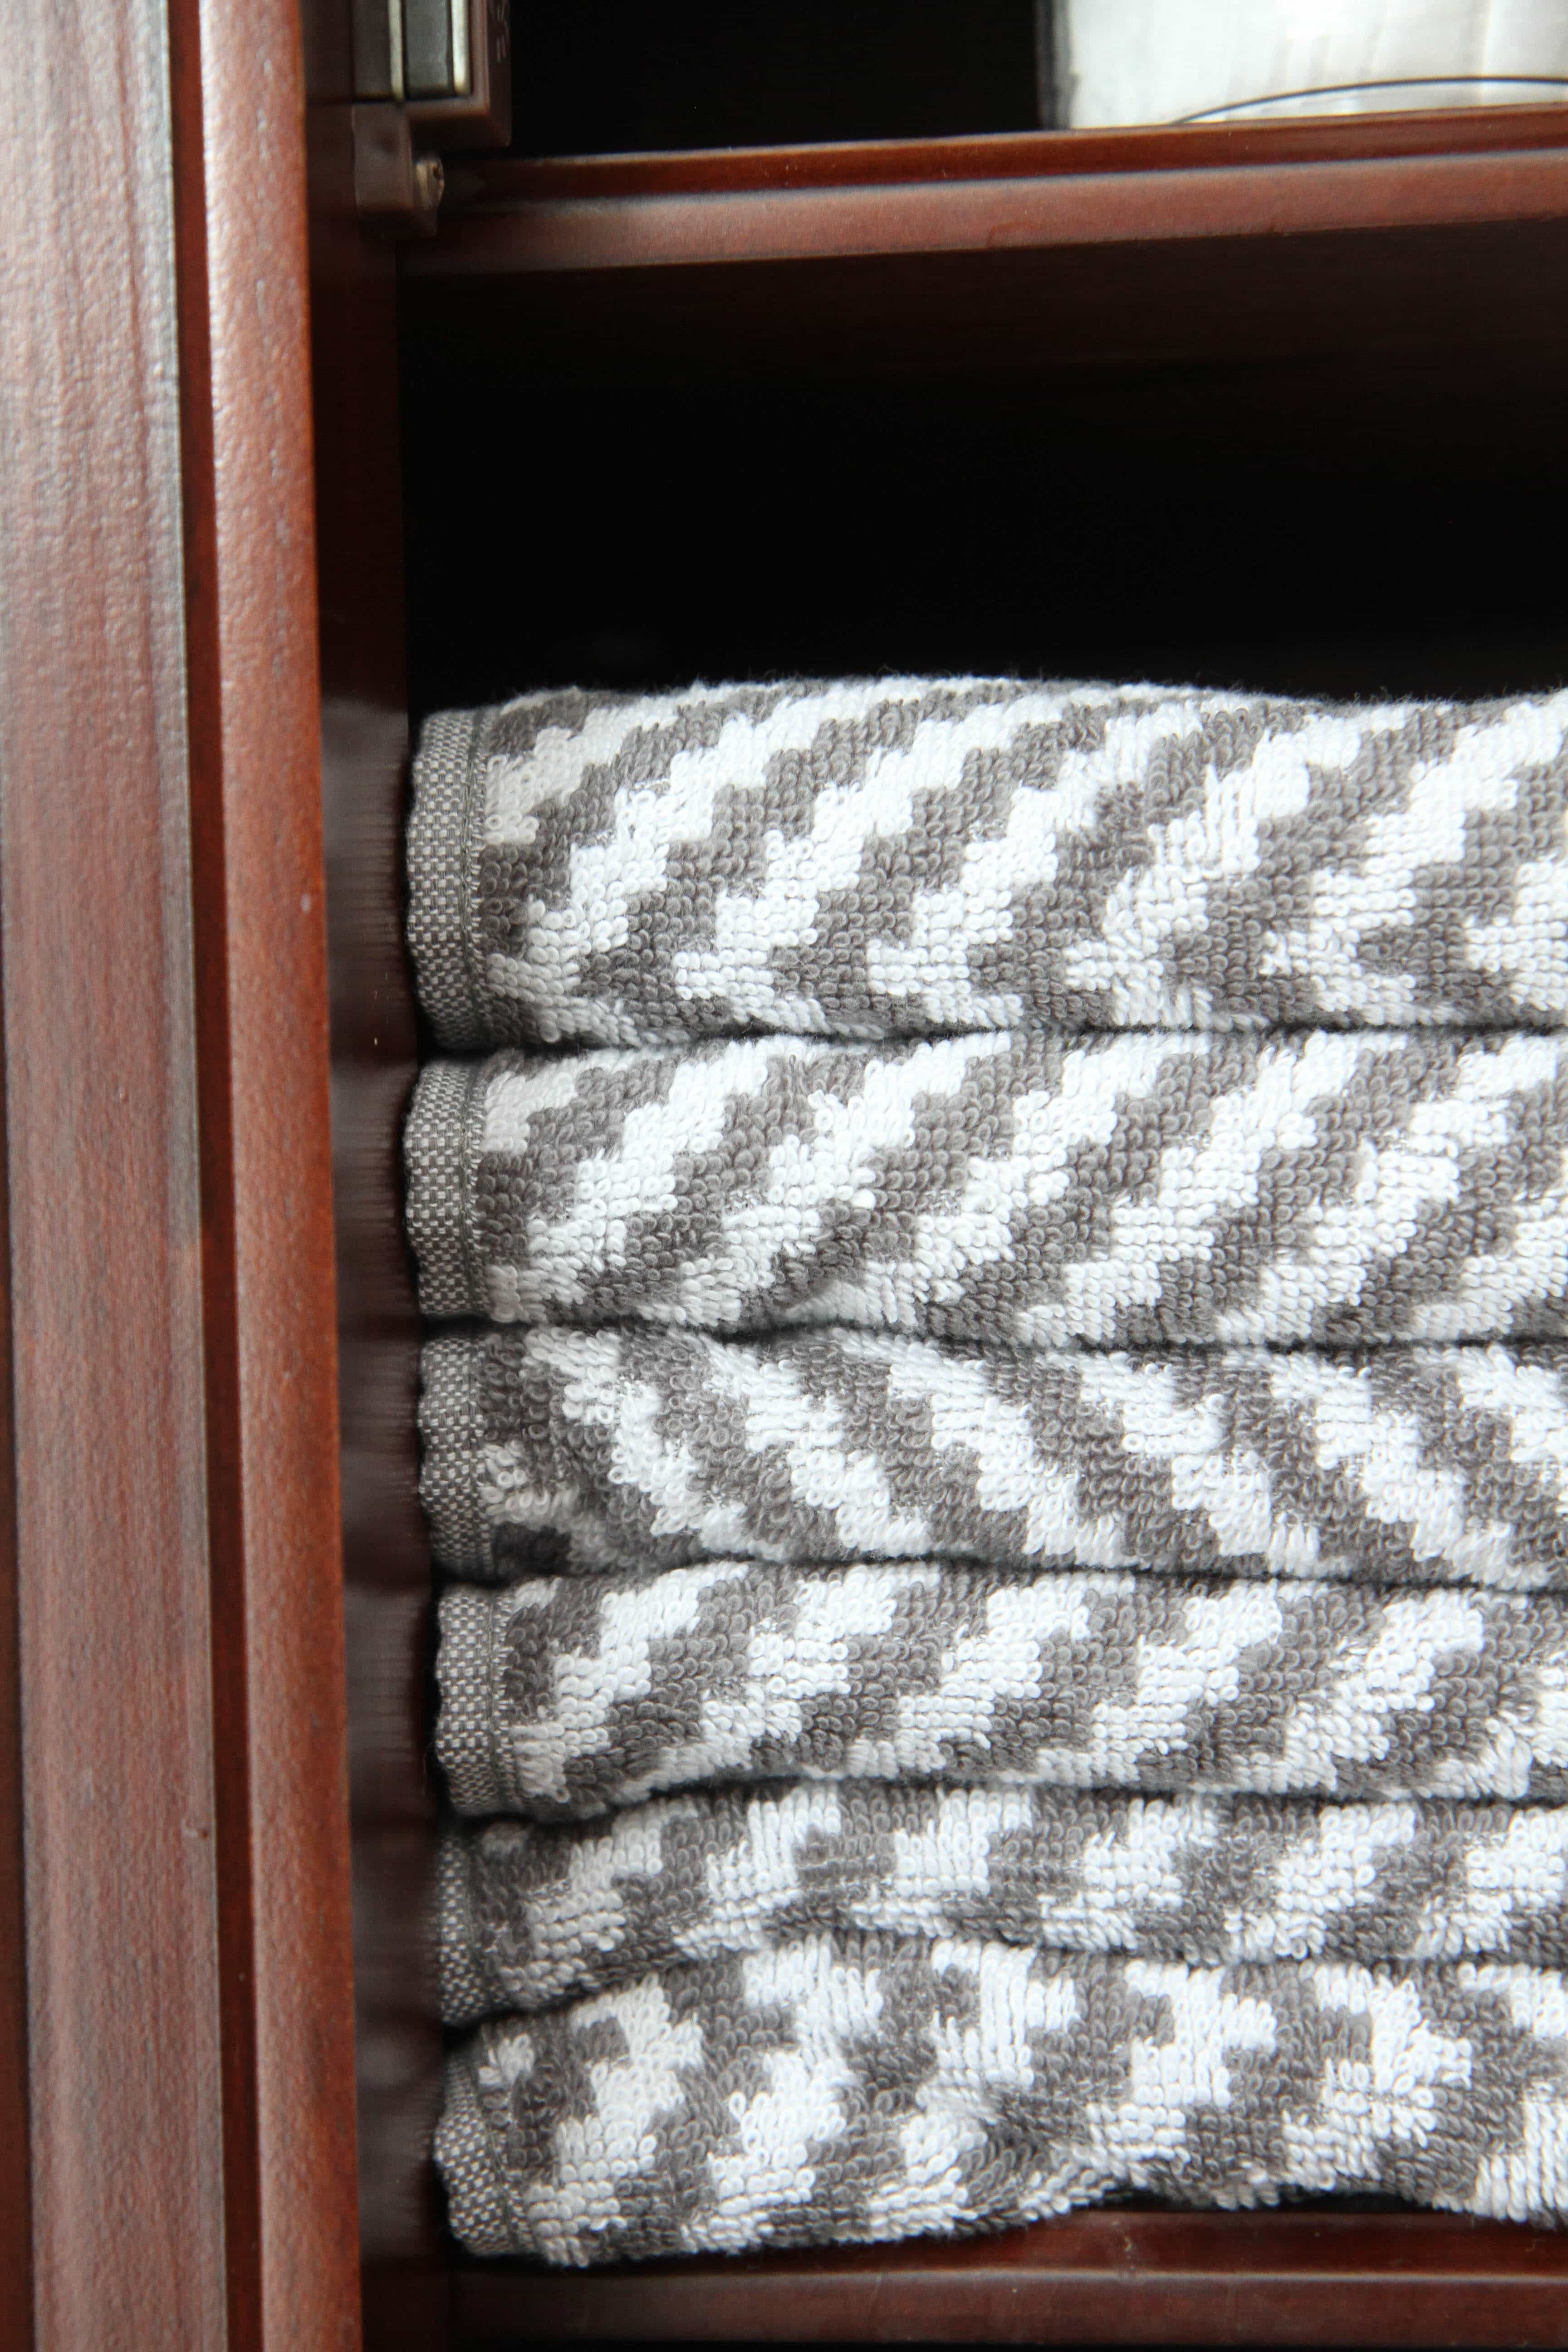
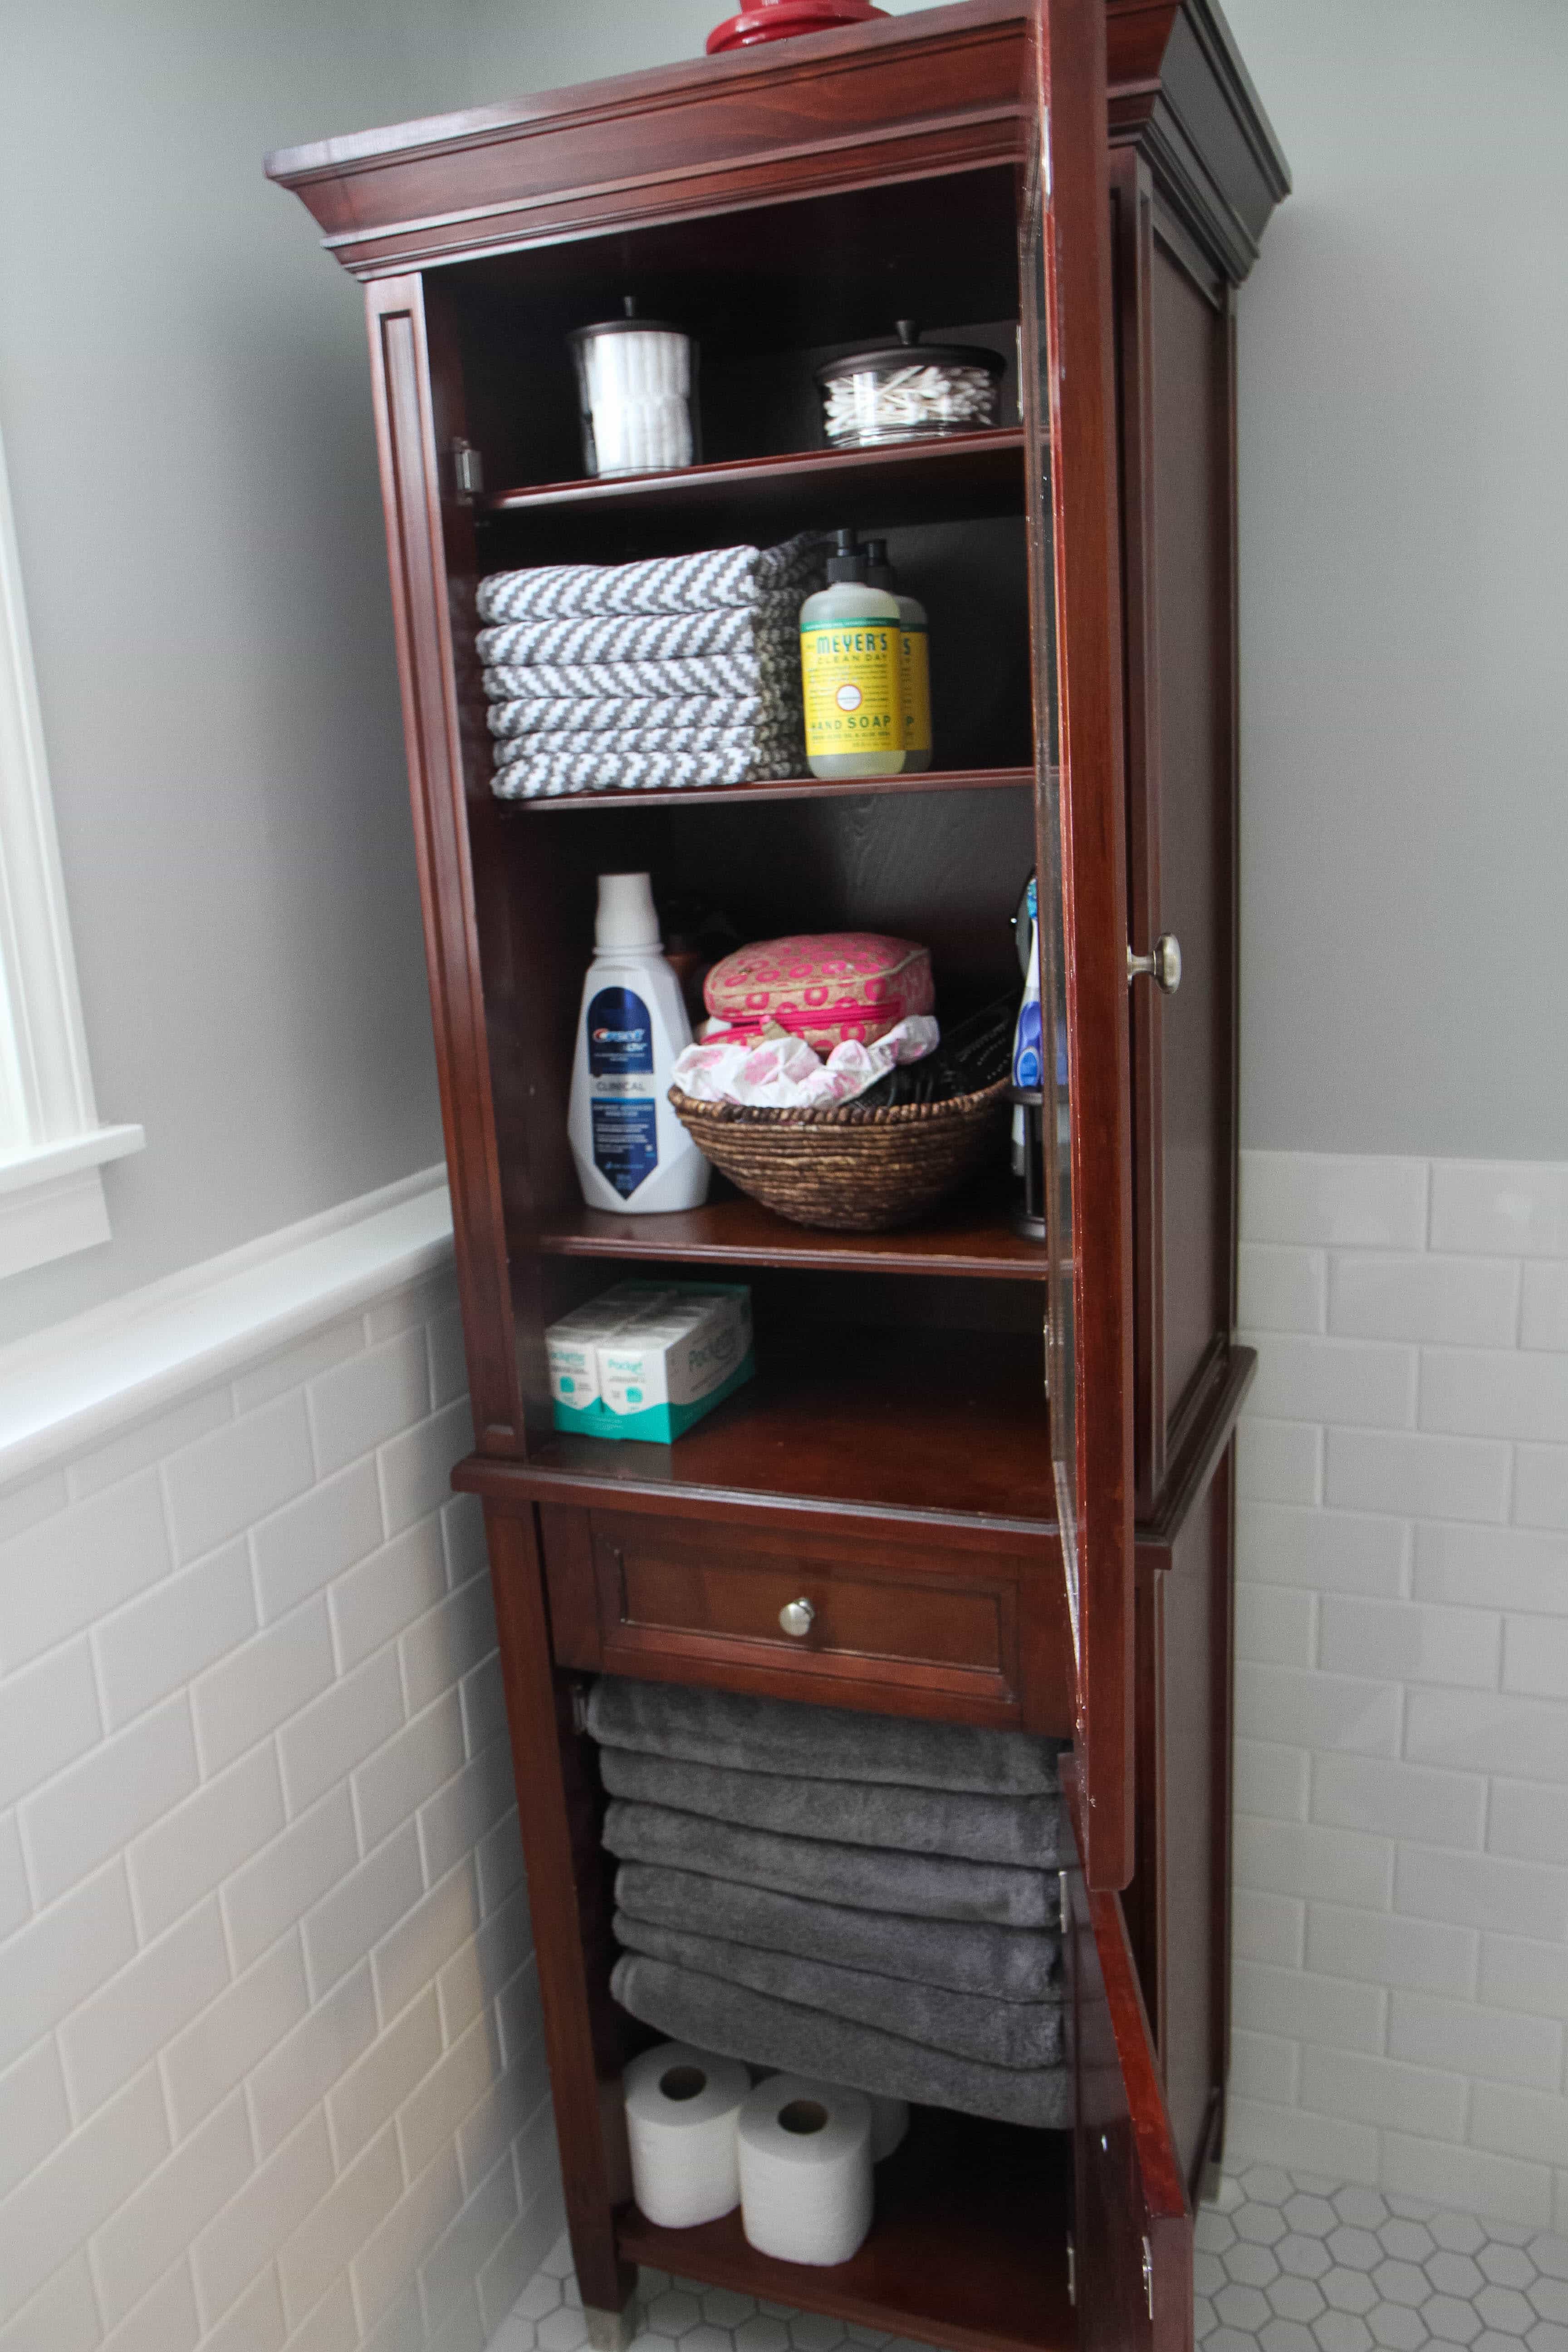
Cut the Clutter in Half

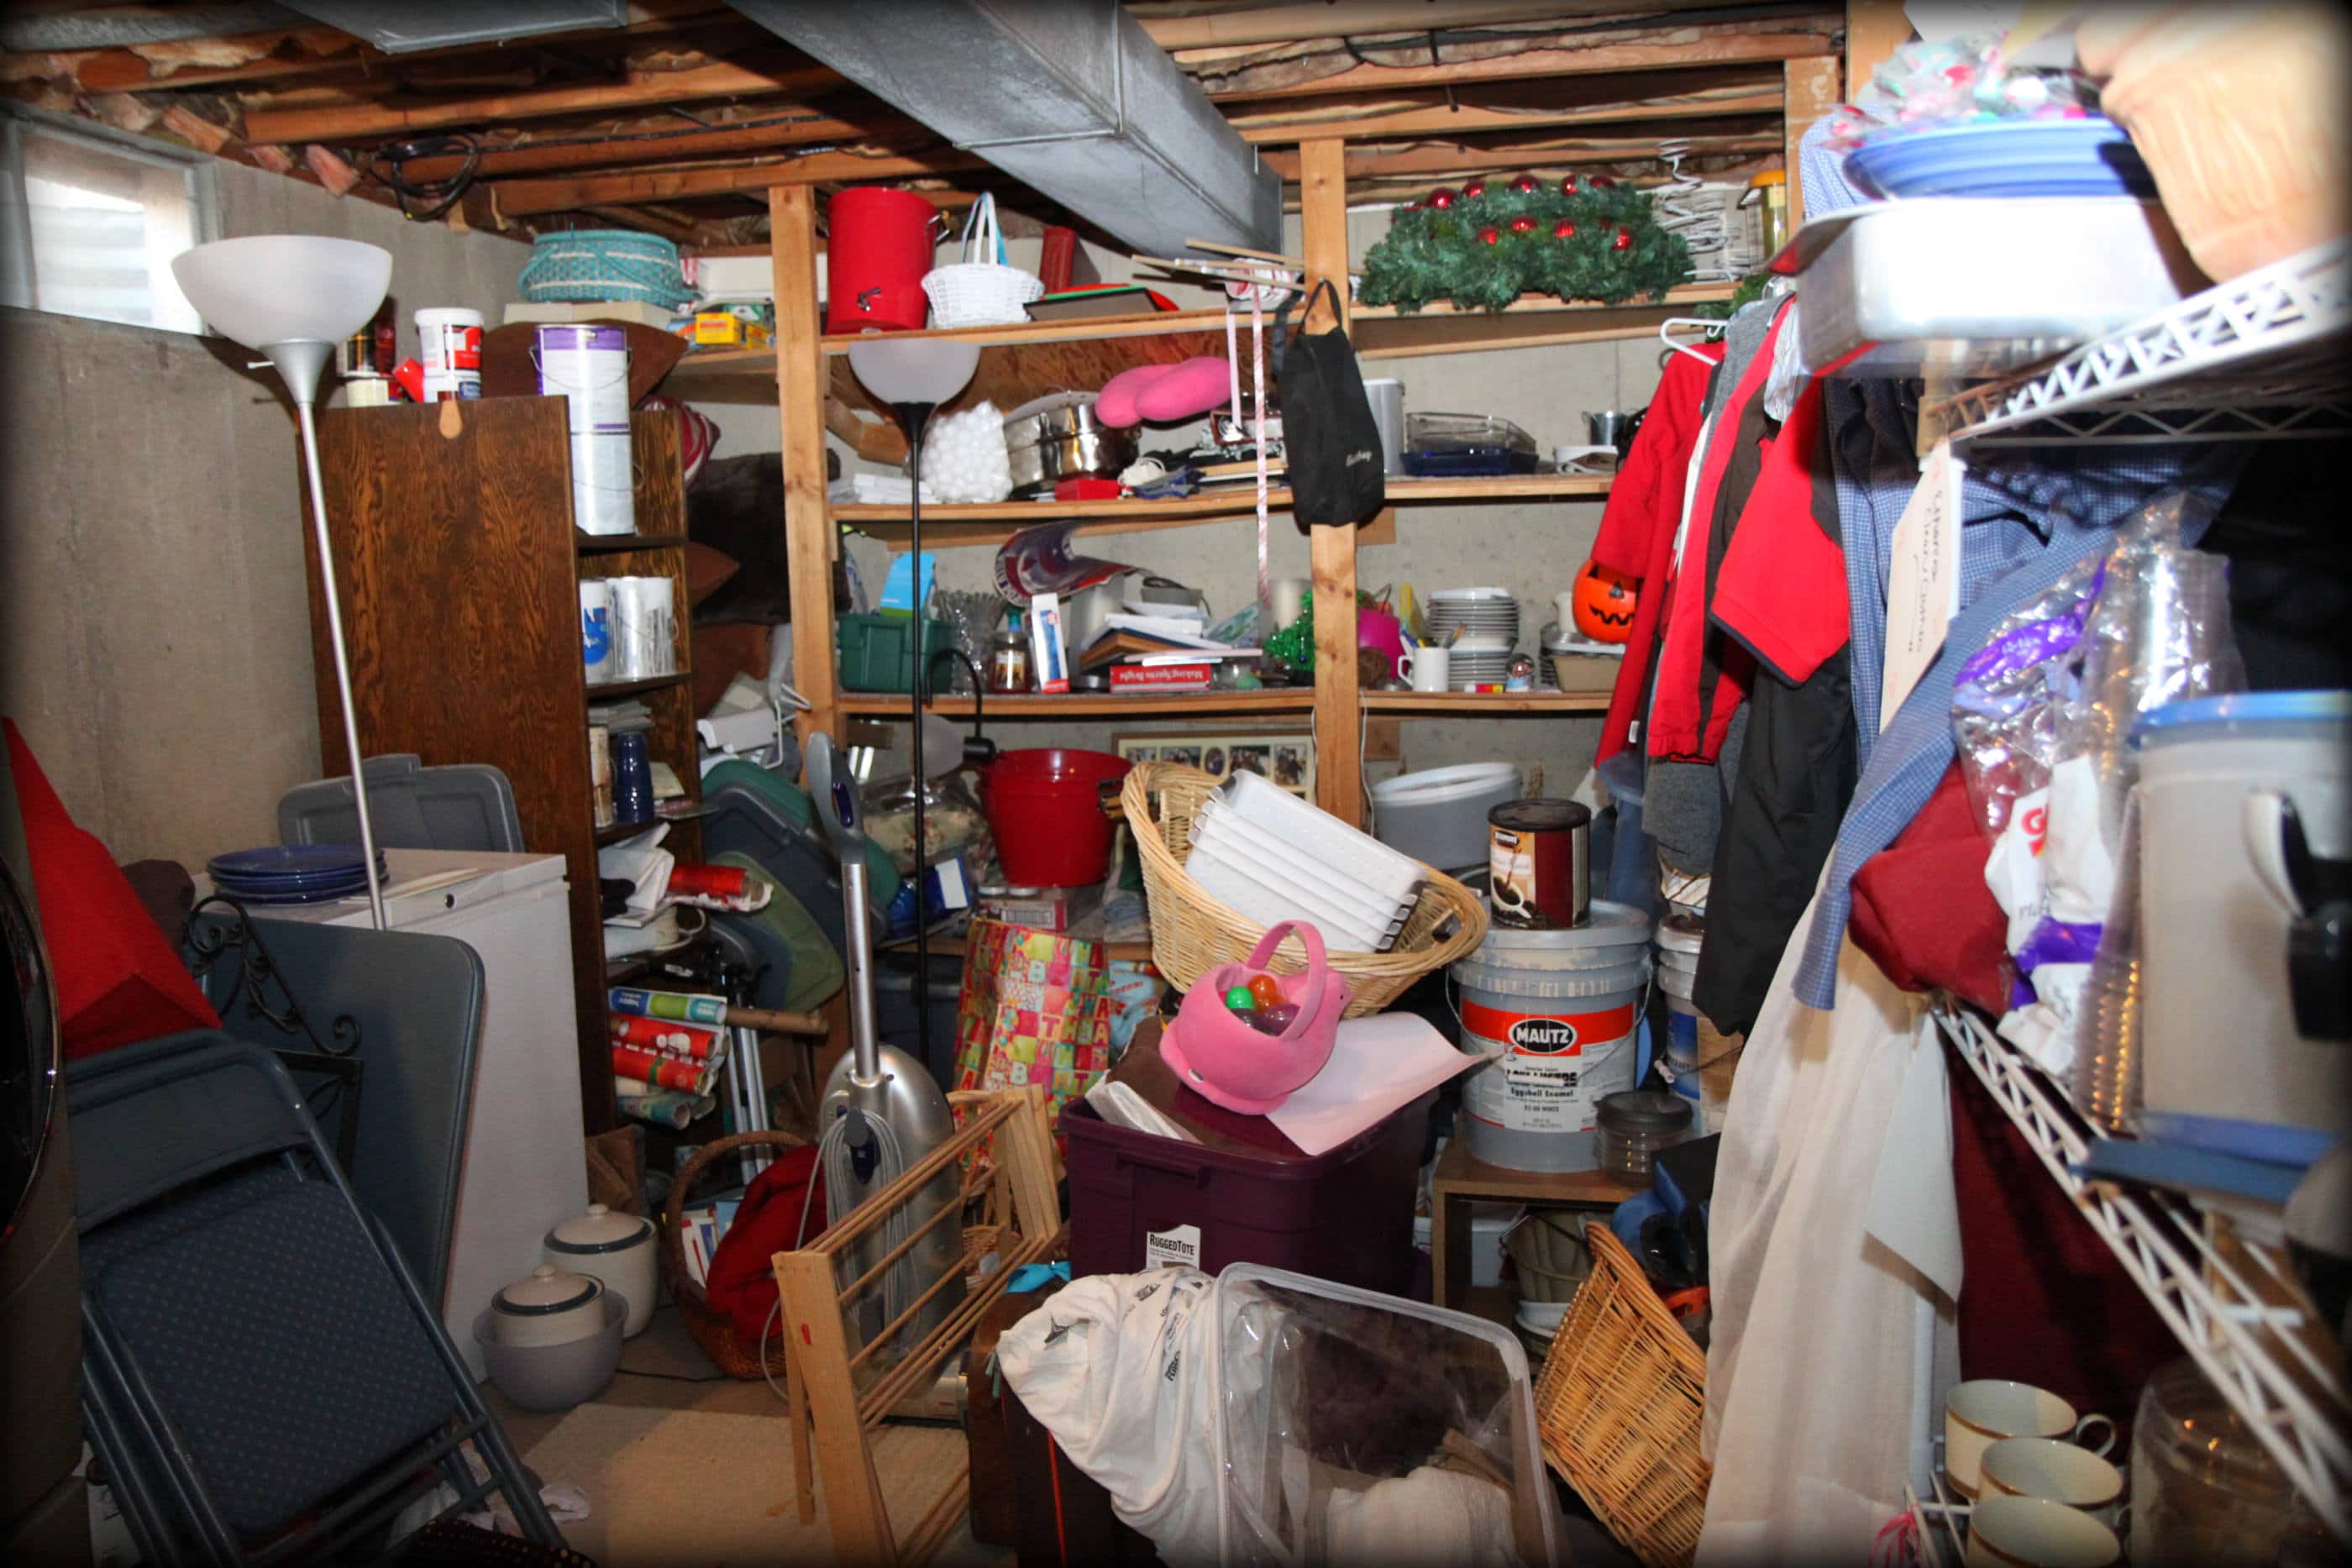
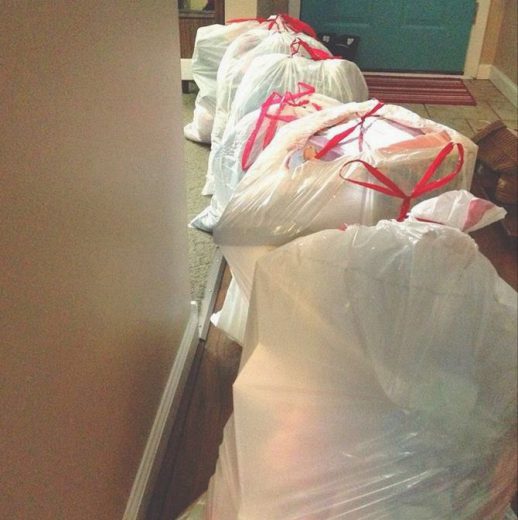
The best part about living in a smaller space is that it has forced me to edit the belongings I have and has kept me from buying as much as I would in a larger space. If your home closets that are small, if you don’t have a basement, if there is no garage…than these situations can truly work for you as a way to keep your clutter naturally under control. Here is my spot where I like to throw things I don’t know what to do with- we all have ’em. I am a work in progress just like the next person, but I am proud to say that I have reduced our clutter by 50% this year thanks to a few new decluttering & minimizing challenges I have embraced.

Lately I have been trying to live my life by the infamous quote from William Morris, “Have nothing in your home that you do not know to be useful and believe to be beautiful.” If it is not bringing beauty or usefulness to my space, then I can feel good about passing those items on to someone else in need.  Suddenly, my kitchen counters feel spacious, the basement really does have a spot for everything in storage, and the house really does have enough space for us all. It’s all about perspective and investing in the things you really do want in life.

Consider making a weekly date with yourself to devote an hour towards improving one spot in your home that you struggle with. If it is a drawer that never opens, an office that is filled with useless papers, a basement that has become an avalanche of misplaced items, spend your hour making those spots in your home better. Make it a goal to cut the clutter in half in these spots to make them more livable and enjoyable.

The Power of Living Small from MomAdvice.com

Make Wise Renovation Investments

Once you cut the clutter in your home, you can begin dreaming of new ways to use that freed up space. Renovating your home can be costly, but it is not as costly as it is to buy a brand new home. The best part is that you can take your time with it and tackle one corner at a time, personalizing it to your own personal style. If there is a particular area in your home you want to improve, consider getting an estimate to make your space more livable. Many homes have unused corners and smaller spaces that could be improved upon to make the home more livable.

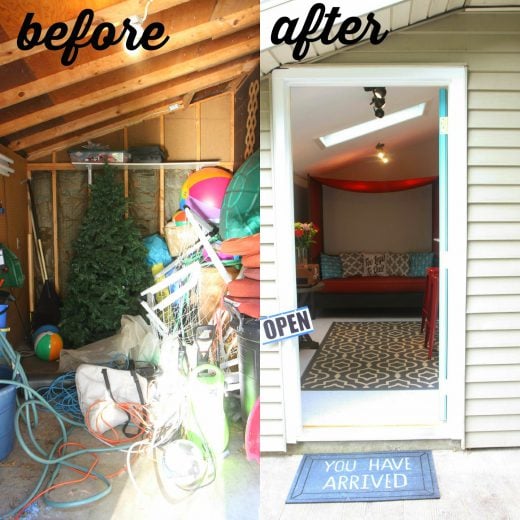
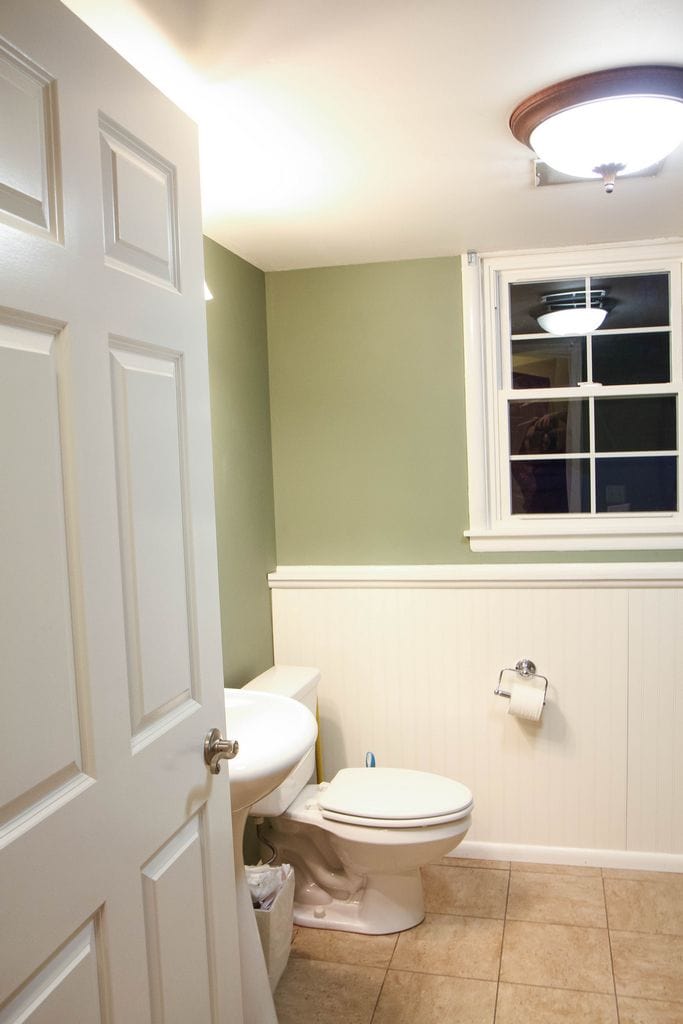
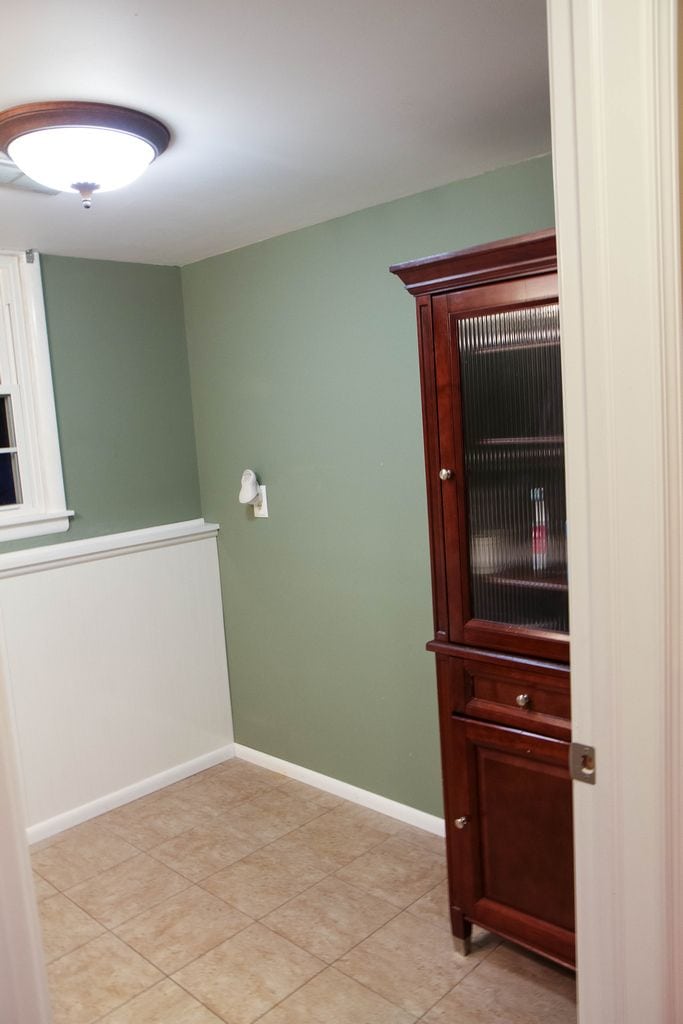
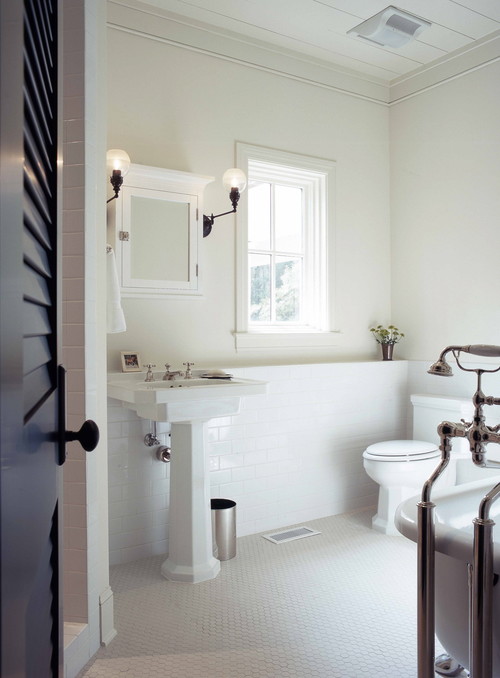
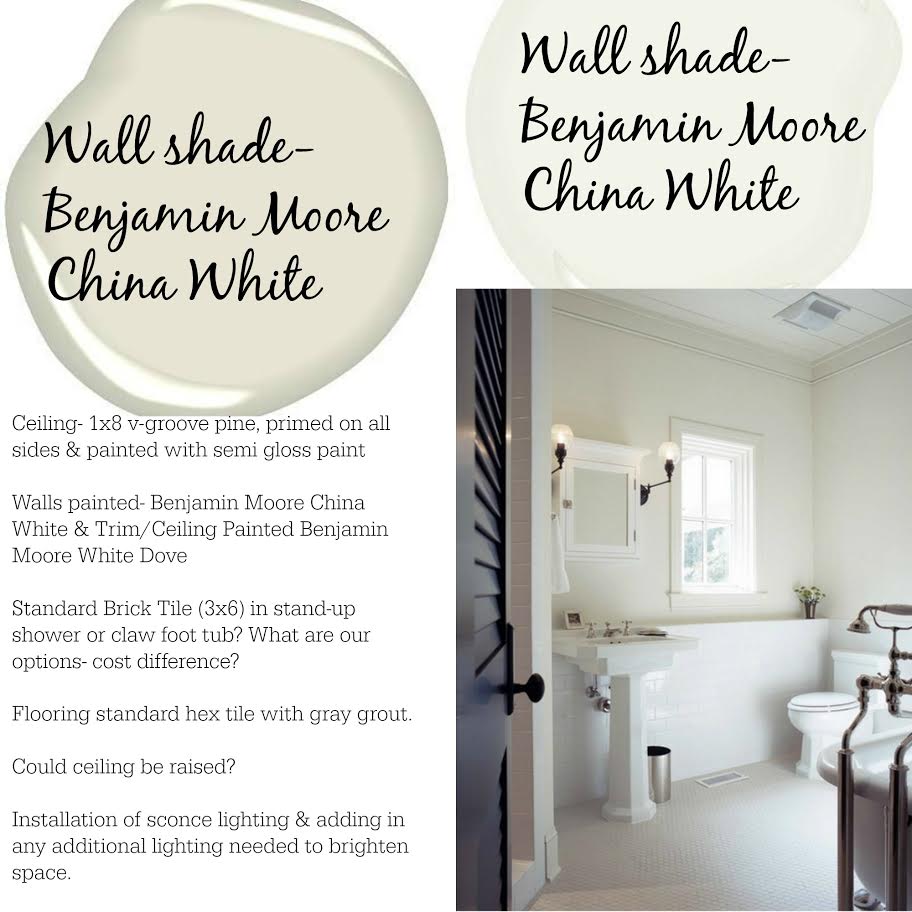
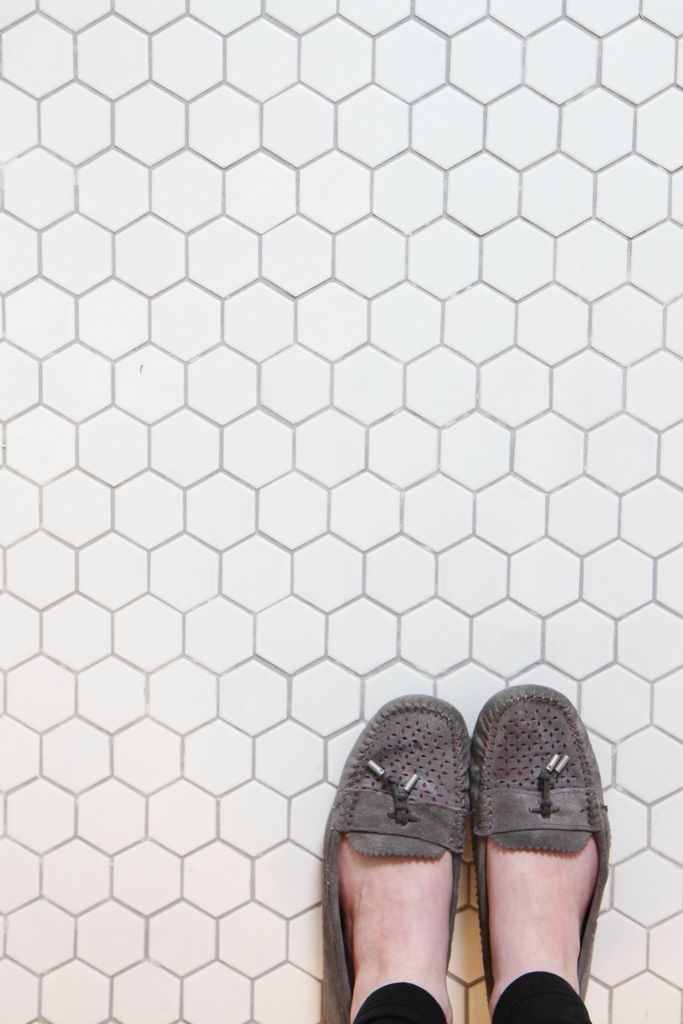
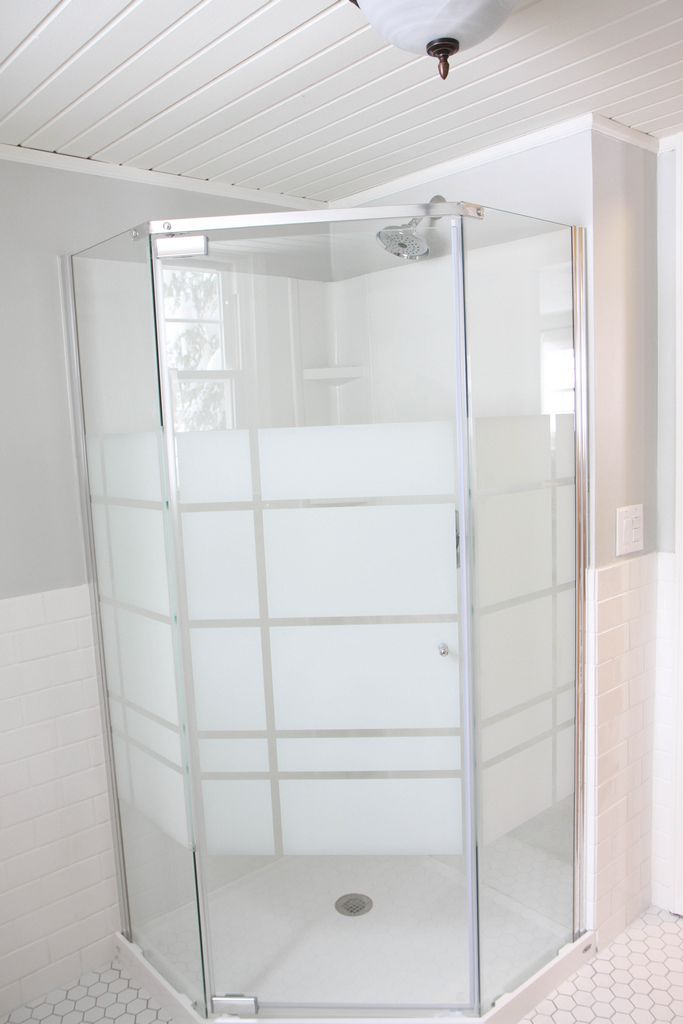
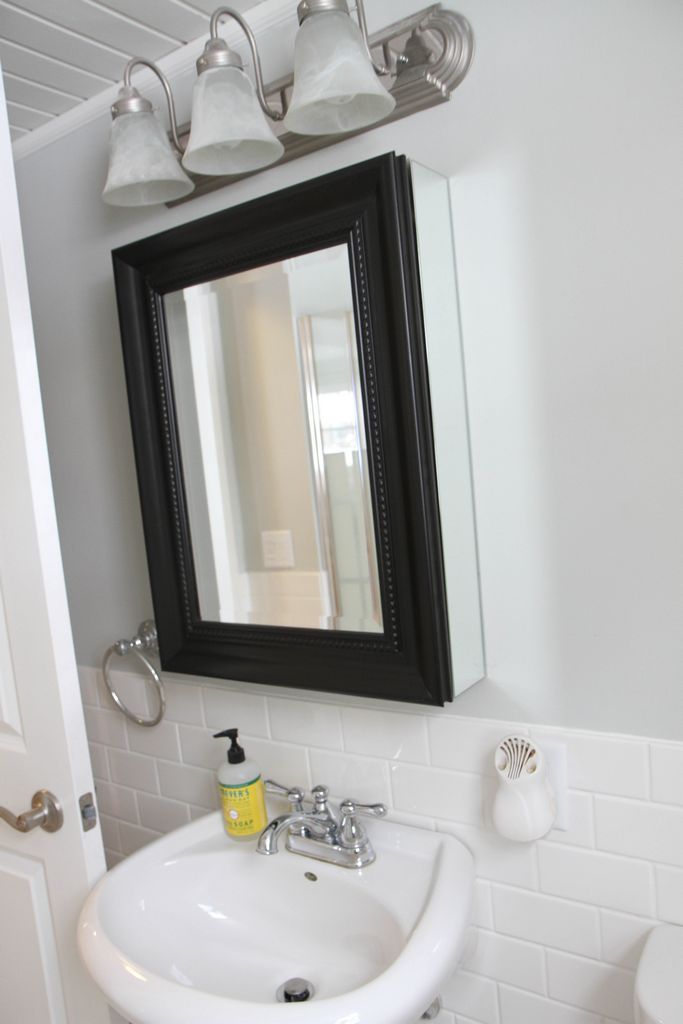
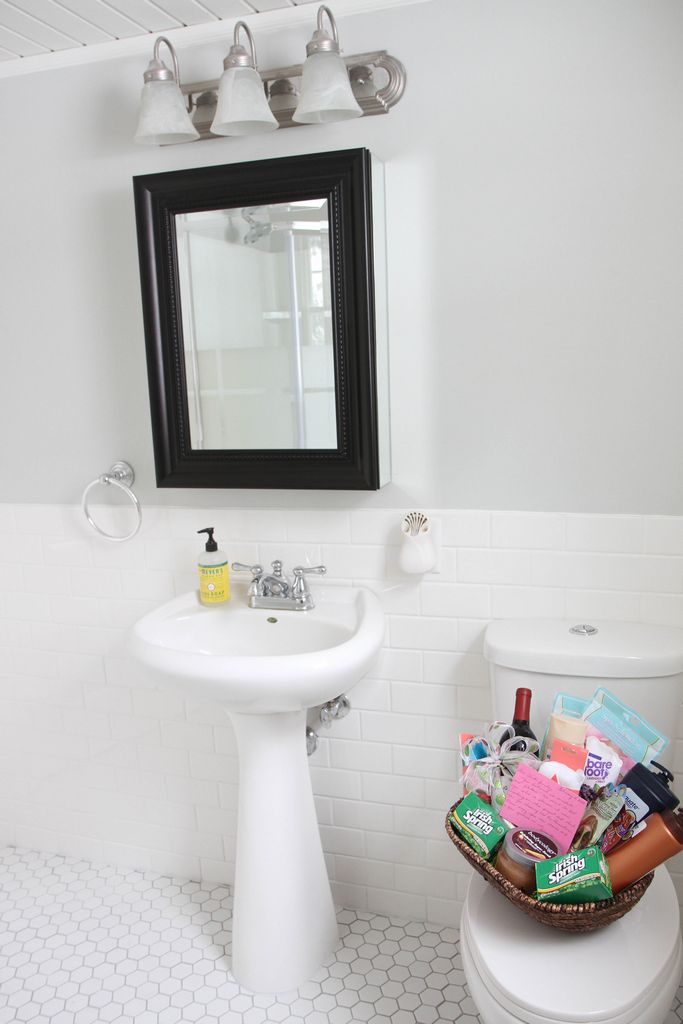
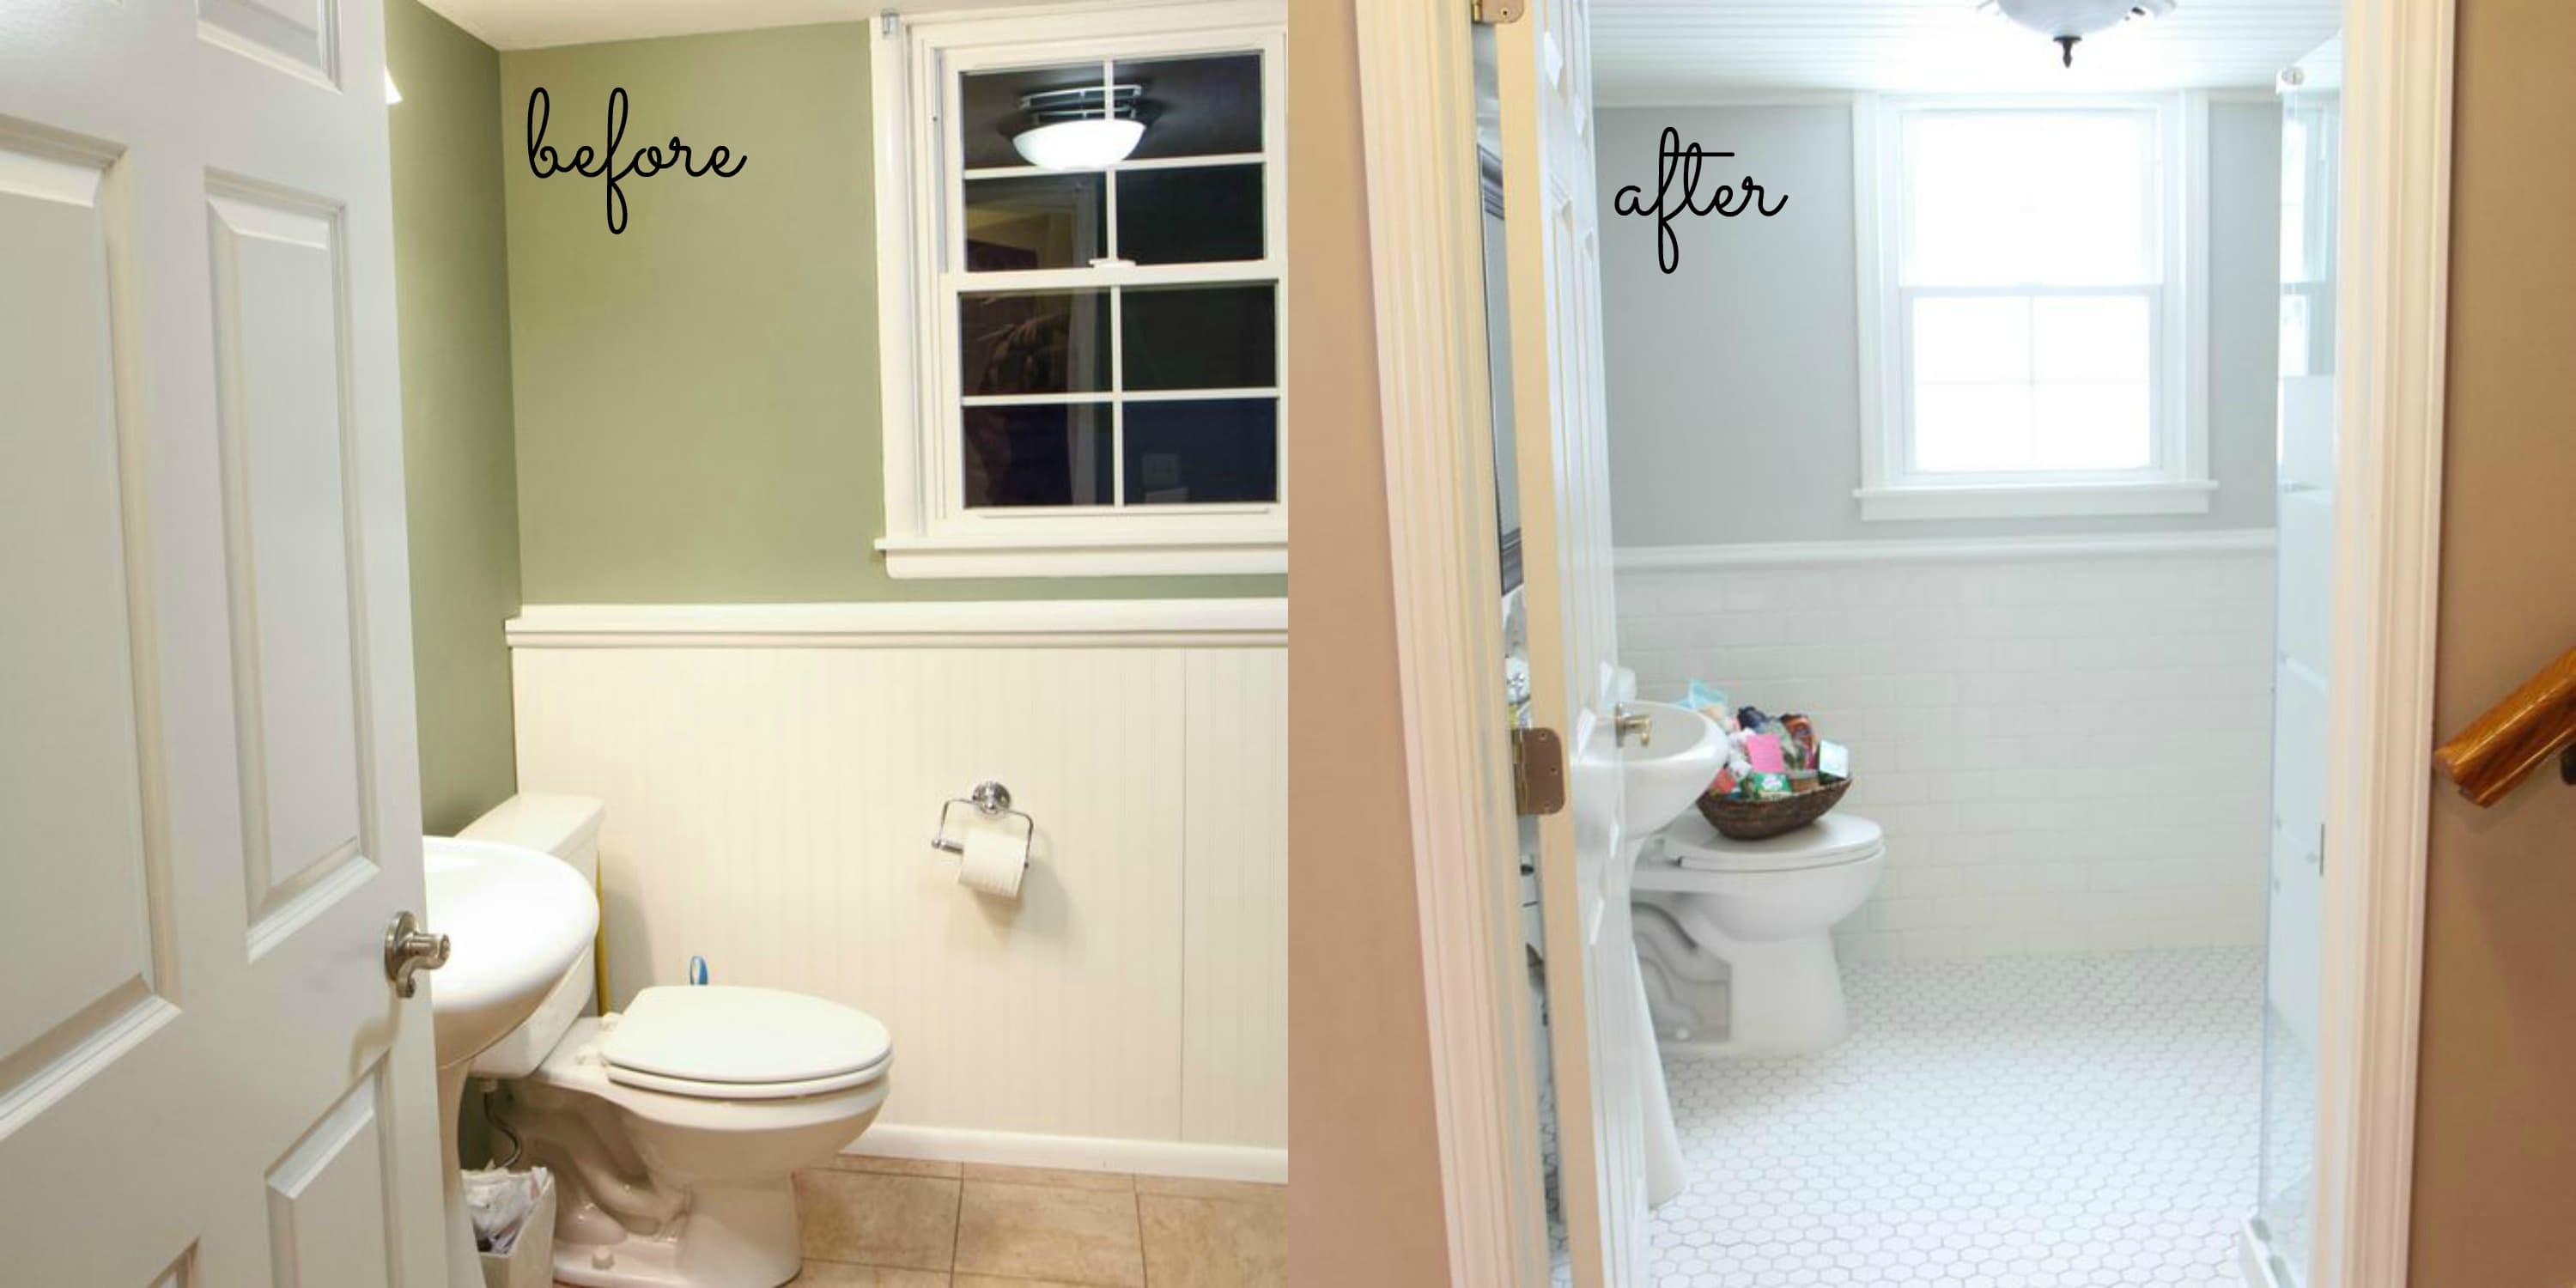
Our little house got a much needed renovation to make our space work for us for many years to come that has been one of the wisest investments we have ever made.  With one wall knocked out and putting unused basement storage to work, our home was renovated into a spacious family room and a quiet home office in the basement. Each year we tackle one project (at least) to make our home look and feel spacious and loved. We have updated our backyard shed into a useable bonus space, we did a beautiful stamped patio & firepit that could act as an extension to our indoor space outdoors, and we added little things like a fireplace in the office that cozy up the home, and knocked out walls to let the sunshine in through big open windows. As we speak, we are adding a shower to our little guest bathroom so that we can make this home a two bath house.

With a ’60’s home, there will always be projects, but I actually love the dreaming and scheming of making these spaces in our house uniquely us.

As my husband’s grandmother says when she visits us, “I love coming here because there is just always something new to look at!” That is probably a very true statement since we are always working on our little fixer-upper.

Begin really thinking about the space you are in and how you could make it work for your family. Look for guidance in home magazines or consider spending the money on having an architect coming to evaluate your home to draw up a plan for making more out of the space you are currently in. You may be surprised to discover how much more square footage you might have right where you already are.

Family-2014-1

Make Your Space Feel Permanent

If you look at your home as a temporary place until you find something better, you might be overlooking the chance to really make the space you are in work for your family. I found that when I finally told myself that this was my home (whether I liked it or not) and put the elbow grease into it, it transformed not only the space…but my attitude towards it.  As with all things in life, it is what you make it and I am choosing to make it the best that I truly can!

If you are living in a smaller home or apartment, just remember to consider your blessings. Not only do you have a mortgage or monthly payment that you can afford, but you have less of a home to clean, a natural way to edit the excess from your life, and more importantly….cozier quarters that force your family to always be together. What could be better for a family than that?

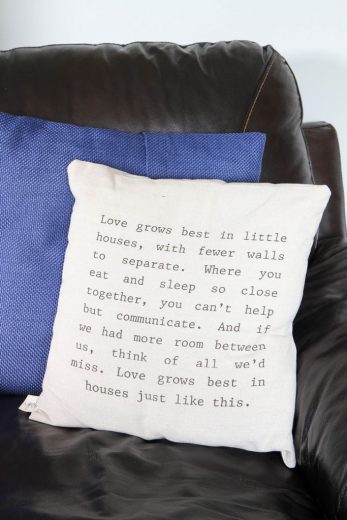
We have a sign hanging in our home that reads, “Small homes grow tight families.” It is truly my belief that  our little house fosters just the kinds of relationships that I want with the best people in my life.  I can continue to maximize the square footage on the existing space, but I love the togetherness that our smaller space brings.

How have you learned to embrace the space you are in right now?

Pin It

Declutter Your Space & Rid Your Life of Clutter Forever

Tuesday, February 3rd, 2015

How to Declutter Your Home from MomAdvice.com

This year I went on a journey towards being truly serious about decluttering our home of unnecessary items.

I would conservatively say that we have reduced our belongings easily by 50% and I still feel that there is more that we can do this year. Is your dream to declutter your space this year and rid yourself of clutter forever?

It is a common resolution and I am living proof that this is achievable, although I will always be a work in progress.

Today I want to share with you a few resources that have helped our family on the journey towards reclaiming our home – the transformation is so worth it!


Try the 40 Bags in 40 Days Challenge

I attribute the 40 Bags in 40 days Challenge as the kickstart towards decrapifying (that is totally a word!) our life.
Each year White House Black Shutters shares a 40 Bags in 40 Days Challenge that typically runs from March to April. During this challenge, you are encouraged to gather 40 bags of stuff that you don’t need over the course of 40 days.
I never dreamed that I could gather that many belongings from our home, but it started me on a journey towards realizing how much excess we really did have.
Each morning I started my day with a bag and tried to clear one spot in our house to create a more organized space.
I did not typically have a plan, only a desire to remove anything that I saw throughout the day that we didn’t need anymore.
As each bag was unloaded, it made our space a little less cluttered and a little easier to upkeep.
Utilize this list to help you begin tackling different areas in your home and download the free printable to track your progress as you unload the clutter from your home.
This is an example of a space that needed attention in our home that I worked on in the Spring.
With the 40 Bags in 40 Days Challenge encouragement, I was able to free our shed of unnecessary clutter and transformed it into a dreamy bonus room for our family.
Who would have ever thought that this cluttered and embarrassing space could have ever been an oasis right on our own property?
Perhaps there is an area in your own home like this that with a clutter unload could become a cozy space for your family?
Try this easy challenge to successfully achieve that goal!

Try Project 333: Experiments in Living With Less

Feeling inspired by my journey towards living with less, I began to turn my eye to my closet.
In full confession, I had a lot of clothing in my closet and not a lot of closet space to house it.
I started reading about fashion capsules and thought that minimizing my wardrobe while working on selecting key pieces that worked together would be a great way to continue my journey in decluttering our home of unnecessary items.
Have you heard of a capsule wardrobe before?
A capsule wardrobe is a collection of clothing which is designed using only interchangeable items, in order to maximize the number of outfits which can be created.
The aim is to have an outfit suitable for any occasion without owning excessive items of clothing.
This is usually achieved by buying what are considered to be “key” or “staple” items in coordinating colors.
Project 333 is what I am doing right now which is a minimalist approach to fashion that incorporates a 33-piece capsule wardrobe.
Participants can have 33 items in their closet that they wear for three months.
You are allowed to set aside 3 items that you can weave in as long as you weave items out, keeping the item number to just 33.
Although I have found the planning of my capsules to be a little stressful, once I execute them well, I have discovered that I have plenty of options in my closet to wear and actually get more compliments than I did when I had a closet that was overflowing.
You can view my current capsule as an inspiration for creating your own.
My best advice though is to really create your capsule around YOU and not a capsule that is just copying someone else’s style so you feel your best!

Try the A Bag a Day Challenge

You would think that after participating in the 40 Bags in 40 Days that our home would be completely clutter free.
I fully admit, I am a work in progress and that I still have a ways to go.
This year I am participating in the A Bag a Day Challenge from Inspired Room which is a 12-month decluttering plan to help you reclaim your home.
I like that this challenge isn’t focused on organizing, but simply on ridding the excess from your home.
With a beautiful outlined plan in place and the gentle encouragement of the beauty of Melissa’s stunning home, who wouldn’t want to rid their homes of the clutter?
Over the snowy holiday, I got rid of six bags of clutter and four bags of trash in our home.
It was so freeing to let these items go and reclaim corners in our little house. I loaded these up in the car and took them over to the Goodwill donation bin, conveniently just down our road, and knew that these items would be put to good use in their store.
I hope you will find this post encouraging and hearing feedback from family and friends about our clutter-free spaces makes me even more proud of the journey we have taken towards a life with less.
I hope these ideas inspire you to declutter your space and reclaim your home!  What are some of your favorite ways to declutter?
Leave your ideas in the comments below!
Don’t miss these other great ideas from MomAdvice.com:

My Year of Living Intentionally


Unexpected Blessings of Simple Living


Make the Most of your Capsule Wardrobe


Advice and tips for keeping a cleaner house

How I Learned to Keep a Cleaner House


Sign up for the MomAdvice newsletter

Pin It

Healthy Fridge Makeover {& No-Bake Energy Bites}

Thursday, January 22nd, 2015

Healthy Fridge Makeover_1

As I shared with you, when I attended college I lived on junk & convenience food and I had the inevitable “Freshman 15,” to prove it from my bad eating habits throughout the year. I only wish I knew how great I would have felt and how much better I would have performed if I had stocked my fridge with healthy options.

Now I know that there are healthy ideas for stocking your refrigerator – whether it’s a dorm sized mini-fridge, your first apartment fridge, or the huge family-sized fridge many of us graduate to – and I’m making sure that my kids do know that the foods that are good for your body are easy to keep on hand, too. In this healthy fridge makeover, I’m sharing easy ways to keep good-for-you foods within reach along with a recipe for a quick to make no-bake energy bite that you can mix up in a bowl for easy snacks on-the-go that both kids and adults love.

Healthy Fridge Makeover_2

Eggs- Eggs are the perfect food for starting your day out right or for a healthy late night snack. Did you know that you can prepare an egg easily in the microwave with no special equipment at all? Simply spray or grease a bowl to prepare it and crack two eggs in it with a tablespoon of milk and whisk well with a fork. Place your bowl of eggs in the microwave and cook for one minute. Give it another little scramble with your fork and then cook for thirty second intervals, until your eggs reach the desired consistency. That’s it! Don’t forget that you can add your own fun add-ins to this versatile food like chopped up veggies, cheeses, or meats.

Berries- Berries are a great item to keep on hand to eat as a side, to grab by the handful for a quick snack, mixed in with a cup of Greek yogurt, or as a topper to a bowl of instant oatmeal in the morning. Cut berries can also be added to a water bottle and then allowed to steep overnight to create a healthy & inexpensive infused water.

Veggies- Cut veggies are the perfect item to have on hand for a quick and healthy snack. Some of my favorites for snacking are peppers (in every color), carrot sticks, celery sticks, & cauliflower. Pair these veggies with your favorite dips like a nut butter with celery or dip them in hummus for an easy snack.

Nut Butters & Nuts- Nothing is quicker or easier than keeping a package of nuts on hand for snacking. Did you know that you can even freeze nuts? Grab an extra package and store it in your freezer, up to six months, to make sure they don’t go rancid. Try a new variety like almonds, pistachios, walnuts, hazelnuts, peanuts, or cashews for a little variety. These can also be added to bowls of instant oatmeal in the morning or mixed into a salad for a crunch topping.

Nut butters are great for an accompaniment to celery or cut apples. My own favorite nighttime snack is peanut butter on a slice of whole grain toast with a glass of almond milk before I go to bed. It’s a satisfying and inexpensive snack!

Hummus- There are many different flavors and varities now of hummus and it is the perfect snack or spread to add to pitas or even smeared as a topping for your favorite sandwich. My favorite variety is the Red Pepper Hummus with sliced cucumbers or pita for an effortless snack.

String Cheese- String cheese is one of those grab-and-go snacks that I love to keep on hand in our fridge. Chop these up to add to your eggs to add a little cheesiness to your egg dishes without investing in bags of shredded cheese or wrap cheese with whole grain bread and a little deli meat into a “sushi” roll for a quick sandwich that can make lunches special.

No_Bake_Energy_Bites

Energy Bites- No-bake energy bites are a fun snack to have on hand when you are craving a treat with a little sweetness. We all adore these at my house! The best part is that they don’t require an oven or mixer, making these an easy treat to make…and to eat! Did I mention it tastes an awful like cookie dough too? Yum!

No_Bake_Energy_Bites_3

No-Bake Energy Bites
Recipe Type: Snack
Author: Amy Clark
Prep time:
Total time:
Serves: 12-16 bites
Ingredients
  • 1 cup oatmeal
  • 1/2 cup peanut butter (or other nut butter)
  • 1/3 cup honey
  • 1 cup wheat germ
  • 1/2 cup ground flaxseed
  • 1/2 cup mini chocolate chips
  • 1 teaspoon vanilla
  • Pinch of salt
Instructions
  1. Mix everything above in a medium bowl until thoroughly incorporated.
  2. Let chill in the refrigerator for half an hour.
  3. Once chilled, simply roll into balls.
  4. Store these in an airtight container and keep refrigerated for up to one week.

No_Bake_Energy_Bites_2

Pin It

The First Aid Essentials Every Mom Needs (Free Printables) & a $100 Walmart Gift Card Giveaway

Wednesday, January 14th, 2015

How to Stock a First Aid Kit

This post is sponsored on behalf of BHG at Walmart.

A fresh new year is a great time to  not only declutter our homes of unnecessary items, but it is also a great time to stock up on life’s daily essentials. Emergency preparation has been something that has been on my mind these days and with the focus of our site being on health/wellness for the m challenge, I thought this would be a great time to address my poorly stocked First Aid Kit, a unique way to package it for the home, and I would love to give you the chance to win a gift card of $100 to create one yourself out of products from BHG at Walmart.  What do I know about First Aid essentials and preparedness. It turns out, not much.

How to Stock a First Aid Kit: ER Doctor Jamie Shoemaker

I am not an expert on emergencies and emergency situations, but lucky for me, I actually happen to know an ER doctor in town who has seen his fair share of emergencies at his hospital. Dr. Jamie Shoemaker is an ER Doctor for Elkhart General Hospital and GRACIOUSLY offered his expert opinion on what every mom should have in her First Aid Kit to be prepared for emergency situations.

It should come as no surprise that I barely had the bandages and cream category covered.

Ahem.

On his list of First Aid essentials, he suggested different size bandages, Tylenol, Motrin, Benadryl, Hydrocortisone creme, Triple antibiotic ointment, hydrogen peroxide, nasal bulbsuction, syringes for oral med admin, tweezers, tape, gauze of varying sizes, Ace wraps, aloe, nail clippers, antiseptic wipes, instant cold compresses, scissors, pairs of non latex gloves, thermometer, splint, safety pins, calamine lotion, flashlight, blanket, tooth preservation
kit, contact lenses saline and case and a first aid manual.

Don’t worry- we have a printable for all of this for you to take when you head to the store.

He also noted that aspirin should be avoided in children due to Reye’s syndrome so he did not include it on this list for moms.

Thank you, Dr. Shoemaker, for helping us get prepared for emergencies in this new year.

How to Stock a First Aid Kit

How to Stock a First Aid Kit

How to Stock a First Aid Kit

How to Stock a First Aid Kit

I headed to Walmart with his list and wanted to stock up on every item, but also knew that I had to find a pretty way to package it. Thankfully, the BHG product line at Walmart offer a variety of cute totes, baskets, and other organizer essentials. Since I have nowhere to tuck my First Aid kit, it will rest on top of our little bathroom storage unit, on display for our guests. I wanted something attractive for storage so I settled on this handy Better Homes & Gardens Chesapeake Magazine Basket for under $13 that housed all of these fabulous First Aid essentials with ease and kept them tucked away without anyone knowing what is in there. How perfect is that?

Emergency preparedness is such an essential part of running a household and I know that this is something I should work on in our home. Whether it is being prepared with a bandage and some cream for the neverending injuries in our home or making sure our home is stocked with candles and flashlights for our neverending power outages or even more seriously, the need for disaster preparedness with canned foods and water…

Let’s face it, this stuff tends to fall on the shoulders of many mothers.

I know it falls on mine.

I can admit that I have done a pretty lousy job at stuff like that, but this year I want to do better and I want to encourage you to do better too. This month, the m challenge isn’t just about focusing on our own needs, but also on the needs of those we love. I hope this little push can help you this year to address key needs in your own household.

How to Stock a First Aid Kit

(just a screenshot- click below for the printable please!)

I have prepared for you a FREE printable list of First Aid Essentials that you can take to the store of all the recommendations Dr. Shoemaker offers for us.  There is no need to stress about being prepared this year- we have you covered!

Enter below to win one $100 Walmart Gift Card from BHG at Walmart to stock your First Aid Kit for the new year. One lucky winner will receive this gift card to stock up on all the essentials. This giveaway ends on January 21st! Good luck, everyone!

a Rafflecopter giveaway


Live-Better-Network-Badge

In accordance with the FTC Guidelines, I am disclosing that I received compensation from BHG at Walmart for my time and participation in the BHG Live Better Network. Although we have material connection to BHG, any publicly stated opinions of BHG and their products remain my own.

Pin It

How to Make a Breakfast Bar

Thursday, January 1st, 2015

How to Make a Breakfast Bar from MomAdvice.com

We have come to the age of slumber parties and epic sleepovers in our home. If you were anything like me when I was a child, you just couldn’t wait to wake up and find out what would be for breakfast.  Making a breakfast bar can be a fun way to serve a large group whether it is your child’s birthday or simply an easy way to entertain guests for the morning. I am partnering with Walmart today to show off a cute display for creating a breakfast bar in your home.

My favorite sleepover when I was a kid involved a huge display of toppings for our waffles and pancakes. I remember as a child delighting in all of the options and I still have that delight even as an adult.  Now as mom, I love creating a self-service bar of choices for our meals where everyone can customize their own meals to their own tastes.

Breakfast, in particular, as a buffet is a great idea so that guests can sleep in and then come and create their breakfast whenever they are ready, eliminating the need for you to all be around the table at the same exact time.

Even on busy school mornings, I find that this option would work beautifully since we all arrive at the table at different times. By prepping the toppings ahead, you can save time in the morning and really enjoy that cup of coffee.

Here are some of my suggestions for creating a beautiful and easy breakfast bar spread!

How to Make a Breakfast Bar from MomAdvice.com

Make Serving Easy With Scoops & Trifle Bowls

Ditch the cereal boxes for an elegant display utilizing clear glass trifle bowls and an inexpensive all-purpose scoop. Give your guests choices by providing more than one selection of cereal.


How to Make a Breakfast Bar from MomAdvice.com

Create a Simple Toppings Bar

I love to provide a variety of toppings so everyone can make their bowl their own. Fresh strawberries, blackberries, or blueberries can be a wonderful fresh topper. Dried fruits, slivered almonds, or crunchy walnuts can also add variety to your toppings bar. Make an easy batch of granola (I love this vanilla-scented granola or this easy honey nut granola) and add this to the mix for another crunchy layer. Remember to take advantage of what fruits are in-season to make sure you get the most bang for your buck.

How to Make a Breakfast Bar from MomAdvice.com

Add a Gluten-Free Option

As someone who is gluten-free, I love when there are options for me. Yogurt can be a delicious option and give your guests a chance to also create their own bowl utilizing the delicious toppings you have provided for your breakfast buffet. I like to keep small bowls handy to pour the yogurt out into and giving me room to really layer on the fruit, nut, and granola toppings, just as I would do with cereal. Make sure that you are using gluten-free oats if making your own granola or purchase gluten-free prepared granola if purchasing them.

How to Make a Breakfast Bar from MomAdvice.com

Make a Pretty Display

If there is one investment that I am glad I have made over the years, it has been in classic white dishes. Display your toppings in pretty bowls and add an inexpensive bouquet of flowers to the center of your breakfast bar. Even if the ingredients are not all homemade, you can still make things feel pretty and upscale with a few inexpensive additions and beautiful plating.

How to Make a Breakfast Bar from MomAdvice.com

I hope these ideas inspired you for your breakfast. Whether it is a weekday rush or a leisurely morning with out-of-town guests, the breakfast bar can be an easy way to serve a meal!

walmart_mom_disclaimer

Pin It

Make Money Organizing Your Closet

Tuesday, November 25th, 2014

Make Money Organizing Your Closet

I have never had a truly clean and organized closet until I started my fashion capsule project. Had I known that I could have been making considerable cash this whole time, I might have taken the endeavor a bit more seriously. Today I want to share with you some resources I have discovered for making money while cleaning out your closet. Not only do you have the power to make some serious cash, but you also have the opportunity to transform lives by paying it forward to charities in need.

First things first, let’s talk about my purse clean out that netted me $80! 

Make Money Organizing Your Closet

Start With Your Purses- I Made a Ton

I have a terrible habit of switching my purses and never taking time to clean them out. Not only did I find a lot of great lipsticks to wear, but I also discovered that I had a lot of credit card gift cards with small denominator amounts on them that I didn’t know what to do with. Do you know that you can transfer all of these tiny gift card amounts to an Amazon gift card with no minimum balance? I headed over to this page where you can quickly reload your balance with NO MINIMUM amount. After kicking myself for all of the cards that had been sitting there expiring, I was happy to see that I now had $80 of credit that I can use towards my shopping.

Sell The Things You Aren’t Wearing

It has been brought to my attention since minimizing my wardrobe how little I really do need and how little I really do wear. If your items are brand name and in gently used condition consider selling them to make some extra cash or to put towards wardrobe items you really would love and wear.

Here are a few resources you can check. I know there are more, but these are the ones that I am most familiar with: 

Twice

Twice This has been my #1 resource for pulling together my capsule wardrobe, but it is also my #1 resource for selling my gently used items. Twice will send you a selling kit within 4-6 days of your request that includes a bag and prepaid postage sticker for your items. If you are really excited to just get started though, you can grab a box from your recycling and fill it up with a label you print from your computer. Once you send in your first shipment they will give you $10 of credit towards a purchase so you can buy something you really love. Here is a list of the brands that they accept. Once they make an offer you can decide if you want to accept it or not.  If you don’t like the price, you pay $4.95 for return shipping. In contrast, thredUP charges $12.00 to return your items.

Keep in mind that this is not a consignment shop so they pay you once the item is accepted. No need to wait for your items to sell.

Threadflip

Threadflip– Threadflip is a new discovery for me and I am so excited about using this for my next capsule wardrobe. Threadflip is more of an online consignment shop for your clothing so that means you get paid when your item has been sold and shipped. That being said, they charge a mere 20% commission on your items so that you can pocket 80% of the profit. 

Much like Twice, they will send you an envelope with a prepaid shipping label for your items. Once you send it to them, they will list it for you by their team of professionals, saving you the hassle of trying to photograph and style your item. There is also the option to list the items yourself if you don’t want to send the items in. For me, the profit is the same so I would much rather have their team list it for me, but that one is totally up to you.

Poshmark

Poshmark Poshmark & Threadflip are very similar in nature and the site is one of my new favorite places to browse for items for my capsule.  It is an app available for iPad and iPhone that allows you to shop, sell, and engage with virtual closets full of pre-worn or new pieces on one simple platform.

You list the items yourself- some take their own pictures while others utilize the photos from the website of where they purchased the item. They also charge a 20% commision fee on your items allowing you to pocket 80% of your profit. 

I will say from a user perspective, despite adding my sizing and storing it, I find the site a bit like going to a high-end garage sale. You have to really scan through all of the listings and even when sizing is set, it still pulls items that are not in my size or unrelated to my searches. Since users set their own pricing, you can find some steals though and I still love the thrill of a good hunt so I am sure thrifty shoppers will be ready to embrace your gently loved clothing.

thredUP

thredUP– All of my friends have been raving about thredUP and after joining to try it for this article, I can see what the fuss is about. Not only can you clean out your closet to make money, but you can also make money on your kid’s stuff and maternity items too! As with some of the other places I have listed, you can order a bag with a prepaid shipping label to start your closet clean out. Their fashion resale professionals review your clothing and then pay up to 80% of the resale value. You can earn thredUP shopping credit, or simply cash out with PayPal. Items that they don’t accept go to charitable partners or textile recycling companies. They can also be mailed back to you as part of their Return Assurance program for a $12.99 shipping fee. Be sure to check their quality standards before sending. Here is $10 of credit to spend on your first purchase. 

eBay eBay has been around forever and is actually featured a lot in my It’s the 3 Little Things because I find some really killer deals on there as a buyer.  Although I have never personally sold items on eBay, I have had many friends who have with great success. There is a seller fee that you can read more about the eBay seller fees here. The nice thing is that you can sell items individually or you can sell them as a lot grouping instead.

Make Money Organizing Your Closet

Give Away The Rest

If you don’t love it, you aren’t wearing it, and you can’t sell it…share it with someone in need. There are so many fantastic charities to give to and if the items aren’t the wildly popular name brands or you just don’t want to hassle with the sale, consider paying it forward and giving your items to a worthwhile cause.

Here are a few options to consider:

Women’s Shelters– By far my favorite place to donate is to our local women’s shelters. This link helps you browse your state and find a shelter closest to you to give.

Dress For Success– Help someone look and feel their best for their job interviews. Their greatest need is larger size suits and apparel, but any business attire will do! Check here for locations.

Pick Up Please The Vietnam Veterans of America is a respected charity that gives aid to all of America’s veterans, not just those of a particular age group or war. By donating used clothes, shoes, appliances, and other household items, you help generate funds to take care of the soldiers and service men and women who help keep America safe from harm. See if your state participates by visiting here.

Churches- Growing up our church had a room where guests or members could shop. Check with your church to see if they offer this or if they are partnered with any shelters in town where they could recommend sharing your donation.

Goodwill– Goodwill provides employment and job training to those in need of job assistance. Donations couldn’t be easier thanks to the drop-off boxes. Check here for locations.

Once you have your closet cleaned out, let’s get it organized!

Try a Capsule Wardrobe (here are my Fall & Winter capsules) to Minimize- Read more about what I have learned from minimizing my closet.

Tips & Tools for Organizing Your Closet

Have you made money selling items in your closet? Leave your experience here with the different services and be sure to share any resources that I might have missed!

Pin It

Back to School Organization Ideas

Thursday, September 18th, 2014

Back to School Organization Ideas from MomAdvice.com.


*This post is sponsored by the Post-it Brand. All thoughts and opinions are my own.

It is such an honor to be working with the Post-it Brand for the back-to-school season.  I am so thrilled that you loved our DIY Homework Stations we created for our family and today I wanted to continue along that theme and share with you some additional ways that we keep our kids organized for back-to-school.

Since we live in a small home, organization is truly necessary to keep our small spaces functional.  I also am someone who prefers to not have a lot of visual clutter and appreciates smart hidden storage for our homework area rather than bulky caddies that can take up a lot of space since we don’t have a lot of storage space in our home. With that in mind, here are some of our ideas for organizing for back-to-school in a small space.

Back to School Organization Ideas from MomAdvice.com.

Designate a Small Area for Homework Organization- I recently created a bar cart for our shed bonus room and this cart has become the hub of this room for our back-to-school organization this year.  I purchased a chalkboard for tracking our to-do list, a small globe, and then stackable hollowed books for school supplies storage. This little area is efficient and has just what we need to stay organized.

A hub can be created in a corner of your own home, tucked away in a closet, or even just a designated drawer of supplies. The key isn’t how much space you have to organize, but just that the space is functional and that you always have on-hand what your child needs to complete their assignments.

Back to School Organization Ideas from MomAdvice.com.

Put Them in Charge- I can admit that I am a bit of a helicopter mom and it is hard for me to let my kids be in charge of their own tasks. This year I am really going to work on helping them to be more independent and make them be in charge of their own to-do lists and schedules.

Imagine if they went to college and wondered where their mother was to keep them on task.

This could get a little embarrassing.

I purchased this chalkboard and each child can jot down their own to-do list on Post-it Study Super Sticky Notes to attach to the chalkboard to remind themselves of the important tasks they need to accomplish for the week. I am loving the new Post-it Study Collection because it offers a fantastic new line of Notes, Notebook Kits, Flags, Tabs, and Page Markers that stick securely to papers, notebooks, folders, and more, yet remove cleanly. The products all work together to help your family stay organized on-the-go.  In this case with our Study Super Sticky Notes, once the task is accomplished, they can remove it from the board. As new tasks and assignments are added, they can create their own reminder list to attach to the chalkboard.  Each child gets their own color of Post-it Study Super Sticky Notes so that they know exactly whose task is whose, eliminating the need for two boards and creating a visual area for them of necessary items to accomplish.

Back to School Organization Ideas from MomAdvice.com.

Make Those School Supplies Part of Your Décor-  Pinterest has many ideas for creating storage caddies of homework supplies for your children which is great, but we don’t really have somewhere we can store it when those items are not being used. I happened upon these hollowed out books for storage at our craft store and realized that this was the perfect spot for camouflaging our homework helpers and adding visual interest to a room.

Inside the smallest book I stored crayons and glue sticks, the middle storage is for pencils and pens, and the largest book holds our Post-it Study collection homework helpers like Study Super Sticky Notes, Study Grid Notes, and Study Message Flags. This also houses our extra Post-it Super Sticky Notes for our chalkboard to-do list.

Back to School Organization Ideas from MomAdvice.com.

Back to School Organization Ideas from MomAdvice.com.

Cut Down the Distractions- The reason I love our bonus room for our homework area is that this area is screen-free and there is absolutely nothing in this room to distract them. I can be in the room with them to help them work through problems in a distraction-free environment.  The DIY Homework Stations we created for this room help each child to stay in their own zone and keep focused on their own list of tasks. Once everything has been completed, the kids can exit the space and head off to their technology-filled lives.

I really hope you enjoyed this fun series on back-to-school organization that I created with the Post-it Brand. Thanks to this job, I feel more confident than ever that we will have a successful and truly organized school year! To purchase some fun Post-it Brand items of your own, you will find that they are available at office superstores and mass merchandise retailers nationwide!


This post is sponsored by the Post-it Brand. I’ve received product samples and compensation for my time and effort in creating this post. All thoughts and opinions are my own.


Tracking Pixel

Easy DIY Homework Stations

Tuesday, September 16th, 2014

Easy DIY Homework Stations from MomAdvice.com

*This post is sponsored by the Post-it Brand. All thoughts and opinions are my own.

I’m so excited to be working with Post-it Brand for back-to-school and today I want to showcase a fun way to create a DIY Homework Station that is perfect for small spaces utilizing some of my favorite Post-it Products.

Since finishing our shed into a bonus room for the family, this has been a great screen-free place for our kids to hang out. I wanted to create a homework area that would be away from home distractions and help to keep us focused on our work. These DIY Homework Stations remind me of the quiet areas that were set up in our school area for tackling test-taking and reading. Since we only have one table in this room, it is necessary for us to work at the same table, but we needed some type of divider to help keep each child focused in this space.

Post-it Products have been a longtime family favorite for helping to create reminders in agendas, to flag assignments, and for communication back-and-forth to our teachers.  Have you seen the new Post-it Study collection that has hit store shelves? They are offering a new line of Notes, Notebook Kits, Flags, and Tabs that all work together to help you stay organized on-the-go and find the important things you need to remember quickly! I wanted to utilize some of my new Post-it Product discoveries from their Post-it Study collection to help organize a small space work area that would really keep their focus and keep them organized.

On a personal note, the transition from elementary school to middle school was a tough one for all of us. Never before have I needed more organizational helpers then now and I am hoping that if I provide the right tools for my kids from the start that I can help them succeed at being organized this year.

With that in mind, I have created these DIY Homework Stations and wanted to share this project with you to inspire you to create a couple of your own for this coming school year.

Easy DIY Homework Stations from MomAdvice.com

Easy DIY Homework Stations from MomAdvice.com

Supplies Needed:

1- tri-fold foam display board (this will make two homework stations for you)

Razor Blade

General All-Purpose Spray Adhesive

Measuring Tape

Post-it Study Pocket

Post-it Study Super Sticky Notes

Post-it Study Notebook Kit

Post-it Study Message Flags

Post-it Study Notebook Tabs & Arrow Flags

Post-it Study Flags

Post-it Study Grid Notes

Binder Clips

Scrapbook Paper in coordinating colors (8 sheets total per homework station- I chose four of each coordinating paper)

Hot glue & glue gun

Easy DIY Homework Stations from MomAdvice.com

1. Begin by measuring and marking the halfway point of your tri-fold display board. The display board is 48″ total, so you will want to cut it so that each side is 24″ long.

2. Cut the display board with a razor blade, making sure to cut carefully through all of the layers. If the edge is not clean, we can camouflage it with a fold-over on your scrapbook paper to finish it (demonstrated in a picture below).

3. Select eight sheets of scrapbook paper and set them up for where you would like to display them. Set them aside and, beginning with one side, line the bottom sheets up and, holding them in place with your hands, flip them up to add a little spray adhesive to the underside. Do this all along the bottom of your display board. One thing to keep in mind is that you want to make sure that the paper is not in the fold of the display board so that it can open and shut easily.

Easy DIY Homework Stations from MomAdvice.com

4.  For the top, I am  folding the edge of the paper over a bit on the top four sheets, making sure the edges are folded roughly the same side.  Now do the same process again on the top and allow the folded edge of the paper to hang over to the other side of the display. Secure the folded edge on the back with a little hot glue and to create a smooth finish on top. If your paper does not have a lip on it like this, don’t worry, you can still fold it over.

Easy DIY Homework Stations from MomAdvice.com

5. Using your Post-it Study Super Sticky Notes, jot down the days of the week and line them along the top of your homework station. This can be a place where your child can write down their daily reminders and tasks that need to be accomplished each day.

Easy DIY Homework Stations from MomAdvice.com

I also attached a Post-it Study Pocket and filled it with Post-it Study Flags, Post-it Study Notebook Tabs & Arrow Flags to have on-hand when items need to be noted and flagged in our homework and agendas. These were attached to my older child’s homework station since we have so much to remember. If you have a child in middle school, I know you understand how hard that is!

6. For younger kids, I love the Post-it Study Grid Notes for jotting down notes. The space on these is generous and perfect for younger children who are still working on writing. I also attached the Post-it Study Notebook Kit for jotting down notes and flagging items in work. To anchor it, I folded it away with a binder clip to be opened when she needed an item.

Easy DIY Homework Stations from MomAdvice.com

Easy DIY Homework Stations from MomAdvice.com

I hope this post inspires you to create a few homework stations of your own. It goes to show that you don’t need a lot of space to create the perfect focused work space! Post-it Products are available at office superstores and mass merchandise retailers nationwide to help you make an organized DIY Homework Station of your own!

This post is sponsored by the Post-it Brand. I’ve received product samples and compensation for my time and effort in creating this post. All thoughts and opinions are my own.

Tracking Pixel

Pin It