Archive for the ‘Sides’ Category

Maple Coffee Bacon Recipe & a NEW Coffee Line from ALDI!

Thursday, February 26th, 2015

Maple Coffee Bacon Recipe
Tracking Pixel
This is a sponsored post written by me on behalf of ALDI.

If there is one thing I have learned over my years of surfing on Pinterest it’s that anything bacon and anything coffee is always a hit (and not just with me!).

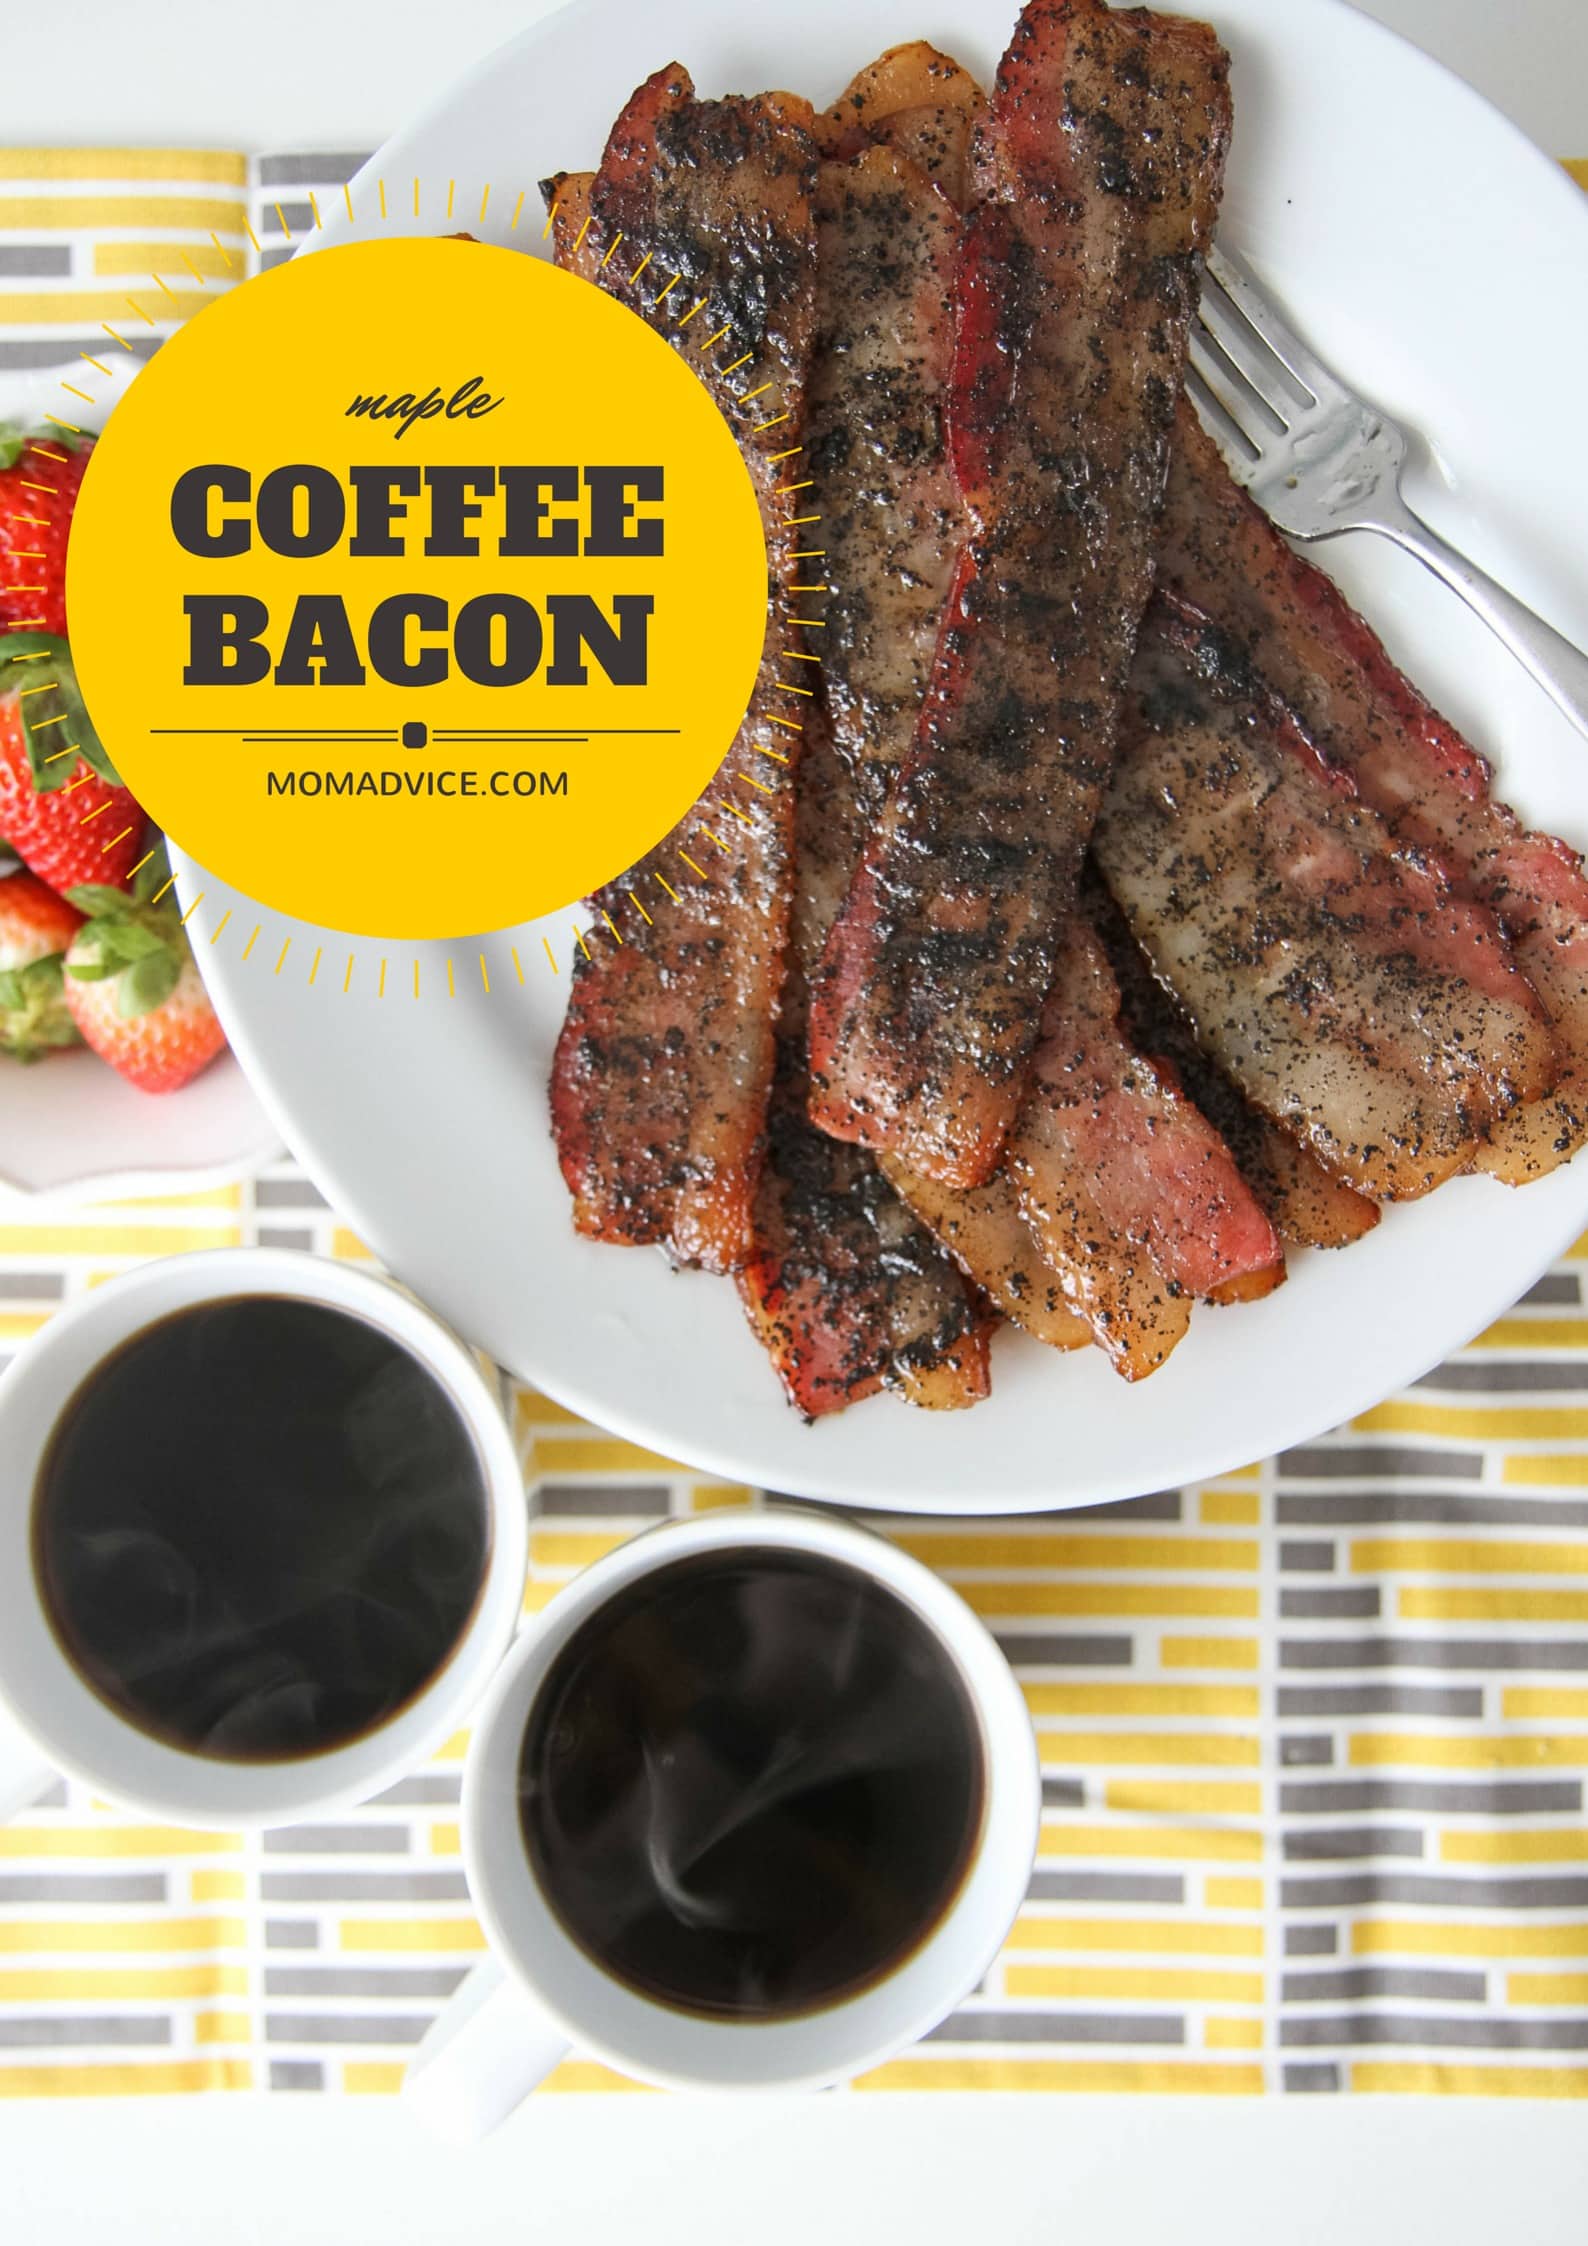
Today I wanted to pair these two flavors together in a Maple Coffee Bacon that your whole family will love. The inspiration for this project came along with the opportunity to try the new Barissimo line of premium coffee products that are available at your local ALDI store.

Since you know I am a regular shopper, I had noticed the new line on the store shelves and was intrigued. The packaging is beautiful and the product feels very high-end, but a whole bag of ground coffee is a mere $3.99.  It is, seriously, a steal!

This line features nine bagged and single serve coffee items, along with additional seasonal and Special Buy items that will be available for a limited time. Pictured below are a few of the ones that I found on my store shelves this week.

Barrisimo Coffee Line from Aldi

The Barissimo line, available exclusively at ALDI, includes the following (and here are the prices on these items too) for my fellow frugal shoppers:

Ready-to-drink Iced Coffees (French Vanilla, Mocha and Coffee) – $1.19

Whole Bean Coffee (Morning Roast and Donut Store) – $3.99

Fair Trade Coffee (Medium and Dark Roast) – $3.99

Donut Store Ground Coffee – $3.99

12 oz. Bag Coffee (Breakfast Blend, House Blend, and French Roast) – $3.99

Assorted Flavored Coffee (French Vanilla and Hazelnut) – $4.99

Flavored Coffee Cups (French Vanilla and Hazelnut) – $4.79

Regular Roast Coffee Cups (Breakfast and Donut) – $4.79

Specialty Roast Coffee Cups (Fair Trade Colombian and Dark Roast) – $4.79

Maple Coffee Bacon Recipe

Maple Coffee Bacon Recipe

Ever since a trip last year to NOLA, I have been thinking about the embarrassing pile of praline bacon I ate in one of the local restaurants that my brother took me too. Bacon that tastes like candy? How could that be bad?

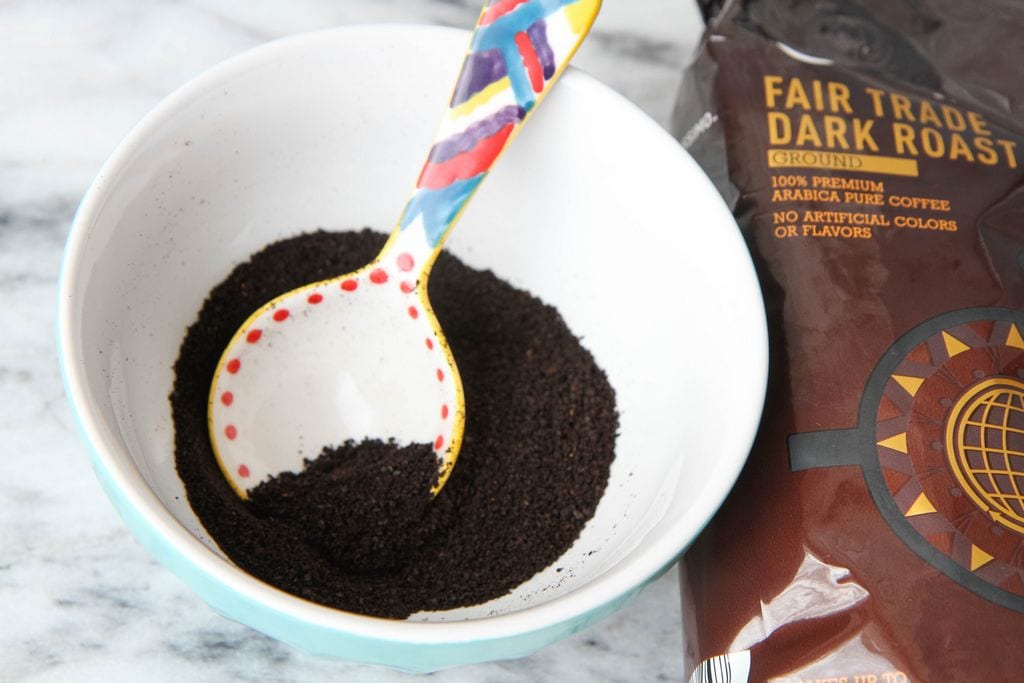
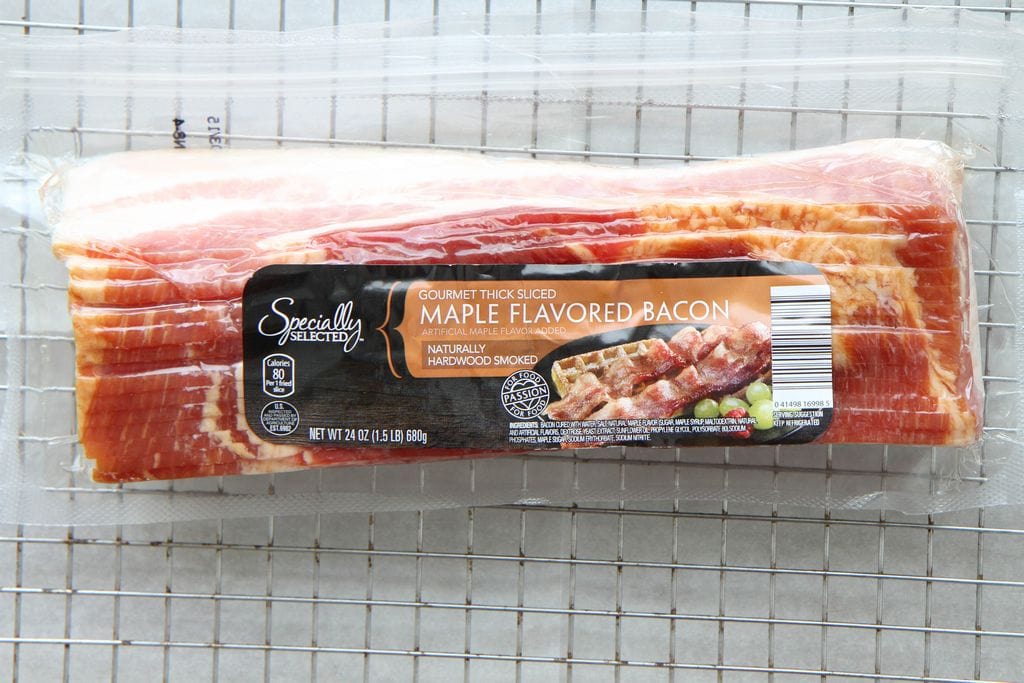
I loved the candied sweetness of the bacon, but I love to add on to that layer of flavor with something to cut the sweet and I decided the Fair Trade Dark Roast Coffee paired with the thick sliced Maple Flavored Bacon would be a delightful combination.

If you haven’t tried the coffee itself, the dark roast is delightfully full-bodied and strong.  It’s the kind of coffee that a mom who has to get her kids on the bus in the morning can really embrace.

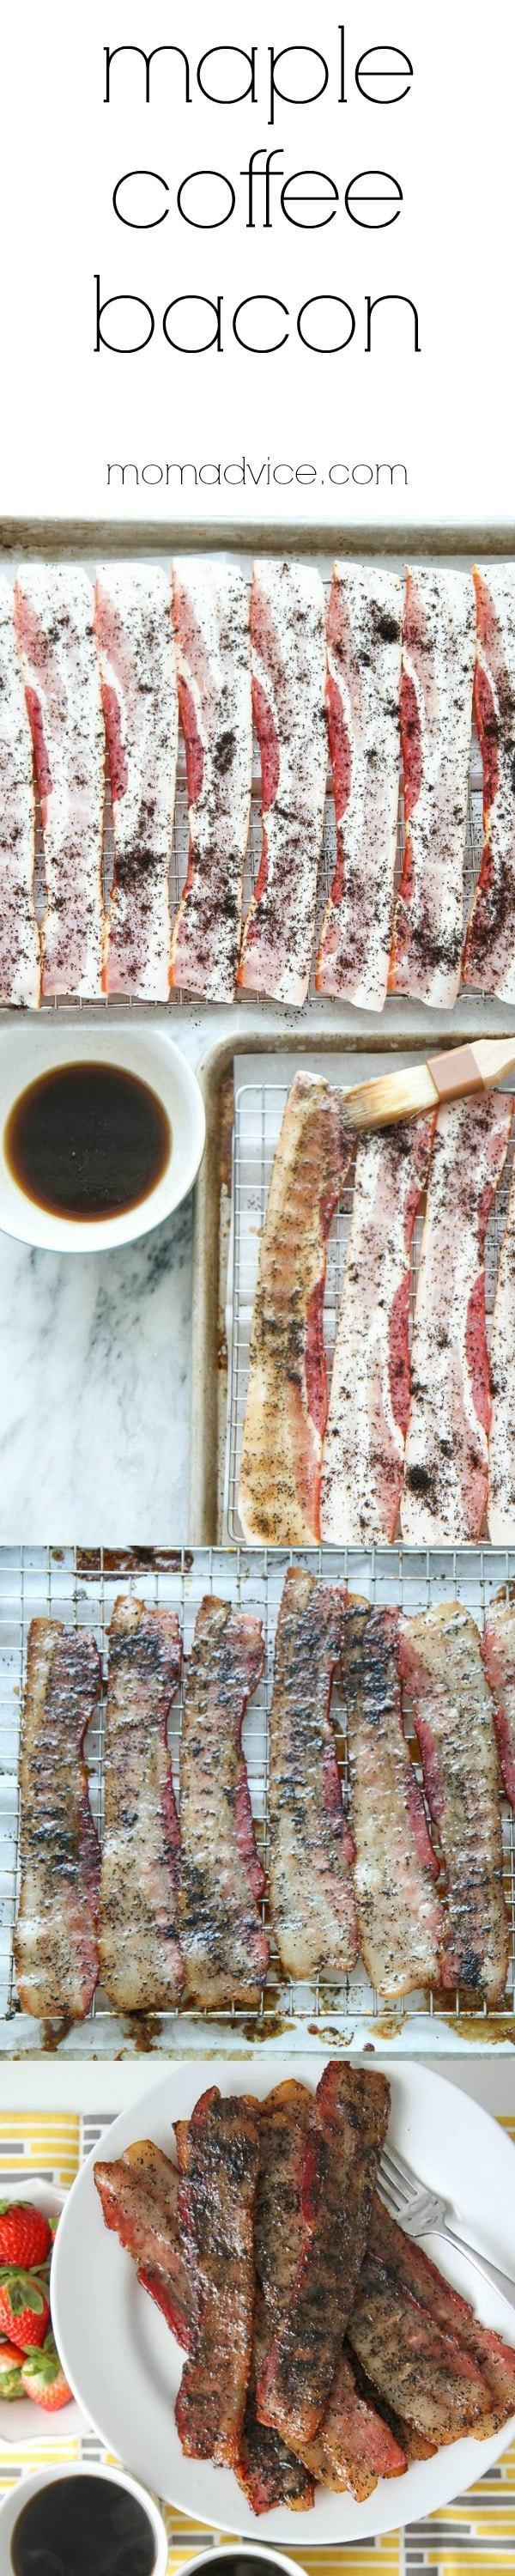
As I had suspected, this delicious dark roast coffee was just what this sweet bacon needed to balance it out. The coarseness of the ground coffee adds an element of texture and the brown sugar glaze made from freshly brewed coffee and brown sugar is brushed on to each side of the bacon to create that delightful layering of flavors.

Maple Coffee Bacon Recipe

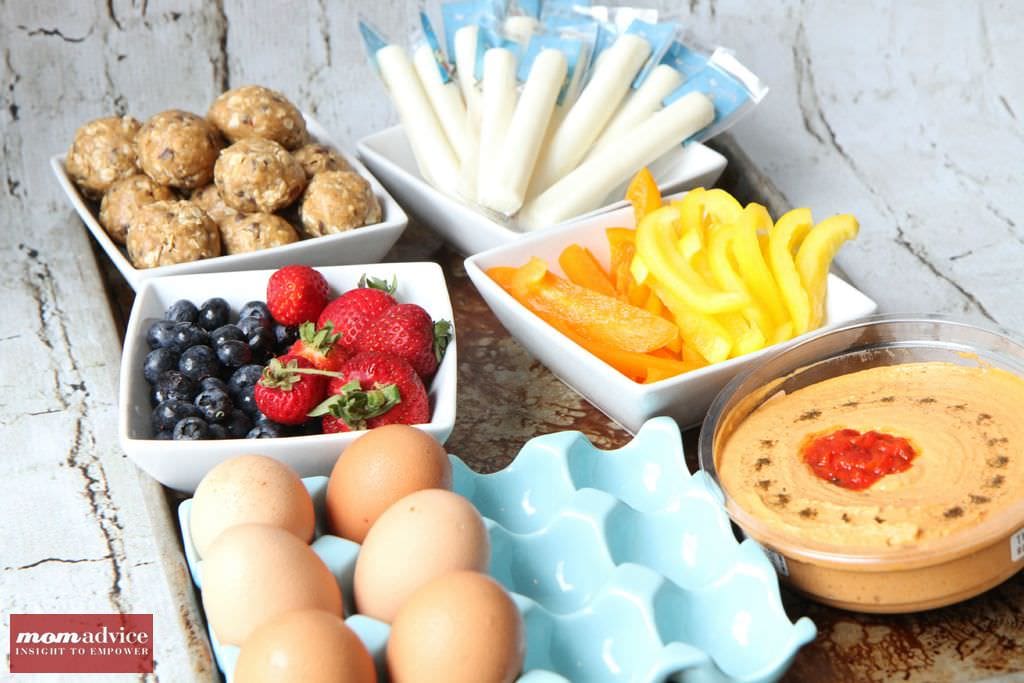
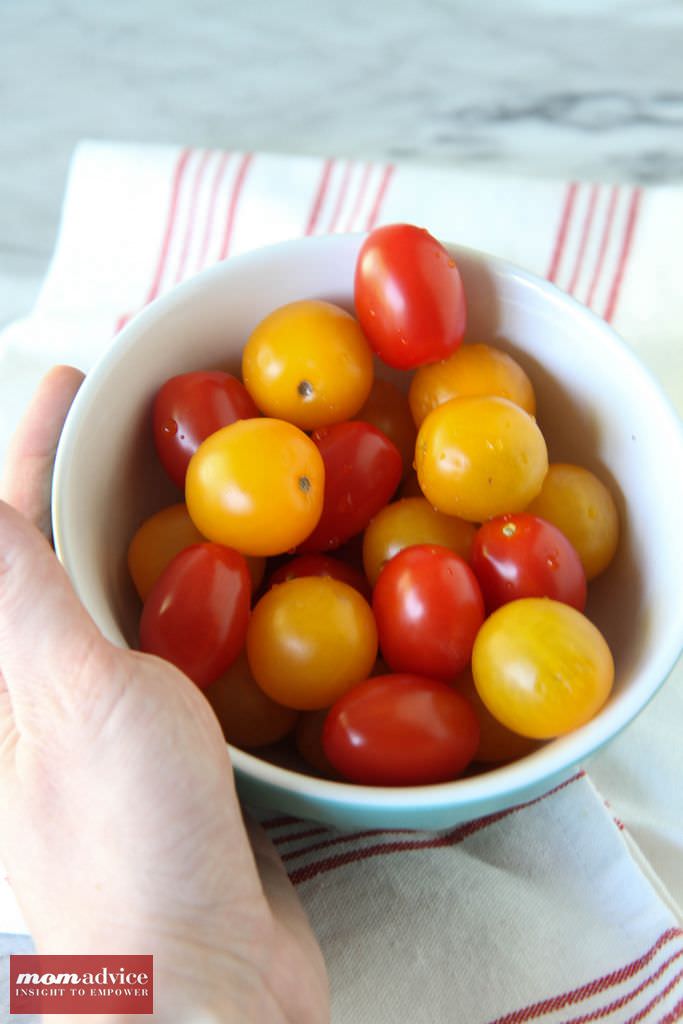
Since this bacon is so sweet, you don’t want to pair this one with another sweet breakfast item.  I recommend an easy frittata for balance, a little fresh fruit, and a big mug of coffee (of course!).

Now run over to your local ALDI and snag a bag of this delicious coffee for yourself- at a price like that, you have nothing to lose!

Maple Bacon Coffee Tutorial

Maple Coffee Bacon Recipe

Maple Bacon Coffee
Prep time:
Cook time:
Total time:
Serves: 10 servings
This is a sponsored post written by me on behalf of ALDI.
Ingredients
  • 1 pound Specially Selected Maple Thick Sliced Bacon
  • 1 tablespoon Barrisimo Fair Trade Dark Roast Ground Coffee
  • 1/2 cup packed Baker’s Corner Brown Sugar
  • 2 tablespoons freshly brewed Barrisimo Fair Trade Dark Roast Ground Coffee
  • Note- *Some of these items are Special Buy or Seasonal items that are only in stores for a limited time and may no longer be available.
Instructions
  1. Preheat oven to 375°. Line a rimmed baking pan with parchment or waxed paper and set a flat rack on top. Lay bacon strips on rack, overlapping slightly if needed. Sprinkle top of strips evenly with ground coffee. In a small bowl, combine brown sugar and brewed coffee, stirring just to blend to a paste. Brush top of strips with half of sugar mixture. Bake 15 minutes. Turn bacon over and brush with remaining sugar glaze. Bake until crispy, 10-15 minutes more.
Pin It

Healthy Fridge Makeover {& No-Bake Energy Bites}

Thursday, January 22nd, 2015

Healthy Fridge Makeover_1

As I shared with you, when I attended college I lived on junk & convenience food and I had the inevitable “Freshman 15,” to prove it from my bad eating habits throughout the year. I only wish I knew how great I would have felt and how much better I would have performed if I had stocked my fridge with healthy options.

Now I know that there are healthy ideas for stocking your refrigerator – whether it’s a dorm sized mini-fridge, your first apartment fridge, or the huge family-sized fridge many of us graduate to – and I’m making sure that my kids do know that the foods that are good for your body are easy to keep on hand, too. In this healthy fridge makeover, I’m sharing easy ways to keep good-for-you foods within reach along with a recipe for a quick to make no-bake energy bite that you can mix up in a bowl for easy snacks on-the-go that both kids and adults love.

Healthy Fridge Makeover_2

Eggs- Eggs are the perfect food for starting your day out right or for a healthy late night snack. Did you know that you can prepare an egg easily in the microwave with no special equipment at all? Simply spray or grease a bowl to prepare it and crack two eggs in it with a tablespoon of milk and whisk well with a fork. Place your bowl of eggs in the microwave and cook for one minute. Give it another little scramble with your fork and then cook for thirty second intervals, until your eggs reach the desired consistency. That’s it! Don’t forget that you can add your own fun add-ins to this versatile food like chopped up veggies, cheeses, or meats.

Berries- Berries are a great item to keep on hand to eat as a side, to grab by the handful for a quick snack, mixed in with a cup of Greek yogurt, or as a topper to a bowl of instant oatmeal in the morning. Cut berries can also be added to a water bottle and then allowed to steep overnight to create a healthy & inexpensive infused water.

Veggies- Cut veggies are the perfect item to have on hand for a quick and healthy snack. Some of my favorites for snacking are peppers (in every color), carrot sticks, celery sticks, & cauliflower. Pair these veggies with your favorite dips like a nut butter with celery or dip them in hummus for an easy snack.

Nut Butters & Nuts- Nothing is quicker or easier than keeping a package of nuts on hand for snacking. Did you know that you can even freeze nuts? Grab an extra package and store it in your freezer, up to six months, to make sure they don’t go rancid. Try a new variety like almonds, pistachios, walnuts, hazelnuts, peanuts, or cashews for a little variety. These can also be added to bowls of instant oatmeal in the morning or mixed into a salad for a crunch topping.

Nut butters are great for an accompaniment to celery or cut apples. My own favorite nighttime snack is peanut butter on a slice of whole grain toast with a glass of almond milk before I go to bed. It’s a satisfying and inexpensive snack!

Hummus- There are many different flavors and varities now of hummus and it is the perfect snack or spread to add to pitas or even smeared as a topping for your favorite sandwich. My favorite variety is the Red Pepper Hummus with sliced cucumbers or pita for an effortless snack.

String Cheese- String cheese is one of those grab-and-go snacks that I love to keep on hand in our fridge. Chop these up to add to your eggs to add a little cheesiness to your egg dishes without investing in bags of shredded cheese or wrap cheese with whole grain bread and a little deli meat into a “sushi” roll for a quick sandwich that can make lunches special.

No_Bake_Energy_Bites

Energy Bites- No-bake energy bites are a fun snack to have on hand when you are craving a treat with a little sweetness. We all adore these at my house! The best part is that they don’t require an oven or mixer, making these an easy treat to make…and to eat! Did I mention it tastes an awful like cookie dough too? Yum!

No_Bake_Energy_Bites_3

No-Bake Energy Bites
Recipe Type: Snack
Author: Amy Clark
Prep time:
Total time:
Serves: 12-16 bites
Ingredients
  • 1 cup oatmeal
  • 1/2 cup peanut butter (or other nut butter)
  • 1/3 cup honey
  • 1 cup wheat germ
  • 1/2 cup ground flaxseed
  • 1/2 cup mini chocolate chips
  • 1 teaspoon vanilla
  • Pinch of salt
Instructions
  1. Mix everything above in a medium bowl until thoroughly incorporated.
  2. Let chill in the refrigerator for half an hour.
  3. Once chilled, simply roll into balls.
  4. Store these in an airtight container and keep refrigerated for up to one week.

No_Bake_Energy_Bites_2

Pin It

Mint Watermelon Berry Fruit Salad: Turning a Fruit Bowl Into a Salad

Monday, September 1st, 2014

From our food contributor, Shaina Olmanson.

Mint Watermelon Berry Fruit Salad via MomAdvice.com
Summer is coming to a close. Once the kids go back it’s basically already over, but there are still warm weekends that you can make the most of before the wind turns cold and the produce stops flowing. It’s actually right now in this early September air that my farmer’s market seems to be bursting at the seams with tables overflowing and after months of waiting, there are watermelons for the taking.

There’s something about a watermelon grown locally that just sings more than any supermarket watermelon (that I’ve been enjoying liberally all summer long, mind you). We usually get our best watermelon of the season right at the end of summer, a bright flag-waving send off as we head into the colder months. It’s only right to dress it up then.

I’m the first to admit that I have a love-hate relationship with my melon baller. The waste is what gets me. There’s all this juice that seems to collect as you’re balling, and then the bits in between the balls are just byproduct – okay, so I just snack on all the little bits, and I’d do the same if I were slicing it.

Still, it’s a kitchen tool I don’t often use. I pulled it out recently to make a fruit salad for my daughter’s swim team (high school sports do so many meal functions), and everyone was excited about the end result, but none more so than my 6-year-old, who told me it was like “eating a bouncy ball made of watermelon” that was “so, so tasty.” That, folks, right there is how you win your mommy over.

Mint Watermelon Berry Fruit Salad via MomAdvice.com
This fruit salad gets a minty punch from reduced watermelon juice, and an extra special crunch from a few chia seeds sprinkled on at the end.

Mint Watermelon Berry Fruit Salad
Recipe Type: salad
Prep time: 20 mins
Cook time: 25 mins
Total time: 45 mins
Serves: 10
Ingredients
  • 1 watermelon
  • 4 cups strawberries or other summer berries
  • 2 cups blueberries
  • 1/4 cup mint
  • 2 tablespoons honey
  • 1/4 cup chia seeds
Instructions
  1. Cut the watermelon in half and, using a melon baller, scoop the watermelon into balls. Collect the formed balls in a bowl, and pour off the excess juice that collects in the watermelon into another bowl or pot to use for later.
  2. Slice the strawberries, rinse the blueberries, and combine with the watermelon balls.
  3. Julienne the mint, setting aside 1 tablespoon for garnish, and combine with 3 cups of the reserved watermelon juice and the honey in a medium saucepan. Bring to a boil over medium-high heat. Reduce the heat slightly and cook, stirring frequently, until the liquid has reduced by half. Once the liquid has reduced, strain the mint pieces, remove from heat and chill.
  4. Pour the watermelon-mint syrup over the fruit. Sprinkle the chia seeds on, toss to combine, and serve cold.
3.2.2708


Pin It

Gluten-Free Broccoli Grape Harvest Salad

Wednesday, August 27th, 2014

Gluten-Free Broccoli Grape Harvest Salad

I don’t know if I ever devoted an entire post to grapes in over a decade of running this site, but perhaps this showcases how underappreciated this fruit is.  It is a staple around here as a side to round out our sandwiches, it’s an effortless appetizer paired with wine and cheese, and it spends its freshly rinsed self at the pool with us as a snack that can withstand the heat and temperatures. We are definitely fans of the humble grape and I am sure you are too.

Walmart gives me a produce challenge each month to showcase one of their produce items. If you haven’t followed along on my journey towards appreciating fruits and veggies, I have roasted and churned a Roasted Plum & Cinnamon Ice Cream,   Baked Strawberry Doughnuts, created a Blueberry Sangria Lemonade, threw on my grill  Grilled Tomato Bread With Prosciutto, churned Fresh Peach Sorbet, slow cooked my Slow Cooker Honey Crisp Apple Oatmeal, wowed my family with a 3-ingredient Watermelon Granita,  and my fresh Gluten-Free Orange Chicken is our weeknight staple now. What a journey it has been to appreciate the produce section.

Gluten-Free Broccoli Grape Harvest Salad

Tips for Selecting Great Grapes

Unlike some of the more difficult fruits I have featured, it is quite easy to spot a good batch of grapes.  Did you know premium grape season is actually September and October? It really is the best time to buy a big bag of grapes for your family. It is advised to select grapes based on the color of them. For green grapes, they should have a slightly yellowish, translucent hue rather than a true, opaque green. Red grape varieties should be mostly red and have a rich, crimson tone.

One other way to check for a good grape is to look at the stem of the grapes. A dry and brittle stem indicates that the grapes might not be as fresh and seeing a little peek of green on the stem is a good indicator of a fresh batch. The shape of the grape should not be misshapen or wrinkled, but plump and juicy.  Of course, you can always bring them back to Walmart if they aren’t perfect thanks to their 100% money back guarantee so selecting great grapes is foolproof.

Gluten-Free Broccoli Grape Harvest Salad

I decided to incorporate these grapes into a gluten-free pasta salad to take to a cookout. This salad was hearty and filling for someone who is often unsure if she will be able to eat at social events (ahem). Not only is this just the kind of creamy pasta dish I love, but it incorporates the smoky saltiness of turkey bacon and chopped toasted pecans for a protein punch that really fills you up.  The smokiness is balanced with the sweetness of the grapes making for an interesting flavor combination and perfect for showcasing the beautiful in-season grapes.

Oh, grape, you certainly are a wonderful fruit and I’m sorry we haven’t loved on you more over the years! I promise to do better!

Gluten-Free Broccoli Grape Harvest Salad

Gluten-Free Broccoli Grape Harvest Salad
Recipe Type: Side
Prep time:
Cook time:
Total time:
Serves: 8
A gluten-free pasta salad laced with pecans, bacon, and sweet grapes.
Ingredients
  • 1 bag of gluten-free pasta (any variety)- 16 ounces
  • 1 lb. fresh broccoli
  • 1/2 cup light mayonnaise
  • 1/2 cup plain Greek yogurt
  • 2 packets Stevia
  • 1/3 cup red wine vinegar
  • 1 tsp. sea salt
  • 2 cups seedless red grapes
  • 10 cooked turkey bacon slices, crumbled
  • 1/2 cup pecans
Instructions
  1. Preheat oven to 350 degrees F. Bake pecans in a single layer in a shallow pan for about 6 minutes until lightly toasted and fragrant, stirring halfway through.
  2. Prepare pasta according to package directions. Once done cooking, rinse well before assembling.
  3. Meanwhile, cut broccoli florets from stems and separate into small pieces using a paring knife. In a large bowl, whisk together mayo, yogurt, Stevia, red wine vinegar and salt and toss with broccoli, hot cooked pasta (that has been rinsed) and grapes. Stir to coat.
  4. Cover and chill for up to 3 hours. Stir in bacon and toasted pecans just before serving.
  5. Note- The sauce on this can be doubled if you desire a more creamy pasta.
Slightly Adapted from Eat Yourself Skinny

walmart_mom_disclaimer

Pin It

Caprese Pasta Salad

Monday, August 4th, 2014

From our food contributor, Shaina Olmanson.

Caprese Pasta Salad #recipe via MomAdvice.com
Some evening meals require simplicity. They are the evenings when I’ve stood in my kitchen, sans air conditioning, feeling the heat condense on my skin as I look in the cupboards and attempted to choose a heat-less meal twice already that day.

They are evenings when the day has been one obstacle to climb after another. It’s when each child has separately skinned their knee on the driveway in four isolated incidents, each involving band-aids. It’s for days when even the excitement of a long-awaited package arrival ends in disappointment as it is opened to reveal a wrong item and a note indicating an “upgrade.”

This meal isn’t flashy. It’s honest and good. It’s your basic caprese salad, the one with the thick slices of summer tomatoes and too white mozzarella, full leaves of sweet basil, and a healthy drizzle of olive oil and balsamic – a summer essential. It’s that salad with a few extras. Pasta and green onions are invited, and if it’s a meal on its own, add a bit of protein in the way of beans or leftover chicken, shredded and tossed directly into the mix. It’s served in one bowl with one spoon, and it can be eaten on the patio or on a picnic blanket with slices of watermelon and a jug of iced tea. It can be tucked into a thermos and carried along to school or camp or off to the beach.

Caprese Pasta Salad #recipe via MomAdvice.com
In my repertoire of summer meals, I tend to rely on salads more than anything. This year’s has been an ode to simple pasta salads and a leafy salad with a hearty helping of quinoa dumped in for good measure. They’re simple, but they’re pulled together enough to be carried to a neighborhood barbecue or a family gathering where they’ll disappear on the buffet table in short order. You won’t regret doubling the recipe here.

Tomorrow, when you climb out of bed and feel the breeze coming through the open window, the world will feel new. And there will be leftover salad in the refrigerator for lunch.

Caprese Pasta Salad #recipe via MomAdvice.com

Caprese Pasta Salad
Recipe Type: Pasta Salad
Author: Shaina Olmanson
Serves: 8
Ingredients
  • 8 ounces small pasta (in shape of your choice)
  • 2 teaspoons kosher salt
  • 1 cup fresh basil (packed tightly)
  • 2 cups grape tomatoes, halved
  • 2 cups fresh mozzarella pearls
  • 2 green onions, diced
  • 2 tablespoons aged balsamic vinegar
  • 1 teaspoon Dijon mustard
  • 1/2 teaspoon sea salt
  • 1/3 cup extra virgin olive oil
  • Add-ins: shredded chicken, chickpeas, white beans, grilled peaches
Instructions
  1. Cook the pasta according to the box directions with the kosher salt in the water. Drain, rinse with cold water, place it in a large bowl, and chill.
  2. Make a chiffonade of basil by stacking the basil leaves on top of one another, rolling tightly, and slicing very thin strips.
  3. Once the pasta is chilled, add the grape tomato halves, the mozzarella pearls, green onions, and the basil to the bowl.
  4. In a separate bowl, combine the balsamic vinegar, Dijon, and the sea salt. Whisk in the olive oil. Pour the dressing over the pasta and toss to coat evenly. Stir in any additional add-ins to make this a meal on its own or serve as is.
3.2.2708


Pin It

A Sensational Beet and Strawberry Summer Salad

Monday, July 28th, 2014

From our food contributor, Diana Bauman.

A Sensational Beet and Strawberry Summer Salad

Summer is the season of abundant vegetables. My family eats such a wide variety of vegetables in this season that my husband often jokes with me and asks if we’re becoming vegetarian. We are certainly not but I do take full advantage of the abundance of vegetables in this season, both in my garden and at the farmers market, to cook them in many different ways.

Although I love to experiment and develop new recipes using vegetables, an incredibly easy way to incorporate more of these nourishing ingredients grown from the earth is to make salads out of them. So often we think of salads as just greens tossed with tomatoes, cucumbers, and cheese; however, salads can be made from a variety of vegetables tossed in a simple oil and vinegar vinaigrette – in Spain, this type of salad is called an aliño.

An aliño is just vegetables, cooked or cut up raw, and then tossed in a simple vinaigrette and seasoned with a large granule sea salt. It’s super simple to make and with the addition of fresh grown herbs, the salads become something to swoon over. Let me show you just how simple this beet and strawberry salad is to make:

A Sensational Beet and Strawberry Summer Salad

Step 1. Boil the beets, peel, and dice. Toss into a bowl.

A Sensational Beet and Strawberry Summer Salad

Step 2. Thinly slice some red onions and add to the bowl.

A Sensational Beet and Strawberry Summer Salad

Step 3. Slice up some perfectly ripened strawberries and add to the bowl.

A Sensational Beet and Strawberry Summer Salad

Step 4. Add in a bit of herbs of your choice, olive oil, red wine vinegar, and sprinkle with a large granule sea salt.

A Sensational Beet and Strawberry Summer Salad

Step 5. Toss together and serve.

Salads of this nature can be made from any vegetable you may have on hand. Here are a few tips for making sensational summer salads.

  • Red onions generally go really well in most salads. They’re sweeter and compliment vegetables and fruit well.
  • Add in seasonal fruit as it comes into season. It gives salads a touch of sweetness without having to add sugar or honey. I’ve been known to add blueberries, raspberries, strawberries, sliced peaches, and even watermelon to summer salads.
  • Don’t be afraid to experiment. I’ve tossed cauliflower salads, cucumber and tomato salads, beet and watermelon salads, roasted red pepper with red onion salads, etc…
  • Large granule sea salt is for more than flavor. It’s surprising how amazing salads can taste by the simple addition of a large granule sea salt. It gives them texture –  a delightful crunch.
  • Herbs can make a salad. It’s amazing how one salad can taste many different ways by using different herbs. Again, experiment with herbs. Some of my favorites are mint, cilantro, summer savory, marjoram, and lemon balm.

Now the key to a fabulous summer salad is in the vinaigrette. Often times we think we need to concoct a dressing made of 10 different ingredients to enjoy a salad but really it’s much simpler than that. As long as you have the seasons freshest fruit and vegetables all you need is a simple vinaigrette. On hand, I always have balsamic vinegar, red wine vinegar, and apple cider vinegar. The following is my ratio for a simple vinaigrette.

  • 1/4 cup good quality extra virgin olive oil
  • 2 tbls of vinegar (red wine, balsamic, or apple cider)
  • 1/2 – 1 tsp large granule sea salt

That’s it. As soon as you start experimenting making salads with a variety of fruits and vegetables I’m sure you’ll memorize that ratio as I have.

A Sensational Beet and Strawberry Summer Salad
Recipe Type: Salad
Author: Diana Bauman
Prep time: 10 mins
Cook time: 30 mins
Total time: 40 mins
Serves: 4
A simple summer salad made with the seasons finest beets and strawberries dressed in a simple vinaigrette.
Ingredients
  • 3-4 large beets, boiled, peeled, diced, and cooled
  • 1/2 red onion, thinly sliced
  • 1 cup strawberries, sliced
  • 1 tbls marjoram (or any other variety of fresh herb like mint)
  • 1/4 cup extra virgin olive oil
  • 2 tbls red wine vinegar
  • 1/2 tsp large granule salt.
Instructions
  1. In a large bowl, toss together all of the ingredients.
  2. Chill or serve at room temperature.
3.2.2708

Do you enjoy trying new summer salads? Please let us know in the comments below some of your favorite recipes for summer salads.


Pin It

McCormick FlavorPrint + 3 Fun Ideas for Dinner!

Wednesday, June 25th, 2014

*This post is sponsored by McCormick Spice in partnership with the One2One Network.

One of my late night past times is staying up to take ridiculous quizzes like, “What 80’s Boyfriend Should You Have?,” and “What OITNB Character Would You Be?” and one of my favorites, “What Country Should You Live In,” as though these quizzes will hold the deep meaning to life.

In case you are wondering, I am Piper, Lloyd Dobbler from Say Anything should be my boyfriend, &  I belong in Paris. All completely accurate & true.

Well, if you are a quiz junkie like, me you will love the new FlavorPrint tool from MCcormick Spice that is a lot like those quizzes you love, but actually will be useful because you can plan your family’s meal around the answers you provide. For someone who is stumped for fresh ideas in the summer and who has found herself gravitating towards the same three dishes for ease, I couldn’t wait to take the quiz and figure out what options would fit our family’s needs.

McCormick FlavorPrint

McCormick has found that each person has a unique flavor “fingerprint” that is conveyed through a distinct visual mark, which has 33 “spikes” to represent different flavors in your personal flavor profile. The bigger the spike, the more prominent the flavor. Through this quiz, it can identify your own personal tastes and provide delicious options that fit that unique profile for your dinner hour.

The quiz takes about two minutes of answering questions like, “Do you like mint?” and then “How about onions?” Once you have completed the quiz, it will provide meal options for you that you can try. If you like the options, you can dive in deeper and give them a thumbs up, answer more questions about your personal taste, share what you always have on hand in your pantry, and even tell them what type of equipment you have or don’t have in your kitchen. It will continue to share more and more personalized meal options as you completely more answers. For quiz junkies like me, it was a little slice of heaven.

McCormick FlavorPrint
For families that suffer from food allergies or sensitivities, you can also share what you need to avoid. I love that Wheat was an option on this so that the recipes that were shown for our family were gluten-free meal options, helping us really have useful choices for us. The last thing I want to see is all the wheaty goodness I can’t indulge in. Thanks, FlavorPrint, for making me feel like I actually have food choices.

McCormick FlavorPrint After answering the questions, these were the flavors that rose to the top. Based on this information, FlavorPrint offered some meal ideas for us. After I picked a meal to try, I answered  more questions on the quiz and got more meal ideas.  Here are three meal ideas that FlavorPrint suggested for me.

Edamame and Corn Salad with Oregano Vinaigrette

Edamame and Corn Salad with Oregano Vinaigrette

The first dish it recommended for me was a Edamame and Corn Salad with Oregano Vinaigrette. I can see exactly why it would recommend this for me because I LOVE edamame and I love corn. Since sourness is something I love, the acidic dressing just makes sense for me. This salad had fresh corn, red bell peppers, parsley, and edamame in it. This would be a great dish to take to a cookout and I have been eating the leftovers as a side dish for my lunch.

Creamy Spinach & Mushroom Risotto

Creamy Spinach & Mushroom Risotto

Playing on my love for all things cheesy, the next recommendation that was made was this Creamy Spinach & Mushroom Risotto made from an easy boxed rice mix. Although I wouldn’t say that this would be in our regular rotation, I know that on a busy weeknight of activities, this would be a fun side to add with a little grilled meat and is much easier to create than babysitting a pot of homemade risotto.

Let’s be honest…ain’t nobody got time for that.

My kids really loved this dish and I found it comforting & satisfying. We called this another dinner win!

Grilled Chicken Caprese

Grilled Chicken Caprese

Grilled Chicken Caprese

Grilled Chicken Caprese

The last dish recommended was a Grilled Chicken Caprese which could not have fit our family more perfectly. You may recall, I had just shared a 5-ingredient Caprese Pork Chop recipe that our family loved. This mimicked those same flavors, but did not require marinating the chicken, but utilized Lawry’s Roasted Garlic Salt with Oregano & Basil instead and a grilled tomato that was sprinkled with the same. My family absolutely loved this dinner option and my only regret was not making a double batch of these. It paired well with the risotto and would be a perfect summer meal to entertain with.

McCormick FlavorPrint

As you can see, we got some great dinner ideas using the FlavorPrint tool and we can’t wait to continue quiz-taking to find more meal ideas for our family.  I highly recommend you take the quiz too and get some fresh ideas for your dinner hour. In the meantime, I have created three pinnable images (below) for the meals that we tried, in case your FlavorProfile looks anything like ours!

Edamame and Corn Salad with Oregano Vinaigrette

Creamy Spinach & Mushroom Risotto

Grilled Chicken Caprese


Cheers to summertime meal ease & quizzes that give us actually useful information for our families… although wouldn’t you be sad if you didn’t know your destiny resides in Paris?  I hope you love it as much as we did!


*This post is sponsored by McCormick Spice in partnership with the One2One Network.

3-Ingredient Watermelon Granita

Monday, June 23rd, 2014

3-Ingredient Watermelon Granita from MomAdvice.com

I don’t know of anything more delicious than fresh fruit in the summertime.

Today I am sharing an EASY 3-ingredient watermelon granita you can prepare with just fresh watermelon, lime juice, and a little sugar.  

It is one of those dishes you will love for an effortless weeknight treat or a fun dish to entertain with for the 4th of July weekend!

Each month Walmart challenges me to find a new way to use their fresh produce and this month’s challenge just-so-happens to be one of my favorite fruits…WATERMELON.

Hello, summer!

Seedless Watermelon


I woke up early one morning to make this dish and here is my early morning watermelon shot for you as the sun had not even risen.

I tend to operate best first thing after I have had my coffee. I’m sure you can relate (*ahem*).

I chose a seedless watermelon for this dish because trying to pick out seeds to prepare your granita is far too time-consuming for a busy mom especially when she has a full summer day of kids.

If you have a high- powered blender it is possible to pulverise them, but I save my blender the work and choose the seedless variety to make it easy on all parties involved.


How to Pick the Perfect Watermelon

There are three easy steps to selecting the perfect watermelon.

1. Lift Your Watermelon– Does it feel heavy? You want a watermelon that feels weighted and not light.

2. Check for the Yellow Dot– Watermelons have a yellow spot on them where they have rested and grown on the ground. You want to find one that has a creamy yellow spot on it because that showcases that it is a lovely ripe melon.

3. Thump It– Have you seen people thump their watermelons at the grocery store and wondered what that was all about? Sometimes I don’t think they even know why they do it.  You are listening for a sound that indicates a great melon. It should have a deep hollow sound, but if it is too ripe or underripe, it will have a dull sound.

4. Dissatisfied? Bring it Back– I didn’t tell you there was a fourth step, but if you should pick the wrong watermelon, Walmart will graciously give you a refund on it since they have a 100% freshness guarantee on their produce. Basically, it makes the process of selection foolproof, especially if that thumping bit gets confusing.

3-Ingredient Watermelon Granita from MomAdvice.com


What is a Granita?

The word granita sounds awfully fancy to this Midwest girl’s ears, but it is actually not fancy at all.

A granita is a semi-frozen dessert traditionally made from sugar, water and various flavorings that originated in Sicily.

It’s a little like sorbet a little like Italian ice, but uniquely its own person with a texture that is a tin bit coarser.  

Since the watermelon is in season and often on sale this time of year, I decided to use it to make the granita. 

All you do for this recipe is give it a whirl through your blender.

After blending your cubed watermelon, fresh lime juice, and sugar, pour it into a 9×13″ dish and slide it in your freezer.

Every half hour or so, take a peek and give it a scrape with a fork to move things around.

Keep doing this every once in awhile and then after about three-four hours of freezing time, your dessert should be ready for serving.


3-Ingredient Watermelon Granita from MomAdvice.com

3-Ingredient Watermelon Granita from MomAdvice.com


I wish there was more to tell you about this dish, but it really is as easy as that.

It’s a frugal way to incorporate more fresh fruit and is best served with lots of spoons on a hot summer’s day!

Looking for more ideas to try with fresh produce this summer? Be sure to check out my Baked Strawberry Doughnuts, my Blueberry Sangria Lemonade, my Grilled Tomato Bread With Prosciutto, my Fresh Peach Sorbet, our Slow Cooker Honey Crisp Apple Oatmeal, and my fresh Gluten-Free Orange Chicken for some fun ways to incorporate fresh produce in your family’s diet!

For more watermelon ideas, check out this Watermelon-Strawberry Smoothie from Mommy’s Kitchen & this Watermelon Margarita from Presley’s Pantry. Oh, yum!


3-Ingredient Watermelon Granita

6-8 cups cubed seedless watermelon
1/3 cup sugar
Juice of 2 limes
Add your cubed watermelon, sugar, and lime juice to your blender. Blend until smooth. Pour it all into a 9×13 metal pan and freeze for one hour. Using a fork, scrape to loosen the granita. Freeze for another hour and repeat. After it has been frozen for three hours, scrape it once more and then serve in a hollowed watermelon or in cups.


Watermelon Granita from MomAdvice.com


walmart_mom_disclaimer


Watermelon Granita from MomAdvice.com

Pin It

Berry Pecan Salad With Candied Pecans & Homemade Raspberry Vinaigrette

Tuesday, June 17th, 2014

Berry Pecan Salad With Candied Pecans & Homemade Raspberry Vinaigrette

Summer was made for salads.  This month I want to share with you some new salad flavor combinations we have been trying for our family dinners. Today I am sharing a delicious Berry Pecan Salad that is perfect for sharing around the picnic table or at your next cookout. It is my new favorite salad and what makes this salad standout is the homemade raspberry vinaigrette dressing, pecans, and the combination of berries.  When I took an enormously large bowl of this to our last cookout, I brought home an empty bowl and a promise to share the recipe.

Berry Pecan Salad from MomAdvice.com.

Where to Buy Raspberry Balsamic Vinegar

Since going gluten-free, I have become really diligent about package reading and making sure that I am not eating anything that can make me sick. Many of the bottled dressings are not anything that I can eat or even pronounce. Unfortunately, not all the items I need to create beautiful flavor combinations are necessarily on the grocery store shelves where I shop.

For this dressing recipe, you will need Raspberry Balsamic Vinegar. I went to two grocery stores and wasn’t able to find it so I headed to The Olive Branch, a locally-owned shop that sells olive oils and vinegars. I spent the morning tasting all of these rich balsamic vinegars and learning more about the different flavor notes in each one. I took home a bottle of their Red Raspberry Balsamic Vinegar and couldn’t wait to put it to work in this salad.  You can certainly substitute this homemade version with a bottled dressing, but I promise you that it will lack the depth of flavor and the richness that I was able to achieve with my homemade dressing. Because the dressing is so rich, a small drizzle is all you need to dress your salad bowl.

Candied Nuts

Have you ever candied nuts before?  It is ridiculously easy and you can make a large quantity at one time for your salads.  This recipe calls for just Candied Pecans, but you can add any variety of nuts into your salad that you prefer. Pictured above are my Sugar & Spice Nuts that are always a fun gift to give (and to eat!).  They also are a delicious topper to oatmeal or even bowls of warm quinoa.

For the chicken, I use this technique for cooking chicken in bulk. If you are pressed for time, you can certainly substitute with a rotisserie chicken from your grocer.

To keep this salad vegan, ditch the chicken and replace the egg white in the nut recipe with two to three tablespoons of water and a tablespoon of flax to coat the candied nuts.

To enjoy this salad all week long, prepare it all for the week and consider creating your own DIY Salad Bar in the fridge for easy summer meals after a long day with the kids. Everyone can customize their own salad bowls and you can enjoy that prep work all week long!

I hope this salad inspires you to get creative with your summer salad and I look forward to sharing more fun salad combinations in the upcoming weeks!

Berry Pecan Salad from MomAdvice.com.


Editor’s Note- Our recipe software is not working this week and we have submitted a support ticket. Please accept our apologies!

A berry pecan salad that is perfect for celebrating the berry season. Enjoy this one at your next potluck or cookout!

Pecan Berry Salad

1 bag of spinach

1 pint of strawberries, sliced

1 pint of blueberries, rinsed

1 pound roast chicken (see technique above or use a rotisserie chicken), sliced

1/4 cup granulated sugar

1/2 teaspoon ground cinnamon

1 teaspoon cornstarch

Pinch of Salt

1/4 teaspoon ground cloves

1/4 teaspoon ground nutmeg

1 egg white (see above for vegan substitution)

1/4 teaspoon vanilla extract

2 cups pecan halves

1/4 cup raspberry balsamic vinegar

1/2 teaspoon salt, plus more if needed

1 teaspoon Dijon mustard

3/4 cup extra-virgin olive oil

1-2 tablespoons white sugar (to taste, you may not even need it depending upon the quality of your balsamic vinegar)

1/4 teaspoon dried oregano

Freshly ground black pepper to taste

Preheat the oven to 300 degrees. Line a rimmed baking sheet with parchment paper.

Place the sugar, cinnamon, cornstarch, salt, ground cloves, and ground nutmeg in a plastic bag, seal the bag, and shake to mix.

Put the egg white and vanilla in a bowl, and beat until slightly foamy.

Add the pecans and stir to coat them well. Using a slotted spoon, lift the pecans out the bowl and transfer them to the bag of sugar and spices. Shake, making sure the pecans are well coated with the seasoning. Spread the pecans out on the prepared baking sheet, and bake for 30 minutes. Remove from the oven and let them cool on the baking sheet.

Assemble the salad: spinach, sliced strawberries, blueberries, roast chicken, and then top with cooled candied pecans. In a mason jar, add the oil, vinegar, oregano, salt, pepper, mustard, and sugar. Shake well. Serve on the side for your salad, shaking well before using.

Prep Time: 10 Minutes

Cook Time: 30 Minutes

Serves: 6

Pin It

Grilled Tomato Bread with Prosciutto

Thursday, May 29th, 2014

Grilled Tomato Bread with Prosciutto

Tomatoes are one of my favorite summer foods and I try to incorporate them into almost every dish we eat. The fresh burst of flavor compliments just about any dish whether it is a garnish to our favorite pasta dishes, a fresh sauce, or a flavorful addition to our summer salads.  When I was pregnant, it was the food that I most craved with a drizzle of olive oil, a generous shake of salt, with a red wine vinegar finish. Although I am far from those years in my life, it is still my favorite summer craving.

Each month Walmart challenges me to create something in my kitchen with an item from their produce department. Today’s piece is dedicated to the fun varieties of tomatoes you can find in their produce department.

Cherry Tomatoes

We can all get in a rut when it comes to selecting our produce, myself included. Although I am a fan of my cherry red tomatoes, I incorporated some of these delicious yellow tomatoes into my dish today to add even more color to this easy summer appetizer.  I love to challenge myself to try the new varieties of fruits and vegetables out there and, especially this time of year, there is always so much to love!

Grilled Tomato Bread with Prosciutto

Grilled Tomato Bread with Prosciutto

Grilled Tomato Bread with Prosciutto

Today’s recipe is for a very simple Grilled Tomato Bread with Prosciutto that requires just a few ingredients and can all be done out on your grill.

Have you ever grilled tomatoes before? It adds a layer of smokiness to the tomatoes, warming them and bursting the skins to create a sauciness to the bread.  I found this recipe that Bobby Flay created and he recommends grilling the tomatoes on high heat, until they are charred. I prefer a gentler heat with less charring, but I think that is a matter of one’s own personal taste. I recommend getting one of these grilling baskets for your veggies (and fish!) or purchasing a package of disposable grill pans for preparing these tomatoes all summer long. Not only are they delicious on top of bread, but grilled tomatoes can be flavored with any variety of herb in your garden or spiced up with your favorite dried spices and stand alone as a side dish with your favorite grilled meats!

Grilled Tomato Bread with Prosciutto

Even though the recipe calls for a loaf of crusty French Bread, I also toasted up some gluten-free bread for myself so I could enjoy this appetizer with the family. If you want to keep it fancy, purchase a gluten-free baguette, but I found that with so many flavors in this appetizer, that my regular loaf helps hold this appetizer together and offered a sturdy base for my overflowing of tomato topping.

Although the ingredient list couldn’t be simpler- cherry tomatoes, ricotta cheese, a fresh loaf of bread, prosciutto, and a little lemon juice, this appetizer is both impressive and satisfying. The saltiness from the meat balances the acidity from the tomatoes & lemons, while also incorporating the sweetness of the tomato with the creaminess of  the cheese. We paired this with our favorite red wine, but it would also pair beautifully with a glass of sangria or a mojito for a lighter combination.

No need to heat up the kitchen for this summer appetizer and it is a beautiful one to create for your next barbecue and shared with friends & family!

Grilled Tomato Bread with Prosciutto

Grilled Tomato Bread with Prosciutto
Recipe Type: Appetizer
Author: Adapted from Food Network
Prep time:
Cook time:
Total time:
Serves: 12
An easy and impressive appetizer that you can create entirely on the grill!
Ingredients
  • Cherry Tomatoes (in red & yellow), total of one pint
  • Olive oil
  • Salt and freshly ground black pepper
  • 2 cloves garlic, finely chopped
  • 12 slices French bread, sliced 1/2-inch thick slices (can substitute with gluten-free bread)
  • 1/2 cup ricotta cheese
  • 12 slices prosciutto
  • 1 lemon cut in half
  • Basil for garnish
Instructions
  1. Heat grill to medium heat.
  2. Toss tomatoes in oil and season with salt and pepper in a small bowl.
  3. Place on the grill in a grilling basket and grill until softened, turning a few times, about 10 minutes.
  4. Remove to a bowl.
  5. Crush the garlic with a little salt to form a paste and add to the bowl with a few tablespoons of olive oil.
  6. Brush bread with olive oil. Season with salt and pepper, and place on the grill. Grill the bread until lightly golden brown on both sides, about 20 seconds per side.
  7. Combine the ricotta with a little olive oil in a small bowl and season with salt and pepper. Mound some of the tomato mixture on the bread. Lay prosciutto on top. Dollop with some ricotta mixture and garnish with lemon juice squeezed over the top.
 Adapted from Food Network walmart_mom_disclaimer
Pin It